Category: quick_meals

  • Cream Cheese Banana Bread: Extra Moist. Extra Creamy. Extra Good.

    Cream Cheese Banana Bread: Extra Moist. Extra Creamy. Extra Good.

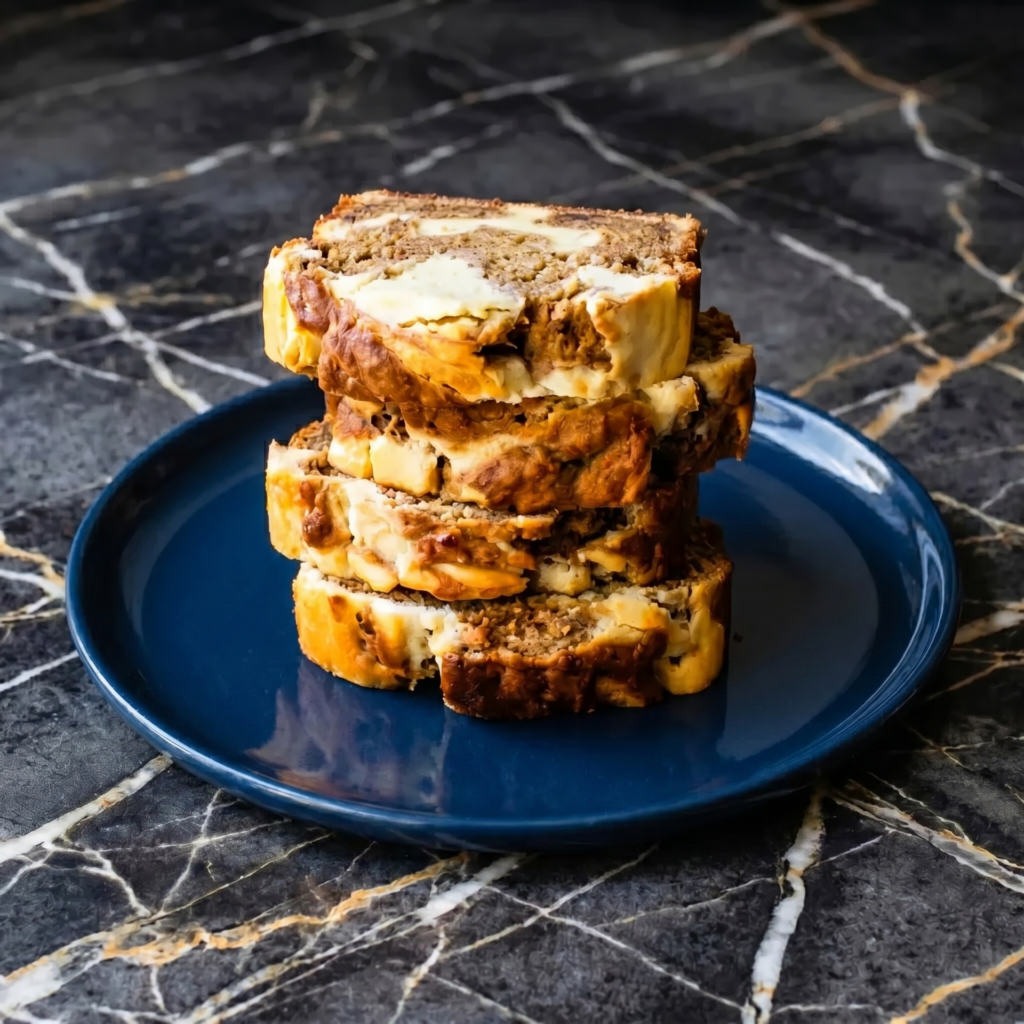
    Banana bread is a classic. Cream cheese makes it unforgettable.

    Ripe bananas. A tangy, sweet cream cheese swirl running through the middle. So moist. So tender. One bowl. 10 minutes. Your new banana bread era starts now.
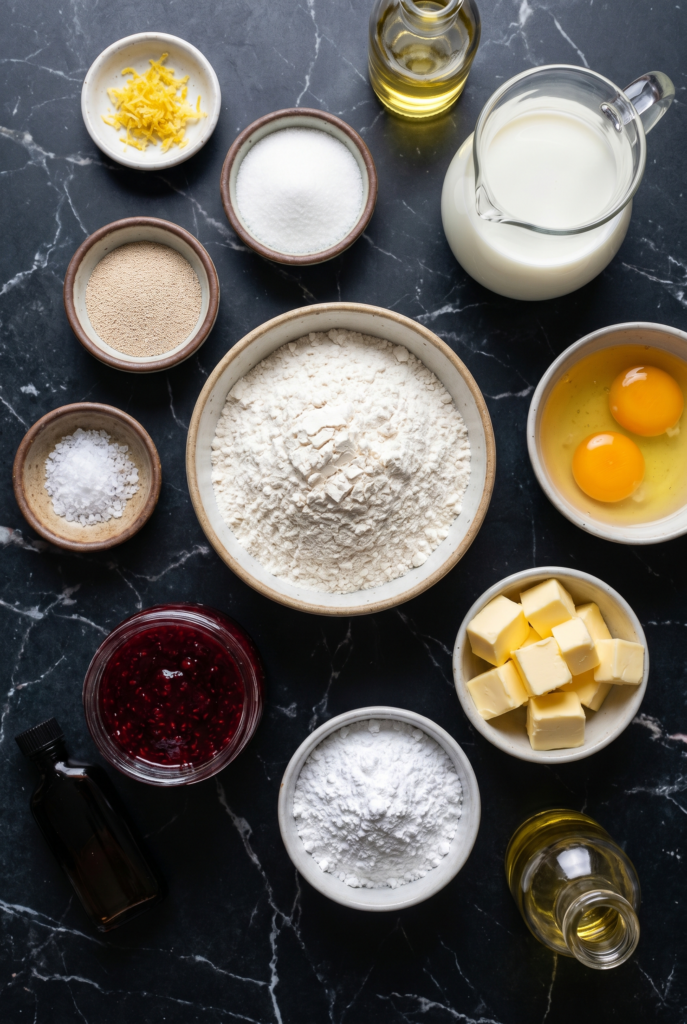
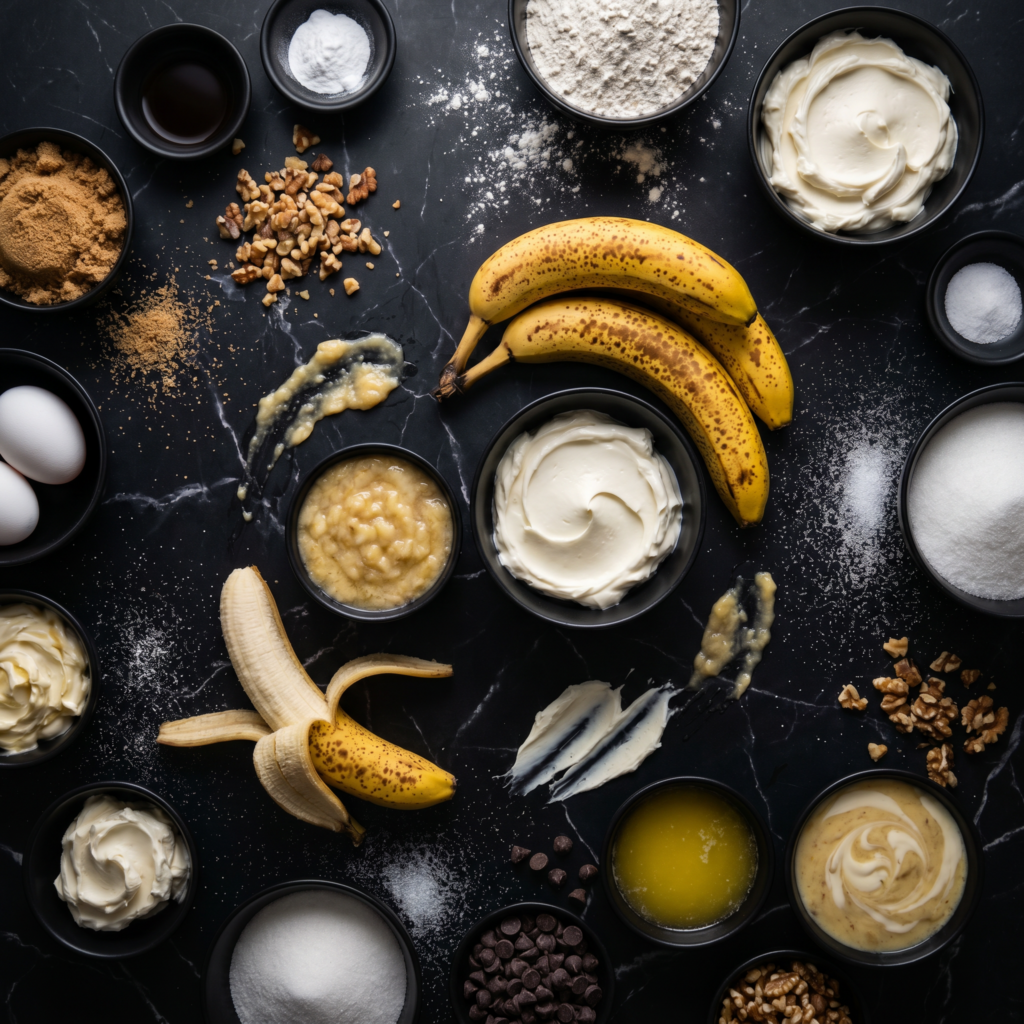
    Ingredients

    Makes 1 loaf (8-10 slices).

    For the Banana Bread:

    • 3 ripe bananas (spotty = best)
    • ½ cup unsalted butter, melted
    • ¾ cup brown sugar
    • 2 large eggs
    • 1 tsp vanilla extract
    • 1½ cups all-purpose flour
    • 1 tsp baking soda
    • ½ tsp salt

    For the Cream Cheese Swirl:

    • 4 oz cream cheese, softened
    • ¼ cup granulated sugar
    • 1 egg yolk
    • ½ tsp vanilla extract

    Step-by-Step Instructions

    Step 1: Preheat and Prep

    1. Preheat oven to 350°F (175°C). Grease a 9×5 loaf pan or line with parchment.

    Step 2: Make the Cream Cheese Swirl

    1. Beat cream cheese, sugar, egg yolk, and vanilla until smooth. Set aside.

    Step 3: Mash Bananas

    1. In a large bowl, mash bananas with a fork until smooth.

    Step 4: Mix Wet Ingredients

    1. Add melted butter, brown sugar, eggs, and vanilla. Whisk until combined.

    Step 5: Add Dry Ingredients

    1. Add flour, baking soda, and salt. Stir until just combined (don’t overmix).

    Step 6: Layer and Swirl

    1. Pour half the banana batter into loaf pan.
    2. Dollop cream cheese mixture on top. Swirl with a knife.
    3. Add remaining banana batter. Swirl again.

    Step 7: Bake

    1. Bake 50-60 minutes until toothpick comes out clean.
    2. Cool 15 minutes in pan, then transfer to wire rack.

    Summary

    Prep Time: 15 minutes | Cook Time: 50-60 minutes | Total Time: 1 hour 10 minutes

    Yield: 1 loaf (8-10 slices)

    Difficulty: Easy

    Storage Notes

    Room Temp:

    Store wrapped tightly for 3 days.

    Fridge:

    Refrigerate for up to 1 week (cream cheese filling is perishable).

    Freezer Friendly:

    Freeze for 3 months. Thaw at room temperature.

    Pro Tip:

    Spotty bananas = sweeter bread. Green bananas = sad bread. Be patient.

  • Spinach and Feta Puff Pastry Triangles: Greek Spanakopita Shortcut

    Spinach and Feta Puff Pastry Triangles: Greek Spanakopita Shortcut

    Spanakopita is delicious. Phyllo dough is fussy. This is the hack.

    Puff pastry instead of phyllo. Same creamy spinach-feta filling. Same flaky, buttery magic. Half the work. 30 minutes. All the glory.

    Ingredients

    Makes 12 triangles.

    • 1 sheet puff pastry (thawed)
    • 1 tbsp olive oil
    • 2 green onions, sliced
    • 10 oz frozen chopped spinach, thawed and squeezed VERY dry
    • 4 oz feta cheese, crumbled
    • ¼ cup ricotta cheese (or cream cheese)
    • 1 garlic clove, minced
    • ½ tsp dill (optional)
    • ¼ tsp black pepper
    • 1 egg, beaten (for egg wash)
    • 1 tbsp sesame seeds (optional)

    Step-by-Step Instructions

    Step 1: Preheat and Prep

    1. Preheat oven to 400°F (200°C). Line a baking sheet with parchment.
    2. Squeeze spinach in a kitchen towel until bone-dry (critical!).

    Step 2: Make the Filling

    1. Heat oil in a small skillet. Cook green onions 1 minute.
    2. In a bowl, combine cooked onions, spinach, feta, ricotta, garlic, dill, and pepper.

    Step 3: Cut and Fill Pastry

    1. Roll puff pastry slightly into a 10×12-inch rectangle. Cut into 12 squares.
    2. Place 1 tbsp filling in center of each square. Fold diagonally into triangles.
    3. Crimp edges with a fork to seal.

    Step 4: Brush and Bake

    1. Place triangles on baking sheet. Brush with beaten egg. Sprinkle with sesame seeds.
    2. Cut a small slit on top for steam.
    3. Bake 15-18 minutes until puffed and golden brown.

    Step 5: Serve

    1. Cool 5 minutes. Serve warm or at room temperature.

    Summary

    Prep Time: 15 minutes | Cook Time: 15-18 minutes | Total Time: 30 minutes

    Yield: 12 triangles

    Difficulty: Easy

    Storage Notes

    Fridge:

    Store baked triangles for 4 days. Reheat in oven or air fryer.

    Freezer Friendly:

    Freeze unbaked triangles for 3 months. Bake from frozen at 400°F for 18-20 minutes.

    Pro Tip:

    Squeeze spinach DRY. Wet spinach = soggy pastry = sad triangles.

  • Berliner: Germany’s Jam-Filled, Powdered Sugar Dream

    Berliner: Germany’s Jam-Filled, Powdered Sugar Dream

    American doughnuts have holes. Berliners do not. That hole is filled with jam.

    Fluffy, yeast-risen dough. Fried until golden. Injected with raspberry or apricot jam. Rolled in powdered sugar. One bite. You’re in Berlin. No plane ticket required.

    Ingredients

    Makes 12-15 Berliner.

    • 2¼ tsp active dry yeast (1 packet)
    • ¼ cup warm milk (110°F)
    • ¼ cup granulated sugar
    • ½ tsp salt
    • 3½ cups all-purpose flour
    • 3 large eggs
    • 4 tbsp unsalted butter, softened
    • ½ cup warm water
    • Oil for frying (vegetable or canola)
    • 1 cup raspberry or apricot jam
    • 1 cup powdered sugar (for coating)

    Step-by-Step Instructions

    Step 1: Make the Dough

    1. Dissolve yeast in warm milk. Let sit 5 minutes until foamy.
    2. Add sugar, salt, 1 cup flour, eggs, and warm water. Mix.
    3. Gradually add remaining flour and softened butter. Knead 8-10 minutes until smooth.
    4. Cover. Let rise 1 hour until doubled.

    Step 2: Shape and Rise Again

    1. Punch down dough. Roll to ½-inch thickness. Cut circles with a 3-inch cutter.
    2. Place on floured baking sheet. Cover. Let rise 30 minutes.

    Step 3: Fry

    1. Heat oil to 350°F (175°C).
    2. Fry doughnuts in batches, 2-3 minutes per side, until golden brown.
    3. Drain on paper towels. Cool slightly.

    Step 4: Fill and Coat

    1. Fill a piping bag with jam. Use a small tip to inject jam into each Berliner.
    2. Roll in powdered sugar until fully coated.

    Step 5: Serve

    1. Serve same day. They’re best fresh. Eat immediately. No sharing required.

    Summary

    Prep Time: 30 minutes | Rise Time: 1.5 hours | Cook Time: 15 minutes | Total Time: ~2.5 hours

    Yield: 12-15 Berliner

    Difficulty: Medium

    Storage Notes

    Best Fresh:

    Berliners are best eaten the day they’re made. Day-old is still good, but not the same.

    Freezer Friendly:

    Freeze unfilled, uncoated doughnuts for 1 month. Reheat in oven, then fill and coat.

    Pro Tip:

    No piping tip? Poke a hole with a chopstick and use a squeeze bottle.

  • Oreo Fudge Brownies: Chocolate³. Send Help.

    Oreo Fudge Brownies: Chocolate³. Send Help.

    Brownies are great. Oreos are great. Together? Unstoppable.

    Fudgy brownie batter. A layer of whole Oreos. More brownie on top. Baked until crackly. One bite. You’ll never go back.

    Ingredients

    Makes 12-16 brownies.

    • 1 box brownie mix (plus eggs, oil, water as box directs)
    • OR homemade: 1 cup butter, 2 cups sugar, 4 eggs, 1 cup flour, ¾ cup cocoa, 1 tsp vanilla
    • 20-24 Oreo cookies (regular or double stuf)
    • ½ cup chocolate chips or crushed Oreos for topping (optional)

    Step-by-Step Instructions

    Step 1: Preheat and Prep

    1. Preheat oven to 350°F (175°C). Grease a 9×9 or 9×13 baking dish. Line with parchment paper.

    Step 2: Make Brownie Batter

    1. Prepare brownie batter according to package or recipe.

    Step 3: Layer the Oreos

    1. Pour half the brownie batter into prepared dish. Spread evenly.
    2. Arrange whole Oreos in a single layer on top of batter (about 16-20).
    3. Pour remaining brownie batter over Oreos. Spread to cover.

    Step 4: Top and Bake

    1. Sprinkle crushed Oreos or chocolate chips on top (optional).
    2. Bake 30-35 minutes until toothpick comes out with fudgy crumbs (not wet).

    Step 5: Cool and Cut

    1. Let cool completely in pan (at least 1 hour).
    2. Cut into squares. Serve with cold milk.

    Summary

    Prep Time: 10 minutes | Cook Time: 30-35 minutes | Total Time: 40-45 minutes

    Yield: 12-16 brownies

    Difficulty: Easy

    Storage Notes

    Room Temp:

    Store in an airtight container for up to 5 days.

    Fridge/Freezer:

    Refrigerate for 1 week. Freeze for 3 months. Thaw at room temperature.

    Pro Tip:

    Underbake slightly for fudgier brownies. Overbake = dry. Watch the timer.

  • Chocolate Rice Krispie Treats: The Original, But Make It Cocoa

    Chocolate Rice Krispie Treats: The Original, But Make It Cocoa

    Rice Krispie Treats are perfect. Chocolate Rice Krispie Treats are perfecter.

    Same buttery marshmallow base. Same crispy crunch. Plus cocoa powder in the mix and melted chocolate on top. 10 minutes. No oven. Maximum chocolate.

    Ingredients

    Makes 12-16 bars.

    • 4 tbsp unsalted butter
    • 1 bag (10 oz) marshmallows (about 40 regular or 4 cups mini)
    • ¼ cup unsweetened cocoa powder
    • ½ tsp vanilla extract
    • Pinch of salt
    • 6 cups Rice Krispies cereal
    • ½ cup chocolate chips (milk or semi-sweet) for topping

    Optional add-ins: Mini chocolate chips inside, sprinkles, peanut butter chips

    Step-by-Step Instructions

    Step 1: Prep the Pan

    1. Grease a 9×13 baking dish with butter or non-stick spray.

    Step 2: Melt Butter and Marshmallows

    1. In a large pot over low heat, melt butter.
    2. Add marshmallows. Stir constantly until completely melted and smooth.
    3. Whisk in cocoa powder, vanilla, and salt until fully combined.

    Step 3: Add the Cereal

    1. Pour in Rice Krispies. Stir quickly until cereal is fully coated in chocolate marshmallow.
    2. Don’t overmix.

    Step 4: Press Into Pan

    1. Transfer mixture to prepared dish. Press firmly into an even layer using greased hands or wax paper.

    Step 5: Add Chocolate Topping

    1. Melt chocolate chips in microwave (30-second bursts, stirring).
    2. Drizzle or spread over the top. Let set 5 minutes.

    Step 6: Cut and Serve

    1. Let cool completely. Cut into squares. Serve.

    Summary

    Prep Time: 5 minutes | Cook Time: 5 minutes | Total Time: 10 minutes (+ cooling)

    Yield: 12-16 bars

    Difficulty: So Easy

    Storage Notes

    Room Temp:

    Store in an airtight container for up to 5 days. Do not refrigerate (they get hard).

    Freezer Friendly:

    Freeze for up to 6 weeks. Thaw at room temperature.

    Pro Tip:

    Use dark cocoa powder for an extra-rich, Oreo-like flavor. Life-changing.

  • Rice Krispie Treats: The 5-Ingredient Childhood Hero

    Rice Krispie Treats: The 5-Ingredient Childhood Hero

    Some recipes are timeless. This is one of them.

    Butter. Marshmallows. Cereal. That’s it. 10 minutes. No oven. Sticky, gooey, crispy perfection. Make them with a kid. Eat them like a kid. No judgment.

    Ingredients

    Makes 12-16 bars.

    • 4 tbsp unsalted butter
    • 1 bag (10 oz) marshmallows (about 40 regular or 4 cups mini)
    • ½ tsp vanilla extract (optional)
    • Pinch of salt (optional)
    • 6 cups Rice Krispies cereal

    Optional add-ins: Sprinkles, chocolate chips, M&Ms, peanut butter

    Step-by-Step Instructions

    Step 1: Prep the Pan

    1. Grease a 9×13 baking dish with butter or non-stick spray.

    Step 2: Melt the Butter and Marshmallows

    1. In a large pot over low heat, melt butter.
    2. Add marshmallows. Stir constantly until completely melted and smooth.
    3. Remove from heat. Stir in vanilla and salt (if using).

    Step 3: Add the Cereal

    1. Pour in Rice Krispies. Stir quickly until cereal is fully coated.
    2. Don’t overmix (cereal gets crushed).

    Step 4: Press Into Pan

    1. Transfer mixture to prepared dish.
    2. Press firmly into an even layer using greased hands or wax paper (mixture is sticky!).

    Step 5: Cool and Cut

    1. Let cool at room temperature for 15-20 minutes.
    2. Cut into squares. Serve.

    Summary

    Prep Time: 5 minutes | Cook Time: 5 minutes | Total Time: 10 minutes (+ cooling)

    Yield: 12-16 bars

    Difficulty: So Easy

    Storage Notes

    Room Temp:

    Store in an airtight container for up to 5 days. Do not refrigerate (they get hard).

    Freezer Friendly:

    Freeze for up to 6 weeks. Thaw at room temperature.

    Pro Tip:

    For extra gooey treats, add 1 extra cup of marshmallows. For extra crispy, add 1 less cup.

  • Crispy Chicken Caesar Wraps: Salad That Fights Back

    Crispy Chicken Caesar Wraps: Salad That Fights Back

    Salad is great. Salad you can eat with your hands? Genius.

    Crispy chicken. Creamy Caesar dressing. Shaved Parmesan. Crunchy romaine. All wrapped in a tortilla. 15 minutes. Lunch just got an upgrade.

    Ingredients

    Serves 4.

    • 4 large flour tortillas (10-inch)
    • 4 cups romaine lettuce, chopped
    • 4 crispy chicken tenders (frozen or homemade, cooked crispy)
    • ½ cup Caesar dressing (plus extra)
    • ½ cup shaved or grated Parmesan cheese
    • ½ cup croutons, crushed (optional, for crunch)
    • Black pepper to taste

    Step-by-Step Instructions

    Step 1: Prep the Chicken

    1. Cook chicken tenders according to package instructions until crispy.
    2. Slice into bite-sized strips.

    Step 2: Toss the Caesar Salad

    1. In a bowl, toss romaine with Caesar dressing, Parmesan, and crushed croutons.

    Step 3: Warm the Tortillas

    1. Microwave tortillas for 10-15 seconds until pliable.

    Step 4: Assemble Wraps

    1. Spread a thin layer of Caesar dressing on each tortilla.
    2. Layer crispy chicken strips down the center.
    3. Pile Caesar salad on top. Add black pepper.

    Step 5: Roll and Serve

    1. Fold in sides. Roll from bottom up, keeping it tight.
    2. Cut in half on a diagonal. Serve immediately.

    Summary

    Prep Time: 10 minutes | Cook Time: 5 minutes | Total Time: 15 minutes

    Yield: 4 wraps

    Difficulty: Easy

    Storage Notes

    Best Fresh:

    Assemble right before eating. Soggy lettuce = sad wrap.

    Meal Prep Style:

    Store components separately for 3 days. Assemble when hungry.

    Pro Tip:

    Toast the tortilla in a dry skillet for 30 seconds per side. Holds up better. Worth it.

  • Chicken Stuffed Peppers: The Lean, Mean, Flavor Machine

    Chicken Stuffed Peppers: The Lean, Mean, Flavor Machine

    Stuffed peppers are a full meal in a bowl. A bowl you can eat.

    Ground chicken. Rice. Marinara. Mozzarella. All baked inside sweet bell peppers. Healthy? Sure. Delicious? Absolutely. No one will miss the beef.

    Ingredients

    Serves 4.

    • 4 large bell peppers (any color)
    • 1 lb ground chicken
    • 1 small onion, diced
    • 2 garlic cloves, minced
    • 1 cup cooked rice (white, brown, or cauliflower rice)
    • 1 can (15 oz) marinara or tomato sauce (divided)
    • 1 tsp Italian seasoning
    • ½ tsp salt
    • ¼ tsp black pepper
    • 1 cup shredded mozzarella cheese (divided)
    • 2 tbsp fresh parsley or basil, chopped (optional)

    Step-by-Step Instructions

    Step 1: Preheat and Prep Peppers

    1. Preheat oven to 375°F (190°C).
    2. Slice tops off peppers. Remove seeds and membranes.
    3. Place peppers upright in a baking dish. Add 2 tbsp water to dish.

    Step 2: Cook the Filling

    1. In a skillet over medium heat, cook ground chicken and onion until chicken is browned (5-7 minutes). Drain any liquid.
    2. Add garlic. Cook 1 minute until fragrant.
    3. Stir in cooked rice, half the marinara sauce (about ¾ cup), Italian seasoning, salt, pepper, and half the mozzarella.

    Step 3: Stuff the Peppers

    1. Spoon filling into each pepper, pressing down gently.
    2. Pour remaining marinara over and around the peppers.
    3. Top with remaining mozzarella cheese.

    Step 4: Bake and Serve

    1. Cover dish with foil. Bake 30 minutes.
    2. Uncover. Bake 10 more minutes until cheese is bubbly and peppers are tender.
    3. Garnish with parsley or basil. Serve hot.

    Summary

    Prep Time: 15 minutes | Cook Time: 40 minutes | Total Time: 55 minutes

    Yield: 4 stuffed peppers

    Difficulty: Easy

    Storage Notes

    Fridge:

    Store in an airtight container for up to 4 days. Tastes even better day 2.

    Reheat:

    Microwave 2-3 minutes. Or oven at 350°F for 10-12 minutes.

    Freezer Friendly:

    Assemble (don’t bake). Freeze up to 3 months. Bake from frozen at 375°F for 50-60 minutes.

    Pro Tip:

    Substitute cauliflower rice to keep it low-carb. Works perfectly.

  • Buffalo Ranch Chicken Sliders: Spicy, Cool, Disappearing Fast

    Buffalo Ranch Chicken Sliders: Spicy, Cool, Disappearing Fast

    Buffalo wings are great. Sliders are better.

    Spicy shredded chicken. Cool ranch dressing. Melty cheddar. Sweet Hawaiian rolls. Baked until golden. One bite. You’ll forget wings existed.

    Ingredients

    Makes 12 sliders.

    • 1 package (12 count) Hawaiian rolls
    • 3 cups cooked chicken, shredded (rotisserie = hero)
    • ½ cup buffalo sauce (Franks + butter)
    • ½ cup ranch dressing (plus extra for drizzling)
    • 1½ cups shredded cheddar or Monterey Jack cheese
    • 3 tbsp butter, melted
    • 1 tsp garlic powder
    • 1 tbsp fresh parsley or chives (optional)

    Step-by-Step Instructions

    Step 1: Preheat and Sauce

    1. Preheat oven to 375°F (190°C).
    2. Toss shredded chicken with buffalo sauce until coated.

    Step 2: Prep the Rolls

    1. Without separating individual rolls, slice entire slab of Hawaiian rolls horizontally (top and bottom).
    2. Place bottom half in a greased 9×13 baking dish.

    Step 3: Assemble

    1. Drizzle ranch dressing on bottom rolls.
    2. Layer buffalo chicken evenly on top.
    3. Sprinkle with cheese.
    4. Place top slab of rolls back on.

    Step 4: Butter and Bake

    1. Mix melted butter and garlic powder. Brush over tops.
    2. Bake 10-12 minutes until golden and cheese is melted.

    Step 5: Finish and Serve

    1. Drizzle with extra ranch. Sprinkle with parsley.
    2. Separate sliders. Serve hot. Watch them vanish.

    Summary

    Prep Time: 10 minutes | Cook Time: 10-12 minutes | Total Time: 20-22 minutes

    Yield: 12 sliders

    Difficulty: Easy

    Storage Notes

    Fridge:

    Store leftovers for 3 days.

    Reheat:

    Oven at 350°F for 8-10 minutes. Microwave for 30 seconds but buns get soft.

    Pro Tip:

    Double the filling. Make a batch for now. Freeze the filling for later.

  • Honey Garlic BBQ Ribs: Sticky, Sweet, Fall-Off-The-Bone

    Honey Garlic BBQ Ribs: Sticky, Sweet, Fall-Off-The-Bone

    Ribs sound intimidating. They’re not.

    Low heat. Long cook. Sticky honey garlic glaze. That’s the secret. No smoker. No grill. Just an oven and some patience. These ribs will make you look like a pitmaster.

    Ingredients

    Serves 4.

    • 2 racks baby back ribs (about 4 lbs total)
    • 1 tbsp salt
    • 1 tbsp black pepper
    • 1 tbsp garlic powder
    • 1 tbsp paprika
    • 1 tsp cayenne (optional)

    For the Honey Garlic BBQ Sauce:

    • ½ cup honey
    • ½ cup BBQ sauce
    • 4 garlic cloves, minced
    • 2 tbsp soy sauce
    • 1 tbsp apple cider vinegar
    • 1 tbsp brown sugar

    Step-by-Step Instructions

    Step 1: Preheat and Prep

    1. Preheat oven to 300°F (150°C). Line a baking sheet with foil.
    2. Remove membrane from back of ribs (grip with paper towel and pull).

    Step 2: Season the Ribs

    1. Mix salt, pepper, garlic powder, paprika, and cayenne. Rub all over ribs.
    2. Wrap ribs tightly in foil. Place on baking sheet.

    Step 3: Bake Low and Slow

    1. Bake 2.5 to 3 hours until tender (meat pulls back from bones).

    Step 4: Make the Glaze

    1. Whisk honey, BBQ sauce, garlic, soy sauce, vinegar, and brown sugar in a saucepan.
    2. Simmer 5 minutes until thickened.

    Step 5: Glaze and Finish

    1. Remove ribs from foil. Brush generously with glaze.
    2. Increase oven to 400°F. Bake uncovered 10 minutes.
    3. Broil 1-2 minutes for sticky, charred edges.

    Step 6: Serve

    1. Rest 5 minutes. Slice. Serve with extra glaze. Napkins mandatory.

    Summary

    Prep Time: 15 minutes | Cook Time: 3 hours | Total Time: 3+ hours

    Yield: 4 servings (2 racks)

    Difficulty: Easy (just needs time)

    Storage Notes

    Fridge:

    Store leftovers for 4 days. Ribs get even more flavorful overnight.

    Reheat:

    Oven at 325°F for 15 minutes wrapped in foil. Microwave works but less sticky.

    Freezer Friendly:

    Freeze cooked ribs for 2 months. Thaw overnight. Reheat in oven.

    Pro Tip:

    Make the glaze ahead. Keeps in the fridge for 2 weeks. Double it for extra dipping.