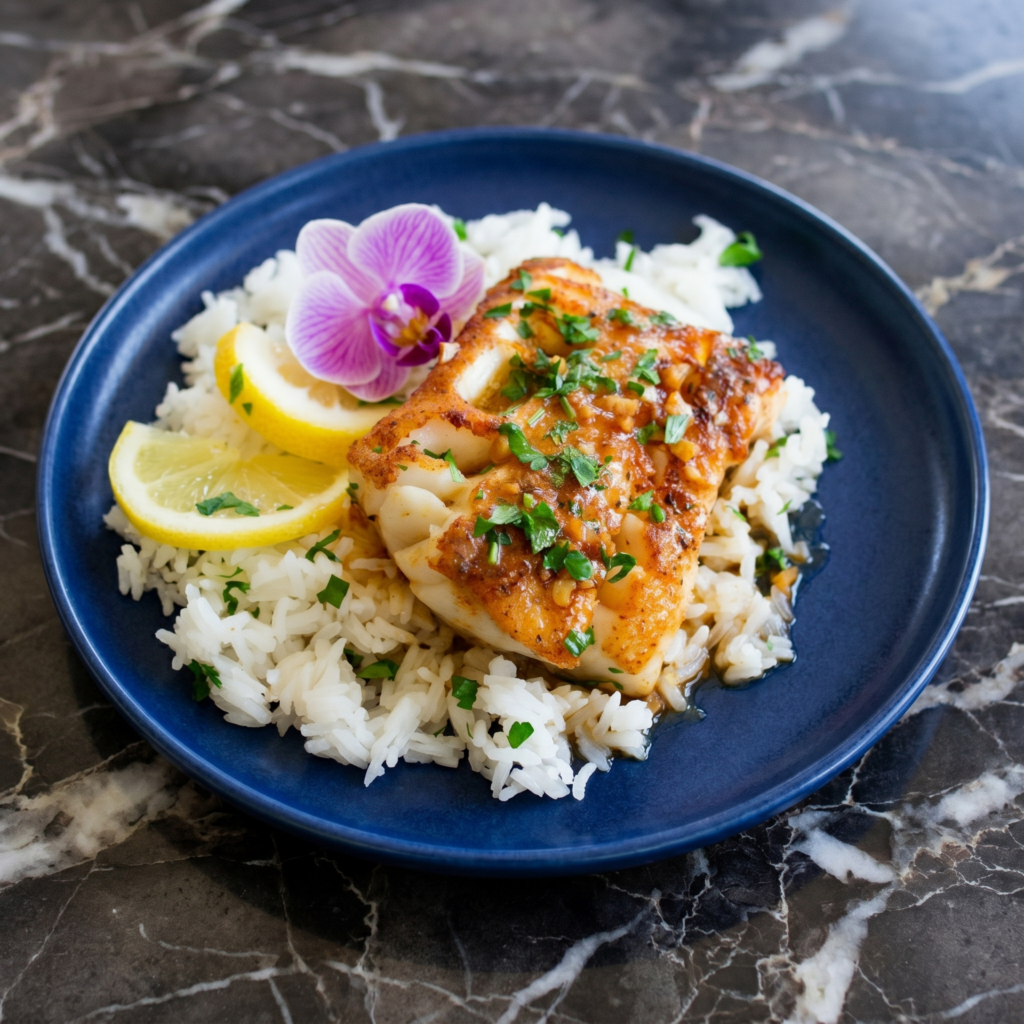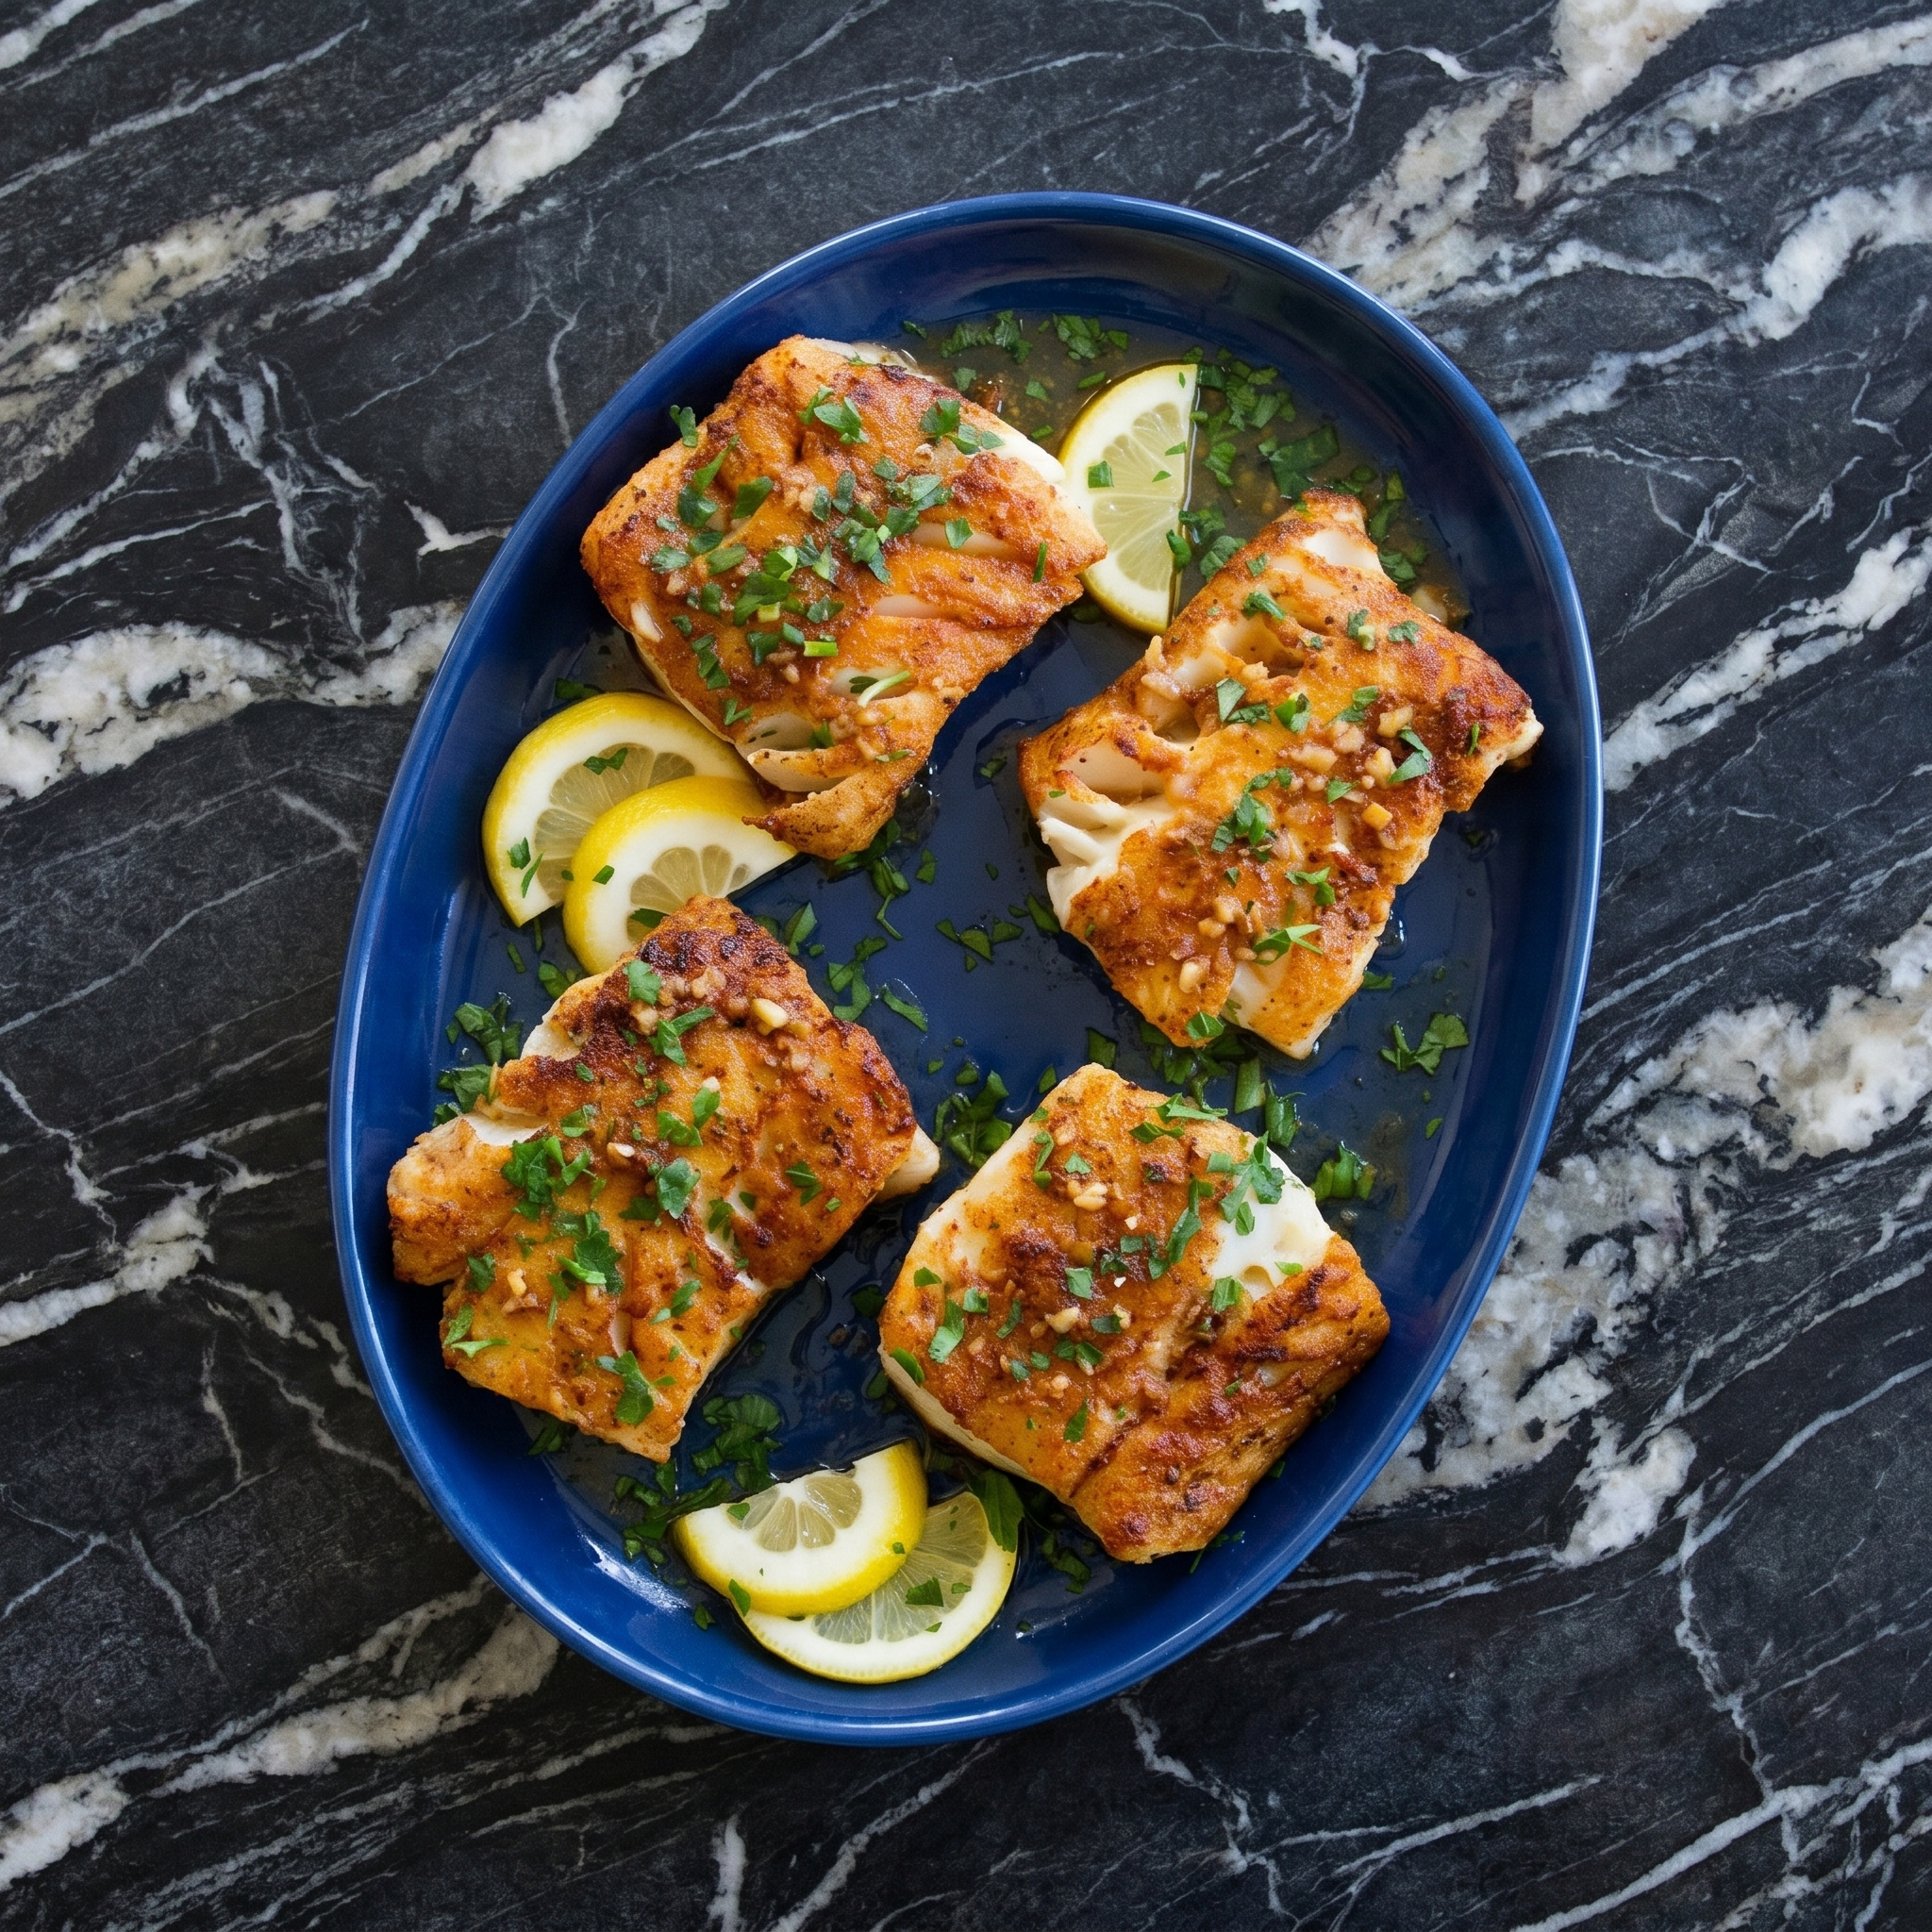
Fish is fast. This fish is fast AND delicious.
Cod fillets seared in garlic butter. Finished with fresh lemon and parsley. Flaky. Juicy. Bright. 15 minutes from fridge to plate. No fishy smell. No stress.
Ingredients
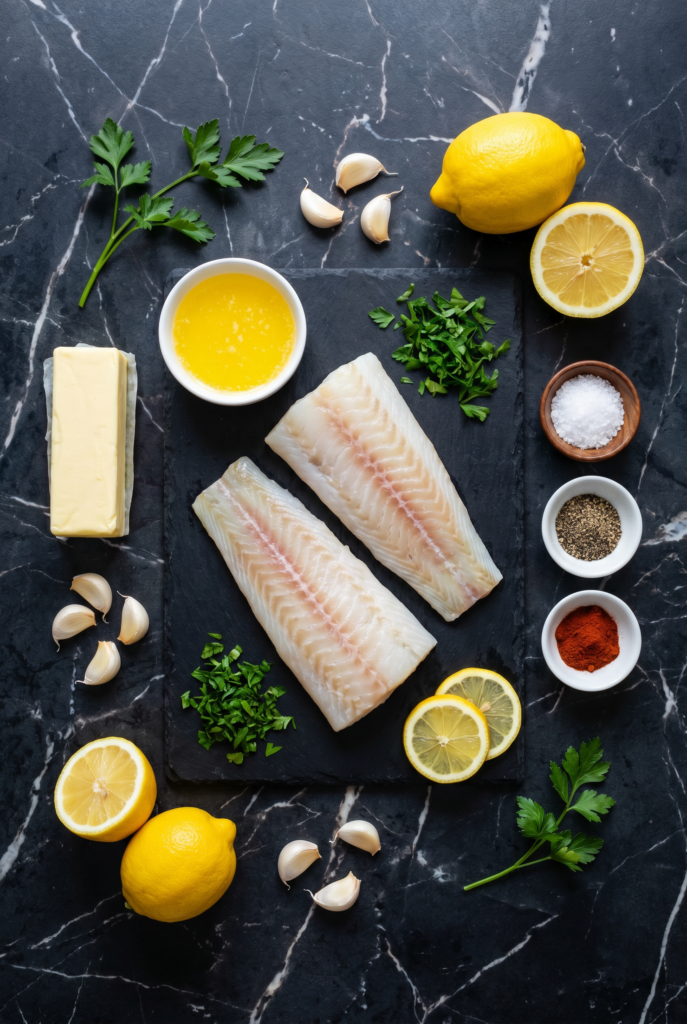
Serves 4.
- 4 cod fillets (about 1.5 lbs total)
- 3 tbsp unsalted butter
- 4 garlic cloves, minced
- 2 tbsp fresh lemon juice
- 1 tsp lemon zest
- 2 tbsp fresh parsley, chopped
- ½ tsp salt
- ¼ tsp black pepper
- ¼ tsp paprika (optional, for color)
- Lemon wedges for serving
Step-by-Step Instructions
Step 1: Pat and Season
- Pat cod fillets completely dry with paper towels.
- Season both sides with salt, pepper, and paprika.
Step 2: Sear the Cod
- Melt 2 tbsp butter in a large skillet over medium-high heat.
- Place cod in skillet. Cook 3-4 minutes per side until golden and flaky (internal temp 145°F).
- Remove cod to a plate.
Step 3: Make the Sauce
- Reduce heat to low. Add remaining 1 tbsp butter and garlic. Cook 30 seconds until fragrant.
- Stir in lemon juice, lemon zest, and parsley.
Step 4: Finish and Serve
- Return cod to skillet. Spoon sauce over the top.
- Serve immediately with lemon wedges. Great with rice, asparagus, or crusty bread.
Summary
Prep Time: 5 minutes | Cook Time: 10 minutes | Total Time: 15 minutes
Yield: 4 servings
Difficulty: Easy
Storage Notes
Best Fresh:
Cod is best eaten immediately. Leftover fish gets dry.
Fridge:
Store leftovers for 1 day. Reheat gently in a skillet with a splash of broth.
Pro Tip:
Don’t overcook! Cod turns rubbery fast. Cook until just flaky. Trust the timer.