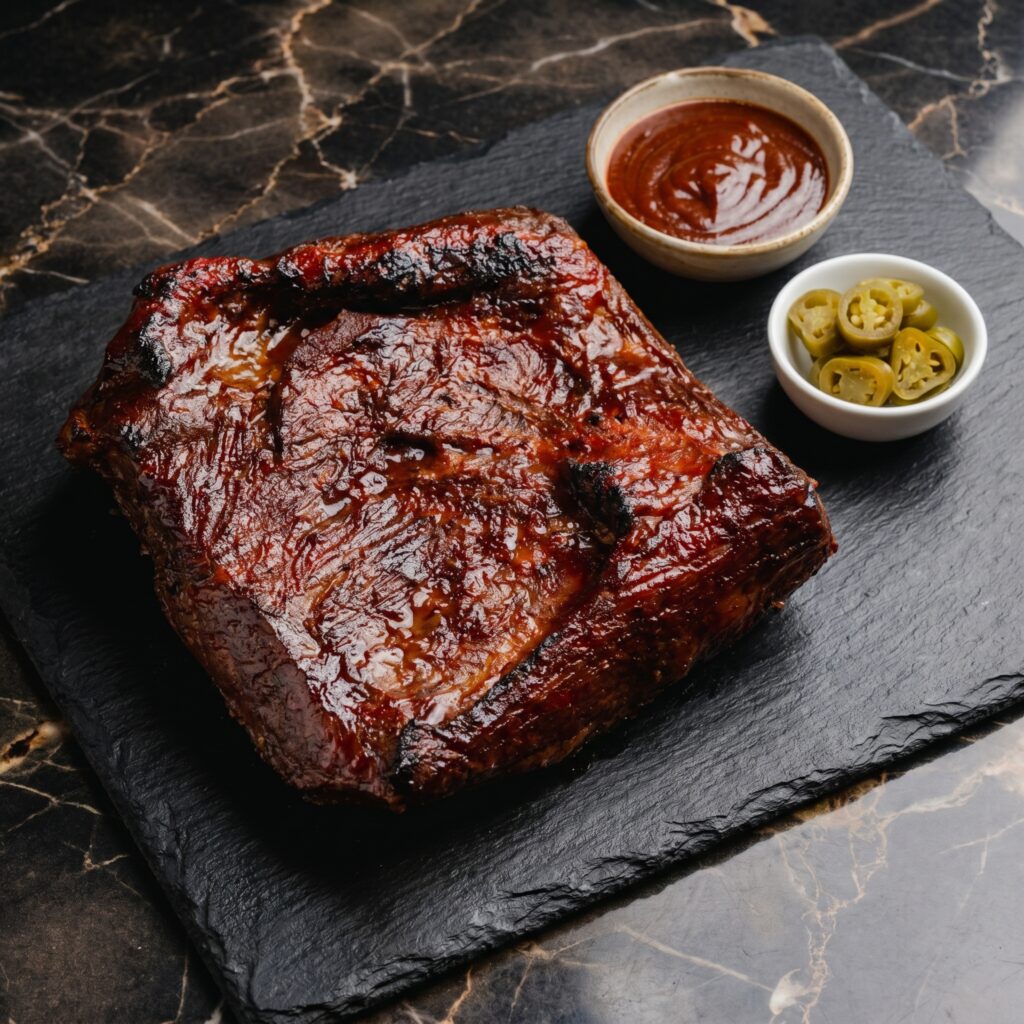
Brisket is the king of BBQ. Low and slow is the only way. This oven method delivers smoky, tender, fall-apart beef with a sticky glaze. No smoker? No problem. Your kitchen can do this.
Ingredients
Serves 6-8.
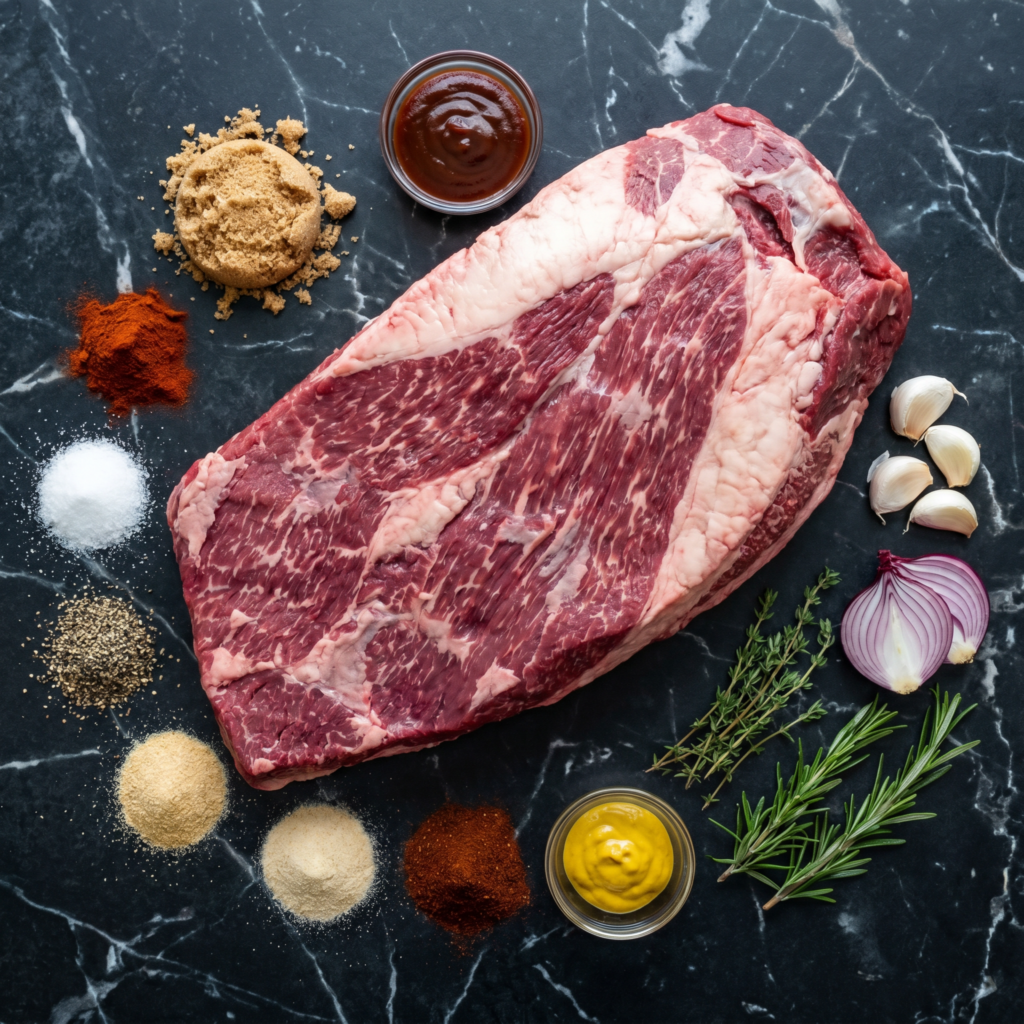
- 3-4 lb (1.4-1.8kg) beef brisket
- 2 tbsp olive oil
- 1 cup beef broth
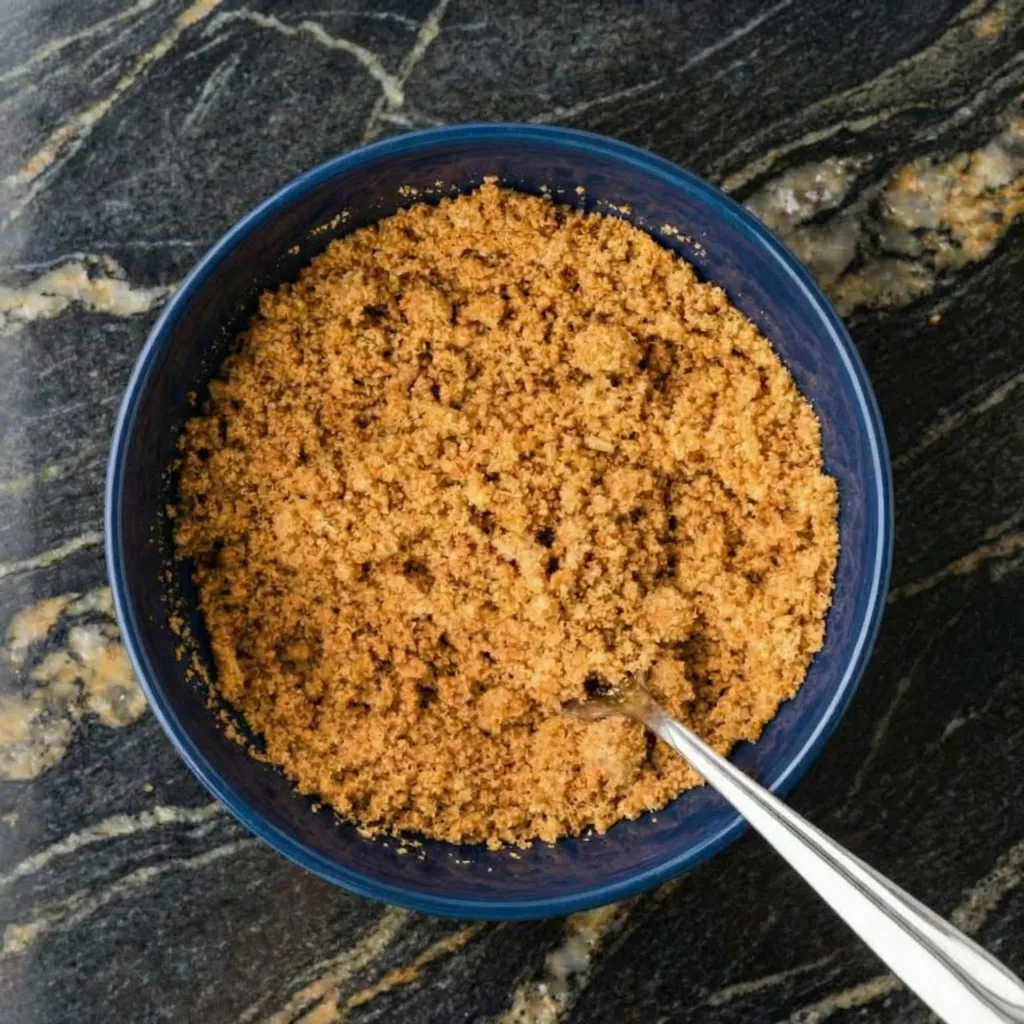
For the Dry Rub:
- 2 tbsp brown sugar
- 1 tbsp smoked paprika
- 1 tbsp garlic powder
- 1 tbsp onion powder
- 1 tbsp black pepper
- 1 tbsp salt
- 1 tsp cayenne pepper (optional)
For the BBQ Glaze:
- 1½ cups BBQ sauce
- ¼ cup apple cider vinegar
- 2 tbsp Worcestershire sauce
Step-by-Step Instructions
Step 1: Preheat & Season
- Preheat oven to 300°F (150°C). Mix dry rub ingredients. Rub all over brisket.
Step 2: Sear
- Heat oil in a Dutch oven or large oven-safe pot over high heat. Sear brisket 3-4 minutes per side until browned.
Step 3: Slow Cook
- Pour beef broth around the brisket (not over the top — keeps rub intact). Cover with lid.
- Bake 3½ to 4 hours until fork-tender.
Step 4: Make Glaze
- Mix BBQ sauce, vinegar, and Worcestershire sauce.
Step 5: Glaze & Finish
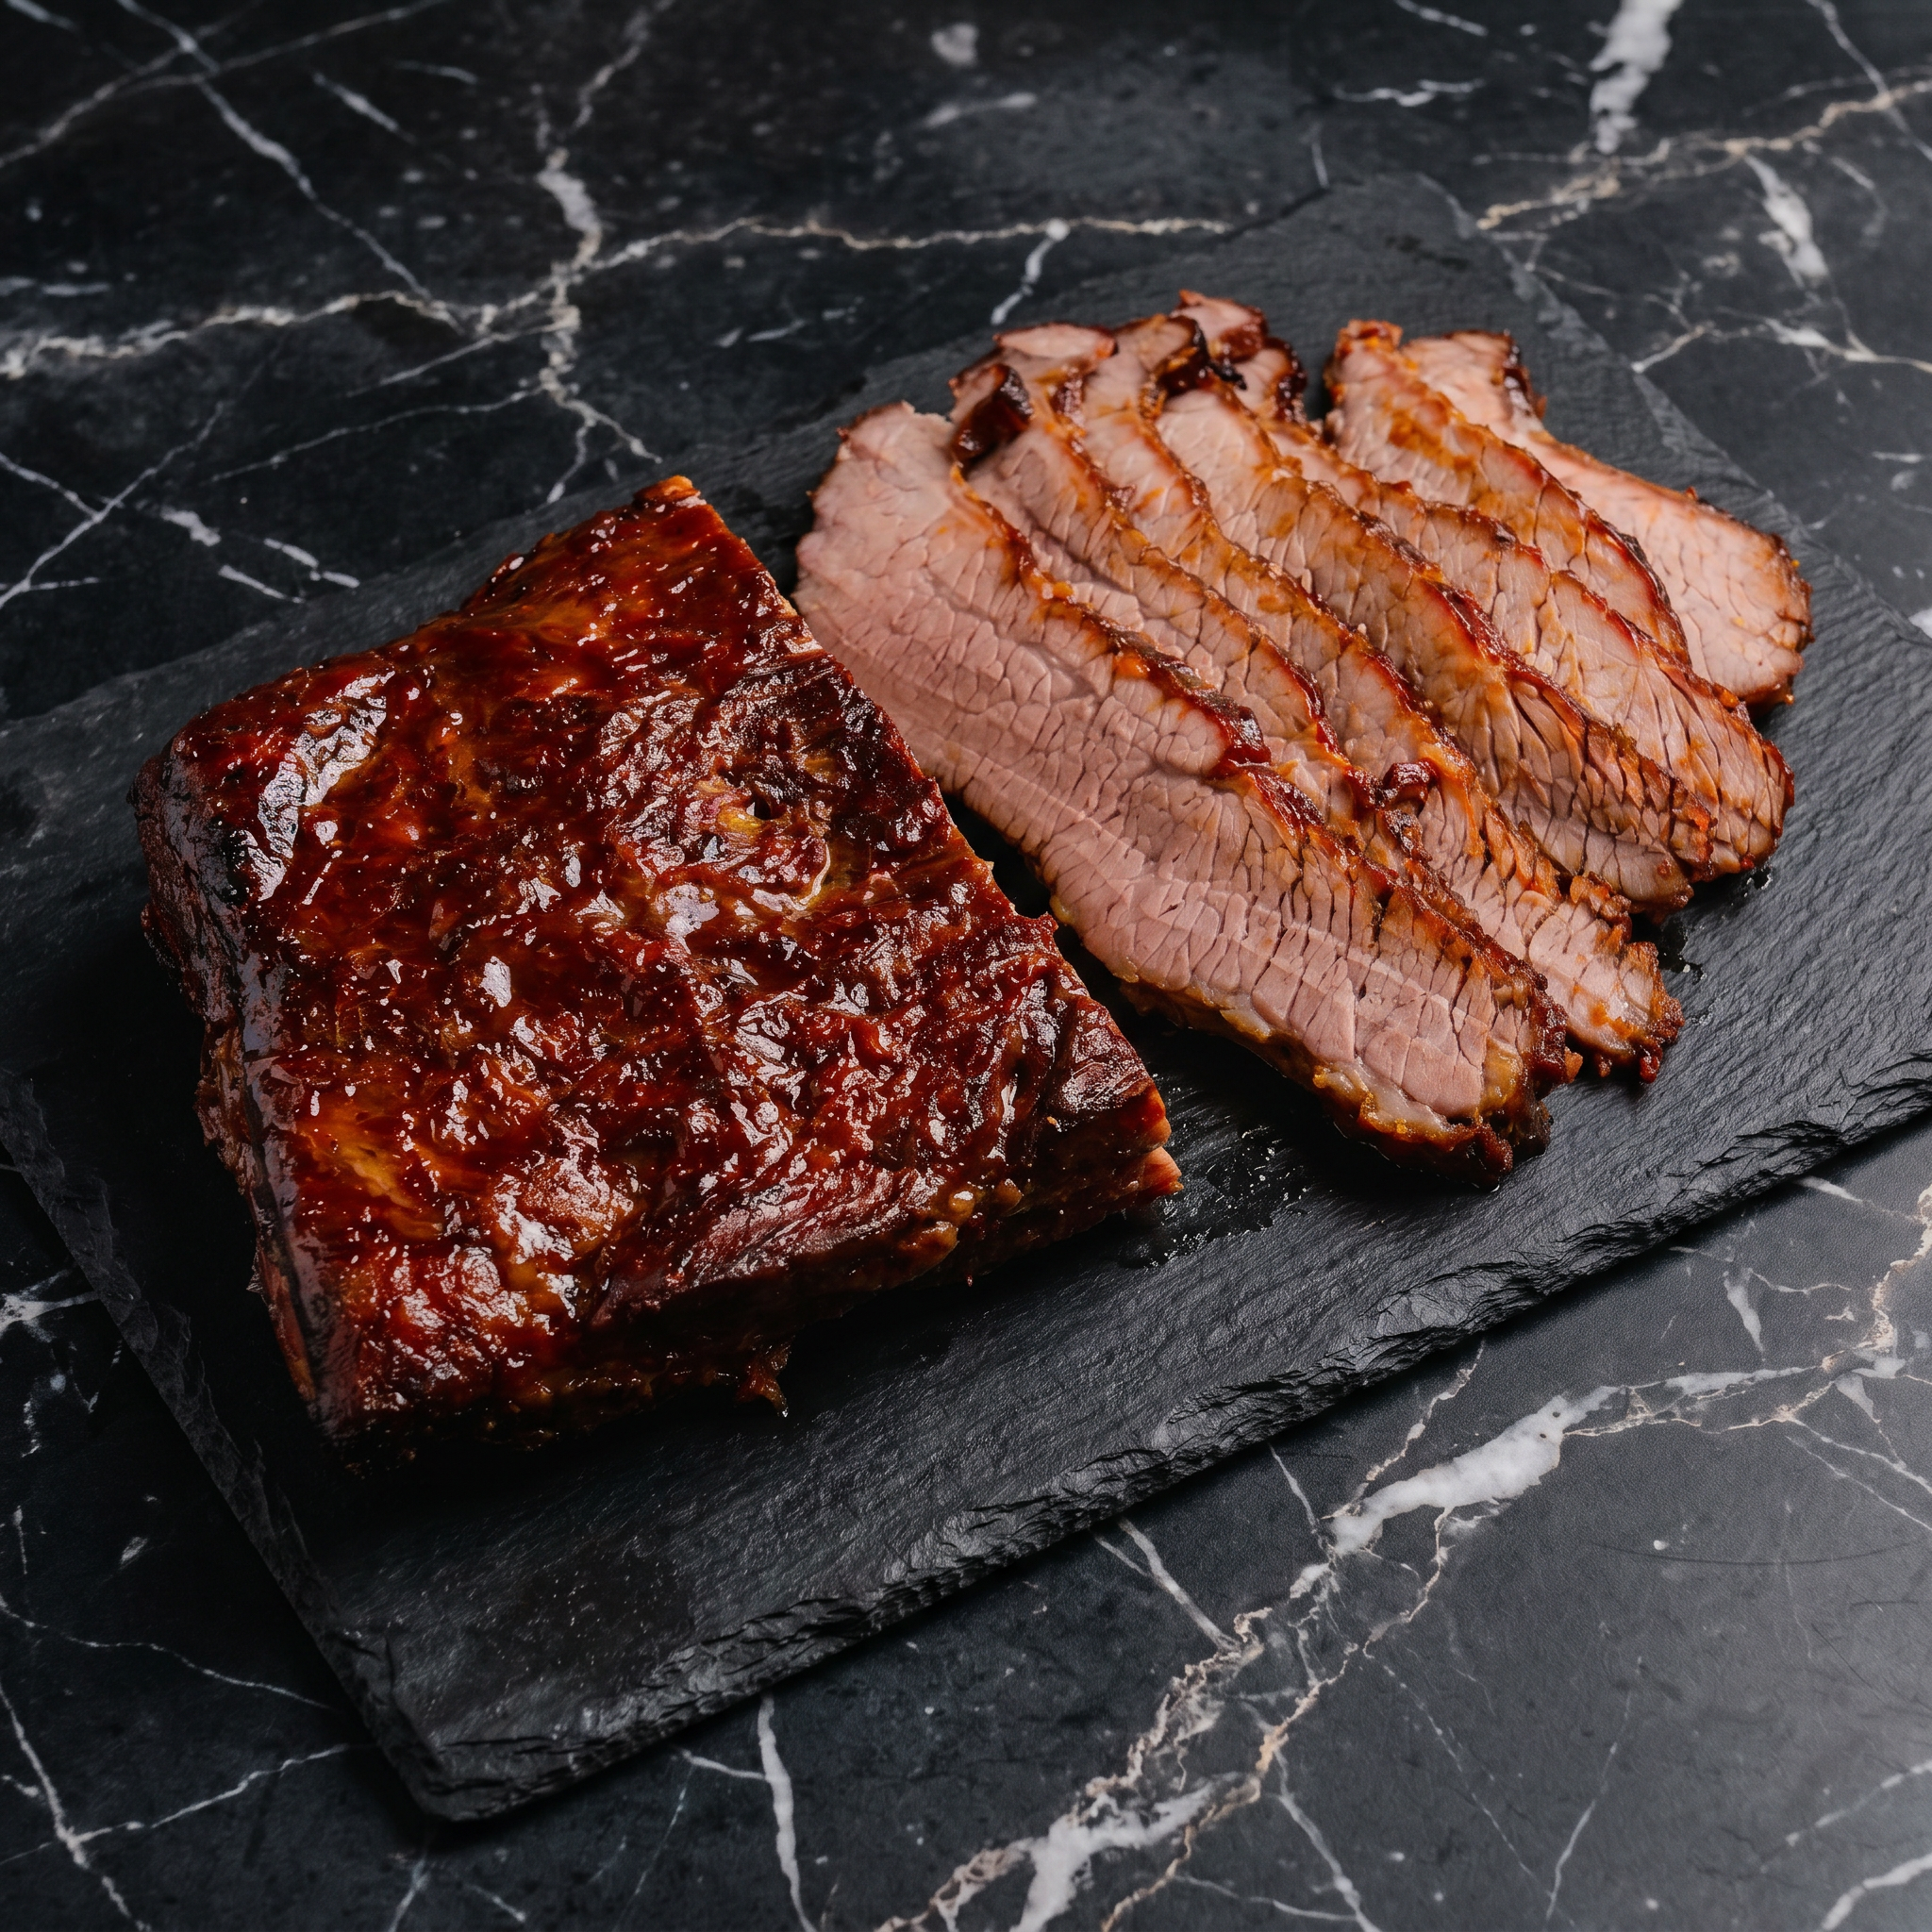
- Remove brisket. Brush generously with glaze. Return to oven uncovered for 15-20 minutes until sticky.
Step 6: Rest & Slice
- Rest 15 minutes. Slice against the grain (crucial for tenderness). Serve with extra BBQ sauce.
Summary
Prep Time: 15 min | Cook Time: 4 hours | Total: 4 hours 15 min
Yield: 6-8 servings | Difficulty: Easy (requires patience)
Storage Notes
Fridge: 5 days. Freezer (sliced): 3 months. Reheat in oven at 300°F for 15-20 minutes covered with foil (keeps moist). Avoid microwave — brisket gets tough. Leftovers are incredible in sandwiches, tacos, or on loaded nachos.