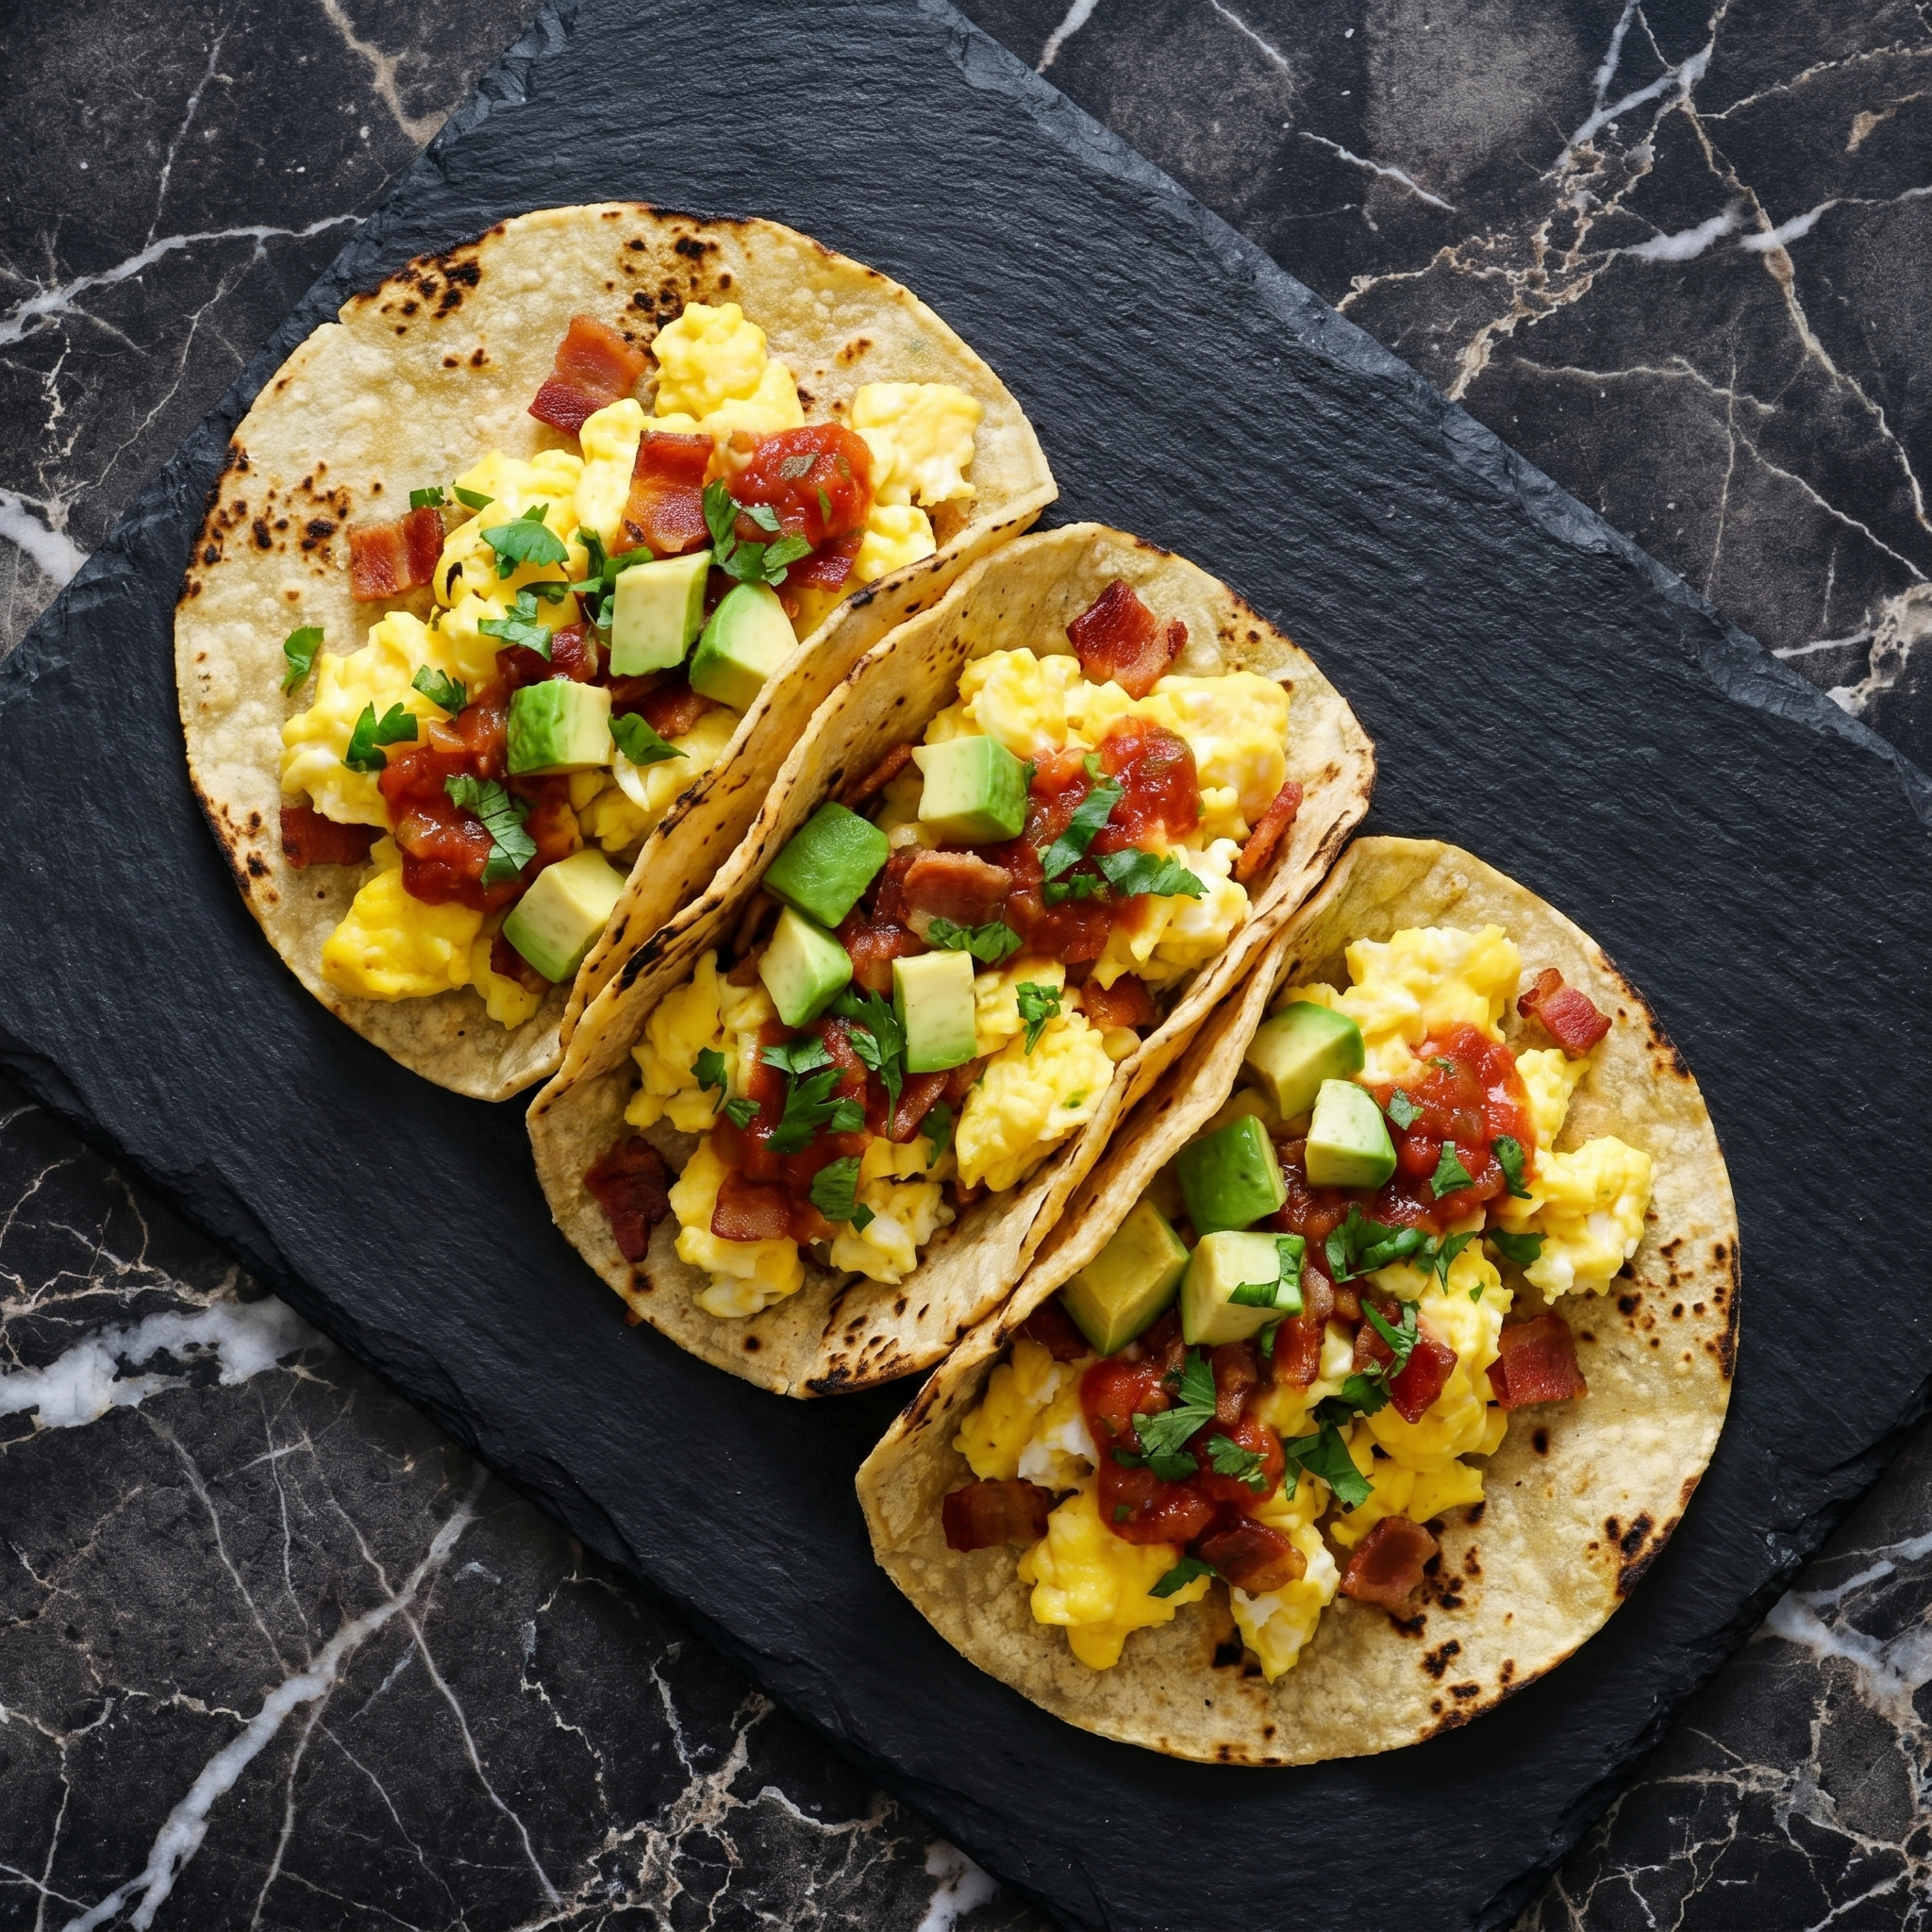
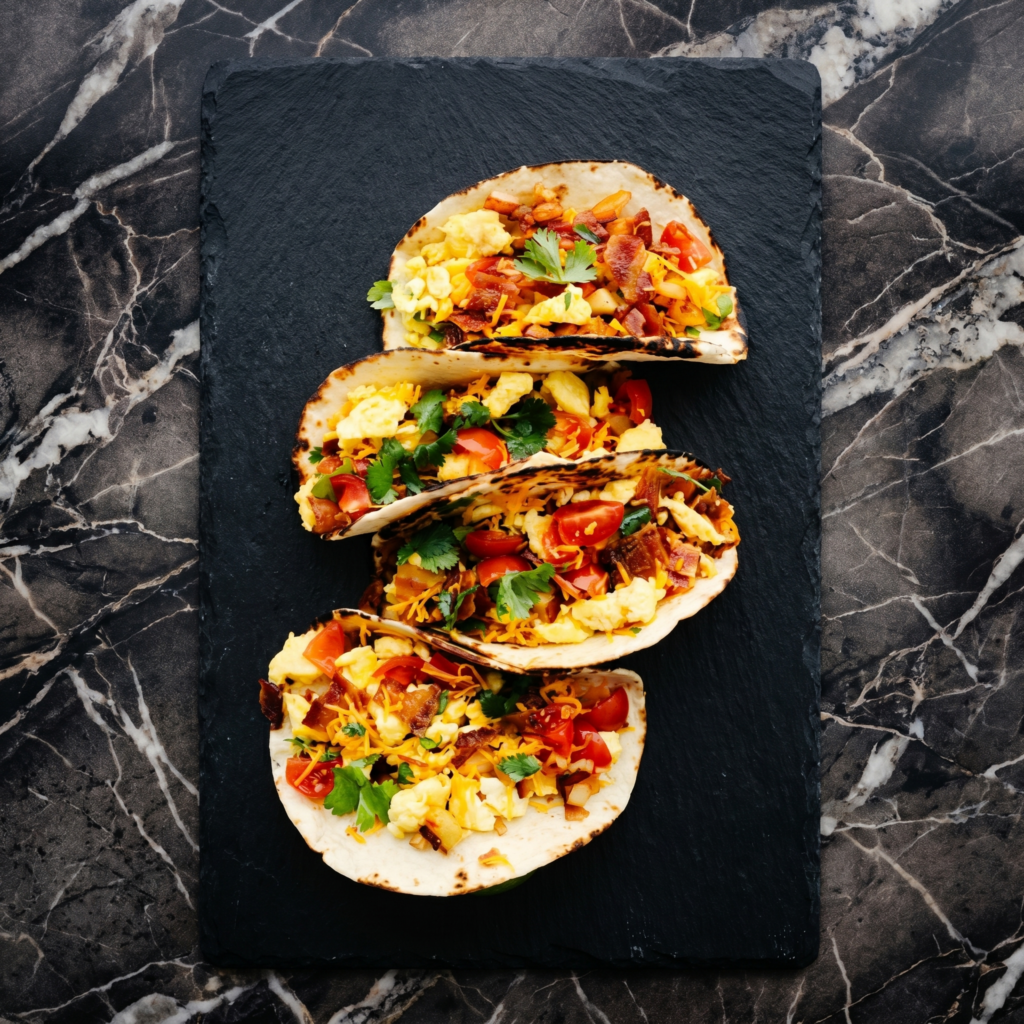
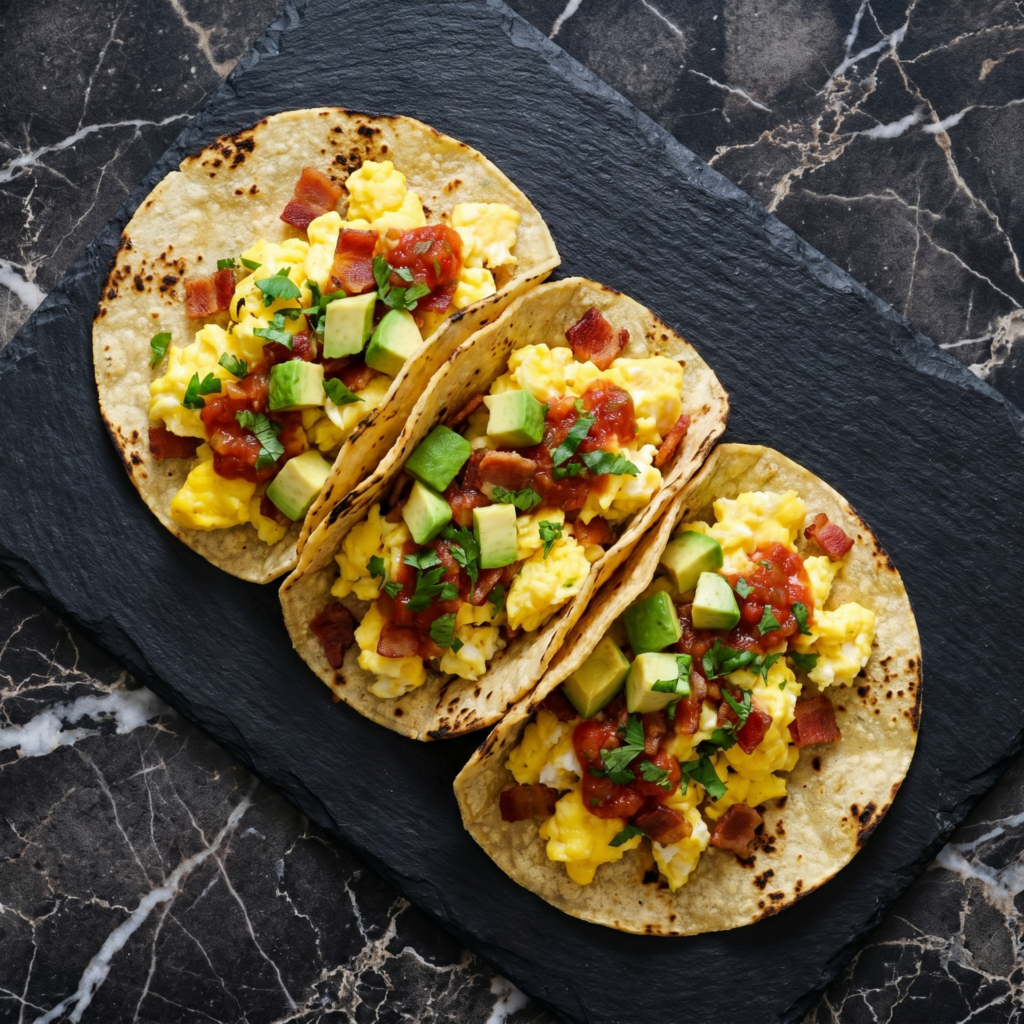
Forget smoothie bowls. In Texas, breakfast means tacos. Warm tortillas stuffed with eggs, crispy potatoes, melty cheese, and whatever else you’ve got. It’s fast, cheap, and actually fills you up.
Ten minutes. One skillet. Zero regrets. Let’s go.
Ingredients
Makes 4 tacos (serves 2).
The Basics:
4 small corn or flour tortillas
4 large eggs
2 tablespoons milk (optional, for fluffier eggs)
½ cup shredded cheese (cheddar, Monterey Jack, or Oaxaca)
4 strips bacon OR ½ cup cooked chorizo
Salt and pepper to taste
Toppings (Go Crazy):
Salsa roja or verde
Pickled jalapeños
Chopped cilantro
Diced onion
Hot sauce
Sour cream or crema
Avocado slices
Step-by-Step Instructions
Step 1: Cook Your Meat
Cook bacon until crispy, then crumble. Or brown chorizo in a skillet, 5 minutes.
Drain excess grease, leaving a little for the eggs.
Step 2: Scramble the Eggs
Whisk eggs with milk, salt, and pepper.
Pour into the same skillet over medium-low heat.
Stir gently until soft curds form. Don’t overcook.
Step 3: Warm the Tortillas
Heat tortillas directly over a gas flame (10 seconds per side) or in a dry skillet.
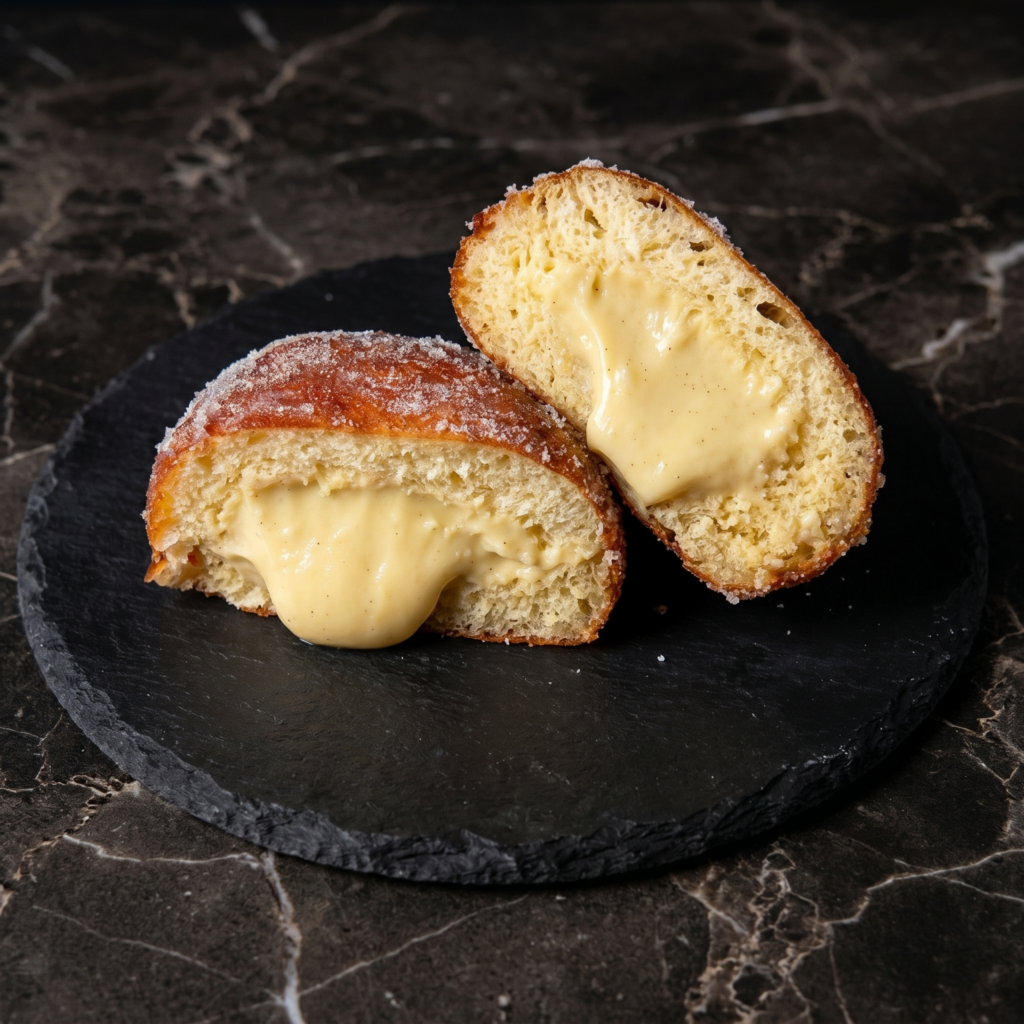
Light, airy, deep-fried to golden perfection. Rolled in sugar. Stuffed with creamy pastry cream, warm Nutella, or tangy jam. They’re Italy’s gift to the world. And you can make them in your kitchen with no special equipment.
Ingredients
Makes 12-15 bomboloni.
For the Dough:
3½ cups (440g) bread flour or all-purpose flour
¼ cup (50g) sugar
2¼ teaspoons instant yeast (one packet)
½ teaspoon salt
3 large eggs, room temperature
½ cup (120ml) warm milk
¼ cup (55g) unsalted butter, softened
For Frying and Coating:
Oil for frying (vegetable or canola)
1 cup (200g) granulated sugar (for rolling)
Fillings (pick your favorite):
Nutella or chocolate hazelnut spread
Pastry cream (vanilla custard)
Raspberry or apricot jam
Step-by-Step Instructions
Step 1: Make the Dough
Mix flour, sugar, yeast, and salt. Add eggs and warm milk. Mix until shaggy.
Add softened butter one tablespoon at a time. Knead 8-10 minutes until smooth and elastic.
Cover and let rise 1-2 hours until doubled.
Step 2: Shape and Rise Again
Punch down dough. Roll or pat to ½-inch thickness.
Cut into 2-3 inch rounds (use a biscuit cutter or glass). Place on parchment.
Cover and rise for 45-60 minutes until puffy.
Step 3: Fry
Heat 2 inches of oil to 350°F (175°C).
Fry 2-3 bomboloni at a time, 1-2 minutes per side, until deep golden brown.
Drain on paper towels. While still warm, roll in sugar.
Step 4: Fill and Devour
Let cool slightly. Fill a piping bag with your chosen filling.
Poke a hole in each bombolone and pipe in filling until heavy.
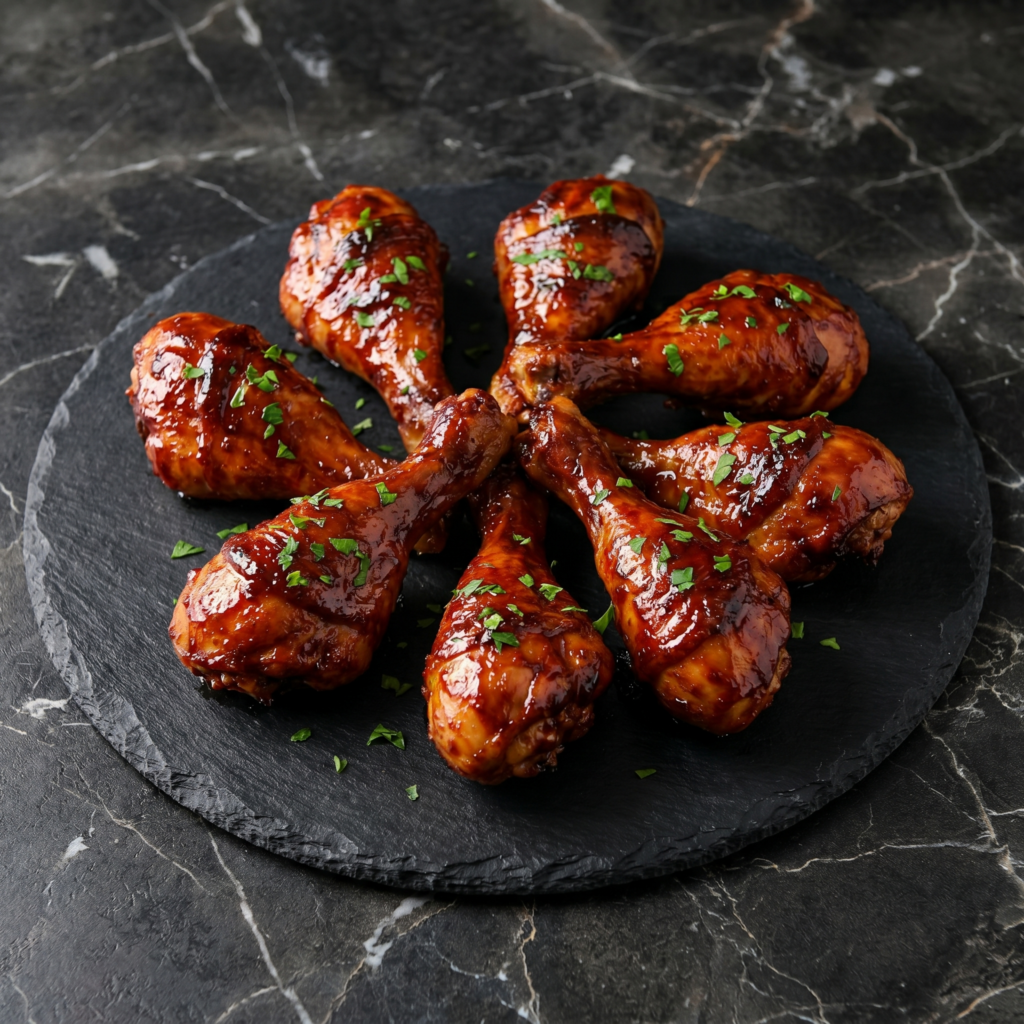
Forget boneless, skinless chicken breasts. Drumsticks are cheaper, juicier, and way more fun to eat. Smother them in BBQ sauce, bake or grill until sticky and caramelized, and watch them disappear.
Five ingredients. Zero dryness. Maximum flavor.
Ingredients
Serves 4 (8 drumsticks).
8 chicken drumsticks
1 tablespoon olive oil
1 teaspoon salt
½ teaspoon black pepper
1 teaspoon garlic powder
1 teaspoon smoked paprika (optional, but do it)
1 cup BBQ sauce (your favorite)
Step-by-Step Instructions
Option 1: Oven-Baked
Preheat oven to 400°F (200°C). Line a baking sheet with foil.
Pat drumsticks dry. Toss with oil, salt, pepper, garlic powder, paprika.
Arrange on sheet. Bake 25 minutes.
Brush with BBQ sauce. Bake 10 more minutes.
Flip. Brush again. Bake 5-10 minutes until sticky and internal temp hits 165°F.
Option 2: Grilled
Preheat grill to medium (350-400°F).
Season drumsticks. Grill 20-25 minutes, turning every 5 minutes.
Brush with BBQ sauce last 10 minutes. Flip a few times until caramelized.
Serve:
Rest 5 minutes. Serve with extra sauce on the side. Napkins required.
Fridge: Keeps 3-4 days. Reheat in oven at 375°F for 10-15 minutes (not microwave—rubbery skin is sad).
Freezer (cooked): Up to 3 months. Thaw overnight, reheat in oven.
Freezer (raw, seasoned): Freeze in a bag. Thaw overnight before cooking.
Pro Tip:
Pat the drumsticks DRY before seasoning. Wet skin = steamed chicken = flabby skin. Dry skin = crispy, sticky goodness. Also, sauce goes on at the END—too early and it burns.
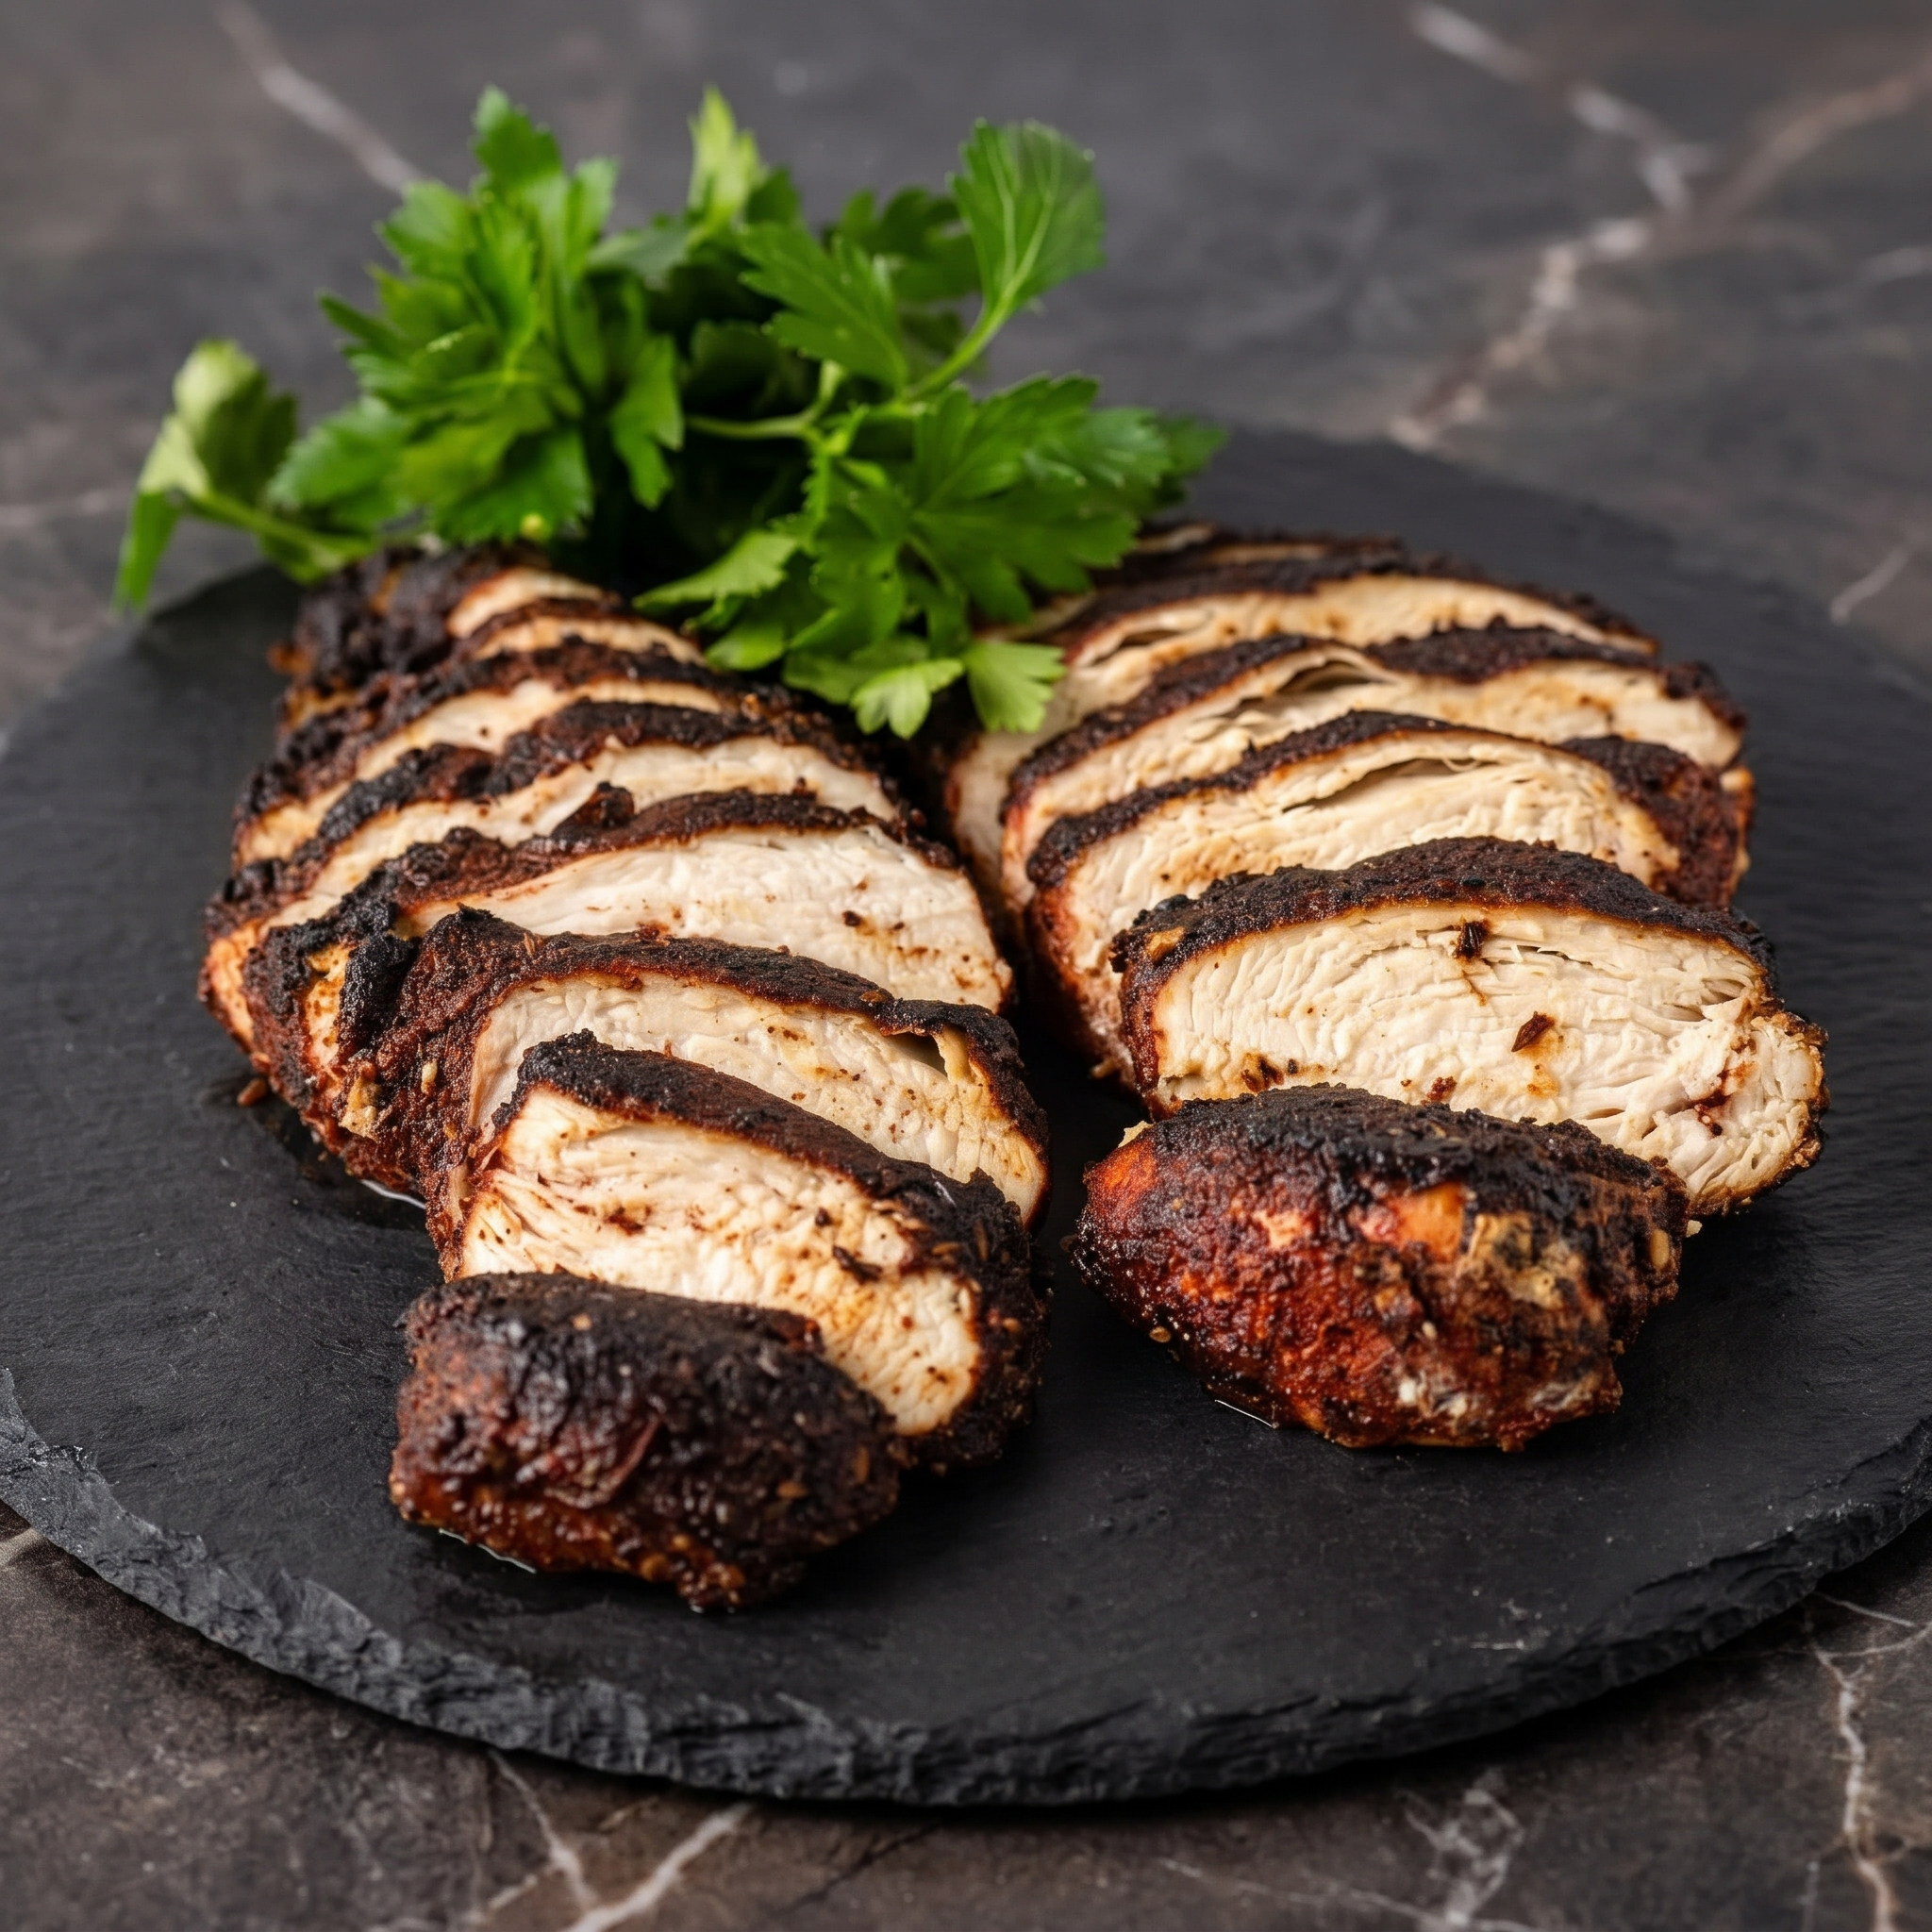
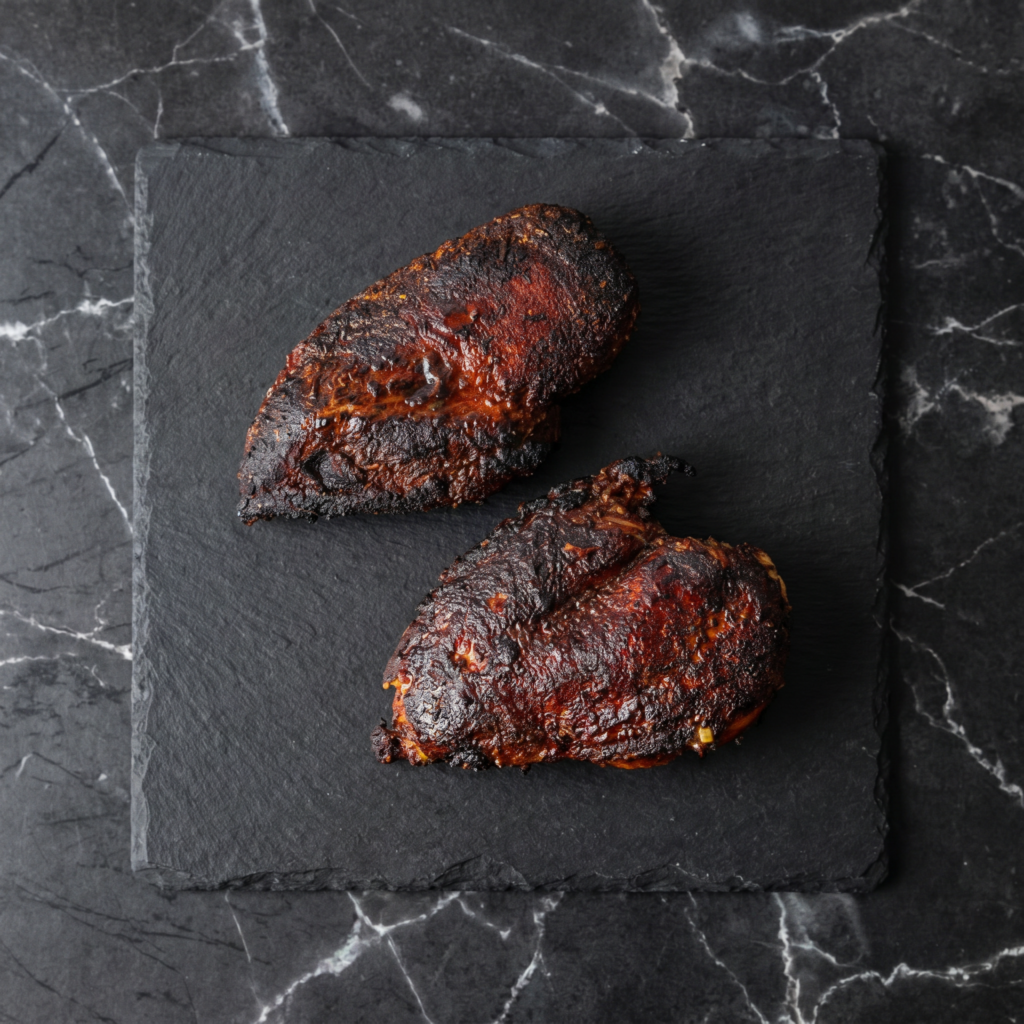
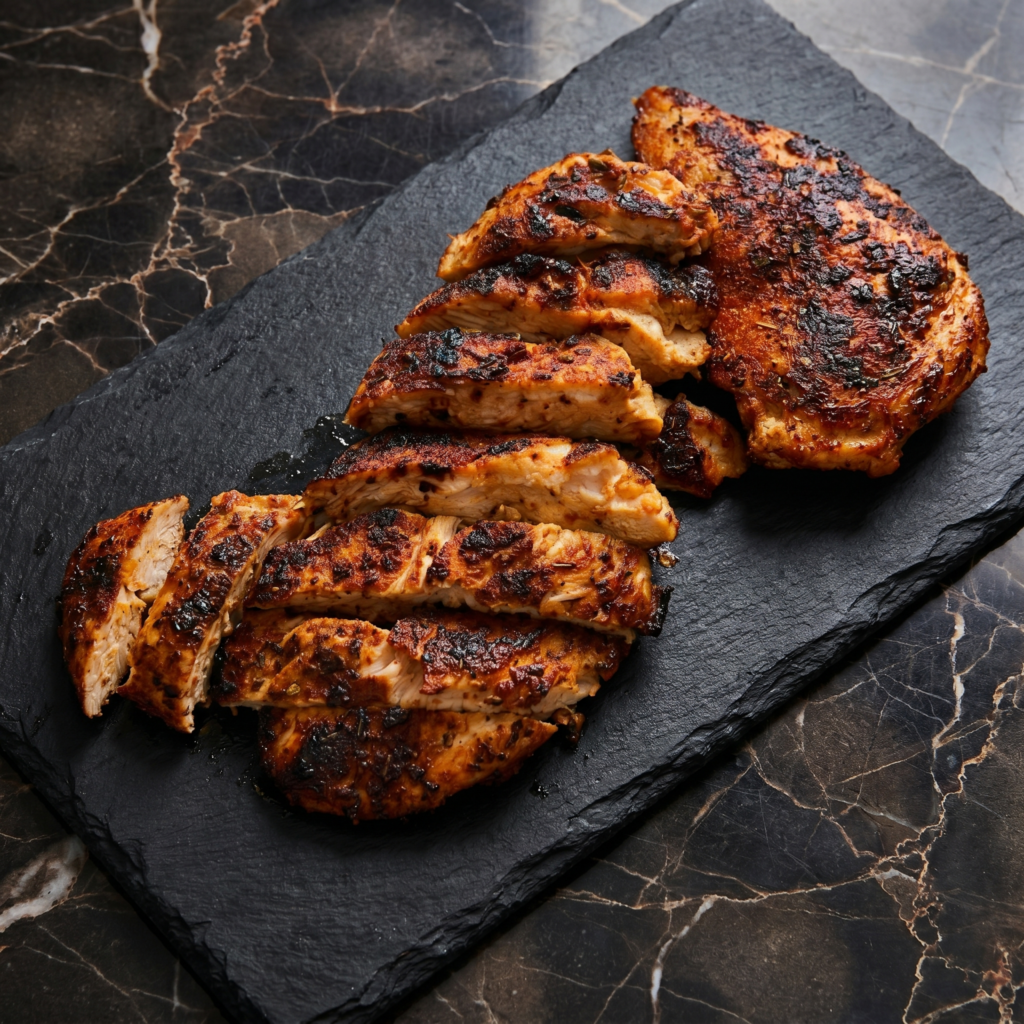
Blackened chicken is the dish that proves big flavor doesn’t require big effort. A bold, smoky Cajun spice blend. A screaming-hot skillet. A few minutes per side. That’s it. The spices create a dark, flavorful crust that’s not burnt—it’s blackened. There’s a difference, and it’s delicious.
This is weeknight cooking at its finest. The seasoning comes together from pantry staples. The chicken cooks in under 15 minutes. And the result? Juicy, tender chicken with a crust that crackles and a kick that lingers. Serve it over rice, tucked into sandwiches, or piled on salads. It’s the kind of recipe you’ll memorize and make on repeat.
Ingredients
Serves 4.
For the Chicken:
4 boneless, skinless chicken breasts (about 6 oz each)
2 tbsp olive oil or avocado oil (high smoke point)
2 tbsp butter (optional, for extra richness)
Lemon wedges, for serving
Fresh parsley, for garnish
For the Cajun Seasoning:
2 tbsp smoked paprika
1 tbsp garlic powder
1 tbsp onion powder
1 tbsp dried oregano
1 tbsp dried thyme
1 tsp cayenne pepper (adjust to heat preference)
1 tsp black pepper
1 tsp salt
½ tsp white pepper (optional, adds depth)
½ tsp red pepper flakes (optional, for extra heat)
Step-by-Step Instructions
Step 1: Make the Cajun Seasoning
In a small bowl, combine smoked paprika, garlic powder, onion powder, oregano, thyme, cayenne, black pepper, salt, white pepper, and red pepper flakes (if using).
Mix well. Store any extra in an airtight jar—it’s great on fish, shrimp, vegetables, and potatoes too.
Step 2: Prep the Chicken
Place chicken breasts between two sheets of plastic wrap or parchment paper.
Using a meat mallet or rolling pin, gently pound to an even ½-inch thickness. This ensures even cooking.
Pat chicken completely dry with paper towels. Moisture is the enemy of a good sear.
Step 3: Season the Chicken
Drizzle chicken with 1 tbsp olive oil and rub to coat.
Sprinkle Cajun seasoning generously over both sides of each chicken breast, pressing gently to adhere. You want a thick, even coating—that’s what creates the blackened crust.
Step 4: Heat the Skillet
Heat a large cast-iron skillet or heavy-bottomed pan over medium-high heat until it’s ripping hot—almost smoking. Cast iron is ideal because it holds heat evenly.
Add remaining 1 tbsp oil (and butter if using) to the pan.
Step 5: Sear the Chicken
Place chicken in the skillet in a single layer. Don’t crowd the pan—work in batches if needed.
Cook undisturbed for 4-5 minutes until the underside is deeply darkened and crispy. The spices should look blackened, not burnt.
Flip and cook another 4-5 minutes until chicken is cooked through (internal temp 165°F) and the second side is also blackened.
If the crust is dark but the chicken isn’t done, reduce heat to medium and cook until finished.
Step 6: Rest and Serve
Transfer chicken to a cutting board and let rest for 5 minutes. This allows juices to redistribute.
Slice if desired, or serve whole.
Garnish with fresh parsley and serve with lemon wedges for squeezing.
Take a bite. Crispy, spicy crust. Juicy, tender interior. This is Cajun cooking at its finest.
Store in an airtight container in the fridge for up to 4 days. Blackened chicken is delicious cold on salads or gently reheated.
Reheating:
Skillet (best): Reheat over medium heat for 2-3 minutes per side. Oven: 350°F for 8-10 minutes. Microwave: 60-90 seconds at reduced power—the crust will soften but flavor remains.
Make Ahead:
Mix the Cajun seasoning up to 3 months in advance. Season chicken up to 24 hours ahead and refrigerate. Cook just before serving for the crispiest crust.
Freezer-Friendly:
Freeze cooked chicken in an airtight container for up to 3 months. Thaw overnight in the fridge and reheat in a skillet or oven.
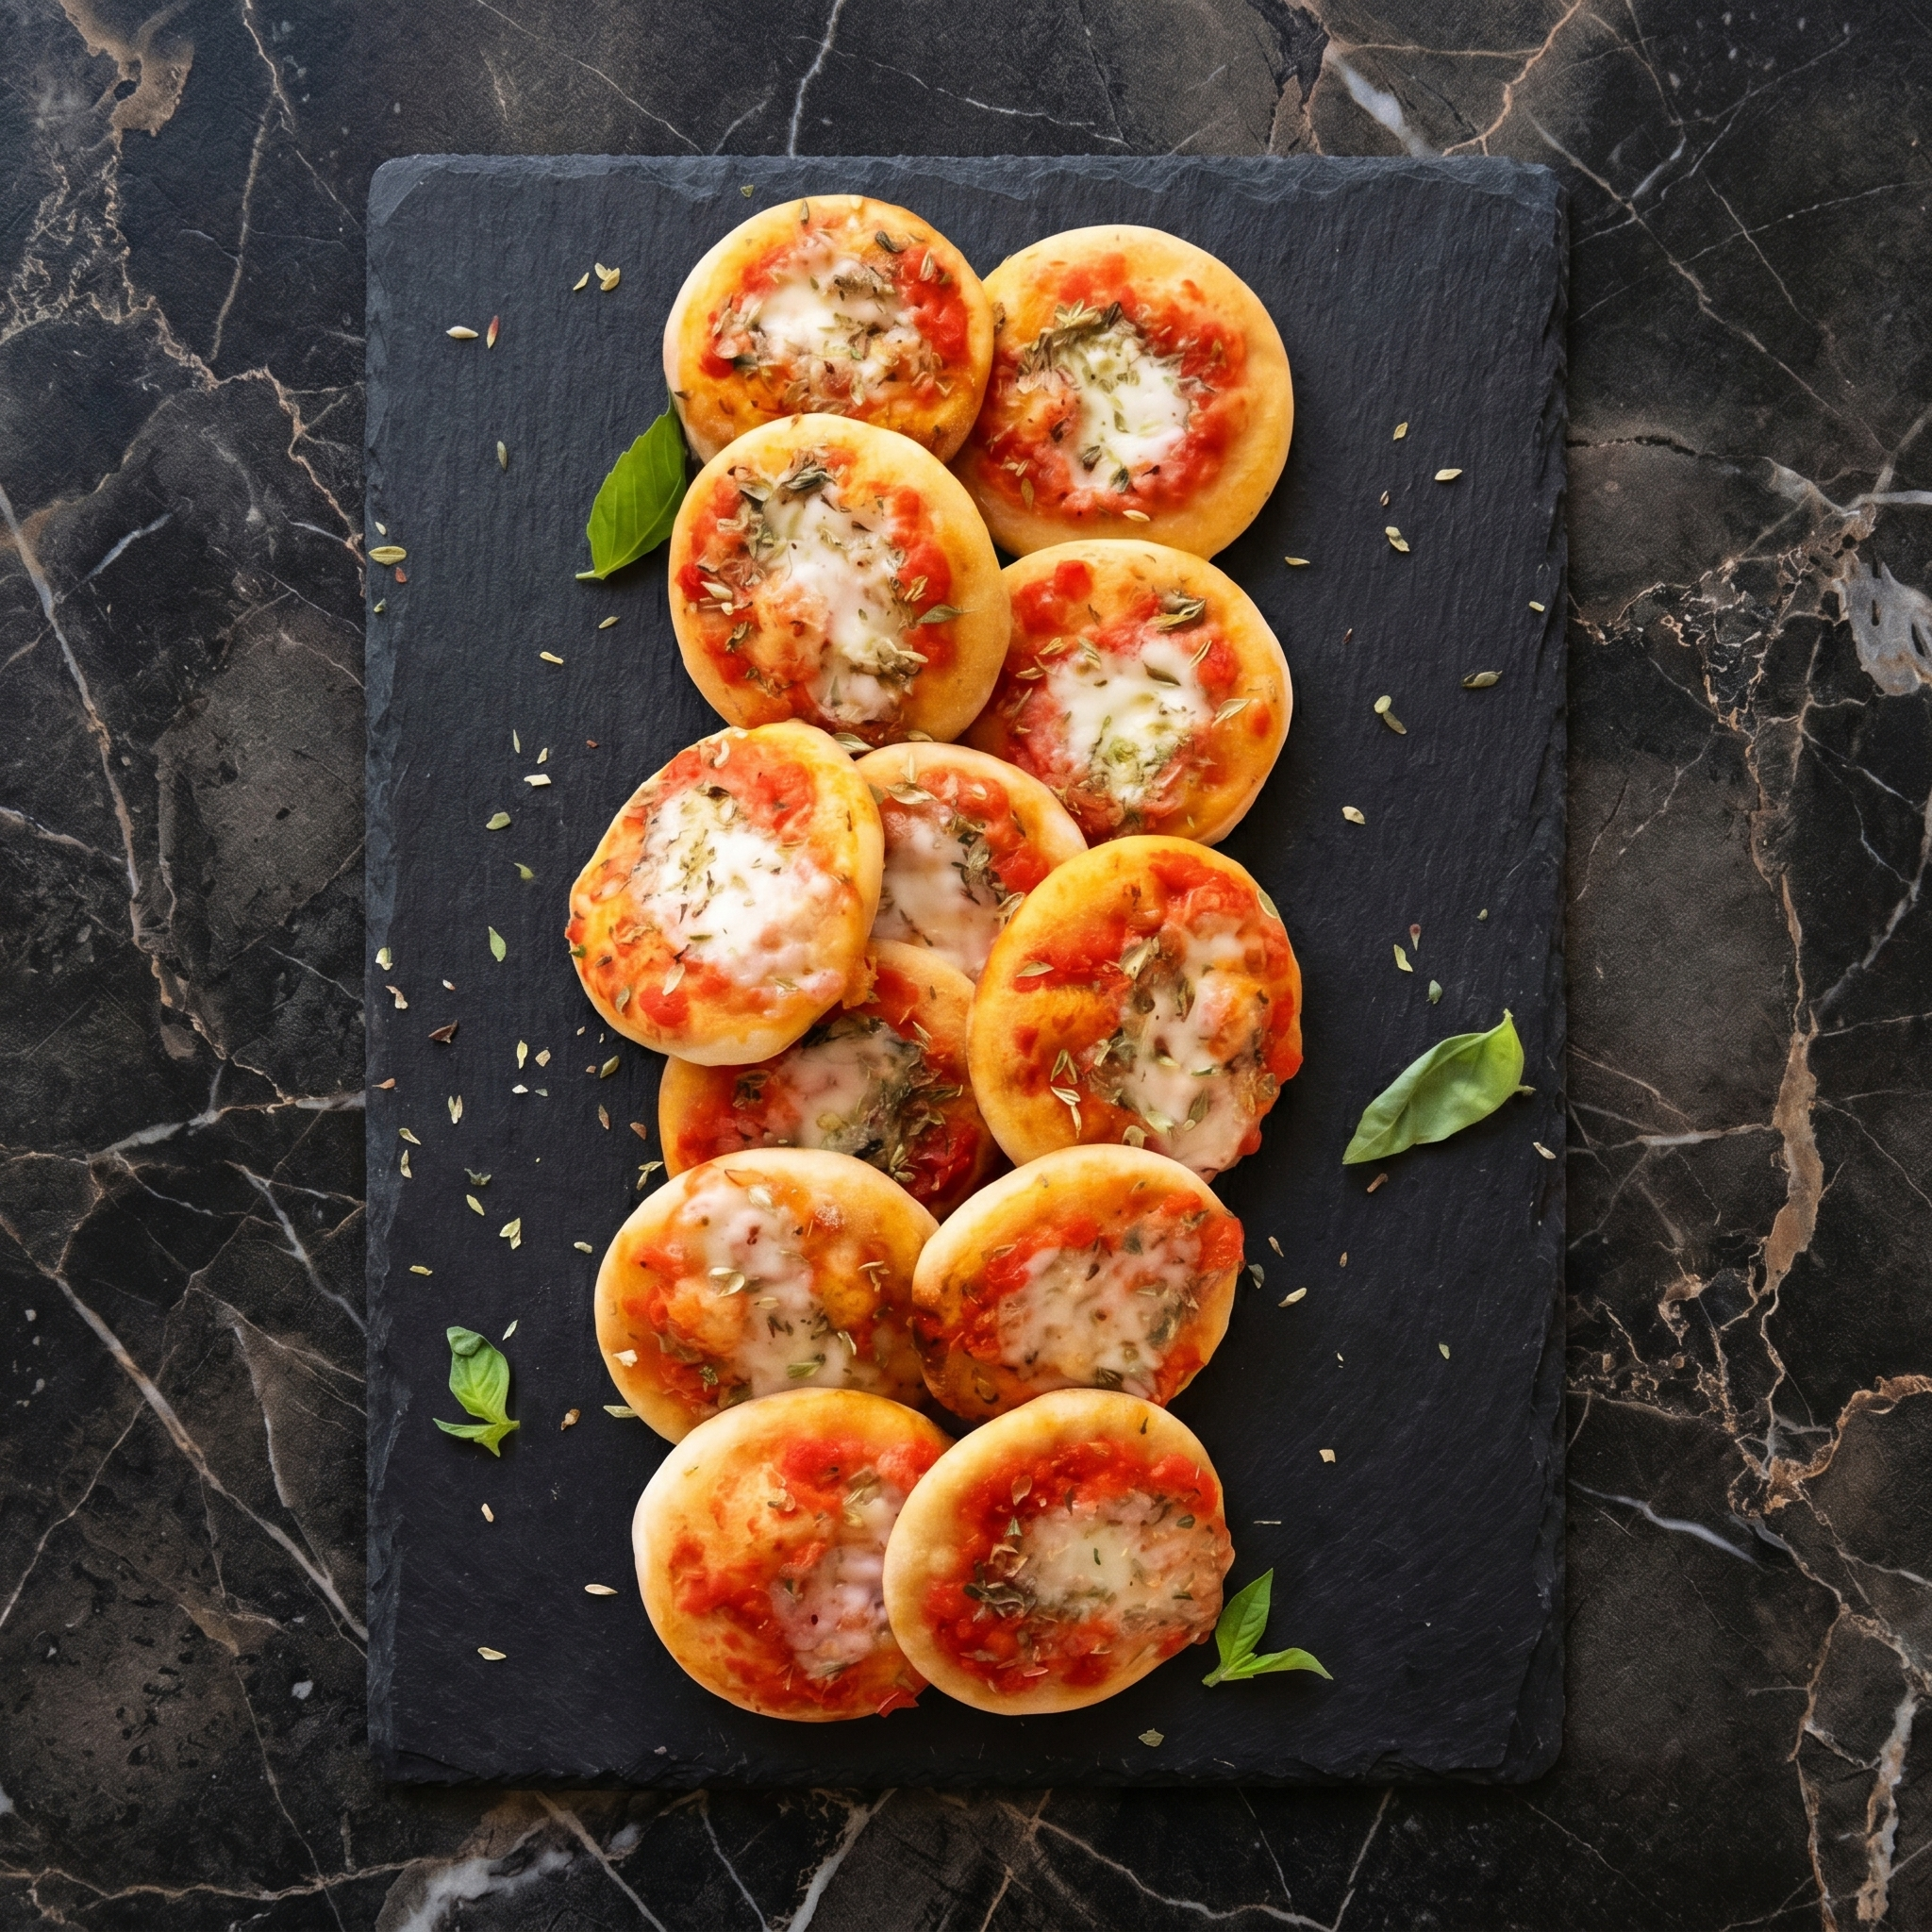
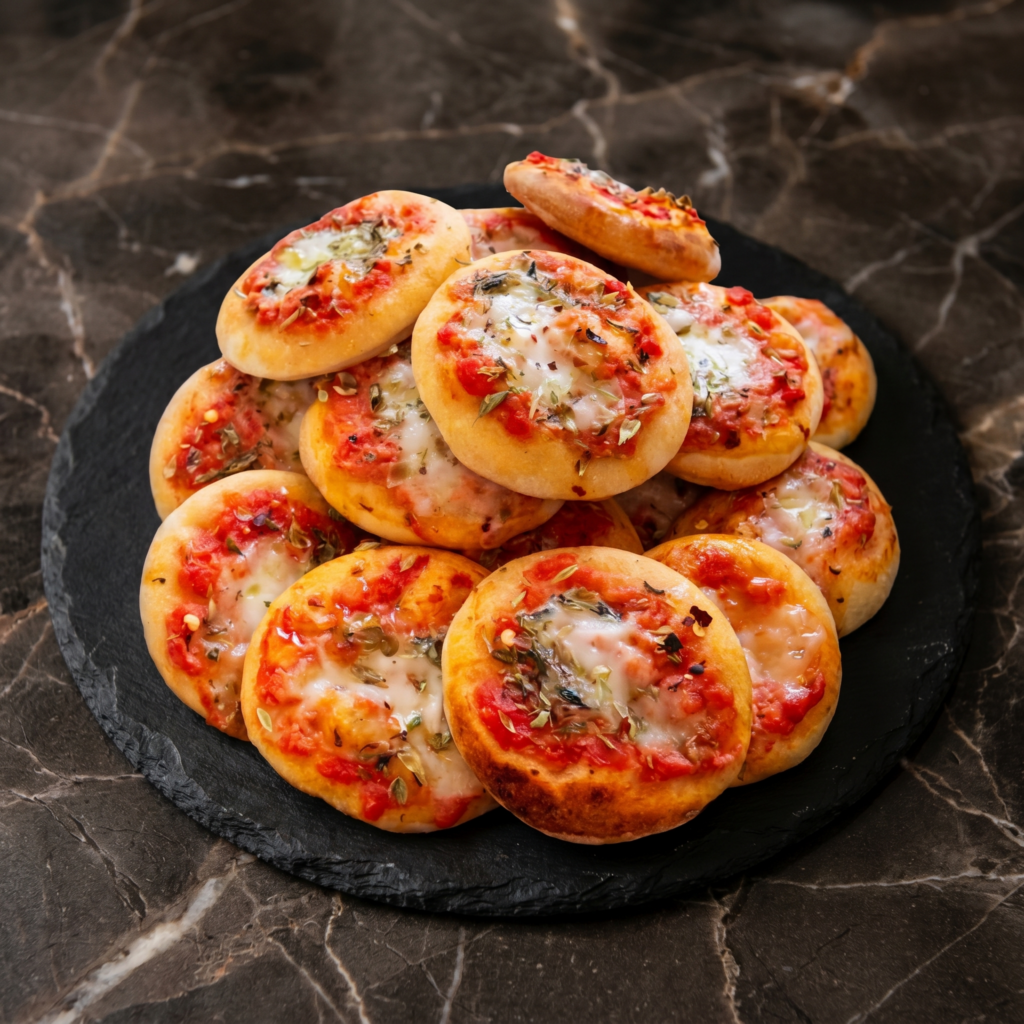
Is there anything better than pizza? Yes—mini pizzas! These adorable little pies are everything you love about pizza, but cuter, more customizable, and somehow even more fun to eat.
Whether you’re hosting a party, feeding a crowd with different topping preferences, or just want to make dinner feel special, mini pizzas are the answer. The possibilities are endless: classic pepperoni, margherita, veggie-loaded, or whatever your heart desires.
And the best part? They come together in no time, especially if you use store-bought dough as a shortcut. Get the kids involved, set up a topping bar, and let everyone build their own perfect little pizza. Dinner just got a whole lot more fun.
Ingredients
Makes 8-10 mini pizzas (depending on size).
For the Pizza Dough:
1 lb (450g) pizza dough (homemade or store-bought)
All-purpose flour, for dusting
Cornmeal, for dusting (optional)
For the Pizza Sauce:
1 cup (240ml) pizza sauce or marinara sauce
1 teaspoon dried oregano
½ teaspoon garlic powder
Pinch of red pepper flakes (optional)
For the Cheese:
2 cups (225g) shredded mozzarella cheese
¼ cup (25g) grated Parmesan cheese
Classic Topping Ideas:
Pepperoni slices
Cooked Italian sausage, crumbled
Cooked bacon, crumbled
Mushrooms, thinly sliced
Bell peppers, thinly sliced
Red onion, thinly sliced
Black olives, sliced
Fresh basil leaves
Cherry tomatoes, halved
Step-by-Step Instructions
1. Preheat and Prepare:
Preheat your oven to 450°F (230°C). If you have a pizza stone, place it in the oven to preheat as well. Otherwise, line two baking sheets with parchment paper or sprinkle with cornmeal to prevent sticking.
2. Prepare the Sauce:
In a small bowl, combine the pizza sauce with oregano, garlic powder, and red pepper flakes (if using). Set aside to let the flavors meld.
3. Divide the Dough:
On a lightly floured surface, divide the pizza dough into 8-10 equal pieces. For mini pizzas, each piece should be about 2-3 ounces (about the size of a golf ball).
Roll each piece into a smooth ball. Cover with a clean kitchen towel and let rest for 10-15 minutes. This relaxes the gluten and makes the dough easier to shape.
4. Shape the Mini Crusts:
Working with one ball at a time, flatten it with your fingers or roll it out with a small rolling pin into a 4-5 inch circle. The edges can be slightly thicker than the center for that classic pizza crust.
If the dough springs back, let it rest a few more minutes before continuing.
Place the shaped crusts on the prepared baking sheets (or on parchment paper if using a pizza stone).
5. Assemble the Mini Pizzas:
Spread about 1-2 tablespoons of sauce onto each crust, leaving a small border for the crust.
Sprinkle with mozzarella cheese and a pinch of Parmesan.
Add your desired toppings. Don’t overload—mini pizzas cook quickly and too many toppings can make them soggy.
6. Bake:
If using a pizza stone, carefully transfer the parchment paper with the pizzas onto the hot stone. If using baking sheets, simply place them in the oven.
Bake for 8-12 minutes, until the crusts are golden brown and the cheese is bubbly and slightly browned in spots.
For crispier crusts, bake directly on the oven rack (without a pan) if you have a stone or steel.
7. Finish and Serve:
Remove from the oven and let cool for 2-3 minutes before serving.
If desired, top with fresh basil leaves and a drizzle of olive oil or balsamic glaze.
Store leftover mini pizzas in an airtight container in the refrigerator for up to 3 days. They’re great for lunch the next day!
Reheating:
For best results, reheat in a skillet over medium heat for 2-3 minutes per side, or in a 350°F oven for 5-7 minutes. The microwave works but the crust won’t be as crisp.
Can You Freeze Mini Pizzas?
Absolutely! Two great options:
Freeze baked pizzas: Cool completely, wrap individually in plastic wrap and foil, and freeze for up to 3 months. Reheat directly from frozen in a 375°F oven.
Freeze unbaked assembled pizzas: Assemble on parchment-lined baking sheets, freeze until solid, then transfer to freezer bags. Bake from frozen, adding 2-3 minutes to the baking time.
Make-Ahead Prep:
Prep your toppings ahead of time and store in the refrigerator. Make the sauce up to 5 days ahead. On pizza night, all you have to do is shape and assemble.
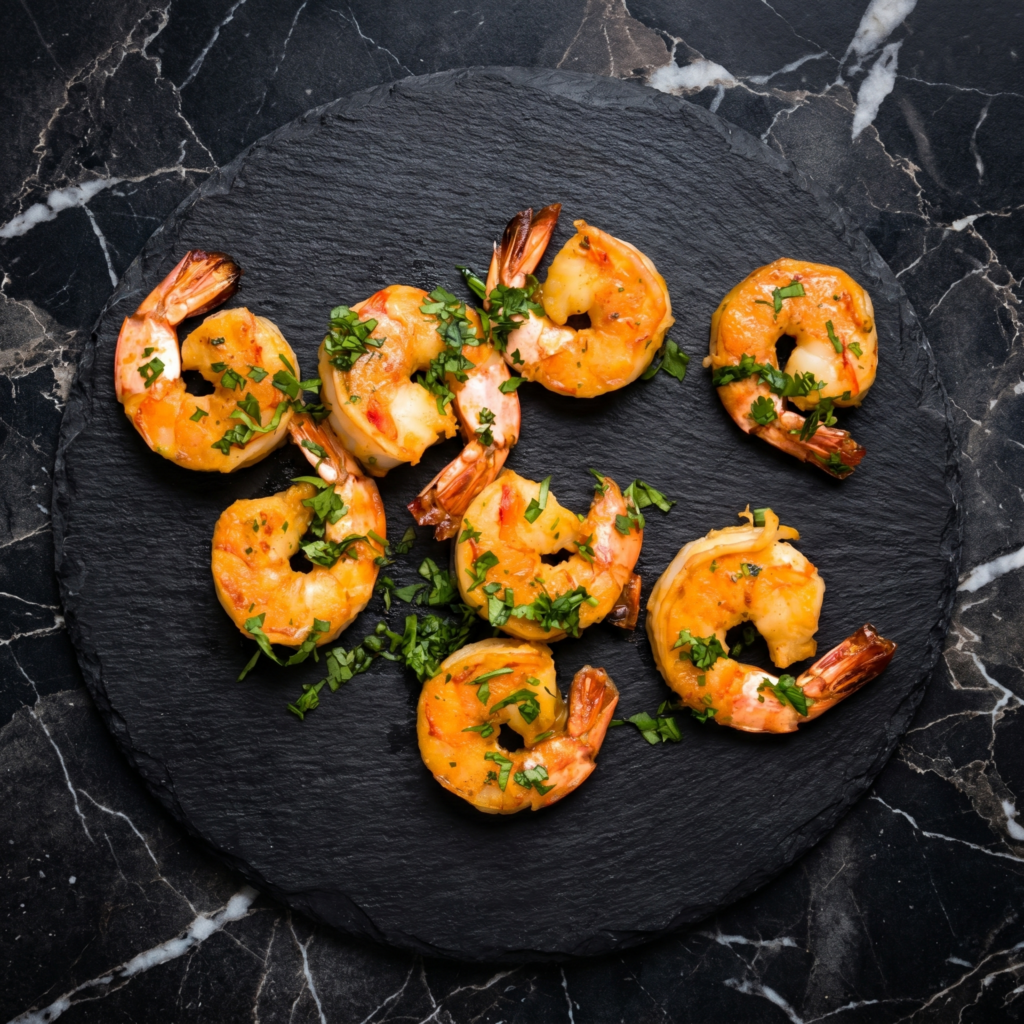
Shrimp is the fastest food on earth. This spicy garlic version takes five minutes and tastes like a restaurant splurge. Butter. Garlic. Red pepper. Lemon. Boom.
Serve with bread, rice, or just a fork. No judgment.
Ingredients
Serves 4.
1.5 lbs (675g) large shrimp, peeled and deveined
4 tablespoons butter
8 cloves garlic, minced (yes, eight)
1 teaspoon red pepper flakes (more if you dare)
½ teaspoon salt
¼ cup fresh parsley, chopped
Juice of 1 lemon
Lemon wedges for serving
Step-by-Step Instructions
Step 1: Pat Shrimp Dry
Pat shrimp completely dry with paper towels. Season with salt.
Step 2: Sear Shrimp
Melt 2 tablespoons butter in a large skillet over medium-high heat.
Add shrimp in a single layer. Cook 1-2 minutes per side until pink and curled. Remove.
Step 3: Make Garlic Butter Sauce
Reduce heat to medium. Add remaining 2 tablespoons butter, garlic, and red pepper flakes.
Cook 30-60 seconds until fragrant (don’t burn the garlic!).
Step 4: Toss & Serve
Return shrimp to pan. Add lemon juice and parsley. Toss to coat.
Serve immediately with lemon wedges and crusty bread.
The best part of a baked potato is the skin. Prove me wrong. Crispy, salty, and sturdy enough to hold mountains of cheese and bacon. These loaded potato skins are the undisputed king of game day snacks.
Crispy outside. Gooey inside. Gone in 10 minutes.
Ingredients
Serves 4 (makes 8 skins).
4 medium russet potatoes
2 tablespoons olive oil
1 teaspoon salt
½ teaspoon black pepper
1 cup shredded cheddar cheese
6 slices bacon, cooked and crumbled
3 green onions, thinly sliced
Sour cream (for serving)
Step-by-Step Instructions
Step 1: Bake the Potatoes
Preheat oven to 400°F (200°C). Pierce potatoes with a fork.
Bake 50-60 minutes until tender. Let cool until handleable.
Step 2: Scoop and Prep
Cut each potato in half lengthwise. Scoop out most of the flesh, leaving a ¼-inch thick shell.
Save the scooped potato for mashed potatoes later.
Step 3: Crisp the Skins
Brush inside and outside with olive oil. Sprinkle with salt and pepper.
Place skin-side up on a baking sheet. Bake 10 minutes. Flip and bake 5 more minutes.
Step 4: Load Them Up
Fill each skin with cheddar cheese and crumbled bacon.
Bake 5 minutes until cheese is melted and bubbly.
Step 5: Finish and Serve
Top with green onions. Add a dollop of sour cream. Serve hot.
Fridge: Keeps 3-4 days. Reheat in oven or air fryer at 375°F for 5-7 minutes. (Microwave kills the crisp.)
Freezer: Freeze fully loaded (before sour cream) on a tray, then bag. Reheat from frozen at 400°F for 12-15 minutes.
Pro Tip:
Don’t throw away the scooped potato! Mix with butter and milk for instant mashed potatoes. Also, double the recipe—trust me, one batch is never enough.
Beef Wellington scares people. It shouldn’t. Yes, it’s fancy. Yes, it’s impressive. But it’s also just steak wrapped in mushrooms, ham, and puff pastry. Follow these steps. You’ve got this.
Your guests will lose their minds.
Ingredients
Serves 4-6.
1.5 lbs (675g) beef tenderloin (center-cut)
Salt and pepper
2 tablespoons oil
8 oz (225g) mushrooms, finely chopped
2 shallots, minced
2 cloves garlic, minced
6 slices prosciutto
1 sheet puff pastry, thawed
1 egg, beaten (for egg wash)
Fresh thyme (optional)
Step-by-Step Instructions
Step 1: Sear Beef
Season beef with salt and pepper. Sear in hot oil 2-3 minutes per side until browned. Cool.
Step 2: Make Duxelles
In same pan, cook mushrooms, shallots, and garlic until dry (no liquid left). Cool.
Step 3: Wrap
Lay prosciutto on plastic wrap, overlapping. Spread mushroom mixture on top.
Place beef in center. Roll tightly using plastic wrap. Chill 20 minutes.
Step 4: Pastry Wrap
Roll out puff pastry. Unwrap beef, place on pastry. Brush edges with egg, seal tightly.
Chill 20 minutes. Preheat oven to 400°F (200°C).
Step 5: Bake
Brush pastry with egg. Score decorative lines. Bake 35-40 minutes (internal temp 125°F for medium-rare).
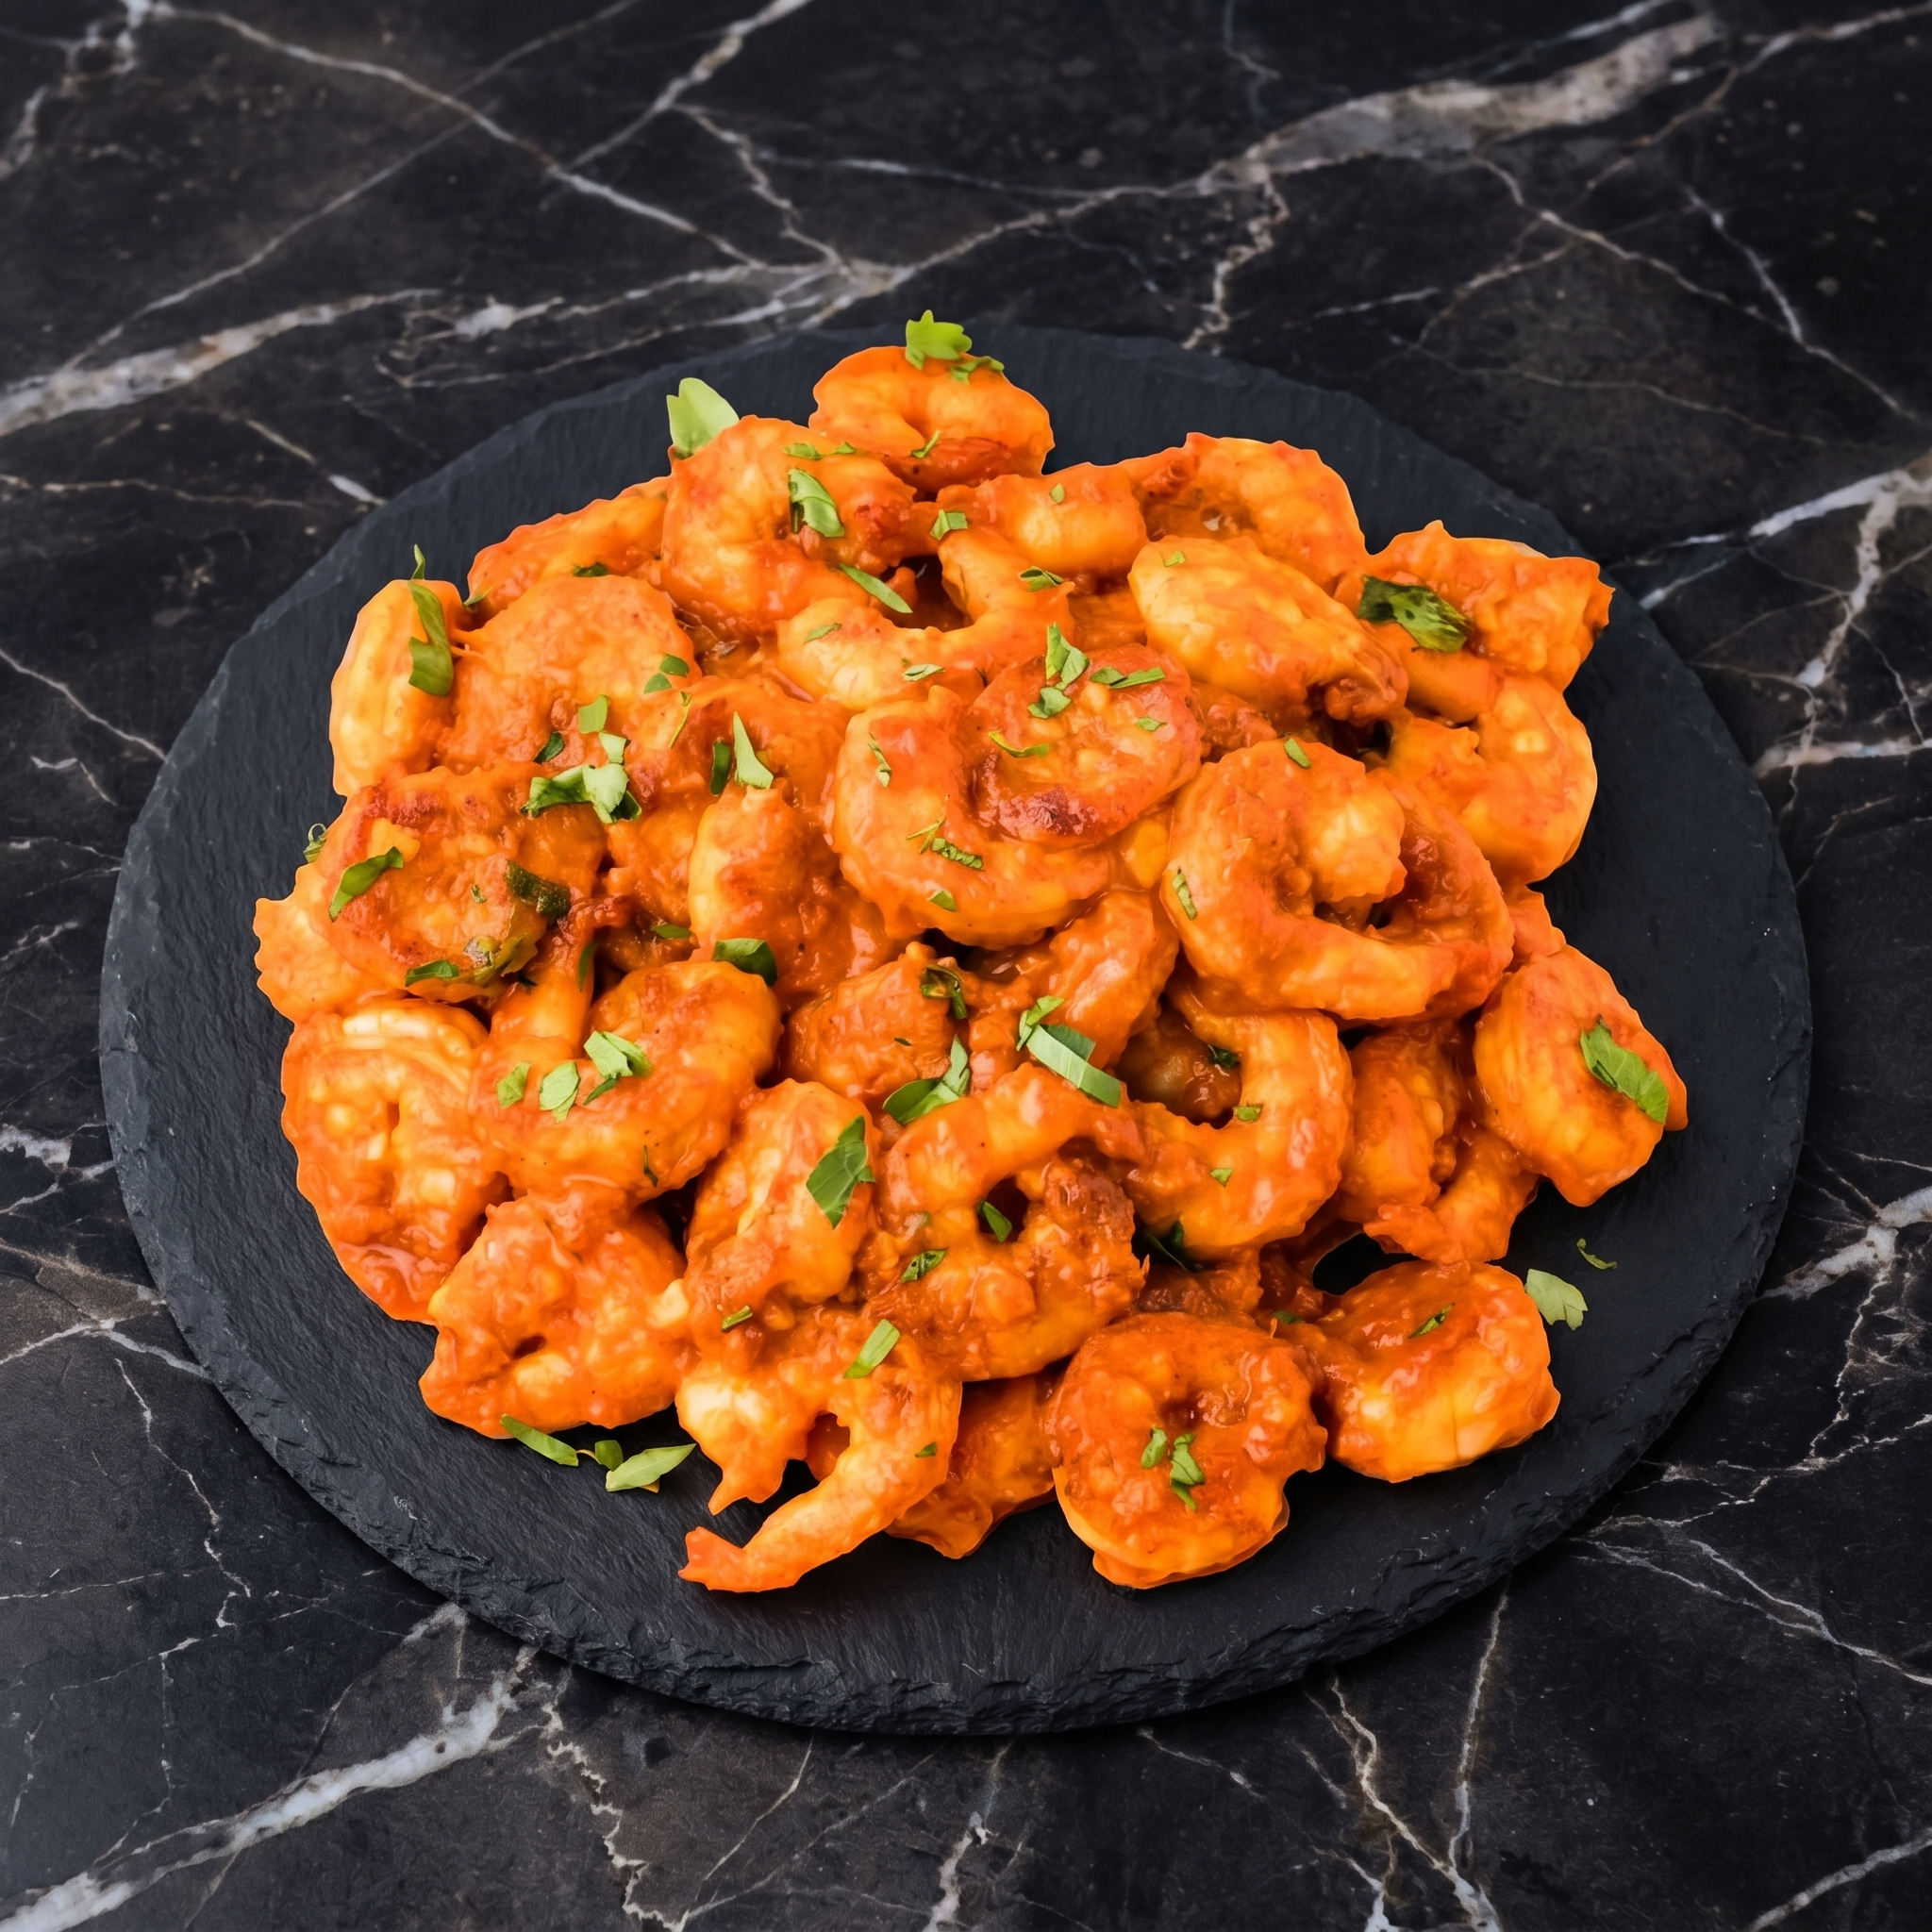
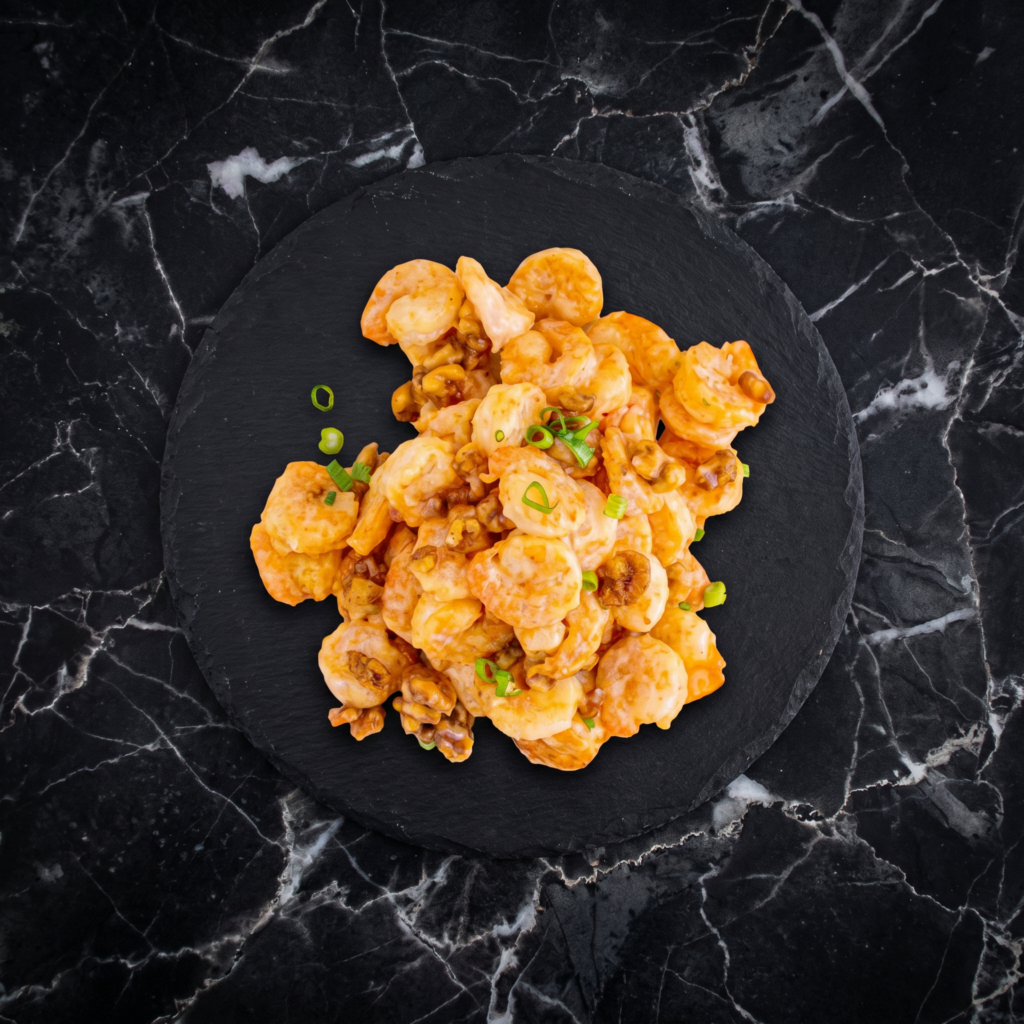
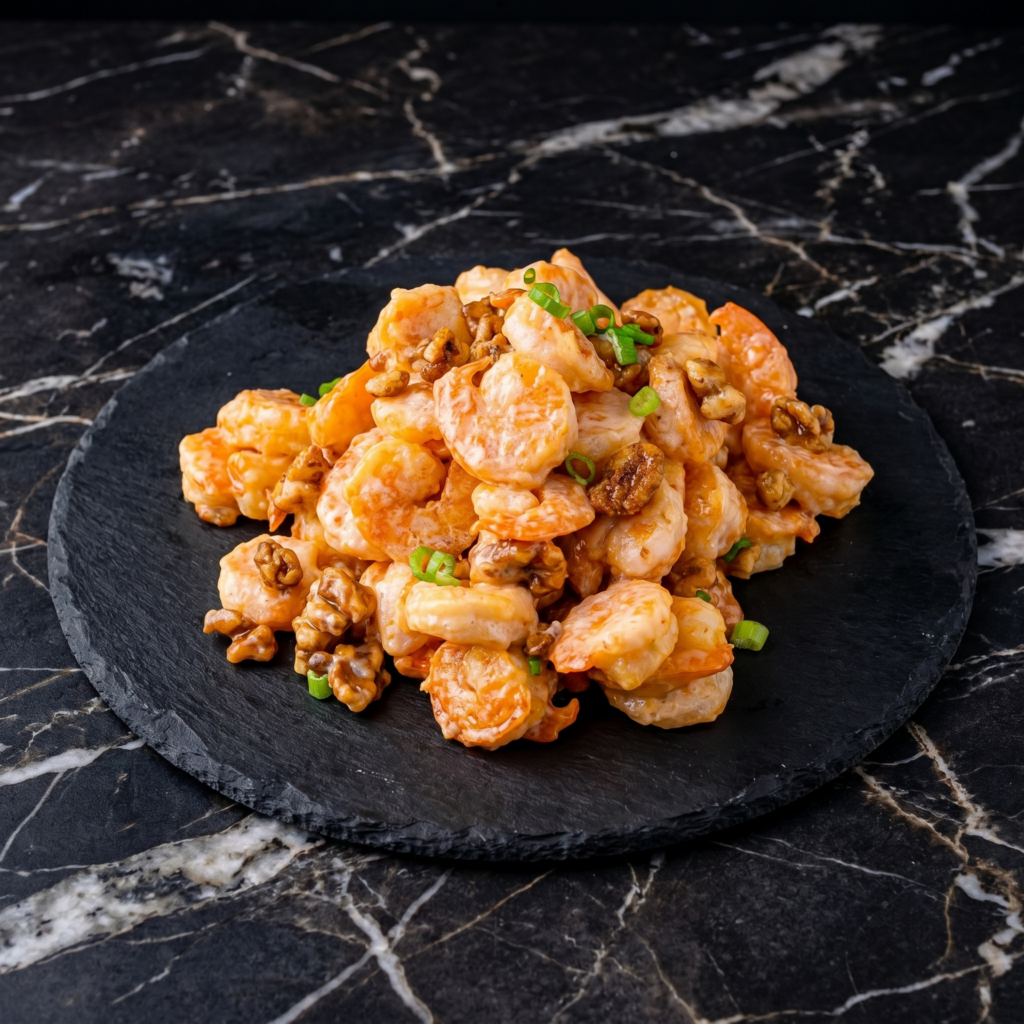
Let’s be real: takeout honey walnut shrimp is delicious, but it’s also expensive and arrives slightly soggy. This homemade version solves both problems. You get that same iconic combo—crispy shrimp, candied walnuts, creamy sweet sauce—in about 20 minutes. Plus, it stays crunchy way longer than anything from a delivery bag.
Ingredients
Serves 3-4.
For the Candied Walnuts:
½ cup walnuts
2 tablespoons honey
1 tablespoon sugar
1 tablespoon water
For the Shrimp & Batter:
1 lb large shrimp, peeled and deveined
½ cup cornstarch
¼ cup flour
½ cup cold water
1 egg
Oil for frying (vegetable or canola)
For the Creamy Sauce:
¼ cup mayonnaise
2 tablespoons sweetened condensed milk
1 tablespoon honey
1 teaspoon lemon juice
Step-by-Step Instructions
Step 1: Candy the Walnuts
In a small pan over medium heat, combine walnuts, honey, sugar, and water.
Stir constantly for 3-4 minutes until syrup thickens and coats the walnuts.
Transfer to parchment paper to cool and harden.
Step 2: Make the Sauce
Whisk together mayonnaise, sweetened condensed milk, honey, and lemon juice until smooth.
Set aside.
Step 3: Prepare the Batter
In a bowl, whisk cornstarch, flour, cold water, and egg until just combined. Don’t overmix—lumps are fine.
Step 4: Fry the Shrimp
Heat 1 inch of oil in a deep pan to 350°F (175°C).
Dip each shrimp into batter, letting excess drip off.
Fry in batches for 2-3 minutes until golden and crispy.
Drain on paper towels.
Step 5: Toss and Serve
In a large bowl, gently toss crispy shrimp with the creamy sauce until lightly coated.
Honey walnut shrimp is best eaten fresh—the batter loses crispiness within a few hours. To reheat leftovers, use an air fryer at 375°F for 3-4 minutes. Do not microwave (soggy disaster). Store sauce separately if meal prepping.
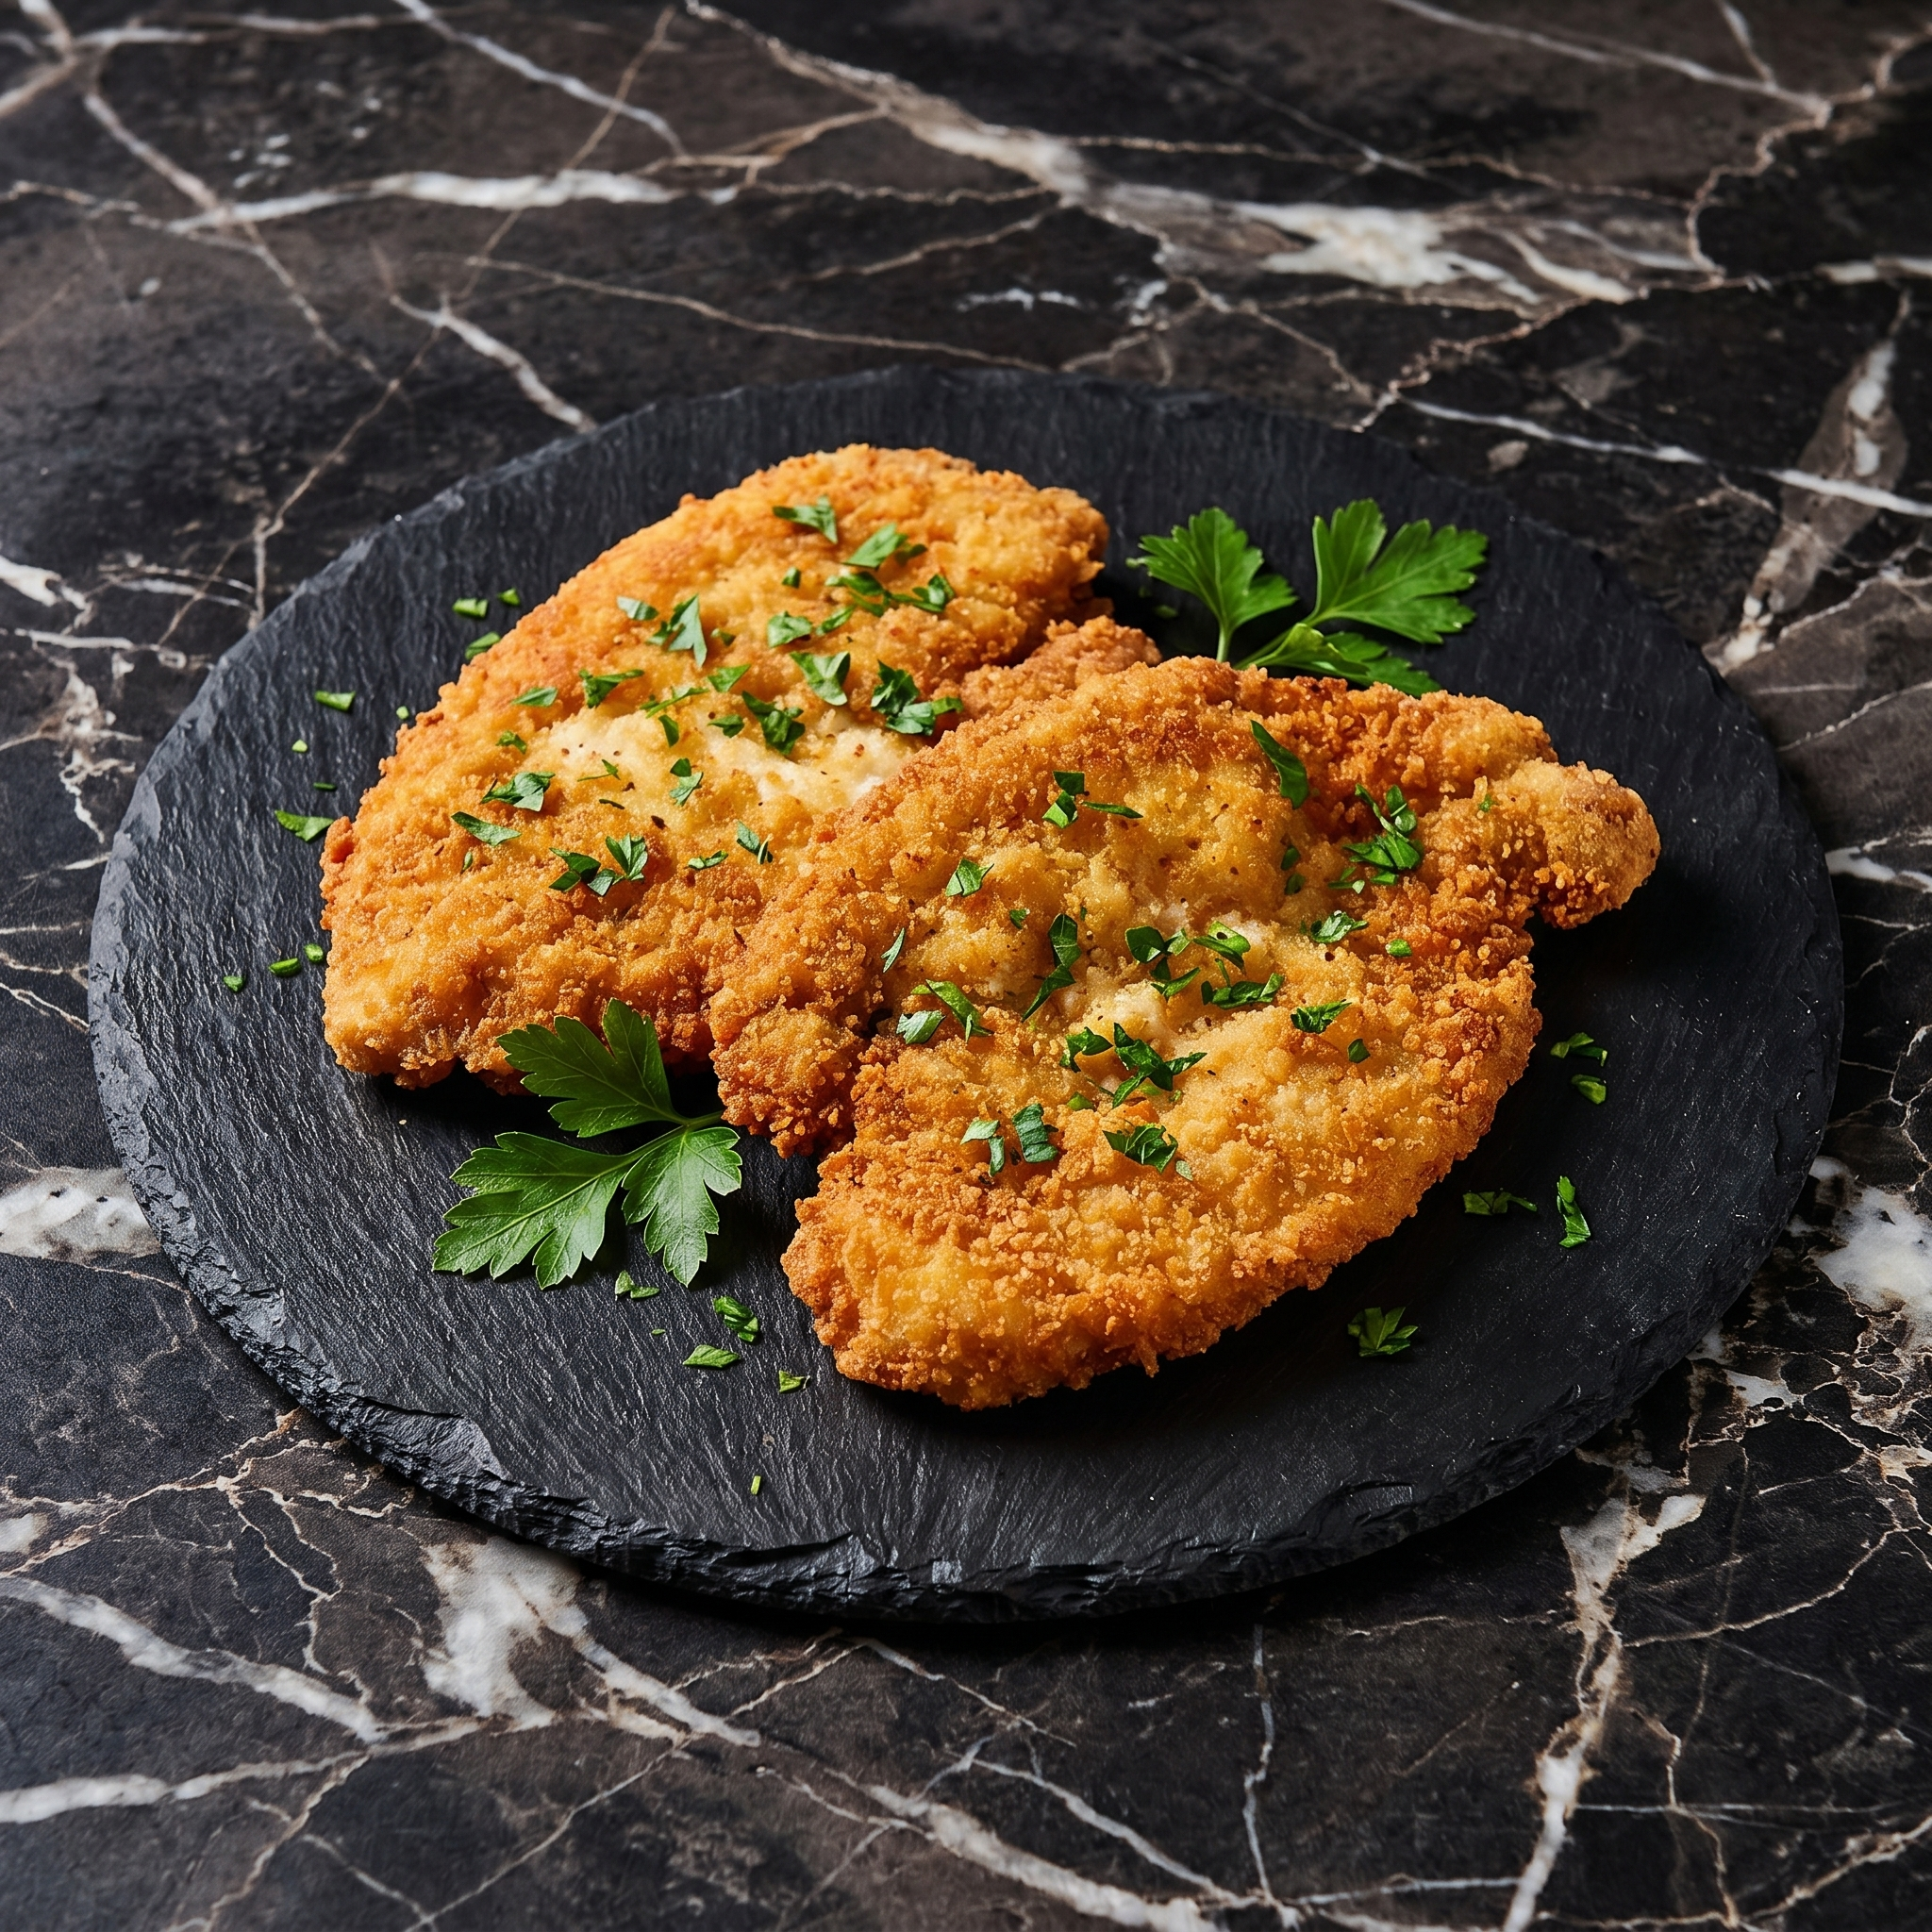
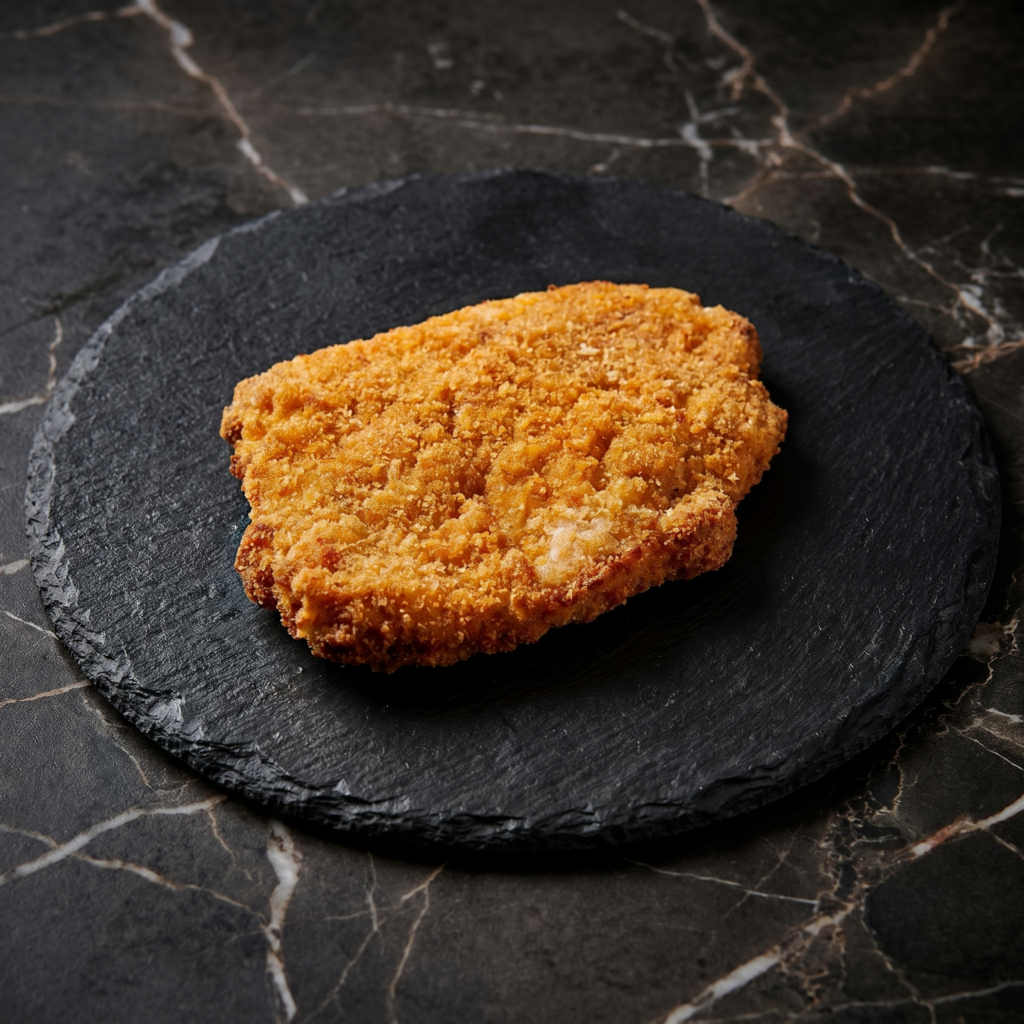
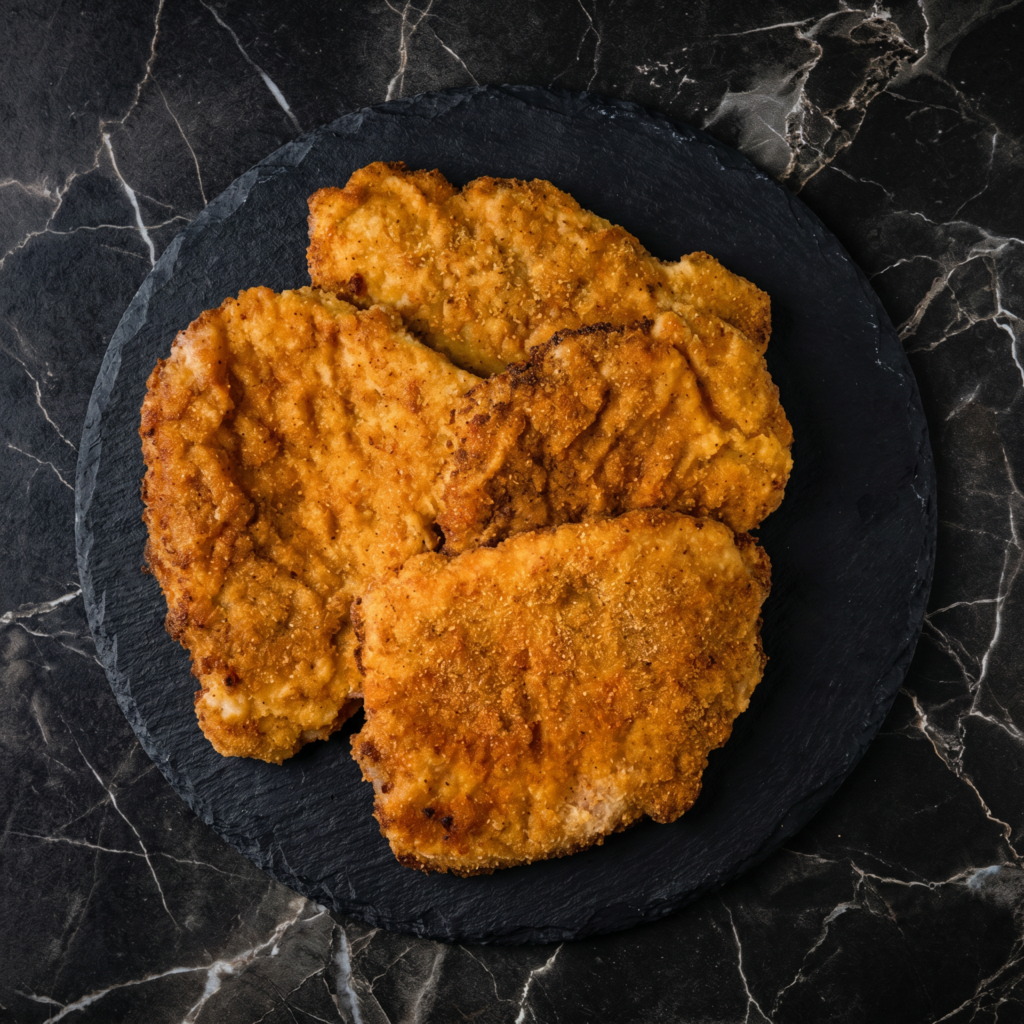
Pork schnitzel sounds fancy, but here’s the secret: it’s just a really good breaded cutlet, and it takes 15 minutes from fridge to plate. No travel to Vienna required. This version stays crispy, never greasy, and uses a simple technique that works every single time.
Ingredients
Serves 4.
4 boneless pork chops (about 1 lb total)
½ cup all-purpose flour
2 large eggs
1 cup breadcrumbs (panko or regular)
Salt and black pepper
½ teaspoon paprika (optional)
Vegetable oil or clarified butter for frying
Lemon wedges, for serving
Fresh parsley, for garnish
Step-by-Step Instructions
Step 1: Pound the Pork
Place each pork chop between two sheets of plastic wrap.
Pound with a meat mallet or rolling pin until ¼-inch thin. This is non-negotiable—thick pork = chewy schnitzel.
Step 2: Set Up the Breading Station
Season pounded pork with salt, pepper, and paprika.
Place flour in one shallow bowl, beaten eggs in a second, breadcrumbs in a third.
Step 3: Bread the Cutlets
Dredge each cutlet in flour (shake off excess).
Dip into egg, letting excess drip off.
Press firmly into breadcrumbs until fully coated.
Step 4: Fry to Golden Perfection
Heat ¼ inch of oil in a large skillet over medium-high heat.
Fry schnitzels for 2-3 minutes per side until deep golden brown.
Don’t crowd the pan—work in batches.
Step 5: Drain and Serve
Transfer to a paper towel-lined plate or wire rack.
Squeeze fresh lemon over the top, garnish with parsley, and serve immediately.
Schnitzel is best fresh and hot. Leftovers can be refrigerated for 2 days. Reheat in an air fryer at 375°F for 4-5 minutes or in a dry skillet—never microwave, or you’ll lose all that beautiful crunch.