Category: quick_meals

  • Breakfast Burritos: The Best Morning of Your Week

    Breakfast Burritos: The Best Morning of Your Week

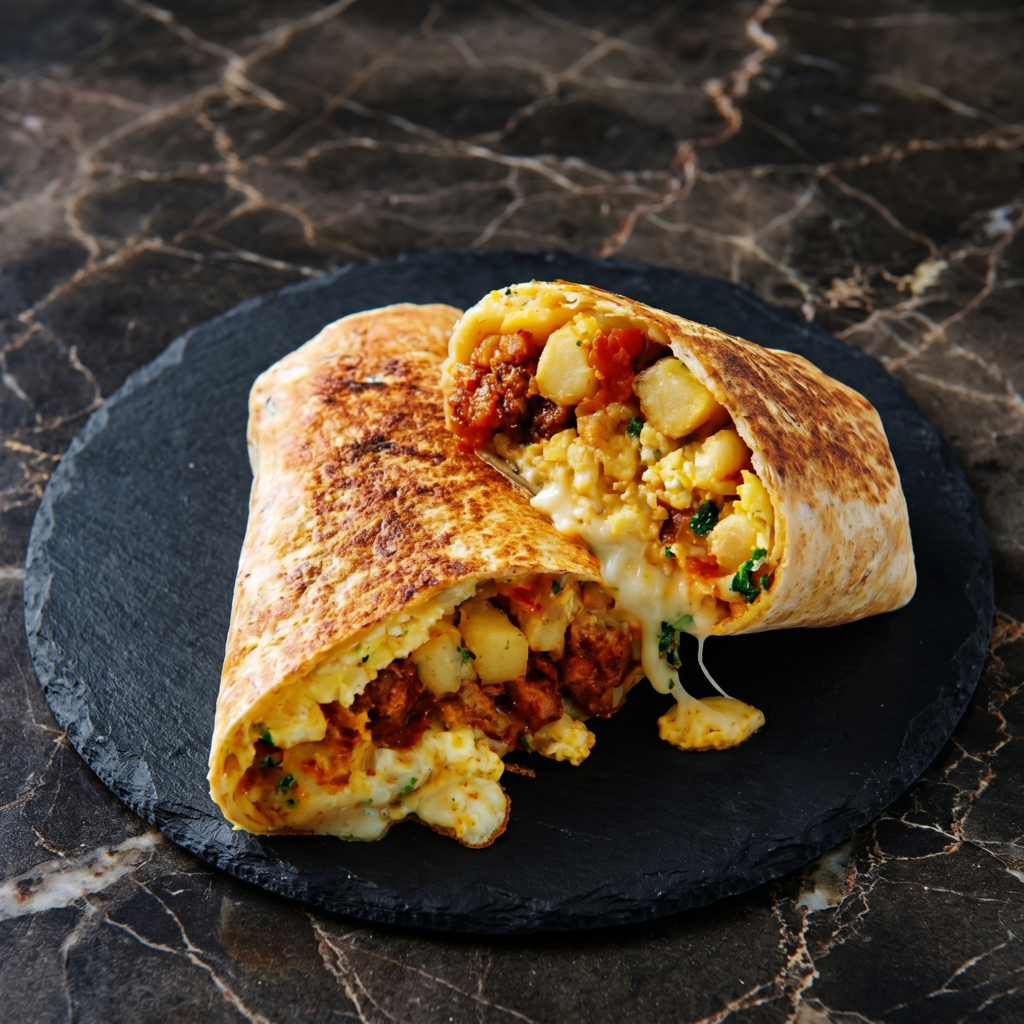
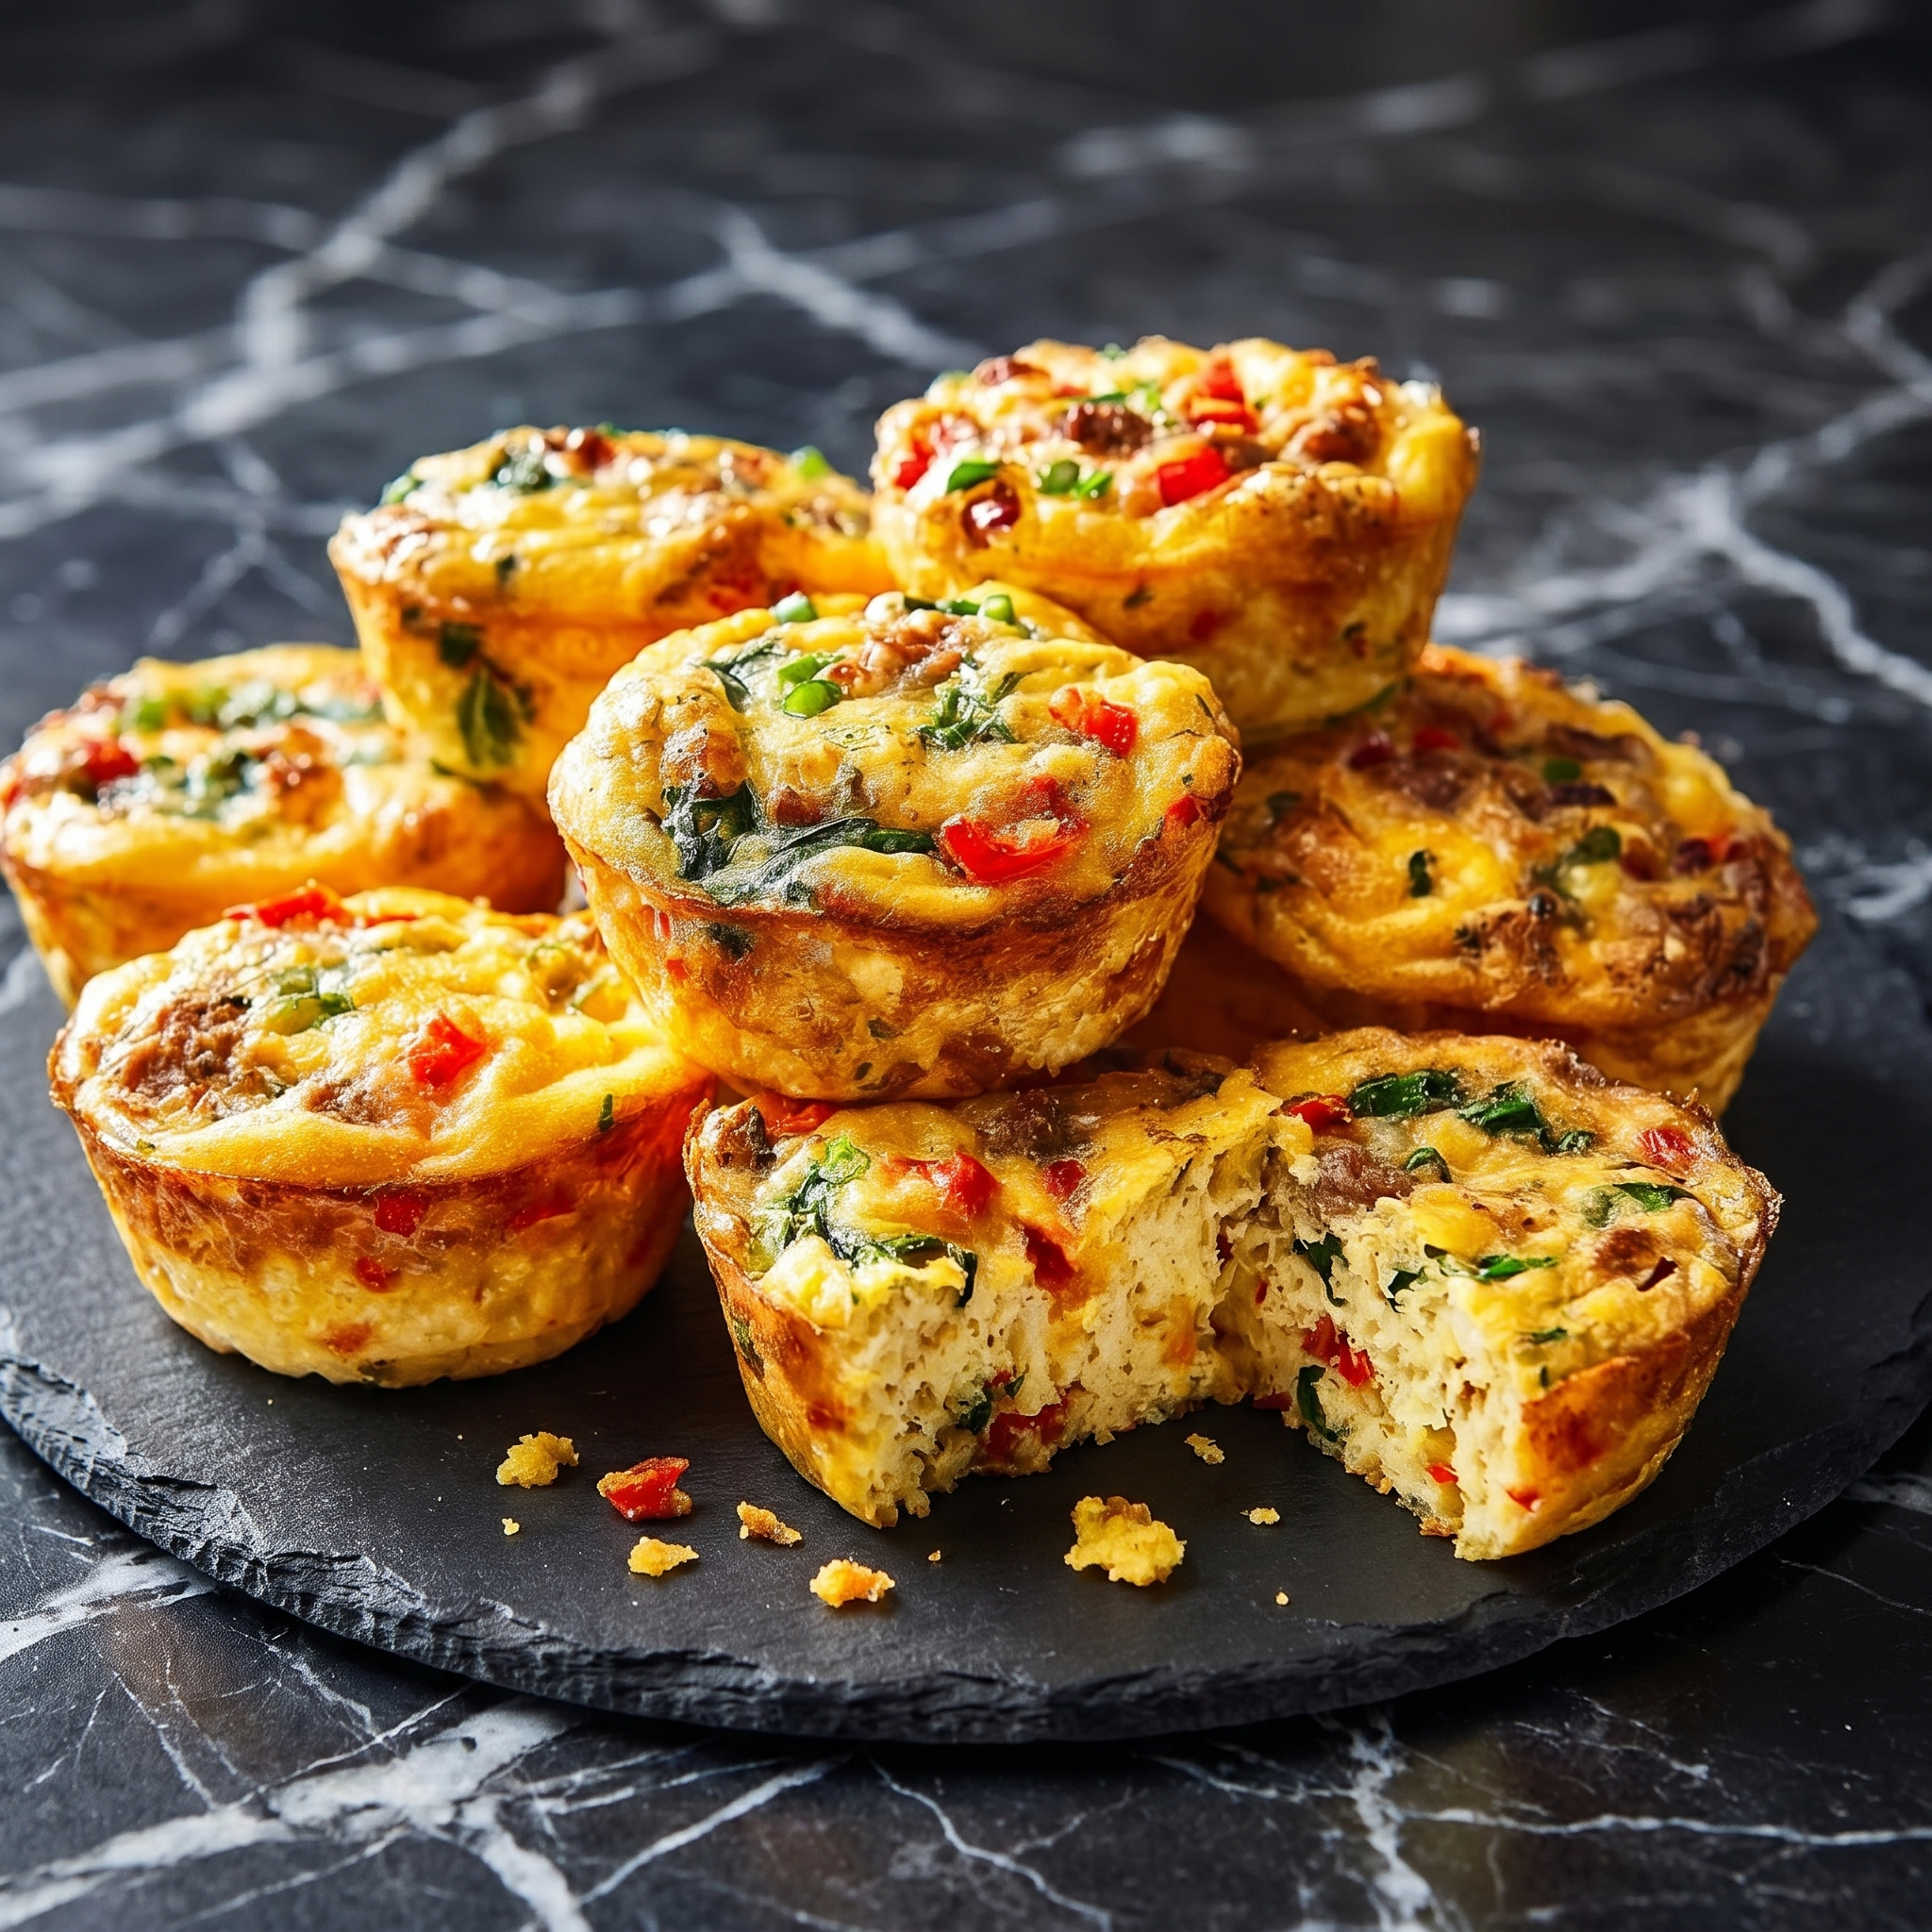
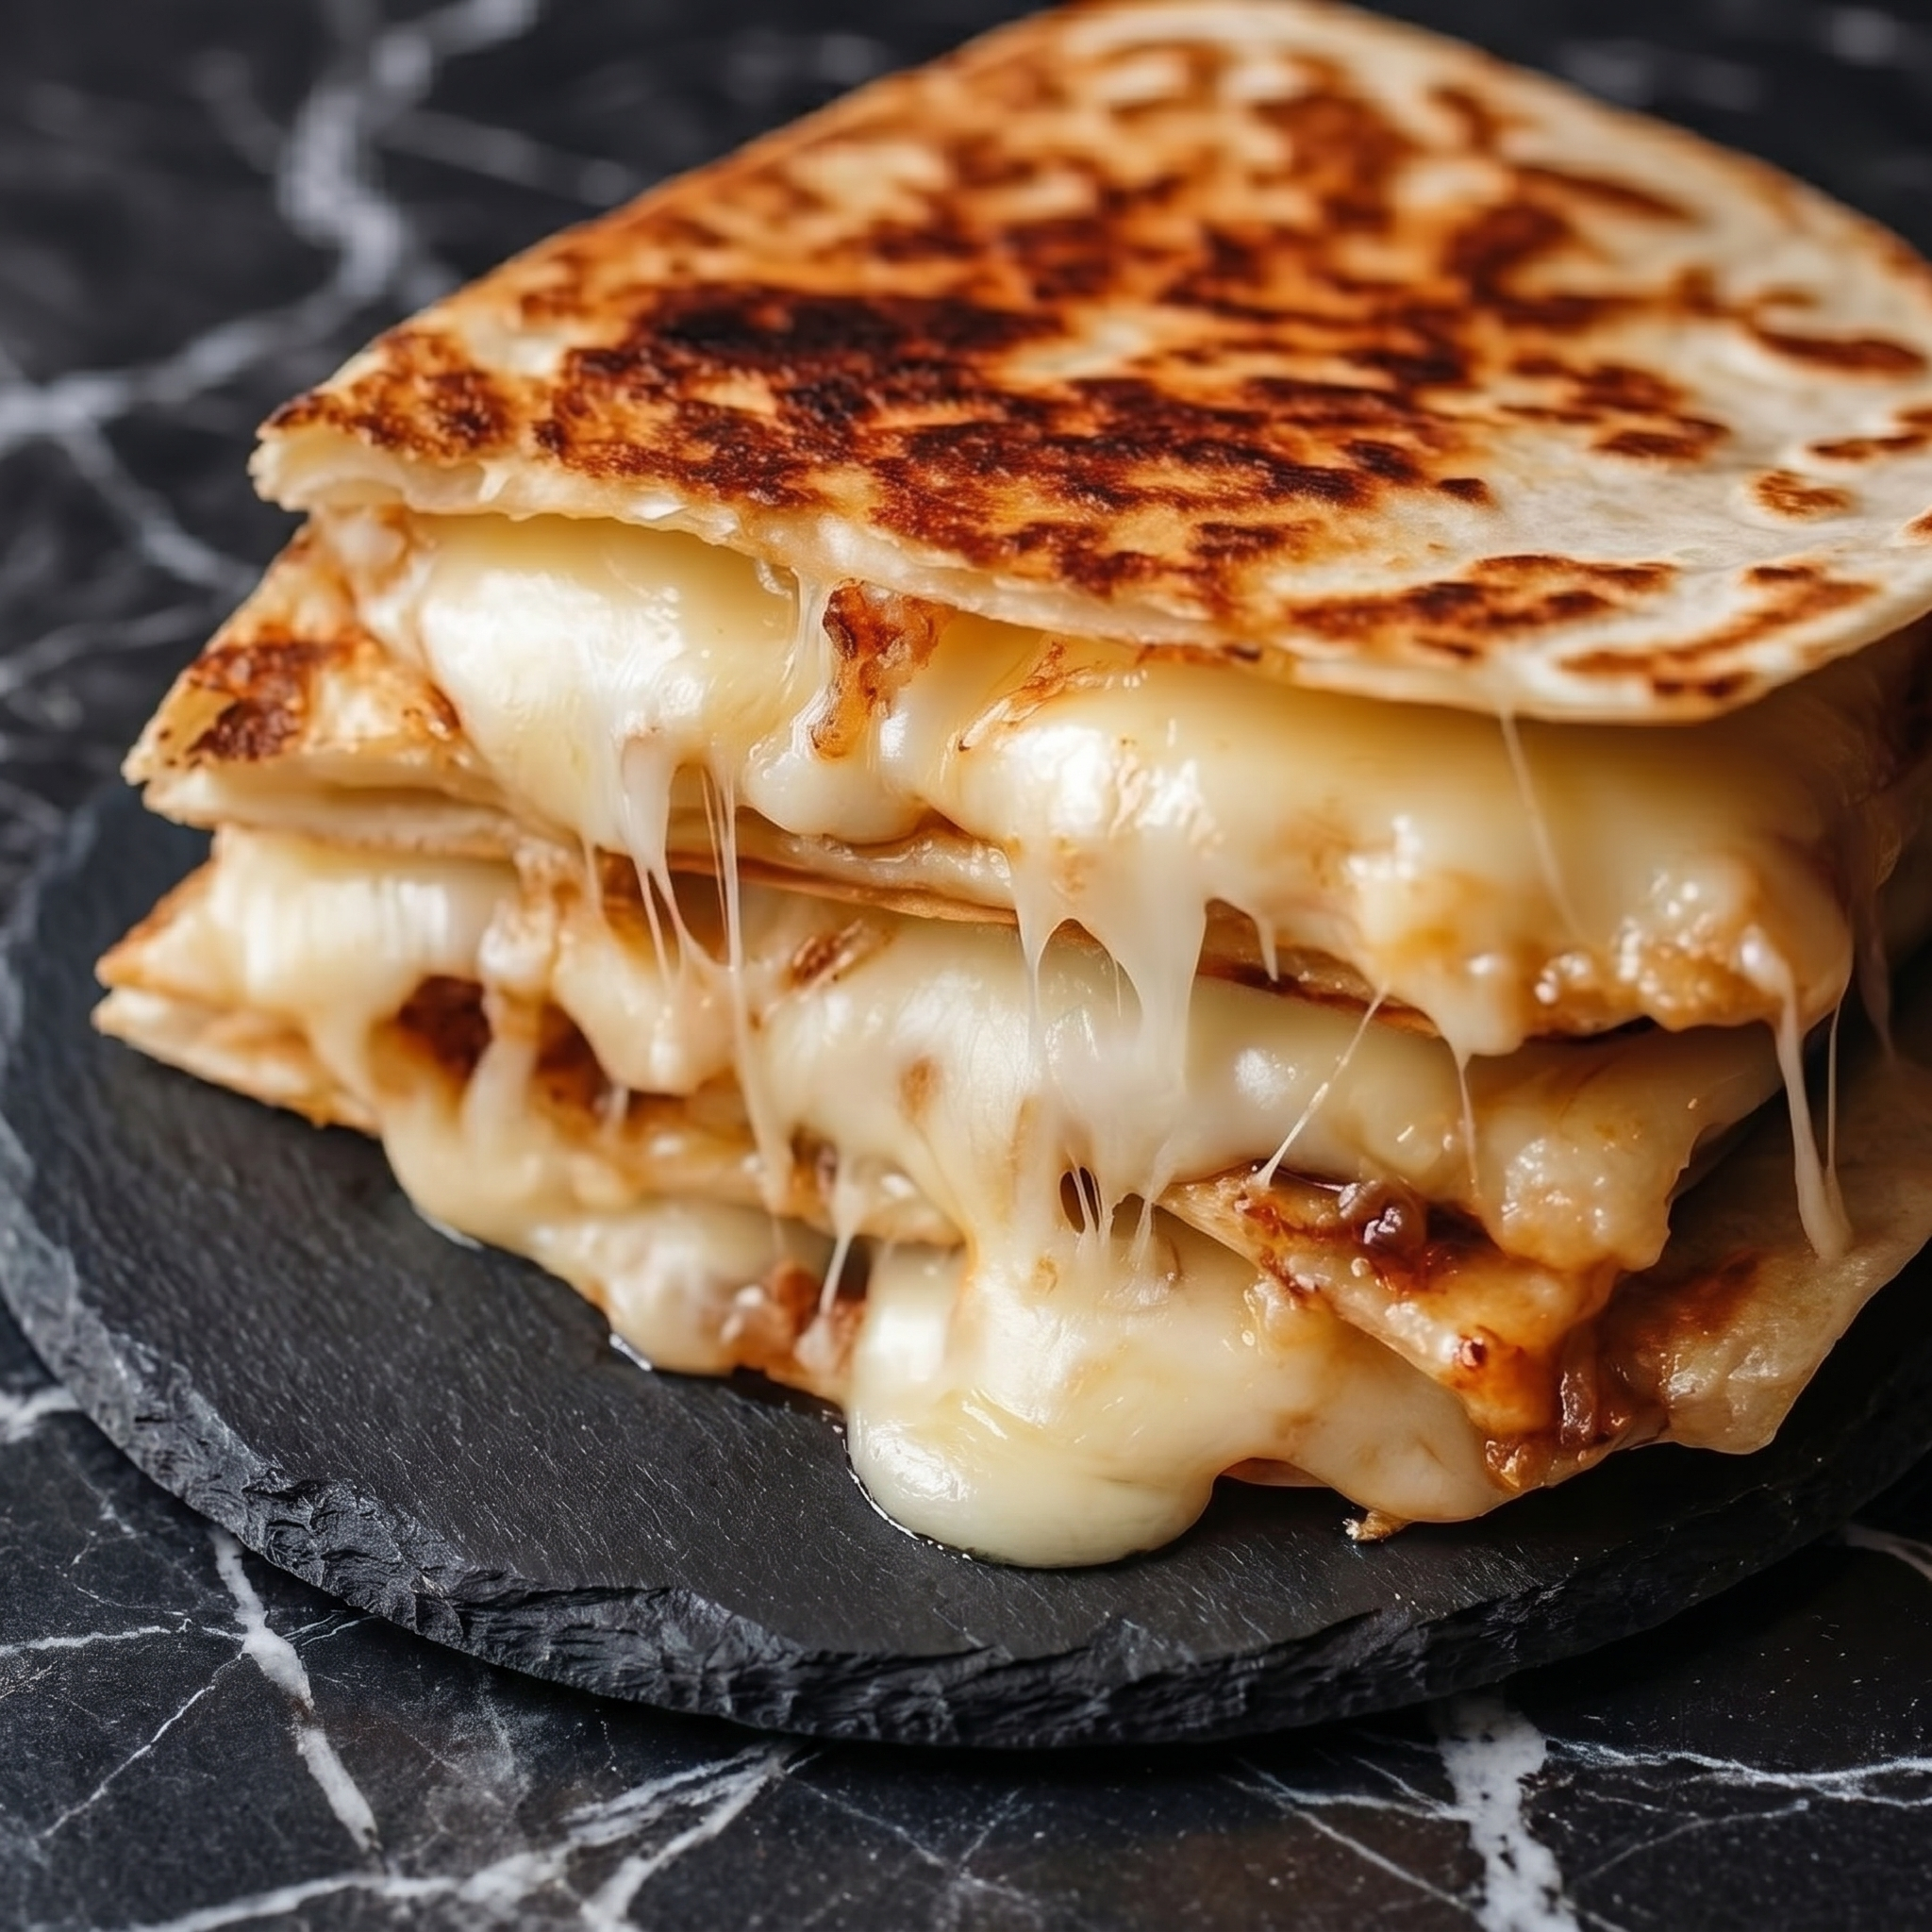
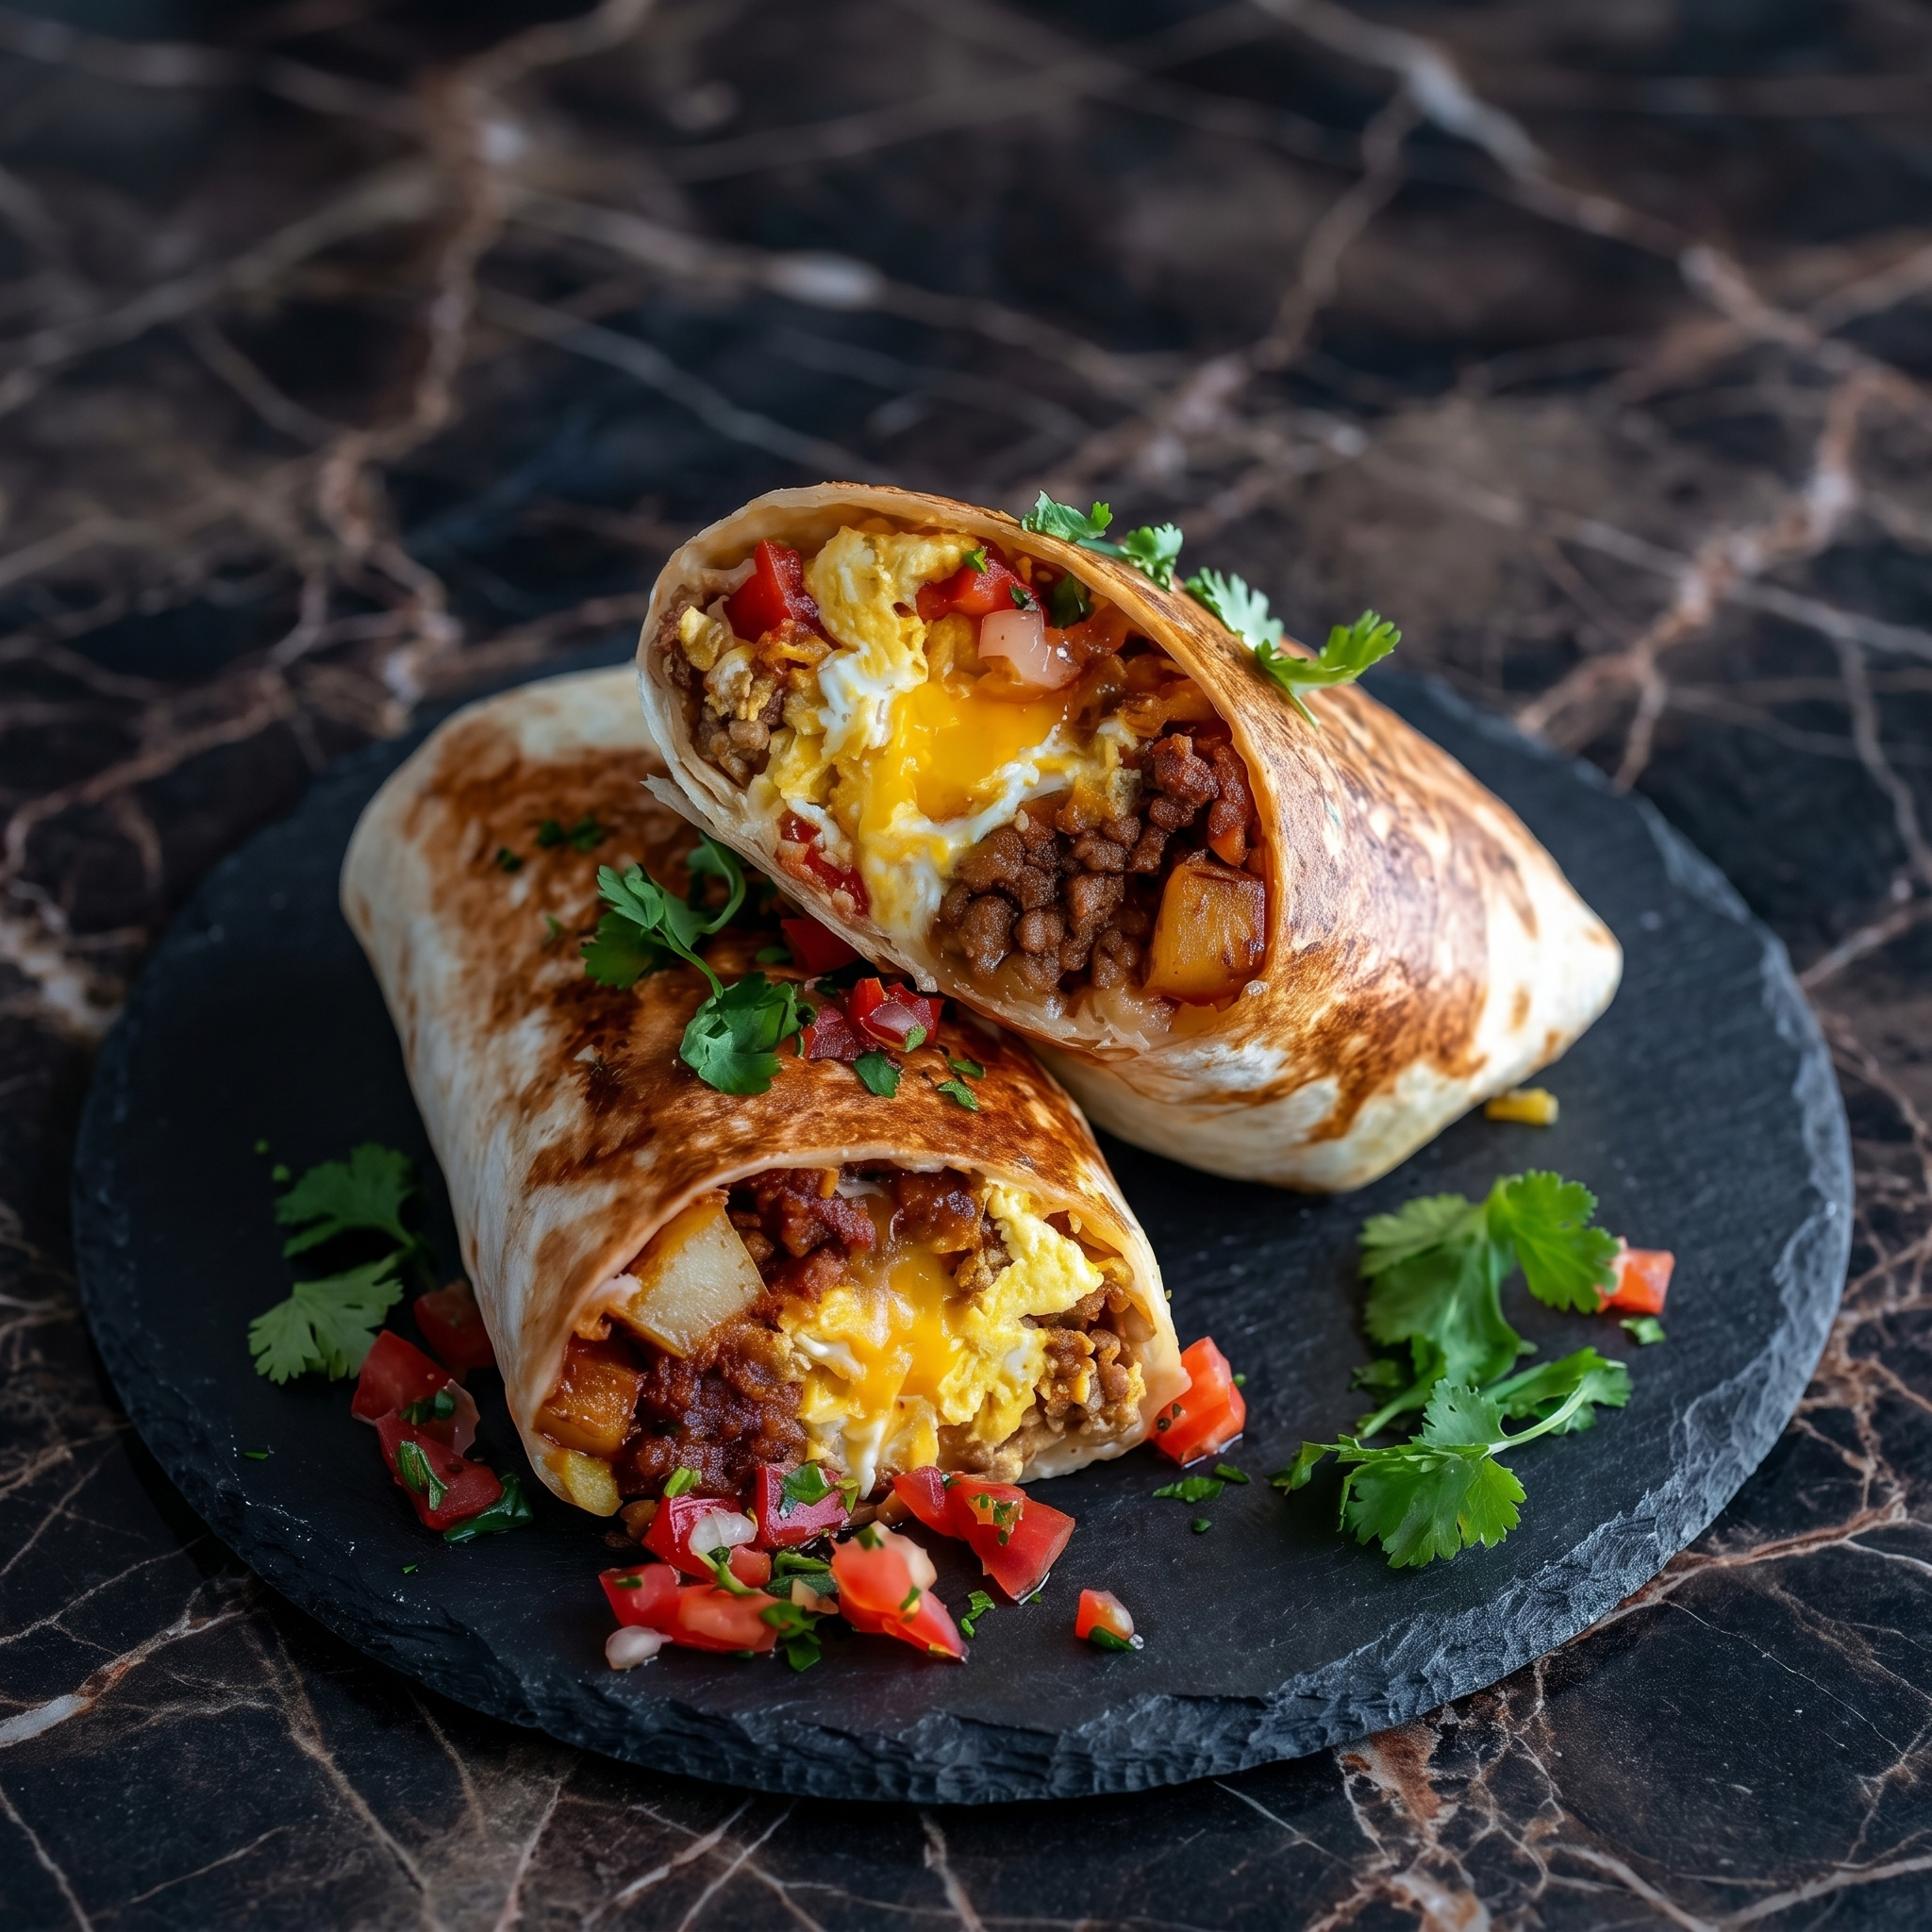
    A great breakfast burrito is a hug you can eat. Eggs, meat, potatoes, cheese, and your favorite sauces all wrapped in a warm, slightly crispy tortilla.

    This recipe is designed for meal prep. Spend an hour on Sunday. Eat like a champion all week. Your future self will weep with joy.

    Ingredients

    Makes 8 burritos.

    • 8 large flour tortillas (burrito size, 10-inch)
    • 10 large eggs
    • ¼ cup milk
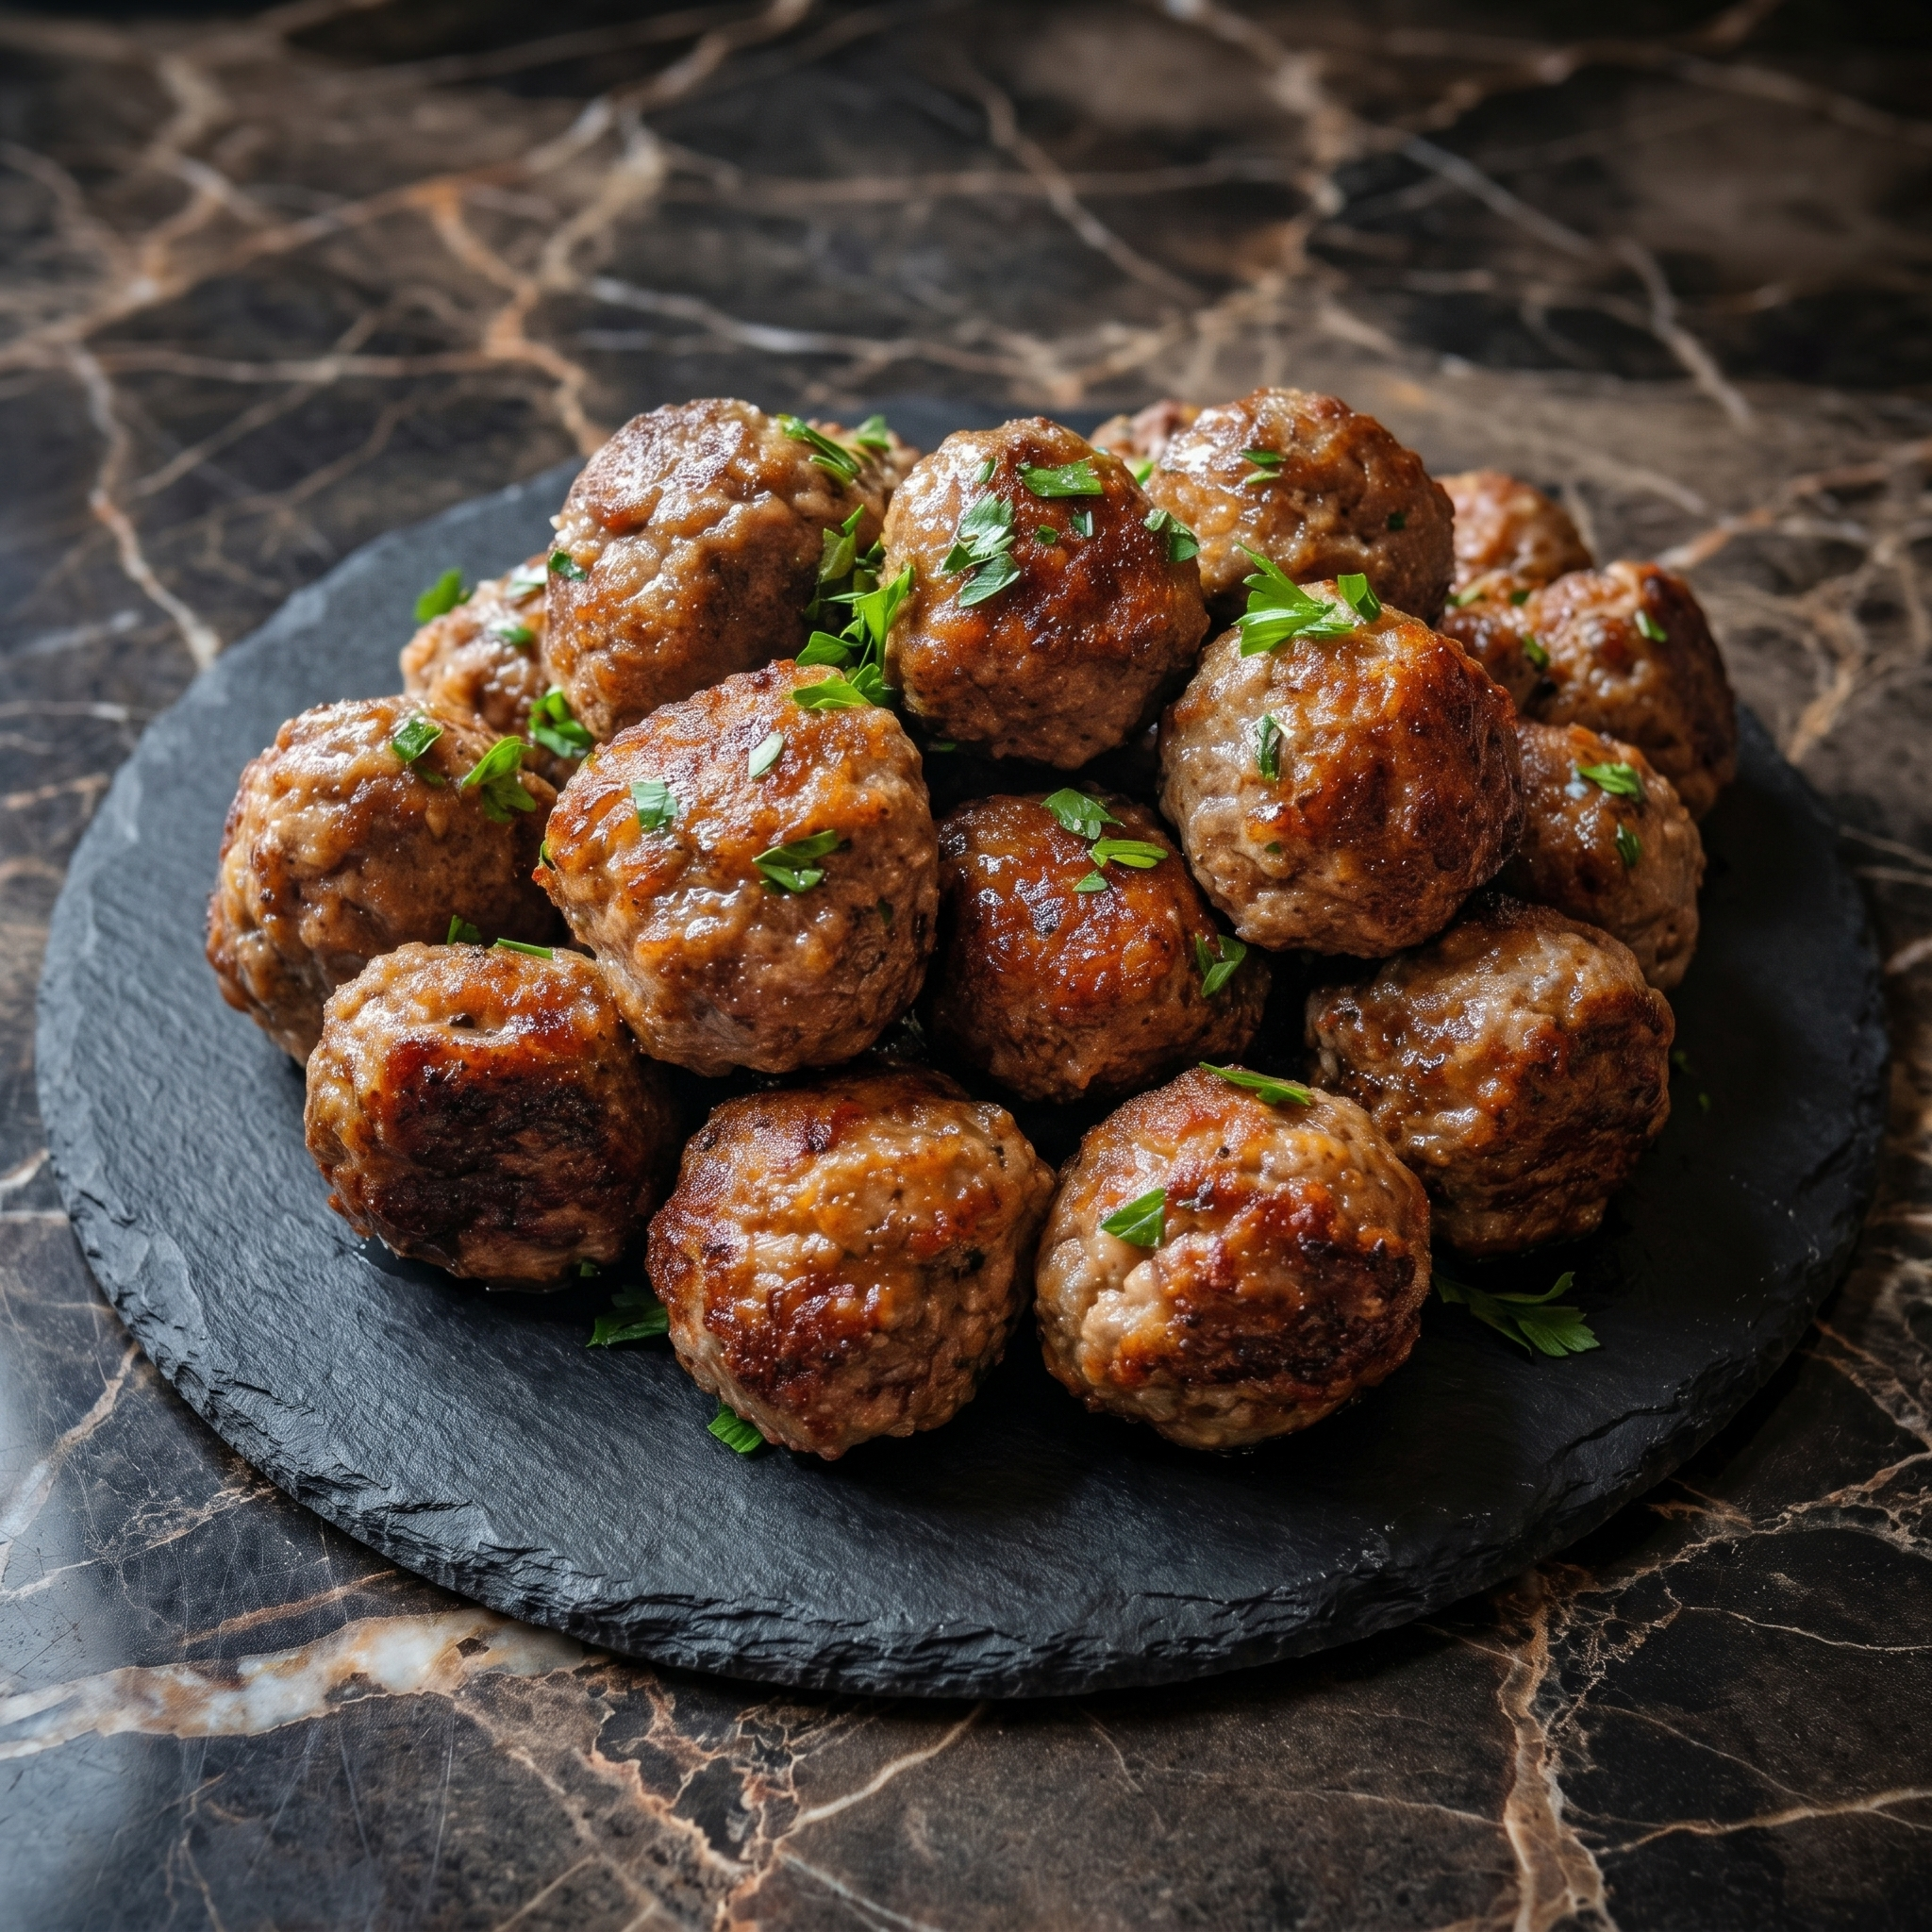
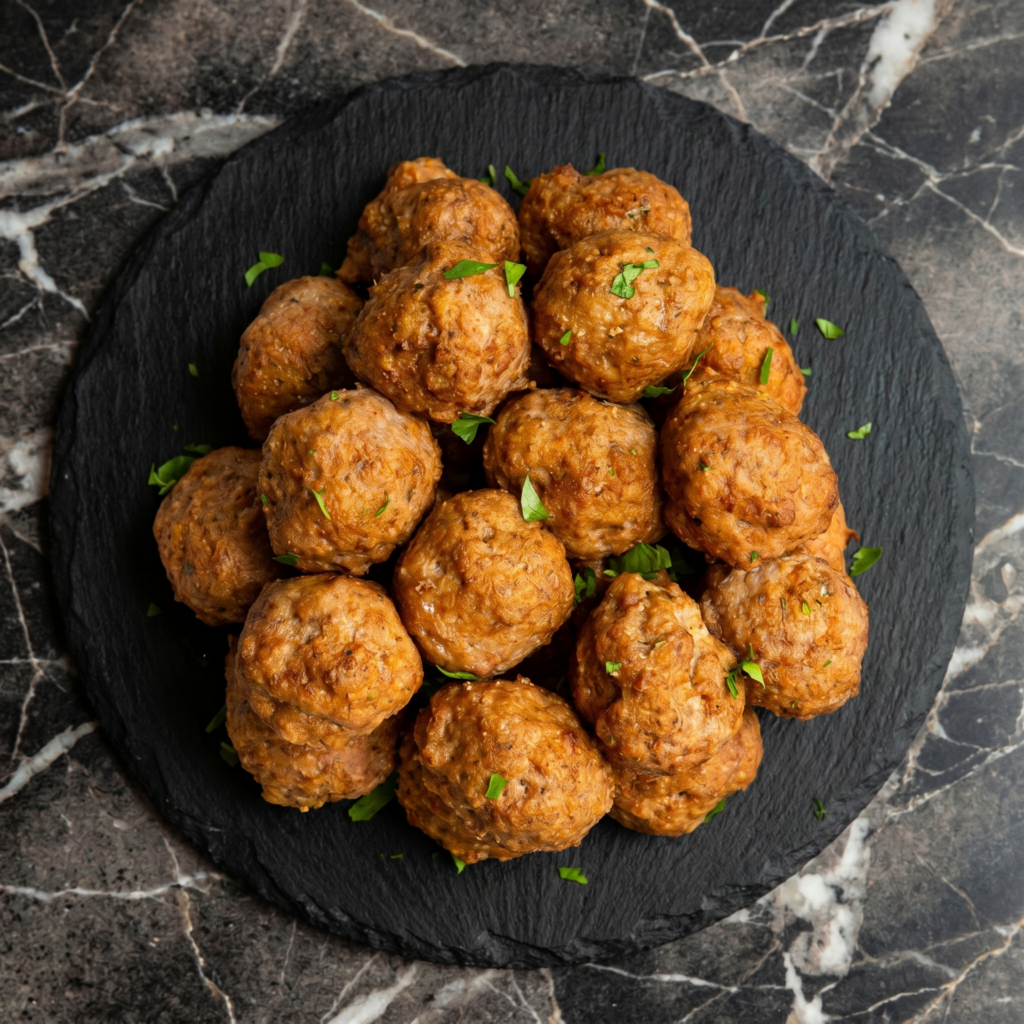
    • 1 lb breakfast sausage or bacon, cooked and crumbled
    • 2 cups frozen hash browns (or diced cooked potatoes)
    • 2 cups shredded cheddar or Monterey Jack cheese
    • 1 teaspoon salt, ½ teaspoon pepper
    • Optional: salsa, sour cream, avocado, hot sauce

    Step-by-Step Instructions

    Step 1: Cook the Fillings

    1. Cook sausage (or bacon) in a skillet until crispy. Remove and set aside.
    2. In the same skillet, cook hash browns until golden and crispy.

    Step 2: Scramble the Eggs

    1. Whisk eggs, milk, salt, and pepper in a bowl.
    2. Pour into a greased skillet over medium heat. Scramble until just set (slightly undercooked is fine—they’ll finish later).

    Step 3: Assemble the Burritos

    1. Warm tortillas in the microwave for 20 seconds (makes them pliable).
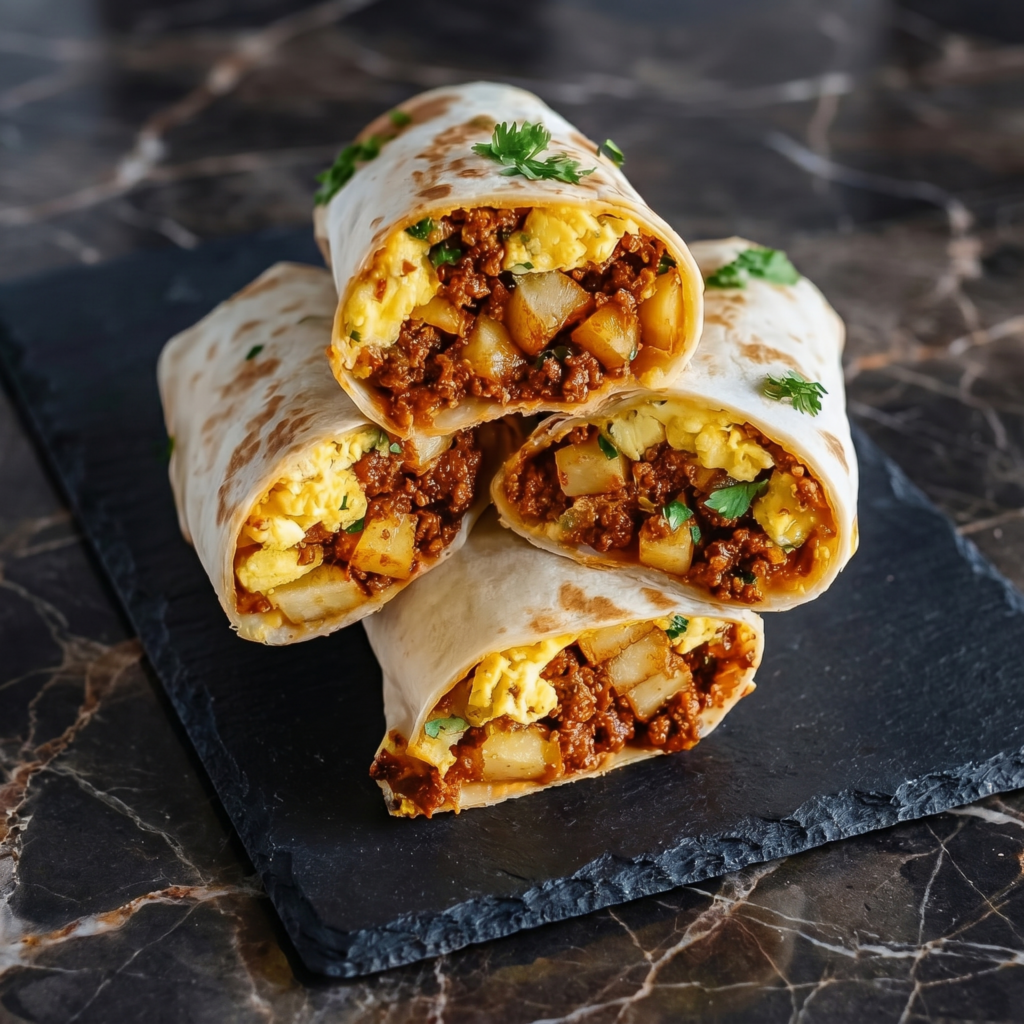
    2. Layer: eggs, sausage, potatoes, cheese, and any sauces in the center.
    3. Fold in the sides, then roll tightly from the bottom up.

    Step 4: Toast (Optional but Elite)

    1. Place burritos seam-side down on a hot, dry skillet for 30 seconds per side to seal and crisp.

    Step 5: Eat or Freeze

    1. Eat immediately or wrap in foil and freeze. No wrong answer.

    Summary

    Prep Time: 20 minutes | Cook Time: 15 minutes | Total Time: 35 minutes

    Yield: 8 burritos

    Difficulty: Easy

    Storage Notes

    Fridge:

    Wrap burritos tightly in foil or plastic wrap. Refrigerate for up to 5 days.

    Freezer (The Move):

    Wrap each burrito in foil, then place in a freezer bag. Freeze for up to 3 months.

    Reheating from Frozen:

    Remove foil, wrap in a damp paper towel, and microwave for 2-3 minutes. Or thaw overnight in the fridge and microwave for 1 minute. For crispy tortillas, finish in a dry skillet or air fryer at 375°F for 5 minutes.

  • Baked Meatballs: Hands-Off, No-Flip, Perfect Every Time

    Baked Meatballs: Hands-Off, No-Flip, Perfect Every Time

    Pan-frying meatballs means constant turning, uneven browning, and grease everywhere. Baking solves all of it.

    These meatballs go into the oven and come out perfectly browned, tender, and ready for sauce, subs, or spaghetti. No flipping. No mess. Just meatball magic.

    Ingredients

    Makes about 20 meatballs.

    • 1 lb (450g) ground beef (80/20 is best)
    • ½ lb (225g) ground pork (or all beef, but pork keeps them juicy)
    • ½ cup breadcrumbs (panko or regular)
    • ⅓ cup milk
    • 1 large egg
    • ½ cup grated Parmesan cheese
    • 2 cloves garlic, minced
    • 1 teaspoon salt
    • ½ teaspoon black pepper
    • 1 teaspoon dried oregano
    • Fresh parsley (optional, for garnish)

    Step-by-Step Instructions

    Step 1: Prep the Oven and Pan

    1. Preheat oven to 400°F (200°C).
    2. Line a baking sheet with parchment paper or foil (spray foil with oil so they don’t stick).

    Step 2: Make the Panade (The Juicy Secret)

    1. In a small bowl, combine breadcrumbs and milk. Let sit for 5 minutes until pasty.
    2. This panade keeps meatballs tender, not dense.

    Step 3: Mix Everything

    1. In a large bowl, combine ground beef, ground pork, panade, egg, Parmesan, garlic, salt, pepper, and oregano.
    2. Mix gently with your hands until just combined. Overmixing = tough meatballs.

    Step 4: Roll and Bake

    1. Roll mixture into 1.5-inch balls (about 2 tablespoons each).
    2. Place on baking sheet with a little space between them.
    3. Bake for 18-20 minutes until browned and cooked through (internal temp 165°F).

    Step 5: Serve or Sauce

    1. Add directly to marinara sauce, pile onto subs, or eat them plain like a gremlin. No judgment.

    Summary

    Prep Time: 10 minutes | Cook Time: 20 minutes | Total Time: 30 minutes

    Yield: 20 meatballs

    Difficulty: Easy

    Storage Notes

    Fridge:

    Store cooked meatballs in an airtight container for up to 5 days. Reheat in sauce or microwave.

    Freezer (Do This):

    Freeze baked and cooled meatballs on a tray, then transfer to a bag. Frozen meatballs last 3 months. Reheat from frozen in sauce (simmer 15 minutes) or oven (350°F for 15 minutes).

    Meal Prep Move:

    Double the batch. Freeze half. You’ll thank yourself on a busy Tuesday.

  • Chicken Enchiladas: Roll, Smother, Bake, Devour

    Chicken Enchiladas: Roll, Smother, Bake, Devour

    Enchiladas are the casserole that doesn’t feel like a casserole. Soft tortillas stuffed with savory chicken and cheese, then drowned in sauce and baked until bubbly.

    This version is fast, uses a sauce hack (no simmering for hours), and delivers exactly what you want: cheesy, saucy, slightly spicy perfection.

    Ingredients

    Serves 4-6.

    • 2 cups cooked shredded chicken (rotisserie chicken saves the day)
    • 8 small flour or corn tortillas
    • 2 cups shredded Monterey Jack or Mexican blend cheese
    • 1 can (19 oz) red enchilada sauce
    • ½ cup diced onion
    • Optional toppings: sour cream, cilantro, diced avocado, hot sauce

    Step-by-Step Instructions

    Step 1: Prep and Preheat

    1. Preheat oven to 375°F (190°C).
    2. Spread ½ cup enchilada sauce on the bottom of a 9×13 baking dish.

    Step 2: Make the Filling

    1. In a bowl, mix shredded chicken, 1 cup of cheese, and diced onion.

    Step 3: Roll the Enchiladas

    1. Warm tortillas in the microwave for 30 seconds (prevents cracking).
    2. Spoon filling down the center of each tortilla.
    3. Roll tightly and place seam-side down in the baking dish.

    Step 4: Smother and Top

    1. Pour remaining enchilada sauce over the rolled tortillas.
    2. Sprinkle with remaining 1 cup of cheese.

    Step 5: Bake and Finish

    1. Bake uncovered for 20 minutes until sauce is bubbly and cheese is melted.
    2. Let rest 5 minutes (so they hold their shape). Top with sour cream, cilantro, and whatever else you love.

    Summary

    Prep Time: 15 minutes | Cook Time: 20 minutes | Total Time: 35 minutes

    Yield: 8 enchiladas (4-6 servings)

    Difficulty: Easy

    Storage Notes

    Leftovers:

    Store in the fridge for up to 4 days. The tortillas will soften, but the flavor gets even better.

    Freezing:

    Assemble the enchiladas (without baking) in a freezer-safe dish. Cover tightly and freeze for up to 3 months. Bake from frozen at 375°F for 40-45 minutes.

    Reheating:

    Microwave individual portions for 1-2 minutes. For a whole dish, cover with foil and bake at 350°F for 15 minutes.

  • Cheesy Egg Muffins: Breakfast That Makes Itself

    Cheesy Egg Muffins: Breakfast That Makes Itself

    Mornings are hard. Breakfast shouldn’t be. These cheesy egg muffins are the answer: grab, reheat, and go.

    They’re fluffy, cheesy, and packed with whatever add-ins you have lurking in the fridge. Make a batch on Sunday. Thank yourself all week.

    Ingredients

    Makes 12 muffins.

    • 8 large eggs
    • ½ cup milk (any kind works)
    • 1 cup shredded cheddar cheese
    • ½ teaspoon salt
    • ¼ teaspoon black pepper
    • Optional add-ins (pick 1-2):
      – ½ cup cooked bacon or sausage, crumbled
      – ¼ cup diced bell peppers
      – ¼ cup chopped spinach
      – ¼ cup diced onion

    Step-by-Step Instructions

    Step 1: Prep the Pan

    1. Preheat oven to 375°F (190°C).
    2. Grease a 12-cup muffin tin generously with nonstick spray or butter (don’t skimp or they’ll stick).

    Step 2: Whisk the Eggs

    1. In a large bowl, whisk eggs, milk, salt, and pepper until frothy and well combined.

    Step 3: Add Cheese and Mix-ins

    1. Stir in shredded cheese and your chosen add-ins.

    Step 4: Fill and Bake

    1. Pour egg mixture evenly into muffin cups (about ¾ full).
    2. Bake for 18-20 minutes until puffed and golden on top.
    3. A toothpick inserted in the center should come out clean.

    Step 5: Cool and Pop Out

    1. Let cool in the pan for 5 minutes. Run a knife around the edges and pop them out. They will deflate slightly—that’s normal.

    Summary

    Prep Time: 10 minutes | Cook Time: 20 minutes | Total Time: 30 minutes

    Yield: 12 muffins

    Difficulty: Easy

    Storage Notes

    Fridge:

    Store in an airtight container for up to 5 days. Reheat in the microwave for 20-30 seconds.

    Freezer (Best for Meal Prep):

    Cool completely. Freeze in a single layer on a tray, then transfer to a freezer bag. Store for up to 3 months. Reheat from frozen for 45-60 seconds.

    Pro Tip:

    Reheat in an air fryer at 300°F for 3-4 minutes for slightly crispy edges instead of soft ones.

  • The Perfect Cheese Quesadilla (Yes, Really)

    The Perfect Cheese Quesadilla (Yes, Really)

    A cheese quesadilla sounds too simple for a recipe. But how many times have you made one that was pale, soggy, or had unmelted cheese in the middle?

    This method fixes all that. You’ll get a tortilla that’s shatteringly crisp, cheese that stretches for days, and golden-brown leopard spots. No fancy equipment. No brain power required.

    Ingredients

    Serves 1 (easily doubled).

    • 1 large flour tortilla (burrito size)
    • ¾ cup shredded cheese (see note below)
    • ½ tablespoon butter or oil
    • Optional: salsa, sour cream, or hot sauce for dipping

    Cheese Note: Monterey Jack is classic. Cheddar adds bite. Oaxaca or Chihuahua are the stretchiest. A mix of +Jack and cheddar is unbeatable.

    Step-by-Step Instructions

    Step 1: Heat Your Pan Right

    1. Place a nonstick or cast-iron skillet over medium heat.
    2. Add butter or oil. Let it melt and shimmer.

    Step 2: Lay Down the Tortilla

    1. Place the tortilla in the pan. Swirl it around to coat the bottom with butter.
    2. Sprinkle cheese evenly over ONE HALF of the tortilla only.

    Step 3: The Pro Fold

    1. When cheese starts to melt (about 30 seconds), fold the empty half over the cheese half.
    2. Press down gently with a spatula.

    Step 4: Flip at the Right Moment

    1. Cook for 1-2 minutes until bottom is golden brown with dark spots.
    2. Flip. Cook second side for 1 minute until cheese is fully melted and oozing.

    Step 5: Slice and Dip

    1. Transfer to a cutting board. Let rest 30 seconds (prevents cheese lava burns).
    2. Slice into wedges. Serve with salsa, sour cream, or straight up.

    Summary

    Prep Time: 1 minute | Cook Time: 4 minutes | Total Time: 5 minutes

    Yield: 1 quesadilla

    Difficulty: Easy

    Storage Notes

    Leftover Quesadillas:

    Reheat in a dry skillet over medium-low heat for 1-2 minutes per side. Air fryer at 375°F for 2 minutes also works great.

    Never Microwave:

    A microwave turns the tortilla into a rubbery, sweating mess. Just say no.

    Freezing:

    Freeze cooked and cooled quesadillas for up to 2 months. Reheat from frozen in a skillet or toaster oven.

  • Sweet Potato Fries: Crispy, Salty, Sweet Perfection

    Sweet Potato Fries: Crispy, Salty, Sweet Perfection

    Sweet potato fries have one problem: they get floppy. Not these. The secret is cornstarch and a hot oven.

    You’ll get fries with a crunchy exterior, a soft and sweet interior, and a smoky, salty kick. Dip them in aioli or spicy mayo and try not to eat the whole tray.

    Ingredients

    Serves 2-3.

    • 2 large sweet potatoes
    • 2 tablespoons cornstarch (the crispy secret)
    • 2 tablespoons olive or avocado oil
    • ½ teaspoon salt
    • ½ teaspoon smoked paprika
    • ¼ teaspoon garlic powder
    • ¼ teaspoon black pepper
    • Optional: pinch of cayenne for heat

    Step-by-Step Instructions

    Step 1: Prep and Cut

    1. Preheat oven to 425°F (220°C). Line a baking sheet with parchment paper.
    2. Peel sweet potatoes (or scrub well and leave skin on).
    3. Cut into even ¼-inch fries. Thinner = crispier.

    Step 2: The Cornstarch Trick

    1. Place cut fries in a large bowl. Sprinkle with cornstarch and toss to coat evenly.
    2. Add oil, salt, paprika, garlic powder, pepper, and cayenne. Toss again.

    Step 3: Bake, Don’t Crowd

    1. Arrange fries in a single layer on the baking sheet. Leave space between them or they’ll steam (not crisp).
    2. Bake for 15 minutes. Flip with a spatula. Bake for 10-15 more minutes until edges are dark and crispy.

    Step 4: Serve Fast

    1. These get less crispy as they sit. Serve immediately with ketchup, chipotle mayo, or garlic aioli.

    Summary

    Prep Time: 10 minutes | Cook Time: 25 minutes | Total Time: 35 minutes

    Yield: 2-3 servings

    Difficulty: Easy

    Storage Notes

    Leftovers:

    Sweet potato fries do not reheat well—they get soft. If you must, reheat in an air fryer at 400°F for 3-4 minutes or in a hot oven on a wire rack.

    Make-Ahead Prep:

    Cut the fries and store them in a bowl of cold water in the fridge for up to 24 hours. Dry them VERY thoroughly before adding cornstarch and oil.

    Never Microwave:

    Microwaving = sad, limp fries. Just don’t.

  • Stuffed Bell Peppers: A Whole Meal in a Colorful Bowl

    Stuffed Bell Peppers: A Whole Meal in a Colorful Bowl

    Stuffed bell peppers are dinner magic. The pepper gets tender and sweet, the filling is savory and hearty, and the cheese on top turns into a golden, bubbly crown.

    This version uses basic pantry ingredients and bakes everything in one dish. No boiling peppers first. No complicated steps. Just dinner that actually works.

    Ingredients

    Serves 4.

    • 4 large bell peppers (any color, but red and yellow are sweetest)
    • 1 lb (450g) ground beef (or ground turkey)
    • 1 cup cooked rice (white or brown)
    • 1 small onion, diced
    • 2 cloves garlic, minced
    • 1 can (15 oz) diced tomatoes, drained
    • 1 cup shredded mozzarella or cheddar cheese
    • 1 teaspoon salt, ½ teaspoon black pepper
    • Optional: fresh parsley for garnish

    Step-by-Step Instructions

    Step 1: Prep the Peppers

    1. Preheat oven to 375°F (190°C).
    2. Slice the tops off each pepper and remove seeds and membranes.
    3. Arrange peppers standing up in a baking dish.

    Step 2: Cook the Filling

    1. In a skillet over medium heat, cook ground beef until browned. Drain excess fat.
    2. Add onion and garlic, cook for 2 minutes until soft.
    3. Stir in cooked rice, drained tomatoes, salt, and pepper. Remove from heat.

    Step 3: Stuff and Top

    1. Spoon the filling into each pepper, packing it gently.
    2. Sprinkle cheese generously over the top of each pepper.

    Step 4: Bake Until Tender

    1. Add ¼ cup of water to the bottom of the baking dish (steams the peppers).
    2. Cover with foil and bake for 30 minutes.
    3. Remove foil and bake for 10 more minutes until cheese is bubbly and browned.

    Step 5: Serve Hot

    1. Garnish with parsley and serve immediately. Those peppers are juicy, so watch for drips.

    Summary

    Prep Time: 15 minutes | Cook Time: 40 minutes | Total Time: 55 minutes

    Yield: 4 servings

    Difficulty: Easy

    Storage Notes

    Leftovers:

    Store in an airtight container in the fridge for up to 4 days. The peppers get softer but still taste great.

    Freezing:

    Freeze fully cooked and cooled peppers for up to 3 months. Thaw overnight in the fridge, then reheat in a 350°F oven for 20 minutes.

    Meal Prep:

    Assemble the stuffed peppers (without baking) up to 2 days ahead. Cover and refrigerate. Add water to the dish and bake when ready.

  • Potato Pancakes: Shredded, Sizzled, and Irresistible

    Potato Pancakes: Shredded, Sizzled, and Irresistible

    Forget the boxed stuff. Real potato pancakes are just shredded potatoes, onion, and egg, fried until lacy and crispy. They’re salty, crunchy, and tender all at once.

    This recipe keeps it simple. No fancy equipment. No draining for hours. Just potato perfection in under 30 minutes.

    Ingredients

    Serves 4 (makes about 8 pancakes).

    • 1 lb (450g) russet potatoes (about 2 large)
    • ½ small yellow onion
    • 1 large egg, lightly beaten
    • 2 tablespoons all-purpose flour
    • ½ teaspoon salt
    • ¼ teaspoon black pepper
    • Oil for frying (vegetable or canola)
    • For serving: applesauce or sour cream

    Step-by-Step Instructions

    Step 1: Shred the Potatoes and Onion

    1. Peel potatoes (or don’t—skin adds texture).
    2. Shred potatoes and onion using a box grater or food processor.

    Step 2: Remove Excess Liquid

    1. Transfer shreds to a clean kitchen towel or several paper towels.
    2. Squeeze firmly over the sink to wring out as much liquid as possible.
    3. Don’t skip this—it’s the secret to crispy pancakes.

    Step 3: Make the Batter

    1. In a bowl, combine squeezed shreds, egg, flour, salt, and pepper.
    2. Mix until just combined. Don’t overmix.

    Step 4: Fry Until Golden

    1. Heat ¼ inch of oil in a large skillet over medium-high heat.
    2. Drop spoonfuls of batter into the oil and flatten slightly with a spatula.
    3. Fry for 2–3 minutes per side until deep golden brown and crispy.
    4. Drain on paper towels and sprinkle with a pinch of salt.

    Step 5: Serve Immediately

    1. These are best hot and crunchy. Serve with a big scoop of applesauce or a dollop of sour cream.

    Summary

    Prep Time: 10 minutes | Cook Time: 12 minutes | Total Time: 22 minutes

    Yield: 8 pancakes

    Difficulty: Easy

    Storage Notes

    Leftover Pancakes:

    Store in the fridge for up to 3 days. Reheat in a 400°F oven or air fryer for 5 minutes to bring back the crunch.

    Freezing:

    Freeze cooked pancakes in a single layer, then transfer to a bag. Reheat from frozen in an oven or toaster oven. Never microwave (soggy disaster).

    Make-Ahead Trick:

    Shred and squeeze potatoes up to 4 hours ahead. Cover and refrigerate. Add egg and flour right before frying.

  • The Loaded Baked Potato That Steals the Show

    The Loaded Baked Potato That Steals the Show

    Let’s be honest: the toppings are why we’re here. A perfect loaded baked potato is a buttery, fluffy cloud cradled in a salty, crispy shell, then absolutely buried in cheese, bacon, and chives. It’s cheap, it’s easy, and it makes everyone happy.

    This recipe skips the fuss. You’ll get a potato with crispy skin, a tender inside, and a topping-to-potato ratio that respects your time and taste buds.

    Ingredients

    Serves 4.

    • 4 medium russet potatoes (the best for baking)
    • 2 tablespoons olive oil
    • 1 teaspoon kosher salt
    • 1 cup shredded cheddar cheese
    • 6 slices cooked bacon, crumbled
    • ½ cup sour cream
    • ¼ cup chopped fresh chives or green onions
    • Optional: butter, black pepper, hot sauce

    Step-by-Step Instructions

    Step 1: Prep the Potatoes

    1. Preheat oven to 400°F (200°C).
    2. Scrub potatoes dry, then prick each one several times with a fork.
    3. Rub with olive oil and sprinkle with salt all over.

    Step 2: Bake Until Tender

    1. Place potatoes directly on the middle oven rack.
    2. Bake for 50–60 minutes, until a knife slides in easily with no resistance.

    Step 3: Fluff the Inside

    1. Cut a slit down the middle of each potato.
    2. Gently squeeze the ends toward the center to open it up.
    3. Use a fork to fluff the inside while adding a pat of butter if you’re feeling fancy.

    Step 4: Load It Up

    1. Pile on the cheddar cheese (it will melt instantly).
    2. Sprinkle with crumbled bacon and chives.
    3. Top with a generous dollop of sour cream.
    4. Finish with black pepper or hot sauce.

    Step 5: Serve Immediately

    1. These potatoes do not wait. Serve hot, with extra toppings on the side for the over-achievers at your table.

    Summary

    Prep Time: 10 minutes | Cook Time: 1 hour | Total Time: 1 hour 10 minutes

    Yield: 4 servings

    Difficulty: Easy

    Storage Notes

    Leftover Potatoes:

    Store baked (but unloaded) potatoes in the fridge for up to 4 days. Reheat in a 350°F oven or air fryer to crisp the skin again.

    Do Not Store Fully Loaded:

    Soggy bacon and sad sour cream are not the vibe. Keep toppings separate and assemble fresh.

    Meal Prep Trick:

    Bake a batch of potatoes on Sunday. Refrigerate. During the week, just reheat and load in 5 minutes.

  • Beef Mechado: The Filipino Stew That Beats Any Pot Roast

    Beef Mechado: The Filipino Stew That Beats Any Pot Roast

    Imagine pot roast, but make it Filipino. That’s Mechado. Beef chuck simmered for hours in a tangy tomato sauce with potatoes, carrots, and bell peppers. It’s rich, hearty, and ridiculously good over rice.

    The secret? A generous splash of lemon or calamansi. It cuts through the richness and wakes everything up. Make it on a Sunday. Thank yourself all week.

    Ingredients

    Serves 4-6.

    • 2 lbs (900g) beef chuck, cut into 2-inch cubes
    • 3 tbsp cooking oil
    • 5 cloves garlic, minced
    • 1 onion, chopped
    • 2 cups tomato sauce
    • 3 cups beef broth or water
    • 3 tbsp soy sauce
    • 2 potatoes, cubed
    • 2 carrots, sliced
    • 1 red bell pepper, sliced
    • 2 tbsp lemon juice or calamansi juice
    • 2 bay leaves
    • 1 tsp black pepper

    Step-by-Step Instructions

    Step 1: Sear the Beef

    1. Heat oil in a heavy pot over medium-high heat. Sear beef in batches until browned, 5-7 minutes per batch. Remove and set aside.

    Step 2: Sauté Aromatics

    1. In the same pot, sauté garlic and onion until soft, 2 minutes.

    Step 3: Braise the Beef

    1. Return beef to pot. Add tomato sauce, broth, soy sauce, bay leaves, and pepper. Bring to a boil.
    2. Lower heat, cover, and simmer 1.5 to 2 hours until beef is fork-tender.

    Step 4: Add Vegetables

    1. Add potatoes, carrots, and bell peppers. Cook 15 minutes until tender.

    Step 5: Finish with Citrus

    1. Stir in lemon juice. Simmer 2 more minutes.
    2. Serve hot over steamed rice.

    Summary

    Prep Time: 15 min | Cook Time: 2 hours | Total: 2 hr 15 min

    Yield: 4-6 servings

    Difficulty: Easy (needs time, not skill)

    Storage Notes

    Refrigerate up to 5 days. Freezes beautifully for 3 months. Like all stews, Mechado tastes better the next day. Reheat gently on stovetop. Add broth if too thick. Do not skip the lemon at the end—it’s magic.