Category: quick_meals

  • Jamaican Jerk Chicken (Smoky, Spicy, Absolutely Addictive)

    Jamaican Jerk Chicken (Smoky, Spicy, Absolutely Addictive)

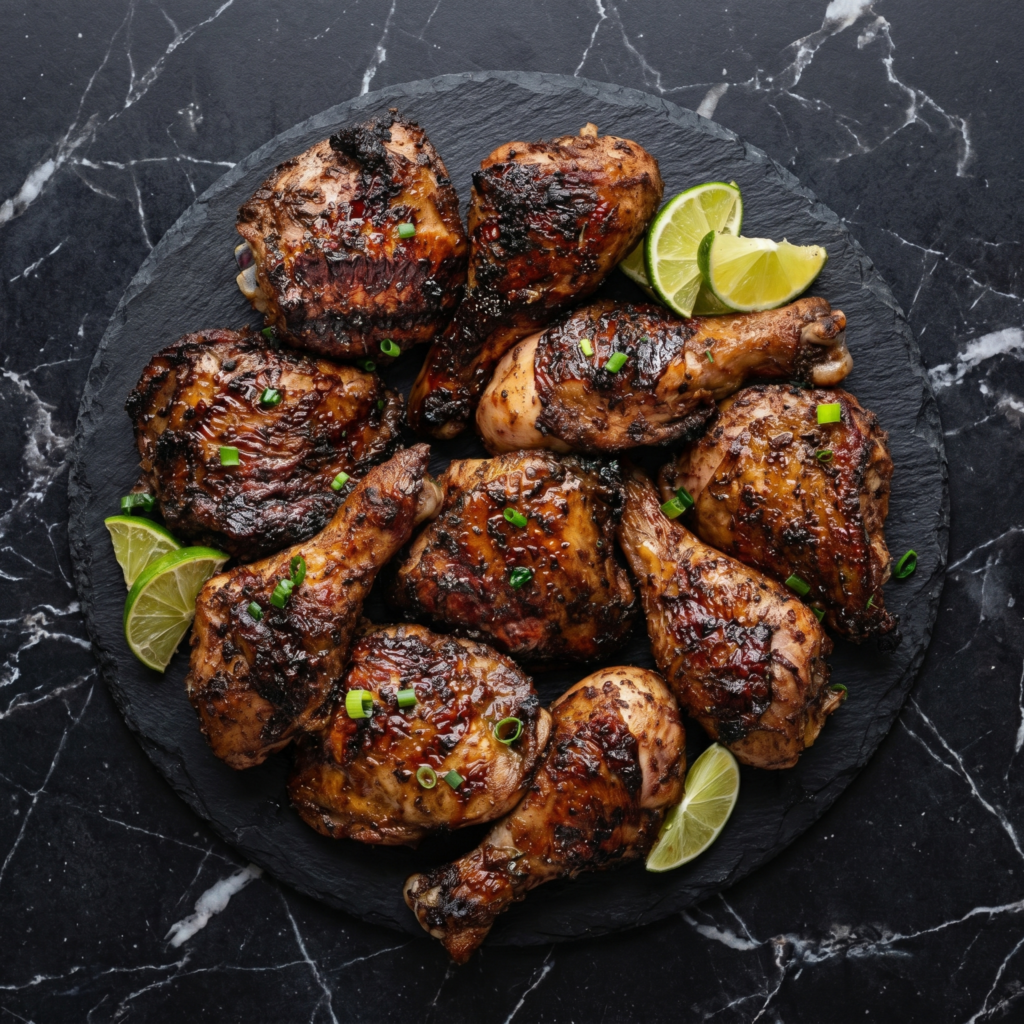
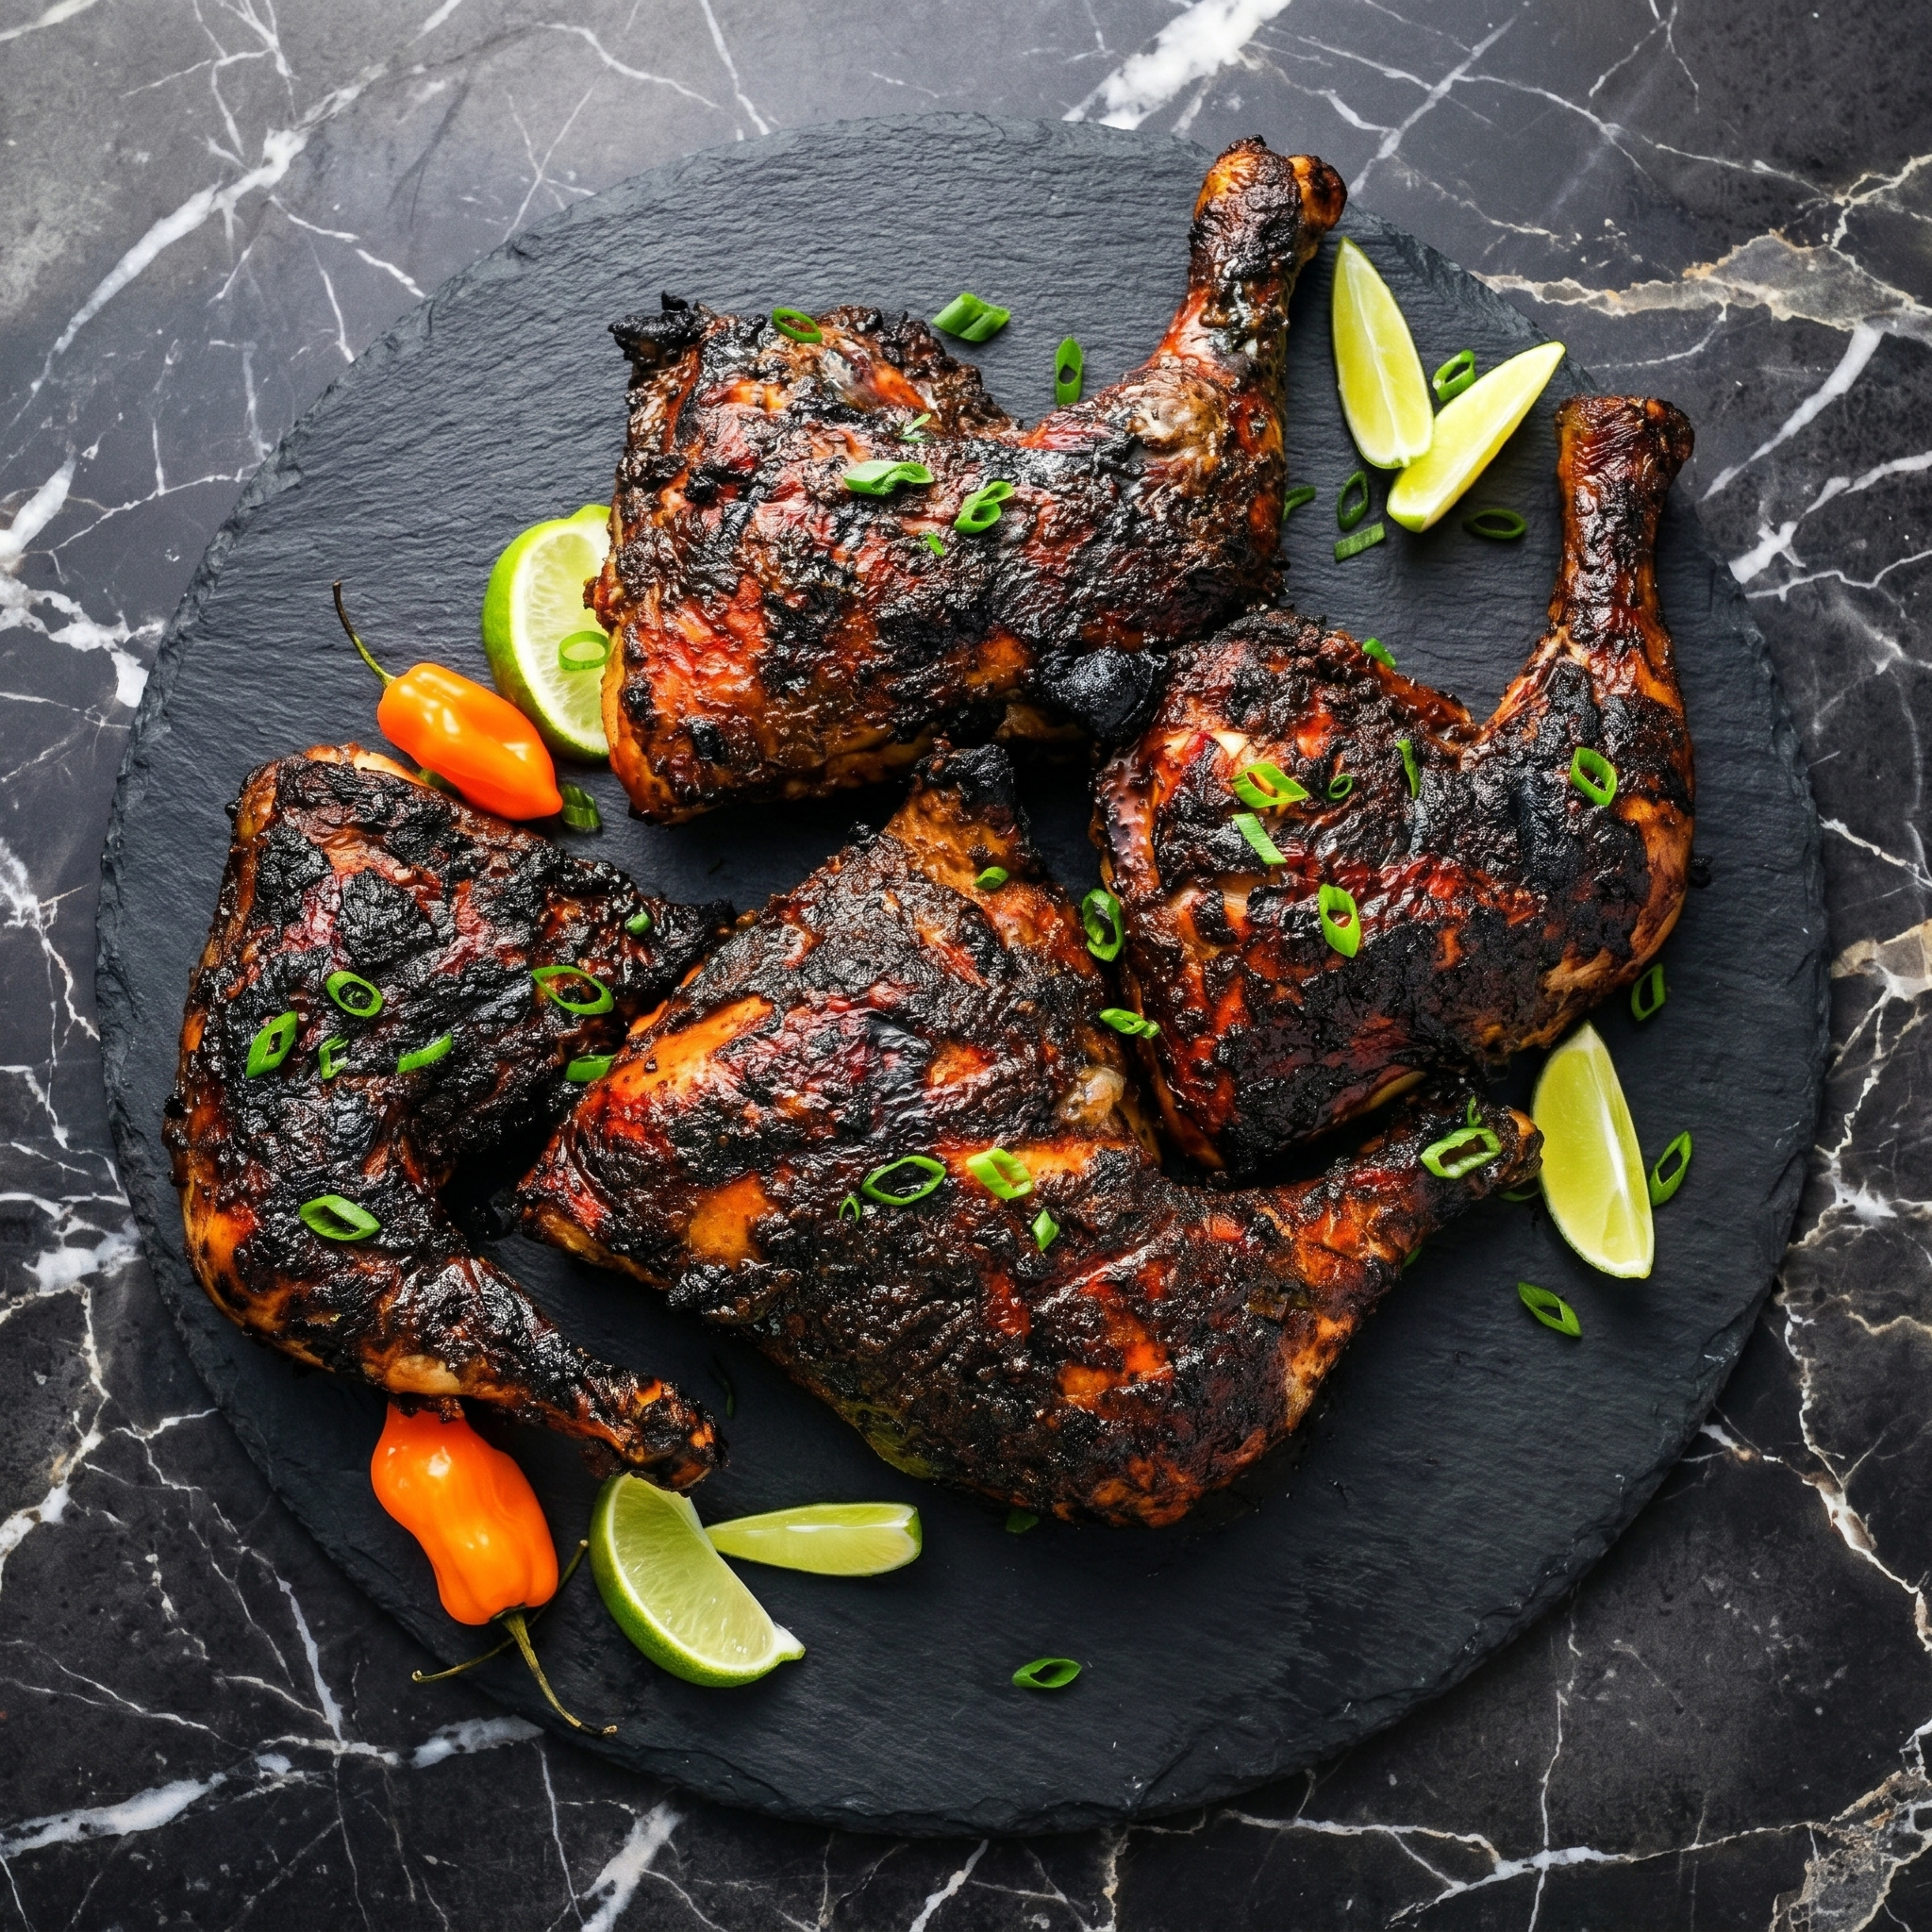
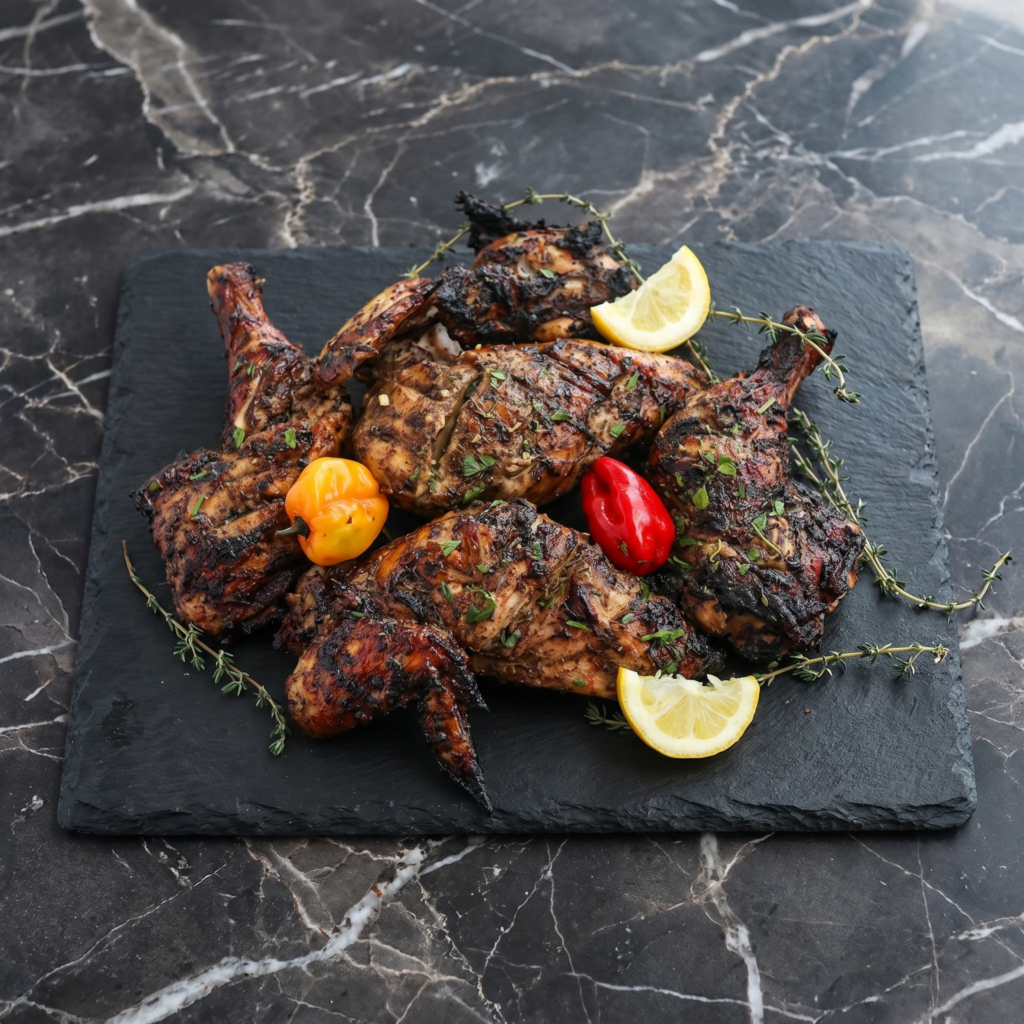
    Jerk isn’t just spicy. It’s complex.

    Scotch bonnet brings the heat. Allspice, thyme, and ginger bring the soul. Slow grilling over low heat (or pimento wood if you’re fancy) makes it smoky and tender. Your backyard just got a Caribbean upgrade.

    Ingredients

    Serves 4.

    Jerk Marinade:

    • 2-3 Scotch bonnet peppers, seeded (reduce for less heat)
    • 4 green onions, chopped
    • 4 cloves garlic
    • 1 tbsp fresh ginger, grated
    • 2 tbsp fresh thyme (or 1 tbsp dried)
    • 2 tbsp brown sugar
    • 2 tbsp soy sauce
    • 2 tbsp vegetable oil
    • 1 tbsp allspice
    • 1 tsp cinnamon
    • 1 tsp black pepper
    • ¼ cup lime juice (or white vinegar)

    Chicken:

    • 8 bone-in, skin-on chicken thighs or 1 whole chicken (cut up)

    Step-by-Step Instructions

    Step 1: Make Marinade

    1. Blend all marinade ingredients in a food processor until smooth.

    Step 2: Marinate

    1. Score chicken thighs with shallow cuts. Coat completely in marinade.
    2. Refrigerate overnight (minimum 4 hours).

    Step 3: Prep Grill

    1. Heat grill to medium-low (300-325°F / 150-160°C).
    2. Oil the grates.

    Step 4: Grill Slow

    1. Grill chicken skin-side down, covered, for 15 minutes.
    2. Flip. Cook another 15-20 minutes until internal temp hits 165°F (74°C).

    Step 5: Crisp and Serve

    1. Move chicken to direct heat for 1-2 minutes per side to crisp skin.
    2. Serve with rice and peas, grilled pineapple, or festival bread.

    Summary

    Prep Time: 15 minutes | Marinate Time: 4+ hours | Cook Time: 35 minutes | Total Time: ~5 hours

    Yield: 4 servings

    Difficulty: Easy (needs patience)

    Storage Notes

    Refrigerate Leftovers:

    Store in an airtight container for up to 4 days. Reheat in oven at 350°F for 10-15 minutes.

    Freeze:

    Freeze raw chicken in marinade for up to 3 months. Thaw overnight in fridge before grilling.

    Oven Method (No Grill):

    Bake at 375°F for 40-45 minutes, then broil 2 minutes to crisp.

    Heat Warning:

    Wear gloves when handling Scotch bonnets. Don’t touch your face. Seriously.

  • Jamaican Patties (Flaky, Spicy, Golden Packets of Joy)

    Jamaican Patties (Flaky, Spicy, Golden Packets of Joy)

    Jamaican patties are the reason golden pastry exists.

    Flaky, buttery, turmeric-bright dough wrapped around deeply seasoned ground beef. A little spicy. A lot addictive. Eat one with coco bread or just alone. Just make extra—they disappear fast.

    Ingredients

    Makes 8 patties.

    For the Dough:

    • 2 cups (250g) all-purpose flour
    • 1 teaspoon turmeric
    • ½ teaspoon salt
    • ½ cup (115g) cold butter, cubed
    • ½ cup (120ml) ice water

    For the Filling:

    • 1 lb (450g) ground beef
    • 1 onion, finely chopped
    • 2 cloves garlic, minced
    • 1 teaspoon thyme
    • 1 teaspoon curry powder
    • ½ teaspoon allspice
    • 1 Scotch bonnet pepper (whole, or ½ tsp dried)
    • ¼ cup beef broth
    • 1 egg (for egg wash)

    Step-by-Step Instructions

    Step 1: Make Dough

    1. Mix flour, turmeric, and salt. Cut in butter until crumbly.
    2. Add ice water gradually until dough forms. Wrap and chill 30 minutes.

    Step 2: Cook Filling

    1. Brown ground beef with onion and garlic. Drain fat.
    2. Add thyme, curry, allspice, and Scotch bonnet. Cook 1 minute.
    3. Add broth. Simmer until liquid evaporates. Remove whole pepper if used. Cool.

    Step 3: Assemble

    1. Preheat oven to 400°F (200°C). Roll dough to ⅛-inch thick.
    2. Cut into 6-inch circles. Place filling on one half. Fold over. Crimp with a fork.

    Step 4: Bake

    1. Brush with beaten egg. Bake 25-30 minutes until golden brown.

    Step 5: Serve

    1. Serve warm or at room temperature.

    Summary

    Prep Time: 30 minutes | Chill Time: 30 minutes | Cook Time: 30 minutes | Total Time: ~1.5 hours

    Yield: 8 patties

    Difficulty: Medium

    Storage Notes

    Refrigerate Baked:

    Store in an airtight container for up to 4 days. Reheat at 350°F for 10 minutes.

    Freeze Unbaked:

    Assemble patties, freeze on a tray, then transfer to a bag. Bake from frozen at 375°F for 30-35 minutes.

    Make It Milder:

    Remove Scotch bonnet seeds or substitute with ½ teaspoon paprika + cayenne to taste.

    Fillings to Try:

    Chicken, veggies, saltfish, or cheese + callaloo.

  • Classic Po’Boy Sandwich (New Orleans in Your Hands)

    Classic Po’Boy Sandwich (New Orleans in Your Hands)

    New Orleans didn’t invent the sandwich. They just perfected it.

    A proper po’boy is crispy seafood, soft French bread, creamy remoulade, and crunchy lettuce. It’s supposed to be messy. It’s supposed to drip. Embrace it.

    Ingredients

    Makes 2 sandwiches.

    For the Seafood:

    • ½ lb (225g) shrimp (or oysters), peeled
    • ½ cup cornmeal
    • ½ cup flour
    • 1 tsp Cajun seasoning
    • ½ tsp salt
    • Vegetable oil for frying

    For the Remoulade:

    • ½ cup mayo
    • 2 tbsp Creole mustard
    • 1 tbsp hot sauce
    • 1 tsp paprika
    • 1 clove garlic, minced

    For Assembly:

    • 1 loaf French bread (soft inside, crispy outside)
    • Shredded lettuce
    • Tomato slices
    • Pickle slices

    Step-by-Step Instructions

    Step 1: Make Remoulade

    1. Whisk all remoulade ingredients in a bowl. Refrigerate until ready.

    Step 2: Heat Oil

    1. Pour 1 inch of oil into a heavy pot. Heat to 350°F (175°C).

    Step 3: Dredge Seafood

    1. Mix cornmeal, flour, Cajun seasoning, and salt in a bowl.
    2. Toss shrimp in mixture until fully coated.

    Step 4: Fry

    1. Fry shrimp in batches for 2-3 minutes until golden and crispy.
    2. Drain on paper towels. Sprinkle with salt.

    Step 5: Assemble

    1. Cut bread into 2 sandwich portions. Split but don’t cut all the way through.
    2. Spread remoulade on both sides.
    3. Pile on lettuce, tomato, pickles, then fried shrimp.

    Step 6: Serve

    1. Press down gently. Serve with extra hot sauce and napkins. Lots of napkins.

    Summary

    Prep Time: 15 minutes | Cook Time: 10 minutes | Total Time: 25 minutes

    Yield: 2 sandwiches

    Difficulty: Easy

    Storage Notes

    Do Not Store Assembled

    Fried shrimp gets soggy. Bread gets sad. Assemble and eat immediately.

    Prep Ahead:

    • Make remoulade up to 5 days ahead.
    • Dredge shrimp up to 2 hours ahead (refrigerate).
    • Fry fresh for best crunch.

    Leftover Fried Shrimp:

    Reheat in air fryer at 375°F for 3-4 minutes. Then make a smaller sandwich.

    Oyster Option:

    Same dredge, same oil. Fry oysters 2-3 minutes until edges curl.

  • Classic Sausage Rolls (Britain’s Best Party Trick)

    Classic Sausage Rolls (Britain’s Best Party Trick)

    Every British party has them. Now your party will too.

    Sausage rolls are just good pastry wrapped around good sausage. That’s it. No mystery. But when done right—flaky, golden, juicy inside—they become the first thing to vanish from the table. Make two batches.

    Ingredients

    Makes 12 sausage rolls.

    • 1 sheet (½ box) puff pastry, thawed
    • 1 lb (450g) good quality sausage meat or ground pork
    • 1 teaspoon dried sage (or 1 tbsp fresh)
    • ½ teaspoon black pepper
    • ¼ teaspoon nutmeg (optional)
    • 1 egg, beaten (for egg wash)
    • 1 tablespoon sesame or poppy seeds (optional)

    Step-by-Step Instructions

    Step 1: Prep

    1. Preheat oven to 400°F (200°C). Line a baking sheet with parchment.
    2. If using ground pork, mix with sage, pepper, and nutmeg.

    Step 2: Roll and Fill

    1. Unroll puff pastry on a lightly floured surface.
    2. Shape sausage meat into a log along one long edge, about 1 inch thick.
    3. Fold pastry over the meat. Press edge to seal. Crimp with a fork.

    Step 3: Cut and Brush

    1. Cut the long roll into 2-inch pieces.
    2. Place seam-side down on baking sheet. Brush with beaten egg.
    3. Sprinkle with seeds if using.

    Step 4: Bake

    1. Bake 20-25 minutes until deep golden brown and puffed.
    2. Let cool 5 minutes on the sheet.

    Step 5: Serve

    1. Serve warm or at room temperature. Brown mustard on the side is non-negotiable.

    Summary

    Prep Time: 10 minutes | Cook Time: 25 minutes | Total Time: 35 minutes

    Yield: 12 sausage rolls

    Difficulty: Easy

    Storage Notes

    Refrigerate Baked:

    Store in an airtight container for up to 3 days. Reheat at 350°F for 8-10 minutes. Cold is also fine (picnic style).

    Freeze Unbaked:

    Assemble and cut, then freeze on a tray. Bake from frozen at 400°F for 25-30 minutes. Add 5 minutes to cook time.

    Pro Tip:

    Prick each roll with a fork to let steam escape and prevent soggy bottoms.

    Cheater’s Version:

    Use pre-made cocktail sausages. Wrap each in a strip of puff pastry. Bake as directed. No shame.

  • Loaded Potato Skins (The Game Day MVP Everyone Fights Over)

    Loaded Potato Skins (The Game Day MVP Everyone Fights Over)

    Potato skins disappear fast. Plan accordingly.

    These are everything you want: crispy edges, fluffy centers, salty bacon, melted cheddar, and a cool dollop of sour cream. Bake, scoop, fill, bake again. No deep fryer required. Just a hot oven and hungry people.

    Ingredients

    Serves 4 as appetizer (8 skins).

    • 4 medium russet potatoes
    • 2 tablespoons olive oil
    • 1 teaspoon salt
    • ½ teaspoon black pepper
    • 1 cup shredded cheddar cheese
    • 4 slices bacon, cooked crisp and crumbled
    • 2 green onions, thinly sliced
    • Sour cream for serving

    Step-by-Step Instructions

    Step 1: Bake Potatoes

    1. Preheat oven to 400°F (200°C). Prick potatoes with a fork.
    2. Bake directly on rack for 50-60 minutes until tender.

    Step 2: Scoop

    1. Let potatoes cool until handleable. Cut in half lengthwise.
    2. Scoop out flesh, leaving a ¼-inch wall. Save flesh for mashed potatoes later.

    Step 3: Crisp the Skins

    1. Brush skins inside and out with olive oil. Sprinkle with salt and pepper.
    2. Place on a baking sheet, skin-side up. Bake 10 minutes. Flip. Bake another 5 minutes.

    Step 4: Fill and Melt

    1. Fill each skin with cheddar, bacon, and green onions.
    2. Bake 5 more minutes until cheese is bubbly.

    Step 5: Serve

    1. Top with a dollop of sour cream and extra green onions. Serve hot.

    Summary

    Prep Time: 15 minutes | Cook Time: ~75 minutes | Total Time: ~90 minutes

    Yield: 8 potato skins

    Difficulty: Easy

    Storage Notes

    Refrigerate:

    Store fully baked skins in an airtight container for up to 3 days. Reheat at 375°F for 8-10 minutes. Not microwave-friendly (soggy disaster).

    Freeze Before Second Bake:

    After scooping and crisping, freeze skins on a tray. Then transfer to a bag. Bake from frozen: fill with toppings, bake at 400°F for 12-15 minutes.

    Pro Tip:

    Don’t toss the scooped potato! Make quick mashed potatoes or add to soup.

    AIR FRYER OPTION:

    After scooping, air fry skins at 375°F for 5 minutes. Fill. Air fry 3 more minutes. Faster and extra crispy.

  • Spinach Fatayer (Little Savory Pies That Steal the Show)

    Spinach Fatayer (Little Savory Pies That Steal the Show)

    Meet your new favorite handheld pie.

    Fatayer are soft, triangular pastries filled with lemony spinach, onions, and a touch of sumac. They’re tangy, savory, and somehow light despite being bread. Eat them warm, at room temperature, or straight from the freezer (kidding… mostly).

    Ingredients

    Makes 12 fatayer.

    For the Dough:

    • 2 cups (260g) all-purpose flour
    • 1 teaspoon instant yeast
    • ½ teaspoon salt
    • 1 teaspoon sugar
    • 3 tablespoons olive oil
    • ½ cup (120ml) warm water

    For the Filling:

    • 10 oz (280g) fresh spinach, finely chopped
    • 1 small onion, finely diced
    • 3 tablespoons lemon juice
    • 2 tablespoons olive oil
    • 1 teaspoon sumac (or more to taste)
    • ½ teaspoon salt
    • ¼ teaspoon black pepper

    Step-by-Step Instructions

    Step 1: Make Dough

    1. In a bowl, mix flour, yeast, salt, and sugar.
    2. Add olive oil and warm water. Mix until a soft dough forms.
    3. Knead 5 minutes until smooth. Cover and let rise 1 hour.

    Step 2: Prep Filling

    1. Chop spinach finely. Squeeze out excess moisture (very important!).
    2. In a bowl, combine spinach, onion, lemon juice, olive oil, sumac, salt, and pepper.
    3. Do NOT cook the filling—it cooks inside the dough.

    Step 3: Shape

    1. Preheat oven to 400°F (200°C). Line a baking sheet with parchment.
    2. Divide dough into 12 balls. Roll each into a 4-inch circle.
    3. Place 1-2 tablespoons filling in the center.

    Step 4: Form Triangles

    1. Pinch two edges together to form a triangle. Leave a small opening at the top (traditional) or seal completely.

    Step 5: Bake

    1. Bake 12-15 minutes until golden brown on bottom and edges.
    2. Serve warm or at room temperature with lemon wedges.

    Summary

    Prep Time: 20 minutes | Rise Time: 1 hour | Cook Time: 15 minutes | Total Time: ~1.5 hours

    Yield: 12 fatayer

    Difficulty: Medium (easy dough)

    Storage Notes

    Refrigerate Baked:

    Store in an airtight container for up to 4 days. Reheat at 350°F for 5-7 minutes or eat at room temperature.

    Freeze (Best Method):

    Freeze unbaked fatayer on a tray, then transfer to a bag. Bake from frozen at 400°F for 15-18 minutes.

    Filling Warning:

    Do NOT pre-cook the spinach filling. Raw spinach releases liquid as it bakes, keeping the inside moist. Pre-cooked = dry.

    Sumac Substitute:

    No sumac? Use lemon zest + a pinch of paprika. But sumac is worth finding.

  • Chicken and Cheese Taquitos: Rolled, Crispy, Irresistible

    Chicken and Cheese Taquitos: Rolled, Crispy, Irresistible

    Taquitos are the perfect handheld crunch. A crispy, golden cylinder packed with seasoned chicken and melted cheese. Dip them in everything.

    Bake them for easier cleanup or fry them for extra crunch. Either way, they’ll disappear before you sit down.

    Ingredients

    Makes 12-16 taquitos (serves 4).

    • 12-16 corn tortillas (small, 5-6 inch)
    • 2 cups cooked chicken, shredded
    • 1½ cups shredded cheese (Monterey Jack, cheddar, or Mexican blend)
    • 4 oz cream cheese, softened
    • ¼ cup salsa or canned diced green chiles
    • ½ teaspoon cumin
    • ½ teaspoon chili powder
    • ¼ teaspoon garlic powder
    • ¼ teaspoon salt
    • Cooking spray or oil for brushing

    For Serving:

    • Salsa, sour cream, guacamole, or hot sauce

    Step-by-Step Instructions

    Step 1: Preheat and Prep

    1. Preheat oven to 425°F (220°C). Line a baking sheet with parchment paper or foil.
    2. If baking, spray the sheet with cooking spray.

    Step 2: Make the Filling

    1. In a bowl, mix shredded chicken, shredded cheese, cream cheese, salsa, cumin, chili powder, garlic powder, and salt until well combined.

    Step 3: Warm the Tortillas

    1. Wrap corn tortillas in damp paper towels. Microwave for 30-45 seconds until soft and pliable (prevents cracking when rolling).

    Step 4: Fill and Roll

    1. Place 2 tablespoons of filling in a line across the lower third of each tortilla.
    2. Roll tightly from bottom to top. Place seam-side down on the baking sheet.
    3. Repeat with remaining tortillas.

    Step 5: Bake Until Crispy

    1. Spray or brush taquitos lightly with oil.
    2. Bake for 15-20 minutes until golden brown and crispy, flipping halfway.

    Step 6: Serve Immediately

    1. Let cool for 2 minutes (filling is lava hot). Serve with salsa, sour cream, and guac.

    Summary

    Prep Time: 15 minutes | Cook Time: 20 minutes | Total Time: 35 minutes

    Yield: 12-16 taquitos (4 servings)

    Difficulty: Easy

    Storage Notes

    Fridge:

    Store baked taquitos in an airtight container for up to 4 days. They soften but re-crisp well.

    Reheating (Best):

    Air fryer at 375°F for 5-6 minutes. Oven at 400°F for 8-10 minutes. Microwave is fine but won’t be crispy.

    Freezing:

    Freeze unbaked taquitos on a tray, then transfer to a bag. Freeze for up to 3 months. Bake from frozen at 425°F for 20-25 minutes.

    Frying Option:

    Heat ½ inch oil to 350°F. Fry taquitos seam-side down for 2-3 minutes until golden. Flip and fry 1-2 minutes more. Drain on wire rack.

    Pro Tip:

    Use leftover rotisserie chicken. It’s perfect here and saves time.

  • Garlic Butter Lobster Tail: Fancy Date Night in 15 Minutes

    Garlic Butter Lobster Tail: Fancy Date Night in 15 Minutes

    Lobster tail sounds intimidating. It’s not. Cut the shell, loosen the meat, slather with garlic butter, and broil. Fifteen minutes from fridge to plate.

    This is your special occasion move. Anniversary, Valentine’s Day, or just Tuesday. You deserve lobster.

    Ingredients

    Serves 2 (2 lobster tails).

    • 2 lobster tails (4-6 oz each), thawed if frozen
    • ½ cup unsalted butter (1 stick)
    • 4 cloves garlic, minced
    • 1 tablespoon fresh parsley, finely chopped
    • 1 tablespoon lemon juice
    • ½ teaspoon salt
    • ¼ teaspoon black pepper
    • ¼ teaspoon paprika (for color, optional)
    • Lemon wedges for serving

    Step-by-Step Instructions

    Step 1: Preheat and Prep

    1. Preheat broiler to high (or oven to 450°F if no broiler).
    2. Position rack in the top third of the oven.
    3. Line a baking sheet with foil.

    Step 2: Make the Garlic Butter

    1. In a small saucepan, melt butter over low heat.
    2. Add garlic and cook for 1 minute until fragrant (don’t brown).
    3. Stir in parsley, lemon juice, salt, pepper, and paprika. Remove from heat.

    Step 3: Prepare the Lobster Tails

    1. Using kitchen shears, cut down the center of the top shell (the hard side) lengthwise.
    2. Gently pull the shell apart slightly.
    3. Loosen the meat from the shell, keeping it attached at the tail end.
    4. Lift the meat up and rest it on top of the shell (looks like a lobster topper).

    Step 4: Butter the Lobster

    1. Place lobster tails on the baking sheet.
    2. Brush the exposed meat generously with garlic butter (reserve some for serving).

    Step 5: Broil the Lobster

    1. Broil for 6-8 minutes until meat is opaque and lightly golden.
    2. Watch closely—broiler moves fast. Lobster is done at 140°F internal temp.

    Step 6: Serve Immediately

    1. Remove from oven. Drizzle with reserved garlic butter.
    2. Squeeze fresh lemon over the top. Serve with more melted butter on the side.

    Summary

    Prep Time: 5 minutes | Cook Time: 8 minutes | Total Time: 13 minutes

    Yield: 2 servings

    Difficulty: Easy

    Storage Notes

    Leftovers?

    Lobster is best fresh. Cooked lobster tails can be refrigerated for up to 2 days. Eat cold (lobster salad) or reheat gently.

    Reheating:

    Remove meat from shell. Reheat in a skillet with butter over low heat for 2-3 minutes. Microwave in 15-second bursts (risk of rubber).

    Buying Lobster Tails:

    Frozen tails are fine—most are frozen at sea. Thaw overnight in the fridge. Cold water tails (Australia, Maine) are sweeter than warm water (Caribbean, Brazil).

    Pro Tip:

    Don’t skip butter basting. Lobster meat is lean and dries out fast. Butter is flavor + insurance.

    No Broiler Option:

    Bake at 450°F for 12-15 minutes. Brush with butter halfway through.

  • Bacon, Egg & Cheese Croissants: Breakfast Never Looked This Good

    Bacon, Egg & Cheese Croissants: Breakfast Never Looked This Good

    The croissant changes everything. Flaky, buttery, shattering into a million delicious crumbs. Fill it with bacon, eggs, and cheese? Now we’re talking about the best breakfast sandwich of your life.

    Ten minutes. One pan. Zero regrets. Make two.

    Ingredients

    Serves 2 (or 1 very hungry person).

    • 2 large croissants (day-old is fine—toast revives them)
    • 4 slices bacon
    • 4 large eggs
    • 2 tablespoons milk or cream (optional, for fluffy eggs)
    • 2 slices cheddar, Swiss, or American cheese
    • 1 tablespoon butter (for eggs)
    • Salt and pepper to taste
    • Optional: hot sauce, avocado, or tomato slices

    Step-by-Step Instructions

    Step 1: Cook the Bacon

    1. In a skillet over medium heat, cook bacon until crispy, 5-7 minutes.
    2. Transfer to a paper towel-lined plate. Pour off most of the bacon grease, leaving about 1 tablespoon.

    Step 2: Scramble the Eggs

    1. In a bowl, whisk eggs, milk (if using), salt, and pepper until frothy.
    2. Reduce skillet heat to low-medium. Add butter and let it melt.
    3. Pour in eggs. Gently scramble with a spatula, pushing cooked eggs toward the center.
    4. Remove from heat just before they look done (they’ll finish cooking off the heat).

    Step 3: Toast the Croissants

    1. Slice croissants in half horizontally.
    2. Toast in a toaster oven, regular oven at 350°F for 3 minutes, or in the same skillet cut-side down until golden.

    Step 4: Assemble the Sandwiches

    1. Place a slice of cheese on the bottom half of each warm croissant (heat melts it slightly).
    2. Top with scrambled eggs, then bacon (break slices in half).
    3. Add hot sauce, avocado, or tomato if using.
    4. Close with the top croissant half.

    Step 5: Serve Immediately

    1. Press down gently. Serve with napkins. So many napkins. Crumbs everywhere. Worth it.

    Summary

    Prep Time: 5 minutes | Cook Time: 10 minutes | Total Time: 15 minutes

    Yield: 2 sandwiches

    Difficulty: Easy

    Storage Notes

    Leftovers?

    Assembled sandwiches don’t keep well—croissants get soggy. Store components separately if you must.

    Make-Ahead Components:

    • Cooked bacon: fridge for 5 days
    • Scrambled eggs: 2 days (reheat gently)
    • Croissants: room temp, toast before using

    Reheating Croissant Sandwiches:

    Wrap in foil. Bake at 350°F for 8-10 minutes. Air fryer at 350°F for 4-5 minutes. Microwave makes croissants rubbery (avoid).

    Pro Tip:

    Day-old croissants are actually better for sandwiches—they’re sturdier and toast up crispier. Fresh croissants get smushed.

    Make It Fancy:

    Add a drizzle of honey. Yes, honey on bacon and eggs. Trust me.

  • Chicken Spring Rolls: Fresh, Crunchy, Dippable Perfection

    Chicken Spring Rolls: Fresh, Crunchy, Dippable Perfection

    Fresh spring rolls are nothing like fried egg rolls. They’re light, bright, and packed with crunchy veggies, tender chicken, and fragrant herbs. Rice paper wraps hold it all together.

    The peanut dipping sauce is non-negotiable. Sweet, savory, nutty, a little spicy. Dip, bite, repeat.

    Ingredients

    Makes 8-10 spring rolls.

    • 8-10 rice paper wrappers (round, 8-10 inch)
    • 2 cups cooked chicken breast, shredded or thinly sliced
    • 1 cup cooked vermicelli rice noodles
    • 1 cup shredded carrots
    • 1 cup cucumber, cut into thin matchsticks
    • 1 cup red bell pepper, thinly sliced
    • ½ cup fresh mint leaves
    • ½ cup fresh cilantro leaves
    • Butter lettuce leaves (optional, for wrapping)

    Peanut Dipping Sauce:

    • ½ cup creamy peanut butter
    • 2 tablespoons hoisin sauce
    • 1 tablespoon soy sauce
    • 1 tablespoon lime juice
    • 1 teaspoon sriracha (or to taste)
    • ¼ cup warm water (to thin)

    Step-by-Step Instructions

    Step 1: Make the Peanut Sauce

    1. Whisk together peanut butter, hoisin, soy sauce, lime juice, and sriracha.
    2. Gradually add warm water until smooth and dippable.

    Step 2: Prep All Your Fillings

    1. Arrange chicken, noodles, carrots, cucumber, bell pepper, mint, cilantro, and lettuce on a work surface near where you’ll roll.
    2. Have a large bowl of warm water ready.

    Step 3: Soften the Rice Paper

    1. Dip one rice paper wrapper into warm water for 5-10 seconds until slightly softened (still a little firm—it softens more as you fill).
    2. Place on a damp cutting board or plate.

    Step 4: Fill and Roll

    1. Layer lettuce, noodles, chicken, carrots, cucumber, bell pepper, and herbs in the lower third of the wrapper.
    2. Don’t overfill (about 2 tablespoons total).
    3. Fold the bottom edge over the filling, tuck tightly, then fold in the sides. Roll upward firmly like a burrito.

    Step 5: Repeat and Serve

    1. Continue with remaining wrappers. Keep finished rolls covered with a damp towel (prevents drying out).
    2. Serve immediately with peanut sauce.

    Summary

    Prep Time: 20 minutes | Cook Time: 0 minutes | Total Time: 20 minutes

    Yield: 8-10 spring rolls

    Difficulty: Medium (rolling takes practice)

    Storage Notes

    Fridge (Short Term):

    Store spring rolls in an airtight container with a damp paper towel between layers to prevent sticking. Eat within 24 hours—rice paper gets hard and cracks.

    Do Not Freeze:

    Rice paper wrappers become brittle and fall apart after freezing. Make fresh.

    Make-Ahead Prep:

    Chop all veggies, cook chicken, make sauce up to 2 days ahead. Assemble rolls within a few hours of serving.

    Pro Tip:

    Don’t oversoak rice paper. 5-10 seconds is enough. It continues to soften as you build the roll. Mushy wrappers = tears and frustration.

    Substitutions:

    Swap chicken for shrimp, tofu, or pork. Use any crunchy veggies you have: jicama, bean sprouts, avocado.