Category: quick_meals

  • Bacon Wrapped Chicken Breasts (Juicy Inside, Crispy Outside)

    Bacon Wrapped Chicken Breasts (Juicy Inside, Crispy Outside)

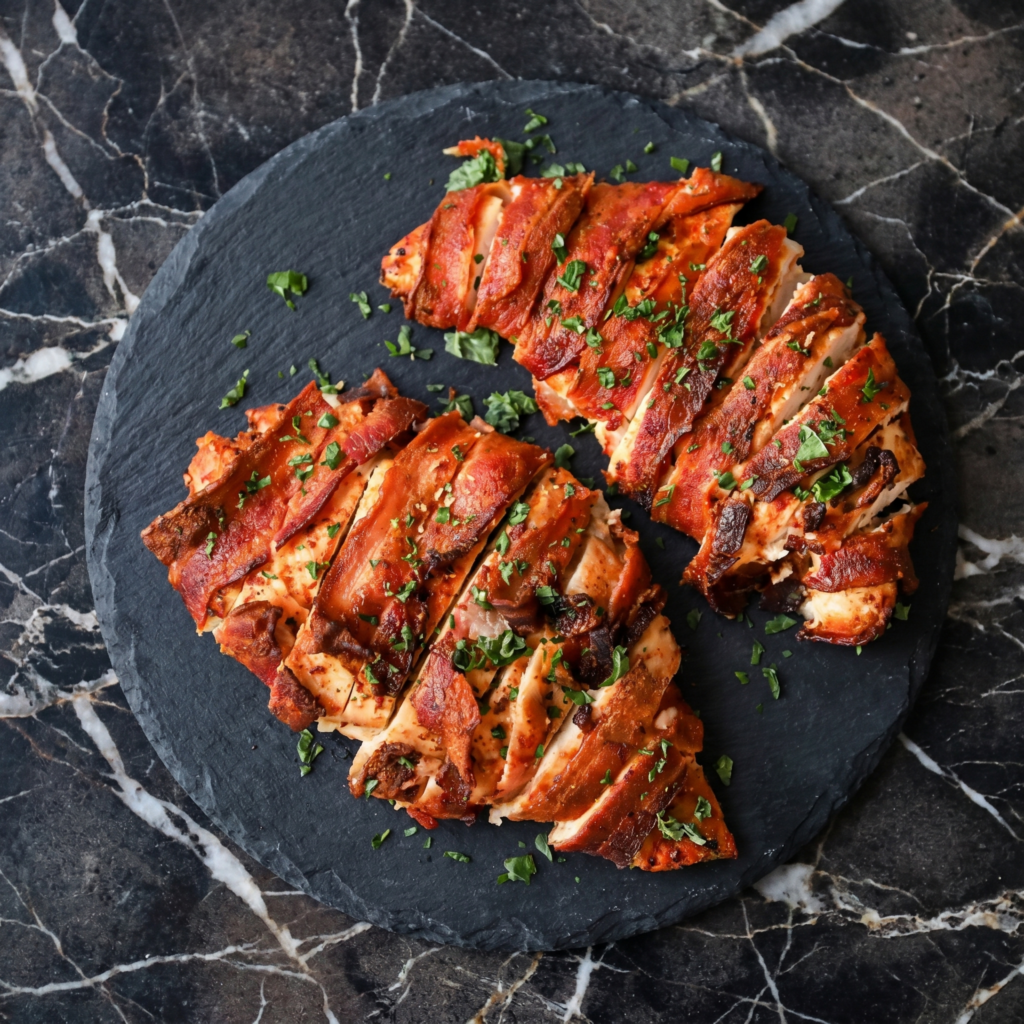
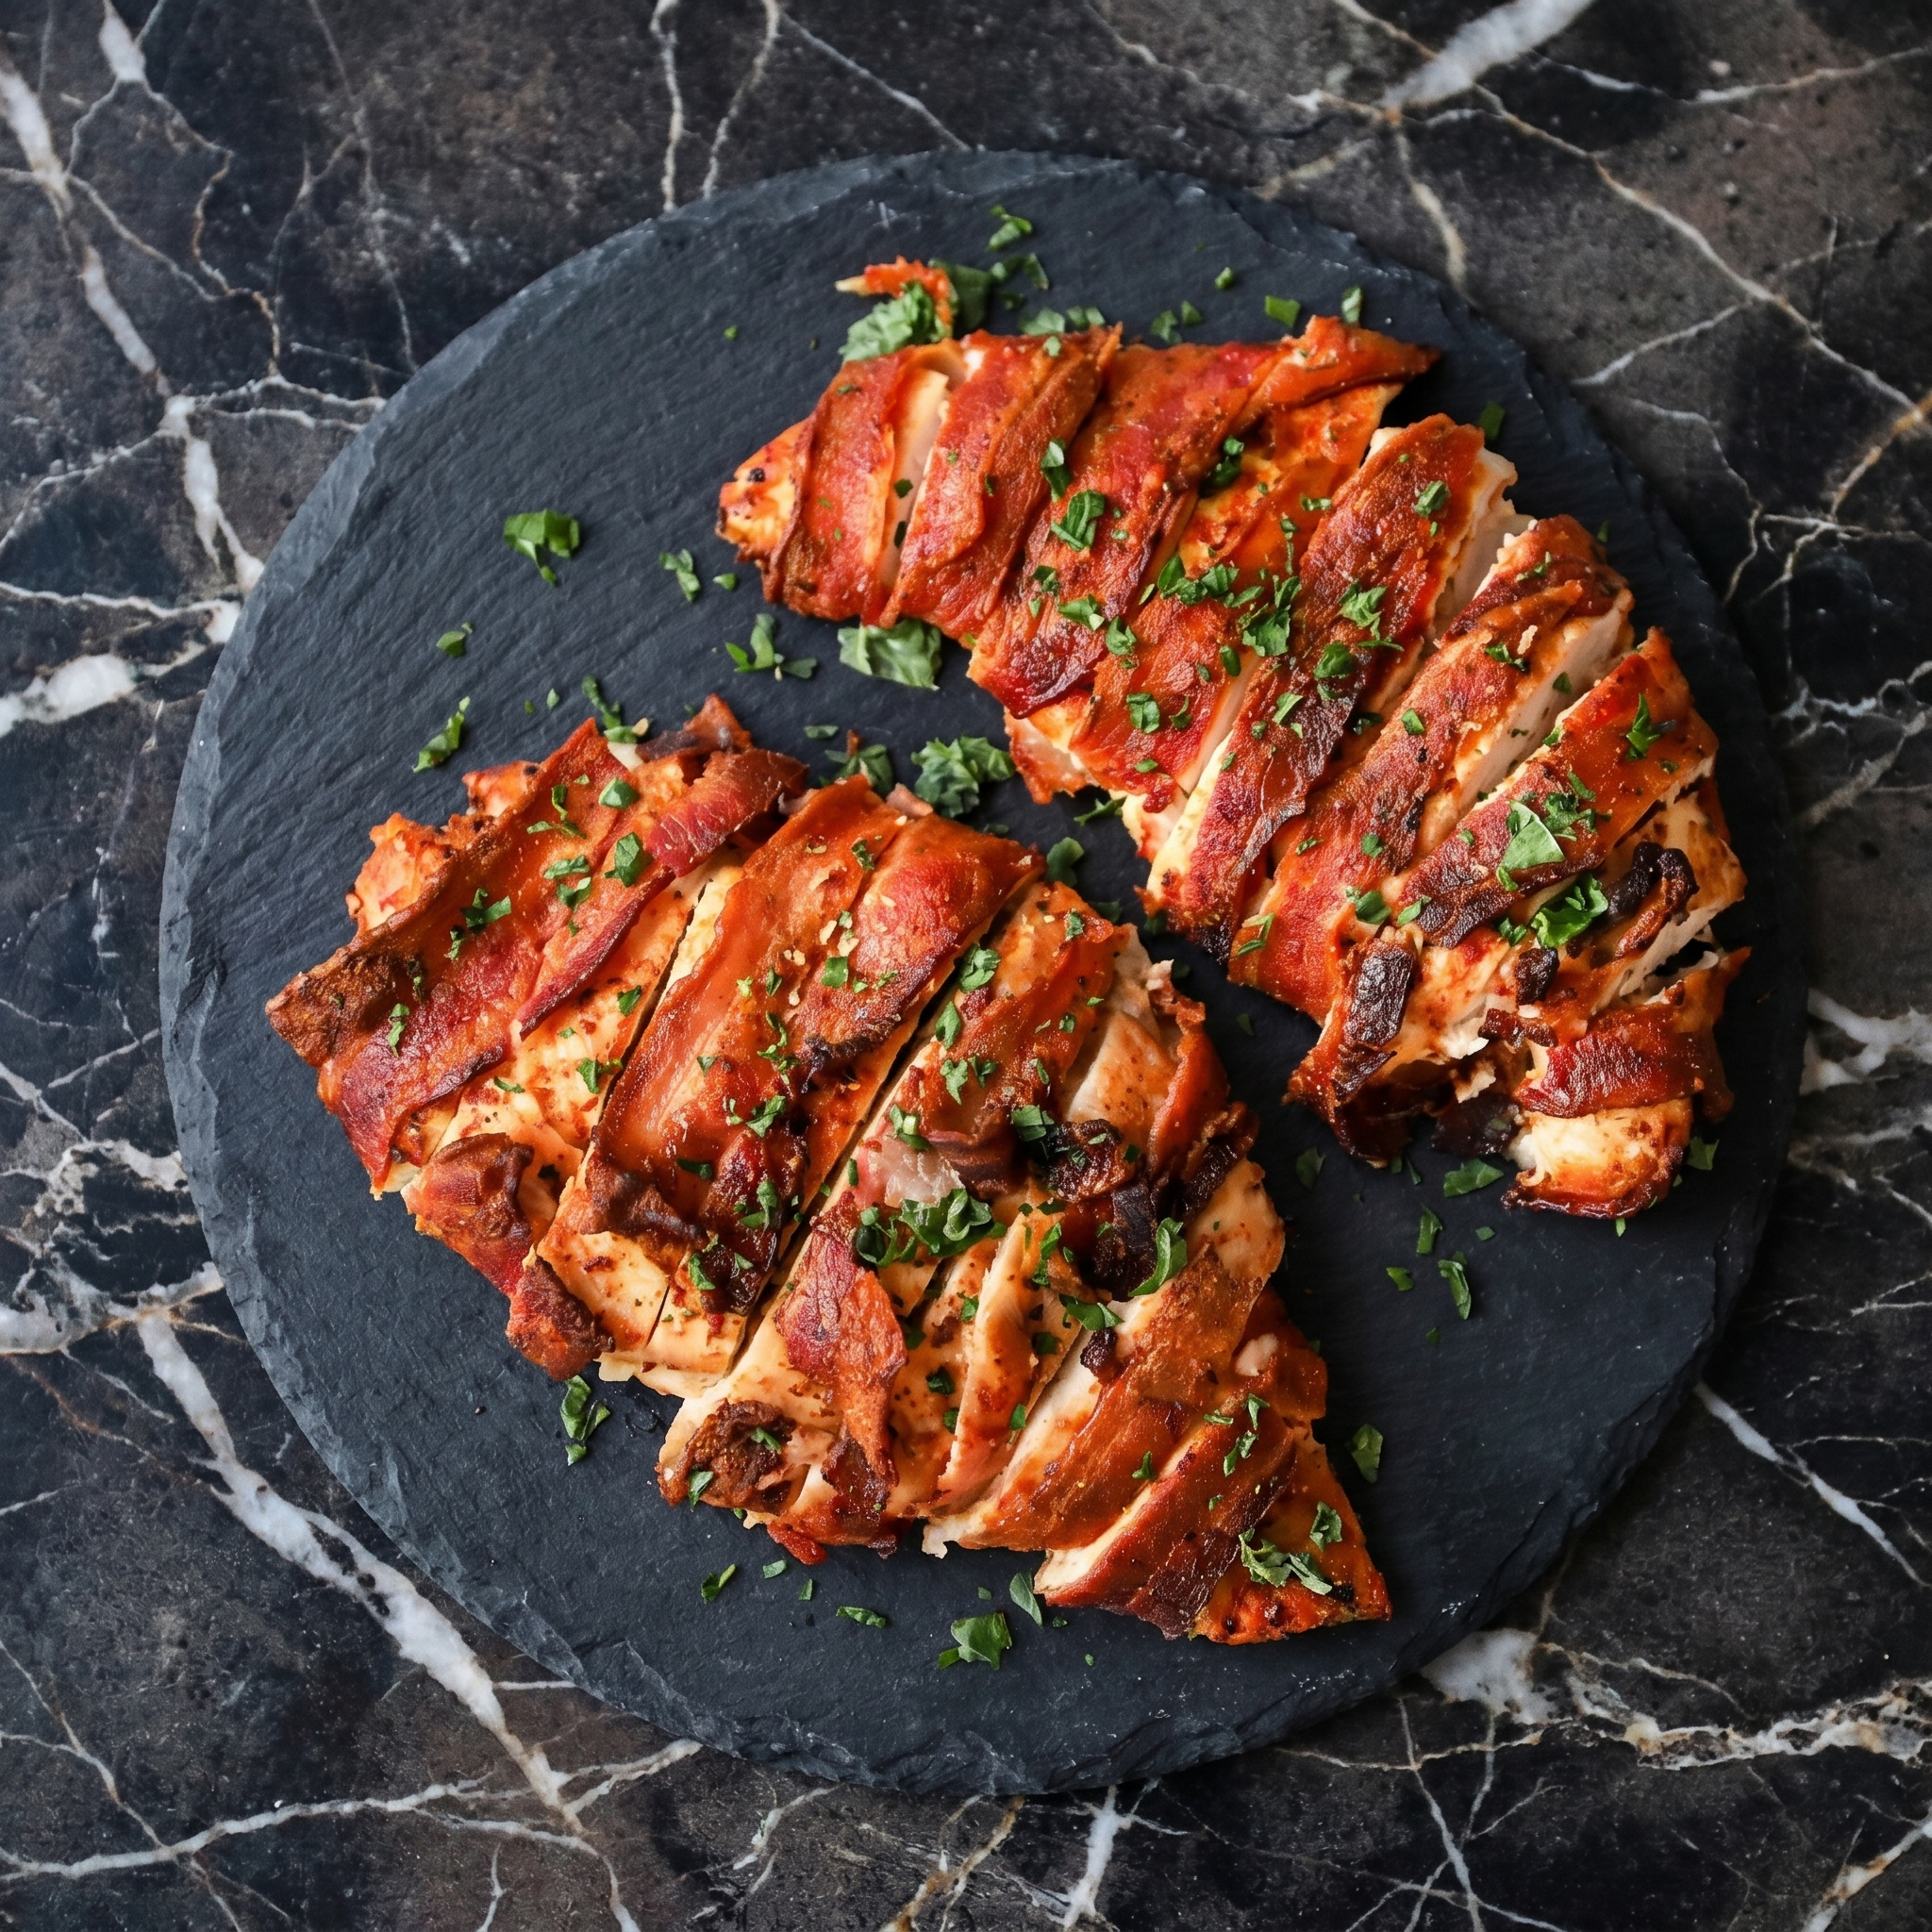
    Chicken breast has a reputation for being dry, boring, and sad. This recipe exists to destroy that reputation.

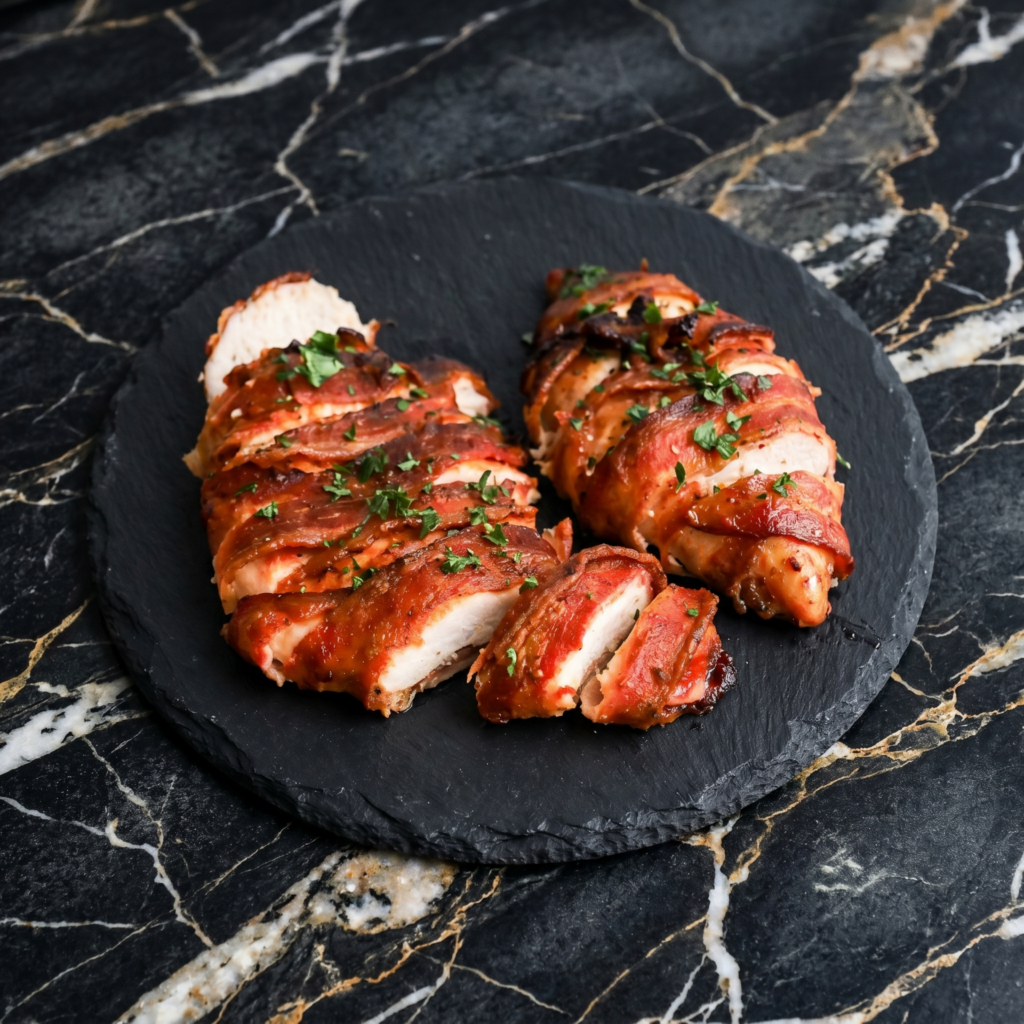
    Wrap a chicken breast in bacon, and something magical happens. The bacon bastes the chicken as it cooks. The chicken stays juicy. The bacon gets crispy. Everyone wins. No brine. No complicated steps. Just dinner that tastes like you tried way harder than you did.

    Ingredients

    Serves 4.

    • 4 boneless, skinless chicken breasts (about 6 oz / 170g each)
    • 8 slices bacon (thin or regular, not thick-cut)
    • 1 teaspoon salt
    • ½ teaspoon black pepper
    • 1 teaspoon garlic powder
    • ½ teaspoon paprika (optional)
    • Optional: brown sugar for caramelized bacon

    Step-by-Step Instructions

    Step 1: Preheat and Prep

    1. Preheat oven to 400°F (200°C). Line a baking sheet with foil and place a wire rack on top.
    2. Pat chicken breasts dry with paper towels.
    3. Season all over with salt, pepper, garlic powder, and paprika.

    Step 2: Wrap in Bacon

    1. Wrap 2 slices of bacon around each chicken breast, slightly overlapping.
    2. Tuck the ends underneath. No toothpicks needed if tucked well.
    3. Sprinkle a little brown sugar on top if you want caramelized bacon.

    Step 3: Bake

    1. Place wrapped chicken on the wire rack (this lets bacon crisp on all sides).
    2. Bake for 25-30 minutes, until chicken hits 165°F (74°C) and bacon is crispy.
    3. For extra crispiness, broil for 1-2 minutes at the end.

    Step 4: Rest and Serve

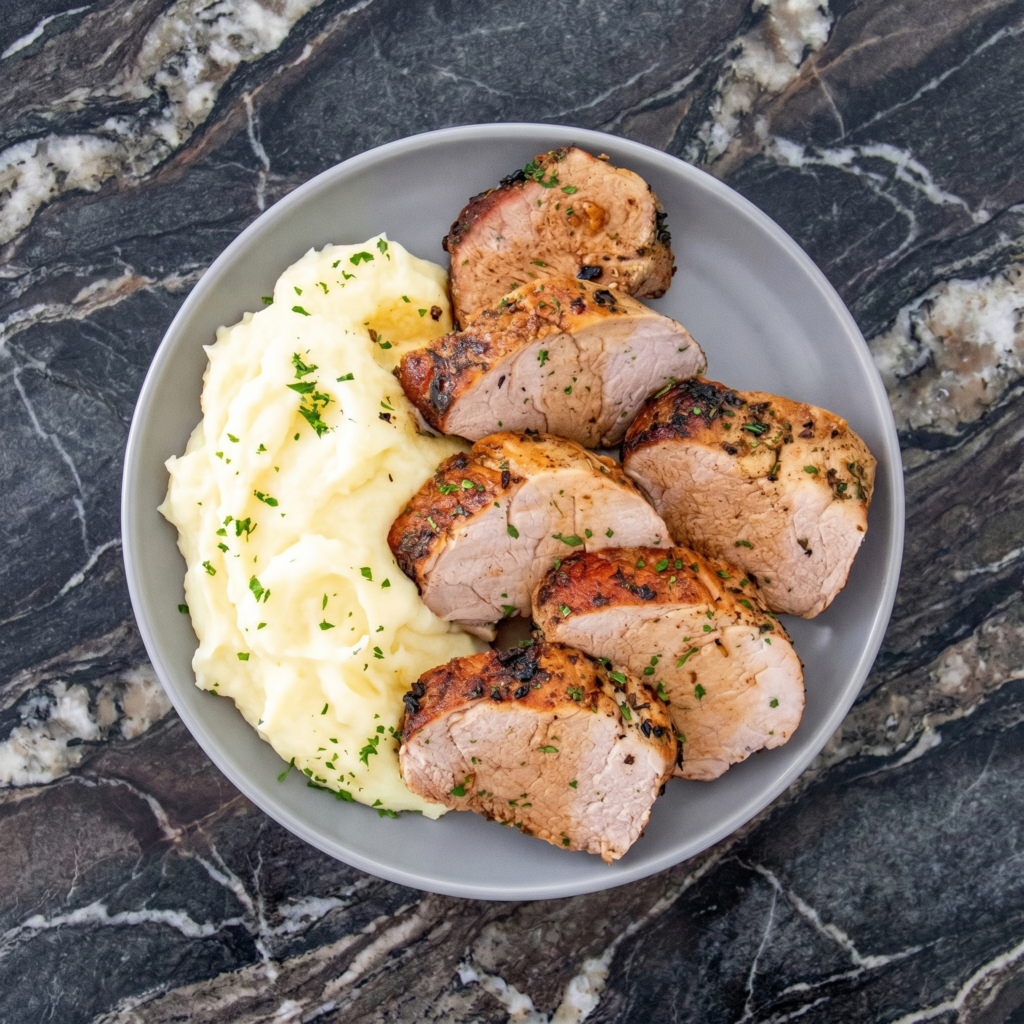
    1. Let rest for 5 minutes. Serve with roasted veggies, potatoes, or a salad.

    Summary

    Prep Time: 5 minutes | Cook Time: 25-30 minutes | Total Time: 30-35 minutes

    Yield: 4 servings

    Difficulty: Easy

    Storage Notes

    • Fridge: Leftovers keep for 4 days in an airtight container.
    • Reheat: Oven or air fryer at 375°F for 8-10 minutes. Microwaving will make bacon soft.
    • Meal prep: Wrap seasoned chicken in bacon up to 24 hours ahead. Keep covered in the fridge.
    • Freezer: Freeze uncooked wrapped chicken for up to 2 months. Thaw before baking.
  • Crispy Parmesan Potatoes (The Side Dish That Steals the Show)

    Crispy Parmesan Potatoes (The Side Dish That Steals the Show)

    Let’s be real: the main course is fine. But these potatoes? These potatoes are the reason people come back for seconds.

    Crispy on the outside. Pillowy on the inside. Coated in salty Parmesan and garlic. Roasted until the bottoms form a crunchy, cheesy golden crust. They’re the side dish that never makes it home in leftovers. Make a double batch. Trust me.

    Ingredients

    Serves 4.

    • 2 lbs (900g) baby potatoes or Yukon Golds, cut into 1-inch pieces
    • ¼ cup olive oil
    • ½ cup grated Parmesan cheese
    • 3 cloves garlic, minced
    • 1 teaspoon salt
    • ½ teaspoon black pepper
    • 1 teaspoon dried oregano or rosemary (optional)
    • Fresh parsley for garnish

    Step-by-Step Instructions

    Step 1: Preheat and Prep

    1. Preheat oven to 425°F (220°C).
    2. Line a baking sheet with parchment paper (not foil—potatoes will stick).

    Step 2: Coat the Potatoes

    1. In a large bowl, toss potatoes with olive oil, garlic, salt, pepper, and oregano (if using).
    2. Add Parmesan and toss again until coated.

    Step 3: Roast Until Crispy

    1. Spread potatoes in a single layer on the baking sheet.
    2. Roast for 25-30 minutes, flipping halfway, until golden brown and crispy on the edges.
    3. For extra crunch, broil for 1-2 minutes at the end.

    Step 4: Serve

    1. Garnish with fresh parsley.
    2. Serve immediately while hot and crunchy.

    Summary

    Prep Time: 5 minutes | Cook Time: 25-30 minutes | Total Time: 30-35 minutes

    Yield: 4 servings

    Difficulty: Easy

    Storage Notes

    • Fridge: Leftovers keep for 4 days. They will lose crispiness.
    • Reheat: Air fryer at 375°F for 5 minutes or oven at 400°F for 8 minutes. Don’t microwave.
    • Pro tip: These are best fresh from the oven. Make only what you’ll eat.
  • Herb Crusted Pork Loin (Fancy Dinner, Zero Stress)

    Herb Crusted Pork Loin (Fancy Dinner, Zero Stress)

    Want to impress someone? Make this. Want to eat like a king on a Tuesday? Also make this.

    This herb crusted pork loin is the answer to “what do I cook that feels special but isn’t stressful?” A garlic-herb crust on the outside. Tender, juicy pork on the inside. One pan. Zero drama. Serve it with roasted potatoes or a pile of greens and feel like a genius.

    Ingredients

    Serves 4-6.

    • 2 lb (900g) pork tenderloin (or pork loin roast)
    • 2 tablespoons olive oil
    • 1 teaspoon salt
    • ½ teaspoon black pepper

    For the Herb Crust:

    • ¼ cup panko breadcrumbs
    • ¼ cup fresh parsley, finely chopped
    • 2 tablespoons fresh rosemary, finely chopped
    • 2 tablespoons fresh thyme leaves
    • 4 cloves garlic, minced
    • 2 tablespoons Dijon mustard (to glue the crust on)

    Step-by-Step Instructions

    Step 1: Preheat and Prep

    1. Preheat oven to 400°F (200°C). Line a baking sheet with parchment.
    2. Pat pork dry. Season all over with salt and pepper.

    Step 2: Make the Crust

    1. In a bowl, mix panko, parsley, rosemary, thyme, garlic, and 1 tablespoon olive oil.
    2. Brush pork all over with Dijon mustard (this helps the crust stick).
    3. Press the herb mixture onto the pork, coating all sides.

    Step 3: Sear (Optional but Recommended)

    1. Heat 1 tablespoon olive oil in an oven-safe skillet over medium-high heat.
    2. Sear pork for 2 minutes per side until crust is golden. Skip this step if using a regular baking sheet.

    Step 4: Roast

    1. Transfer to oven. Roast for 15-20 minutes until internal temp hits 145°F (63°C).
    2. Let rest for 5-10 minutes before slicing. Do not skip resting.

    Step 5: Slice and Serve

    1. Slice into medallions. Serve with pan juices.

    Summary

    Prep Time: 10 minutes | Cook Time: 20-25 minutes | Total Time: 35 minutes

    Yield: 4-6 servings

    Difficulty: Easy

    Storage Notes

    • Fridge: Sliced pork keeps for 4 days in an airtight container.
    • Freezer: Freezes well for up to 3 months. Slice first.
    • Reheat: Skillet with a splash of broth or oven at 325°F. Not the microwave.
    • Leftover magic: Great in sandwiches, salads, or wrapped in tortillas.
  • Lemon Pepper Wings (Tangy, Buttery, and Crackly-Crisp)

    Lemon Pepper Wings (Tangy, Buttery, and Crackly-Crisp)

    Some wings shout. These wings whisper lemon zest and black pepper in your ear.

    Lemon pepper wings are a cult classic for a reason. Bright, buttery, peppery, and impossible to stop eating. This baked version skips the deep fryer but keeps the crackly-crisp skin. Tossed in a warm lemon butter glaze and finished with extra lemon zest. Atlanta would approve.

    Ingredients

    Serves 4 (about 20-24 wings).

    • 2 lbs (900g) chicken wings (drumettes and flats)
    • 1 tablespoon baking powder (NOT baking soda)
    • 1 teaspoon salt
    • 1 teaspoon lemon pepper seasoning (plus more for finishing)

    For the Lemon Butter Glaze:

    • 4 tablespoons butter, melted
    • Juice of 1 lemon (about 2 tablespoons)
    • 1 teaspoon lemon zest
    • 1 teaspoon lemon pepper seasoning
    • 1 clove garlic, minced (optional)

    Garnish:

    • Fresh parsley or extra lemon zest

    Step-by-Step Instructions

    Step 1: Prep the Wings

    1. Preheat oven to 425°F (220°C). Line a baking sheet with foil. Place a wire rack on top.
    2. Pat wings bone-dry with paper towels. This is non-negotiable for crispiness.
    3. Toss wings with baking powder, salt, and 1 teaspoon lemon pepper seasoning.

    Step 2: Bake Until Crackly

    1. Arrange wings on the wire rack in a single layer.
    2. Bake for 40-45 minutes, flipping halfway, until deep golden brown and crispy.

    Step 3: Make the Lemon Butter

    1. While wings bake, melt butter in a small bowl.
    2. Stir in lemon juice, lemon zest, lemon pepper, and garlic (if using).

    Step 4: Toss and Finish

    1. Place hot wings in a large bowl. Pour lemon butter over them.
    2. Toss until fully coated.
    3. Sprinkle with extra lemon pepper and fresh parsley or zest.
    4. Serve immediately with ranch, blue cheese, or alone (they’re that good).

    Summary

    Prep Time: 10 minutes | Cook Time: 45 minutes | Total Time: 55 minutes

    Yield: 20-24 wings

    Difficulty: Easy

    Storage Notes

    • Fridge: Leftovers keep for 3 days in an airtight container.
    • Reheat: Air fryer at 375°F for 5 minutes or oven at 400°F for 8 minutes.
    • Don’t microwave: You’ll lose the crispiness and gain sadness.
    • Make ahead: Bake wings plain. Reheat, then toss with fresh lemon butter.
  • Crispy Coconut Shrimp (Beach Weather Not Required)

    Crispy Coconut Shrimp (Beach Weather Not Required)

    Take one bite. Close your eyes. You’re on a beach. There’s a drink with an umbrella in your other hand.

    These crispy coconut shrimp are sweet, crunchy, and dangerously easy. Coconut flakes + panko = that perfect shattery crust. Bake ’em or fry ’em. Dip ’em in orange marmalade or sweet chili sauce. Make them for parties, game day, or a Tuesday that needs a little tropical energy.

    Ingredients

    Serves 4 (about 16-20 shrimp).

    • 1 lb (450g) large shrimp, peeled and deveined (tails on)
    • ½ cup all-purpose flour
    • 2 large eggs, beaten
    • 1 cup sweetened shredded coconut
    • ½ cup panko breadcrumbs
    • ½ teaspoon salt
    • ¼ teaspoon black pepper
    • Cooking spray or oil for frying

    For Dipping (pick one or two):

    • Orange marmalade
    • Sweet chili sauce
    • Spicy mayo (mayo + sriracha)
    • Coconut pineapple dip

    Step-by-Step Instructions

    Step 1: Prep the Stations

    1. Set up three bowls: flour (seasoned with salt/pepper), beaten eggs, and coconut + panko mixed together.

    Step 2: Coat the Shrimp

    1. Pat shrimp dry. Dip each shrimp in flour, then egg, then coconut mixture.
    2. Press firmly so coconut sticks. Place on a baking sheet.

    Step 3: Cook ‘Em (Your Choice)

    1. Bake: Preheat oven to 400°F (200°C). Spray shrimp with oil. Bake for 10-12 minutes until golden, flipping halfway.
    2. Fry: Heat 1 inch of oil to 350°F (175°C). Fry for 2-3 minutes until golden brown.
    3. Air fry: 375°F (190°C) for 6-8 minutes.

    Step 4: Serve

    1. Arrange on a plate with dipping sauce on the side.
    2. Squeeze of lime optional but recommended.

    Summary

    Prep Time: 10 minutes | Cook Time: 10-12 minutes | Total Time: 20-22 minutes

    Yield: 16-20 shrimp

    Difficulty: Easy

    Storage Notes

    • Fridge: Leftovers keep for 2 days. They will lose crispiness.
    • Reheat: Air fryer or oven at 375°F for 5 minutes. No microwave.
    • Make ahead: Coat raw shrimp and refrigerate for up to 4 hours before cooking.
    • Pro tip: These are best fresh and hot. Don’t over-make unless you love sad shrimp.
  • Chicken Bacon Ranch Wraps (Lunch That Doesn’t Suck)

    Chicken Bacon Ranch Wraps (Lunch That Doesn’t Suck)

    Let’s be honest: most homemade lunches are depressing. Leftovers from three days ago. A sad, dry sandwich. Not today.

    This Chicken Bacon Ranch wrap is the lunch you’ll actually look forward to. Juicy chicken, salty crispy bacon, cool ranch dressing, fresh lettuce and tomato, and melty cheese. Roll it up. Toast it if you’re fancy. Eat it with one hand while you pretend to work.

    Ingredients

    Makes 2 large wraps.

    • 2 large flour tortillas (10-12 inch)
    • 2 cups cooked chicken (shredded or chopped)
    • 4 slices bacon, cooked crispy and crumbled
    • ½ cup shredded cheddar or Monterey Jack
    • ¼ cup ranch dressing (plus more for dipping)
    • 1 cup shredded lettuce
    • 1 tomato, diced
    • Optional: red onion, avocado, hot sauce

    Step-by-Step Instructions

    Step 1: Warm the Tortilla

    1. Microwave tortillas for 10 seconds or warm in a dry skillet to make them pliable.

    Step 2: Assemble

    1. Spread ranch dressing down the center of each tortilla.
    2. Top with chicken, bacon, cheese, lettuce, and tomato.
    3. Add any optional toppings.

    Step 3: Roll It Tight

    1. Fold in the sides, then roll from the bottom up, tucking tightly.
    2. Roll should be snug but not bursting.

    Step 4: Toast (Optional But Great)

    1. Place wrap seam-side down in a dry skillet over medium heat.
    2. Toast for 1-2 minutes per side until golden and sealed.

    Step 5: Serve

    1. Slice in half on a diagonal.
    2. Serve with extra ranch for dipping.

    Summary

    Prep Time: 10 minutes | Cook Time: 0-2 minutes (toasting optional) | Total Time: 10 minutes

    Yield: 2 wraps

    Difficulty: Easy

    Storage Notes

    • Fridge: Wrapped tightly in foil, keeps for 1 day. Lettuce will soften.
    • Meal prep tip: Keep components separate. Assemble fresh for best crunch.
    • Reheat: Skillet or panini press works great. Cold is also fine.
    • Make ahead: Cook chicken and bacon up to 3 days in advance.
  • Shrimp Tacos (10 Minutes, No Regrets)

    Shrimp Tacos (10 Minutes, No Regrets)

    Tuesday is for tacos. But who says you need to simmer meat for hours?

    These shrimp tacos are your new weeknight weapon. Shrimp cooks in 3 minutes flat. Toss it with garlic, lime, and a little spice. Pile onto tortillas with a quick slaw and a drizzle of creamy chipotle sauce. Dinner in 10 minutes. Zero drama.

    Ingredients

    Makes 8-10 tacos (serves 3-4).

    • 1 lb (450g) raw shrimp, peeled and deveined (tail off)
    • 2 tablespoons olive oil
    • 3 cloves garlic, minced
    • 1 teaspoon chili powder
    • ½ teaspoon cumin
    • Juice of 1 lime
    • Salt and pepper to taste
    • 8-10 small corn or flour tortillas

    For the Quick Slaw:

    • 2 cups shredded cabbage (or coleslaw mix)
    • ¼ cup cilantro, chopped
    • 2 tablespoons lime juice

    For the Chipotle Sauce (optional):

    • ¼ cup sour cream (or Greek yogurt)
    • 2 tablespoons mayo
    • 1 tablespoon chipotle in adobo (or hot sauce)

    Step-by-Step Instructions

    Step 1: Make the Sauce and Slaw

    1. Mix sour cream, mayo, and chipotle in a small bowl. Set aside.
    2. Toss cabbage, cilantro, and lime juice in another bowl. Set aside.

    Step 2: Cook the Shrimp

    1. Heat olive oil in a large skillet over medium-high heat.
    2. Add shrimp, garlic, chili powder, cumin, salt, and pepper.
    3. Cook for 2-3 minutes, flipping once, until pink and curled.
    4. Remove from heat. Squeeze lime juice over shrimp.

    Step 3: Warm the Tortillas

    1. Heat tortillas in a dry skillet or directly over a gas flame for 10 seconds per side.

    Step 4: Assemble and Serve

    1. Place a few shrimp on each tortilla.
    2. Top with slaw and a drizzle of chipotle sauce.
    3. Optional: extra cilantro, lime wedge, or avocado.
    4. Eat immediately. Do not share.

    Summary

    Prep Time: 5 minutes | Cook Time: 5 minutes | Total Time: 10 minutes

    Yield: 8-10 tacos

    Difficulty: Dirt Simple

    Storage Notes

    • Fridge: Cooked shrimp keeps for 2 days. Store separately from tortillas and slaw.
    • Reheat: Skillet for 1-2 minutes. Do not microwave shrimp (turns rubbery).
    • Pro tip: Assemble fresh. Leftover tacos are sad tacos.
  • Garlic Parmesan Wings (No Sauce, All Attitude)

    Garlic Parmesan Wings (No Sauce, All Attitude)

    Not everyone wants their wings dripping in sauce. Some of us want crunch. Some of us want garlic. Some of us want cheese.

    These Garlic Parmesan wings are for that crowd. Baked until shatteringly crisp, then tossed in melted butter, minced garlic, and a blizzard of Parmesan. No fryer. No mess. Just 30 minutes between you and the best dry-style wings of your life.

    Ingredients

    Serves 4 (about 20-24 wings).

    • 2 lbs (900g) chicken wings (drumettes and flats)
    • 1 tablespoon baking powder (NOT baking soda)
    • 1 teaspoon salt
    • ½ teaspoon black pepper
    • ½ teaspoon garlic powder

    For the Garlic Parmesan Coating:

    • 4 tablespoons butter, melted
    • 4 cloves garlic, minced
    • ½ cup finely grated Parmesan cheese
    • 2 tablespoons fresh parsley, chopped (optional)

    Step-by-Step Instructions

    Step 1: Prep the Wings

    1. Preheat oven to 425°F (220°C). Line a baking sheet with foil. Place a wire rack on top.
    2. Pat wings completely dry with paper towels.
    3. Toss wings with baking powder, salt, pepper, and garlic powder.

    Step 2: Bake Until Crispy

    1. Arrange wings on the wire rack in a single layer.
    2. Bake for 40-45 minutes, flipping halfway, until golden brown and crispy.

    Step 3: Make the Garlic Butter

    1. While wings bake, melt butter in a small pan.
    2. Add minced garlic and cook for 1 minute until fragrant. Don’t burn it.

    Step 4: Toss and Serve

    1. Place hot wings in a large bowl.
    2. Pour garlic butter over wings. Toss well.
    3. Sprinkle with Parmesan and parsley. Toss again.
    4. Serve immediately with ranch or blue cheese.

    Summary

    Prep Time: 10 minutes | Cook Time: 45 minutes | Total Time: 55 minutes

    Yield: 20-24 wings

    Difficulty: Easy

    Storage Notes

    • Fridge: Leftovers keep for 3 days. Reheat to restore crunch.
    • Reheat: Air fryer at 375°F for 5 minutes or oven at 400°F for 8 minutes.
    • Don’t microwave: They’ll turn into rubber.
    • Make ahead: Bake wings plain. Re-crisp, then toss with garlic butter and Parmesan.
  • Mushroom Swiss Burgers (Fancy Enough for Guests, Easy Enough for Tuesday)

    Mushroom Swiss Burgers (Fancy Enough for Guests, Easy Enough for Tuesday)

    Burgers don’t need to be complicated to be amazing. But sometimes, you want a little extra.

    Enter the Mushroom Swiss burger. Same juicy patty you love, now topped with a mountain of buttery, garlicky sautéed mushrooms and a slice of nutty, melty Swiss cheese. It’s savory. It’s satisfying. And it’ll make your kitchen smell like a steakhouse. No reservations required.

    Ingredients

    Makes 4 burgers.

    • 1.5 lbs (680g) ground beef (80/20 recommended)
    • 8 oz (225g) cremini mushrooms, sliced
    • 4 slices Swiss cheese
    • 4 burger buns (brioche or potato)
    • 2 tablespoons butter
    • 2 cloves garlic, minced
    • 1 teaspoon Worcestershire sauce
    • Salt and pepper to taste
    • Optional: lettuce, tomato, mayo, or Dijon mustard

    Step-by-Step Instructions

    Step 1: Make the Patties

    1. Form ground beef into 4 patties (slightly wider than the buns).
    2. Season both sides generously with salt and pepper.

    Step 2: Cook the Mushrooms

    1. Melt butter in a skillet over medium-high heat.
    2. Add sliced mushrooms. Cook until browned (5-7 minutes).
    3. Add garlic and Worcestershire sauce. Cook 1 more minute. Remove from pan.

    Step 3: Cook the Burgers

    1. In the same skillet (or on a grill), cook patties for 3-4 minutes per side for medium.
    2. During the last minute, top each patty with Swiss cheese. Cover to melt.

    Step 4: Toast and Assemble

    1. Toast the buns in the same pan until golden.
    2. Place burger on bottom bun. Pile mushrooms on top.
    3. Add optional toppings. Close the bun. Devour.

    Summary

    Prep Time: 10 minutes | Cook Time: 15 minutes | Total Time: 25 minutes

    Yield: 4 burgers

    Difficulty: Easy

    Storage Notes

    • Fridge: Cooked patties and mushrooms keep separately for 3 days.
    • Reheat: Skillet or air fryer. Do not microwave the bun.
    • Pro tip: Assemble fresh. Soggy mushrooms and cold cheese are sad.
  • Korean Spicy Chicken Wings (Sticky, Fiery, Finger-Licking Insanity)

    Korean Spicy Chicken Wings (Sticky, Fiery, Finger-Licking Insanity)

    Regular buffalo wings are fine. These are unforgettable.

    Korean spicy chicken wings are in a league of their own. Crazy crispy. Gloriously sticky. Perfectly balanced between spicy, sweet, and savory. The secret is double-frying (or baking) and a glossy gochujang glaze that’ll have you licking your fingers shamelessly. Game night? Date night? Solo night? Yes to all.

    Ingredients

    Serves 4 (about 20-24 wings).

    • 2 lbs (900g) chicken wings (drumettes and flats)
    • ½ cup cornstarch (for crispiness)
    • 1 teaspoon salt
    • ½ teaspoon black pepper
    • Oil for frying (or baking sheet if baking)

    For the Gochujang Glaze:

    • ¼ cup gochujang (Korean chili paste)
    • 3 tablespoons honey
    • 2 tablespoons soy sauce
    • 2 cloves garlic, minced
    • 1 tablespoon rice vinegar (or apple cider vinegar)
    • 1 teaspoon sesame oil

    Garnish:

    • Sesame seeds and sliced green onions

    Step-by-Step Instructions

    Step 1: Prep the Wings

    1. Pat wings dry. Toss with salt, pepper, and cornstarch until coated.

    Step 2: Cook ‘Em Crispy

    1. Fry method: Heat oil to 350°F (175°C). Fry wings for 8-10 minutes. Drain. Fry again for 2-3 minutes (extra crispy).
    2. Bake method: Bake at 425°F (220°C) for 40-45 minutes, flipping halfway. Add 2 minutes under broiler at the end.

    Step 3: Make the Glaze

    1. In a saucepan, combine gochujang, honey, soy sauce, garlic, rice vinegar, and sesame oil.
    2. Simmer for 3 minutes until thick and bubbly.

    Step 4: Toss and Serve

    1. Toss hot wings in the glaze until fully coated.
    2. Sprinkle with sesame seeds and green onions.
    3. Serve immediately. Have napkins ready.

    Summary

    Prep Time: 10 minutes | Cook Time: 15 minutes (fry) or 45 minutes (bake) | Total Time: 25-55 minutes

    Yield: 20-24 wings

    Difficulty: Medium

    Storage Notes

    • Fridge: Keep for 3 days in an airtight container. Glaze will soften the crispiness.
    • Reheat: Air fryer or oven at 375°F for 6-8 minutes to restore crunch.
    • Make ahead: Fry the wings plain, cool, and refrigerate. Re-crisp in oven, then toss in fresh glaze.