Category: quick_meals

  • Spinach Ricotta Cannelloni

    Spinach Ricotta Cannelloni

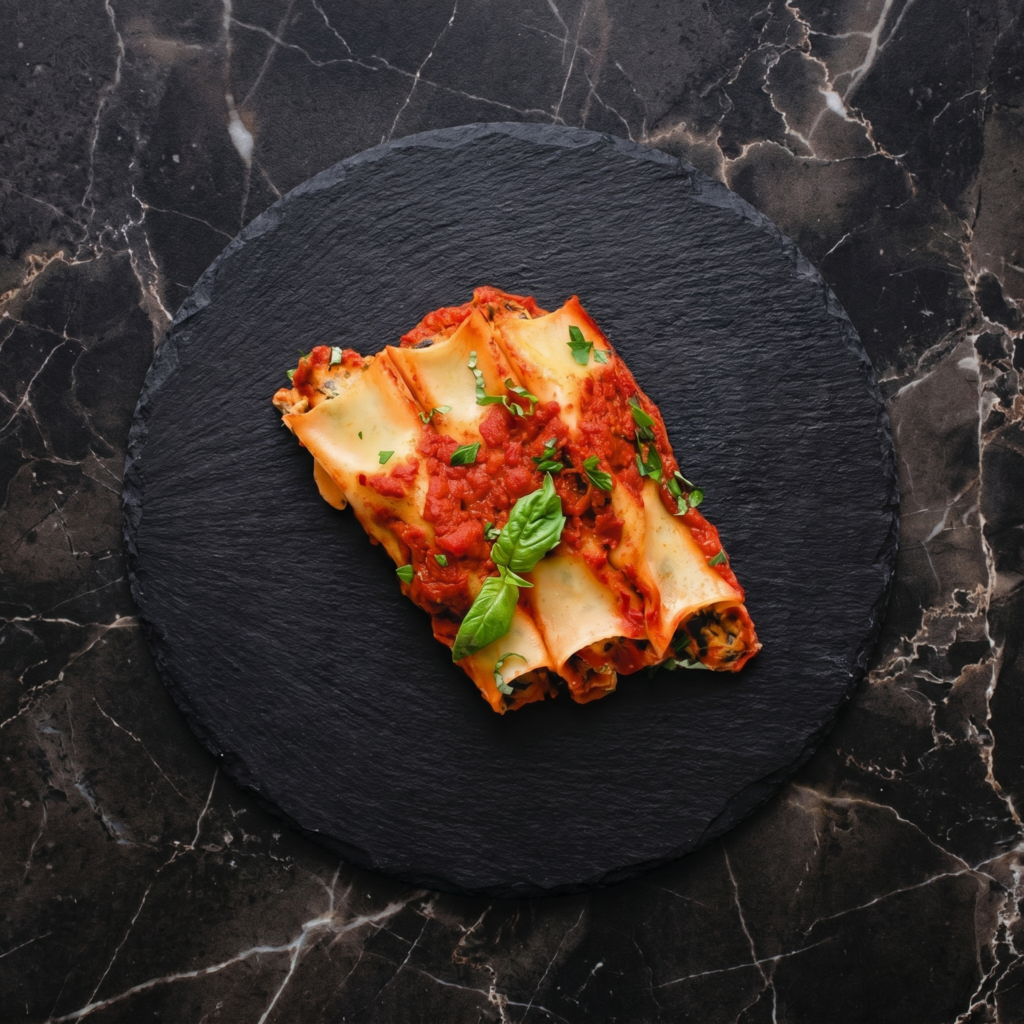
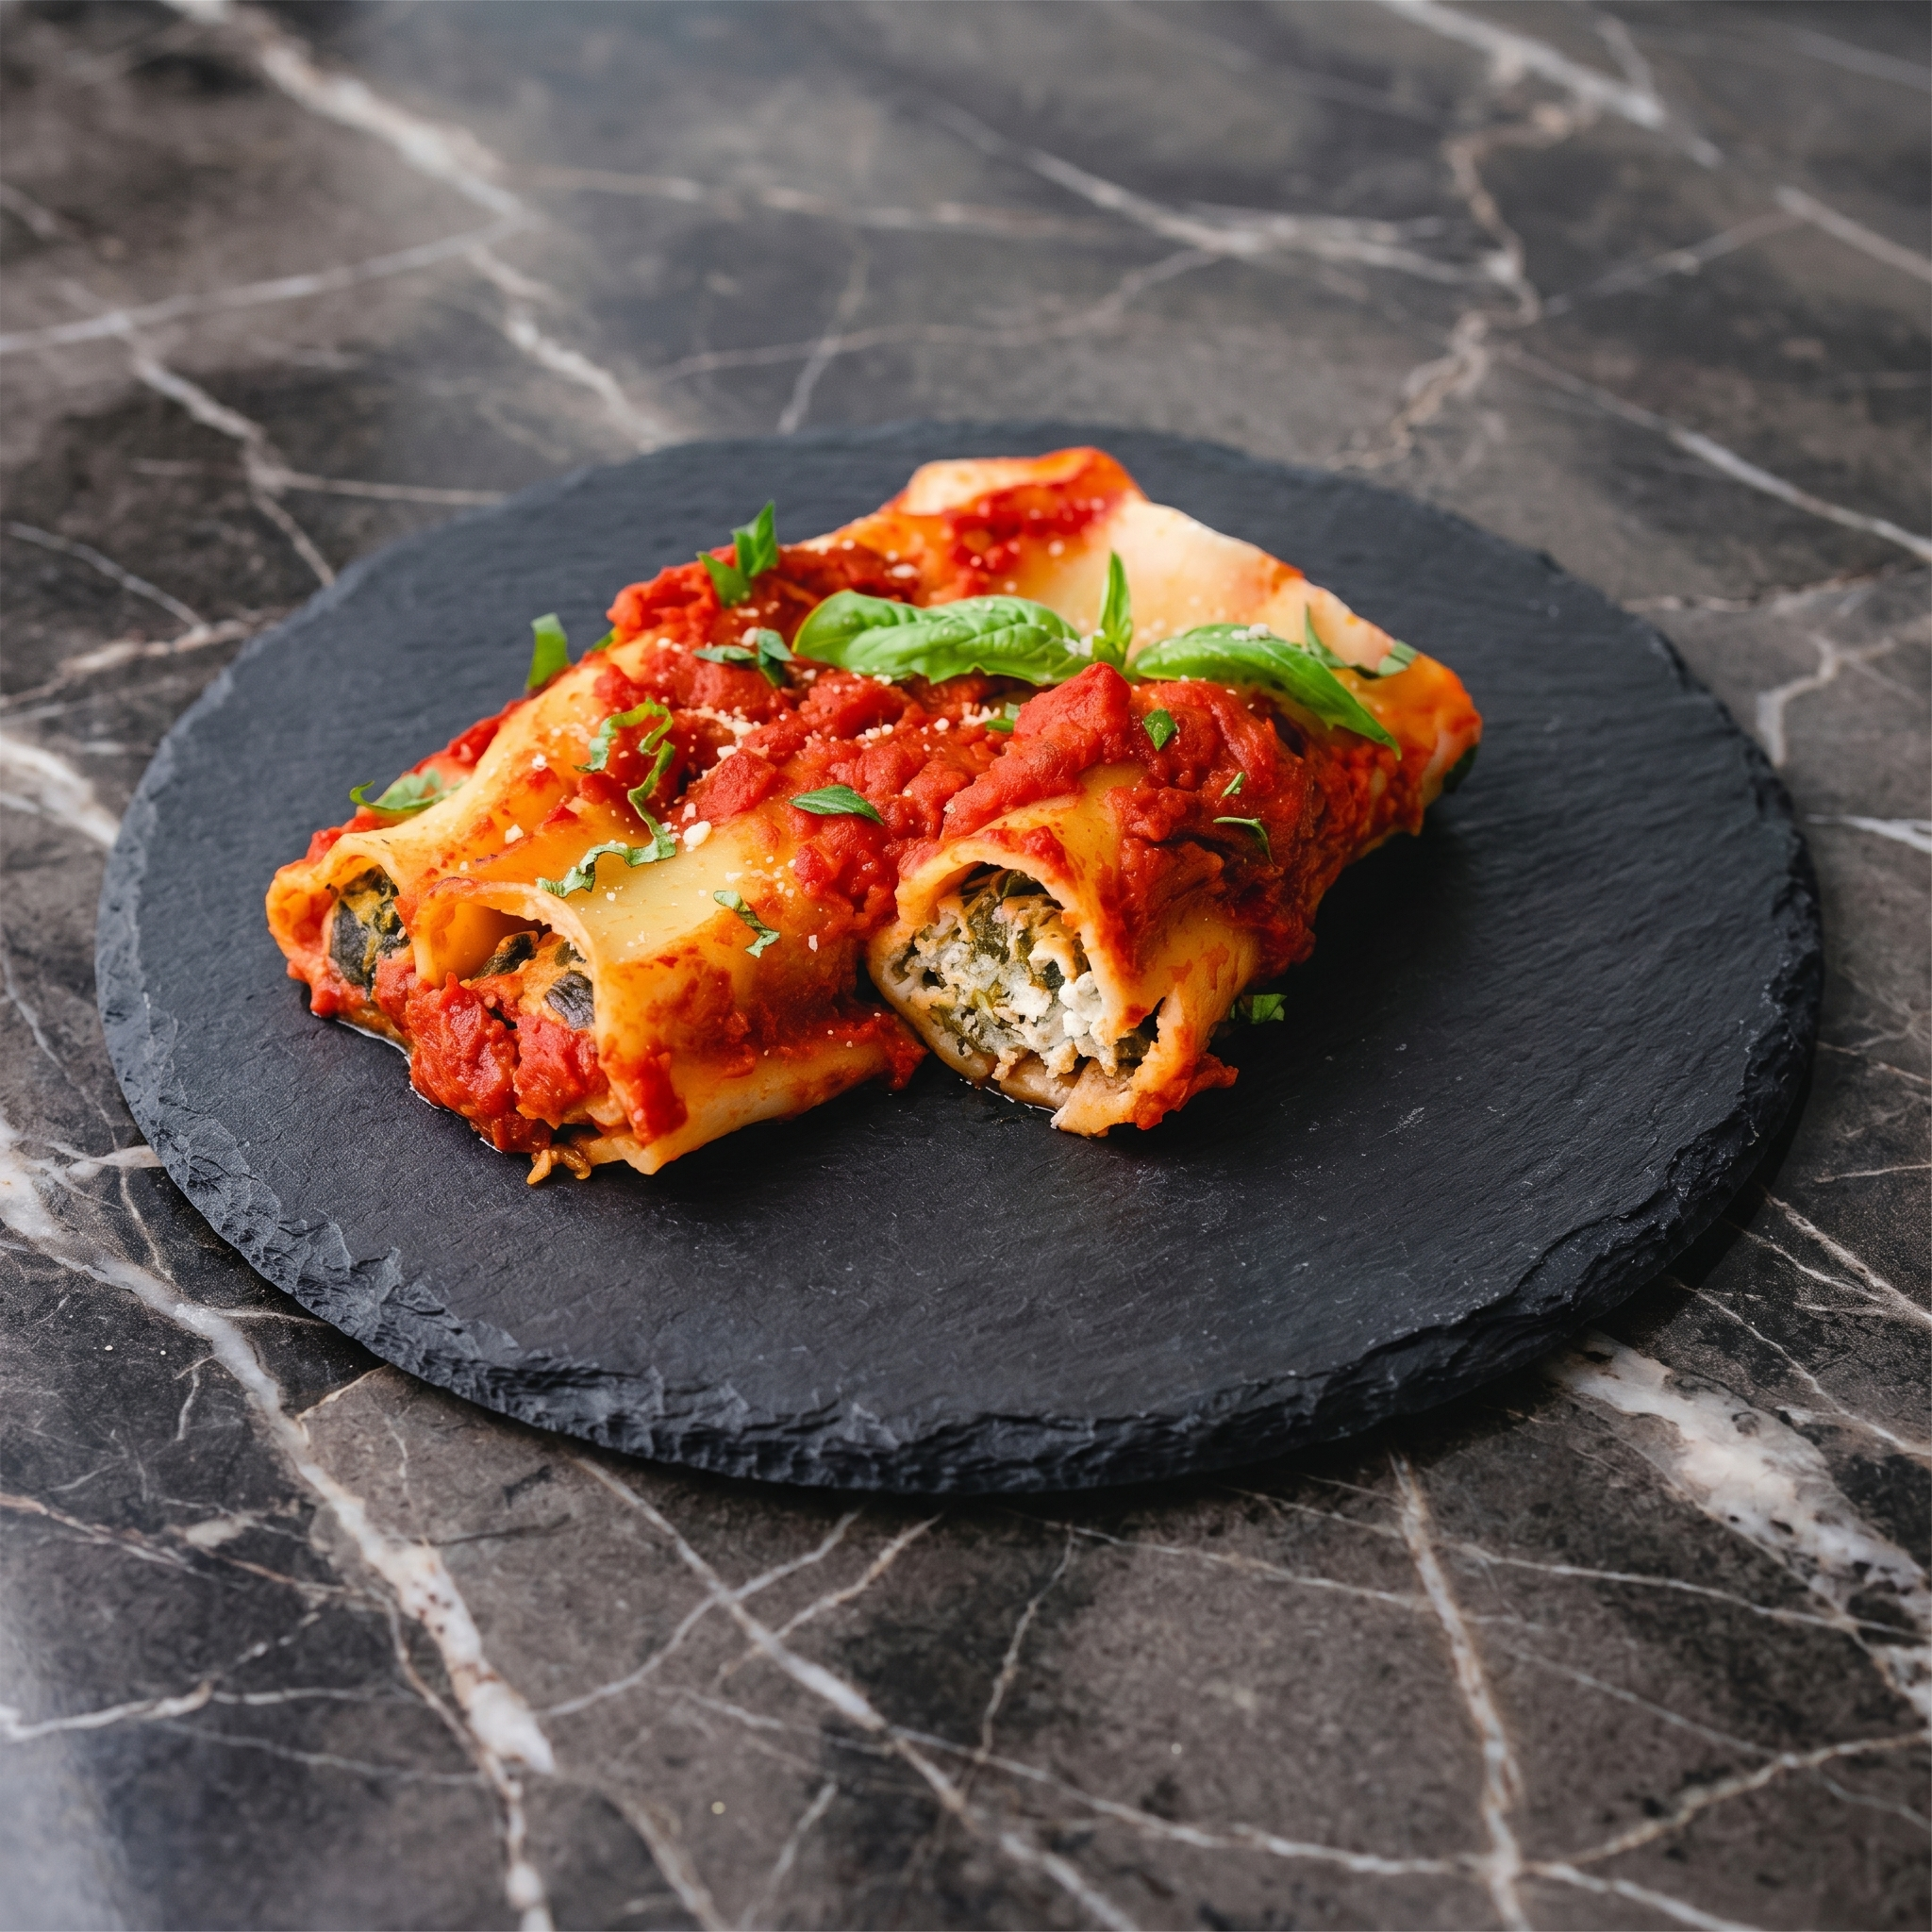
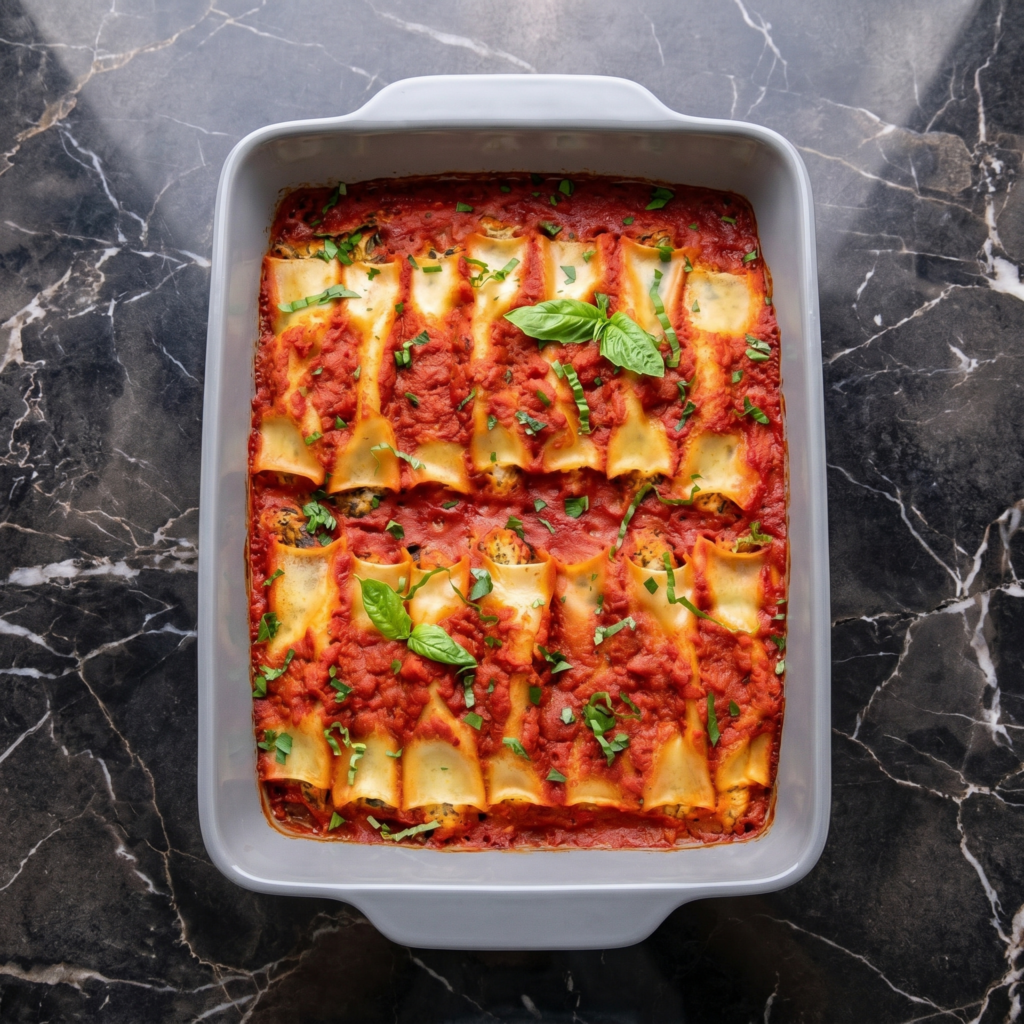
    Cannelloni is what happens when pasta decides to get fancy. Little tubes of tender pasta, stuffed to the brim with a creamy, garlicky spinach and ricotta filling, then baked in a cozy tomato sauce until everything is bubbly and golden. It’s the pasta equivalent of a warm hug.

    This version keeps things classic. The filling is simple—ricotta, spinach, Parmesan, a little nutmeg to wake it all up. The sauce is a straightforward tomato passata with garlic and basil. And then there’s the cheese on top, because cannelloni without a blanket of melted mozzarella is just sad. It takes a little time to stuff the tubes, but trust me: every single bite is worth it.

    Ingredients

    Serves 4-6.

    For the Cannelloni:

    • 12-16 cannelloni tubes (about 1 box, depending on brand)
    • 2 tbsp olive oil
    • 10 oz (300g) frozen spinach, thawed and squeezed absolutely dry
    • 2 cloves garlic, minced
    • 15 oz (425g) whole milk ricotta cheese
    • 1 cup grated Parmesan cheese, divided
    • 1 large egg, lightly beaten
    • ¼ tsp freshly grated nutmeg
    • Salt and black pepper, to taste

    For the Tomato Sauce:

    • 2 tbsp olive oil
    • 1 small onion, finely chopped
    • 2 cloves garlic, minced
    • 1 tsp dried oregano
    • 24 oz (680g) tomato passata or crushed tomatoes
    • Handful of fresh basil leaves, torn
    • Salt and pepper, to taste

    For the Topping:

    • 2 cups shredded mozzarella cheese
    • Fresh basil or parsley, for garnish

    Step-by-Step Instructions

    Step 1: Make the Tomato Sauce

    1. Heat olive oil in a large skillet over medium heat. Add onion and cook until soft and translucent, about 5 minutes.
    2. Add garlic and oregano, cook 1 minute until fragrant.
    3. Pour in tomato passata, season with salt and pepper, and stir in fresh basil. Simmer for 10-15 minutes until slightly thickened. Set aside.

    Step 2: Prep the Spinach

    1. Thaw frozen spinach completely, then transfer to a clean kitchen towel. Gather the towel and wring it out over the sink. Squeeze like your life depends on it—you want that spinach desert-dry.

    Step 3: Make the Filling

    1. In a large bowl, combine the squeezed spinach, ricotta, ½ cup of the Parmesan, beaten egg, nutmeg, and a generous pinch of salt and pepper. Mix until everything is well combined. Taste and adjust seasoning.

    Step 4: Stuff the Tubes

    1. Preheat your oven to 375°F (190°C).
    2. Transfer the ricotta mixture to a piping bag or a sturdy zip-top bag. Snip off the corner.
    3. Pipe the filling into each cannelloni tube. Don’t overstuff—just fill until it’s full, but not bursting. This is a little tedious, but worth it. Put on some music.

    Step 5: Assemble the Dish

    1. Spread about 1 cup of the tomato sauce evenly over the bottom of a 9×13-inch baking dish.
    2. Arrange the filled cannelloni tubes in a single layer over the sauce. They can touch, but don’t overcrowd.
    3. Pour the remaining tomato sauce over the tubes, making sure they’re mostly covered. Use the back of a spoon to spread it gently.
    4. Sprinkle the remaining ½ cup Parmesan over the sauce, followed by the shredded mozzarella.

    Step 6: Bake to Golden Perfection

    1. Cover with foil and bake for 20 minutes.
    2. Remove foil and bake another 10-15 minutes until the cheese is melted, bubbly, and golden in spots.
    3. Let it rest for 10 minutes before serving. This is crucial—the filling sets and you won’t burn your mouth.

    Step 7: Garnish and Serve

    1. Sprinkle with fresh basil or parsley. Serve with a simple green salad and crusty bread for sopping up any extra sauce.
    2. Take a bite. Close your eyes. You’re in a little trattoria in Tuscany now.

    Summary

    Prep Time: 30 minutes | Cook Time: 35 minutes | Total Time: 1 hour 5 minutes

    Yield: 4-6 servings

    Difficulty: Worth the effort

    Storage Notes

    Leftovers:

    Store in an airtight container in the fridge for up to 4 days. The flavors meld beautifully overnight.

    Reheating:

    Cover with foil and reheat in a 350°F oven for 15-20 minutes until warmed through. Microwave individual portions in 30-second bursts, but oven is better for texture.

    Make Ahead:

    Assemble the entire dish (without baking) up to 24 hours in advance. Cover and refrigerate. Add 10-15 minutes to the bake time when cooking from cold.

    Freezer-Friendly:

    Cannelloni freezes beautifully! Assemble completely but don’t bake. Cover tightly with plastic wrap and foil, freeze for up to 3 months. To bake from frozen: remove plastic wrap, cover with foil, and bake at 375°F for 50-60 minutes. Remove foil for the last 15 minutes.

    Pro Tip:

    Make two. Eat one now, freeze one for the busy week when you need comfort in a hurry. Future you will send thank-you notes.

  • Balsamic Glazed Beef Short Ribs (Fall-Off-The-Bone, Zero Regrets)

    Balsamic Glazed Beef Short Ribs (Fall-Off-The-Bone, Zero Regrets)

    Short ribs are a flex that requires almost no effort. You sear. You pour. You walk away. Hours later, your kitchen smells like a steakhouse heaven, and dinner is unforgettable.

    This version gets a glossy balsamic glaze that’s sticky, tangy, and deeply savory. Serve over mashed potatoes or polenta and watch people fight over the last rib.

    Ingredients

    Serves 4.

    • 3–4 lbs beef short ribs (bone-in, about 6–8 ribs)
    • 2 tablespoons olive oil
    • 1 large onion, diced
    • 4 garlic cloves, smashed
    • 1 cup balsamic vinegar
    • 2 cups beef broth
    • 2 tablespoons tomato paste
    • 2 sprigs fresh rosemary
    • Salt and black pepper

    Step-by-Step Instructions

    Step 1: Sear the Ribs

    1. Preheat oven to 325°F (165°C). Pat short ribs dry. Season generously with salt and pepper.
    2. Heat oil in a Dutch oven over medium-high heat. Sear ribs in batches until deeply browned on all sides, about 3–4 minutes per batch. Transfer to a plate.

    Step 2: Build the Braise

    1. Pour off all but 1 tablespoon of fat. Add onion and cook 3 minutes. Add garlic and tomato paste, cook 1 more minute.
    2. Pour in balsamic vinegar. Scrape up brown bits. Simmer until reduced by half, about 2 minutes.
    3. Add beef broth and rosemary. Bring to a simmer.

    Step 3: Braise Low and Slow

    1. Return ribs to the pot (meat-side down). Liquid should come halfway up the ribs—add water if needed.
    2. Cover and transfer to oven. Braise for 2.5 to 3 hours until meat is fall-apart tender.

    Step 4: Glaze and Serve

    1. Remove ribs to a platter. Skim fat from the sauce. Simmer sauce on stovetop until thickened to a syrupy glaze, about 5–10 minutes.
    2. Spoon glaze over ribs. Serve hot.

    Summary

    Prep Time: 15 minutes | Cook Time: 3 hours | Total Time: 3 hours 15 minutes

    Yield: 4 servings

    Difficulty: Easy (patient required, skill not so much)

    Storage Notes

    Even better the next day: Short ribs improve overnight. Refrigerate in the sauce for up to 4 days. Skim solidified fat before reheating.

    Freezer friendly: Freeze in sauce for up to 3 months. Thaw overnight in the fridge and reheat gently on the stovetop.

    Make ahead move: Braise a day early. Reheat slowly in a 300°F oven for 20 minutes before glazing.

  • Lamb Lollipops with Mint Pesto (Fancy Enough for a Crown)

    Lamb Lollipops with Mint Pesto (Fancy Enough for a Crown)

    Lamb lollipops are exactly what they sound like. Lamb chops. Frenched into little handles. Eat with your hands. No shame.

    Juicy, herb-crusted, seared to perfection. Served with a vibrant, garlicky mint pesto that cuts through the richness. Fancy dinner party energy. Zero stress.

    Ingredients

    Serves 4 as an appetizer or 2 as a main.

    For the Lamb:

    • 8 lamb chops (frenched—ask your butcher)
    • 2 tablespoons olive oil
    • 4 cloves garlic, minced
    • 1 tablespoon fresh rosemary, finely chopped
    • 1 tablespoon fresh thyme, finely chopped
    • 1 teaspoon salt
    • ½ teaspoon black pepper

    For the Mint Pesto:

    • 2 cups fresh mint leaves (packed)
    • ½ cup fresh parsley or basil
    • ¼ cup pine nuts or walnuts
    • ¼ cup grated Parmesan cheese
    • 2 cloves garlic
    • ¼ cup olive oil
    • 1 tablespoon lemon juice
    • Salt to taste

    Step-by-Step Instructions

    Step 1: Marinate the Lamb

    1. In a bowl, mix olive oil, garlic, rosemary, thyme, salt, and pepper.
    2. Coat lamb chops. Marinate for 15 minutes (or up to 4 hours in the fridge).

    Step 2: Make the Mint Pesto

    1. In a food processor, combine mint, parsley, nuts, Parmesan, garlic, and lemon juice.
    2. Pulse until finely chopped. With machine running, stream in olive oil.
    3. Season with salt. Set aside.

    Step 3: Sear the Lamb Lollipops

    1. Heat a heavy pan over medium-high heat (no oil needed—meat has oil).
    2. Sear lamb chops for 2–3 minutes per side for medium-rare.
    3. Let rest for 5 minutes.

    Step 4: Serve

    1. Arrange lamb lollipops on a platter.
    2. Spoon mint pesto over the top or serve on the side for dipping.
    3. Pick up by the bone. Bite. Grin. Repeat.

    Summary

    Prep Time: 10 minutes | Marinate: 15 minutes | Cook Time: 6 minutes | Total Time: 30 minutes

    Yield: 8 lamb lollipops

    Difficulty: Easy

    Storage Notes

    Lamb is best fresh. Leftover pesto is a gift that keeps giving.

    • Fridge (lamb): Store cooked chops for up to 3 days. Reheat in pan over medium-low for 2 minutes per side.
    • Fridge (pesto): Store in a jar with a thin layer of olive oil on top for up to 1 week.
    • Freezer (pesto): Freeze in ice cube trays for up to 3 months. Pop one out whenever you need brightness.
    • Pro tip: Ask your butcher to french the lamb chops. It takes 30 seconds and makes you look like a pro.
  • Veal Saltimbocca: The 15-Minute Italian Classic

    Veal Saltimbocca: The 15-Minute Italian Classic

    “Saltimbocca” means “jumps in your mouth.” One bite and you’ll get it. Tender veal cutlets topped with fresh sage and salty prosciutto, pan-seared, then finished with a buttery white wine sauce. It’s Roman. It’s elegant. It’s on your table in 15 minutes. Date night? Weeknight fancy? Yes and yes. Let’s cook.

    Ingredients

    Serves 4.

    • 4 veal cutlets (about 1.5 lbs / 700g), pounded thin
    • 4 slices prosciutto
    • 12 fresh sage leaves
    • ½ cup all-purpose flour
    • 2 tablespoons olive oil
    • 2 tablespoons unsalted butter
    • ½ cup dry white wine
    • ¼ cup chicken broth
    • Salt and black pepper
    • Lemon wedges for serving

    Step-by-Step Instructions

    Step 1: Assemble the Saltimbocca

    1. Season veal with salt and pepper. Lay a sage leaf on each cutlet. Top with a slice of prosciutto (same size as veal). Press to adhere.
    2. Dredge veal in flour, shake off excess (prosciutto side up, don’t coat it).

    Step 2: Sear the Veal

    1. Heat olive oil and 1 tablespoon butter in a large skillet over medium-high heat.
    2. Place veal prosciutto-side down. Cook 2 minutes until golden. Flip. Cook 1-2 more minutes. Remove to a plate.

    Step 3: Make the Sauce

    1. Add wine to the pan, scraping up brown bits. Simmer 1 minute.
    2. Add broth and remaining butter. Simmer 1 minute until slightly thickened.

    Step 4: Finish and Serve

    1. Return veal to pan, turning to coat in sauce (30 seconds).
    2. Serve immediately with lemon wedges and sauce spooned over.
    3. Add roasted potatoes or polenta. Mangia.

    Summary

    Prep Time: 5 minutes | Cook Time: 10 minutes | Total Time: 15 minutes

    Yield: 4 servings

    Difficulty: Easy

    Storage Notes

    Best fresh. Leftovers keep 2 days in fridge. Reheat gently in a skillet with a splash of broth (microwave dries out veal). Prosciutto can be swapped with pancetta. No veal? Use chicken or turkey cutlets (chicken saltimbocca works great). Don’t skip the sage—it’s essential. This sauce also works on pasta. Double the recipe. You’ll want leftovers.

  • Pistachio Crusted Salmon (Fancy Enough for Guests, Fast Enough for Tuesday)

    Pistachio Crusted Salmon (Fancy Enough for Guests, Fast Enough for Tuesday)

    Salmon is already great. Add a pistachio crust? Now we’re talking. The nuts toast into a golden, buttery crunch that contrasts perfectly with the tender, flaky fish underneath.

    A quick honey-mustard glaze holds everything together and adds sweet-tangy depth. This is your new “impress someone” dinner—and it’s faster than ordering delivery.

    Ingredients

    Serves 2.

    • 2 salmon fillets (6 oz each, skin on or off)
    • ½ cup shelled pistachios (unsalted)
    • 2 tablespoons honey
    • 1 tablespoon Dijon mustard
    • 1 tablespoon olive oil
    • Salt and black pepper
    • Lemon wedges, for serving

    Step-by-Step Instructions

    Step 1: Make the Crust

    1. Pulse pistachios in a food processor or chop finely by hand. You want small crumbs, not dust.
    2. Mix pistachios with a pinch of salt.

    Step 2: Glaze and Coat

    1. Pat salmon dry. Season with salt and pepper.
    2. Whisk honey and mustard together in a small bowl.
    3. Brush honey-mustard mixture over the top of each fillet. Press the pistachio crust on top, gently packing it in.

    Step 3: Sear and Finish

    1. Heat olive oil in an oven-safe skillet over medium-high heat.
    2. Place salmon crust-side down. Sear for 2 minutes until golden brown. Carefully flip.
    3. Transfer skillet to a 400°F (200°C) oven for 3–4 minutes for medium, or until cooked to your liking.

    Step 4: Serve

    1. Remove from oven. Squeeze fresh lemon over the top.
    2. Serve immediately—the crust is crispiest right away.

    Summary

    Prep Time: 8 minutes | Cook Time: 8 minutes | Total Time: 16 minutes

    Yield: 2 servings

    Difficulty: Easy

    Storage Notes

    Best fresh: The crust softens within hours. Eat immediately for that crunchy texture.

    Leftovers: Store in an airtight container for up to 2 days. Eat cold over salads or reheat gently in a 300°F oven for 5 minutes (crust won’t be as crisp).

    Prep ahead: Make pistachio crumbs and honey-mustard glaze up to 3 days in advance. Keep separate. Assemble just before cooking.

  • Ribeye Steak (The 10-Minute Pan-Seared Version)

    Ribeye Steak (The 10-Minute Pan-Seared Version)

    Ribeye is the king of steaks. That marbling means flavor, and flavor means you don’t need fancy techniques. This is the fast version: hot pan, cold steak, aggressive seasoning, and a butter bath. Ten minutes. One dirty pan. Steakhouse results.

    Ingredients

    Serves 1-2.

    • 1 ribeye steak (1 inch thick, about 12 oz)
    • 1 tablespoon high-smoke-point oil
    • 2 tablespoons butter
    • 3 cloves garlic, smashed
    • 2 sprigs fresh rosemary or thyme
    • Salt and coarse black pepper

    Step-by-Step Instructions

    Step 1: Dry and Season

    1. Pat steak completely dry with paper towels.
    2. Season generously with salt and pepper on both sides.

    Step 2: Heat the Pan

    1. Heat oil in a cast iron or heavy skillet over medium-high heat until shimmering.
    2. The pan must be screaming hot.

    Step 3: Sear Hard

    1. Place steak in the pan. Press down gently.
    2. Cook undisturbed for 3 minutes until a dark crust forms.
    3. Flip and cook for another 2-3 minutes.

    Step 4: Butter Baste

    1. Reduce heat to medium. Add butter, garlic, and rosemary.
    2. Tilt pan and spoon butter over steak for 1 minute.

    Step 5: Rest and Slice

    1. Transfer steak to a cutting board. Rest for 5 minutes (do not skip).
    2. Slice against the grain. Pour pan juices over the top.

    Summary

    Prep Time: 2 minutes | Cook Time: 8 minutes | Total Time: 10 minutes (plus 5 min rest)

    Yield: 1-2 servings

    Difficulty: Easy

    Storage Notes

    Leftover ribeye keeps for 3 days. Reheat in a hot skillet for 1 minute per side or eat cold sliced over salad. Never microwave. Never freeze cooked steak.

  • BBQ Pulled Pork Sandwich (Oven or Slow Cooker, No Smoker Needed)

    BBQ Pulled Pork Sandwich (Oven or Slow Cooker, No Smoker Needed)

    Real pulled pork doesn’t require a 12-hour smoke session. This version uses a spice rub, a splash of liquid smoke (secret weapon), and a low-and-slow oven or crockpot. The result? Tender, juicy, shreddable pork that tastes like it came from a Southern BBQ joint. Pile it on a bun with coleslaw and watch it disappear.

    Ingredients

    Serves 6-8.

    For the Pork:

    • 3-4 lb pork shoulder (or pork butt)
    • 2 tablespoons brown sugar
    • 1 tablespoon paprika
    • 1 tablespoon garlic powder
    • 1 tablespoon onion powder
    • 1 teaspoon black pepper
    • 1 teaspoon salt
    • ½ teaspoon cayenne (optional)
    • 1 cup BBQ sauce (plus more for serving)
    • ½ cup chicken broth or apple juice
    • 1 teaspoon liquid smoke (optional)

    For the Sandwich & Coleslaw:

    • 6-8 brioche or potato buns
    • 2 cups coleslaw mix
    • ¼ cup mayonnaise
    • 1 tablespoon apple cider vinegar
    • 1 teaspoon sugar

    Step-by-Step Instructions

    Step 1: Rub the Pork

    1. Mix brown sugar, paprika, garlic powder, onion powder, pepper, salt, and cayenne.
    2. Rub all over the pork shoulder.

    Step 2: Cook Low and Slow

    1. Oven method: Place pork in a Dutch oven. Add broth and liquid smoke. Cover and bake at 300°F for 4-5 hours.
    2. Slow cooker method: Add broth and liquid smoke. Cook on LOW for 8-10 hours.

    Step 3: Shred the Pork

    1. Remove pork from liquid. Shred with two forks (it should fall apart easily).
    2. Discard large fat pieces.

    Step 4: Sauce It Up

    1. Return shredded pork to pot. Add BBQ sauce and mix well.
    2. Optional: broil for 3-5 minutes to get crispy edges.

    Step 5: Make Quick Coleslaw

    1. Whisk mayo, vinegar, and sugar. Toss with coleslaw mix.

    Step 6: Assemble Sandwiches

    1. Pile pulled pork onto toasted buns. Top with coleslaw.
    2. Serve with extra BBQ sauce on the side.

    Summary

    Prep Time: 10 minutes | Cook Time: 4-10 hours (depending on method) | Total Time: 4-10 hours

    Yield: 6-8 sandwiches

    Difficulty: Easy

    Storage Notes

    Pulled pork refrigerates for up to 4 days. Freezes beautifully for up to 3 months. Reheat in a covered skillet with a splash of broth or BBQ sauce. Coleslaw is best made fresh—leftover slaw gets watery after a day.

  • Turkey Club Sandwich (Three Layers of Pure Lunch Perfection)

    Turkey Club Sandwich (Three Layers of Pure Lunch Perfection)

    The club sandwich is a masterpiece of engineering. Three slices of toast. Two layers of fillings. One frilly toothpick holding it all together. This version keeps it classic: turkey, bacon, lettuce, tomato, and mayo. No fancy stuff. Just diner-perfect crunch in 10 minutes.

    Ingredients

    Serves 1 very hungry person or 2 normal people.

    • 3 slices white, sourdough, or whole wheat bread
    • 4-6 slices roasted turkey breast
    • 4 slices crispy bacon
    • 2 leaves romaine or iceberg lettuce
    • 2 thick slices tomato
    • 2 tablespoons mayonnaise
    • Salt and black pepper
    • Frilly toothpicks (for authenticity)

    Step-by-Step Instructions

    Step 1: Toast the Bread

    1. Toast all three bread slices until golden and crisp.
    2. Lightly spread mayo on one side of each slice.

    Step 2: Layer the Bottom Tier

    1. Place one slice of toast (mayo-side up) on a plate.
    2. Top with half the turkey, half the bacon, lettuce, and tomato.
    3. Season tomato with a pinch of salt and pepper.

    Step 3: Add the Middle Toast

    1. Place the second slice of toast (mayo-side up) right on top of the fillings.

    Step 4: Layer the Top Tier

    1. Add remaining turkey, bacon, lettuce, and tomato on the middle toast.
    2. Season again.

    Step 5: Cap It Off

    1. Place the third slice of toast on top (mayo-side down).

    Step 6: Secure and Slice

    1. Stick 2-4 frilly toothpicks through the sandwich to hold everything together.
    2. Slice diagonally into 4 triangles (or 2 rectangles).
    3. Serve with pickles and potato chips.

    Summary

    Prep Time: 5 minutes | Cook Time: 5 minutes | Total Time: 10 minutes

    Yield: 1 large or 2 smaller servings

    Difficulty: Easy

    Storage Notes

    The club sandwich does not store well—bread gets soggy, lettuce wilts. Assemble fresh. You can cook bacon ahead and refrigerate for up to 3 days. Leftover turkey keeps for 3-4 days. But seriously, just eat the whole sandwich.

  • Crispy-Skinned Duck Breast with Cherry Sauce (Fancy, But Easy)

    Crispy-Skinned Duck Breast with Cherry Sauce (Fancy, But Easy)

    Duck sounds fancy. But crispy-skinned duck breast with cherry sauce? Easier than chicken. Score the skin. Sear it low and slow to render fat. Crisp it up. Make a quick cherry pan sauce. 20 minutes. One pan. Serve with mashed potatoes or roasted veggies. Date night? Nailed it. Weeknight treat? Absolutely. Let’s cook duck.

    Ingredients

    Serves 2.

    • 2 duck breasts (about 6-8 oz each)
    • Salt and black pepper
    • 1 cup fresh or frozen cherries (pitted) or ½ cup cherry jam
    • ¼ cup chicken or duck stock
    • 2 tablespoons balsamic vinegar
    • 1 tablespoon honey or maple syrup
    • 1 shallot, finely chopped
    • 1 sprig fresh thyme
    • 1 tablespoon butter (optional)

    Step-by-Step Instructions

    Step 1: Score and Season the Duck

    1. Pat duck breasts dry. Score skin in a crosshatch pattern (don’t cut into meat).
    2. Season generously with salt and pepper on both sides.

    Step 2: Sear the Duck (Skin Side Down)

    1. Place duck skin-side down in a cold skillet (no oil needed). Turn heat to medium.
    2. Cook slowly for 6-8 minutes, pouring off fat occasionally, until skin is deep golden and crispy.

    Step 3: Flip and Finish

    1. Flip duck. Cook 2-3 minutes for medium-rare (internal temp 135°F).
    2. Remove duck to a cutting board. Rest 5 minutes.

    Step 4: Make the Cherry Sauce

    1. Pour off all but 1 tablespoon of duck fat. Add shallot. Cook 1 minute.
    2. Add cherries, stock, balsamic, honey, and thyme. Simmer 5 minutes until syrupy.
    3. Stir in butter if using. Remove thyme.

    Step 5: Slice and Serve

    1. Slice duck breast thinly against the grain. Spoon cherry sauce over.
    2. Serve immediately. Pretend you’re in a Paris bistro.

    Summary

    Prep Time: 5 minutes | Cook Time: 20 minutes | Total Time: 25 minutes

    Yield: 2 servings

    Difficulty: Easy (patience with the skin)

    Storage Notes

    Best fresh. Leftover duck keeps 2 days in fridge. Reheat in a hot skillet (not microwave). Cherry sauce keeps 1 week—great on pork or chicken. Save duck fat for roasting potatoes (liquid gold). Don’t skip scoring and drying the skin—that’s the crisp secret. Fresh or frozen cherries both work. Jam works too (skip the honey). This is easier than steak. Try it.

  • Duck Fat Fried Potatoes (The Crunch That Will Haunt Your Dreams)

    Duck Fat Fried Potatoes (The Crunch That Will Haunt Your Dreams)

    Let’s be honest: regular roasted potatoes are fine. But duck fat potatoes? They’re a revelation. The fat renders into shatteringly crisp exteriors while keeping interiors fluffy and cloud-soft. This is the potato dish that steals the show from whatever you serve it with—steak, roast chicken, or just a fried egg.

    You only need five ingredients, one pan, and about 20 minutes of active time. No fancy technique. Just potatoes, duck fat, salt, and a little herb magic.

    Ingredients

    Serves 4 as a side.

    • 2 lbs (900g) Yukon Gold or baby potatoes
    • 3 tablespoons duck fat (rendered, from a jar or saved from a roast duck)
    • 1 teaspoon kosher salt, plus more to finish
    • ½ teaspoon black pepper
    • 4 cloves garlic, smashed (optional but recommended)
    • 2 sprigs fresh rosemary or thyme
    • Fresh parsley, chopped (for garnish)

    Step-by-Step Instructions

    Step 1: Par-Cook the Potatoes

    1. Scrub potatoes well. If using larger ones, cut into 1.5-inch chunks. Leave small potatoes whole.
    2. Place in a pot, cover with cold salted water, and bring to a boil.
    3. Cook for 8–10 minutes—until fork-tender but not falling apart.
    4. Drain and let steam dry for 5 minutes. This step guarantees crispiness.

    Step 2: Heat the Duck Fat

    1. Preheat oven to 425°F (220°C). Place a rimmed baking sheet in the oven while it heats.
    2. Carefully add duck fat to the hot pan. Swirl to coat.

    Step 3: Rough Them Up

    1. Tumble the dried potatoes into a bowl. Give them a few good shakes to rough up the edges. Those craggy bits get extra crunchy.

    Step 4: Roast to Golden Perfection

    1. Add potatoes to the hot pan with duck fat. Sprinkle with salt and pepper.
    2. Roast for 20 minutes. Flip once halfway through.
    3. Add smashed garlic and rosemary in the last 5 minutes.

    Step 5: Finish and Serve

    1. Remove from oven. Sprinkle with fresh parsley and flaky salt.
    2. Serve immediately—these wait for no one.

    Summary

    Prep Time: 10 minutes | Cook Time: 30 minutes | Total Time: 40 minutes

    Yield: 4 servings

    Difficulty: Easy

    Storage Notes

    Best fresh: Duck fat potatoes lose their crunch within hours. Reheat leftovers in a hot skillet or air fryer—never microwave.

    Make ahead: Boil and rough up the potatoes a day in advance. Store covered in the fridge. Roast straight from chilled, adding 5 extra minutes.

    Duck fat tip: Strain and save used duck fat. You can reuse it 3-4 times.