Category: quick_meals

  • Crab Rangoon: Crispy, Creamy, Disappears Fast

    Crab Rangoon: Crispy, Creamy, Disappears Fast

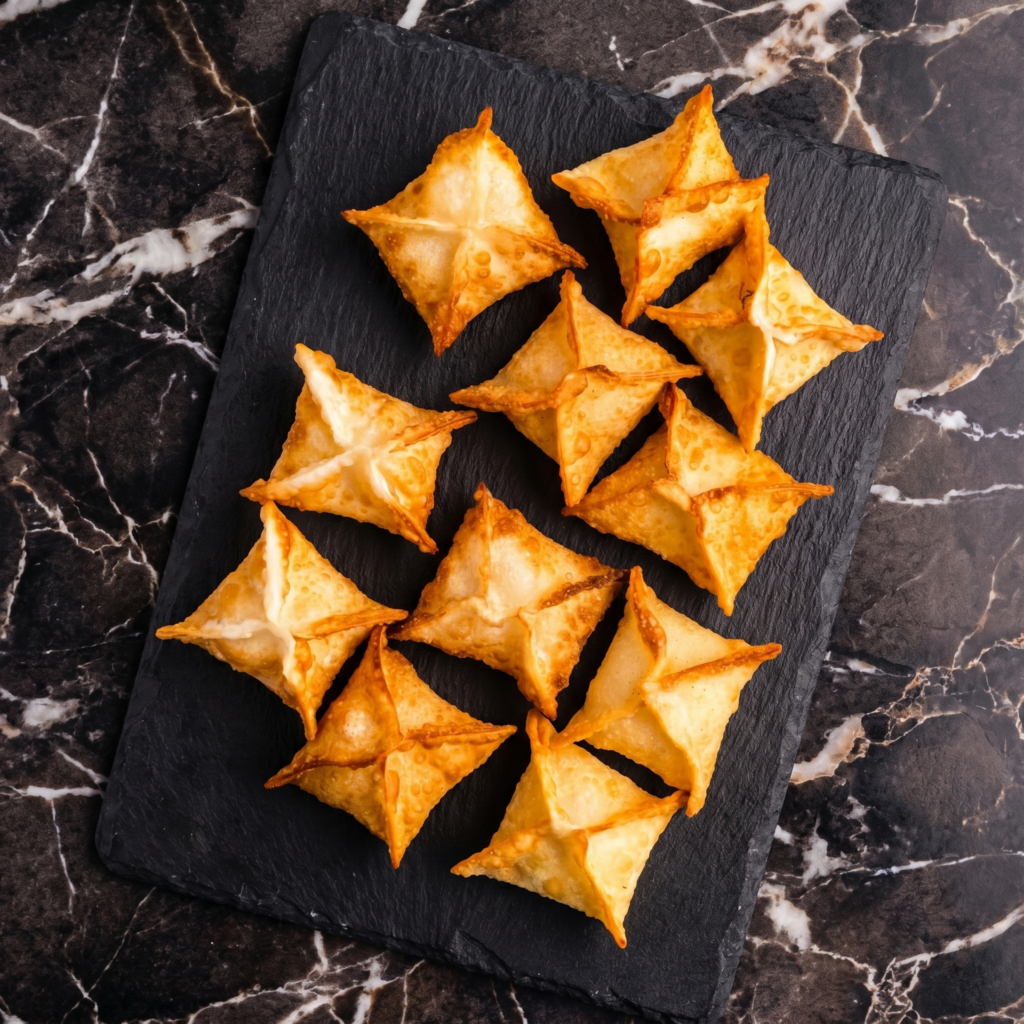
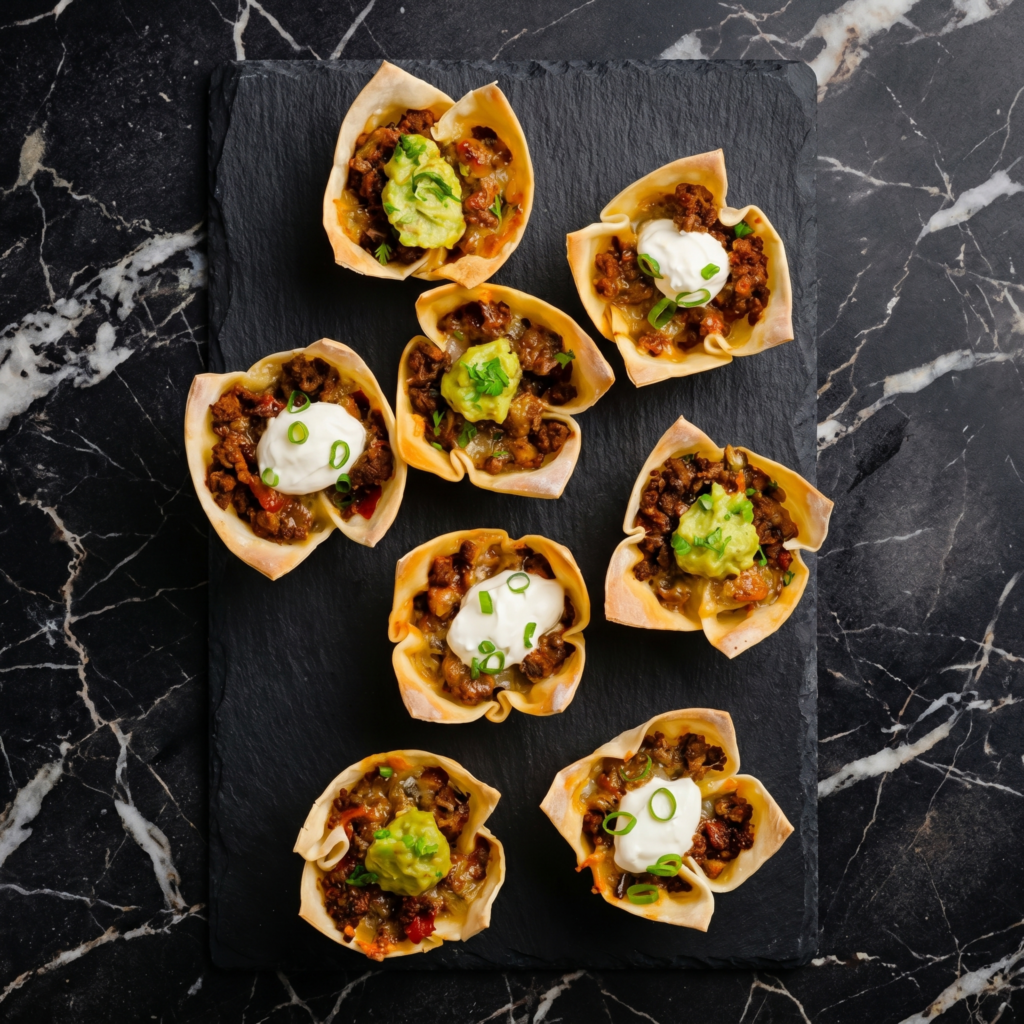
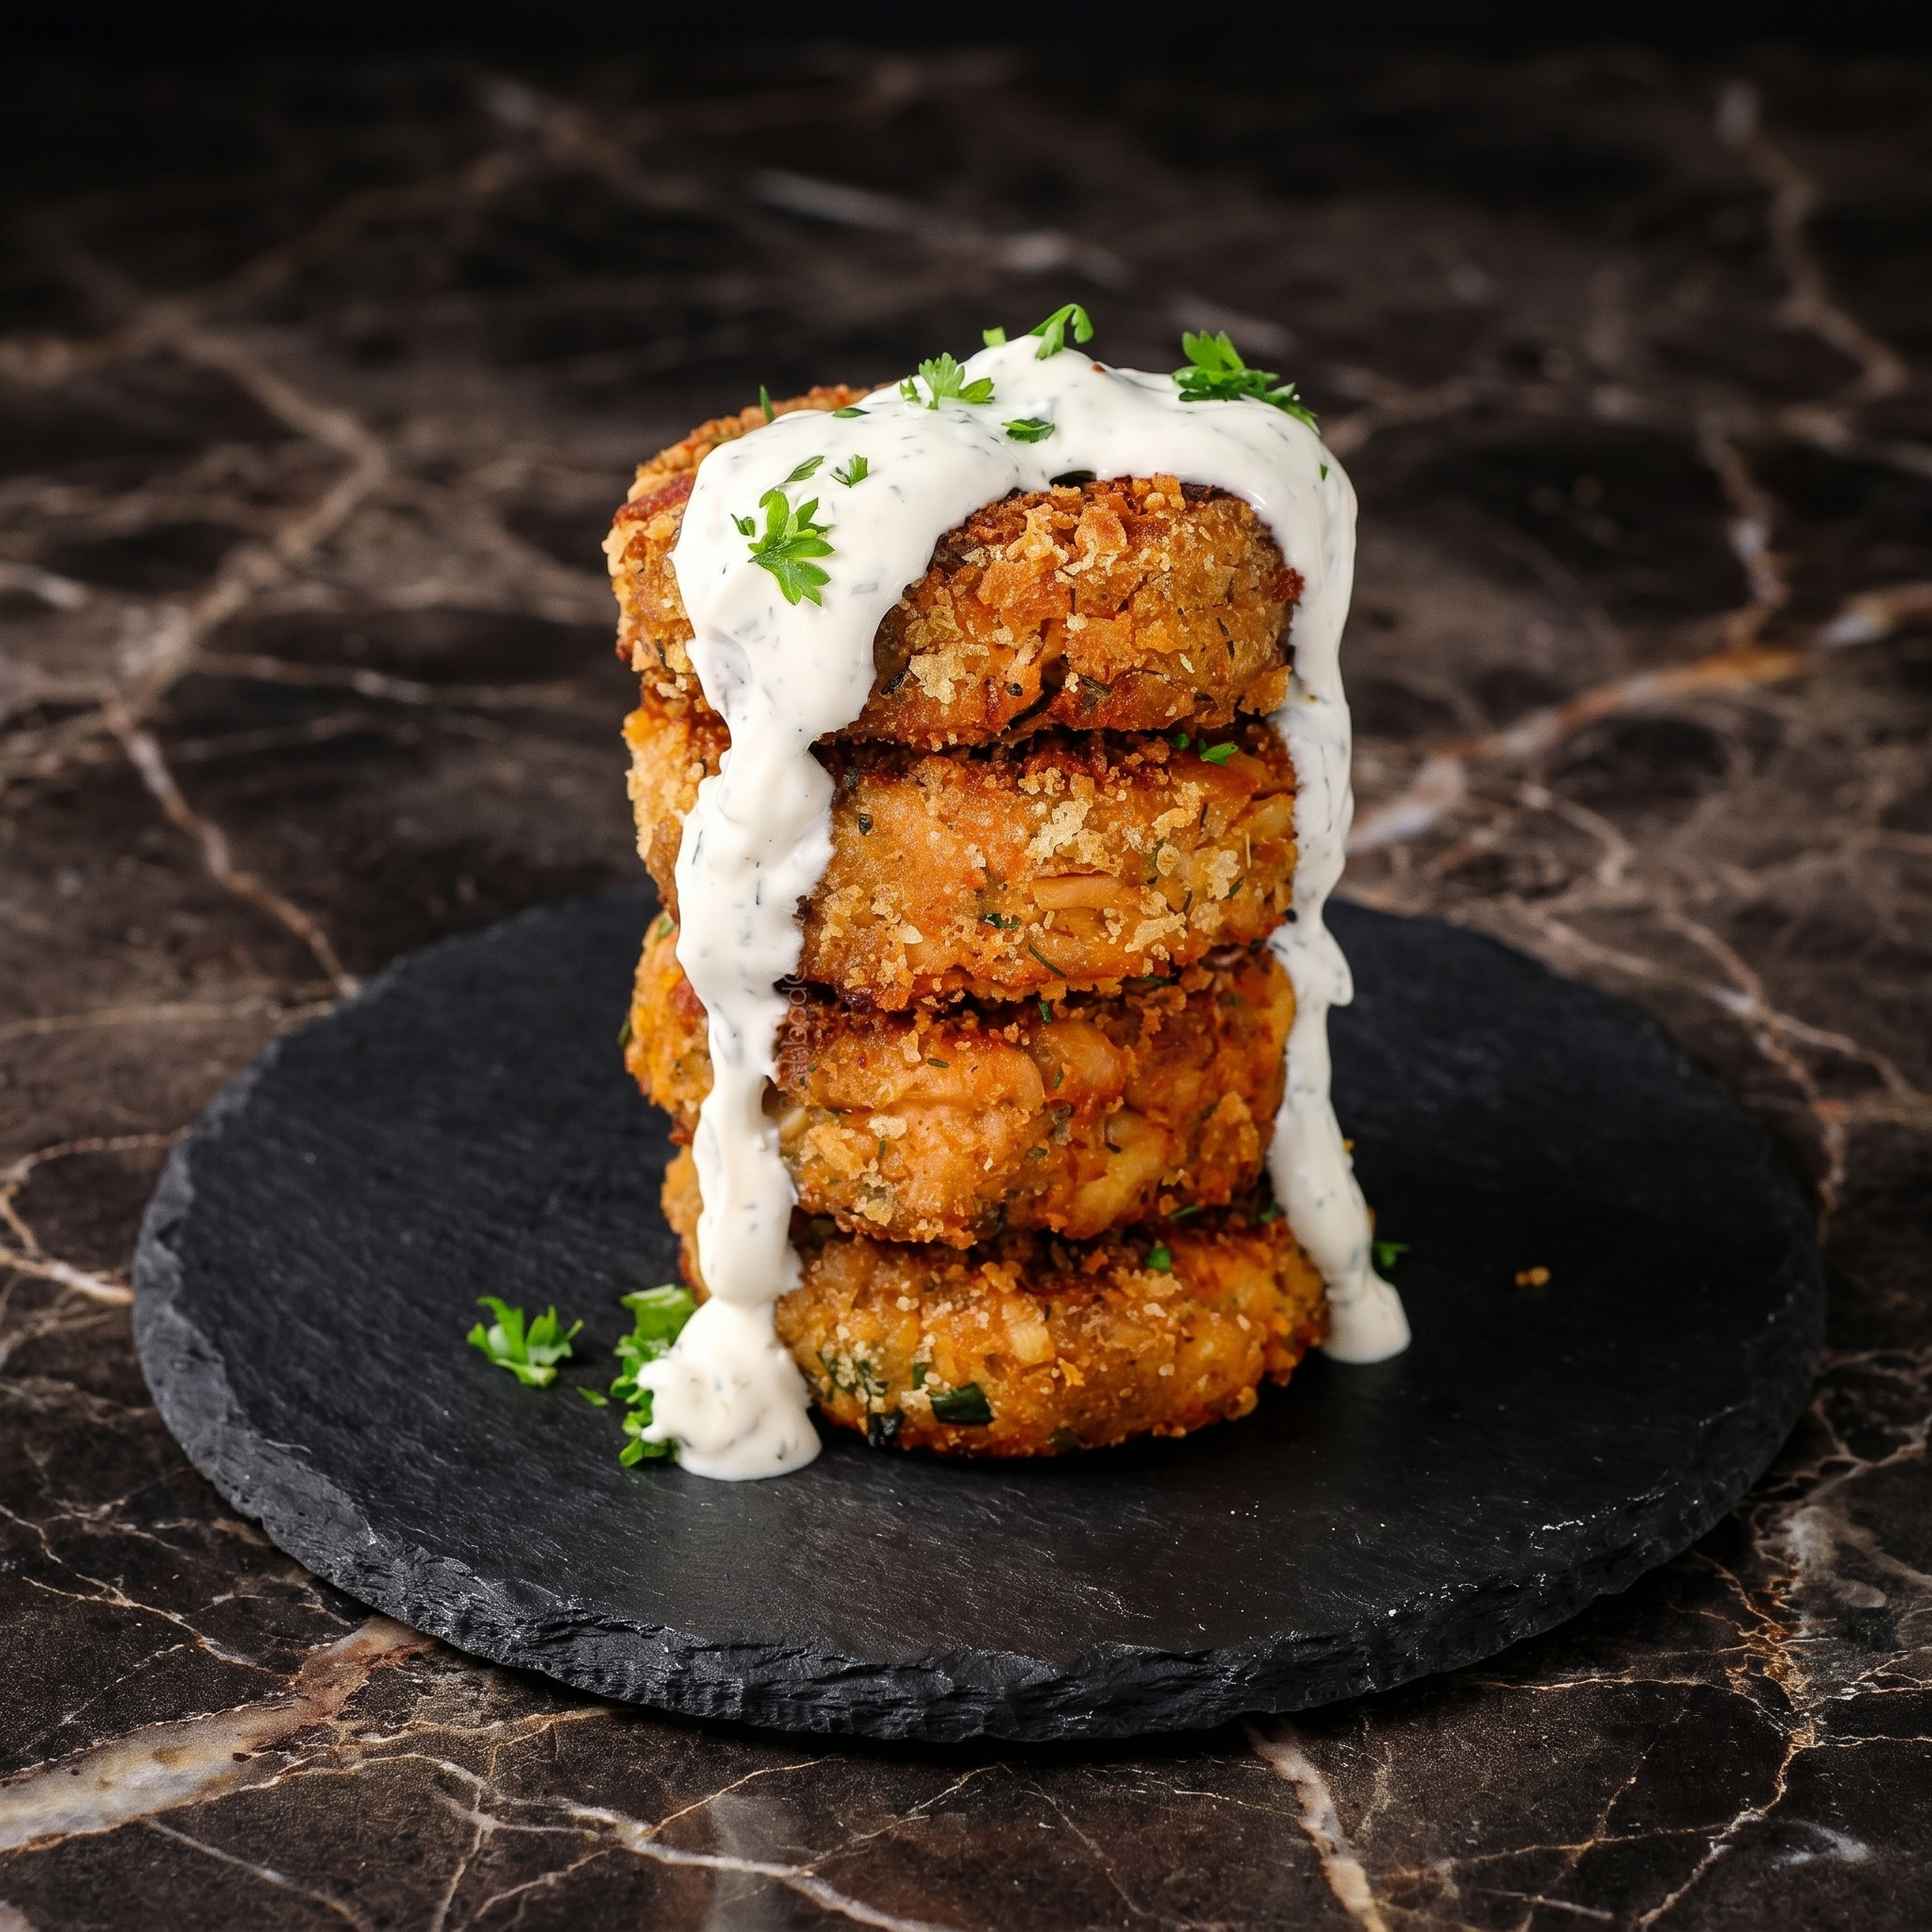
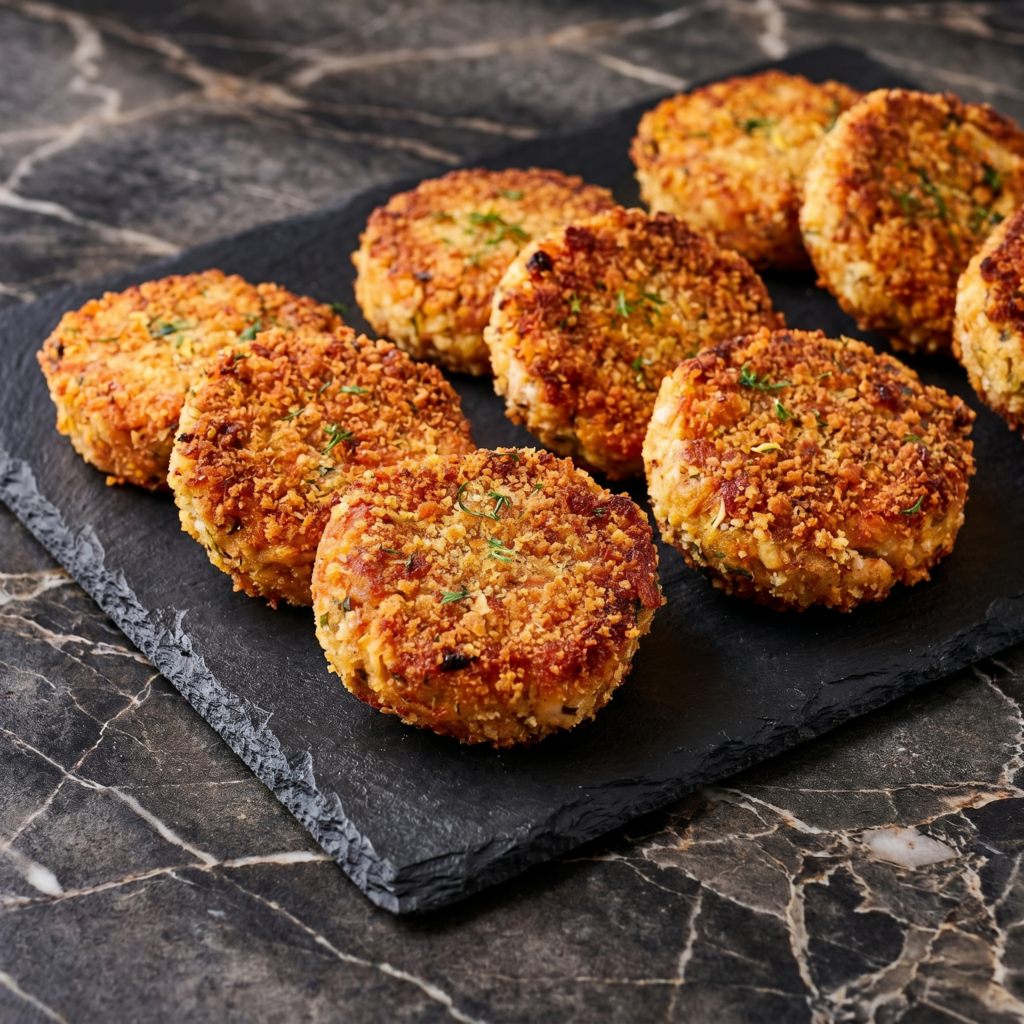
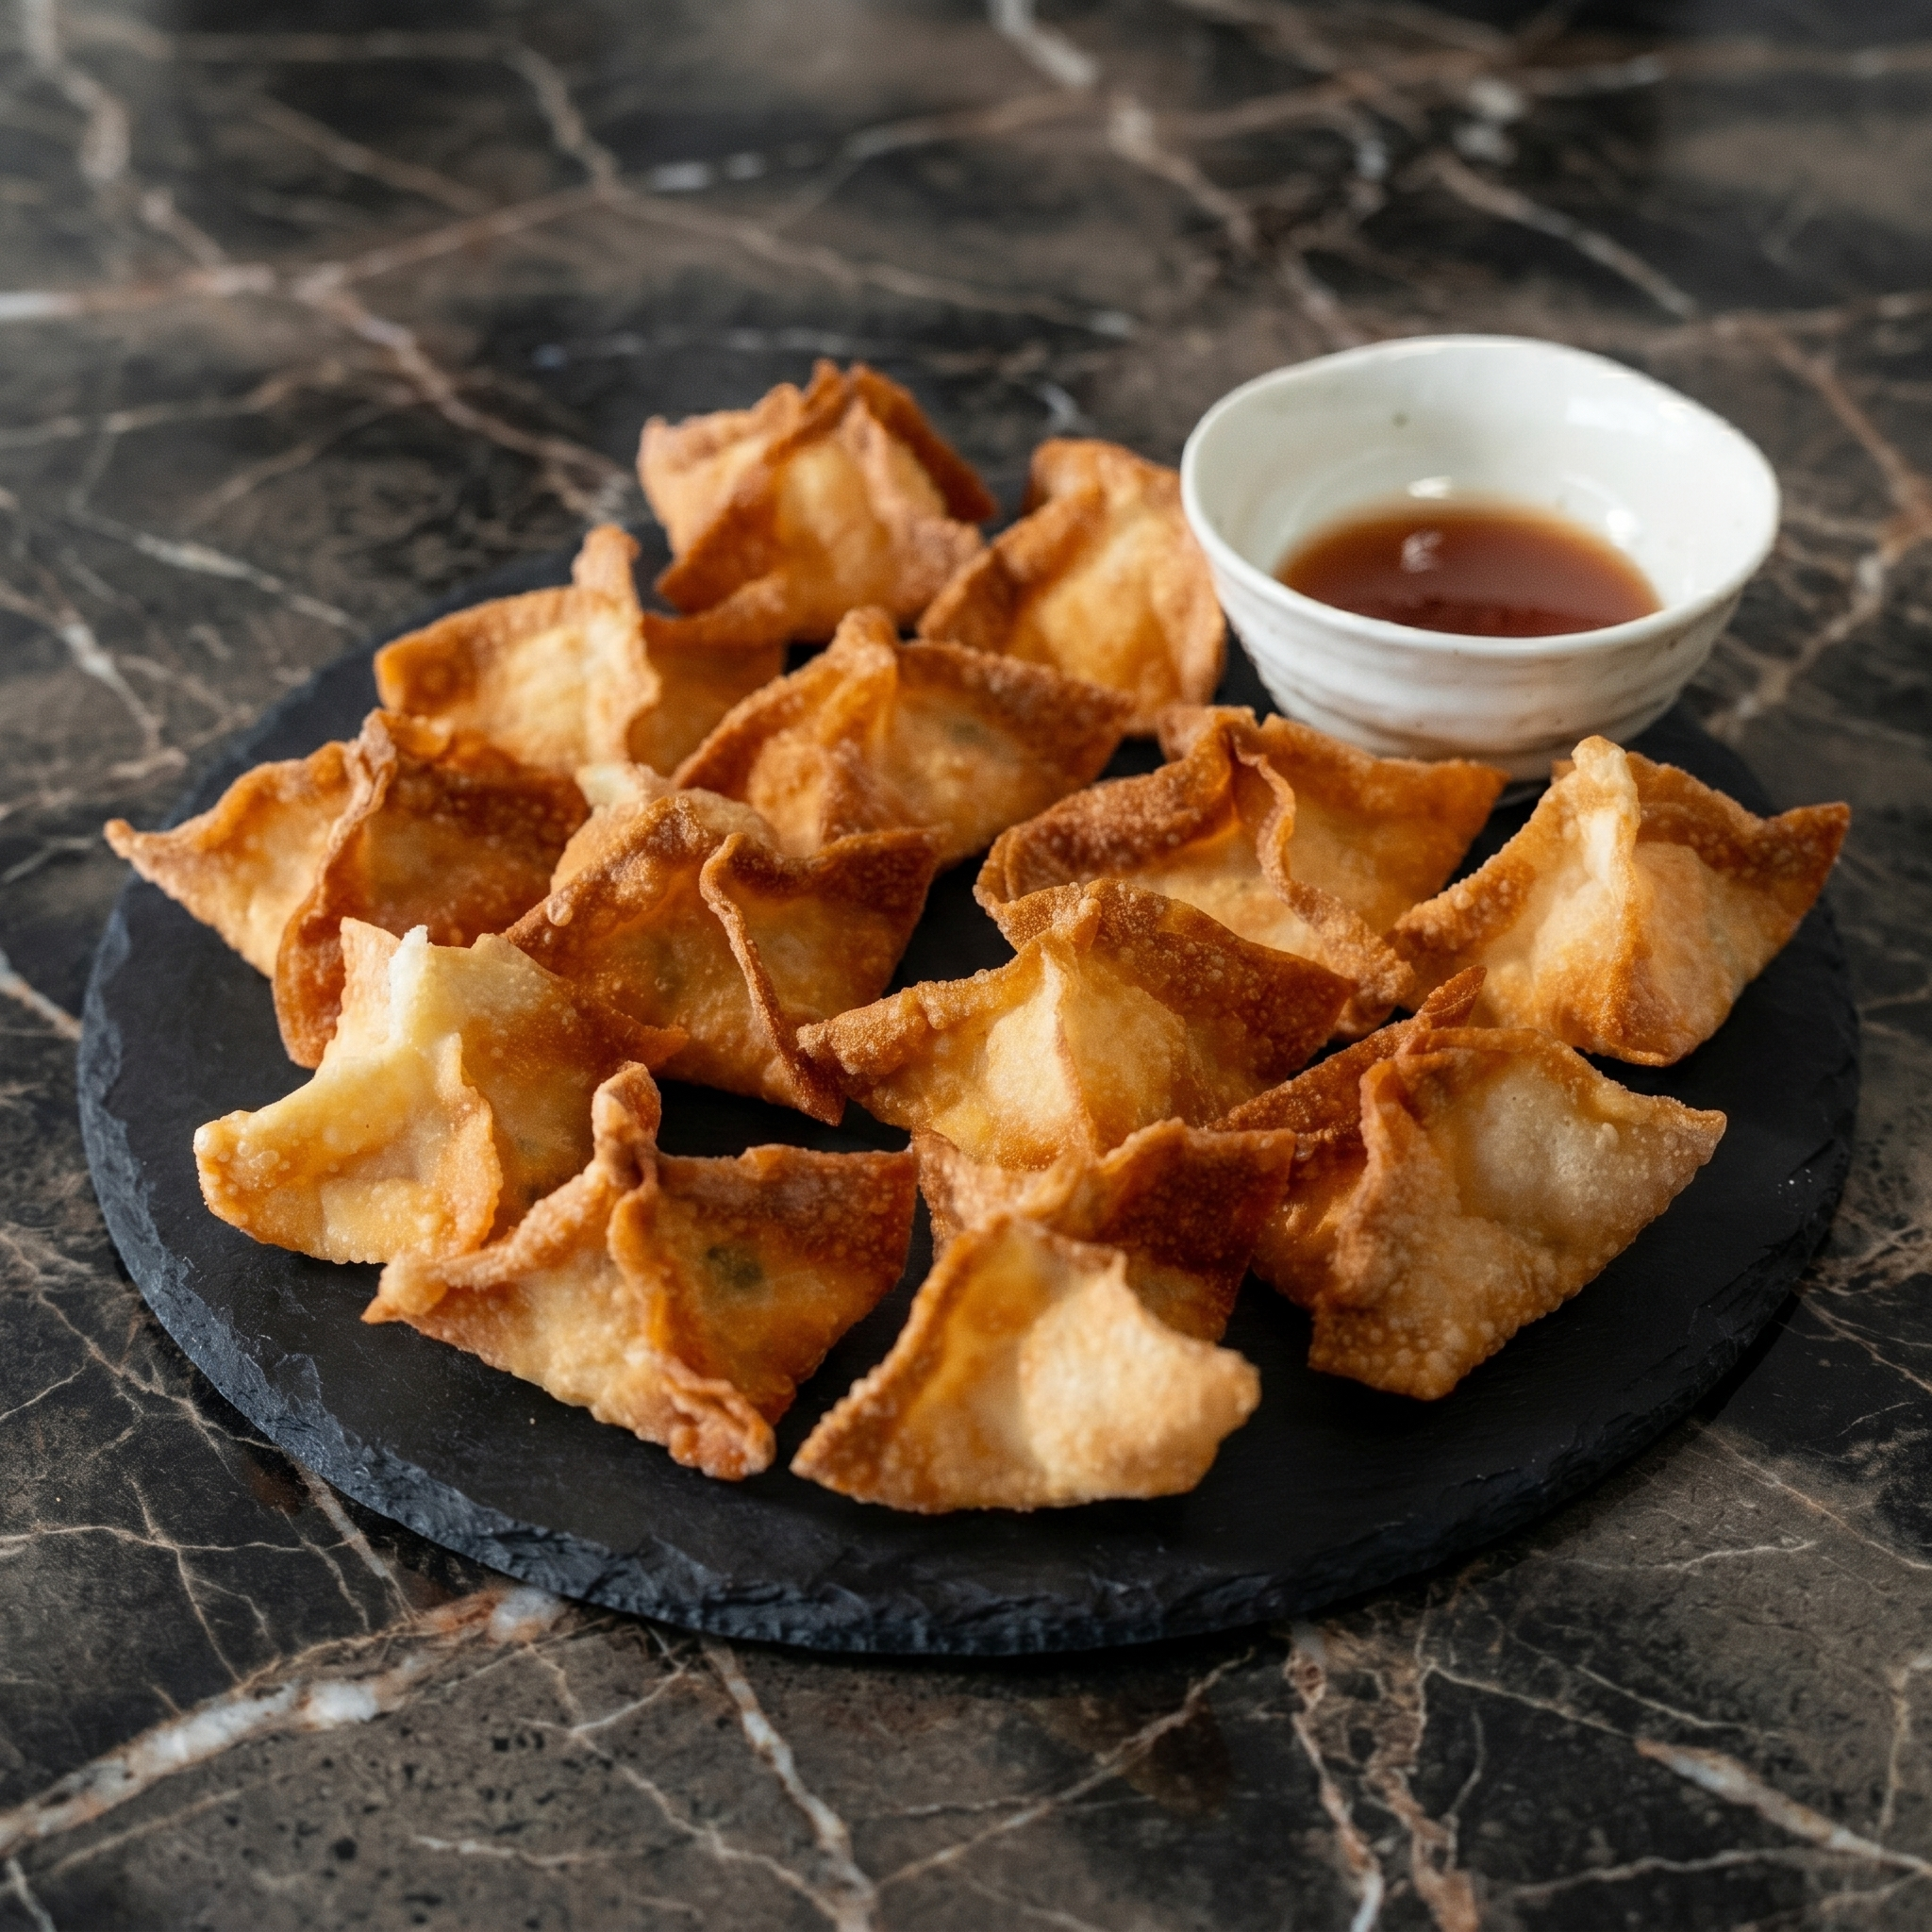
    Crab Rangoon are the ultimate “order too many” appetizer. A crispy, golden wonton wrapper hiding a creamy, sweet filling. The contrast is ridiculous.

    This recipe uses real or imitation crab (both work). Fold, fry, dip. You’ll never order takeout crab Rangoon again.

    Ingredients

    Makes 24-30 rangoons.

    • 24-30 wonton wrappers (square, about 3×3 inches)
    • 8 oz cream cheese, softened
    • 6 oz crab meat (fresh, canned, or imitation krab)
    • 2 green onions, finely chopped
    • 1 clove garlic, minced (optional)
    • 1 teaspoon soy sauce
    • ½ teaspoon Worcestershire sauce
    • Oil for frying (vegetable or canola)

    Sweet and Sour Dip (or use store-bought):

    • ½ cup sweet chili sauce
    • 2 tablespoons rice vinegar
    • 1 tablespoon ketchup

    Step-by-Step Instructions

    Step 1: Make the Filling

    1. In a bowl, mix cream cheese, crab, green onions, garlic, soy sauce, and Worcestershire until well combined.

    Step 2: Fill the Wontons

    1. Place a wonton wrapper on a clean surface (diamond orientation, not square).
    2. Place 1 teaspoon of filling in the center.
    3. Dip a finger in water and moisten all four edges of the wrapper.
    4. Fold one corner to the opposite corner, forming a triangle. Press edges firmly to seal, pushing out air.
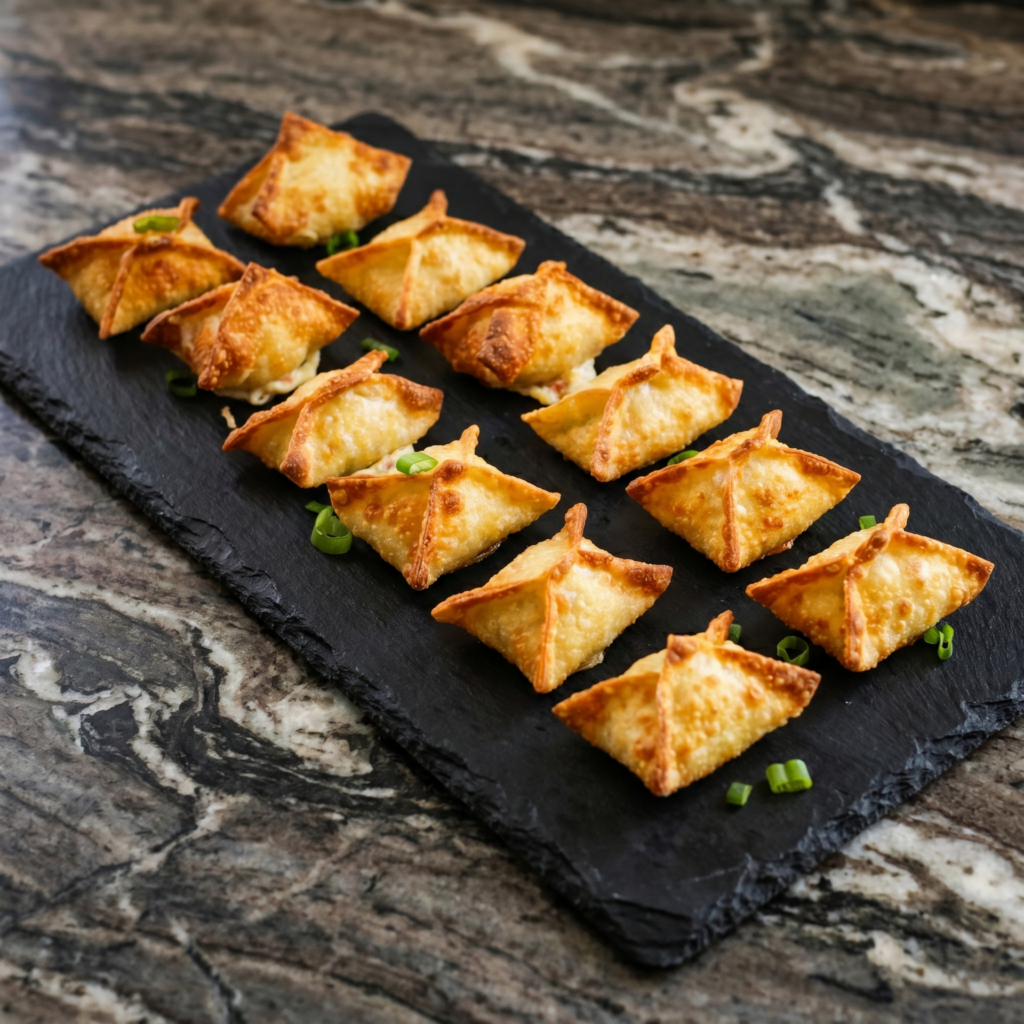
    5. For the classic “nurse cap”: bring the two bottom corners together and pinch.

    Step 3: Heat the Oil

    1. Pour 2 inches of oil into a heavy pot or Dutch oven. Heat to 350°F (175°C).

    Step 4: Fry the Rangoons

    1. Fry in small batches (don’t crowd) for 2-3 minutes until golden brown and crispy.
    2. Remove with a slotted spoon. Drain on a wire rack (not paper towels).

    Step 5: Make the Dip (Optional)

    1. Whisk together sweet chili sauce, rice vinegar, and ketchup.

    Step 6: Serve Immediately

    1. Sprinkle with a pinch of salt. Serve hot with sweet and sour dip. Watch them vanish.

    Summary

    Prep Time: 20 minutes | Cook Time: 10 minutes | Total Time: 30 minutes

    Yield: 24-30 rangoons

    Difficulty: Medium (folding takes practice)

    Storage Notes

    Leftovers?

    Crab Rangoon are best fresh. Reheated ones lose their crunch. If you must, air fry at 375°F for 3-4 minutes.

    Freezing Uncooked:

    Assemble the rangoons (don’t fry). Freeze in a single layer on a tray, then transfer to a freezer bag. Freeze for up to 2 months. Fry from frozen (add 1-2 minutes to cook time).

    Make-Ahead Filling:

    Mix the filling up to 2 days ahead. Keep refrigerated. Fill and fry when ready.

    Pro Tip:

    Don’t overfill. Too much filling = bursting rangoons and messy oil. One teaspoon is plenty.

    Baked Option (Less Crispy):

    Brush with oil, bake at 400°F for 10-12 minutes. Not as crunchy, but still tasty.

  • Pork Carnitas Tacos: Crispy, Juicy, Pure Magic

    Pork Carnitas Tacos: Crispy, Juicy, Pure Magic

    Carnitas means “little meats” in Spanish. It’s pork shoulder slow-cooked until it falls apart, then crisped until the edges are golden and crunchy. Two textures. One glorious taco.

    This recipe works in a slow cooker, Instant Pot, or Dutch oven. Make a big batch. Tacos for days.

    Ingredients

    Serves 6-8 (makes 16-20 tacos).

    • 3 lbs pork shoulder (pork butt), cut into 2-inch chunks
    • 1 onion, quartered
    • 6 cloves garlic, smashed
    • 1 orange, juiced (throw the spent halves in too)
    • 1 lime, juiced
    • 1 teaspoon dried oregano
    • 1 teaspoon ground cumin
    • 1 teaspoon salt
    • ½ teaspoon black pepper
    • 2 bay leaves
    • 1 cup chicken broth (or water)

    For Serving:

    • Corn or flour tortillas
    • Diced onion, chopped cilantro, lime wedges, salsa, hot sauce

    Step-by-Step Instructions

    Step 1: Cook the Pork

    1. Place pork, onion, garlic, orange juice, lime juice, oregano, cumin, salt, pepper, bay leaves, and broth in a slow cooker, Instant Pot, or Dutch oven.
    2. Slow cooker: Low for 8-10 hours or high for 5-6 hours.
    3. Instant Pot: High pressure for 45 minutes + natural release (15 minutes).
    4. Dutch oven: 300°F for 3-4 hours until fork-tender.

    Step 2: Shred the Pork

    1. Remove pork from cooking liquid. Shred with two forks. Discard bay leaves and orange halves.
    2. Save about ½ cup of the cooking liquid.

    Step 3: Crisp the Carnitas (Crucial Step)

    1. Heat a large skillet over medium-high heat. Add a drizzle of oil or some of the pork fat.
    2. Spread shredded pork in an even layer. Don’t stir for 2-3 minutes—let it get crispy and brown.
    3. Flip and crisp the other side. Add a splash of reserved cooking liquid to keep it moist.

    Step 4: Warm the Tortillas

    1. Heat tortillas in a dry skillet, microwave (30 seconds between damp paper towels), or directly over a gas flame.

    Step 5: Assemble the Tacos

    1. Pile crispy carnitas onto warm tortillas.
    2. Top with onion, cilantro, and a squeeze of lime.
    3. Add salsa or hot sauce. Fold. Devour. Repeat.

    Summary

    Prep Time: 10 minutes | Cook Time: 4-10 hours (depending on method) | Total Time: 4-10 hours

    Yield: 16-20 tacos (6-8 servings)

    Difficulty: Easy

    Storage Notes

    Fridge:

    Store carnitas in an airtight container with some cooking liquid for up to 5 days. Re-crisp in a skillet before serving.

    Freezing:

    Freeze shredded carnitas (before crisping) for up to 3 months. Thaw overnight in the fridge. Crisp in a skillet when ready.

    Pro Tip:

    Don’t skip the crisping step. That’s what makes carnitas magical. Soft pork is fine. Crispy pork is unforgettable.

    Leftover Ideas:

    Carnitas bowls (rice, beans, avocado). Carnitas nachos. Carnitas burritos. Carnitas omelets. You can’t mess this up.

  • Beef Meatball Subs: Saucy, Cheesy, Hero Status

    Beef Meatball Subs: Saucy, Cheesy, Hero Status

    A great meatball sub is a beautiful mess. Sloppy, saucy, cheesy, and absolutely worth the napkins. The meatballs are tender and flavorful. The bread holds up. The cheese stretches for days.

    Use homemade or jarred sauce. Bake the meatballs or use leftovers. Either way, dinner is in 20 minutes.

    Ingredients

    Serves 4 (makes 4 subs).

    • 4 sub rolls (soft but sturdy)
    • 16-20 cooked beef meatballs (homemade or frozen)
    • 2 cups marinara sauce (jarred or homemade)
    • 8 slices provolone or mozzarella cheese
    • 2 tablespoons grated Parmesan cheese
    • 2 tablespoons butter, melted
    • ½ teaspoon garlic powder
    • Optional: fresh basil, red pepper flakes

    Step-by-Step Instructions

    Step 1: Heat Meatballs and Sauce

    1. In a saucepan, combine meatballs and marinara sauce.
    2. Simmer over medium-low heat for 10–15 minutes until meatballs are hot and sauce is bubbling.

    Step 2: Preheat Oven

    1. Preheat oven to 400°F (200°C).
    2. Line a baking sheet with foil or parchment paper.

    Step 3: Toast the Rolls

    1. Slice sub rolls open lengthwise (but not all the way through).
    2. Mix melted butter with garlic powder. Brush inside and outside of rolls.
    3. Place on baking sheet and toast for 3–5 minutes until lightly golden.

    Step 4: Assemble the Subs

    1. Spoon 4–5 meatballs onto each bottom roll.
    2. Top with a generous scoop of sauce.
    3. Lay 2 slices of provolone over the meatballs.
    4. Sprinkle with Parmesan.

    Step 5: Melt the Cheese

    1. Return subs to the oven (open-faced) for 3–5 minutes until cheese is bubbly and melted.

    Step 6: Close and Serve

    1. Top with fresh basil or red pepper flakes if using.
    2. Close the roll. Press down gently. Serve with extra sauce on the side and a mountain of napkins.

    Summary

    Prep Time: 5 minutes | Cook Time: 20 minutes | Total Time: 25 minutes

    Yield: 4 subs

    Difficulty: Easy

    Storage Notes

    Leftovers:

    Store meatballs and sauce separately from bread. Sub rolls get soggy fast. Assemble fresh for the best experience.

    Fridge:

    Meatballs in sauce last 4 days. Reheat in microwave or saucepan. Store bread at room temperature.

    Freezing:

    Freeze meatballs and sauce for up to 3 months. Thaw overnight. Toast fresh rolls when ready.

    Pro Tip:

    Don’t over-sauce the bread. Too much liquid = soggy collapse. Serve extra sauce on the side for dipping.

  • Taco Cups (All the Flavor, None of the Crumble)

    Taco Cups (All the Flavor, None of the Crumble)

    Tacos are great. Crumbling taco shells all over your shirt? Less great.

    Enter taco cups. Wonton wrappers pressed into a muffin tin, baked until crispy, then filled with taco meat and cheese. They hold together perfectly. One bite. No mess. Everyone wants the recipe.

    Ingredients

    Makes 12 taco cups.

    • 24 square wonton wrappers
    • 1 lb (450g) ground beef (or turkey)
    • 1 packet taco seasoning (or 2 tbsp homemade)
    • ⅓ cup water
    • 1 cup shredded Mexican cheese blend
    • Cooking spray

    Toppings:

    • Sour cream
    • Diced tomatoes
    • Sliced olives
    • Jalapeños
    • Fresh cilantro
    • Hot sauce

    Step-by-Step Instructions

    Step 1: Preheat and Prep

    1. Preheat oven to 375°F (190°C). Spray a 12-cup muffin tin with cooking spray.

    Step 2: Press Wontons

    1. Place one wonton wrapper in each cup. Press down and up the sides.
    2. Spray lightly with oil. Layer a second wrapper on top, rotated 45 degrees.
    3. Press again. Spray with oil.

    Step 3: Pre-Bake

    1. Bake empty shells for 5 minutes until lightly golden.

    Step 4: Cook Taco Meat

    1. While shells bake, brown ground beef in a skillet. Drain fat.
    2. Add taco seasoning and water. Simmer 5 minutes until thickened.

    Step 5: Fill and Bake

    1. Fill each cup with taco meat. Top with shredded cheese.
    2. Bake another 5-7 minutes until cheese melts and edges are crisp.

    Step 6: Top and Serve

    1. Let cool 2 minutes. Run a knife around edges to release.
    2. Add toppings. Serve warm.

    Summary

    Prep Time: 10 minutes | Cook Time: 15 minutes | Total Time: 25 minutes

    Yield: 12 taco cups

    Difficulty: Easy

    Storage Notes

    Refrigerate:

    Store baked (un-topped) taco cups in an airtight container for up to 3 days. Reheat at 350°F for 5-7 minutes. Add fresh toppings after reheating.

    Freeze:

    Freeze baked, unfilled shells for up to 2 months. Reheat from frozen at 375°F for 5 minutes, then fill with hot taco meat.

    Make Ahead Hack:

    Cook taco meat up to 3 days ahead. Assemble and bake when ready.

    Not For Microwave:

    Microwave makes wonton shells chewy. Always use oven or air fryer to reheat.

  • Gougères (Cheese Puffs That Make You Look Like a Chef)

    Gougères (Cheese Puffs That Make You Look Like a Chef)

    Say it with me: goo-ZHAIR.

    These French cheese puffs sound fancy. They are not. Choux pastry is just butter, water, flour, and eggs—plus a pile of nutty Gruyère. The oven does the magic. Serve them with wine and watch people think you took a class.

    Ingredients

    Makes 20-25 gougères.

    • ½ cup (120ml) water
    • ¼ cup (60g) unsalted butter, cut into pieces
    • ¼ teaspoon salt
    • ½ cup (65g) all-purpose flour
    • 2 large eggs, room temperature
    • 1 cup (80g) finely grated Gruyère or Comté cheese
    • Optional: ¼ teaspoon black pepper or nutmeg

    Step-by-Step Instructions

    Step 1: Cook the Dough

    1. In a saucepan, combine water, butter, and salt. Bring to a boil.
    2. Remove from heat. Add flour all at once. Stir vigorously until a smooth ball forms.
    3. Return to medium heat. Cook 1-2 minutes, stirring, until a thin film forms on the pan bottom.

    Step 2: Add Eggs

    1. Transfer dough to a bowl. Let cool 5 minutes.
    2. Add eggs one at a time, mixing fully after each. Dough will look broken then come together.

    Step 3: Add Cheese

    1. Stir in grated Gruyère (and pepper/nutmeg if using).

    Step 4: Pipe

    1. Preheat oven to 400°F (200°C). Line a baking sheet with parchment.
    2. Spoon or pipe 1-inch mounds of dough onto sheet, spacing 2 inches apart.

    Step 5: Bake

    1. Bake 20-25 minutes until puffed, golden, and crisp.
    2. Do NOT open the oven for the first 18 minutes (they will collapse).

    Step 6: Serve

    1. Poke a small hole in each to release steam (keeps them crisp).
    2. Serve warm or at room temperature.

    Summary

    Prep Time: 15 minutes | Cook Time: 25 minutes | Total Time: 40 minutes

    Yield: 20-25 gougères

    Difficulty: Medium (trust the process)

    Storage Notes

    Best Day Of:

    Gougères are crispiest within hours of baking. But they keep surprisingly well.

    Reheat Method:

    Store baked gougères in a paper bag (not plastic—soggy risk). Reheat at 350°F for 5 minutes to restore crunch.

    Freeze Unbaked:

    Pipe dough onto a tray, freeze solid, then transfer to a bag. Bake from frozen at 400°F for 25-28 minutes.

    Pro Tip:

    If they deflate after baking? You opened the oven too early. Still tasty. Just less puffy.

  • Avocado Toast (Worth the Hype, Not the $14 Price Tag)

    Avocado Toast (Worth the Hype, Not the $14 Price Tag)

    Yes, it’s everywhere. Yes, it’s that good.

    This isn’t complicated. Toast + smashed avocado + salt = magic. But with a few small tricks (toast it darker, season it better, finish it brighter), you’ll never pay cafe prices again. Five minutes. Seriously.

    Ingredients

    Serves 1 (easily doubled).

    • 2 slices sourdough or rustic bread
    • 1 ripe avocado
    • 2 teaspoons lemon or lime juice
    • ¼ teaspoon red pepper flakes (optional)
    • Flaky sea salt and black pepper
    • Drizzle of olive oil

    Topping Ideas:

    • Everything bagel seasoning
    • Radish slices + chives
    • Soft-boiled egg
    • Cherry tomatoes + basil

    Step-by-Step Instructions

    Step 1: Toast Dark

    1. Toast bread until golden-brown and sturdy. Darker than you think—soggy toast is enemy #1.

    Step 2: Mash Avocado

    1. Cut avocado in half. Remove pit. Scoop flesh into a small bowl.
    2. Mash with a fork to your liking (chunky or smooth).

    Step 3: Season Hard

    1. Add lemon juice, pepper flakes, salt, and pepper to avocado. Mix.

    Step 4: Assemble

    1. Spread avocado evenly onto hot toast.
    2. Drizzle with olive oil.
    3. Sprinkle more flaky salt on top (don’t skip).

    Step 5: Finish and Eat

    1. Add any toppings. Eat immediately while toast is still crunchy.

    Summary

    Prep Time: 5 minutes | Cook Time: 2 minutes | Total Time: 7 minutes

    Yield: 1 serving

    Difficulty: Too easy

    Storage Notes

    Don’t Store Assembled

    Avocado turns brown. Toast turns soggy. This is a make-and-eat-immediately situation.

    Prep Ahead Instead:

    • Toast bread? No (gets stale).
    • Mash avocado? No (browns).
    • Have ripe avocados ready? Yes.
    • Mix seasoning blend? Yes—keep in a small jar.

    Leftover Avocado Hack:

    Rub cut side with lemon, wrap tightly in plastic, refrigerate. Use within 1 day.

  • Fried Calamari (Better Than Your Favorite Italian Restaurant)

    Fried Calamari (Better Than Your Favorite Italian Restaurant)

    Bad calamari is chewy rubber. Good calamari is a revelation.

    This fried calamari is light, shatteringly crisp, and tender inside. The secret? Super-hot oil, a quick fry, and a cornmeal-dredge that stays crunchy. Plate it with marinara and lemon. You just beat your local red-checkered-tablecloth joint.

    Ingredients

    Serves 4 as appetizer.

    • 1 lb (450g) calamari rings and tentacles, thawed if frozen
    • 1 cup buttermilk (or whole milk)
    • 1 cup all-purpose flour
    • ½ cup cornmeal (for extra crunch)
    • 1 teaspoon salt (plus more for finishing)
    • ½ teaspoon black pepper
    • ½ teaspoon paprika
    • ¼ teaspoon cayenne pepper (optional)
    • Vegetable oil for frying
    • Lemon wedges and marinara sauce for serving

    Step-by-Step Instructions

    Step 1: Soak

    1. Place calamari in a bowl. Cover with buttermilk.
    2. Let sit for 15 minutes (tenderizes + removes fishy taste).

    Step 2: Heat Oil

    1. Pour 2 inches of oil into a heavy pot or Dutch oven.
    2. Heat to 375°F (190°C). Use a thermometer—non-negotiable.

    Step 3: Make Dredge

    1. In a shallow bowl, whisk flour, cornmeal, salt, pepper, paprika, and cayenne.

    Step 4: Dredge

    1. Remove calamari from buttermilk, letting excess drip off.
    2. Toss in flour mixture until fully coated.
    3. Shake off extra.

    Step 5: Fry Fast

    1. Drop calamari in oil in small batches (don’t crowd).
    2. Fry 60-90 seconds only—until light golden.
    3. Overcooking = rubber. Trust the timer.

    Step 6: Drain and Serve

    1. Remove with slotted spoon. Drain on paper towels.
    2. Sprinkle immediately with salt.
    3. Serve with lemon wedges and warm marinara.

    Summary

    Prep Time: 20 minutes | Cook Time: 5 minutes | Total Time: 25 minutes

    Yield: 4 appetizer servings

    Difficulty: Easy

    Storage Notes

    Do Not Refrigerate Leftovers (Seriously)

    Fried calamari becomes chewy and sad within hours. Make only what you’ll eat immediately.

    Prep Ahead Instead:

    • Soak calamari in buttermilk up to 4 hours ahead. Keep refrigerated.
    • Mix dry dredge up to 1 week ahead, stored in a bag or jar.

    Reheat Fail:

    There’s no good way to reheat fried calamari. Air fryer helps a little, but fresh is the only real answer.

  • Potato Croquettes (Crispy Cream Bombs That Disappear Fast)

    Potato Croquettes (Crispy Cream Bombs That Disappear Fast)

    Leftover mashed potatoes just found their destiny.

    These potato croquettes are what happens when mashed potatoes get dressed up for a party. Rolled in breadcrumbs, fried to a crisp, and impossibly creamy inside. They vanish within minutes. Make extra. You’ve been warned.

    Ingredients

    Makes 12-15 croquettes.

    • 2 cups cold mashed potatoes (leftover is perfect)
    • ½ cup shredded Parmesan or cheddar cheese
    • 1 large egg yolk
    • 2 tablespoons chopped fresh parsley or chives
    • ½ cup all-purpose flour
    • 2 large eggs, beaten (for coating)
    • 1 cup panko breadcrumbs
    • ½ teaspoon salt
    • Vegetable oil for frying

    Step-by-Step Instructions

    Step 1: Make the Mix

    1. In a bowl, combine cold mashed potatoes, cheese, egg yolk, and parsley.
    2. Mix until uniform. Season with salt.

    Step 2: Shape

    1. Scoop mixture and roll into 2-inch logs or balls.
    2. Place on a parchment-lined tray.

    Step 3: Set Up Breading Station

    1. Bowl 1: flour. Bowl 2: beaten eggs. Bowl 3: panko.
    2. Roll each croquette: flour → egg → panko.

    Step 4: Chill (Important)

    1. Freeze shaped croquettes for 15 minutes. This prevents falling apart in the fryer.

    Step 5: Fry

    1. Heat 1 inch of oil to 350°F (175°C).
    2. Fry croquettes in batches, 2-3 minutes, until golden brown.
    3. Don’t overcrowd.

    Step 6: Drain and Serve

    1. Drain on paper towels. Sprinkle with salt immediately.
    2. Serve with marinara, aioli, or just alone.

    Summary

    Prep Time: 20 minutes | Chill Time: 15 minutes | Cook Time: 10 minutes | Total Time: 45 minutes

    Yield: 12-15 croquettes

    Difficulty: Easy

    Storage Notes

    Freeze Before Frying (Best Method):

    Freeze shaped, breaded croquettes on a tray, then transfer to a bag. Fry from frozen—add 1-2 minutes.

    Refrigerate Cooked:

    Store in an airtight container for up to 3 days. Reheat in air fryer or oven (375°F for 5-8 minutes). Microwave makes them sad and soggy.

    Do Not Refrigerate Raw:

    Breaded raw croquettes get mushy in the fridge. Freeze only.

  • Lamb Chops (Fancy Enough for Company, Fast Enough for Tuesday)

    Lamb Chops (Fancy Enough for Company, Fast Enough for Tuesday)

    Lamb chops feel like a splurge. But here’s the secret: they cook faster than chicken.

    These pan-seared lamb chops are crusted with garlic, rosemary, and thyme, then seared until golden. Inside, they’re pink, juicy, and ridiculously tender. From fridge to plate in 15 minutes. Impress your date. Impress yourself.

    Ingredients

    Serves 2-3.

    • 8 lamb loin chops (about 1.5 inches thick)
    • 2 tablespoons olive oil
    • 4 cloves garlic, minced
    • 2 tablespoons fresh rosemary, finely chopped
    • 1 tablespoon fresh thyme leaves
    • 1 teaspoon salt
    • ½ teaspoon black pepper
    • 2 tablespoons butter (for basting)
    • Optional: lemon wedges for serving

    Step-by-Step Instructions

    Step 1: Prep the Chops

    1. Pat lamb chops completely dry with paper towels. This = better sear.
    2. In a small bowl, mix garlic, rosemary, thyme, salt, and pepper.
    3. Rub mixture all over both sides of each chop.

    Step 2: Heat the Pan

    1. Heat olive oil in a large cast-iron or heavy skillet over medium-high heat.
    2. Oil should shimmer—almost smoking.

    Step 3: Sear Hard

    1. Place chops in pan without crowding (work in batches if needed).
    2. Sear 2-3 minutes per side for medium-rare. Do not move them while searing.

    Step 4: Butter Baste

    1. Add butter to pan during last minute of cooking.
    2. Tilt pan and spoon melted butter over chops repeatedly.

    Step 5: Rest

    1. Transfer chops to a plate. Let rest 5 minutes—non-negotiable.
    2. Resting keeps the juices inside, not on your plate.

    Step 6: Serve

    1. Squeeze fresh lemon over chops. Serve immediately.

    Summary

    Prep Time: 5 minutes | Cook Time: 10 minutes | Total Time: 15 minutes (plus 5 min rest)

    Yield: 8 chops (2-3 servings)

    Difficulty: Easy

    Storage Notes

    Refrigerate Leftovers:

    Store in an airtight container for up to 3 days. Reheat gently in a skillet over low heat (microwave ruins lamb).

    Best Enjoyed Fresh:

    Lamb chops really shine right off the pan. Leftovers work for salads or pitas, but that perfect medium-rare is a one-time event.

    Doneness Guide:

    • Medium-rare: 130-135°F internal (recommended)
    • Medium: 140-145°F
    • Well-done: Not recommended (dry lamb is sad lamb)
  • Salmon Croquettes (Crispy Outside, Flaky Inside, Zero Canned-Fish Sadness)

    Salmon Croquettes (Crispy Outside, Flaky Inside, Zero Canned-Fish Sadness)

    Let’s rescue canned salmon from its sad, forgotten corner of the pantry.

    These salmon croquettes are crispy on the outside, tender on the inside, and taste nothing like cafeteria food. They’re cheap, fast, and legitimately craveable. Serve with hot sauce, remoulade, or just a squeeze of lemon. Dinner in 20 minutes. You’re welcome.

    Ingredients

    Makes 8 croquettes (serves 4).

    • 2 cans (14.75 oz each) pink or red salmon, drained
    • ½ cup plain breadcrumbs (plus more for coating)
    • 2 large eggs, lightly beaten
    • ¼ cup finely diced onion
    • 2 tablespoons mayonnaise
    • 1 tablespoon lemon juice
    • 1 teaspoon garlic powder
    • 1 teaspoon Old Bay or Cajun seasoning
    • ¼ cup vegetable oil (for frying)
    • Salt and black pepper to taste

    Step-by-Step Instructions

    Step 1: Drain and Flake

    1. Open salmon cans. Drain liquid completely. Remove any large bones or skin (or mash them in—they’re edible and calcium-rich).
    2. Flake salmon with a fork in a large bowl.

    Step 2: Mix It Up

    1. Add breadcrumbs, eggs, onion, mayo, lemon juice, garlic powder, and seasoning.
    2. Mix until just combined. Don’t overmix—you want flaky, not pasty.

    Step 3: Form Patties

    1. Shape mixture into 8 patties, about ½-inch thick.
    2. Coat each patty lightly in extra breadcrumbs.

    Step 4: Heat the Pan

    1. Heat oil in a large skillet over medium heat.
    2. Test with a breadcrumb—it should sizzle immediately.

    Step 5: Fry ‘Em Up

    1. Cook croquettes in batches, 3-4 minutes per side, until golden brown and crispy.
    2. Drain on paper towels.

    Step 6: Serve Hot

    1. Sprinkle with salt immediately. Serve with lemon wedges, tartar sauce, or hot sauce.

    Summary

    Prep Time: 10 minutes | Cook Time: 10 minutes | Total Time: 20 minutes

    Yield: 8 croquettes (4 servings)

    Difficulty: Easy

    Storage Notes

    Refrigerate:

    Cooked croquettes keep in an airtight container for up to 3 days. Reheat in a skillet or air fryer—not the microwave (soggy danger).

    Freeze (Uncooked):

    Form patties, freeze on a baking sheet, then transfer to a bag. Cook from frozen, adding 2-3 minutes per side.

    Pro Tip:

    These are not air fryer friendly from raw (they fall apart). Stick to pan-frying for the crunch.