Category: quick_meals

  • Classic Palmiers: Fancy Cookies That Fake Being Hard

    Classic Palmiers: Fancy Cookies That Fake Being Hard

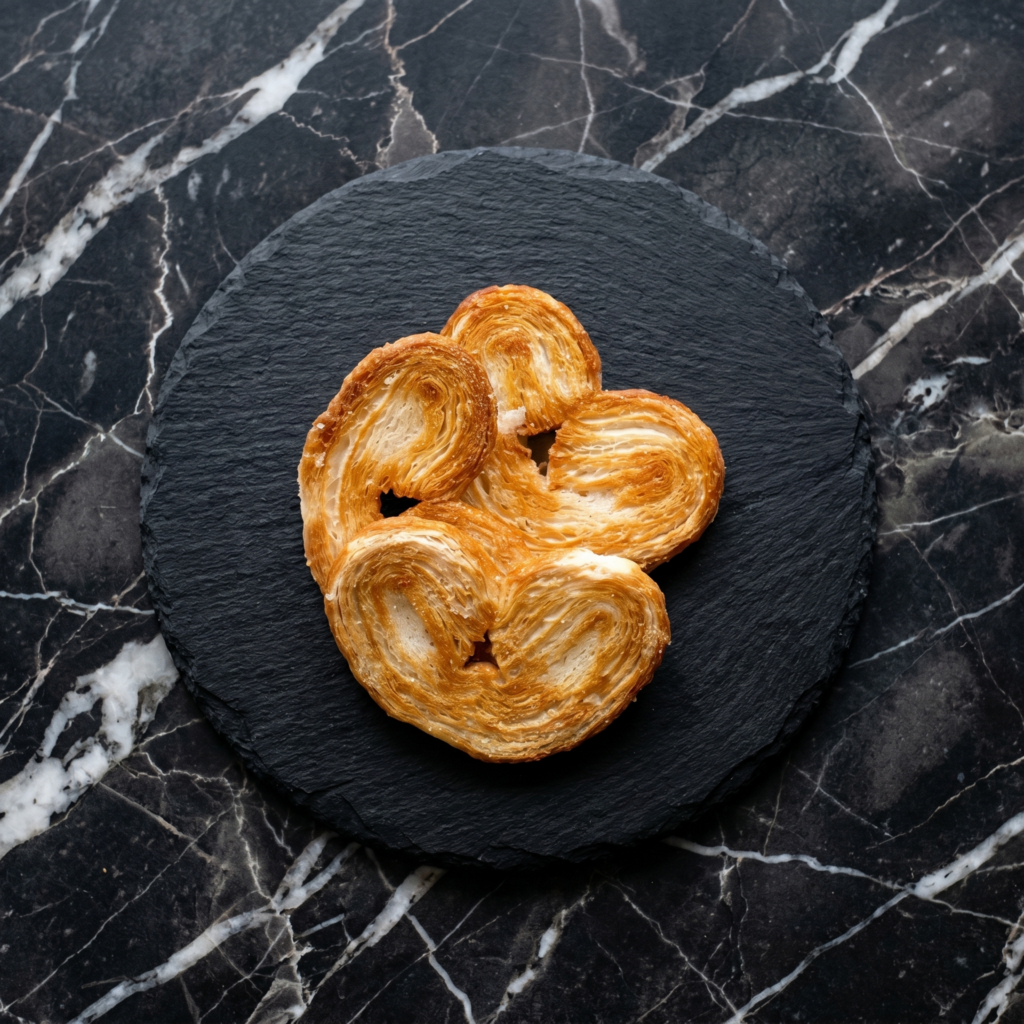
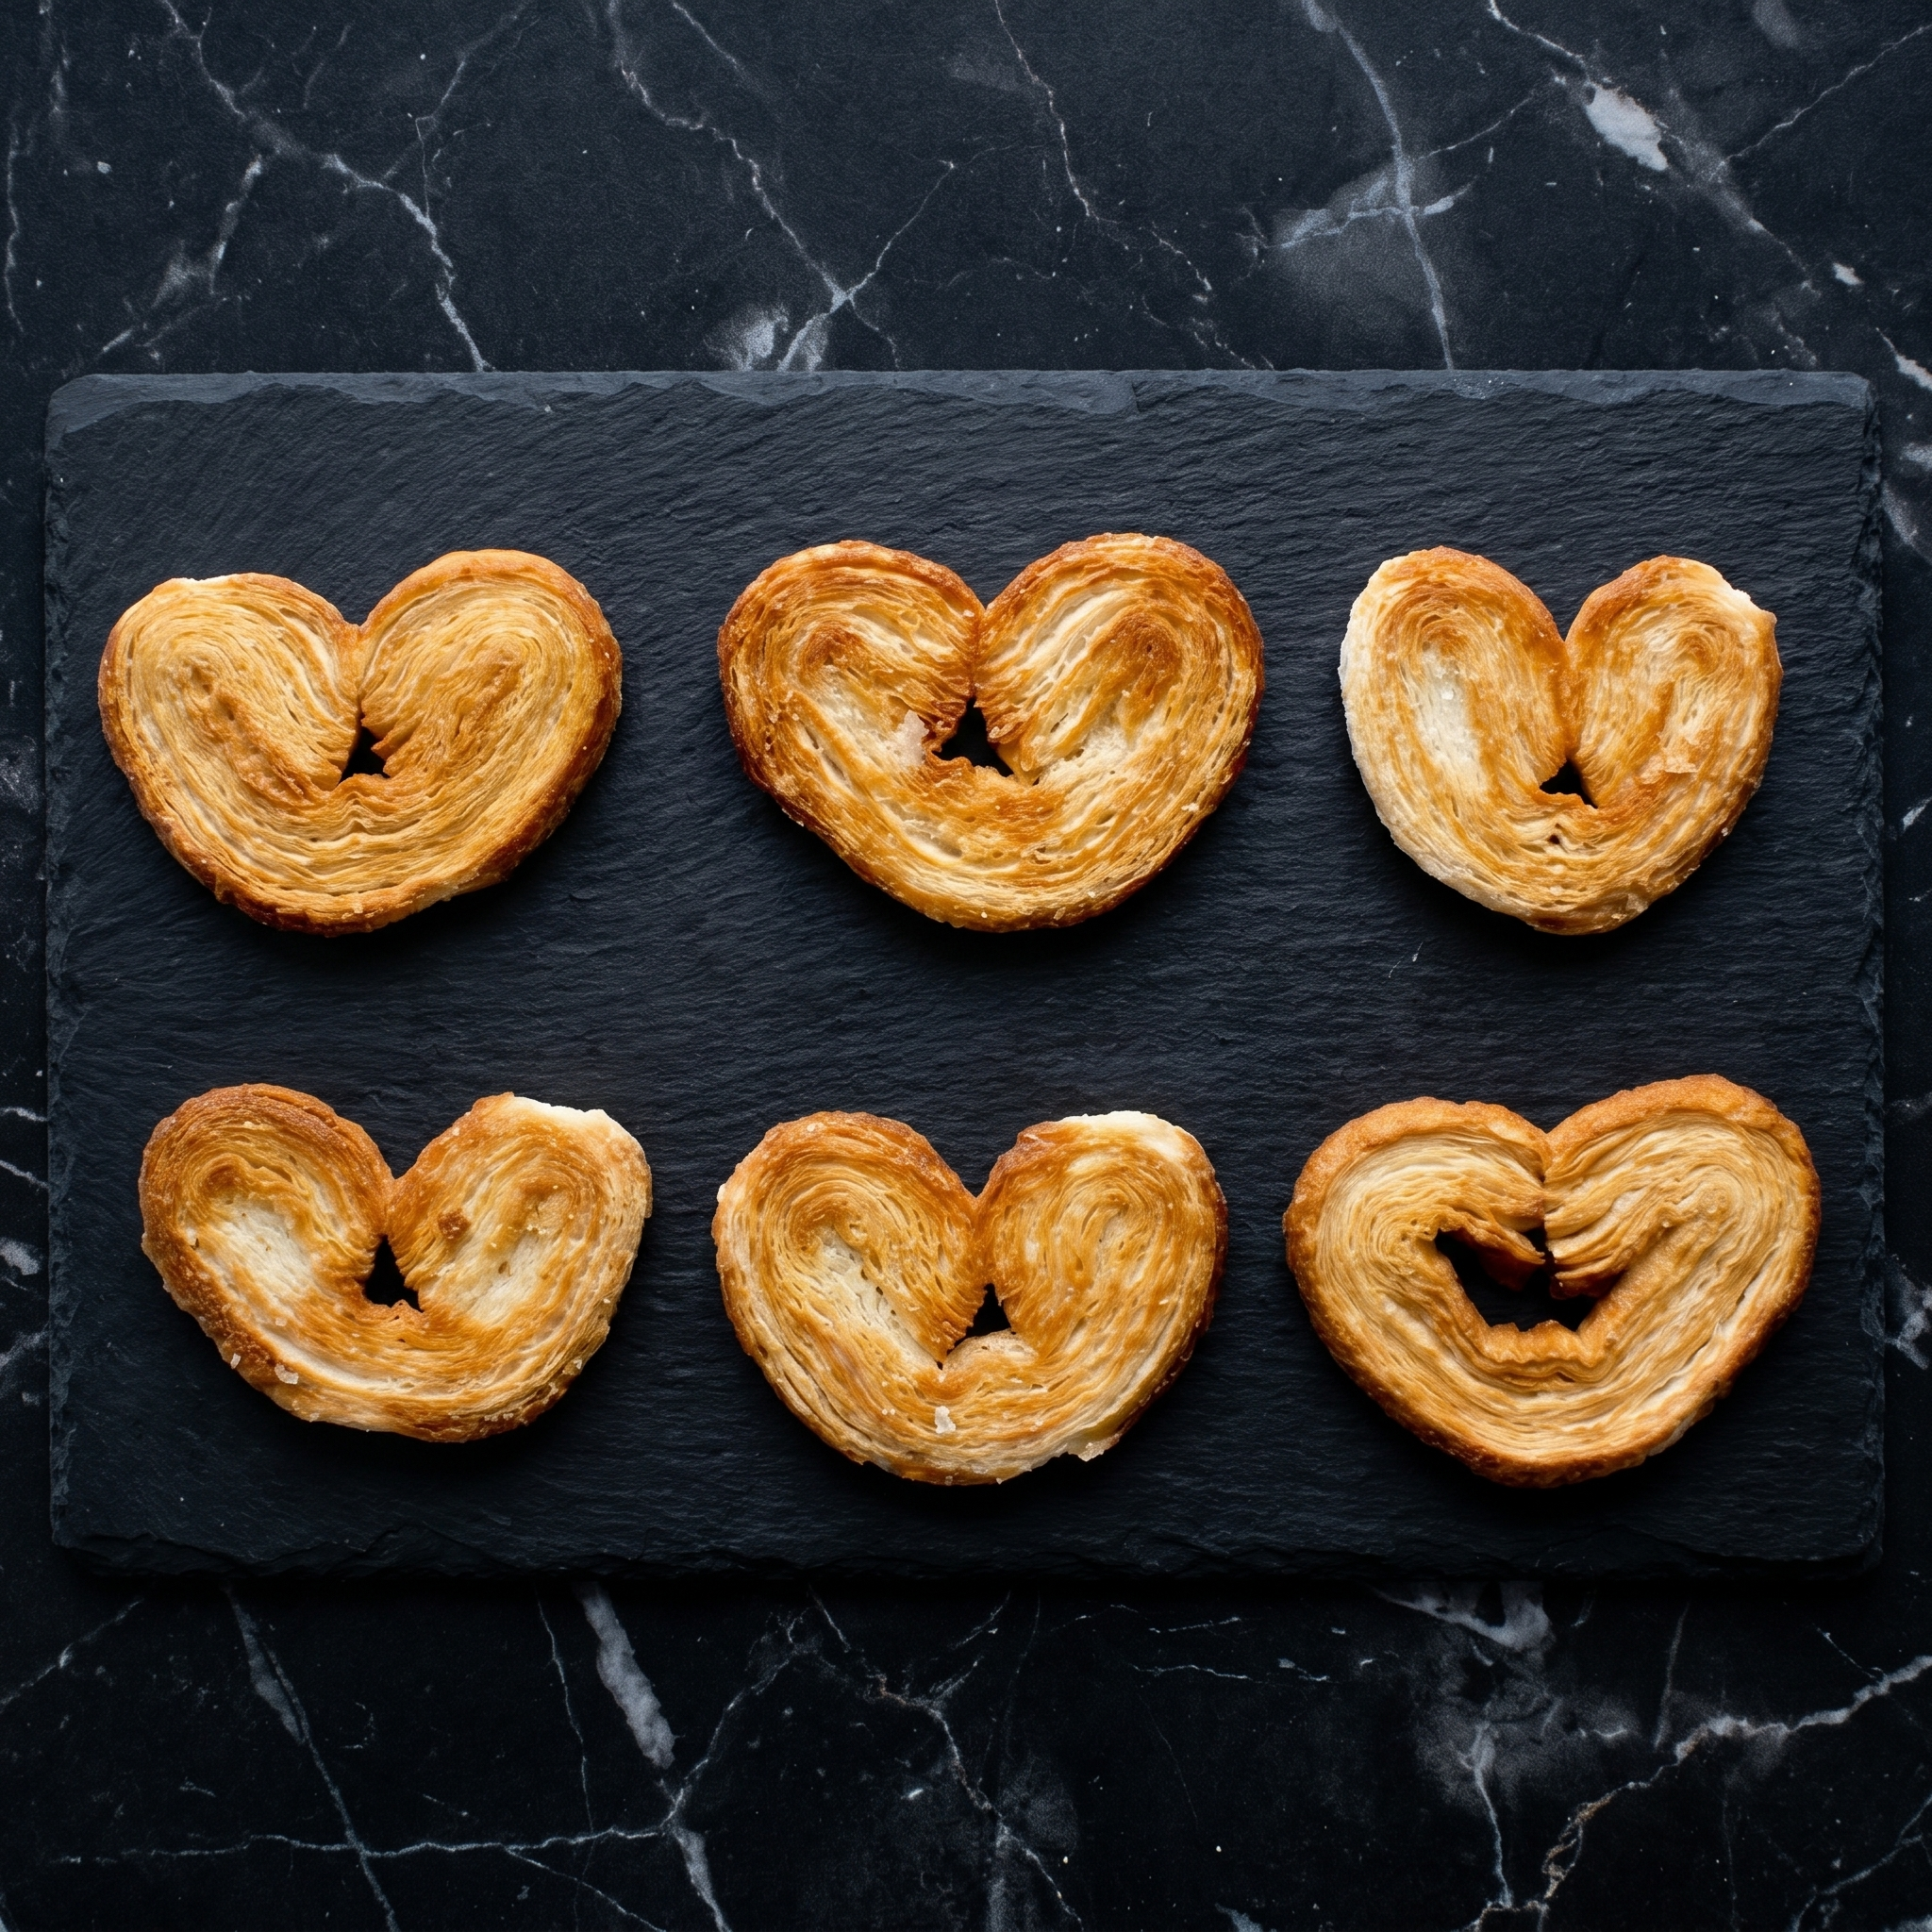
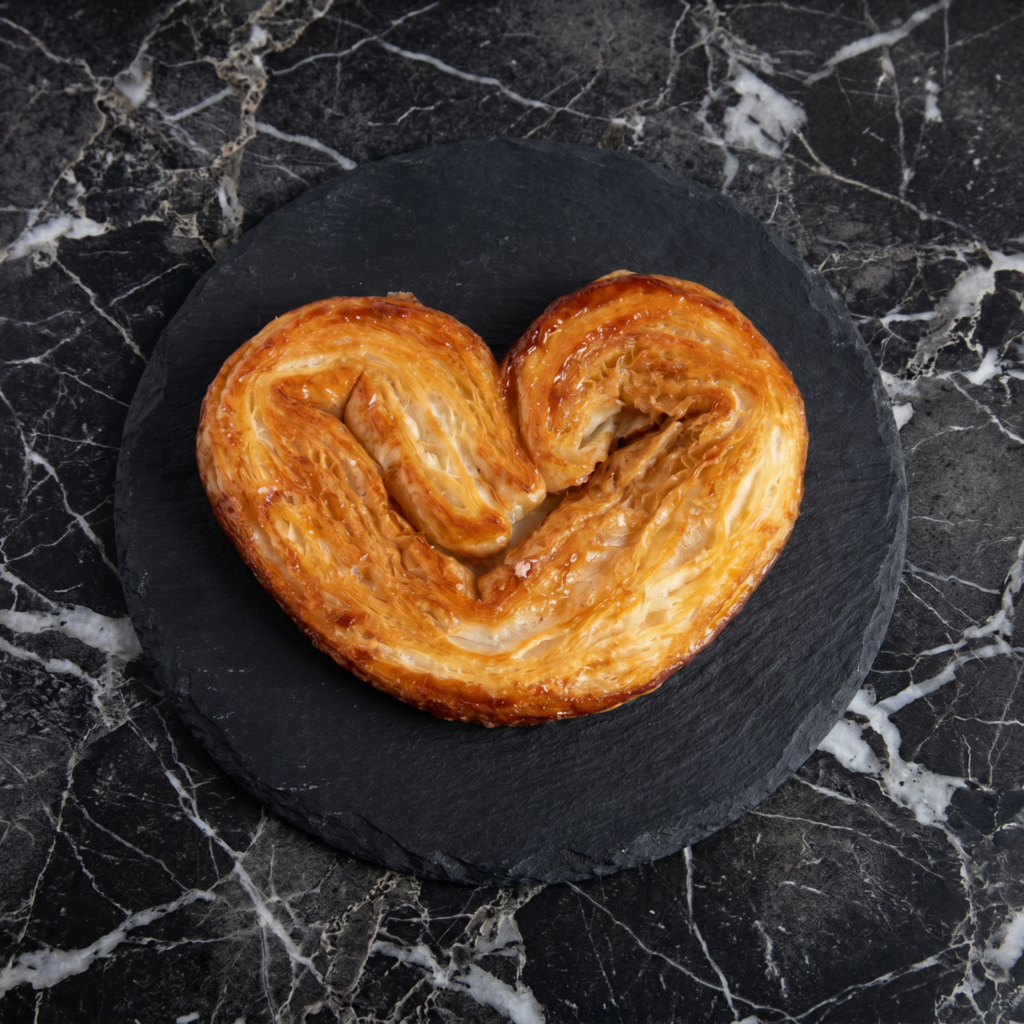
    French pastries have a reputation for being fussy. Palmiers said “nah.”

    These crispy, caramelized butterfly cookies are just puff pastry, sugar, and butter. No rolling pin gymnastics. No chill time. Just fold, slice, bake, and pretend you spent hours in the kitchen.

    Ingredients

    Makes about 20 palmiers.

    • 1 sheet frozen puff pastry, thawed
    • ½ cup granulated sugar, plus more for rolling
    • 2 tablespoons unsalted butter, very soft

    Step-by-Step Instructions

    Step 1: Prep

    1. Preheat oven to 400°F (200°C). Line a baking sheet with parchment.
    2. Sprinkle a clean surface with a thick layer of sugar.

    Step 2: Sugar the Dough

    1. Unfold puff pastry onto the sugar. Lightly roll it to press sugar into both sides.
    2. Spread soft butter over the top. Sprinkle with remaining sugar.

    Step 3: Fold Like a Letter

    1. Fold the left edge toward the center. Fold the right edge to meet it.
    2. Fold again like a book (left over right). You’ll have a 4-layer strip.
    3. Chill for 10 minutes to firm up.

    Step 4: Slice & Bake

    1. Slice the log into ¼-inch slices. Dip cut sides in sugar.
    2. Place on baking sheet, 2 inches apart. Flatten slightly.
    3. Bake for 10-12 minutes. Flip and bake 3-5 more minutes until deep golden and caramelized.
    4. Cool on a wire rack. Try not to eat all twenty.

    Summary

    Prep Time: 10 minutes | Bake Time: 15 minutes | Total Time: 25 minutes

    Yield: 20 palmiers | Difficulty: Easy

    Storage Notes

    Store in an airtight container at room temperature for up to 5 days (if they last that long). Freeze baked palmiers for up to 2 months. To re-crisp, bake at 350°F for 5 minutes.

  • Ham and Cheese Croissants: Flaky, Gooey, Gone in 60 Seconds

    Ham and Cheese Croissants: Flaky, Gooey, Gone in 60 Seconds

    Croissants are already perfect. Then you add ham. Then you add cheese. Then you bake it until the cheese tries to escape.

    These ham and cheese croissants are dangerous. Flaky, buttery layers. Warm, salty ham. Stretchy, nutty Gruyère. Fifteen minutes from fridge to face. Let’s get melty.

    Ingredients

    Makes 4 croissants.

    • 4 large butter croissants (day-old is fine)
    • 4 oz (115g) thinly sliced ham (honey or black forest)
    • 4 oz (115g) Gruyère cheese, shredded or thinly sliced
    • 2 tablespoons Dijon mustard (optional but clutch)
    • 2 tablespoons unsalted butter, melted

    Step-by-Step Instructions

    Step 1: Prep & Preheat

    1. Preheat oven to 375°F (190°C). Line a baking sheet with parchment.

    Step 2: Assemble

    1. Slice each croissant in half horizontally, like a book.
    2. Spread Dijon mustard on the bottom half (if using).
    3. Layer ham on the mustard, folding it to fit.
    4. Pile on the Gruyère cheese generously.
    5. Close with the top croissant half.

    Step 3: Butter & Bake

    1. Brush the tops of the croissants with melted butter.
    2. Place on the baking sheet. Bake for 8-10 minutes until golden brown and the cheese is bubbling out the sides.

    Step 4: Serve Hot

    1. Let cool for 1 minute (or burn your mouth immediately—your choice).
    2. Serve warm with a pickle or a green salad.

    Summary

    Prep Time: 5 minutes | Bake Time: 10 minutes | Total Time: 15 minutes

    Yield: 4 croissants | Difficulty: So Easy

    Storage Notes

    Best eaten fresh. To reheat leftover assembled croissants, air fry at 350°F for 3-4 minutes or bake at 350°F for 5 minutes. Do not microwave—soggy croissants are a tragedy.

  • Homemade Sourdough: Loud, Proud, and Perfectly Crusted

    Homemade Sourdough: Loud, Proud, and Perfectly Crusted

    Making sourdough feels like a rite of passage. But it shouldn’t feel like a chemistry exam.

    This recipe is simple, forgiving, and produces a loaf that cracks, pops, and tastes like a bakery threw up in your kitchen (in the best way). You’ll need an active starter. Everything else is patience and your two hands.

    Ingredients

    Makes 1 large loaf.

    • 100g active sourdough starter (fed 4-8 hours ago)
    • 350g warm water (about 80°F)
    • 500g bread flour (or all-purpose in a pinch)
    • 10g salt (about 2 teaspoons)

    Tools: Dutch oven, parchment paper, scoring knife or razor blade

    Step-by-Step Instructions

    Step 1: Mix the Dough

    1. In a large bowl, whisk starter and warm water until milky.
    2. Add flour and salt. Mix with your hands until no dry bits remain. It will look shaggy. That’s fine.
    3. Cover and rest for 30 minutes (autolyse).

    Step 2: Stretch & Folds

    1. Over 2 hours, perform 4 sets of stretch and folds. Every 30 minutes.
    2. To do a set: wet your hands, grab a side of dough, stretch it up, and fold it over the center. Rotate bowl and repeat 4 times.
    3. After the last fold, cover and let dough finish bulk fermenting until it’s puffy, jiggly, and has bubbles on top (about 2-4 more hours depending on your kitchen temp).

    Step 3: Shape & Cold Proof

    1. Turn dough onto a lightly floured surface. Shape into a tight round.
    2. Place seam-side up into a floured proofing basket or a bowl lined with a floured towel.
    3. Cover and refrigerate for 8-12 hours (overnight).

    Step 4: Bake

    1. Preheat Dutch oven inside your oven to 500°F (260°C) for 30 minutes.
    2. Turn dough onto parchment paper. Score the top with a razor blade (one deep slash).
    3. Lower dough into Dutch oven using parchment. Cover with lid.
    4. Bake covered for 20 minutes. Remove lid, lower heat to 450°F (230°C), and bake uncovered for 15-20 minutes until dark golden brown.
    5. Cool completely on a wire rack before slicing (at least 1 hour or it will be gummy).

    Summary

    Prep Time: 30 minutes | Ferment + Proof: 12-16 hours | Bake Time: 40 minutes

    Yield: 1 large loaf | Difficulty: Medium (requires patience, not skill)

    Storage Notes

    Store cut side down on a cutting board at room temperature for up to 3 days. Never refrigerate (it stales faster). Freeze whole or sliced for up to 3 months. Toast frozen slices straight from the freezer.

  • Lumpiang Shanghai (Little Crunchy Packets of Joy)

    Lumpiang Shanghai (Little Crunchy Packets of Joy)

    Small size. Big crunch. Huge flavor.

    Lumpiang Shanghai are the crispy, golden, pork-filled spring rolls that disappear faster than you can fry them. Make a batch. Hide some for yourself.

    Ingredients

    Makes 25–30 rolls.

    • 25–30 small spring roll wrappers (lumpia wrappers)
    • ½ lb (225g) ground pork
    • ¼ cup (25g) finely chopped carrot
    • ¼ cup (30g) finely chopped onion
    • 2 green onions, minced
    • 1 egg (for filling + separate for sealing)
    • 1 tablespoon soy sauce
    • ½ teaspoon black pepper
    • Oil for frying

    Step-by-Step Instructions

    Step 1: Make Filling

    1. Mix pork, carrot, onion, green onions, 1 egg, soy sauce, and pepper in a bowl.

    Step 2: Roll

    1. Place 1½ teaspoons filling near one corner of a wrapper.
    2. Fold corner over filling. Fold in sides. Roll tightly.
    3. Seal edge with beaten egg (the extra egg).
    4. Repeat. They should be cigar-thin.

    Step 3: Fry

    1. Heat 1 inch of oil to 350°F (175°C).
    2. Fry rolls in batches for 3–4 minutes until golden brown and crispy.
    3. Drain on paper towels.

    Summary

    Prep Time: 20 minutes | Cook Time: 10 minutes | Total Time: 30 minutes

    Yield: 25–30 rolls

    Difficulty: Medium (rolling takes patience)

    Storage Notes

    • Fridge (uncooked): Keep rolled lumpia in a single layer, covered, for up to 1 day.
    • Freezer (uncooked): Freeze on a tray, then transfer to a bag. Fry from frozen—add 1–2 minutes.
    • Leftovers (cooked): Reheat in air fryer at 350°F for 3–4 minutes or oven at 375°F for 8 minutes.

    Pro tip: Serve with sweet chili sauce or vinegar with garlic. Don’t skip the dip.

  • Buffalo Wings (Spicy, Tangy & 35 Minutes)

    Buffalo Wings (Spicy, Tangy & 35 Minutes)

    Buffalo wings are a game day legend. Spicy. Tangy. Buttery. Crispy baked wings tossed in classic Frank’s RedHot sauce. 35 minutes. Ranch or blue cheese on the side. Celery sticks mandatory.

    Keep napkins close.

    Ingredients

    Serves 4 (about 2 lbs wings).

    For the Wings:

    • 2 lbs chicken wings (drumettes and flats)
    • 1 tbsp baking powder (not baking soda—crispy secret!)
    • ½ tsp salt
    • ¼ tsp black pepper
    • ½ tsp garlic powder

    For the Buffalo Sauce:

    • ½ cup Frank’s RedHot sauce (or similar)
    • 4 tbsp unsalted butter, melted
    • 1 tbsp white vinegar
    • ½ tsp garlic powder
    • ¼ tsp cayenne pepper (optional, for extra heat)

    For Serving:

    • Ranch or blue cheese dressing
    • Celery sticks
    • Carrot sticks (optional)

    Step-by-Step Instructions

    Step 1: Preheat & Prep Wings

    1. Preheat oven to 425°F (220°C). Line a baking sheet with foil and place a wire rack on top.
    2. Pat wings completely dry with paper towels.
    3. In a bowl, toss wings with baking powder, salt, pepper, and garlic powder.

    Step 2: Bake the Wings

    1. Arrange wings on the wire rack in a single layer.
    2. Bake for 20 minutes. Flip. Bake 10-15 more minutes until golden and crispy.

    Step 3: Make the Buffalo Sauce

    1. In a bowl, whisk together Frank’s RedHot, melted butter, vinegar, garlic powder, and cayenne.

    Step 4: Toss & Serve

    1. Place baked wings in a large bowl. Pour buffalo sauce over wings. Toss to coat.
    2. Serve hot with ranch or blue cheese dressing and celery sticks.

    Summary

    Prep Time: 10 minutes | Cook Time: 30-35 minutes | Total Time: 40-45 minutes

    Yield: 4 servings

    Difficulty: Easy

    Storage Notes

    Best fresh and crispy. Keeps in fridge for 3 days. Reheat in oven or air fryer at 375°F for 5-7 minutes (microwave makes skin soft). The sauce-soaked wings are still delicious the next day.

  • Crispy Fried Chicken: The Ultimate Bucket List Recipe

    Crispy Fried Chicken: The Ultimate Bucket List Recipe

    Great fried chicken is a treasure. A crust that crackles when you bite into it. Meat that’s still juicy underneath. No greasy aftertaste.

    This recipe delivers all of that. Buttermilk brine tenderizes, double dredge builds the crunch, and the spice blend brings the heat. Make extra. You’ll need it.

    Ingredients

    Serves 4-6.

    • 3 lbs chicken pieces (drumsticks, thighs, or a mix)
    • 2 cups buttermilk
    • 2 cups all-purpose flour
    • ¼ cup cornstarch (extra crunch!)
    • 2 large eggs
    • Oil for frying (peanut or vegetable)

    Spice Blend:

    • 2 teaspoons salt
    • 2 teaspoons paprika
    • 1 teaspoon garlic powder
    • 1 teaspoon onion powder
    • 1 teaspoon black pepper
    • ½ teaspoon cayenne (optional, for heat)

    Step-by-Step Instructions

    Step 1: Brine the Chicken

    1. In a bowl, combine chicken and buttermilk with 1 teaspoon of the spice blend.
    2. Cover and refrigerate for at least 4 hours (overnight is better).

    Step 2: Make the Dredge

    1. In a large bowl, whisk flour, cornstarch, and remaining spice blend.
    2. In another bowl, beat the eggs.

    Step 3: Double Dredge

    1. Remove chicken from buttermilk, letting excess drip off.
    2. Dip in flour mixture, then egg, then flour mixture again. Press firmly.

    Step 4: Fry to Golden Glory

    1. Heat 1-2 inches of oil in a Dutch oven to 350°F (175°C).
    2. Fry chicken in batches (don’t crowd) for 12-15 minutes, turning occasionally.
    3. Internal temp should reach 165°F. Drain on a wire rack (not paper towels—keeps crunch).

    Step 5: Serve Hot

    1. Sprinkle with a little extra salt. Serve with pickles, slaw, or biscuits. Then fight over the last drumstick.

    Summary

    Prep Time: 20 minutes + 4 hours brining | Cook Time: 25 minutes | Total Time: 4 hours 45 minutes

    Yield: 4-6 servings

    Difficulty: Medium

    Storage Notes

    Fridge:

    Store leftover fried chicken in the fridge for up to 3 days. The crust will soften but the flavor remains.

    Reheating (Don’t Microwave):

    Air fryer at 375°F for 6-8 minutes. Oven at 375°F on a wire rack for 15 minutes. Microwave = soggy tragedy.

    Leftover Cold Chicken:

    Honestly? Cold fried chicken straight from the fridge is a gift. Enjoy it without shame.

  • Honey Garlic Wings: Sticky, Sweet, and Irresistible

    Honey Garlic Wings: Sticky, Sweet, and Irresistible

    Honey garlic wings are the people-pleaser of the wing world. Not too spicy, not too sweet. Just sticky, glossy, garlicky perfection.

    These are baked until crispy, then tossed in a glaze that clings to every nook and cranny. No deep fryer needed. Just a wire rack, a hot oven, and a bowl to lick clean afterward.

    Ingredients

    Serves 4.

    • 2 lbs chicken wings (drumettes and flats)
    • 1 tablespoon baking powder (not baking soda)
    • ½ teaspoon salt

    Honey Garlic Glaze:

    • ½ cup honey
    • ¼ cup soy sauce (low sodium preferred)
    • 4 cloves garlic, minced
    • 1 tablespoon rice vinegar (or apple cider vinegar)
    • 1 teaspoon sesame oil
    • Optional: 1 teaspoon sriracha for heat

    Garnish:

    • Sesame seeds, sliced green onions

    Step-by-Step Instructions

    Step 1: Prep the Wings

    1. Preheat oven to 425°F (220°C). Line a baking sheet with foil and place a wire rack on top.
    2. Pat wings completely dry with paper towels.
    3. Toss wings with baking powder and salt until coated.

    Step 2: Bake Until Crispy

    1. Arrange wings on the rack (not touching).
    2. Bake for 45-50 minutes, flipping halfway, until golden and crispy.

    Step 3: Make the Glaze

    1. While wings bake, combine honey, soy sauce, garlic, vinegar, sesame oil, and sriracha (if using) in a small saucepan.
    2. Simmer over medium-low heat for 5 minutes until slightly thickened.

    Step 4: Toss and Serve

    1. Transfer hot wings to a large bowl. Pour glaze over and toss to coat.
    2. Sprinkle with sesame seeds and green onions. Serve immediately with napkins. So many napkins.

    Summary

    Prep Time: 10 minutes | Cook Time: 50 minutes | Total Time: 1 hour

    Yield: 4 servings

    Difficulty: Easy

    Storage Notes

    Fridge:

    Store in an airtight container for up to 3 days. The glaze sets up but reheats beautifully.

    Reheating:

    Air fryer at 375°F for 5-7 minutes. Oven at 375°F for 8-10 minutes. Microwave works but softens the sticky glaze.

    Make-Ahead:

    Bake wings without glaze. Cool, refrigerate. Reheat, then toss in warmed glaze. Almost as good as fresh.

  • Mozzarella Sticks (The Cheesiest Pull of Your Life)

    Mozzarella Sticks (The Cheesiest Pull of Your Life)

    Cheese + crunch + that ridiculous stretch. Need we say more?

    Homemade mozzarella sticks are easier than you think. Freeze them, fry them, and watch everyone fight for the last one.

    Ingredients

    Makes 12 sticks.

    • 12 string cheese sticks (or block mozzarella cut into 3″ x ½” sticks)
    • ½ cup (60g) all-purpose flour
    • 2 large eggs, beaten
    • 1 cup (100g) breadcrumbs (panko is best for crunch)
    • ½ cup (50g) grated parmesan cheese
    • 1 teaspoon garlic powder
    • 1 teaspoon dried oregano
    • Oil for frying
    • Marinara sauce for dipping

    Step-by-Step Instructions

    Step 1: Freeze First (Crucial!)

    1. Place cheese sticks in freezer for at least 1 hour. Solid cheese = no blowouts.

    Step 2: Set Up Breading Station

    1. Bowl 1: Flour. Bowl 2: Beaten eggs. Bowl 3: Breadcrumbs + parmesan + garlic powder + oregano.

    Step 3: Bread Twice

    1. Dip each cheese stick: flour → egg → breadcrumbs → egg again → breadcrumbs again.
    2. Return to freezer for 15 minutes. Non-negotiable.

    Step 4: Fry & Serve

    1. Heat 1 inch of oil to 375°F (190°C).
    2. Fry 4–5 sticks at a time for 45–60 seconds until golden.
    3. Drain on paper towels. Serve immediately with marinara.

    Summary

    Prep Time: 10 minutes | Freeze Time: 1 hour 15 minutes | Cook Time: 5 minutes | Total Time: 1 hour 30 minutes

    Yield: 12 sticks

    Difficulty: Easy (patience required for freezing)

    Storage Notes

    • Freezer (raw, breaded): Store in a single layer in a freezer bag for up to 2 months. Fry from frozen — no thawing.
    • Leftovers (cooked): Almost impossible, but reheat in air fryer at 350°F for 2–3 minutes. Microwave = sad, soggy cheese tubes.

    Pro tip: Double breading + double freezing = zero cheese explosions. You’ve been warned.

  • Fried Dumplings (Crispy, Juicy, Gone in 60 Seconds)

    Fried Dumplings (Crispy, Juicy, Gone in 60 Seconds)

    Craving takeout? Make these instead. They’re crispier, juicier, and way more satisfying.

    Pan-fried dumplings have it all: a crunchy golden skirt, tender filling, and that perfect dip. Let’s get folding.

    Ingredients

    Makes 20 dumplings.

    • 20 round dumpling wrappers
    • ½ lb (225g) ground pork (or chicken/turkey)
    • 1 cup (100g) finely shredded cabbage
    • 2 green onions, minced
    • 1 clove garlic, minced
    • 1 tablespoon soy sauce
    • 1 teaspoon sesame oil
    • 2 tablespoons oil (for frying)
    • ⅓ cup water (for steaming)

    Step-by-Step Instructions

    Step 1: Make Filling

    1. Mix pork, cabbage, green onions, garlic, soy sauce, and sesame oil in a bowl.

    Step 2: Fold

    1. Place 1 teaspoon filling in center of each wrapper.
    2. Wet edges with water. Fold in half and pleat or press shut.

    Step 3: Fry & Steam

    1. Heat oil in a non-stick pan over medium-high heat.
    2. Place dumplings flat-side down. Fry 2 minutes until golden brown.
    3. Pour in water. Cover immediately. Steam 4–5 minutes until water evaporates.

    Step 4: Crisp & Serve

    1. Uncover. Let fry 1 more minute to re-crisp the bottoms.
    2. Flip onto a plate. Serve with soy sauce + rice vinegar + chili oil.

    Summary

    Prep Time: 15 minutes | Cook Time: 8 minutes | Total Time: 23 minutes

    Yield: 20 dumplings

    Difficulty: Medium (folding takes practice)

    Storage Notes

    • Fridge (uncooked): Store on a tray in a single layer, covered, for up to 1 day.
    • Freezer (uncooked): Freeze on a tray, then transfer to a bag. Cook from frozen—add 1 extra minute to steaming time.
    • Leftovers: Reheat in a dry pan over medium heat to re-crisp. Microwave makes them sad and soggy.

    Pro tip: Make a double batch. Freeze half. Future you will be very happy.

  • Stuffed Jalapeño Poppers: Creamy, Spicy, Crispy Heaven

    Stuffed Jalapeño Poppers: Creamy, Spicy, Crispy Heaven

    Jalapeño poppers are the MVP of appetizers. Spicy, creamy, salty, and crispy all at once. This version wraps them in bacon because… why wouldn’t you?

    Baked, not fried. Easy to prep ahead. And absolutely impossible to stop eating.

    Ingredients

    Makes 12-16 poppers (serves 4-6).

    • 12-16 fresh jalapeños
    • 8 oz cream cheese, softened
    • ½ cup shredded cheddar cheese
    • ¼ cup grated Parmesan (optional)
    • 2 green onions, finely chopped
    • 1 clove garlic, minced
    • ½ teaspoon smoked paprika
    • ¼ teaspoon salt
    • Optional: ranch or chipotle crema for dipping

    Step-by-Step Instructions

    Step 1: Preheat and Prep

    1. Preheat oven to 400°F (200°C). Line a baking sheet with foil and place a wire rack on top.
    2. Wearing gloves (seriously—don’t touch your eyes), cut each jalapeño in half lengthwise.
    3. Scoop out seeds and white membranes with a small spoon. Leave some seeds if you want more heat.

    Step 2: Make the Filling

    1. In a bowl, mix cream cheese, cheddar, Parmesan, green onions, garlic, paprika, and salt until smooth.

    Step 3: Fill the Jalapeños

    1. Spoon or pipe filling into each jalapeño half, mounding it slightly.

    Step 4: Bake Until Crispy

    1. Bake for 20-25 minutes until bacon is crispy and peppers are tender.
    2. For extra crispiness, broil for 1-2 minutes at the end—watch closely.

    Step 5: Serve Hot

    1. Let cool for 5 minutes (cheese lava is real). Serve with ranch or chipotle crema.

    Summary

    Prep Time: 15 minutes | Cook Time: 25 minutes | Total Time: 40 minutes

    Yield: 12-16 poppers (4-6 servings)

    Difficulty: Easy

    Storage Notes

    Fridge:

    Store baked poppers in an airtight container for up to 4 days. Reheat in air fryer at 375°F for 5 minutes or oven at 375°F for 8 minutes.

    Freezing:

    Freeze unbaked assembled poppers on a tray, then transfer to a bag. Freeze for up to 2 months. Bake from frozen at 400°F for 25-30 minutes.

    Make-Ahead:

    Prep and fill the jalapeños (without bacon) up to 2 days ahead. Refrigerate. Add bacon and bake when ready.

    Heat Warning:

    WEAR GLOVES when handling jalapeños. The oils stick to your skin and will burn your eyes, nose, and other sensitive areas for hours. Learn from our mistakes.

    Vegetarian Option:

    Skip the bacon. Sprinkle with panko breadcrumbs mixed with a little olive oil before baking.