Author: user

  • Oreo Fudge Brownies: Chocolate³. Send Help.

    Oreo Fudge Brownies: Chocolate³. Send Help.

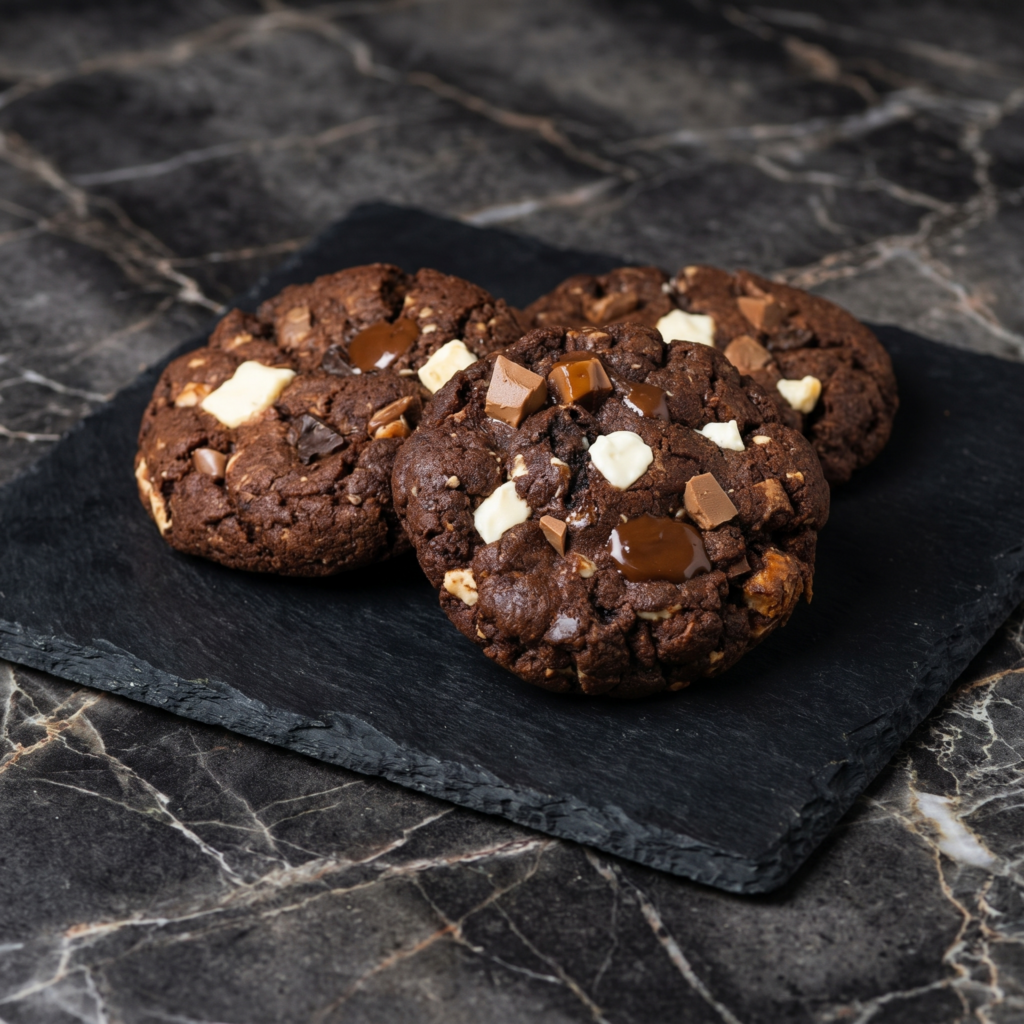
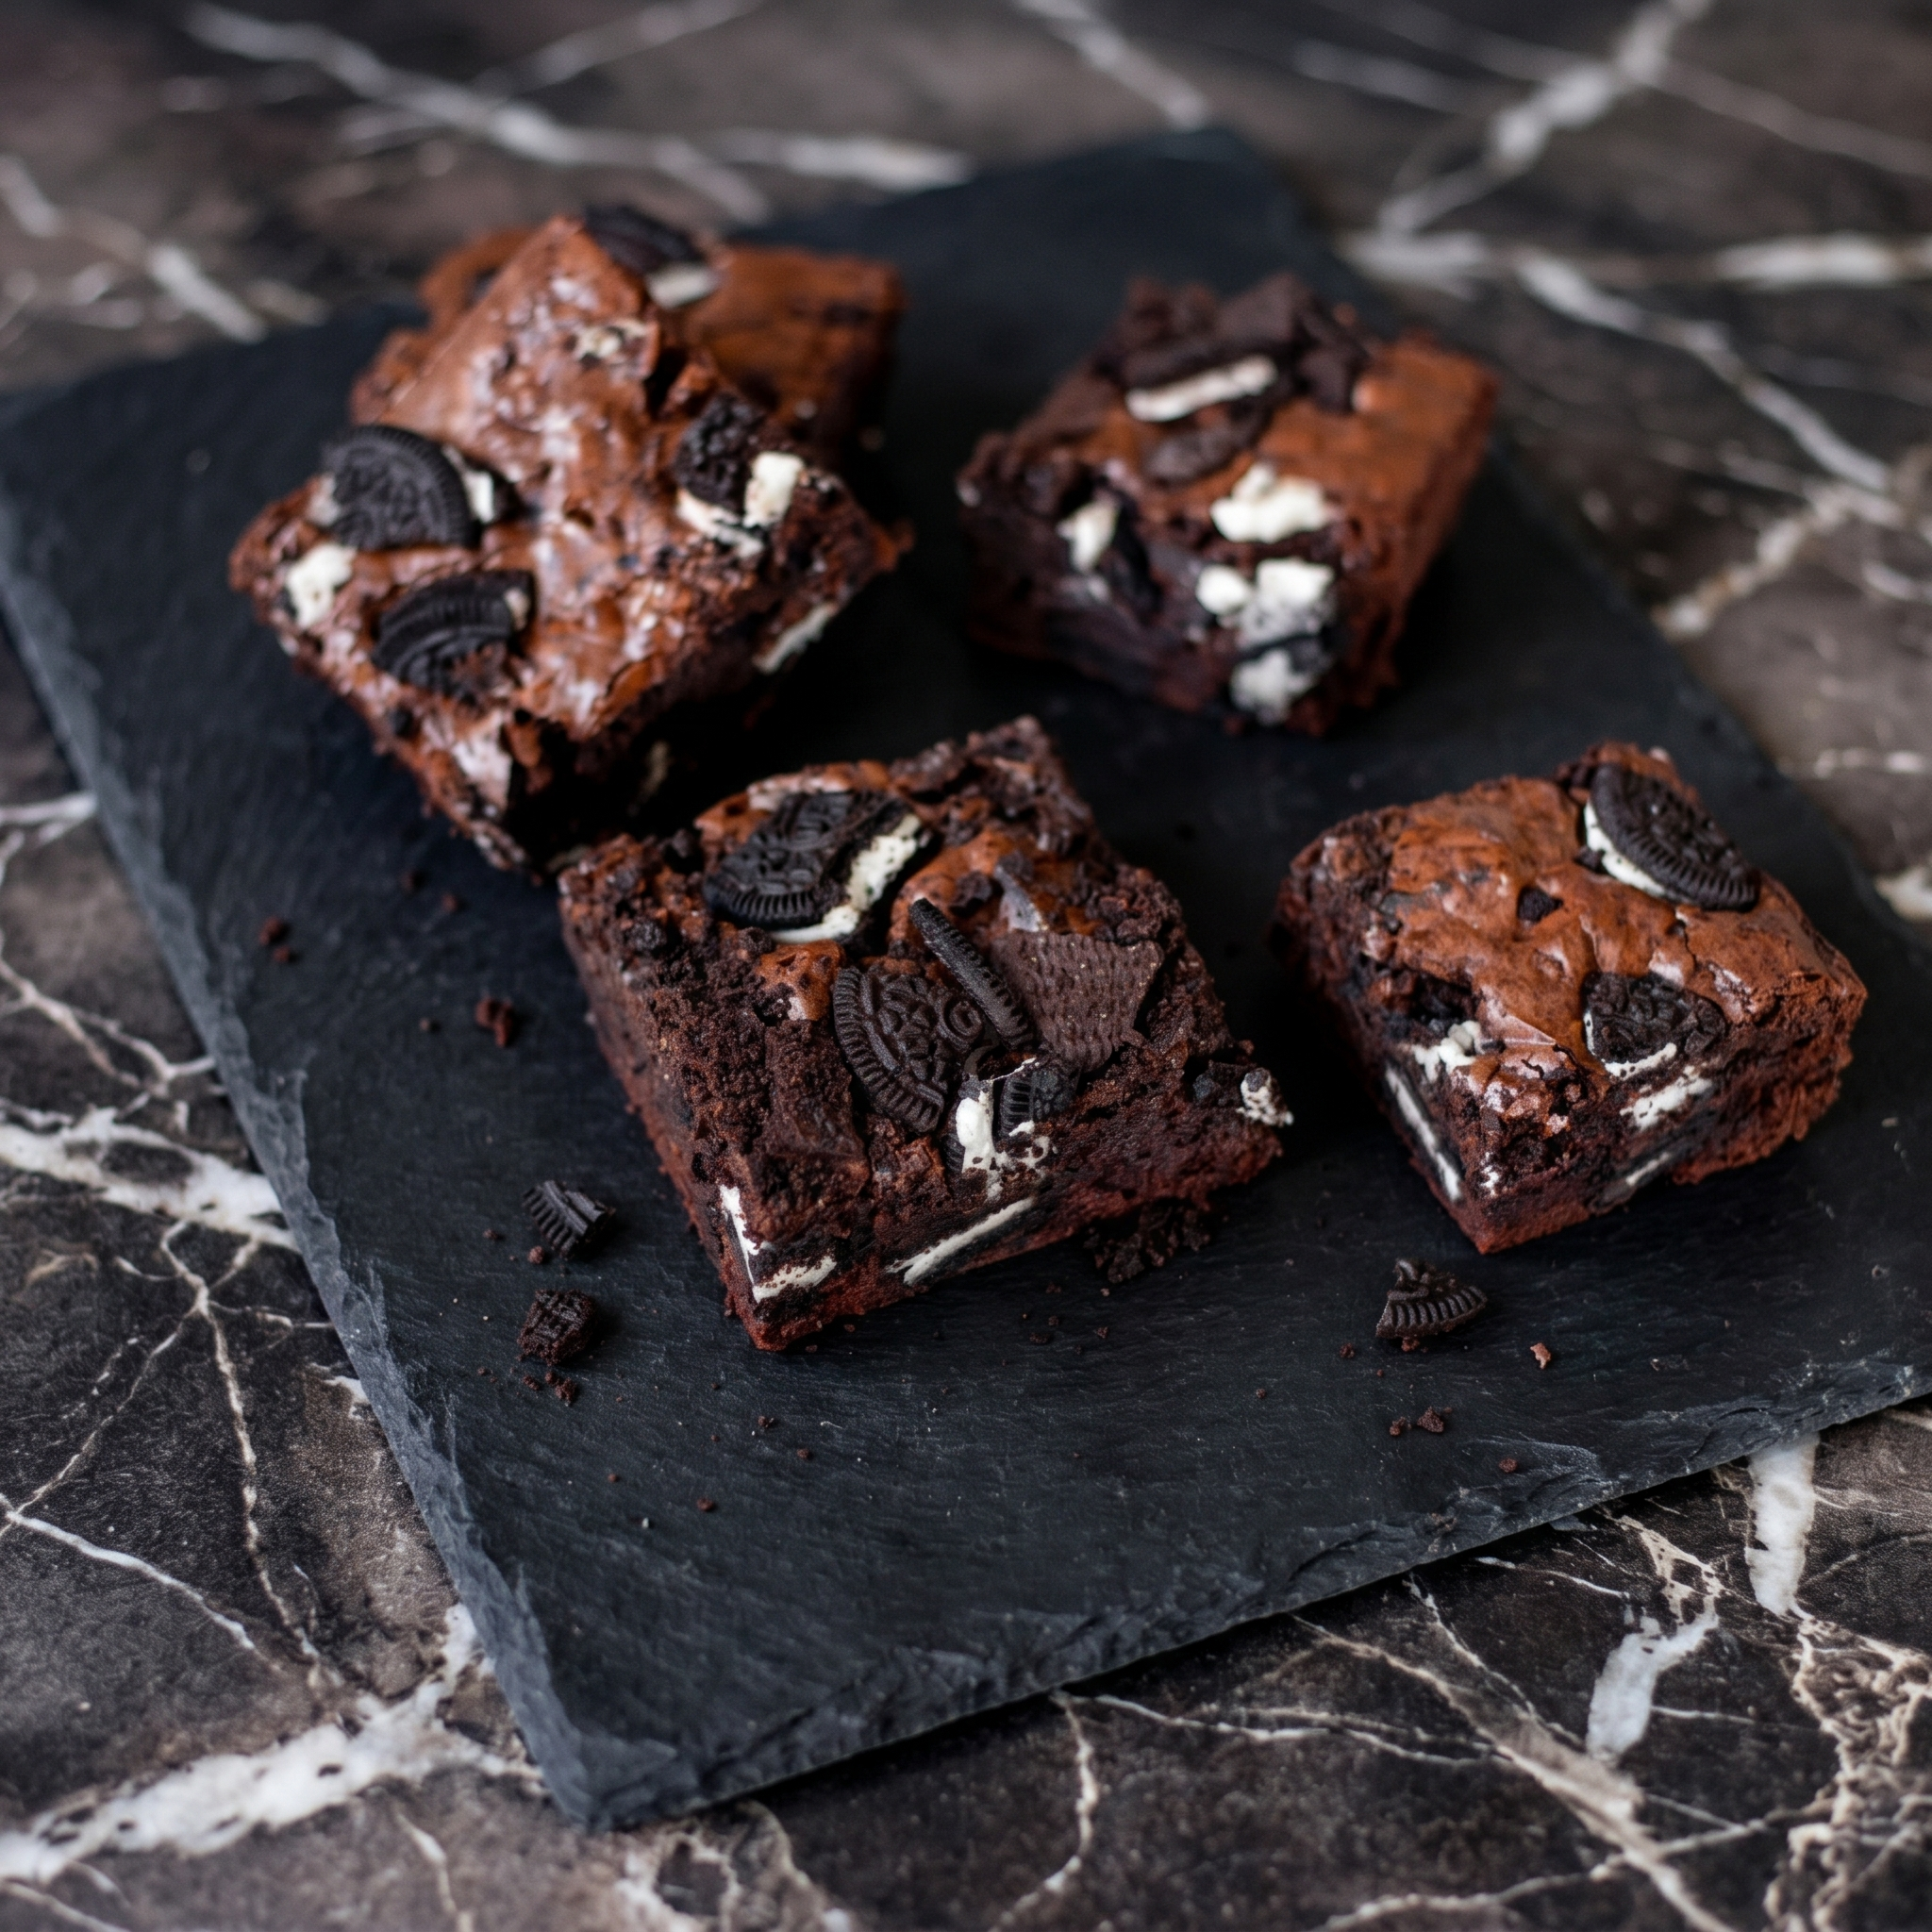
    Brownies are great. Oreos are great. Together? Unstoppable.

    Fudgy brownie batter. A layer of whole Oreos. More brownie on top. Baked until crackly. One bite. You’ll never go back.

    Ingredients

    Makes 12-16 brownies.

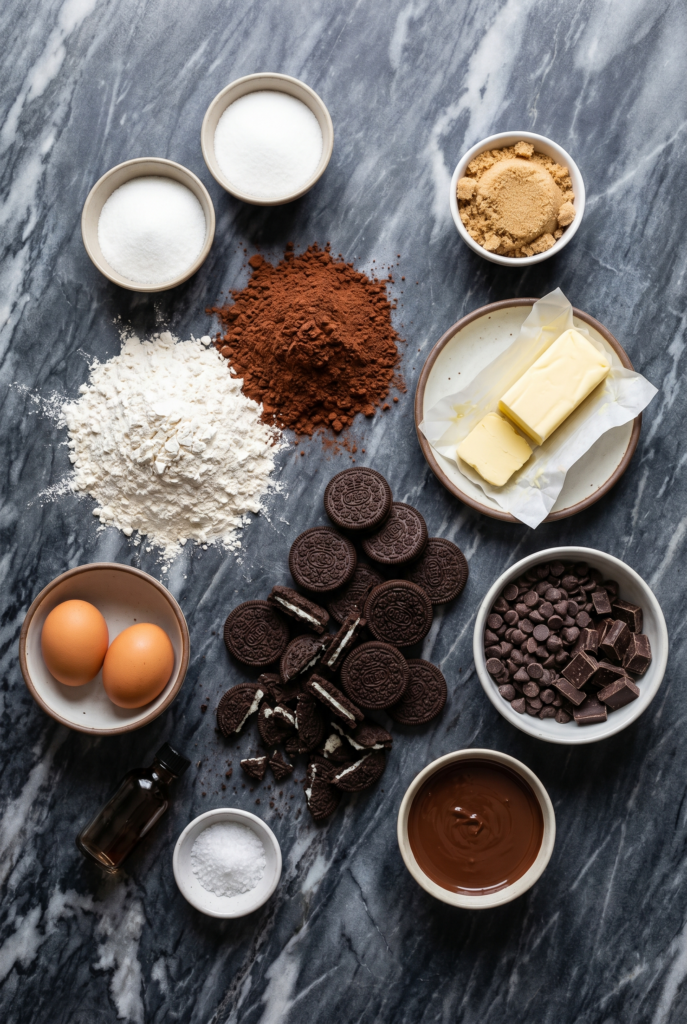
    • 1 box brownie mix (plus eggs, oil, water as box directs)
    • OR homemade: 1 cup butter, 2 cups sugar, 4 eggs, 1 cup flour, ¾ cup cocoa, 1 tsp vanilla
    • 20-24 Oreo cookies (regular or double stuf)
    • ½ cup chocolate chips or crushed Oreos for topping (optional)

    Step-by-Step Instructions

    Step 1: Preheat and Prep

    1. Preheat oven to 350°F (175°C). Grease a 9×9 or 9×13 baking dish. Line with parchment paper.

    Step 2: Make Brownie Batter

    1. Prepare brownie batter according to package or recipe.

    Step 3: Layer the Oreos

    1. Pour half the brownie batter into prepared dish. Spread evenly.
    2. Arrange whole Oreos in a single layer on top of batter (about 16-20).
    3. Pour remaining brownie batter over Oreos. Spread to cover.

    Step 4: Top and Bake

    1. Sprinkle crushed Oreos or chocolate chips on top (optional).
    2. Bake 30-35 minutes until toothpick comes out with fudgy crumbs (not wet).

    Step 5: Cool and Cut

    1. Let cool completely in pan (at least 1 hour).
    2. Cut into squares. Serve with cold milk.

    Summary

    Prep Time: 10 minutes | Cook Time: 30-35 minutes | Total Time: 40-45 minutes

    Yield: 12-16 brownies

    Difficulty: Easy

    Storage Notes

    Room Temp:

    Store in an airtight container for up to 5 days.

    Fridge/Freezer:

    Refrigerate for 1 week. Freeze for 3 months. Thaw at room temperature.

    Pro Tip:

    Underbake slightly for fudgier brownies. Overbake = dry. Watch the timer.

  • Chocolate Rice Krispie Treats: The Original, But Make It Cocoa

    Chocolate Rice Krispie Treats: The Original, But Make It Cocoa

    Rice Krispie Treats are perfect. Chocolate Rice Krispie Treats are perfecter.

    Same buttery marshmallow base. Same crispy crunch. Plus cocoa powder in the mix and melted chocolate on top. 10 minutes. No oven. Maximum chocolate.

    Ingredients

    Makes 12-16 bars.

    • 4 tbsp unsalted butter
    • 1 bag (10 oz) marshmallows (about 40 regular or 4 cups mini)
    • ¼ cup unsweetened cocoa powder
    • ½ tsp vanilla extract
    • Pinch of salt
    • 6 cups Rice Krispies cereal
    • ½ cup chocolate chips (milk or semi-sweet) for topping

    Optional add-ins: Mini chocolate chips inside, sprinkles, peanut butter chips

    Step-by-Step Instructions

    Step 1: Prep the Pan

    1. Grease a 9×13 baking dish with butter or non-stick spray.

    Step 2: Melt Butter and Marshmallows

    1. In a large pot over low heat, melt butter.
    2. Add marshmallows. Stir constantly until completely melted and smooth.
    3. Whisk in cocoa powder, vanilla, and salt until fully combined.

    Step 3: Add the Cereal

    1. Pour in Rice Krispies. Stir quickly until cereal is fully coated in chocolate marshmallow.
    2. Don’t overmix.

    Step 4: Press Into Pan

    1. Transfer mixture to prepared dish. Press firmly into an even layer using greased hands or wax paper.

    Step 5: Add Chocolate Topping

    1. Melt chocolate chips in microwave (30-second bursts, stirring).
    2. Drizzle or spread over the top. Let set 5 minutes.

    Step 6: Cut and Serve

    1. Let cool completely. Cut into squares. Serve.

    Summary

    Prep Time: 5 minutes | Cook Time: 5 minutes | Total Time: 10 minutes (+ cooling)

    Yield: 12-16 bars

    Difficulty: So Easy

    Storage Notes

    Room Temp:

    Store in an airtight container for up to 5 days. Do not refrigerate (they get hard).

    Freezer Friendly:

    Freeze for up to 6 weeks. Thaw at room temperature.

    Pro Tip:

    Use dark cocoa powder for an extra-rich, Oreo-like flavor. Life-changing.

  • Rice Krispie Treats: The 5-Ingredient Childhood Hero

    Rice Krispie Treats: The 5-Ingredient Childhood Hero

    Some recipes are timeless. This is one of them.

    Butter. Marshmallows. Cereal. That’s it. 10 minutes. No oven. Sticky, gooey, crispy perfection. Make them with a kid. Eat them like a kid. No judgment.

    Ingredients

    Makes 12-16 bars.

    • 4 tbsp unsalted butter
    • 1 bag (10 oz) marshmallows (about 40 regular or 4 cups mini)
    • ½ tsp vanilla extract (optional)
    • Pinch of salt (optional)
    • 6 cups Rice Krispies cereal

    Optional add-ins: Sprinkles, chocolate chips, M&Ms, peanut butter

    Step-by-Step Instructions

    Step 1: Prep the Pan

    1. Grease a 9×13 baking dish with butter or non-stick spray.

    Step 2: Melt the Butter and Marshmallows

    1. In a large pot over low heat, melt butter.
    2. Add marshmallows. Stir constantly until completely melted and smooth.
    3. Remove from heat. Stir in vanilla and salt (if using).

    Step 3: Add the Cereal

    1. Pour in Rice Krispies. Stir quickly until cereal is fully coated.
    2. Don’t overmix (cereal gets crushed).

    Step 4: Press Into Pan

    1. Transfer mixture to prepared dish.
    2. Press firmly into an even layer using greased hands or wax paper (mixture is sticky!).

    Step 5: Cool and Cut

    1. Let cool at room temperature for 15-20 minutes.
    2. Cut into squares. Serve.

    Summary

    Prep Time: 5 minutes | Cook Time: 5 minutes | Total Time: 10 minutes (+ cooling)

    Yield: 12-16 bars

    Difficulty: So Easy

    Storage Notes

    Room Temp:

    Store in an airtight container for up to 5 days. Do not refrigerate (they get hard).

    Freezer Friendly:

    Freeze for up to 6 weeks. Thaw at room temperature.

    Pro Tip:

    For extra gooey treats, add 1 extra cup of marshmallows. For extra crispy, add 1 less cup.

  • Triple Chocolate Cookies: For Chocolate Emergency Situations

    Triple Chocolate Cookies: For Chocolate Emergency Situations

    Some cookies have chocolate. These cookies ARE chocolate.

    Three kinds: cocoa powder in the dough, milk chocolate chips, white chocolate chunks. Fudgy. Chewy. Crackly tops. One batch. Zero self-control.

    Ingredients

    Makes 18-20 cookies.

    • 1 cup unsalted butter, softened
    • 1 cup brown sugar
    • ½ cup granulated sugar
    • 2 large eggs
    • 1 tsp vanilla extract
    • 1¾ cups all-purpose flour
    • ¾ cup unsweetened cocoa powder
    • 1 tsp baking soda
    • ½ tsp salt
    • 1 cup milk chocolate chips
    • 1 cup white chocolate chips or chunks

    Step-by-Step Instructions

    Step 1: Preheat and Prep

    1. Preheat oven to 350°F (175°C). Line baking sheets with parchment paper.

    Step 2: Cream Butter and Sugars

    1. Beat softened butter, brown sugar, and granulated sugar until light and fluffy.
    2. Add eggs one at a time. Mix in vanilla.

    Step 3: Add Dry Ingredients

    1. Whisk flour, cocoa powder, baking soda, and salt in a separate bowl.
    2. Gradually add to wet mixture. Mix until just combined (don’t overmix).

    Step 4: Add the Chocolate

    1. Fold in milk chocolate chips and white chocolate chunks.

    Step 5: Scoop and Bake

    1. Scoop tablespoon-sized dough balls onto baking sheets (2 inches apart).
    2. Bake 10-12 minutes until edges are set and tops are crackly.
    3. Let cool on baking sheet 5 minutes, then transfer to wire rack.

    Step 6: Serve

    1. Serve with a tall glass of milk. Try not to eat the whole batch.

    Summary

    Prep Time: 10 minutes | Cook Time: 10-12 minutes | Total Time: 20-22 minutes

    Yield: 18-20 cookies

    Difficulty: Easy

    Storage Notes

    Room Temp:

    Store in an airtight container for up to 5 days. They stay soft and fudgy.

    Freezer Friendly:

    Freeze dough balls for 3 months. Bake from frozen at 350°F for 12-14 minutes.

    Pro Tip:

    Underbake slightly for fudgier cookies. 10 minutes is perfect for gooey centers.

  • Crispy Chicken Caesar Wraps: Salad That Fights Back

    Crispy Chicken Caesar Wraps: Salad That Fights Back

    Salad is great. Salad you can eat with your hands? Genius.

    Crispy chicken. Creamy Caesar dressing. Shaved Parmesan. Crunchy romaine. All wrapped in a tortilla. 15 minutes. Lunch just got an upgrade.

    Ingredients

    Serves 4.

    • 4 large flour tortillas (10-inch)
    • 4 cups romaine lettuce, chopped
    • 4 crispy chicken tenders (frozen or homemade, cooked crispy)
    • ½ cup Caesar dressing (plus extra)
    • ½ cup shaved or grated Parmesan cheese
    • ½ cup croutons, crushed (optional, for crunch)
    • Black pepper to taste

    Step-by-Step Instructions

    Step 1: Prep the Chicken

    1. Cook chicken tenders according to package instructions until crispy.
    2. Slice into bite-sized strips.

    Step 2: Toss the Caesar Salad

    1. In a bowl, toss romaine with Caesar dressing, Parmesan, and crushed croutons.

    Step 3: Warm the Tortillas

    1. Microwave tortillas for 10-15 seconds until pliable.

    Step 4: Assemble Wraps

    1. Spread a thin layer of Caesar dressing on each tortilla.
    2. Layer crispy chicken strips down the center.
    3. Pile Caesar salad on top. Add black pepper.

    Step 5: Roll and Serve

    1. Fold in sides. Roll from bottom up, keeping it tight.
    2. Cut in half on a diagonal. Serve immediately.

    Summary

    Prep Time: 10 minutes | Cook Time: 5 minutes | Total Time: 15 minutes

    Yield: 4 wraps

    Difficulty: Easy

    Storage Notes

    Best Fresh:

    Assemble right before eating. Soggy lettuce = sad wrap.

    Meal Prep Style:

    Store components separately for 3 days. Assemble when hungry.

    Pro Tip:

    Toast the tortilla in a dry skillet for 30 seconds per side. Holds up better. Worth it.

  • Chicken Stuffed Peppers: The Lean, Mean, Flavor Machine

    Chicken Stuffed Peppers: The Lean, Mean, Flavor Machine

    Stuffed peppers are a full meal in a bowl. A bowl you can eat.

    Ground chicken. Rice. Marinara. Mozzarella. All baked inside sweet bell peppers. Healthy? Sure. Delicious? Absolutely. No one will miss the beef.

    Ingredients

    Serves 4.

    • 4 large bell peppers (any color)
    • 1 lb ground chicken
    • 1 small onion, diced
    • 2 garlic cloves, minced
    • 1 cup cooked rice (white, brown, or cauliflower rice)
    • 1 can (15 oz) marinara or tomato sauce (divided)
    • 1 tsp Italian seasoning
    • ½ tsp salt
    • ¼ tsp black pepper
    • 1 cup shredded mozzarella cheese (divided)
    • 2 tbsp fresh parsley or basil, chopped (optional)

    Step-by-Step Instructions

    Step 1: Preheat and Prep Peppers

    1. Preheat oven to 375°F (190°C).
    2. Slice tops off peppers. Remove seeds and membranes.
    3. Place peppers upright in a baking dish. Add 2 tbsp water to dish.

    Step 2: Cook the Filling

    1. In a skillet over medium heat, cook ground chicken and onion until chicken is browned (5-7 minutes). Drain any liquid.
    2. Add garlic. Cook 1 minute until fragrant.
    3. Stir in cooked rice, half the marinara sauce (about ¾ cup), Italian seasoning, salt, pepper, and half the mozzarella.

    Step 3: Stuff the Peppers

    1. Spoon filling into each pepper, pressing down gently.
    2. Pour remaining marinara over and around the peppers.
    3. Top with remaining mozzarella cheese.

    Step 4: Bake and Serve

    1. Cover dish with foil. Bake 30 minutes.
    2. Uncover. Bake 10 more minutes until cheese is bubbly and peppers are tender.
    3. Garnish with parsley or basil. Serve hot.

    Summary

    Prep Time: 15 minutes | Cook Time: 40 minutes | Total Time: 55 minutes

    Yield: 4 stuffed peppers

    Difficulty: Easy

    Storage Notes

    Fridge:

    Store in an airtight container for up to 4 days. Tastes even better day 2.

    Reheat:

    Microwave 2-3 minutes. Or oven at 350°F for 10-12 minutes.

    Freezer Friendly:

    Assemble (don’t bake). Freeze up to 3 months. Bake from frozen at 375°F for 50-60 minutes.

    Pro Tip:

    Substitute cauliflower rice to keep it low-carb. Works perfectly.

  • Buffalo Ranch Chicken Sliders: Spicy, Cool, Disappearing Fast

    Buffalo Ranch Chicken Sliders: Spicy, Cool, Disappearing Fast

    Buffalo wings are great. Sliders are better.

    Spicy shredded chicken. Cool ranch dressing. Melty cheddar. Sweet Hawaiian rolls. Baked until golden. One bite. You’ll forget wings existed.

    Ingredients

    Makes 12 sliders.

    • 1 package (12 count) Hawaiian rolls
    • 3 cups cooked chicken, shredded (rotisserie = hero)
    • ½ cup buffalo sauce (Franks + butter)
    • ½ cup ranch dressing (plus extra for drizzling)
    • 1½ cups shredded cheddar or Monterey Jack cheese
    • 3 tbsp butter, melted
    • 1 tsp garlic powder
    • 1 tbsp fresh parsley or chives (optional)

    Step-by-Step Instructions

    Step 1: Preheat and Sauce

    1. Preheat oven to 375°F (190°C).
    2. Toss shredded chicken with buffalo sauce until coated.

    Step 2: Prep the Rolls

    1. Without separating individual rolls, slice entire slab of Hawaiian rolls horizontally (top and bottom).
    2. Place bottom half in a greased 9×13 baking dish.

    Step 3: Assemble

    1. Drizzle ranch dressing on bottom rolls.
    2. Layer buffalo chicken evenly on top.
    3. Sprinkle with cheese.
    4. Place top slab of rolls back on.

    Step 4: Butter and Bake

    1. Mix melted butter and garlic powder. Brush over tops.
    2. Bake 10-12 minutes until golden and cheese is melted.

    Step 5: Finish and Serve

    1. Drizzle with extra ranch. Sprinkle with parsley.
    2. Separate sliders. Serve hot. Watch them vanish.

    Summary

    Prep Time: 10 minutes | Cook Time: 10-12 minutes | Total Time: 20-22 minutes

    Yield: 12 sliders

    Difficulty: Easy

    Storage Notes

    Fridge:

    Store leftovers for 3 days.

    Reheat:

    Oven at 350°F for 8-10 minutes. Microwave for 30 seconds but buns get soft.

    Pro Tip:

    Double the filling. Make a batch for now. Freeze the filling for later.

  • Honey Garlic BBQ Ribs: Sticky, Sweet, Fall-Off-The-Bone

    Honey Garlic BBQ Ribs: Sticky, Sweet, Fall-Off-The-Bone

    Ribs sound intimidating. They’re not.

    Low heat. Long cook. Sticky honey garlic glaze. That’s the secret. No smoker. No grill. Just an oven and some patience. These ribs will make you look like a pitmaster.

    Ingredients

    Serves 4.

    • 2 racks baby back ribs (about 4 lbs total)
    • 1 tbsp salt
    • 1 tbsp black pepper
    • 1 tbsp garlic powder
    • 1 tbsp paprika
    • 1 tsp cayenne (optional)

    For the Honey Garlic BBQ Sauce:

    • ½ cup honey
    • ½ cup BBQ sauce
    • 4 garlic cloves, minced
    • 2 tbsp soy sauce
    • 1 tbsp apple cider vinegar
    • 1 tbsp brown sugar

    Step-by-Step Instructions

    Step 1: Preheat and Prep

    1. Preheat oven to 300°F (150°C). Line a baking sheet with foil.
    2. Remove membrane from back of ribs (grip with paper towel and pull).

    Step 2: Season the Ribs

    1. Mix salt, pepper, garlic powder, paprika, and cayenne. Rub all over ribs.
    2. Wrap ribs tightly in foil. Place on baking sheet.

    Step 3: Bake Low and Slow

    1. Bake 2.5 to 3 hours until tender (meat pulls back from bones).

    Step 4: Make the Glaze

    1. Whisk honey, BBQ sauce, garlic, soy sauce, vinegar, and brown sugar in a saucepan.
    2. Simmer 5 minutes until thickened.

    Step 5: Glaze and Finish

    1. Remove ribs from foil. Brush generously with glaze.
    2. Increase oven to 400°F. Bake uncovered 10 minutes.
    3. Broil 1-2 minutes for sticky, charred edges.

    Step 6: Serve

    1. Rest 5 minutes. Slice. Serve with extra glaze. Napkins mandatory.

    Summary

    Prep Time: 15 minutes | Cook Time: 3 hours | Total Time: 3+ hours

    Yield: 4 servings (2 racks)

    Difficulty: Easy (just needs time)

    Storage Notes

    Fridge:

    Store leftovers for 4 days. Ribs get even more flavorful overnight.

    Reheat:

    Oven at 325°F for 15 minutes wrapped in foil. Microwave works but less sticky.

    Freezer Friendly:

    Freeze cooked ribs for 2 months. Thaw overnight. Reheat in oven.

    Pro Tip:

    Make the glaze ahead. Keeps in the fridge for 2 weeks. Double it for extra dipping.

  • Lemon Butter Garlic Cod: 15 Minutes to Flaky Perfection

    Lemon Butter Garlic Cod: 15 Minutes to Flaky Perfection

    Fish is fast. This fish is fast AND delicious.

    Cod fillets seared in garlic butter. Finished with fresh lemon and parsley. Flaky. Juicy. Bright. 15 minutes from fridge to plate. No fishy smell. No stress.

    Ingredients

    Serves 4.

    • 4 cod fillets (about 1.5 lbs total)
    • 3 tbsp unsalted butter
    • 4 garlic cloves, minced
    • 2 tbsp fresh lemon juice
    • 1 tsp lemon zest
    • 2 tbsp fresh parsley, chopped
    • ½ tsp salt
    • ¼ tsp black pepper
    • ¼ tsp paprika (optional, for color)
    • Lemon wedges for serving

    Step-by-Step Instructions

    Step 1: Pat and Season

    1. Pat cod fillets completely dry with paper towels.
    2. Season both sides with salt, pepper, and paprika.

    Step 2: Sear the Cod

    1. Melt 2 tbsp butter in a large skillet over medium-high heat.
    2. Place cod in skillet. Cook 3-4 minutes per side until golden and flaky (internal temp 145°F).
    3. Remove cod to a plate.

    Step 3: Make the Sauce

    1. Reduce heat to low. Add remaining 1 tbsp butter and garlic. Cook 30 seconds until fragrant.
    2. Stir in lemon juice, lemon zest, and parsley.

    Step 4: Finish and Serve

    1. Return cod to skillet. Spoon sauce over the top.
    2. Serve immediately with lemon wedges. Great with rice, asparagus, or crusty bread.

    Summary

    Prep Time: 5 minutes | Cook Time: 10 minutes | Total Time: 15 minutes

    Yield: 4 servings

    Difficulty: Easy

    Storage Notes

    Best Fresh:

    Cod is best eaten immediately. Leftover fish gets dry.

    Fridge:

    Store leftovers for 1 day. Reheat gently in a skillet with a splash of broth.

    Pro Tip:

    Don’t overcook! Cod turns rubbery fast. Cook until just flaky. Trust the timer.

  • Chili Cheese Dogs: Messy. Cheesy. Perfect.

    Chili Cheese Dogs: Messy. Cheesy. Perfect.

    Some foods are meant to be messy. Chili cheese dogs are the king of messy.

    Grilled hot dog. Smoky, beefy chili. A mountain of shredded cheddar. Diced onion. That’s it. 20 minutes. Eat with your hands. Lick your fingers. Zero regrets.

    Ingredients

    Serves 4.

    • 4 hot dogs (beef recommended)
    • 4 hot dog buns
    • 1 (15 oz) can chili (no beans or with beans—your call)
    • 1 cup shredded cheddar cheese
    • ¼ cup diced white onion (optional)
    • Yellow mustard (optional)
    • Pickled jalapeños (optional)

    Quick Homemade Chili (Optional):

    • ½ lb ground beef
    • 1 (8 oz) can tomato sauce
    • 1 tbsp chili powder
    • ½ tsp cumin

    Step-by-Step Instructions

    Step 1: Heat the Chili

    1. In a small pot, heat chili over medium heat until bubbly.
    2. If making quick homemade: brown ground beef, drain, add tomato sauce, chili powder, and cumin. Simmer 5 minutes.

    Step 2: Cook the Hot Dogs

    1. Grill, pan-fry, or boil hot dogs until heated through.
    2. Steam or toast buns lightly.

    Step 3: Assemble

    1. Place hot dog in bun. Squeeze mustard if using.
    2. Ladle chili generously over the dog.
    3. Pile on cheddar cheese. Top with onion and jalapeños.

    Step 4: Serve

    1. Serve immediately with a fork (and napkins. so many napkins).

    Summary

    Prep Time: 5 minutes | Cook Time: 10-15 minutes | Total Time: 15-20 minutes

    Yield: 4 chili cheese dogs

    Difficulty: Easy

    Storage Notes

    Best Fresh:

    Assemble and eat immediately. Nobody wants a soggy chili cheese dog.

    Leftover Chili:

    Store chili in fridge for 4 days or freeze for 3 months. Reheat and make fresh dogs.

    Pro Tip:

    Toast the buns. A little crunch prevents soggy bottom syndrome.