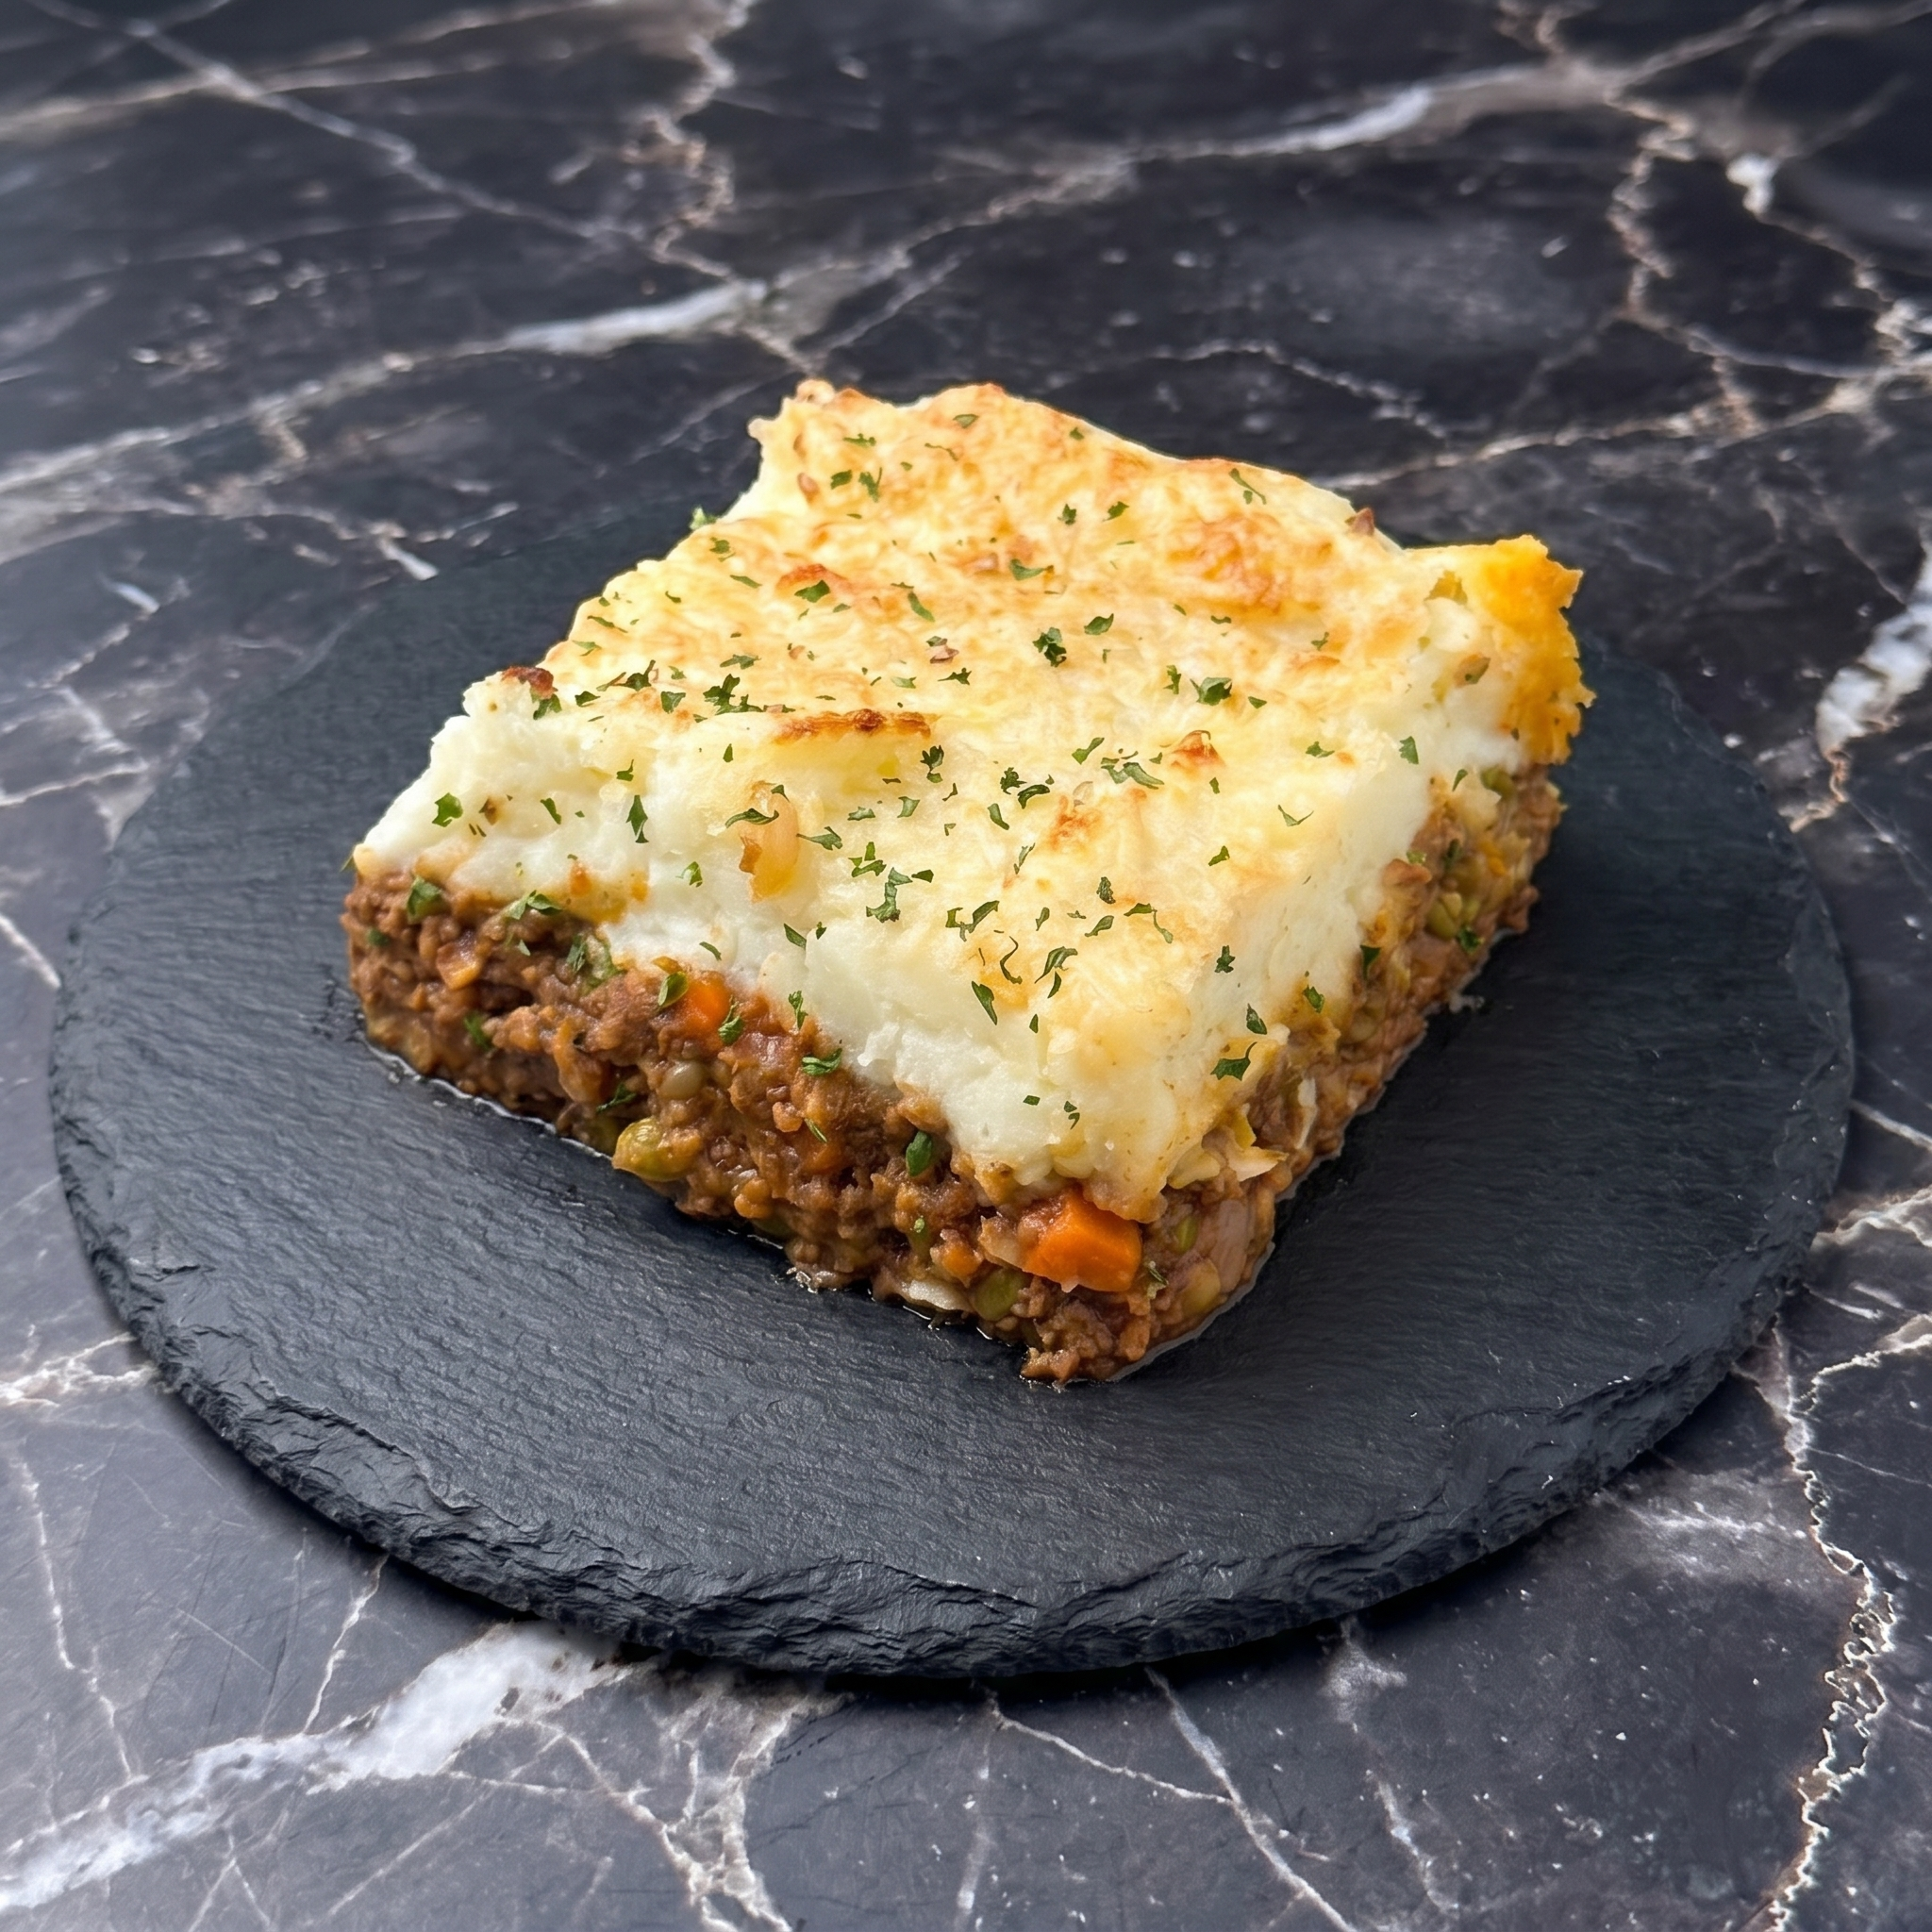
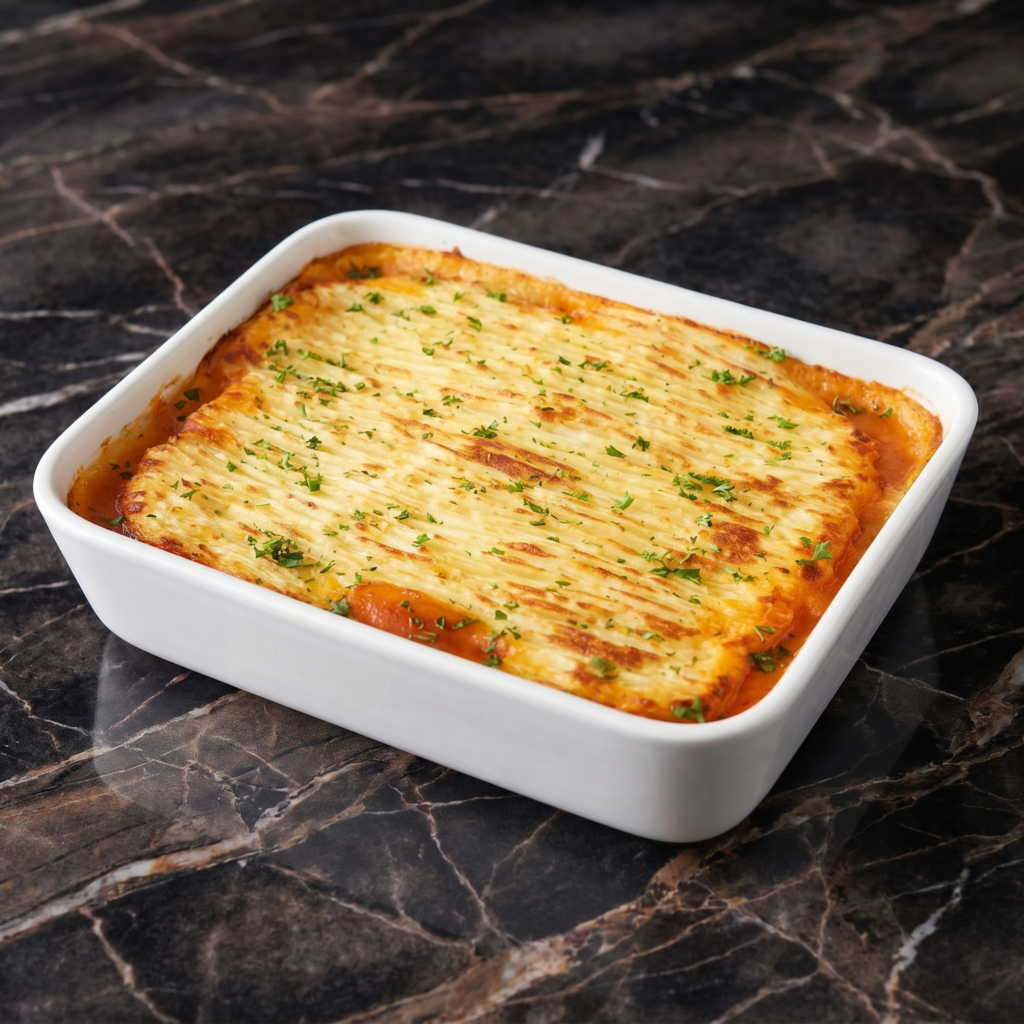
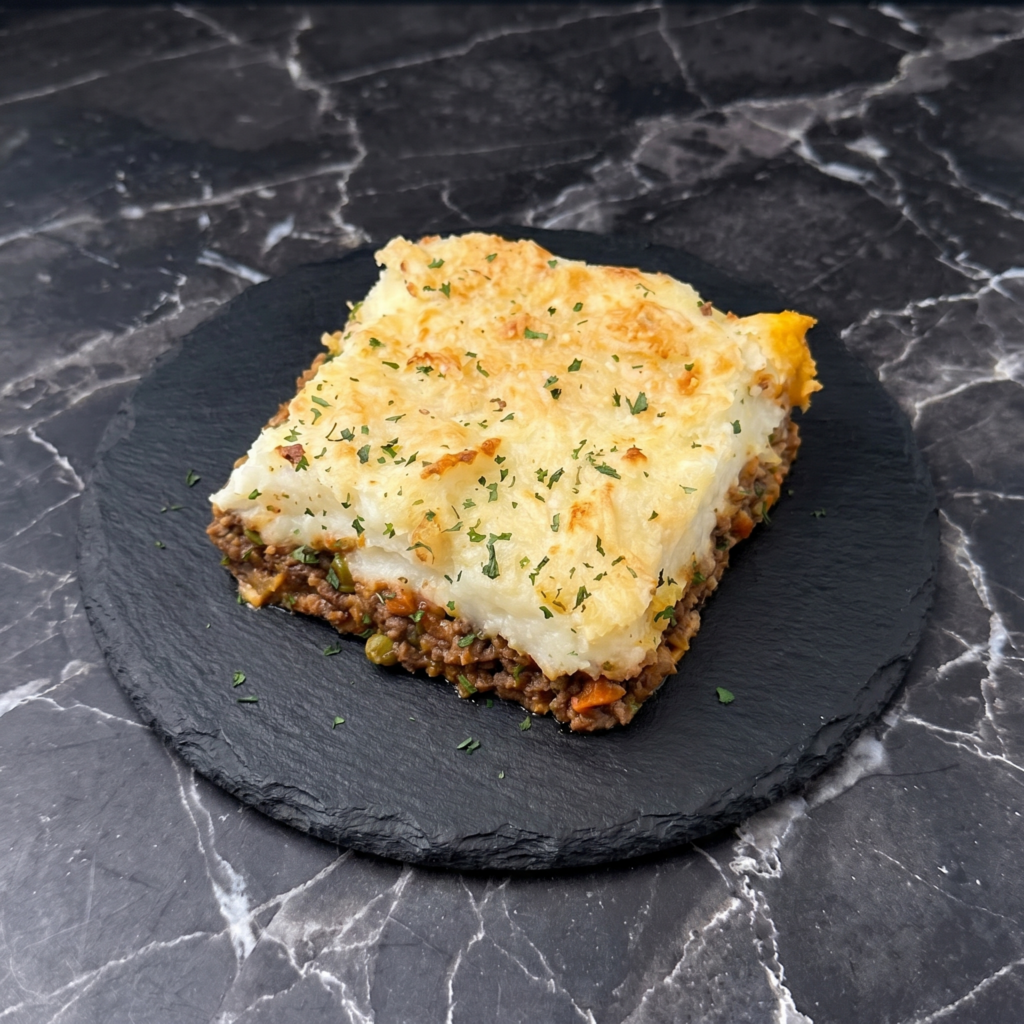
Shepherd’s pie is what happens when leftovers dream big. But honestly? It’s better when you make it on purpose.
Savory meat filling. Sweet carrots and peas. Topped with creamy mashed potatoes that get crispy edges in the oven. It’s a hug in a baking dish. No fancy skills required.
Ingredients
Serves 6.
2 lbs (900g) russet or Yukon gold potatoes, peeled and cubed
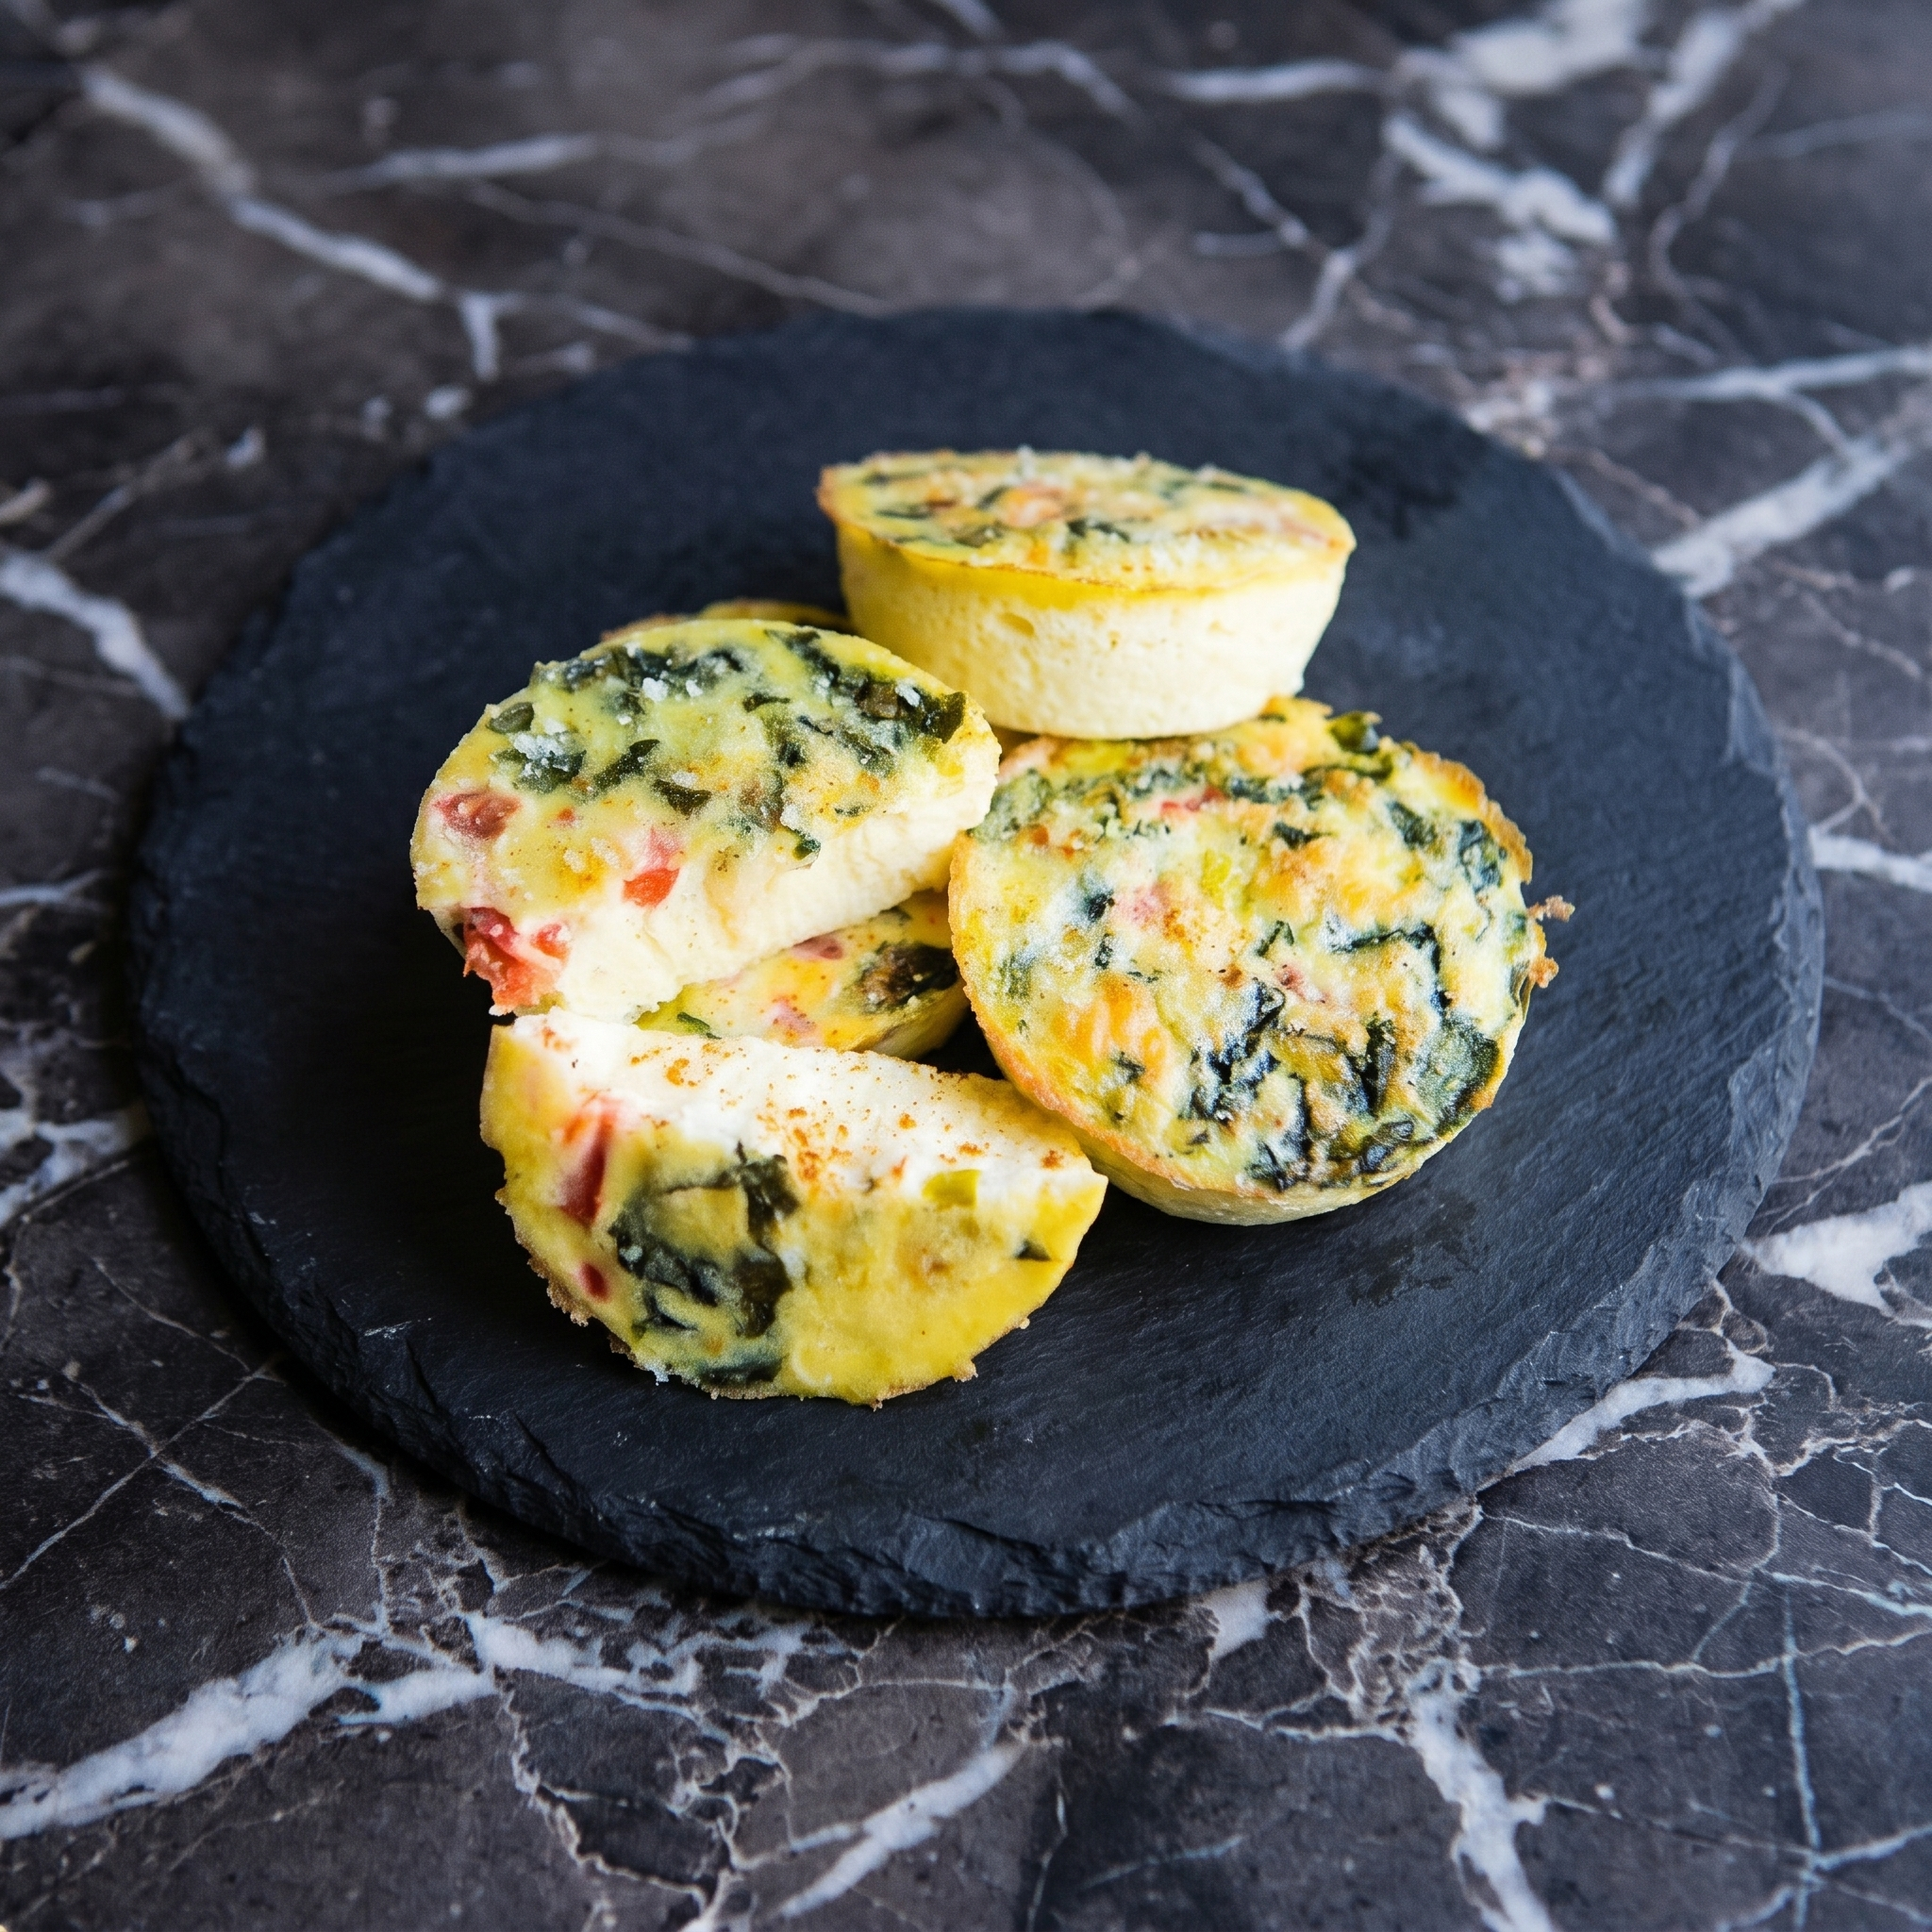
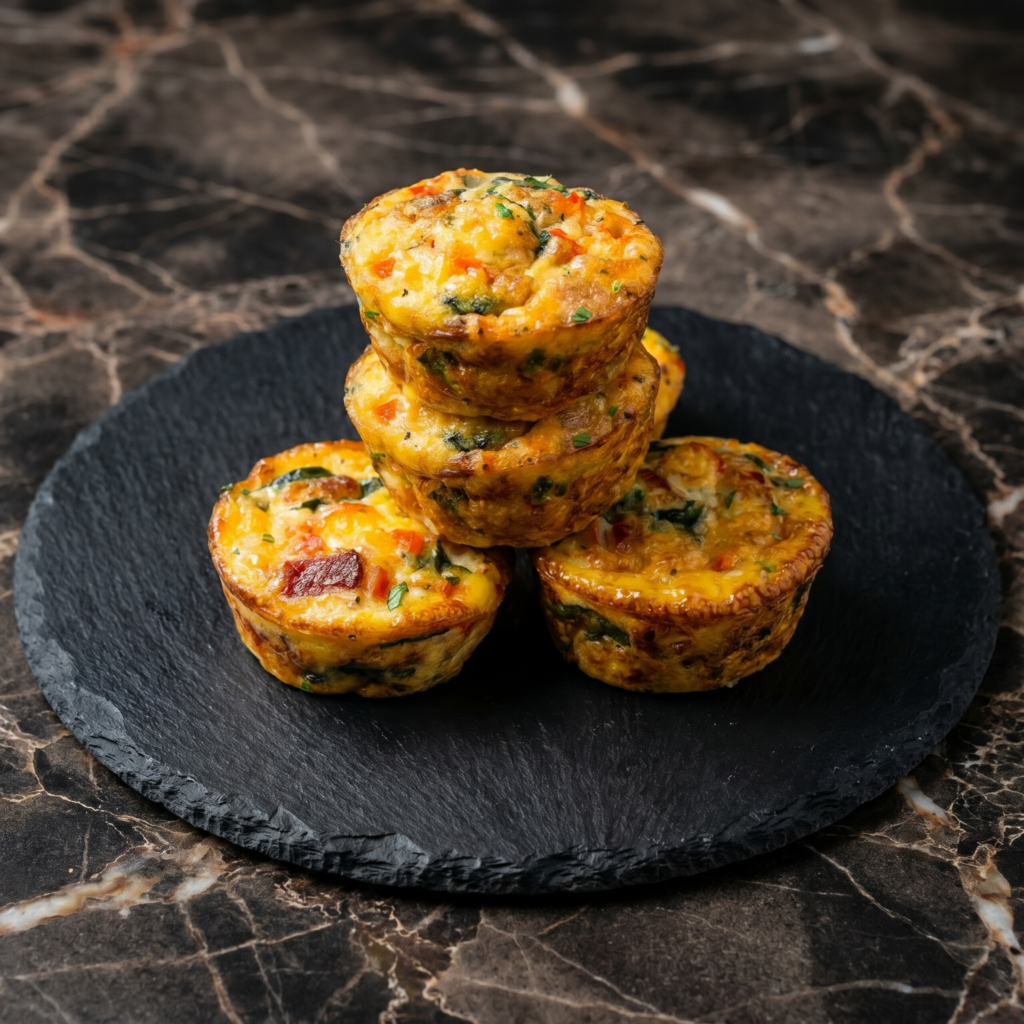
Starbucks egg bites are delicious. And expensive. Make them at home for a fraction of the cost. Fluffy, protein-packed, with sweet roasted red peppers and creamy cottage cheese. No fancy sous vide machine. Just a muffin tin and a water bath. Make a batch on Sunday. Eat all week. Let’s bake.
Ingredients
Makes 8-10 bites.
8 large egg whites (or 1 cup liquid egg whites)
½ cup cottage cheese
½ cup roasted red peppers, finely chopped
¼ cup grated Parmesan cheese
2 tablespoons fresh chives or parsley, chopped
¼ teaspoon salt
¼ teaspoon black pepper
¼ teaspoon garlic powder (optional)
Step-by-Step Instructions
Step 1: Preheat and Prep
Preheat oven to 325°F (165°C). Grease a muffin tin (silicone works best).
Step 2: Blend the Base
In a blender, combine egg whites, cottage cheese, salt, pepper, and garlic powder. Blend until smooth and frothy.
Step 3: Add Mix-Ins
Stir in roasted red peppers, Parmesan, and chives by hand.
Step 4: Fill and Bake (Water Bath)
Pour mixture into muffin cups, filling ¾ full.
Place muffin tin in a larger baking pan. Fill outer pan with hot water (1 inch deep).
Bake 20-25 minutes until set and slightly golden.
Step 5: Cool and Store
Let cool 5 minutes. Remove from tin.
Eat warm or refrigerate. Reheat 30 seconds in microwave.
Store in an airtight container in the fridge for 5 days. Freeze for 2 months. Reheat in microwave for 30 seconds or toaster oven. Swap roasted red peppers for spinach, sun-dried tomatoes, or broccoli. Add cooked turkey sausage for extra protein. Water bath = creamy texture. Don’t skip it. These beat Starbucks every time. Make a double batch.
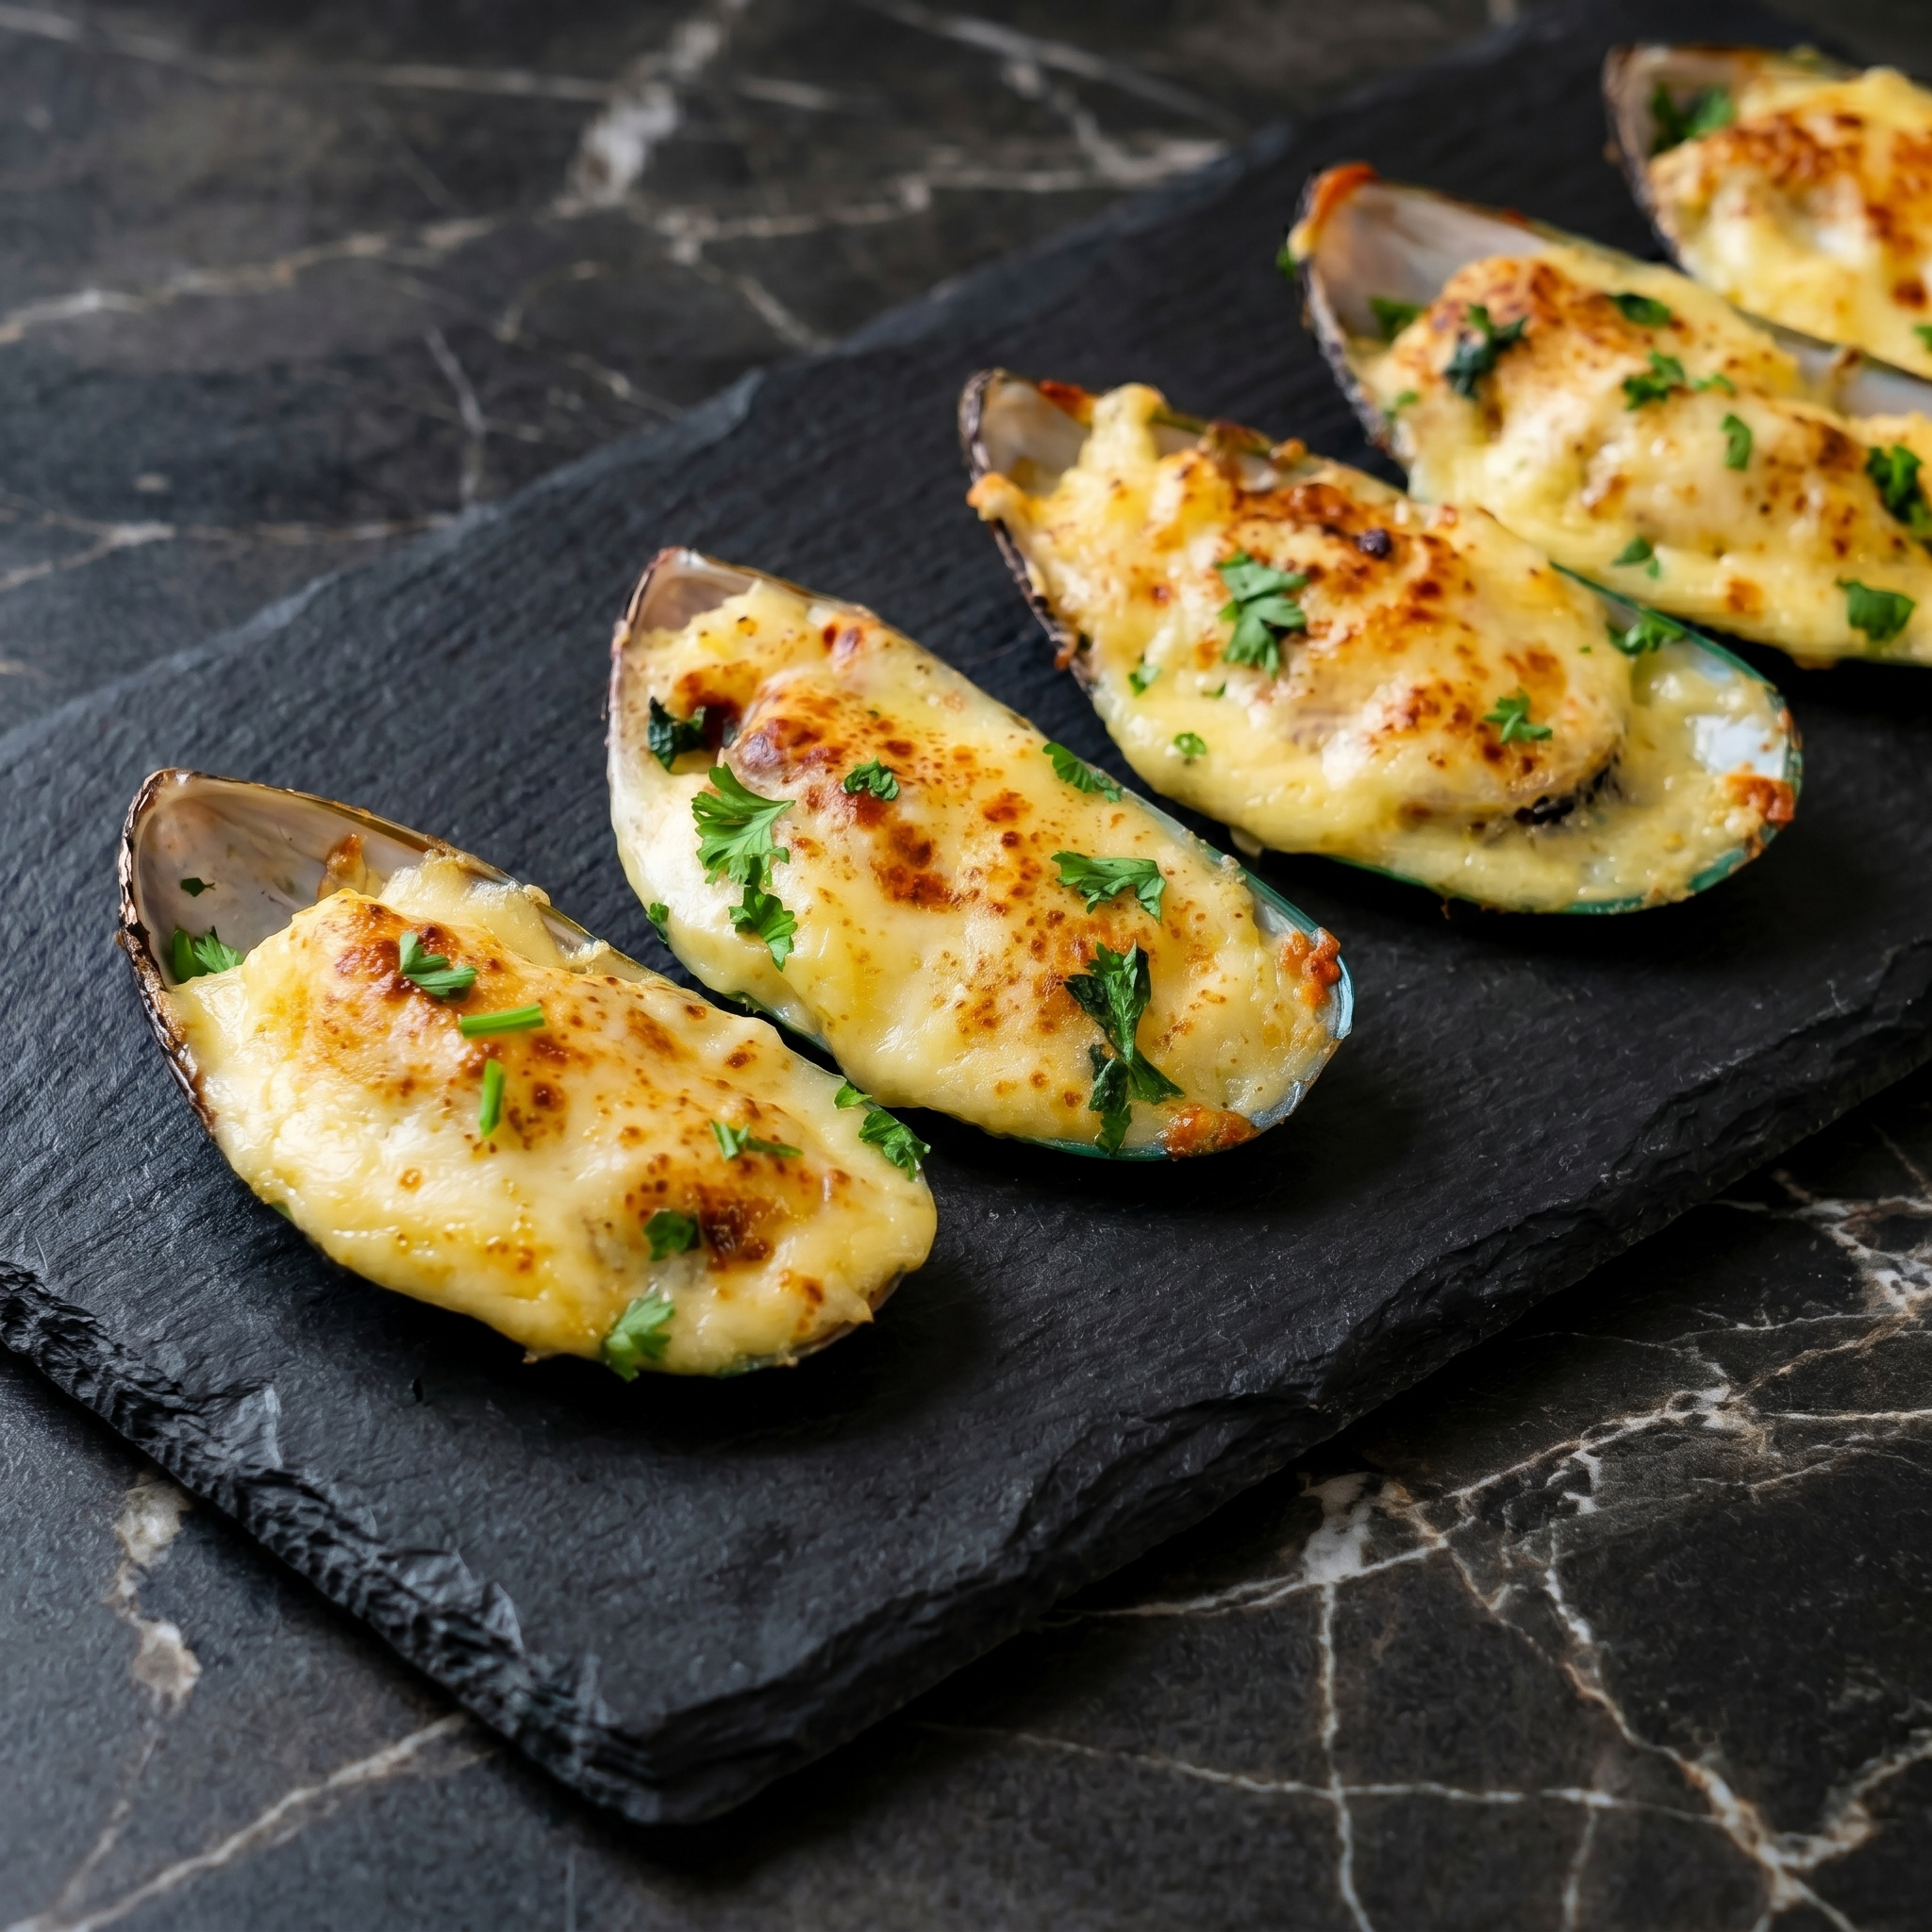
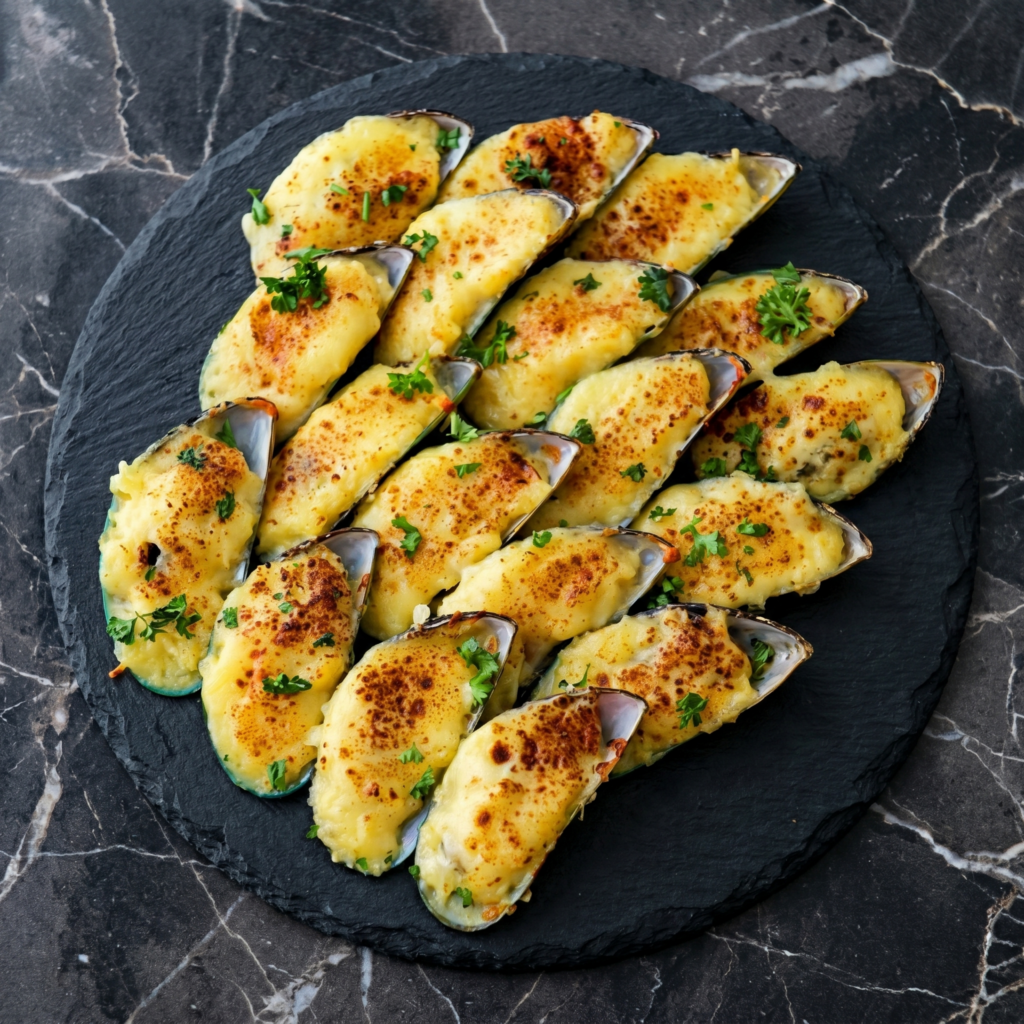
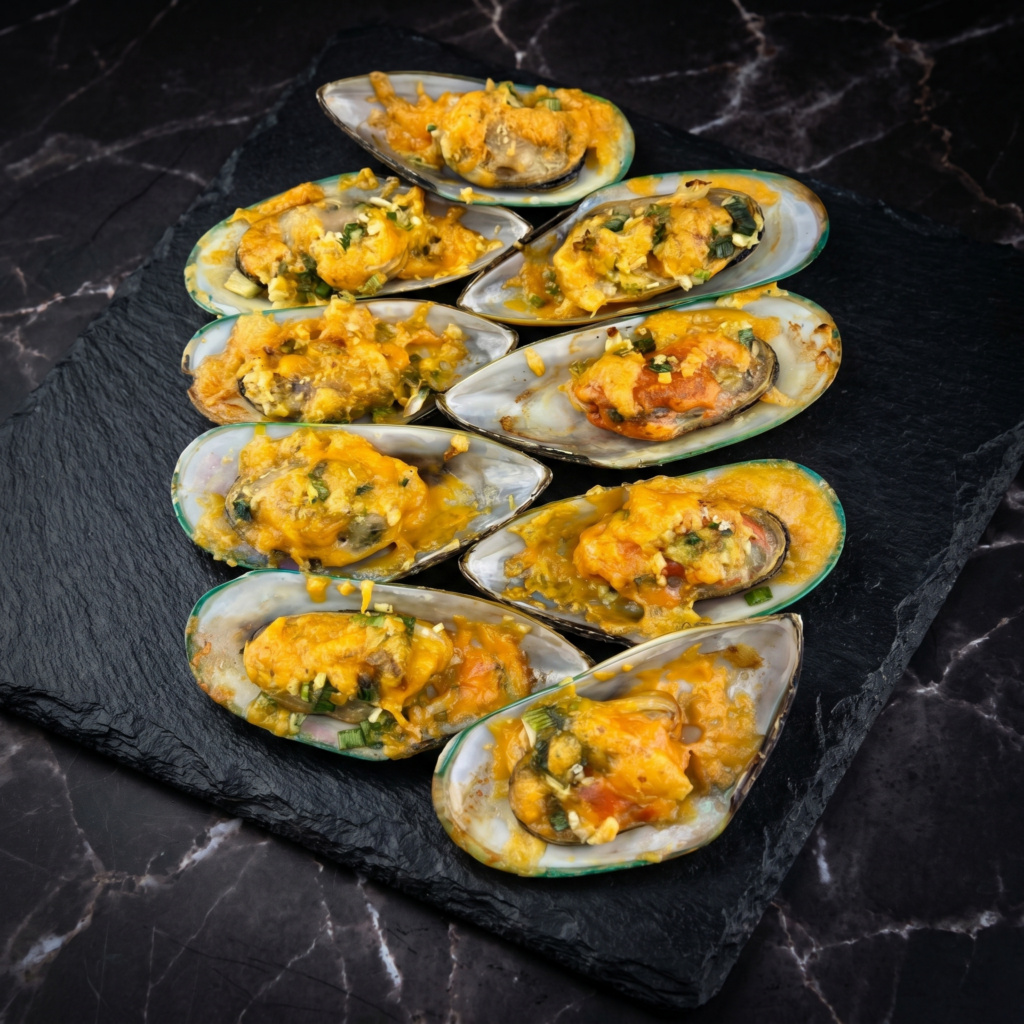
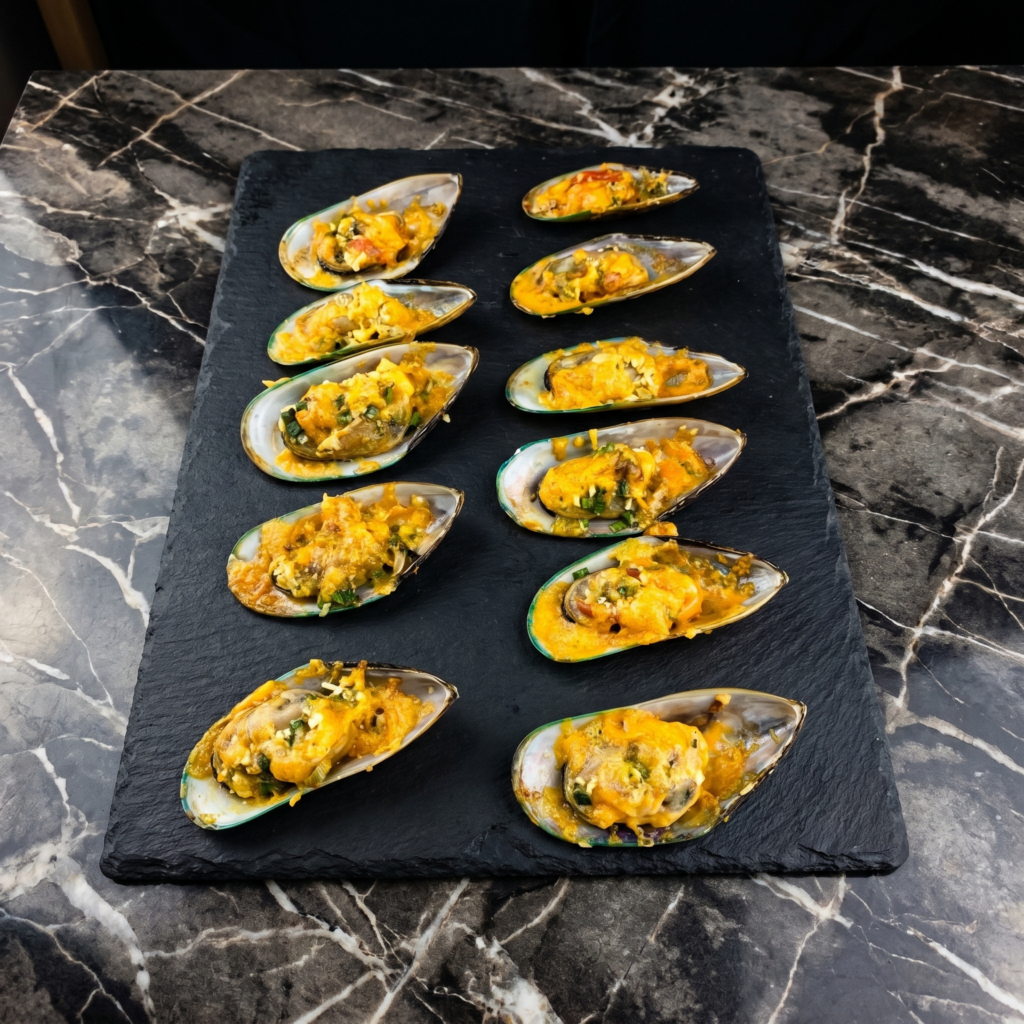
Mussels are secretly easy. They cook fast, taste like the ocean, and look impressive as hell. This baked version tops them with garlic butter, Parmesan, and breadcrumbs. Then you broil until bubbly and golden.
Frozen or fresh mussels work. Ten minutes of prep. Serve with a baguette and a glass of white wine. Date night solved.
Ingredients
Serves 2-3 as an appetizer (about 20-24 mussels).
1 lb mussels (about 20-24), cleaned and debearded
½ cup unsalted butter, softened
4 cloves garlic, minced
¼ cup grated Parmesan cheese
¼ cup panko breadcrumbs
2 tablespoons fresh parsley, finely chopped
1 tablespoon lemon juice
¼ teaspoon salt
¼ teaspoon black pepper
Lemon wedges for serving
Step-by-Step Instructions
Step 1: Preheat and Prep
Preheat oven to 450°F (230°C) with broiler on high.
Clean mussels: scrub shells, remove beards (the fuzzy string), and discard any that are already open and won’t close when tapped.
Step 2: Make the Garlic Butter Topping
In a bowl, mix softened butter, minced garlic, Parmesan, panko, parsley, lemon juice, salt, and pepper until combined.
Step 3: Top the Mussels
Place mussels in a single layer on a baking sheet (cup-side up so the topping doesn’t run out).
Top each mussel with a generous dollop of the garlic butter mixture.
Step 4: Bake and Broil
Bake for 5 minutes. Then switch to broil for 2-3 minutes until the topping is golden brown and bubbly.
Watch closely—broiler moves fast.
Step 5: Serve Immediately
Transfer to a platter. Sprinkle with extra parsley. Serve with lemon wedges and crusty bread for dipping in the garlic butter puddles.
Mussels are best fresh. Reheated mussels get rubbery. If you must, store in the fridge for 1 day and reheat in a covered skillet with a splash of water or white wine.
Make-Ahead Topping:
Mix the garlic butter topping up to 3 days ahead. Keep refrigerated. Bring to room temperature before topping mussels.
Frozen Mussels:
Frozen pre-cooked mussels work great. Thaw, drain, and bake as directed (reduce baking time by 2 minutes since they’re already cooked).
Pro Tip:
Serve these right out of the oven. They cool fast and lose that magical butter puddle action.
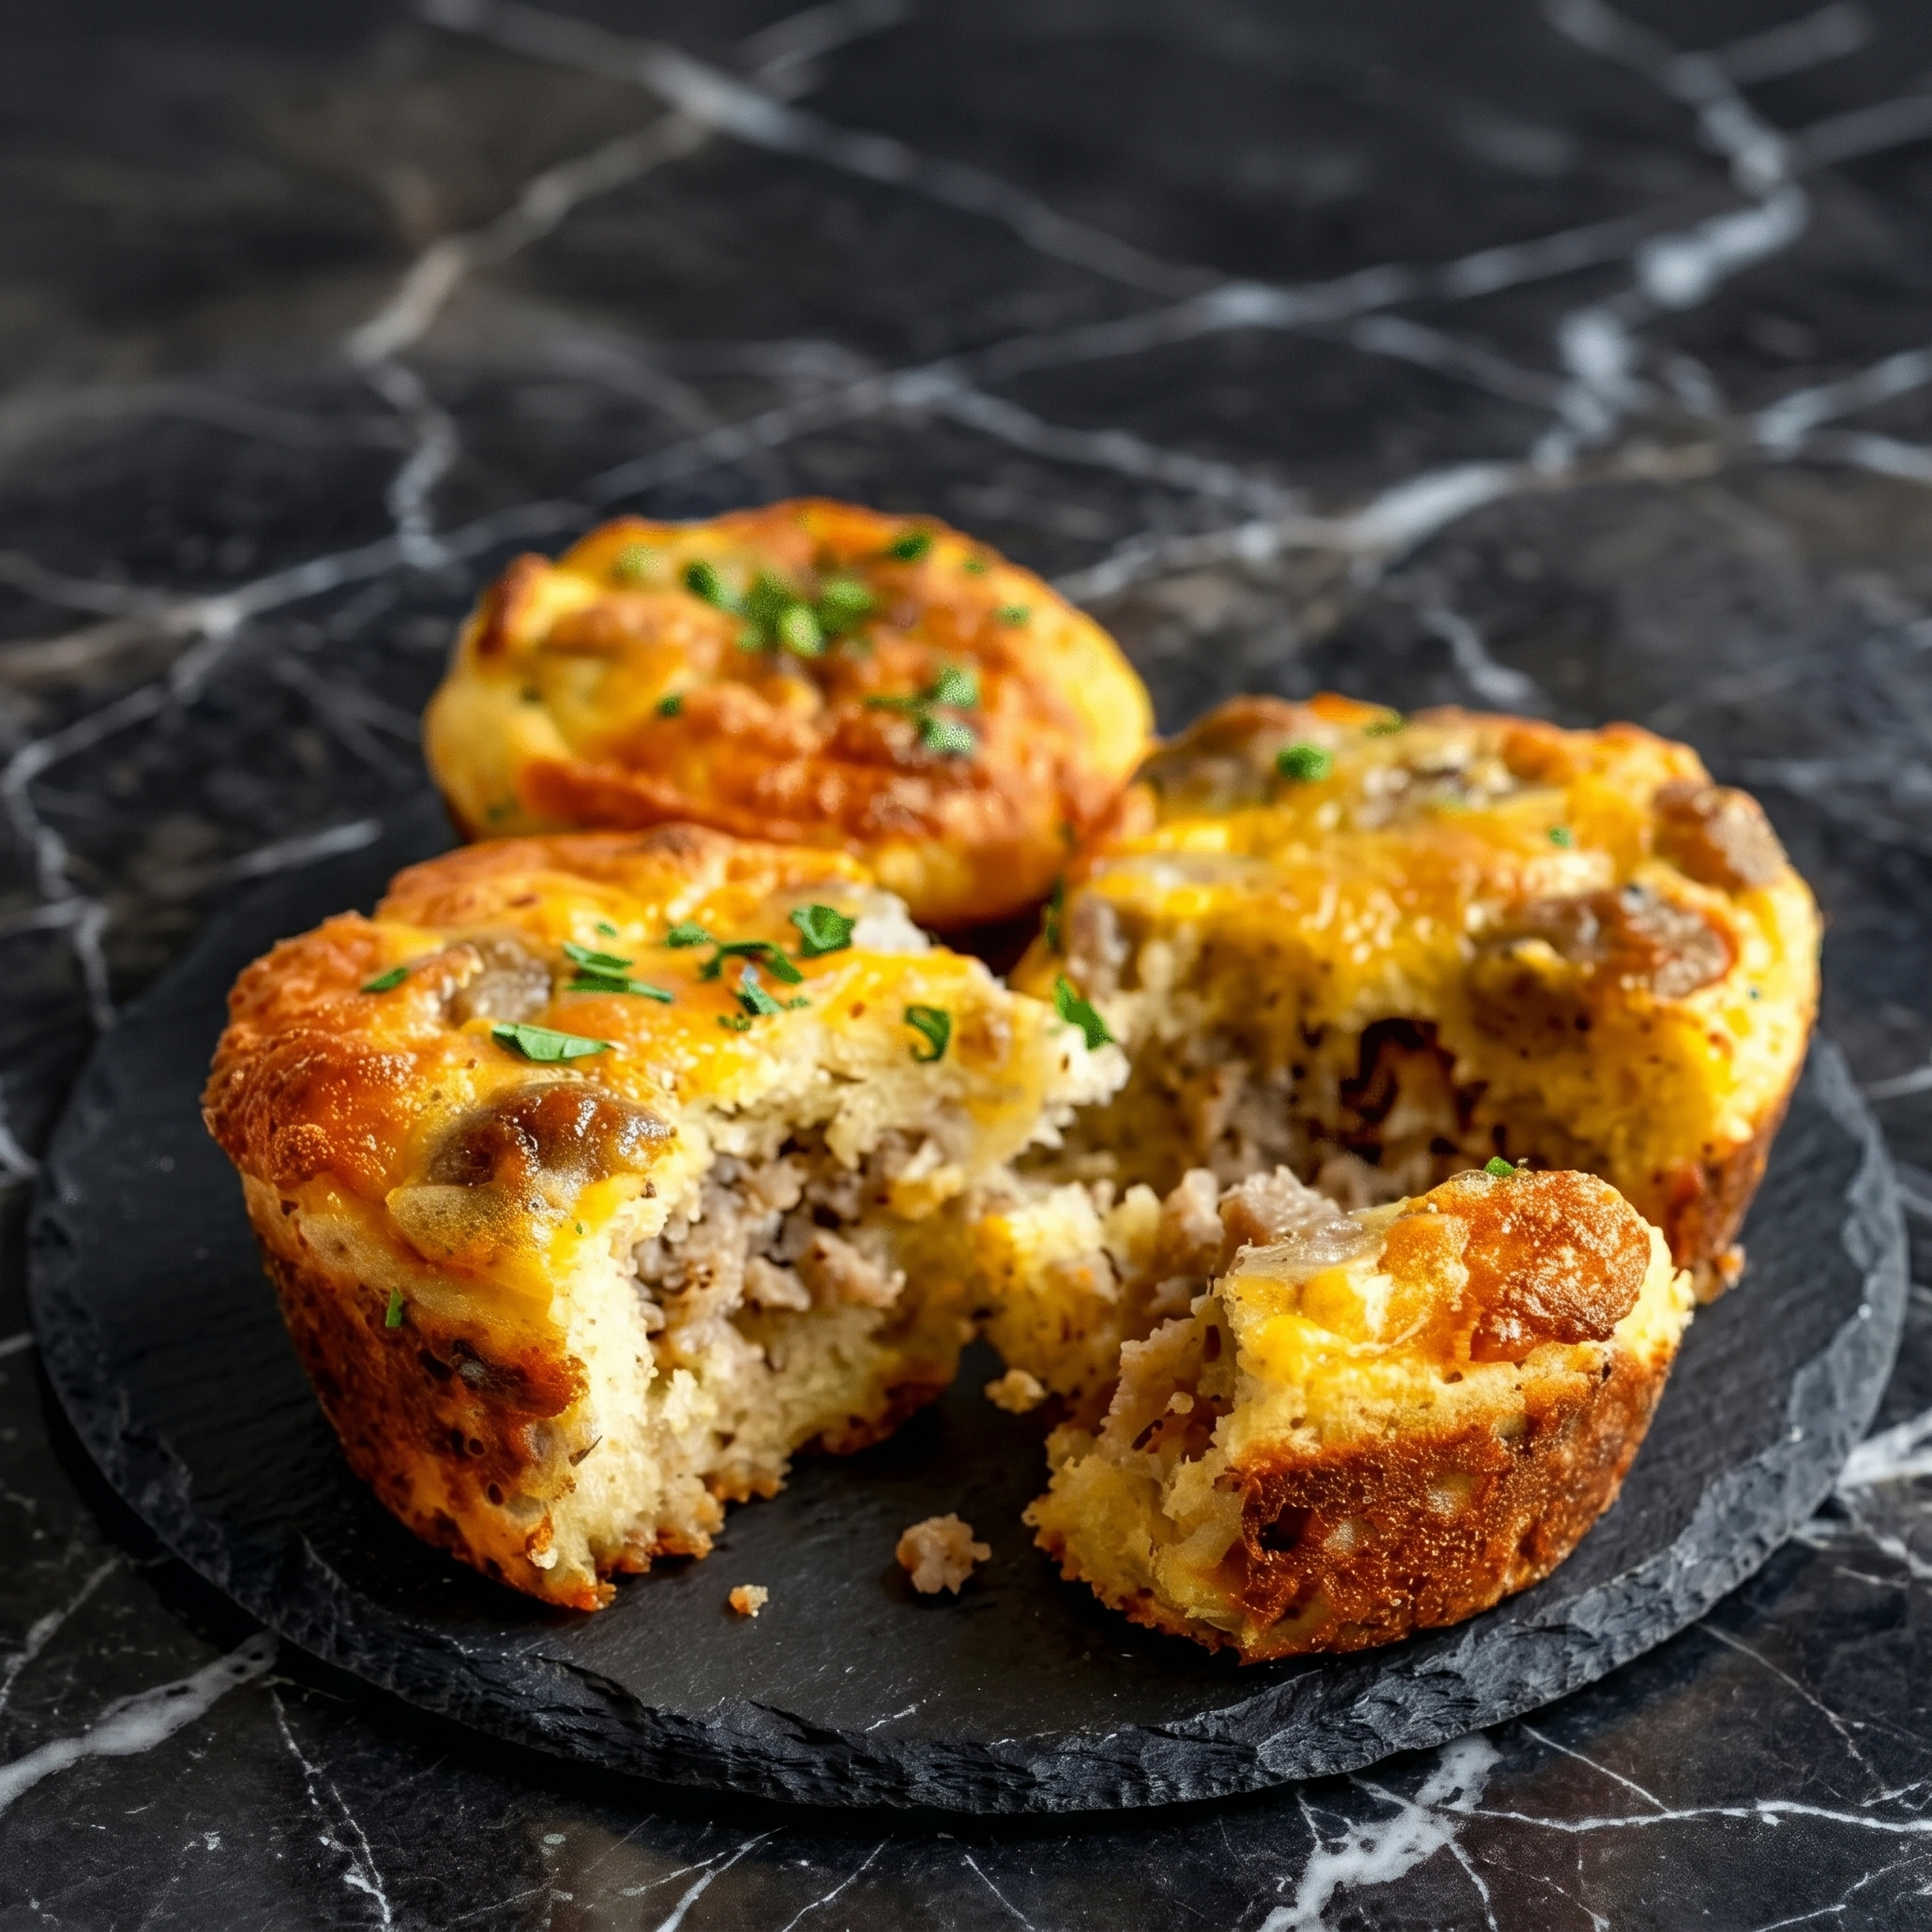
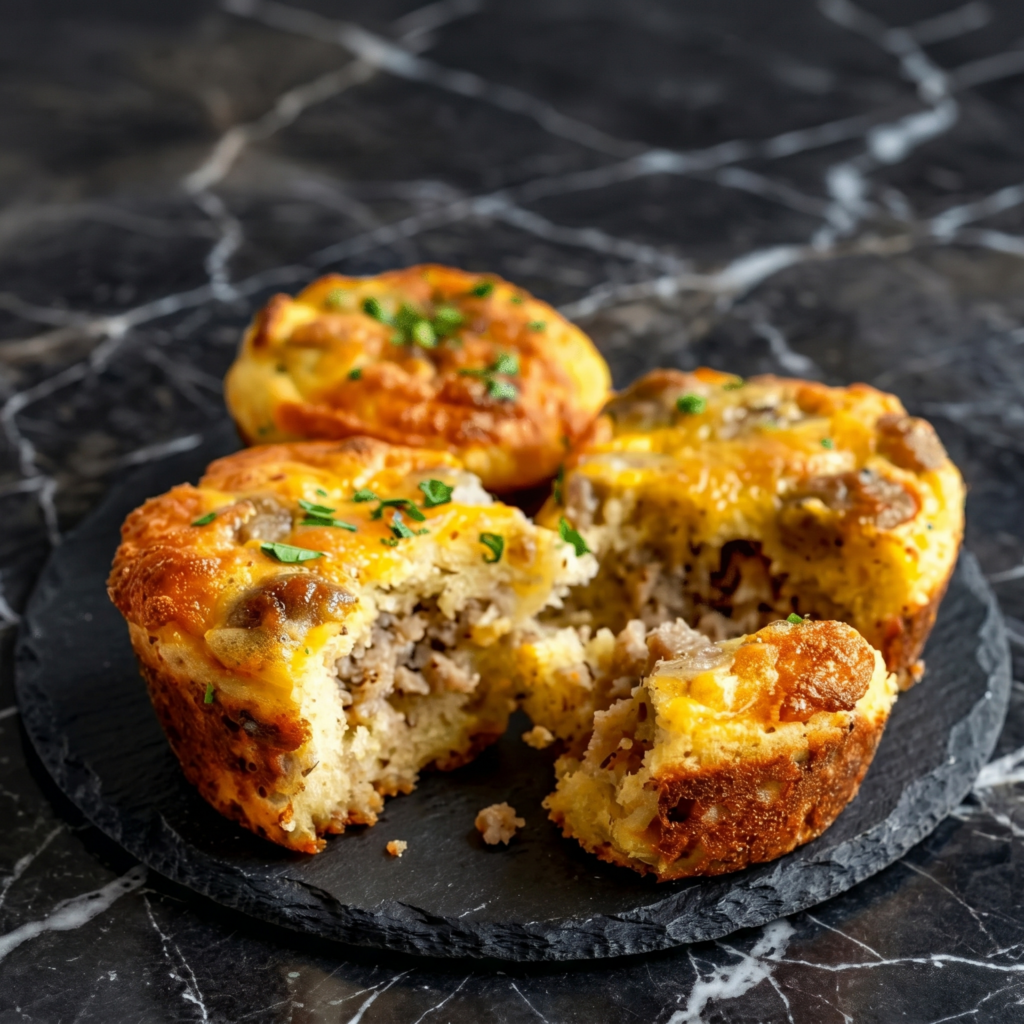
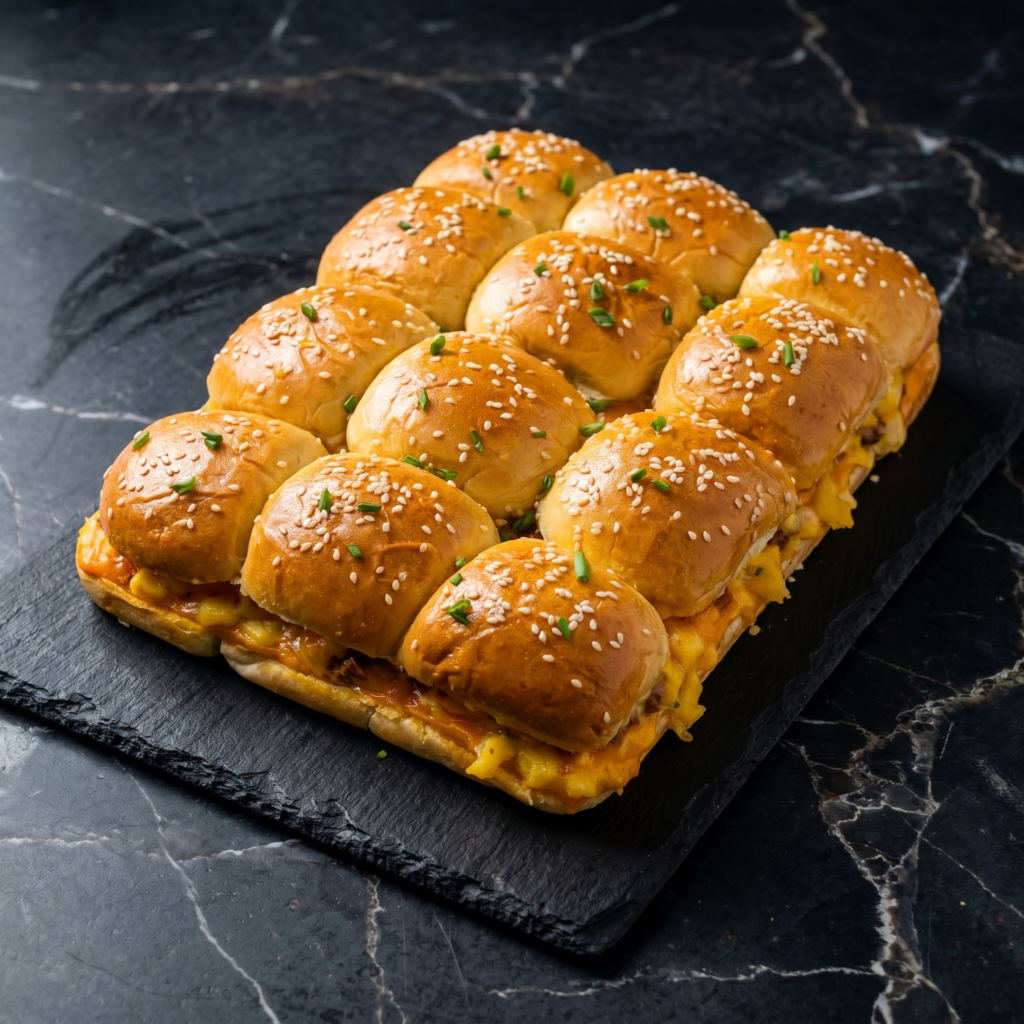
Sliders are fun. Breakfast sliders are a movement. Soft rolls, cheesy eggs, crispy breakfast meat, and a golden, buttery top. Bake them all together in one pan.
These disappear fast. Make two batches. You’ve been warned.
Ingredients
Makes 12 sliders.
12 slider rolls (Hawaiian or dinner rolls)
8 large eggs
¼ cup milk
½ teaspoon salt
¼ teaspoon black pepper
12 slices cheddar or American cheese
12 slices bacon or 12 breakfast sausage patties (cooked)
3 tablespoons butter, melted
Optional: 1 teaspoon garlic powder or everything bagel seasoning
Step-by-Step Instructions
Step 1: Prep the Pan
Preheat oven to 350°F (175°C).
Grease a 9×13 baking dish.
Step 2: Scramble the Eggs
In a bowl, whisk eggs, milk, salt, and pepper.
Scramble in a skillet over medium heat until just set (slightly undercooked—they’ll finish in the oven).
Step 3: Assemble the Sliders
Slice the entire block of rolls in half horizontally (keeping them connected).
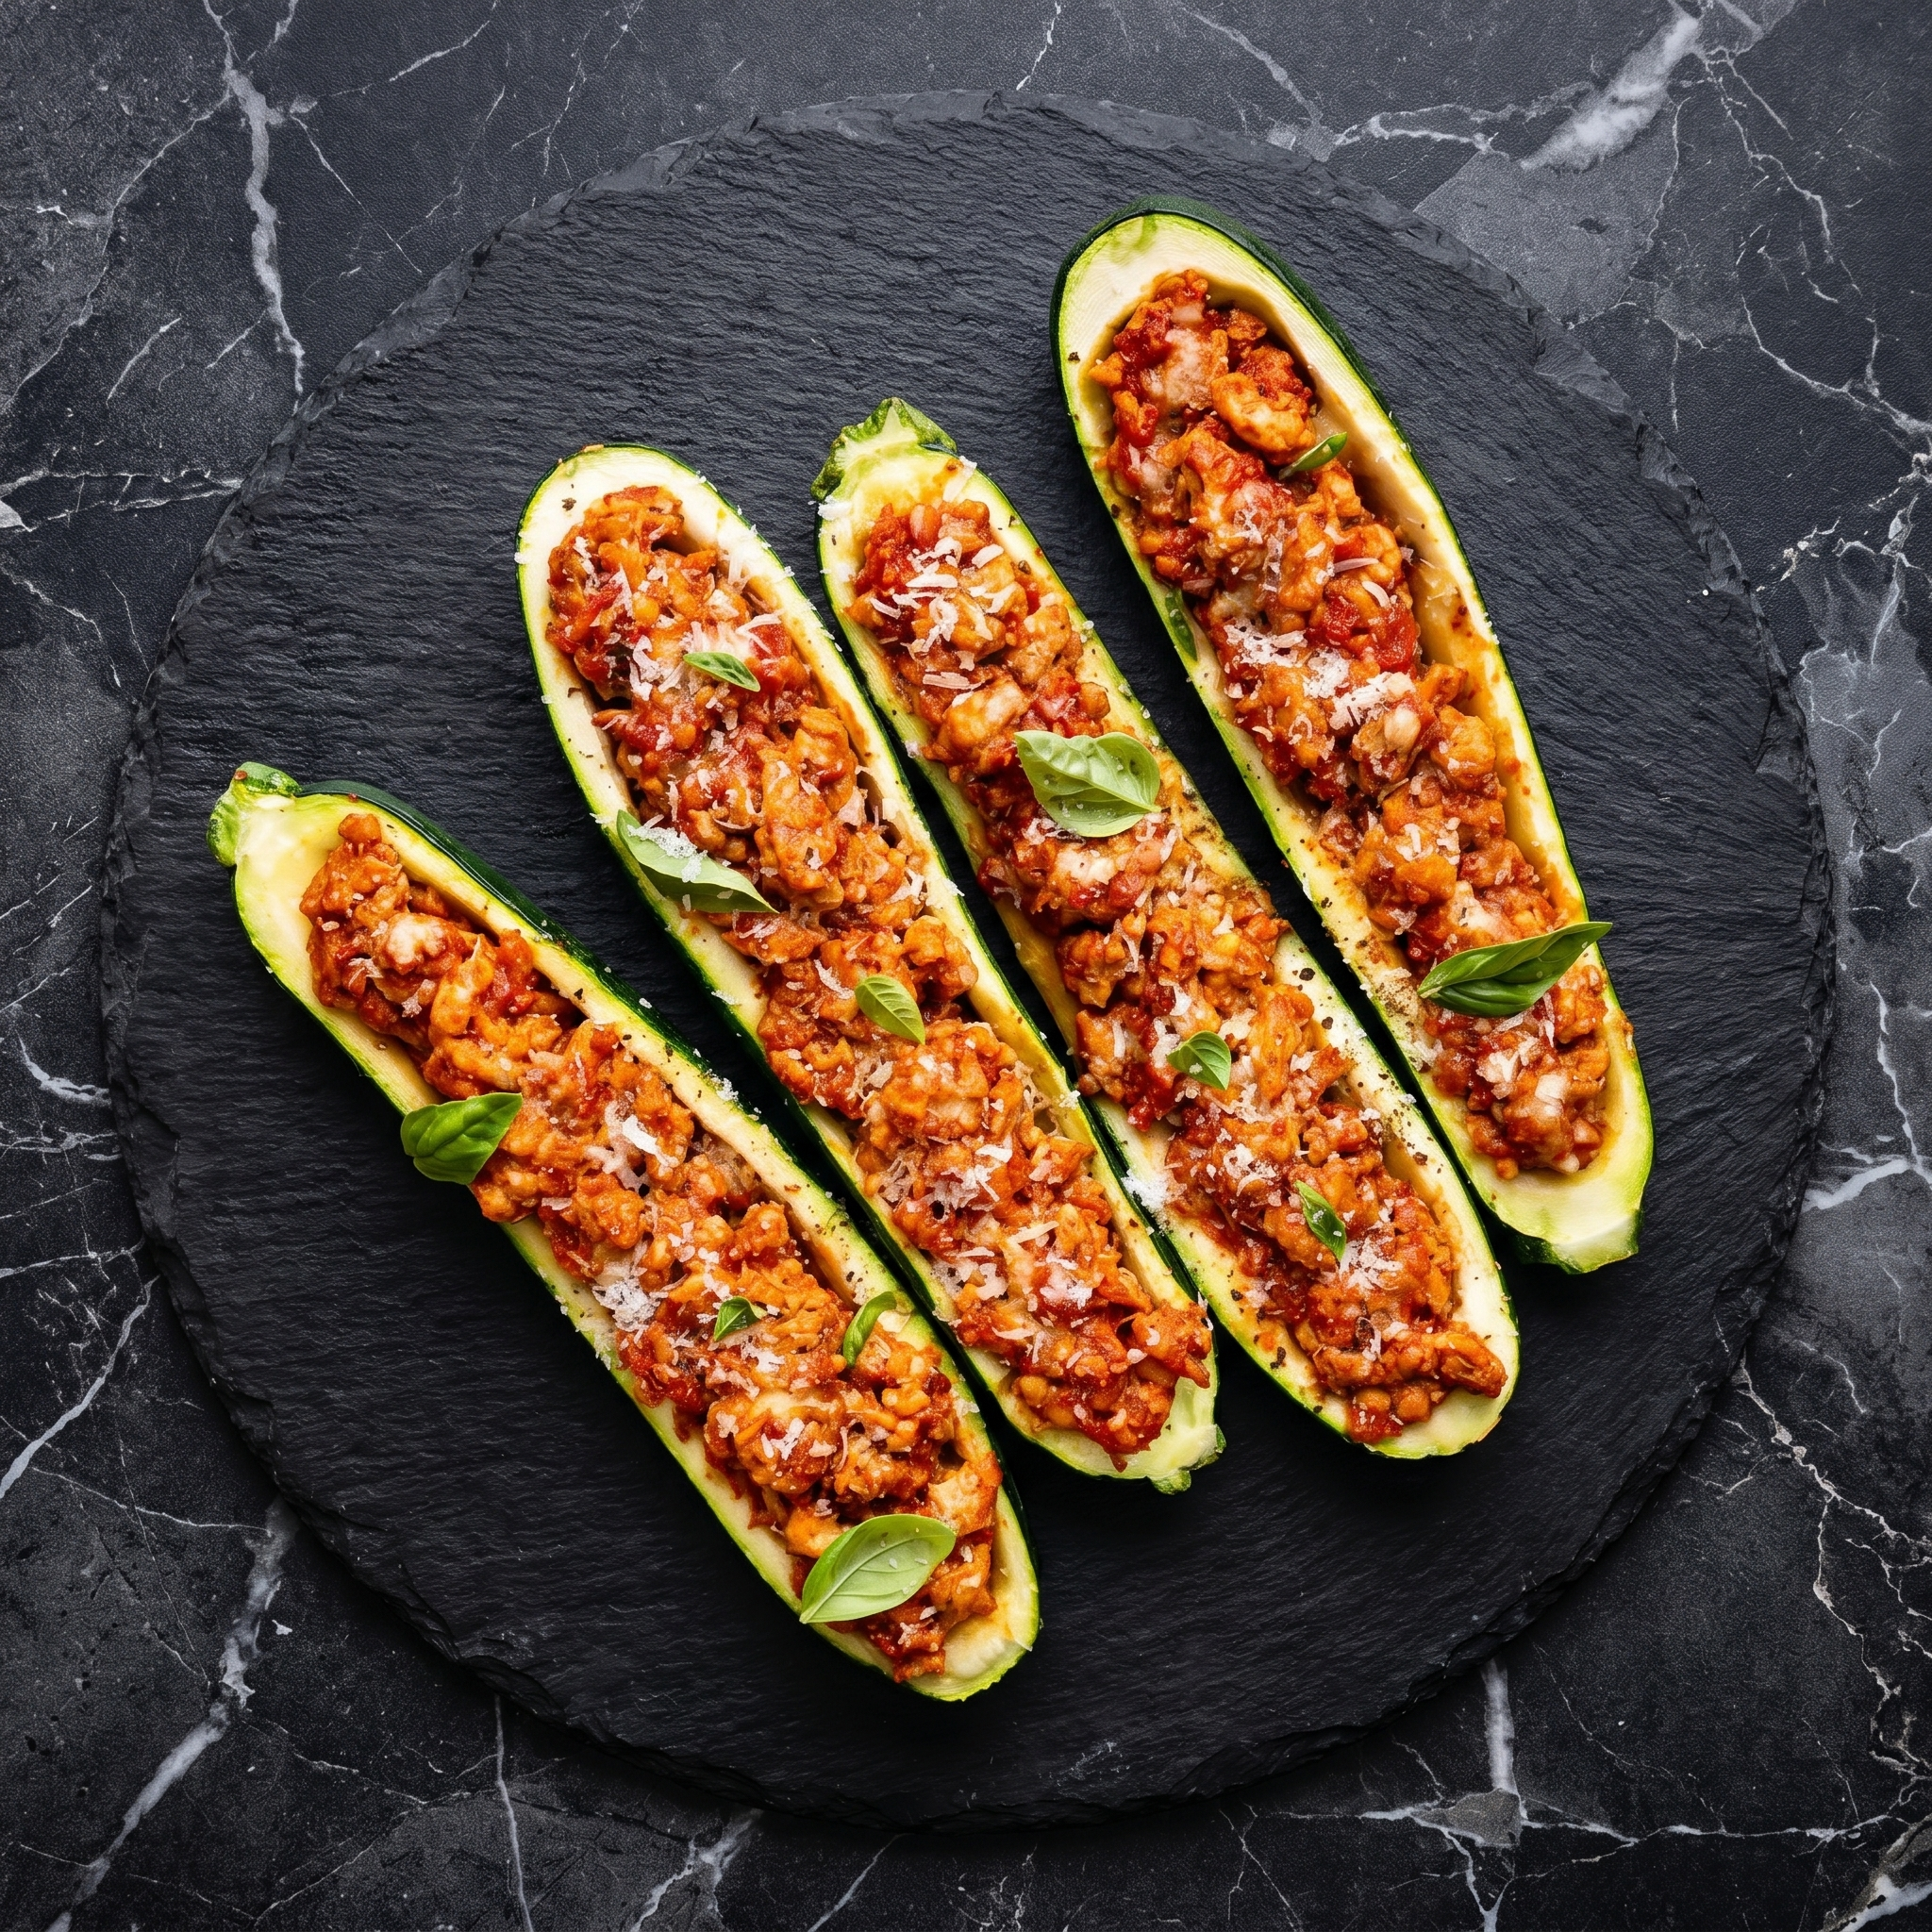
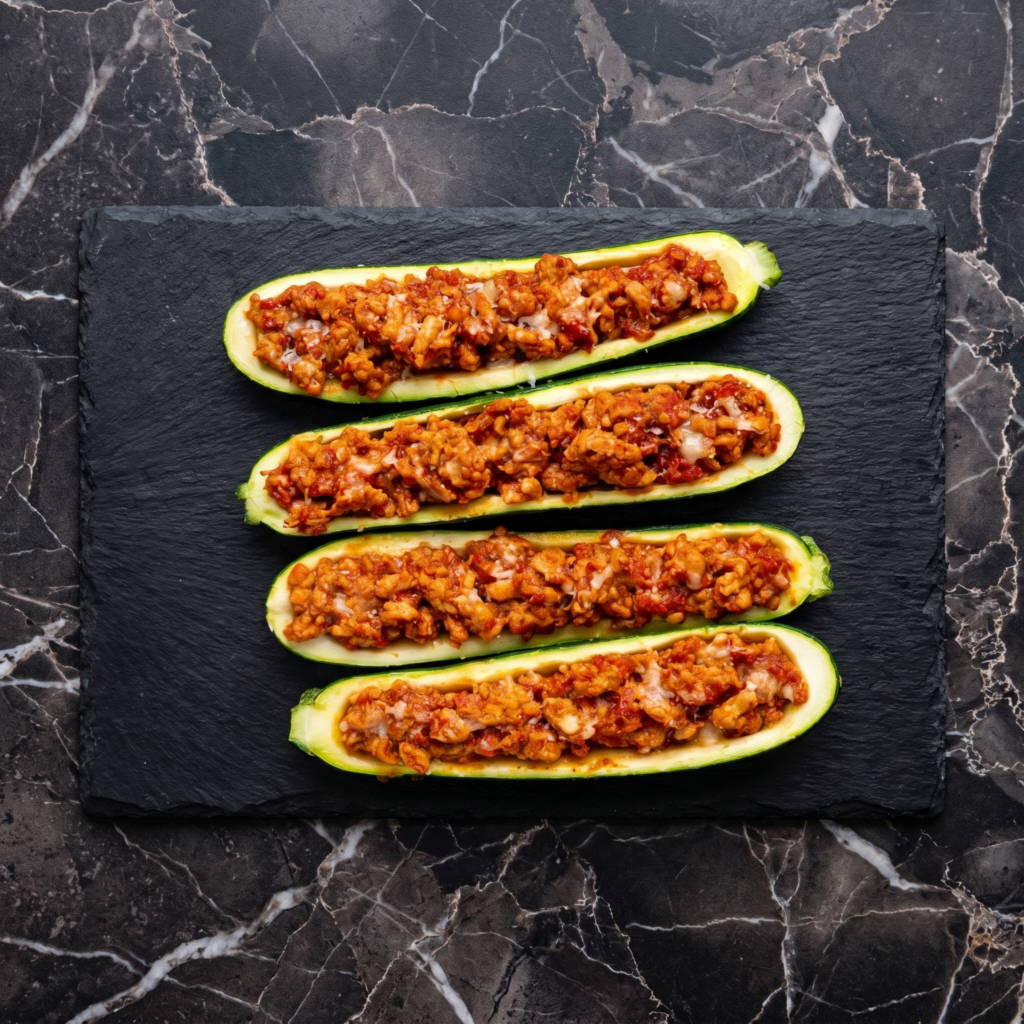
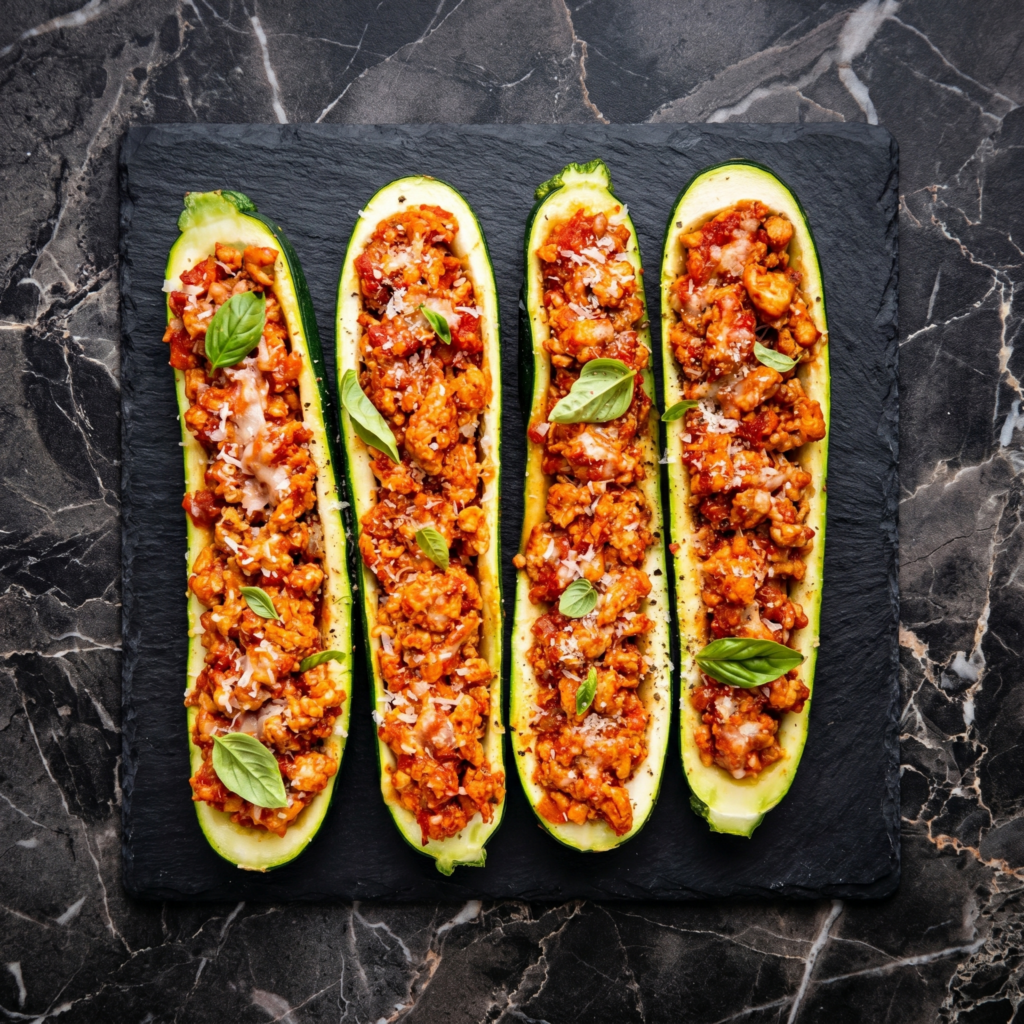
Zucchini boats are the veggie vessel you didn’t know you needed. Hollow out a zucchini, crack an egg inside, bake, and suddenly breakfast feels fancy.
This is low-carb, high-protein, and endlessly customizable. The zucchini gets tender, the egg bakes up perfectly runny or set (your call), and the cheese on top gets golden and bubbly.
Ingredients
Serves 2.
2 medium zucchini (firm, straight ones work best)
2 large eggs
¼ cup shredded Parmesan or mozzarella cheese
1 tablespoon olive oil
¼ teaspoon salt
¼ teaspoon black pepper
¼ teaspoon garlic powder
Fresh parsley or chives for garnish
Optional: red pepper flakes, crumbled bacon, or diced tomato
Step-by-Step Instructions
Step 1: Prep the Zucchini Boats
Preheat oven to 400°F (200°C). Line a baking dish with parchment paper.
Cut each zucchini in half lengthwise.
Scoop out the center seeds and some flesh to create a canoe-like boat. Leave about ¼-inch walls.
Chop the scooped-out flesh and save for another use (or add to eggs).
Step 2: Season and Bake First
Brush zucchini boats with olive oil. Sprinkle with salt, pepper, and garlic powder.
Place in baking dish and bake for 10 minutes (this prevents soggy bottoms).
Step 3: Add the Egg
Remove from oven. Carefully crack one egg into each zucchini boat.
If egg white spills over, just trim it off or let it bake into a crispy edge.
Step 4: Top and Finish Baking
Sprinkle cheese over the eggs.
Bake for 12-15 minutes until egg whites are set and yolks reach your desired doneness.
Step 5: Garnish and Serve
Top with fresh herbs and red pepper flakes. Eat with a fork right out of the boat.
Empanadas are the perfect food. A golden, flaky pocket wrapped around a juicy, spiced beef filling. They’re portable, freezer-friendly, and impossible to eat just one.
This version is baked (not fried), uses a simple dough, and packs a filling with garlic, cumin, paprika, and briny olives. Make a batch. Watch them vanish.
Ingredients
Makes 12-14 empanadas.
For the Dough:
2½ cups all-purpose flour
½ teaspoon salt
½ cup cold butter, cubed
1 egg
⅓ cup cold water
For the Filling:
1 lb ground beef
1 small onion, finely chopped
2 cloves garlic, minced
1 teaspoon ground cumin
1 teaspoon paprika
½ teaspoon chili powder
½ teaspoon salt
¼ cup green olives, chopped
¼ cup raisins (optional, but traditional)
2 hard-boiled eggs, chopped (optional)
For Egg Wash:
1 egg beaten with 1 tablespoon water
Step-by-Step Instructions
Step 1: Make the Dough
In a bowl, mix flour and salt. Cut in cold butter until it looks like coarse crumbs.
Add egg and cold water. Mix until just combined (don’t overwork).
Form into a disc, wrap in plastic, and refrigerate for 30 minutes.
Step 2: Cook the Filling
In a skillet over medium heat, cook ground beef until browned. Drain excess fat.
Add onion and garlic. Cook for 3 minutes until soft.
Stir in cumin, paprika, chili powder, and salt. Cook for 1 minute.
Remove from heat. Stir in olives, raisins, and chopped eggs (if using). Let cool.
Step 3: Preheat and Roll
Preheat oven to 375°F (190°C). Line a baking sheet with parchment paper.
Roll dough on a floured surface until ⅛-inch thick.
Cut into 4-5 inch circles using a cutter or bowl.
Step 4: Fill and Seal
Place 1-2 tablespoons of filling in the center of each circle.
Fold over into a half-moon. Press edges with a fork to seal.
Place on baking sheet. Brush with egg wash.
Step 5: Bake and Serve
Bake for 20-25 minutes until golden brown.
Cool for 5 minutes. Serve with chimichurri or hot sauce.
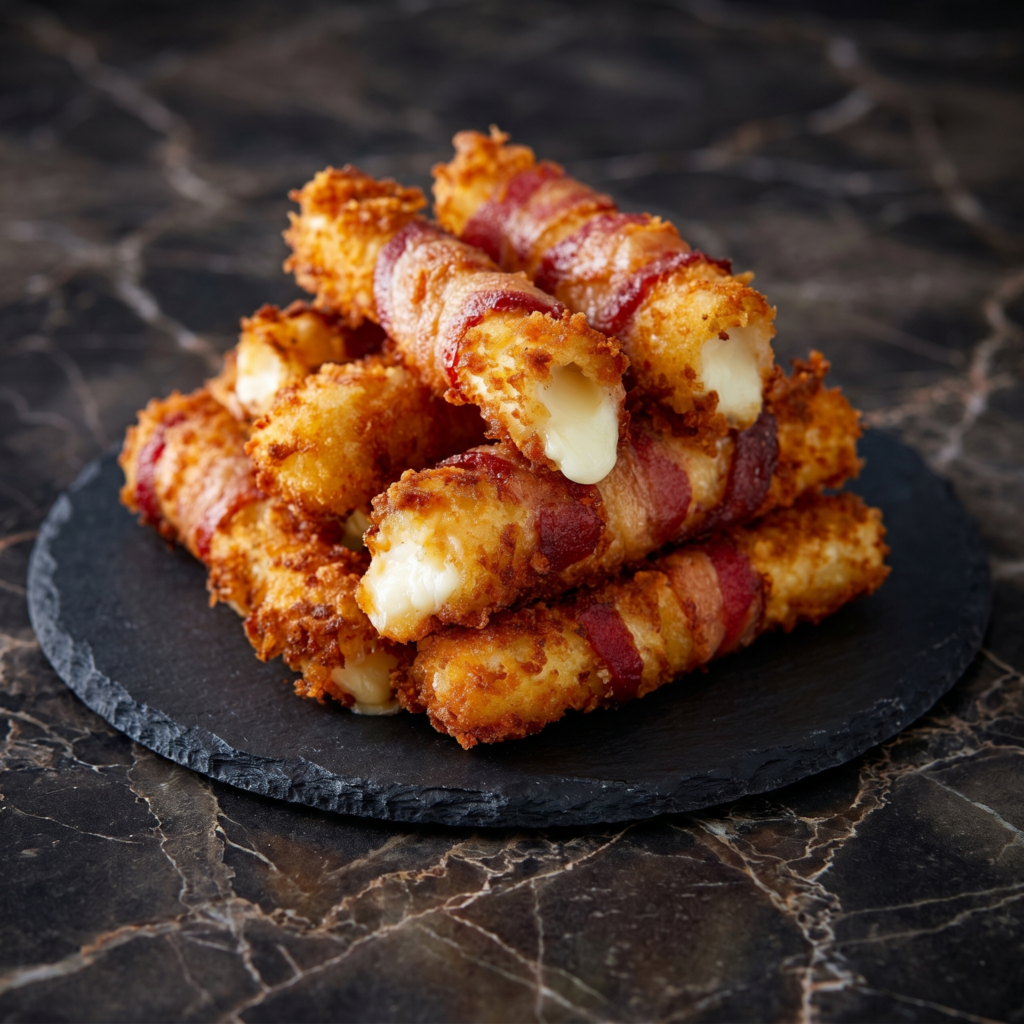
Mozzarella sticks are great. Bacon is great. So why has no one forced them to marry sooner? This is a three-ingredient miracle: string cheese, bacon, and your favorite marinara. Air fry or bake until the bacon is crispy and the cheese is melty. Prepare for addiction.
Ingredients
Makes 8 sticks (serves 2-4).
8 mozzarella string cheese sticks
8 slices thin-cut bacon
1 cup marinara sauce, for dipping
Optional: Everything bagel seasoning or black pepper
Step-by-Step Instructions
Step 1: Prep the Cheese
Remove string cheese from wrappers.
If using, roll each stick in everything bagel seasoning or pepper.
Step 2: Wrap With Bacon
Wrap one slice of bacon around each cheese stick in a spiral, slightly overlapping.
Tuck the end under the bacon to secure. No toothpicks needed.
Step 3: Cook Until Crispy
Air fryer method: Place sticks in a single layer. Cook at 380°F for 8-10 minutes until bacon is crispy.
Oven method: Bake at 400°F on a wire rack over a baking sheet for 12-15 minutes.
Pan method: Cook in a skillet over medium heat, turning often, for 8-10 minutes.
Step 4: Cool Slightly
Let rest for 2 minutes. The cheese will be lava-hot.
Step 5: Serve With Marinara
Warm marinara sauce in a small bowl.
Dip and pull. Watch the cheese stretch to oblivion.
These are best fresh and hot. Leftovers can be refrigerated for 2 days. Reheat in an air fryer at 375°F for 3-4 minutes. Do not microwave (soggy bacon, exploded cheese). Uncooked bacon-wrapped sticks can be frozen for up to 1 month—cook from frozen, add 2-3 minutes.
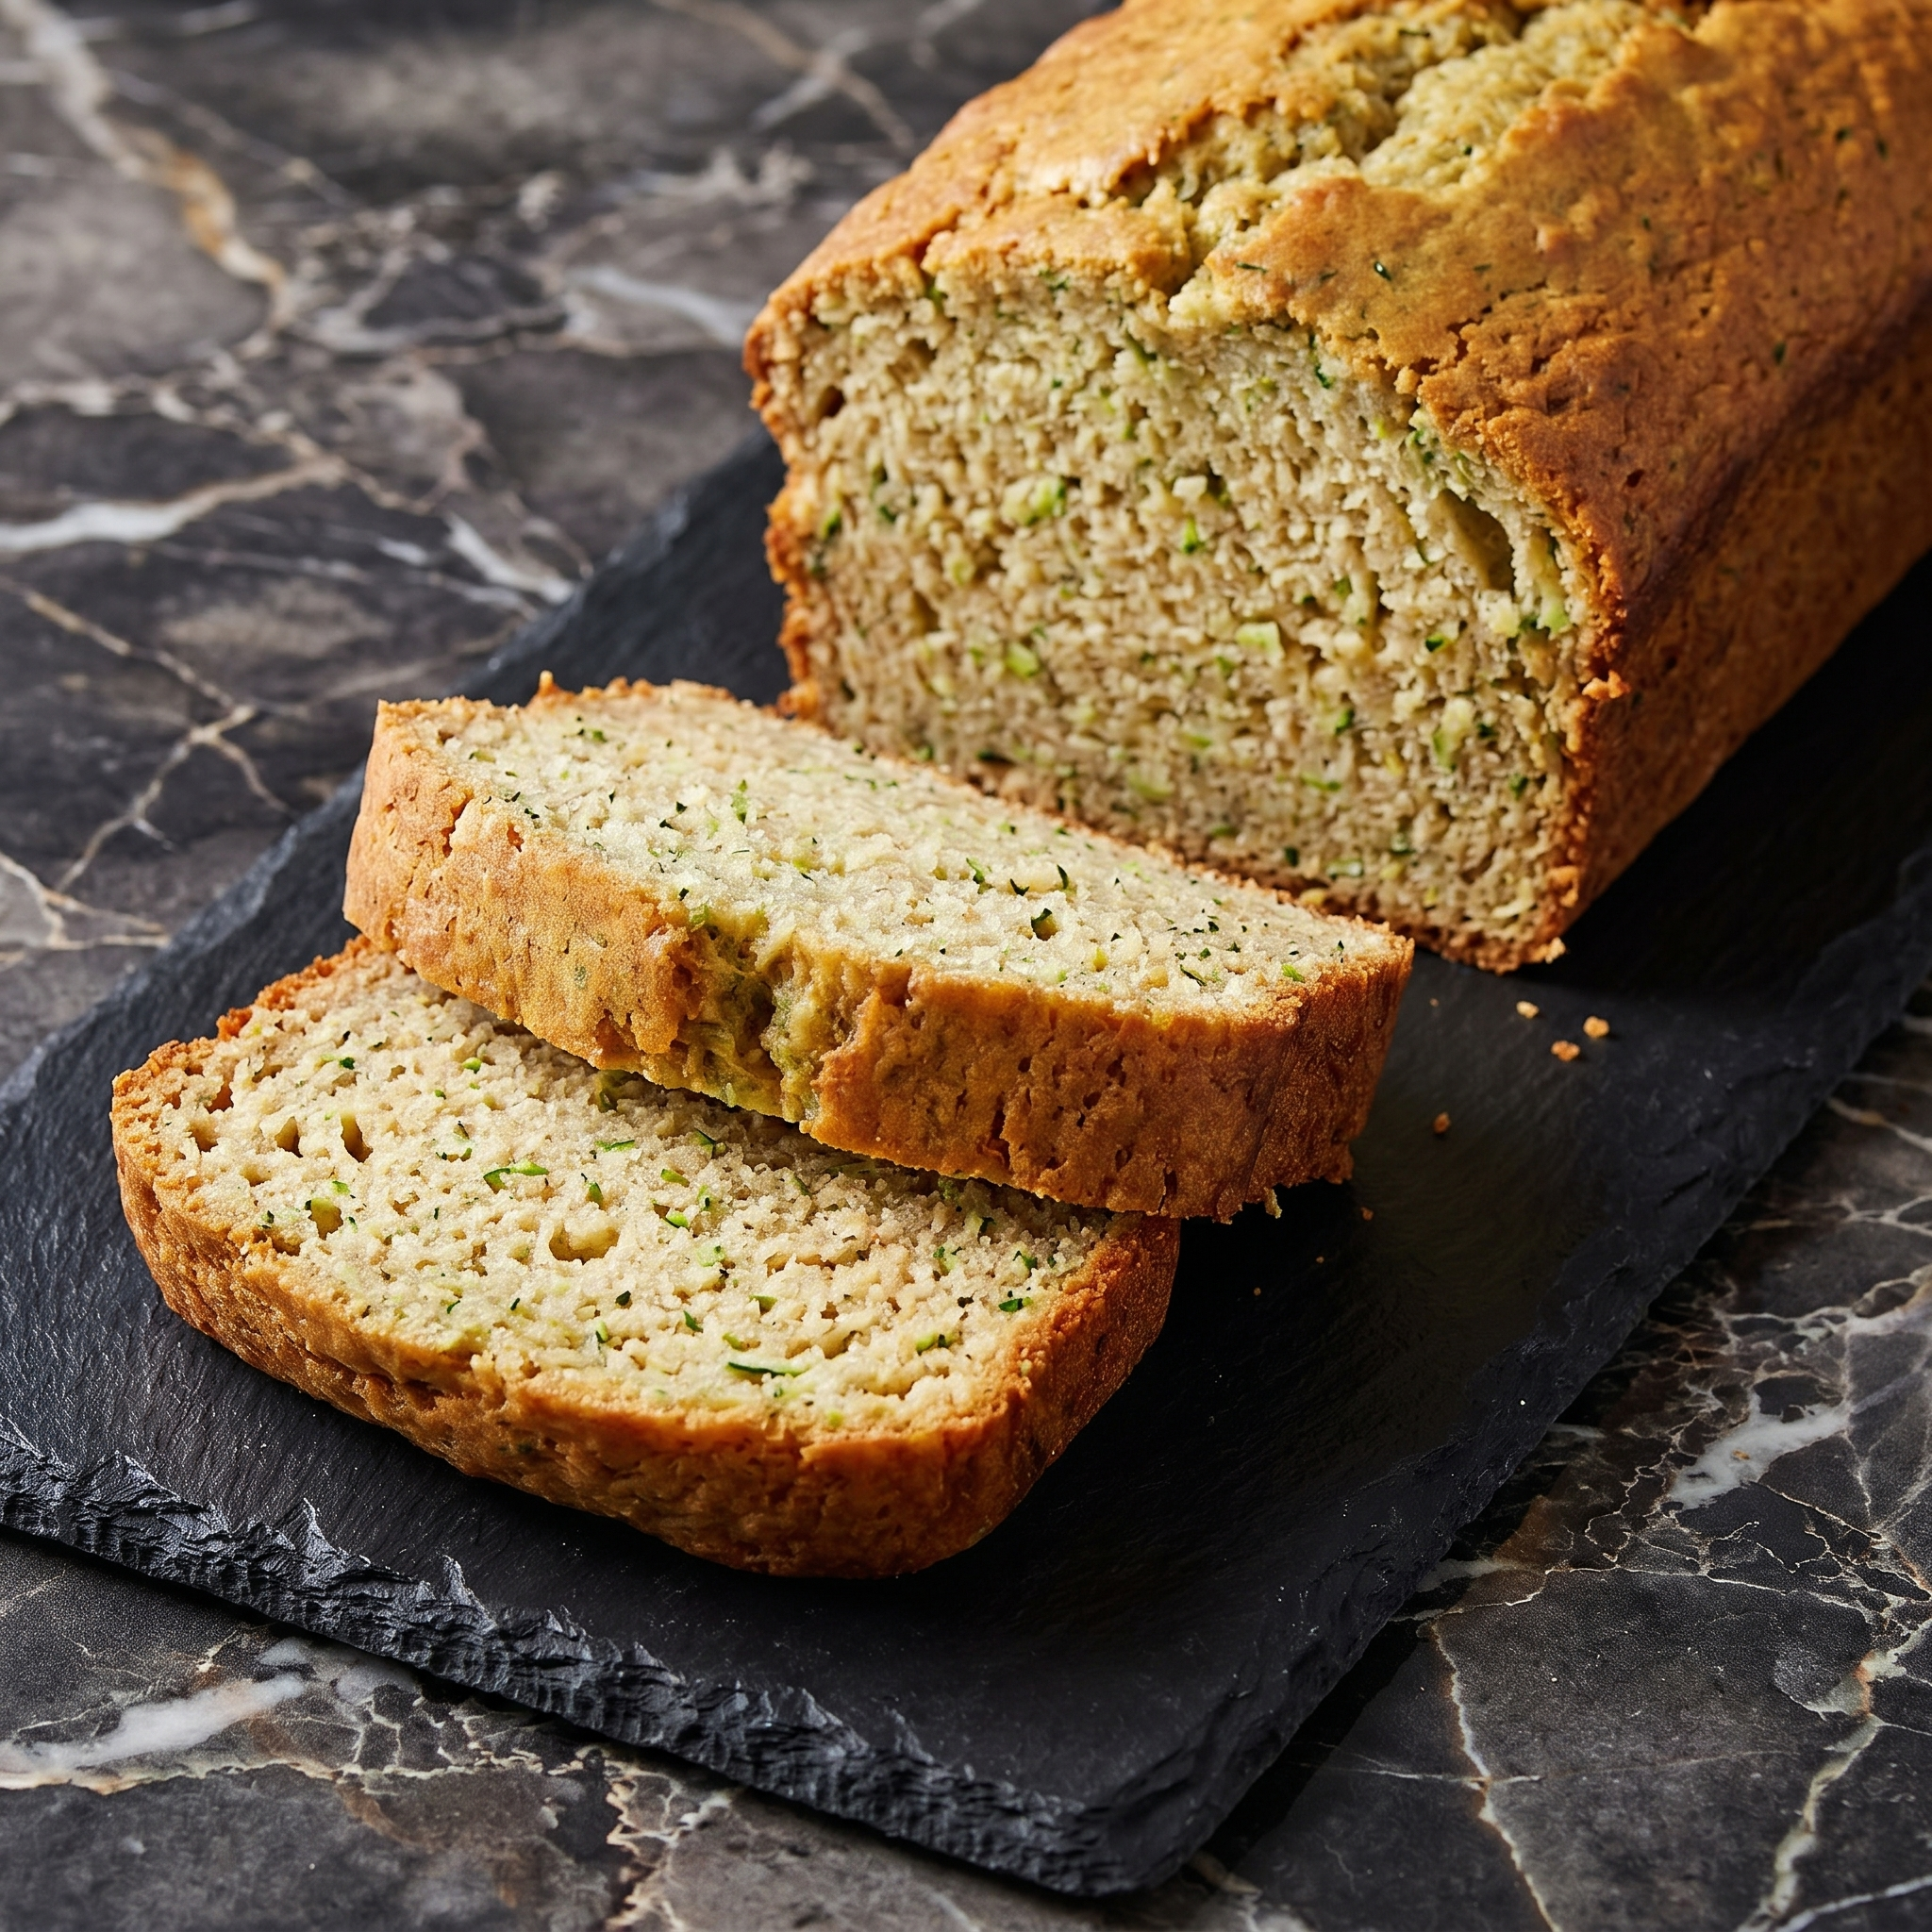
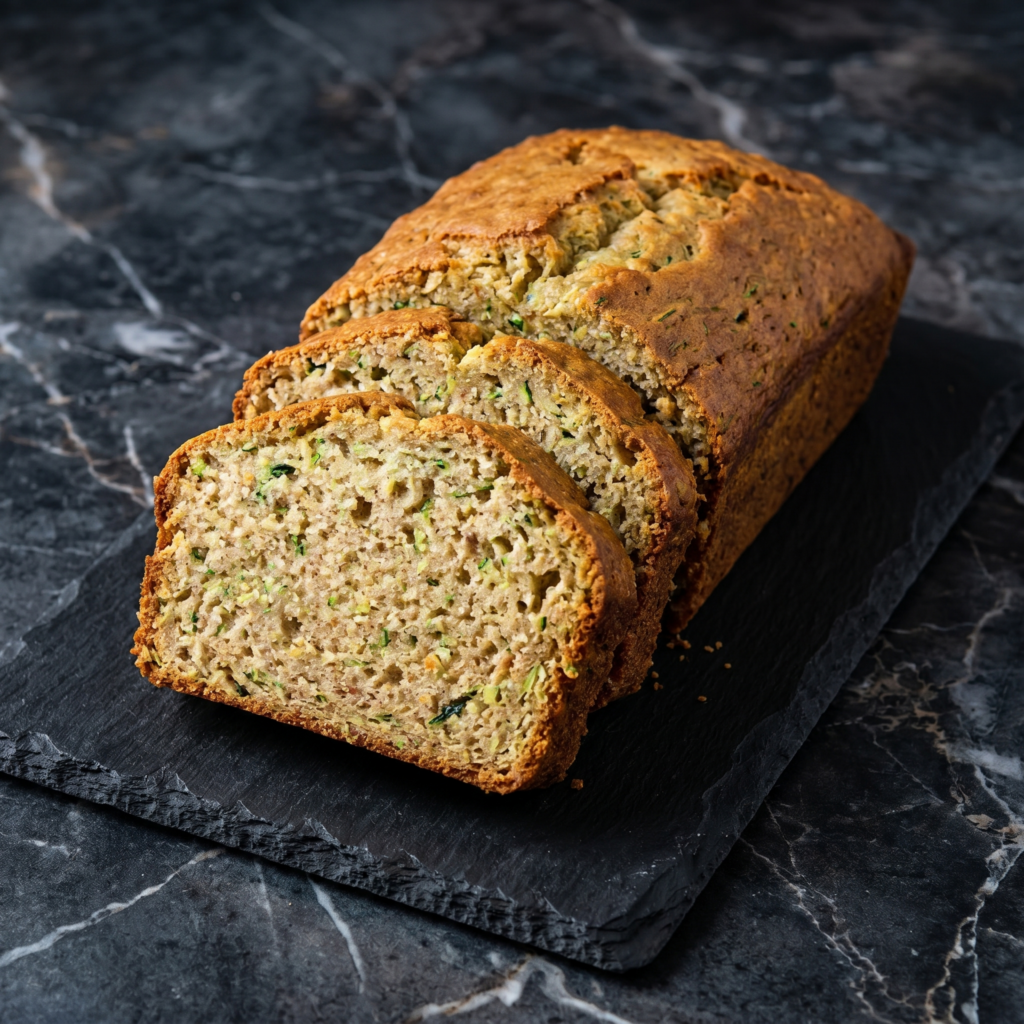
This zucchini bread is so incredibly moist and delicious, no one will ever guess it’s packed with vegetables. The zucchini melts into the batter, leaving behind nothing but incredible tenderness and a subtle sweetness that pairs perfectly with warm spices.
Studded with walnuts and chocolate chips (because everything is better with chocolate), this bread disappears fast. Whether you’re sneaking veggies into breakfast or just looking for the best way to use up that garden bounty, this recipe is about to become your summer staple.
Ingredients
Makes one 9×5 inch loaf (10-12 servings) or two mini loaves.
For the Zucchini Bread:
1 ½ cups (190g) all-purpose flour
½ teaspoon baking powder
½ teaspoon baking soda
½ teaspoon salt
1 ½ teaspoons ground cinnamon
½ teaspoon ground nutmeg
¼ teaspoon ground ginger (optional)
2 large eggs, at room temperature
½ cup (120ml) vegetable oil or melted coconut oil
¾ cup (150g) granulated sugar
½ cup (100g) light brown sugar, packed
2 teaspoons vanilla extract
1 ½ cups (about 1 medium zucchini) grated zucchini, lightly packed
½ cup chopped walnuts or pecans (optional)
½ cup semi-sweet chocolate chips (optional, but highly recommended)
For the Cinnamon Sugar Topping (Optional):
1 tablespoon granulated sugar
¼ teaspoon cinnamon
Step-by-Step Instructions
1. Preheat and Prepare:
Preheat your oven to 325°F (160°C). Grease a 9×5 inch loaf pan thoroughly, then dust with flour, tapping out the excess. Alternatively, line with parchment paper, leaving overhang on the long sides for easy removal.
2. Prepare the Zucchini:
Wash the zucchini and trim off the ends. Using a box grater, grate the zucchini on the large holes. Do not peel it—the green skin adds beautiful flecks of color.
Place the grated zucchini in a clean kitchen towel or several layers of paper towels. Squeeze firmly to remove excess moisture. You should have about 1 cup of squeezed zucchini. This step is crucial for a moist, not soggy, loaf.
3. Combine Dry Ingredients:
In a medium bowl, whisk together the flour, baking powder, baking soda, salt, cinnamon, nutmeg, and ginger (if using). Set aside.
4. Combine Wet Ingredients:
In a large bowl, whisk the eggs until lightly beaten.
Add the oil, granulated sugar, brown sugar, and vanilla extract. Whisk until smooth and well combined.
5. Bring It Together:
Add the dry ingredients to the wet ingredients and fold gently with a spatula until just combined. Do not overmix.
Fold in the squeezed zucchini, and if using, the walnuts and chocolate chips. The batter will be thick and chunky with goodness.
6. Fill the Pan:
Pour the batter into the prepared loaf pan and spread evenly.
If using the cinnamon sugar topping, mix the sugar and cinnamon together and sprinkle over the top.
7. Bake:
Bake for 55-65 minutes, until a toothpick inserted into the center comes out clean or with a few moist crumbs.
If the top is browning too quickly, tent loosely with foil for the last 15-20 minutes.
Let the bread cool in the pan for 15-20 minutes, then transfer to a wire rack to cool completely.
8. Serve:
Slice and serve at room temperature. This bread is delicious on its own, but a pat of butter takes it to another level.
Store zucchini bread tightly wrapped in plastic wrap or in an airtight container at room temperature for up to 4 days. The moisture from the zucchini keeps it incredibly soft. For longer storage, refrigerate for up to a week.
Can You Freeze Zucchini Bread?
Absolutely! Zucchini bread freezes like a dream. Wrap the cooled loaf tightly in plastic wrap, then in foil, and place in a freezer bag. Freeze for up to 3 months. Thaw at room temperature.
Freezing Slices:
Slice the bread and wrap individual slices in plastic wrap, then place in a freezer bag. This way you can grab just one slice at a time. Toast frozen slices directly from the freezer for a quick breakfast.
Make-Ahead for Gift Giving:
Zucchini bread makes wonderful homemade gifts. Bake mini loaves, cool completely, wrap in decorative cellophane, and tie with a ribbon. It’s the perfect way to share your garden bounty!
Freezing Grated Zucchini:
Have more zucchini than you can use? Grate it, squeeze out the excess moisture, and freeze in 1½-cup portions. Thaw and use directly in bread—no need to squeeze again.