Category: baking

  • Blueberry Muffins

    Blueberry Muffins

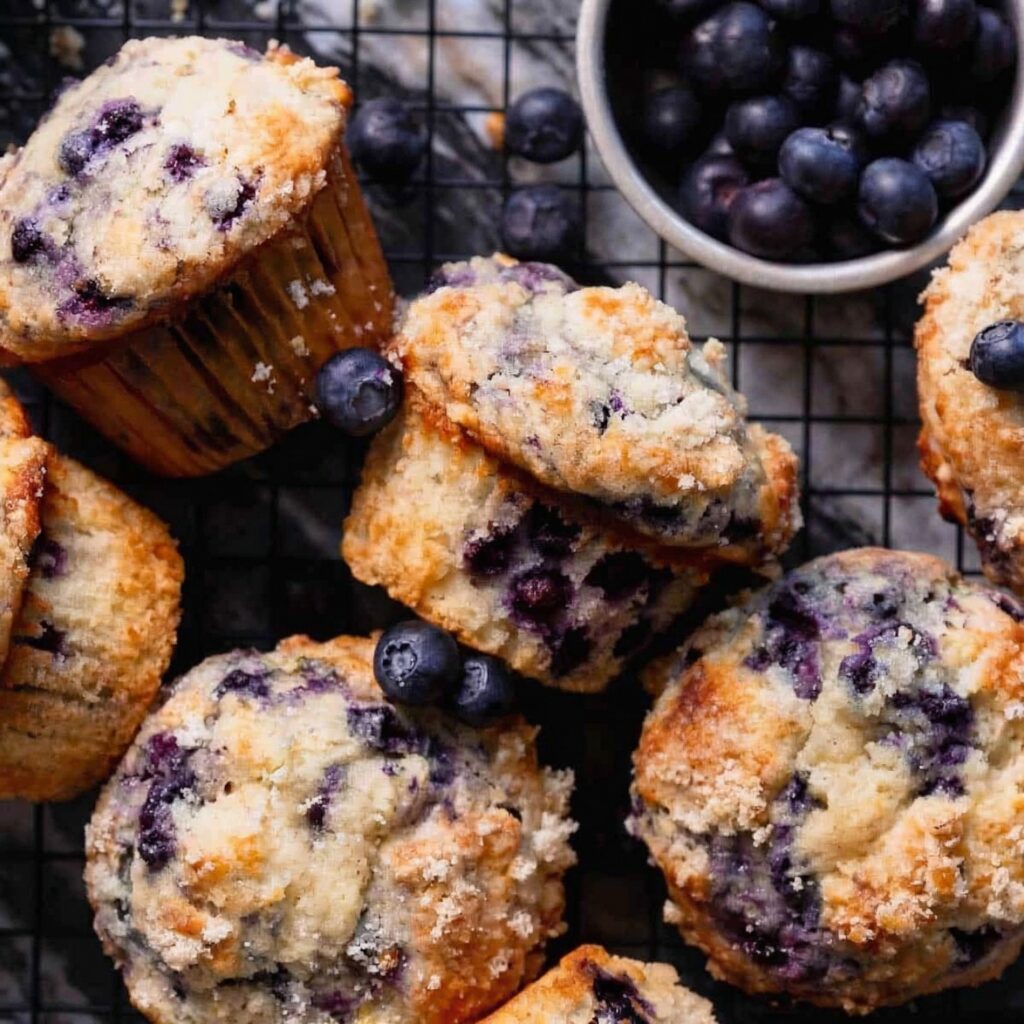
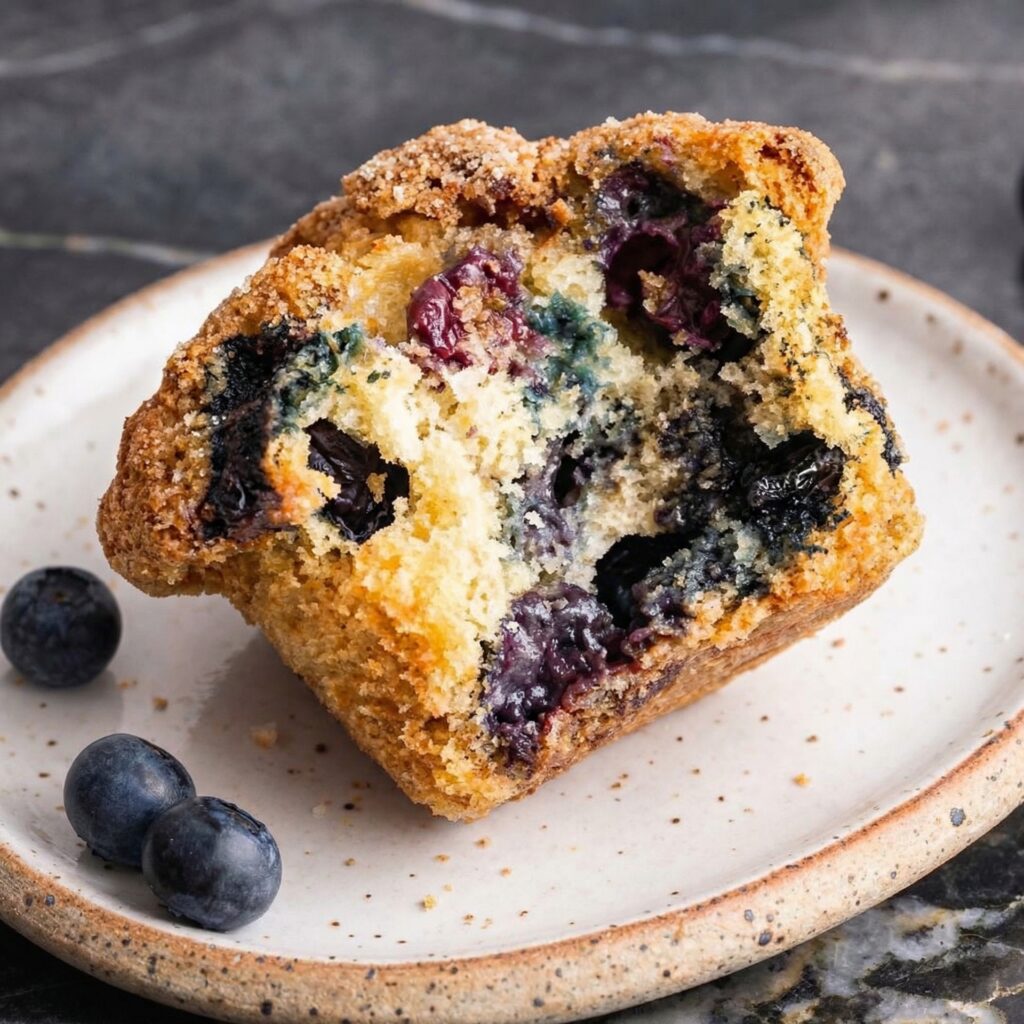
    You know those muffins from the bakery—the ones with the tall, domed tops, the crunchy streusel, and the berries so perfectly distributed that every bite has at least three? The ones you can’t resist buying even though you know they cost five times what they should?

    This is that muffin. And now you can make them at home, any time the craving strikes. These jumbo blueberry muffins are everything you want: tender and moist, bursting with fresh blueberries, and topped with a generous, buttery streusel that adds the perfect crunch.

    The secret to those sky-high domes? A hot oven and a simple technique that works every time. Let’s bake the best blueberry muffins of your life.

    Ingredients

    Yields 6 jumbo muffins or 12 standard muffins.

    For the Streusel Topping:

    • ½ cup (65g) all-purpose flour
    • ¼ cup (50g) granulated sugar
    • ¼ cup (50g) light brown sugar, packed
    • ½ teaspoon ground cinnamon
    • Pinch of salt
    • ¼ cup (60g) unsalted butter, melted

    For the Blueberry Muffins:

    • 2 ½ cups (310g) all-purpose flour
    • 1 tablespoon baking powder
    • ½ teaspoon baking soda
    • ½ teaspoon salt
    • ½ cup (115g) unsalted butter, softened
    • 1 cup (200g) granulated sugar
    • 2 large eggs, at room temperature
    • 1 ½ teaspoons vanilla extract
    • 1 teaspoon lemon zest (optional, but recommended)
    • 1 cup (240ml) buttermilk, at room temperature
    • 2 cups (300g) fresh or frozen blueberries (do not thaw if frozen)
    • 1 tablespoon all-purpose flour (for tossing blueberries)

    Step-by-Step Instructions

    1. Preheat and Prepare:

    1. Preheat your oven to 425°F (220°C). Line a jumbo 6-cup muffin pan or a standard 12-cup muffin pan with paper liners. For jumbo muffins, you may need to spray the tops of the pan with non-stick spray to prevent the muffin tops from sticking.

    2. Make the Streusel:

    1. In a medium bowl, whisk together the flour, granulated sugar, brown sugar, cinnamon, and salt.
    2. Pour in the melted butter and stir with a fork until the mixture forms clumps. Set aside in the refrigerator while you prepare the muffin batter.

    3. Prepare the Blueberries:

    1. In a small bowl, toss the blueberries with 1 tablespoon of flour. This helps prevent them from sinking to the bottom of the muffins. If using frozen blueberries, keep them frozen and toss with flour just before adding to the batter.

    4. Combine Dry Ingredients:

    1. In a medium bowl, whisk together the flour, baking powder, baking soda, and salt. Set aside.

    5. Cream Butter and Sugar:

    1. In a large bowl, beat the softened butter and granulated sugar together with an electric mixer until light and fluffy, about 2-3 minutes. Scrape down the sides as needed.

    6. Add Wet Ingredients:

    1. Add the eggs one at a time, beating well after each addition. Scrape down the bowl again.
    2. Beat in the vanilla extract and lemon zest (if using).

    7. Alternate Dry and Wet:

    1. With the mixer on low speed, add half of the flour mixture, mixing until just combined. Add all of the buttermilk, then the remaining flour mixture. Mix until just combined and no streaks of flour remain. Do not overmix.
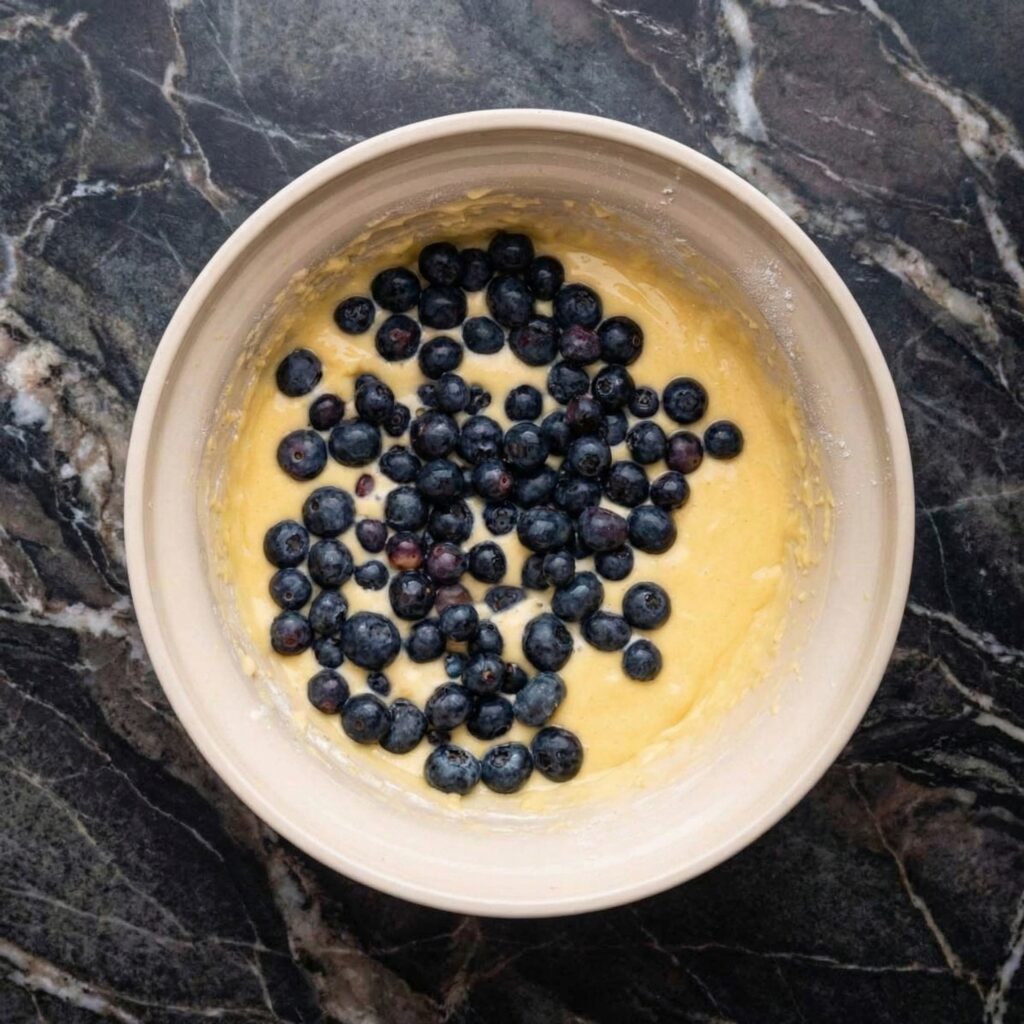
    2. Gently fold in the floured blueberries with a spatula, being careful not to crush them. A few strokes should do it.

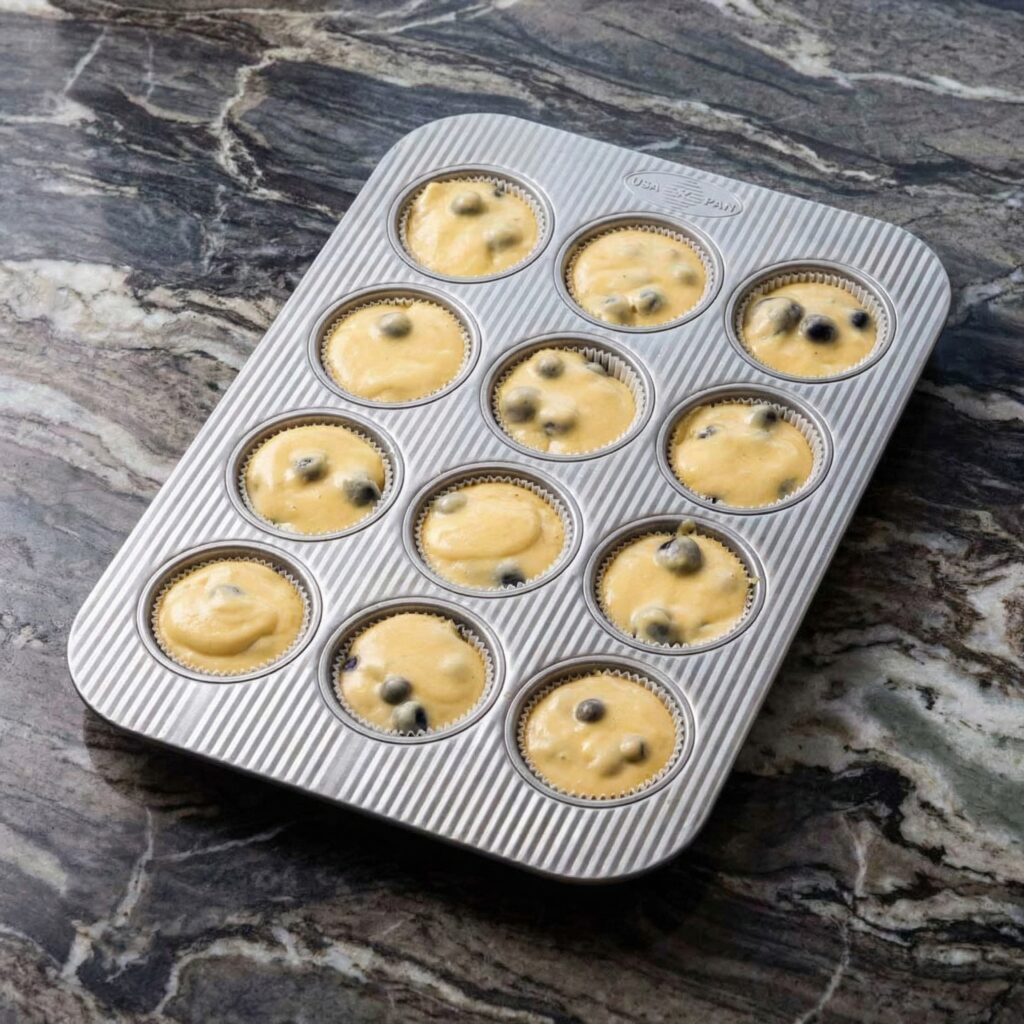
    8. Fill the Muffin Cups:

    1. Scoop the batter into the prepared muffin cups, filling them all the way to the top. For jumbo muffins, this will be about ½ cup of batter per muffin. For standard muffins, about ¼ cup. This high fill is the secret to those domed tops!
    2. Sprinkle the streusel generously over each muffin, pressing it gently so it adheres.

    9. Bake:

    1. Bake at 425°F for 5 minutes, then reduce the oven temperature to 375°F (190°C) without opening the door. Continue baking for 15-18 minutes for standard muffins, or 20-25 minutes for jumbo muffins, until a toothpick inserted into the center comes out clean or with a few moist crumbs.
    2. Let the muffins cool in the pan for 5-10 minutes, then transfer to a wire rack to cool completely. Serve warm or at room temperature.

    Summary

    Prep Time: 20 minutes | Bake Time: 20-25 minutes (jumbo) or 15-18 minutes (standard) | Total Time: 40-45 minutes

    Yield: 6 jumbo muffins or 12 standard muffins

    Difficulty: Easy

    Storage and Make-Ahead Tips

    How to Store:

    Store blueberry muffins in an airtight container at room temperature for up to 3 days. The streusel will soften slightly over time, which is normal. For longer storage, refrigerate for up to 5 days.

    Can You Freeze Muffins?

    Absolutely! Muffins freeze beautifully. Cool completely, then place in a freezer bag or airtight container with parchment between layers. Freeze for up to 3 months. Thaw at room temperature or microwave for 20-30 seconds.

    Reviving Day-Old Muffins:

    To refresh muffins, microwave for 10-15 seconds or warm in a 300°F oven for 5-7 minutes. They’ll taste almost freshly baked!

    Make-Ahead for Breakfast:

    You can prepare the streusel up to 3 days ahead and store in the refrigerator. The muffin batter is best baked immediately, but you can mix the dry ingredients ahead of time.

    Freezing Unbaked Muffins:

    Fill muffin cups with batter, top with streusel, and freeze until solid. Transfer frozen muffins to a freezer bag. Bake from frozen, adding 5-10 minutes to the baking time.

  • Homemade Pita Bread (Soft, Puffy & Always Pockets!)

    Homemade Pita Bread (Soft, Puffy & Always Pockets!)

    There is something truly magical about watching pita bread puff up in the oven. One moment it’s a flat disc of dough, and the next—poof!—it balloons into a gorgeous, golden pocket, just waiting to be filled with your favorite ingredients.

    Making pita bread at home is easier than you might think. With just a handful of simple ingredients and a hot oven, you can create soft, pillowy pitas that put any store-bought version to shame.

    They’re perfect for stuffing with gyros and falafel, tearing and dipping into hummus, or simply slathering with butter and eating warm from the oven. Once you try homemade, there’s no going back. Let’s make some pita!

    Ingredients

    Yields 8 pitas.

    For the Pita Dough:

    • 3 ½ cups (440g) all-purpose flour or bread flour, plus more for dusting
    • 2 teaspoons instant yeast (or active dry yeast)
    • 2 teaspoons salt
    • 1 teaspoon sugar
    • 1 ¼ cups (300ml) warm water (about 105-115°F)
    • 2 tablespoons olive oil

    For Baking:

    • Cornmeal or semolina flour (for dusting baking sheets, optional)

    Step-by-Step Instructions

    1. Mix the Dough:

    1. In a large bowl or the bowl of a stand mixer, whisk together the flour, instant yeast, salt, and sugar.
    2. Add the warm water and olive oil. If using active dry yeast instead of instant, dissolve it in the warm water with a pinch of sugar first and let it sit for 5-10 minutes until foamy, then proceed.
    3. Mix with a wooden spoon or dough hook until a shaggy dough forms.

    2. Knead:

    1. If using a stand mixer, knead with the dough hook on medium-low speed for 5-7 minutes, until the dough is smooth and elastic.
    2. If kneading by hand, turn the dough onto a lightly floured surface and knead for 8-10 minutes, until smooth and springy.
    3. The dough should be soft, smooth, and slightly tacky but not sticky. Add flour one tablespoon at a time only if absolutely necessary.

    3. First Rise:

    1. Place the dough in a lightly oiled bowl, cover with plastic wrap or a clean kitchen towel, and let rise in a warm place for 1-1.5 hours, until doubled in size.

    4. Divide and Shape:

    1. Punch down the risen dough and turn it onto a lightly floured surface.
    2. Divide the dough into 8 equal pieces (about 110-120g each).
    3. Shape each piece into a smooth ball by pulling the edges underneath and pinching to seal. Place on a lightly floured surface, cover with a towel, and let rest for 15-20 minutes. This rest is crucial for easy rolling.

    5. Roll Out:

    1. On a lightly floured surface, roll each ball into a circle about ¼-inch thick and 6-7 inches in diameter. Roll gently and evenly—if the edges are too thin, they won’t puff properly.
    2. Place the rolled circles on a lightly floured baking sheet, separated by parchment paper or floured towels. Cover and let rest for 30-45 minutes while you preheat the oven.

    6. Preheat the Oven and Baking Surface:

    1. Place a baking stone, steel, or an inverted heavy baking sheet on the middle rack of your oven. Preheat to 500°F (260°C) for at least 30 minutes. The intense heat is essential for the pita to puff.
    2. If you have one, place a cast iron skillet on the bottom rack to create steam, or have a spray bottle ready for water.

    7. Bake:

    1. Carefully remove the hot baking surface from the oven and dust lightly with cornmeal or semolina if using (this prevents sticking and adds a nice texture).
    2. Place 2-3 pitas on the hot surface (don’t overcrowd).
    3. Bake for 2-3 minutes, until they puff up dramatically and get lightly golden spots. You can also toss a few ice cubes or spray water into the bottom of the oven just before closing the door to create steam, which helps with puffing.
    4. Flip and bake for another 1-2 minutes if desired, though this isn’t always necessary.
    5. Remove from the oven and wrap immediately in a clean kitchen towel to keep them soft. The steam trapped in the towel keeps them pliable.
    6. Repeat with remaining pitas.

    8. Serve:

    1. Serve warm, stuffed with your favorite fillings, or alongside dips like hummus, tzatziki, and baba ganoush.

    Summary

    Prep Time: 20 minutes | Rise Time: 1.5-2 hours | Bake Time: 3-4 minutes per batch | Total Time: About 2 hours

    Yield: 8 pitas

    Difficulty: Easy to Intermediate

    Storage and Make-Ahead Tips

    How to Store:

    Store cooled pitas in an airtight container or zip-top bag at room temperature for up to 3 days. To keep them soft, you can add a slightly damp paper towel to the bag and refresh in the microwave for 10-15 seconds.

    Can You Freeze Them?

    Absolutely! Pita bread freezes beautifully. Stack cooled pitas with parchment paper between each one to prevent sticking, then place in a freezer bag. Freeze for up to 3 months. Thaw at room temperature and warm in a dry skillet, oven, or microwave before serving.

    Make-Ahead Dough:

    You can prepare the dough through step 3 (first rise), then punch it down, cover tightly, and refrigerate for up to 24 hours. When ready to bake, let it come to room temperature, then proceed with dividing, shaping, and resting.

    Freezing Shaped Pitas:

    Roll out the pitas, place them on parchment-lined baking sheets with parchment between layers, and freeze until solid. Transfer to a freezer bag. Bake from frozen directly on a hot baking stone—they may need an extra minute.

    Reviving Day-Old Pitas:

    Sprinkle slightly stale pitas with a few drops of water, wrap in foil, and warm in a 300°F oven for 5-10 minutes. They’ll taste almost freshly baked.

  • Classic Chocolate Cake (Rich, Moist & Perfectly Decadent)

    Classic Chocolate Cake (Rich, Moist & Perfectly Decadent)

    Every baker needs a signature chocolate cake recipe—the one you turn to for birthdays, celebrations, and those days when only chocolate will do. This is mine, and after today, it might just become yours too.

    This classic chocolate cake is everything you want it to be. The layers are incredibly moist and tender with a deep, rich chocolate flavor. The frosting is silky, smooth, and perfectly balanced between sweet and chocolatey.

    Together, they create a cake that looks impressive but is surprisingly simple to make. Whether you’re a beginner baking your first layer cake or a seasoned pro looking for a reliable go-to, this recipe delivers every single time. Let’s bake something beautiful.

    Ingredients

    Makes one 8-inch or 9-inch cake (8-10 servings).

    For the Chocolate Cake:

    • 1 ¾ cups (220g) all-purpose flour
    • 2 cups (400g) granulated sugar
    • ¾ cup (75g) unsweetened cocoa powder (Dutch-process or natural)
    • 2 teaspoons baking soda
    • 1 teaspoon baking powder
    • 1 teaspoon salt
    • 2 large eggs, at room temperature
    • 1 cup (240ml) buttermilk, at room temperature
    • ½ cup (120ml) vegetable oil
    • 2 teaspoons vanilla extract
    • 1 cup (240ml) hot coffee or hot water

    For the Chocolate Frosting:

    • 1 ½ cups (340g) unsalted butter, softened
    • 4 cups (480g) powdered sugar, sifted
    • ¾ cup (75g) unsweetened cocoa powder, sifted
    • ½ teaspoon salt
    • 2 teaspoons vanilla extract
    • ¼ cup (60ml) heavy cream or milk, plus more as needed

    Optional:

    • Chocolate sprinkles or shavings for decoration
    • Fresh berries for serving

    Step-by-Step Instructions

    1. Preheat and Prepare:

    1. Preheat your oven to 350°F (175°C). Grease two 8-inch or 9-inch round cake pans, line the bottoms with parchment paper, then grease the parchment. Dust with cocoa powder or flour, tapping out the excess.

    2. Combine Dry Ingredients:

    1. In a large bowl or the bowl of a stand mixer, sift or whisk together the flour, sugar, cocoa powder, baking soda, baking powder, and salt until well combined.

    3. Add Wet Ingredients:

    1. Add the eggs, buttermilk, vegetable oil, and vanilla extract to the dry ingredients. Beat on medium speed for 2 minutes, scraping down the sides as needed. The batter will be thick.

    4. Add Hot Coffee:

    1. With the mixer on low speed, carefully pour in the hot coffee (or hot water). Beat until just combined—the batter will be very thin. This is normal and creates an incredibly moist cake.

    5. Bake:

    1. Divide the batter evenly between the prepared pans.
    2. Bake for 30-35 minutes, until a toothpick inserted into the center comes out clean or with a few moist crumbs.
    3. Let the cakes cool in the pans for 15-20 minutes, then turn out onto wire racks to cool completely. The cakes must be completely cool before frosting.

    6. Make the Frosting:

    1. In a large bowl, beat the softened butter with an electric mixer until creamy and smooth, about 2 minutes.
    2. Gradually add the sifted powdered sugar and cocoa powder, beating on low speed until combined. Scrape down the sides as needed.
    3. Add the salt, vanilla extract, and heavy cream. Beat on medium-high speed for 3-5 minutes until light, fluffy, and spreadable. If the frosting is too thick, add more cream 1 tablespoon at a time. If too thin, add more powdered sugar.

    7. Assemble the Cake:

    1. If the cake layers have domed tops, use a serrated knife to level them for even stacking.
    2. Place one layer on a cake stand or plate. Spread about 1 cup of frosting evenly over the top.
    3. Place the second layer on top, upside down for a flat surface. Apply a thin crumb coat (a thin layer of frosting) all over the cake to seal in crumbs. Refrigerate for 20-30 minutes to set.
    4. Frost the entire cake with the remaining frosting, creating swirls or smooth edges as desired. Decorate with chocolate sprinkles or shavings if desired.

    8. Serve:

    1. Slice and serve at room temperature for the best texture and flavor. Store leftovers in an airtight container.

    Summary

    Prep Time: 25 minutes | Bake Time: 30-35 minutes | Cooling/Frosting Time: 1 hour | Total Time: 2 hours

    Yield: One 8-inch or 9-inch双层 cake (8-10 servings)

    Difficulty: Intermediate

    Storage and Make-Ahead Tips

    How to Store:

    Store frosted cake in an airtight container at room temperature for up to 3 days, or in the refrigerator for up to 5 days. Bring to room temperature before serving for the best flavor and texture.

    Can You Freeze Cake Layers?

    Absolutely! This is a great make-ahead strategy. Wrap completely cooled cake layers tightly in plastic wrap, then in foil. Freeze for up to 3 months. Thaw at room temperature before frosting.

    Freezing Frosted Cake:

    You can freeze a fully frosted cake! Place it in the freezer uncovered for 1-2 hours until the frosting is firm, then wrap tightly in plastic wrap and foil. Freeze for up to 3 months. Thaw overnight in the refrigerator.

    Make-Ahead Frosting:

    The frosting can be made up to 3 days ahead and stored in the refrigerator. Let it come to room temperature, then re-whip for a few minutes before using.

    Cupcakes:

    This recipe makes about 24-30 cupcakes. Bake at 350°F for 18-22 minutes. Frost as desired.

  • Rich, Fudgy & Ultra-Moist: The Ultimate Double Chocolate Banana Bread

    Rich, Fudgy & Ultra-Moist: The Ultimate Double Chocolate Banana Bread

    If you love classic banana bread but crave something more indulgent, Double Chocolate Banana Bread is about to become your new obsession.

    This recipe combines sweet, ripe bananas with deep cocoa flavor and melty chocolate chips for a loaf that’s incredibly moist, tender, and decadently rich. It’s the perfect balance of comforting and chocolatey—ideal for breakfast, dessert, or an afternoon treat with coffee.

    Let’s walk step by step through making bakery-style double chocolate banana bread right in your own kitchen.


    Why You’ll Love This Recipe

    • Extra moist and tender texture
    • Deep chocolate flavor from cocoa and chocolate chips
    • Perfect way to use overripe bananas
    • Simple, pantry-friendly ingredients
    • Freezer-friendly and great for meal prep

    This isn’t just banana bread—it’s a chocolate lover’s dream.


    Ingredients You’ll Need

    Wet Ingredients:

    • 3 very ripe bananas (mashed)
    • ½ cup unsalted butter, melted (or vegetable oil)
    • ¾ cup granulated sugar
    • ¼ cup brown sugar
    • 2 large eggs
    • 1 teaspoon vanilla extract

    Dry Ingredients:

    • 1 ½ cups all-purpose flour
    • ½ cup unsweetened cocoa powder
    • 1 teaspoon baking soda
    • ½ teaspoon salt

    Chocolate Add-Ins:

    • 1 cup semi-sweet chocolate chips
    • ½ cup dark chocolate chunks (optional but recommended)

    Step 1: Preheat and Prepare Your Pan

    Preheat your oven to 350°F (175°C).

    Grease a 9×5-inch loaf pan and line it with parchment paper, leaving an overhang for easy removal. Proper preparation ensures clean slices and prevents sticking.


    Step 2: Mash the Bananas

    In a large mixing bowl, mash the ripe bananas until mostly smooth with a few small lumps remaining.

    The riper the bananas, the sweeter and more flavorful your bread will be. Overripe bananas with brown spots are perfect.


    Step 3: Combine Wet Ingredients

    Add melted butter (cooled slightly) to the mashed bananas. Stir to combine.

    Mix in granulated sugar and brown sugar until smooth.

    Add the eggs one at a time, whisking well after each addition.

    Stir in vanilla extract.

    The mixture should look glossy and well blended.


    Step 4: Mix Dry Ingredients

    In a separate bowl, whisk together:

    • Flour
    • Cocoa powder
    • Baking soda
    • Salt

    Sifting the cocoa powder helps eliminate lumps and ensures even chocolate flavor throughout.


    Step 5: Combine Wet and Dry Mixtures

    Gradually add the dry ingredients into the wet mixture.

    Use a spatula to fold gently until just combined. Avoid overmixing—this keeps the bread soft and tender rather than dense.

    The batter will be thick and rich.


    Step 6: Fold in Chocolate Chips

    Gently fold in the chocolate chips and chocolate chunks.

    Reserve a small handful to sprinkle on top for a bakery-style finish.

    This step creates that irresistible double chocolate effect—cocoa in the batter plus pockets of melted chocolate.


    Step 7: Transfer to Pan

    Pour the batter into the prepared loaf pan.

    Smooth the top evenly with a spatula.

    Sprinkle remaining chocolate chips on top.

    For a decorative touch, slice a banana lengthwise and place it cut-side up on top before baking (optional).


    Step 8: Bake to Perfection

    Bake for 55–65 minutes, or until a toothpick inserted into the center comes out with moist crumbs but no raw batter.

    If the top begins browning too quickly, loosely tent with foil during the last 15 minutes.

    Avoid overbaking—slightly underbaked ensures a fudgy texture.


    Step 9: Cool Properly

    Remove from the oven and let the bread cool in the pan for 10–15 minutes.

    Then lift it out using the parchment overhang and transfer to a wire rack to cool completely.

    Cooling allows the crumb to set and makes slicing easier.


    Step 10: Slice and Enjoy

    Once cooled, slice using a sharp serrated knife.

    Serve plain, warm with butter, or slightly toasted for an even richer experience.


    Texture and Flavor Highlights

    • Deep chocolate intensity
    • Ultra-moist banana base
    • Melty chocolate pockets
    • Soft, tender crumb
    • Slightly crisp top edges

    Every bite delivers rich cocoa flavor balanced by natural banana sweetness.


    Pro Tips for Perfect Double Chocolate Banana Bread

    Use very ripe bananas. The darker, the better.

    Don’t overmix. Gentle folding keeps the bread tender.

    Measure flour correctly. Spoon and level for accuracy.

    Add espresso powder. A teaspoon enhances chocolate flavor without tasting like coffee.

    Check early. Ovens vary—start checking at 50 minutes.


    Optional Variations

    Nutty Crunch: Add ½ cup chopped walnuts or pecans.

    Healthier Swap: Replace half the butter with Greek yogurt.

    Extra Fudgy: Add ¼ cup melted dark chocolate to the batter.

    Mini Loaves: Divide batter into mini pans and bake 25–30 minutes.

    Chocolate Swirl: Swirl Nutella into the top before baking.


    Storage Instructions

    Store at room temperature in an airtight container for up to 4 days.

    Refrigerate for up to 1 week.

    To freeze, wrap slices individually in plastic wrap and store in a freezer-safe bag for up to 3 months.

    Thaw at room temperature or microwave for 15–20 seconds.


    Why This Recipe Works

    Double Chocolate Banana Bread succeeds because it balances moisture and structure perfectly. Bananas provide natural sweetness and tenderness, while cocoa powder delivers concentrated chocolate flavor.

    The combination of granulated and brown sugar adds depth and helps maintain moisture.

    Chocolate chips create melty pockets that elevate every slice, while careful mixing prevents toughness. Baking at a moderate temperature ensures even cooking without drying out the loaf.


    If you’re craving something comforting yet indulgent, this Double Chocolate Banana Bread checks every box. It’s rich, moist, packed with chocolate, and wonderfully simple to make.

    Whether served as a sweet breakfast, afternoon snack, or dessert, it’s guaranteed to satisfy chocolate lovers and banana bread fans alike.

    Once you try it, plain banana bread may never be enough again.

  • Fudgy, Decadent & Loaded with Crunch: The Ultimate Oreo Brownies Recipe

    Fudgy, Decadent & Loaded with Crunch: The Ultimate Oreo Brownies Recipe

    If you love rich, chocolatey brownies and can’t resist the classic cookies-and-cream flavor of Oreos, then Oreo Brownies are about to become your new favorite dessert.

    These brownies are intensely fudgy, layered with whole Oreo cookies, and topped with even more crunchy chocolate goodness. Each bite delivers deep cocoa flavor, creamy filling, and a satisfying cookie crunch.

    The best part?

    They’re surprisingly easy to make. Let’s walk step by step through creating bakery-style Oreo brownies right in your own kitchen.


    Why You’ll Love These Oreo Brownies

    • Ultra-fudgy texture
    • Layers of whole Oreo cookies
    • Crackly brownie top
    • Rich chocolate flavor
    • Simple, pantry-friendly ingredients

    They’re perfect for parties, bake sales, or when you simply need a serious chocolate fix.


    Ingredients You’ll Need

    For the Brownie Batter:

    • 1 cup (226g) unsalted butter
    • 1 ½ cups granulated sugar
    • ½ cup brown sugar
    • 3 large eggs
    • 1 tablespoon vanilla extract
    • 1 cup all-purpose flour
    • ¾ cup unsweetened cocoa powder
    • ½ teaspoon salt
    • ½ teaspoon baking powder
    • 1 cup semi-sweet chocolate chips

    For the Oreo Layer:

    • 16–20 Oreo cookies (regular or double stuffed)

    Step 1: Preheat and Prepare Your Pan

    Preheat your oven to 350°F (175°C).

    Line a 9×9-inch baking pan with parchment paper, leaving some overhang for easy removal. Lightly grease the paper to prevent sticking.

    Proper preparation ensures clean slices and easy removal later.


    Step 2: Melt the Butter

    In a microwave-safe bowl or saucepan, melt the butter completely.

    Allow it to cool slightly before mixing. Hot butter can cook the eggs if added immediately.

    Melted butter helps create that signature dense, fudgy brownie texture.


    Step 3: Mix the Sugars

    Add granulated sugar and brown sugar to the melted butter.

    Whisk thoroughly until smooth and glossy. This step dissolves the sugars slightly and contributes to a shiny, crackly top.


    Step 4: Add Eggs and Vanilla

    Add the eggs one at a time, whisking well after each addition.

    Stir in the vanilla extract.

    The mixture should become thick, smooth, and slightly lighter in color. Properly incorporating the eggs helps build structure and gives brownies their chewy texture.


    Step 5: Combine Dry Ingredients

    In a separate bowl, whisk together:

    • Flour
    • Cocoa powder
    • Salt
    • Baking powder

    Sifting the cocoa powder can help avoid lumps.


    Step 6: Combine Wet and Dry

    Gradually fold the dry ingredients into the wet mixture using a spatula.

    Mix just until combined. Overmixing can make brownies cakey instead of fudgy.

    Fold in the chocolate chips for extra richness.

    The batter should be thick and glossy.


    Step 7: Layer the Oreos

    Spread half of the brownie batter evenly into the prepared pan.

    Place Oreo cookies in a single layer on top of the batter. You can arrange them in rows to ensure even distribution.

    Gently press them down slightly.

    Spread the remaining brownie batter over the Oreo layer, covering the cookies as evenly as possible.

    For an extra touch, press a few broken Oreo pieces on top of the batter.


    Step 8: Bake to Perfection

    Place the pan in the preheated oven.

    Bake for 30–35 minutes.

    The edges should look set, and the center should still appear slightly soft. A toothpick inserted into the center should come out with moist crumbs—not wet batter.

    Be careful not to overbake. Slight underbaking keeps the brownies fudgy.


    Step 9: Cool Completely

    Remove from the oven and allow the brownies to cool in the pan for at least 30 minutes.

    For clean slices, let them cool completely or refrigerate for 1 hour before cutting.

    Using the parchment overhang, lift the brownies out of the pan and place on a cutting board.


    Step 10: Slice and Serve

    Use a sharp knife to cut into squares.

    Wipe the knife clean between cuts for neat edges.

    Serve as is, or elevate them with:

    • A scoop of vanilla ice cream
    • A drizzle of chocolate sauce
    • A dusting of powdered sugar

    Texture and Flavor Highlights

    • Deep chocolate intensity
    • Dense, fudgy interior
    • Crunchy Oreo layer
    • Creamy cookie filling surprise
    • Slightly crisp edges

    Every bite combines gooey brownie richness with the familiar cookies-and-cream crunch.


    Pro Tips for Perfect Oreo Brownies

    Use room temperature eggs. They mix more evenly.

    Don’t overmix. Stir until just combined.

    Underbake slightly. The brownies continue cooking as they cool.

    Line with parchment. Makes removal effortless.

    Chill before slicing. This helps maintain sharp layers.


    Optional Variations

    Double Chocolate: Add white chocolate chips for contrast.

    Stuffed Center: Add a layer of sweetened cream cheese between the brownie and Oreo layers.

    Mint Twist: Use mint-flavored Oreos for a refreshing change.

    Peanut Butter Swirl: Drop spoonfuls of peanut butter on top and swirl before baking.

    Extra Crunch: Crush additional Oreos into the batter itself.


    Storage Instructions

    Store Oreo brownies in an airtight container at room temperature for up to 4 days.

    For longer storage, refrigerate up to 1 week or freeze for up to 3 months.

    To freeze, wrap individual slices tightly in plastic wrap and place in a freezer-safe container.


    Why This Recipe Works

    The combination of melted butter and balanced sugars creates a moist, dense base. Cocoa powder delivers deep chocolate flavor without making the brownies too sweet. The Oreo layer adds texture contrast and a creamy center that transforms ordinary brownies into something special.

    Layering the cookies instead of mixing them into the batter keeps the structure defined and ensures every slice has that iconic Oreo surprise.


    Oreo Brownies are indulgent, chocolate-packed, and impossible to resist. With their fudgy interior, crunchy cookie layer, and crackly top, they’re everything you want in a dessert bar.

    Whether you’re baking for a celebration or simply treating yourself, this recipe delivers rich flavor and bakery-quality results every single time. Once you try them, plain brownies may never be enough again.