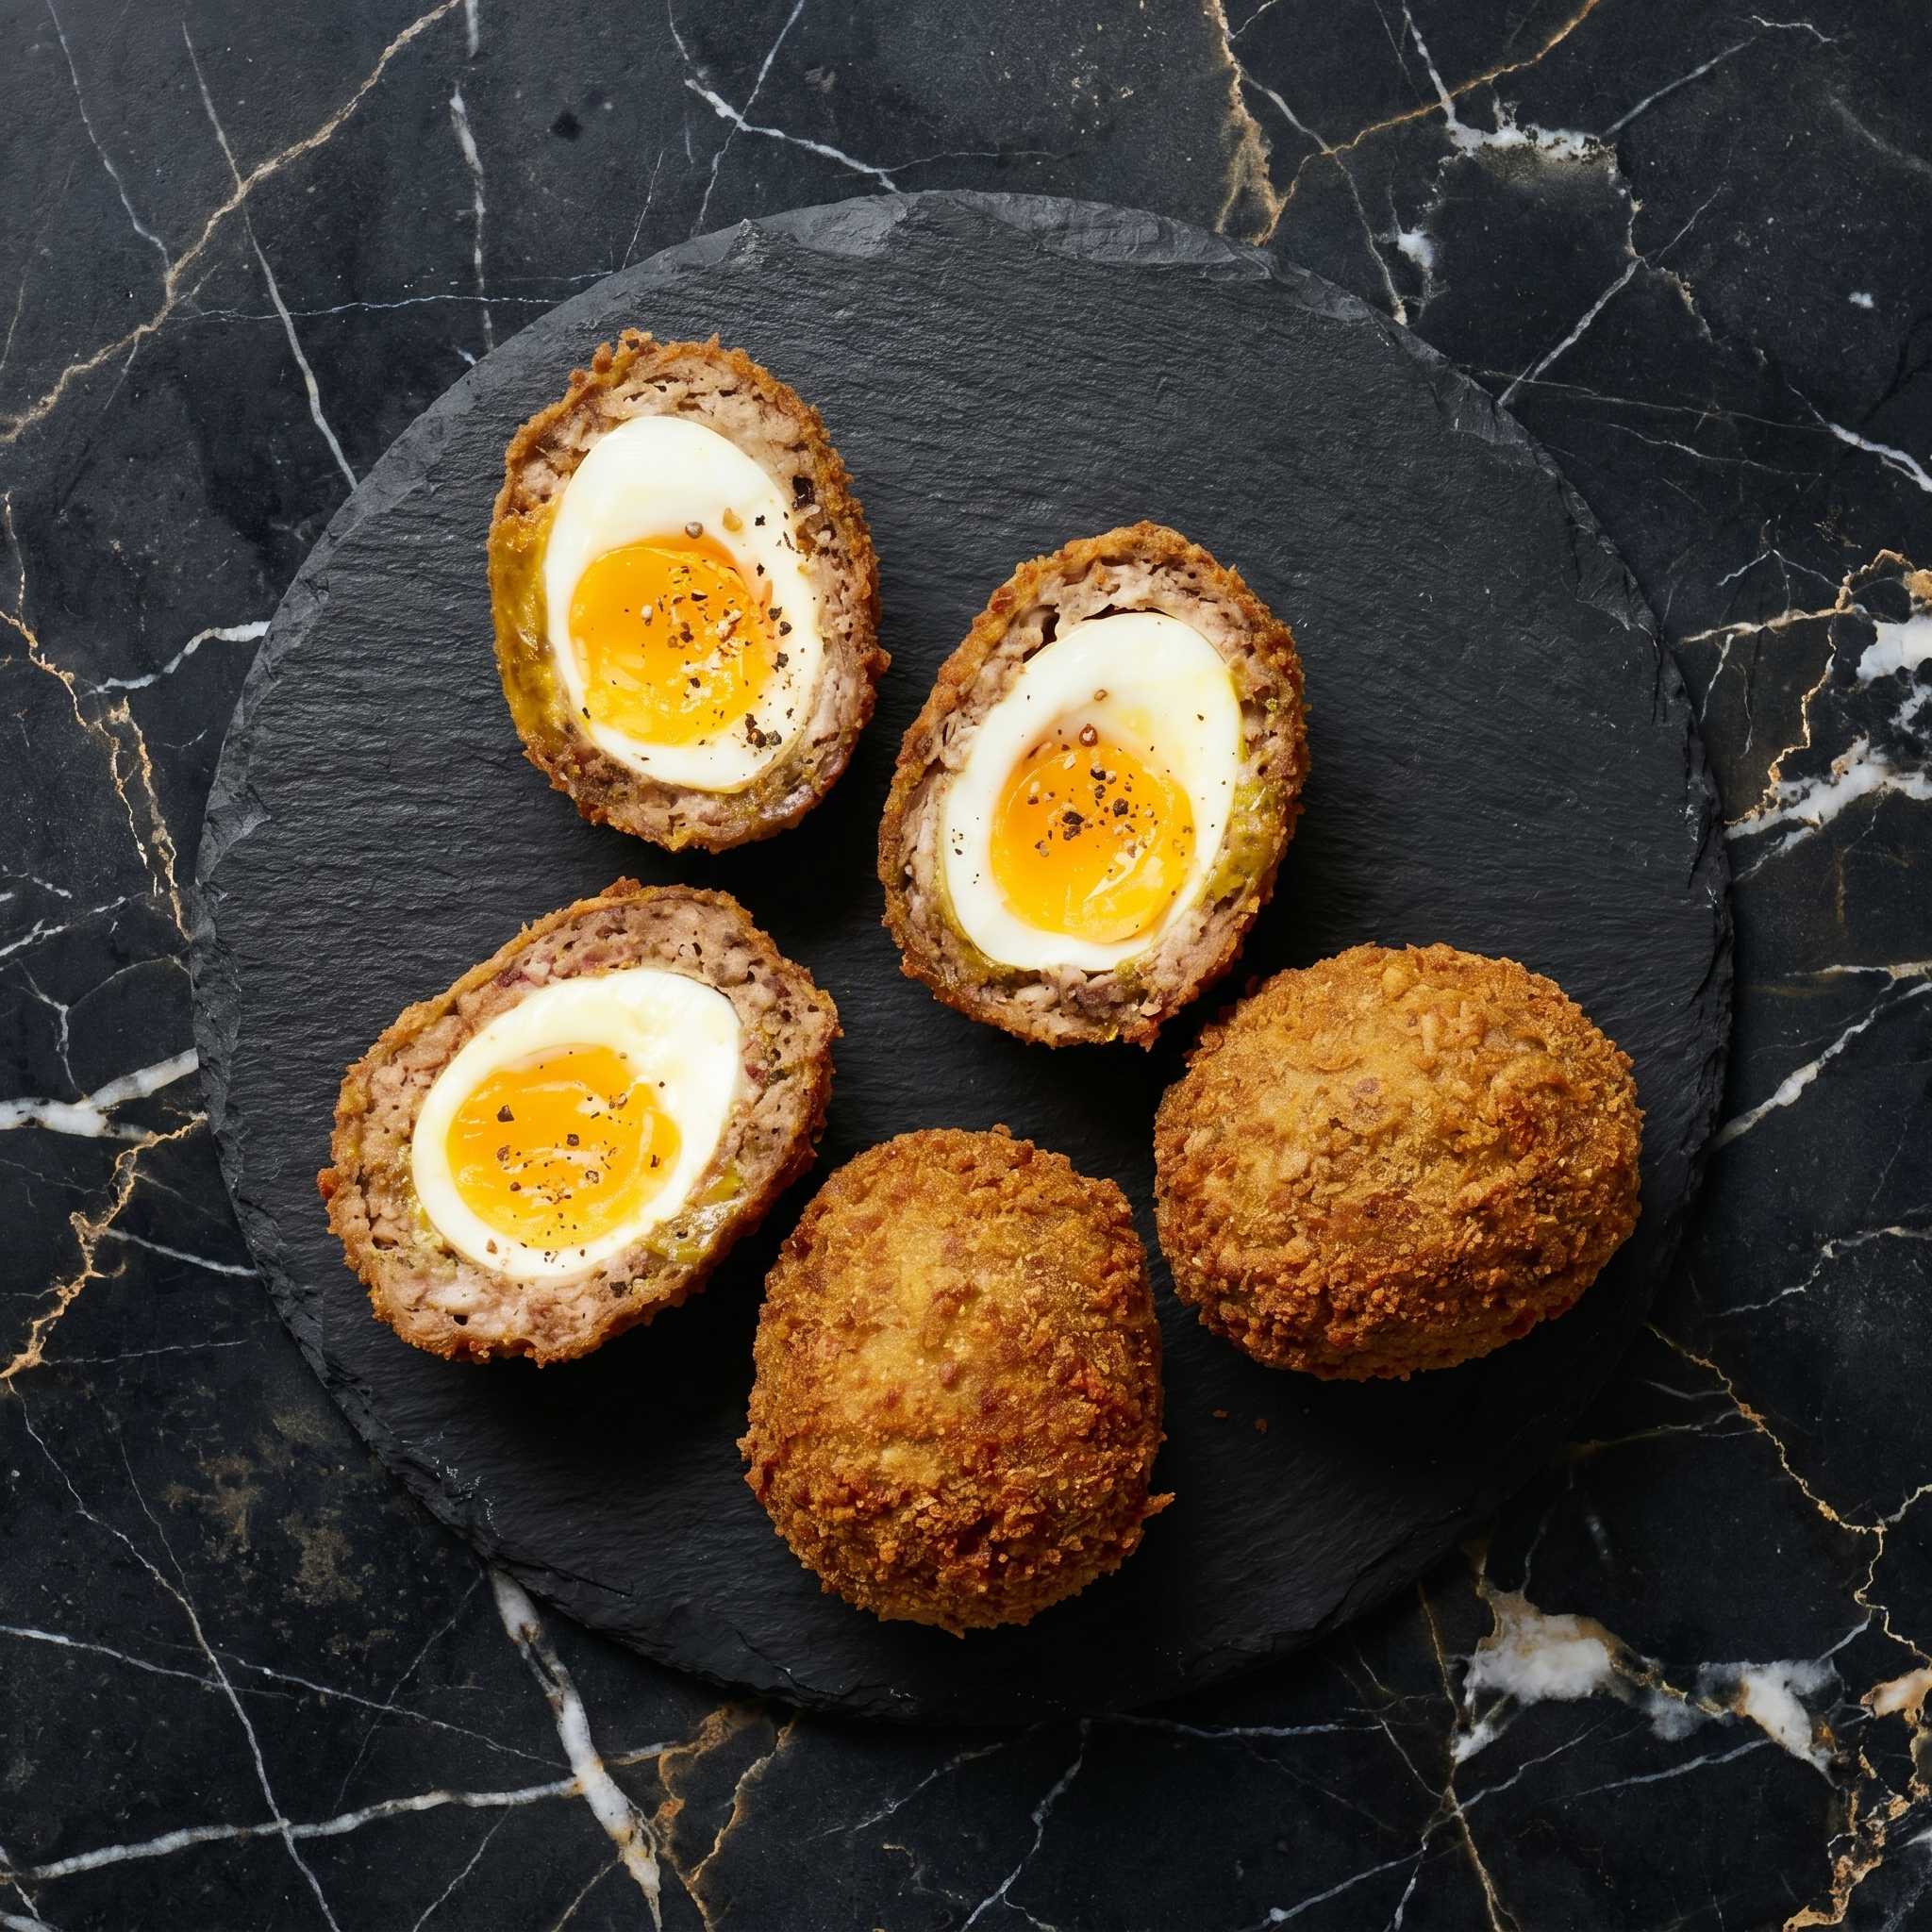
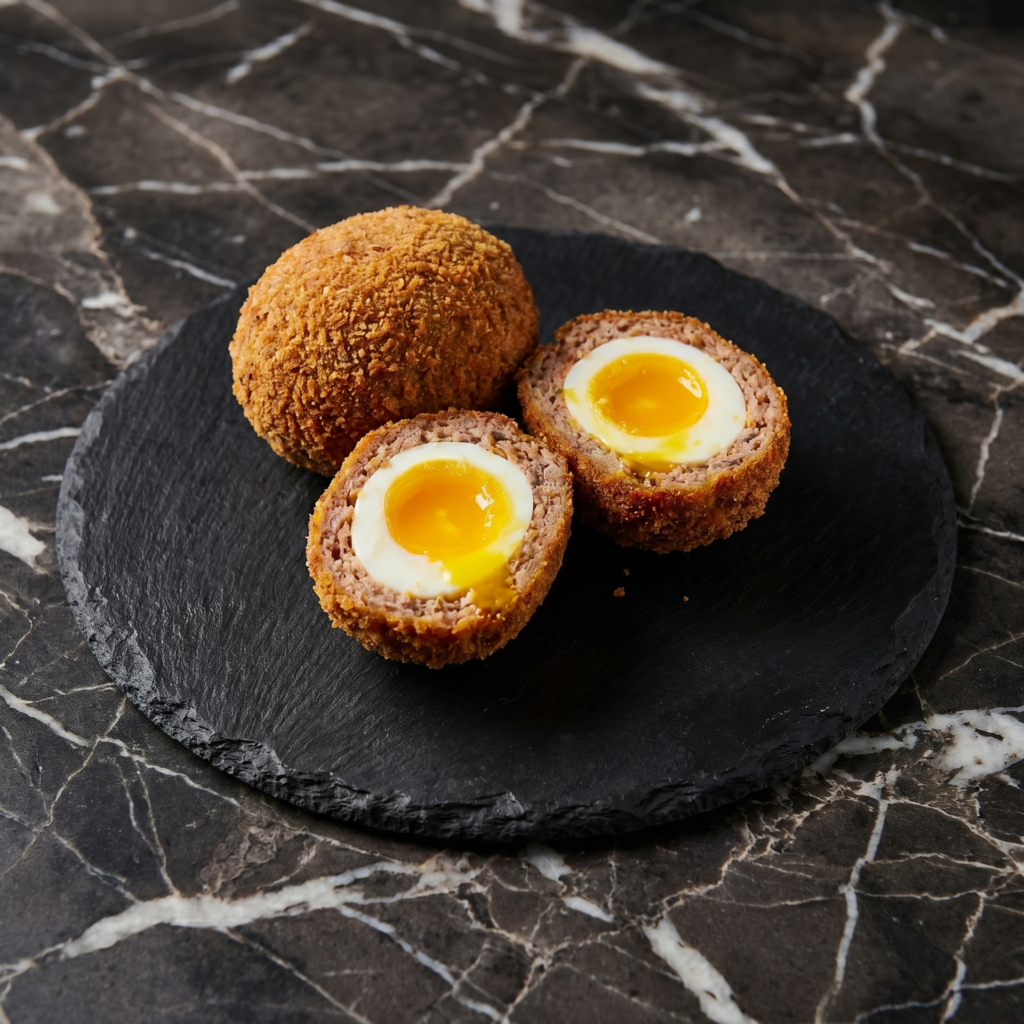
Scotch eggs look like they belong in a fancy pub. They’re actually just soft-boiled eggs wrapped in sausage meat, breaded, and fried. The trick? A jammy, runny yolk that spills out when you cut in. Crunchy outside, savory middle, golden inside. Let’s go.
Ingredients
Serves 4.
4 large eggs (room temperature)
1 lb breakfast sausage or ground pork
½ cup all-purpose flour
2 large eggs (for breading)
1 cup panko breadcrumbs
½ teaspoon salt
½ teaspoon black pepper
½ teaspoon paprika (optional)
Oil for frying (vegetable or canola)
Step-by-Step Instructions
Step 1: Soft Boil the Eggs
Bring a pot of water to a boil. Gently lower in 4 eggs.
Boil for 6 minutes (for jammy yolk) or 7 minutes (firmer).
Transfer immediately to an ice bath. Cool completely.
Peel carefully. Set aside.
Step 2: Set Up Breading Station
Place flour in one bowl. Beat 2 eggs in a second bowl. Place panko in a third bowl.
Mix salt, pepper, and paprika into the panko.
Step 3: Wrap in Sausage
Divide sausage into 4 equal portions. Flatten each into a thin patty.
Wrap each patty completely around a soft-boiled egg. Seal seams tightly.
Step 4: Bread the Scotch Eggs
Roll each sausage-wrapped egg in flour. Shake off excess.
Dip into beaten egg. Let excess drip off.
Roll in panko until fully coated.
Step 5: Fry Until Golden
Heat 2 inches of oil in a deep pot to 350°F.
Fry scotch eggs in batches for 5-6 minutes, turning occasionally, until deep golden brown.
Drain on a wire rack (not paper towels, to keep crisp).
Step 6: Serve Warm or Room Temp
Cut in half to reveal the jammy yolk. Sprinkle with flaky salt.
Scotch eggs keep in the fridge for up to 3 days. Serve cold or at room temperature—they’re traditional picnic food. To reheat crispy: air fry at 375°F for 5 minutes. Do not microwave (soggy sausage, rubbery yolk).
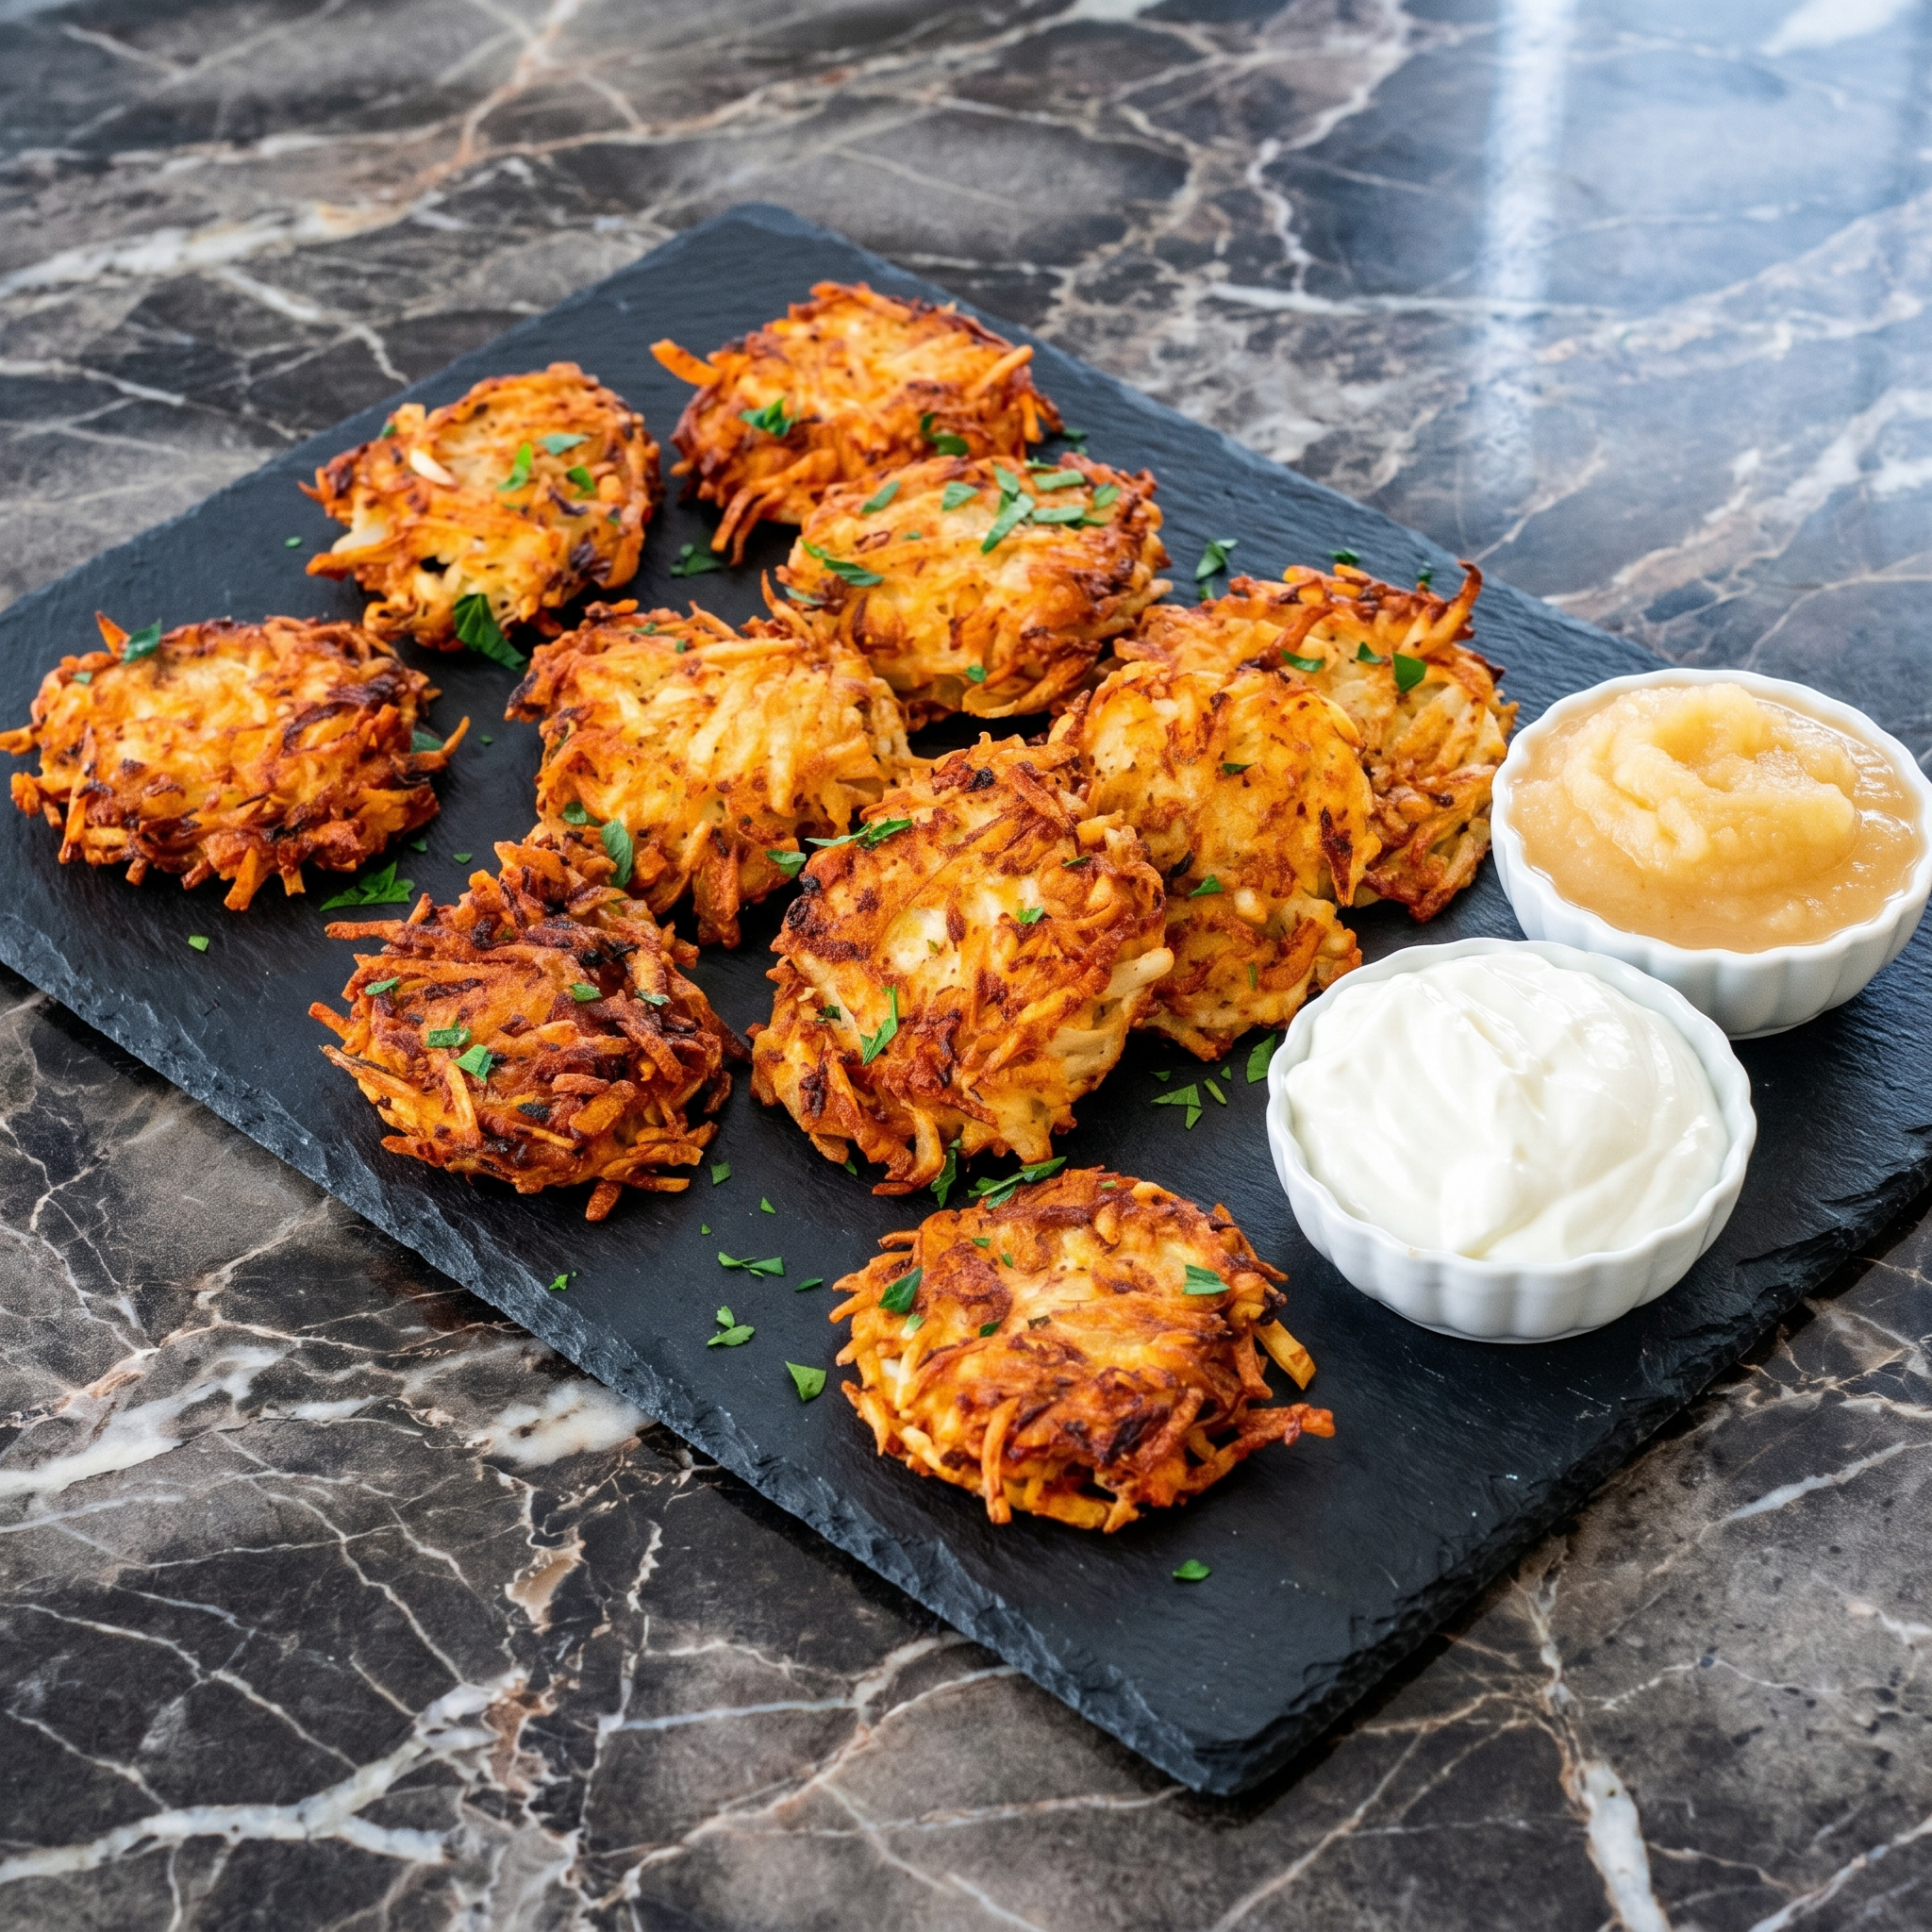
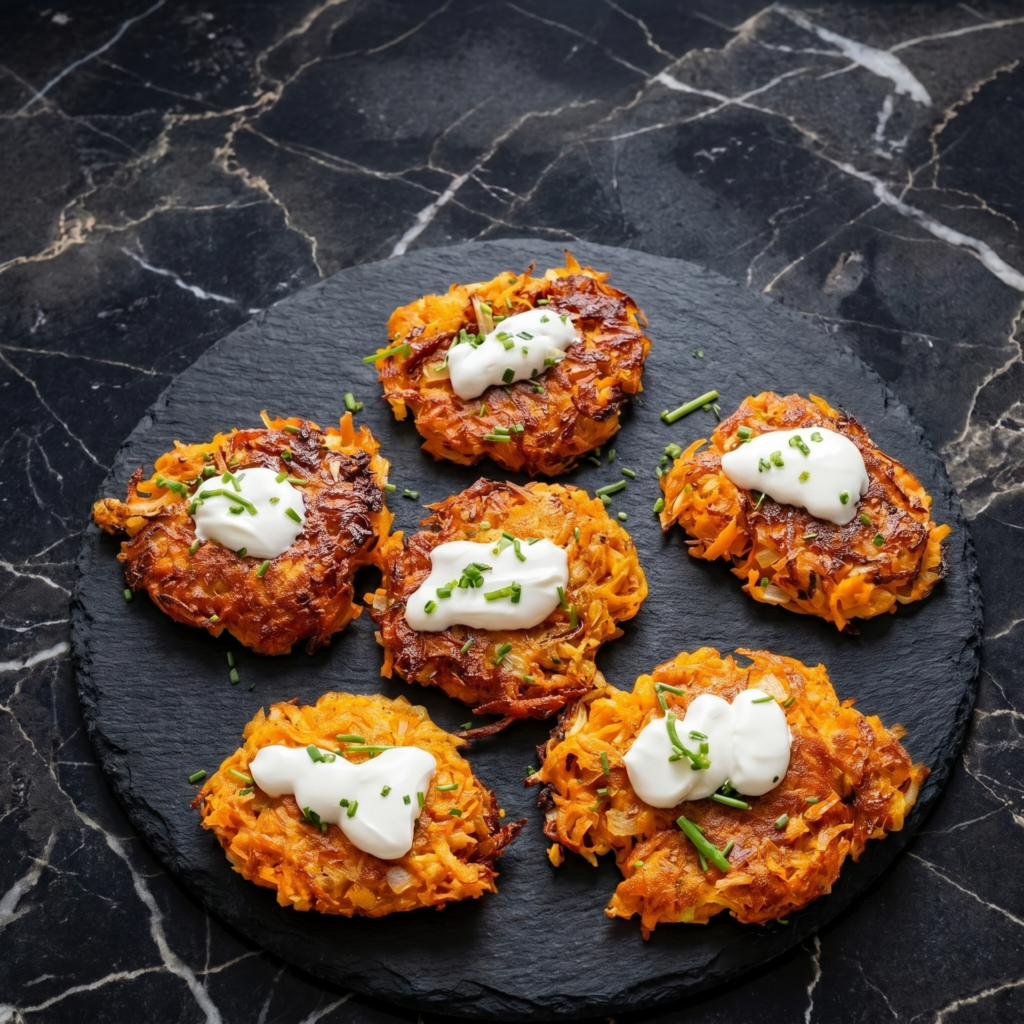
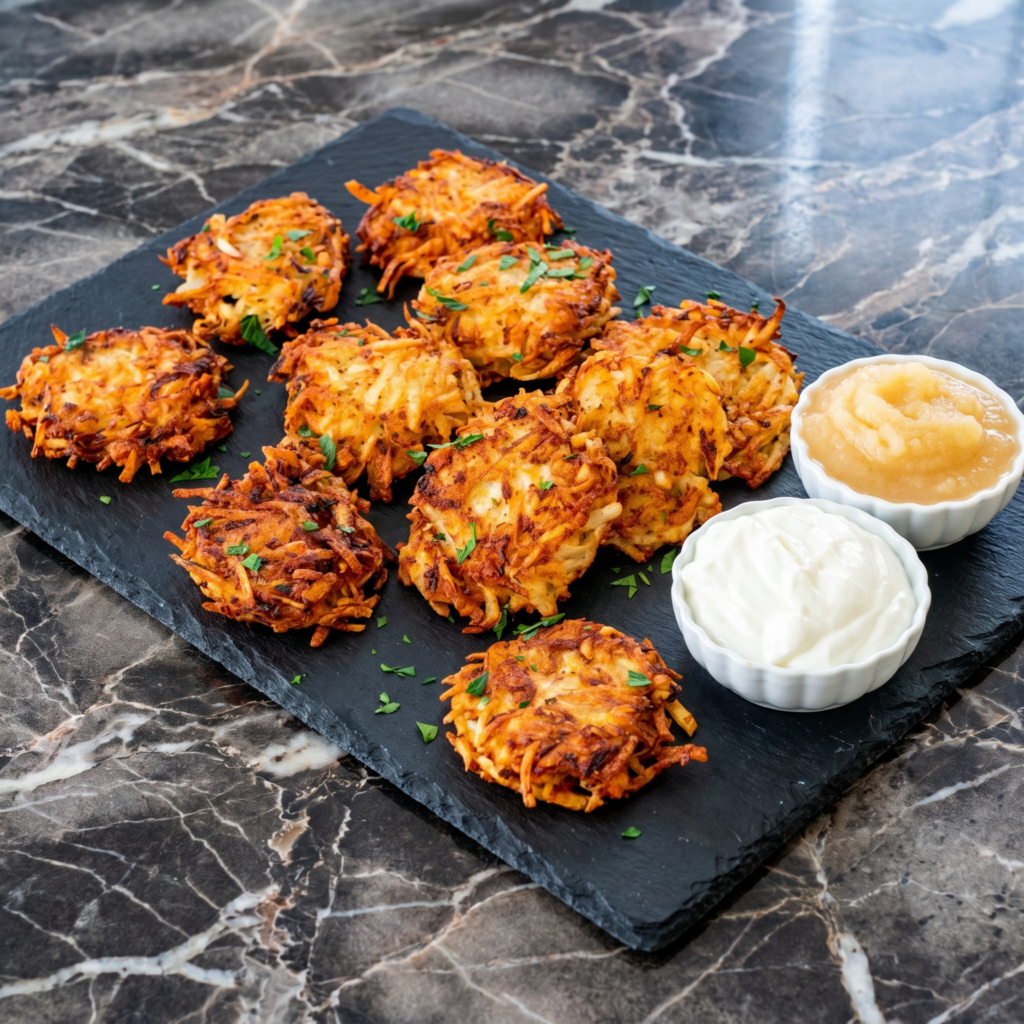
Latkes are simple: potatoes, onion, egg, flour, salt. But the difference between sad, soggy disks and transcendent, shatteringly crisp pancakes is one thing—water. Squeeze. Then squeeze again. That’s the secret. Serve with applesauce or sour cream. Watch them vanish.
Ingredients
Makes about 12 latkes (serves 4).
2 lbs russet potatoes (about 4 medium)
1 small onion
2 large eggs, beaten
¼ cup all-purpose flour or matzo meal
1 teaspoon salt
½ teaspoon black pepper
Oil for frying (vegetable or canola)
Applesauce and sour cream, for serving
Step-by-Step Instructions
Step 1: Grate the Potatoes and Onion
Peel potatoes. Grate using a box grater or food processor with shredding disc.
Grate onion as well.
Step 2: SQUEEZE (Crucial Step)
Transfer grated mixture to a clean kitchen towel or cheesecloth.
Twist and squeeze HARD over a bowl until no more liquid comes out.
Discard liquid, but keep the starchy white sediment at the bottom of the bowl—add it back to the potatoes.
Step 3: Make the Batter
In a large bowl, combine squeezed potato-onion mixture, eggs, flour, salt, and pepper.
Mix well. The batter should be moist but not wet.
Step 4: Heat the Oil
Pour ¼ inch of oil into a large skillet over medium-high heat.
Oil is ready when a shred of potato sizzles immediately.
Step 5: Fry the Latkes
Scoop about 2 tablespoons of batter per latke. Drop into oil and flatten slightly.
Fry for 3-4 minutes per side until deep golden brown and crispy.
Drain on a wire rack (not paper towels—paper traps steam).
Step 6: Serve Immediately
Serve hot with applesauce and sour cream on the side.
Latkes reheat beautifully in a 400°F oven or air fryer for 5 minutes. Refrigerate for up to 3 days. Do not microwave—soggy disaster. Uncooked batter does not store well (potatoes oxidize). Make fresh.
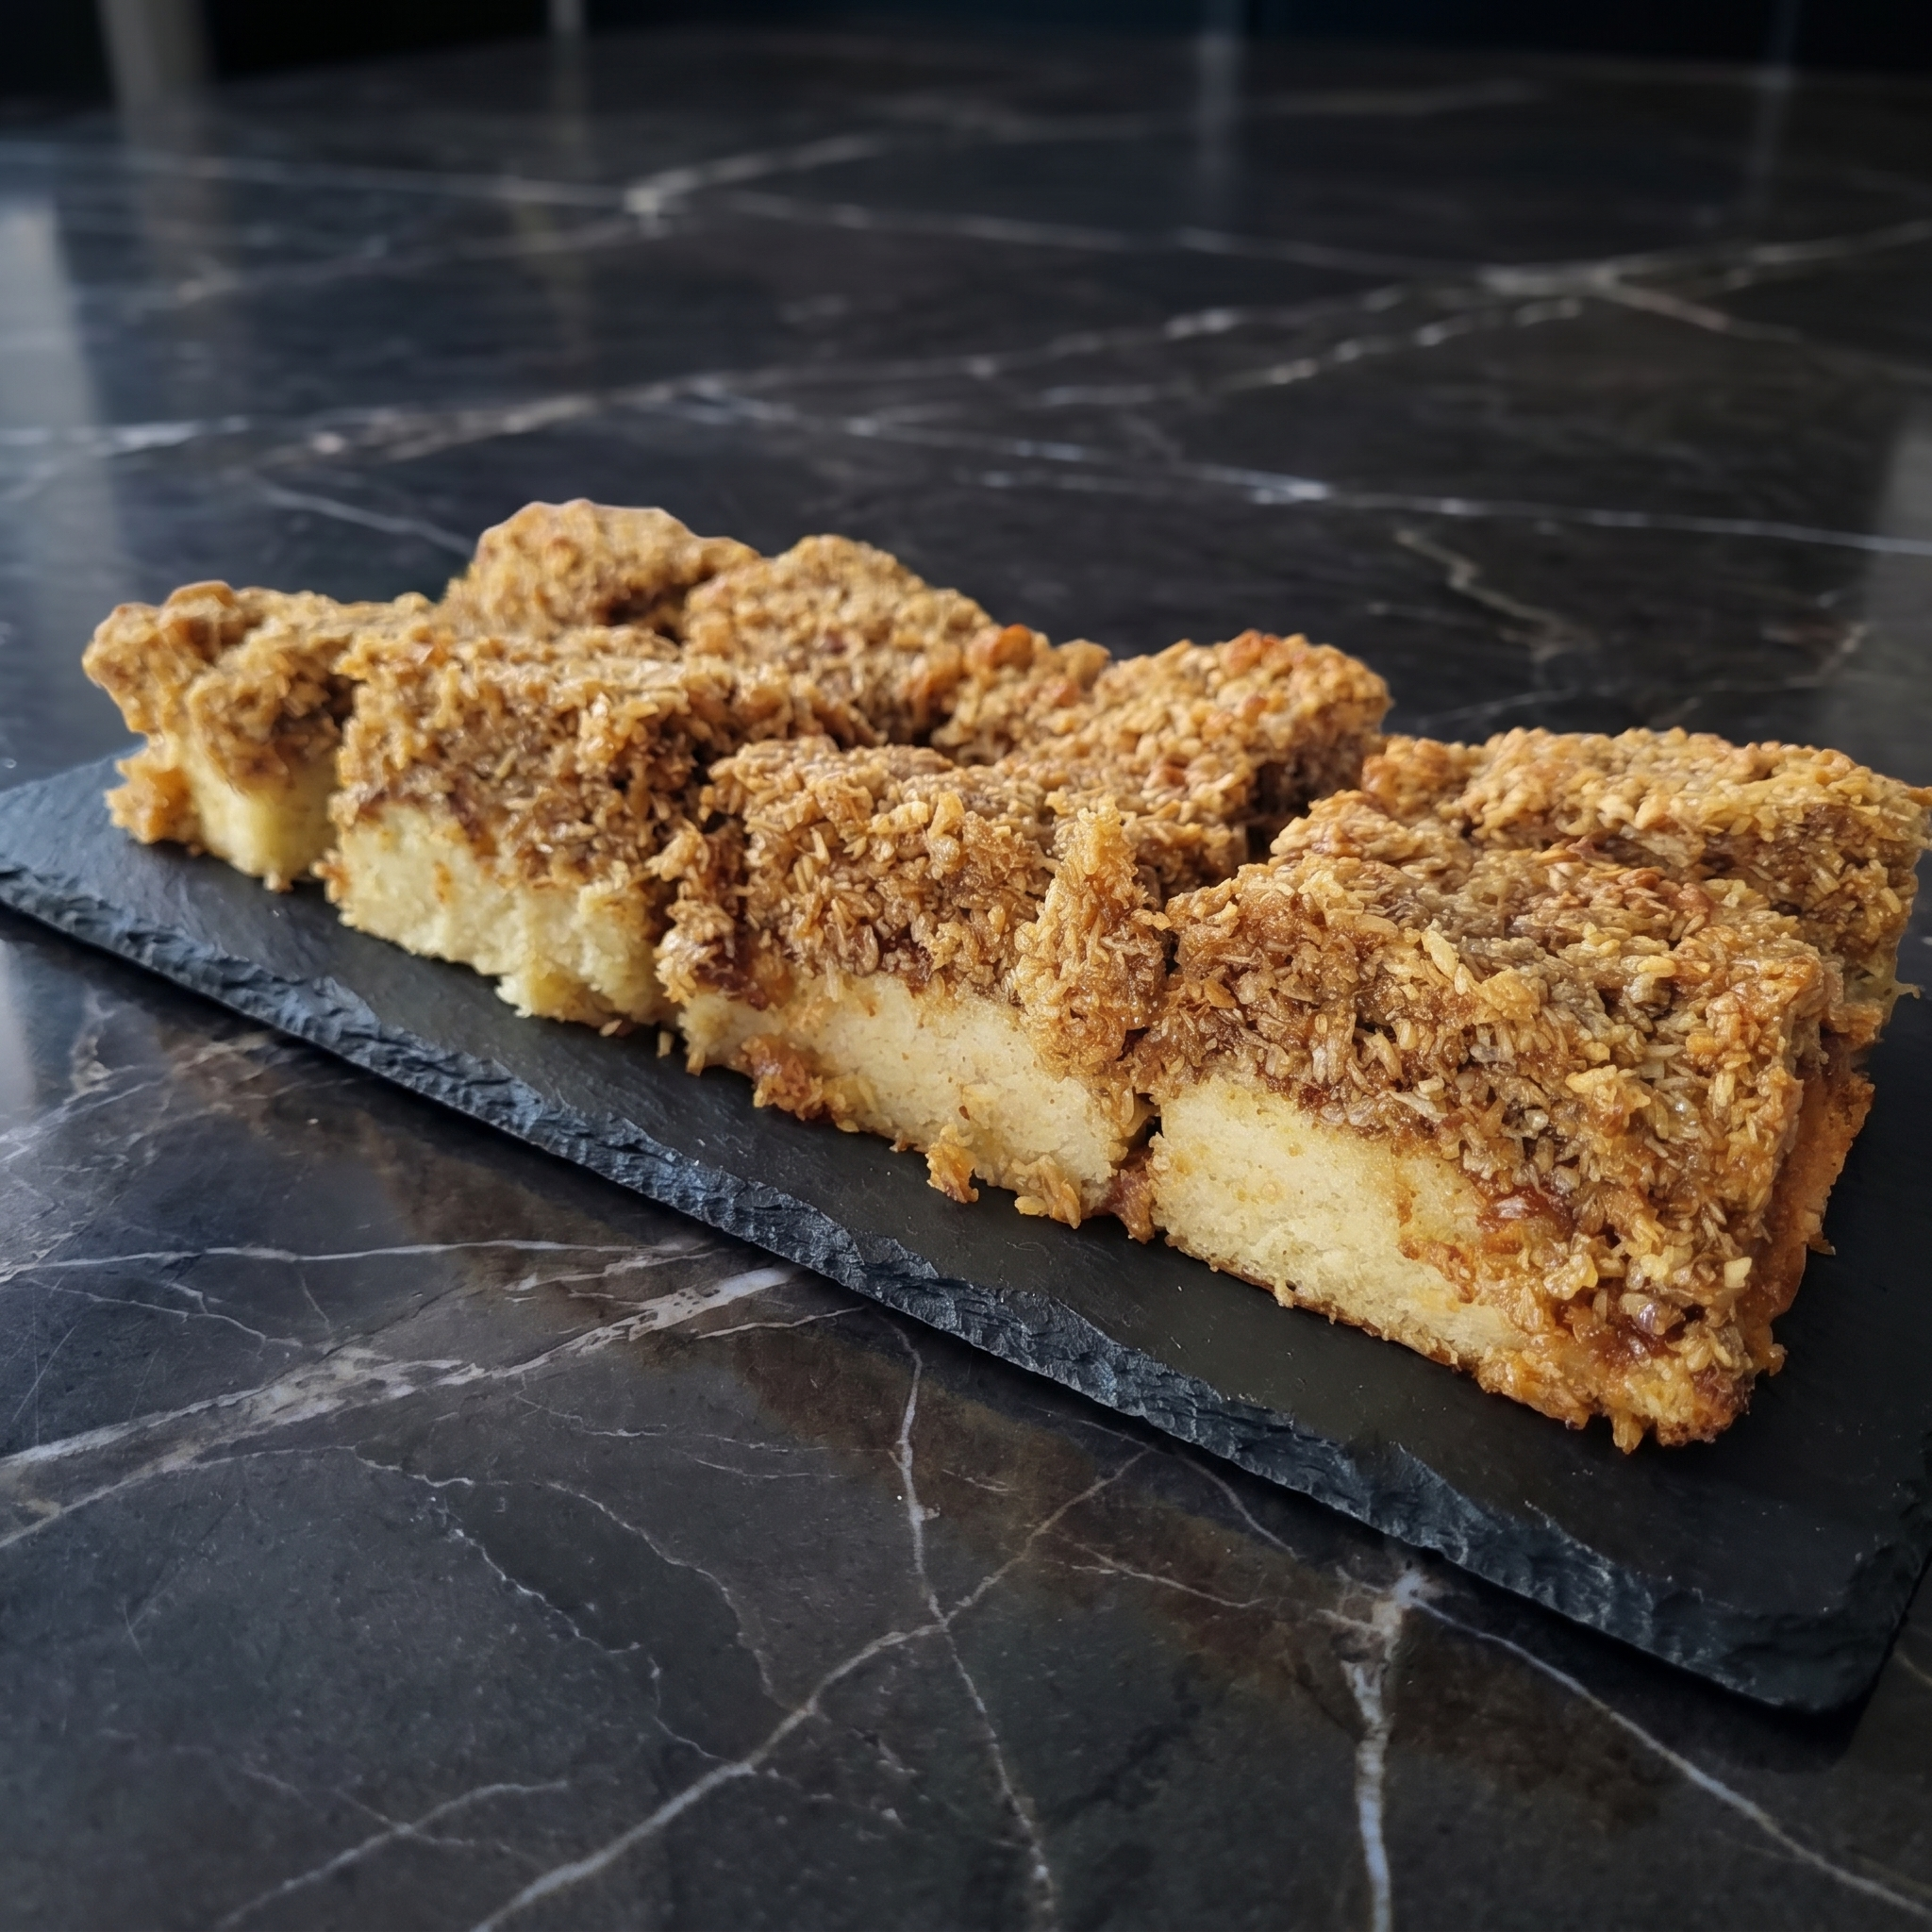
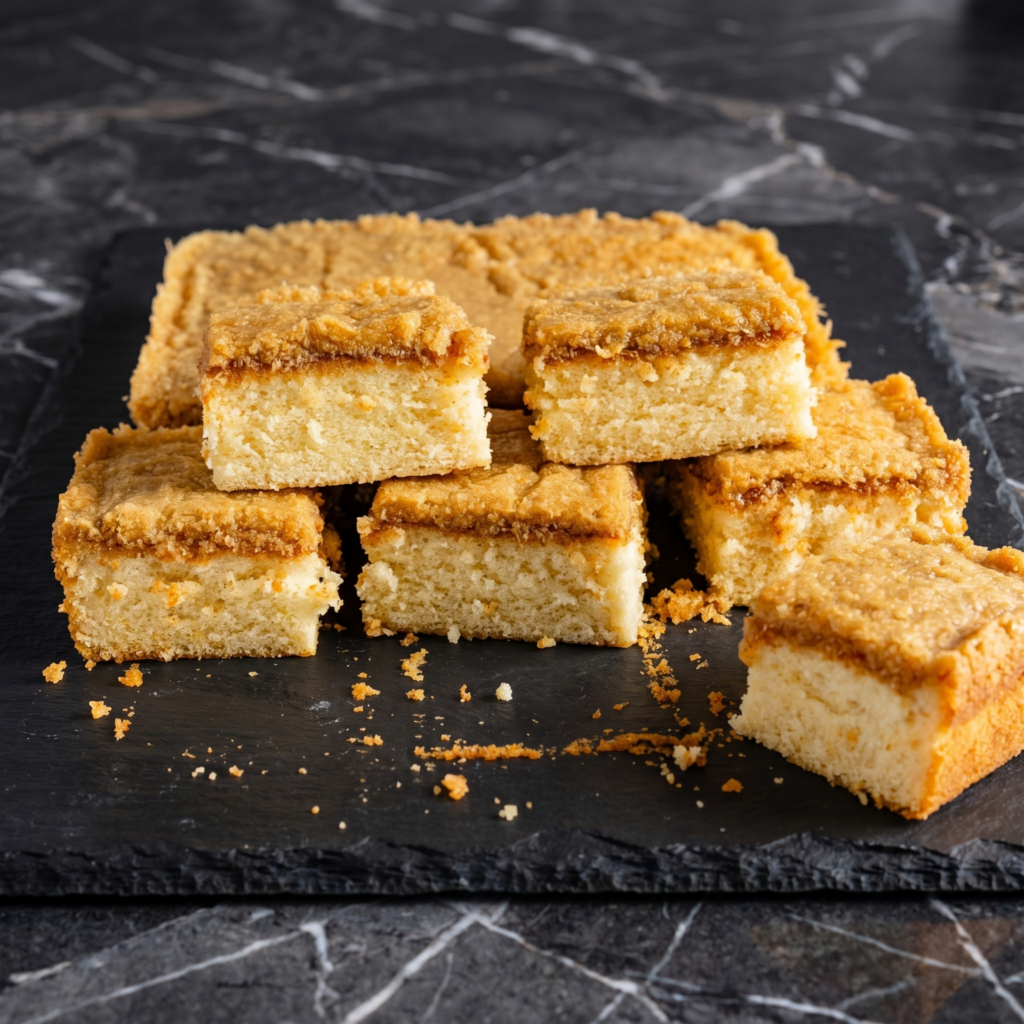
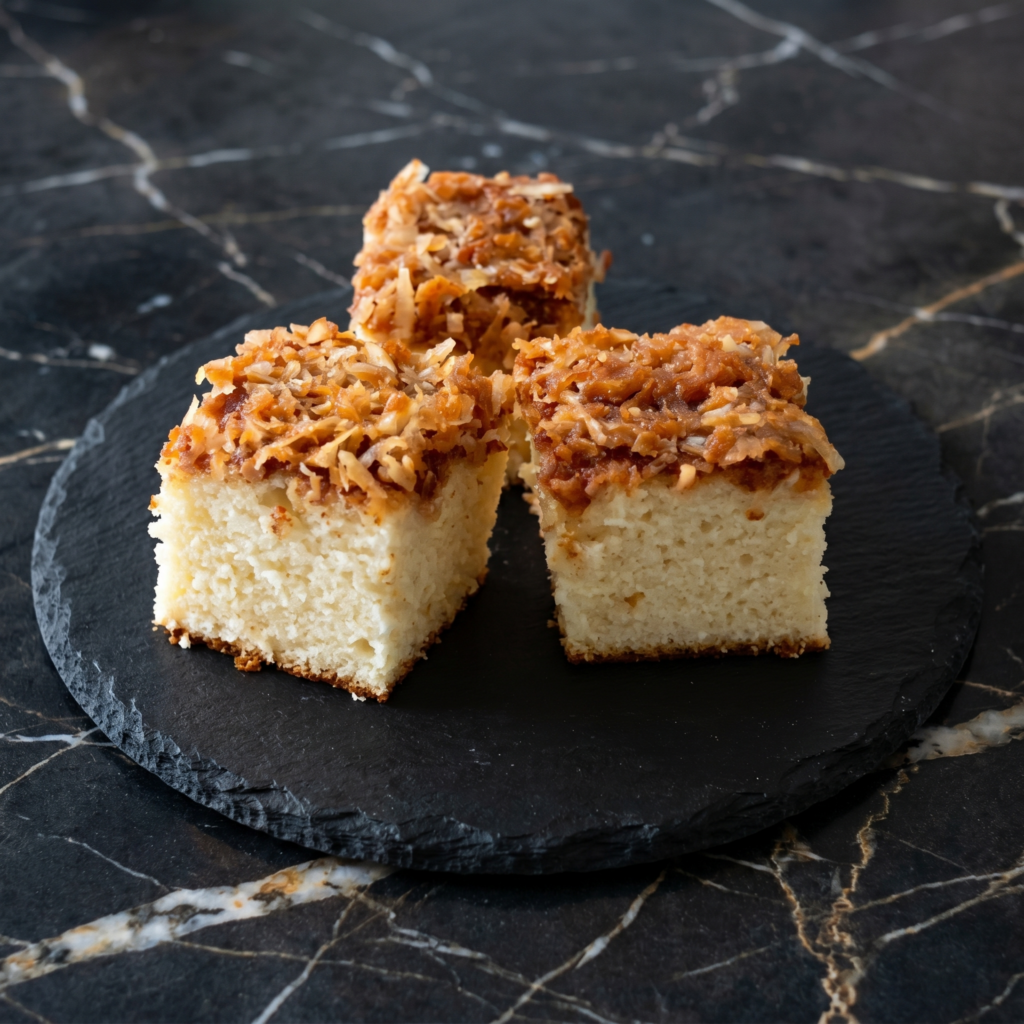
In 1960, a young Danish woman named Jytte Andersen entered her grandmother’s cake recipe into a national baking competition. She won. Today, that cake—Drømmekage, or “Dream Cake”—is everywhere in Denmark: birthday parties, office coffee breaks, bakeries, and hygge-filled afternoons [citation:3][citation:7]. It’s a simple vanilla sponge topped with a sticky, caramelized coconut layer. Pure Danish magic.
Ingredients
Serves 10-12.
For the Cake:
3 large eggs
1 cup (225g) granulated sugar
1 tsp vanilla extract or vanilla sugar
1½ cups (225g) plain flour
2 tsp baking powder
⅔ cup (165ml) whole milk
85g unsalted butter, melted
For the Coconut Topping:
100g unsalted butter
1 cup (250g) dark brown sugar, packed
⅓ cup (80ml) whole milk
3 cups (210g) shredded coconut (desiccated)
Pinch of salt
Step-by-Step Instructions
Step 1: Prep the Oven and Pan
Preheat oven to 375°F (190°C).
Grease a 9-inch springform or round cake pan and line with parchment paper.
Step 2: Make the Batter
Whisk eggs and sugar together until light, pale, and fluffy (about 3-5 minutes).
In a separate bowl, sift together flour and baking powder.
Mix milk with melted butter.
Gently fold flour mixture into egg mixture alternately with milk-butter mixture until just combined.
Step 3: Bake the Base
Pour batter into prepared pan.
Bake for 20-25 minutes until cake is almost done but still slightly soft.
Step 4: Make the Topping While It Bakes
In a saucepan over medium heat, melt butter with brown sugar, milk, and salt.
Bring to a gentle simmer for 1-2 minutes until sugar dissolves.
Stir in shredded coconut until fully coated.
Step 5: Add Topping and Finish Baking
Remove cake from oven. Spread coconut topping evenly over the top.
Return to oven. Increase temperature to 400°F (200°C).
Bake for 5-10 more minutes until topping is golden and bubbly [citation:1].
Step 6: Cool and Serve
Let cake cool in the pan for 15-20 minutes.
Serve warm or at room temperature with coffee or tea.
Store in an airtight container at room temperature for up to 3 days. The topping stays wonderfully gooey. Do not refrigerate—coconut topping hardens. This cake does not freeze well (texture changes). Serve slightly warm for the full dreamy experience.
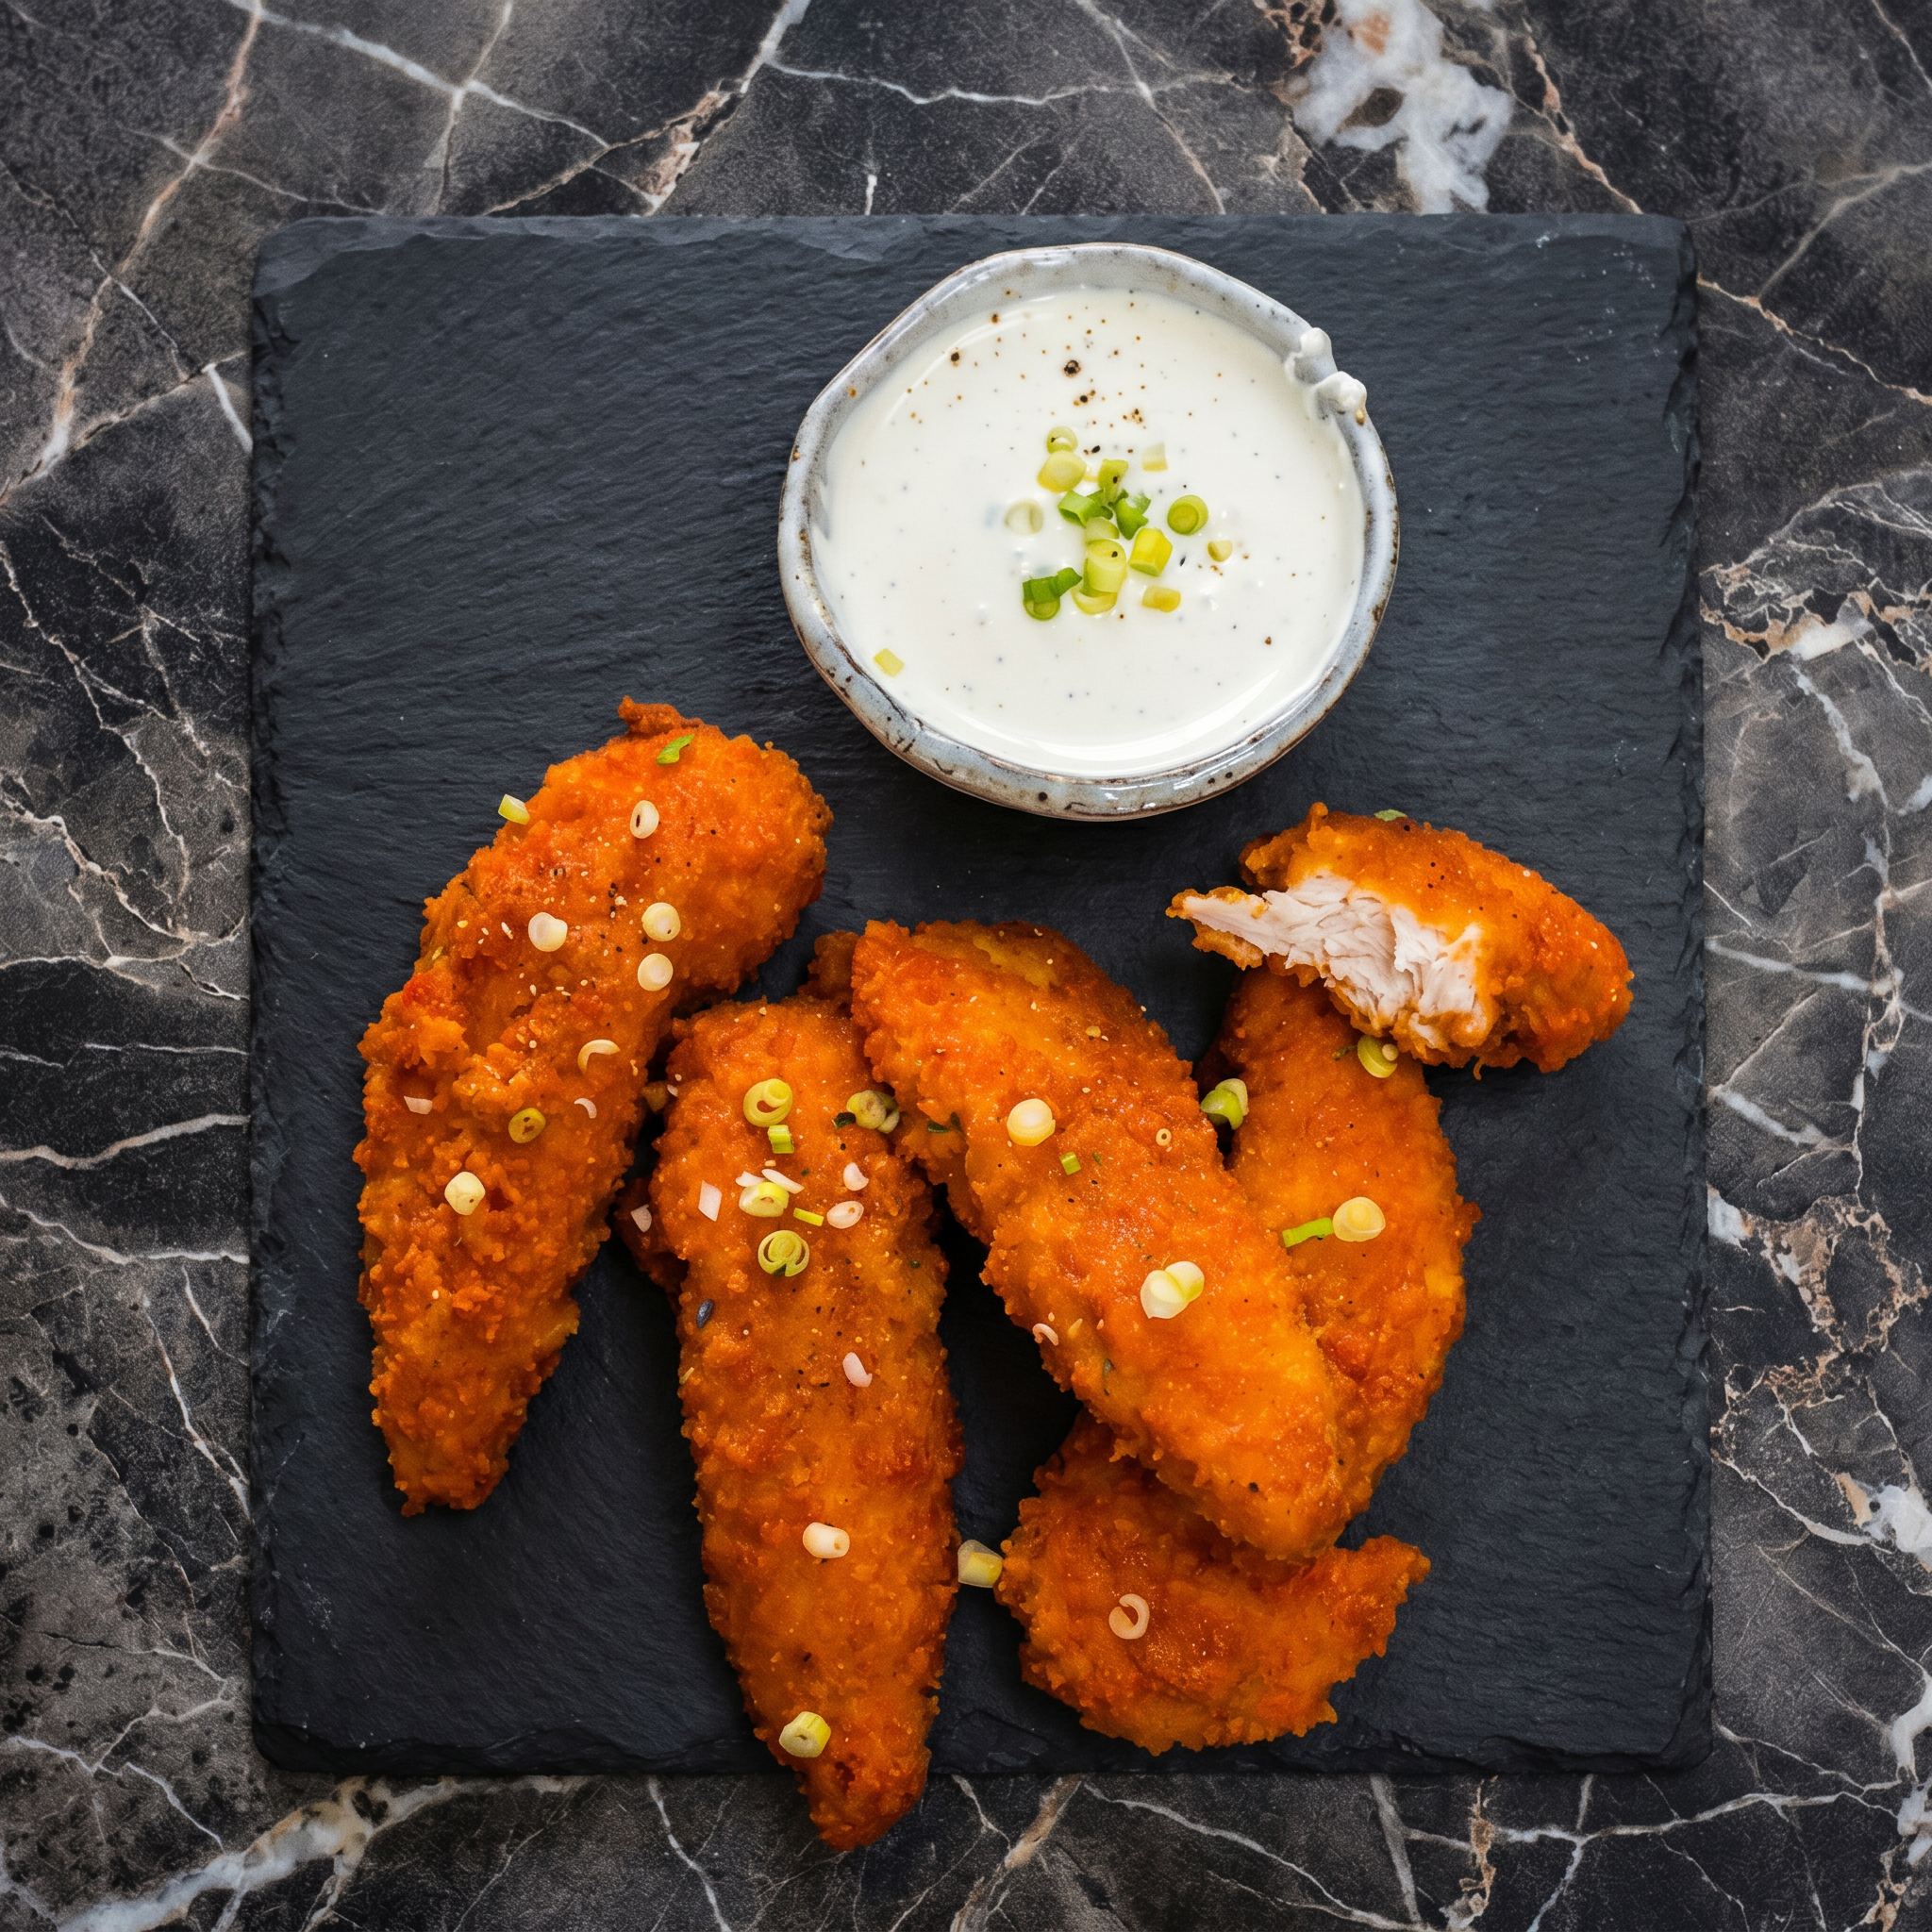
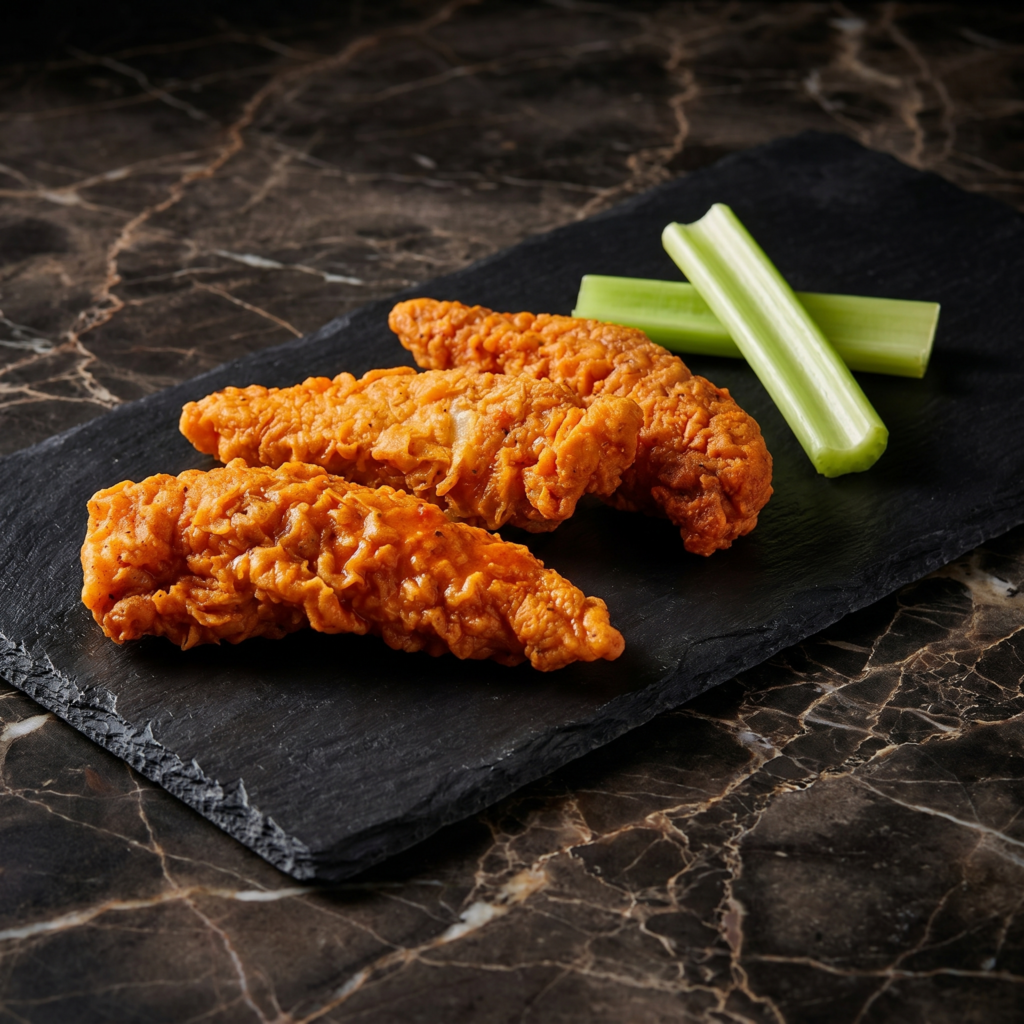
Buffalo wings are great. But buffalo chicken tenders? Even better. All the spicy, buttery, tangy goodness, none of the messy bone-picking.
These tenders come out ultra-crispy (even baked, not fried). Toss them in classic Frank’s + butter sauce, then serve with ranch or blue cheese. Game day, dinner night, or just a hungry Tuesday—these deliver.
Store leftovers in an airtight container in the fridge for up to 3 days. Reheat in an air fryer or oven at 375°F for 5-7 minutes to bring back the crisp. (Microwave will make them sad and soggy.)
Make ahead? Bread the tenders and refrigerate (uncooked) for up to 6 hours. Bake when ready.
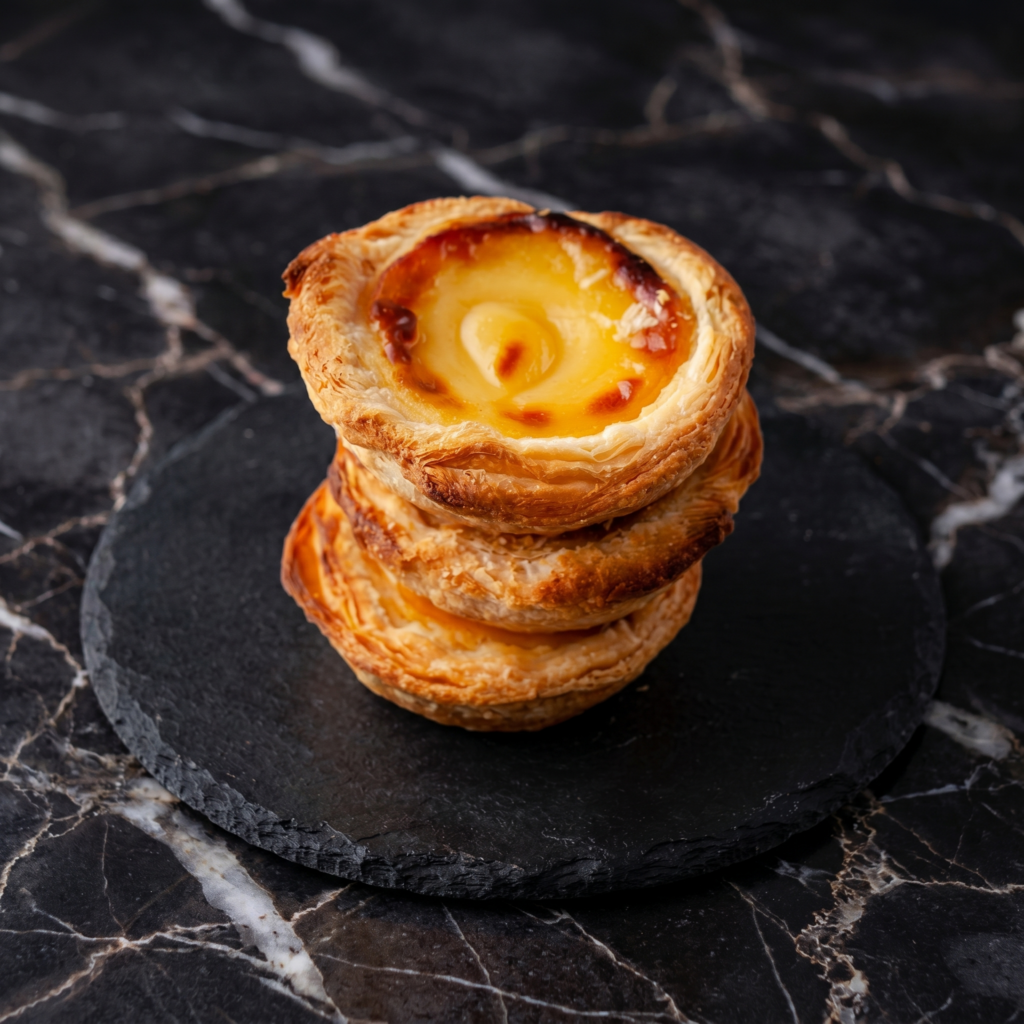
Egg custard tarts are Hong Kong’s greatest pastry. Fight me.
Buttery, flaky, melt-in-your-mouth pastry. Silky, wobbly, vanilla-scented custard. One bite and you’re transported to a dim sum cart. Easier than you think. Worth every minute.
Ingredients
Makes 12 tarts.
For the Pastry:
1¾ cups (220g) all-purpose flour
½ cup (113g) cold unsalted butter, cubed
¼ cup (50g) powdered sugar
1 egg yolk
2–3 tablespoons cold water
For the Custard Filling:
3 eggs
½ cup (100g) sugar
¾ cup (180ml) whole milk
½ cup (120ml) heavy cream
1 teaspoon vanilla extract
Special equipment: 12-cup muffin tin or tartlet pans.
Step-by-Step Instructions
Step 1: Make the Pastry
In a bowl, mix flour and powdered sugar. Cut in cold butter until mixture looks like coarse crumbs.
Add egg yolk and cold water. Mix until dough forms.
Wrap in plastic. Refrigerate for 30 minutes.
Step 2: Make the Custard
In a bowl, whisk eggs and sugar until pale.
Warm milk and cream in a pot until just steaming (don’t boil).
Slowly pour warm milk into egg mixture, whisking constantly.
Stir in vanilla. Strain through a fine sieve.
Step 3: Line the Tins
Preheat oven to 375°F (190°C).
Roll dough to ⅛-inch thickness. Cut circles larger than muffin cups.
Press dough into muffin tin. Prick bottoms with a fork.
Step 4: Fill and Bake
Pour custard into pastry shells, filling about 80% full.
Bake for 15–18 minutes until custard is set but still slightly jiggly in center.
Step 5: Cool and Serve
Cool in pan for 5 minutes, then transfer to a rack.
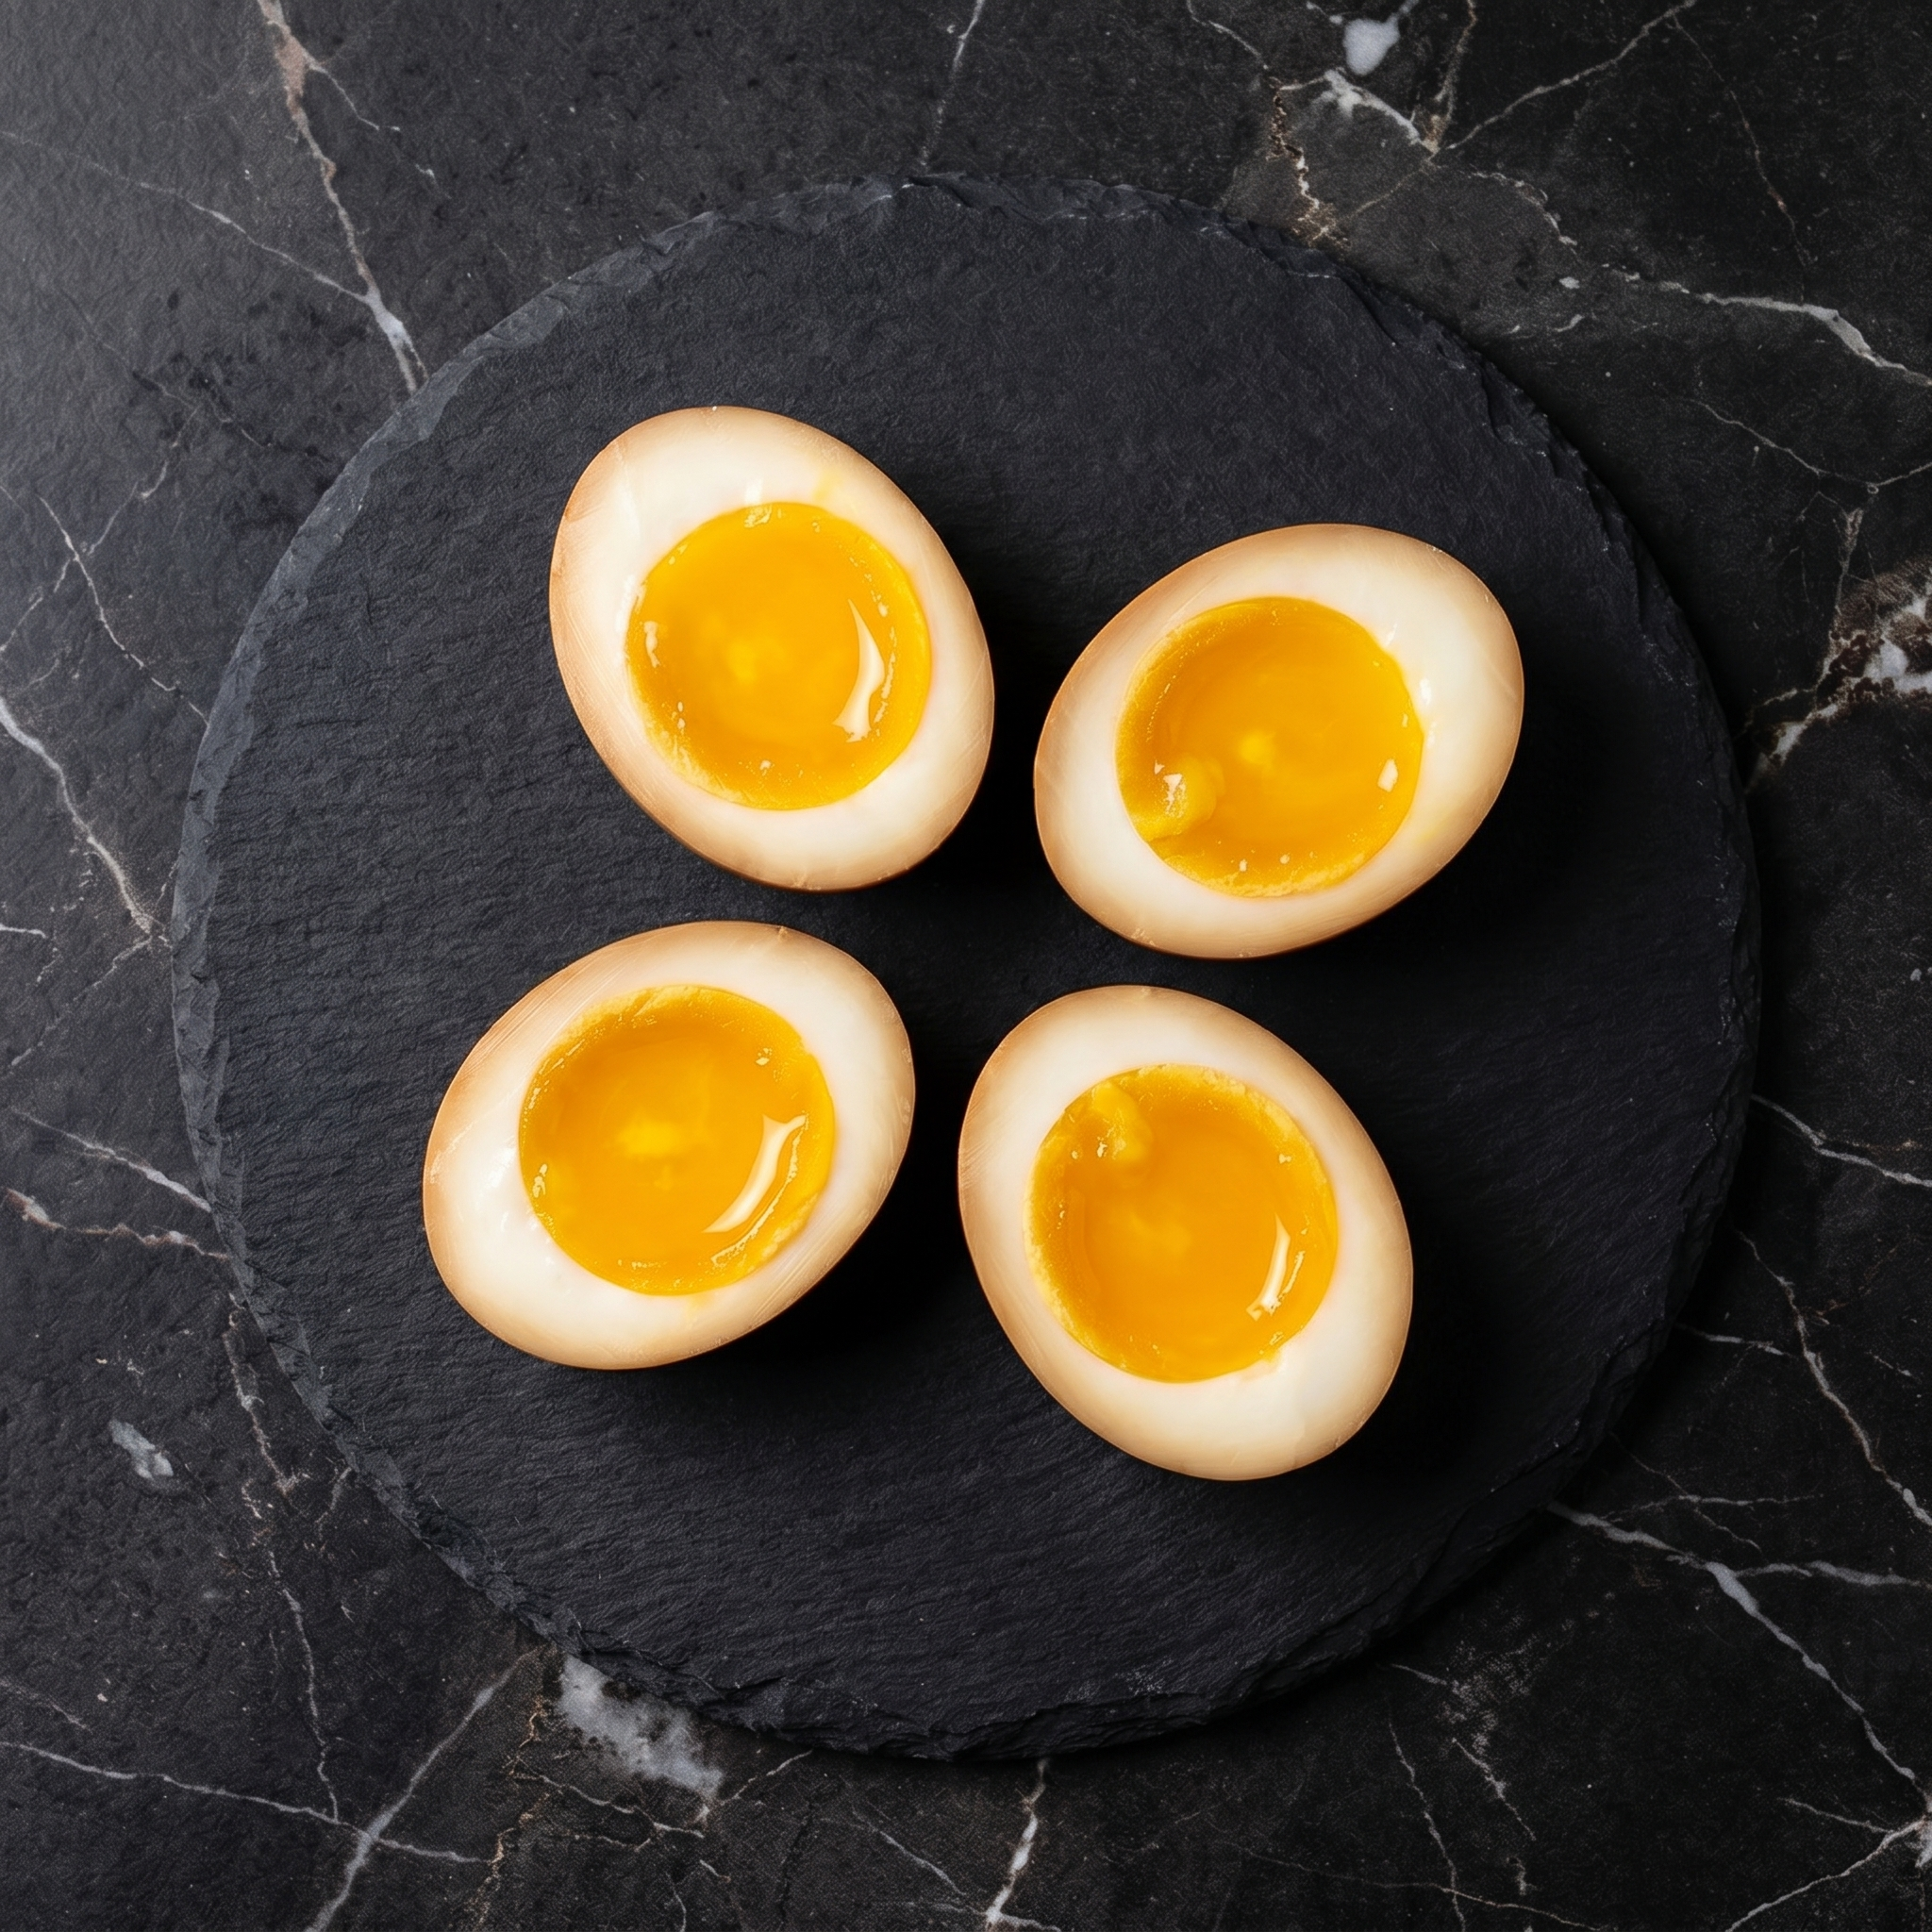
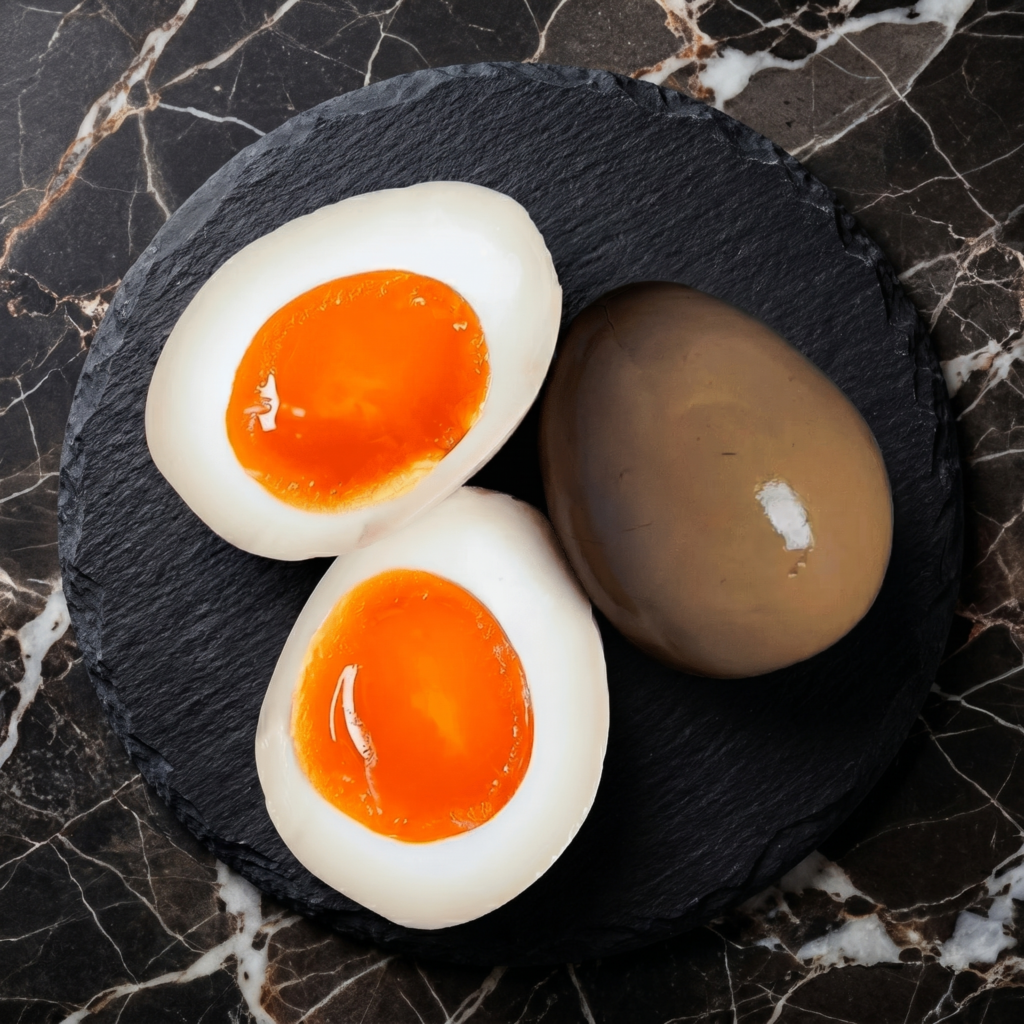
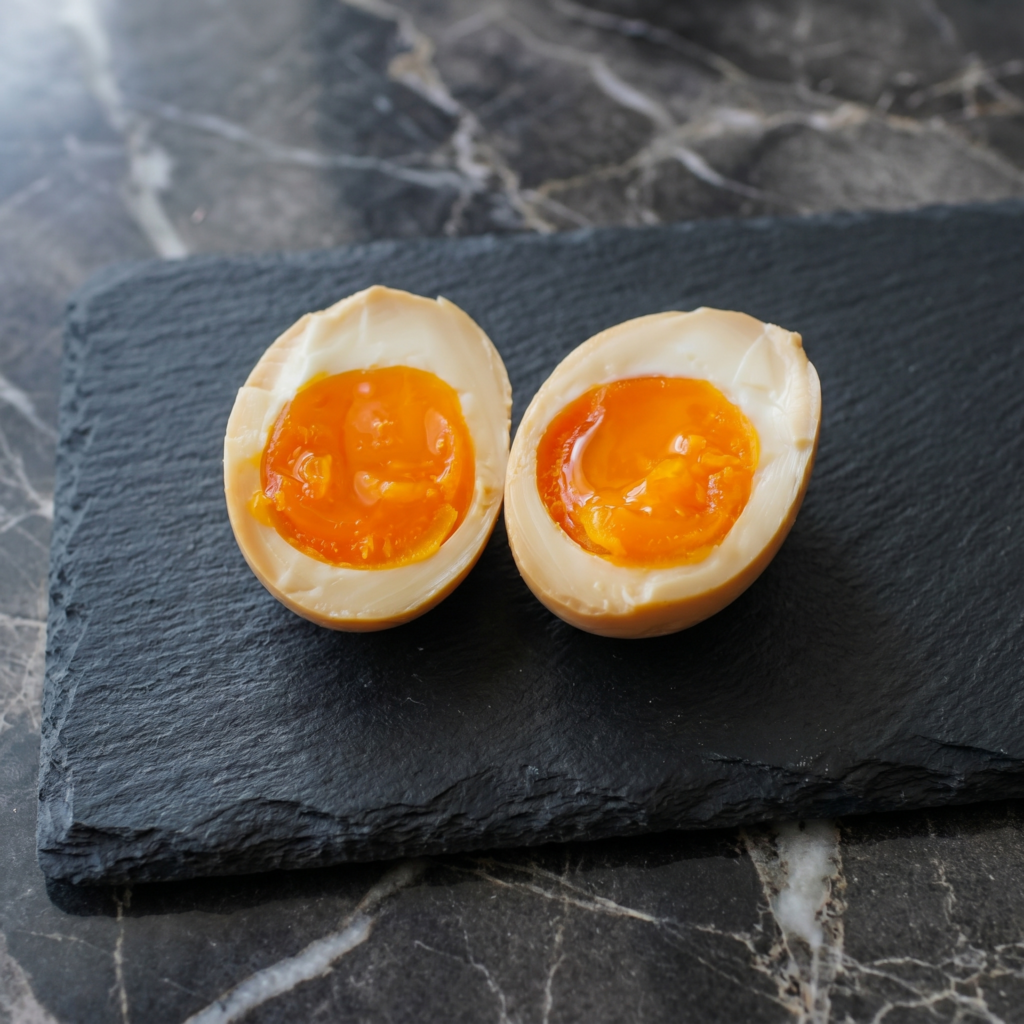
You’ve seen them. Those perfect amber-brown eggs floating in your ramen. Cut in half. Yolk like golden velvet. That’s Ajitsuke Tamago. And you can make them at home with zero skill, just patience.
Soy. Mirin. Sake. A little time. That’s it. Make a dozen on Sunday. Eat them all by Tuesday. No regrets.
Ingredients
Makes 6 eggs.
6 large eggs (room temperature, not fridge-cold)
½ cup soy sauce
½ cup mirin
½ cup water
2 tbsp sake (or water + splash of vinegar)
1 clove garlic, smashed (optional)
1 slice ginger (optional)
Step-by-Step Instructions
Step 1: Make the Marinade
In a bowl or jar, combine soy sauce, mirin, water, sake, garlic, and ginger. Stir.
Step 2: Boil the Eggs
Bring a pot of water to a rolling boil. Gently lower eggs in with a spoon.
Boil for 6 minutes 30 seconds (for jammy yolk). Adjust: 7 min = firmer, 6 min = runnier.
Transfer eggs immediately to an ice bath. Cool completely (5 minutes).
Step 3: Peel Carefully
Gently tap eggs all over. Peel under running water—it helps.
Step 4: Marinate
Place peeled eggs in a ziplock bag or container. Pour marinade over.
Seal bag, removing air (eggs should be submerged).
Refrigerate for at least 4 hours, ideally overnight.
Step 5: Serve
Remove eggs from marinade. Cut in half. Put on ramen, rice bowls, or just eat plain.
Marinade can be reused once (boil it first).
Summary
Prep Time: 5 min | Cook Time: 7 min | Marinate: 4+ hours | Total: 4+ hours
Yield: 6 eggs
Difficulty: Easy (timing matters)
Storage Notes
Keep eggs in marinade, refrigerated, up to 5 days. Flavor intensifies. Remove from marinade after 3 days or they get too salty. Don’t freeze (texture dies). Eat cold or at room temperature. Make extra. You’ll eat more than you expect.
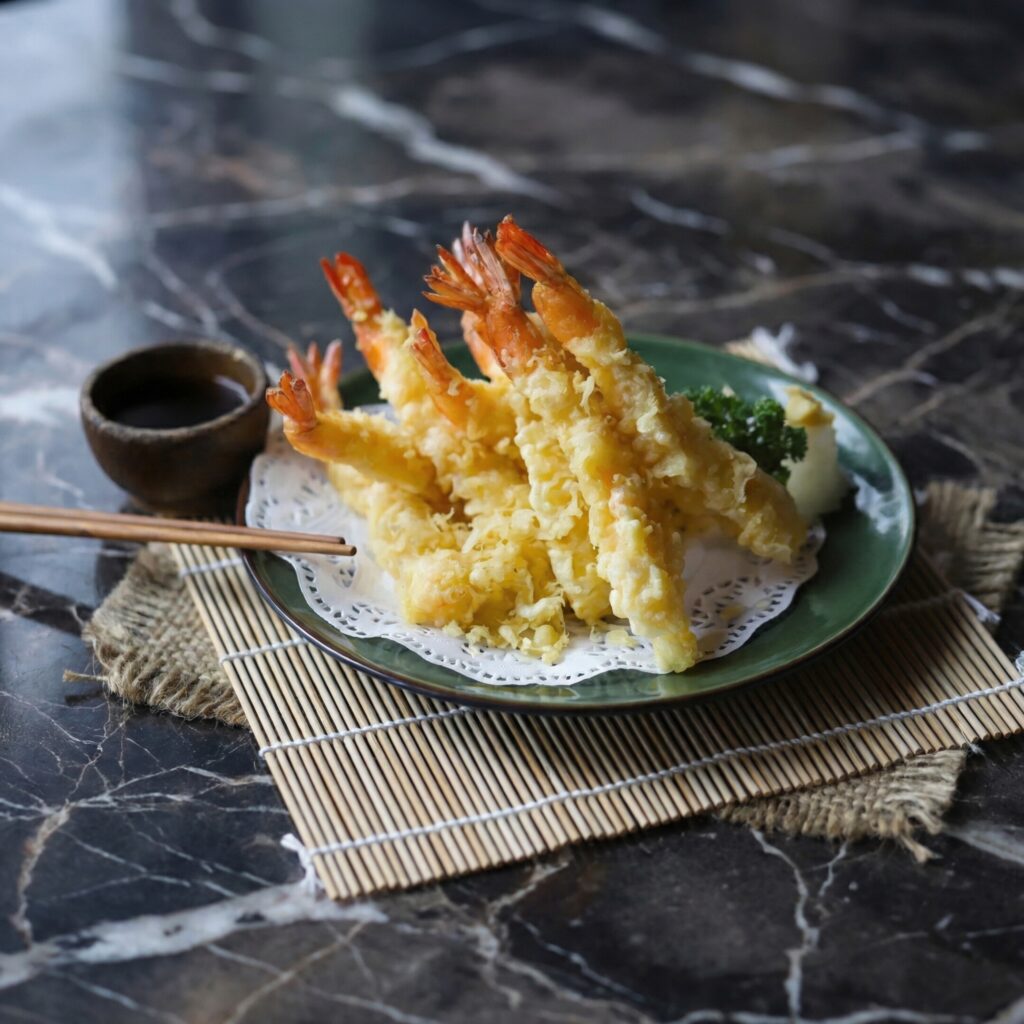
Tempura is frying at its most elegant. Where other fried foods rely on thick, heavy coatings, tempura is all about lightness—a whisper-thin batter that turns into a lacy, shatteringly crisp shell, letting the ingredient inside shine. Shrimp with a sweet, snappy bite. Sweet potato that’s creamy and caramelized at the edges. Shishito peppers that blister and pop.
The secret is in the technique: ice-cold water, minimal mixing, and the right temperature. It’s easier than you think, and once you’ve made it at home, you’ll never look at the freezer section the same way again.
Neutral oil, for frying (vegetable, canola, or avocado)
For the Batter:
1 cup all-purpose flour (or tempura flour if available)
¼ cup cornstarch (for extra crispiness)
1 cup ice-cold water (plus ice cubes to keep it cold)
1 large egg yolk (cold)
Optional: 1 tbsp vodka (evaporates quickly for extra crispiness)
For the Dipping Sauce (Tentsuyu):
½ cup dashi (or ½ cup water + ½ tsp dashi powder)
¼ cup soy sauce
¼ cup mirin
1 tbsp grated daikon radish (optional, for serving)
1 tsp grated ginger (optional, for serving)
Step-by-Step Instructions
Step 1: Prep the Ingredients
Shrimp: Make shallow cuts along the belly side to prevent curling. Gently press to straighten.
Vegetables: Slice into thin, even pieces (¼-inch thick for root vegetables). Pat everything completely dry with paper towels. Moisture is the enemy of crispy tempura.
Step 2: Make the Dipping Sauce
In a small saucepan, combine dashi, soy sauce, and mirin. Bring to a simmer, then remove from heat.
Serve in small bowls with grated daikon and ginger on the side for stirring in.
Step 3: Heat the Oil
Fill a heavy-bottomed pot or Dutch oven with 2-3 inches of oil. Heat to 340-350°F (170-175°C).
Use a thermometer—temperature control is critical for tempura.
Step 4: Make the Batter (Just Before Frying)
In a large bowl, whisk together flour and cornstarch.
In a separate bowl, whisk ice-cold water and egg yolk together (add vodka if using).
Pour wet into dry and mix with chopsticks or a fork. Do not overmix. The batter should be lumpy with streaks of flour. Lumps = crispy tempura. Smooth batter = tough tempura.
Keep the batter cold by placing the bowl over another bowl filled with ice.
Step 5: Fry the Tempura
Working in small batches, dip ingredients into the batter, allowing excess to drip off.
Gently drop into the hot oil. Don’t crowd the pot.
Vegetables: Fry for 1-3 minutes until crispy and lightly golden.
Shrimp: Fry for 1-2 minutes until batter is crispy and shrimp is just cooked through.
Remove with a slotted spoon and drain on a wire rack (not paper towels—paper towels trap steam and soften the crust).
Step 6: Serve Immediately
Arrange tempura on a platter with a bowl of tentsuyu sauce for dipping.
Sprinkle with a pinch of flaky salt if desired.
Dip, crunch, and repeat. Tempura waits for no one—serve immediately while it’s at its crispiest peak.
Tempura is best eaten immediately—it loses its crispiness within hours. If you have leftovers, store in an airtight container in the fridge for up to 1 day.
Reheating (Bring Back Some Crunch):
Oven or air fryer (best): 400°F for 3-5 minutes. Never microwave—it turns tempura into a sad, soggy mess.
Make Ahead:
Prep all ingredients up to a day ahead. Keep refrigerated. Pat dry before battering. Make batter fresh—it takes 2 minutes.
Pro Tips for Tempura Greatness:
Ice-cold everything. Cold batter + hot oil = crispy tempura. Use ice water, keep the bowl over ice, and work quickly.
Don’t overmix. Lumpy batter is good batter. Overmixing develops gluten and makes tempura heavy.
Pat ingredients dry. Any moisture on the surface creates steam that prevents crispiness.
Maintain oil temperature. Invest in a thermometer. Oil that’s too cool = greasy; too hot = burnt outside, raw inside.
Work in small batches. Overcrowding drops the temperature. Fry 4-5 pieces at a time.
Drain on wire racks. Paper towels trap steam and soften the crust. Wire racks let air circulate.
Vodka is a pro trick. Alcohol evaporates faster than water, creating even crispier batter.
Serve immediately. Tempura’s crispiness peaks at 3 minutes out of the oil.
Corn fritters are the kind of food that disappears before it hits the table. Little golden disks of sweet corn, lightly bound with a simple batter, fried until crispy and served with something cool and creamy (or drizzled with honey, if you’re into sweet-savory perfection).
They’re Southern, they’re summery, and they’re ridiculously easy to make. Fresh corn is ideal when it’s in season, but frozen corn works beautifully too. Serve them as an appetizer, a side dish, or pile them up for a lazy brunch. However you eat them, they won’t last long.
¼ cup finely chopped green onions (white and green parts)
1 small jalapeño, finely minced (optional, for heat)
Neutral oil, for frying (vegetable, canola, or avocado)
For Serving:
Sour cream or crème fraîche
Honey or maple syrup (for drizzling)
Fresh chives or cilantro, chopped
Lime wedges
Hot sauce (optional)
Step-by-Step Instructions
Step 1: Prep the Corn
If using fresh corn, cut kernels off the cob. Run the back of your knife down the cob to extract the “milk”—that starchy liquid adds flavor and helps bind the fritters.
If using frozen corn, thaw completely and pat dry with paper towels to remove excess moisture.
Step 2: Make the Batter
In a large bowl, whisk together flour, cornmeal (if using), baking powder, salt, pepper, and cayenne.
In a separate bowl, whisk eggs and milk together.
Pour wet ingredients into dry ingredients and stir until just combined. A few lumps are okay—don’t overmix.
Fold in corn, green onions, and jalapeño (if using). The batter should be thick but scoopable. If it’s too thick, add a splash more milk.
Step 3: Heat the Oil
Heat about ¼ inch of oil in a large skillet over medium-high heat until shimmering (about 350°F).
Test by dropping a tiny bit of batter—it should sizzle immediately.
Step 4: Fry the Fritters
Drop heaping tablespoons of batter into the hot oil, gently flattening with the back of a spoon into 2-3 inch rounds.
Don’t crowd the pan—work in batches. Cook for 2-3 minutes per side until deep golden brown and crispy.
Transfer to a paper towel-lined plate to drain. Sprinkle with a little salt while hot.
Step 5: Serve Immediately
Arrange fritters on a platter. Top with a dollop of sour cream, a drizzle of honey, and a sprinkle of fresh chives.
Serve with lime wedges for squeezing and hot sauce on the side.
Take a bite. Crispy exterior, sweet corn interior, a little heat, a little honey. This is the way.
Store in an airtight container in the fridge for up to 3 days. They’ll lose crispiness, but still taste great.
Reheating (Bring Back the Crunch):
Air fryer (best): 375°F for 3-4 minutes. Oven: 400°F for 5-7 minutes on a wire rack. Skillet: Reheat in a dry pan over medium heat, flipping once. Microwave: Avoid—it makes them soggy.
Freezer-Friendly:
Freeze cooked fritters in a single layer on a baking sheet, then transfer to a zip-top bag for up to 3 months. Reheat from frozen in the oven or air fryer.
Make Ahead:
Mix the batter up to 4 hours in advance and refrigerate. Stir before using. Fry just before serving for maximum crispiness.
Pro Tips for Corn Fritter Greatness:
Pat corn dry. Excess moisture makes fritters soggy instead of crispy.
Don’t overmix the batter. Overmixing develops gluten, making tough fritters. Stir until just combined.
Oil temperature matters. Too cool = greasy fritters. Too hot = burnt outside, raw inside. Aim for 350°F.
Test with a batter drop. If it sizzles immediately and floats, you’re ready.
Flatten gently. Pressing the batter in the pan creates more surface area for crispy edges.
Don’t crowd the pan. Fritters need room to crisp up. Work in batches and keep finished ones warm in a low oven.
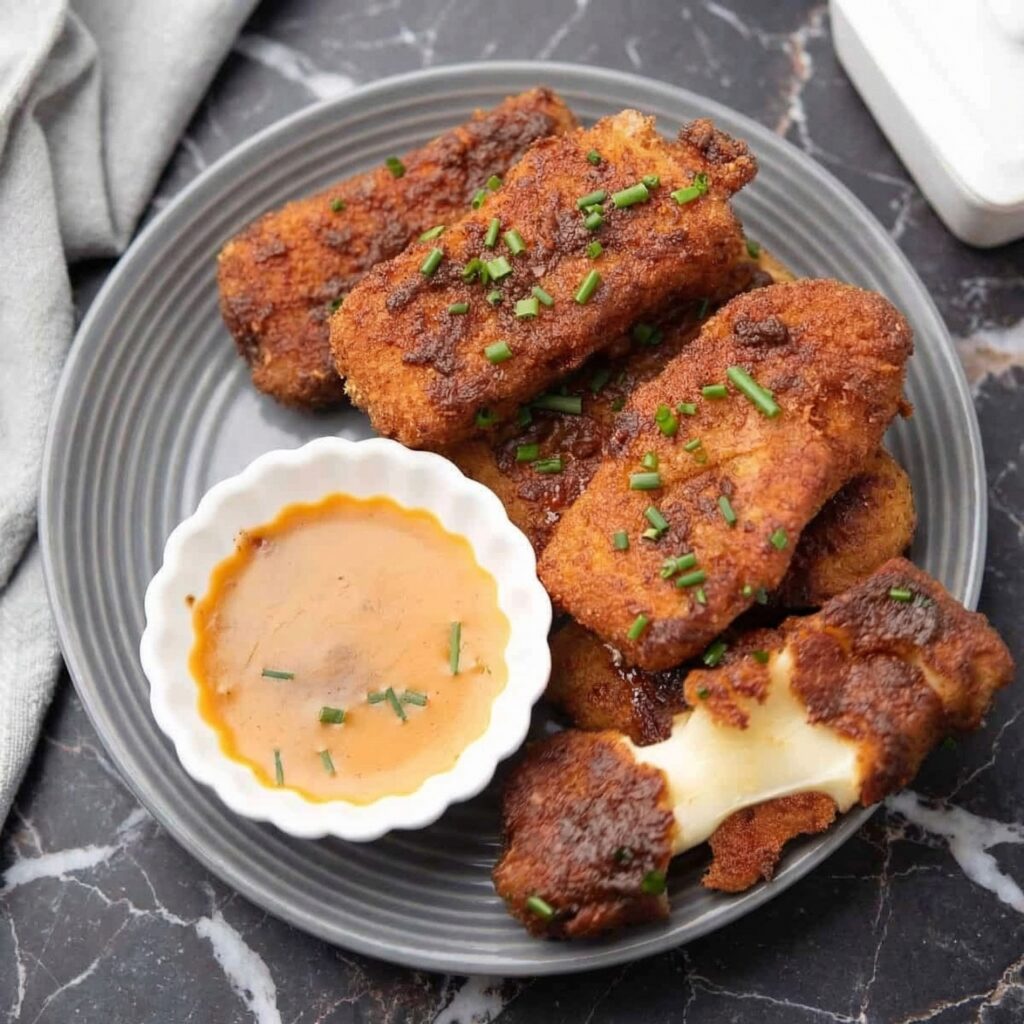
Mozzarella sticks are a universal language. But Nashville hot mozzarella sticks? That’s a revelation. Imagine the crispy, golden exterior of a perfect fried cheese stick, now coated in a spicy, buttery, cayenne-laced glaze that brings the heat of Music City straight to your appetizer plate.
This is what happens when Italian-American comfort food meets Southern fried chicken culture. The cheese pull is still there (glorious and stretchy). But now there’s a kick—a slow-building, lip-tingling heat that keeps you coming back for one more. Serve with ranch or comeback sauce, and watch them disappear.
Ingredients
Serves 4-6 as an appetizer.
For the Mozzarella Sticks:
16 oz block low-moisture mozzarella (not fresh—it won’t hold up)
1 cup all-purpose flour
1 tsp garlic powder
1 tsp paprika
½ tsp salt
¼ tsp black pepper
3 large eggs, beaten
2 cups panko breadcrumbs
Neutral oil, for frying (vegetable or canola)
For the Nashville Hot Oil:
½ cup reserved frying oil (or melted butter)
2 tbsp cayenne pepper (adjust to your heat tolerance)
1 tbsp brown sugar
1 tsp paprika
1 tsp garlic powder
½ tsp salt
½ tsp black pepper
For Serving:
Ranch dressing or comeback sauce
Pickle slices (classic Nashville hot chicken pairing)
White bread slices (for authenticity)
Step-by-Step Instructions
Step 1: Prep the Cheese
Cut mozzarella block into ½-inch thick sticks (about 3-4 inches long). You should get about 12-16 sticks.
Place cheese sticks in the freezer for at least 2 hours, or overnight. This is non-negotiable—frozen cheese won’t melt during frying.
Step 2: Set Up Dredging Station
In a shallow dish, combine flour, garlic powder, paprika, salt, and pepper.
In a second dish, beat the eggs.
In a third dish, place panko breadcrumbs.
Step 3: Coat the Cheese Sticks
Working quickly, dredge each frozen cheese stick in flour mixture, shaking off excess.
Dip into beaten eggs, letting excess drip off.
Coat in panko, pressing firmly to adhere.
For extra crunch, repeat the egg and panko steps (double-coat).
Place coated sticks on a baking sheet and freeze for another 30 minutes. This ensures the coating stays put during frying.
Step 4: Make the Nashville Hot Oil
In a small bowl, whisk together cayenne, brown sugar, paprika, garlic powder, salt, and pepper.
Set aside. You’ll add hot oil to this later.
Step 5: Fry the Mozzarella Sticks
Heat 2 inches of oil in a heavy-bottomed pot or Dutch oven to 375°F (190°C).
Working in batches (don’t crowd the pot), carefully lower frozen mozzarella sticks into the hot oil.
Fry for 45-60 seconds until golden brown and crispy. They cook fast—watch carefully!
Remove with a slotted spoon and drain briefly on paper towels.
Step 6: Apply the Nashville Heat
Carefully ladle about ½ cup of the hot frying oil into the bowl with the spice mixture. Whisk until smooth. (Be careful—it will bubble and steam.)
Brush or drizzle the spicy oil over the hot mozzarella sticks immediately after frying. Don’t drown them—just a generous coating.
Step 7: Serve Immediately
Arrange on a platter with ranch or comeback sauce for dipping.
Add pickle slices on the side (the acidity cuts the heat beautifully).
Take a bite. Let the cheese stretch. Feel the heat build. This is the appetizer you didn’t know you needed.
These are best eaten immediately—mozzarella sticks don’t reheat well. If you must, store in an airtight container in the fridge for up to 2 days.
Reheating:
Air fryer (best): 375°F for 3-4 minutes. Oven: 400°F for 5-7 minutes on a wire rack. Microwave: Avoid—it turns them into sad, greasy puddles of cheese.
Make Ahead (Freezer-Friendly):
These are the ultimate make-ahead appetizer. Coat the mozzarella sticks completely, freeze on a baking sheet, then transfer to a zip-top bag. Fry straight from frozen—no need to thaw. Just add 15-30 seconds to fry time.
Pro Tips for Mozzarella Stick Greatness:
Freeze the cheese. Solidly frozen cheese is essential—it stays intact during frying instead of melting into the oil.
Low-moisture mozzarella only. Fresh mozzarella has too much water and will leak everywhere. A block of low-moisture mozzarella is the way to go.
Double coat for extra crunch. Flour → egg → panko → egg → panko. It’s worth the extra step.
Freeze after coating. Another 30 minutes in the freezer sets the coating so it doesn’t fall off in the oil.
Oil temperature is critical. 375°F is the sweet spot. Too cool and they absorb oil; too hot and the coating burns before the inside warms.
Work in batches. Overcrowding drops the oil temperature. Give them space.
Apply the hot oil while hot. The spice mixture absorbs best when the sticks are fresh from the fryer.
Adjusting the Heat Level:
Mild: Use 1 tbsp cayenne instead of 2. Add extra brown sugar for sweetness.
Medium: 2 tbsp cayenne as written. Classic Nashville heat.
Hot: 3-4 tbsp cayenne. Add a pinch of ghost pepper if you’re feeling dangerous.
Extra hot (Nashville style): Use lard instead of oil for the base. It’s authentic and adds richness.
Variations:
Air fryer version: Spray coated sticks with oil, cook at 400°F for 6-8 minutes, flipping halfway. Apply hot oil after cooking.
Baked version (lighter): Bake at 425°F for 8-10 minutes until golden. Brush with hot oil after baking.
Pepper jack sticks: Use pepper jack cheese for even more heat.
Nashville halloumi: Try with halloumi cheese—it won’t melt, making it even easier to fry.
Gluten-free: Use gluten-free flour and gluten-free panko.
Dipping Sauce Options:
Comeback sauce: Mayo, ketchup, hot sauce, Worcestershire, garlic powder, paprika. A Mississippi classic.
Ranch: Cooling and classic. Essential for taming the heat.
Blue cheese dressing: Tangy and rich.
Honey: Sweet and spicy is a winning combo.
Spicy ranch: Mix ranch with extra cayenne or hot sauce.
White bread (the traditional Nashville hot chicken side)
Celery sticks
Cold beer (to put out the fire)
Sweet tea (the Southern way)
The Nashville Hot Story:
Nashville hot chicken was born in the 1930s at Prince’s Hot Chicken Shack, created as a spicy revenge dish. The technique—frying then brushing with a cayenne-laced oil—has since become a Tennessee icon. Applying it to mozzarella sticks? That’s culinary evolution at its finest.
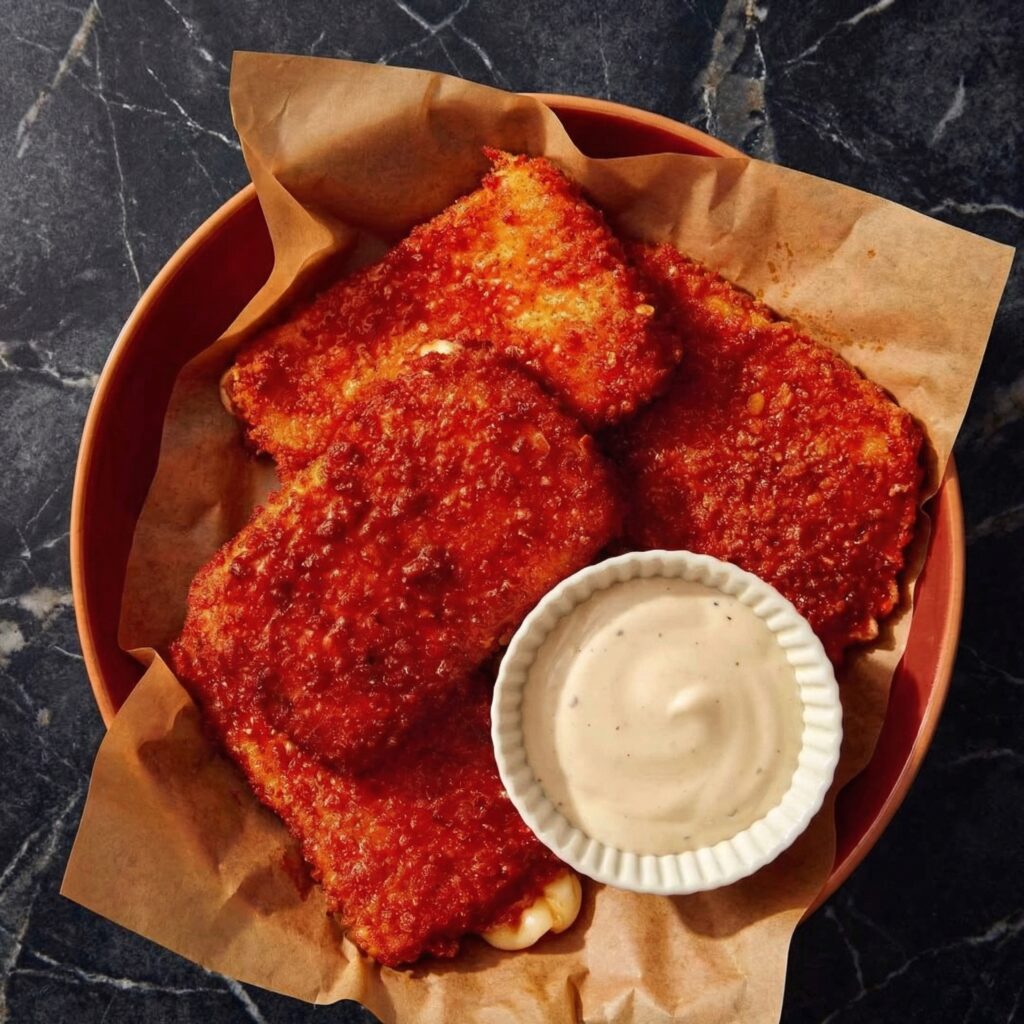
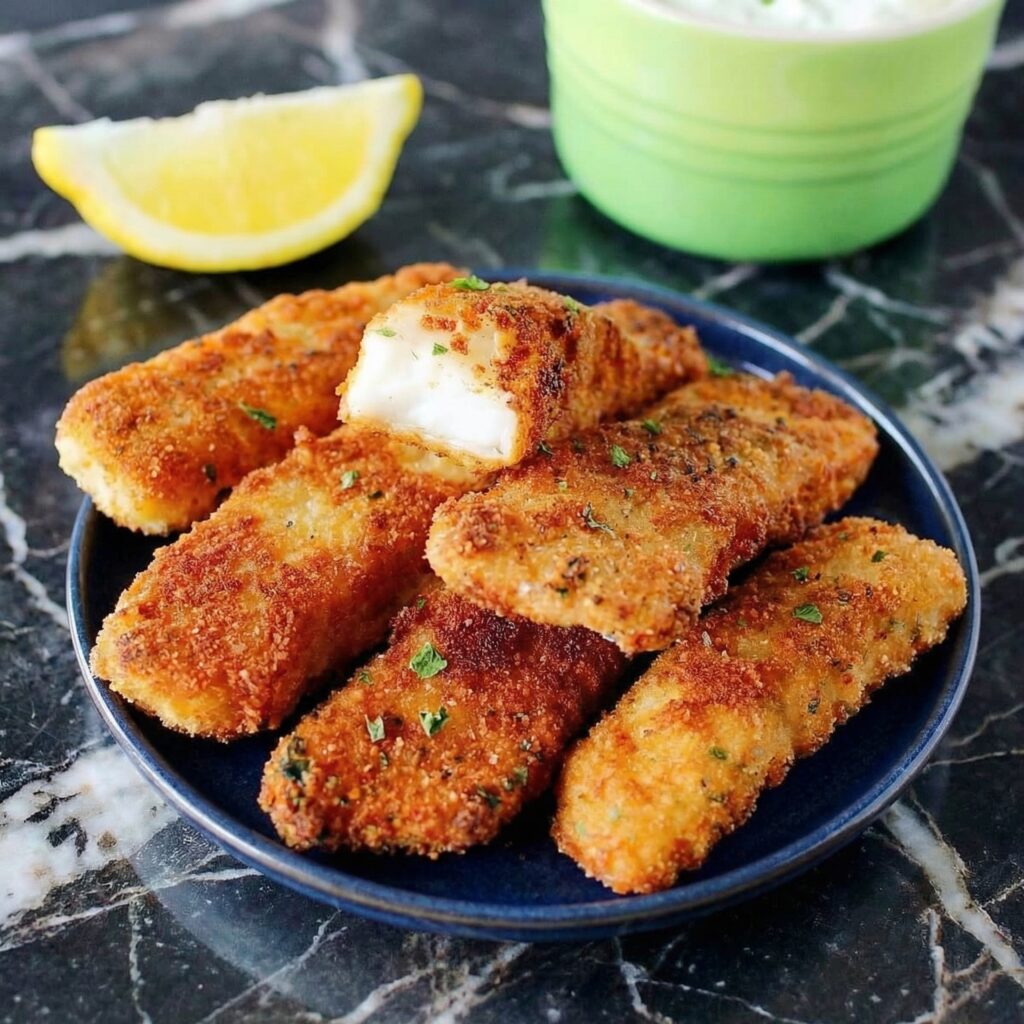
Fish sticks have a reputation. They’re the frozen rectangles of our childhood, the thing your mom pulled out of a box on a busy Tuesday. But here’s the secret: homemade fish sticks are a revelation. Fresh, flaky cod, coated in crispy panko breadcrumbs, seasoned just right, and baked until golden.
They’re still fast. They’re still kid-friendly. But now they’re also something you actually want to eat. Serve them with tartar sauce, a squeeze of lemon, and maybe some crispy fries. Channel your inner child. You’ve earned it.
Ingredients
Serves 4.
For the Fish Sticks:
1½ lbs firm white fish (cod, haddock, or halibut), cut into 1-inch wide strips
½ cup all-purpose flour
½ tsp garlic powder
½ tsp paprika
½ tsp salt
¼ tsp black pepper
2 large eggs, beaten
1½ cups panko breadcrumbs (Japanese-style for extra crunch)
¼ cup grated Parmesan cheese (optional, but amazing)
In a small bowl, combine mayonnaise, relish, lemon juice, parsley, mustard, salt, and pepper. Stir well. Refrigerate until ready to serve.
Step 2: Set Up Your Dredging Station
Pat fish strips completely dry with paper towels. Dry fish = crispy coating.
In a shallow dish, combine flour, garlic powder, paprika, salt, and pepper.
In a second shallow dish, beat the eggs.
In a third shallow dish, combine panko breadcrumbs and Parmesan cheese (if using).
Step 3: Coat the Fish
Dredge each fish strip in the flour mixture, shaking off excess.
Dip into beaten eggs, letting excess drip off.
Coat thoroughly in panko mixture, pressing gently to adhere.
Place coated fish sticks on a wire rack or baking sheet. Let rest for 10 minutes if time allows—this helps the coating set.
Step 4: Choose Your Cooking Method
Baking method (easier, lighter): Preheat oven to 425°F (220°C). Place fish sticks on a wire rack set over a baking sheet. Spray generously with cooking spray or drizzle with oil. Bake for 10-12 minutes, flip, and bake another 5-7 minutes until golden and crispy.
Frying method (crispier, more indulgent): Heat ½ inch of oil in a large skillet over medium-high heat to 350°F. Fry fish sticks in batches for 2-3 minutes per side until golden brown and cooked through. Drain on paper towels.
Air fryer method (best of both): Preheat air fryer to 400°F. Place fish sticks in a single layer, spray with oil, and cook for 8-10 minutes, flipping halfway, until crispy and golden.
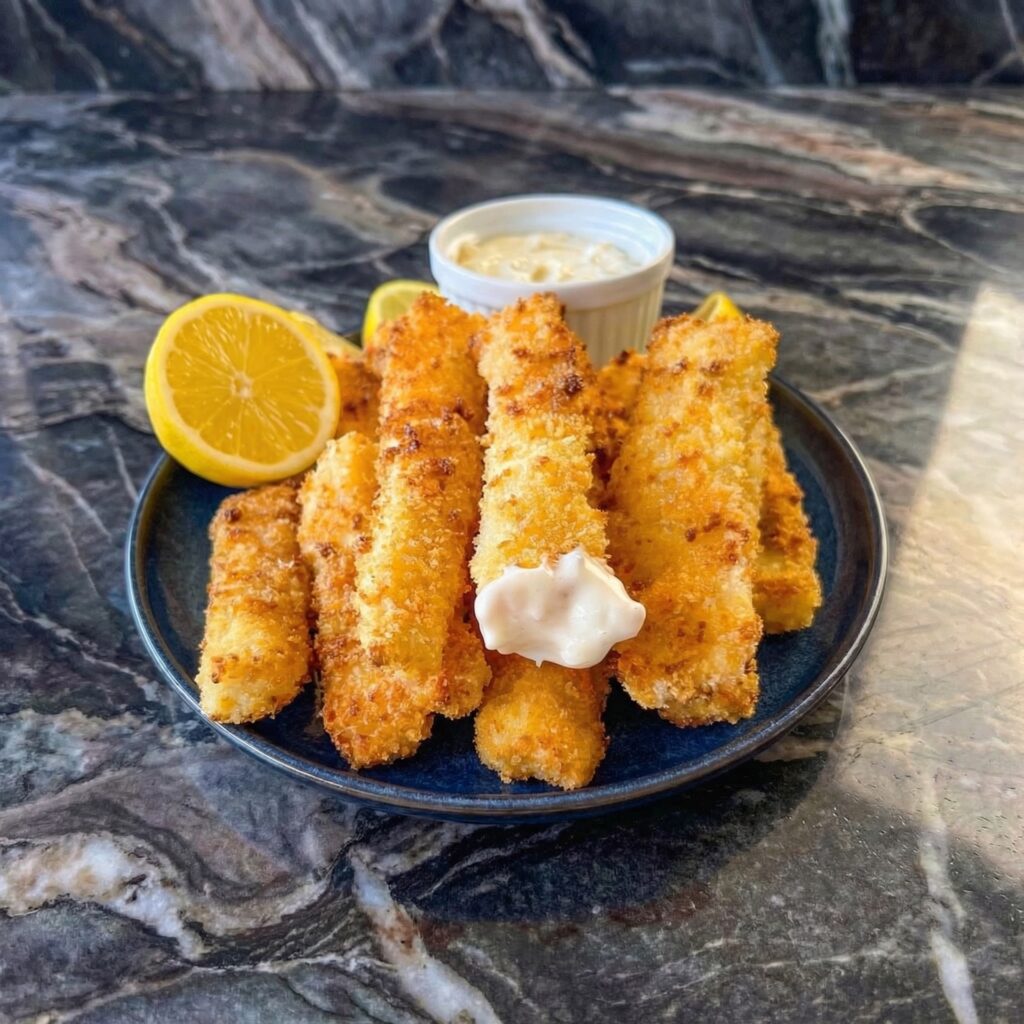
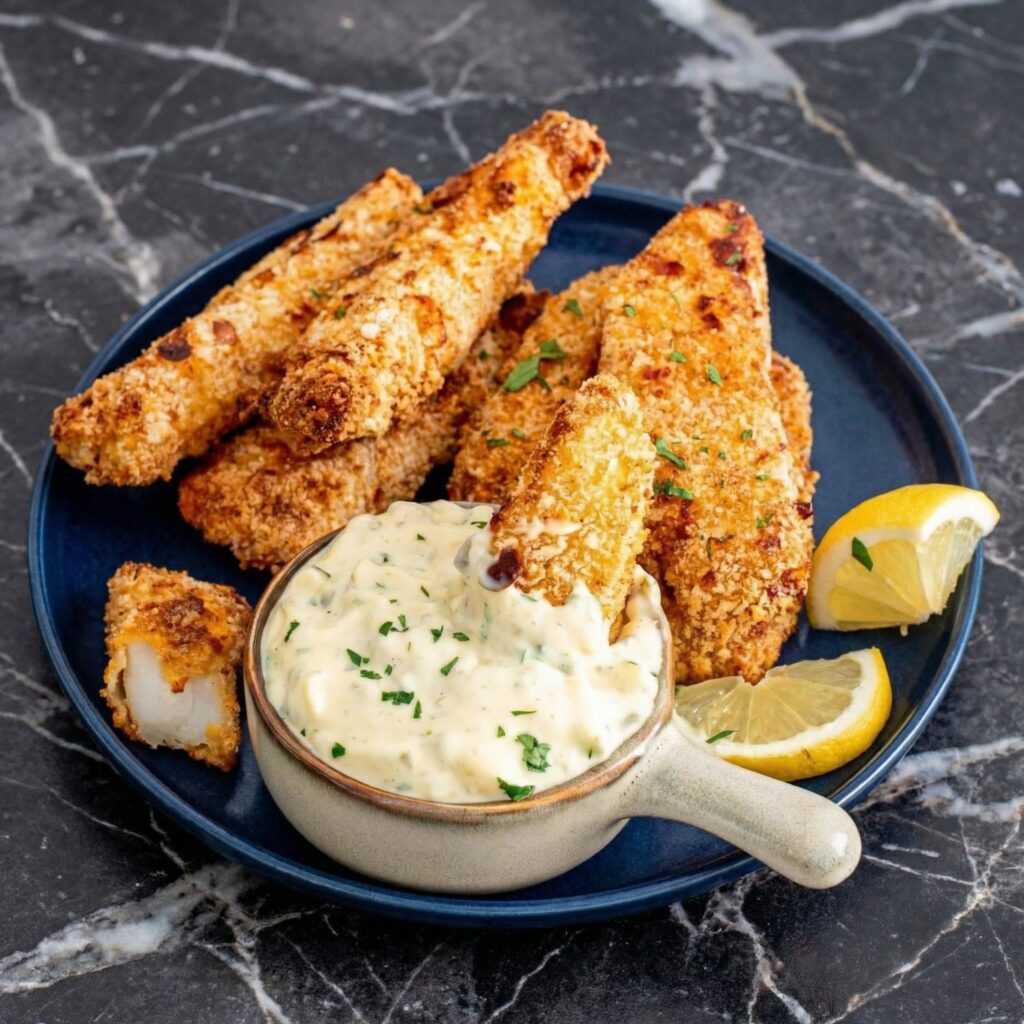
Step 5: Serve Immediately
Arrange fish sticks on a platter with lemon wedges and a bowl of tartar sauce.
Sprinkle with fresh parsley. Serve with fries or coleslaw.
Take a bite. Hear that crunch. Remember why you loved these as a kid—and why you love them even more now.
Store cooked fish sticks in an airtight container in the fridge for up to 2 days. They’ll lose crispiness, but still taste great.
Reheating (Bring Back the Crunch):
Oven or air fryer (best): 375°F for 5-7 minutes until hot and crispy. Skillet: Reheat in a dry pan over medium heat, flipping once. Microwave: Avoid—it makes them soggy.
Freezer-Friendly (Make Ahead Dream):
These freeze beautifully! Place uncooked, coated fish sticks on a baking sheet and freeze until solid (about 2 hours). Transfer to a zip-top bag and freeze for up to 3 months. Cook from frozen—add 3-5 minutes to baking time or 1-2 minutes to frying time.
Make Ahead:
Coat fish sticks up to 4 hours in advance and refrigerate on a wire rack. Cook just before serving for maximum crunch.
Pro Tips for Fish Stick Greatness:
Pat fish dry. Moisture is the enemy of crispy coating.
Use panko. Japanese breadcrumbs are lighter, crispier, and stay crunchy longer than regular breadcrumbs.
Let coated fish rest. 10 minutes on a wire rack helps the coating set and prevents it from falling off during cooking.
Don’t crowd the pan. Overcrowding lowers the temperature and leads to soggy fish sticks.
Wire rack baking is key. It allows air to circulate underneath, crisping all sides.
Fresh fish makes a difference. Frozen works, but fresh cod or haddock gives you that flaky, tender interior.
Variations:
Spicy fish sticks: Add cayenne or chipotle powder to the flour mixture. Serve with sriracha mayo.
Herb-crusted: Add dried herbs (dill, parsley, thyme) to the panko.
Lemon pepper: Add lemon zest and black pepper to the panko.
Parmesan-crusted: Go heavy on the Parmesan in the panko. Nutty, savory, irresistible.
Gluten-free: Use gluten-free flour and gluten-free panko.
Fish tacos: Make smaller strips, serve in corn tortillas with slaw, avocado, and chipotle crema.
Dipping Sauces:
Classic tartar: Mayonnaise, pickles, lemon, herbs.
Remoulade: Add capers, cornichons, and Creole mustard to mayo.
Honey mustard: Mix equal parts honey and Dijon mustard.
Spicy aioli: Mayo, garlic, sriracha, lime juice.
Chipotle crema: Mayo or sour cream with chipotle in adobo.
Roasted vegetables (broccoli, asparagus, green beans)
Mac and cheese (the ultimate comfort pairing)
A simple green salad with lemon vinaigrette
Malt vinegar malt vinegar (authentic fish and chips vibes)
Why Homemade Beats Frozen Every Time:
Frozen fish sticks are often made with minced fish paste and fillers. Homemade uses real, flaky fish. You control the salt. You control the ingredients. And the crunch? Unbeatable.