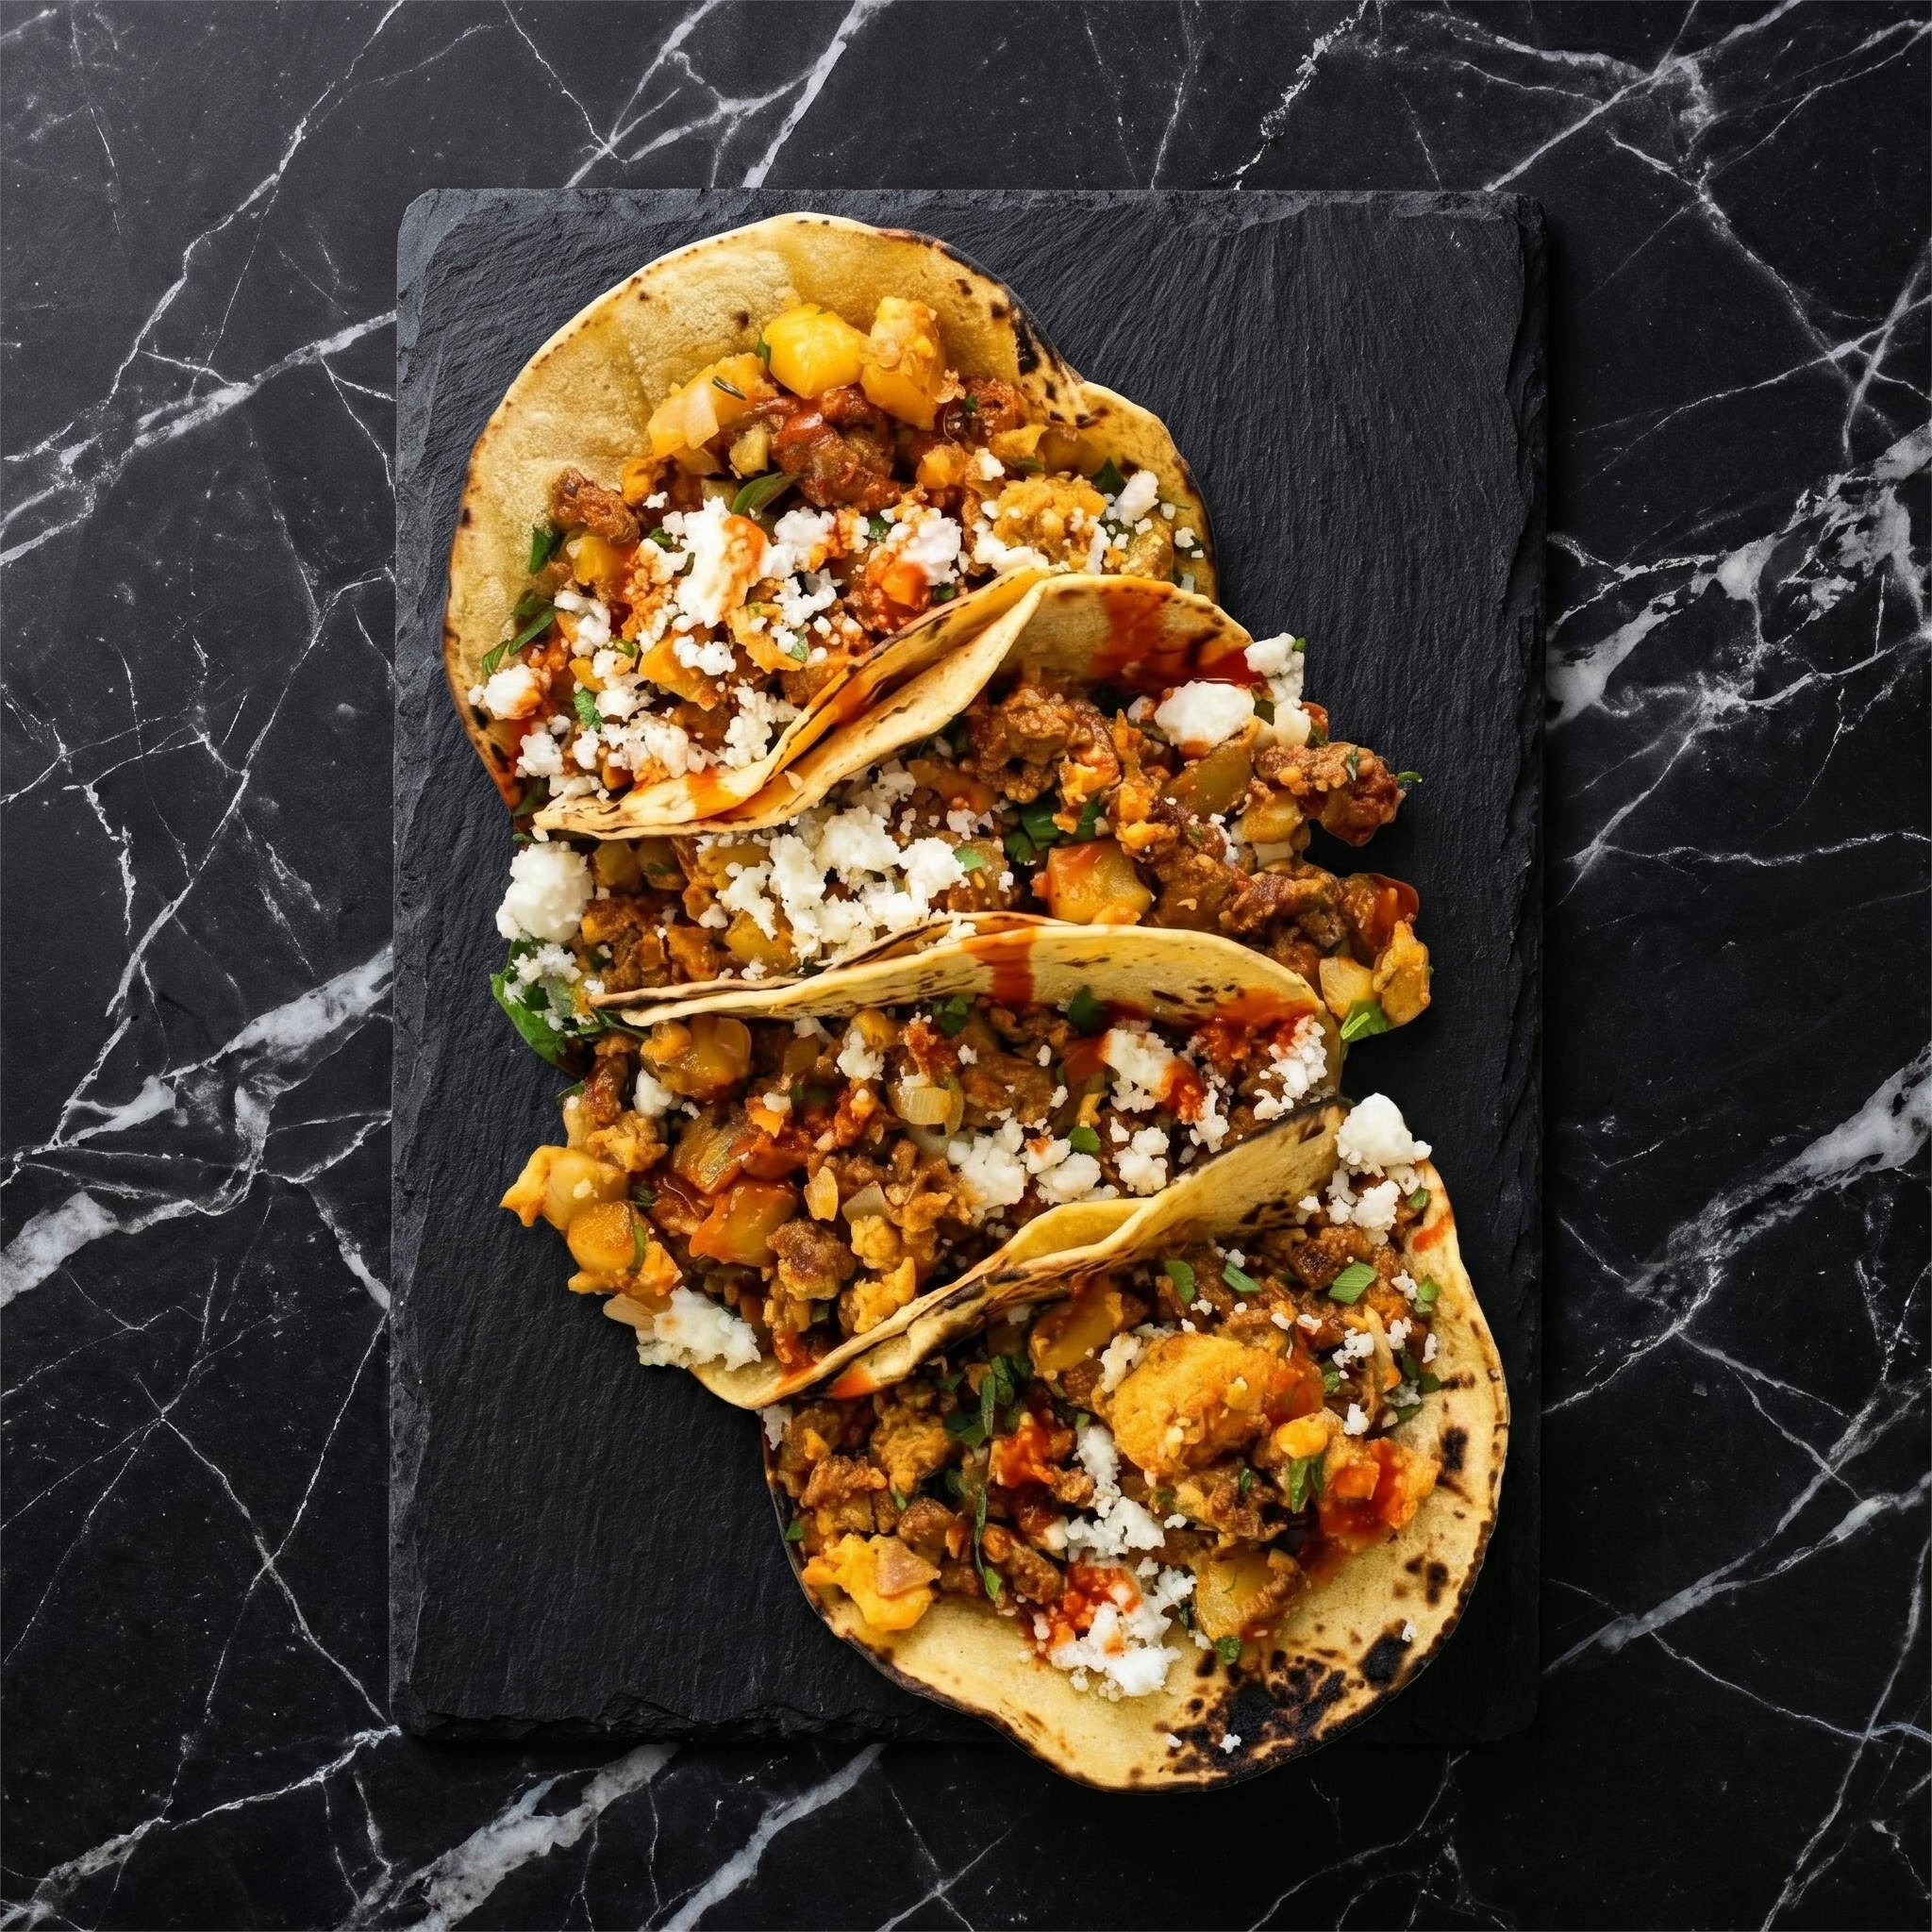
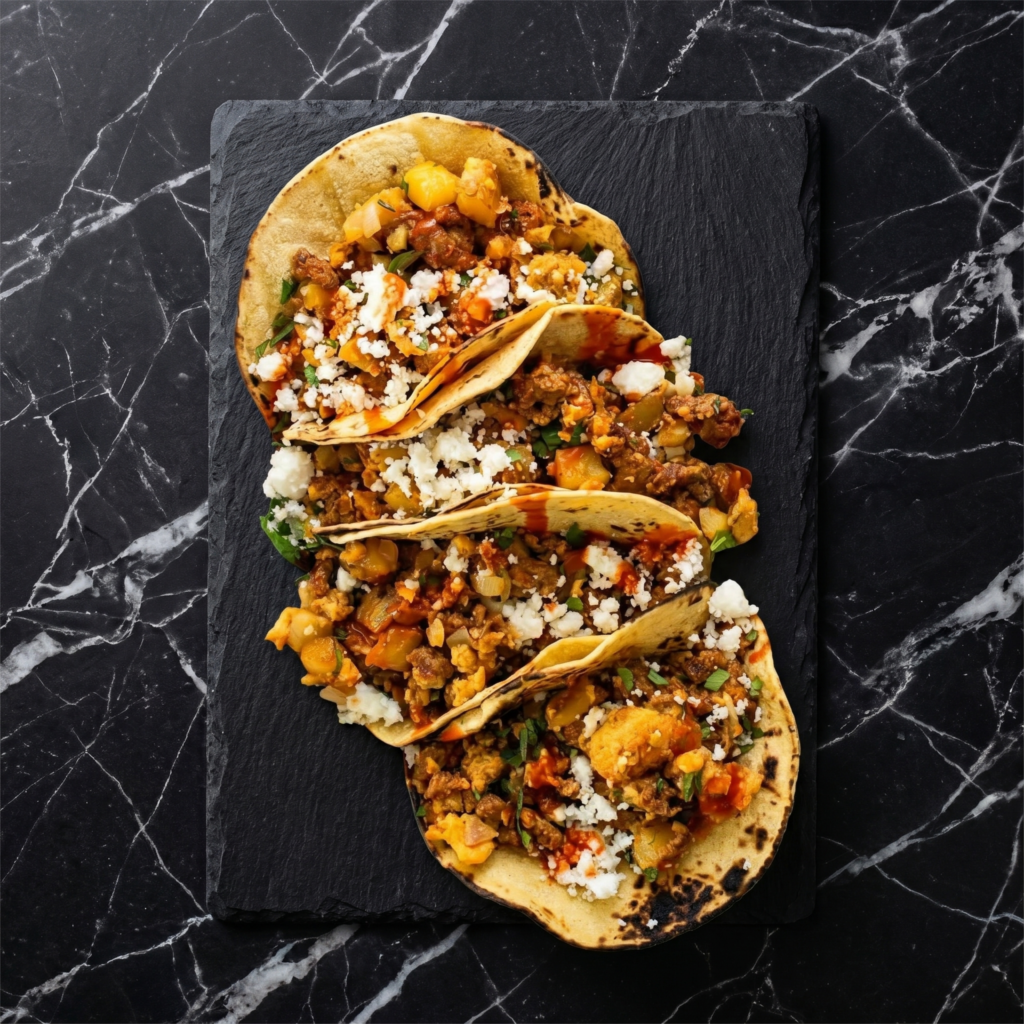
Breakfast tacos are a way of life. And chorizo is the best thing that can happen to your morning eggs. It’s spicy, savory, and stains everything orange in the best way.
Ten minutes from start to tortilla. No fancy moves. Just chorizo, eggs, and a stack of warm tortillas. Breakfast wins again.
Ingredients
Serves 2-3 (makes 6-8 tacos).
8 small corn or flour tortillas
8 ounces Mexican chorizo (casings removed)
6 large eggs
2 tablespoons milk or cream (optional, for fluffier eggs)
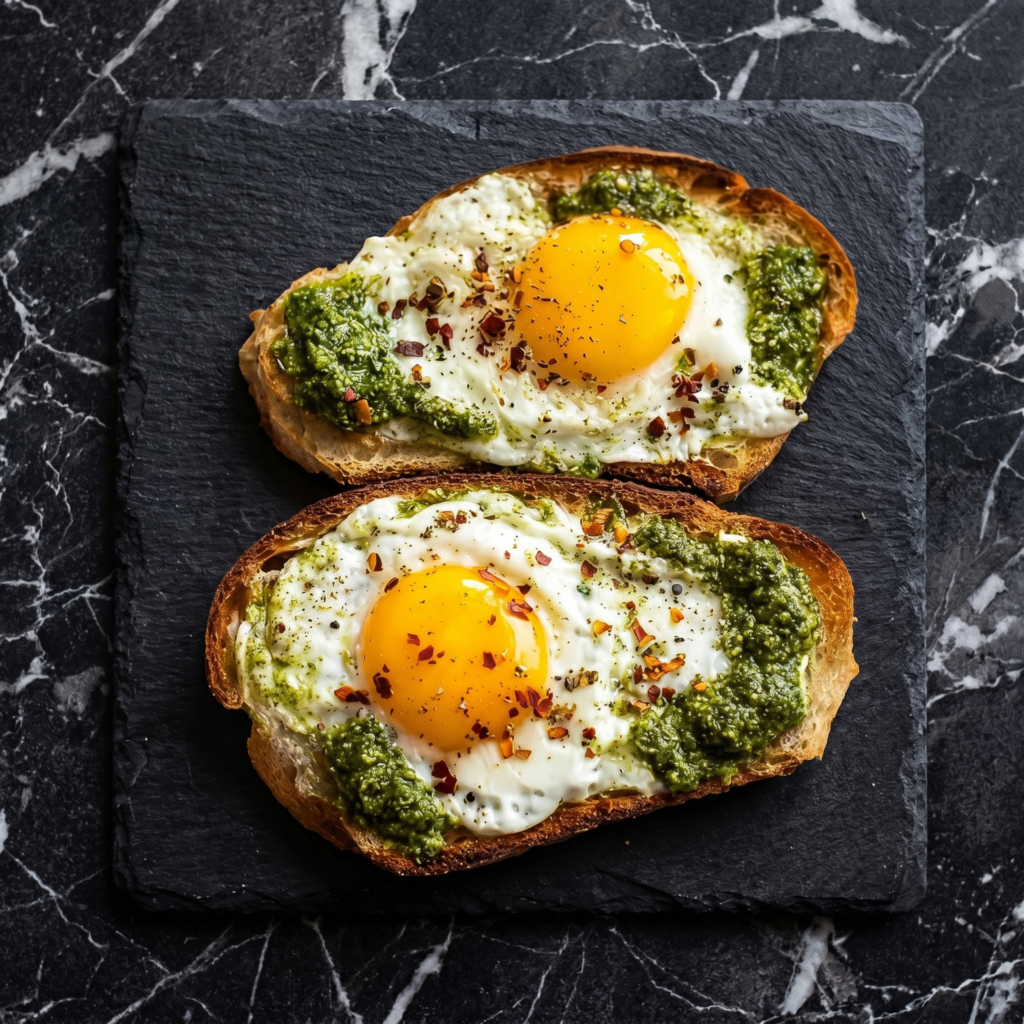
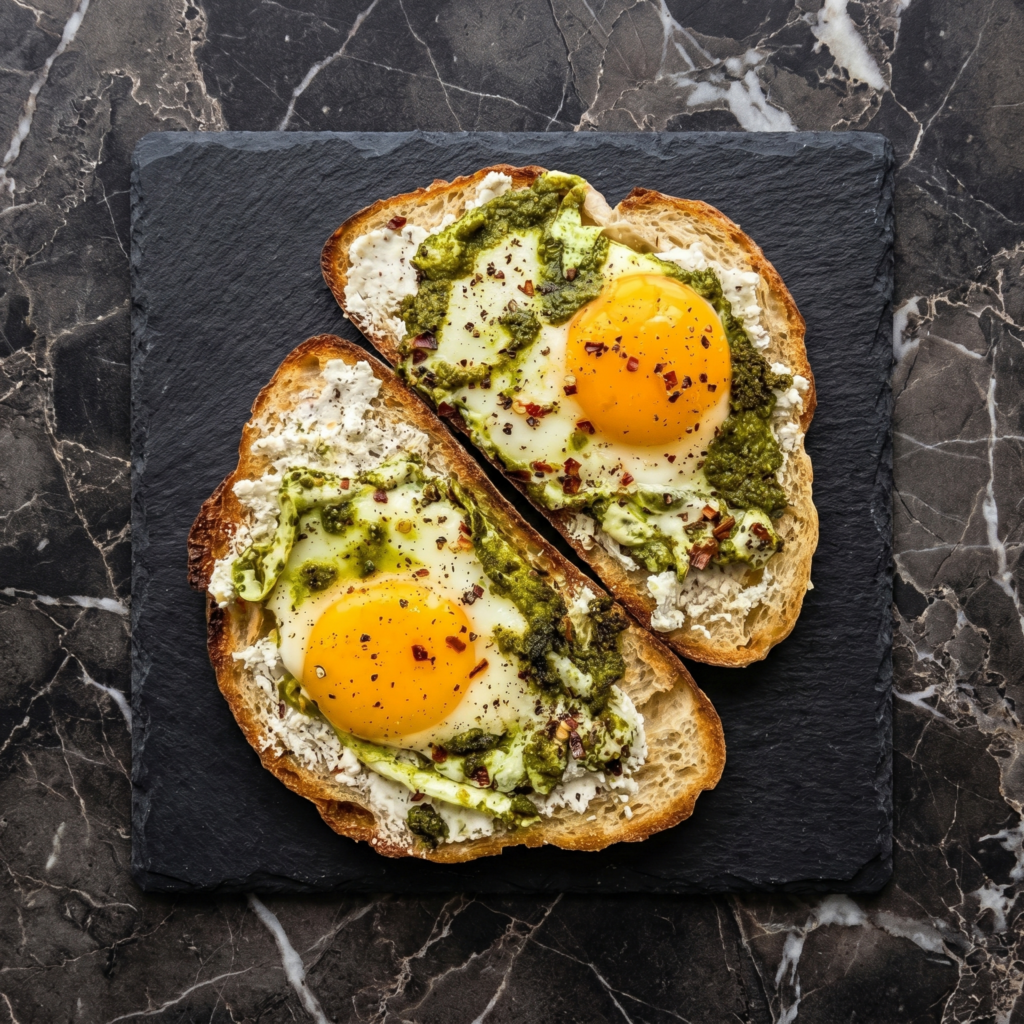
Avocado toast is great. But pesto toast? That’s the upgrade. It’s nutty, garlicky, herbaceous, and pairs perfectly with a runny egg.
You need toast, pesto, an egg, and about five minutes. That’s it. Breakfast just got interesting again.
Ingredients
Serves 1 (easily multiplied).
1 thick slice sourdough or rustic bread
1-2 tablespoons pesto (store-bought or homemade)
1 egg
Pinch of salt and red pepper flakes
Optional: Parmesan shavings, fresh basil
Step-by-Step Instructions
Step 1: Toast the Bread
Toast the bread until golden and crisp. You want it sturdy enough to hold the toppings.
Step 2: Cook the Egg
In a nonstick skillet over medium heat, cook the egg your way: – Sunny side up: 2-3 minutes, cover for set whites. – Jammy (best): 3 minutes, then remove. – Over easy: Flip after 2 minutes, cook 30 seconds.
Season with salt.
Step 3: Assemble
Spread pesto generously over the warm toast.
Gently place the egg on top.
Sprinkle with red pepper flakes and Parmesan (if using).
Step 4: Serve Immediately
Cut into the yolk and let it run into the pesto. That’s the money shot. Eat with a fork or pick it up like a boss.
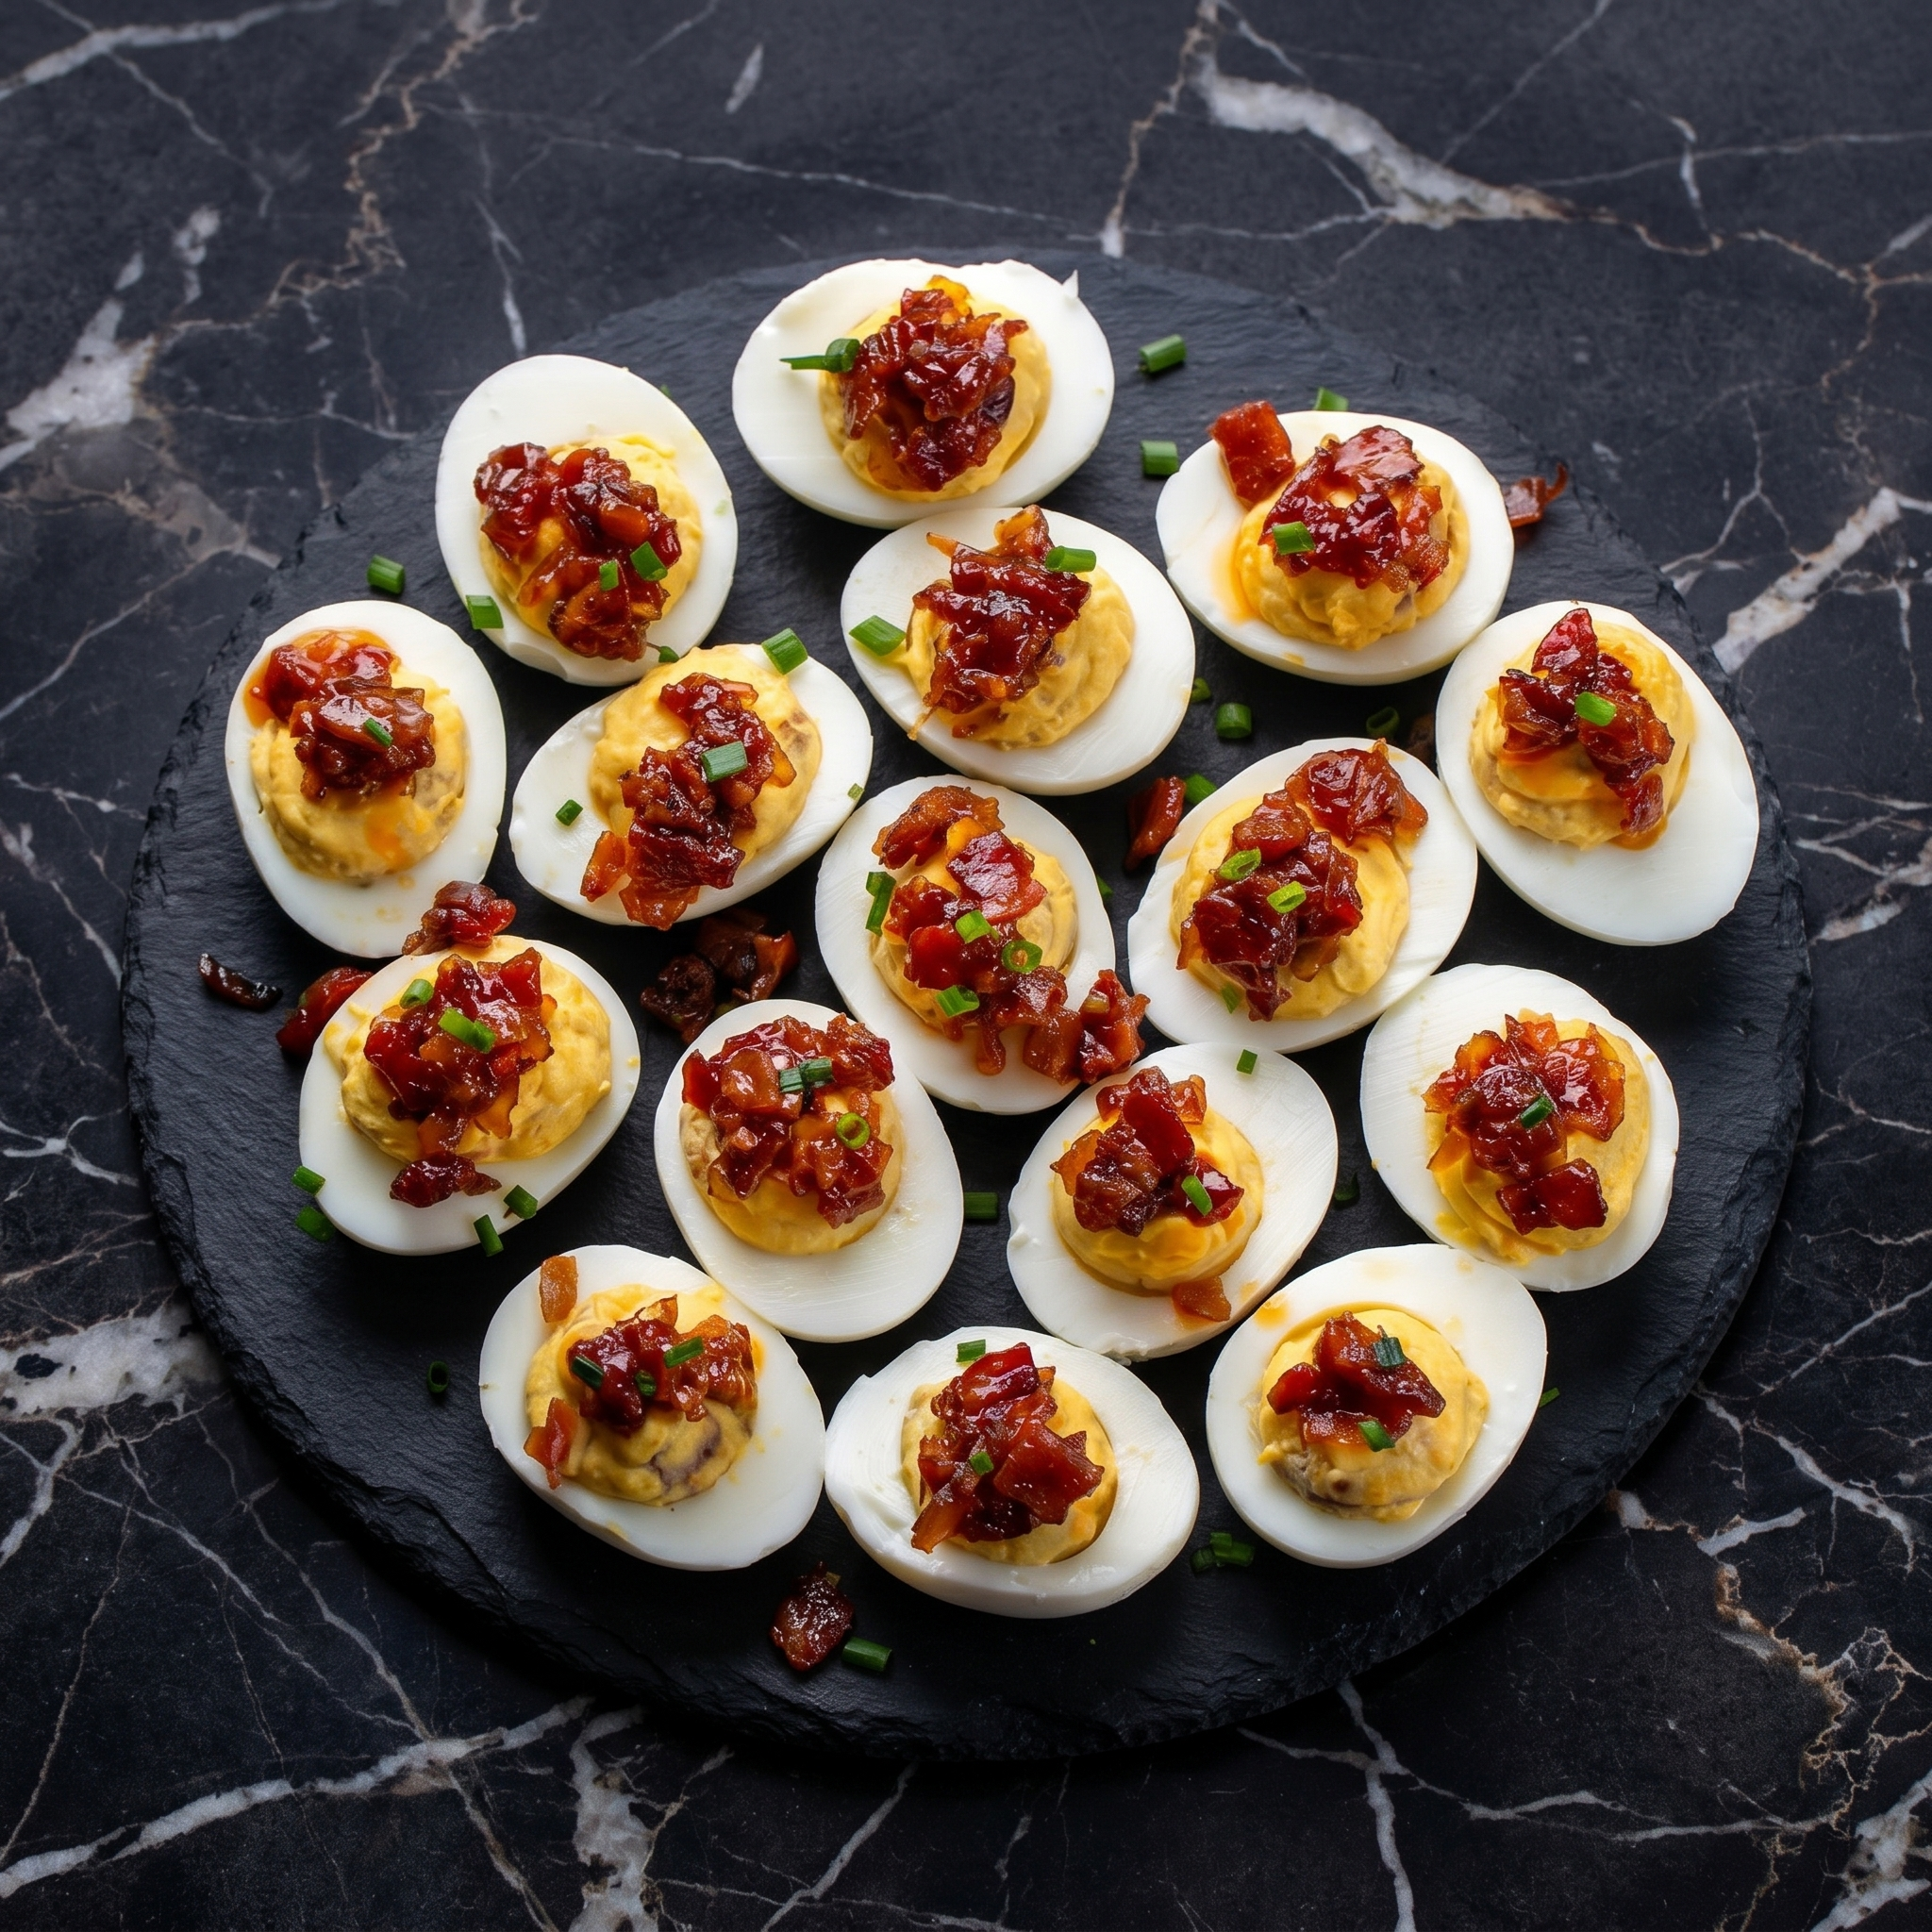
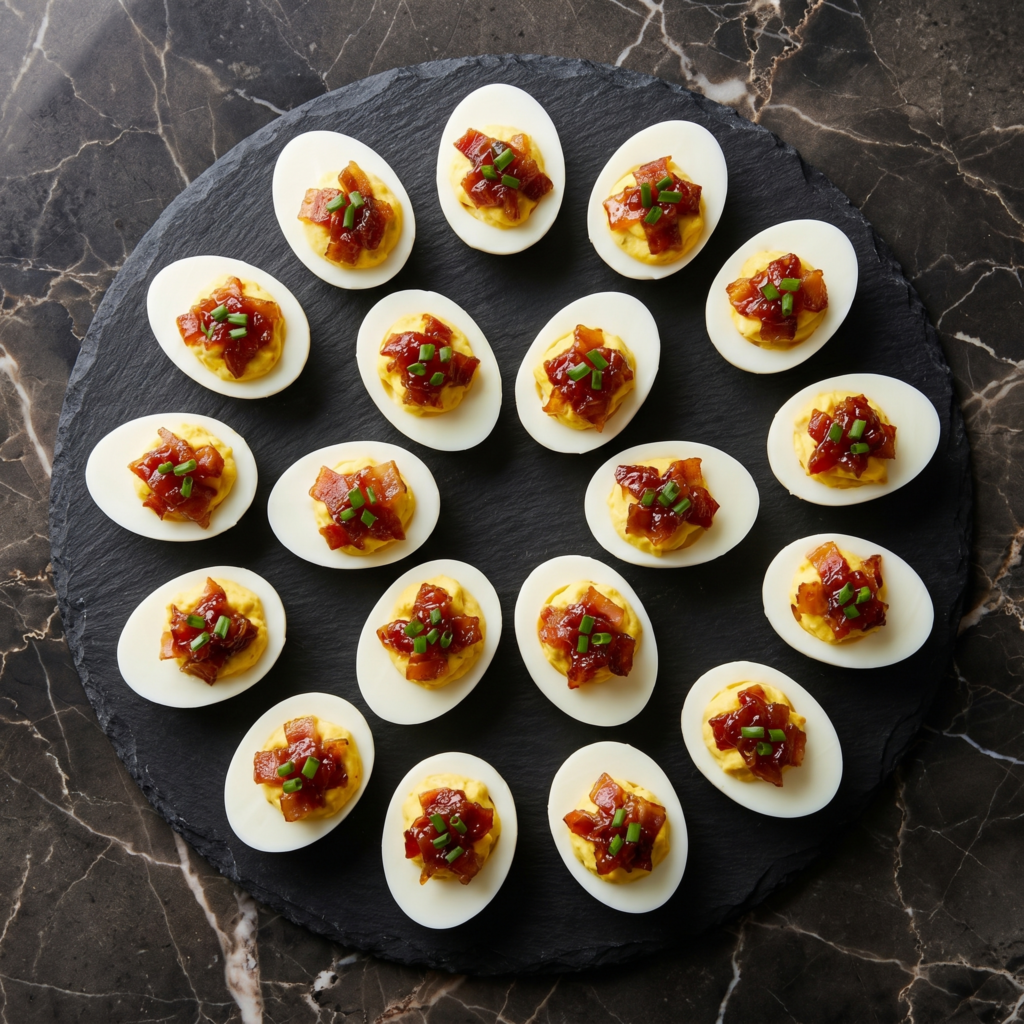
These are perfect make-ahead party food. Just don’t assemble too early.
Fridge (filling only): Store yolk mixture in a piping bag or container for up to 2 days. Keep egg whites separate in a sealed container. Fill fresh before serving.
Fridge (assembled): Store in an airtight container for up to 1 day. Bacon may lose crispiness.
Do not freeze. Texture disaster.
Pro tip: Use a piping bag or zip-top bag with the corner snipped off for Instagram-worthy filling.
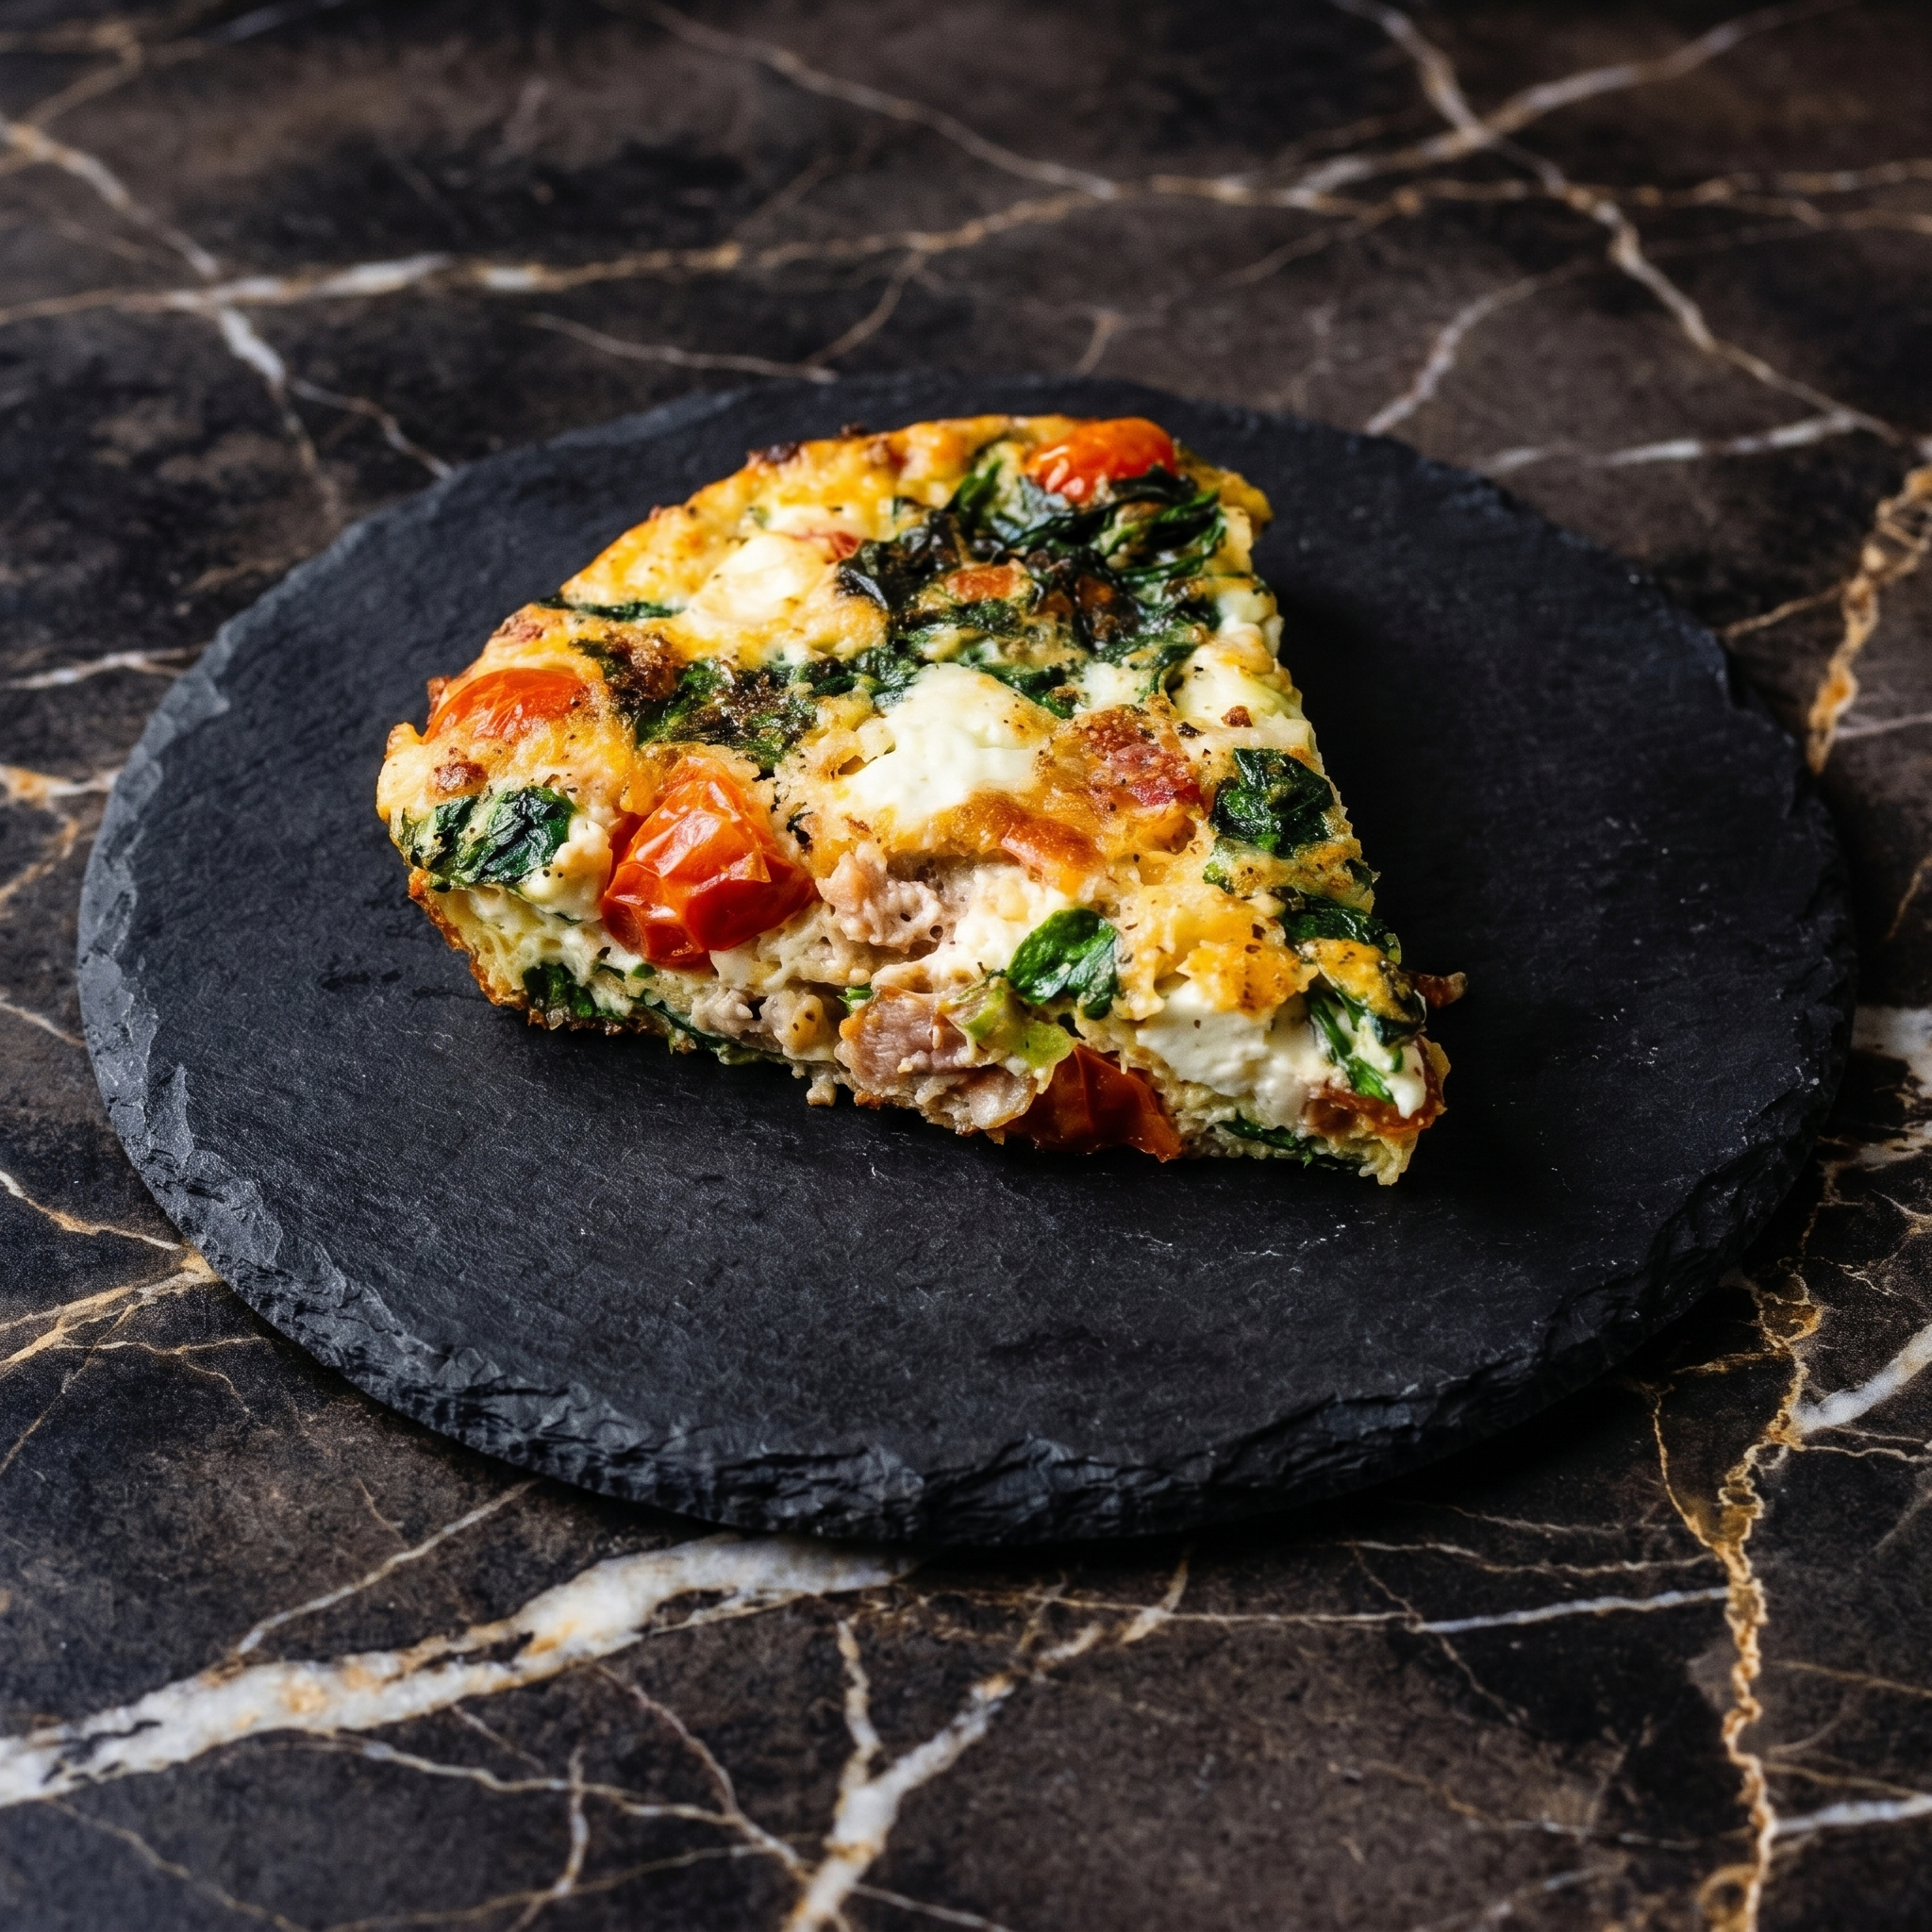
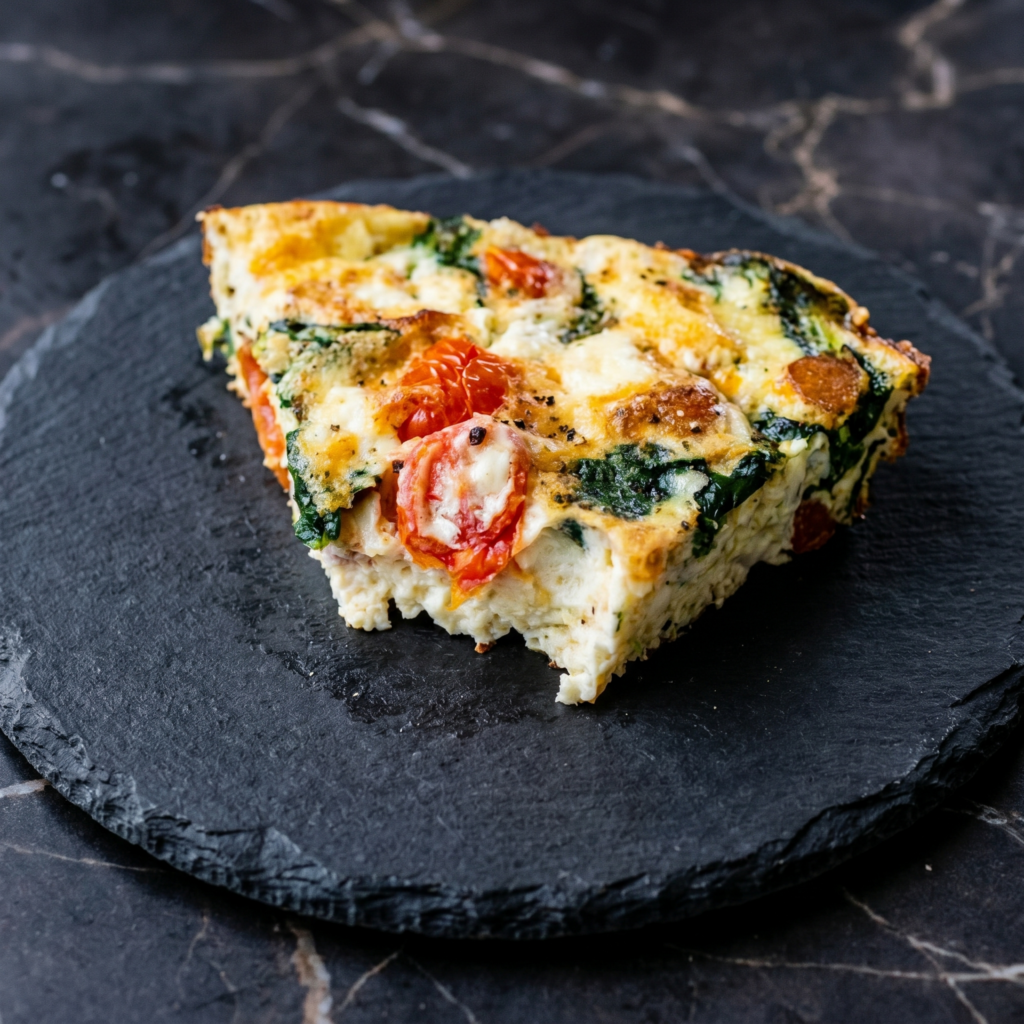
Not this time. This frittata is fluffy, savory, and packed with garlicky spinach and salty feta. No yolks? No problem. You won’t miss them. Perfect for meal prep. Perfect for using up that bag of spinach about to go bad.
Ingredients
Serves 4.
8 egg whites (or 1 cup liquid egg whites)
2 whole eggs (optional but adds richness)
4 cups fresh spinach, roughly chopped
2 cloves garlic, minced
¼ cup feta cheese, crumbled
2 tablespoons grated Parmesan cheese
1 tablespoon olive oil
¼ cup milk or unsweetened almond milk
¼ teaspoon salt
¼ teaspoon black pepper
¼ teaspoon red pepper flakes (optional)
Step-by-Step Instructions
Step 1: Preheat and Prep
Preheat oven to 375°F (190°C).
In a bowl, whisk egg whites, whole eggs (if using), milk, salt, pepper, and red pepper flakes.
Step 2: Cook the Spinach
Heat olive oil in an oven-safe skillet (cast iron or nonstick) over medium heat.
Add garlic. Cook for 30 seconds until fragrant.
Add spinach. Cook for 2–3 minutes until wilted. Season with a pinch of salt.
Step 3: Add Eggs and Cheese
Spread spinach evenly in the skillet.
Pour egg mixture over spinach. Sprinkle with feta and Parmesan.
Cook without stirring for 2–3 minutes until edges start to set.
Step 4: Bake the Frittata
Transfer skillet to the oven.
Bake for 10–12 minutes until puffed and golden, and center is just set.
Step 5: Serve
Let cool for 5 minutes. Slice into wedges.
Serve warm, at room temperature, or cold. Great with toast or a side salad.
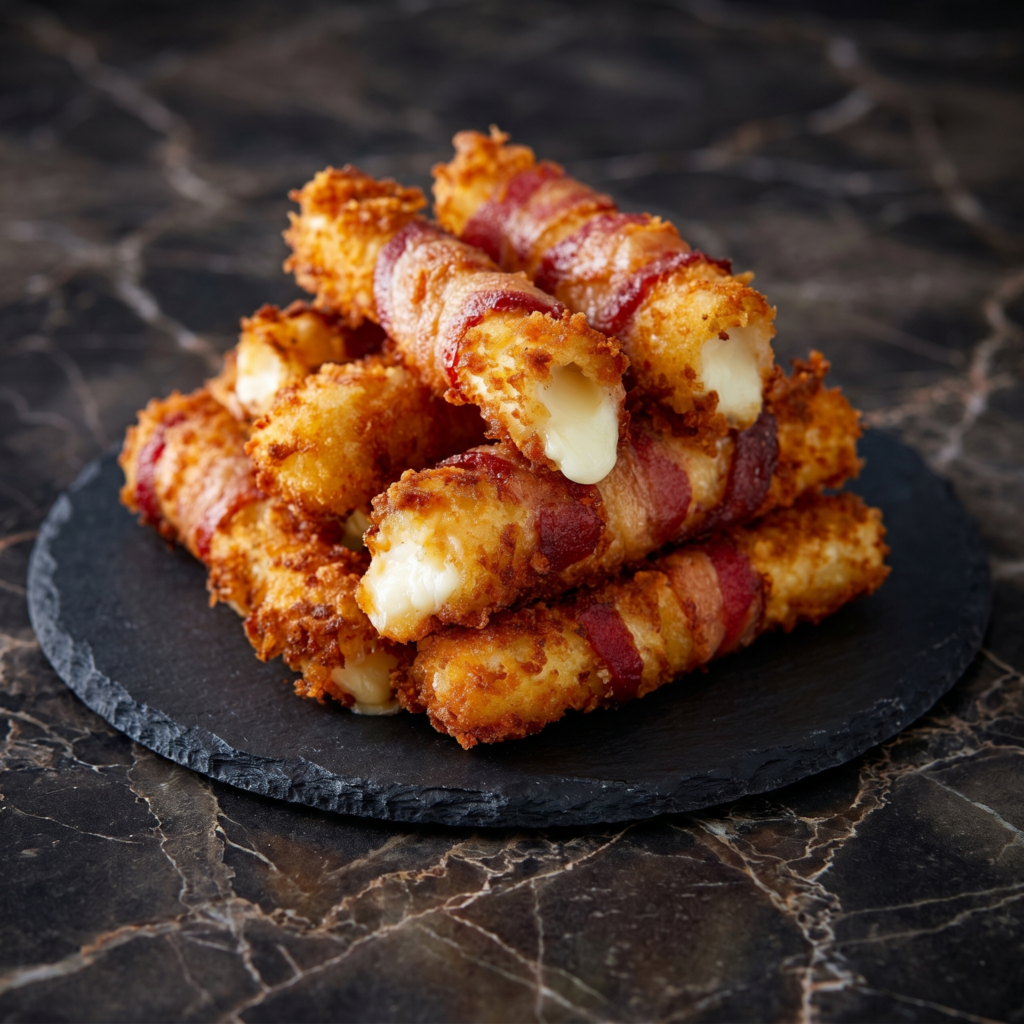
Mozzarella sticks are great. Bacon is great. So why has no one forced them to marry sooner? This is a three-ingredient miracle: string cheese, bacon, and your favorite marinara. Air fry or bake until the bacon is crispy and the cheese is melty. Prepare for addiction.
Ingredients
Makes 8 sticks (serves 2-4).
8 mozzarella string cheese sticks
8 slices thin-cut bacon
1 cup marinara sauce, for dipping
Optional: Everything bagel seasoning or black pepper
Step-by-Step Instructions
Step 1: Prep the Cheese
Remove string cheese from wrappers.
If using, roll each stick in everything bagel seasoning or pepper.
Step 2: Wrap With Bacon
Wrap one slice of bacon around each cheese stick in a spiral, slightly overlapping.
Tuck the end under the bacon to secure. No toothpicks needed.
Step 3: Cook Until Crispy
Air fryer method: Place sticks in a single layer. Cook at 380°F for 8-10 minutes until bacon is crispy.
Oven method: Bake at 400°F on a wire rack over a baking sheet for 12-15 minutes.
Pan method: Cook in a skillet over medium heat, turning often, for 8-10 minutes.
Step 4: Cool Slightly
Let rest for 2 minutes. The cheese will be lava-hot.
Step 5: Serve With Marinara
Warm marinara sauce in a small bowl.
Dip and pull. Watch the cheese stretch to oblivion.
These are best fresh and hot. Leftovers can be refrigerated for 2 days. Reheat in an air fryer at 375°F for 3-4 minutes. Do not microwave (soggy bacon, exploded cheese). Uncooked bacon-wrapped sticks can be frozen for up to 1 month—cook from frozen, add 2-3 minutes.
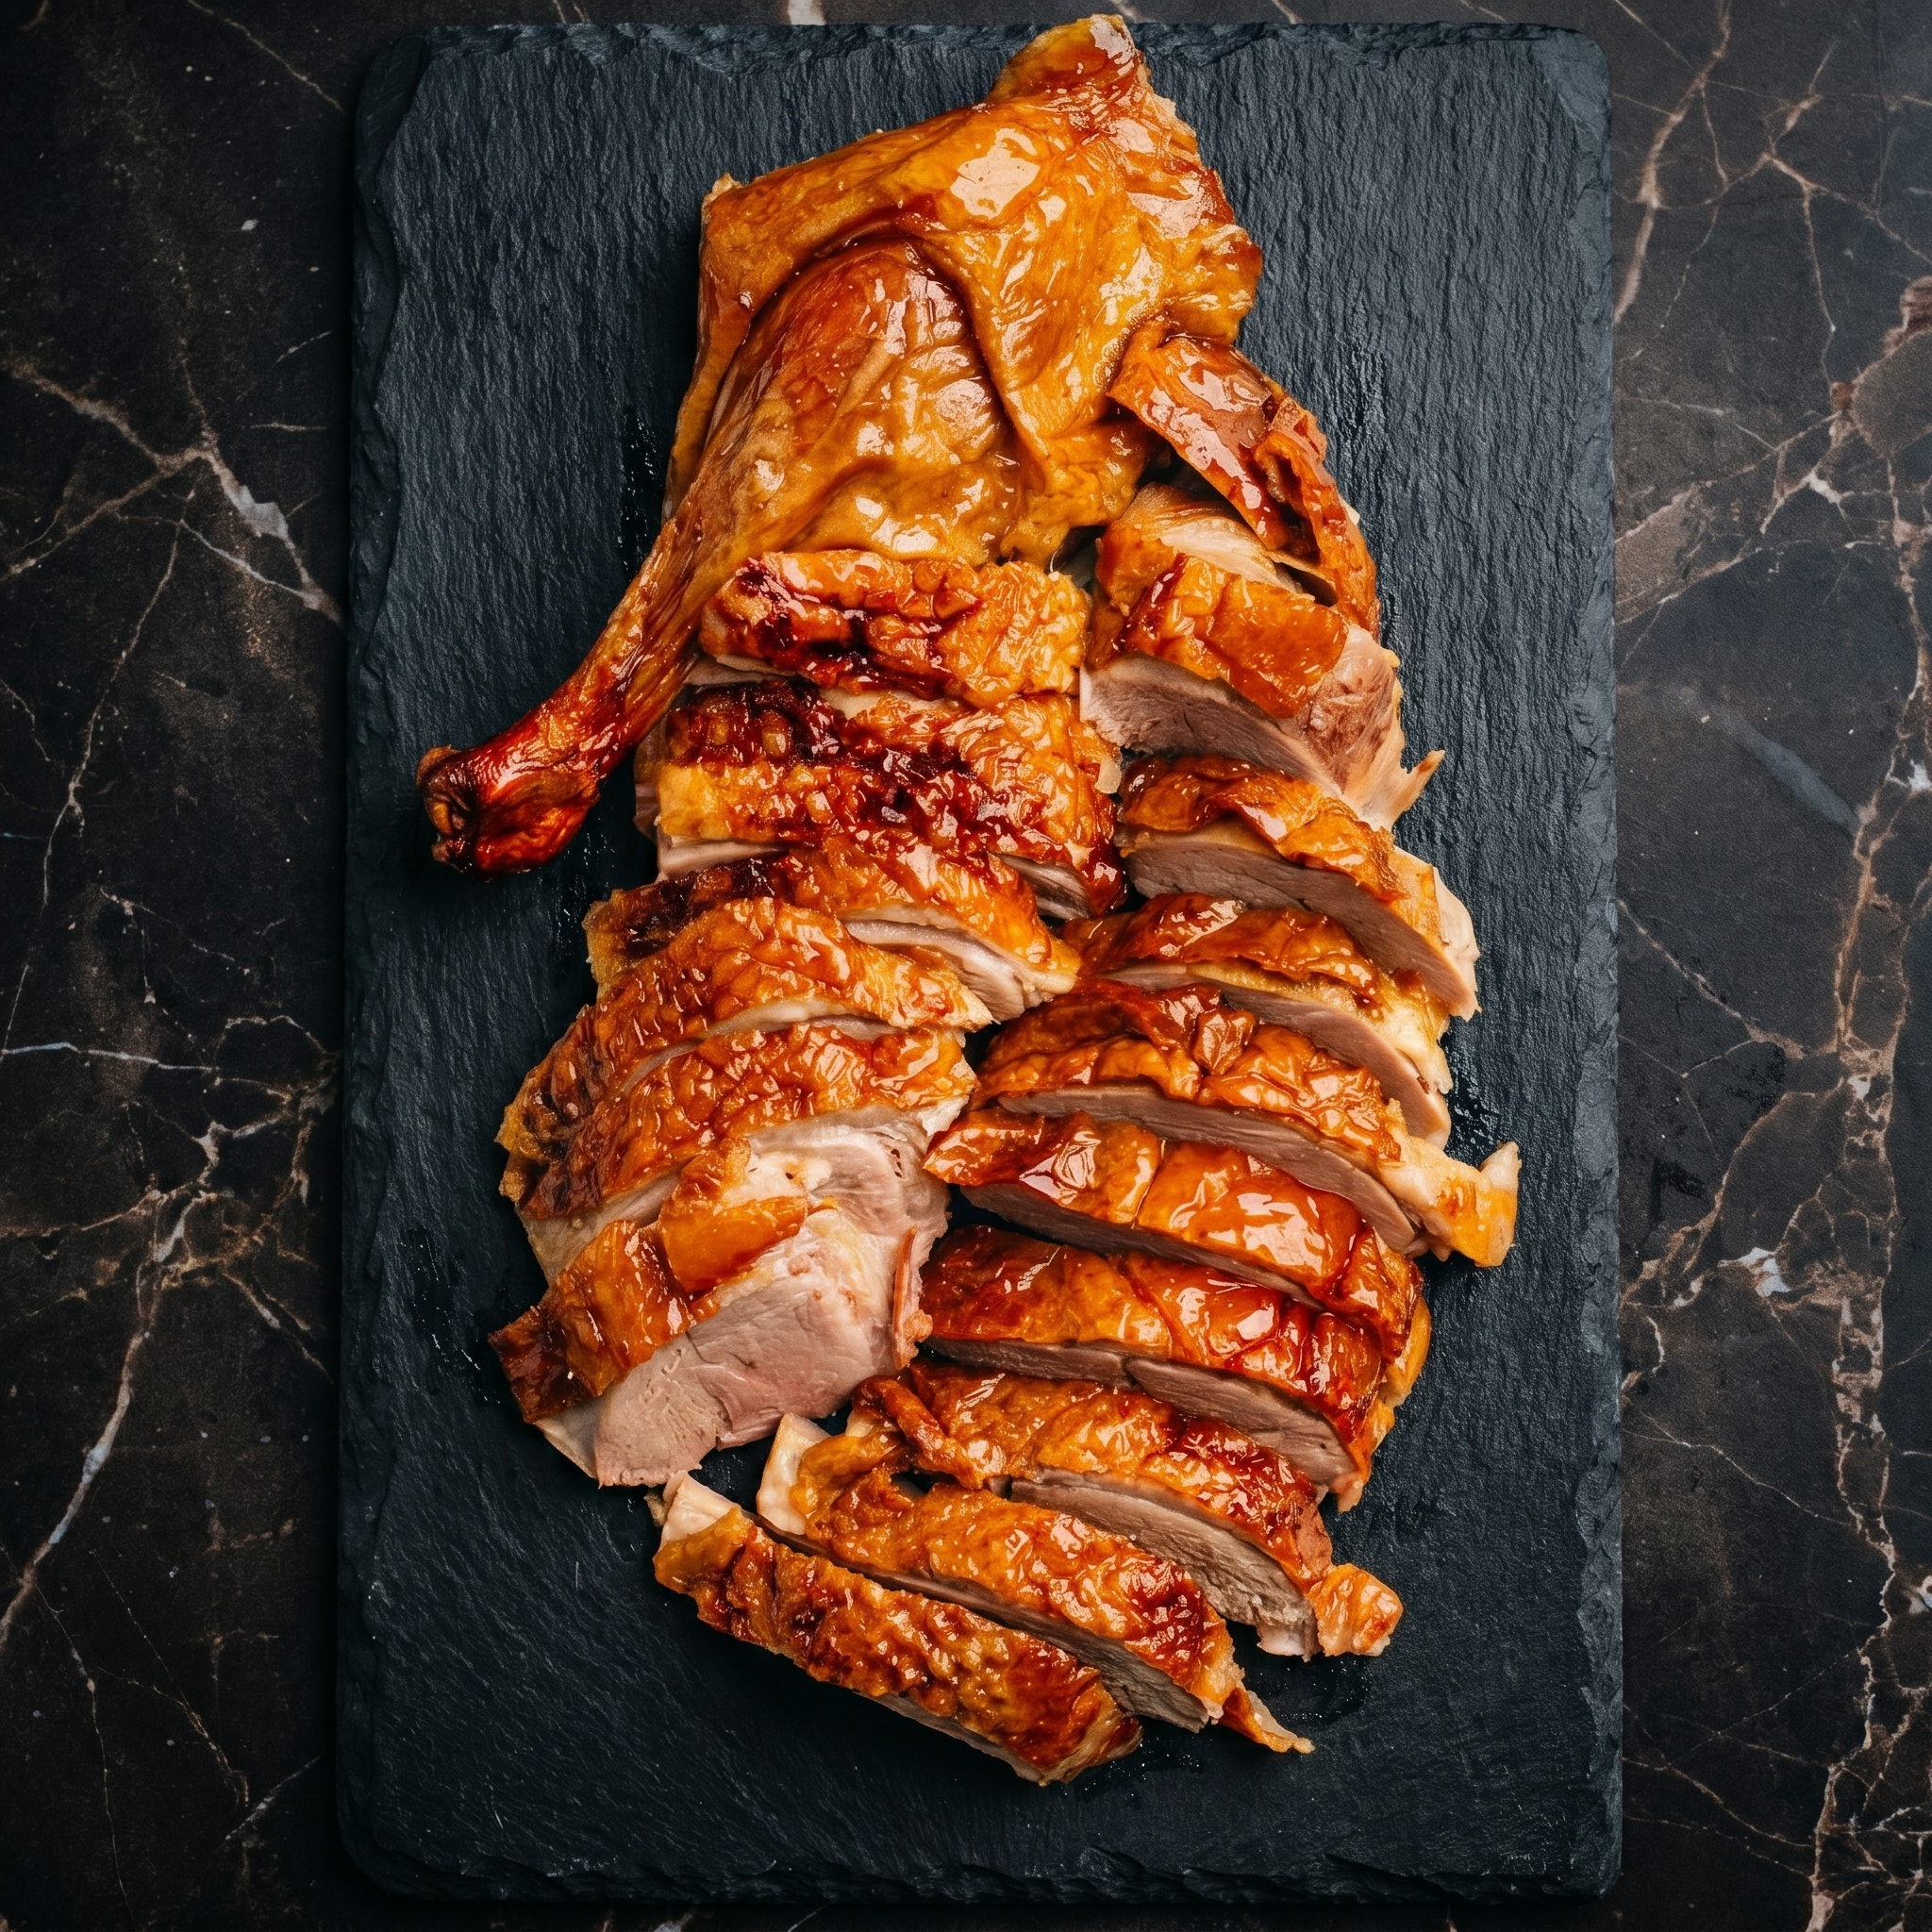
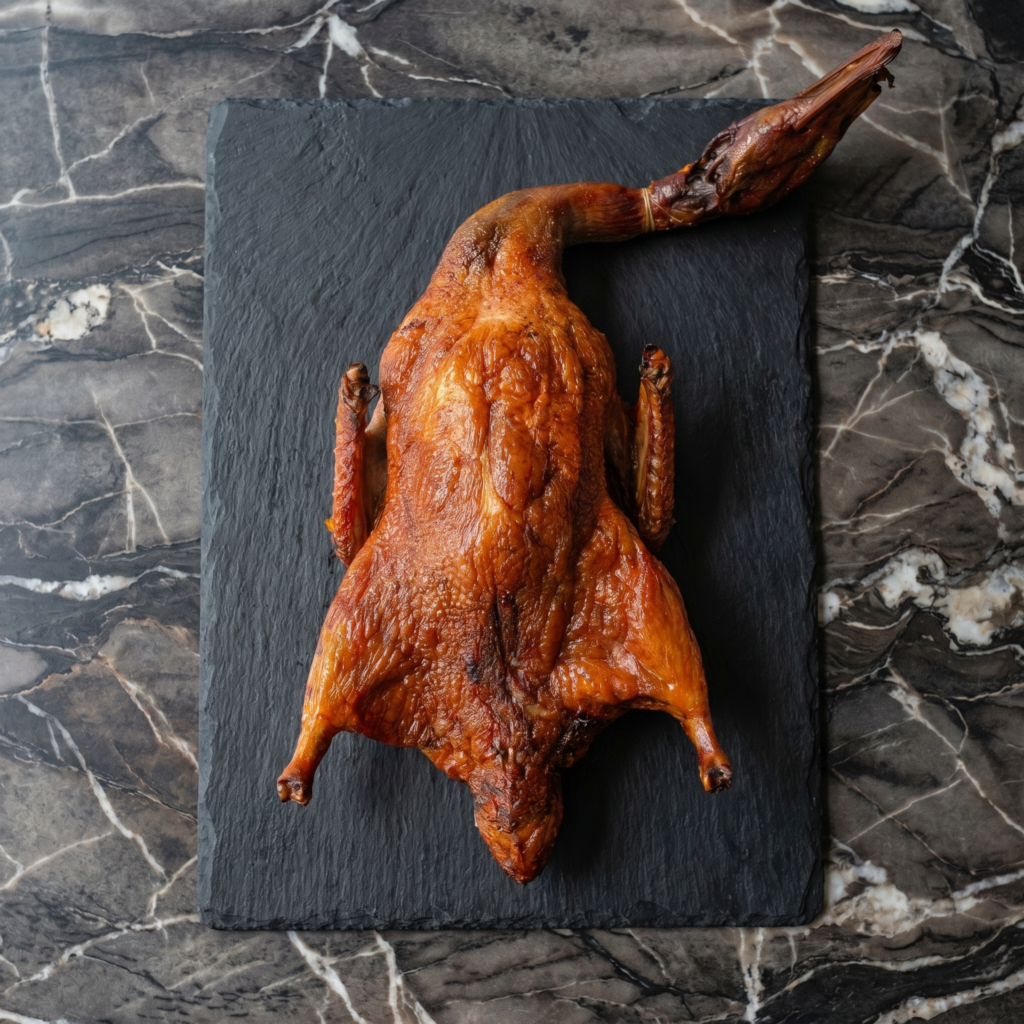
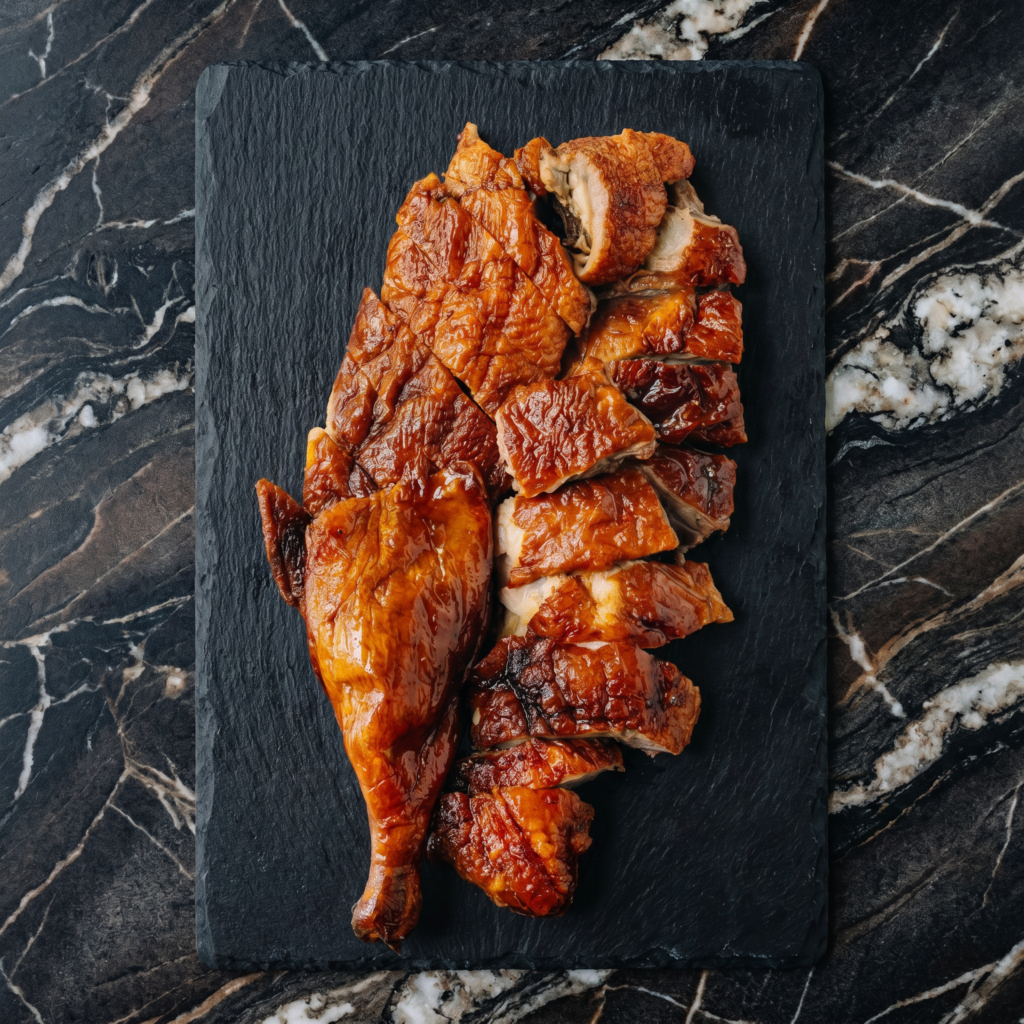
Roasted duck is the dinner party flex that nobody expects. The skin shatters like glass. The meat is dark, rich, and impossibly juicy. And the secret? It’s actually easier than roasting a chicken.
The magic is in the prep. Dry the skin. Poke it all over. Let it rest in the fridge overnight. Then roast hot and fast. That’s it. You’ve got restaurant duck at home.
Ingredients
Serves 2-4.
1 whole duck (5-6 lbs / 2.2-2.7 kg)
1 tablespoon salt
1 teaspoon five-spice powder (optional)
½ teaspoon black pepper
1 orange or lemon, quartered
4 cloves garlic, smashed
Few sprigs fresh thyme or rosemary
For the Glaze (Optional):
2 tablespoons honey
1 tablespoon soy sauce
1 tablespoon rice vinegar
Step-by-Step Instructions
Step 1: Dry the Duck (Critical)
Remove giblets. Pat duck completely dry inside and out with paper towels.
Using a fork or skewer, prick the skin all over—especially the fatty areas (breast, thighs). Do not pierce the meat.
Step 2: Season and Rest
Mix salt, five-spice, and pepper. Rub all over duck, inside and out.
Place duck on a rack over a baking sheet. Refrigerate UNCOVERED for at least 4 hours (overnight is best). This dries the skin for maximum crispiness.
Step 3: Preheat and Stuff
Preheat oven to 425°F (220°C). Stuff duck cavity with orange quarters, garlic, and herbs.
Step 4: Roast the Duck
Place duck breast-side up on a rack in a roasting pan. Add 1 cup water to the pan (prevents smoke).
Roast for 45 minutes. Flip duck breast-side down. Roast another 30 minutes.
Flip back to breast-side up. If using glaze, brush on now. Roast final 10-15 minutes until skin is deep brown and crispy. Internal temp should reach 165°F (74°C) in the thigh.
Step 5: Rest and Serve
Let duck rest for 15 minutes before carving. Serve with roasted potatoes or rice.
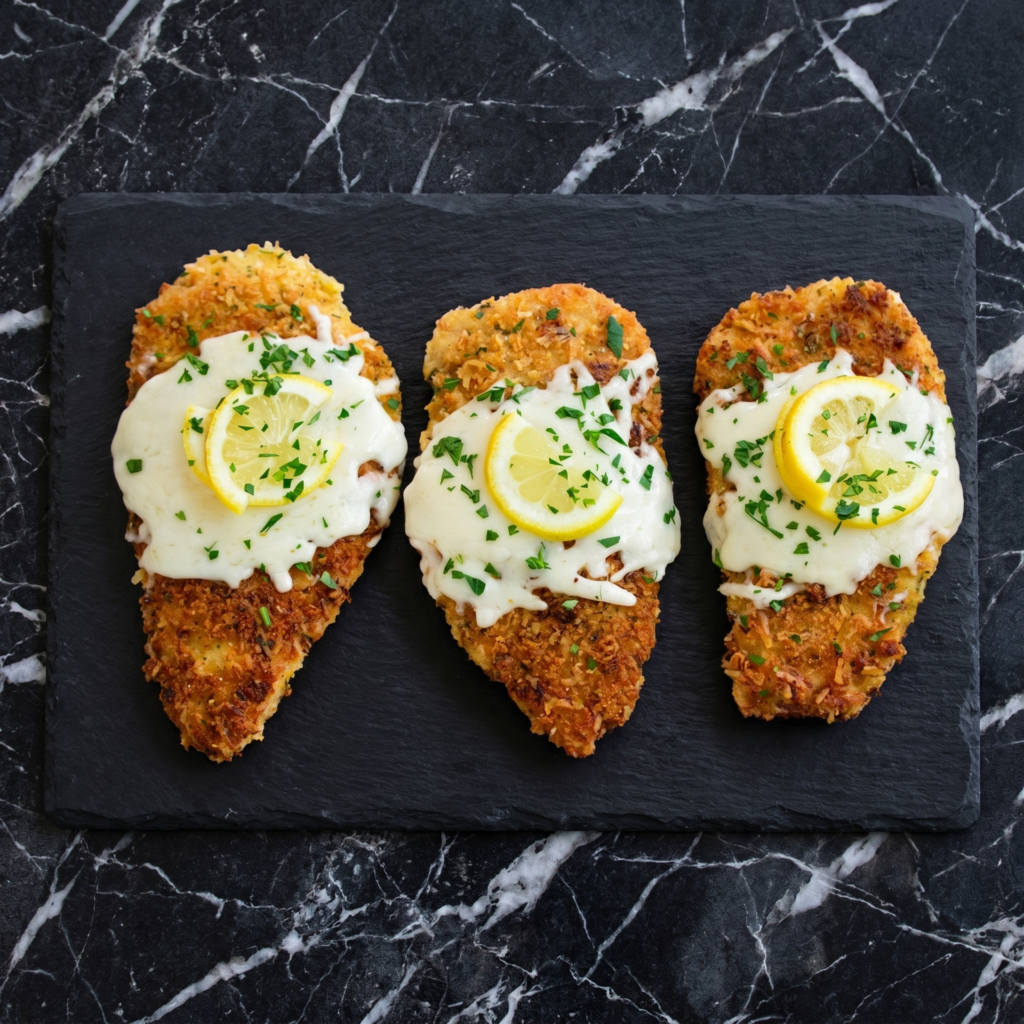
If you love bright citrus flavor paired with crispy, golden chicken and savory cheese, Lemon Chicken Romano is about to become your new favorite dinner. This Italian-inspired classic features tender chicken breasts coated in a Romano cheese crust, pan-fried until perfectly crisp, and finished with a silky lemon butter sauce that ties everything together beautifully.
It’s elegant enough for entertaining, yet simple enough for a weeknight meal. With just a few pantry staples and the right technique, you can create a restaurant-quality dish right at home. Let’s break it down step by step so you get perfectly juicy chicken with bold, balanced flavor every time.
Ingredients You’ll Need
For the Chicken:
2 large boneless, skinless chicken breasts
1 cup all-purpose flour
2 large eggs
2 tablespoons milk
¾ cup grated Romano cheese
½ cup grated Parmesan cheese
½ teaspoon salt
½ teaspoon black pepper
½ teaspoon garlic powder
¼ cup olive oil (for frying)
For the Lemon Butter Sauce:
2 tablespoons unsalted butter
2 cloves garlic, minced
½ cup chicken broth
¼ cup fresh lemon juice (about 1–2 lemons)
1 teaspoon lemon zest
2 tablespoons heavy cream (optional, for richness)
Salt and pepper to taste
Fresh parsley, chopped (for garnish)
Step 1: Prepare the Chicken
Place the chicken breasts between two sheets of plastic wrap or parchment paper. Using a meat mallet or rolling pin, pound them to an even thickness of about ½ inch. This ensures even cooking and tender results.
Season both sides lightly with salt and pepper.
Step 2: Set Up Your Breading Station
Prepare three shallow bowls:
In the first bowl, add the flour.
In the second bowl, whisk together the eggs and milk.
In the third bowl, combine the grated Romano, Parmesan, garlic powder, and a pinch of black pepper.
This three-step coating process creates that signature crispy, cheesy crust.
Step 3: Bread the Chicken
Dredge each chicken breast in flour, shaking off excess. Next, dip into the egg mixture, allowing any extra to drip off. Finally, press firmly into the Romano-Parmesan mixture, ensuring both sides are fully coated.
Place the coated chicken on a plate and let it rest for 5–10 minutes. This helps the coating adhere better during cooking.
Step 4: Pan-Fry Until Golden
Heat olive oil in a large skillet over medium heat. Once hot (but not smoking), carefully place the chicken into the pan.
Cook for about 4–5 minutes per side, or until golden brown and cooked through. The internal temperature should reach 165°F (74°C).
Avoid overcrowding the pan. Cook in batches if necessary to maintain even browning.
Once done, transfer the chicken to a plate and tent loosely with foil to keep warm.
Step 5: Prepare the Lemon Butter Sauce
In the same skillet (do not wipe it clean—those browned bits add flavor), reduce heat to medium-low. Add butter and minced garlic. Sauté for about 30 seconds until fragrant.
Pour in the chicken broth and lemon juice, scraping up any browned bits from the bottom of the pan. Let the sauce simmer for 3–4 minutes to reduce slightly.
Stir in lemon zest and heavy cream if using. Season with salt and pepper to taste. Simmer another 1–2 minutes until the sauce thickens slightly.
Step 6: Combine and Finish
Return the cooked chicken to the skillet. Spoon the lemon butter sauce over the top and let everything simmer together for 2–3 minutes. This allows the chicken to absorb some of the bright citrus flavor while staying crisp.
Step 7: Garnish and Serve
Sprinkle freshly chopped parsley over the chicken before serving. For extra lemon brightness, add a thin lemon slice on top.
Serve immediately while hot and crispy.
Perfect Pairings
Lemon Chicken Romano pairs beautifully with:
Angel hair or linguine pasta
Garlic mashed potatoes
Steamed broccoli or asparagus
A simple arugula salad with vinaigrette
The fresh lemon sauce complements lighter sides particularly well.
Pro Tips for Success
Use freshly grated Romano cheese for the best flavor and melt.
Pound chicken evenly to avoid dry edges and undercooked centers.
Don’t rush the browning—a golden crust equals big flavor.
Fresh lemon juice is essential—bottled juice won’t deliver the same brightness.
Let the chicken rest briefly before slicing to retain juices.
Flavor Variations
Extra Crispy Version: Add a tablespoon of breadcrumbs to the cheese coating.
Spicy Twist: Add red pepper flakes to the sauce.
Herb Upgrade: Stir fresh thyme or basil into the lemon sauce.
Capers Addition: Add a tablespoon of capers for a briny punch.
Storage and Reheating
Store leftovers in an airtight container in the refrigerator for up to 3 days.
To reheat, warm gently in a skillet over medium-low heat with a splash of broth to loosen the sauce. Avoid microwaving if possible, as it can soften the crispy crust.
Why This Recipe Works
Lemon Chicken Romano strikes the perfect balance between rich and bright. The salty Romano cheese creates a crisp, flavorful crust, while the lemon butter sauce adds freshness and acidity that keeps the dish from feeling heavy.
The technique is straightforward—bread, pan-fry, simmer—and the ingredients are simple yet impactful. The result is a dish that feels elevated without requiring complicated steps.
Final Thoughts
Lemon Chicken Romano is one of those meals that feels special every time you make it. The crispy, cheesy coating combined with the silky lemon sauce creates layers of flavor and texture that are deeply satisfying.
Whether you’re cooking for family, entertaining guests, or simply treating yourself to a restaurant-style dinner at home, this dish delivers elegance and comfort in every bite.
With a little preparation and attention to detail, you can master this zesty, golden classic and bring bright Italian-inspired flavor straight to your dinner table.
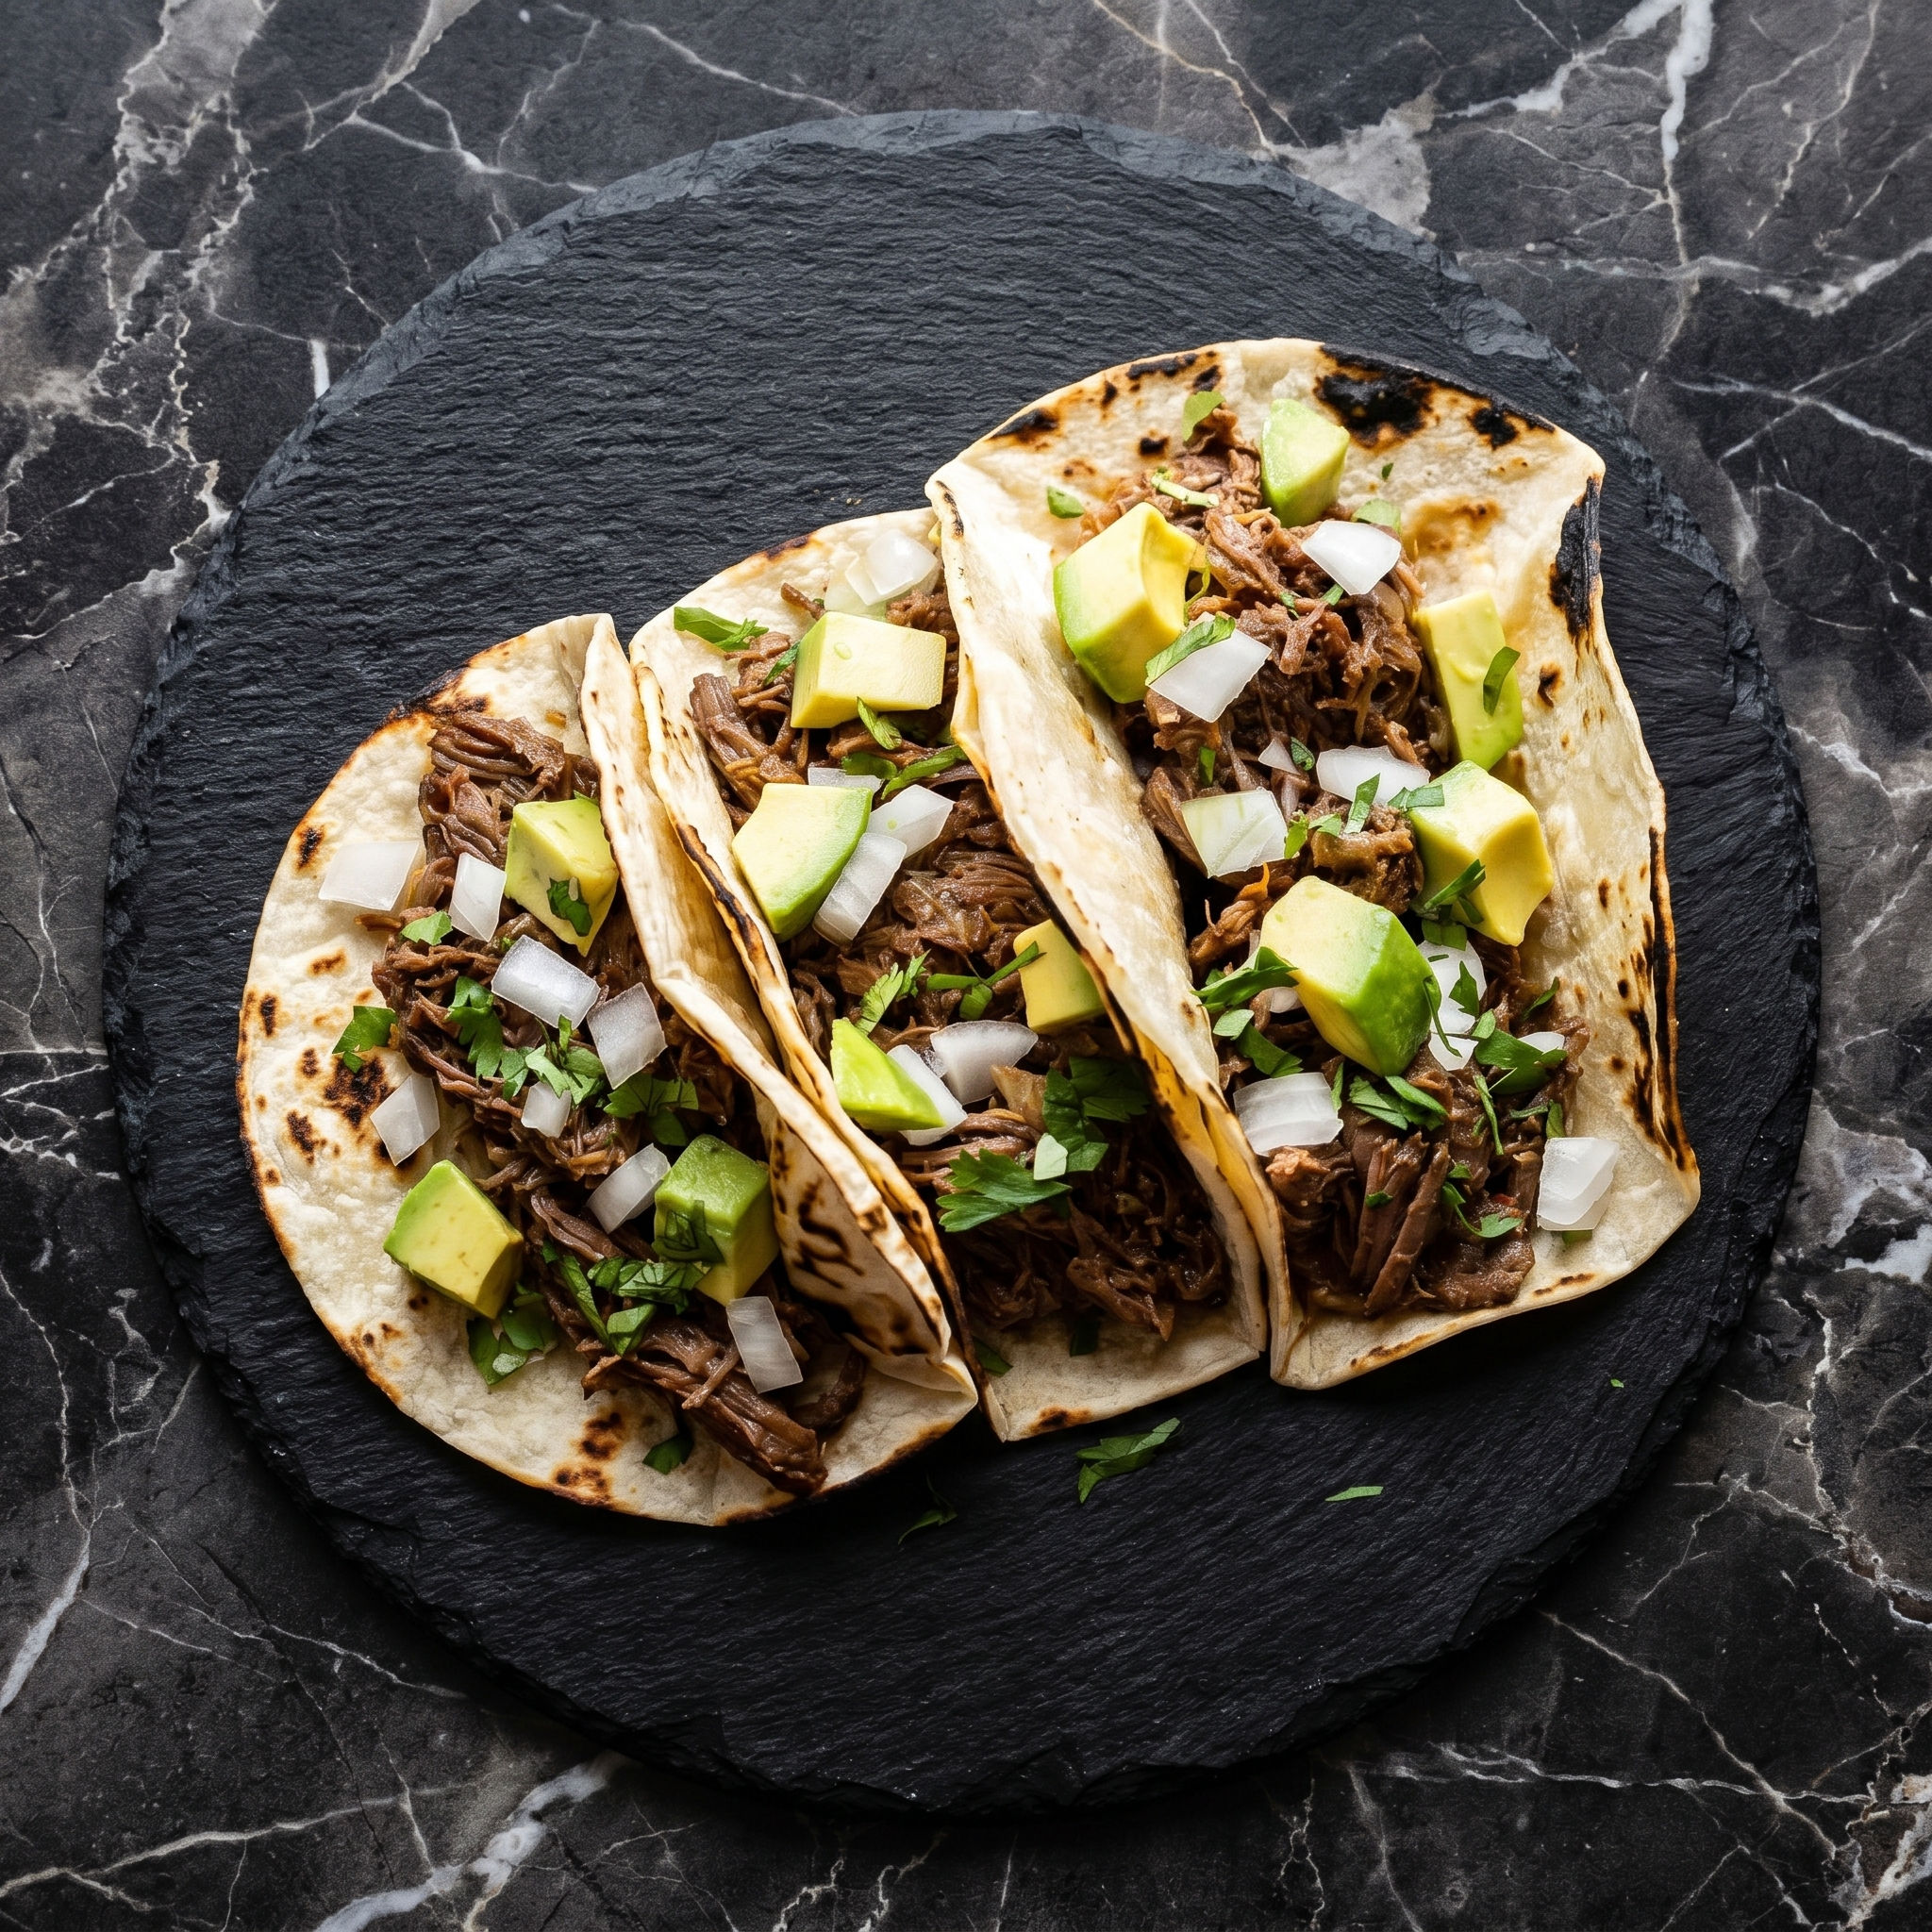
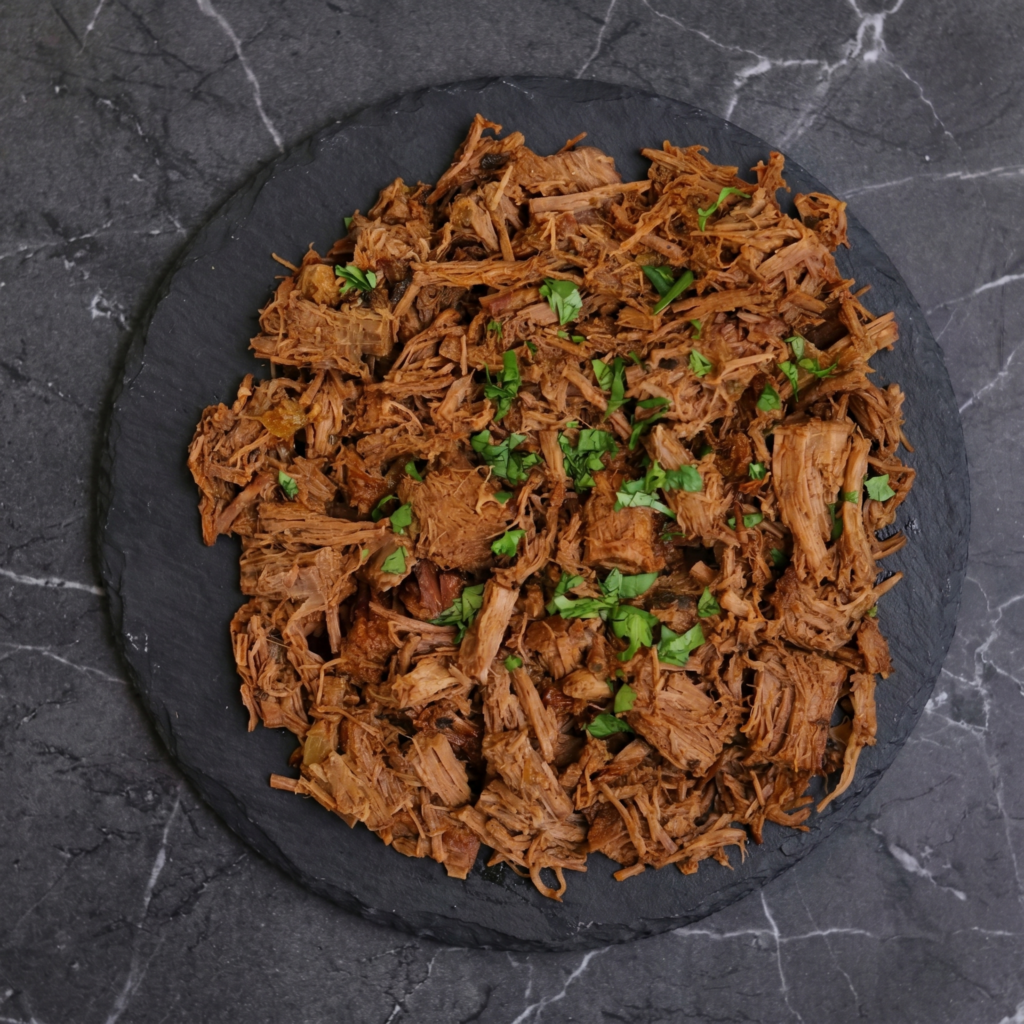
Barbacoa is what happens when beef meets low heat, patience, and a smoky chipotle hug. Traditionally cooked in a pit underground. Today? Your slow cooker does all the work. The result is the same: beef so tender it falls apart if you look at it wrong.
Use it for tacos, burritos, nachos, or just eat it with a spoon standing over the sink. No judgment. This is pure comfort.
Ingredients
Serves 6-8.
3 lbs (1.4kg) beef chuck roast, cut into 4 large chunks
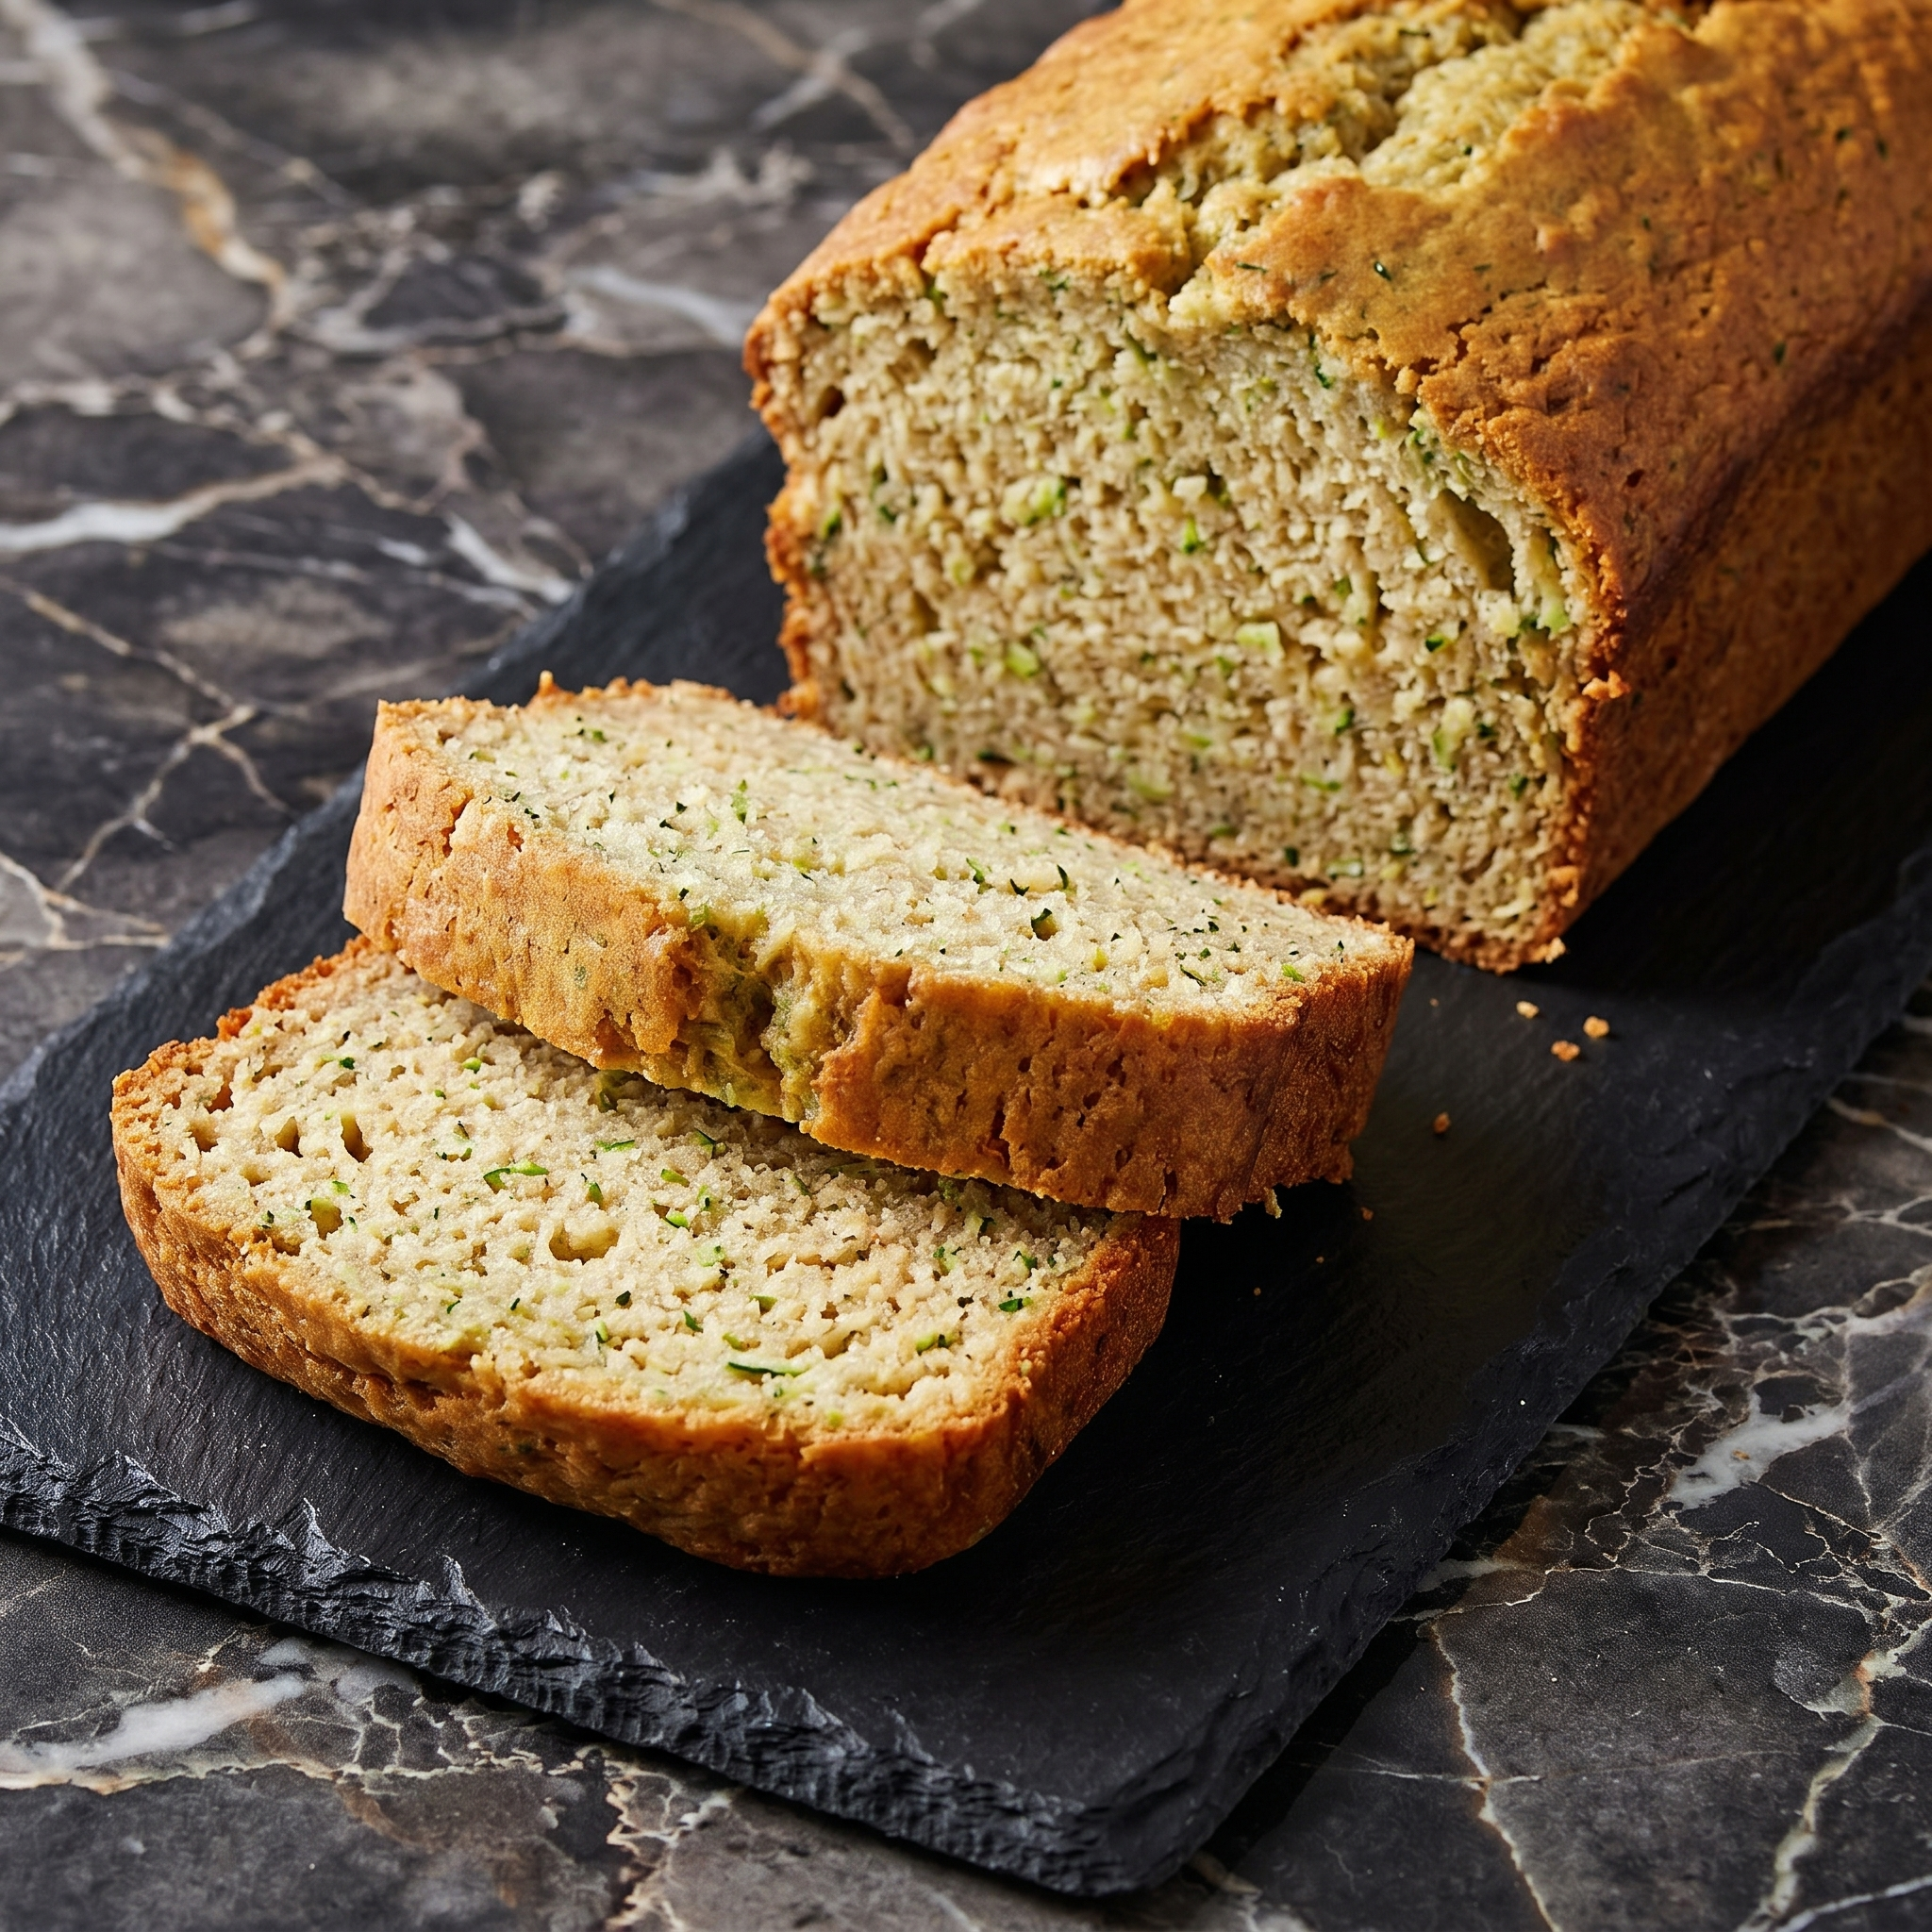
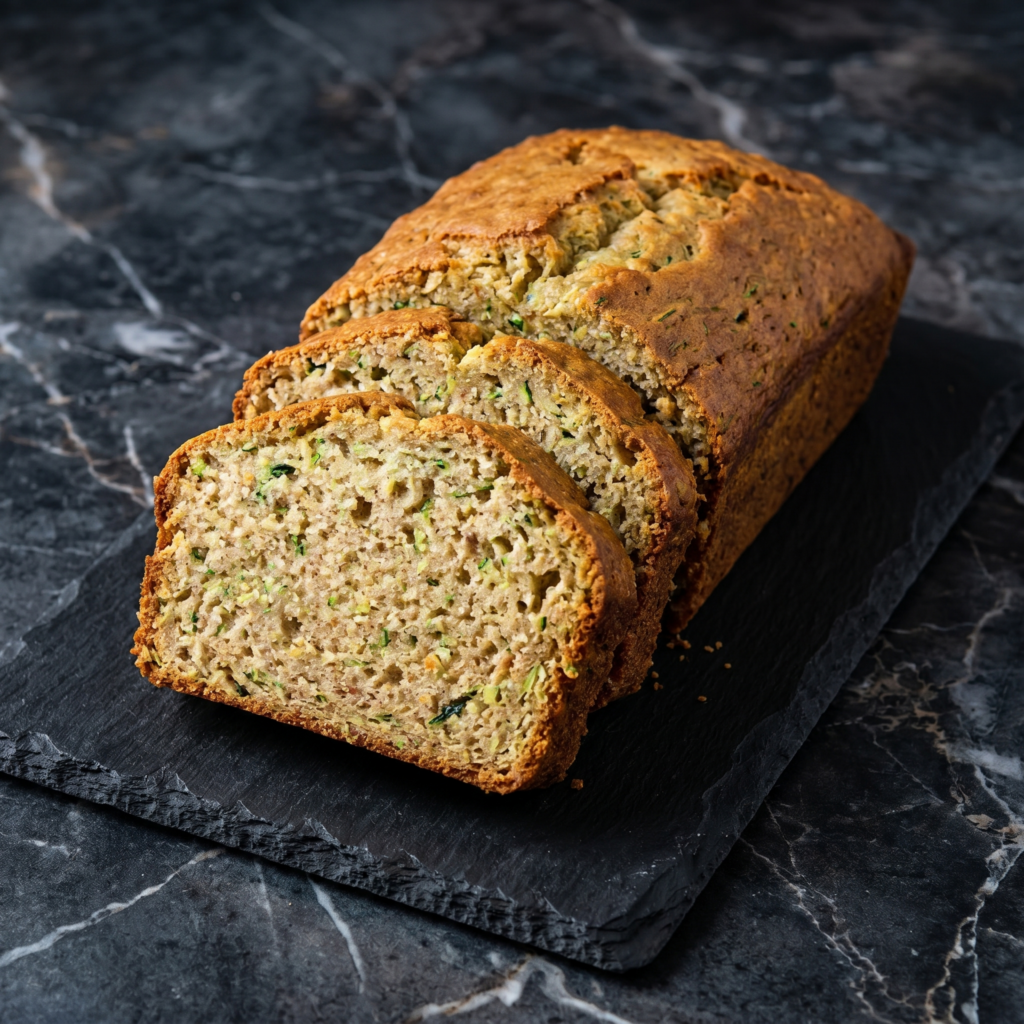
This zucchini bread is so incredibly moist and delicious, no one will ever guess it’s packed with vegetables. The zucchini melts into the batter, leaving behind nothing but incredible tenderness and a subtle sweetness that pairs perfectly with warm spices.
Studded with walnuts and chocolate chips (because everything is better with chocolate), this bread disappears fast. Whether you’re sneaking veggies into breakfast or just looking for the best way to use up that garden bounty, this recipe is about to become your summer staple.
Ingredients
Makes one 9×5 inch loaf (10-12 servings) or two mini loaves.
For the Zucchini Bread:
1 ½ cups (190g) all-purpose flour
½ teaspoon baking powder
½ teaspoon baking soda
½ teaspoon salt
1 ½ teaspoons ground cinnamon
½ teaspoon ground nutmeg
¼ teaspoon ground ginger (optional)
2 large eggs, at room temperature
½ cup (120ml) vegetable oil or melted coconut oil
¾ cup (150g) granulated sugar
½ cup (100g) light brown sugar, packed
2 teaspoons vanilla extract
1 ½ cups (about 1 medium zucchini) grated zucchini, lightly packed
½ cup chopped walnuts or pecans (optional)
½ cup semi-sweet chocolate chips (optional, but highly recommended)
For the Cinnamon Sugar Topping (Optional):
1 tablespoon granulated sugar
¼ teaspoon cinnamon
Step-by-Step Instructions
1. Preheat and Prepare:
Preheat your oven to 325°F (160°C). Grease a 9×5 inch loaf pan thoroughly, then dust with flour, tapping out the excess. Alternatively, line with parchment paper, leaving overhang on the long sides for easy removal.
2. Prepare the Zucchini:
Wash the zucchini and trim off the ends. Using a box grater, grate the zucchini on the large holes. Do not peel it—the green skin adds beautiful flecks of color.
Place the grated zucchini in a clean kitchen towel or several layers of paper towels. Squeeze firmly to remove excess moisture. You should have about 1 cup of squeezed zucchini. This step is crucial for a moist, not soggy, loaf.
3. Combine Dry Ingredients:
In a medium bowl, whisk together the flour, baking powder, baking soda, salt, cinnamon, nutmeg, and ginger (if using). Set aside.
4. Combine Wet Ingredients:
In a large bowl, whisk the eggs until lightly beaten.
Add the oil, granulated sugar, brown sugar, and vanilla extract. Whisk until smooth and well combined.
5. Bring It Together:
Add the dry ingredients to the wet ingredients and fold gently with a spatula until just combined. Do not overmix.
Fold in the squeezed zucchini, and if using, the walnuts and chocolate chips. The batter will be thick and chunky with goodness.
6. Fill the Pan:
Pour the batter into the prepared loaf pan and spread evenly.
If using the cinnamon sugar topping, mix the sugar and cinnamon together and sprinkle over the top.
7. Bake:
Bake for 55-65 minutes, until a toothpick inserted into the center comes out clean or with a few moist crumbs.
If the top is browning too quickly, tent loosely with foil for the last 15-20 minutes.
Let the bread cool in the pan for 15-20 minutes, then transfer to a wire rack to cool completely.
8. Serve:
Slice and serve at room temperature. This bread is delicious on its own, but a pat of butter takes it to another level.
Store zucchini bread tightly wrapped in plastic wrap or in an airtight container at room temperature for up to 4 days. The moisture from the zucchini keeps it incredibly soft. For longer storage, refrigerate for up to a week.
Can You Freeze Zucchini Bread?
Absolutely! Zucchini bread freezes like a dream. Wrap the cooled loaf tightly in plastic wrap, then in foil, and place in a freezer bag. Freeze for up to 3 months. Thaw at room temperature.
Freezing Slices:
Slice the bread and wrap individual slices in plastic wrap, then place in a freezer bag. This way you can grab just one slice at a time. Toast frozen slices directly from the freezer for a quick breakfast.
Make-Ahead for Gift Giving:
Zucchini bread makes wonderful homemade gifts. Bake mini loaves, cool completely, wrap in decorative cellophane, and tie with a ribbon. It’s the perfect way to share your garden bounty!
Freezing Grated Zucchini:
Have more zucchini than you can use? Grate it, squeeze out the excess moisture, and freeze in 1½-cup portions. Thaw and use directly in bread—no need to squeeze again.