Category: baking

  • Bright & Fresh: Oven-Baked Salmon with Avocado Cucumber Salsa and Fluffy Rice

    Bright & Fresh: Oven-Baked Salmon with Avocado Cucumber Salsa and Fluffy Rice

    If you want a healthy, vibrant meal that feels elegant but requires minimal effort, this Oven-Baked Salmon with Avocado Cucumber Salsa and Rice is the perfect choice. Baking the salmon in the oven ensures even cooking, tender texture, and hands-off convenience—no splattering stovetop required.

    Paired with cool, creamy avocado cucumber salsa and fluffy rice, this dish delivers the perfect balance of warm and fresh, rich and bright. Let’s walk through it step by step so you can recreate this flavorful meal at home.


    Why Bake the Salmon?

    Oven-baking salmon is:

    • Easier and less messy than pan-searing
    • Great for cooking multiple fillets at once
    • Consistent and beginner-friendly
    • Perfect for juicy, evenly cooked fish

    The gentle heat keeps the salmon moist while allowing the seasoning to shine.


    Ingredients You’ll Need

    For the Rice:

    • 1½ cups jasmine or long-grain white rice
    • 2 cups water
    • ½ teaspoon salt

    For the Oven-Baked Salmon:

    • 4 salmon fillets (about 6 oz each)
    • 1 tablespoon olive oil
    • Salt and black pepper to taste
    • 1 teaspoon garlic powder
    • 1 teaspoon paprika
    • Juice of ½ lemon

    For the Avocado Cucumber Salsa:

    • 1 ripe avocado, diced
    • 1 cup cucumber, finely chopped
    • 2 tablespoons red onion, finely diced
    • Juice of ½ lemon or lime
    • Salt to taste
    • Optional: chopped fresh cilantro

    Step 1: Preheat the Oven

    Preheat your oven to 400°F (200°C).

    Line a baking sheet with parchment paper or lightly grease a baking dish. This prevents sticking and makes cleanup easy.


    Step 2: Cook the Rice

    Start the rice first so everything finishes at the same time.

    Rinse the rice under cold water until the water runs mostly clear. This removes excess starch and keeps the rice fluffy.

    In a medium saucepan, combine the rinsed rice, water, and salt. Bring to a boil over medium-high heat.

    Once boiling, reduce to low, cover, and simmer for 15 minutes. Do not lift the lid during cooking.

    After 15 minutes, remove from heat and let it sit covered for 5–10 minutes. Fluff gently with a fork before serving.


    Step 3: Prepare the Salmon

    Pat the salmon fillets dry with paper towels. Removing surface moisture helps the seasoning adhere better.

    Place the fillets on the prepared baking sheet.

    Drizzle olive oil evenly over the salmon. Season generously with salt, black pepper, garlic powder, and paprika. Squeeze fresh lemon juice over the top for brightness.

    Let the seasoned salmon sit for about 5–10 minutes while the oven finishes preheating.


    Step 4: Bake the Salmon

    Place the baking sheet in the preheated oven.

    Bake for 12–15 minutes, depending on thickness. A general rule is about 4–6 minutes per half-inch of thickness.

    The salmon is done when:

    • It flakes easily with a fork
    • The center is opaque
    • Internal temperature reaches about 125–130°F (52–54°C) for medium

    Avoid overcooking—salmon can dry out quickly.

    If you prefer slightly golden edges, broil for the last 1–2 minutes.


    Step 5: Prepare the Avocado Cucumber Salsa

    While the salmon bakes, make the salsa.

    In a bowl, gently combine diced avocado, chopped cucumber, and red onion.

    Add lemon or lime juice and a pinch of salt. Toss gently to combine without mashing the avocado.

    If using cilantro, fold it in last.

    Place the salsa in the refrigerator until ready to serve.

    Keeping it chilled enhances the refreshing contrast against the warm salmon.


    Step 6: Rest the Salmon

    Once baked, remove the salmon from the oven and let it rest for about 3–5 minutes.

    Resting allows the juices to redistribute and keeps the fish tender.


    Step 7: Assemble the Dish

    Spoon a generous serving of fluffy rice onto each plate or bowl.

    Place a warm salmon fillet on top.

    Spoon the chilled avocado cucumber salsa over the salmon.

    The cool salsa melts slightly against the warm fish, creating a beautiful temperature contrast.


    Flavor and Texture Balance

    This dish offers:

    • Tender, flaky baked salmon
    • Creamy avocado richness
    • Crisp cucumber crunch
    • Bright citrus notes
    • Soft, comforting rice

    Every bite feels fresh yet satisfying.


    Tips for Perfect Oven-Baked Salmon

    • Use salmon fillets of similar thickness for even cooking.
    • Don’t overcrowd the baking sheet.
    • Line the pan for easy cleanup.
    • Bake just until flaky—avoid drying it out.
    • Let it rest before serving.

    Optional Variations

    Want to customize?

    • Add diced mango to the salsa for sweetness.
    • Sprinkle red pepper flakes for heat.
    • Use coconut rice for a tropical twist.
    • Drizzle honey over salmon before baking for subtle caramelization.
    • Add a dollop of Greek yogurt mixed with lemon for extra creaminess.

    Storage and Meal Prep

    Store leftovers in airtight containers for up to 2 days.

    Keep salsa separate from salmon and rice to maintain freshness.

    Reheat salmon and rice gently in the microwave or oven at low heat. Add fresh salsa just before serving.

    This recipe makes an excellent meal prep option for healthy lunches.


    Why This Recipe Works

    Baking the salmon keeps the cooking simple and hands-off, while the fresh salsa adds brightness and texture. The rice anchors the dish, making it filling and balanced.

    It’s clean, flavorful, and visually beautiful—perfect for both casual dinners and special occasions.


    Oven-Baked Salmon with Avocado Cucumber Salsa and Rice proves that wholesome meals can be exciting and satisfying. With fresh ingredients and simple techniques, you’ll create a dish that feels vibrant, balanced, and restaurant-worthy—right from your own kitchen.

  • Chewy, Chocolatey, and Irresistible: The Ultimate Homemade Revel Bars Recipe

    Chewy, Chocolatey, and Irresistible: The Ultimate Homemade Revel Bars Recipe

    If you love the combination of buttery oats and rich, fudgy chocolate, then Revel Bars are about to become your new favorite dessert.

    These classic layered bars feature a soft oatmeal cookie crust and topping with a thick, gooey chocolate center that melts in your mouth.

    They’re simple enough for beginner bakers yet impressive enough for potlucks, bake sales, and family gatherings. Follow this detailed step-by-step guide to make perfectly chewy, chocolate-packed Revel Bars right in your own kitchen.


    What Are Revel Bars?

    Revel Bars are a vintage dessert bar made with a hearty oatmeal cookie dough that doubles as both the crust and crumb topping.

    The center is filled with a luscious chocolate mixture that bakes into a soft fudge-like layer. The contrast between chewy oats and silky chocolate is what makes these bars so special.


    Ingredients You’ll Need

    For the Oatmeal Cookie Base and Topping:

    • 1 cup (226g) unsalted butter, softened
    • 2 cups (400g) packed brown sugar
    • 2 large eggs
    • 1 teaspoon vanilla extract
    • 2½ cups (310g) all-purpose flour
    • 1 teaspoon baking soda
    • ½ teaspoon salt
    • 3 cups (270g) old-fashioned rolled oats

    For the Chocolate Filling:

    • 1 can (14 oz) sweetened condensed milk
    • 2 cups (340g) semi-sweet chocolate chips
    • 2 tablespoons unsalted butter
    • ½ teaspoon salt
    • 1 teaspoon vanilla extract

    Step 1: Preheat and Prepare the Pan

    Preheat your oven to 350°F (175°C).

    Grease a 9×13-inch baking pan or line it with parchment paper, leaving overhang on the sides for easy removal. Proper preparation ensures your bars release cleanly once cooled.


    Step 2: Cream Butter and Sugar

    In a large mixing bowl, beat the softened butter and brown sugar together until light and fluffy.

    This step incorporates air into the mixture, helping create a soft and chewy texture. Cream for about 2–3 minutes using a hand mixer or stand mixer.


    Step 3: Add Eggs and Vanilla

    Add the eggs one at a time, beating well after each addition. Stir in the vanilla extract.

    The mixture should be smooth and slightly creamy at this stage.


    Step 4: Combine Dry Ingredients

    In a separate bowl, whisk together the flour, baking soda, and salt.

    Gradually add the dry ingredients to the wet mixture, mixing just until combined. Avoid overmixing to keep the bars tender.


    Step 5: Fold in the Oats

    Stir in the old-fashioned rolled oats until evenly distributed.

    The dough will be thick and hearty—this is exactly what you want for that classic chewy texture.


    Step 6: Press the Base Layer

    Press about two-thirds of the oatmeal dough evenly into the bottom of the prepared baking pan.

    Use a spatula or lightly damp fingers to smooth it into an even layer. This will serve as the sturdy base for your chocolate filling.

    Set aside the remaining dough for the topping.


    Step 7: Prepare the Chocolate Filling

    In a medium saucepan over low heat, combine the sweetened condensed milk, chocolate chips, and butter. Stir continuously until the chocolate is fully melted and smooth.

    Remove from heat and stir in the salt and vanilla extract. The filling should be glossy, thick, and rich.


    Step 8: Spread the Chocolate Layer

    Pour the warm chocolate filling evenly over the oatmeal base in the pan. Use a spatula to spread it into an even layer, making sure it reaches all corners.


    Step 9: Add the Oatmeal Topping

    Crumble the remaining oatmeal dough evenly over the chocolate layer. Don’t worry about covering every inch—the chocolate peeking through creates that classic rustic look.


    Step 10: Bake to Perfection

    Bake in the preheated oven for 25–30 minutes, or until the top is lightly golden brown and set.

    The center may still look slightly soft, but it will firm up as it cools.

    Avoid overbaking, as this can dry out the bars.


    Step 11: Cool Completely

    Remove the pan from the oven and allow the bars to cool completely in the pan.

    This step is crucial—cutting them too early can cause the chocolate layer to ooze and fall apart.

    For clean slices, refrigerate the cooled bars for 1–2 hours before cutting.


    Step 12: Slice and Serve

    Use the parchment overhang to lift the bars out of the pan. With a sharp knife, cut into squares or rectangles.

    Wipe the knife clean between cuts for neat edges.

    Serve at room temperature for the perfect balance of chewy oatmeal and fudgy chocolate.


    Tips for Perfect Revel Bars

    1. Use old-fashioned oats, not quick oats, for the best texture.
    2. Line the pan with parchment for easy removal.
    3. Don’t overbake—slightly soft centers ensure a fudgy filling.
    4. Chill before slicing for cleaner cuts.
    5. Add chopped nuts like walnuts or pecans for extra crunch if desired.

    Storage and Freezing

    • Store Revel Bars in an airtight container at room temperature for up to 4 days.
    • Refrigerate for a firmer texture and longer freshness.
    • Freeze individually wrapped bars for up to 3 months. Thaw at room temperature before serving.

    Revel Bars are the perfect combination of nostalgic comfort and indulgent flavor.

    The chewy oatmeal layers contrast beautifully with the rich chocolate center, creating a dessert that feels both homey and decadent. Whether you’re baking for a gathering or simply satisfying a chocolate craving, these bars deliver every time.

    Once you try homemade Revel Bars, you’ll understand why this classic recipe has stood the test of time. With simple ingredients and easy steps, you can create a batch of irresistible bars that disappear almost as quickly as they cool.

  • Swirled with Sweet Spice: The Ultimate Cinnamon Quick Bread You’ll Make Again and Again

    Swirled with Sweet Spice: The Ultimate Cinnamon Quick Bread You’ll Make Again and Again

    There’s something timeless about the warm aroma of cinnamon drifting through your kitchen.

    Cinnamon quick bread is soft, tender, and beautifully swirled with sweet spice—perfect for breakfast, brunch, or an afternoon treat with coffee. Best of all, since it’s a quick bread, there’s no yeast and no rising time required.

    Just mix, swirl, bake, and enjoy. This step-by-step guide will show you exactly how to create a moist, bakery-style cinnamon quick bread with a rich cinnamon sugar ribbon in every slice.


    Ingredients You’ll Need

    For the Bread Batter:

    • 2 cups (250g) all-purpose flour
    • 1 cup (200g) granulated sugar
    • 1 teaspoon baking soda
    • ½ teaspoon baking powder
    • ½ teaspoon salt
    • 1 teaspoon ground cinnamon
    • 2 large eggs
    • 1 cup (240ml) buttermilk (or milk + 1 tablespoon vinegar)
    • ½ cup (120ml) vegetable oil or melted butter
    • 1 teaspoon vanilla extract

    For the Cinnamon Swirl:

    • ⅓ cup (65g) brown sugar
    • 1 tablespoon ground cinnamon
    • 1 tablespoon melted butter

    Optional Glaze:

    • ½ cup powdered sugar
    • 1–2 tablespoons milk
    • ¼ teaspoon vanilla extract

    Step 1: Preheat and Prepare Your Pan

    Preheat your oven to 350°F (175°C). Lightly grease a standard 9×5-inch loaf pan with butter or nonstick spray.

    For easy removal, you can also line the pan with parchment paper, leaving an overhang on the sides.

    Preparing the pan properly ensures your bread releases cleanly after baking.


    Step 2: Mix the Dry Ingredients

    In a large mixing bowl, whisk together the flour, sugar, baking soda, baking powder, salt, and cinnamon.

    Mixing the dry ingredients first ensures even distribution of the leavening agents and spice, giving the bread a consistent texture and flavor throughout.


    Step 3: Combine the Wet Ingredients

    In a separate bowl, whisk together the eggs, buttermilk, oil (or melted butter), and vanilla extract until smooth.

    The buttermilk adds moisture and a slight tang, while the oil keeps the bread soft and tender for days.


    Step 4: Combine Wet and Dry Mixtures

    Pour the wet ingredients into the bowl of dry ingredients. Using a spatula or wooden spoon, gently stir until just combined.

    Be careful not to overmix—this can develop too much gluten and make the bread dense. The batter should be smooth but slightly thick, with no visible streaks of flour.


    Step 5: Prepare the Cinnamon Swirl

    In a small bowl, mix together the brown sugar, ground cinnamon, and melted butter until combined.

    This mixture will create the sweet, gooey ribbon that makes cinnamon quick bread so irresistible.


    Step 6: Layer and Swirl

    Pour half of the batter into the prepared loaf pan and spread evenly. Sprinkle half of the cinnamon swirl mixture over the batter.

    Add the remaining batter on top and gently smooth it out. Sprinkle the rest of the cinnamon mixture over the top layer. Using a knife or skewer, gently swirl the cinnamon sugar into the batter with a few figure-eight motions. Avoid over-swirling—you want distinct ribbons of cinnamon throughout the bread.


    Step 7: Bake to Golden Perfection

    Place the loaf pan in the preheated oven and bake for 50–60 minutes, or until a toothpick inserted into the center comes out clean or with just a few moist crumbs.

    If the top begins to brown too quickly, loosely tent the bread with aluminum foil during the last 10–15 minutes of baking.


    Step 8: Cool Before Removing

    Once baked, remove the bread from the oven and let it cool in the pan for 10–15 minutes.

    Then carefully transfer it to a wire rack to cool completely. Cooling allows the crumb to set and prevents the bread from becoming gummy when sliced.


    Step 9: Add the Optional Glaze

    For an extra touch of sweetness, whisk together powdered sugar, milk, and vanilla extract until smooth.

    Drizzle the glaze over the cooled bread, allowing it to cascade down the sides. Let it set for 10–15 minutes before slicing.


    Step 10: Slice and Serve

    Use a sharp serrated knife to slice the bread. Each slice should reveal beautiful swirls of cinnamon sugar running throughout the soft, tender crumb.

    Serve warm with butter, alongside coffee or tea, or as a comforting afternoon snack.


    Tips for the Best Cinnamon Quick Bread

    1. Don’t overmix the batter – Stir just until combined to keep the bread tender.
    2. Use room-temperature ingredients – They incorporate more smoothly into the batter.
    3. Measure flour correctly – Spoon it into the measuring cup and level it off to avoid dense bread.
    4. Let it cool fully before slicing – This ensures clean slices and proper texture.
    5. Customize it – Add chopped nuts, raisins, or a streusel topping for extra texture.

    Storage and Freezing

    • Store cinnamon quick bread in an airtight container at room temperature for up to 3 days.
    • Refrigerate for up to 5 days if glazed.
    • Freeze slices individually wrapped for up to 3 months. Thaw at room temperature or warm gently in the microwave.

    Cinnamon quick bread is the kind of recipe you’ll turn to again and again. It’s simple enough for beginner bakers yet impressive enough to share with friends and family. The soft crumb, sweet cinnamon swirl, and optional glaze create a comforting loaf that feels both nostalgic and indulgent.

    With minimal prep and everyday ingredients, you can fill your kitchen with the warm scent of cinnamon and enjoy a homemade treat that tastes like it came straight from a bakery. One slice is never enough—and luckily, this recipe makes it easy to bake another loaf whenever the craving strikes.

  • Decadent & Delicate: How to Make Perfect Chocolate Macarons from Scratch

    Decadent & Delicate: How to Make Perfect Chocolate Macarons from Scratch

    Chocolate macarons are the ultimate show-stopping treat—crisp on the outside, chewy in the center, and filled with luscious chocolate ganache.

    These elegant French sandwich cookies may seem intimidating, but with careful technique and attention to detail, you can absolutely master them at home.

    This step-by-step guide will walk you through everything you need to know to create beautiful, bakery-style chocolate macarons with smooth tops, ruffled “feet,” and rich chocolate flavor in every bite.

    Ingredients You’ll Need

    For the Chocolate Macaron Shells:

    • 1 cup (100g) almond flour, finely sifted
    • 1 ¾ cups (200g) powdered sugar
    • 2 tablespoons unsweetened cocoa powder
    • 3 large egg whites (room temperature)
    • ¼ cup (50g) granulated sugar
    • ¼ teaspoon cream of tartar (optional, stabilizes meringue)
    • ½ teaspoon vanilla extract

    For the Chocolate Ganache Filling:

    • ¾ cup (120g) semi-sweet chocolate chips or chopped chocolate
    • ½ cup (120ml) heavy cream
    • 1 tablespoon unsalted butter (optional, for shine)

    Step 1: Prepare Your Workspace

    Macarons require precision. Line two baking sheets with parchment paper or silicone mats.

    If you want evenly sized macarons, place a printed template underneath the parchment as a guide.

    Make sure your mixing bowls and beaters are completely clean and grease-free—any oil can prevent the egg whites from whipping properly.


    Step 2: Sift the Dry Ingredients

    In a large bowl, sift together the almond flour, powdered sugar, and cocoa powder.

    Sifting is crucial to remove lumps and ensure smooth macaron shells. If needed, pulse the mixture briefly in a food processor before sifting to achieve a fine texture.

    Set aside while you prepare the meringue.


    Step 3: Make the Meringue

    In a clean mixing bowl, beat the room-temperature egg whites on medium speed until foamy. Add the cream of tartar if using. Gradually sprinkle in the granulated sugar while continuing to beat.

    Increase the speed to medium-high and whip until stiff, glossy peaks form. The meringue should hold its shape firmly when you lift the beaters. Add vanilla extract and mix briefly to combine.


    Step 4: The Macaronage (Folding Process)

    Add the sifted dry ingredients to the meringue in two additions. Using a silicone spatula, gently fold the mixture by sweeping around the bowl and cutting through the center. Rotate the bowl as you fold.

    This step—called macaronage—is critical. The batter should flow slowly like lava when lifted with a spatula. If it’s too thick, the shells will be lumpy; if overmixed, they will spread too much. Aim for a smooth, glossy batter that forms ribbons and settles back into itself within 10–15 seconds.


    Step 5: Pipe the Macarons

    Transfer the batter to a piping bag fitted with a round tip. Hold the bag vertically and pipe small, even circles onto the prepared baking sheets. Leave space between each macaron.

    Once piped, tap the baking sheets firmly on the counter several times to release air bubbles. Use a toothpick to pop any visible bubbles on the surface.


    Step 6: Rest the Shells

    Allow the piped macarons to rest at room temperature for 30–60 minutes, or until a thin skin forms on the surface. Gently touch the tops—if the batter doesn’t stick to your finger, they are ready to bake.

    This resting period helps develop the iconic “feet” at the base of each macaron.


    Step 7: Bake to Perfection

    Preheat your oven to 300°F (150°C). Bake one tray at a time on the center rack for 15–18 minutes. The macarons are done when they have risen with visible feet and do not wobble when gently touched.

    Remove from the oven and allow them to cool completely before attempting to remove them from the parchment. Trying to lift them too early may cause sticking.


    Step 8: Make the Chocolate Ganache

    While the shells cool, heat the heavy cream in a small saucepan until just simmering (do not boil). Pour the hot cream over the chopped chocolate in a heatproof bowl. Let sit for 1–2 minutes, then stir until smooth and glossy.

    Add butter if desired for extra shine and richness. Let the ganache cool until thick enough to pipe.


    Step 9: Assemble the Macarons

    Match similar-sized shells together. Pipe a small amount of ganache onto the flat side of one shell, then gently press another shell on top to form a sandwich.

    Repeat with remaining shells and filling.


    Step 10: Mature for Best Flavor

    For the best texture and flavor, place the assembled macarons in an airtight container and refrigerate for 24 hours. This resting period allows the filling to soften the shells slightly, creating the perfect chewy center.

    Bring to room temperature before serving.


    Tips for Perfect Chocolate Macarons

    1. Weigh your ingredients for accuracy. Macarons are sensitive to measurement errors.
    2. Avoid humidity—moist air can affect how shells dry and bake.
    3. Don’t skip resting time—it’s essential for developing feet.
    4. Use room-temperature egg whites for better volume.
    5. Practice patience—macarons improve with experience.

    Storage

    • Store filled macarons in the refrigerator for up to 5 days.
    • Freeze for up to 1 month in an airtight container. Thaw in the refrigerator before serving.

    Chocolate macarons are delicate, elegant, and deeply satisfying. With crisp shells, chewy centers, and silky ganache filling, they strike the perfect balance between texture and flavor.

    While they require attention to detail, the reward is a tray of bakery-worthy treats that look as stunning as they taste.

    Once you master these Chocolate Macarons, you’ll feel confident experimenting with flavors, fillings, and colors—turning your kitchen into your very own French pâtisserie.

  • Creamy, Cheesy, and Absolutely Decadent: How to Make Chicken Alfredo Lasagna at Home

    Creamy, Cheesy, and Absolutely Decadent: How to Make Chicken Alfredo Lasagna at Home

    If you love the rich, creamy flavors of Alfredo sauce but also crave the comforting layers of lasagna, then Chicken Alfredo Lasagna is the ultimate dish for you.

    This recipe combines tender, shredded chicken, smooth Alfredo sauce, perfectly cooked pasta, and layers of melty cheese to create a decadent, family-friendly meal.

    Unlike traditional tomato-based lasagna, this version is creamy, garlicky, and irresistibly cheesy, making it perfect for dinner parties, weekend indulgence, or a cozy family meal.

    Follow this step-by-step guide to make a restaurant-quality Chicken Alfredo Lasagna right in your own kitchen.


    Ingredients You’ll Need

    For the Chicken:

    • 2 cups cooked chicken, shredded (rotisserie chicken works perfectly)
    • 1 teaspoon garlic powder
    • Salt and black pepper, to taste

    For the Alfredo Sauce:

    • 4 tablespoons unsalted butter
    • 3 cloves garlic, minced
    • 2 tablespoons all-purpose flour
    • 2 cups whole milk
    • 1 cup heavy cream
    • 1 cup freshly grated Parmesan cheese
    • ½ teaspoon salt
    • ¼ teaspoon black pepper
    • ¼ teaspoon nutmeg (optional, adds warmth)

    For the Lasagna Layers:

    • 9–12 no-boil lasagna noodles (or traditional noodles, cooked)
    • 2 cups shredded mozzarella cheese
    • 1 cup shredded provolone or fontina cheese
    • Fresh parsley, chopped, for garnish

    Step 1: Prepare the Chicken

    If you haven’t done so already, cook and shred your chicken. Rotisserie chicken saves time and adds flavor, but you can also poach or bake chicken breasts.

    Season the shredded chicken with garlic powder, salt, and pepper. Set aside until ready to layer in the lasagna.


    Step 2: Make the Alfredo Sauce

    In a medium saucepan over medium heat, melt butter. Add minced garlic and sauté for 30–60 seconds until fragrant, taking care not to burn it. Sprinkle in flour and whisk continuously for 1–2 minutes to form a roux.

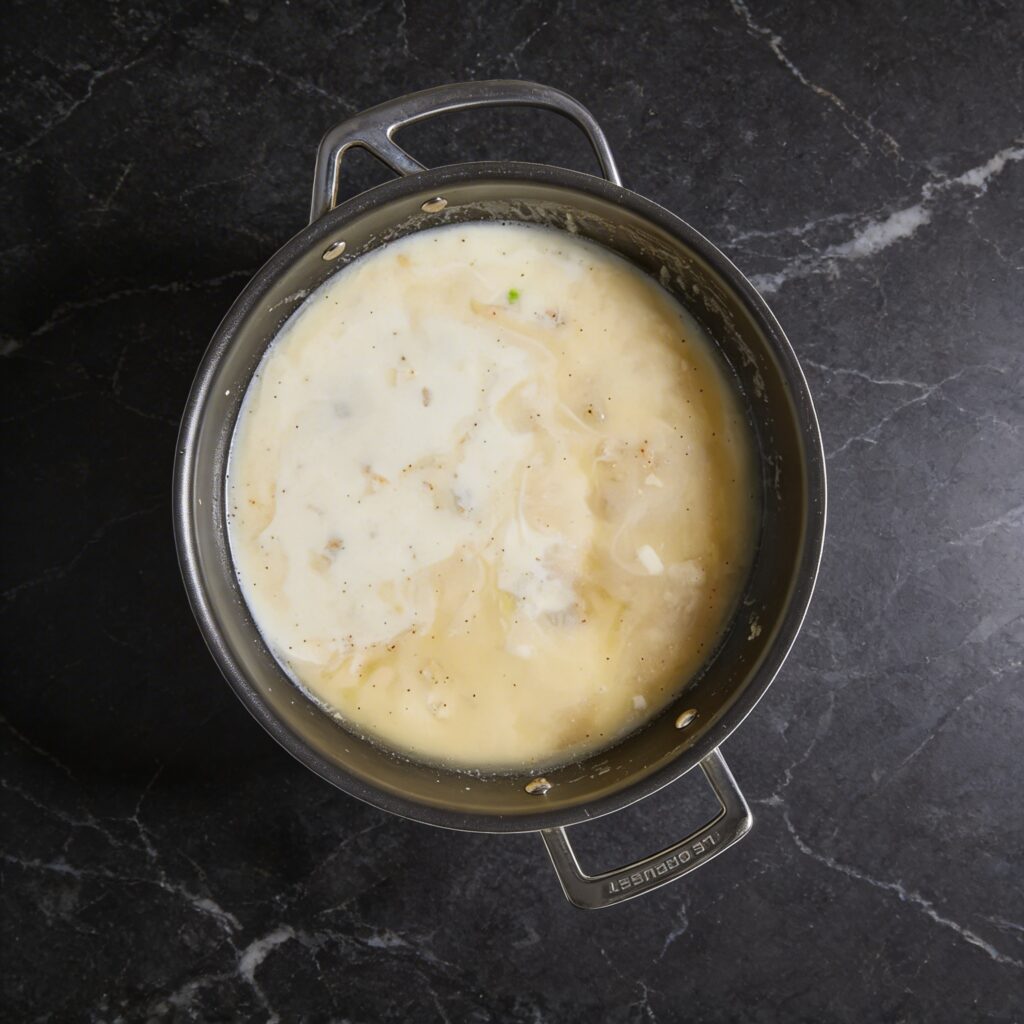
    Slowly pour in milk and heavy cream, whisking constantly to avoid lumps. Bring to a gentle simmer and let the sauce thicken, about 4–5 minutes. Remove from heat and stir in Parmesan cheese, salt, pepper, and optional nutmeg until smooth. Taste and adjust seasoning as needed.


    Step 3: Preheat the Oven

    Preheat your oven to 375°F (190°C).

    Lightly grease a 9×13-inch baking dish with butter or nonstick cooking spray to prevent sticking.


    Step 4: Layer the Lasagna

    Start by spreading a thin layer of Alfredo sauce on the bottom of the baking dish. This prevents the noodles from sticking and adds a creamy base.

    Next, place a layer of lasagna noodles over the sauce, slightly overlapping if necessary. Spread a portion of shredded chicken evenly over the noodles, then drizzle more Alfredo sauce on top. Sprinkle a mix of mozzarella and provolone cheeses evenly.

    Repeat the layers: noodles → chicken → sauce → cheese, until all ingredients are used. The final layer should be noodles topped generously with Alfredo sauce and shredded cheese.


    Step 5: Cover and Bake

    Cover the dish with aluminum foil to prevent the top from browning too quickly. Bake in the preheated oven for 25 minutes.

    Then remove the foil and bake for an additional 15–20 minutes, until the top is golden and bubbly.


    Step 6: Let It Rest

    Remove the lasagna from the oven and allow it to rest for 10–15 minutes before slicing.

    Resting helps the layers set and makes serving easier while keeping the creamy texture intact.


    Step 7: Serve and Garnish

    Slice the lasagna into squares and serve warm.

    Garnish with freshly chopped parsley for color and freshness.

    Pair with a crisp green salad or garlic bread to complete the meal.


    Tips for the Perfect Chicken Alfredo Lasagna

    1. Use freshly grated Parmesan – Pre-grated cheese can be coated with anti-caking agents, affecting how smoothly it melts.
    2. No-boil noodles save time – But ensure your sauce is generous enough to soften them completely.
    3. Shred chicken finely – This helps distribute it evenly and ensures each bite has chicken.
    4. Adjust cheese ratios – Use more mozzarella for stretchiness or add fontina for a richer flavor.
    5. Optional vegetables – Add spinach, mushrooms, or roasted red peppers between layers for extra flavor and texture.

    Storage and Reheating

    • Store leftover lasagna in an airtight container in the refrigerator for up to 3 days.
    • Reheat slices in the microwave or oven at 350°F (175°C) for 10–15 minutes until warmed through.
    • For freezing, wrap portions tightly in foil or plastic wrap and freeze for up to 2 months. Thaw overnight in the refrigerator before reheating.

    This Chicken Alfredo Lasagna is rich, cheesy, and creamy without being overwhelming.

    The tang of the Parmesan, the melt-in-your-mouth noodles, and the tender chicken make it a crowd-pleaser for family dinners, potlucks, or special occasions. Each bite is comfort food perfection, combining creamy sauce, cheesy layers, and hearty protein in a single, satisfying dish.

    With just a little prep and layering, you can enjoy homemade, restaurant-quality lasagna in the comfort of your kitchen. Once you try it, this creamy, cheesy, chicken-filled lasagna will become a staple for special dinners and family favorites alike.

  • The Ultimate Oreo Cheesecake: Creamy, Crunchy, and Impossible to Resist

    The Ultimate Oreo Cheesecake: Creamy, Crunchy, and Impossible to Resist

    If you’re looking for a dessert that guarantees wide eyes and empty plates, Oreo cheesecake is it.

    This indulgent classic combines a buttery Oreo crust, an ultra-creamy vanilla cheesecake filling, and generous chunks of chocolate sandwich cookies in every bite. It’s rich without being heavy, sweet without being overwhelming, and impressive enough for special occasions while still being totally achievable at home.
    Whether you’re baking for a celebration or simply craving something decadent, this step-by-step guide will help you create a smooth, crack-free Oreo cheesecake that looks as good as it tastes.


    Why Oreo Cheesecake Always Wins

    Oreo cheesecake works because it balances textures and flavors beautifully:

    • A crunchy chocolate cookie crust
    • A silky, tangy cream cheese filling
    • Chunks of Oreos that soften slightly as they bake

    The contrast between creamy and crunchy makes every forkful exciting, while the familiar Oreo flavor keeps it comforting and nostalgic.


    Ingredients You’ll Need

    Before you begin, make sure all ingredients are at room temperature for the smoothest batter.

    For the crust:

    • 24 Oreo cookies, finely crushed (filling included)
    • 5 tablespoons unsalted butter, melted

    For the cheesecake filling:

    • 3 packages (8 oz / 225 g each) cream cheese
    • ¾ cup granulated sugar
    • 3 large eggs
    • 1 cup sour cream
    • 1 teaspoon vanilla extract
    • 12 Oreo cookies, roughly chopped

    Optional topping:

    • Whipped cream
    • Extra crushed Oreos

    Step-by-Step Instructions

    Step 1: Prepare the Pan and Oven

    Preheat your oven to 160°C / 325°F. Lightly grease a 9-inch springform pan and wrap the outside with foil to protect against leaks during baking.

    This small step prevents soggy crusts and ensures even baking.


    Step 2: Make the Oreo Crust

    Combine the crushed Oreos and melted butter in a bowl until the mixture resembles wet sand. Press it firmly into the bottom of the prepared pan using the bottom of a glass.

    Bake the crust for 10 minutes, then set aside to cool. Pre-baking helps the crust stay crisp under the creamy filling.


    Step 3: Beat the Cream Cheese

    In a large bowl, beat the cream cheese on low speed until smooth and creamy. Scrape down the sides of the bowl to remove lumps.

    Mixing on low speed prevents excess air, which helps avoid cracks later.


    Step 4: Add Sugar and Eggs

    Add the sugar and mix until just combined. Then add the eggs one at a time, mixing gently after each addition.

    Avoid overmixing—this keeps the cheesecake dense and velvety rather than airy.


    Step 5: Add Sour Cream and Vanilla

    Mix in the sour cream and vanilla extract until smooth. The sour cream adds richness and a subtle tang that balances the sweetness of the Oreos.

    Fold in the chopped Oreos gently, distributing them evenly throughout the batter.


    Step 6: Assemble and Bake

    Pour the cheesecake batter over the cooled crust and smooth the top.

    Place the pan in a large roasting pan and carefully add hot water halfway up the sides to create a water bath. Bake for 55–65 minutes, until the edges are set but the center still jiggles slightly.


    Step 7: Cool Gradually

    Turn off the oven, crack the door open, and let the cheesecake cool inside for 1 hour. This gradual cooling prevents sudden temperature changes that cause cracks.

    Afterward, remove from the oven and let it cool completely at room temperature.


    Step 8: Chill for Best Texture

    Refrigerate the cheesecake for at least 4 hours, preferably overnight. Chilling allows the flavors to develop and the texture to set properly.


    Tips for a Perfect Oreo Cheesecake

    • Room-temperature ingredients ensure smooth batter
    • Low oven temperature prevents overbaking
    • Water bath keeps the cheesecake creamy
    • Patience during chilling makes slicing clean and beautiful

    These details turn a good cheesecake into a great one.


    Serving Suggestions

    Before serving, top the cheesecake with whipped cream and extra crushed Oreos for a bakery-style finish. Use a sharp knife wiped clean between slices for perfect presentation.

    Serve plain, or drizzle with chocolate sauce for extra indulgence.


    Final Thoughts

    This Oreo cheesecake recipe is the kind of dessert that never goes out of style. It’s rich, creamy, and packed with cookies and cream flavor in every bite. Best of all, it’s surprisingly simple when you follow the steps carefully.

    Once you master this recipe, it’s bound to become your go-to cheesecake for birthdays, holidays, and everything in between.

  • Chocolate Sourdough Bread

    Chocolate Sourdough Bread

    Indulge in the rich, comforting flavor of this deeply chocolate sourdough bread. This isn’t a marbled loaf, but a uniformly dark, cocoa-infused bread with a subtle tang from slow fermentation and sweet pockets of melted chocolate chips.

    With a crisp crust and a soft, tender crumb, it’s a luxurious treat perfect for afternoon tea, decadent French toast, or as a special homemade gift for any chocolate lover.

    The Science of a Uniform Chocolate Crumb

    This bread achieves its consistent dark color and rich flavor through complete cocoa integration and enriched dough chemistry. Unlike marbled breads, the cocoa powder is incorporated into the entire dough during mixing, ensuring every bite carries the deep, bitter-sweet notes of chocolate.

    Cocoa powder is hydrophilic (water-loving) and contains starch and fiber, which absorb liquid and can make dough stiff. To counter this, the hydration is slightly increased, and the dough is given a long autolyse to fully hydrate the cocoa and flour.

    The added sugar and oil tenderize the crumb and balance cocoa’s bitterness, while the robust sourdough fermentation cuts through the richness, preventing the loaf from being overly sweet. The chocolate chips are added during the final folds to distribute them evenly without overworking the dough.

    Ingredients

    For the Dough (Makes one loaf):

    • 500g (about 4 cups) bread flour
    • 330g (about 1 ⅓ cups + 2 tbsp) warm water
    • 100g (about ½ cup) active sourdough starter (100% hydration, at peak)
    • 50g (about ½ cup) unsweetened cocoa powder (Dutch-process preferred)
    • 60g (about ⅓ cup) brown sugar or granulated sugar
    • 30g (about 2 tbsp) neutral oil (vegetable, sunflower) or melted butter
    • 10g (2 tsp) fine sea salt
    • 150g (about 1 cup) dark chocolate chips or chopped chocolate

    For Dusting & Topping (Optional):

    • Rice flour, for dusting the banneton
    • Rolled oats or pearl sugar, for topping before baking

    Instructions

    1. Mix the Dough & Autolyse: In a large bowl, whisk together the warm water, active starter, and cocoa powder until smooth and no lumps remain. Add the bread flour and brown sugar.

    Mix with a spatula or your hands until a shaggy dough forms with no dry flour. Cover and let rest (autolyse) for 1 hour. This allows the cocoa and flour to fully hydrate.
    2. Add Salt & Oil: After the autolyse, add the salt and oil to the dough. Mix thoroughly, squeezing and folding the dough in the bowl until the salt and oil are fully incorporated. The dough will be sticky and dark.
    3. Bulk Fermentation with Folds: Cover the bowl and let the dough rise at room temperature (70-75°F / 21-24°C) for 5-6 hours. During the first 2.5 hours, perform 4-5 sets of stretch and folds, spaced 30 minutes apart. After the third set of folds, gently incorporate the chocolate chips by sprinkling them over the dough and folding them in.

    Complete the remaining folds. Let the dough rest undisturbed for the remainder of bulk fermentation. It should look puffy, have bubbles, and increase by about 50-60%.

    4. Shape & Cold Proof: Gently turn the dough out onto a lightly floured surface. Shape it into a tight round (boule) or oval (batard), being careful not to pop the visible bubbles. Place it seam-side up in a well-floured banneton or proofing basket. Cover and place in the refrigerator for 12-16 hours (overnight) for a cold proof.

    5. Bake: Preheat a Dutch oven or combo cooker in your oven at 425°F (220°C) for 1 hour. Carefully remove the cold dough from the fridge and invert it onto a piece of parchment paper. If desired, mist the top lightly with water and sprinkle with rolled oats or pearl sugar.

    Score the top with a sharp lame or razor—a simple “X” or single slash works well. Transfer the dough (on the parchment) into the preheated Dutch oven, cover, and bake for 30 minutes. Remove the lid and bake for another 20-25 minutes until the crust is firm and sounds hollow when tapped.

    6. Cool Completely: Transfer the loaf to a wire rack and let it cool completely for at least 4 hours before slicing. This is crucial for the crumb to set and the chocolate to solidify, ensuring clean slices.

    Pro-Tips for a Perfect Chocolate Loaf

    • Use Dutch-Process Cocoa: It has a richer, less acidic flavor than natural cocoa and gives a darker color.
    • Ensure a Smooth Cocoa Paste: Whisking the cocoa with water and starter first prevents dry lumps in your dough.
    • Higher Hydration: Cocoa absorbs a lot of water. The dough will be stickier than a plain loaf—avoid adding too much extra flour.
    • Add Chips During Folds: Incorporating chocolate chips during bulk fermentation prevents them from sinking to the bottom during baking.
    • Cold Proof for Flavor: The overnight rest deepens the chocolate flavor and makes the dough easier to handle.
    • Lower Baking Temperature: Sugar and chocolate can cause quicker browning. Baking at 425°F instead of the typical 450°F prevents burning.
    • Wait to Slice: The molten chocolate will smear if you cut the bread warm.
    • Storage: Store in a paper bag for 1-2 days to keep the crust crisp. For longer storage, wrap in plastic and freeze for up to 2 months.

    This Chocolate Sourdough Bread is a deeply satisfying, decadent twist on a classic loaf.

  • Puff Pastry Nutella Twists

    Puff Pastry Nutella Twists

    Transform store-bought puff pastry and Nutella into elegant, bakery-worthy pastries in under 20 minutes. These Nutella Twists feature layers of buttery, flaky pastry twisted around a rich ribbon of chocolate-hazelnut spread. They’re deceptively simple to make yet look impressively professional—perfect for a quick breakfast treat, an after-school snack, or a last-minute dessert that delights guests of all ages.

    The Science of Puff & Caramelization

    The magic of these twists lies in the pre-existing architecture of puff pastry. Commercial puff pastry contains hundreds of alternating layers of dough and butter.

    When heated, the water in both the dough and butter vaporizes into steam, pushing the layers apart and creating that signature flaky rise. By cutting and twisting the pastry, you create more exposed edges, which allows for maximum caramelization and crispness.

    The Nutella filling serves a dual purpose: its sugar content caramelizes slightly during baking, adding flavor, while its fat content helps keep the interior layers tender. The twists’ shape also ensures even heat distribution, so every bite has the perfect ratio of crisp exterior to soft, chocolatey interior.

    Ingredients

    For the Twists:

    • 1 sheet (about 8 oz / 225g) frozen puff pastry, thawed but cold
    • ½ cup (150g) Nutella or chocolate-hazelnut spread
    • 1 tablespoon all-purpose flour, for dusting

    For Finishing (Optional):

    • 1 large egg, beaten (for egg wash)
    • 2 tablespoons coarse sugar or powdered sugar
    • ¼ cup (30g) chopped hazelnuts

    Instructions

    1. Prepare Pastry Sheet: Preheat oven to 400°F (200°C). Line a baking sheet with parchment paper. On a lightly floured surface, unfold the thawed puff pastry sheet. Roll it out gently with a rolling pin to smooth any seams and create an even rectangle, about 9×12 inches.

    2. Spread Nutella: Spread the Nutella evenly over the entire surface of the pastry, leaving a ½-inch border along one of the longer edges (this will help seal the twist).

    3. Fold & Cut: Fold the pastry in half lengthwise, bringing the uncovered edge over to meet the opposite edge, pressing gently to seal. You now have a long, narrow rectangle of two pastry layers with Nutella in between. Using a sharp knife or pizza cutter, cut the folded pastry crosswise into 12-14 even strips, each about ¾-inch wide.

    4. Twist & Shape: Hold one strip at both ends. Twist it 3-4 times to create a spiral pattern, then place it on the prepared baking sheet, pressing both ends down lightly to secure. Repeat with all strips, spacing them about 1 inch apart.

    5. Bake: If desired, brush the twists lightly with beaten egg and sprinkle with coarse sugar or chopped hazelnuts. Bake for 13-16 minutes, until puffed, golden brown, and crisp. The Nutella may bubble out slightly—this is normal.

    6. Cool & Serve: Let the twists cool on the baking sheet for 5 minutes before transferring to a wire rack. Dust with powdered sugar if desired. Serve warm or at room temperature. They are best enjoyed the day they are made.

    Pro-Tips for Perfect Twists

    • Keep Pastry Cold: Work quickly to prevent the butter in the pastry from softening, which can inhibit the puff.
    • Don’t Overfill: Too much Nutella will leak out during baking and can cause the pastry to become soggy. A thin, even layer is key.
    • Seal the Edge Well: A good seal on the open edge prevents the Nutella from oozing out the side during twisting.
    • Sharp Cuts: Use a sharp knife or pizza cutter for clean cuts that don’t compress the layers.
    • Twist Gently: Hold the ends and let the middle twist naturally; over-twisting can tear the dough.
    • Space Them Out: The twists will expand as they bake. Giving them room ensures even browning.
    • Watch Closely: Ovens vary. Bake until deeply golden for the crispiest result.
    • Customize: Add a sprinkle of sea salt before baking, or swap Nutella for Biscoff spread, jam, or peanut butter.

    These Puff Pastry Nutella Twists prove that impressive baking can be wonderfully simple.

  • Viennese Apple Strudel

    Viennese Apple Strudel

    Experience the magic of traditional European baking with this authentic Apple Strudel. This recipe guides you through creating a remarkably thin, elastic dough that bakes into countless delicate, buttery layers, wrapped around a fragrant filling of spiced apples, raisins, and toasted breadcrumbs. While the technique requires patience, the result—a warm, flaky pastry with a perfectly balanced sweet-tart filling—is a showstopping dessert worth mastering.

    The Science of Stretchable Dough & Crisp Layers

    The hallmark of a true strudel is its paper-thin, translucent dough, achieved through gluten development and careful stretching. The dough is made with high-protein flour and a touch of oil, then rested extensively to relax the gluten just enough to be stretched without tearing.

    When stretched properly, the dough becomes so thin you can read through it, creating dozens of layers when folded around the filling. The filling includes toasted breadcrumbs, which serve a crucial purpose: they absorb excess moisture released by the apples during baking, preventing a soggy bottom and keeping the pastry crisp.

    Baking at a high temperature causes the water in the butter-brushed layers to vaporize rapidly, creating steam that separates the dough into the signature flaky, shattering texture.

    Ingredients

    For the Strudel Dough:

    • 2 cups (250g) all-purpose flour, plus more for dusting
    • ¼ teaspoon salt
    • 1 large egg, room temperature
    • 2 tablespoons (30ml) neutral oil (like vegetable or sunflower)
    • ⅔ cup (160ml) lukewarm water
    • 2 tablespoons (28g) unsalted butter, melted (for brushing)

    For the Apple Filling:

    • 2 lbs (about 900g) tart baking apples (Granny Smith, Braeburn), peeled, cored, and thinly sliced
    • ⅓ cup (65g) granulated sugar
    • ¼ cup (30g) raisins or dried currants
    • Zest of 1 lemon
    • 1 tablespoon lemon juice
    • 1 teaspoon ground cinnamon
    • ¼ teaspoon ground nutmeg
    • Pinch of salt
    • ½ cup (50g) dry breadcrumbs or ground nuts (almonds, walnuts), toasted
    • 2 tablespoons (28g) unsalted butter, melted (for the filling)

    For Assembly & Serving:

    • Powdered sugar, for dusting
    • Vanilla sauce (Vanillesoße), whipped cream, or vanilla ice cream

    Instructions

    1. Make & Rest the Dough: In a large bowl, mix flour and salt. Make a well and add the egg, oil, and lukewarm water. Mix with a wooden spoon until a shaggy dough forms, then knead on a lightly floured surface for 8-10 minutes until smooth and elastic. Form into a ball, brush lightly with oil, cover with a warm bowl, and let rest at room temperature for 1-2 hours. This rest is essential for gluten relaxation.

    2. Prepare the Filling: While the dough rests, combine sliced apples, sugar, raisins, lemon zest, lemon juice, cinnamon, nutmeg, and salt in a large bowl. Toss to coat and let macerate for 30 minutes. In a small skillet, toast the breadcrumbs or ground nuts in 1 tablespoon of the melted butter until golden and fragrant. Set aside.

    3. Stretch the Dough: Lay a large, clean tablecloth or sheet on a table and dust lightly with flour. Place the rested dough in the center. Using a rolling pin, roll it out as much as possible.

    Then, using the backs of your hands (knuckles up), gently stretch the dough from the center outward, working your way around the table. Aim for a rectangle so thin it’s nearly translucent, about 24×18 inches. Trim any thick edges with scissors.

    4. Assemble the Strudel: Brush the entire stretched dough with some of the melted butter. Sprinkle the toasted breadcrumbs evenly over the surface, leaving a 2-inch border. Drain any excess liquid from the apple mixture, then spread it evenly over the breadcrumbs.

    Using the cloth to help, lift the edge of the dough and roll it over the filling, tucking in the sides as you go, to form a tight log. Carefully transfer the strudel, seam-side down, to a parchment-lined baking sheet. Brush the entire surface with remaining melted butter.

    5. Bake: Preheat oven to 375°F (190°C). Bake the strudel for 40-45 minutes, until the pastry is deep golden brown and crisp. If it browns too quickly, tent loosely with foil.

    6. Cool & Serve: Let the strudel cool on the baking sheet for at least 30 minutes to allow the filling to set. Dust generously with powdered sugar. Slice with a serrated knife and serve warm or at room temperature with vanilla sauce, whipped cream, or ice cream.

    Pro-Tips for Authentic Strudel

    • Patience with the Dough: The long rest and gentle stretching are non-negotiable for the proper texture.
    • Stretch from Beneath: Use the backs of your hands to avoid poking holes in the delicate dough.
    • Keep Filling Dry: Draining the macerated apples prevents a soggy strudel. The breadcrumbs are your insurance.
    • Use a Cloth: A floured cotton tablecloth is traditional and makes stretching and rolling infinitely easier than on a hard counter.
    • Embrace Imperfections: A few small tears in the dough are normal and won’t affect the final bake.
    • High Heat is Key: A hot oven ensures the layers puff and crisp before the apples overcook.
    • Cool Before Slicing: Cutting too soon releases steam and makes the filling run out.
    • Make Ahead: The assembled, unbaked strudel can be refrigerated for a few hours before baking. Brush with butter just before it goes in the oven.

    This Classic Apple Strudel is a rewarding project that delivers unforgettable results.

  • Classic Beef Wellington Recipe: The Ultimate Step-by-Step Guide for Perfect Results

    Classic Beef Wellington Recipe: The Ultimate Step-by-Step Guide for Perfect Results

    If you’ve ever wanted to make a restaurant-quality Beef Wellington, this step-by-step recipe shows you exactly how to create a perfectly cooked beef tenderloin wrapped in mushroom duxelles, prosciutto, and golden puff pastry.

    This classic Beef Wellington recipe delivers a juicy center, crisp pastry exterior, and rich savory flavor that makes it ideal for holidays, dinner parties, or special occasions.

    This easy Beef Wellington guide simplifies every step so even home cooks can confidently prepare this elegant centerpiece.

    Why This Is the Best Beef Wellington Recipe

    Beef Wellington is famous for its luxurious flavor and impressive presentation. When done correctly, the contrast between flaky pastry and tender beef creates one of the most iconic dishes in classic French and British cuisine.

    Reasons to love this recipe:

    • Step-by-step instructions for beginners
    • Perfect medium-rare beef every time
    • Crispy puff pastry that doesn’t get soggy
    • Ideal for holidays, Christmas, and celebrations
    • Restaurant-style gourmet dinner at home

    Ingredients for Beef Wellington

    Using high-quality ingredients ensures the best flavor and texture.

    Main Ingredients

    • 2–3 lb beef tenderloin (center-cut)
    • Salt and freshly ground black pepper
    • 2 tablespoons olive oil
    • 2 tablespoons Dijon mustard

    Mushroom Duxelles

    • 1 lb mushrooms, finely chopped
    • 2 tablespoons butter
    • 2 cloves garlic, minced
    • 2 shallots, finely chopped
    • Salt and pepper to taste
    • Fresh thyme leaves

    Assembly

    • 8–10 slices prosciutto
    • 1 sheet puff pastry, thawed
    • 1 egg, beaten (egg wash)

    How to Make Beef Wellington (Step-by-Step)

    Step 1: Prepare the Beef Tenderloin

    Pat the beef dry with paper towels and season generously with salt and pepper.

    Heat olive oil in a large skillet over high heat and sear the beef on all sides until browned, about 1–2 minutes per side. This locks in flavor and creates a rich crust.

    Remove from heat and brush the tenderloin with Dijon mustard while still warm. Let cool completely before assembling.

    Step 2: Make the Mushroom Duxelles

    In the same pan, melt butter over medium heat. Add chopped mushrooms, shallots, garlic, thyme, salt, and pepper.

    Cook until the mixture becomes dry and paste-like, about 10–15 minutes. Removing excess moisture is essential to prevent soggy pastry.

    Transfer to a plate and allow the mixture to cool fully.

    Step 3: Wrap with Prosciutto

    Lay plastic wrap on your work surface and arrange prosciutto slices slightly overlapping to form a rectangle large enough to wrap the beef. Spread the cooled mushroom duxelles evenly over the prosciutto.

    Place the seared tenderloin on top and use the plastic wrap to roll everything tightly into a cylinder. Twist the ends to secure and refrigerate for 20–30 minutes to help maintain shape.

    Step 4: Wrap in Puff Pastry

    Roll out the puff pastry on a lightly floured surface until large enough to enclose the beef completely. Remove the beef from the plastic wrap and place it in the center of the pastry.

    Fold the pastry over the beef, sealing the edges tightly. Trim any excess pastry and place the Wellington seam-side down on a baking sheet lined with parchment paper.

    Brush the entire surface with egg wash for a glossy golden finish.

    Step 5: Chill Before Baking

    Refrigerate the assembled Wellington for another 15–20 minutes. Chilling helps the pastry stay crisp and prevents shrinking during baking.

    Step 6: Bake to Perfection

    Preheat the oven to 400°F (200°C). Bake the Beef Wellington for 40–45 minutes, or until the pastry is deep golden brown and an internal thermometer reads:

    • 125°F for rare
    • 135°F for medium-rare
    • 145°F for medium

    Let the Wellington rest for at least 10 minutes before slicing to retain juices.

    Pro Tips for Perfect Beef Wellington

    • Use center-cut beef tenderloin for even cooking.
    • Ensure the mushroom duxelles is dry to keep pastry crisp.
    • Chill between wrapping steps for better structure.
    • Use a meat thermometer for precise doneness.
    • Rest the meat before slicing to prevent juice loss.

    Serving Suggestions

    Beef Wellington pairs beautifully with classic steakhouse sides, including:

    • Garlic mashed potatoes
    • Roasted asparagus or green beans
    • Red wine reduction sauce
    • Creamy mushroom sauce
    • Buttered carrots or roasted root vegetables

    These sides balance the richness of the pastry and tender beef.

    Make-Ahead and Storage Tips

    You can assemble Beef Wellington up to 24 hours ahead and refrigerate until ready to bake. This makes it an excellent option for holiday meal preparation.

    Leftovers can be stored in the refrigerator for up to 3 days and reheated gently in the oven at 325°F to maintain pastry texture.

    Frequently Asked Questions

    What cut of beef is best for Beef Wellington?
    Beef tenderloin is ideal because of its tenderness and uniform shape, ensuring even cooking.

    How do I keep the pastry from getting soggy?
    Cook the mushroom mixture until dry, chill the wrapped beef before baking, and avoid excess moisture.

    Can I make individual Beef Wellingtons?
    Yes, smaller individual portions cook faster and are perfect for elegant dinner parties.

    Final Thoughts

    This classic Beef Wellington recipe is one of the most impressive dishes you can prepare at home.

    With tender beef, flavorful mushroom duxelles, savory prosciutto, and buttery puff pastry, it delivers a gourmet dining experience that rivals fine restaurants.

    By following these step-by-step Beef Wellington instructions, you can confidently create a stunning holiday centerpiece or celebratory meal that will leave guests truly impressed.