Category: baking

  • Sugar Cookie Icing (The One That Sets Perfectly Shiny)

    Sugar Cookie Icing (The One That Sets Perfectly Shiny)

    Let’s talk about cookie icing. The kind that goes on smooth, stays exactly where you put it, and dries to a beautiful, glossy, crack-free finish. The kind that makes your decorated cookies look like they came from a fancy bakery instead of your kitchen table. This is that icing. It’s made with just a few simple ingredients, comes together in minutes, and is endlessly customizable.

    Outline, flood, drizzle, dunk—whatever your cookie decorating heart desires, this icing delivers. And the best part? It sets hard enough to stack but stays soft enough to bite into without shattering. Christmas cookies, birthday treats, or just because—let’s make some magic.

    The Secret to Perfect Consistency (Flood vs. Outline)

    The magic of sugar cookie icing is all about consistency. Too thick, and it won’t smooth out; too thin, and it’ll run right off your cookies. The secret is understanding the two main consistencies: outline consistency (thicker, like toothpaste) for piping borders and details, and flood consistency (thinner, like honey) for filling in large areas.

    You start with a thick base icing, then thin it down gradually with tiny amounts of water until it reaches that perfect flow. The other secret? Patience between layers. Let your outlines dry for 15-20 minutes before flooding, and let flooded cookies dry completely (4-6 hours or overnight) before adding details or stacking. A little patience gives you that flawless, professional finish.

    Ingredients

    For the Sugar Cookie Icing (Makes about 2 cups):

    • 4 cups (480g) powdered sugar, sifted
    • 3 tablespoons meringue powder (NOT protein powder—this is key)
    • 5-6 tablespoons warm water, divided
    • ½ teaspoon light corn syrup (optional, adds extra shine)
    • ½ teaspoon vanilla extract or almond extract (optional, for flavor)
    • Gel food coloring (liquid food coloring will thin the icing too much)

    Instructions

    1. Combine Dry Ingredients: In a large bowl (or the bowl of a stand mixer fitted with the paddle attachment), combine the sifted powdered sugar and meringue powder. Whisk together to break up any lumps.

    2. Add Water and Mix: Add 5 tablespoons of warm water and the corn syrup (if using). Beat on low speed until combined, then increase to medium speed and beat for 3-4 minutes until the icing is thick, smooth, and glossy. It should look like thick, spreadable marshmallow fluff.

    3. Check Consistency (For Outlining): Lift the beater or a spoon—the icing should fall back into the bowl in a thick ribbon and disappear back into the surface within 10-15 seconds. This is your base outline consistency. If it’s too thick, add water ½ teaspoon at a time.

    4. Add Flavor (Optional): Stir in vanilla or almond extract if desired. Be aware that extract will thin the icing slightly.

    5. Divide for Colors: If using multiple colors, divide the icing into separate bowls. Leave one bowl white, and color the others with gel food coloring. Gel is essential—liquid coloring will ruin your consistency.

    6. Adjust for Flood Consistency: For the icing you’ll use to fill in (flood), you need a thinner consistency. Take a portion of your outline icing and add water ¼ teaspoon at a time, stirring gently.

    Test by lifting a spoon—the icing should fall back into the bowl and the ribbon should disappear into the surface within 5-8 seconds. It should be thin enough to smooth itself out, but not so thin that it runs off the cookie.

    7. Transfer to Piping Bags: Fit piping bags with small round tips (or just snip a tiny corner off a disposable bag). Fill with your outline and flood icings. Keep unused icing covered with a damp paper towel to prevent drying.

    8. Outline Your Cookies: Pipe a border around the edge of each cookie using your outline consistency icing. This “dam” will hold the flood icing inside. Let outlines dry for 15-20 minutes until a light crust forms.

    9. Flood the Cookies: Using your flood consistency icing, fill in the area inside the outline. Use a toothpick or scribe tool to guide the icing into corners and pop any air bubbles. Let the icing settle and smooth itself.

    10. Add Details: While the flood icing is still wet, you can add additional colors or details for a layered effect. For details on top of dried icing, wait 4-6 hours (or overnight) until completely set.

    11. Let Dry Completely: Allow decorated cookies to dry uncovered at room temperature for at least 4-6 hours, preferably overnight. The icing should be completely hard to the touch and shiny.

    12. Store: Once dry, store cookies in an airtight container at room temperature for up to 2 weeks. Do not refrigerate—humidity will ruin the shine.

    Pro-Tips for Icing Greatness

    • Meringue Powder is Non-Negotiable: It stabilizes the icing, helps it dry hard, and gives that beautiful matte-shiny finish. Don’t substitute.
    • Gel Food Coloring Only: Liquid coloring adds too much moisture and ruins your carefully adjusted consistency.
    • Cover Unused Icing: This icing dries out fast. Keep bowls covered with a damp paper towel or plastic wrap at all times.
    • Practice on Parchment: If you’re new to decorating, practice outlining and flooding on a piece of parchment paper before touching your cookies.
    • Patience is Everything: Let outlines dry before flooding. Let flooded cookies dry before stacking. Rushing leads to smudges and sadness.
  • Banana Chocolate Chip Bread (The One with Melty Chocolate in Every Bite)

    Banana Chocolate Chip Bread (The One with Melty Chocolate in Every Bite)

    Let’s be honest: banana bread is great. But banana bread with chocolate chips? That’s greatness. This is the loaf you make when you want something comforting, something familiar, but also something that feels a little bit like a treat.

    It’s impossibly moist—thanks to those spotty, overripe bananas—and absolutely studded with melty chocolate chips in every single bite. The chocolate isn’t an afterthought; it’s a feature. It melts into little pools of richness throughout the tender, banana-y crumb.

    Breakfast with a pat of butter? Perfect. Afternoon snack with a glass of milk? Divine. Late-night slice standing in front of the fridge? No judgment here. This is the banana bread that disappears fast.

    The Secret to the Moistest Banana Bread (Every Single Time)

    The secret to outrageously moist banana bread is simple: use really, really ripe bananas. We’re talking bananas that are practically black, the ones you might normally toss. Those spotty, overripe bananas are sweeter and softer than their yellow counterparts, and they break down completely in the batter, infusing every crumb with moisture and flavor.

    The other secret? Don’t overmix. Once the flour goes in, mix just until combined. A few lumps are fine. Overmixing develops gluten, which can make your bread tough instead of tender. And finally, reserve a handful of chocolate chips to sprinkle on top before baking. It makes the loaf look gorgeous and guarantees those melty chocolate pockets on the very first slice.

    Ingredients

    For the Banana Chocolate Chip Bread:

    • 1 ¾ cups (220g) all-purpose flour
    • 1 teaspoon baking soda
    • ½ teaspoon salt
    • ½ cup (113g) unsalted butter, softened
    • ¾ cup (150g) packed brown sugar (light or dark)
    • 2 large eggs, at room temperature
    • 1 teaspoon vanilla extract
    • 1 ½ cups (340g) mashed very ripe bananas (about 3-4 large bananas)
    • ¼ cup (60ml) sour cream or Greek yogurt, at room temperature
    • 1 ½ cups (255g) semi-sweet chocolate chips, divided

    Instructions

    1. Preheat and Prep: Preheat your oven to 350°F (175°C). Grease a 9×5-inch loaf pan and line it with a strip of parchment paper, leaving overhang on the long sides for easy removal .

    2. Mash the Bananas: In a medium bowl, mash your very ripe bananas with a fork until mostly smooth with a few small lumps remaining. Measure out 1 ½ cups (340g) and set aside. The riper the bananas, the better the flavor .

    3. Combine Dry Ingredients: In a separate medium bowl, whisk together the flour, baking soda, and salt. Set aside .

    4. Cream Butter and Sugar: In a large bowl using a hand mixer or stand mixer with the paddle attachment, beat the softened butter and brown sugar together on medium speed until light and fluffy, about 2-3 minutes .

    5. Add Eggs, Vanilla, and Bananas: Add the eggs one at a time, beating well after each addition. Beat in the vanilla extract. Add the mashed bananas and sour cream (or yogurt) and mix until combined. The mixture may look slightly curdled—that’s perfectly normal .

    6. Add Dry Ingredients: Gradually add the dry ingredients to the wet mixture, mixing on low speed just until no streaks of flour remain. Do not overmix. The batter will be thick and lovely .

    7. Fold in Chocolate Chips: Gently fold in 1 ¼ cups of the chocolate chips with a spatula, reserving about ¼ cup for topping .
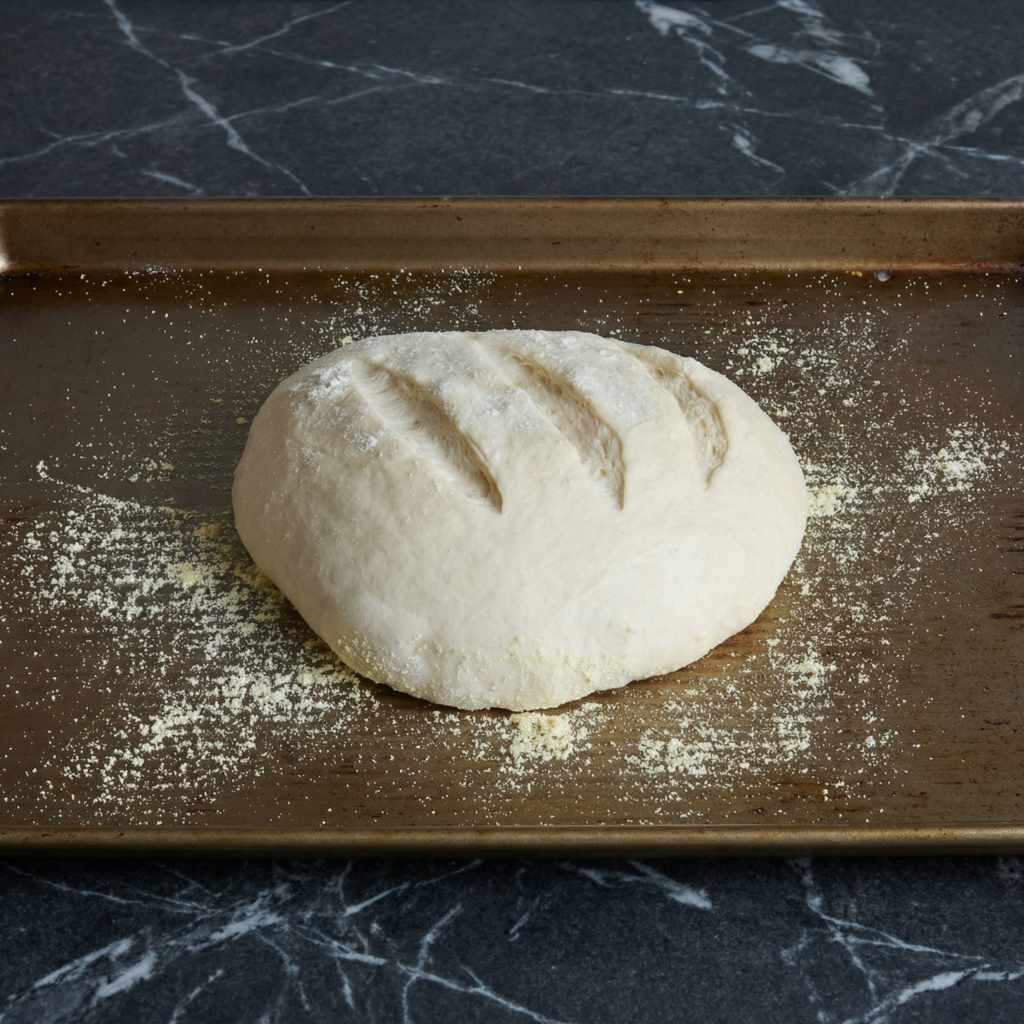
    8. Transfer to Pan: Pour the batter into the prepared loaf pan and spread it evenly. Sprinkle the reserved chocolate chips over the top .

    9. Bake: Bake for 55-65 minutes, until a toothpick inserted into the center comes out clean or with a few moist crumbs (avoid hitting a chocolate chip for an accurate test). If the top is browning too quickly, tent loosely with foil for the last 15-20 minutes .

    10. Cool in Pan: Let the bread cool in the pan for 15-20 minutes. Then, using the parchment overhang, lift it out and transfer to a wire rack to cool completely .

    11. Slice and Serve: Once completely cool, slice and serve. Extra delicious warm with a pat of butter .

    12. Store: Store in an airtight container at room temperature for up to 4 days, or refrigerate for up to a week. It also freezes beautifully for up to 3 months .

    Pro-Tips for Banana Bread Greatness

    • Use Very Ripe Bananas: The blacker, the better. Super-ripe bananas are sweeter, more flavorful, and mash more easily into the batter .
    • Reserve Chips for Topping: Sprinkling chocolate chips on top before baking makes the loaf look gorgeous and guarantees melty chocolate on the first slice .
    • Don’t Overmix: Mix just until the flour disappears. Overmixing = tough bread .
    • Room Temperature Ingredients: Butter, eggs, and sour cream should be at room temperature for a smooth, evenly mixed batter .
    • Test for Doneness Carefully: If you hit a chocolate chip with your toothpick, it will come out wet. Test in a few spots to be sure .
  • Creamy, Cheesy, Classic: How to Make Old-Fashioned Macaroni and Cheese

    Creamy, Cheesy, Classic: How to Make Old-Fashioned Macaroni and Cheese

    Few comfort foods are as universally beloved as old-fashioned macaroni and cheese.

    With tender pasta enveloped in a rich, creamy cheese sauce and a golden, slightly crunchy topping, it’s the kind of dish that evokes childhood memories and satisfies every craving for warmth and indulgence.

    While boxed mac and cheese has its place, nothing beats the real deal—made from scratch with love, simple ingredients, and a focus on creamy, cheesy perfection.

    Here’s your ultimate guide to making old-fashioned macaroni and cheese, step by step.


    Ingredients You’ll Need

    Gather your ingredients ahead of time for a smooth cooking process.

    For the pasta:

    • 12 oz elbow macaroni (or any small pasta shape)
    • 1 teaspoon salt (for the boiling water)

    For the cheese sauce:

    • 4 tablespoons unsalted butter
    • 4 tablespoons all-purpose flour
    • 3 cups milk (whole milk preferred)
    • 1 teaspoon Dijon mustard (optional, for depth)
    • ½ teaspoon salt
    • ¼ teaspoon black pepper
    • ¼ teaspoon paprika (optional, for color and subtle flavor)
    • 2 cups sharp cheddar cheese, shredded
    • 1 cup Gruyère or Monterey Jack cheese, shredded (optional for creaminess)

    For the topping:

    • ½ cup breadcrumbs (plain or panko)
    • 2 tablespoons unsalted butter, melted
    • 2 tablespoons Parmesan cheese, grated
    • Pinch of paprika for color (optional)

    Step 1: Preheat the Oven

    Preheat your oven to 350°F (175°C).

    Greasing a 9×13-inch baking dish or lightly spraying it with nonstick cooking spray will prevent sticking and make cleanup easier.


    Step 2: Cook the Pasta

    Bring a large pot of salted water to a boil.

    Add the macaroni and cook according to package instructions until just al dente.

    Remember, the pasta will continue to cook slightly in the oven, so avoid overcooking.

    Drain the pasta and set aside.


    Step 3: Make the Cheese Sauce

    In a medium saucepan over medium heat, melt the butter until fully melted and slightly foamy.

    Sprinkle in the flour, whisking constantly to form a smooth roux.

    Cook for 1–2 minutes to remove the raw flour taste.

    Gradually add the milk, whisking continuously to prevent lumps.

    Bring the mixture to a gentle simmer until it thickens, about 3–5 minutes.

    Stir in the Dijon mustard, salt, black pepper, and paprika.

    Remove the sauce from the heat and stir in the shredded cheeses until smooth and fully melted.

    Taste and adjust seasoning if needed.

    The cheese sauce should be creamy, rich, and slightly thickened.


    Step 4: Combine Pasta and Cheese Sauce

    Add the drained pasta to the cheese sauce, stirring until every piece is coated evenly.

    Pour the cheesy macaroni mixture into the prepared baking dish, spreading it out evenly.


    Step 5: Prepare the Topping

    In a small bowl, combine the breadcrumbs, melted butter, Parmesan cheese, and a pinch of paprika.

    Mix until the crumbs are evenly coated. Sprinkle the breadcrumb mixture evenly over the macaroni and cheese.

    This topping will give your dish that golden, crunchy texture that contrasts beautifully with the creamy pasta underneath.


    Step 6: Bake the Macaroni and Cheese

    Place the baking dish in the preheated oven and bake for 25–30 minutes, or until the top is golden brown and crispy and the cheese sauce is bubbling around the edges.

    For an extra-crispy topping, broil for the last 2–3 minutes, watching closely to prevent burning.


    Step 7: Cool Slightly and Serve

    Remove the macaroni and cheese from the oven and let it cool for 5 minutes before serving.

    This allows the cheese sauce to set slightly, making it easier to scoop perfect portions.


    Pro Tips for Perfect Old-Fashioned Macaroni and Cheese

    1. Use sharp cheddar – The bold flavor balances the creaminess perfectly.
    2. Don’t overcook pasta – Al dente pasta absorbs flavors without becoming mushy.
    3. Make a roux carefully – Cooking the butter and flour removes the raw taste and ensures a silky sauce.
    4. Add a little extra cheese to the sauce – This ensures maximum creaminess and flavor.
    5. Top with panko breadcrumbs – Panko gives a superior crunch compared to regular breadcrumbs.

    Variations to Try

    • Extra Cheesy Mac & Cheese: Mix in extra cheddar or add cream cheese for richness.
    • Bacon Mac & Cheese: Stir in crispy bacon bits before baking for a smoky flavor.
    • Spicy Mac & Cheese: Add a pinch of cayenne pepper or diced jalapeños to the cheese sauce.
    • Veggie Mac & Cheese: Fold in cooked broccoli, peas, or roasted red peppers for added nutrition and color.

    Wrapping Up

    Old-fashioned macaroni and cheese is more than just a meal—it’s nostalgia in a dish.

    The creamy cheese sauce, tender pasta, and golden breadcrumb topping create a perfect combination of flavors and textures that will satisfy kids and adults alike.

    Unlike boxed versions, homemade mac and cheese allows you to control the ingredients, the cheese blend, and the richness, making every bite a decadent treat.

    Whether served as a main course for dinner, a side dish for a holiday meal, or a comfort-food indulgence on a cozy night in, old-fashioned macaroni and cheese never fails to impress.

    With these step-by-step instructions, you can make a perfectly creamy, golden, cheesy casserole that will have everyone asking for seconds.

    So grab your cheese, pasta, and butter, and get ready to enjoy the ultimate in creamy, cheesy, golden-baked comfort food.

    There’s nothing quite like homemade mac and cheese straight from the oven—a classic dish done right.

  • Comfort in a Crust: How to Make Classic Chicken Pot Pie

    Comfort in a Crust: How to Make Classic Chicken Pot Pie

    Few dishes evoke the warmth and nostalgia of home quite like chicken pot pie.

    With tender chunks of chicken, hearty vegetables, and a creamy, savory sauce nestled under a golden, flaky crust, it’s the ultimate comfort food.

    Whether you’re cooking for your family or preparing a meal to impress guests, making chicken pot pie from scratch is easier than it seems—and the results are far superior to store-bought versions.

    Follow this step-by-step guide, and you’ll create a pot pie that’s rich, flavorful, and utterly satisfying.


    Ingredients You’ll Need

    Gather all ingredients before starting to make the process smooth and stress-free.

    For the filling:

    • 2 tablespoons unsalted butter
    • 1 small onion, finely chopped
    • 2 cloves garlic, minced
    • 2 medium carrots, diced
    • 2 celery stalks, diced
    • 1 cup frozen peas
    • 2 cups cooked chicken, shredded or diced (rotisserie chicken works great)
    • ¼ cup all-purpose flour
    • 2 cups chicken broth
    • 1 cup whole milk or heavy cream
    • 1 teaspoon dried thyme
    • ½ teaspoon salt
    • ¼ teaspoon black pepper

    For the crust:

    • 1 package (2 sheets) refrigerated pie crusts, or homemade pie dough
    • 1 egg, beaten (for egg wash)

    Optional garnish: Fresh parsley, chopped


    Step 1: Preheat the Oven

    Preheat your oven to 400°F (200°C).

    Grease a 9-inch pie dish with butter or nonstick cooking spray to prevent sticking. If using a deep-dish pie pan, you may need to adjust cooking time slightly.


    Step 2: Cook the Vegetables

    In a large skillet over medium heat, melt the butter.

    Add the onion, carrots, and celery, cooking for about 5–6 minutes until the vegetables are tender but not mushy.

    Add the garlic and cook for another 30 seconds, until fragrant.


    Step 3: Make the Creamy Filling

    Sprinkle the flour over the cooked vegetables and stir well to coat. Cook for 1–2 minutes to eliminate the raw flour taste.

    Gradually add the chicken broth while stirring constantly to prevent lumps. Bring the mixture to a simmer until it thickens slightly.

    Add the milk or cream, dried thyme, salt, and black pepper, stirring until the sauce is smooth and creamy. Stir in the shredded chicken and frozen peas.

    Simmer for 2–3 minutes, then remove from heat.

    The filling should be thick enough to hold together but still saucy enough to coat the vegetables and chicken.


    Step 4: Prepare the Pie Crust

    Roll out one sheet of pie crust and fit it into the bottom of the greased pie dish.

    Make sure the crust covers the bottom and sides evenly.

    Pour the chicken and vegetable filling into the crust, spreading it evenly.

    Roll out the second pie crust and place it over the filling.

    Trim any excess dough around the edges and crimp the edges together with a fork or your fingers to seal the pie.

    Cut a few small slits in the top crust to allow steam to escape during baking.


    Step 5: Apply Egg Wash

    Brush the top crust with the beaten egg.

    This will give your pie a beautiful golden-brown finish.

    You can also sprinkle a little salt or freshly cracked black pepper on top for extra flavor.


    Step 6: Bake the Chicken Pot Pie

    Place the pie in the preheated oven and bake for 30–40 minutes, or until the crust is golden brown and the filling is bubbling through the vents.

    If the crust begins to brown too quickly, cover the edges with foil to prevent burning.


    Step 7: Cool Slightly and Serve

    Remove the pie from the oven and let it cool for 5–10 minutes before slicing.

    This resting time allows the filling to set slightly, making it easier to serve without spilling.

    Garnish with fresh parsley if desired.


    Step 8: Slice and Enjoy

    Use a sharp knife to cut the pie into wedges.

    Each slice should reveal a creamy, savory filling encased in a flaky, golden crust.

    Serve warm with a side salad or steamed vegetables for a complete meal.


    Pro Tips for Perfect Chicken Pot Pie

    1. Use cooked chicken – Rotisserie chicken or leftover roasted chicken works perfectly.
    2. Don’t overcook vegetables – Slightly tender vegetables hold up well in the creamy filling.
    3. Thicken properly – Make sure your filling isn’t too runny, or the pie may become soggy.
    4. Egg wash matters – Brushing the crust with egg gives a shiny, golden finish.
    5. Vent the top crust – Small slits allow steam to escape and prevent a soggy top.

    Variations to Try

    • Cheesy Chicken Pot Pie: Add ½ cup shredded cheddar or Gruyère to the filling for extra richness.
    • Herb-Infused: Mix in fresh thyme, rosemary, or parsley for a fragrant flavor boost.
    • Vegetarian Version: Replace chicken with mushrooms, cauliflower, and other hearty vegetables.
    • Mini Pot Pies: Use muffin tins or small ramekins for individual servings—perfect for parties.

    Wrapping Up

    Chicken pot pie is the ultimate comfort food: creamy, savory, and enveloped in a golden, flaky crust.

    Making it from scratch allows you to control the flavors, textures, and quality of ingredients, resulting in a meal that’s far superior to frozen or store-bought options.

    Whether for a cozy weeknight dinner or a special family gathering, this recipe delivers a hearty, satisfying dish that pleases everyone at the table.

    The combination of tender chicken, vegetables, creamy sauce, and buttery crust is timeless, making chicken pot pie a staple for any comfort-food lover.

    With this guide, you can confidently prepare a pot pie that’s perfectly balanced—rich and indulgent, yet homey and comforting.

    Serve it with a simple salad or steamed veggies, and enjoy the ultimate in warm, cheesy, savory satisfaction. Chicken pot pie isn’t just a meal—it’s a hug in a dish.

  • Golden Perfection: How to Make Authentic Portuguese Egg Tarts

    Golden Perfection: How to Make Authentic Portuguese Egg Tarts

    Few desserts can rival the sweet, creamy, caramelized delight of Portuguese egg tarts, also known as pastéis de nata.

    With a crisp, flaky puff pastry shell and a rich, velvety custard filling topped with a signature caramelized surface, these tarts are a treat that captures the heart of Portuguese cuisine.

    While they may look sophisticated, making them at home is a rewarding experience that doesn’t require professional pastry skills.

    Follow this step-by-step guide to create egg tarts that are golden, creamy, and utterly irresistible.


    Ingredients You’ll Need

    Before starting, gather all ingredients to ensure smooth preparation.

    For the pastry shell:

    • 1 package of frozen puff pastry (about 8 sheets), thawed
    • 1 tablespoon all-purpose flour (for dusting)

    For the custard filling:

    • 1 cup whole milk
    • ½ cup heavy cream
    • ½ cup granulated sugar
    • 3 tablespoons all-purpose flour
    • 6 large egg yolks
    • 1 teaspoon vanilla extract
    • 1 tablespoon lemon zest (optional, for subtle aroma)
    • ½ teaspoon ground cinnamon (optional, for flavor)

    Step 1: Preheat the Oven

    Preheat your oven to 500°F (260°C).

    Place a baking tray in the oven to heat as well. Using a hot baking surface helps achieve the signature caramelized top on Portuguese egg tarts.


    Step 2: Prepare the Puff Pastry

    Lightly flour your work surface and roll out the puff pastry sheets. Cut the pastry into circles slightly larger than the openings of your muffin tin or tart molds.

    Gently press the pastry circles into the cups, ensuring the sides are evenly lined. Chill the pastry-lined molds in the refrigerator for 15 minutes to prevent shrinking during baking.


    Step 3: Make the Custard Filling

    In a medium saucepan, combine milk, heavy cream, and lemon zest (if using).

    In a separate bowl, whisk together sugar and flour until smooth.

    Gradually add the milk mixture to the flour and sugar, whisking constantly to prevent lumps.

    Return the mixture to the saucepan over medium heat. Stir continuously until the custard thickens slightly, about 5–7 minutes. Remove from heat and allow it to cool slightly.

    In another bowl, lightly beat the egg yolks. Gradually whisk the egg yolks into the slightly cooled custard, along with vanilla extract and cinnamon if using.

    Mix until fully incorporated, creating a smooth, velvety filling.


    Step 4: Fill the Pastry Shells

    Remove the chilled pastry-lined molds from the refrigerator. Carefully pour the custard filling into each pastry shell, filling about ¾ of the way.

    Avoid overfilling to prevent spillage during baking.


    Step 5: Bake the Egg Tarts

    Place the filled tarts on the preheated baking tray and bake for 12–15 minutes.

    The high temperature will help the custard set quickly and create the iconic caramelized, slightly blistered top.

    Keep a close eye on the tarts in the final minutes to ensure the custard doesn’t burn but achieves those signature dark spots.


    Step 6: Cool Slightly and Serve

    Once baked, remove the tarts from the oven and let them cool for 5–10 minutes.

    This resting period allows the custard to set while keeping the pastry crisp.

    Serve warm for the ultimate creamy and flaky experience.


    Step 7: Optional Garnish

    Sprinkle a tiny pinch of cinnamon or powdered sugar over the tarts before serving.

    Some enjoy them with a light drizzle of caramel or a touch of lemon zest for added flavor complexity.


    Pro Tips for Perfect Portuguese Egg Tarts

    1. Use high-quality puff pastry – Proper layering is key for crisp, flaky shells.
    2. High oven temperature – Achieves the signature caramelized spots on the custard.
    3. Do not overcook the custard – The filling should be creamy, not dry or rubbery.
    4. Chill the pastry before filling – Helps prevent shrinkage during baking.
    5. Watch the baking closely – A few seconds can make the difference between a perfect caramelized top and a burnt custard.

    Variations and Twists

    • Classic Cinnamon: Sprinkle extra cinnamon for a spiced aroma.
    • Coffee Egg Tarts: Add 1 teaspoon instant coffee to the custard for a mocha twist.
    • Citrus Zest: Incorporate orange or lemon zest for a fresh, bright flavor.
    • Mini Egg Tarts: Use mini muffin tins for bite-sized treats perfect for parties or tea time.
    • Chocolate Twist: Add a thin layer of chocolate ganache at the bottom of the pastry before pouring the custard.

    Wrapping Up

    Portuguese egg tarts are a perfect balance of flaky pastry and silky custard with a golden, caramelized top that delights the eyes and palate alike.

    While they may seem intimidating at first glance, following these steps ensures a successful, delicious outcome.

    Making these tarts at home is rewarding—not only do you get to enjoy their warm, creamy goodness fresh out of the oven, but you also gain the satisfaction of mastering a classic dessert that has charmed generations.

    Whether for breakfast, dessert, or a special gathering, these pastéis de nata will impress anyone lucky enough to enjoy them.

    From preparing the crisp puff pastry shells to whisking the velvety custard and achieving the iconic caramelized top, each step is essential for the perfect balance of texture and flavor.

    Serve them with a hot cup of coffee or tea, and you have a delightful treat that transports you straight to the streets of Lisbon.

    Indulge yourself and your loved ones with homemade Portuguese egg tarts—golden, creamy, and absolutely irresistible.

    With patience, attention to detail, and a little love, these tarts are a masterpiece of dessert perfection.

  • Cheesy, Saucy, Irresistible: The Ultimate Homemade Baked Ziti

    Cheesy, Saucy, Irresistible: The Ultimate Homemade Baked Ziti

    If there’s one dish that guarantees comfort in every bite, it’s Baked Ziti.

    Layers of tender pasta, rich tomato sauce, creamy cheese, and bubbling golden mozzarella come together in a hearty casserole that’s perfect for family dinners, potlucks, or meal prep.

    It’s the kind of dish that fills your kitchen with incredible aromas and brings everyone to the table before you even call them.

    This step-by-step guide will walk you through making a classic baked ziti from scratch—simple ingredients, bold flavor, and that perfectly cheesy finish.

    Let’s get started.


    Why You’ll Love This Recipe

    • Classic Italian-American comfort food
    • Perfectly cheesy and saucy
    • Great for feeding a crowd
    • Make-ahead and freezer friendly
    • Easy to customize

    Baked ziti is essentially the cozier cousin of lasagna—without all the layering fuss.


    Ingredients You’ll Need

    For the Pasta:

    • 1 pound ziti pasta
    • Salt for pasta water

    For the Meat Sauce:

    • 1 pound ground beef or Italian sausage
    • 1 small onion, diced
    • 3 cloves garlic, minced
    • 1 (24-ounce) jar marinara sauce or 3 cups homemade tomato sauce
    • 1 (14-ounce) can crushed tomatoes
    • 1 teaspoon dried oregano
    • 1 teaspoon dried basil
    • ½ teaspoon red pepper flakes (optional)
    • Salt and black pepper, to taste
    • 1 tablespoon olive oil

    For the Cheese Layer:

    • 1 cup ricotta cheese
    • 1 large egg
    • ½ cup grated Parmesan cheese
    • 2 cups shredded mozzarella cheese (divided)
    • 2 tablespoons chopped fresh parsley (optional)

    Step 1: Cook the Pasta

    Bring a large pot of salted water to a boil. Add the ziti and cook until just shy of al dente—about 1–2 minutes less than the package directions.

    The pasta will continue cooking in the oven, so slightly undercooking prevents it from becoming mushy.

    Drain and set aside. Do not rinse.


    Step 2: Prepare the Meat Sauce

    Heat olive oil in a large skillet over medium heat. Add diced onion and sauté for 3–4 minutes until softened.

    Add garlic and cook for 30 seconds until fragrant.

    Stir in the ground beef or sausage. Cook, breaking it up with a spoon, until browned and fully cooked. Drain excess fat if needed.

    Add marinara sauce, crushed tomatoes, oregano, basil, red pepper flakes, salt, and pepper. Stir well.

    Let the sauce simmer for 10–15 minutes to develop flavor.


    Step 3: Prepare the Cheese Mixture

    In a medium bowl, combine ricotta cheese, egg, Parmesan, parsley, and 1 cup of shredded mozzarella.

    Mix until smooth and well combined.

    This mixture adds creamy richness and helps bind the layers together.


    Step 4: Combine Pasta and Sauce

    Preheat your oven to 375°F (190°C).

    In a large mixing bowl, combine the drained pasta with about two-thirds of the meat sauce. Toss until evenly coated.

    This ensures every bite has flavor built in—not just on top.


    Step 5: Assemble the Baked Ziti

    Spread a thin layer of remaining sauce on the bottom of a 9×13-inch baking dish.

    Add half of the pasta mixture in an even layer.

    Dollop half of the ricotta cheese mixture over the pasta and gently spread it.

    Repeat with the remaining pasta mixture.

    Top with the rest of the sauce, then sprinkle the remaining 1 cup of mozzarella evenly over the top.

    Step 6: Bake Until Bubbly

    Cover the baking dish with foil and bake for 20 minutes.

    Remove the foil and bake for an additional 10–15 minutes, until the cheese is melted, bubbly, and lightly golden.

    For extra browning, broil for 1–2 minutes at the end—watch closely to prevent burning.


    Step 7: Rest Before Serving

    Remove from the oven and let the baked ziti rest for 5–10 minutes.

    This allows the layers to set, making it easier to slice and serve.


    Serving Suggestions

    Serve warm with:

    • Garlic bread
    • A crisp Caesar salad
    • Roasted vegetables
    • Extra grated Parmesan

    A sprinkle of fresh basil on top adds a beautiful finishing touch.


    Tips for Perfect Baked Ziti

    • Slightly undercook pasta before baking.
    • Simmer sauce long enough to deepen flavor.
    • Use whole milk ricotta for creaminess.
    • Let it rest before slicing.
    • Don’t skimp on cheese—it’s part of the magic.

    Variations

    • Swap ground beef for ground turkey.
    • Add sautéed mushrooms or spinach.
    • Use spicy Italian sausage for extra heat.
    • Make it vegetarian by skipping the meat and adding roasted vegetables.
    • Try a blend of mozzarella and provolone for deeper flavor.

    Make-Ahead & Storage

    To make ahead, assemble the dish and refrigerate (covered) up to 24 hours before baking. Add 5–10 extra minutes to baking time if starting cold.

    Store leftovers in the refrigerator for up to 4 days. Reheat individual portions in the microwave or oven until warmed through.

    Baked ziti freezes beautifully. Wrap tightly and freeze up to 2 months. Thaw overnight before reheating.


    Final Thoughts

    Baked Ziti is everything you want in a comfort meal—rich, cheesy, saucy, and satisfying. It’s simple enough for a weeknight but impressive enough to serve to guests.

    With tender pasta layered between hearty meat sauce and creamy ricotta, finished with bubbling golden mozzarella, this dish delivers classic flavor with every forkful.

    Gather your ingredients, preheat your oven, and get ready to pull a beautifully golden, bubbling pan of baked ziti from your kitchen.

    Once you make it from scratch, it might just become your go-to comfort food classic.

  • Baked Feta Pasta: The Creamy, Roasted Tomato Sensation You’ll Make on Repeat

    Baked Feta Pasta: The Creamy, Roasted Tomato Sensation You’ll Make on Repeat

    Few dishes have taken home kitchens by storm quite like Baked Feta Pasta.

    With just a handful of simple ingredients, this recipe transforms into a creamy, tangy, roasted tomato sauce that clings beautifully to tender pasta. It’s rich without being heavy, vibrant without being complicated, and best of all—it practically cooks itself in the oven.

    If you’re looking for a cozy, crowd-pleasing meal that requires minimal effort but delivers maximum flavor, this is it. Let’s walk through it step by step so you can master this viral favorite with confidence.


    Why You’ll Love This Recipe

    • Minimal prep work
    • Oven does most of the cooking
    • Creamy without heavy cream
    • Perfect for weeknights or entertaining
    • Easily customizable

    The magic happens when the feta bakes alongside juicy cherry tomatoes, creating a silky sauce with almost no stirring required.


    Ingredients You’ll Need

    • 2 pints cherry or grape tomatoes
    • 1 block (7–8 ounces) feta cheese
    • ¼ cup olive oil
    • 3–4 cloves garlic, minced
    • ½ teaspoon red pepper flakes (optional)
    • ½ teaspoon dried oregano
    • Salt and freshly ground black pepper
    • 12 ounces pasta (penne, rigatoni, or rotini work well)
    • Fresh basil leaves
    • Optional: grated Parmesan for serving

    Step 1: Preheat the Oven

    Preheat your oven to 400°F (200°C).

    Choose a medium-sized baking dish—large enough to hold the tomatoes in a single layer while leaving space in the center for the feta.


    Step 2: Prepare the Tomatoes

    Add the cherry tomatoes to the baking dish.

    Drizzle with olive oil and sprinkle with salt, pepper, oregano, and red pepper flakes. Toss gently to coat.

    Spread the tomatoes evenly around the dish.

    The oil helps the tomatoes roast and caramelize, intensifying their natural sweetness.


    Step 3: Add the Feta

    Place the block of feta in the center of the tomatoes.

    Drizzle a little extra olive oil over the top of the feta and sprinkle lightly with black pepper.

    Add the minced garlic around the tomatoes (not directly on top of the feta to prevent burning).

    This setup allows the tomatoes to blister and burst while the feta softens into creamy perfection.


    Step 4: Bake Until Golden and Jammy

    Transfer the dish to the oven and bake for 30–35 minutes.

    You’ll know it’s ready when:

    • The tomatoes have burst and released their juices
    • The feta is soft and lightly golden on top
    • The garlic is fragrant

    For extra color, switch the oven to broil for 2–3 minutes at the end, watching carefully to avoid burning.


    Step 5: Cook the Pasta

    While the feta and tomatoes bake, bring a large pot of salted water to a boil.

    Cook the pasta according to package instructions until al dente.

    Reserve about ½ cup of pasta water before draining. This starchy water helps loosen and emulsify the sauce later.

    Drain the pasta and set aside.


    Step 6: Create the Creamy Sauce

    Once the baking dish comes out of the oven, use a spoon to gently mash the softened feta and roasted tomatoes together.

    Stir until everything blends into a creamy, rosy-colored sauce. The feta will melt into the tomato juices, creating a rich yet tangy base.

    If the sauce seems thick, add a splash of reserved pasta water to loosen it.


    Step 7: Combine Pasta and Sauce

    Add the cooked pasta directly into the baking dish.

    Toss thoroughly until every piece of pasta is coated in the creamy feta-tomato sauce.

    If needed, add more pasta water a tablespoon at a time to reach your desired consistency.

    The heat from the pasta will help bring everything together into a silky, cohesive dish.


    Step 8: Finish With Fresh Herbs

    Tear fresh basil leaves and stir them into the pasta.

    The basil adds brightness and freshness that balances the richness of the feta.

    Taste and adjust seasoning—add more salt, pepper, or red pepper flakes if desired.

    Serve immediately with an optional sprinkle of grated Parmesan.


    Tips for Success

    Use block feta. Pre-crumbled feta doesn’t melt as smoothly.

    Don’t overcrowd the tomatoes. They should roast, not steam.

    Reserve pasta water. It’s the secret to achieving a silky sauce.

    Taste before adding salt. Feta is naturally salty.


    Easy Variations

    This recipe is wonderfully adaptable. Try these ideas:

    • Add baby spinach after mixing for extra greens.
    • Stir in cooked chicken or shrimp for added protein.
    • Toss in sun-dried tomatoes for deeper flavor.
    • Use whole wheat pasta for a heartier option.
    • Add a splash of balsamic glaze for subtle sweetness.

    You can even swap cherry tomatoes for grape tomatoes or a mix of both.


    Storage and Reheating

    Store leftovers in an airtight container in the refrigerator for up to 4 days.

    When reheating, add a splash of water or milk before warming to restore creaminess.

    The flavors deepen overnight, making leftovers especially delicious.


    Final Thoughts

    Baked Feta Pasta is proof that simple ingredients can create extraordinary results. Roasted tomatoes, creamy feta, and perfectly cooked pasta combine into a dish that feels indulgent yet effortless.

    Whether you’re cooking for yourself, your family, or entertaining friends, this recipe delivers bold flavor with minimal effort and cleanup.

    Preheat that oven, grab a block of feta, and prepare to fall in love with one of the easiest—and most satisfying—pasta dishes you’ll ever make.

  • Quick, Cheesy, and Bursting with Flavor: How to Make a 4-Ingredient Pesto Tortellini Bake

    Quick, Cheesy, and Bursting with Flavor: How to Make a 4-Ingredient Pesto Tortellini Bake

    Sometimes the simplest recipes are the most satisfying. If you’re craving a hearty, cheesy, and flavorful pasta dish but don’t want to spend hours in the kitchen, this 4-Ingredient Pesto Tortellini Bake is your new go-to.

    With just four ingredients, you can create a comforting, melty, and delicious baked pasta dish that’s perfect for weeknight dinners, potlucks, or any time you need a quick but impressive meal.

    This recipe combines tender tortellini, vibrant pesto, creamy mozzarella, and savory Parmesan to create layers of flavor in every bite. Follow along, and you’ll have a bubbling, golden, cheesy pasta bake ready in under 30 minutes.


    Why You’ll Love This 4-Ingredient Pesto Tortellini Bake

    • Ready in under 30 minutes
    • Requires only four ingredients
    • Cheesy, gooey, and comforting
    • Perfect for weeknight dinners or meal prep
    • Minimal cleanup

    Despite its simplicity, this dish tastes like something straight from a gourmet Italian kitchen. The secret is using quality ingredients and letting the flavors shine through.


    Ingredients You’ll Need

    • 1 pound (450 g) refrigerated or frozen cheese tortellini
    • 1 cup (240 ml) prepared pesto (store-bought or homemade)
    • 2 cups (200 g) shredded mozzarella cheese
    • ½ cup (50 g) grated Parmesan cheese

    Optional garnish: fresh basil leaves, cherry tomatoes, or a sprinkle of red pepper flakes.


    Step 1: Preheat Your Oven

    Preheat your oven to 375°F (190°C). Lightly grease a 9×13-inch baking dish with cooking spray or a drizzle of olive oil.

    Preheating ensures the tortellini bake evenly and the cheese melts perfectly, creating a golden, bubbly top.


    Step 2: Cook the Tortellini

    Bring a large pot of salted water to a boil. Add the tortellini and cook until just al dente—usually 1–2 minutes less than package instructions.

    Drain the pasta and set aside. If using frozen tortellini, check the package instructions; some brands can be added directly to the baking dish without boiling.

    Toss the cooked tortellini with a small drizzle of olive oil to prevent sticking.


    Step 3: Mix in the Pesto

    In a large mixing bowl, combine the cooked tortellini with the pesto. Stir gently until each tortellini is coated evenly in the vibrant green sauce.

    The pesto is the star flavor here, so don’t be shy—make sure every piece of tortellini is well coated.


    Step 4: Layer the Cheese

    Transfer half of the pesto-coated tortellini into the prepared baking dish. Sprinkle half of the mozzarella and half of the Parmesan over the layer.

    Add the remaining tortellini and top with the rest of the mozzarella and Parmesan.

    Layering the cheese ensures that every bite has a perfect balance of creamy, melty mozzarella and salty, nutty Parmesan.


    Step 5: Bake Until Golden and Bubbly

    Cover the baking dish loosely with foil and bake in the preheated oven for 15 minutes.

    Remove the foil and bake for another 5–10 minutes, or until the cheese is melted, bubbly, and lightly golden on top.

    For an extra crispy finish, broil for 1–2 minutes, keeping a close eye to prevent burning.


    Step 6: Rest and Garnish

    Once baked, allow the dish to rest for 5 minutes. This helps the cheese set slightly, making serving easier.

    Optional: top with fresh basil leaves, halved cherry tomatoes, or a sprinkle of red pepper flakes for color and extra flavor.

    Slice and serve directly from the baking dish.


    Flavor and Texture Highlights

    • Tender, cheesy tortellini coated in fragrant pesto
    • Melty mozzarella for gooey indulgence
    • Nutty Parmesan for depth and slight saltiness
    • Golden, slightly crisp top adds texture contrast

    The combination of creamy, cheesy, and herbaceous flavors makes this dish irresistible. It’s rich without being heavy and full of comforting Italian flavor.


    Tips for the Perfect Pesto Tortellini Bake

    • Use quality pesto: Fresh or high-quality store-bought pesto makes a huge difference.
    • Don’t overcook tortellini: Slightly undercooked pasta will finish cooking in the oven, keeping it tender but not mushy.
    • Even cheese distribution: Make sure the mozzarella and Parmesan are evenly layered for consistent flavor.
    • Make it ahead: Assemble in advance, cover tightly, and refrigerate. Add 5–10 extra minutes to baking time if chilled.
    • Customize: Add cooked chicken, cherry tomatoes, or spinach to bulk up the dish.

    Optional Variations

    • Creamy Version: Stir in ½ cup heavy cream or cream cheese with the pesto for extra richness.
    • Vegan Option: Use dairy-free cheese and vegan pesto for a plant-based version.
    • Garlic Parmesan Crunch: Mix ¼ cup breadcrumbs with 1 tablespoon olive oil and sprinkle on top before baking for a crisp topping.
    • Spicy Twist: Add a pinch of crushed red pepper flakes to the pesto mix for a subtle heat.

    Storage and Reheating

    • Store leftovers in an airtight container in the refrigerator for up to 3 days.
    • Reheat in the oven at 350°F (175°C) for 10–15 minutes or in the microwave for 1–2 minutes until heated through.
    • This dish can also be assembled and frozen before baking. Bake from frozen, adding 10–15 extra minutes to cooking time.

    Why This Recipe Works

    This 4-Ingredient Pesto Tortellini Bake works because it focuses on simple, high-quality ingredients that complement each other perfectly. The tortellini provides structure and a soft, pillowy base, while the pesto adds aromatic herb flavor.

    The combination of mozzarella and Parmesan creates creamy, melty cheese that contrasts beautifully with the tender pasta. Baking allows the flavors to meld while giving the dish a golden, bubbly top that’s both visually appealing and delicious.


    With just four ingredients, you can make a pasta dish that feels indulgent, elegant, and comforting. This 4-Ingredient Pesto Tortellini Bake is quick, easy, and perfect for busy nights when you want maximum flavor with minimal effort.

    The creamy cheese, tender pasta, and vibrant pesto create a dish that’s sure to be a family favorite and a recipe you’ll return to again and again.

    Every bite delivers creamy, cheesy, herbaceous comfort—proof that sometimes the simplest recipes are the most unforgettable.

  • Five Cheese Ziti al Forno: The Ultimate Bubbly, Golden Baked Pasta Dream

    Five Cheese Ziti al Forno: The Ultimate Bubbly, Golden Baked Pasta Dream

    If there’s one dish that guarantees empty plates and second helpings, it’s Five Cheese Ziti al Forno.

    This baked pasta is rich, creamy, perfectly sauced, and layered with five different cheeses that melt into pure comfort. With tender ziti, a hearty tomato sauce, and a golden, bubbling cheese topping, this recipe brings restaurant-quality flavor straight to your kitchen.

    Let’s walk through this indulgent, crowd-pleasing pasta step by step.


    Ingredients You’ll Need

    For the Pasta and Sauce:

    • 1 pound ziti pasta
    • 1 tablespoon olive oil
    • 1 pound ground beef or Italian sausage
    • 1 small onion, finely diced
    • 3 cloves garlic, minced
    • 1 (24-ounce) jar marinara sauce
    • 1 (14-ounce) can crushed tomatoes
    • 1 teaspoon Italian seasoning
    • ½ teaspoon salt
    • ½ teaspoon black pepper

    For the Five Cheese Blend:

    • 1 cup ricotta cheese
    • 1 cup shredded mozzarella
    • 1 cup shredded provolone
    • ½ cup grated Parmesan
    • ½ cup shredded fontina (or Romano)

    Step 1: Cook the Ziti

    Bring a large pot of salted water to a rolling boil. Add the ziti and cook until just shy of al dente, about 1–2 minutes less than package instructions. The pasta will continue cooking in the oven, so slightly undercooking prevents it from becoming mushy.

    Drain the pasta and set aside. Drizzle lightly with olive oil to prevent sticking.


    Step 2: Prepare the Meat Sauce

    In a large skillet or Dutch oven, heat olive oil over medium heat. Add the diced onion and cook for about 3–4 minutes until softened and translucent.

    Add the minced garlic and cook for 30 seconds until fragrant. Stir in the ground beef or sausage, breaking it apart with a wooden spoon. Cook until browned and fully cooked through. Drain excess grease if necessary.

    Pour in the marinara sauce and crushed tomatoes. Add Italian seasoning, salt, and black pepper. Stir well and let the sauce simmer gently for 10–15 minutes. This helps the flavors deepen and blend beautifully.


    Step 3: Prepare the Cheese Mixture

    In a medium bowl, combine the ricotta, half of the mozzarella, half of the provolone, and half of the fontina. Mix until smooth and evenly blended. The Parmesan will mostly be reserved for layering and topping.

    This creamy cheese blend will create pockets of richness throughout the baked pasta.


    Step 4: Preheat and Prepare the Baking Dish

    Preheat your oven to 375°F (190°C).

    Lightly grease a 9×13-inch baking dish with cooking spray or olive oil. This prevents sticking and makes serving easier.


    Step 5: Combine Pasta and Sauce

    In a large mixing bowl, combine the cooked ziti with the prepared meat sauce. Stir until every piece of pasta is coated in that rich tomato mixture.

    This ensures even distribution and prevents dry spots in the finished dish.


    Step 6: Layer the Ziti al Forno

    Now comes the fun part — layering.

    1. Spread half of the pasta mixture evenly in the baking dish.
    2. Dollop half of the cheese mixture across the pasta and gently spread.
    3. Sprinkle a portion of Parmesan over the layer.
    4. Add the remaining pasta mixture.
    5. Spread the remaining cheese mixture on top.
    6. Finish with the rest of the mozzarella, provolone, fontina, and a generous sprinkle of Parmesan.

    This layering method guarantees cheesy goodness in every bite.


    Step 7: Bake to Golden Perfection

    Cover the dish loosely with foil (tent it slightly so it doesn’t stick to the cheese).

    Bake for 20 minutes covered. Then remove the foil and bake for another 15–20 minutes, or until the cheese is fully melted, bubbling, and lightly golden on top.

    For extra browning, broil for 1–2 minutes at the end — but watch closely to prevent burning.


    Step 8: Let It Rest

    Once out of the oven, allow the ziti to rest for 10–15 minutes before serving. This step is crucial. Resting allows the cheese and sauce to settle, making slicing and serving much easier.

    Skipping this step can result in a runny texture.


    Step 9: Garnish and Serve

    Sprinkle with freshly chopped parsley or extra grated Parmesan before serving for a pop of color and flavor.

    Serve hot with:

    • Garlic bread
    • A crisp green salad
    • Roasted vegetables

    Tips for the Best Five Cheese Ziti al Forno

    Use freshly shredded cheese. Pre-shredded cheese contains anti-caking agents that can affect melt quality.

    Don’t overcook the pasta. Slightly undercooked pasta ensures the final dish has perfect texture.

    Customize your cheese blend. Romano, asiago, or even white cheddar can replace one of the cheeses if desired.

    Make it ahead. Assemble the dish up to a day in advance, cover tightly, and refrigerate. Add 10–15 extra minutes to the baking time if cooking from cold.

    Freeze for later. Wrap tightly and freeze before baking for up to 2 months. Thaw overnight in the refrigerator before baking.


    Why You’ll Love This Recipe

    Five Cheese Ziti al Forno combines everything we crave in comfort food: creamy cheese, hearty sauce, tender pasta, and that irresistible golden crust. It’s ideal for family dinners, potlucks, or when you simply want something indulgent and satisfying.

    Every forkful delivers layers of flavor and gooey, melty cheese balanced by rich tomato sauce and perfectly baked pasta. Once you make it, this baked ziti just might become your go-to pasta dish.

    So preheat that oven, shred that cheese, and get ready to serve up a bubbling pan of pure comfort.

  • Creamy, Cheesy, and Comforting: How to Make Classic Scalloped Potatoes

    Creamy, Cheesy, and Comforting: How to Make Classic Scalloped Potatoes

    Few side dishes capture the essence of comfort food quite like scalloped potatoes. Layered with tender slices of potato, creamy sauce, and melted cheese, this dish is perfect for holiday dinners, family gatherings, or simply a cozy weeknight meal. Scalloped potatoes are deceptively simple to make but deliver a rich, decadent flavor that everyone will love.

    This step-by-step guide will walk you through making classic scalloped potatoes with a creamy, cheesy sauce and perfectly tender layers. By following these steps, you’ll end up with a golden, bubbling dish that’s as beautiful as it is delicious.


    Why You’ll Love These Scalloped Potatoes

    • Creamy, cheesy, and comforting
    • Perfectly tender potato slices
    • Baked to golden perfection with a bubbly top
    • Great as a side dish for any meal
    • Easily customizable with herbs, spices, or additional cheese varieties

    The combination of tender potatoes and a rich, flavorful sauce makes scalloped potatoes a dish that never goes out of style.


    Ingredients You’ll Need

    For the Potatoes:

    • 3 pounds (1.4 kg) russet or Yukon gold potatoes, peeled and thinly sliced
    • 2 tablespoons unsalted butter
    • 2 tablespoons all-purpose flour
    • 2 cups (480 ml) whole milk, warmed
    • 1 cup (100 g) shredded sharp cheddar cheese
    • ½ cup (50 g) grated Parmesan cheese
    • 2 teaspoons garlic powder or 2 cloves garlic, minced
    • 1 teaspoon salt
    • ½ teaspoon black pepper
    • Optional: ½ teaspoon paprika or dried thyme for garnish

    Step 1: Preheat and Prepare

    Preheat your oven to 375°F (190°C).

    Grease a 9×13-inch baking dish with butter or nonstick spray. This will prevent the potatoes from sticking and make cleanup easier.


    Step 2: Prepare the Creamy Cheese Sauce

    In a medium saucepan over medium heat, melt the butter. Add the flour and whisk constantly for 1–2 minutes to form a roux. This cooks out the raw flour taste and will thicken the sauce.

    Gradually whisk in the warm milk, making sure to eliminate any lumps. Continue to cook until the sauce begins to thicken, about 5–7 minutes.

    Remove from heat and stir in ¾ cup of cheddar cheese, garlic, salt, and pepper until melted and smooth.

    The cheese sauce should be creamy, slightly thick, and full of flavor—it will coat the potatoes beautifully.


    Step 3: Slice the Potatoes

    Peel the potatoes and slice them into ¼-inch thick rounds. Use a sharp knife or mandoline for even slices, which ensures uniform cooking.

    Even slices allow the potatoes to cook at the same rate and create an attractive layered presentation.


    Step 4: Layer the Potatoes

    Arrange a layer of potato slices in the bottom of the prepared baking dish. Pour a portion of the cheese sauce over the layer, spreading it evenly.

    Repeat the layers, alternating potatoes and sauce, until all potatoes and sauce are used. Sprinkle the remaining cheddar and Parmesan on top for a golden, cheesy crust.

    Optional: Sprinkle paprika or dried thyme over the top for color and added flavor.


    Step 5: Cover and Bake

    Cover the baking dish tightly with aluminum foil to prevent the top from browning too quickly while the potatoes cook through.

    Bake in the preheated oven for 45 minutes.


    Step 6: Uncover and Finish Baking

    Remove the foil and bake for an additional 20–25 minutes, or until the potatoes are tender and the top is golden brown and bubbling.

    Check for doneness by inserting a knife into the center—potatoes should slide easily without resistance.


    Step 7: Rest Before Serving

    Let the scalloped potatoes rest for 5–10 minutes before serving.

    Resting allows the sauce to thicken slightly, making the dish easier to serve and giving the flavors time to meld together.


    Flavor and Texture Highlights

    • Tender potato slices cooked to perfection
    • Creamy, cheesy sauce with rich flavor
    • Golden, bubbly top with slightly crisp edges
    • Subtle garlic and spice notes enhance the richness

    Every bite offers a balance of soft potatoes and rich, savory sauce, with just the right amount of cheese pull.


    Tips for Perfect Scalloped Potatoes

    • Use starchy potatoes like Russet for fluffier layers or Yukon Gold for a creamier texture.
    • Slice potatoes evenly to ensure uniform cooking.
    • Warm the milk before adding to the roux to prevent lumps.
    • Cover during the initial bake to prevent the top from burning.
    • Let the dish rest before serving to thicken the sauce.

    Optional Variations

    • Bacon and Onion: Add cooked bacon bits and sautéed onions between layers.
    • Herb-Infused: Mix fresh rosemary, thyme, or sage into the cheese sauce.
    • Extra Cheesy: Use a blend of cheeses like Gruyère, Fontina, or mozzarella for depth of flavor.
    • Spicy Kick: Add a pinch of cayenne or red pepper flakes to the cheese sauce.
    • Vegetable Boost: Layer in thin slices of zucchini, sweet potato, or cauliflower for variety.

    Storage and Serving

    • Serve immediately for the best texture.
    • Store leftovers in an airtight container in the refrigerator for up to 3 days.
    • Reheat covered in the oven at 350°F (175°C) until warmed through.
    • Can be prepared ahead and baked just before serving—cover and refrigerate overnight.

    Why This Recipe Works

    Classic scalloped potatoes succeed because of the combination of thinly sliced potatoes, a flavorful cheese sauce, and layered baking. Covering the dish during the initial bake ensures tender potatoes, while uncovering allows a golden, bubbly top.

    The balance of creamy sauce, cheese, and tender potatoes creates a dish that is comforting, decadent, and universally loved.


    With its tender, flavorful layers, rich cheese sauce, and golden baked top, these classic scalloped potatoes are a comforting, elegant side dish for any meal.

    Perfect for holiday feasts, cozy dinners, or special occasions, every bite delivers creamy, cheesy goodness that will leave everyone asking for seconds. Whether served alongside roasted meats, vegetables, or enjoyed on their own, scalloped potatoes are the ultimate comfort food.