Category: baking

  • White Apple Pie Bars: Easy, Sliceable Apple Crumble Bars

    White Apple Pie Bars: Easy, Sliceable Apple Crumble Bars

    Imagine the cozy, spiced flavor of a perfect apple pie, but in a handheld, easy-to-share bar form. That’s the magic of these White Apple Pie Bars. They start with a simple, press-in shortbread crust, get filled with a juicy, cinnamon-spiced apple layer, and are topped with a buttery crumble.

    Finished with a drizzle of sweet white icing, they deliver every element of the classic dessert without the fuss of pie dough. They’re the ultimate make-ahead treat for potlucks, school bake sales, or a delicious autumnal snack with coffee.

    The Science of the Perfect Bar Structure

    The success of these bars lies in the distinct, balanced layers. The shortbread crust is a 1:2:3 ratio of sugar, butter, and flour—a classic that bakes into a sturdy, crisp, and buttery base that can support the moist filling without getting soggy.

    The fat in the butter coats the flour proteins, inhibiting gluten formation for a tender, crumbly texture. The apple filling uses a combination of fresh apples and a small amount of flour or cornstarch. As the bars bake, the apples release their juices, which are immediately thickened by the starch, creating a cohesive, jam-like layer that slices cleanly.

    The crumble topping uses the same base as the crust but with less liquid, creating distinct clumps that bake up crisp and golden. The final powdered sugar icing is more than decoration; its slight acidity from milk or cream balances the sweetness, and as it sets, it adds a delicate, crackly textural contrast.

    Ingredients

    For the Crust & Crumble:

    • 2 cups (250g) all-purpose flour
    • ½ cup (100g) granulated sugar
    • ½ teaspoon baking powder
    • ¼ teaspoon salt
    • 1 cup (2 sticks / 226g) cold unsalted butter, cubed
    • 1 large egg yolk

    For the Apple Filling:

    • 4-5 medium tart apples (like Granny Smith), peeled and finely diced*
    • 3 tablespoons granulated sugar
    • 2 tablespoons all-purpose flour or cornstarch
    • 1 ½ teaspoons ground cinnamon
    • ¼ teaspoon ground nutmeg
    • 1 tablespoon lemon juice

    For the White Icing:

    • ½ cup (60g) powdered sugar, sifted
    • 1-2 tablespoons milk or cream
    • ¼ teaspoon vanilla extract

    *Finely dicing ensures the apples soften completely and the bars slice neatly.

    Instructions

    1. Prep: Preheat oven to 350°F (175°C). Line a 9×13 inch baking pan with parchment paper, leaving an overhang on two sides.

    2. Make Crust & Crumble: In a food processor or large bowl, combine flour, sugar, baking powder, and salt. Add the cold, cubed butter. Pulse or cut in with a pastry cutter until the mixture resembles coarse crumbs. Remove 1 heaping cup of this mixture and set aside for the crumble topping.

    3. Form the Crust: To the remaining mixture in the bowl, add the egg yolk. Mix with a fork or your hands until it comes together into a crumbly dough. Press this mixture firmly and evenly into the bottom of the prepared pan.

    4. Make Apple Filling: In a large bowl, toss the diced apples with sugar, flour (or cornstarch), cinnamon, nutmeg, and lemon juice until evenly coated.

    5. Assemble: Spread the apple mixture evenly over the pressed crust. Sprinkle the reserved crumble topping over the apples.

    6. Bake: Bake for 40-50 minutes, until the topping is golden brown and the filling is bubbly. Let the bars cool completely in the pan on a wire rack.

    7. Make Icing & Finish: Once cool, lift the bars out of the pan using the parchment overhang. Whisk powdered sugar, 1 tablespoon of milk, and vanilla until smooth. Add more milk if needed for a drizzling consistency. Drizzle over the bars in a zig-zag pattern.

    8. Slice & Serve: Let the icing set for 15 minutes, then slice into squares. Serve at room temperature.

    Pro-Tips for Bar Excellence

    • Use Cold Butter: This is essential for a flaky, crumbly crust and topping.
    • Finely Dice the Apples: Larger chunks can create gaps and make the bars harder to slice. A small, even dice ensures a uniform layer that bakes through.
    • Press the Crust Firmly: Use the bottom of a measuring cup to press the crust into a compact, even layer. This prevents it from crumbling when cut.
    • Don’t Skip the Lemon Juice: It prevents the apples from browning and adds a bright note that balances the sweetness.
    • Cool Completely: The filling needs time to set. Cutting into warm bars will result in a messy, crumbly slice.
    • Customize the Spice: Add a pinch of cardamom or cloves to the apple mixture for extra warmth.
    • Add Nuts: Mix ½ cup of chopped pecans or walnuts into the crumble topping before sprinkling.
    • Storage: Store bars in an airtight container at room temperature for up to 3 days, or refrigerate for up to 5 days.

    These White Apple Pie Bars are the effortless, crowd-feeding answer to your apple pie cravings.

  • Egg Bread: A Beautiful, Braided Loaf for Any Table

    Egg Bread: A Beautiful, Braided Loaf for Any Table

    Challah is more than just bread—it’s a centerpiece. This enriched Jewish egg bread is known for its soft, slightly sweet, and tender interior, its beautiful braided shape, and its deeply golden, glossy crust. Baking challah is a deeply satisfying ritual.

    The process of kneading the supple dough, mastering the braid, and watching it transform in the oven yields a loaf that’s as impressive to look at as it is delicious to eat. Whether for a Friday night Shabbat dinner, French toast on Sunday morning, or simply to elevate any meal, homemade challah is a gift from the oven.

    The Science of the Rich, Tender Crumb & Shiny Crust

    Challah’s distinct texture and appearance come from its enriched dough. The high proportion of eggs and oil (or sometimes butter) adds fat, which coats the flour proteins, tenderizing the gluten and creating a soft, rich crumb with a slight yellow hue.

    The sugar feeds the yeast for a robust rise and contributes to browning. The key to challah’s signature shine is the egg wash applied before baking. The proteins in the egg coagulate quickly in the oven’s heat, creating a thin, sealed layer that traps steam, allowing the loaf to expand fully before setting. Meanwhile, the sugars in the egg caramelize, producing that deep, mahogany brown, glossy crust.

    The braiding isn’t just for beauty; it creates a structured loaf that bakes evenly and offers a delightful pull-apart texture.

    Ingredients

    For One Large Loaf:

    • 4 ½ cups (563g) bread flour or all-purpose flour, plus more as needed
    • ¼ cup (50g) granulated sugar
    • 2 ¼ teaspoons instant yeast (1 packet)
    • 2 teaspoons salt
    • 2 large eggs, room temperature
    • 1 large egg yolk (save the white for the wash)
    • ¾ cup (180ml) warm water (110°F/43°C)
    • ¼ cup (60ml) vegetable or neutral oil
    • Optional: ¼ cup (85g) honey (replace the sugar for a deeper flavor)

    For the Egg Wash & Topping:

    • 1 egg white + 1 tablespoon water, beaten
    • Sesame seeds or poppy seeds for sprinkling

    Instructions

    1. Make the Dough: In the bowl of a stand mixer fitted with the dough hook, combine flour, sugar, yeast, and salt. In a separate bowl or measuring cup, whisk together the 2 whole eggs, 1 egg yolk, warm water, and oil (and honey, if using).

    2. Knead: With the mixer on low, gradually pour the wet ingredients into the dry. Once combined, increase speed to medium and knead for 6-8 minutes until the dough is smooth, elastic, and slightly tacky but not sticky. Add a tablespoon of flour if needed, but avoid a dry dough.

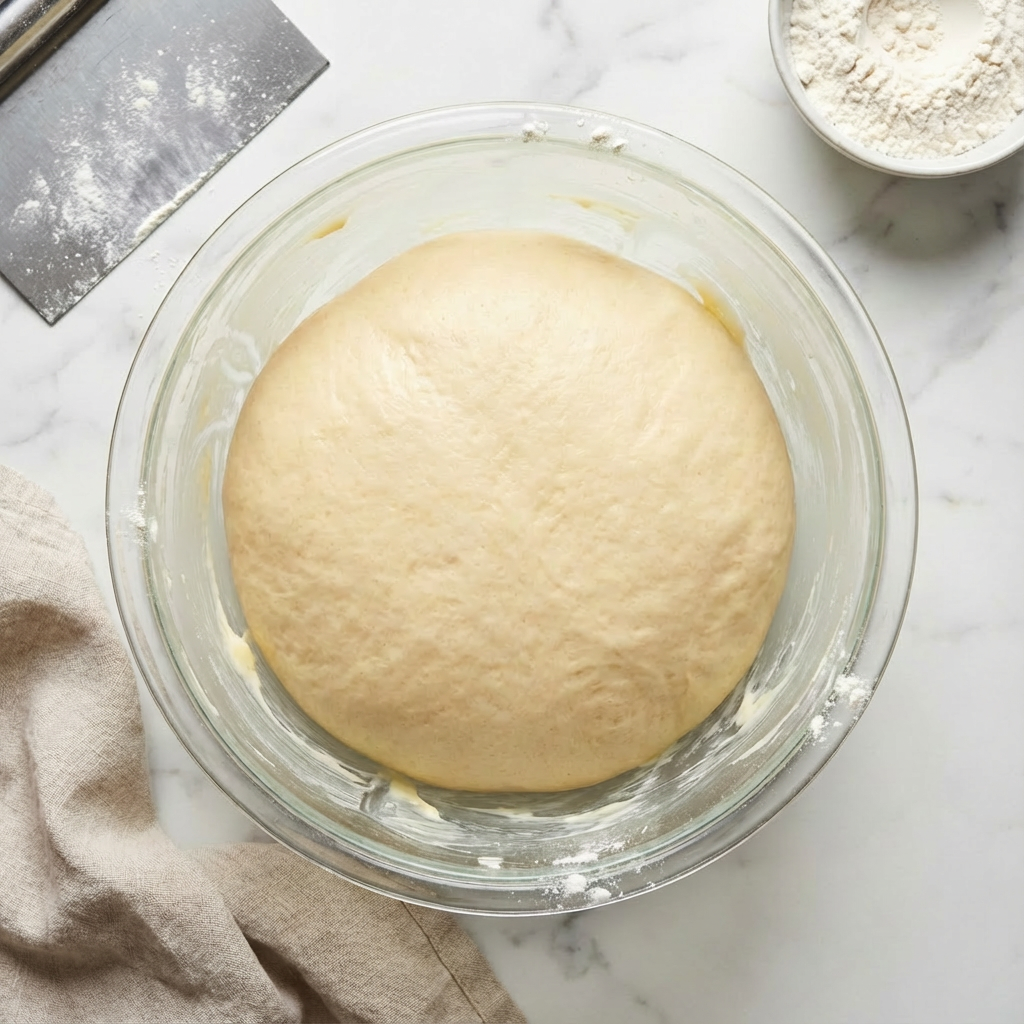
    3. First Rise: Place dough in a lightly oiled bowl, turn to coat, and cover with a damp towel or plastic wrap. Let rise in a warm place until doubled in size, about 1.5 to 2 hours.

    4. Divide & Braid: Punch down the dough. Turn it out onto a lightly floured surface. For a classic 3-strand braid, divide the dough into 3 equal pieces. Roll each piece into a long rope, about 18 inches long, thicker in the middle and tapered at the ends.

    5. Braid the Loaf: Pinch the tops of the three ropes together. Braid them tightly, then pinch the ends together and tuck both pinched ends under the loaf. Transfer the braid to a parchment-lined baking sheet.

    6. Second Rise: Cover the braided loaf loosely and let rise until puffy and nearly doubled, about 45 minutes to 1 hour. Preheat oven to 375°F (190°C).

    7. Bake: Gently brush the loaf all over with the egg wash. Sprinkle with seeds if desired. Bake for 25-35 minutes, until the crust is a deep, glossy golden brown and the loaf sounds hollow when tapped on the bottom.

    8. Cool: Transfer the challah to a wire rack and let it cool completely before slicing.

    Pro-Tips for Challah Mastery

    • Flour Choice: Bread flour gives a chewier, more structured loaf; all-purpose yields a more tender crumb. Both work.
    • Proper Hydration: The dough should be soft and slightly tacky. Resist the urge to add too much flour during kneading, as this will make the bread dry.
    • Even Rolling: When forming the ropes, roll them evenly so your braid is uniform. Let the ropes rest for 5 minutes if they keep snapping back.
    • Tight Braid, Loose Proof: Braid tightly so it holds its shape, but don’t pull too hard. The final proof will relax and expand the braid.
    • The Egg Wash Secret: For maximum shine, do a double wash: apply a thin coat 10 minutes into the final proof, then a second coat right before baking.
    • Testing for Doneness: The hollow sound is the best test. An internal temperature of 190°F (88°C) is perfect.
    • Braid Variations: Challenge yourself with a 4 or 6-strand braid for an even more impressive look.
    • Storage: Keep challah in a bread bag or wrapped in foil at room temp for 2-3 days. It makes phenomenal French toast or bread pudding.

    Baking Challah is a rewarding craft that fills your home with warmth and your table with beauty.

  • Perfect Carrot Cupcakes with Cream Cheese Frosting

    Perfect Carrot Cupcakes with Cream Cheese Frosting

    Carrot cupcakes are the quintessential treat that feels like a celebration but is grounded in wholesome goodness. This recipe delivers everything you love: an incredibly moist, spice-kissed crumb studded with sweet carrots and pecans, all crowned by a luxurious, tangy cream cheese frosting that’s not too sweet.

    They’re surprisingly easy to make, and the result is a cupcake that’s perfectly balanced, utterly delicious, and sure to become a requested favorite for birthdays, Easter, or any spring gathering.

    The Science of Moisture & Flavor Development

    The legendary moistness of carrot cake comes from a combination of oil-based hydration and vegetable-derived moisture. Using vegetable oil instead of butter keeps the crumb tender and locks in moisture for days, as oil coats flour proteins more thoroughly than solid fat.

    The finely grated carrots are the star, releasing their natural sugars and water during baking, which steams the cake from within. The warm spices—cinnamon, nutmeg, and ginger—are fat-soluble, meaning their aromatic compounds are best released and carried by the oil in the batter, creating a deep, complex flavor profile.

    The cream cheese frosting relies on the emulsion of fat and acid. Using full-fat, brick-style cream cheese and properly softened butter is crucial for a stable, pipeable frosting that won’t be runny. The slight acidity of the cream cheese cuts through the sweetness of the cupcakes, creating the perfect balance.

    Ingredients

    For the Carrot Cupcakes (Makes 14-16):

    • 1 ½ cups (188g) all-purpose flour
    • 1 teaspoon baking powder
    • ½ teaspoon baking soda
    • 1 ½ teaspoons ground cinnamon
    • ¼ teaspoon ground nutmeg
    • ¼ teaspoon ground ginger
    • ½ teaspoon salt
    • 2 large eggs, room temperature
    • ¾ cup (150g) granulated sugar
    • ¾ cup (165g) packed light brown sugar
    • ⅔ cup (160ml) vegetable or canola oil
    • 1 teaspoon vanilla extract
    • 2 cups (about 220g) finely grated carrots (about 3 medium)
    • ½ cup (60g) chopped pecans or walnuts (optional)

    For the Cream Cheese Frosting:

    • 8 oz (226g) full-fat brick cream cheese, softened
    • ½ cup (1 stick / 113g) unsalted butter, softened
    • 3 cups (360g) powdered sugar, sifted
    • 1 teaspoon vanilla extract
    • Pinch of salt

    Instructions

    1. Make the Cupcakes: Preheat oven to 350°F (175°C). Line a muffin tin with paper liners. In a medium bowl, whisk together flour, baking powder, baking soda, cinnamon, nutmeg, ginger, and salt.

    2. Mix Wet Ingredients: In a large bowl, whisk eggs, both sugars, oil, and vanilla until smooth and well combined.

    3. Combine & Add Carrots: Add the dry ingredients to the wet ingredients and mix with a spatula until just combined. Fold in the grated carrots and chopped nuts (if using). The batter will be thick.

    4. Bake: Divide batter evenly among liners, filling each about ⅔ full. Bake for 18-22 minutes, until a toothpick inserted comes out clean. Cool in pan for 5 minutes, then transfer to a wire rack to cool completely.

    5. Make the Frosting: While cupcakes cool, beat the softened cream cheese and butter together with an electric mixer on medium speed until completely smooth and creamy, about 2 minutes.

    6. Finish Frosting: With the mixer on low, gradually add the sifted powdered sugar, then the vanilla and salt. Once incorporated, beat on high speed for 1-2 minutes until light and fluffy. If frosting is too soft to pipe, refrigerate for 15-20 minutes.

    7. Frost & Serve: Once cupcakes are completely cool, pipe or spread the frosting on top. Garnish with a sprinkle of cinnamon, extra chopped nuts, or a fondant carrot.

    8. Storage: Store frosted cupcakes in an airtight container in the refrigerator for up to 4 days. Let sit at room temperature for 20 minutes before serving for the best texture.

    Pro-Tips for Cupcake Perfection

    • Grate Carrots Finely: Use the small holes of a box grater. This ensures they distribute evenly and soften completely during baking.
    • Don’t Drain the Carrots: Their natural moisture is essential to the cake. Squeezing them out will result in a drier cupcake.
    • Room Temperature Ingredients: Cold eggs or cream cheese won’t emulsify properly, leading to a broken batter or grainy frosting.
    • Measure Flour Correctly: For accuracy, spoon flour into the measuring cup and level it off. Packing the cup can lead to dense cupcakes.
    • The Toothpick Test: Check a few minutes before the minimum bake time. Overbaking is the enemy of moisture.
    • Cool Completely Before Frosting: The slightest warmth will melt the cream cheese frosting. Patience is key.
    • Frosting Consistency: If your frosting seems too soft after mixing, it’s likely because the cream cheese or butter was too warm. Chilling it briefly will fix it.
    • Add-In Ideas: For extra texture and flavor, fold in ½ cup of crushed pineapple (well-drained) or ½ cup of raisins with the carrots.

    These Perfect Carrot Cupcakes are a timeless, beloved classic for a very good reason.

  • Strawberry Lemon Cheesecake Rolls: A Bright & Berry-Filled Breakfast

    Strawberry Lemon Cheesecake Rolls: A Bright & Berry-Filled Breakfast

    Wake up to a burst of spring flavor with these stunning Strawberry Lemon Cheesecake Rolls. Imagine soft, pillowy sweet roll dough wrapped around a ribbon of creamy, tangy cheesecake filling and juicy fresh strawberries, all finished with a zesty lemon glaze.

    They combine the comforting warmth of a homemade roll with the bright, fresh taste of strawberries and lemon. While they look like they came from a fancy bakery, the process is straightforward—a simple enriched dough, an easy no-cook filling, and a glaze that comes together in minutes. Perfect for Easter, Mother’s Day, or a special weekend brunch, these rolls are guaranteed to impress and delight everyone at the table.

    The Science of a Tender Roll & Stable Filling

    The perfection of these rolls hinges on two key elements: the enriched dough and the stabilized filling. The dough is enriched with butter, eggs, and milk, which tenderize the gluten, resulting in a soft, fluffy, and rich crumb that can hold the moist filling without becoming soggy. A proper rise is crucial for developing flavor and texture.

    The cheesecake filling gets its pipeable, non-runny consistency from a clever technique: combining cream cheese with a thickener. Cornstarch (or flour) is mixed with the sugar before being blended into the cream cheese. This starch absorbs excess moisture released from the strawberries during baking, preventing a soggy, leaking filling. Macerating the strawberries with a little sugar draws out some juice beforehand, which further protects the dough’s structure. This balance ensures every bite has a defined, creamy swirl and tender bread.

    Ingredients

    For the Sweet Roll Dough:

    • ¾ cup (180ml) whole milk, warmed to about 110°F
    • 2 ¼ teaspoons (1 packet) instant yeast
    • ⅓ cup (65g) granulated sugar
    • 1 large egg, room temperature
    • ¼ cup (½ stick / 57g) unsalted butter, melted and cooled
    • 1 teaspoon vanilla extract
    • ½ teaspoon salt
    • 3 – 3 ½ cups (375-440g) all-purpose flour, divided

    For the Strawberry Cheesecake Filling:

    • 8 oz (one block) full-fat cream cheese, softened
    • ¼ cup (50g) granulated sugar
    • 1 tablespoon cornstarch or all-purpose flour
    • 1 teaspoon vanilla extract
    • 1 ½ cups (225g) fresh strawberries, finely diced
    • 1 tablespoon granulated sugar (for macerating strawberries)

    For the Lemon Glaze:

    • 1 cup (120g) powdered sugar, sifted
    • 2-3 tablespoons fresh lemon juice
    • 1 teaspoon lemon zest
    • 1 tablespoon heavy cream or milk (optional, for creaminess)

    Instructions

    1. Make the Dough: In the bowl of a stand mixer, combine warm milk, yeast, and ⅓ cup sugar. Let sit for 5 minutes until foamy. Add egg, melted butter, vanilla, salt, and 3 cups of flour. Using the dough hook, mix on low until combined, then increase speed to medium and knead for 5-7 minutes, adding more flour 1 tablespoon at a time if needed, until dough is soft, smooth, and slightly tacky. Place in a greased bowl, cover, and let rise in a warm place for 1-2 hours, until doubled.

    2. Macerate Strawberries & Make Filling: While dough rises, toss diced strawberries with 1 tablespoon sugar and set aside for 20 minutes. Drain excess liquid. For the filling, beat cream cheese, ¼ cup sugar, cornstarch, and vanilla until completely smooth. Gently fold in the drained strawberries.

    3. Shape the Rolls: Punch down risen dough. On a lightly floured surface, roll into a 10×15 inch rectangle. Spread the strawberry cheesecake filling evenly over the dough, leaving a ½-inch border on one long edge. Tightly roll up the dough, starting from the long side with filling. Pinch the seam to seal.

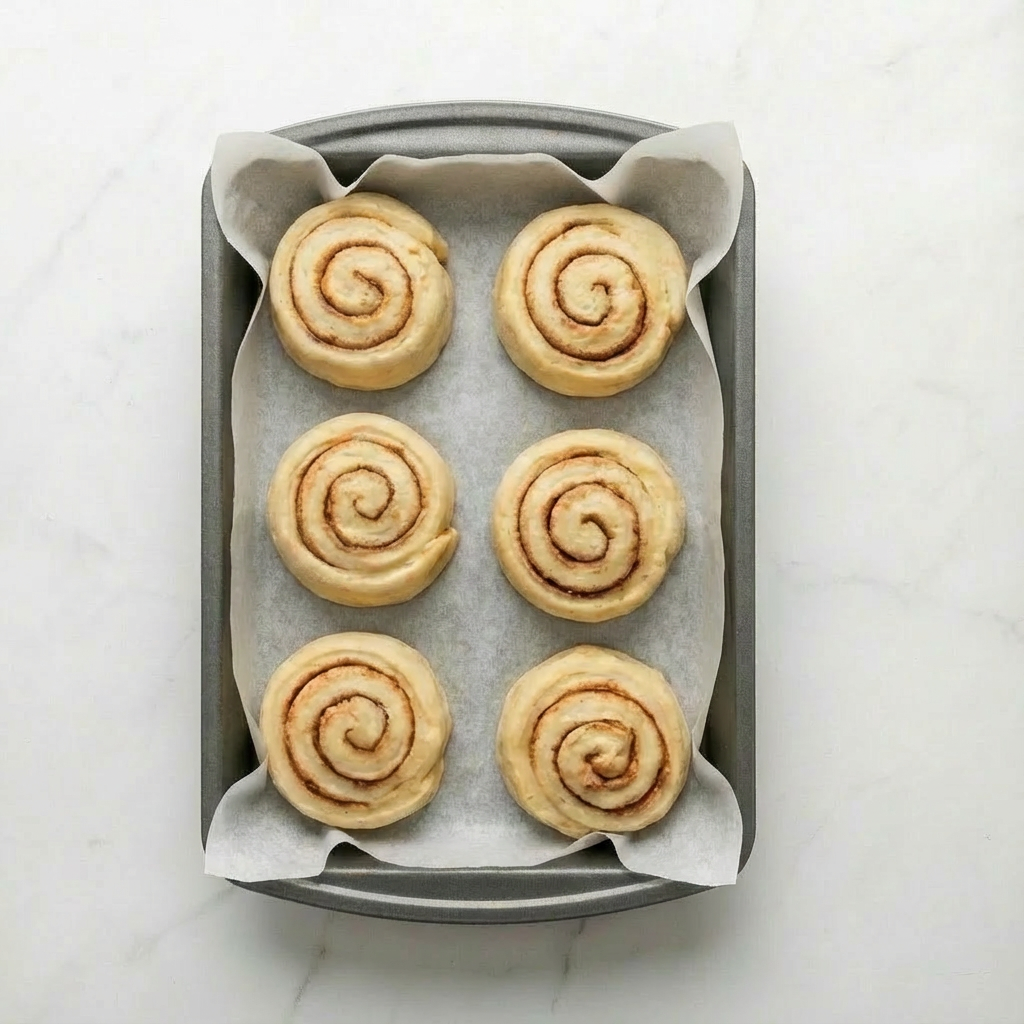
    4. Cut & Second Rise: Using a sharp knife or unflavored dental floss, cut the log into 12 even rolls. Place them in a greased 9×13 inch baking dish. Cover and let rise for 30-45 minutes, until puffy.

    5. Bake: Preheat oven to 350°F (175°C). Bake rolls for 25-30 minutes, until golden brown on top. If the filling bubbles heavily, it’s normal.

    6. Make Glaze & Finish: While rolls bake, whisk together powdered sugar, 2 tablespoons lemon juice, zest, and cream (if using) until smooth. Add more juice for a thinner consistency. Let rolls cool in pan for 10 minutes, then drizzle generously with lemon glaze.

    7. Serve: Serve warm. Store leftovers covered in the refrigerator for up to 3 days. Reheat gently.

    Pro-Tips for Perfect, Leak-Free Rolls

    • Proper Dough Texture: The dough should be soft and slightly sticky, but not so wet that it can’t be handled. Adding flour gradually is key.
    • Drain Those Berries: Draining the macerated strawberries is the most important step to prevent a soggy, leaking mess. Pat them gently with a paper towel if needed.
    • Cornstarch is Your Friend: The cornstarch in the filling acts as a stabilizer, absorbing berry juices during baking. Don’t skip it.
    • Sharp Cutting Tool: Use a sharp serrated knife or dental floss to cut the rolls cleanly without squishing them.
    • Don’t Overbake: The rolls are done when they’re golden. Overbaking can dry out the dough.
    • Glaze Consistency: For a thick glaze that sits on top, use less lemon juice. For a thinner, drizzle-able glaze that soaks in slightly, add more juice.
    • Make Ahead: Assemble the rolls up through step 4, cover tightly, and refrigerate overnight. In the morning, let them sit at room temp for 30 minutes while the oven preheats, then bake as directed.

    These Strawberry Lemon Cheesecake Rolls are a beautiful, flavorful celebration in every bite.

  • Cinnamon Roll Focaccia: The Cozy, No-Knead Breakfast Mashup

    Cinnamon Roll Focaccia: The Cozy, No-Knead Breakfast Mashup

    Imagine all the warm, gooey goodness of a cinnamon roll, but in a beautifully rustic, no-fuss, one-pan format. That’s Cinnamon Roll Focaccia. This genius recipe takes the famously easy no-knead focaccia method and gives it a sweet twist, swirled with buttery cinnamon sugar and baked until puffed and golden.

    Forget rolling and cutting individual rolls—this is a dump, dimple, and bake situation. Topped with a simple cream cheese glaze while still warm, it’s the ultimate shareable treat for a lazy weekend brunch, holiday morning, or any time you want the comfort of cinnamon rolls without the work. Rip off a piece and enjoy the perfect blend of crispy edges and soft, sweet centers.

    The Science of a Sweet, Swirled No-Knead Dough

    This recipe works because of the forgiving nature of high-hydration, no-knead dough. A wet dough (lots of water relative to flour) develops gluten slowly over a long fermentation, creating those signature large, irregular air pockets (alveoli) without any kneading. The extended rise, especially a cold overnight proof, allows enzymes to break down starches into simple sugars, which the yeast consumes, producing gas for rise and complex flavor.

    The swirling technique is key: spreading softened butter over the dimpled dough creates a barrier and fat layer. The cinnamon-sugar mixture then sits on top of this butter. During baking, the butter melts and the sugar partially dissolves, creating rivers of caramel that seep into the dimples and swirls, flavoring every bite while the top bakes into a crisp, crackly crust. It’s a lesson in how minimal effort and maximum time can create spectacular results.

    Ingredients

    For the Sweet Focaccia Dough:

    • 3 ½ cups (440g) all-purpose or bread flour
    • 2 teaspoons instant yeast
    • 1 teaspoon salt
    • ¼ cup (50g) granulated sugar
    • 1 ½ cups (360ml) lukewarm water
    • ⅓ cup (80ml) olive oil or melted butter, plus more for the pan

    For the Cinnamon Swirl & Topping:

    • 4 tablespoons (½ stick / 57g) unsalted butter, very soft
    • ½ cup (100g) packed light brown sugar
    • 1 ½ tablespoons ground cinnamon
    • Coarse sugar, for sprinkling (optional)

    For the Cream Cheese Glaze:

    • 2 oz (¼ block) cream cheese, softened
    • ¾ cup (90g) powdered sugar, sifted
    • 2-3 tablespoons milk or heavy cream
    • ½ teaspoon vanilla extract

    Instructions

    1. Mix the Dough (Day 1 or at least 2 hours ahead): In a large bowl, whisk together flour, yeast, salt, and sugar. Add the lukewarm water and ⅓ cup oil/butter. Stir with a sturdy spoon or spatula until a sticky, shaggy dough forms and no dry flour remains. Cover tightly with plastic wrap.

    2. First Rise (Bulk Ferment): Let the dough rise at room temperature for 1-2 hours until puffy and bubbly. Then, refrigerate for at least 12 hours or up to 3 days (for best flavor).

    3. Pan the Dough (Baking Day): Generously coat a 9×13 inch baking pan with olive oil or melted butter (2-3 tablespoons). Scrape the cold, risen dough directly into the pan. Using oiled hands, gently stretch and press the dough to mostly fill the pan. It’s okay if it doesn’t reach the corners perfectly yet.

    4. Second Rise: Drizzle the dough’s surface with a little more oil. Cover loosely with plastic and let rise at room temperature for 1.5 to 2 hours, until puffy and nearly filling the pan.

    5. Preheat & Dimple: Preheat oven to 375°F (190°C). Using oiled fingers, press straight down firmly all over the dough to create deep dimples that reach the bottom of the pan.

    6. Add the Cinnamon Swirl: Spread the very soft 4 tablespoons of butter evenly over the entire dimpled surface. In a small bowl, mix brown sugar and cinnamon. Sprinkle this mixture evenly over the butter, getting it into all the dimples.

    7. Bake: Bake for 25-30 minutes, until the top is deep golden brown, the sugar is bubbling, and the edges are pulling away from the pan.

    8. Cool Slightly & Glaze: Let the focaccia cool in the pan on a wire rack for 15-20 minutes. While it cools, make the glaze: whisk together softened cream cheese, powdered sugar, 2 tablespoons milk, and vanilla until smooth. Add more milk if needed for a drizzle-able consistency.

    9. Finish & Serve: Drizzle the warm focaccia with the cream cheese glaze. Slice into squares or rectangles and serve warm. It’s best enjoyed the day it’s made.

    10. Store: Cover and store leftovers at room temperature for 1 day or in the fridge for up to 3 days. Reheat gently in the oven or microwave.

    Pro-Tips for the Perfect Sweet & Swirled Focaccia

    • Embrace the Wet Dough: The dough will be very sticky—this is correct and essential for an open, airy crumb. Use a spatula and oiled hands to handle it.
    • Cold Ferment for Flavor: Don’t skip the overnight fridge rest. It develops a lovely depth of flavor that mimics traditional cinnamon roll dough.
    • Butter Temperature is Key: The butter for the swirl must be very soft (almost melted) to spread easily without tearing the delicate, risen dough.
    • Press Dimples with Confidence: Don’t be shy! Pressing all the way to the pan creates pockets that hold the cinnamon sugar and create fantastic textural contrast.
    • Watch for Doneness: The focaccia is done when it’s a rich golden brown and the bubbling sugar looks caramelized. The center should spring back lightly when touched.
    • Glaze When Warm: Drizzling the glaze on the warm (not hot) focaccia allows it to seep slightly into the cracks and dimples, creating delicious pockets of sweetness.
    • Add Mix-Ins: Press a handful of raisins, chopped apples, or toasted pecans into the dimples along with the cinnamon sugar.

    This Cinnamon Roll Focaccia is the ultimate low-effort, high-reward breakfast centerpiece.

  • Chocolate Zucchini Muffins: The Sneaky, Healthy Treat Everyone Loves

    Chocolate Zucchini Muffins: The Sneaky, Healthy Treat Everyone Loves

    What if you could have a deeply chocolatey, bakery-style muffin that’s also packed with a hidden serving of vegetables? These Chocolate Zucchini Muffins make that delicious paradox a reality. The shredded zucchini vanishes into the dark batter, working its magic to create an unbelievably moist and tender crumb while adding nutrients without a trace of “green” flavor.

    Topped with a sprinkle of chocolate chips, they taste like pure indulgence but come with a wholesome secret. They’re the ultimate win-win: a satisfying treat for chocolate lovers and a clever way to use up summer’s bounty or sneak veggies into picky eaters.

    The Science of the Invisible Veggie & Ultimate Moistness

    The success of these muffins hinges on the unique properties of zucchini. When grated, zucchini is about 95% water. During baking, this water slowly releases as steam, which has two crucial effects. First, it keeps the muffin’s interior environment humid, preventing the starches in the flour from drying out and ensuring an exceptionally moist crumb that stays soft for days. Second, the steam helps the muffin rise, creating a light texture.

    The cocoa powder and chocolate chips provide such a dominant, rich flavor that they completely mask any vegetal taste. Furthermore, the oil in the recipe coats the flour proteins more thoroughly than butter would, inhibiting gluten formation and guaranteeing tenderness. The zucchini’s moisture is so effective that these muffins require no additional dairy like yogurt or buttermilk, keeping the ingredient list simple and the result decadently fudgy.

    Ingredients

    For 12 Standard Muffins:

    • 1 ½ cups (188g) all-purpose flour
    • ⅓ cup (30g) unsweetened cocoa powder
    • 1 teaspoon baking soda
    • ½ teaspoon baking powder
    • ½ teaspoon salt
    • ½ teaspoon ground cinnamon (optional, enhances chocolate flavor)
    • 2 large eggs, room temperature
    • ½ cup (100g) granulated sugar
    • ½ cup (110g) packed light brown sugar
    • ½ cup (120ml) vegetable oil or melted coconut oil
    • 1 teaspoon vanilla extract
    • 1 cup (about 120g) finely grated zucchini, unpeeled & NOT drained*
    • 1 cup (170g) semi-sweet chocolate chips, divided

    *Pack the grated zucchini lightly into the measuring cup. Do not squeeze out the water.

    Instructions

    1. Prep: Preheat oven to 375°F (190°C). Line a 12-cup muffin tin with paper liners or grease well. Grate the zucchini using the small holes of a box grater.

    2. Whisk Dry Ingredients: In a medium bowl, whisk together the flour, cocoa powder, baking soda, baking powder, salt, and cinnamon (if using).

    3. Mix Wet Ingredients: In a large bowl, whisk the eggs vigorously for 30 seconds. Add both sugars and whisk until combined and slightly pale. Whisk in the oil and vanilla until smooth.

    4. Combine & Fold: Add the dry ingredients to the wet ingredients. Stir with a spatula until just combined and no dry flour remains—do not overmix. Gently fold in the grated zucchini and ¾ cup of the chocolate chips. The batter will be thick.

    5. Portion & Top: Divide the batter evenly among the muffin cups, filling each nearly to the top for a nice dome. Sprinkle the remaining ¼ cup of chocolate chips over the tops.

    6. Bake: Bake for 18-22 minutes, or until a toothpick inserted into the center of a muffin comes out clean or with a few moist crumbs (but no wet batter).

    7. Cool: Let muffins cool in the pan for 5 minutes, then transfer to a wire rack to cool completely. They are very tender when hot.

    8. Storage: Store in an airtight container at room temperature for up to 3 days, or freeze for up to 3 months.

    Pro-Tips for Muffin Mastery

    • Don’t Drain the Zucchini: The moisture is essential. Squeezing it out will result in dry muffins.
    • Grate it Fine: Using the small holes on your grater makes the zucchini virtually disappear into the baked muffin, leaving only moistness behind.
    • Use Room Temperature Eggs: They incorporate more easily into the batter, creating a better emulsion for even baking.
    • The Two-Sugar Trick: Brown sugar adds moisture and a subtle molasses note that pairs perfectly with chocolate, while white sugar helps create a nice crust.
    • Fill the Muffin Cups: Don’t be shy. Filling them nearly full (about ¾ full) encourages a beautiful, bakery-style dome.
    • The Toothpick Test: Check a minute or two before the minimum time. Overbaking is the enemy of moisture.
    • Add-Ins: Stir in ½ cup of chopped walnuts or pecans with the chocolate chips for added crunch. For a double chocolate version, replace ¼ cup of flour with an extra ¼ cup of cocoa powder.

    These Chocolate Zucchini Muffins are the delicious proof that sometimes the healthiest ingredients are the ones you never see coming.

  • Ultra-Moist Lemon Cake: Bright, Buttery & Bursting with Citrus

    Ultra-Moist Lemon Cake: Bright, Buttery & Bursting with Citrus

    There’s a lemon cake, and then there’s this lemon cake. This recipe is a masterclass in balancing bold, sunny citrus flavor with a tender, buttery crumb that stays incredibly moist for days. By using both lemon zest and juice in the batter, and a simple soak of lemon syrup after baking, it delivers a triple hit of real lemon flavor in every single bite.

    The result is a cake that’s neither too sweet nor too tart—just perfectly bright, refreshing, and satisfying. Topped with a zesty lemon glaze, it’s an elegant yet simple dessert that’s equally at home at a weekend brunch or a festive dinner party.

    The Science of the Moist, Tender Crumb

    The legendary moistness of this cake comes from a combination of fat, acid, and a clever technique. Using both oil and butter provides the best of both worlds: butter for rich flavor, and oil (which coats flour proteins more thoroughly than butter) to guarantee tenderness and lock in moisture. The acidic components—fresh lemon juice and buttermilk—are the secret weapons. Their acidity tenderizes the gluten in the flour, resulting in a finer, more delicate crumb. It also reacts with the baking soda, creating extra lift for a light texture.

    The real game-changer is the lemon syrup soak applied while the cake is still warm. This simple syrup, made from lemon juice and sugar, is absorbed directly into the hot cake, infusing it with intense flavor and adding a layer of moisture that prevents it from ever drying out. This technique ensures every slice is perfumed with lemon and wonderfully damp.

    Ingredients

    For the Cake:

    • 2 ½ cups (313g) all-purpose flour
    • 2 teaspoons baking powder
    • ½ teaspoon baking soda
    • 1 teaspoon salt
    • 1 cup (2 sticks / 226g) unsalted butter, room temperature
    • ½ cup (120ml) vegetable or canola oil
    • 1 ¾ cups (350g) granulated sugar
    • 4 large eggs, room temperature
    • 1 tablespoon lemon zest (from 2-3 lemons)
    • ¼ cup (60ml) fresh lemon juice
    • 1 cup (240ml) buttermilk, room temperature*
    • 1 teaspoon vanilla extract

    For the Lemon Soak & Glaze:

    • ⅓ cup (80ml) fresh lemon juice
    • ⅓ cup (65g) granulated sugar
    • 1 cup (120g) powdered sugar, sifted
    • 1-2 tablespoons fresh lemon juice or milk

    *No buttermilk? Add 1 Tbsp lemon juice or vinegar to 1 cup milk and let sit 5 minutes.

    Instructions

    1. Prep: Preheat oven to 350°F (175°C). Generously grease and flour a 10-cup Bundt pan or two 9-inch round cake pans.

    2. Mix Dry Ingredients: In a medium bowl, whisk together flour, baking powder, baking soda, and salt. Set aside.

    3. Cream Butter, Oil & Sugar: In a large bowl, beat the softened butter, oil, and sugar on medium-high speed for 3-4 minutes until very light and fluffy. Beat in the eggs one at a time, then the lemon zest and vanilla.

    4. Combine Alternately: With the mixer on low, add about one-third of the dry ingredients. Then mix in the lemon juice and half of the buttermilk. Add another third of the dry, the remaining buttermilk, and finish with the last of the dry ingredients. Mix until just combined.

    5. Bake: Pour the batter into the prepared pan(s). Bake for 45-55 minutes for a Bundt (or 25-30 for layers) until a toothpick inserted comes out clean.

    6. Make the Soak & Glaze: While the cake bakes, make the soak: heat ⅓ cup lemon juice and ⅓ cup sugar in a small saucepan until the sugar dissolves. Set aside. For the glaze, whisk powdered sugar with 1 tablespoon of lemon juice, adding more until it’s a thick but pourable consistency.

    7. Soak the Cake: As soon as the cake comes out of the oven, poke it all over with a skewer. Slowly brush or spoon the warm lemon soak evenly over the hot cake. Let cake cool in the pan for 20 minutes, then invert onto a wire rack to cool completely.

    8. Glaze & Serve: Once the cake is completely cool, drizzle the lemon glaze over the top. Let set for 15 minutes before slicing.

    Pro-Tips for Lemon Cake Perfection

    • Room Temperature is Non-Negotiable: Cold ingredients don’t incorporate well and can result in a dense cake.
    • Zest First, Juice Later: Zest your lemons before juicing them—it’s infinitely easier.
    • Don’t Overmix: Once you add the flour, mix only until the last streaks disappear. Overmixing develops gluten and leads to toughness.
    • The Soak is Sacred: Applying the syrup while the cake is hot allows it to absorb deeply. Don’t skip this step—it’s what makes the cake exceptionally moist and flavorful.
    • Bundt Pan Prep: To ensure a clean release, grease every nook and cranny of the Bundt pan, then dust with flour or use a baking spray with flour.
    • Cool Completely Before Glazing: Glazing a warm cake will cause the glaze to melt and disappear into the cake.
    • Storage: Store covered at room temperature for up to 3 days. The flavor actually improves on day two.

    This Ultra-Moist Lemon Cake is a timeless recipe you’ll make again and again.

  • Cranberry Brie Bites: The Ultimate Festive 5-Ingredient Appetizer

    Cranberry Brie Bites: The Ultimate Festive 5-Ingredient Appetizer

    Elegant, effortless, and exploding with flavor—these Cranberry Brie Bites are the holy grail of holiday entertaining. They combine all the beloved elements of a baked brie wheel (creamy, gooey cheese, sweet-tart cranberry, buttery pastry, and a nutty crunch) into perfectly portioned, mess-free finger food. Using store-bought puff pastry and cranberry sauce makes them incredibly simple to assemble, yet they bake up looking like they came from a gourmet caterer.

    The warm, flaky pastry cups cradle the molten brie, which pairs magically with the bright pop of cranberry and the toasty pecan. Ready in under 30 minutes, these bites are guaranteed to be the first platter emptied at your Thanksgiving, Christmas, or New Year’s Eve gathering.

    The Science of the Perfect Flaky Cup & Melted Cheese

    The magic of this appetizer lies in the behavior of two key ingredients under heat: puff pastry and brie cheese. Puff pastry is a laminated dough with hundreds of alternating layers of dough and butter. In a hot oven, the water in the butter turns to steam, forcing the layers apart and creating a tall, airy, and shatteringly flaky cup.

    Using a mini muffin tin is crucial—it contains the pastry’s dramatic rise, directing it upward to form a sturdy vessel. Brie, a soft-ripened cheese, has a high fat and moisture content. When baked, its proteins break down quickly, causing it to melt into a luxurious, creamy pool rather than turning oily or rubbery.

    The rind is entirely edible and helps contain the melt, making it the perfect choice for a neat, contained filling. Baking them together allows the pastry to become crisp just as the cheese reaches its perfect molten state, creating an irresistible textural contrast in every bite.

    Ingredients

    For the Bites:

    • 1 sheet frozen puff pastry, thawed (from a 17.3 oz box)
    • 1 (8 oz) wheel or wedge of brie cheese
    • ½ cup whole berry cranberry sauce (jellied or homemade)
    • 24 pecan halves
    • Fresh rosemary or thyme, for garnish (optional)

    Optional Additions:

    • 1 tablespoon honey, for drizzling
    • A pinch of flaky sea salt

    Instructions

    1. Prep: Preheat oven to 400°F (200°C). Lightly grease a 24-cup mini muffin tin.

    2. Cut the Pastry: On a lightly floured surface, roll the thawed puff pastry sheet out slightly to smooth any seams. Using a pizza cutter or sharp knife, cut the sheet into 24 equal squares (approx. 2×2 inches each).

    3. Form the Cups: Gently press each pastry square into a cup of the prepared mini muffin tin, letting the corners point upwards. This creates the classic, rustic “cup” shape.

    4. Prep the Brie: Cut the brie into 24 small cubes (about ½-inch). It’s easier to cube if the brie is cold. A small piece of the rind is fine on each cube—it adds flavor and structure.

    5. Assemble: Place one cube of brie into each pastry cup. Top with about 1 teaspoon of cranberry sauce, then gently press one pecan half on top.

    6. Bake: Bake for 12-15 minutes, or until the puff pastry is deeply golden brown and puffed, and the brie is visibly melted and bubbly around the edges.

    7. Garnish & Serve: Let the bites cool in the tin for 2-3 minutes. Use a small offset spatula or spoon to carefully transfer them to a serving platter. Garnish with fresh rosemary or thyme, and drizzle with honey or sprinkle with flaky salt if desired. Serve warm.

    8. Make Ahead Tip: Assemble the bites in the muffin tin up to 4 hours ahead. Cover and refrigerate until ready to bake. Bake directly from the fridge, adding 1-2 minutes to the baking time.

    Pro-Tips for Flawless, Impressive Bites Every Time

    • Thaw Pastry Properly: Thaw puff pastry in the refrigerator overnight, or on the counter for about 40 minutes. It should be pliable but still cold to the touch for best results.
    • Don’t Overfill: The brie will expand as it melts. Use a cube no larger than ½-inch to prevent overflow.
    • Pecan Placement: Press the pecan lightly into the cranberry sauce so it adheres and toasts slightly during baking.
    • Grease the Tin Well: A light coating of butter or non-stick spray ensures the golden pastry cups release easily without breaking.
    • Serve Immediately: These bites are at their absolute peak within 10 minutes of leaving the oven, when the pastry is crisp and the cheese is gloriously gooey.
    • Variations: Substitute the cranberry sauce with fig jam, apricot preserves, or a spicy pepper jelly. Swap pecans for walnuts or a sprinkle of chopped pistachios. For a savory twist, add a tiny piece of prosciutto under the brie.

    These Cranberry Brie Bites are the perfect marriage of simplicity and sophistication, making you look like a hosting pro with minimal effort.

  • Feta & Herb Foldovers: The Flaky, 4-Ingredient Appetizer That Bakes in 15 Minutes

    Feta & Herb Foldovers: The Flaky, 4-Ingredient Appetizer That Bakes in 15 Minutes

    When the craving for something crispy, cheesy, and savory hits, these Feta & Herb Foldovers are your five-star solution with one-star effort. We’re harnessing the undeniable magic of frozen puff pastry—a secret weapon for instant elegance—and filling it with the classic, bold flavors of tangy feta and aromatic fresh herbs.

    In the oven’s heat, the pastry performs its alchemy, exploding into a hundred delicate, shattering layers that cradle the warm, creamy-salty filling. With barely more effort than opening a package, you can transform four simple ingredients into an impressive platter of gourmet-looking pastries. They’re as fitting for a cocktail party as they are for a solo afternoon indulgence.

    The Alchemy of the Flaky Pocket & Salty Filling

    The magic here is a delicious lesson in food science and contrasts. Puff pastry is a masterpiece of engineering: hundreds of paper-thin layers of dough separated by solid butter. In a hot oven, the butter melts and the water within it vaporizes into steam, violently pushing each layer apart to create that iconic, airy, and crisp architecture.

    The feta filling plays a crucial dual role. Its crumbly texture and high salt content provide a powerful flavor punch that stands up to the rich pastry. Crucially, its low moisture content (compared to a wetter cheese) means it won’t release steam and sog out the delicate layers from the inside, ensuring the pastry shell bakes up supremely crisp. A tight seal around the filling is essential—it acts as a pressure vessel, containing the steam to maximize the “puff” and locking in the flavorful cheese.

    Ingredients

    For the Foldovers:

    • 1 sheet (about 8-9 oz) frozen puff pastry, thawed but cold
    • 1 cup (about 150g) good-quality feta cheese, crumbled
    • 2-3 tablespoons fresh dill or parsley, finely chopped
    • 1 large egg, beaten (for egg wash)

    Optional Enhancements:

    • 1 teaspoon lemon zest
    • Freshly cracked black pepper
    • 1 tablespoon toasted sesame seeds or everything bagel seasoning
    • A pinch of dried oregano or chili flakes
    • 1 finely chopped green onion

    Instructions

    1. Prep: Preheat oven to 400°F (200°C). Line a baking sheet with parchment paper. Lightly beat the egg in a small bowl for the egg wash.

    2. Make the Filling: In a medium bowl, gently combine the crumbled feta and chopped herbs (and any optional additions like lemon zest or pepper). Avoid over-mixing to keep the feta’s texture.

    3. Roll & Cut the Pastry: On a lightly floured surface, unfold the thawed puff pastry sheet. Roll it gently with a rolling pin just to smooth any seams into a roughly 10×10 inch square. Using a pizza cutter or sharp knife, cut the sheet into 9 or 12 equal squares.

    4. Fill & Fold: Place a heaping tablespoon of the feta mixture in the center of each square. Using a pastry brush or your finger, brush a light coating of egg wash around all four edges of the square.

    5. Seal to Form a Triangle: Fold one corner of the square over the filling to meet the opposite corner, creating a triangle. Press down firmly on the edges with your fingers, then use the tines of a fork to crimp and seal the two open sides completely. This step is non-negotiable for a leak-proof pastry.

    6. Top & Bake: Place the sealed triangles on the prepared baking sheet. Brush the tops lightly with the remaining egg wash. If using, sprinkle with sesame seeds. Bake for 14-17 minutes, or until the pastries are dramatically puffed and a deep, golden brown.

    7. Cool & Serve: Let the foldovers cool on the sheet for at least 5 minutes before serving. The filling will be very hot. They are at their absolute peak served warm, when the contrast between the crisp shell and soft, tangy center is most pronounced.

    8. Make Ahead Tip: Assemble the foldovers completely, place them on the parchment-lined sheet, and freeze until solid. Transfer to a freezer bag. Bake from frozen, adding 3-5 minutes to the baking time. No thawing needed.

    Pro-Tips for Perfect, Professional-Looking Foldovers

    • Keep Pastry Cold: Work quickly and use cold pastry for maximum puff. If it becomes soft and sticky, pop it in the fridge for 10 minutes.
    • The Fork Crimp is Key: Don’t skip crimping with a fork after pressing the edges. This creates a physical seal that’s much stronger than fingers alone.
    • Don’t Overfill: Too much filling will prevent a good seal and cause leaks during baking. A heaping tablespoon is perfect.
    • Drain Feta Well: If your feta is very wet or packed in brine, pat it dry with a paper towel before crumbling. Excess moisture is the enemy of flakiness.
    • Variations: Add a teaspoon of chopped sun-dried tomatoes, Kalamata olives, or a thin slice of pepperoni to the filling before folding. For a sweet-savory twist, add a few pine nuts.
    • Serving: Pair with a simple side of tzatziki or a dollop of good-quality honey for drizzling.

    These Feta & Herb Foldovers are a brilliant reminder that the most impressive bites are often hiding in your freezer.