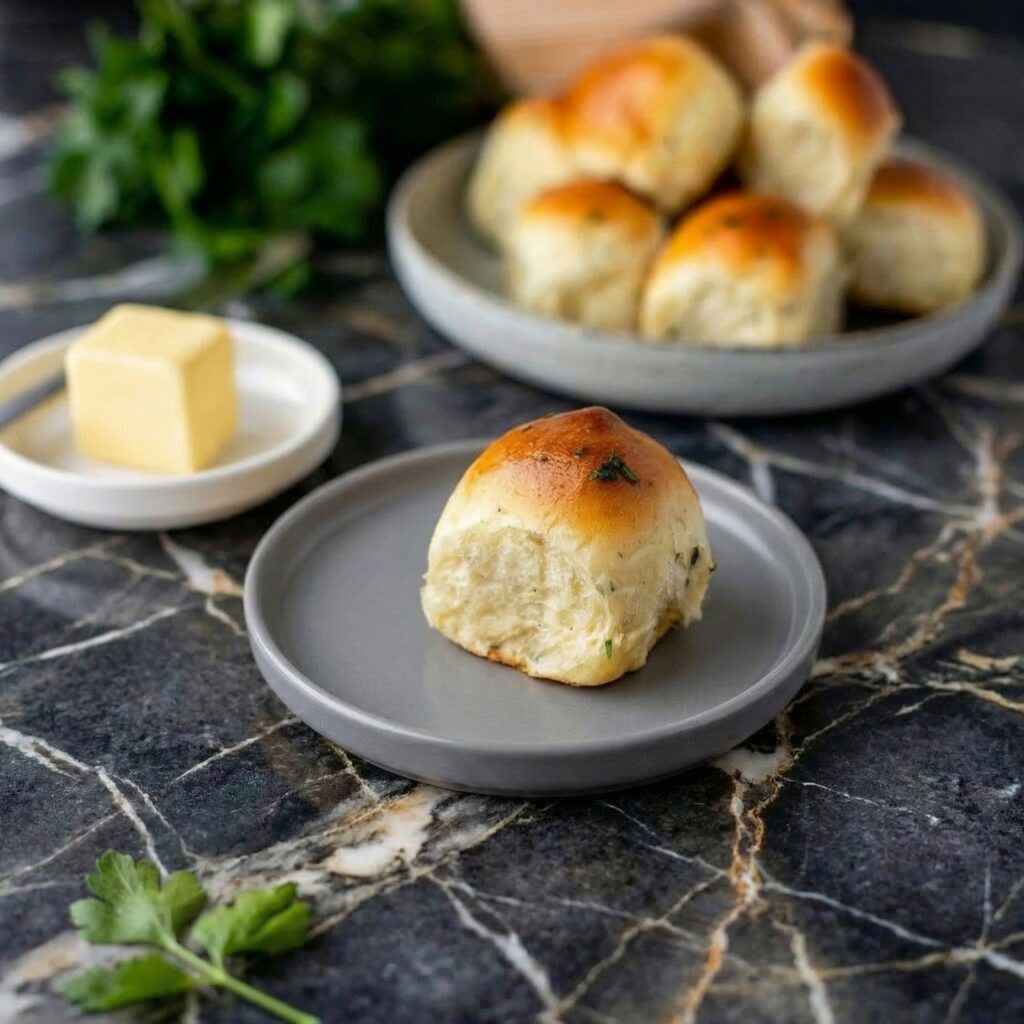
Category: baking

  • Baked Sweet Potato Fries (Crispy, Salty, and Actually Healthy)

    Baked Sweet Potato Fries (Crispy, Salty, and Actually Healthy)

    Let’s be honest: sweet potato fries are the best kind of fries. They’re sweet, they’re salty, they’re satisfying, and they feel just a little bit healthier than regular fries. But getting them crispy in the oven can be a challenge—too often they turn out limp and soggy. Not these.

    These baked sweet potato fries are the real deal: crispy on the outside, tender on the inside, and perfectly seasoned with salt, pepper, and a touch of smoked paprika. They’re baked, not fried, so you can feel good about eating a whole batch. Serve them with your favorite dipping sauce and prepare to be amazed. Oven-baked perfection.

    Ingredients

    For the Baked Sweet Potato Fries (Serves 4):

    • 3 large sweet potatoes (about 2 pounds)
    • 2 tablespoons olive oil or avocado oil
    • 1 tablespoon cornstarch (optional, but helps with crispiness)
    • 1 teaspoon smoked paprika
    • ½ teaspoon garlic powder
    • ½ teaspoon salt (plus more for finishing)
    • ¼ teaspoon black pepper
    • Pinch of cayenne pepper (optional, for heat)
    • Fresh parsley, chopped, for garnish

    For Dipping (Choose Your Adventure):

    • Garlic aioli
    • Sriracha mayo
    • Honey mustard
    • Chipotle sauce
    • Plain ketchup (classic!)

    Instructions

    1. Prep the Sweet Potatoes: Scrub the sweet potatoes well (peeling is optional—skin adds texture and nutrients). Cut them into even sticks, about ¼ to ½ inch thick. Try to keep them uniform for even baking.

    2. Soak the Fries: Place the cut fries in a large bowl and cover with cold water. Let them soak for at least 30 minutes, or up to overnight in the refrigerator. This removes excess starch and is the secret to crispiness.

    3. Preheat and Prep: Preheat your oven to 425°F (220°C). Line two large baking sheets with parchment paper (for easy cleanup).

    4. Dry Thoroughly: Drain the fries and spread them on a clean kitchen towel or several layers of paper towels. Pat them completely dry. Any moisture left will prevent crispiness.

    5. Season the Fries: In a large bowl, combine the dried fries with olive oil, cornstarch (if using), smoked paprika, garlic powder, salt, pepper, and cayenne. Toss well until every fry is evenly coated.

    6. Arrange on Baking Sheets: Spread the fries in a single layer on the prepared baking sheets, making sure they’re not touching or overlapping. Give them space—crowding leads to steaming, not crisping.

    7. Bake: Bake for 15 minutes, then flip the fries with a spatula. Rotate the pans and bake for another 10-15 minutes until the fries are golden brown and crispy on the edges.

    8. Cool Slightly: Let the fries cool on the baking sheets for 5 minutes—they’ll continue to crisp up as they cool.

    9. Season and Garnish: Sprinkle with additional salt to taste and fresh chopped parsley.

    10. Serve: Serve immediately with your favorite dipping sauces.

    Pro-Tips for Sweet Potato Fry Greatness

    • Don’t Skip the Soak: This step removes excess starch and is the number one secret to crispy fries. At least 30 minutes, longer is better.
    • Dry Thoroughly: Any moisture left behind will steam your fries instead of crisping them. Pat them bone-dry.
    • Don’t Overcrowd: Give each fry room to breathe. Use two pans if needed.
    • Flip Halfway: Flipping ensures even browning on all sides.
    • Customize Your Spices: Try cumin, chili powder, or cinnamon for different flavor profiles.

  • Cheesy Breadsticks (Soft, Buttery, and Covered in Melted Cheese)

    Cheesy Breadsticks (Soft, Buttery, and Covered in Melted Cheese)

    Let’s be honest: breadsticks are great. But cheesy breadsticks? They’re on another level. Soft, pillowy breadsticks brushed with garlic butter, then buried under a generous blanket of melted mozzarella and baked until golden and bubbly. They’re the ultimate pizza night side dish—or honestly, they could be the whole meal.

    Serve them warm with a side of marinara sauce for dipping, and watch them disappear before the pizza even arrives at the table. They’re easier to make than you think, and they’ll make you feel like a hero in your own kitchen. Let’s get cheesy.

    Ingredients

    For the Breadstick Dough (Makes 12 breadsticks):

    • 3 ¼ cups (405g) all-purpose flour (plus more for dusting)
    • 2 ¼ teaspoons (1 packet) instant yeast
    • 2 tablespoons granulated sugar
    • 1 teaspoon salt
    • ¾ cup (180ml) warm milk (about 110°F)
    • ¼ cup (60ml) warm water (about 110°F)
    • 3 tablespoons unsalted butter, melted
    • 1 large egg, at room temperature

    For the Garlic Butter Topping:

    • 3 tablespoons unsalted butter, melted
    • 2 cloves garlic, minced
    • 1 tablespoon fresh parsley, chopped (or 1 teaspoon dried)
    • ¼ teaspoon salt

    For the Cheesy Topping:

    • 2 cups (200g) freshly shredded mozzarella cheese
    • ¼ cup (25g) grated Parmesan cheese

    For Serving:

    • Warm marinara sauce, for dipping

    Instructions

    1. Make the Dough: In a large bowl or stand mixer, combine the flour, yeast, sugar, and salt. Add the warm milk, warm water, melted butter, and egg. Mix until a shaggy dough forms.

    2. Knead: Knead with a dough hook or by hand for 8-10 minutes until the dough is smooth, elastic, and slightly tacky. It should pass the windowpane test (stretch a small piece thin enough to see light through without tearing).

    3. First Rise: Place the dough in a lightly oiled bowl, cover, and let rise in a warm place for 1-2 hours until doubled in size.

    4. Shape the Breadsticks: Punch down the dough and turn it out onto a lightly floured surface. Roll it into a rectangle about 12×8 inches. Using a sharp knife or pizza cutter, cut the dough into 12 strips, each about 1 inch wide.

    5. Second Rise: Place the breadsticks on a parchment-lined baking sheet, spacing them about 1 inch apart. Cover loosely and let rise for 30-45 minutes until puffy.

    6. Preheat Oven: While the breadsticks rise, preheat your oven to 375°F (190°C).

    7. Bake: Bake the breadsticks for 12-15 minutes until lightly golden and cooked through.

    8. Make Garlic Butter: While the breadsticks bake, combine the melted butter, minced garlic, parsley, and salt in a small bowl.

    9. Add Cheese: Remove the breadsticks from the oven. Brush immediately with the garlic butter. Sprinkle generously with shredded mozzarella and Parmesan.

    10. Broil: Return to the oven and broil for 1-3 minutes until the cheese is melted, bubbly, and lightly browned in spots. Watch carefully—it burns quickly.

    11. Cool Slightly: Let the breadsticks cool for 5 minutes before serving.

    12. Serve: Serve warm with marinara sauce for dipping.

    Pro-Tips for Cheesy Breadstick Greatness

    • Use Freshly Shredded Cheese: Pre-shredded cheese contains anti-caking agents that prevent smooth melting. Shred your own for that perfect gooey cheese pull.
    • Don’t Overbake the Breadsticks: They’ll continue to cook slightly under the broiler. Pull them when they’re just lightly golden.
    • Watch the Broiler: Cheese can go from perfectly bubbly to burnt in seconds. Keep a close eye on it.
    • Brush with Garlic Butter Immediately: Warm bread soaks up that garlic butter flavor best. Don’t wait.
    • Serve Right Away: These are at their absolute best fresh from the oven while the cheese is still stretchy.
  • Red Velvet Brownies (Fudgy, Dreamy, and Swirled with Cream Cheese)

    Red Velvet Brownies (Fudgy, Dreamy, and Swirled with Cream Cheese)

    Let’s talk about the perfect marriage of two desserts: red velvet cake and fudgy brownies. These red velvet brownies are everything you could want—rich, chocolatey, strikingly beautiful, and swirled with creamy cheesecake goodness.

    They have the signature tang of red velvet, the fudgy texture of a perfect brownie, and a gorgeous cream cheese swirl that makes every bite irresistible. They’re perfect for Valentine’s Day, Christmas, or any time you want to impress with something stunning and delicious. And the best part? They’re easier to make than you’d think. Let’s get swirling.

    Ingredients

    For the Red Velvet Brownies (Makes 16 brownies):

    • ¾ cup (170g) unsalted butter
    • 1 cup (200g) granulated sugar
    • ½ cup (100g) packed brown sugar
    • 2 large eggs, at room temperature
    • 2 teaspoons vanilla extract
    • 1 tablespoon red gel food coloring
    • 1 teaspoon white vinegar
    • 1 cup (125g) all-purpose flour
    • ¼ cup (25g) unsweetened cocoa powder
    • ½ teaspoon salt

    For the Cream Cheese Swirl:

    • 8 oz (225g) cream cheese, softened to room temperature
    • ¼ cup (50g) granulated sugar
    • 1 large egg yolk
    • ½ teaspoon vanilla extract

    For Serving (Optional):

    • Powdered sugar, for dusting

    Instructions

    1. Preheat and Prep: Preheat your oven to 350°F (175°C). Grease an 8×8 or 9×9-inch baking pan and line it with parchment paper, leaving overhang on two sides for easy removal .

    2. Melt Butter: In a medium saucepan or microwave-safe bowl, melt the butter. Let it cool slightly .

    3. Combine Wet Ingredients: In a large bowl, whisk together the melted butter, granulated sugar, and brown sugar until well combined. Whisk in the eggs one at a time, then the vanilla extract, red gel food coloring, and white vinegar until smooth and uniformly red .

    4. Add Dry Ingredients: Sift the flour, cocoa powder, and salt into the wet mixture. Fold gently with a spatula until just combined. Do not overmix .

    5. Make Cream Cheese Swirl: In a separate bowl, beat the softened cream cheese and granulated sugar until smooth. Add the egg yolk and vanilla extract, beating until well combined and creamy .

    6. Assemble: Pour the red velvet batter into the prepared pan and spread evenly. Drop spoonfuls of the cream cheese mixture over the batter. Use a knife or toothpick to gently swirl the cream cheese into the red velvet batter, creating a marbled effect. Don’t over-swirl—you want distinct pockets of cream cheese .

    7. Bake: Bake for 30-35 minutes until the edges are set and a toothpick inserted into the center comes out with a few moist crumbs (not wet batter). The center should still look slightly soft .

    8. Cool Completely: Let the brownies cool completely in the pan on a wire rack. This is essential for clean slices—at least 2 hours .

    9. Chill (Optional but Recommended): For the cleanest cuts, refrigerate the cooled brownies for 1-2 hours before slicing .

    10. Slice: Use the parchment overhang to lift the brownies out of the pan. Place on a cutting board and slice into squares with a sharp knife, wiping clean between cuts .

    11. Serve: Dust with powdered sugar just before serving if desired .

    12. Store: Store in an airtight container in the refrigerator for up to 5 days .

    Pro-Tips for Red Velvet Brownie Greatness

    • Use Gel Food Coloring: Liquid food coloring can thin the batter and won’t give you that vibrant red color. Gel is the way to go .
    • Room Temperature Ingredients: For the cream cheese swirl, make sure the cream cheese is softened to avoid lumps .
    • Don’t Over-Swirl: A few gentle swirls are enough. Over-swirling will muddy the beautiful red and white contrast .
    • Cool Completely: These brownies need time to set up. Don’t rush the cooling process .
    • Chill Before Slicing: For picture-perfect squares, refrigerate before cutting. A warm knife helps too .
  • Homemade Brioche (Buttery, Flaky, and So Worth the Effort)

    Homemade Brioche (Buttery, Flaky, and So Worth the Effort)

    Let’s talk about brioche. It’s the crown jewel of enriched breads—rich, tender, and impossibly buttery, with a golden crust that shatters slightly and a soft, fluffy interior that melts in your mouth. It’s the bread of French bakeries, of leisurely weekend breakfasts, of the most incredible French toast you’ve ever tasted. And yes, you can make it at home.

    Brioche takes time and a little patience, but the result is so worth it. The smell alone as it bakes will transport you to a Parisian pâtisserie. Slather it with jam, turn it into the ultimate bread pudding, or just eat it warm from the oven with a generous pat of butter. This is bread worth waiting for.

    Ingredients

    For the Homemade Brioche (Makes 1 large loaf or 12 brioche buns):

    • 4 cups (500g) all-purpose or bread flour
    • ¼ cup (50g) granulated sugar
    • 2 ¼ teaspoons (1 packet) instant yeast
    • 1 ½ teaspoons salt
    • 4 large eggs, at room temperature
    • ½ cup (120ml) whole milk, warmed to about 110°F
    • 1 cup (226g) unsalted butter, cold, cut into small cubes

    For Egg Wash:

    • 1 large egg, beaten with 1 tablespoon water or milk

    Instructions

    1. Combine Dry Ingredients: In the bowl of a stand mixer, whisk together the flour, sugar, yeast, and salt.

    2. Add Eggs and Milk: Add the eggs and warm milk to the dry ingredients. Mix with the dough hook on low speed until a shaggy dough forms.

    3. Knead: Knead on medium-low speed for 5-7 minutes until the dough becomes smoother and starts to come together. It will still be quite stiff.

    4. Add Butter Gradually: With the mixer running on medium-low, add the cold butter cubes a few at a time, waiting until each addition is mostly incorporated before adding more. This process takes time—be patient.

    The dough will look messy and may seem to fall apart, but keep mixing. After all the butter is added, continue kneading for another 10-15 minutes until the dough is smooth, elastic, and pulls away from the sides of the bowl. It should be silky and shiny.

    5. First Rise: Place the dough in a lightly oiled bowl, cover, and let rise at room temperature for 1-2 hours until doubled in size.

    6. Chill Overnight: Punch down the dough, cover tightly, and refrigerate for at least 4 hours, preferably overnight. This step develops flavor and makes the dough easier to shape.

    7. Shape the Dough: Turn the chilled dough out onto a lightly floured surface. For a loaf, shape it into a rectangle and place in a greased 9×5-inch loaf pan. For buns, divide into 12 equal pieces, shape into balls, and place in a greased baking dish or on a baking sheet.

    8. Second Rise: Cover loosely and let rise at room temperature for 1-2 hours until puffy and almost doubled.

    9. Preheat and Egg Wash: Preheat your oven to 375°F (190°C). Brush the top of the brioche gently with egg wash.

    10. Bake: Bake for 25-35 minutes (depending on shape) until deep golden brown and the internal temperature reaches 190°F (88°C). If the top browns too quickly, tent with foil.

    11. Cool: Let cool in the pan for 10 minutes, then transfer to a wire rack to cool completely.

    12. Serve and Store: Serve warm or at room temperature. Store in an airtight container at room temperature for up to 3 days, or freeze for up to 3 months.

    Pro-Tips for Brioche Greatness

    • Use Cold Butter: Cold butter cubes incorporate better and prevent the dough from becoming greasy.
    • Be Patient with Butter Addition: Adding the butter gradually is crucial. Don’t rush this step.
    • Chill the Dough: The overnight rest in the fridge develops flavor and makes shaping much easier.
    • Don’t Rush the Rises: Brioche needs time to develop its signature texture. Let it rise fully.
    • Egg Wash Gently: A gentle hand with the egg wash prevents deflating the dough.
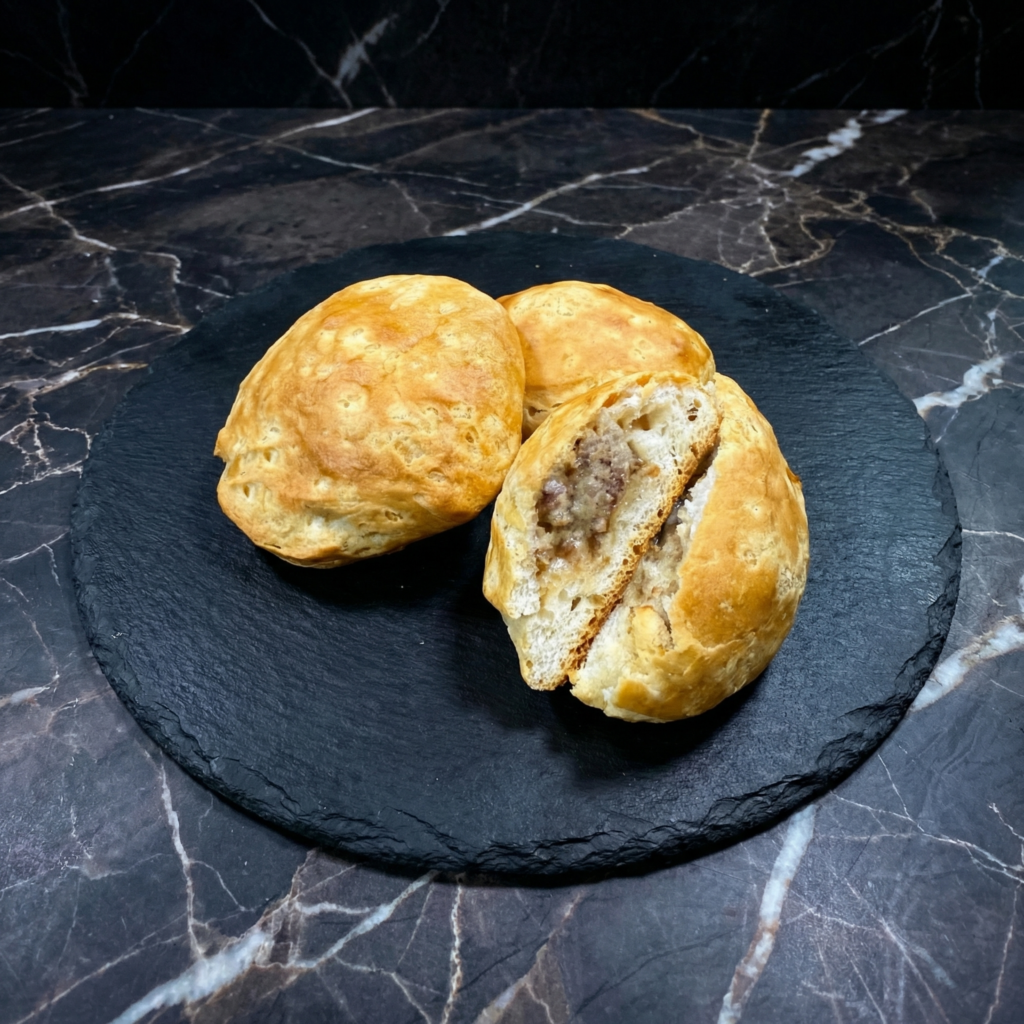
  • Zucchini Biscuits (The Savory, Flaky, Garden-Fresh Dream)

    Zucchini Biscuits (The Savory, Flaky, Garden-Fresh Dream)

    If you’ve ever found yourself with an abundance of zucchini and a desperate need to do something other than make bread, these zucchini biscuits are your answer.

    They’re everything a great biscuit should be: flaky, buttery, tall, and tender. But they’re also packed with tender shreds of zucchini and fresh herbs, adding a savory, garden-fresh twist that makes them completely irresistible.

    Serve them alongside a bowl of soup, piled high with eggs for breakfast, or simply slathered with butter all on their own. They’re the kind of biscuit that disappears before you’ve even finished the meal. Zucchini has never been this exciting.

    The Secret to Flaky, Never-Soggy Zucchini Biscuits

    The challenge with adding zucchini to biscuits is moisture. Zucchini is mostly water, and too much moisture will turn your flaky biscuits into sad, soggy pucks.

    The secret is salting and draining the zucchini. After shredding, toss the zucchini with a little salt and let it sit for 10-15 minutes. Then, squeeze it firmly in a clean kitchen towel or paper towels to remove as much liquid as possible. This simple step concentrates the flavor and ensures your biscuits stay light and flaky.

    The other secret? Very cold butter and minimal handling. Cold butter creates steam as it bakes, creating those glorious flaky layers. Handle the dough gently, and you’ll be rewarded with the best zucchini biscuits of your life.

    Ingredients

    For the Zucchini Biscuits (Makes 8-10 biscuits):

    • 2 cups (250g) all-purpose flour
    • 1 tablespoon baking powder
    • 1 teaspoon sugar
    • ½ teaspoon salt
    • ½ teaspoon black pepper
    • ½ teaspoon garlic powder (optional)
    • ½ cup (113g) unsalted butter, very cold, cut into small cubes
    • 1 cup (150g) shredded zucchini (about 1 medium zucchini)
    • ¼ cup (15g) fresh herbs (chives, parsley, dill, or a mix), finely chopped
    • ½ cup (120ml) buttermilk, cold (plus more for brushing)
    • Flaky sea salt, for topping

    Instructions

    1. Preheat and Prep: Preheat your oven to 425°F (220°C). Line a baking sheet with parchment paper .

    2. Shred and Drain the Zucchini: Shred the zucchini using a box grater. Place the shreds in a colander or bowl, toss with a pinch of salt, and let sit for 10-15 minutes. Then, transfer to a clean kitchen towel or several layers of paper towels and squeeze firmly to remove as much liquid as possible. You should have about ½ cup of squeezed zucchini .

    3. Combine Dry Ingredients: In a large bowl, whisk together the flour, baking powder, sugar, salt, pepper, and garlic powder (if using) .

    4. Cut in the Butter: Add the cold butter cubes to the flour mixture. Using a pastry blender, fork, or your fingertips, cut the butter into the flour until the mixture resembles coarse meal with pea-sized butter pieces. Work quickly to keep the butter cold .

    5. Add Zucchini and Herbs: Add the squeezed zucchini and fresh herbs to the bowl. Toss gently to distribute .

    6. Add Buttermilk: Pour the cold buttermilk over the mixture. Stir with a fork just until a shaggy dough forms. Do not overmix. The dough will be sticky and messy—that’s perfect .

    7. Shape the Biscuits: Turn the dough out onto a lightly floured surface. Gently bring it together with your hands, then pat it into a rectangle about 1-inch thick. Fold it over itself once or twice for extra layers, then pat it back to 1-inch thickness.

    Use a biscuit cutter or sharp knife to cut into rounds or squares. Press straight down without twisting—twisting seals the edges and prevents rising .

    8. Arrange on Baking Sheet: Place the biscuits on the prepared baking sheet, spacing them about 2 inches apart. For softer sides, place them closer together; for crispier edges, space them apart .

    9. Brush and Top: Brush the tops with a little buttermilk and sprinkle with flaky sea salt .

    10. Bake: Bake for 15-18 minutes until the biscuits are golden brown and have risen beautifully .

    11. Cool Slightly: Let the biscuits cool on the baking sheet for 5-10 minutes before serving .

    12. Serve and Store: Serve warm with butter. Store leftovers in an airtight container at room temperature for up to 2 days, or freeze for up to 3 months .

    Pro-Tips for Zucchini Biscuit Greatness

    • Squeeze the Zucchini Thoroughly: This step is non-negotiable. Removing as much moisture as possible ensures flaky, not soggy, biscuits .
    • Keep Everything Cold: Cold butter and cold buttermilk create steam and flaky layers. If your kitchen is warm, pop the shaped biscuits in the fridge for 10 minutes before baking .
    • Don’t Overwork the Dough: Mix just until combined. Overworking develops gluten and makes biscuits tough .
    • Use Fresh Herbs: Fresh herbs add brightness and flavor. Dried herbs won’t give you the same result .
    • Serve Warm: Biscuits are at their absolute best fresh from the oven. Serve them warm with plenty of butter .
  • Artisan Bread (The Crusty, Golden Loaf of Your Dreams)

    Artisan Bread (The Crusty, Golden Loaf of Your Dreams)

    There’s something magical about pulling a gorgeous, golden, crusty loaf of bread out of your own oven. The crackle of the crust as it cools, the aroma filling your kitchen, the way it makes you feel like you’ve just done something extraordinary—because you have.

    This artisan bread is everything you want: a shatteringly crisp crust, a chewy, hole-filled interior, and that deep, complex, bakery-style flavor that seems impossible to achieve at home.

    But here’s the secret: it’s not impossible. It’s actually incredibly simple. With just four ingredients, a little patience, and a Dutch oven, you can create bread that rivals any bakery. Let’s bake something beautiful.

    The Secret to Bakery-Style Crust and Crumb

    The magic of artisan bread lies in three things: high hydration, long fermentation, and steam. A wetter dough (about 75-80% hydration) creates those iconic holes and a chewy, open crumb. A long, slow rise develops deep, complex flavor that you just can’t rush.

    And steam is the secret to that crackly, golden crust—it keeps the exterior soft long enough for the bread to expand fully, then evaporates to leave behind that shatteringly crisp shell. A Dutch oven is your secret weapon here: it traps steam perfectly, creating a mini bread oven right in your kitchen. The result? Bread that looks and tastes like it came from a fancy bakery. Spoiler: you made it.

    Ingredients

    For the Artisan Bread (Makes 1 large loaf):

    • 3 ¼ cups (about 430g) bread flour (or all-purpose flour, but bread flour gives better structure)
    • 1 ½ teaspoons (about 9g) salt
    • ½ teaspoon (about 3g) instant yeast (or active dry yeast)
    • 1 ½ cups (about 360g) warm water (about 90-95°F)
    • Extra flour for dusting

    Instructions

    1. Mix the Dough: In a large bowl, combine the flour, salt, and instant yeast. Whisk to combine. Add the warm water and stir with a wooden spoon or your hand until a shaggy, sticky dough forms and no dry flour remains. The dough will be very wet and sticky—that’s exactly right .

    2. Cover and Rest: Cover the bowl with plastic wrap or a damp kitchen towel. Let it rest at room temperature for 12-18 hours (overnight is perfect). The dough should double in size, be bubbly on top, and smell slightly yeasty .

    3. Turn Out and Fold: Lightly flour a work surface. Turn the dough out onto the floured surface. It will be very wet and sticky. Using floured hands, gently stretch and fold the dough over itself a few times—like folding a letter. This adds structure without kneading .

    4. Shape the Dough: Gently shape the dough into a round by tucking the edges underneath, creating surface tension. Don’t overwork it—a few gentle movements are enough .

    5. Second Rise: Place the shaped dough seam-side down on a piece of parchment paper. Dust the top with flour and cover loosely with plastic wrap or a towel. Let it rise for 1-2 hours until puffy and nearly doubled. It should hold an indent when gently poked .

    6. Preheat Dutch Oven: About 30 minutes before the second rise is complete, place a Dutch oven with its lid in the oven and preheat to 450°F (230°C). Getting the pot screaming hot is essential .

    7. Score the Dough: Carefully remove the hot Dutch oven from the oven. Using the parchment paper as a sling, lift the dough and lower it into the pot. Using a lame or sharp knife, score the top with a quick, confident slash about ¼-inch deep. This allows the bread to expand .

    8. Bake Covered: Put the lid on and bake for 30 minutes. The lid traps steam, creating that perfect crust .

    9. Bake Uncovered: Remove the lid and bake for another 10-15 minutes until the crust is deeply golden brown and beautiful. The bread should sound hollow when tapped on the bottom .

    10. Cool Completely: Transfer the bread to a wire rack and let it cool completely—at least 1-2 hours. This is the hardest part, but essential for the perfect texture .

    11. Slice and Enjoy: Slice into that gorgeous loaf, slather with butter, and marvel at what you’ve created .

    12. Store: Store leftover bread in a paper bag at room temperature for 2-3 days, or freeze for up to 3 months .

    Pro-Tips for Artisan Bread Greatness

    • Use a Kitchen Scale: Baking by weight is far more accurate than cups. A scale is your best friend for consistent results .
    • Don’t Rush the First Rise: A full 12-18 hours develops deep flavor and that beautiful open crumb. Overnight is perfect .
    • Hot Dutch Oven is Essential: A screaming-hot pot creates steam and gives you that gorgeous, crackly crust. Don’t skip preheating it .
    • Be Gentle When Shaping: Wet dough is delicate. Overworking it will deflate all those lovely air bubbles you worked so hard to create .
    • Cool Completely: Slicing warm bread is tempting, but it will be gummy inside. Patience is rewarded with the perfect crumb .
  • Oatmeal Cream Pies (The Lunchbox Classic, But Better)

    Oatmeal Cream Pies (The Lunchbox Classic, But Better)

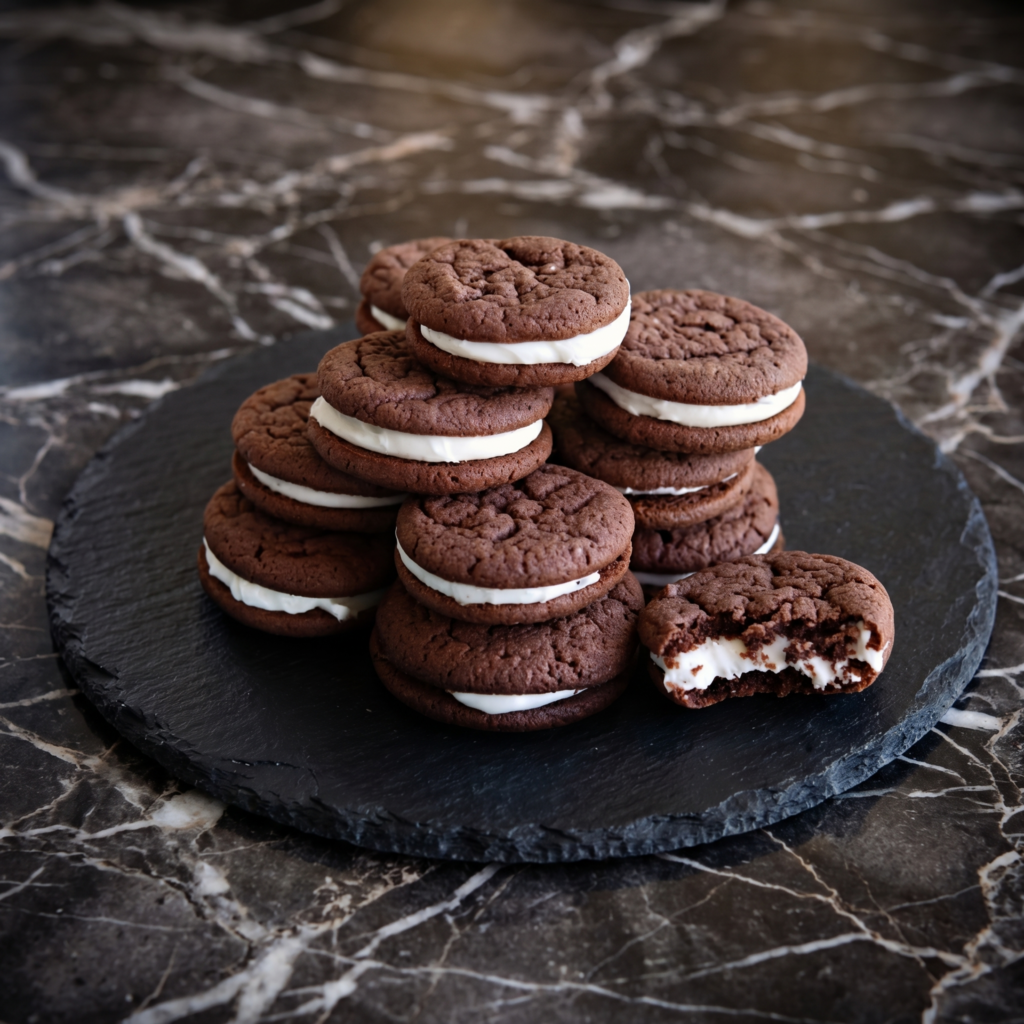
    Remember those little plastic-wrapped oatmeal cream pies from your childhood? The ones you’d find in your lunchbox and trade with friends? This is that cookie—but better. So much better.

    Soft, chewy oatmeal cookies, perfectly spiced with cinnamon and packed with old-fashioned oats, are sandwiched together with a thick, fluffy, marshmallow-like vanilla cream filling that’s absolutely irresistible.

    They’re nostalgic, they’re comforting, and they’re way easier to make than you’d think. One bite and you’ll be transported back to the cafeteria—only now, you’re the one in charge of the recipe. Childhood dreams do come true.

    The Secret to Soft, Chewy Oatmeal Cookies

    The key to perfect oatmeal cream pies is the cookie texture. They need to be soft and chewy, not crisp, so they don’t shatter when you bite into them. The secret is brown sugar and butter. A higher ratio of brown sugar to white sugar adds moisture and that deep, caramel-like flavor.

    Using melted butter instead of creamed butter creates a denser, chewier texture—perfect for sandwich cookies. And don’t overbake. Pull them when the edges are just set and the centers still look slightly underdone; they’ll continue to bake on the hot sheet.

    The other secret? Old-fashioned rolled oats. Quick oats will turn to mush; old-fashioned oats give you that perfect chewy texture and hearty oat flavor in every bite.

    Ingredients

    For the Oatmeal Cookies (Makes about 16-18 sandwich cookies):

    • 1 cup (226g) unsalted butter, melted and slightly cooled
    • 1 cup (200g) packed brown sugar
    • ½ cup (100g) granulated sugar
    • 2 large eggs, at room temperature
    • 1 tablespoon vanilla extract
    • 1 ½ cups (190g) all-purpose flour
    • 1 teaspoon baking soda
    • 1 teaspoon ground cinnamon
    • ½ teaspoon salt
    • 3 cups (270g) old-fashioned rolled oats (not quick oats)
    • 1 cup (150g) raisins (optional, but classic)

    For the Vanilla Cream Filling:

    • 1 cup (226g) unsalted butter, slightly softened
    • 2 cups (240g) powdered sugar, sifted
    • 1 jar (7 oz/200g) marshmallow fluff (about 2 cups)
    • 2 teaspoons vanilla extract
    • Pinch of salt
    • 1-2 tablespoons heavy cream (if needed for consistency)

    Instructions

    1. Preheat and Prep: Preheat your oven to 350°F (175°C). Line two large baking sheets with parchment paper .

    2. Combine Wet Ingredients: In a large bowl, whisk together the melted butter, brown sugar, and granulated sugar until smooth. Whisk in the eggs and vanilla extract until well combined .

    3. Combine Dry Ingredients: In a separate bowl, whisk together the flour, baking soda, cinnamon, and salt .

    4. Mix Wet and Dry: Add the dry ingredients to the wet mixture and stir with a spatula until just combined. Do not overmix .

    5. Add Oats and Raisins: Fold in the rolled oats and raisins (if using) until evenly distributed. The dough will be thick and sticky .

    6. Scoop the Cookies: Using a cookie scoop or tablespoon, scoop rounded tablespoons of dough onto the prepared baking sheets, spacing them about 2 inches apart. They will spread slightly .

    7. Bake: Bake for 10-12 minutes, until the edges are set and lightly golden but the centers still look soft and slightly underdone. Do not overbake—this is key for soft cookies .

    8. Cool: Let the cookies cool on the baking sheet for 5 minutes, then transfer to a wire rack to cool completely .

    9. Make the Cream Filling: In a large bowl, beat the softened butter on medium speed until creamy and smooth, about 2 minutes. Gradually add the powdered sugar, beating until combined. Add the marshmallow fluff, vanilla extract, and salt.

    Beat on medium-high speed for 2-3 minutes until light, fluffy, and smooth. If the filling is too thick, add heavy cream 1 tablespoon at a time until it reaches a spreadable consistency .

    10. Pair the Cookies: Match up cookies by size, placing them in pairs with the flat sides facing each other .

    11. Fill the Cookies: Spoon or pipe a generous amount of cream filling onto the flat side of one cookie. Gently press the second cookie on top, flat-side down, until the filling spreads to the edges. Don’t squish too hard or the filling will burst out .

    12. Serve and Store: Serve immediately or store in an airtight container at room temperature for up to 3 days, or in the refrigerator for up to a week .

    Pro-Tips for Oatmeal Cream Pie Greatness

    • Don’t Overbake the Cookies: Pull them when the edges are set but the centers still look soft. They’ll continue to bake on the hot sheet and stay perfectly chewy .
    • Use Old-Fashioned Oats: Quick oats will give you a mushy texture. Old-fashioned oats are essential for that perfect chewy bite .
    • Room Temperature Butter for Filling: Softened butter creams smoothly into the filling. Cold butter will give you lumps .
    • Pipe the Filling: For neat, even filling, use a piping bag with a large round tip. It’s easier and looks professional .
    • Let Filled Pies Rest: If you can wait, let the assembled pies sit for an hour—the cookies soften slightly against the cream, becoming even more like the classic lunchbox version .
  • Chocolate Cupcakes (The Ones You’ll Make Forever)

    Chocolate Cupcakes (The Ones You’ll Make Forever)

    Some recipes you try once and forget. Others become part of your life—the ones you make for birthdays, bake sales, and those random Tuesday nights when only chocolate will do. These chocolate cupcakes are the ones you’ll make forever. They’re rich, moist, and deeply chocolatey, with that perfect domed top and a tender crumb that stays fresh for days.

    They come together easily with simple ingredients, and they’re absolutely irresistible topped with a silky, swoon-worthy chocolate buttercream. Whether you’re a seasoned baker or making cupcakes for the first time, this recipe delivers perfection every single time. Chocolate dreams really do come true.

    The Secret to Deeply Chocolatey, Super Moist Cupcakes

    The secret to the best chocolate cupcakes lies in two ingredients: hot coffee and buttermilk. Hot coffee doesn’t make the cupcakes taste like coffee—it actually enhances the chocolate flavor, making it deeper and more complex. The coffee interacts with the cocoa powder to bring out its richness in a way water simply can’t.

    Buttermilk adds tenderness and moisture, ensuring a soft, fine crumb that stays fresh for days. The other secret? Don’t overmix. Once the flour meets the wet ingredients, mix just until combined. Overmixing develops gluten, which can make your cupcakes tough instead of tender. Follow these rules, and you’ll have the most perfect, chocolatey cupcakes of your life.

    Ingredients

    For the Chocolate Cupcakes (Makes 12-14 cupcakes):

    • 1 cup (125g) all-purpose flour
    • 1 cup (200g) granulated sugar
    • ½ cup (45g) unsweetened cocoa powder (natural or Dutch-process)
    • 1 teaspoon baking soda
    • ½ teaspoon baking powder
    • ½ teaspoon salt
    • ½ cup (120ml) buttermilk, at room temperature
    • ½ cup (120ml) hot coffee (or hot water)
    • ⅓ cup (80ml) vegetable oil
    • 1 large egg, at room temperature
    • 1 teaspoon vanilla extract

    For the Chocolate Buttercream Frosting:

    • 1 cup (226g) unsalted butter, slightly softened
    • 3 ½ cups (420g) powdered sugar, sifted
    • ¾ cup (65g) unsweetened cocoa powder, sifted
    • ½ cup (120ml) heavy cream (or milk)
    • 2 teaspoons vanilla extract
    • ¼ teaspoon salt

    For Topping (Optional):

    • Sprinkles, chocolate shavings, or chocolate chips

    Instructions

    1. Preheat and Prep: Preheat your oven to 350°F (175°C). Line a 12-cup muffin pan with paper liners (you may have enough batter for 2 extra cupcakes—line a second pan or bake in batches).

    2. Combine Dry Ingredients: In a large bowl, whisk together the flour, sugar, cocoa powder, baking soda, baking powder, and salt until well combined.

    3. Combine Wet Ingredients: In a separate bowl or large measuring cup, whisk together the buttermilk, hot coffee, vegetable oil, egg, and vanilla extract until smooth.

    4. Mix Wet and Dry: Pour the wet ingredients into the dry ingredients. Whisk gently until just combined—about 30 seconds. The batter will be thin. That’s normal. Do not overmix.

    5. Fill the Liners: Divide the batter evenly among the cupcake liners, filling each about ⅔ full. A cookie scoop makes this easy.

    6. Bake: Bake for 18-22 minutes, until a toothpick inserted into the center of a cupcake comes out clean or with a few moist crumbs. The tops should spring back when lightly touched.

    7. Cool: Let the cupcakes cool in the pan for 5-10 minutes, then transfer to a wire rack to cool completely before frosting.

    8. Make the Chocolate Buttercream: In a large bowl, beat the softened butter on medium speed until creamy and smooth, about 2-3 minutes. Gradually add the sifted powdered sugar and cocoa powder, one cup at a time, beating on low until combined.

    Add the heavy cream, vanilla extract, and salt. Beat on medium-high speed for 2-3 minutes until the frosting is light, fluffy, and spreadable.

    9. Frost the Cupcakes: Once the cupcakes are completely cool, frost them using a piping bag fitted with your favorite tip (like a large star tip for a classic swirl) or simply spread the frosting with an offset spatula.

    10. Decorate: Add sprinkles, chocolate shavings, or a chocolate chip on top if desired.

    11. Serve and Store: Serve at room temperature. Store any leftovers in an airtight container at room temperature for up to 3 days, or in the refrigerator for up to 5 days.

    Pro-Tips for Chocolate Cupcake Greatness

    • Use Hot Coffee: It deepens the chocolate flavor without making the cupcakes taste like coffee. Don’t skip it.
    • Room Temperature Ingredients: Buttermilk and egg should be at room temperature for a smooth, evenly mixed batter.
    • Don’t Overmix: Mix just until the flour disappears. Overmixing = tough cupcakes.
    • Cool Completely Before Frosting: If the cupcakes are even slightly warm, your frosting will melt and slide right off.
    • Use a Cookie Scoop: A cookie scoop ensures even, perfectly sized cupcakes every time.
  • Slow-Cooked Elegance: How to Make Classic Beef Bourguignon

    Slow-Cooked Elegance: How to Make Classic Beef Bourguignon

    Few dishes embody the heart and soul of French cuisine quite like Beef Bourguignon.

    This rich, slow-cooked stew combines tender beef, earthy vegetables, and red wine into a dish that’s deeply flavorful and utterly comforting.

    While it may seem like a sophisticated restaurant dish, making beef bourguignon at home is completely achievable with a little patience, the right ingredients, and careful technique.

    Follow this step-by-step guide, and you’ll create a classic French masterpiece that fills your kitchen with tantalizing aromas and delivers unforgettable flavor.


    Ingredients You’ll Need

    Gather all ingredients before starting to streamline the cooking process.

    For the beef and marinade:

    • 2 pounds (900g) beef chuck, cut into 2-inch cubes
    • 2 cups red wine (Burgundy or Pinot Noir works best)
    • 2 tablespoons tomato paste
    • 2 cloves garlic, minced
    • 1 teaspoon fresh thyme (or ½ teaspoon dried thyme)
    • 2 bay leaves
    • Salt and black pepper

    For the stew:

    • 4 tablespoons unsalted butter
    • 2 tablespoons olive oil
    • 1 large onion, chopped
    • 2 medium carrots, sliced
    • 2 celery stalks, sliced
    • 8 oz (225g) pearl onions, peeled
    • 8 oz (225g) mushrooms, quartered
    • 2 tablespoons all-purpose flour
    • 2 cups beef broth
    • 1 teaspoon fresh thyme
    • 2 bay leaves
    • Salt and black pepper, to taste
    • Fresh parsley, chopped, for garnish

    Step 1: Marinate the Beef

    Place the beef cubes in a large bowl. Add red wine, tomato paste, minced garlic, thyme, bay leaves, and a pinch of salt and black pepper.

    Cover and refrigerate for at least 4 hours, preferably overnight.

    Marinating the beef in wine enhances flavor and helps tenderize the meat.


    Step 2: Preheat and Prepare

    Preheat your oven to 325°F (160°C).

    Remove the beef from the marinade, patting it dry with paper towels to ensure proper browning.

    Reserve the marinade, as it will be used later to create the rich stew sauce.


    Step 3: Brown the Beef

    In a large Dutch oven or heavy-bottomed pot, heat 2 tablespoons of butter and 2 tablespoons of olive oil over medium-high heat.

    Working in batches to avoid overcrowding, sear the beef cubes until browned on all sides.

    Remove the browned beef and set aside.

    Browning the meat develops deep, savory flavor essential to a classic beef bourguignon.


    Step 4: Sauté the Vegetables

    In the same pot, add chopped onions, carrots, and celery. Sauté for 5–6 minutes until softened and lightly caramelized.

    Stir in the tomato paste and cook for 1 minute to remove the raw taste.

    Add the reserved wine marinade, scraping the bottom of the pot to release any browned bits—these add tremendous depth of flavor to the stew.


    Step 5: Build the Stew

    Return the browned beef to the pot.

    Sprinkle in the flour, stirring to coat the meat and vegetables.

    Gradually pour in the beef broth, ensuring the meat is mostly submerged.

    Add thyme, bay leaves, and additional salt and pepper.

    Bring the mixture to a gentle simmer on the stovetop.


    Step 6: Slow-Cook in the Oven

    Cover the pot with a lid and transfer it to the preheated oven.

    Cook for 2 ½ to 3 hours, stirring occasionally, until the beef is tender and the flavors have melded together.

    Slow cooking allows the meat to become fork-tender and allows the sauce to thicken naturally.


    Step 7: Prepare Mushrooms and Pearl Onions

    While the stew is cooking, melt 2 tablespoons of butter in a skillet over medium heat.

    Sauté the pearl onions and mushrooms until lightly browned and tender.

    Set aside—they will be added to the stew near the end to preserve texture and flavor.


    Step 8: Combine and Finish

    After the beef has cooked, stir in the sautéed mushrooms and pearl onions.

    Simmer on the stovetop for an additional 10–15 minutes to allow the flavors to meld.

    Taste and adjust seasoning with salt and black pepper as needed.

    The sauce should be rich, glossy, and thick enough to coat the back of a spoon.


    Step 9: Serve

    Serve beef bourguignon over creamy mashed potatoes, buttery egg noodles, or crusty French bread to soak up the luscious sauce.

    Garnish with freshly chopped parsley for a touch of color and freshness.

    Each bite should reveal tender beef, flavorful vegetables, and a perfectly balanced red wine sauce.


    Pro Tips for Perfect Beef Bourguignon

    1. Marinate for depth: Overnight marinating in red wine develops robust flavor and tenderizes the beef.
    2. Brown in batches: Avoid overcrowding the pot to ensure proper caramelization.
    3. Use a Dutch oven: Its thick walls distribute heat evenly for slow-cooked perfection.
    4. Low and slow: Oven cooking at a low temperature ensures tender meat and concentrated flavors.
    5. Fresh herbs enhance flavor: Thyme, bay leaves, and parsley make a big difference in aroma and taste.

    Variations and Twists

    • Bacon Bourguignon: Add 4–6 slices of diced bacon at the beginning for smoky depth.
    • Vegetable-Heavy: Include parsnips, turnips, or baby potatoes for a hearty, veggie-rich version.
    • Spicy Bourguignon: Add a pinch of red pepper flakes or smoked paprika for subtle heat.
    • Wine Swap: Try Pinot Noir or Merlot for slightly different flavor profiles.

    Wrapping Up

    Beef bourguignon is a classic French dish that impresses every time.

    Its slow-cooked beef, hearty vegetables, and rich red wine sauce combine to create a meal that’s comforting, elegant, and perfect for special occasions or cozy nights in.

    While it takes time to prepare, the process is simple, and the result is deeply rewarding.

    With this step-by-step guide, you can recreate this iconic dish in your own kitchen, enjoying the tender beef, luscious sauce, and aromatic vegetables that define a true beef bourguignon.

    Pair it with mashed potatoes, noodles, or a simple green salad, and you’ll have a dinner that’s as sophisticated as it is comforting.

    Treat yourself and your loved ones to a meal that’s rich in flavor, tradition, and sheer indulgence—classic beef bourguignon, made from scratch, is timeless perfection in every bite.

  • Stuffed to Perfection: How to Make Sausage Manicotti

    Stuffed to Perfection: How to Make Sausage Manicotti

    There’s nothing quite like a dish that combines tender pasta, savory sausage, creamy cheese, and rich tomato sauce.

    Sausage manicotti is one of those comfort-food classics that feels indulgent but is surprisingly approachable to make at home.

    With tubular pasta stuffed with a flavorful sausage and cheese mixture, topped with marinara sauce and melted mozzarella, this dish is perfect for family dinners, holiday gatherings, or any time you want a hearty, satisfying meal.

    Follow this step-by-step guide, and you’ll create manicotti that’s cheesy, savory, and irresistible.


    Ingredients You’ll Need

    Gather all ingredients before you begin to ensure a smooth cooking process.

    For the pasta:

    • 8 manicotti shells (uncooked or boiled according to package instructions)

    For the sausage filling:

    • 1 pound (450g) Italian sausage (mild or spicy, removed from casings)
    • 1 small onion, finely chopped
    • 2 cloves garlic, minced
    • 1 ½ cups ricotta cheese
    • 1 cup shredded mozzarella cheese
    • ½ cup grated Parmesan cheese
    • 1 large egg
    • 1 teaspoon dried Italian seasoning
    • Salt and black pepper, to taste
    • Optional: 2 tablespoons fresh parsley, chopped

    For the sauce and topping:

    • 3 cups marinara sauce (homemade or store-bought)
    • 1 cup shredded mozzarella cheese
    • ¼ cup grated Parmesan cheese
    • Fresh basil or parsley for garnish

    Step 1: Preheat the Oven

    Preheat your oven to 375°F (190°C).

    Lightly grease a 9×13-inch baking dish with olive oil or cooking spray to prevent sticking.


    Step 2: Cook the Sausage Filling

    In a large skillet over medium heat, cook the Italian sausage until browned, breaking it into small pieces with a spatula.

    Add the chopped onion and cook until translucent, about 3–4 minutes.

    Stir in the minced garlic and cook for another 30 seconds until fragrant. Remove the skillet from heat and let the mixture cool slightly.

    In a large mixing bowl, combine the cooked sausage mixture with ricotta cheese, shredded mozzarella, Parmesan, egg, Italian seasoning, salt, pepper, and parsley if using. Mix thoroughly until all ingredients are evenly combined.

    This filling will be rich, creamy, and full of savory flavor.


    Step 3: Prepare the Pasta

    If using uncooked manicotti shells, boil them according to package instructions until just al dente, then drain and let cool slightly.

    If using pre-cooked shells, skip this step. It’s important to avoid overcooking, as the pasta will bake further in the oven.


    Step 4: Fill the Manicotti

    Using a small spoon or a piping bag, carefully fill each manicotti shell with the sausage and cheese mixture.

    Fill them generously but leave a small gap at each end to prevent spilling.

    Place the filled shells in the prepared baking dish, arranging them in a single layer.


    Step 5: Add the Sauce

    Pour the marinara sauce evenly over the filled manicotti shells, making sure each shell is well-coated.

    The sauce will keep the pasta moist while baking and infuse it with flavor.


    Step 6: Top with Cheese

    Sprinkle shredded mozzarella and grated Parmesan evenly over the top of the sauced manicotti.

    This creates a golden, bubbling cheese layer that adds richness and visual appeal.


    Step 7: Bake the Manicotti

    Cover the baking dish with aluminum foil and bake in the preheated oven for 25 minutes.

    Remove the foil and bake for an additional 10–15 minutes, or until the cheese is melted and slightly golden on top.


    Step 8: Cool and Garnish

    Remove the manicotti from the oven and allow it to cool for 5 minutes.

    This rest time allows the filling to set slightly and makes serving easier. Garnish with fresh basil or parsley for color and a burst of freshness.


    Step 9: Serve

    Use a spatula to carefully transfer individual manicotti shells to plates. Serve hot, ideally with garlic bread or a simple green salad.

    Each bite combines tender pasta, rich sausage filling, and melty cheese, all balanced by the tangy marinara sauce—a true comfort food masterpiece.


    Pro Tips for Perfect Sausage Manicotti

    1. Cook the sausage thoroughly – Browning the sausage fully brings out its flavor and reduces excess grease.
    2. Don’t overfill the shells – Leaving small gaps at the ends prevents cheese and sausage from spilling during baking.
    3. Use a piping bag – It makes filling manicotti easier and less messy.
    4. Even sauce coverage – Ensures pasta stays moist and flavorful during baking.
    5. Allow it to rest – Cooling slightly before serving makes it easier to cut and keeps the filling intact.

    Variations and Twists

    • Vegetable Sausage Manicotti: Substitute mushrooms, spinach, or zucchini for a veggie-packed version.
    • Spicy Sausage Manicotti: Use hot Italian sausage and add a pinch of red pepper flakes for extra heat.
    • Cheese Lover’s Delight: Mix in provolone or Fontina with the ricotta for an even creamier filling.
    • Creamy Alfredo Sauce: Swap marinara for Alfredo sauce for a rich, white-sauce version.

    Wrapping Up

    Sausage manicotti is a comforting, hearty dish that brings the flavors of Italian cuisine to your table without requiring hours of work.

    The combination of tender pasta, savory sausage, creamy cheeses, and rich tomato sauce makes it a guaranteed crowd-pleaser.

    Whether for a weeknight dinner, a family gathering, or a special occasion, this recipe delivers a dish that’s both indulgent and approachable.

    With a little preparation and careful assembly, you can serve manicotti that tastes like it came from a fine Italian restaurant—golden, cheesy, and bursting with flavor.

    From filling each shell with savory sausage and creamy cheese to topping it with gooey, bubbling mozzarella, every step brings you closer to the perfect baked pasta dish.

    Serve with garlic bread, a fresh salad, and a sprinkle of fresh herbs for a complete, satisfying meal. Sausage manicotti is comfort food at its finest—warm, cheesy, and absolutely irresistible.