Category: quick_meals

  • Crispy Fish Tacos: Crunchy, Creamy, Zesty Bliss

    Crispy Fish Tacos: Crunchy, Creamy, Zesty Bliss

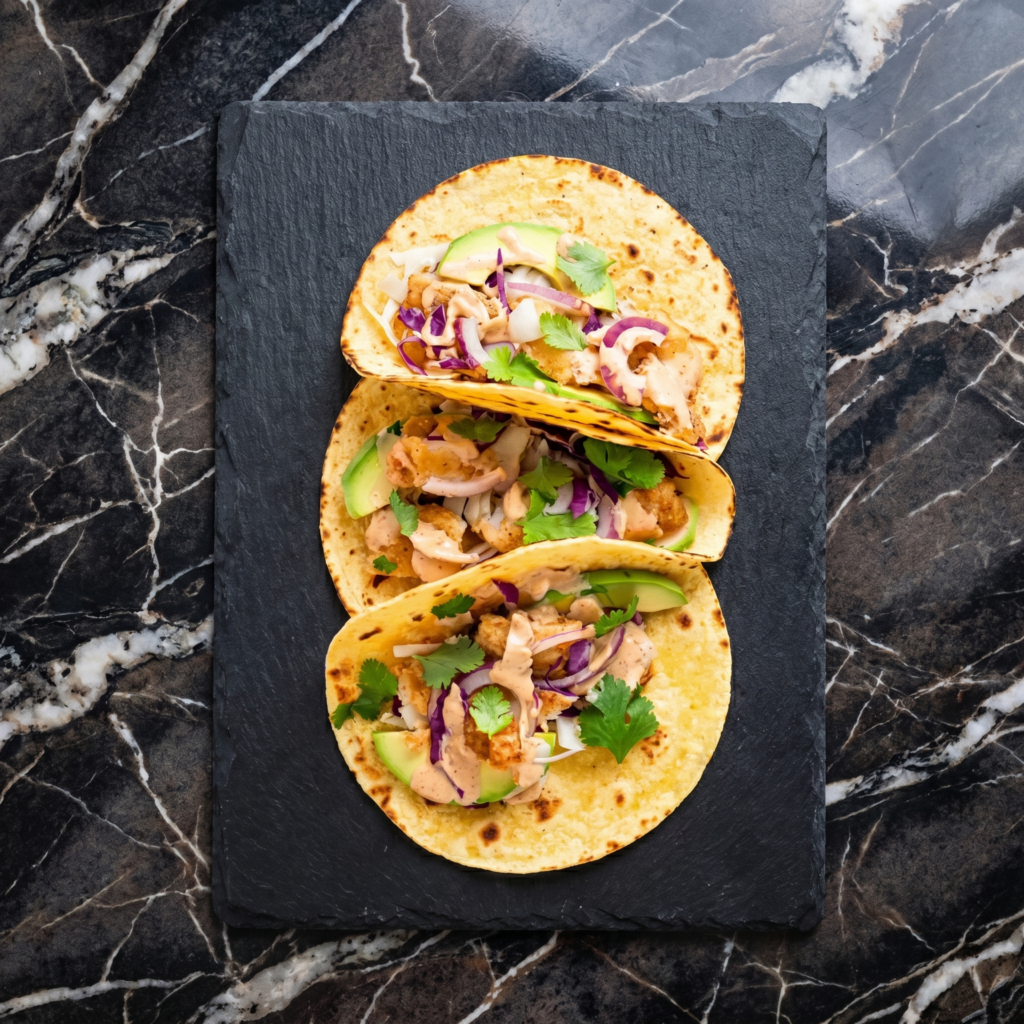
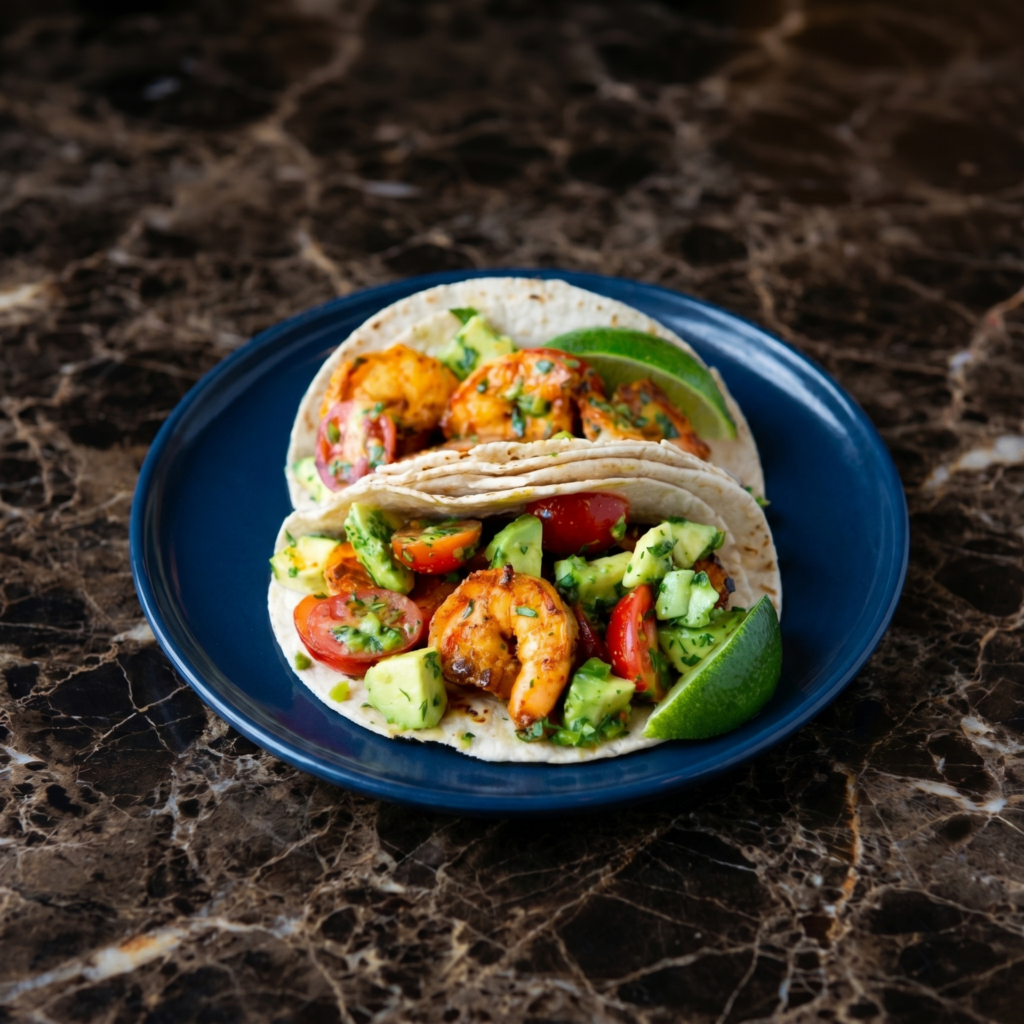
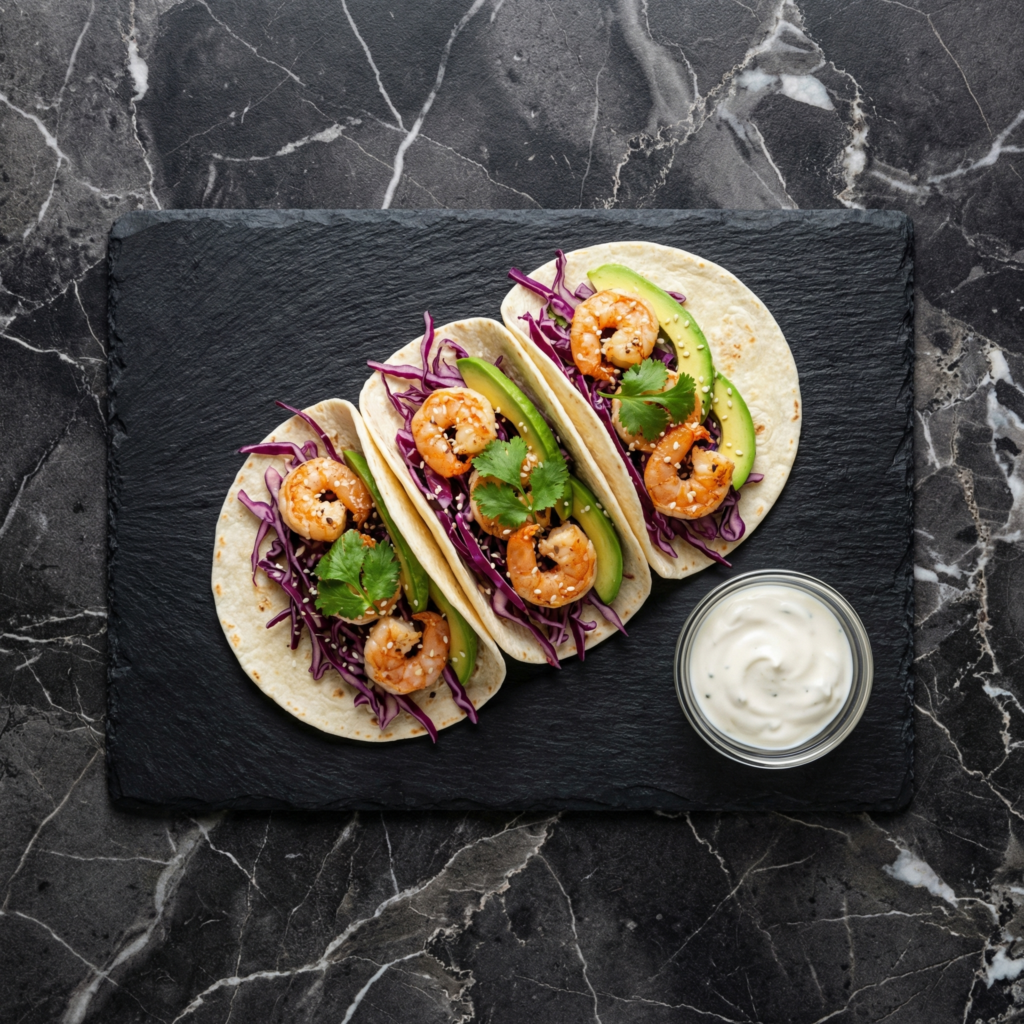
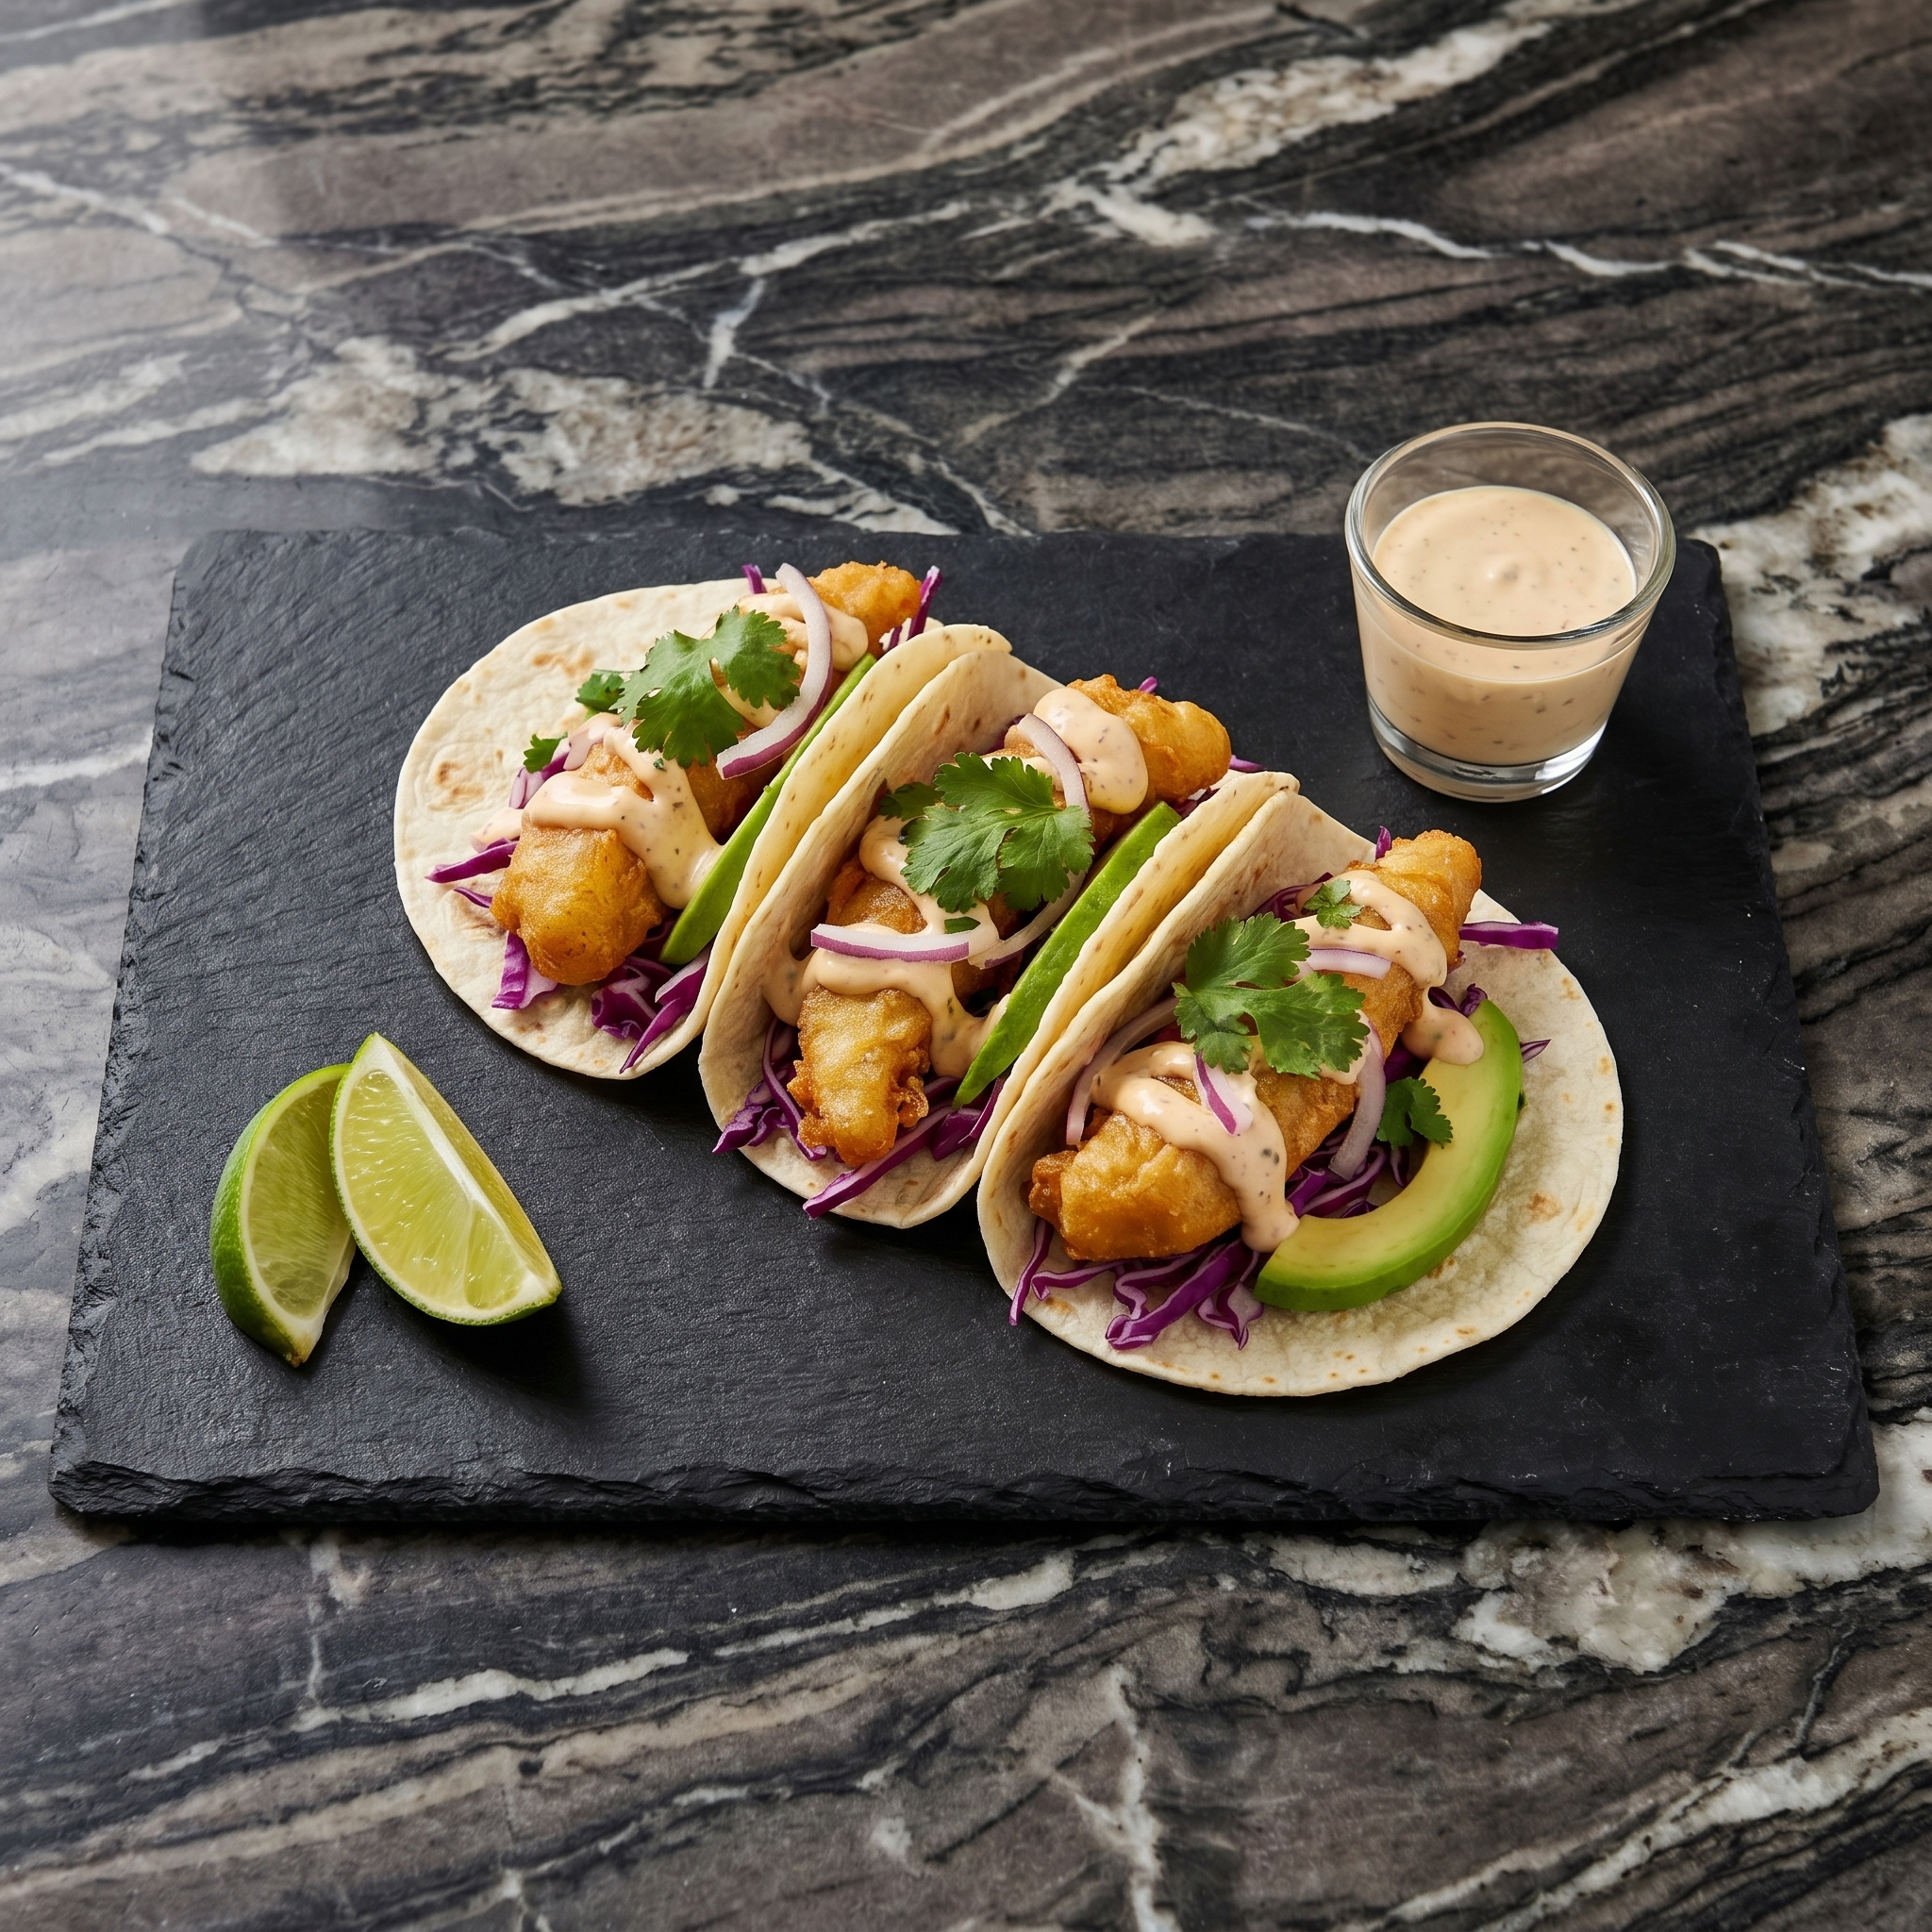
    Fish tacos should be crispy. They should be creamy. They should make you close your eyes and say “yep.”

    These are all three. Beer-battered cod. Crunchy slaw. Zesty lime sauce. All wrapped in a warm tortilla. 30 minutes. Let’s go.
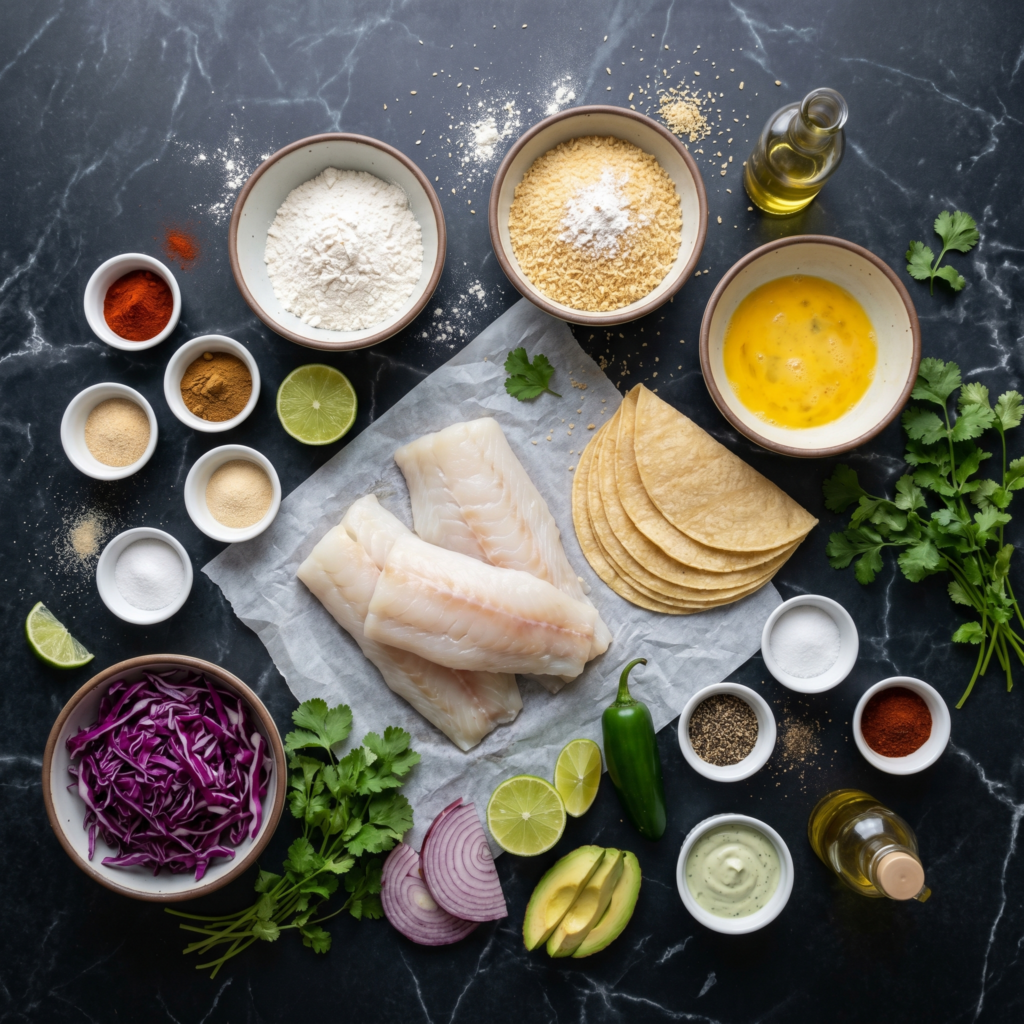
    Ingredients

    Serves 4.

    • 1 lb white fish (cod, haddock, or tilapia), cut into strips
    • ½ cup flour
    • ½ cup cornstarch
    • 1 tsp baking powder
    • 1 tsp salt
    • ½ tsp garlic powder
    • ½ cup cold beer (or seltzer water)
    • Oil for frying (vegetable or canola)
    • 8 small corn or flour tortillas

    For the Slaw:

    • 2 cups shredded cabbage
    • ¼ cup mayo
    • 2 tbsp lime juice
    • Salt and pepper

    For the Sauce:

    • ¼ cup sour cream
    • ¼ cup mayo
    • 1 tbsp hot sauce
    • 1 tbsp lime juice

    Garnish: Cilantro, lime wedges

    Step-by-Step Instructions

    Step 1: Make the Slaw and Sauce

    1. Mix cabbage, mayo, lime juice, salt, and pepper. Set aside.
    2. Whisk sour cream, mayo, hot sauce, and lime juice. Set aside.

    Step 2: Heat Oil

    1. Heat 1 inch of oil in a deep skillet to 375°F (190°C).

    Step 3: Make the Batter

    1. Whisk flour, cornstarch, baking powder, salt, and garlic powder.
    2. Pour in cold beer. Whisk until smooth (don’t overmix).

    Step 4: Fry the Fish

    1. Pat fish dry. Dip in batter, letting excess drip off.
    2. Carefully place in hot oil. Fry 2-3 minutes per side until golden and crispy.
    3. Drain on paper towels.

    Step 5: Assemble Tacos

    1. Warm tortillas. Spread with sauce. Add slaw and crispy fish.
    2. Top with cilantro and a squeeze of lime. Serve immediately.

    Summary

    Prep Time: 15 minutes | Cook Time: 10 minutes | Total Time: 25 minutes

    Yield: 4 servings (8 tacos)

    Difficulty: Medium (worth it)

    Storage Notes

    Best Fresh:

    Fish tacos are best hot and crispy. Leftovers get soggy.

    Reheat Fish:

    Air fryer at 375°F for 4-5 minutes. Oven at 400°F for 8 minutes. Never microwave.

    Pro Tip:

    Cold beer = lighter, crispier batter. Use lager or pilsner. Don’t use light beer.

  • Lemon Pepper Chicken Wings: Bright, Buttery, Undisputed

    Lemon Pepper Chicken Wings: Bright, Buttery, Undisputed

    Lemon pepper wings don’t need hot sauce to be great. They just need butter and lemon. Lots of both.

    Bake these until the skin shatters. Toss in a buttery, zesty, peppery glaze. Bright. Rich. Addictive. Make extra. You’ll eat them all.

    Ingredients

    Serves 4 as appetizer.

    • 2 lbs chicken wings (drumettes and flats)
    • 1 tbsp baking powder (NOT baking soda)
    • 1 tsp salt
    • ½ tsp black pepper

    For the Lemon Pepper Butter:

    • 4 tbsp unsalted butter
    • 2 tbsp lemon pepper seasoning (like Lawry’s or homemade)
    • 1 tbsp fresh lemon juice
    • 1 tsp lemon zest (optional)
    • Fresh parsley for garnish

    Step-by-Step Instructions

    Step 1: Preheat and Prep

    1. Preheat oven to 425°F (220°C). Line a baking sheet with foil. Place a wire rack on top.
    2. Pat wings completely dry with paper towels (critical for crispiness).

    Step 2: Season the Wings

    1. In a bowl, mix baking powder, salt, and pepper. Toss wings to coat evenly.
    2. Arrange wings in a single layer on the rack.

    Step 3: Bake Until Crispy

    1. Bake 40-45 minutes, flipping halfway, until golden brown and crispy.

    Step 4: Make the Lemon Pepper Butter

    1. While wings bake, melt butter in a small saucepan or microwave.
    2. Whisk in lemon pepper seasoning, lemon juice, and lemon zest.

    Step 5: Toss and Serve

    1. Transfer hot wings to a large bowl. Pour lemon pepper butter over. Toss to coat.
    2. Garnish with parsley. Serve immediately with extra lemon wedges.

    Summary

    Prep Time: 10 minutes | Cook Time: 40-45 minutes | Total Time: 50-55 minutes

    Yield: 4 appetizer servings

    Difficulty: Easy

    Storage Notes

    Fridge:

    Store for 3 days. Reheat to bring back crispiness.

    Reheat:

    Air fryer at 375°F for 5 minutes. Oven at 400°F for 8-10 minutes. Microwave = sad wings. Don’t.

    Pro Tip:

    Use fresh lemon zest if you have it. Makes the lemon flavor pop.

  • BBQ Chicken Quesadillas: Crispy, Smoky, Cheesy Perfection

    BBQ Chicken Quesadillas: Crispy, Smoky, Cheesy Perfection

    Quesadillas are the fastest dinner on earth. These are the best ones.

    BBQ chicken. Red onion. Cilantro. Lots of cheese. Griddled until crispy on the outside, gooey on the inside. Dip in ranch. Eat with your hands. No regrets.

    Ingredients

    Serves 4.

    • 4 large flour tortillas (10-inch)
    • 2 cups cooked chicken, shredded (rotisserie = hero)
    • ½ cup BBQ sauce (plus extra for dipping)
    • ½ red onion, thinly sliced
    • ¼ cup fresh cilantro, chopped
    • 2 cups shredded cheese (cheddar, Monterey Jack, or blend)
    • Butter or oil for the pan
    • Ranch dressing for dipping

    Step-by-Step Instructions

    Step 1: Sauce the Chicken

    1. In a bowl, toss shredded chicken with BBQ sauce until coated.

    Step 2: Assemble Quesadillas

    1. Lay tortillas flat. Sprinkle cheese on one half.
    2. Top with BBQ chicken, red onion, and cilantro.
    3. Sprinkle more cheese. Fold the empty half over.

    Step 3: Griddle Until Crispy

    1. Heat a large skillet over medium heat. Add butter or oil.
    2. Place quesadilla in skillet. Cook 2-3 minutes per side until golden brown and cheese is melted.

    Step 4: Slice and Serve

    1. Transfer to cutting board. Let rest 1 minute.
    2. Slice into wedges. Serve with extra BBQ sauce and ranch.

    Summary

    Prep Time: 5 minutes | Cook Time: 10 minutes | Total Time: 15 minutes

    Yield: 4 quesadillas

    Difficulty: Easy

    Storage Notes

    Fridge:

    Store leftovers for 3 days. Reheat in a skillet or air fryer (microwave makes them floppy).

    Reheat:

    Skillet over medium heat for 2 minutes per side. Air fryer at 350°F for 3 minutes.

    Pro Tip:

    Don’t overstuff. Less filling = crispier quesadilla. Trust the process.

  • Philly Cheesesteak Sliders: All the Flavor, None of the Drama

    Philly Cheesesteak Sliders: All the Flavor, None of the Drama

    Cheesesteaks are messy. Sliders are neat. These are the best of both worlds.

    Thinly sliced steak, caramelized onions and peppers, gooey provolone, all tucked into sweet Hawaiian rolls. Brush with garlic butter. Bake. Pull apart. Disappear.

    Ingredients

    Makes 12 sliders.

    • 1 package (12 count) Hawaiian rolls
    • 1 lb thinly sliced ribeye or steak-umms
    • 1 green bell pepper, thinly sliced
    • 1 onion, thinly sliced
    • 2 tbsp olive oil
    • ½ tsp salt
    • ¼ tsp black pepper
    • 6 slices provolone cheese (torn in half)
    • 3 tbsp butter, melted
    • 1 tsp garlic powder

    Step-by-Step Instructions

    Step 1: Preheat and Cook Fillings

    1. Preheat oven to 375°F (190°C).
    2. Heat oil in a skillet over medium-high heat. Add onion and pepper. Cook 5 minutes until soft. Remove.
    3. Add steak to same skillet. Cook 3-4 minutes until browned. Season with salt and pepper.
    4. Mix steak with peppers and onions.

    Step 2: Prep the Rolls

    1. Slice entire slab of Hawaiian rolls horizontally (keep rolls connected).
    2. Place bottom half in a greased 9×13 baking dish.

    Step 3: Assemble

    1. Layer steak mixture evenly on bottom rolls.
    2. Top with provolone slices.
    3. Place top slab of rolls back on.

    Step 4: Butter and Bake

    1. Mix melted butter and garlic powder. Brush over tops.
    2. Bake 10-12 minutes until golden and cheese is melted.

    Step 5: Pull Apart and Serve

    1. Separate sliders. Serve hot. Watch them vanish.

    Summary

    Prep Time: 10 minutes | Cook Time: 15 minutes | Total Time: 25 minutes

    Yield: 12 sliders

    Difficulty: Easy

    Storage Notes

    Fridge:

    Store leftovers for 3 days.

    Reheat:

    Oven at 350°F for 8-10 minutes. Microwave for 30 seconds but rolls get soft.

    Pro Tip:

    Assemble ahead. Refrigerate unbaked up to 24 hours. Bake when guests arrive. Hero status unlocked.

  • Crispy Mozzarella Stuffed Meatballs: When Meatballs Go Supernova

    Crispy Mozzarella Stuffed Meatballs: When Meatballs Go Supernova

    Regular meatballs are fine. Stuffed meatballs are a revelation.

    Seasoned beef and pork. A gooey mozzarella center. Rolled in breadcrumbs and baked until crispy. Serve with marinara. Watch people lose their minds. These are dangerous.

    Ingredients

    Makes 16-20 meatballs.

    • 1 lb ground beef
    • ½ lb ground pork (or all beef)
    • ½ cup breadcrumbs (panko = extra crispy)
    • ¼ cup grated Parmesan cheese
    • 1 large egg
    • 2 garlic cloves, minced
    • 1 tsp salt
    • ½ tsp black pepper
    • 1 tsp Italian seasoning
    • 4 oz fresh mozzarella, cut into ½-inch cubes (about 16-20 cubes)
    • 1 cup marinara sauce (for serving)
    • Fresh basil (optional)

    Step-by-Step Instructions

    Step 1: Preheat and Prep

    1. Preheat oven to 400°F (200°C). Line a baking sheet with parchment.
    2. Cut mozzarella into small cubes. Set aside.

    Step 2: Make Meatball Mix

    1. In a bowl, combine beef, pork, breadcrumbs, Parmesan, egg, garlic, salt, pepper, and Italian seasoning. Mix gently (don’t overwork).

    Step 3: Stuff the Meatballs

    1. Take a portion of meat mixture. Flatten in your palm.
    2. Place a mozzarella cube in the center. Wrap meat around it, sealing completely.
    3. Roll into a smooth ball. Repeat.

    Step 4: Bake

    1. Place meatballs on baking sheet. Bake 15-18 minutes until browned and cooked through (internal temp 165°F).

    Step 5: Serve

    1. Warm marinara sauce. Spoon over meatballs or serve on the side.
    2. Garnish with basil. Watch the cheese pull. Try not to burn your mouth. You will anyway.

    Summary

    Prep Time: 15 minutes | Cook Time: 18 minutes | Total Time: 33 minutes

    Yield: 16-20 meatballs

    Difficulty: Easy

    Storage Notes

    Fridge:

    Store cooked meatballs in an airtight container for 4 days.

    Reheat:

    Oven at 375°F for 8-10 minutes. Microwave works but cheese won’t be as gooey.

    Freezer Friendly:

    Freeze uncooked meatballs on a baking sheet, then transfer to a bag. Bake from frozen at 400°F for 20-25 minutes.

    Pro Tip:

    Don’t overmix the meat. Tough meatballs are sad meatballs. Gentle hands = tender.

  • BBQ Chicken Stuffed Sweet Potatoes: Sweet, Smoky, Spectacular

    BBQ Chicken Stuffed Sweet Potatoes: Sweet, Smoky, Spectacular

    Sweet potatoes are nature’s bowl.

    Roast them. Fluff them. Pile on BBQ chicken and crunchy coleslaw. Sweet. Smoky. Creamy. Crunchy. This is a one-potato meal that hits every note. No leftovers? Make two.

    Ingredients

    Serves 4.

    • 4 medium sweet potatoes
    • 1 tbsp olive oil
    • 2 cups cooked chicken, shredded (rotisserie works)
    • ½ cup BBQ sauce (plus extra for drizzling)

    For the Coleslaw (Quick):

    • 2 cups shredded coleslaw mix
    • ¼ cup mayo
    • 1 tbsp apple cider vinegar
    • 1 tsp honey
    • Salt and pepper

    Optional toppings: Green onions, cilantro, pickled red onions

    Step-by-Step Instructions

    Step 1: Roast the Sweet Potatoes

    1. Preheat oven to 400°F (200°C).
    2. Poke sweet potatoes with a fork. Rub with olive oil and salt.
    3. Roast 40-50 minutes until tender.

    Step 2: Make the Coleslaw

    1. Mix coleslaw, mayo, vinegar, honey, salt, and pepper in a bowl. Set aside.

    Step 3: Prep the BBQ Chicken

    1. Toss shredded chicken with BBQ sauce until coated.

    Step 4: Assemble

    1. Slit sweet potatoes open. Fluff insides with a fork.
    2. Stuff with BBQ chicken. Top with coleslaw.
    3. Drizzle with extra BBQ sauce.

    Step 5: Serve

    1. Sprinkle with green onions or cilantro. Eat with a fork. Or your hands. No judgment.

    Summary

    Prep Time: 10 minutes | Cook Time: 45 minutes | Total Time: 55 minutes

    Yield: 4 stuffed sweet potatoes

    Difficulty: Easy

    Storage Notes

    Fridge:

    Store components separately for 4 days. Assemble fresh for best texture.

    Reheat Potato:

    Microwave 2-3 minutes. Or oven at 375°F for 10 minutes.

    Pro Tip:

    Make a batch of BBQ chicken on Sunday. Stuffed sweet potatoes all week. You’re welcome.

  • Bruschetta (Juicy, Garlicky, and Gone Too Fast)

    Bruschetta (Juicy, Garlicky, and Gone Too Fast)

    Bruschetta isn’t complicated. It’s just good tomatoes, good bread, good olive oil, and a little garlic. But somehow, when they come together? Magic.

    This is the bruschetta you’ll make on repeat. Juicy, garlicky, basil-flecked tomatoes piled onto crispy, toasted bread. No cooking. No fuss. Just peak summer on a plate.

    Ingredients

    Serves 4-6 as an appetizer.

    • 1 French baguette or ciabatta, sliced into ½-inch rounds
    • 3 tablespoons olive oil (plus more for brushing)
    • 1 garlic clove, peeled and halved
    • 4 ripe Roma or cherry tomatoes, diced (about 2 cups)
    • ½ teaspoon salt
    • ¼ teaspoon black pepper
    • ¼ cup fresh basil leaves, thinly sliced (chiffonade)
    • 1 teaspoon balsamic vinegar (optional)
    • Optional: fresh mozzarella or burrata

    Step-by-Step Instructions

    Step 1: Toast the Bread

    1. Preheat oven to 375°F (190°C) or heat a grill pan.
    2. Brush bread slices with olive oil on both sides.
    3. Toast for 5-7 minutes until golden and crisp (flip halfway).

    Step 2: Garlic Rub

    1. While bread is still warm, rub the cut side of the garlic clove over each slice. Don’t skip this—it’s the secret.

    Step 3: Make the Topping

    1. In a bowl, combine diced tomatoes, salt, pepper, and 3 tablespoons olive oil.
    2. Let sit for 5-10 minutes (releases all the juicy flavor).
    3. Stir in fresh basil and balsamic vinegar (if using).

    Step 4: Assemble and Serve

    1. Spoon tomato mixture generously over each toast.
    2. Add mozzarella or burrata on top if you’re feeling fancy.
    3. Serve immediately. Eat with your hands. Let it drip. It’s part of the experience.

    Summary

    Prep Time: 10 mins | Cook Time: 7 mins | Total Time: 17 minutes

    Yield: 12-15 crostini (4-6 servings)

    Difficulty: Easy

    Storage Notes

    Do not assemble ahead—soggy bread is sadness. Store tomato topping separately in the fridge for 1 day. Toast bread fresh when ready to serve. Leftover topping? Eat it with a spoon or toss with pasta. No regrets.

  • Salmon Crostini (Fancy AF, Zero Effort)

    Salmon Crostini (Fancy AF, Zero Effort)

    Need an appetizer that looks like you tried really hard but actually took zero effort? Salmon crostini. Crispy little toasts, a schmear of lemony dill cream cheese, ribbons of smoked salmon, and a few briny pops of caper.

    Ten minutes. No cooking. Everyone thinks you’re a hero. Let’s do this.

    Ingredients

    Makes 12-15 crostini.

    • 1 French baguette, sliced into ½-inch rounds (about 12-15 slices)
    • 2 tablespoons olive oil (for brushing)
    • 4 oz (115g) cream cheese, softened
    • ¼ cup sour cream or Greek yogurt
    • 1 tablespoon fresh dill, chopped (plus more for garnish)
    • 1 tablespoon fresh lemon juice
    • 1 teaspoon lemon zest
    • 4 oz (115g) smoked salmon, sliced into thin ribbons
    • 2 tablespoons capers, drained
    • Optional: thinly sliced red onion, cracked black pepper

    Step-by-Step Instructions

    Step 1: Toast the Baguette

    1. Preheat oven to 375°F (190°C). Arrange baguette slices on a baking sheet.
    2. Brush both sides with olive oil. Bake for 8-10 minutes until golden and crisp. Or toast in a skillet.

    Step 2: Make the Herbed Cream Cheese

    1. In a small bowl, mix cream cheese, sour cream, dill, lemon juice, and lemon zest until smooth and spreadable.

    Step 3: Assemble the Crostini

    1. Spread a generous layer of herbed cream cheese on each toast.
    2. Top with a ribbon or two of smoked salmon (fold it for fluffiness).
    3. Add a few capers and a sprinkle of fresh dill.
    4. Optional: add thin red onion slices and cracked black pepper.

    Step 4: Serve Immediately

    1. Arrange on a platter. Watch them disappear.

    Summary

    Prep Time: 5 mins | Cook Time: 10 mins | Total Time: 15 minutes

    Yield: 12-15 crostini

    Difficulty: Easy

    Storage Notes

    Assemble crostini right before serving. The toasts get soggy if they sit too long with cream cheese. You can make the toasts 2 days ahead (store in an airtight bag) and the herbed cream cheese 3 days ahead. Just assemble when guests arrive. Leftovers? Unlikely.

  • Shrimp Tacos (Ready in 15, Gone in 5)

    Shrimp Tacos (Ready in 15, Gone in 5)

    Taco Tuesday just met its match. Shrimp tacos are fast, fresh, and foolproof. The shrimp cook in like 2 minutes. The slaw is a chop-and-toss situation. And that creamy lime sauce? You’ll want to put it on everything.

    No marinating. No complicated spice blends. Just a ridiculously good dinner that’s on the table in 15 minutes flat. Let’s taco ’bout it.

    Ingredients

    Makes 8 small tacos (serves 2-3).

    For the Shrimp:

    • 1 lb (450g) shrimp, peeled and deveined (tails off)
    • 2 tablespoons olive oil
    • 1 teaspoon chili powder
    • ½ teaspoon cumin
    • ½ teaspoon smoked paprika
    • ¼ teaspoon garlic powder
    • ¼ teaspoon salt
    • Pinch of cayenne (optional, for heat)

    For the Slaw & Sauce:

    • 2 cups shredded cabbage or coleslaw mix
    • ¼ cup sour cream or Greek yogurt
    • ¼ cup mayonnaise
    • Juice of 1 lime (plus extra wedges for serving)
    • 1 tablespoon hot sauce (optional)
    • ¼ cup chopped cilantro

    For Serving:

    • 8 small corn or flour tortillas
    • Avocado slices or guacamole

    Step-by-Step Instructions

    Step 1: Make the Sauce and Slaw

    1. Whisk sour cream, mayo, lime juice, and hot sauce in a small bowl.
    2. Toss cabbage with half the sauce. Save the rest for drizzling.
    3. Stir cilantro into the slaw.

    Step 2: Season the Shrimp

    1. Pat shrimp dry. Toss with olive oil and all spices (chili powder through cayenne).

    Step 3: Cook the Shrimp

    1. Heat a large skillet over medium-high heat.
    2. Cook shrimp for 1-2 minutes per side until pink and curled into a “C” shape. Do not overcook.

    Step 4: Warm the Tortillas

    1. Warm tortillas in a dry skillet or microwave (wrapped in a damp paper towel).

    Step 5: Assemble Tacos

    1. Fill each tortilla with slaw, shrimp, and avocado slices.
    2. Drizzle with reserved sauce. Squeeze extra lime. Eat immediately.

    Summary

    Prep Time: 10 mins | Cook Time: 5 mins | Total Time: 15 minutes

    Yield: 8 small tacos (2-3 servings)

    Difficulty: Easy

    Storage Notes

    These tacos do not reheat well (soggy shrimp = sad). Make only what you’ll eat. Store leftover cooked shrimp separately in the fridge for 2 days—eat cold on a salad or reheat gently in a pan. Sauce keeps for 5 days. Slaw gets watery after a few hours, so make it fresh.

  • Fresh Spring Rolls (So Pretty, You’ll Feel Fancy)

    Fresh Spring Rolls (So Pretty, You’ll Feel Fancy)

    Spring rolls look impressive. Translucent wrappers. Bright pink shrimp. Colorful veggies peeking through. But here’s the secret: they’re basically adult Lunchables. Assemble. Roll. Dip. Eat.

    No fancy skills required. Just rice paper, your favorite fillings, and that creamy peanut sauce. Perfect for hot days, lazy dinners, or when you want to feel like you tried really hard (you didn’t).

    Ingredients

    Makes 8 rolls.

    • 8 round rice paper wrappers (22cm size)
    • 8 large cooked shrimp, halved lengthwise
    • 4 oz (115g) rice vermicelli noodles
    • 1 cup shredded lettuce or butter lettuce leaves
    • 1 cucumber, julienned
    • 1 carrot, julienned
    • ½ cup fresh mint leaves
    • ½ cup fresh cilantro leaves
    • Optional: Thai basil, avocado slices, bean sprouts

    For the Peanut Dipping Sauce:

    • ¼ cup creamy peanut butter
    • 2 tablespoons hoisin sauce
    • 1 tablespoon lime juice
    • 2-3 tablespoons warm water
    • 1 teaspoon sriracha (optional)

    Step-by-Step Instructions

    Step 1: Prep the Fillings

    1. Cook vermicelli according to package directions. Drain and cool.
    2. Slice shrimp in half lengthwise. Julienne cucumber and carrot. Pick herb leaves.
    3. Arrange all fillings within easy reach (assembly line style).

    Step 2: Make the Sauce

    1. Whisk peanut butter, hoisin, lime juice, and sriracha. Add warm water until smooth and dippable.

    Step 3: Dip and Fill

    1. Fill a large shallow dish with warm water. Dip one rice paper wrapper for 5-10 seconds—just until pliable. It will soften more as you work.
    2. Lay wrapper on a damp cutting board.

    Step 4: Layer and Roll

    1. Arrange shrimp halves (cut side up) in a row on the lower third of wrapper—they’ll show through.
    2. Top with lettuce, noodles, cucumber, carrot, and herbs. Don’t overstuff.
    3. Fold bottom over filling, fold in sides, then roll tightly.

    Step 5: Serve

    1. Repeat with remaining wrappers. Serve immediately with peanut sauce.

    Summary

    Prep Time: 20 mins | Cook Time: 5 mins | Total Time: 25 minutes

    Yield: 8 spring rolls

    Difficulty: Easy (first one’s ugly, third one’s perfect)

    Storage Notes

    Spring rolls are best eaten within 2 hours. Rice paper hardens in the fridge. If you must store them, wrap each tightly in plastic wrap and refrigerate for 1 day (they won’t be as soft). Never freeze. Make the peanut sauce ahead—it lasts 1 week in the fridge.