Blog

  • Duck Fat Fried Potatoes (The Crunch That Will Haunt Your Dreams)

    Duck Fat Fried Potatoes (The Crunch That Will Haunt Your Dreams)

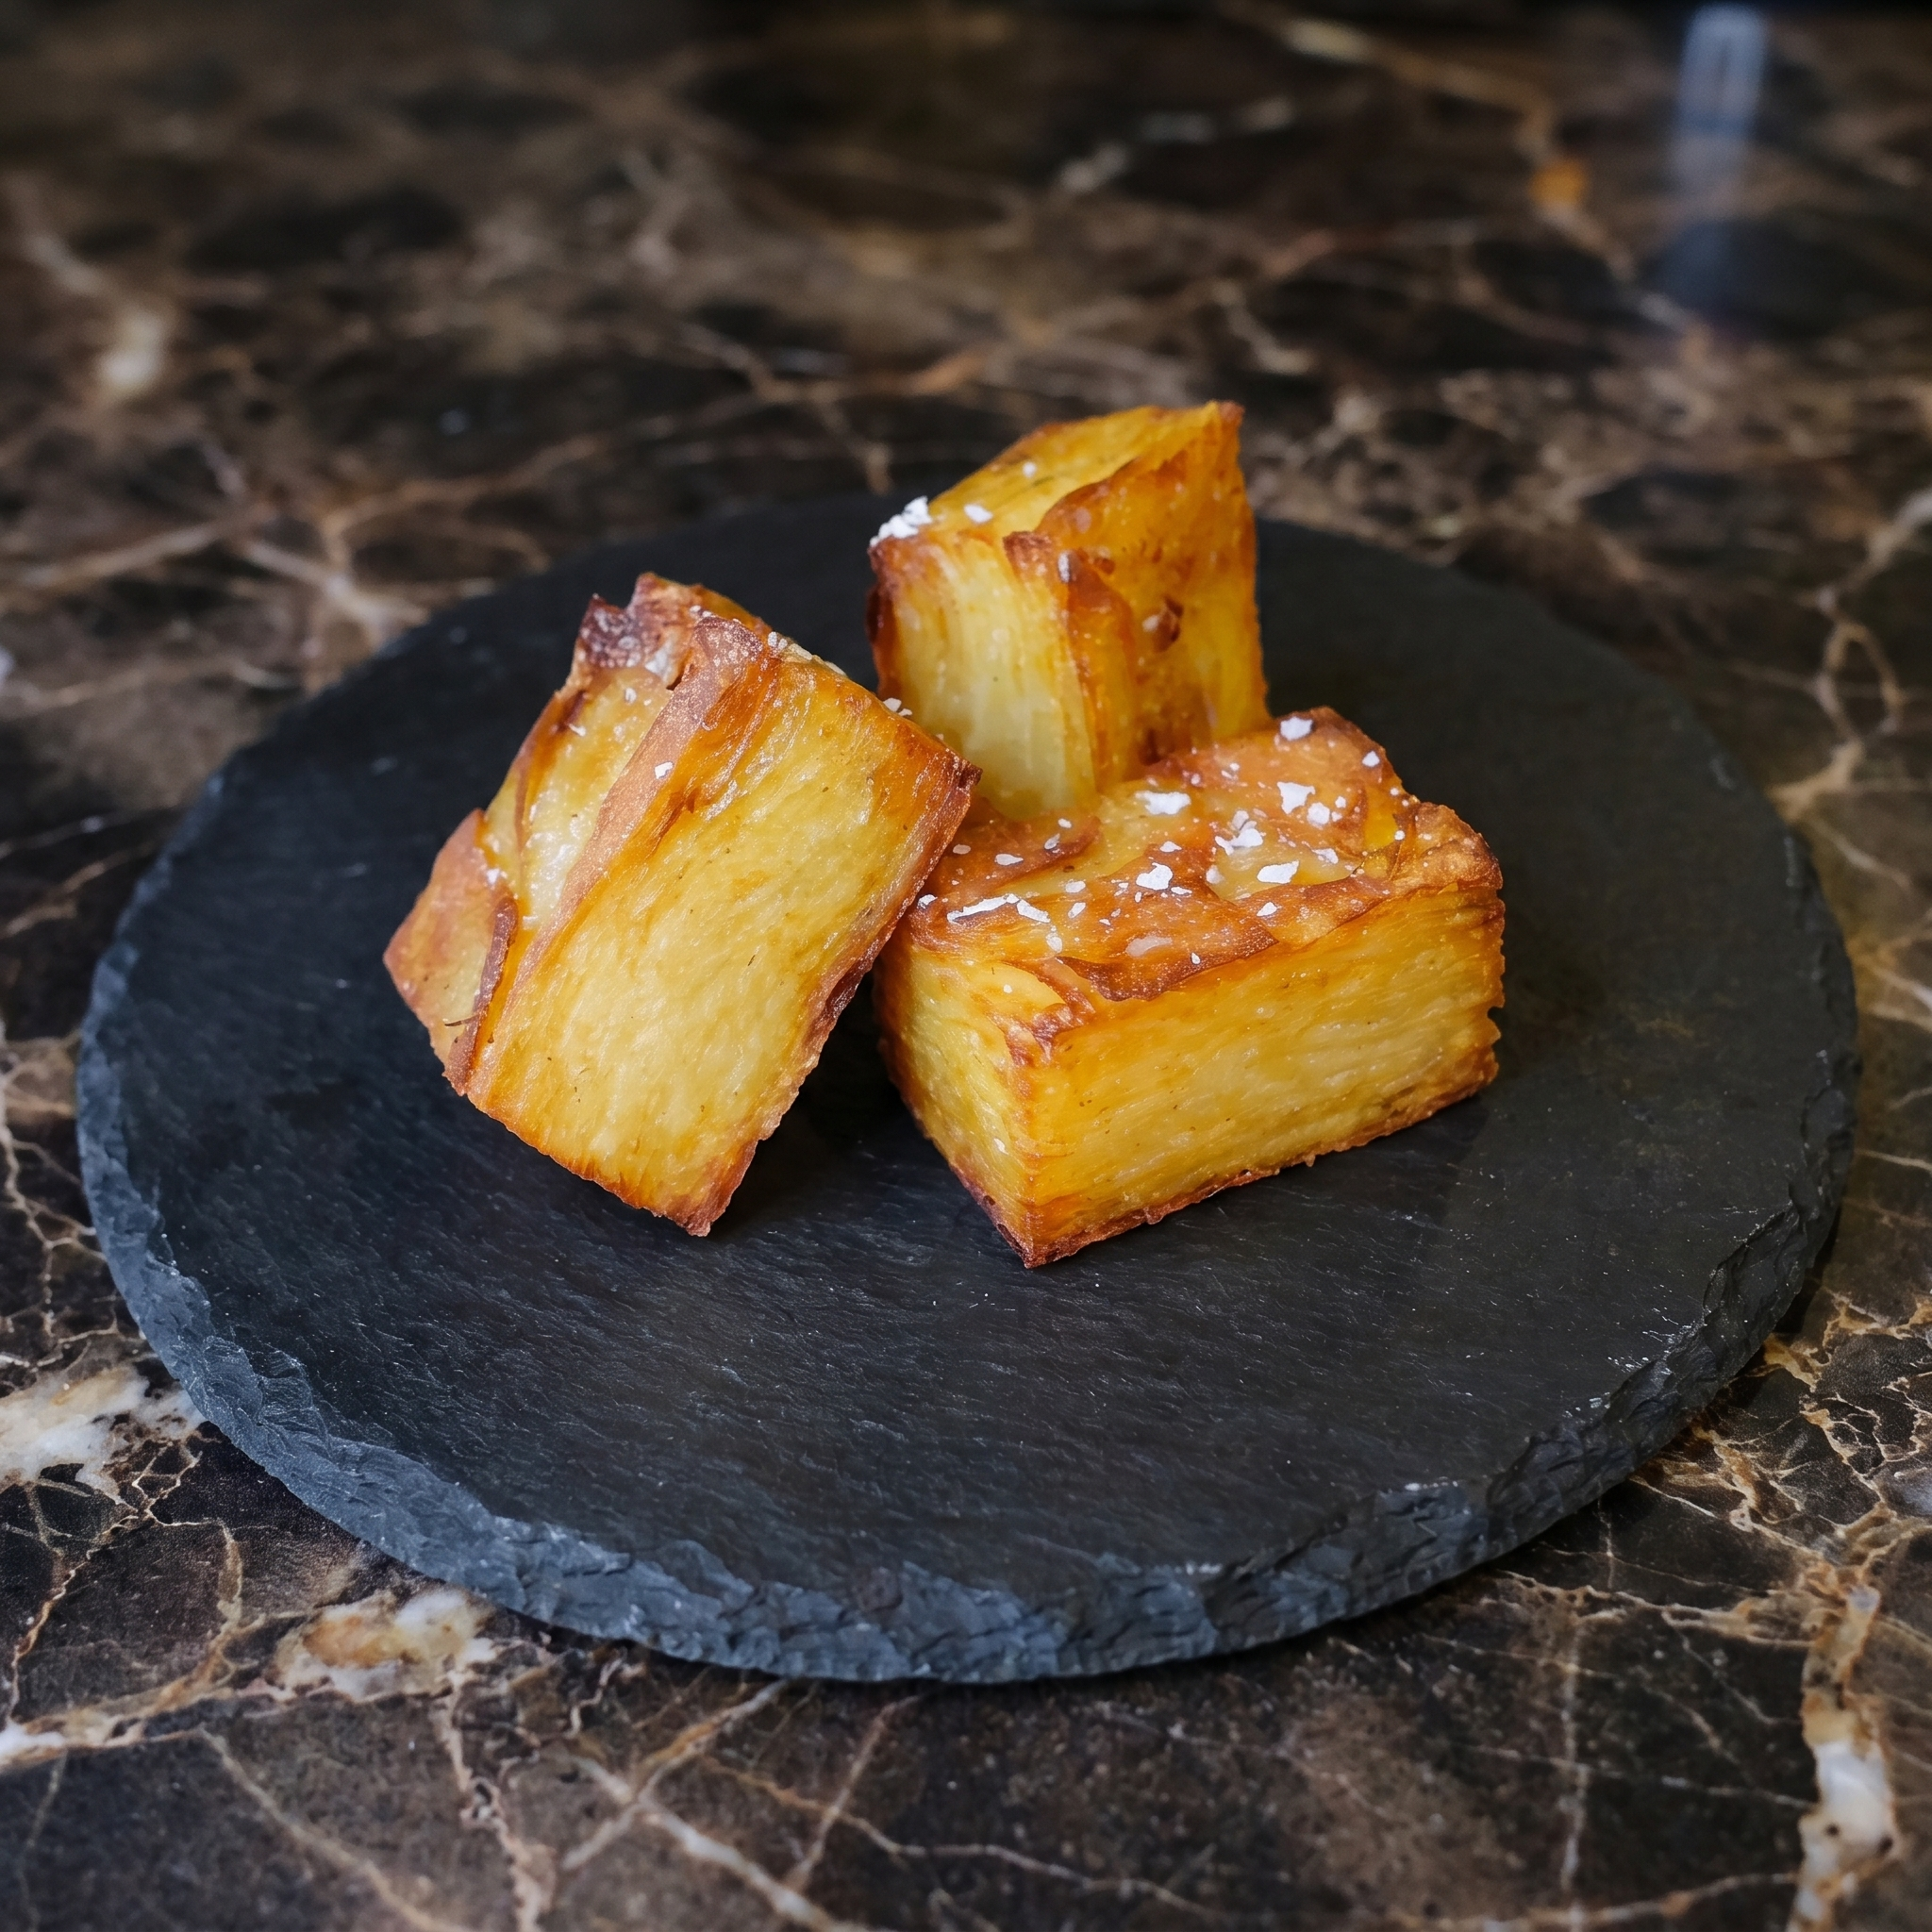
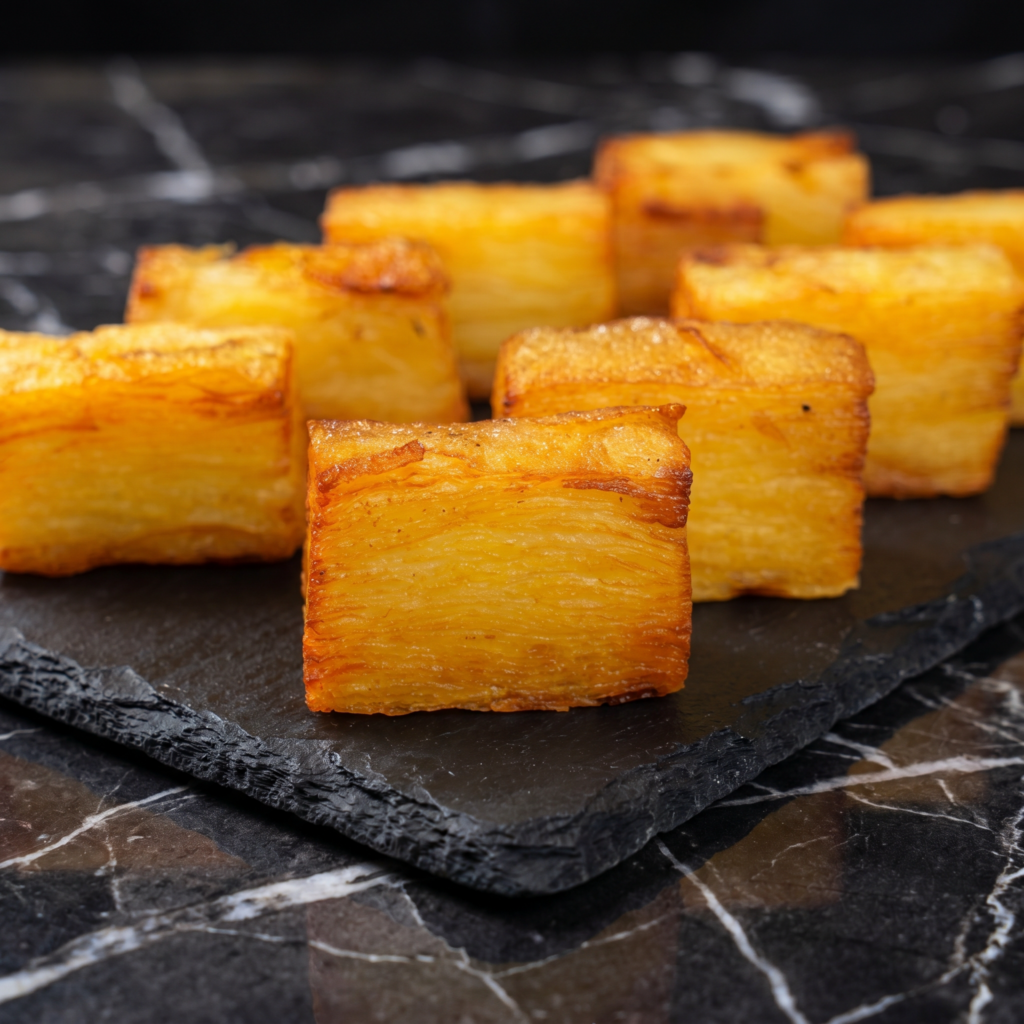
    Let’s be honest: regular roasted potatoes are fine. But duck fat potatoes? They’re a revelation. The fat renders into shatteringly crisp exteriors while keeping interiors fluffy and cloud-soft. This is the potato dish that steals the show from whatever you serve it with—steak, roast chicken, or just a fried egg.

    You only need five ingredients, one pan, and about 20 minutes of active time. No fancy technique. Just potatoes, duck fat, salt, and a little herb magic.

    Ingredients

    Serves 4 as a side.

    • 2 lbs (900g) Yukon Gold or baby potatoes
    • 3 tablespoons duck fat (rendered, from a jar or saved from a roast duck)
    • 1 teaspoon kosher salt, plus more to finish
    • ½ teaspoon black pepper
    • 4 cloves garlic, smashed (optional but recommended)
    • 2 sprigs fresh rosemary or thyme
    • Fresh parsley, chopped (for garnish)

    Step-by-Step Instructions

    Step 1: Par-Cook the Potatoes

    1. Scrub potatoes well. If using larger ones, cut into 1.5-inch chunks. Leave small potatoes whole.
    2. Place in a pot, cover with cold salted water, and bring to a boil.
    3. Cook for 8–10 minutes—until fork-tender but not falling apart.
    4. Drain and let steam dry for 5 minutes. This step guarantees crispiness.

    Step 2: Heat the Duck Fat

    1. Preheat oven to 425°F (220°C). Place a rimmed baking sheet in the oven while it heats.
    2. Carefully add duck fat to the hot pan. Swirl to coat.

    Step 3: Rough Them Up

    1. Tumble the dried potatoes into a bowl. Give them a few good shakes to rough up the edges. Those craggy bits get extra crunchy.

    Step 4: Roast to Golden Perfection

    1. Add potatoes to the hot pan with duck fat. Sprinkle with salt and pepper.
    2. Roast for 20 minutes. Flip once halfway through.
    3. Add smashed garlic and rosemary in the last 5 minutes.

    Step 5: Finish and Serve

    1. Remove from oven. Sprinkle with fresh parsley and flaky salt.
    2. Serve immediately—these wait for no one.

    Summary

    Prep Time: 10 minutes | Cook Time: 30 minutes | Total Time: 40 minutes

    Yield: 4 servings

    Difficulty: Easy

    Storage Notes

    Best fresh: Duck fat potatoes lose their crunch within hours. Reheat leftovers in a hot skillet or air fryer—never microwave.

    Make ahead: Boil and rough up the potatoes a day in advance. Store covered in the fridge. Roast straight from chilled, adding 5 extra minutes.

    Duck fat tip: Strain and save used duck fat. You can reuse it 3-4 times.

  • Porchetta: The Crispy, Juicy, Italian Pork Roast of Your Dreams

    Porchetta: The Crispy, Juicy, Italian Pork Roast of Your Dreams

    Porchetta is Italy’s greatest gift to pork lovers. Crispy, crackling skin. Juicy, herb-flecked meat. Fennel, garlic, rosemary, and lemon zest rolled into a glorious spiral. It looks intimidating. It’s not. Roll it. Tie it. Roast it. Serve it. Your holiday table will never be the same. Let’s make porchetta.

    Ingredients

    Serves 8-10.

    • 4-5 lb pork belly with skin (or pork shoulder + belly combo)
    • 6 cloves garlic, minced
    • 2 tablespoons fennel seeds, toasted
    • 2 tablespoons fresh rosemary, chopped
    • 2 tablespoons fresh sage, chopped (or thyme)
    • 1 tablespoon lemon zest
    • 2 teaspoons red pepper flakes
    • 2 tablespoons olive oil
    • 1 tablespoon salt
    • 1 tablespoon black pepper

    Step-by-Step Instructions

    Step 1: Make the Herb Paste

    1. In a bowl, mix garlic, fennel seeds, rosemary, sage, lemon zest, red pepper flakes, olive oil, salt, and pepper.

    Step 2: Score and Season

    1. Lay pork skin-side down. Score the meat in a crosshatch pattern (not too deep).
    2. Rub herb paste all over the meat side.

    Step 3: Roll and Tie

    1. Roll pork tightly into a log, skin on the outside. Tie with kitchen twine every 2 inches.

    Step 4: Dry the Skin (Crucial)

    1. Pat skin completely dry. Refrigerate uncovered for at least 2 hours (or overnight).

    Step 5: Roast

    1. Preheat oven to 450°F (230°C). Roast 30 minutes to crisp skin.
    2. Reduce heat to 325°F (160°C). Roast 2-3 more hours until internal temp reaches 190°F.

    Step 6: Rest and Carve

    1. Rest 20 minutes. Remove twine. Slice thick.
    2. Serve with crackling skin. Accept applause.

    Summary

    Prep Time: 20 minutes + chilling | Cook Time: 3 hours | Total Time: ~5½ hours

    Yield: 8-10 servings

    Difficulty: Medium (tying takes practice)

    Storage Notes

    Store leftovers in the fridge for 5 days. Reheat slices in a hot skillet to re-crisp skin. Freeze sliced porchetta for 3 months. Leftovers make incredible sandwiches, pasta additions, or breakfast with eggs. The crackling is best day-of. Don’t skip the overnight drying step—that’s how you get shattering skin. Porchetta improves over a few days. Make it ahead. Reheat. Impress everyone.

  • Philly Cheesesteak (No Trip to Pennsylvania Required)

    Philly Cheesesteak (No Trip to Pennsylvania Required)

    There are two kinds of people: Cheez Whiz people and provolone people. This recipe works for both. The real secrets? Freeze the ribeye for easy slicing, don’t crowd the pan, and let the cheese melt into every crevice. Fifteen minutes. One skillet. Sandwich heaven.

    Ingredients

    Serves 2.

    • 1 lb ribeye steak, thinly sliced (freeze for 30 minutes first)
    • 2 soft hoagie rolls or sub rolls
    • 1 onion, thinly sliced
    • 1 green bell pepper, thinly sliced (optional, controversial)
    • 4 slices provolone cheese (or ¼ cup Cheez Whiz)
    • 2 tablespoons vegetable oil
    • Salt and black pepper

    Step-by-Step Instructions

    Step 1: Slice the Steak Paper-Thin

    1. Partially freeze ribeye for 30 minutes.
    2. Slice as thin as possible against the grain. Aim for shaved, not chopped.

    Step 2: Cook the Onions (and Peppers)

    1. Heat 1 tablespoon oil in a large skillet or flat-top over medium-high heat.
    2. Add onions (and peppers if using). Cook for 4-5 minutes until soft and slightly charred. Remove and set aside.

    Step 3: Sear the Beef

    1. Increase heat to high. Add remaining oil.
    2. Spread sliced beef in a thin, even layer. Don’t stir for 30 seconds.
    3. Flip and chop the meat with a spatula as it cooks (about 2 minutes total).
    4. Season with salt and pepper.

    Step 4: Combine and Melt Cheese

    1. Return onions to the pan. Mix with the beef.
    2. Lay provolone slices over the meat. Let melt for 30 seconds.
    3. For Cheez Whiz: drizzle over the top off heat.

    Step 5: Toast the Rolls and Assemble

    1. Slice hoagie rolls but don’t cut all the way through. Toast briefly in a dry pan.
    2. Use a spatula to scoop the cheesy meat into each roll.
    3. Serve immediately with pickles on the side.

    Summary

    Prep Time: 10 minutes (plus freezing time) | Cook Time: 10 minutes | Total Time: 20 minutes

    Yield: 2 sandwiches

    Difficulty: Easy

    Storage Notes

    Cheesesteaks do not store well—bread gets soggy. Leftover meat and onions can be refrigerated for 2 days. Reheat in a hot skillet (not microwave). Assemble fresh for best results. Never freeze an assembled cheesesteak.

  • Eggs Florentine (Fancy Brunch, Zero Restaurant Markup)

    Eggs Florentine (Fancy Brunch, Zero Restaurant Markup)

    Eggs Florentine is just Eggs Benedict’s elegant vegetarian cousin. Same buttery muffin, same runny poached egg, same silky hollandaise—but swap Canadian bacon for garlicky sautéed spinach. Twenty minutes. One pot for poaching. One blender for sauce. You’ve got brunch.

    Ingredients

    Serves 2.

    For the Hollandaise:

    • 2 large egg yolks
    • 1 tablespoon lemon juice
    • ½ cup unsalted butter, melted
    • Pinch of cayenne or paprika
    • Salt to taste

    For the Florentine:

    • 2 English muffins, split
    • 4 large eggs (for poaching)
    • 4 cups fresh spinach
    • 1 tablespoon butter or olive oil
    • 1 clove garlic, minced
    • 1 tablespoon white vinegar (for poaching)
    • Salt and pepper

    Step-by-Step Instructions

    Step 1: Make the Hollandaise (Blender Method)

    1. Add egg yolks and lemon juice to a blender. Blend for 5 seconds.
    2. With blender running, slowly drizzle in hot melted butter.
    3. Blend until thick and creamy. Add cayenne and salt. Set aside.

    Step 2: Sauté the Spinach

    1. Heat butter in a skillet over medium heat. Add garlic and cook for 30 seconds.
    2. Add spinach and cook for 1-2 minutes until wilted. Season with salt and pepper.
    3. Remove from pan and cover to keep warm.

    Step 3: Toast the Muffins

    1. Toast English muffins until golden brown.

    Step 4: Poach the Eggs

    1. Fill a pot with 3 inches of water. Add vinegar and bring to a simmer (not boiling).
    2. Crack each egg into a small bowl. Swirl water gently, then slide egg in.
    3. Poach for 3-4 minutes until whites are set but yolks are runny.
    4. Remove with a slotted spoon and drain on a paper towel.

    Step 5: Assemble

    1. Place toasted muffin halves on plates. Top with sautéed spinach.
    2. Gently place a poached egg on each stack.
    3. Spoon hollandaise sauce over the eggs.
    4. Sprinkle with paprika or fresh chives. Serve immediately.

    Summary

    Prep Time: 10 minutes | Cook Time: 10 minutes | Total Time: 20 minutes

    Yield: 2 servings (4 eggs)

    Difficulty: Medium (poaching + hollandaise)

    Storage Notes

    Eggs Florentine does not store well—assemble fresh. Hollandaise can be made ahead and kept warm in a thermos for up to 1 hour. Leftover spinach keeps for 2 days. Do not refrigerate poached eggs (texture suffers).

  • Grilled Steak With Chimichurri (Argentina’s Gift to Your Grill)

    Grilled Steak With Chimichurri (Argentina’s Gift to Your Grill)

    Steak is great. Steak with chimichurri is a religious experience. This Argentine sauce—parsley, garlic, vinegar, olive oil—cuts through the smoky, fatty meat like a bright, herby lightning bolt. Five minutes to make, zero cooking required. Your grill just found its soulmate.

    Ingredients

    Serves 4.

    For the Steak:

    • 1.5 lbs flank steak, skirt steak, or ribeye
    • 1 tablespoon olive oil
    • 1 teaspoon salt
    • ½ teaspoon black pepper

    For the Chimichurri:

    • 1 cup fresh parsley, finely chopped
    • ¼ cup fresh cilantro (optional)
    • 4 cloves garlic, minced
    • ½ cup olive oil
    • 2 tablespoons red wine vinegar
    • 1 tablespoon lemon juice
    • ½ teaspoon red pepper flakes
    • ½ teaspoon salt

    Step-by-Step Instructions

    Step 1: Make the Chimichurri First

    1. Combine parsley, cilantro (if using), garlic, red pepper flakes, and salt in a bowl.
    2. Add olive oil, red wine vinegar, and lemon juice. Stir well.
    3. Let sit for at least 15 minutes (or up to 2 hours) for flavors to meld.

    Step 2: Prep the Steak

    1. Pat steak completely dry with paper towels.
    2. Rub with olive oil, salt, and pepper.
    3. Let sit at room temperature for 15-20 minutes.

    Step 3: Heat the Grill

    1. Preheat grill to high heat (450-500°F).
    2. Clean and oil the grates.

    Step 4: Grill the Steak

    1. Place steak on the grill. Cook undisturbed for 4-6 minutes.
    2. Flip and cook for another 3-5 minutes for medium-rare.
    3. Use a meat thermometer: 130-135°F for medium-rare.

    Step 5: Rest and Slice

    1. Transfer steak to a cutting board. Rest for 5-10 minutes (non-negotiable).
    2. Slice thinly against the grain.

    Step 6: Douse With Chimichurri

    1. Spoon chimichurri generously over the sliced steak.
    2. Serve with extra sauce on the side.

    Summary

    Prep Time: 10 minutes | Cook Time: 10 minutes | Total Time: 20 minutes (plus resting)

    Yield: 4 servings

    Difficulty: Easy

    Storage Notes

    Steak is best fresh but leftovers keep for 3 days. Reheat gently in a low oven or skillet. Chimichurri refrigerates for up to 1 week—bring to room temperature before serving. Do not freeze chimichurri (herbs turn mushy).

  • Japanese Tamago Sando (The 7-Eleven Sandwich That Changed My Life)

    Japanese Tamago Sando (The 7-Eleven Sandwich That Changed My Life)

    Japan’s 7-Eleven sells a sandwich so perfect it has a cult following. It’s called tamago sando—egg sandwich. Sounds simple. Tastes like a hug. The secret? Creamy, almost sweet egg salad tucked inside impossibly fluffy Japanese milk bread with the crusts cut off.

    This isn’t your chunky, mustard-y egg salad. It’s smooth, rich, and custard-like thanks to Kewpie mayo and a touch of mirin. One bite and you’ll be booking a flight. Or just making another batch.

    Ingredients

    Makes 2 sandwiches.

    • 4 large eggs
    • 3 tablespoons Kewpie mayo (Japanese mayo—don’t substitute)
    • ½ teaspoon sugar
    • ¼ teaspoon salt
    • ½ teaspoon mirin (optional, for sweetness)
    • 4 slices shokupan (Japanese milk bread)
    • Softened butter, for spreading

    Step-by-Step Instructions

    Step 1: Boil the Eggs

    1. Place eggs in a pot and cover with cold water. Bring to a boil, then turn off heat and cover for 10 minutes.
    2. Transfer to an ice bath. Peel carefully.

    Step 2: Make the Egg Salad

    1. Cut eggs in half. Separate yolks from whites.
    2. Mash yolks with Kewpie mayo, sugar, salt, and mirin until smooth and creamy.
    3. Chop whites into small pieces (not too fine). Fold into yolk mixture. Keep some texture.

    Step 3: Assemble the Sando

    1. Trim crusts off the milk bread (authentic and necessary).
    2. Spread a thin layer of butter on each slice.
    3. Pile egg salad generously onto two slices. Top with the remaining bread.

    Step 4: Wrap and Press (The Secret Step)

    1. Wrap each sandwich tightly in plastic wrap. Let sit for 10-15 minutes at room temperature.
    2. Slice in half with a sharp knife (plastic wrap still on) for clean edges.

    Step 5: Serve

    1. Unwrap and eat immediately. Or refrigerate for up to a few hours—it’s designed to be eaten cool.

    Summary

    Prep Time: 10 minutes | Cook Time: 10 minutes | Total Time: 20 minutes (plus resting)

    Yield: 2 sandwiches

    Difficulty: Easy

    Storage Notes

    How to Store:

    Keep wrapped in plastic in the fridge for up to 24 hours. The resting time actually helps the flavors meld. Do not freeze—texture will suffer.

    No Milk Bread?

    Use soft white bread like shokupan’s cousin, brioche, or even regular sandwich bread. Trim the crusts. It won’t be perfect, but it’ll be close.

  • Bacon Egg Cups (Everything’s Better Wrapped in Bacon)

    Bacon Egg Cups (Everything’s Better Wrapped in Bacon)

    Bacon and eggs are a classic. But bacon AS the bowl? That’s next level. These bacon egg cups are crispy, savory, and endlessly satisfying. No bread needed.

    The bacon gets crunchy in the oven. The egg stays soft and runny (or cook it through—you’re the boss). Top with cheese, chives, or nothing at all. Either way, you’re holding breakfast in one hand while you conquer your day.

    Ingredients

    Makes 6 cups.

    • 12 slices bacon (regular cut, not thick)
    • 6 large eggs
    • Salt and black pepper, to taste
    • ¼ cup shredded cheddar or Parmesan (optional)
    • Fresh chives or parsley, for garnish (optional)

    Step-by-Step Instructions

    Step 1: Preheat & Prep

    1. Preheat oven to 400°F (200°C). Grease a 6-cup muffin tin.

    Step 2: Line with Bacon

    1. Wrap 2 slices of bacon around the inside of each muffin cup, crossing them to cover the bottom and sides completely. No gaps!

    Step 3: Pre-Crisp the Bacon

    1. Bake empty bacon cups for 5 minutes. This renders fat so the bacon gets crispy later.
    2. Remove from oven. Drain excess grease with a paper towel (careful—hot).

    Step 4: Add the Eggs

    1. Crack one egg into each bacon cup. Sprinkle with salt and pepper.
    2. Add cheese on top if using.

    Step 5: Bake to Perfection

    1. Bake for 10-12 minutes. For runny yolks: 10 minutes. For firm yolks: 13-14 minutes.
    2. Let cool for 2 minutes. Run a knife around each cup to release.

    Step 6: Serve

    1. Garnish with chives. Eat immediately—these don’t wait around.

    Summary

    Prep Time: 5 minutes | Cook Time: 17 minutes | Total Time: 22 minutes

    Yield: 6 cups

    Difficulty: Easy

    Storage Notes

    Can You Make It Ahead?

    Not really. Bacon egg cups lose their crispiness when reheated. If you have leftovers, store in the fridge for up to 2 days and reheat in an air fryer or oven (not microwave) to regain some crunch.

    Pro tip: Cook the bacon cups empty ahead of time. Add eggs and bake fresh when ready to serve.

  • Egg Breakfast Muffins (Meal Prep’s Best Kept Secret)

    Egg Breakfast Muffins (Meal Prep’s Best Kept Secret)

    Mornings are chaotic. These egg muffins are not. Whisk, pour, bake, and you’ve got breakfast for the whole week. They’re like little portable omelets—no utensils required.

    Fill them with whatever you have in the fridge: bacon, sausage, spinach, bell peppers, cheese. Each muffin is soft, fluffy, and surprisingly satisfying. Make a batch on Sunday, eat like a hero all week.

    Ingredients

    Makes 12 muffins.

    • 12 large eggs
    • ¼ cup milk (any kind)
    • ½ teaspoon salt
    • ¼ teaspoon black pepper
    • 1 cup fillings (choose any): cooked bacon, sausage, ham, chopped spinach, diced bell peppers, onions, mushrooms
    • ½ cup shredded cheese (cheddar, mozzarella, or feta)

    Step-by-Step Instructions

    Step 1: Preheat & Prep

    1. Preheat oven to 375°F (190°C). Grease a 12-cup muffin tin generously with oil or butter.
    2. Chop your fillings into small, bite-sized pieces.

    Step 2: Whisk the Eggs

    1. In a large bowl, whisk eggs, milk, salt, and pepper until frothy and uniform in color.

    Step 3: Fill the Muffin Cups

    1. Divide fillings evenly among the 12 cups (about 1-2 tablespoons each).
    2. Sprinkle cheese over the fillings.
    3. Pour egg mixture into each cup, filling about ¾ full. Stir gently with a fork to distribute everything.

    Step 4: Bake

    1. Bake for 18-22 minutes, until muffins are puffed and set in the center. A toothpick should come out clean.
    2. Let cool in the pan for 5 minutes. Run a knife around the edges to release.

    Step 5: Serve or Store

    1. Eat warm, or let cool completely before storing.

    Summary

    Prep Time: 10 minutes | Cook Time: 20 minutes | Total Time: 30 minutes

    Yield: 12 muffins

    Difficulty: Easy

    Storage Notes

    How to Store:

    Refrigerate in an airtight container for up to 5 days. Reheat in the microwave for 30-45 seconds.

    How to Freeze:

    Freeze on a baking sheet until solid, then transfer to a freezer bag. They keep for 3 months. Reheat frozen muffins for 60-90 seconds.

  • Fluffy Cloud Eggs (The Breakfast That Looks Like Magic)

    Fluffy Cloud Eggs (The Breakfast That Looks Like Magic)

    Cloud eggs look like a fancy brunch trick, but they’re shockingly simple. Whip the whites until stiff, pile them into fluffy clouds, bake for a few minutes, then drop the yolk right into its cozy nest. The result? A dramatic, Instagram-worthy breakfast that tastes as good as it looks.

    The texture is magic: crispy and golden on the outside, soft and marshmallow-like inside, with a warm, runny yolk waiting to be popped. No special equipment needed beyond a whisk or hand mixer.

    Ingredients

    Serves 2.

    • 4 large eggs, separated
    • ¼ teaspoon salt
    • ⅛ teaspoon black pepper
    • 2 tablespoons grated Parmesan or shredded cheddar (optional)
    • Pinch of paprika or chives, for garnish

    Step-by-Step Instructions

    Step 1: Preheat & Prep

    1. Preheat oven to 450°F (230°C). Line a baking sheet with parchment paper.
    2. Separate egg whites from yolks carefully. Keep each yolk intact in its own small bowl.

    Step 2: Whip the Whites

    1. Add salt to egg whites. Whip with a mixer (or whisk vigorously) until stiff peaks form. The whites should hold their shape when you lift the beater.
    2. If using cheese, gently fold it in now.

    Step 3: Shape the Clouds

    1. Scoop the whipped whites onto the baking sheet, forming 4 mounds. Create a shallow well in the center of each with the back of a spoon.
    2. Bake for 3 minutes until the clouds just start to turn golden.

    Step 4: Add the Yolks

    1. Remove from oven. Gently slip one egg yolk into each well.
    2. Return to oven and bake for 3 more minutes for runny yolks, or 4-5 minutes for firmer.

    Step 5: Serve Immediately

    1. Sprinkle with paprika or chives. Eat right away—these deflate quickly.
    2. Serve with toast, avocado, or a simple salad.

    Summary

    Prep Time: 8 minutes | Cook Time: 6-8 minutes | Total Time: 15 minutes

    Yield: 2 servings (4 cloud eggs)

    Difficulty: Easy

    Storage Notes

    Can You Make It Ahead?

    No. Cloud eggs are best eaten immediately. They deflate and become rubbery as they cool. If you have leftovers, chop them up and toss into a salad or scramble into fried rice—but fresh is truly the only way to experience the magic.

  • Spicy Chili Garlic Shrimp Skewers

    Spicy Chili Garlic Shrimp Skewers

    Shrimp skewers are summer in a bite, but these chili garlic shrimp skewers? They’re a flavor explosion. Plump, juicy shrimp marinated in a sticky, spicy, garlicky sauce, then grilled until the edges caramelize and char. Sweet heat. Smoky depth. A kiss of honey to balance it all.

    This recipe is fast, fierce, and foolproof. The marinade doubles as a basting sauce. The shrimp cook in minutes. And the result? Skewers that disappear before they even hit the platter. Serve with rice, noodles, or just a pile of napkins—these are finger-licking good.

    Ingredients

    Serves 4 as an appetizer, 2 as a main.

    For the Shrimp:

    • 1½ lbs large shrimp (16-20 count), peeled and deveined, tails on
    • Wooden or metal skewers (if wooden, soak in water for 30 minutes)
    • 1 tbsp vegetable oil (for grilling)
    • Fresh cilantro, for garnish
    • Lime wedges, for serving

    For the Chili Garlic Marinade:

    • 4 cloves garlic, minced
    • 2 tbsp sriracha or sambal oelek (adjust to heat preference)
    • 2 tbsp soy sauce
    • 2 tbsp honey
    • 1 tbsp lime juice
    • 1 tbsp vegetable oil
    • 1 tsp sesame oil
    • 1 tsp grated ginger
    • ½ tsp red pepper flakes (optional, for extra heat)

    Optional Garnishes:

    • Toasted sesame seeds
    • Chopped green onions
    • Red pepper flakes

    Step-by-Step Instructions

    Step 1: Make the Marinade

    1. In a medium bowl, whisk together garlic, sriracha, soy sauce, honey, lime juice, vegetable oil, sesame oil, ginger, and red pepper flakes (if using).
    2. Reserve 2 tablespoons of marinade for basting later.

    Step 2: Marinate the Shrimp

    1. Add shrimp to the bowl with the remaining marinade. Toss to coat.
    2. Cover and refrigerate for 15-30 minutes. Do not marinate longer—the acid in the lime can start to “cook” the shrimp.

    Step 3: Skewer the Shrimp

    1. If using wooden skewers, soak them in water for 30 minutes to prevent burning.
    2. Thread shrimp onto skewers, piercing through both the thick and thin ends so they lie flat. Leave a little space between each shrimp for even cooking. Aim for 4-5 shrimp per skewer.

    Step 4: Preheat the Grill

    1. Preheat grill to medium-high heat (about 400-450°F). Clean and oil the grates well to prevent sticking.

    Step 5: Grill the Shrimp

    1. Place skewers on the hot grill. Cook for 2-3 minutes per side.
    2. During the last minute, brush the reserved marinade onto the shrimp for extra flavor and a sticky glaze.
    3. Shrimp are done when they’re opaque, pink, and slightly charred on the edges. They should curl into a loose C shape—tight O means they’re overcooked.

    Step 6: Serve Immediately

    1. Transfer skewers to a serving platter. Garnish with fresh cilantro, lime wedges, sesame seeds, and green onions.
    2. Serve with extra lime wedges for squeezing and, if you like, extra chili flakes or sriracha on the side.
    3. Take a bite. Sweet heat, garlic punch, smoky char. This is shrimp at its finest.

    Summary

    Prep Time: 10 minutes + marinating | Cook Time: 6 minutes | Total Time: 25 minutes

    Yield: 4 appetizer servings

    Difficulty: Fast, fiery, fabulous

    Storage Notes

    Leftovers:

    Store cooked shrimp in an airtight container in the fridge for up to 2 days. They’re great cold on salads or lightly reheated.

    Reheating:

    Skillet (best): Reheat quickly over medium-high heat for 1 minute per side. Air fryer: 350°F for 2-3 minutes. Microwave: 20-30 seconds—watch carefully to avoid rubbery shrimp.

    Make Ahead:

    Marinate shrimp up to 4 hours in advance and refrigerate. Skewer just before grilling. Cook fresh for best results.

    Freezer-Friendly:

    Freeze uncooked, marinated shrimp in a zip-top bag for up to 2 months. Thaw overnight in the fridge, then skewer and grill as directed.

    Serving Ideas:

    • Appetizer: Serve on a platter with toothpicks and lime wedges.
    • Main course: 2 skewers per person over rice or noodles.
    • Tacos: Remove shrimp from skewers and serve in corn tortillas with slaw and crema.
    • Salad topper: Pile on a bed of mixed greens with avocado and citrus vinaigrette.
    • Bowl: Serve over coconut rice with mango, avocado, and cilantro.