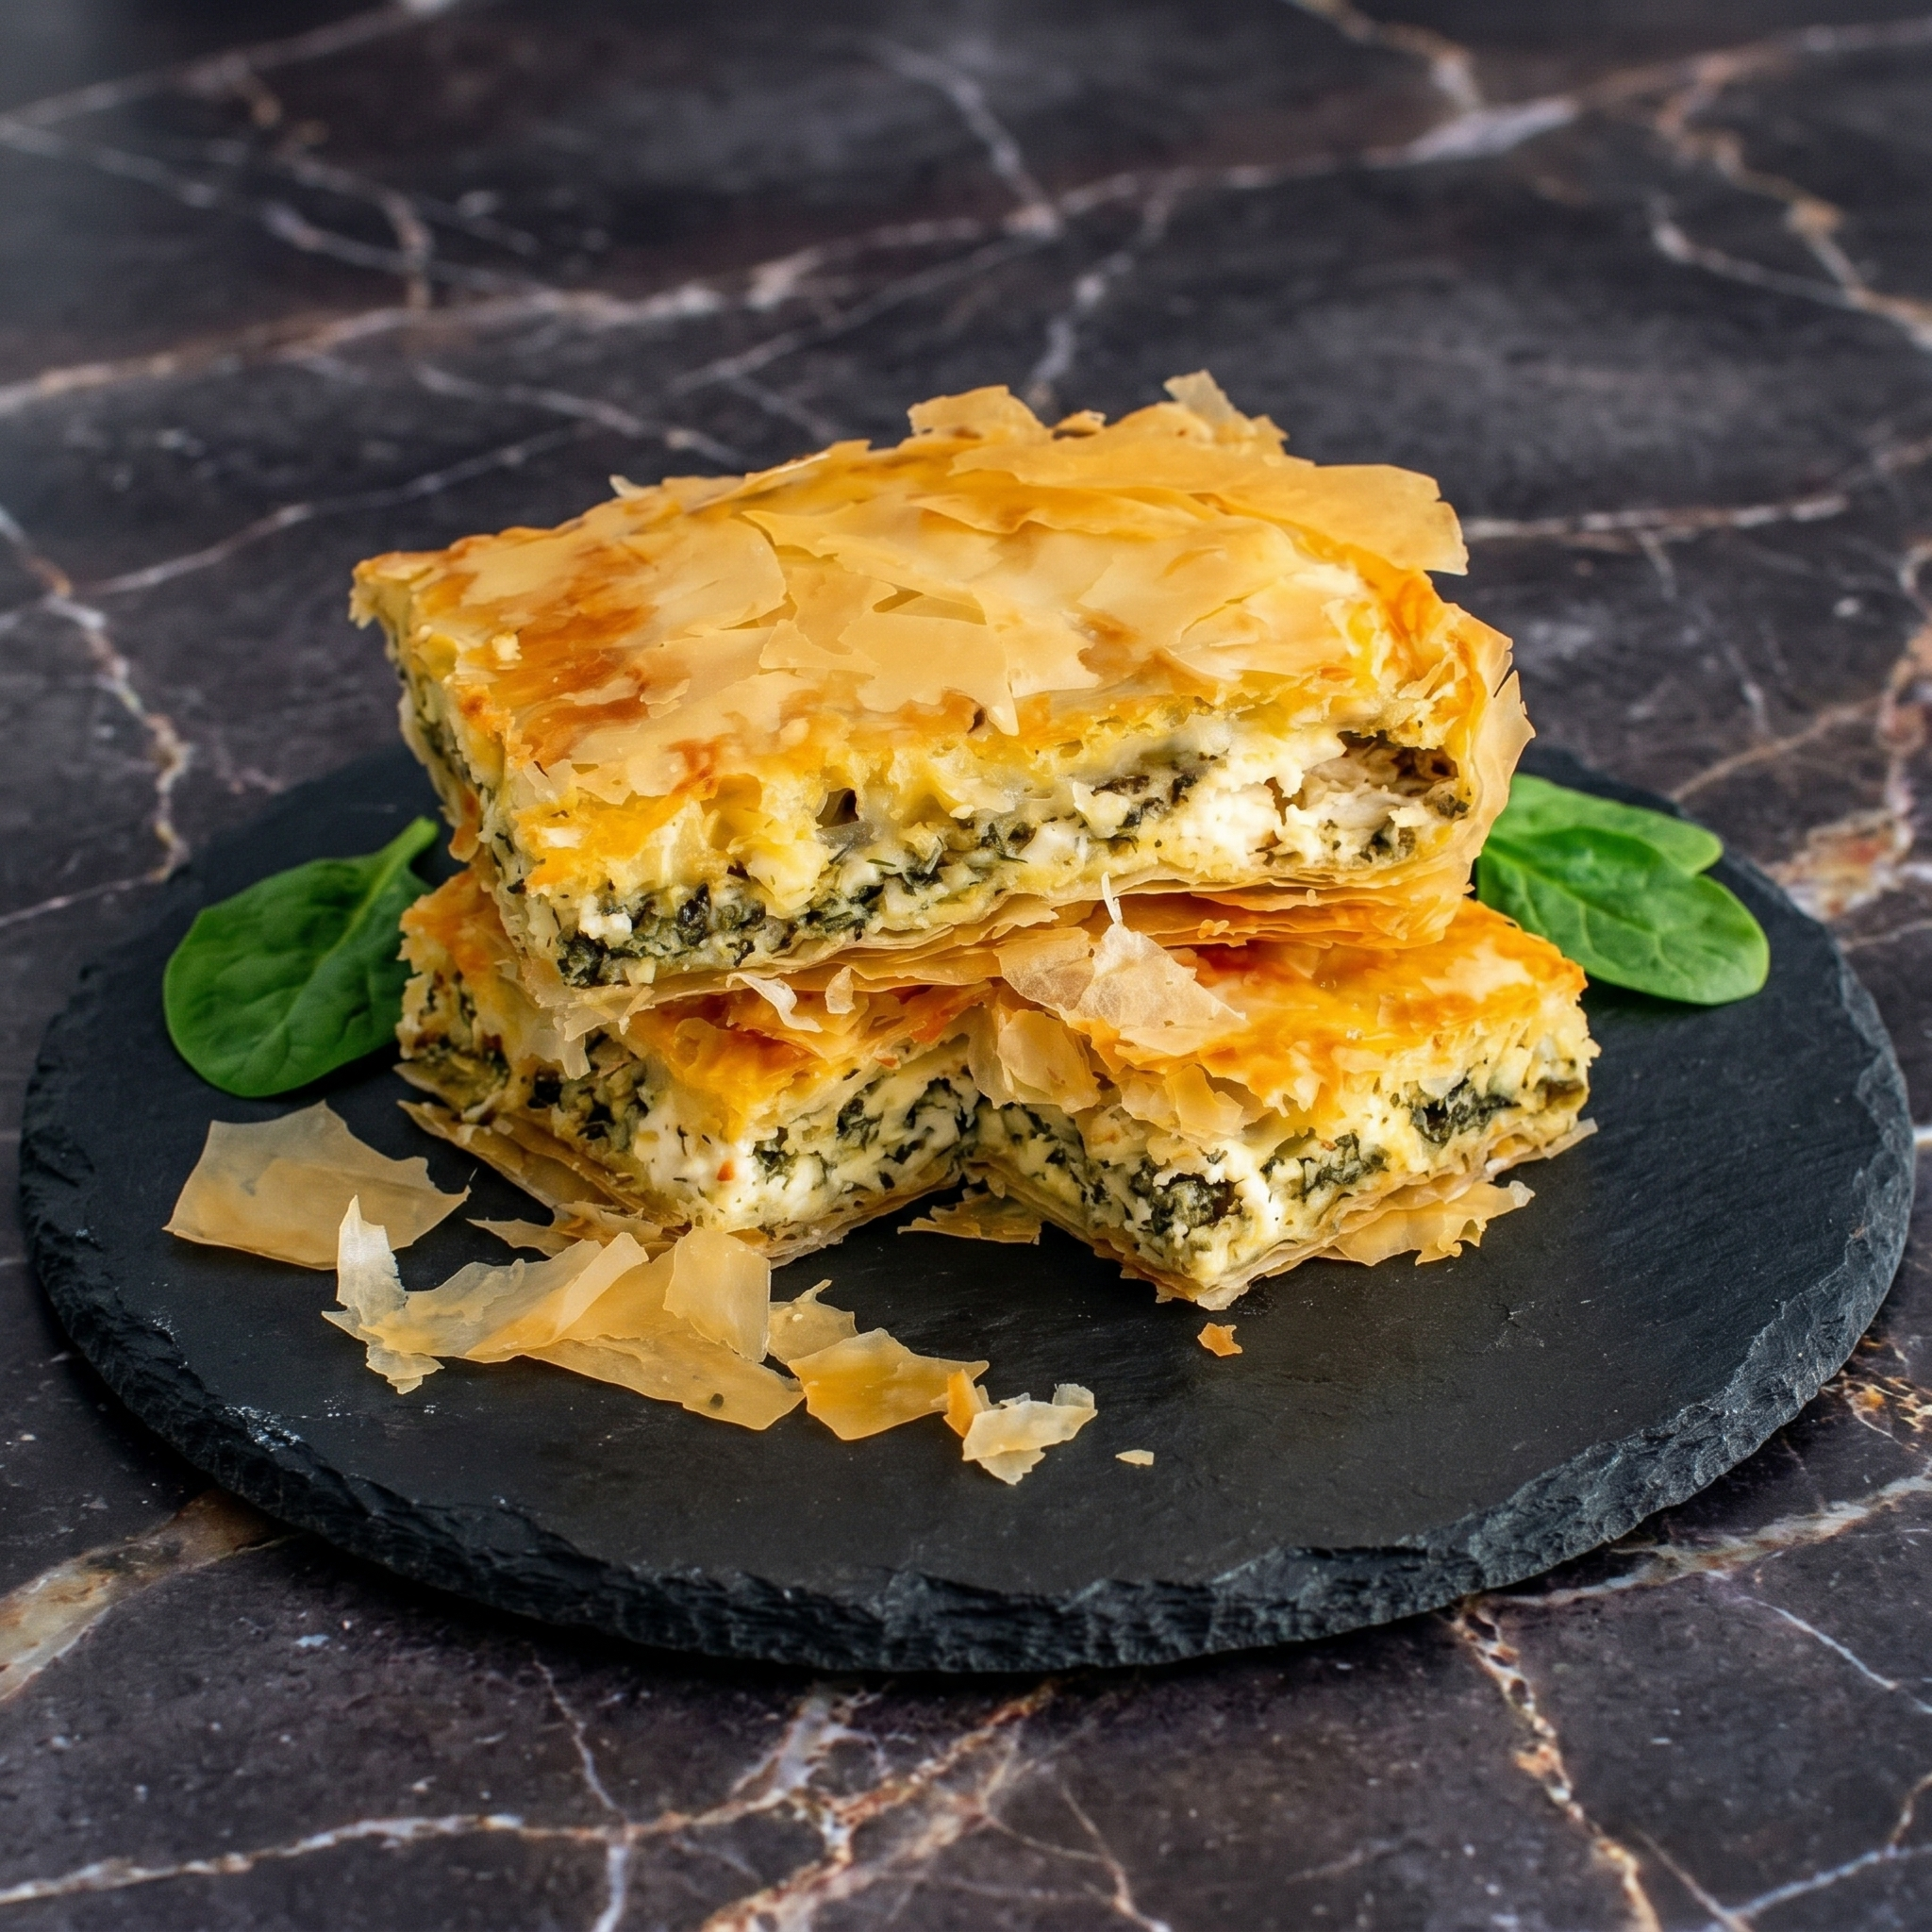
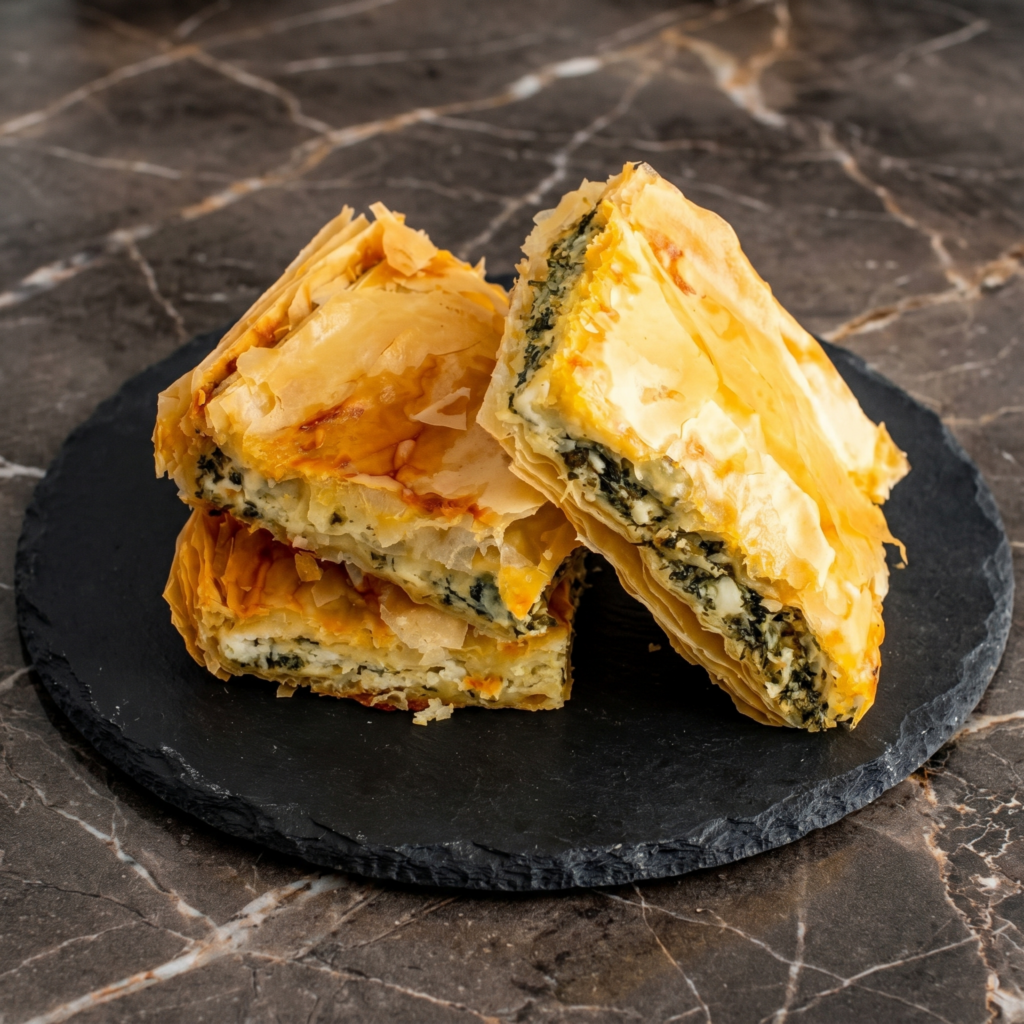
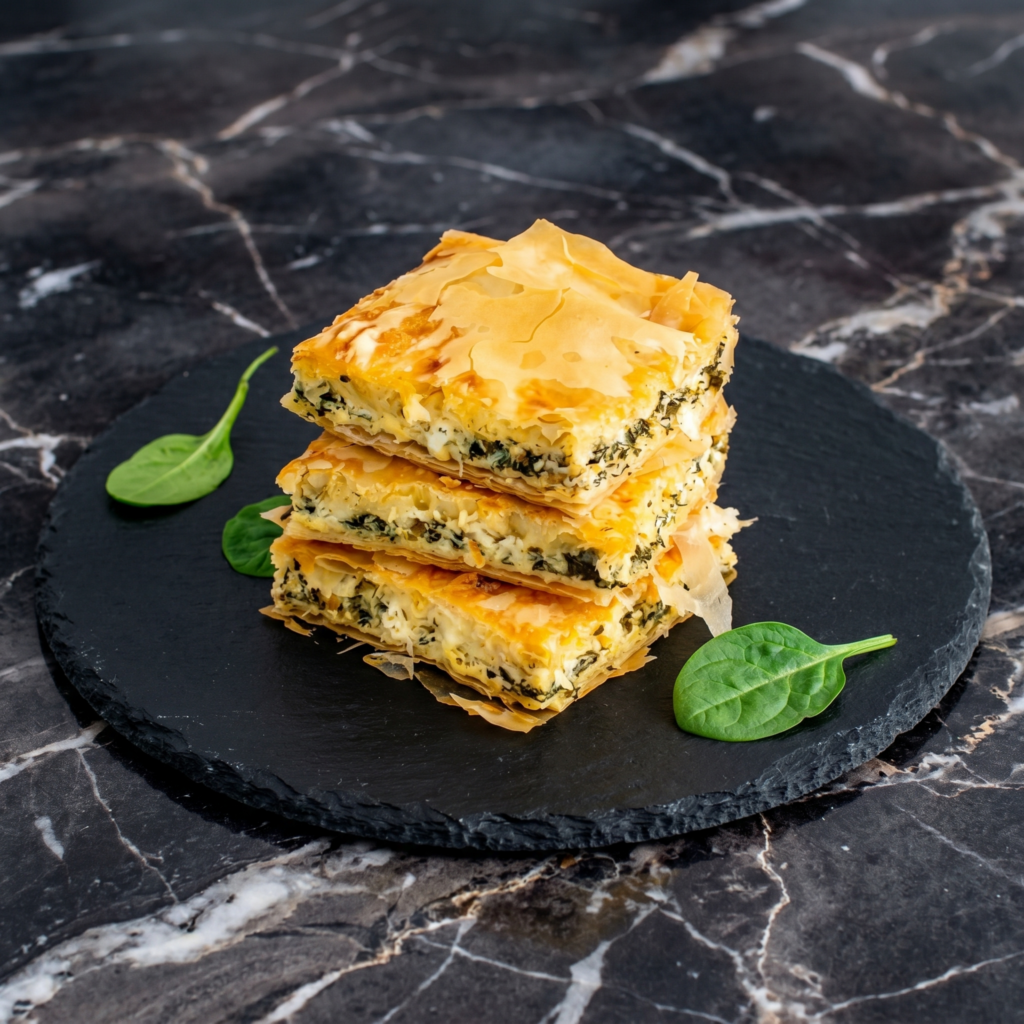
Spanakopita is buttery, crispy, salty, and packed with tangy feta and tender spinach. Make it as a pie or individual triangles. Either way, you get golden layers that shatter when you bite in. Your Greek aunt just nodded in approval.
Ingredients
Makes 12 triangles or one 9×13 pie.
1 box (16 oz) frozen phyllo dough, thawed
10 oz fresh spinach (or 1 box frozen, thawed and squeezed)
1 cup (8 oz) crumbled feta cheese
½ cup ricotta or cottage cheese (optional, for creaminess)
2 green onions, finely chopped
2 tablespoons fresh dill (or 1 tsp dried)
2 large eggs, lightly beaten
½ cup (1 stick) unsalted butter, melted
Salt, pepper, and nutmeg to taste
Step-by-Step Instructions
Step 1: Prep Spinach
If using fresh spinach, wilt in a hot pan for 1-2 minutes. Squeeze out ALL liquid.
If frozen, thaw and squeeze dry. Wet spinach = soggy spanakopita.
Step 2: Make Filling
In a bowl, mix spinach, feta, ricotta (if using), green onions, dill, and eggs.
Season with salt, pepper, and a pinch of nutmeg.
Step 3: Prep Phyllo
Unroll phyllo. Cover with a damp towel (it dries out fast).
Work quickly but calmly.
Step 4: Assemble Triangles
Lay one phyllo sheet on a work surface. Brush with melted butter.
Top with another sheet. Brush again.
Cut into 3-inch wide strips. Place a spoonful of filling at one end.
Fold into triangles like a flag.
Step 5: Bake
Place on a baking sheet. Brush tops with butter.
Bake at 375°F (190°C) for 20-25 minutes, until golden and crispy.
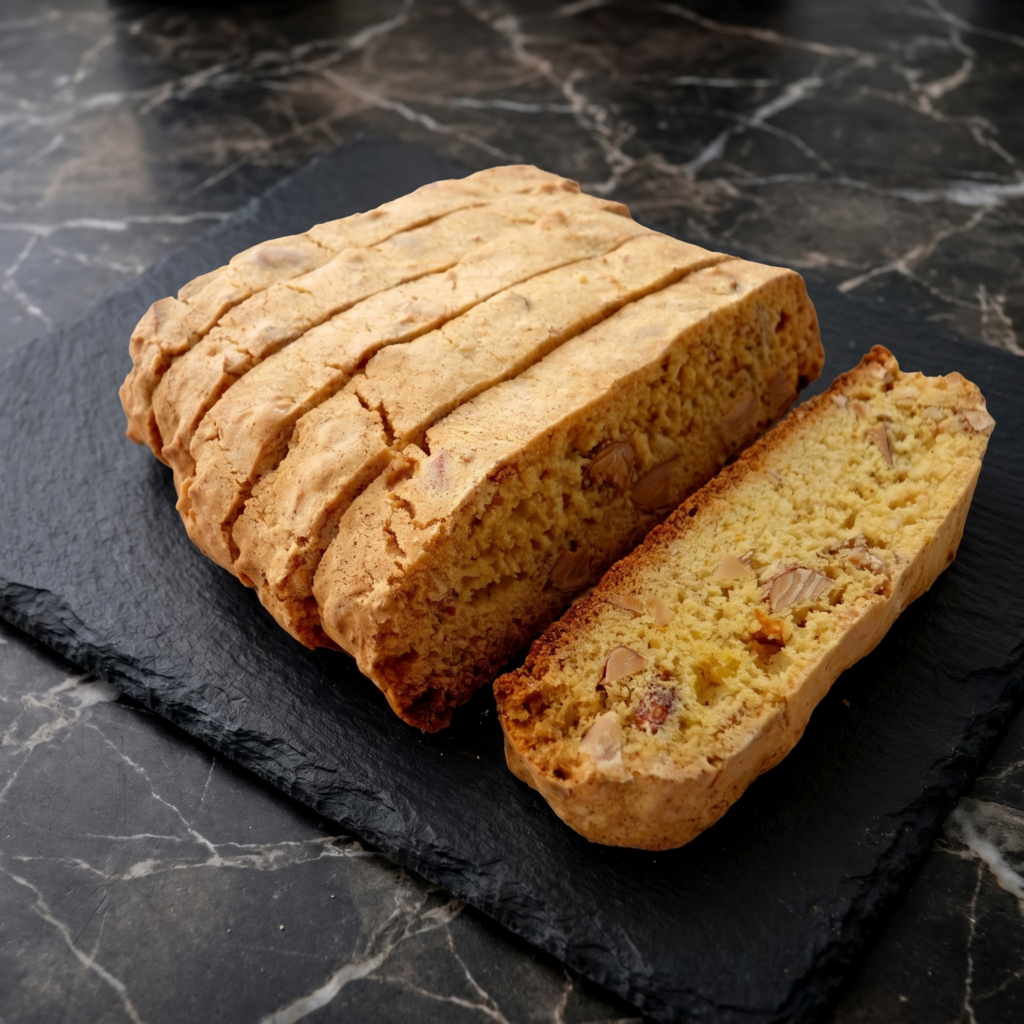
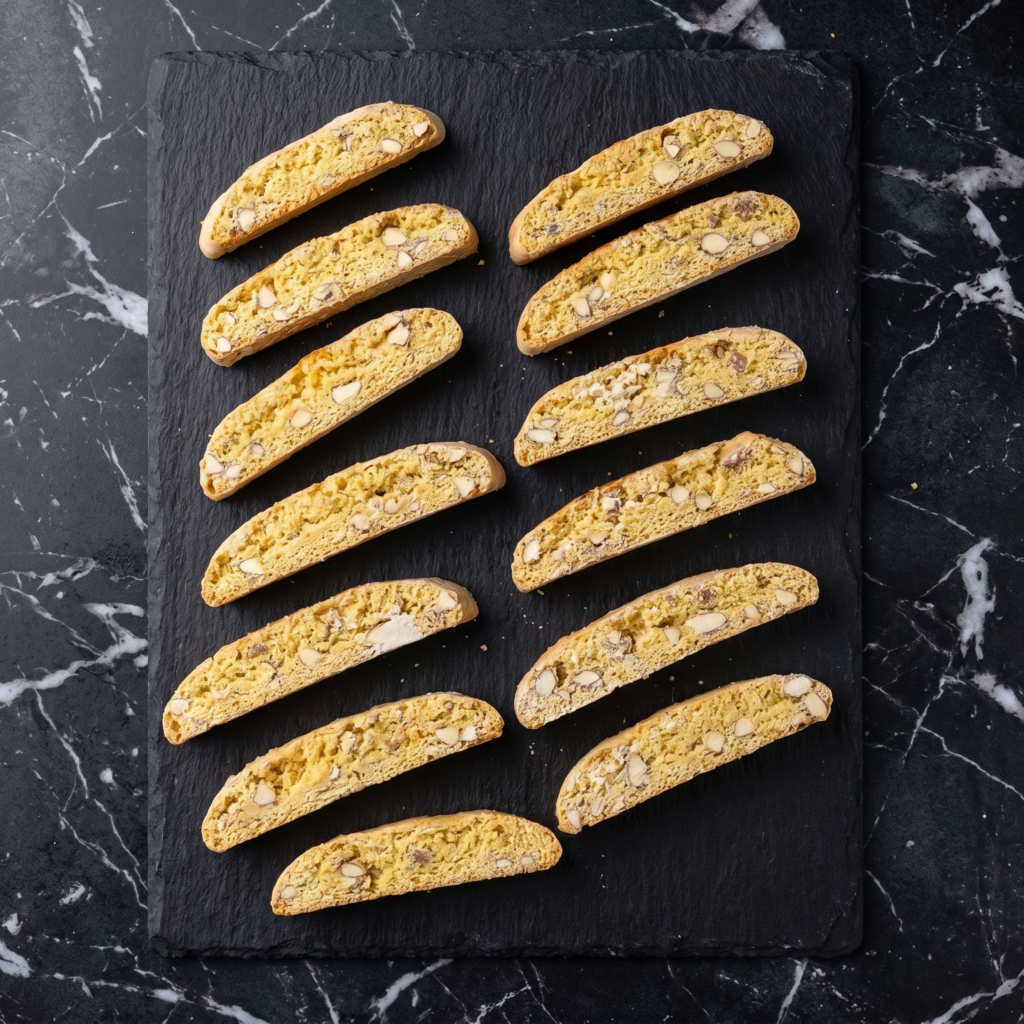
Let’s be honest: most store-bought biscotti are glorified jawbreakers. Not these.
These classic almond biscotti are crunchy but not tooth-shattering, lightly sweet, and absolutely perfect for dunking. They’re twice-baked, which sounds fancy, but really just means you get a cookie that stays crisp for weeks. No stand mixer needed. No weird ingredients. Just butter, sugar, almonds, and a little patience.
Ingredients
Makes about 24 biscotti.
2 cups (260g) all-purpose flour
1 cup (200g) granulated sugar
1 teaspoon baking powder
¼ teaspoon salt
3 large eggs
4 tablespoons (60g) unsalted butter, melted and cooled
1 teaspoon vanilla extract
½ teaspoon almond extract
1 cup (120g) whole raw almonds, lightly toasted
Step-by-Step Instructions
Step 1: Heat Up
Preheat oven to 350°F (175°C). Line a baking sheet with parchment paper.
Step 2: Mix Dry
In a medium bowl, whisk together flour, sugar, baking powder, and salt.
Step 3: Mix Wet
In a large bowl, whisk eggs, melted butter, vanilla, and almond extract until combined.
Step 4: Combine
Pour dry ingredients into wet. Stir with a spatula until a sticky dough forms.
Fold in the toasted almonds.
Step 5: Shape First Log
Divide dough in half. On the prepared baking sheet, shape each half into a log about 10 inches long and 2 inches wide.
Wet your hands slightly to prevent sticking—the dough is sticky by design.
Step 6: First Bake
Bake logs for 25 minutes, until golden and firm to the touch.
Remove from oven and let cool on the sheet for 10 minutes. Don’t turn off the oven—reduce heat to 325°F (160°C).
Step 7: Slice
Transfer logs to a cutting board. Use a serrated knife to slice each log diagonally into ½-inch thick cookies.
Place slices cut-side down back on the baking sheet.
Step 8: Second Bake
Bake for 10 minutes, flip each biscotti, then bake another 10 minutes.
They should be golden, dry, and lightly browned at the edges.
Step 9: Cool and Crunch
Let biscotti cool completely on the baking sheet. They will crisp up further as they cool.
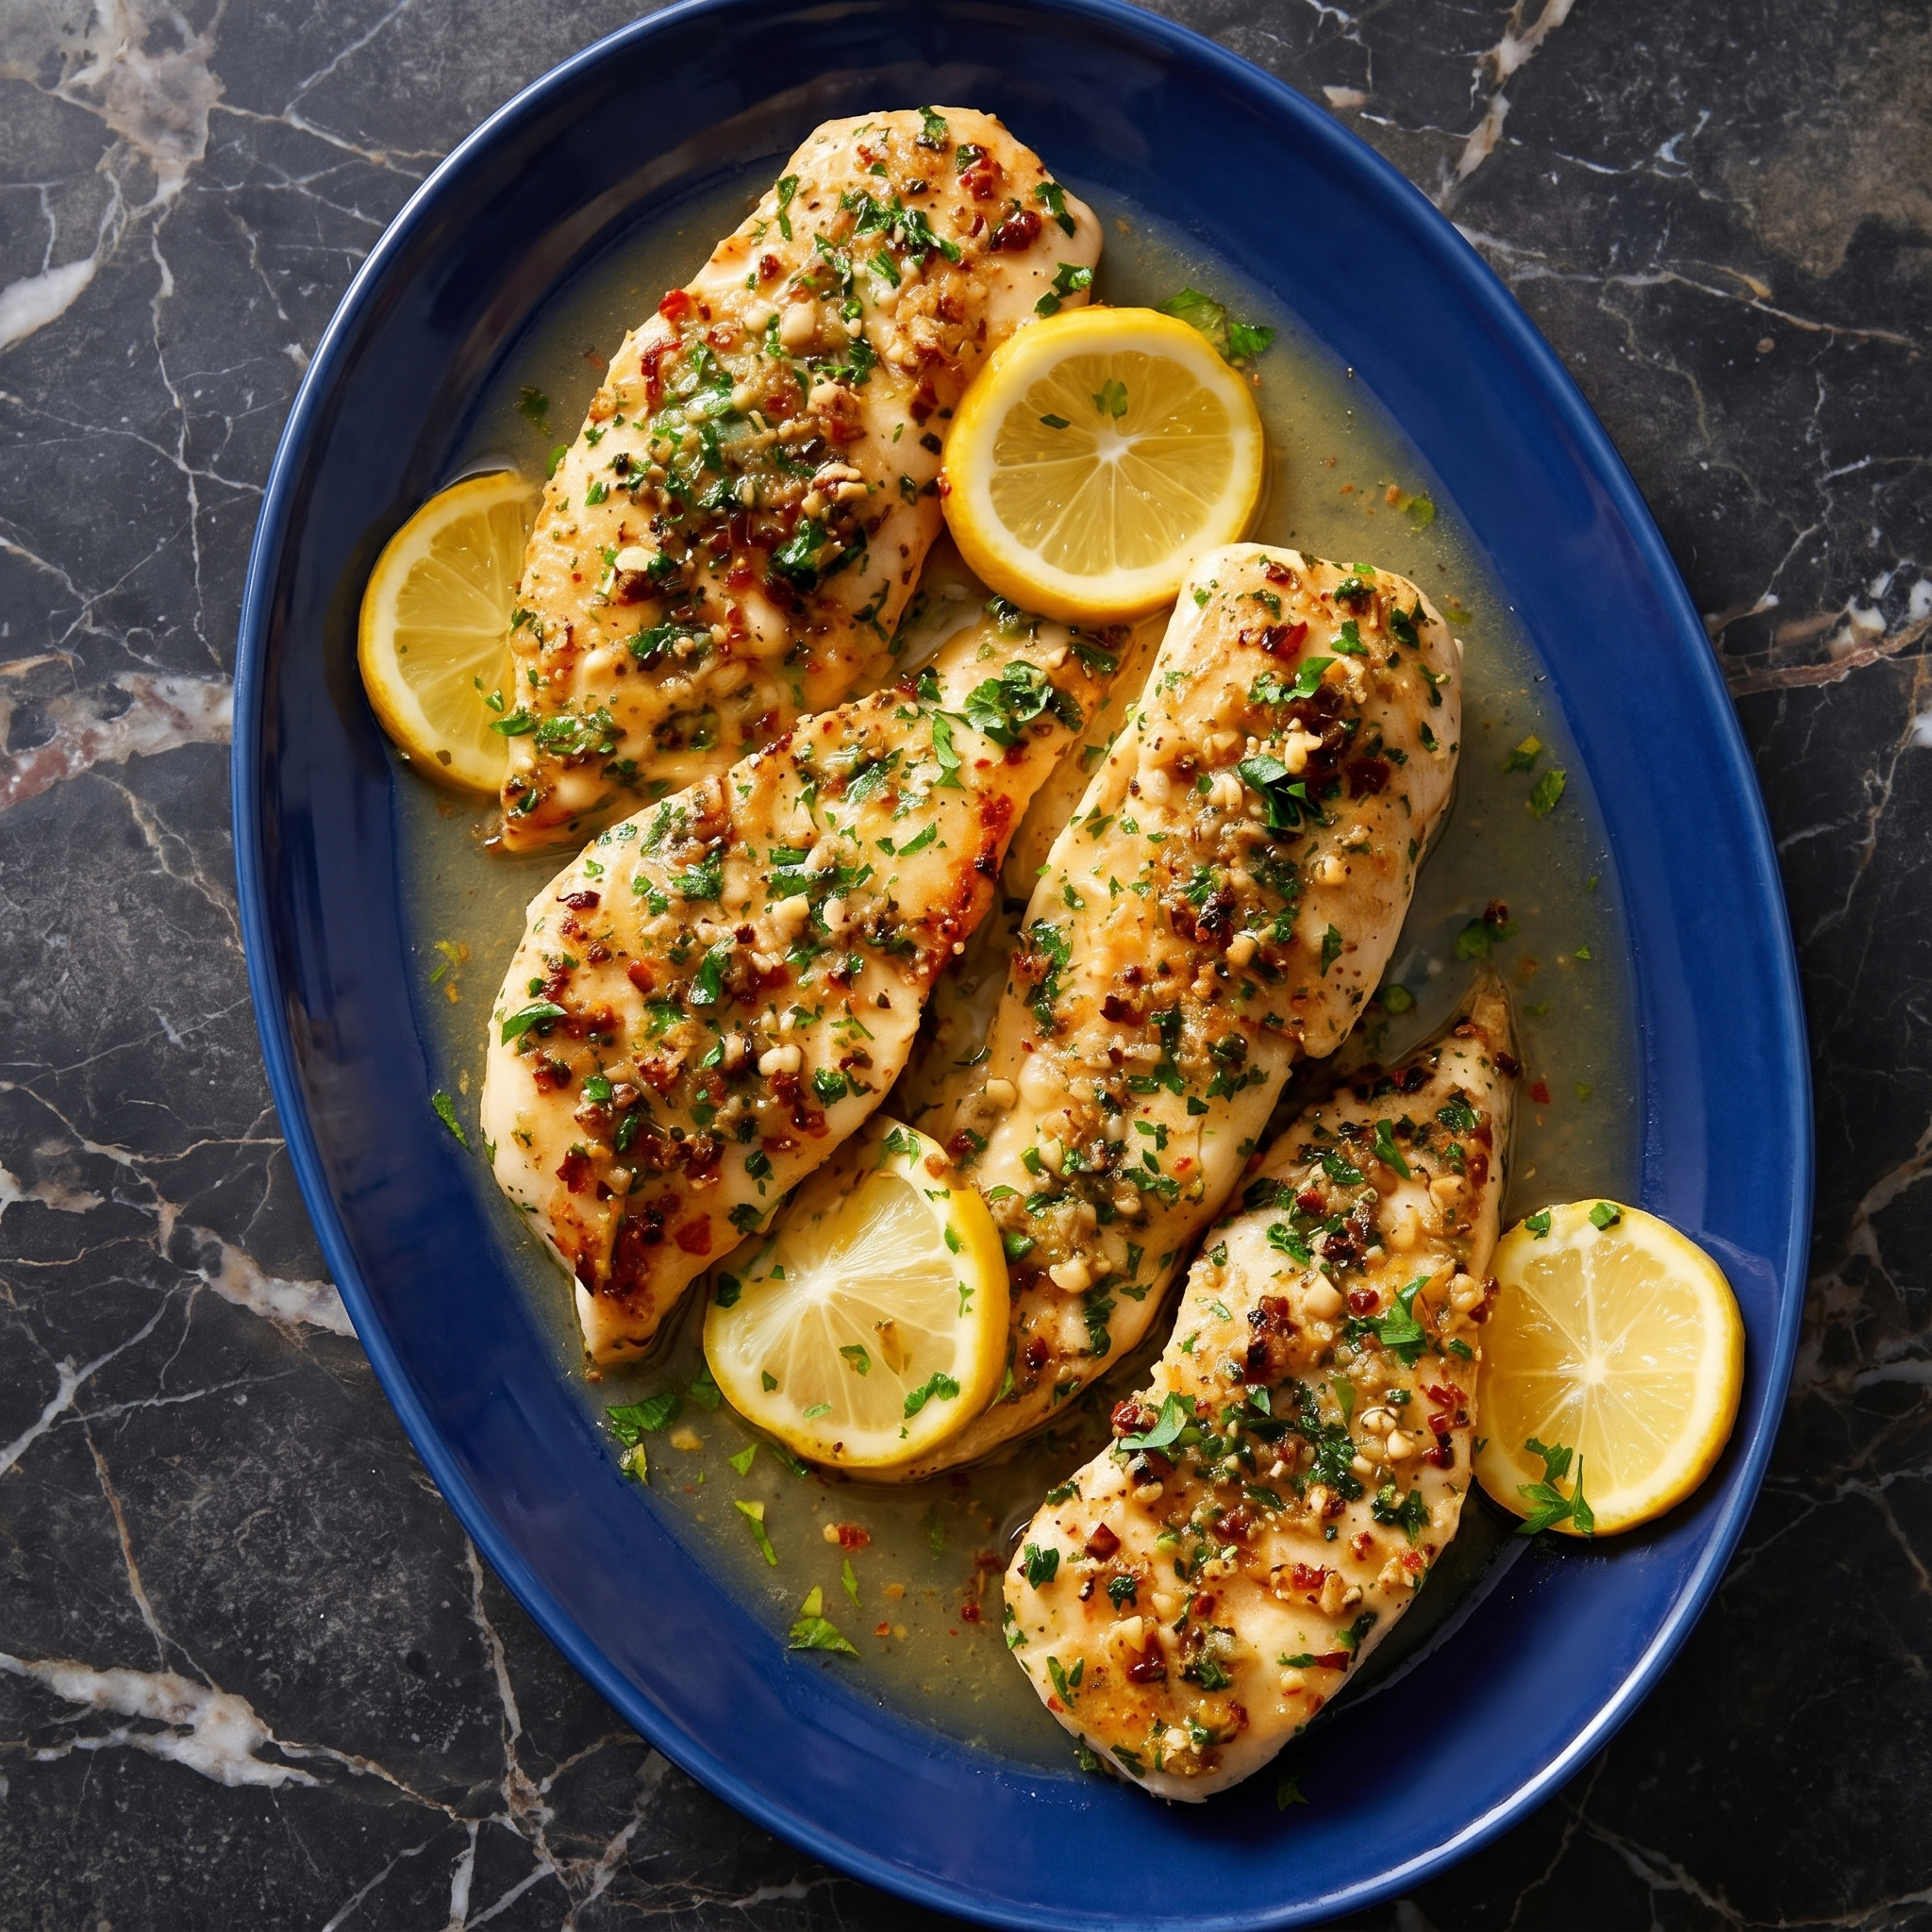
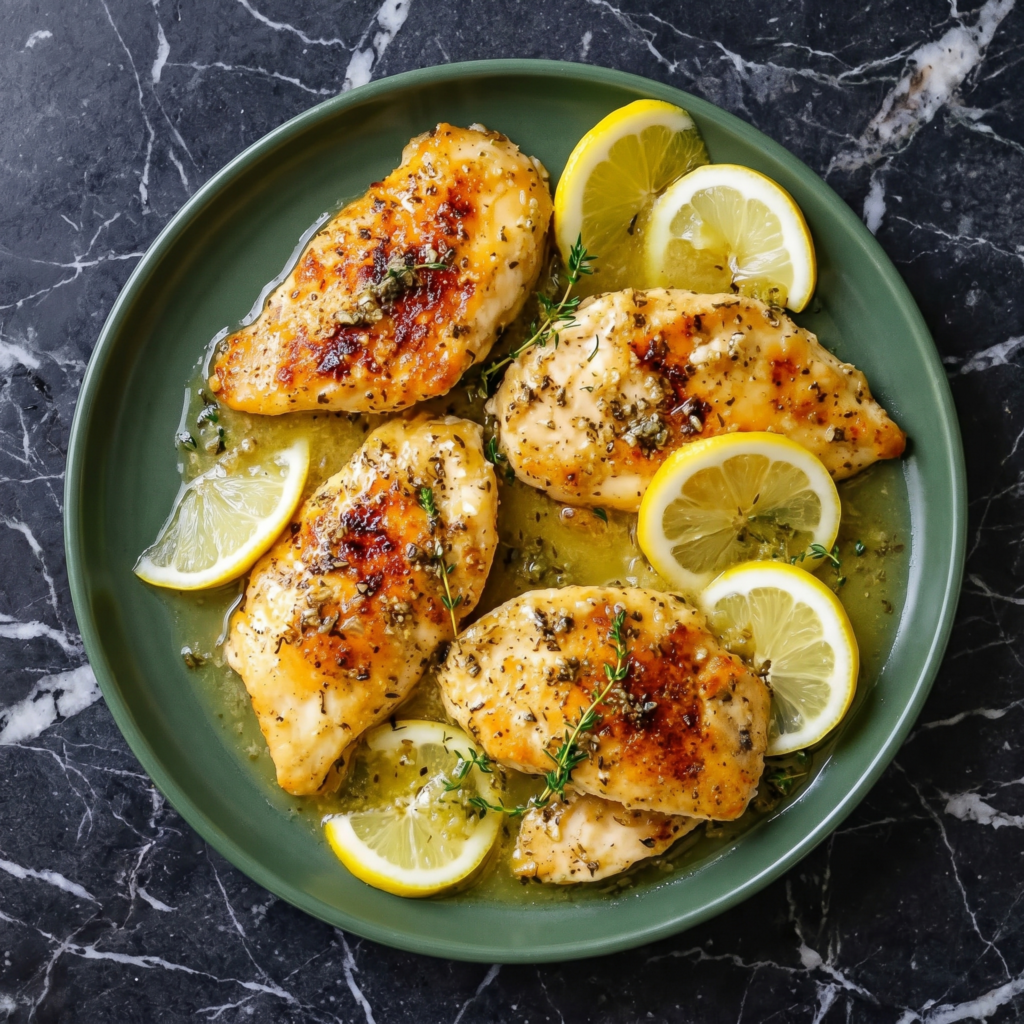
Lemon chicken has one job: brighten up your dinner table. This baked version delivers big citrus flavor without babysitting a skillet.
Toss everything on a sheet pan. The oven does the work. The chicken stays juicy, the edges get crispy, and the lemon-garlic pan juices are practically a sauce. Serve with rice or crusty bread to soak it all up.
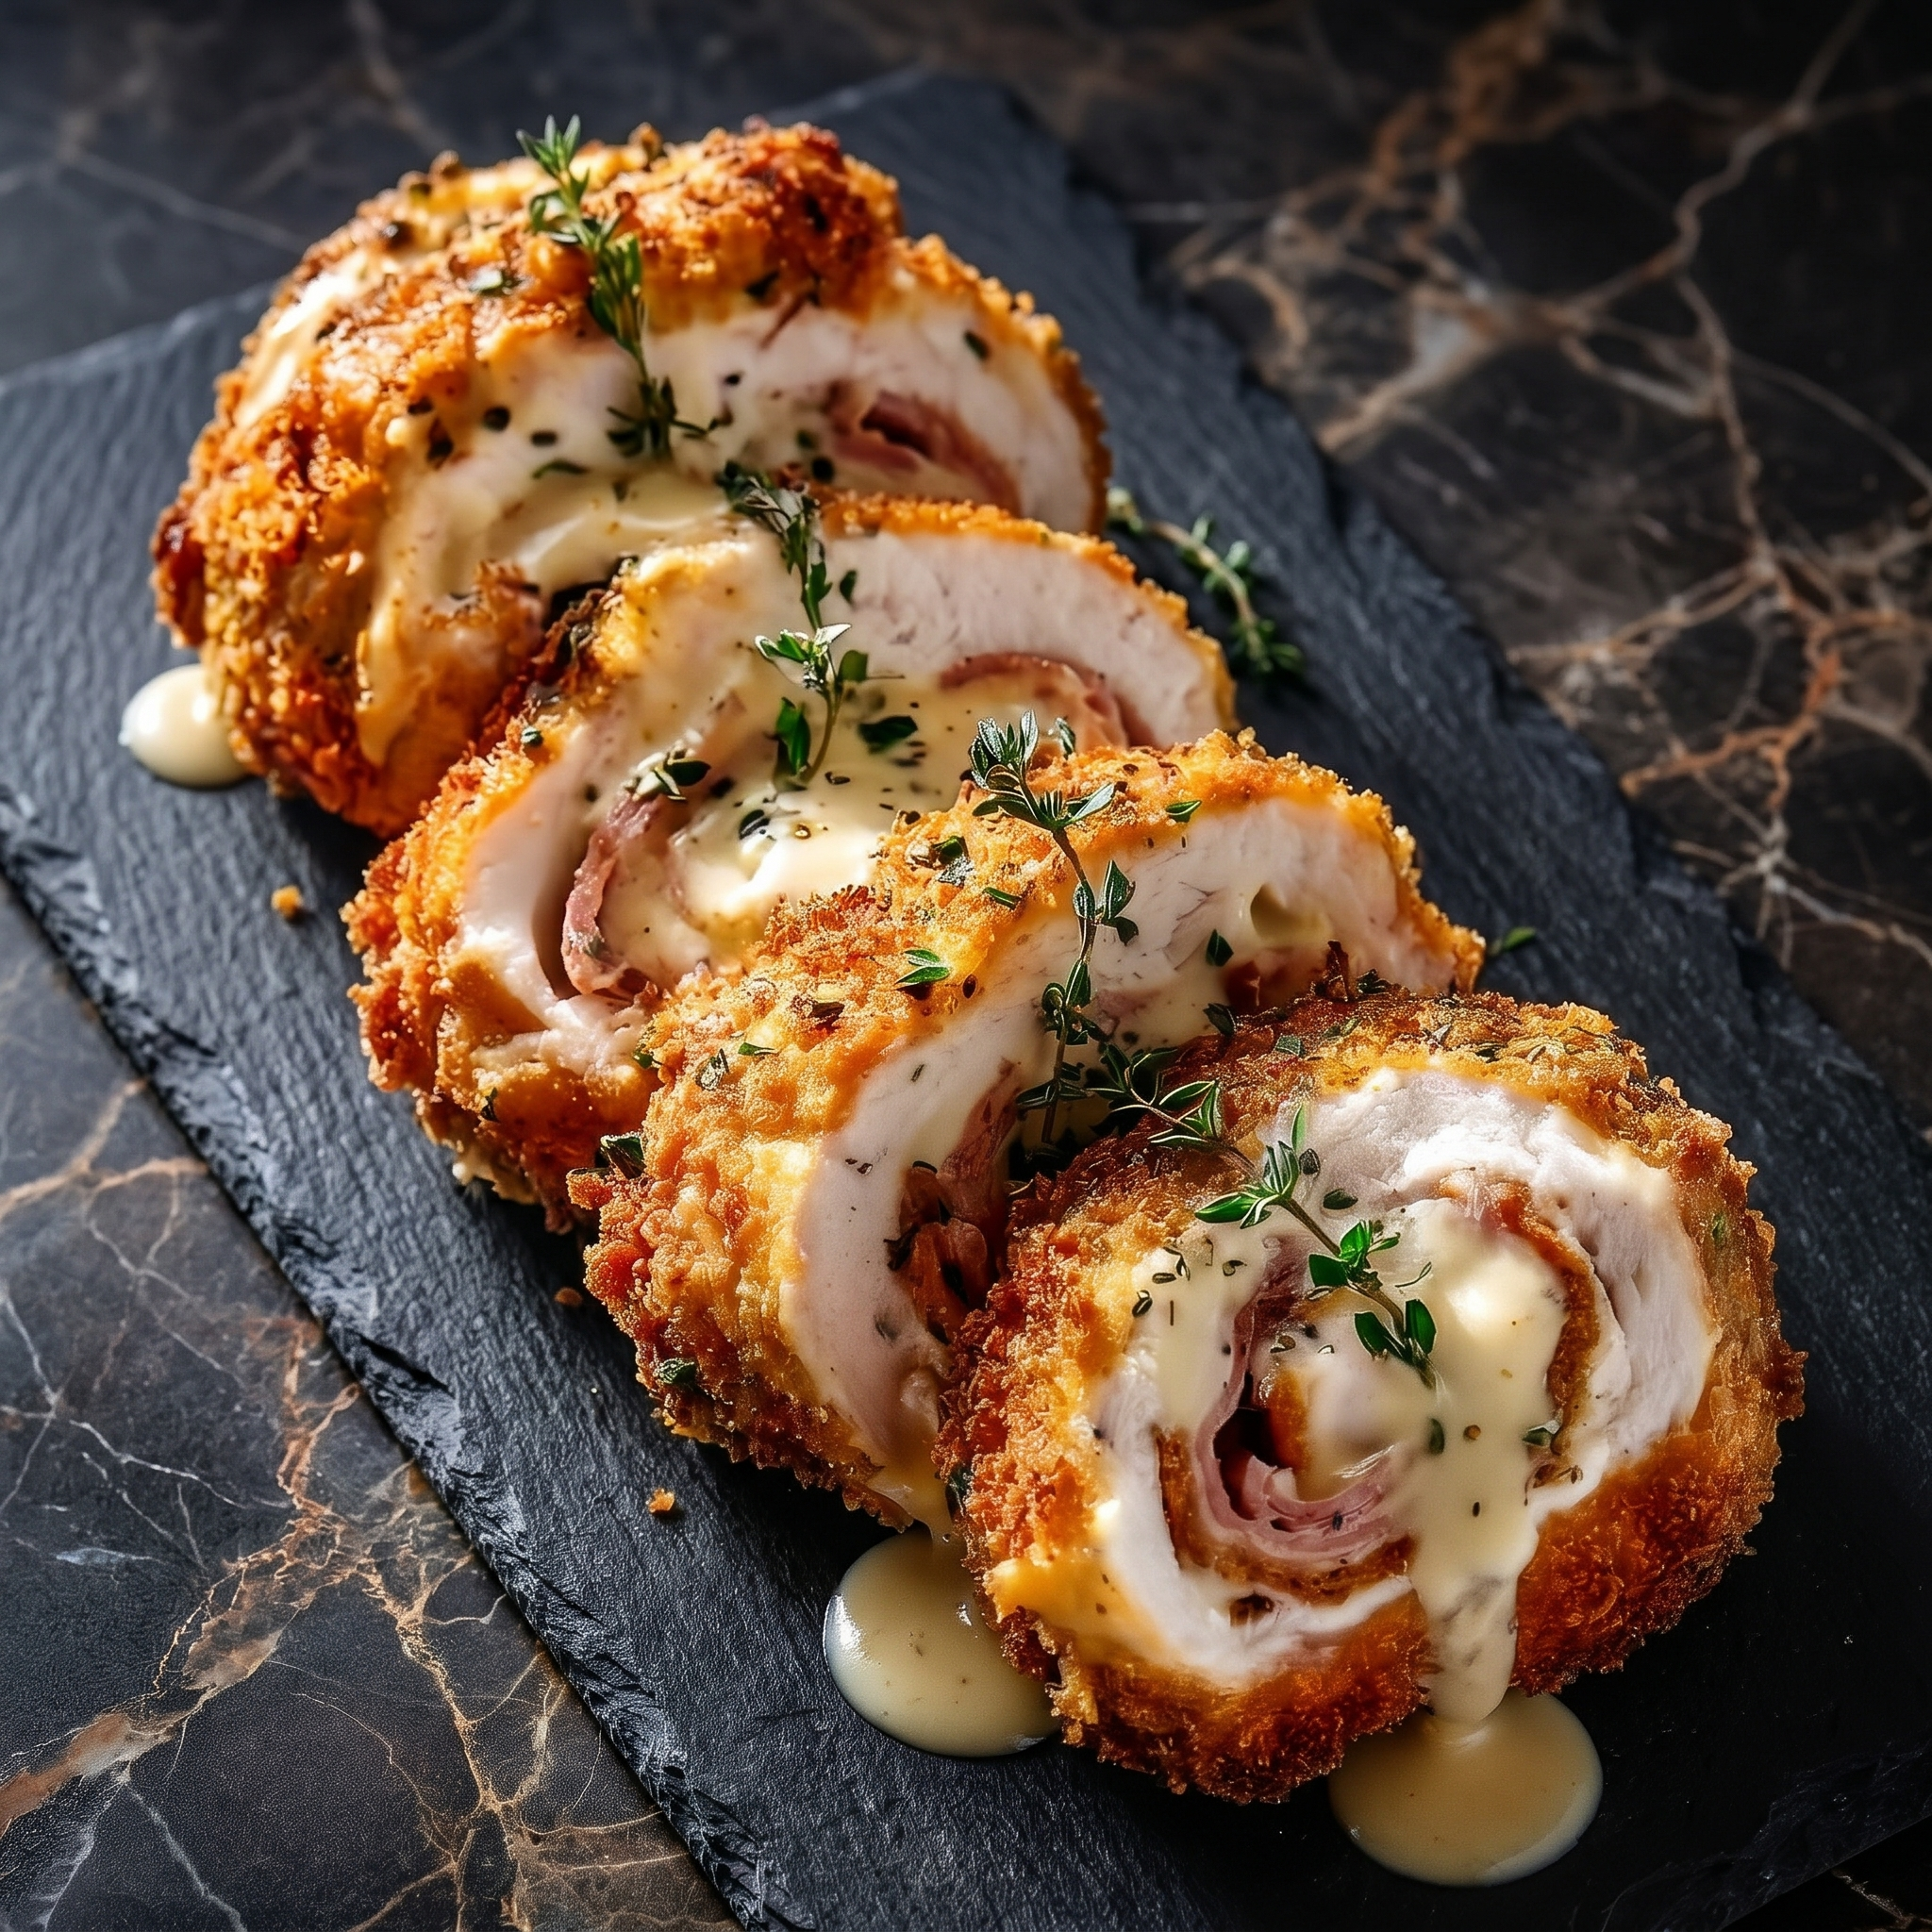
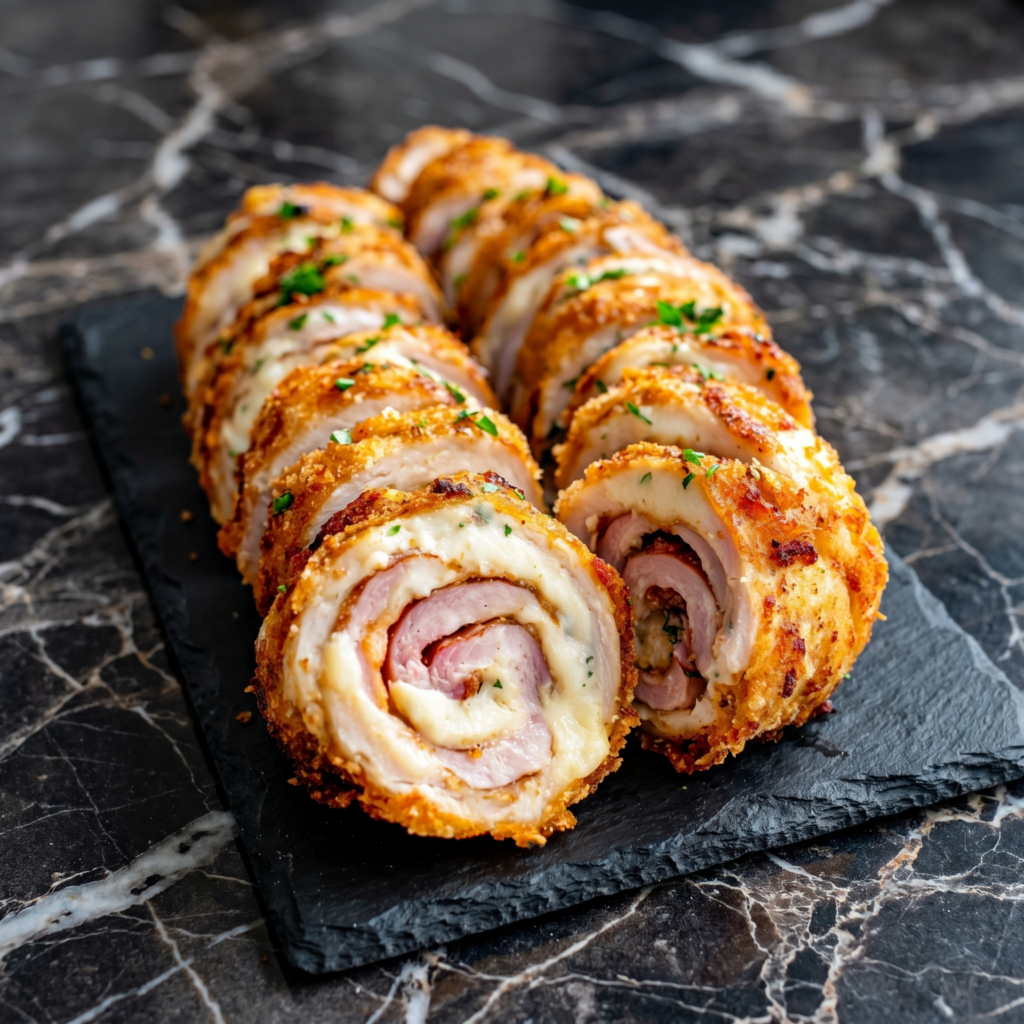
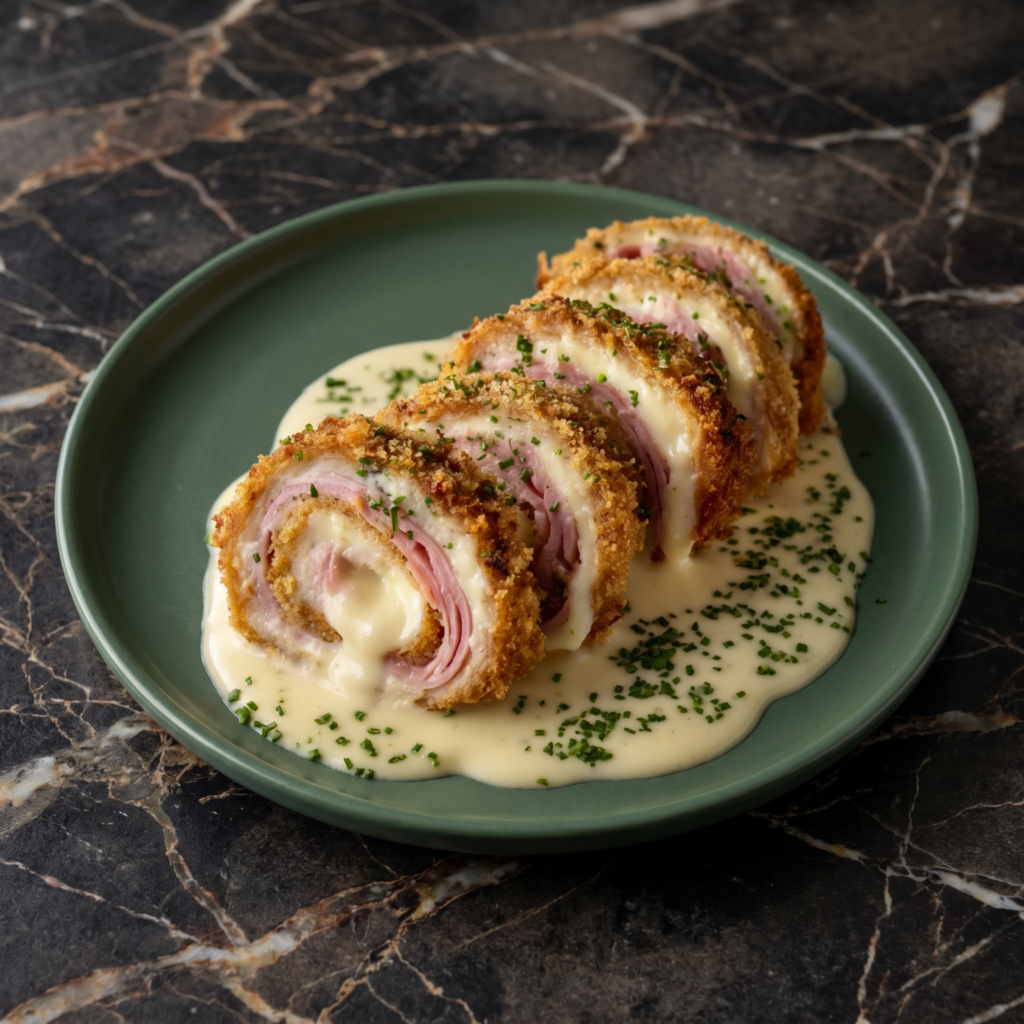
Chicken Cordon Bleu sounds intimidating. But it’s just chicken stuffed with ham and cheese, rolled up, breaded, and baked. The cheese gets melty. The chicken stays juicy. And that creamy sauce? Pure velvet.
This version skips the frying and uses the oven. Less mess, less stress, same impressive result.
Ingredients
Serves 4.
4 boneless, skinless chicken breasts
4 slices deli ham (or prosciutto)
4 slices Swiss cheese (or Gruyère)
½ cup all-purpose flour
2 large eggs, beaten
1 cup panko breadcrumbs
½ teaspoon salt
¼ teaspoon black pepper
½ teaspoon paprika
2 tablespoons olive oil (or cooking spray)
Creamy Dijon Sauce:
2 tablespoons butter
2 tablespoons flour
1 cup milk
¼ cup chicken broth
2 tablespoons Dijon mustard
¼ cup grated Parmesan (optional)
Step-by-Step Instructions
Step 1: Prep the Chicken
Place chicken breasts between plastic wrap. Pound to ¼-inch thickness.
Season with salt, pepper, and paprika.
Step 2: Stuff and Roll
Layer 1 slice ham and 1 slice Swiss on each chicken breast.
Roll tightly from the short end. Secure with toothpicks if needed.
Step 3: Bread the Chicken
Set up bowls: flour, beaten eggs, panko mixed with a pinch of salt.
Dredge each chicken roll in flour, then egg, then panko. Press firmly.
Step 4: Bake Until Golden
Preheat oven to 400°F (200°C). Line a baking sheet with parchment.
Place chicken rolls on the sheet. Drizzle or spray with olive oil.
Bake for 25-30 minutes until golden and internal temp reaches 165°F.
Step 5: Make the Sauce
In a saucepan, melt butter over medium heat. Whisk in flour, cook 1 minute.
Slowly whisk in milk and broth. Simmer until thickened (2-3 minutes).
Whisk in Dijon and Parmesan. Season with salt and pepper.
Step 6: Serve
Remove toothpicks. Slice chicken into medallions or serve whole.
Drizzle with Dijon sauce. Watch everyone pretend they’re at a French bistro.
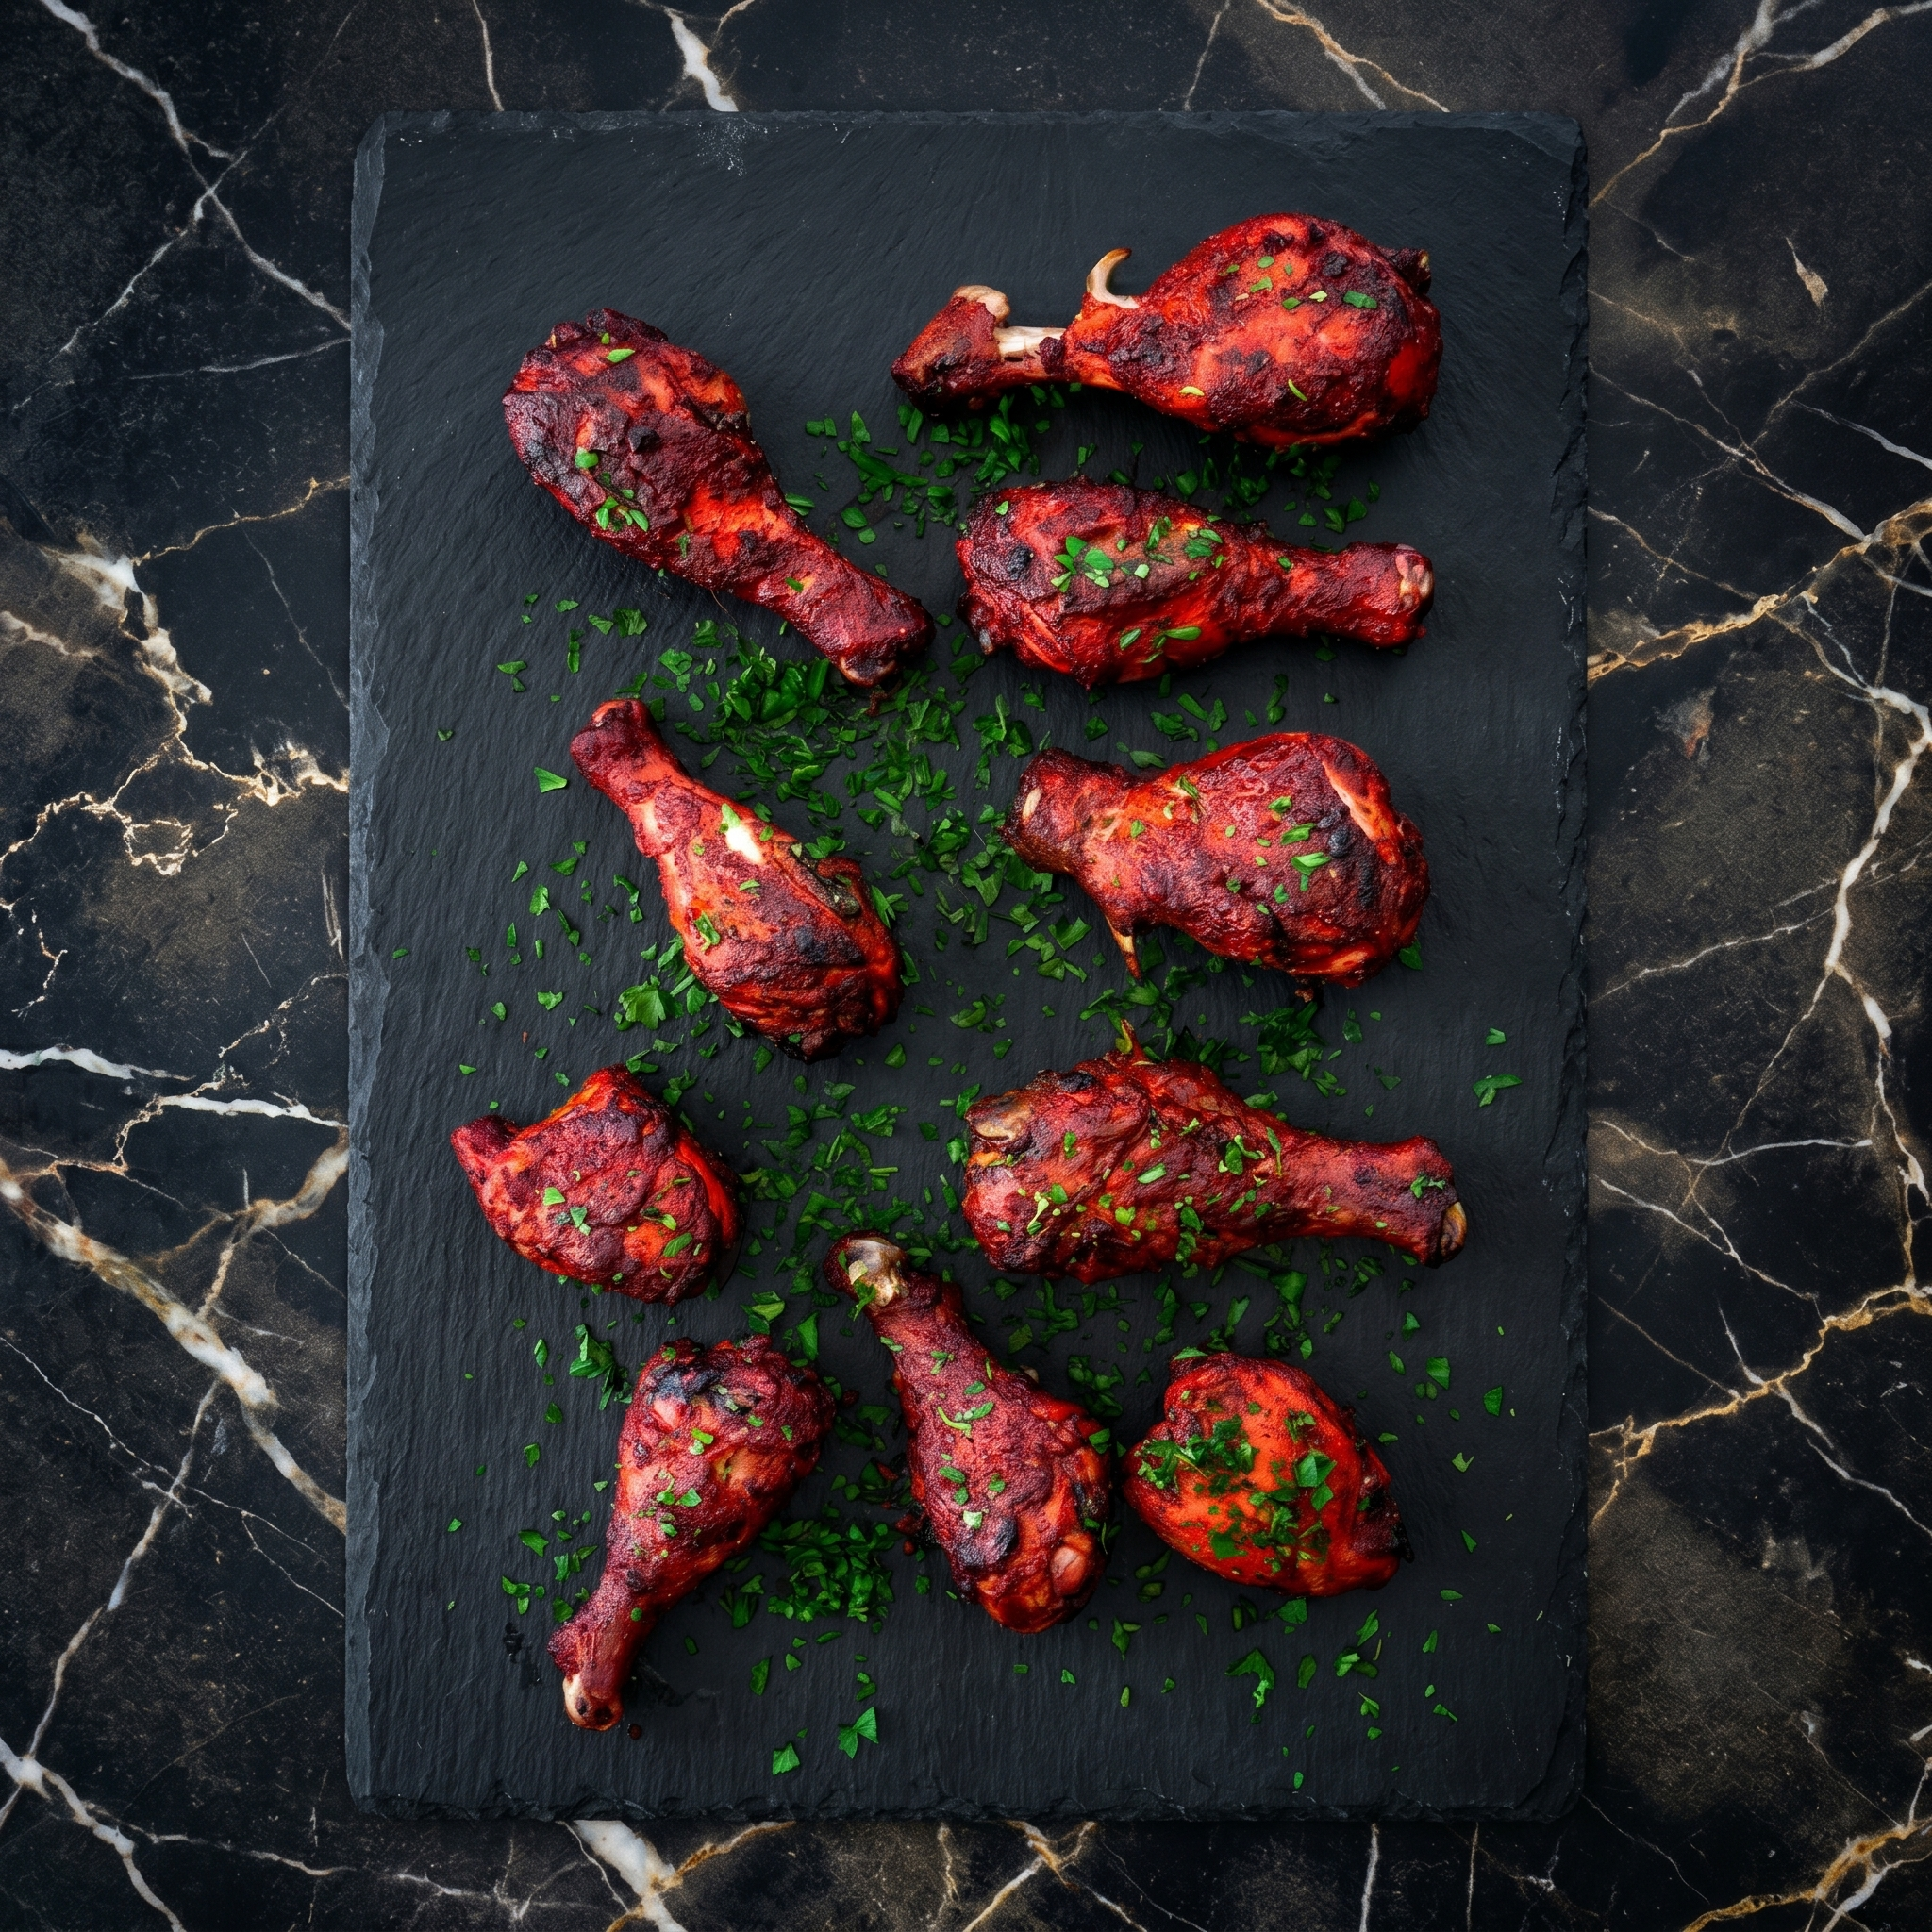
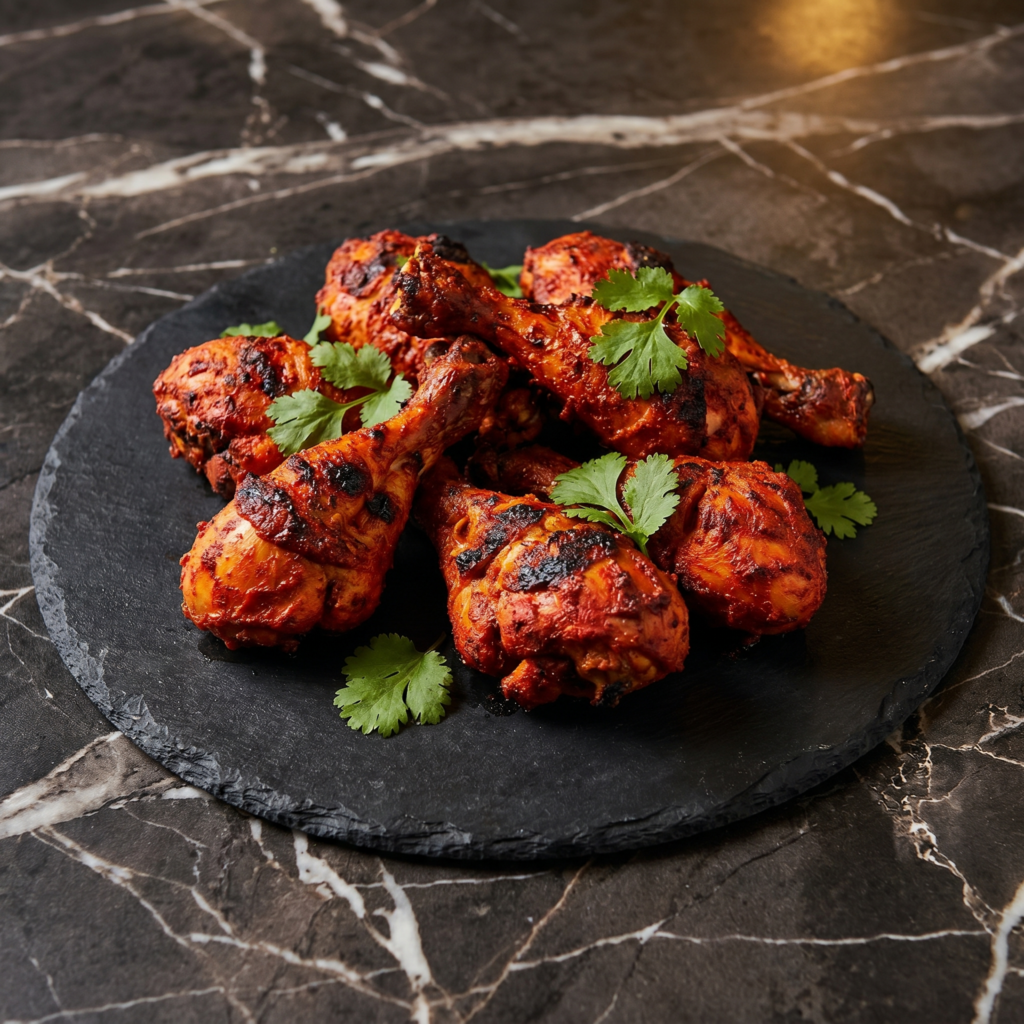
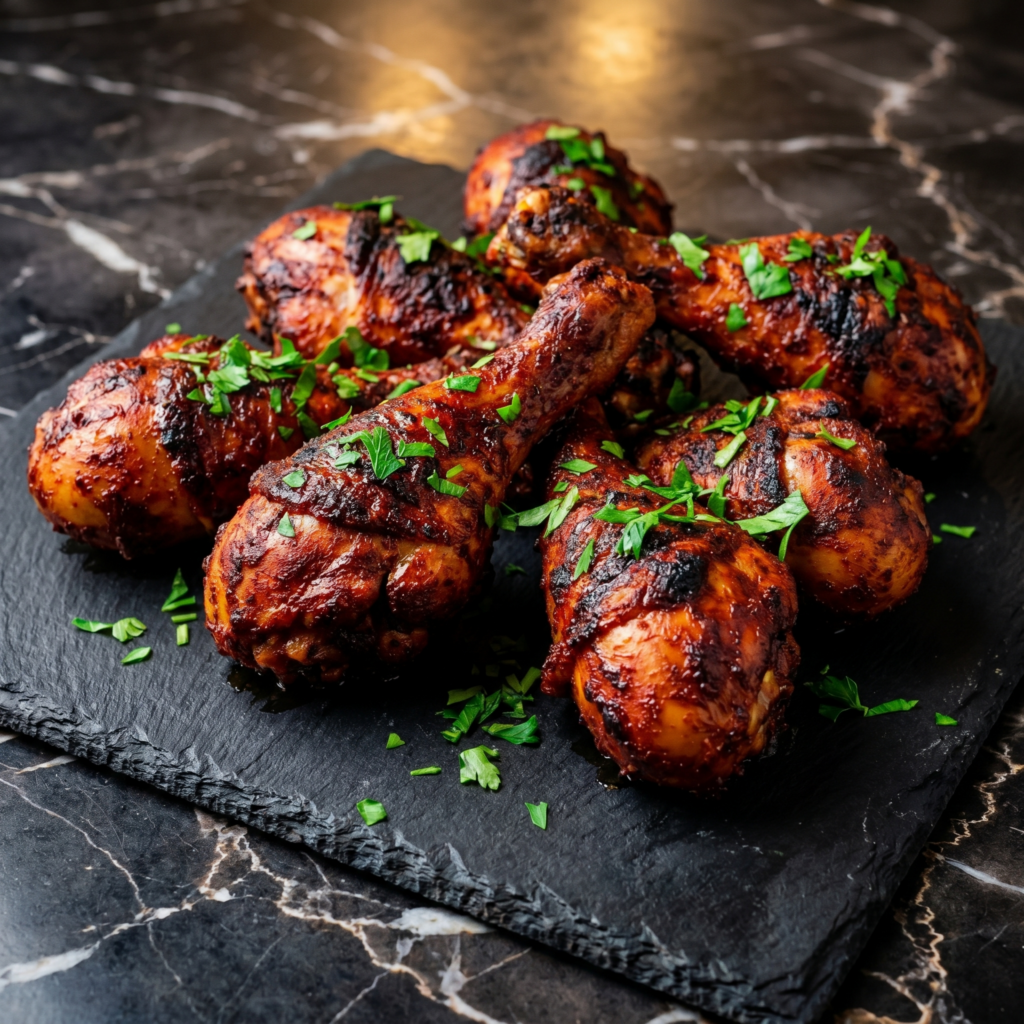
Real tandoori chicken doesn’t require a tandoor. You need a hot oven (or grill), a killer yogurt marinade, and one trick for that signature smoky flavor. This version is juicy, not dry, with charred edges and tender meat that falls off the bone. No red dye #40 required—just paprika doing its job.
Ingredients
Serves 4.
2 lbs chicken drumsticks or thighs, skin removed, scored
1 cup plain full-fat yogurt
2 tablespoons lemon juice
4 cloves garlic, minced
1 tablespoon ginger, grated
1 tablespoon garam masala
1 tablespoon paprika (for color and mild heat)
1 teaspoon cumin
1 teaspoon coriander
½ teaspoon cayenne (optional, for heat)
1 teaspoon salt
1 tablespoon oil
Step-by-Step Instructions
Step 1: Marinate (Do This Early)
Score chicken thighs or drumsticks with shallow cuts.
Whisk yogurt, lemon juice, garlic, ginger, all spices, salt, and oil.
Coat chicken completely. Cover and refrigerate for 2-24 hours. Longer = better.
Step 2: Preheat Like Crazy
Preheat oven to 475°F (245°C) with a baking sheet inside.
Line a second baking sheet with foil and place a wire rack on top.
Step 3: Bake or Grill
Place chicken on the wire rack. Shake off excess marinade.
Bake for 20 minutes. Flip and bake 10-15 more minutes until charred and cooked through.
For grill: cook over medium-high direct heat for 15-20 minutes, turning often.
Step 4: Add Smoky Finish (The Trick)
Optional but amazing: heat a small piece of charcoal until red hot.
Place it in a small foil cup on the baking sheet. Drizzle with oil.
Cover chicken and pan tightly with foil. Let smoke infuse for 2 minutes.
Refrigerate leftovers for up to 3 days. Reheat in a 375°F oven or air fryer for 8-10 minutes—microwave makes it rubbery. Tandoori chicken freezes well for up to 2 months; thaw overnight before reheating.
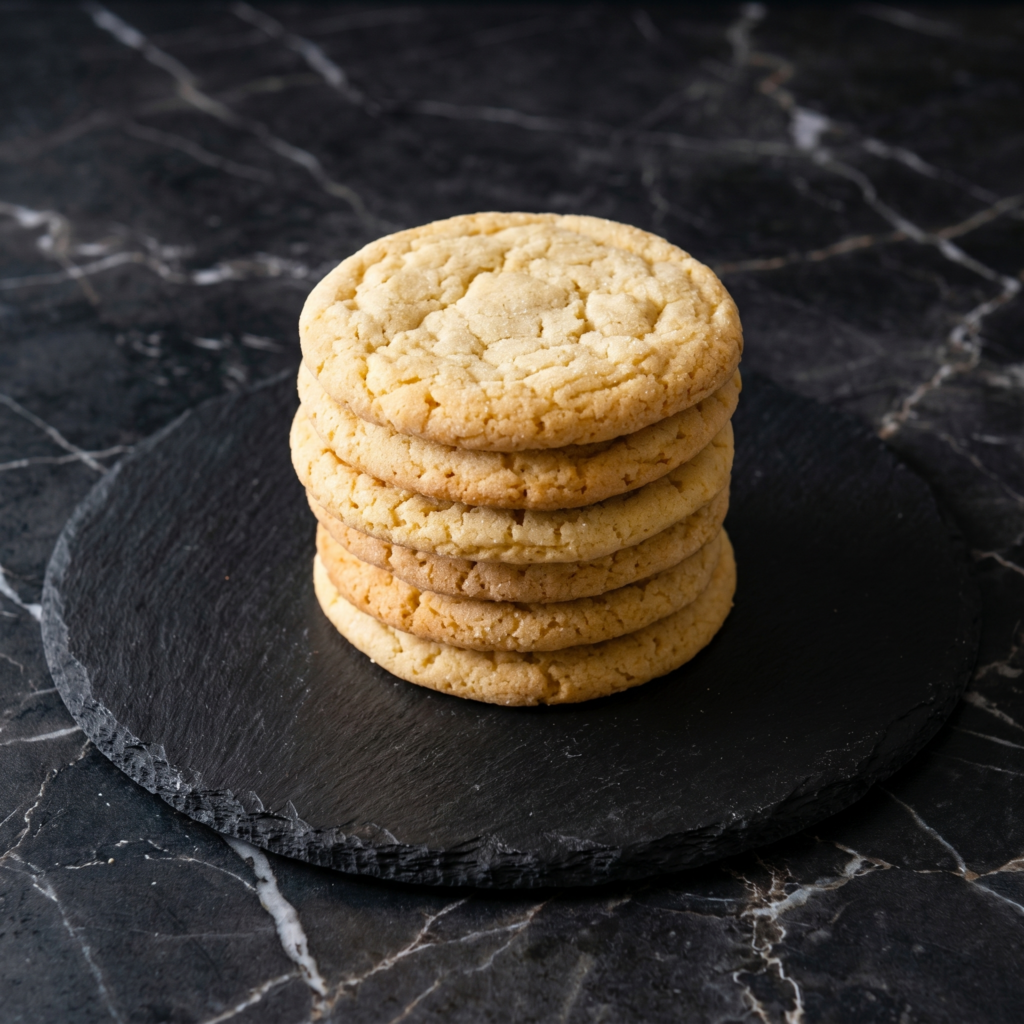
Sometimes you just need a sugar cookie, and you need it now. Not in three hours after the dough has chilled. Not after a complicated rolling and cutting session. Just a soft, buttery, perfectly sweet cookie that comes together quickly and tastes absolutely delicious.
These easy sugar cookies are exactly that. They require no chill time, no fancy equipment, and they come out perfectly every single time—soft and tender in the middle with just a hint of golden crispness around the edges.
They’re sturdy enough for decorating with royal icing, but honestly, they’re so good you’ll want to eat them plain, straight off the baking sheet. Let me show you how to make your new favorite sugar cookie.
Ingredients
Yields about 24-30 cookies (depending on size).
For the Sugar Cookies:
2 ¾ cups (345g) all-purpose flour
1 teaspoon baking soda
½ teaspoon baking powder
½ teaspoon salt
1 cup (225g) unsalted butter, softened
1 ½ cups (300g) granulated sugar, plus more for rolling
1 large egg, at room temperature
2 teaspoons vanilla extract
2 tablespoons milk or heavy cream
For the Simple Glaze (Optional):
1 ½ cups (180g) powdered sugar, sifted
2-3 tablespoons milk or heavy cream
½ teaspoon vanilla extract
Food coloring (optional)
Sprinkles for decorating
Step-by-Step Instructions
1. Preheat and Prepare:
Preheat your oven to 350°F (175°C). Line two baking sheets with parchment paper or silicone baking mats.
2. Combine Dry Ingredients:
In a medium bowl, whisk together the flour, baking soda, baking powder, and salt. Set aside.
3. Cream Butter and Sugar:
In a large bowl, beat the softened butter and granulated sugar together with an electric mixer on medium speed until light and fluffy, about 2-3 minutes. Scrape down the sides as needed.
4. Add Wet Ingredients:
Add the egg and vanilla extract, and beat until well combined. Scrape down the sides again.
Beat in the milk or heavy cream until incorporated.
5. Combine Wet and Dry:
Gradually add the dry ingredients to the wet ingredients, mixing on low speed or folding with a spatula until just combined. Do not overmix. The dough should be soft but not sticky.
6. Shape the Cookies:
Place about ½ cup of granulated sugar in a shallow bowl for rolling.
Scoop tablespoon-sized portions of dough (about 1.5 tablespoons) and roll into balls.
Roll each ball in the granulated sugar until coated, then place on the prepared baking sheets, spacing about 2 inches apart.
For slightly thicker cookies, gently press down with the bottom of a glass or leave as balls for a more domed cookie.
7. Bake:
Bake for 10-12 minutes, until the edges are just set and lightly golden. The centers will still look soft and slightly underdone—that’s perfect.
Let the cookies cool on the baking sheet for 5 minutes before transferring to a wire rack to cool completely.
8. Decorate (Optional):
If making the glaze, whisk together powdered sugar, 2 tablespoons milk, and vanilla until smooth. Add more milk a few drops at a time until you reach a thick but drizzle-able consistency.
Drizzle over cooled cookies or dip the tops, then add sprinkles immediately before the glaze sets.
Store undecorated sugar cookies in an airtight container at room temperature for up to 1 week. Glazed or iced cookies should be stored in a single layer or with parchment between layers to prevent sticking.
Can You Freeze the Dough?
Absolutely! This dough freezes beautifully. Shape into balls, place on a parchment-lined baking sheet, and freeze until solid. Transfer to a freezer bag and freeze for up to 3 months. Bake from frozen, adding 1-2 minutes to the baking time.
Freezing Baked Cookies:
Baked and undecorated cookies freeze well for up to 3 months. Place in a freezer-safe container with parchment between layers. Thaw at room temperature before decorating.
Make-Ahead for Holidays:
This recipe is perfect for holiday baking marathons. Make multiple batches of dough ahead of time, refrigerate for up to 3 days, or freeze for longer storage. Bake fresh when you’re ready.
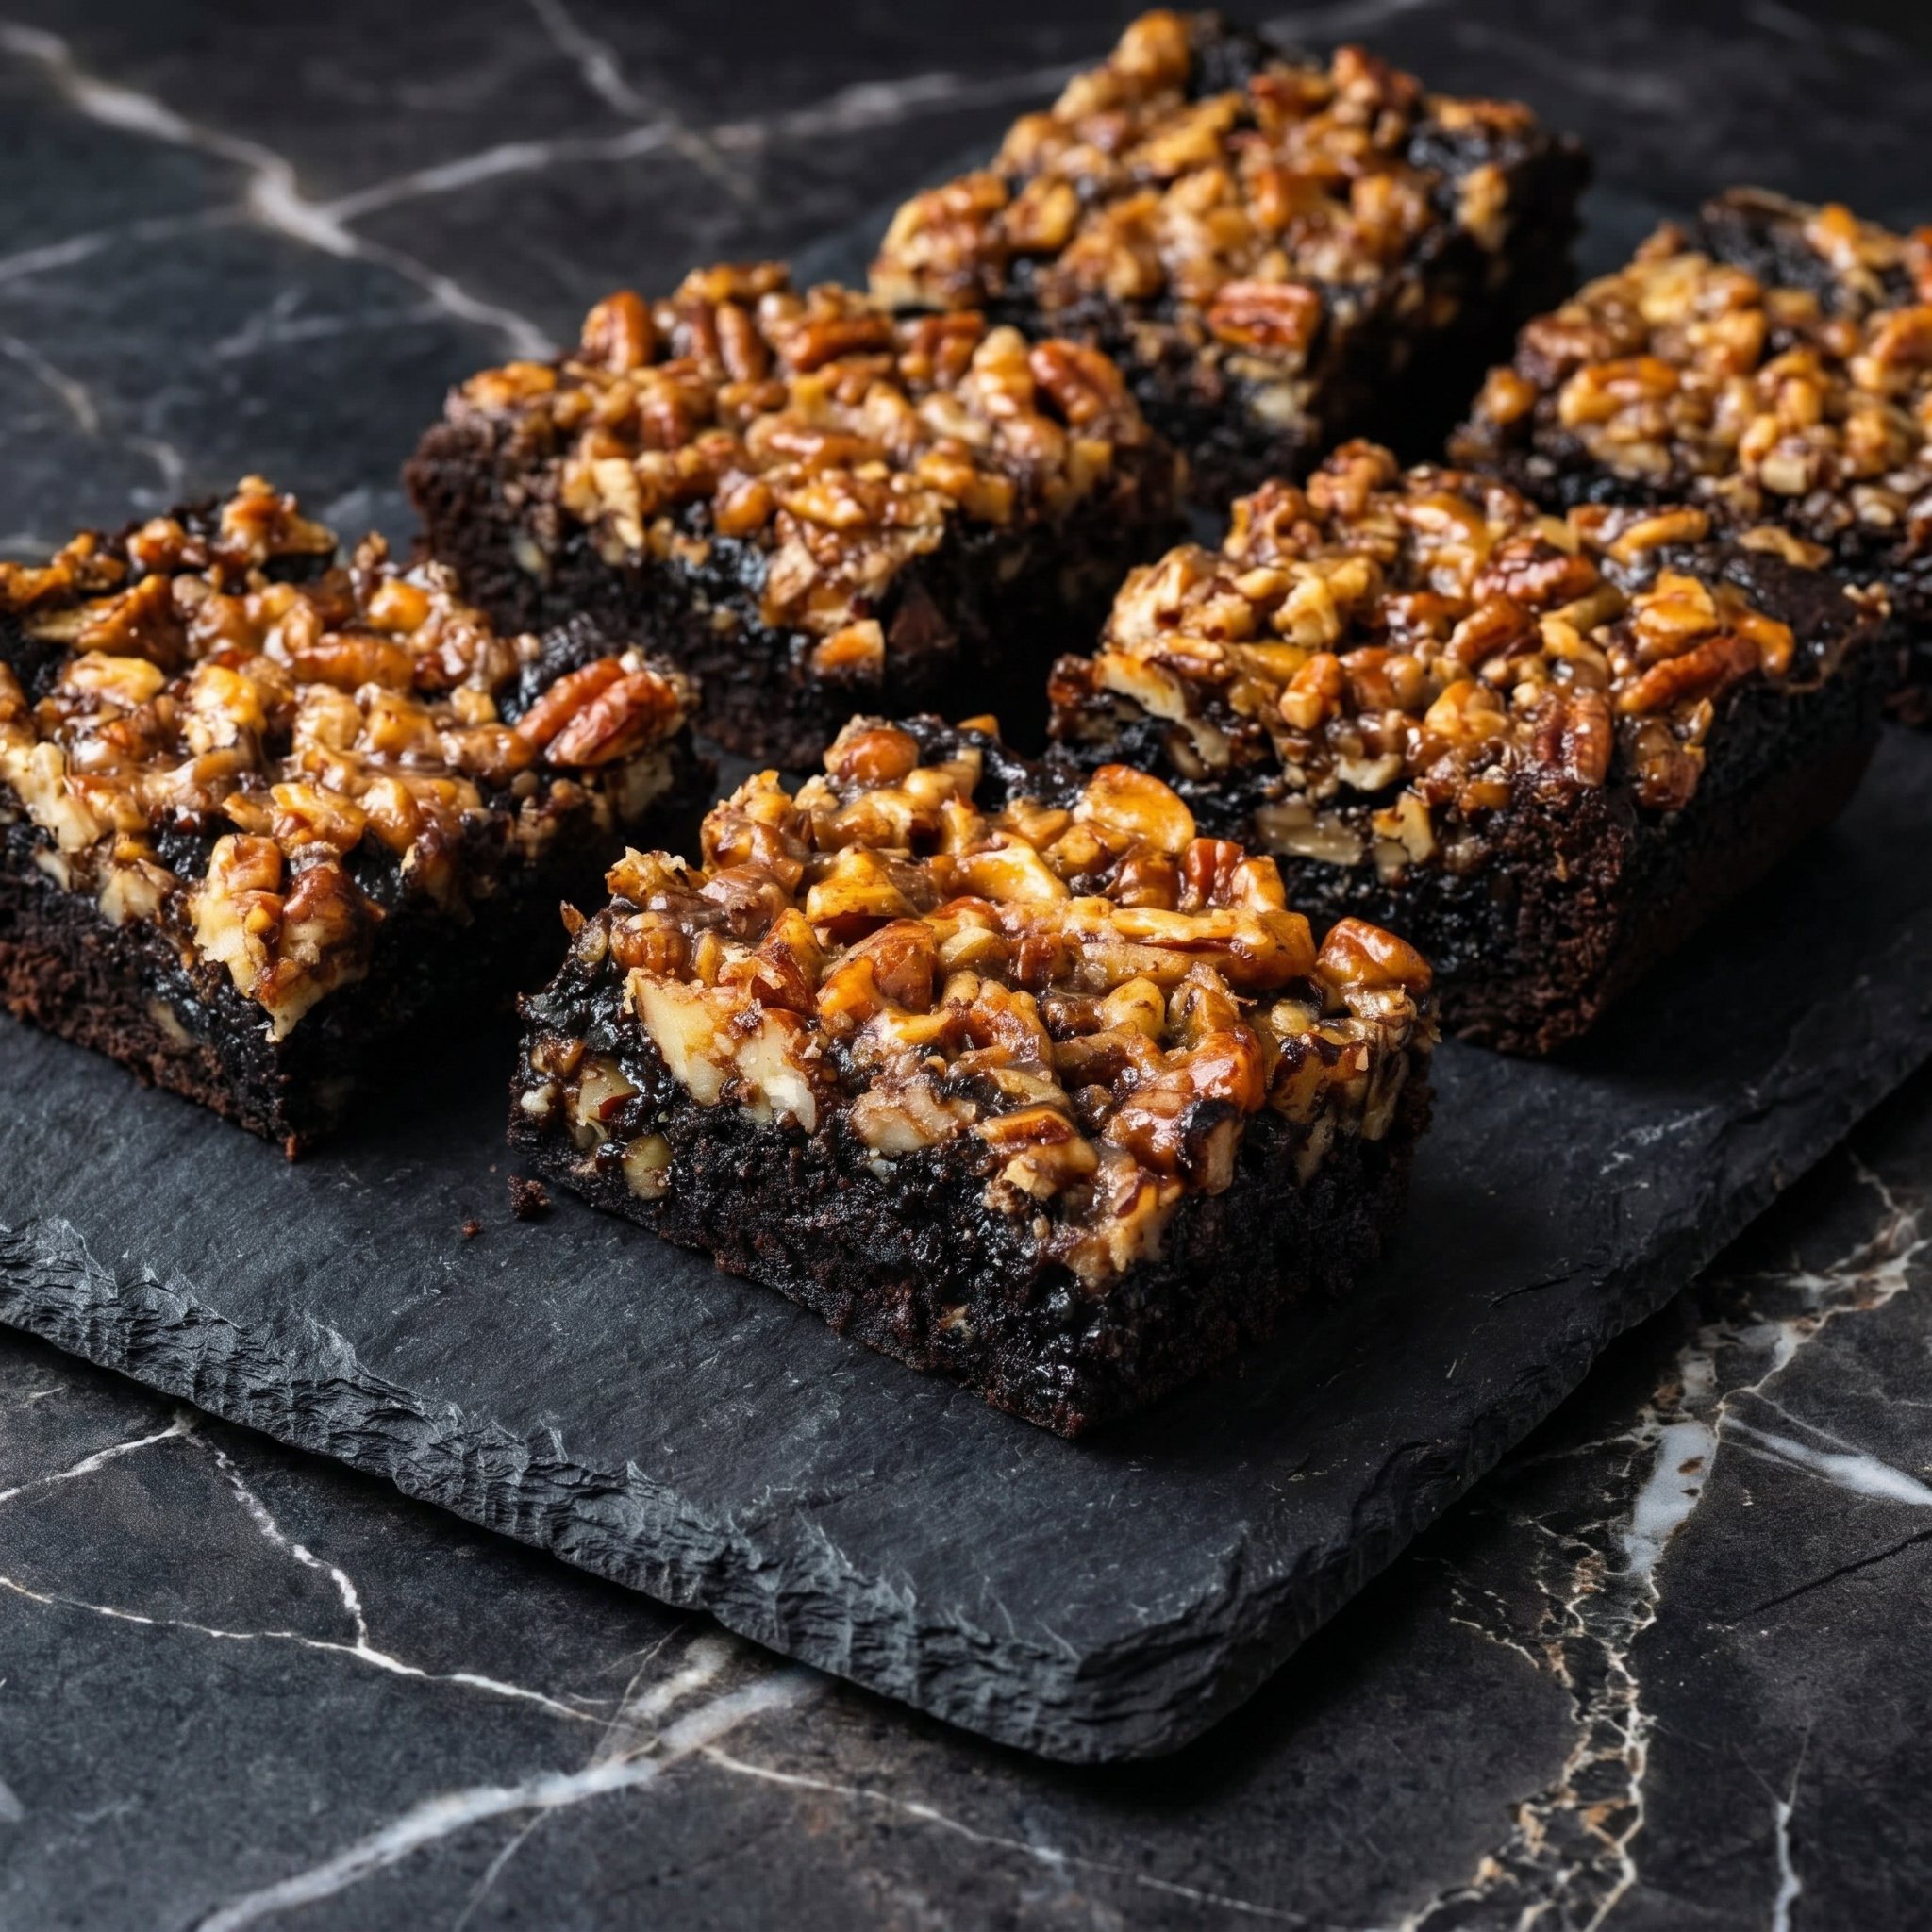
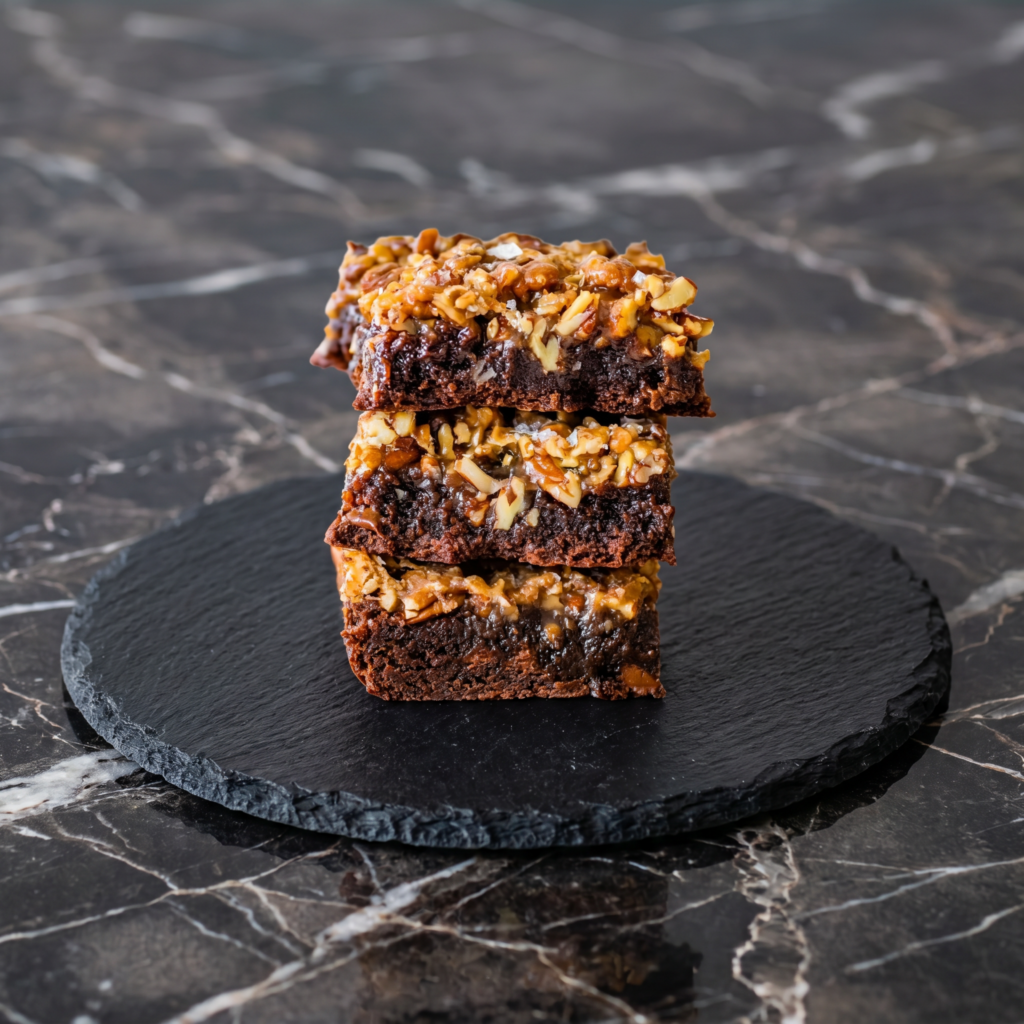
If you’ve ever found yourself torn between a rich chocolate brownie and a sticky-sweet slice of pecan pie, this recipe is your dream come true. Pecan Pie Brownies layer a dense, fudgy chocolate base with a buttery, caramel-like pecan topping that bubbles into golden perfection in the oven. The result? A decadent dessert with contrasting textures—chewy, gooey, crunchy, and melt-in-your-mouth tender—all in one irresistible bite.
Whether you’re baking for the holidays, a potluck, or just a weekend treat, these brownies are guaranteed to impress. Let’s walk through every step to ensure your batch turns out flawless.
Ingredients You’ll Need
Gather your ingredients before starting for a smooth baking experience.
For the Brownie Layer:
1 cup (226g) unsalted butter, melted
1 ½ cups granulated sugar
½ cup brown sugar
3 large eggs, room temperature
1 tablespoon vanilla extract
1 cup all-purpose flour
¾ cup unsweetened cocoa powder
½ teaspoon salt
For the Pecan Pie Topping:
1 cup brown sugar
½ cup light corn syrup
½ cup unsalted butter, melted
2 large eggs
1 teaspoon vanilla extract
¼ teaspoon salt
2 cups pecan halves
Step 1: Preheat and Prepare the Pan
Preheat your oven to 350°F (175°C). Line a 9×13-inch baking pan with parchment paper, leaving some overhang on the sides for easy lifting later. Lightly grease the parchment to prevent sticking. Proper pan preparation ensures clean removal and beautifully cut squares.
Step 2: Make the Brownie Batter
In a large mixing bowl, whisk together the melted butter, granulated sugar, and brown sugar until smooth and glossy. Add the eggs one at a time, mixing thoroughly after each addition. Stir in the vanilla extract.
In a separate bowl, sift together the flour, cocoa powder, and salt. Gradually fold the dry ingredients into the wet mixture using a spatula. Mix just until combined—overmixing can make brownies tough. The batter should be thick and rich.
Step 3: Bake the Brownie Base
Spread the brownie batter evenly into your prepared pan. Bake for 18–22 minutes, or until the top is set but the center is still slightly soft. The brownies should not be fully baked at this stage—they will continue cooking once the pecan topping is added. Remove from the oven and let sit while you prepare the topping.
Step 4: Prepare the Pecan Pie Filling
In a medium bowl, whisk together the brown sugar, corn syrup, melted butter, eggs, vanilla extract, and salt until smooth and fully incorporated. The mixture should look glossy and slightly thick.
Fold in the pecan halves, ensuring they are evenly coated with the sweet filling. This mixture will create the classic gooey pecan pie texture once baked.
Step 5: Assemble the Layers
Carefully pour the pecan mixture over the partially baked brownie layer. Use a spatula to gently spread the pecans into an even layer. Avoid pressing down too hard—you want the layers to remain distinct.
Step 6: Final Bake
Return the pan to the oven and bake for an additional 30–35 minutes. The topping should be bubbling gently and set around the edges, with the center slightly soft but not liquid.
If the pecans begin browning too quickly, loosely tent the pan with aluminum foil during the last 10–15 minutes of baking.
Step 7: Cool Completely
Once done, remove the pan from the oven and allow the brownies to cool completely at room temperature. This is crucial. The pecan topping needs time to firm up, and slicing too soon will result in messy bars.
For best results, refrigerate the brownies for 1–2 hours after they’ve cooled to achieve clean, sharp cuts.
Step 8: Slice and Serve
Lift the brownies out of the pan using the parchment overhang. Place on a cutting board and slice into squares using a sharp knife. Wipe the blade clean between cuts for neat edges.
Serve at room temperature or slightly chilled. For an extra indulgent touch, top with vanilla ice cream or a drizzle of warm chocolate sauce.
Pro Tips for Perfect Results
Room-temperature eggs blend more smoothly into batters.
Don’t overbake the brownie layer before adding the topping.
Toast the pecans for 5–7 minutes before mixing for deeper flavor.
Let them fully cool for clean slicing.
Use good-quality cocoa powder for a richer chocolate base.
Flavor Variations
Bourbon Pecan Brownies: Add 1 tablespoon bourbon to the pecan mixture.
Dark Chocolate Boost: Stir chocolate chips into the brownie batter.
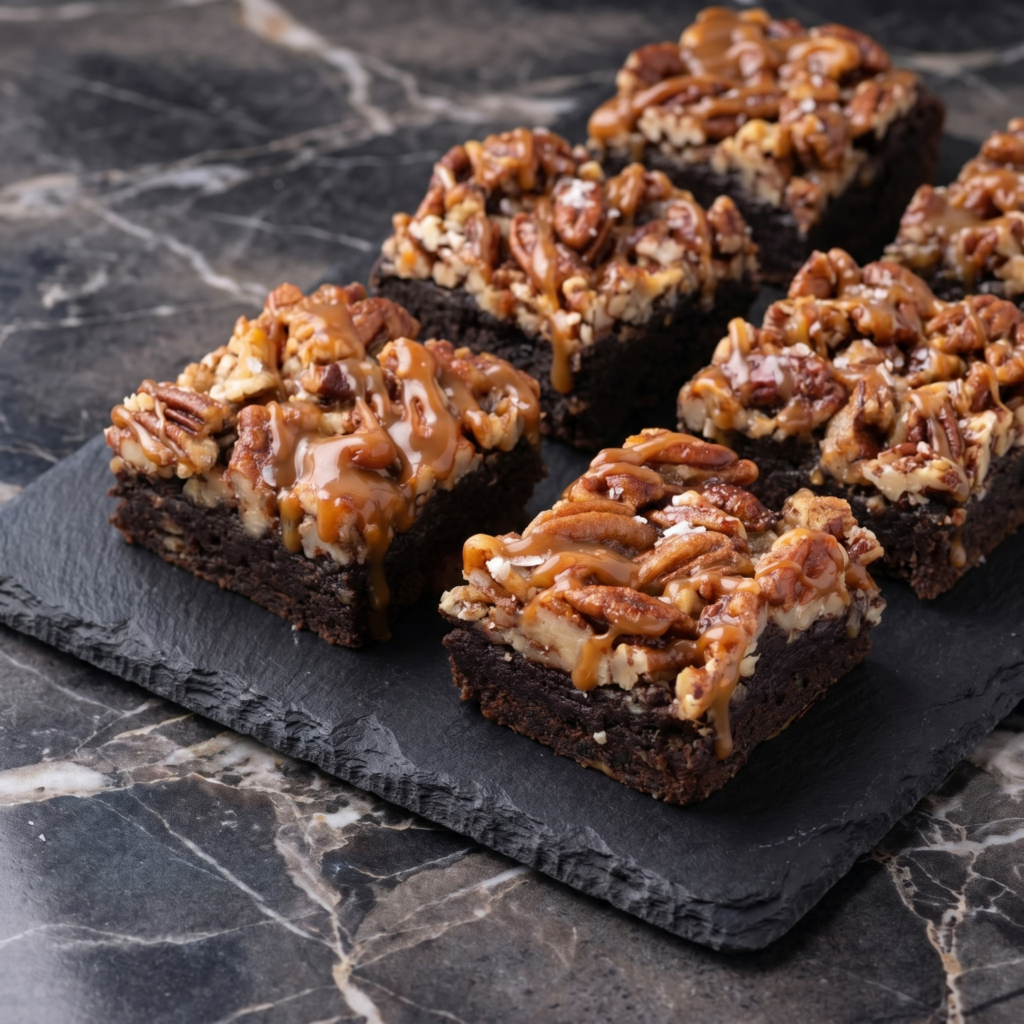
Salted Caramel Twist: Sprinkle flaky sea salt over the topping before baking.
Espresso Kick: Add 1 teaspoon espresso powder to the brownie batter to intensify the chocolate flavor.
Why You’ll Love These Brownies
These Pecan Pie Brownies combine the best of two beloved desserts into one show-stopping treat. The brownie layer is dense, moist, and deeply chocolatey, while the topping brings buttery sweetness and crunchy texture. Every bite delivers balance—rich but not overwhelming, sweet but layered with nutty depth.
They’re perfect for Thanksgiving, Christmas, bake sales, or anytime you want a dessert that feels special. Plus, they store beautifully in an airtight container for up to four days, making them ideal for make-ahead baking.
Final Thoughts
Pecan Pie Brownies are more than just a dessert—they’re a celebration of texture and flavor. With a fudgy chocolate base and a gooey pecan topping, they deliver comfort and indulgence in every square. While they look impressive, the step-by-step process makes them approachable for bakers of all skill levels.
Once you bake these, don’t be surprised if they become your new signature dessert. Slice them thick, serve them proudly, and enjoy the sweet reward of combining two classics into one unforgettable treat.
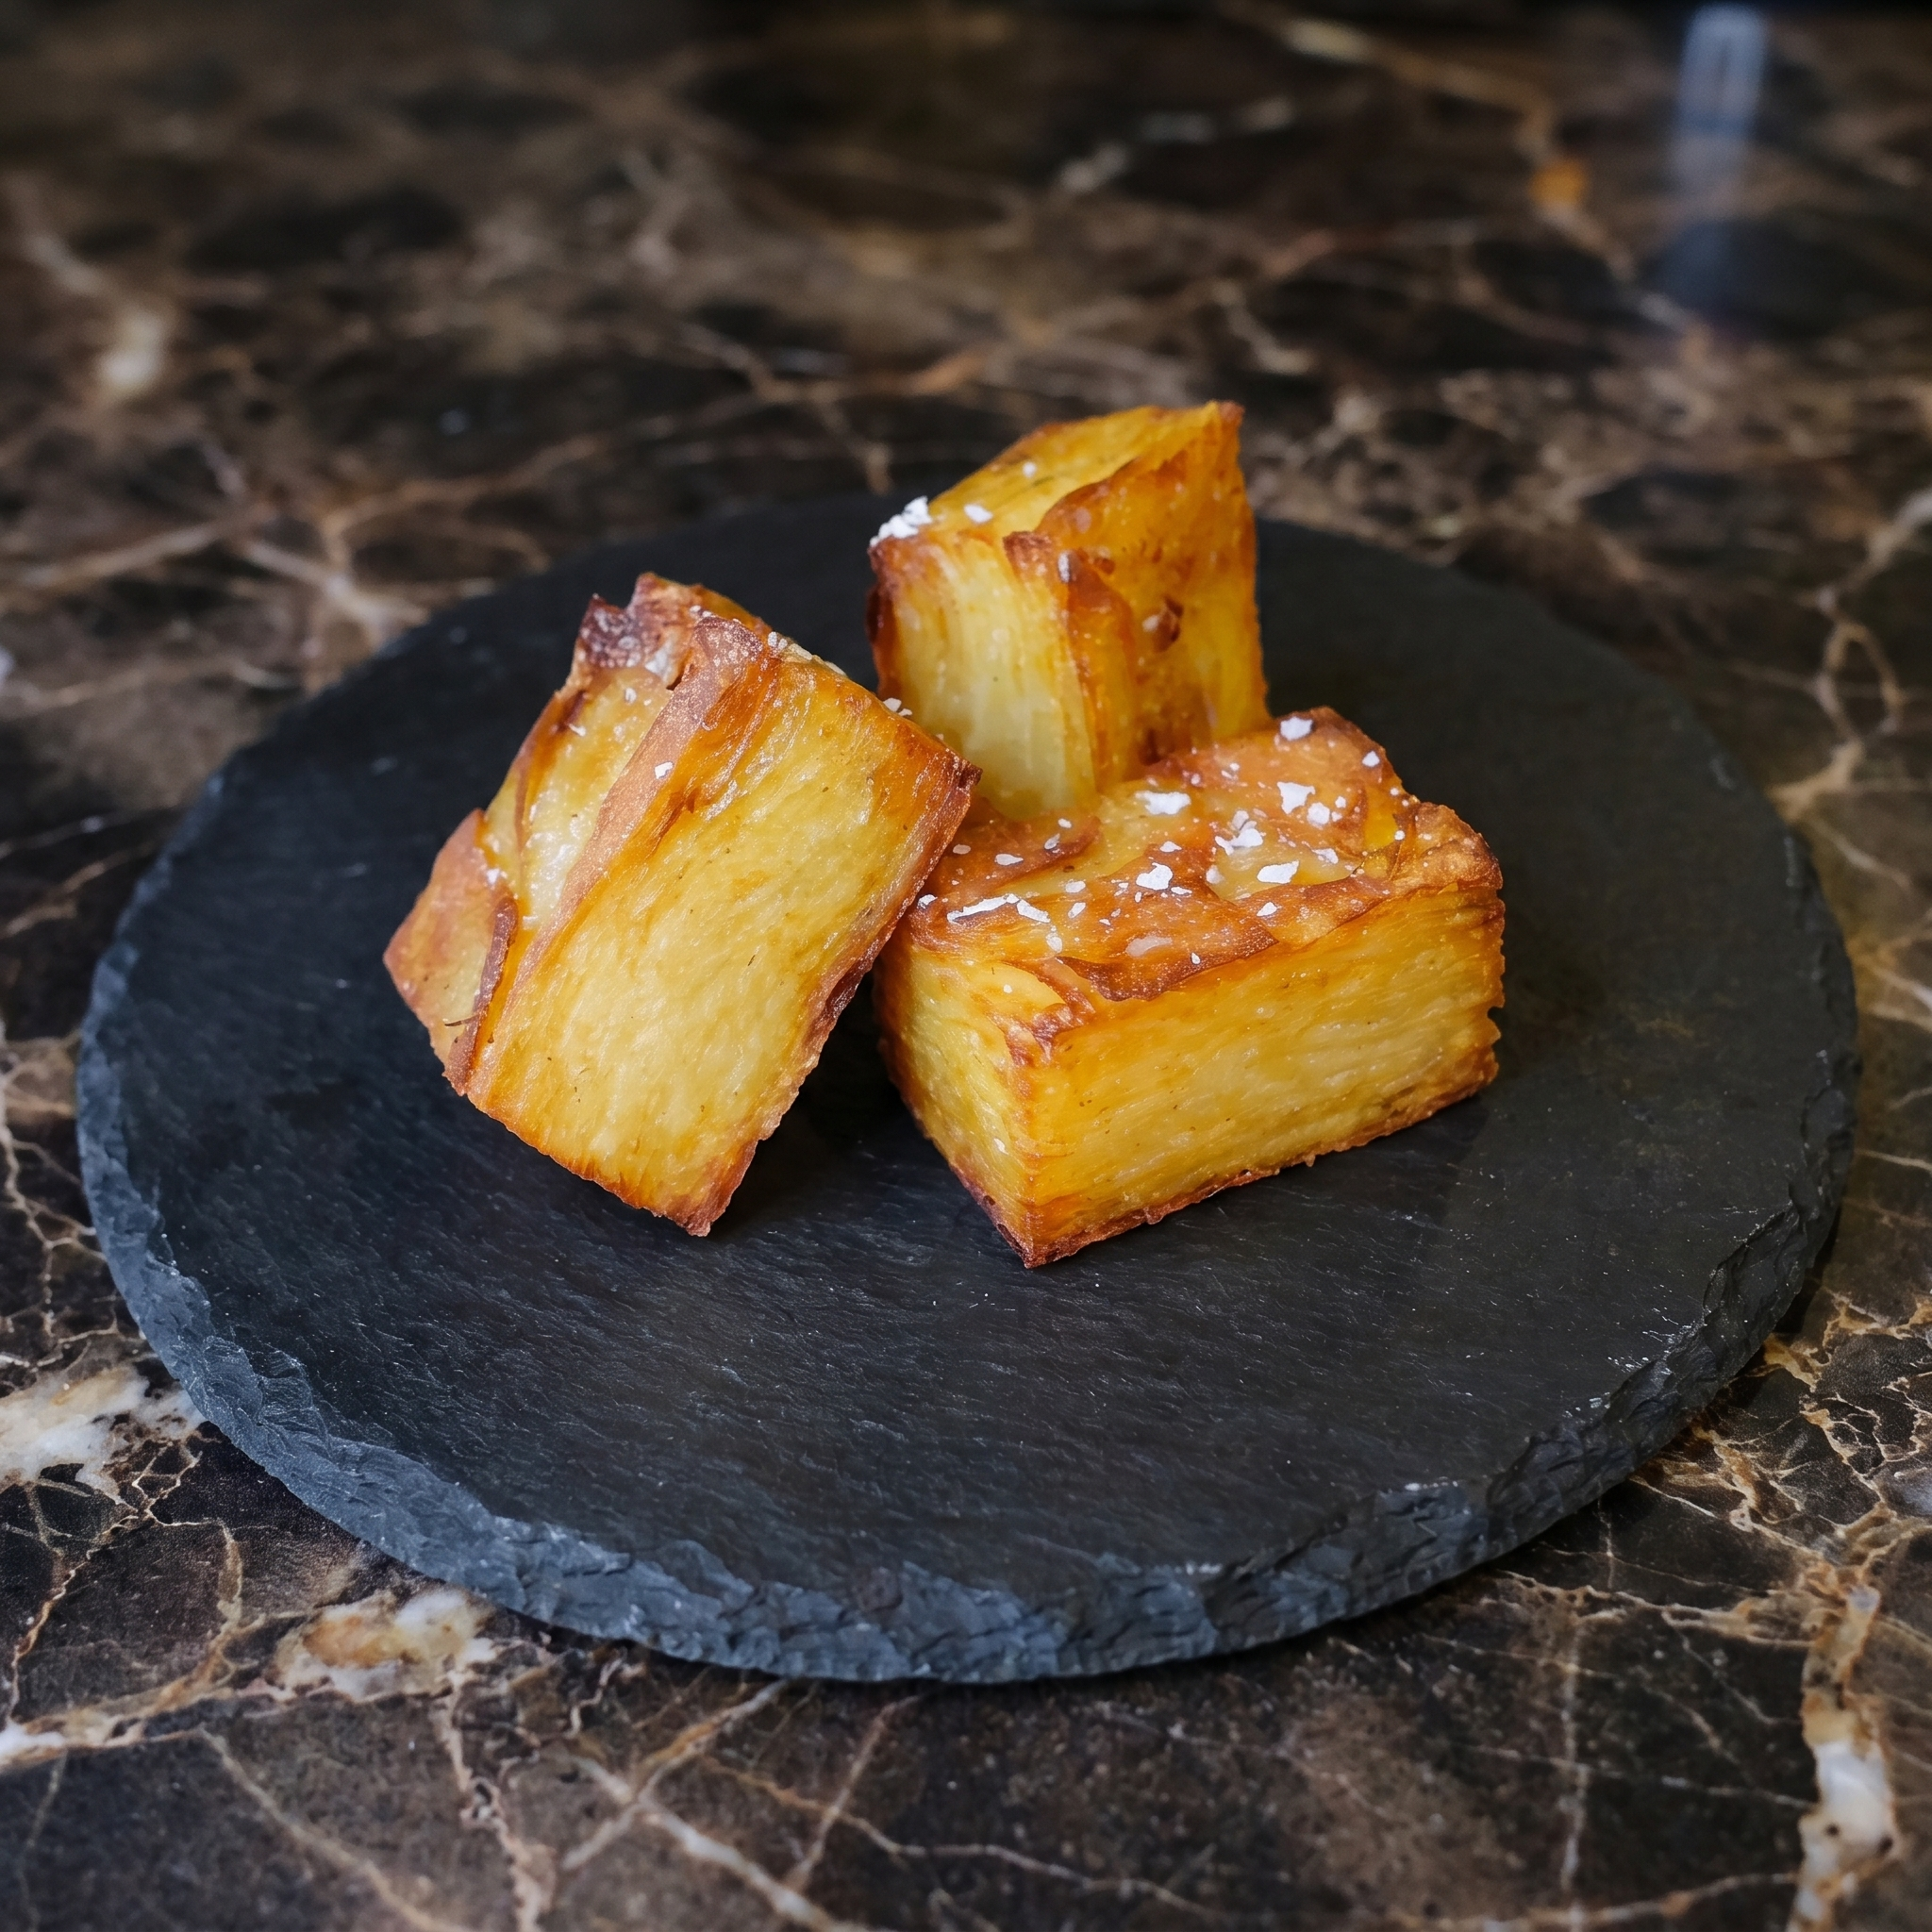
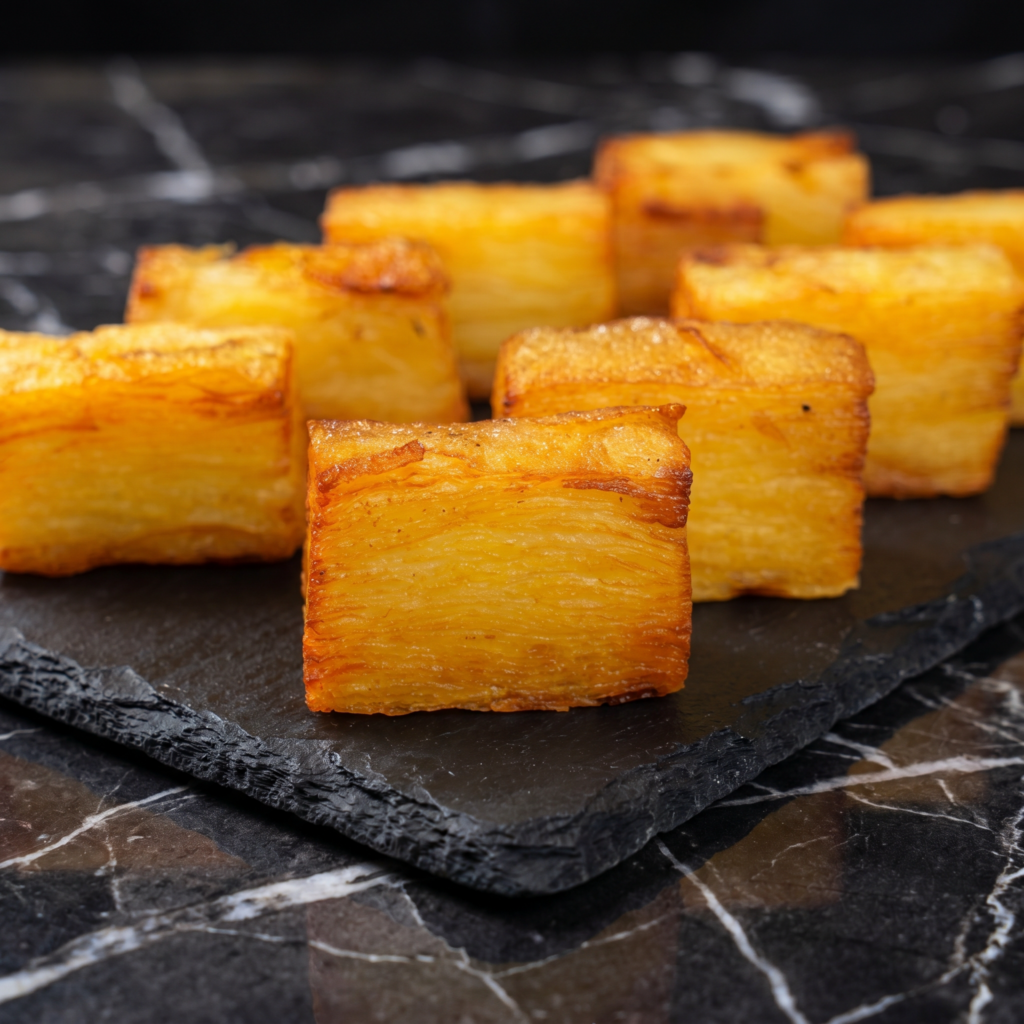
Let’s be honest: regular roasted potatoes are fine. But duck fat potatoes? They’re a revelation. The fat renders into shatteringly crisp exteriors while keeping interiors fluffy and cloud-soft. This is the potato dish that steals the show from whatever you serve it with—steak, roast chicken, or just a fried egg.
You only need five ingredients, one pan, and about 20 minutes of active time. No fancy technique. Just potatoes, duck fat, salt, and a little herb magic.
Ingredients
Serves 4 as a side.
2 lbs (900g) Yukon Gold or baby potatoes
3 tablespoons duck fat (rendered, from a jar or saved from a roast duck)
1 teaspoon kosher salt, plus more to finish
½ teaspoon black pepper
4 cloves garlic, smashed (optional but recommended)
2 sprigs fresh rosemary or thyme
Fresh parsley, chopped (for garnish)
Step-by-Step Instructions
Step 1: Par-Cook the Potatoes
Scrub potatoes well. If using larger ones, cut into 1.5-inch chunks. Leave small potatoes whole.
Place in a pot, cover with cold salted water, and bring to a boil.
Cook for 8–10 minutes—until fork-tender but not falling apart.
Drain and let steam dry for 5 minutes. This step guarantees crispiness.
Step 2: Heat the Duck Fat
Preheat oven to 425°F (220°C). Place a rimmed baking sheet in the oven while it heats.
Carefully add duck fat to the hot pan. Swirl to coat.
Step 3: Rough Them Up
Tumble the dried potatoes into a bowl. Give them a few good shakes to rough up the edges. Those craggy bits get extra crunchy.
Step 4: Roast to Golden Perfection
Add potatoes to the hot pan with duck fat. Sprinkle with salt and pepper.
Roast for 20 minutes. Flip once halfway through.
Add smashed garlic and rosemary in the last 5 minutes.
Step 5: Finish and Serve
Remove from oven. Sprinkle with fresh parsley and flaky salt.
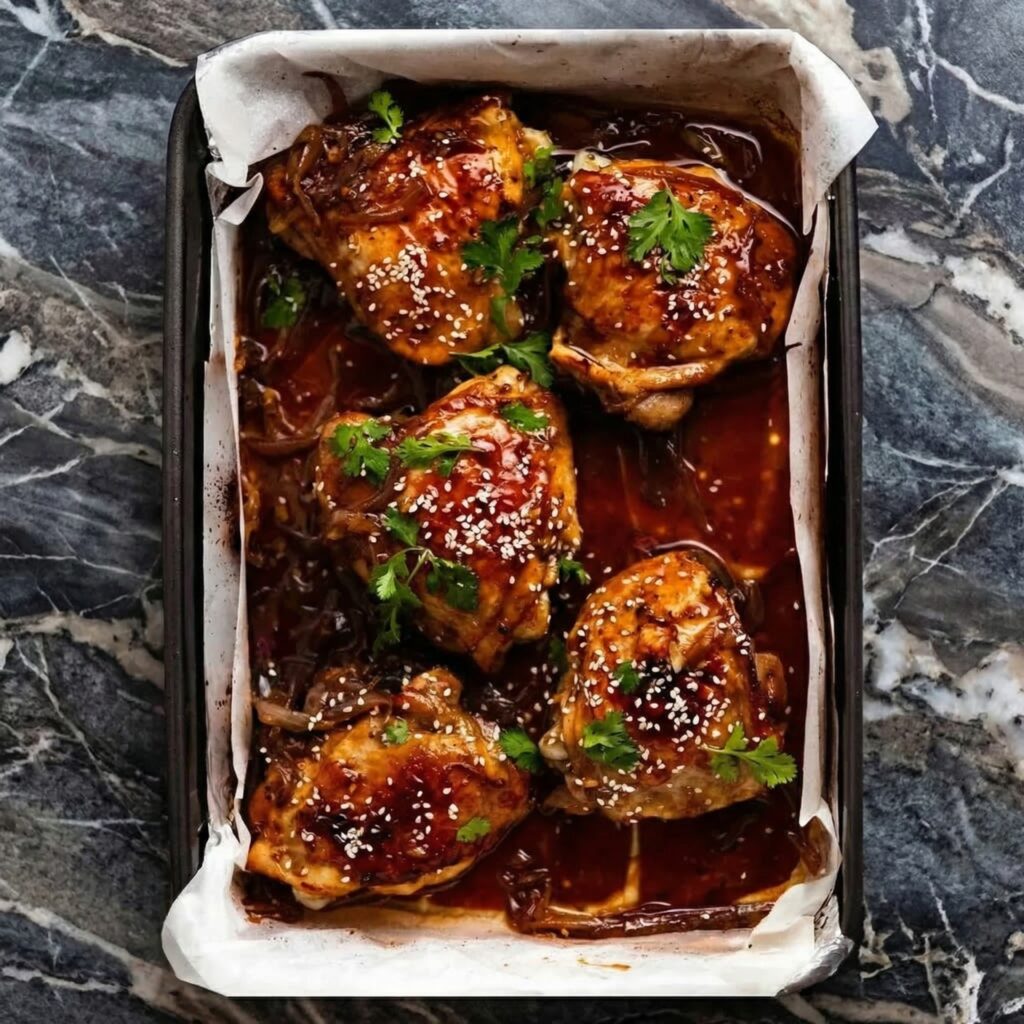
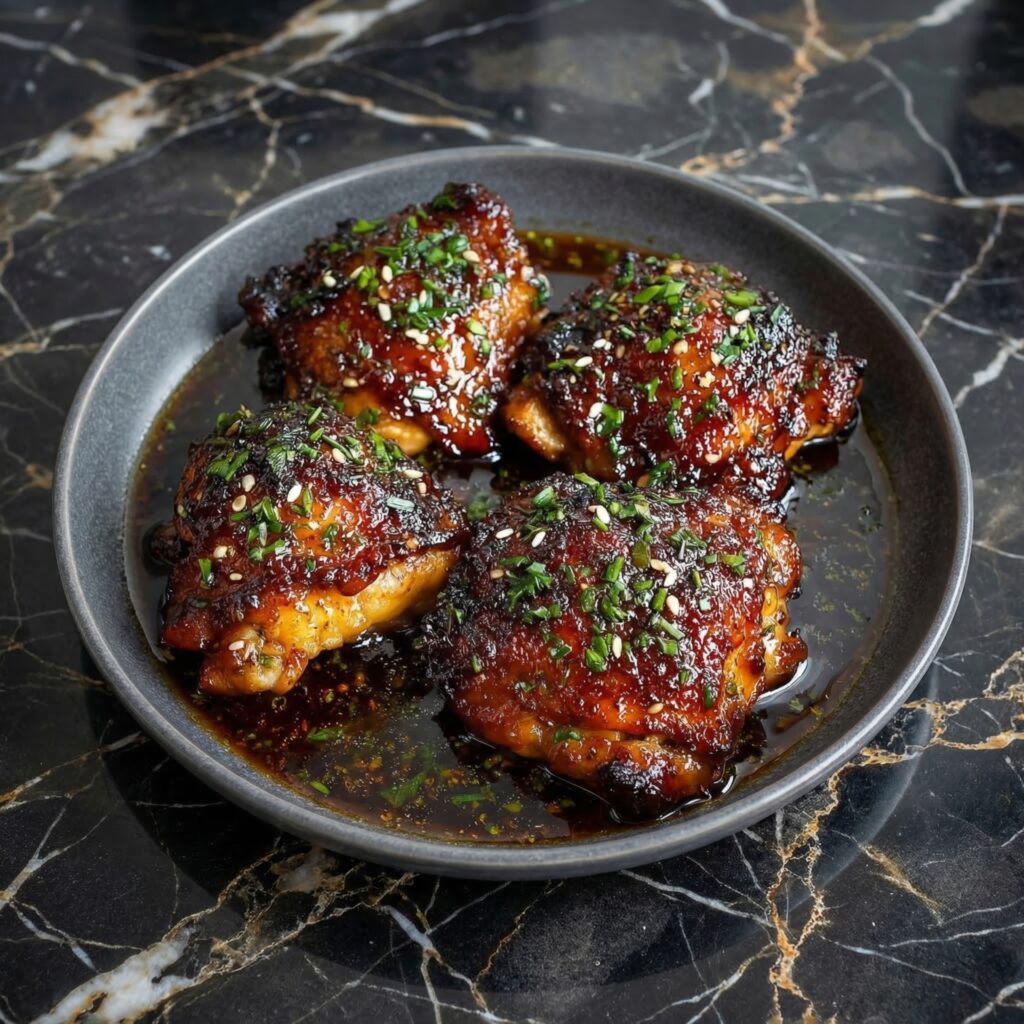
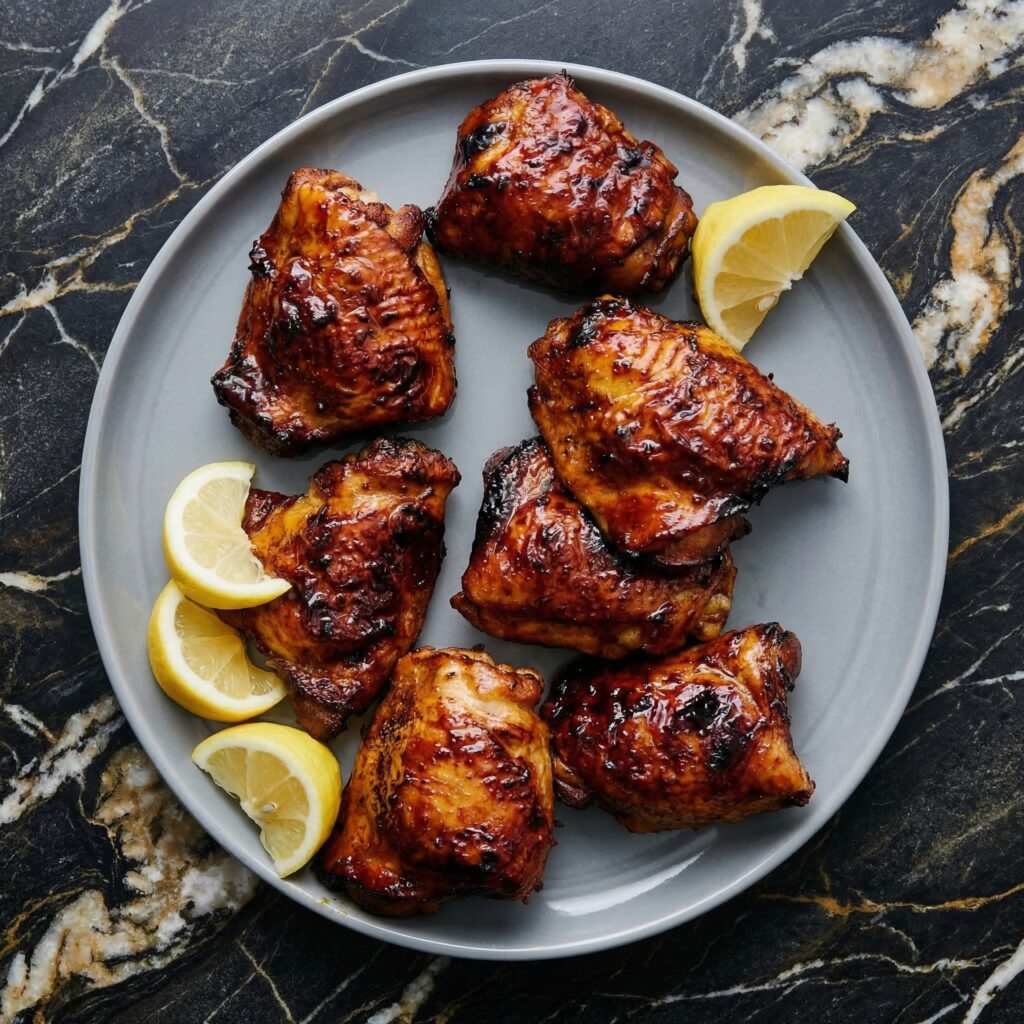
Some chicken recipes are fine. This one is unforgettable. Honey soy baked chicken is the kind of meal that makes everyone at the table go quiet—not because they’re polite, but because they’re too busy eating to talk.
The magic is in the marinade. Honey brings the sweetness and helps everything caramelize into that sticky, lacquered finish. Soy sauce adds depth and salt. Garlic and ginger make it fragrant. And a little sesame oil? That’s the secret handshake. Bake it until the edges are slightly charred and the chicken is so tender it begs to be eaten straight off the bone. Serve with rice and something green, and watch it disappear.
Ingredients
Serves 4.
For the Chicken:
8 bone-in, skin-on chicken thighs (or drumsticks, or a mix)
2 tbsp neutral oil (vegetable, canola, or avocado)
1 tbsp cornstarch mixed with 2 tbsp water (slurry, for thickening)
Optional Veggies (Sheet Pan Style):
1 head broccoli, cut into florets
1 red bell pepper, sliced
1 cup snap peas or green beans
Drizzle of oil and pinch of salt
Step-by-Step Instructions
Step 1: Whisk the Magic
In a medium bowl or measuring cup, whisk together honey, soy sauce, minced garlic, grated ginger, rice vinegar, sesame oil, and red pepper flakes. This is your flavor bomb.
Pour half of the marinade into a small saucepan and set aside (this will become your thick glaze later). The other half stays in the bowl for marinating.
Step 2: Marinate the Chicken
Pat chicken thighs dry with paper towels. Place them in a large bowl or zip-top bag.
Pour the marinade from the bowl over the chicken. Turn to coat every piece.
Cover and refrigerate for at least 30 minutes (2 hours is better, overnight is ideal).
Step 3: Preheat and Prep
Preheat your oven to 400°F (200°C). Line a baking sheet with foil or parchment paper for easy cleanup. Place a wire rack on top if you have one—it helps the skin get crispy all over.
Remove chicken from marinade and let excess drip off. Arrange on the prepared baking sheet, skin-side up. Reserve the used marinade (yes, we’re using it—keep reading).
Step 4: Bake to Sticky Perfection
Bake for 25 minutes. While it bakes, pour the reserved used marinade into the saucepan with the reserved fresh marinade. Bring to a boil over medium-high heat, then reduce to a simmer.
Whisk in the cornstarch slurry and cook for 2-3 minutes until thickened and glossy. This is your final glaze—and boiling ensures it’s safe to eat.
After 25 minutes, brush the chicken generously with some of the thickened glaze. Return to oven and bake another 10-15 minutes until the chicken is cooked through (165°F internal temp) and the glaze is sticky and caramelized.
For extra sticky magic: brush with more glaze halfway through this second bake.
Step 5: Sheet Pan Veggies (Optional)
If adding veggies, toss them with a little oil and salt. Add them to the baking sheet during the last 15-20 minutes of cooking. They’ll roast in those chicken juices and be incredible.
Step 6: Rest and Garnish
Remove chicken from oven and let rest 5-10 minutes. This keeps it juicy.
Sprinkle with sesame seeds and sliced green onions. Drizzle with any remaining glaze (warm it first).
Serve with steamed rice to soak up all that sticky goodness. Use your fingers. Lick them. No shame.
Store chicken in an airtight container in the fridge for up to 4 days. The glaze continues to work its magic overnight.
Reheating:
Oven is best: 350°F for 10-15 minutes until warmed through and sticky again. Air fryer works beautifully too (375°F for 5-7 minutes). Microwave works but the skin won’t be crispy—still delicious though.
Freezer-Friendly:
You can freeze baked chicken in an airtight container for up to 3 months. Thaw overnight in the fridge and reheat in the oven to revive that sticky glaze.
Pro Tip:
Double the glaze. Use the extra for stir-fry, veggies, or just drizzling over rice. You’ll thank yourself later.