Category: baking

  • Red Velvet Cookies That Look Fancy (Zero Effort Required)

    Red Velvet Cookies That Look Fancy (Zero Effort Required)

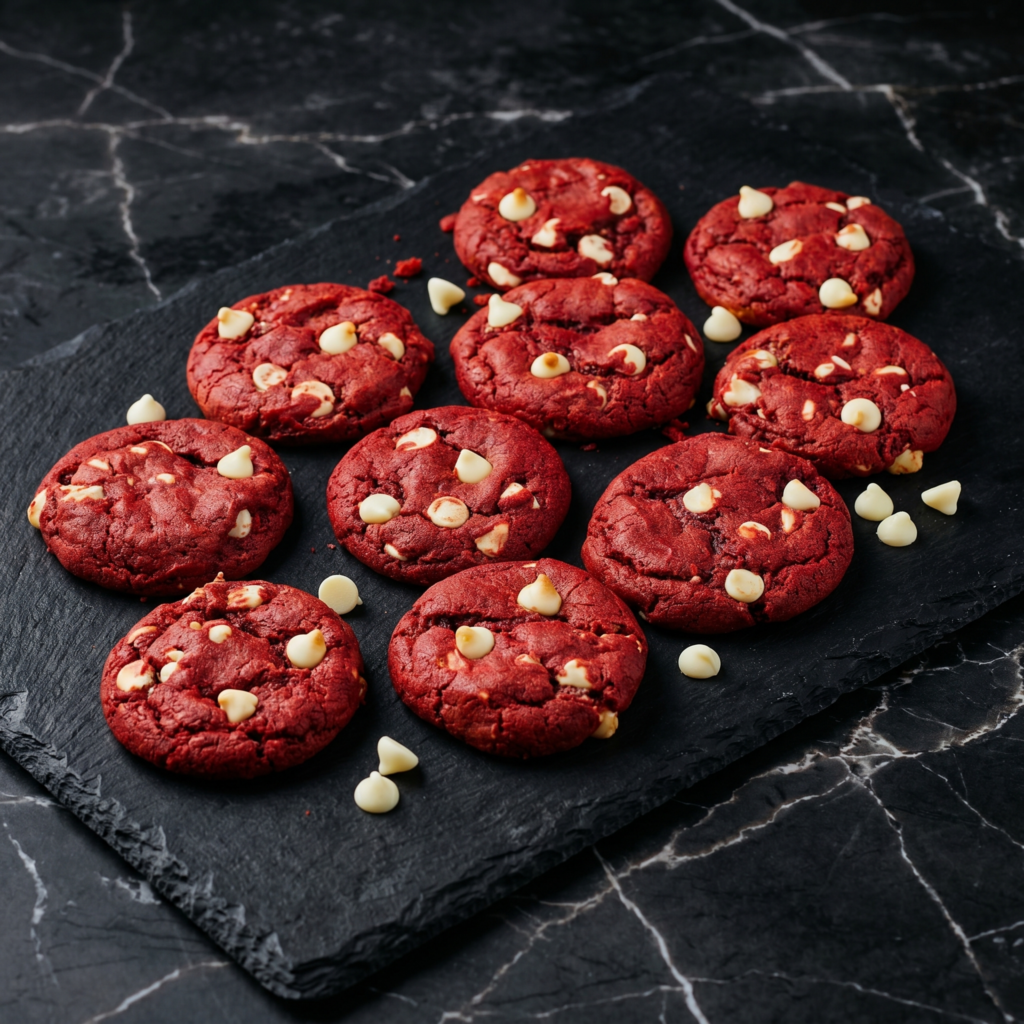
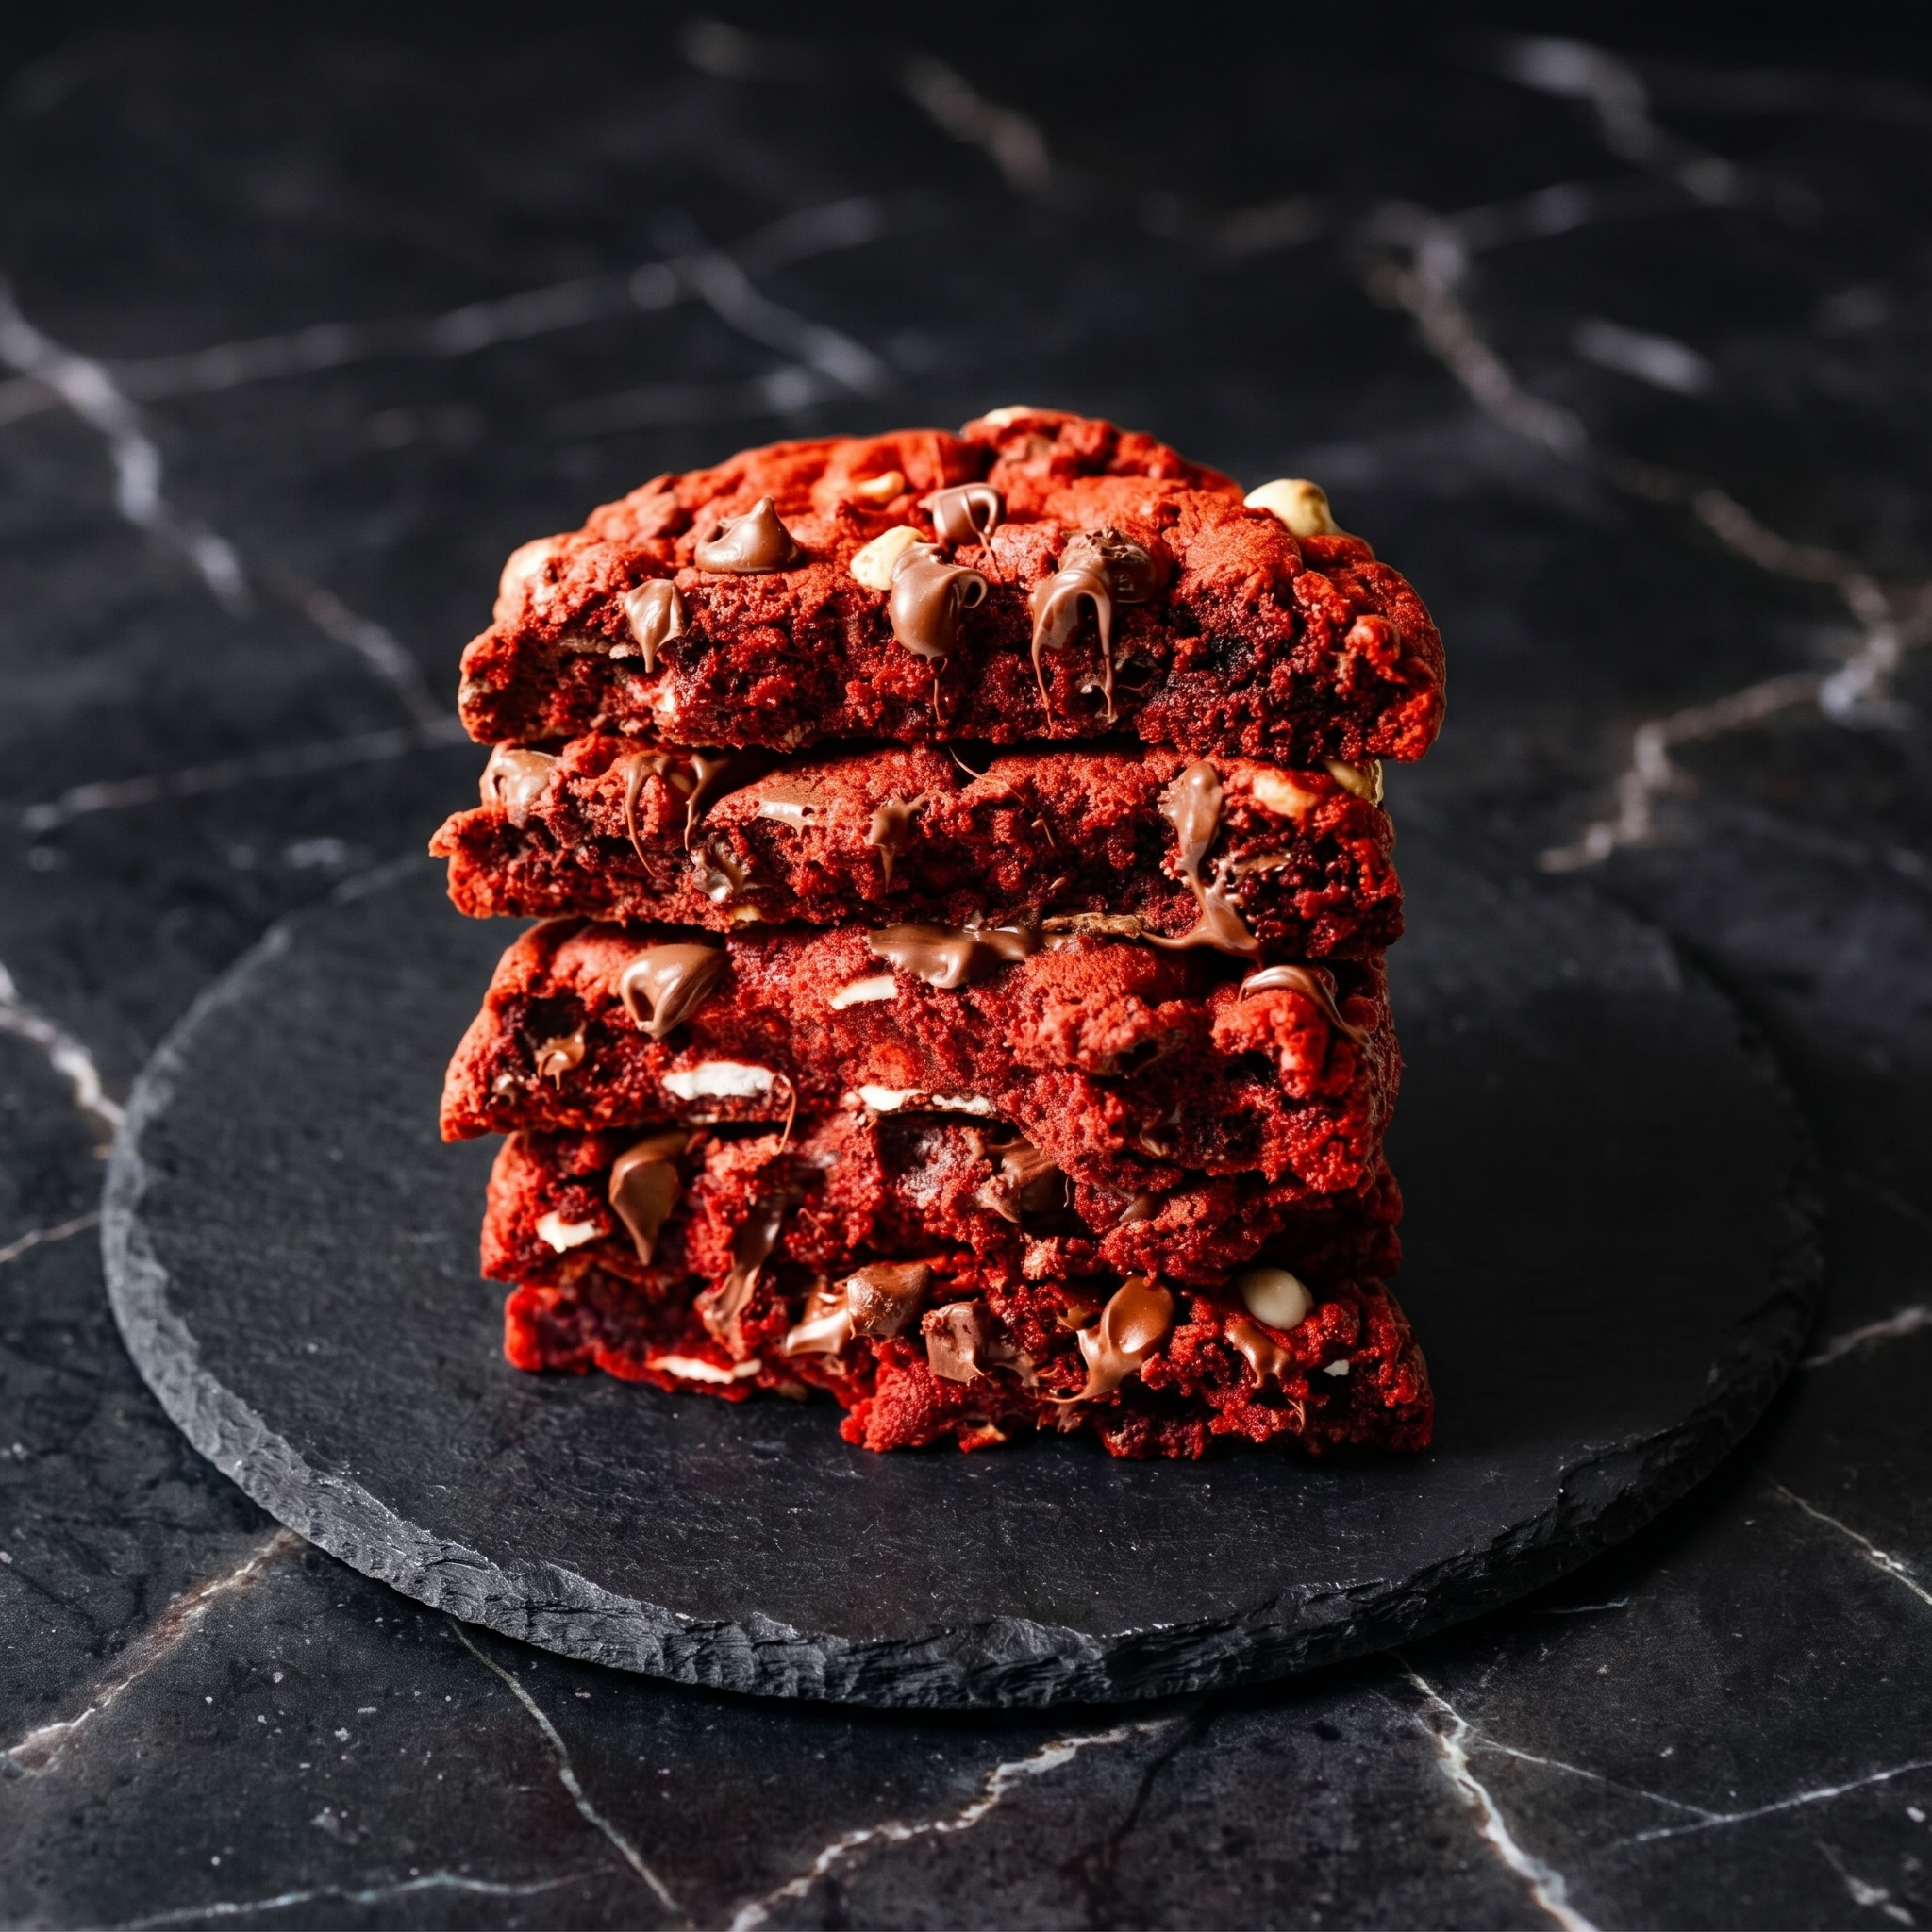
    Red velvet isn’t just for cake. These cookies are the perfect hybrid: soft and chewy like a bakery cookie, with that classic cocoa-vanilla tang and a dramatic crimson color. White chocolate chips melt into sweet pockets. No stand mixer. No chilling required. Just stir, scoop, bake, and pretend you tried really hard.

    Ingredients

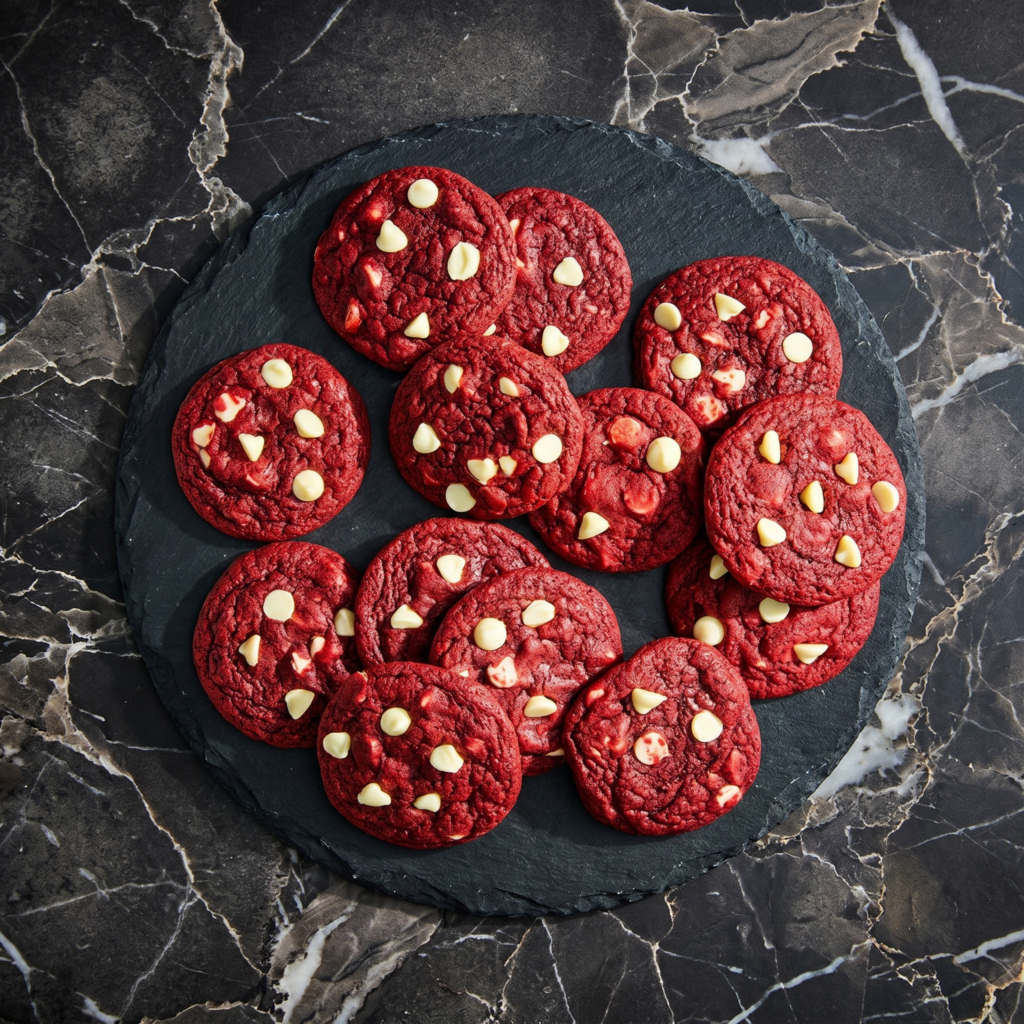
    Makes 18-20 cookies.

    • ½ cup (1 stick) unsalted butter, melted
    • 1 cup brown sugar, packed
    • 1 large egg
    • 1 tablespoon red food coloring (liquid or gel)
    • 1 teaspoon vanilla extract
    • 1 teaspoon white vinegar
    • 1¼ cups all-purpose flour
    • 2 tablespoons cocoa powder
    • ½ teaspoon baking soda
    • ¼ teaspoon salt
    • 1 cup white chocolate chips

    Step-by-Step Instructions

    Step 1: Mix Wet Ingredients

    1. Preheat oven to 350°F (175°C). Line a baking sheet with parchment paper.
    2. In a large bowl, whisk melted butter and brown sugar until smooth.
    3. Add egg, red food coloring, vanilla, and vinegar. Whisk until combined and vibrant red.

    Step 2: Add Dry Ingredients

    1. Pour flour, cocoa powder, baking soda, and salt into the wet mixture.
    2. Stir with a spatula until just combined (don’t overmix).
    3. Fold in white chocolate chips.

    Step 3: Scoop and Bake

    1. Scoop 1.5-tablespoon balls of dough onto the baking sheet, 2 inches apart.
    2. Bake for 10-12 minutes. Edges should look set, centers still slightly soft.
    3. Let cool on the pan for 5 minutes, then transfer to a wire rack.

    Summary

    Prep Time: 10 minutes | Cook Time: 12 minutes | Total Time: 22 minutes

    Yield: 18-20 cookies

    Difficulty: Easy (seriously, one bowl)

    Storage Notes

    How to Store:

    Keep in an airtight container at room temperature for up to 5 days. They stay soft and chewy.

    Freezing Dough:

    Scoop dough balls onto a tray and freeze until solid. Transfer to a bag and bake directly from frozen—add 2-3 minutes to bake time.

    Freezing Baked Cookies:

    Freeze in a single layer in a ziplock bag for up to 3 months. Thaw at room temperature for 15 minutes.

    Pro Tip:

    The vinegar isn’t a typo—it reacts with baking soda for a tender crumb and enhances the red velvet tang. Don’t skip it.

  • Bombolonis: Italian Donuts That Hit Different

    Bombolonis: Italian Donuts That Hit Different

    Donuts are great. Bomboloni are a flex.

    These Italian stuffed donuts are softer, richer, and sexier than your average glazed ring. Rolled in sugar, filled with velvety custard or warm Nutella. They’re actually easy to make at home. No deep fryer? Bake ’em. Let’s go.

    Ingredients

    Makes 12 bomboloni.

    For the Dough:

    • 3 cups all-purpose flour
    • ¼ cup sugar
    • 1 packet (2 ¼ tsp) instant yeast
    • ½ teaspoon salt
    • 3 large egg yolks
    • ½ cup warm milk (about 110°F)
    • 4 tablespoons unsalted butter, softened

    For the Filling (Pick One):

    • 1 cup vanilla pastry cream (recipe below) OR
    • ½ cup Nutella

    For the Coating:

    • ½ cup granulated sugar
    • Oil for frying (or baking method below)

    Step-by-Step Instructions

    Step 1: Make the Dough

    1. In a bowl, whisk flour, sugar, yeast, and salt.
    2. Add egg yolks and warm milk. Mix until a sticky dough forms.
    3. Add softened butter and knead for 8-10 minutes until smooth.
    4. Let rise in a greased bowl for 1-2 hours until doubled.

    Step 2: Shape & Rise Again

    1. Punch down dough. Roll into 12 balls (about 2 inches each).
    2. Place on a parchment-lined tray. Cover and rise for 30 minutes.

    Step 3: Fry or Bake

    1. Fry: Heat oil to 350°F (175°C). Fry 2-3 at a time for 1-2 minutes per side until golden. Drain on paper towels.
    2. Bake: Brush with melted butter. Bake at 375°F for 12-15 minutes until golden.

    Step 4: Coat & Fill

    1. Roll warm bomboloni in granulated sugar until fully coated.
    2. Use a piping bag or a chopstick to poke a hole and fill with custard or Nutella.
    3. Devour immediately. Close your eyes. Thank Italy.

    Summary

    Prep Time: 20 minutes | Rise Time: 1.5-2.5 hours | Cook Time: 10 minutes

    Yield: 12 bomboloni | Difficulty: Medium

    Storage Notes

    Bomboloni are best eaten day-of. Store unfilled leftovers in an airtight container for 1 day (filling makes them soggy). Reheat in an air fryer at 350°F for 3 minutes, then re-roll in sugar. Never microwave.

  • Stromboli (Like a Calzone’s Bigger, Better Sibling)

    Stromboli (Like a Calzone’s Bigger, Better Sibling)

    Calzone is for one. Stromboli is for a crowd.

    It’s pizza dough, but rolled like a jelly roll with layers of salami, pepperoni, ham, gooey mozzarella, and tangy roasted red peppers. Slice it into spirals of perfection. Serve with marinara. Watch it disappear.

    Ingredients

    Serves 4-6.

    • 1 lb (450g) pizza dough (store-bought or homemade)
    • ½ cup marinara sauce (plus more for dipping)
    • 8 slices provolone cheese
    • 6 slices genoa salami
    • 6 slices pepperoni
    • 6 slices ham or capicola
    • 1 cup (120g) shredded mozzarella
    • ½ cup roasted red peppers, drained and sliced
    • 1 egg, beaten (for egg wash)
    • 1 tablespoon sesame seeds or Italian seasoning (optional)

    Step-by-Step Instructions

    Step 1: Preheat Oven

    1. Preheat to 400°F (200°C). Line a baking sheet with parchment paper.

    Step 2: Roll the Dough

    1. On a floured surface, roll dough into a 12×10-inch rectangle.

    Step 3: Layer the Fillings

    1. Spread marinara sauce over dough, leaving a 1-inch border.
    2. Layer provolone, then salami, pepperoni, ham, shredded mozzarella, and roasted peppers.

    Step 4: Roll It Up

    1. Starting from the long edge, roll dough tightly like a jelly roll. Pinch the seam and ends shut.

    Step 5: Brush and Score

    1. Place seam-side down on baking sheet. Brush with egg wash. Sprinkle with sesame seeds if using.
    2. Cut 4-5 small slits on top to vent steam.

    Step 6: Bake

    1. Bake for 20-25 minutes until deep golden brown and crispy.

    Step 7: Rest and Slice

    1. Let rest 5 minutes (cheese is lava-hot). Slice into 1-inch rounds. Serve with warm marinara for dipping.

    Summary

    Prep Time: 15 minutes | Cook Time: 25 minutes | Total Time: 40 minutes

    Yield: 1 stromboli (4-6 servings)

    Difficulty: Easy

    Storage Notes

    Fridge: Keeps 4 days. Reheat in oven at 375°F for 10 minutes (microwave makes it sad and soggy).

    Freezer (baked): Freeze whole or sliced up to 3 months. Reheat from frozen at 375°F for 15-20 minutes.

    Freezer (unbaked): Assemble, wrap tightly, freeze. Bake from frozen – add 10-15 minutes.

  • Buffalo Chicken Sliders (Game Day MVP, 20 Minutes Max)

    Buffalo Chicken Sliders (Game Day MVP, 20 Minutes Max)

    Game day food shouldn’t be complicated. Neither should Tuesday dinner.

    These sliders are spicy, creamy, crunchy, and dangerously snackable. Rotisserie chicken does the heavy lifting. Buffalo sauce brings the heat. Ranch slaw cools it down. You bring the appetite.

    Ingredients

    Makes 12 sliders.

    • 12 slider buns (Hawaiian rolls are elite)
    • 3 cups cooked shredded chicken (rotisserie = hero)
    • ½ cup buffalo sauce (Frank’s RedHot is classic)
    • 4 tablespoons butter, melted
    • 1 cup shredded cheddar or Monterey Jack

    For the Ranch Slaw:

    • 1 cup shredded cabbage or coleslaw mix
    • ¼ cup ranch dressing
    • 2 tablespoons chopped green onions

    Step-by-Step Instructions

    Step 1: Preheat Oven

    1. Preheat to 350°F (175°C).

    Step 2: Make Buffalo Chicken

    1. In a bowl, mix shredded chicken with buffalo sauce until coated.

    Step 3: Make Ranch Slaw

    1. In another bowl, toss cabbage with ranch dressing and green onions.

    Step 4: Assemble Sliders

    1. Slice the whole slab of slider buns in half horizontally (keep them connected).
    2. Place bottom half in a baking dish. Top with buffalo chicken, then cheese.
    3. Add a layer of ranch slaw. Place the top buns on.

    Step 5: Butter and Bake

    1. Brush melted butter over the tops of the buns.
    2. Bake for 10-12 minutes until cheese is melted and buns are golden.

    Step 6: Serve

    1. Pull apart and watch them vanish.

    Summary

    Prep Time: 10 minutes | Cook Time: 10 minutes | Total Time: 20 minutes

    Yield: 12 sliders

    Difficulty: Easy

    Storage Notes

    Fridge: Assembled sliders keep 2-3 days. Reheat covered at 350°F for 10 minutes.

    Make ahead tip: Shred chicken and make buffalo sauce mix up to 2 days ahead. Assemble fresh for best texture (slaw gets soggy).

    Not for freezing: Slaw and buns don’t play nice with freezers. Just eat them all. You know you want to.

  • Garlic Herb Dinner Rolls (So Good, They’ll Disappear Before the Main Course)

    Garlic Herb Dinner Rolls (So Good, They’ll Disappear Before the Main Course)

    Let’s be real: store-bought rolls are fine. These are better.

    Soft, pillowy, brushed with melted garlic butter and fresh herbs. They smell like a bakery, taste like a hug, and somehow only require one bowl and zero fancy equipment. Make them for Thanksgiving, Sunday dinner, or just because Tuesday needs bread.

    Ingredients

    Makes 12 rolls.

    For the Dough:

    • 3½ cups (440g) all-purpose flour
    • 1 packet (2¼ tsp) instant yeast
    • 1¼ cups (300ml) warm milk (about 110°F)
    • 2 tablespoons honey or sugar
    • 1 teaspoon salt
    • 1 large egg
    • 2 tablespoons melted butter

    For the Garlic Herb Butter:

    • 4 tablespoons butter, melted
    • 3 cloves garlic, minced
    • 1 tablespoon fresh parsley, chopped
    • 1 teaspoon fresh thyme or rosemary
    • ¼ teaspoon salt

    Step-by-Step Instructions

    Step 1: Make the Dough

    1. In a large bowl, whisk flour, yeast, and salt. In another bowl, mix warm milk, honey, egg, and melted butter.
    2. Pour wet into dry. Stir until a shaggy dough forms.

    Step 2: Knead (No Mixer Needed)

    1. Turn dough onto a floured surface. Knead 5-7 minutes until smooth and elastic.

    Step 3: First Rise

    1. Place dough in a greased bowl. Cover. Let rise 1 hour until doubled.

    Step 4: Shape

    1. Punch down dough. Divide into 12 equal pieces. Roll into balls.
    2. Place in a greased 9×13-inch baking dish.

    Step 5: Second Rise

    1. Cover and let rise 30 minutes. Preheat oven to 375°F (190°C).

    Step 6: Bake

    1. Bake 18-20 minutes until golden on top.

    Step 7: Garlic Butter Finish

    1. While rolls bake, mix melted butter, garlic, parsley, thyme, and salt.
    2. Brush hot rolls immediately with garlic butter. Serve warm.

    Summary

    Prep Time: 20 minutes | Rise Time: 1½ hours | Cook Time: 20 minutes

    Yield: 12 rolls

    Difficulty: Medium (easy, just needs patience for rising)

    Storage Notes

    Room temp: Keeps 3 days in an airtight container. Reheat in microwave (15 seconds) or oven (350°F for 5 minutes).

    Freezer (baked): Freeze up to 3 months. Reheat from frozen at 350°F for 10 minutes.

    Freezer (unbaked): Shape rolls, freeze on tray, then bag. Bake from frozen – add 10 minutes.

  • Cheddar and Herb Scones (5 Minutes of Work, Bakery-Level Results)

    Cheddar and Herb Scones (5 Minutes of Work, Bakery-Level Results)

    Savory scones are underrated. These are flaky, cheesy, and impossibly easy.

    No cutting in butter by hand. No pastry blender tantrums. Just frozen butter, a box grater, and five minutes of mixing. They’re perfect with soup, eggs, or just straight out of the oven with butter.

    Ingredients

    Makes 8 scones.

    • 2 cups (260g) all-purpose flour
    • 1 tablespoon baking powder
    • ½ teaspoon salt
    • ½ teaspoon black pepper
    • ½ cup (115g) cold unsalted butter (stick it in the freezer for 15 minutes)
    • 1 cup (120g) sharp cheddar cheese, shredded
    • ¼ cup fresh herbs (chives, parsley, or dill – or a mix)
    • ¾ cup (180ml) cold buttermilk (plus 2 tbsp for brushing)

    Step-by-Step Instructions

    Step 1: Heat Oven

    1. Preheat to 400°F (200°C). Line a baking sheet with parchment paper.

    Step 2: Mix Dry Ingredients

    1. In a large bowl, whisk flour, baking powder, salt, and pepper.

    Step 3: Grate the Butter (The Trick!)

    1. Grate the frozen butter on a box grater. Toss the butter shreds into the flour mixture.
    2. Use your fingers to lightly coat the butter with flour (don’t overwork it).

    Step 4: Add Cheese and Herbs

    1. Stir in shredded cheddar and chopped herbs.

    Step 5: Add Buttermilk

    1. Pour in cold buttermilk. Stir until just combined (shaggy dough is fine).

    Step 6: Shape and Cut

    1. Turn dough onto a floured surface. Pat into a 1-inch thick circle.
    2. Cut into 8 wedges. Place on baking sheet.
    3. Brush tops with buttermilk.

    Step 7: Bake

    1. Bake for 15-18 minutes until golden brown. Serve warm.

    Summary

    Prep Time: 5 minutes | Cook Time: 18 minutes | Total Time: 23 minutes

    Yield: 8 scones

    Difficulty: Easy

    Storage Notes

    Fridge (unbaked): Cut scones can sit in the fridge for 2 days. Bake straight from cold – add 2 minutes.

    Freezer (unbaked): Freeze on a tray, then bag. Bake from frozen, add 5 minutes.

    Baked scones: Keep 3 days at room temp. Reheat in toaster oven or 350°F oven for 5 minutes.

  • Homemade Crescent Rolls: Buttery, Flaky, Better Than the Can

    Homemade Crescent Rolls: Buttery, Flaky, Better Than the Can

    That pop of the can? Satisfying. What’s inside? Fine.

    These homemade crescent rolls are not fine. They’re incredible. Soft, buttery, flaky, and made from scratch with zero drama. One bowl. No fancy techniques. Just you, some butter, and a tray of golden crescents that’ll steal every dinner.

    Ingredients

    Makes 12 crescent rolls.

    • 3 cups all-purpose flour
    • ¼ cup sugar
    • 1 packet (2 ¼ tsp) instant yeast
    • 1 teaspoon salt
    • ½ cup warm milk (about 110°F)
    • ¼ cup warm water
    • 1 large egg
    • 6 tablespoons unsalted butter, softened (divided)

    Step-by-Step Instructions

    Step 1: Make the Dough

    1. Whisk flour, sugar, yeast, and salt in a large bowl.
    2. Add warm milk, warm water, egg, and 4 tablespoons softened butter.
    3. Mix until a shaggy dough forms. Knead for 8-10 minutes until smooth.
    4. Let rise in a greased bowl for 1 hour, until doubled.

    Step 2: Roll & Shape

    1. Preheat oven to 375°F (190°C). Line a baking sheet with parchment.
    2. Punch down dough. Roll into a 12-inch circle.
    3. Spread remaining 2 tablespoons softened butter over the dough.
    4. Cut into 12 wedges (like a pizza).
    5. Roll each wedge from the wide end to the tip. Curve into a crescent shape.

    Step 3: Rise & Bake

    1. Place crescents on the baking sheet. Cover and let rise for 30 minutes.
    2. Bake for 12-15 minutes until golden brown.
    3. Brush with more melted butter right out of the oven.
    4. Serve warm. Watch them vanish.

    Summary

    Prep Time: 15 minutes | Rise Time: 1.5 hours | Bake Time: 15 minutes

    Yield: 12 rolls | Difficulty: Easy

    Storage Notes

    Store in an airtight container at room temperature for up to 3 days. Freeze baked rolls for up to 3 months. To reheat, wrap in foil and warm at 350°F for 10 minutes. Never microwave—they get rubbery and sad.

  • Korean Cream Cheese Bread: Soft, Sweet, and Suspiciously Good

    Korean Cream Cheese Bread: Soft, Sweet, and Suspiciously Good

    Korean bakeries know something we don’t. Actually, they know this bread.

    It’s absurdly soft. Like, cloud-soft. Inside, a sweet, tangy cream cheese filling that’s not too heavy. Topped with a dusting of powdered sugar and a sprinkle of nostalgia. This is the bread that disappears before it cools.

    Ingredients

    Makes 6 buns.

    For the Dough:

    • 2 ½ cups all-purpose flour
    • ¼ cup sugar
    • 1 packet (2 ¼ tsp) instant yeast
    • ½ teaspoon salt
    • ½ cup warm milk
    • ¼ cup warm water
    • 1 large egg
    • 3 tablespoons unsalted butter, softened

    For the Cream Cheese Filling:

    • 8 oz cream cheese, softened
    • ¼ cup sugar
    • 1 teaspoon vanilla extract
    • 2 tablespoons heavy cream (optional, for fluffiness)

    For Topping:

    • Powdered sugar for dusting

    Step-by-Step Instructions

    Step 1: Make the Dough

    1. Whisk flour, sugar, yeast, and salt in a large bowl.
    2. Add warm milk, warm water, and egg. Mix into a shaggy dough.
    3. Knead for 8 minutes. Add softened butter and knead 5 more minutes until smooth.
    4. Let rise in a greased bowl for 1 hour, until doubled.

    Step 2: Make the Filling

    1. Beat cream cheese, sugar, vanilla, and heavy cream until smooth and fluffy.
    2. Refrigerate while dough rises.

    Step 3: Fill & Shape

    1. Punch down dough. Divide into 6 equal balls.
    2. Flatten each ball into a 4-inch circle. Place 2 tablespoons of cream cheese filling in the center.
    3. Pinch edges to seal tightly. Place seam-side down on a parchment-lined baking sheet.
    4. Let rise for 30 minutes.

    Step 4: Bake & Dust

    1. Preheat oven to 350°F (175°C).
    2. Bake for 18-20 minutes until golden brown.
    3. Cool for 5 minutes. Dust generously with powdered sugar.
    4. Serve slightly warm. Watch people lose their minds.

    Summary

    Prep Time: 20 minutes | Rise Time: 1.5 hours | Bake Time: 20 minutes

    Yield: 6 buns | Difficulty: Medium

    Storage Notes

    Store in an airtight container in the fridge for up to 4 days. Bring to room temperature or microwave for 10 seconds before serving. Freeze unfilled dough for up to 2 months. Filled buns do not freeze well (the cream cheese gets grainy).

  • Classic Palmiers: Fancy Cookies That Fake Being Hard

    Classic Palmiers: Fancy Cookies That Fake Being Hard

    French pastries have a reputation for being fussy. Palmiers said “nah.”

    These crispy, caramelized butterfly cookies are just puff pastry, sugar, and butter. No rolling pin gymnastics. No chill time. Just fold, slice, bake, and pretend you spent hours in the kitchen.

    Ingredients

    Makes about 20 palmiers.

    • 1 sheet frozen puff pastry, thawed
    • ½ cup granulated sugar, plus more for rolling
    • 2 tablespoons unsalted butter, very soft

    Step-by-Step Instructions

    Step 1: Prep

    1. Preheat oven to 400°F (200°C). Line a baking sheet with parchment.
    2. Sprinkle a clean surface with a thick layer of sugar.

    Step 2: Sugar the Dough

    1. Unfold puff pastry onto the sugar. Lightly roll it to press sugar into both sides.
    2. Spread soft butter over the top. Sprinkle with remaining sugar.

    Step 3: Fold Like a Letter

    1. Fold the left edge toward the center. Fold the right edge to meet it.
    2. Fold again like a book (left over right). You’ll have a 4-layer strip.
    3. Chill for 10 minutes to firm up.

    Step 4: Slice & Bake

    1. Slice the log into ¼-inch slices. Dip cut sides in sugar.
    2. Place on baking sheet, 2 inches apart. Flatten slightly.
    3. Bake for 10-12 minutes. Flip and bake 3-5 more minutes until deep golden and caramelized.
    4. Cool on a wire rack. Try not to eat all twenty.

    Summary

    Prep Time: 10 minutes | Bake Time: 15 minutes | Total Time: 25 minutes

    Yield: 20 palmiers | Difficulty: Easy

    Storage Notes

    Store in an airtight container at room temperature for up to 5 days (if they last that long). Freeze baked palmiers for up to 2 months. To re-crisp, bake at 350°F for 5 minutes.

  • Cinnamon Twists: Twisted, Sugary, Dangerously Snackable

    Cinnamon Twists: Twisted, Sugary, Dangerously Snackable

    Don’t have time for cinnamon rolls? Same. Enter cinnamon twists.

    These are faster, crunchier, and somehow more addictive. Puff pastry + butter + cinnamon sugar + a quick twist = a snack that disappears before the coffee is done brewing. Let’s twist.

    Ingredients

    Makes 12 twists.

    For the Twists:

    • 1 sheet frozen puff pastry, thawed
    • 3 tablespoons unsalted butter, melted
    • ½ cup granulated sugar
    • 1 tablespoon ground cinnamon

    For the Glaze (Optional but Mandatory):

    • ½ cup powdered sugar
    • 1-2 tablespoons milk
    • ¼ teaspoon vanilla extract

    Step-by-Step Instructions

    Step 1: Prep

    1. Preheat oven to 375°F (190°C). Line a baking sheet with parchment.
    2. Mix sugar and cinnamon in a shallow bowl.

    Step 2: Assemble

    1. Roll puff pastry into a 10×12-inch rectangle.
    2. Brush generously with melted butter.
    3. Sprinkle cinnamon sugar evenly over the entire surface.
    4. Fold the pastry in half lengthwise, like closing a book.

    Step 3: Twist

    1. Cut the folded pastry into 12 strips (each about 1 inch wide).
    2. Hold each strip at both ends and twist in opposite directions 3-4 times.
    3. Place twists on the baking sheet, pressing down the ends gently.

    Step 4: Bake & Glaze

    1. Bake for 12-15 minutes until golden brown and puffed.
    2. Whisk powdered sugar, milk, and vanilla until smooth.
    3. Drizzle glaze over warm twists. Let set for 5 minutes. Then fight for the last one.

    Summary

    Prep Time: 10 minutes | Bake Time: 15 minutes | Total Time: 25 minutes

    Yield: 12 twists | Difficulty: Easy

    Storage Notes

    Store in an airtight container for up to 3 days. To re-crisp, pop in an air fryer at 350°F for 3 minutes or in an oven for 5 minutes. They’re still good cold, but warm is a religious experience.