Category: quick_meals

  • Beef Barbacoa (Set It and Forget It Mexican Magic)

    Beef Barbacoa (Set It and Forget It Mexican Magic)

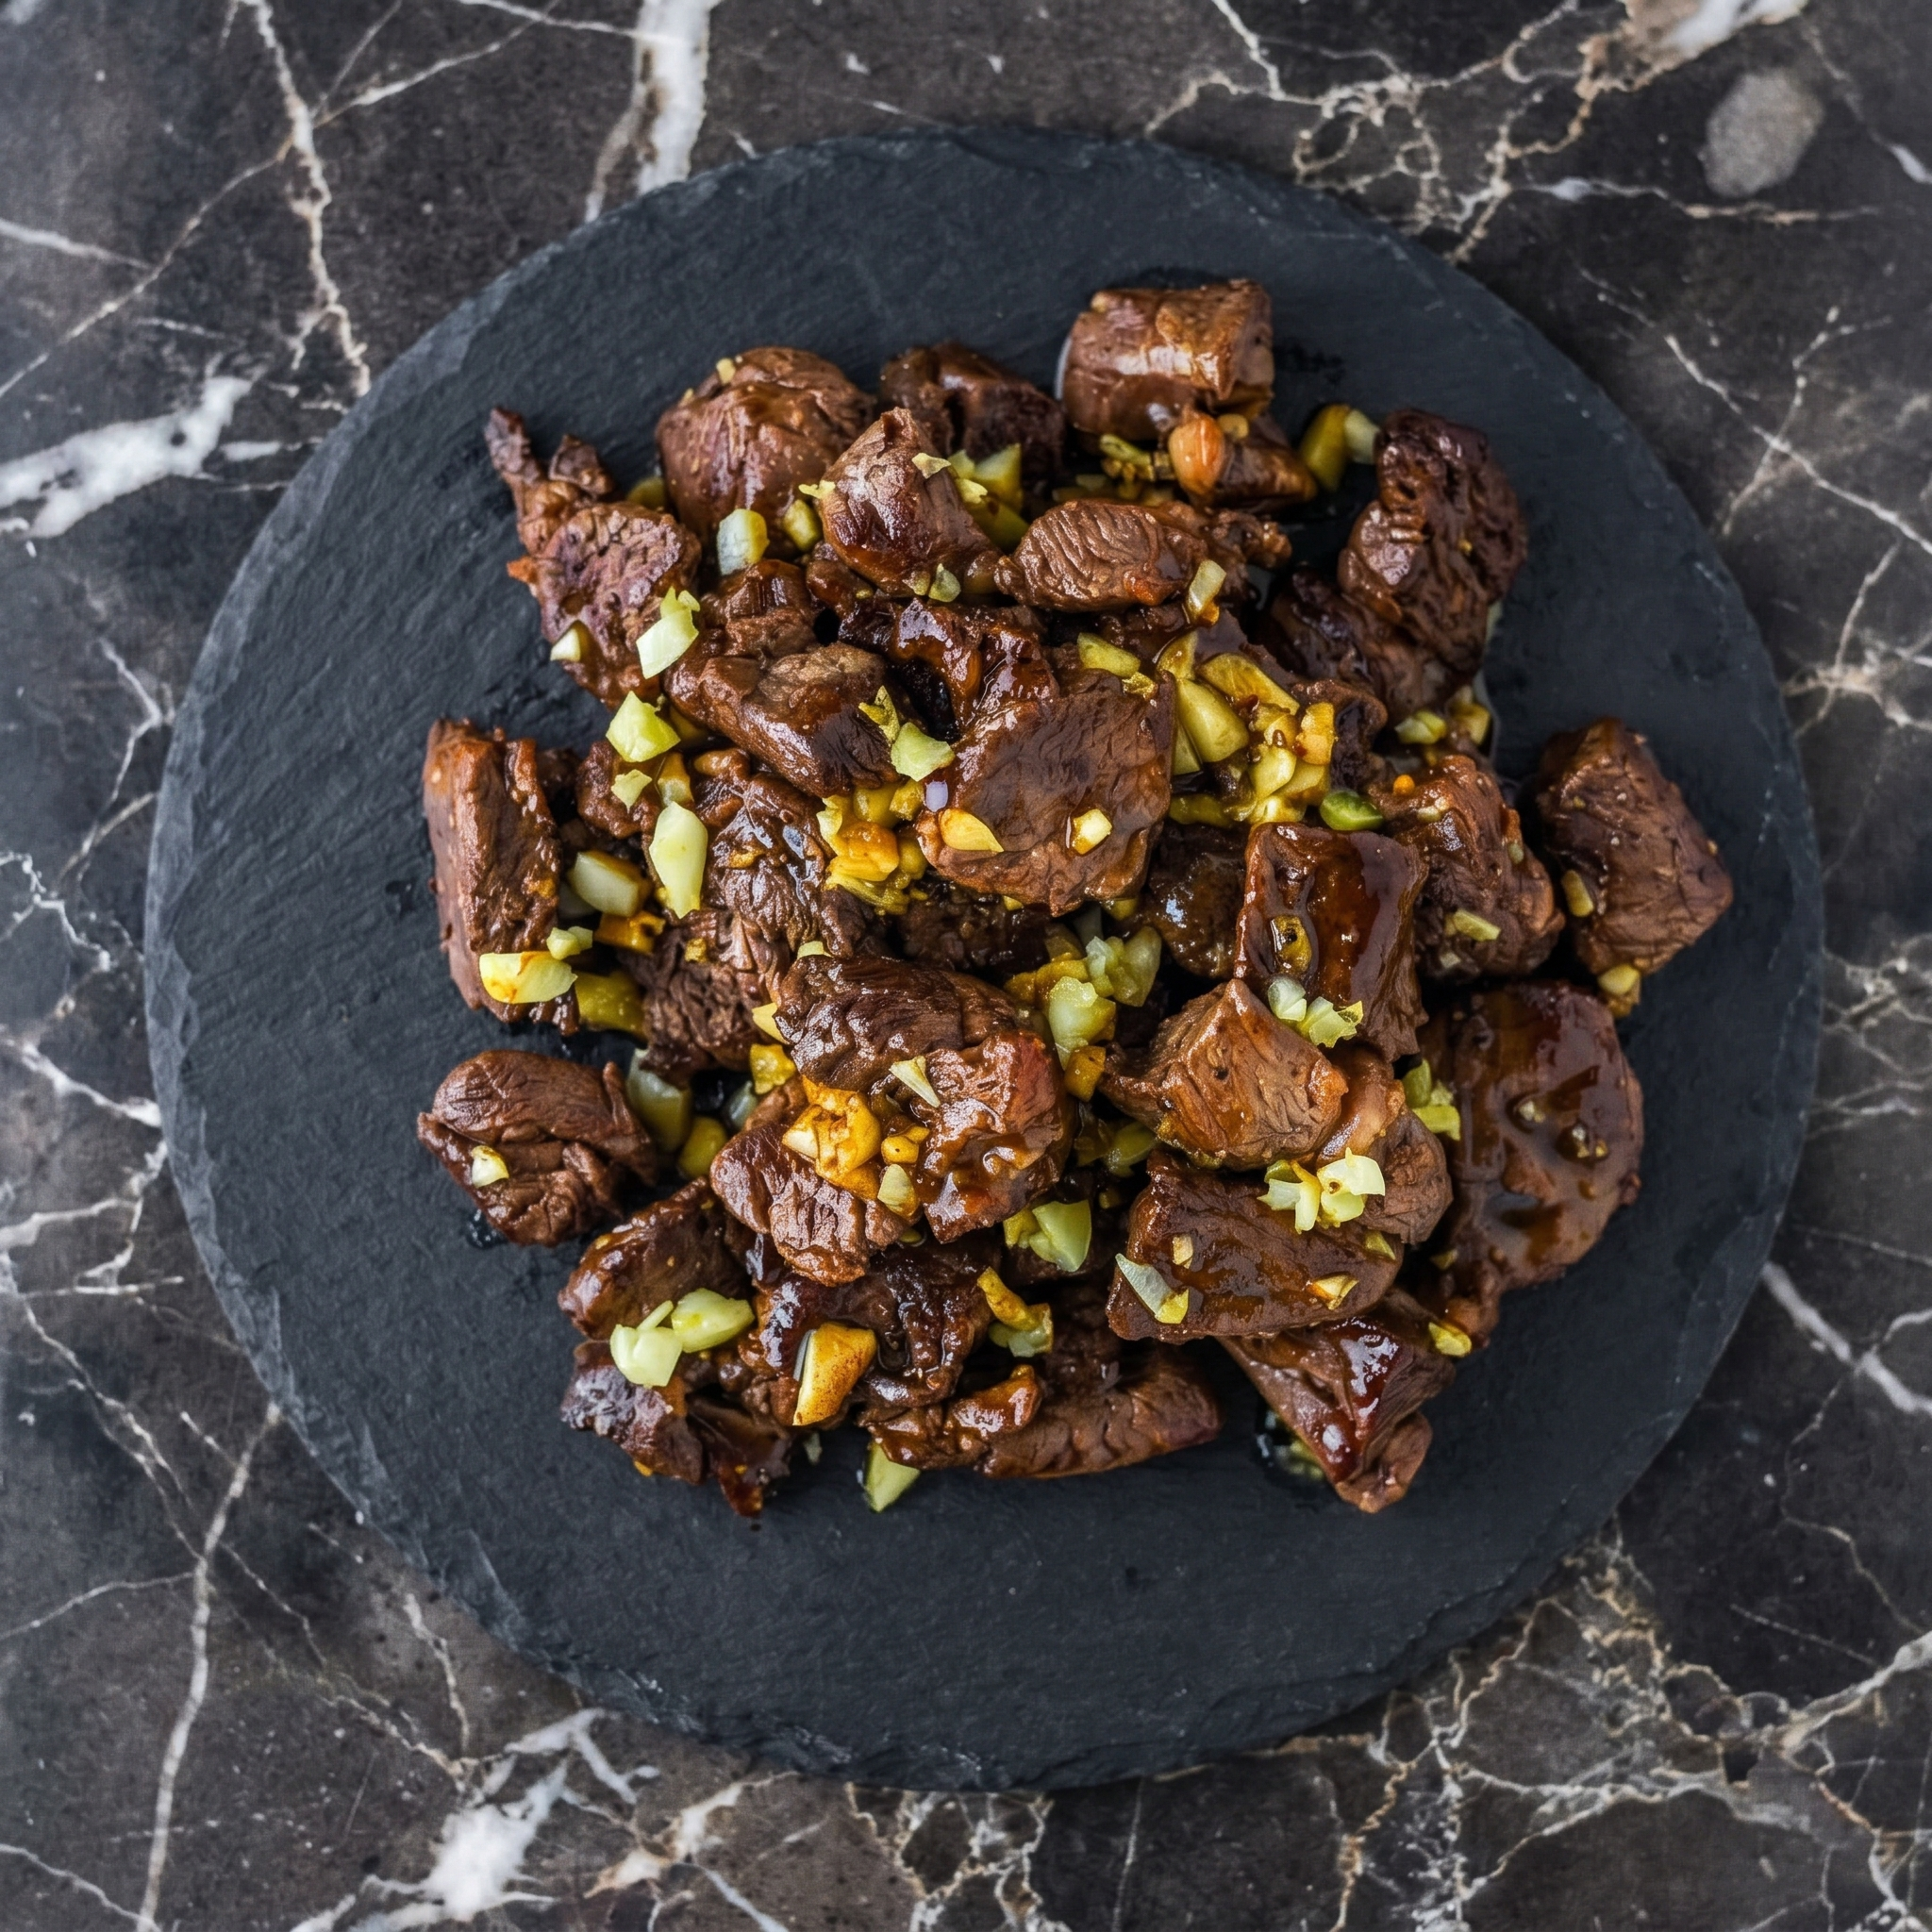
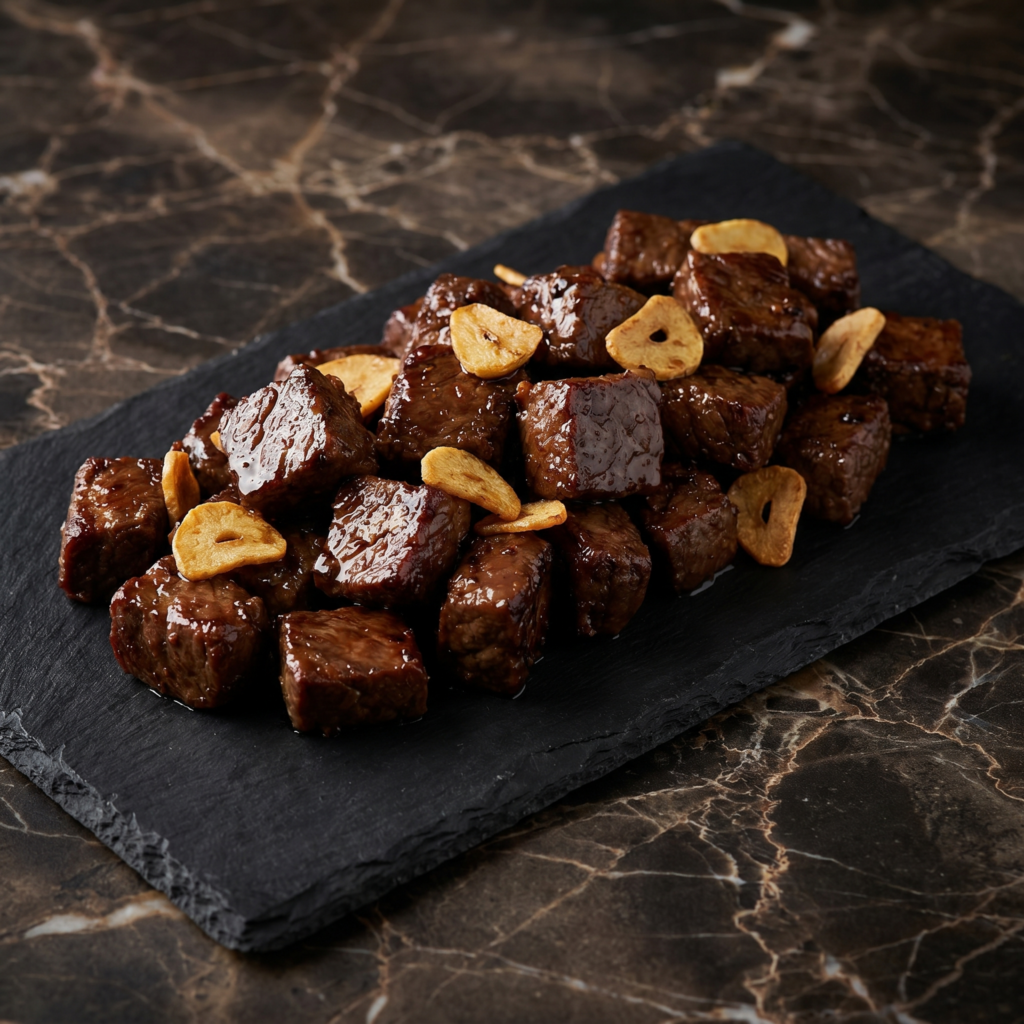
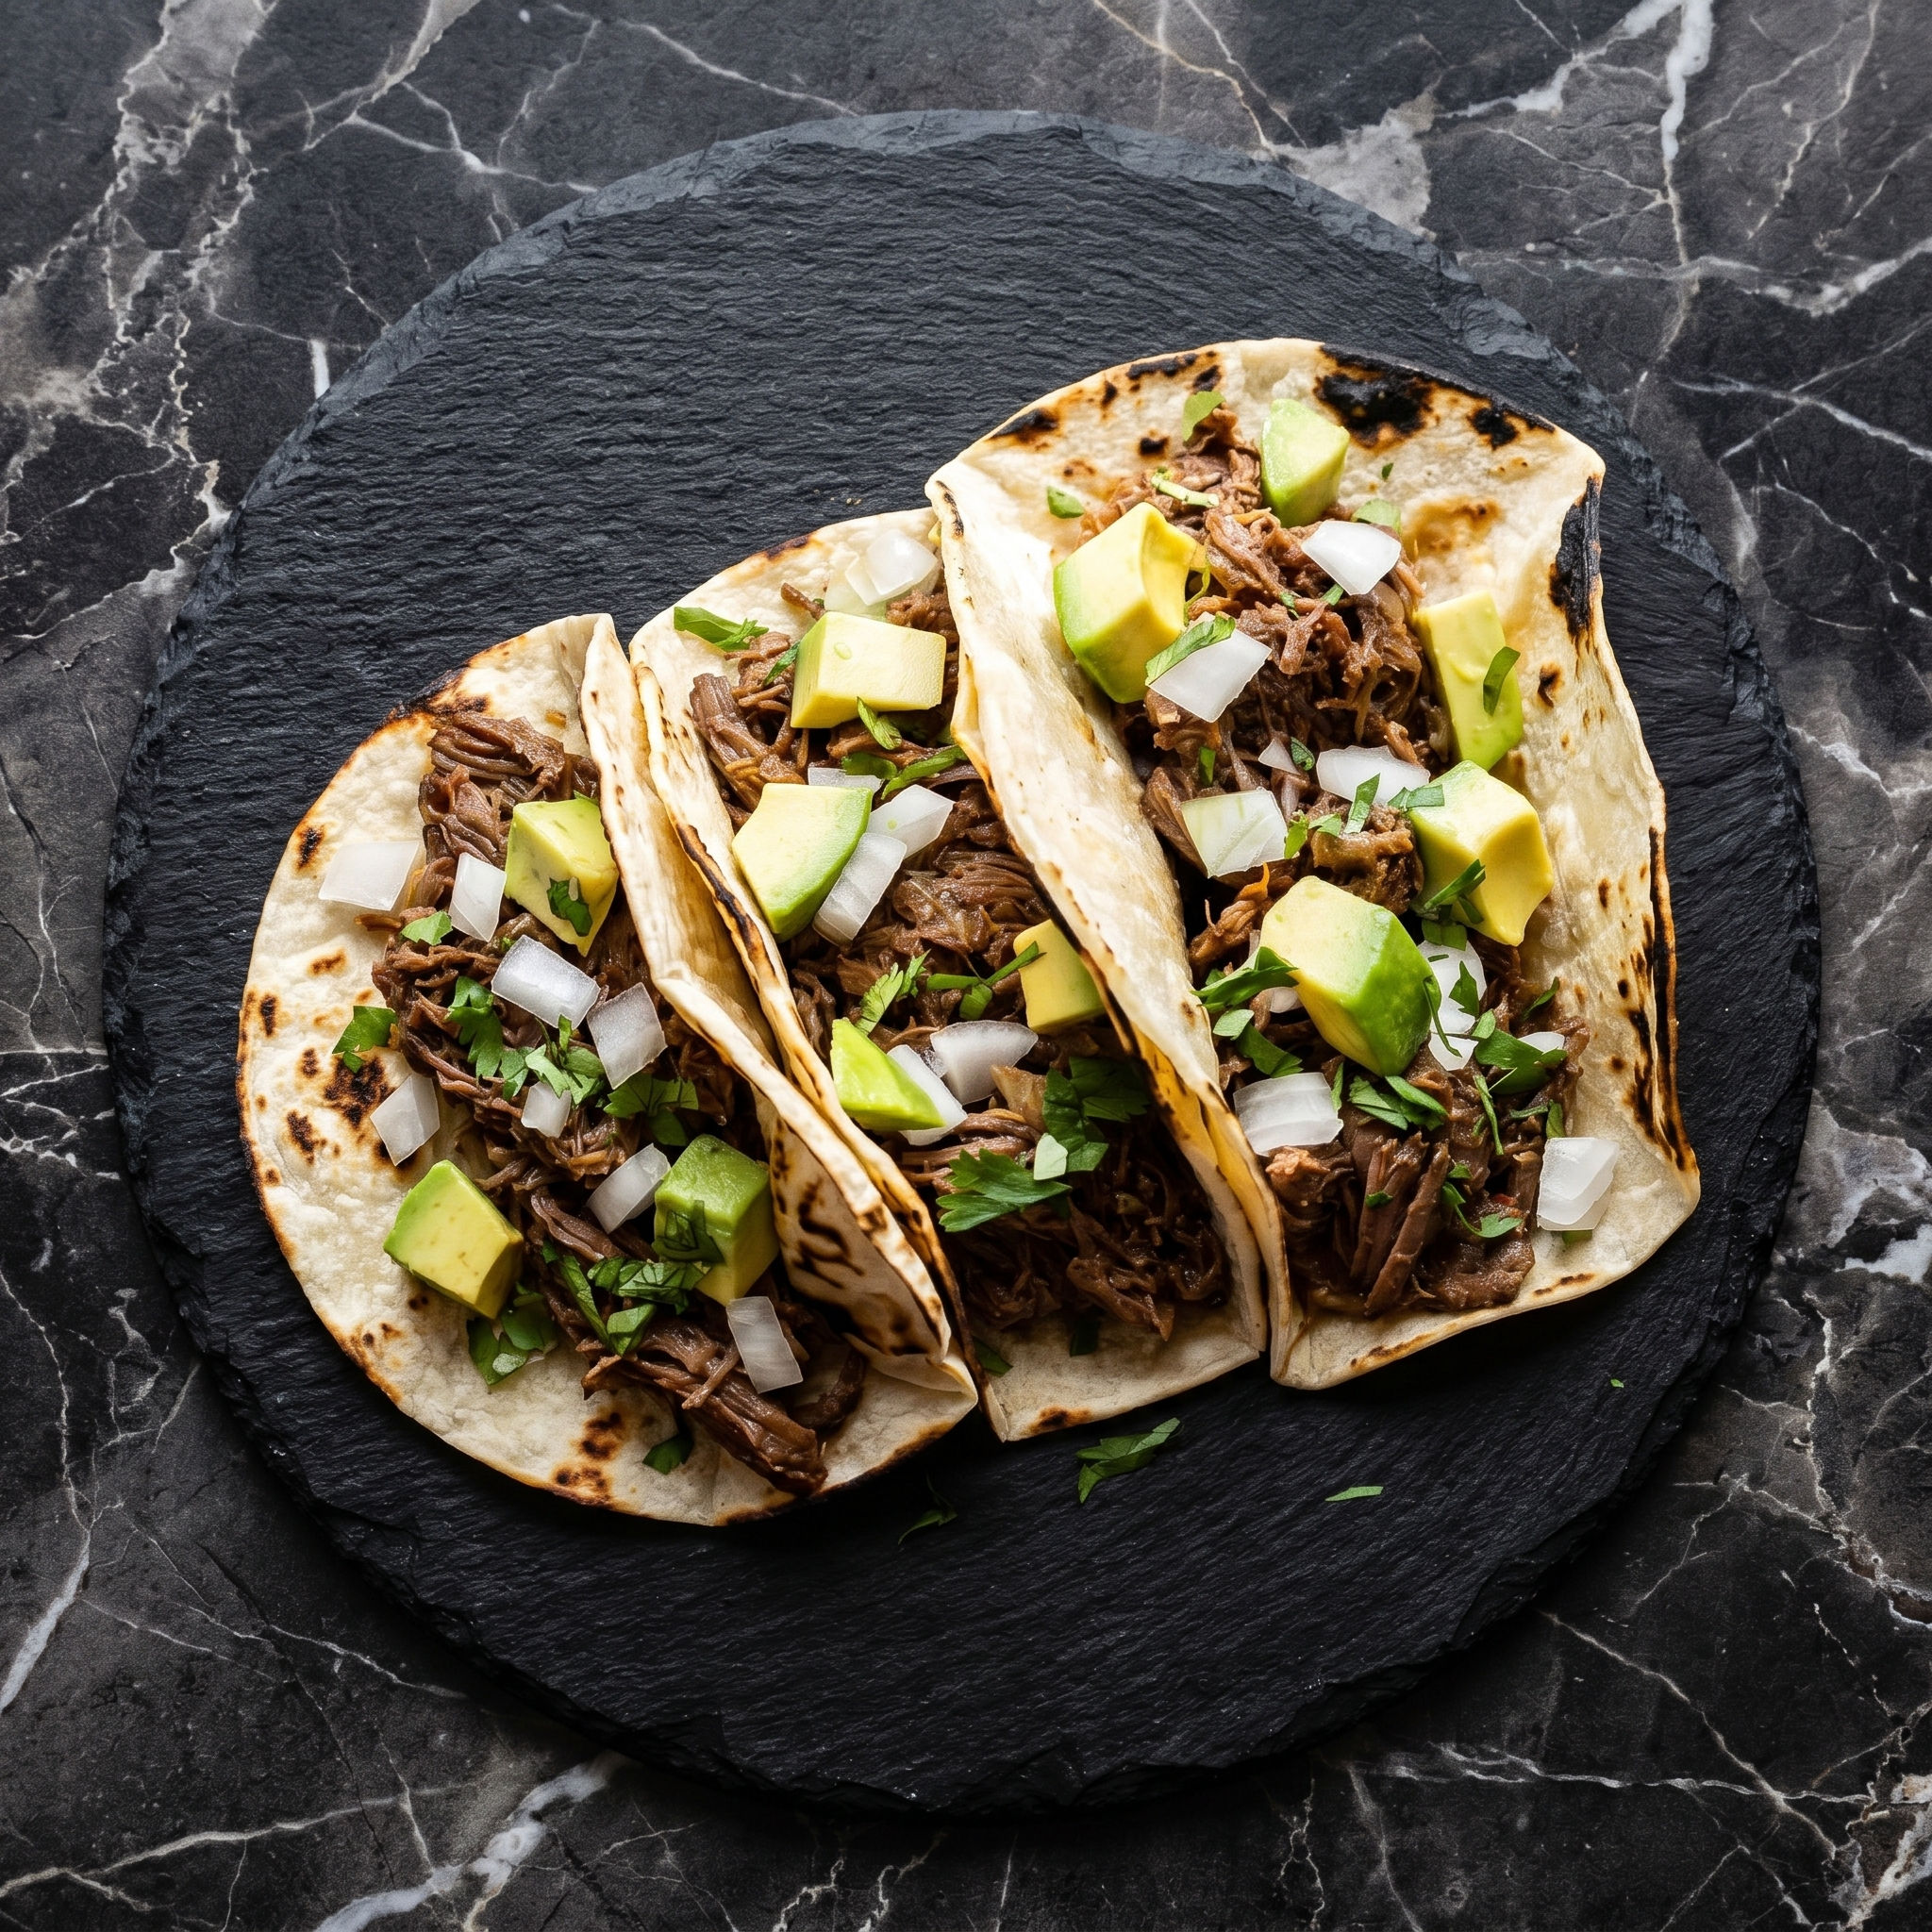
    Barbacoa is what happens when beef meets low heat, patience, and a smoky chipotle hug. Traditionally cooked in a pit underground. Today? Your slow cooker does all the work. The result is the same: beef so tender it falls apart if you look at it wrong.

    Use it for tacos, burritos, nachos, or just eat it with a spoon standing over the sink. No judgment. This is pure comfort.

    Ingredients

    Serves 6-8.

    • 3 lbs (1.4kg) beef chuck roast, cut into 4 large chunks
    • 4 chipotle peppers in adobo sauce + 2 tablespoons adobo sauce
    • 6 cloves garlic, minced
    • 1 onion, quartered
    • ¼ cup lime juice (about 2 limes)
    • ¼ cup beef broth
    • 2 tablespoons apple cider vinegar
    • 2 teaspoons ground cumin
    • 2 teaspoons dried oregano
    • 1 teaspoon salt
    • 4 bay leaves

    Step-by-Step Instructions

    Step 1: Blend the Sauce

    1. In a blender, combine chipotle peppers, adobo sauce, garlic, onion, lime juice, beef broth, vinegar, cumin, oregano, and salt. Blend until smooth.

    Step 2: Slow Cook the Beef

    1. Place beef chunks in the slow cooker. Pour sauce over the top. Add bay leaves.
    2. Cover and cook on LOW for 8-10 hours or HIGH for 5-6 hours, until beef shreds easily with a fork.

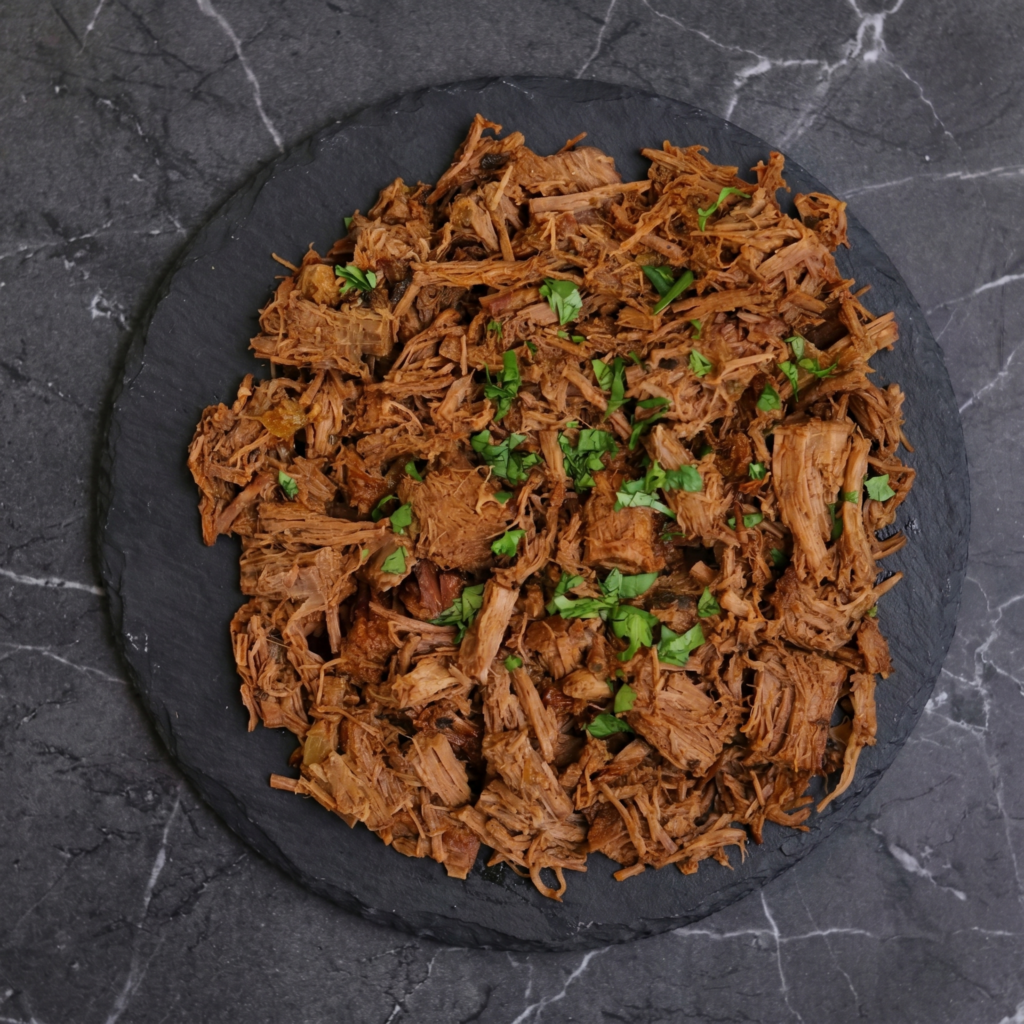
    Step 3: Shred the Beef

    1. Remove bay leaves. Transfer beef to a cutting board and shred with two forks. Discard large fat pieces.
    2. Return shredded beef to the slow cooker and toss with the juices. Let it soak for 10 minutes.

    Step 4: Serve

    1. Serve on warm corn tortillas with diced onion, cilantro, and a squeeze of lime. Or over rice. Or on nachos. You get it.

    Summary

    Prep Time: 10 minutes | Cook Time: 8 hours (low) or 5 hours (high) | Total Time: 8+ hours

    Yield: 6-8 servings

    Difficulty: Easy (the slow cooker does the hard part)

    Storage Notes

    How to Store:

    Refrigerate in an airtight container with juices for up to 5 days. Freezes beautifully for up to 3 months.

    How to Reheat:

    Reheat in a skillet over medium heat with a splash of broth or water. The microwave works too, but stovetop keeps the texture better.

    Pro Tip:

    Make a double batch. You will want leftovers. This beef is liquid gold.

  • Beef Salpicao (Garlic, Butter, and Beef Done Filipino-Style)

    Beef Salpicao (Garlic, Butter, and Beef Done Filipino-Style)

    Beef salpicao is what happens when garlic meets butter meets beef meets a hot pan. It’s a Filipino classic—tender cubes of sirloin seared hard, then simmered in a dark, savory sauce of Worcestershire, soy, and oyster sauce. The garlic gets crispy. The sauce gets buttery. You will not stop eating.

    This is a 15-minute meal. Perfect for busy weeknights when you want something that tastes like you tried really hard (but you didn’t).

    Ingredients

    Serves 2-3.

    • 1 lb (450g) beef sirloin or tenderloin, cubed (1-inch pieces)
    • 10 cloves garlic, minced (yes, ten)
    • 3 tablespoons butter
    • 2 tablespoons olive oil
    • 3 tablespoons Worcestershire sauce
    • 1 tablespoon soy sauce
    • 1 tablespoon oyster sauce
    • 1 teaspoon black pepper (coarse)
    • Salt to taste
    • Optional: chopped parsley or green onions for garnish

    Step-by-Step Instructions

    Step 1: Sear the Beef

    1. Heat oil in a cast iron or heavy pan over high heat until smoking hot.
    2. Add beef cubes in a single layer. Sear for 1-2 minutes per side until deeply browned. Work in batches if needed. Remove beef and set aside.

    Step 2: Cook the Garlic

    1. Reduce heat to medium. Add butter and minced garlic. Cook for 30-60 seconds until fragrant and just starting to turn golden. Do not burn.

    Step 3: Make the Sauce

    1. Add Worcestershire sauce, soy sauce, oyster sauce, and black pepper. Stir and let bubble for 30 seconds.

    Step 4: Finish the Dish

    1. Return beef to the pan (including any juices). Toss to coat in the sauce. Cook for 1 minute until heated through.
    2. Taste and add salt if needed (the sauces are already salty).

    Step 5: Serve

    1. Transfer to a plate. Spoon extra garlic and sauce over the top. Garnish with parsley or green onions.
    2. Serve immediately with hot steamed rice.

    Summary

    Prep Time: 5 minutes | Cook Time: 10 minutes | Total Time: 15 minutes

    Yield: 2-3 servings

    Difficulty: Easy

    Storage Notes

    How to Store Leftovers:

    Refrigerate in an airtight container for up to 3 days. Reheat gently in a pan over medium heat (microwave will toughen the beef). The sauce may thicken—splash in a little water or beef broth.

    Pro Tip:

    Don’t skip the high heat for searing. That browned crust is where the flavor lives. And yes, ten cloves of garlic is correct. Trust the process.

  • Fried Chicken (The Only Recipe You’ll Ever Need)

    Fried Chicken (The Only Recipe You’ll Ever Need)

    Fried chicken is a religious experience. That first bite—the shattering crunch, the juicy pop of meat, the salty-spicy crust—it’s pure magic. This recipe delivers every time. Buttermilk brine keeps the chicken moist. A double dredge builds that craggy, crispy shell.

    Skip the takeout line. Your cast iron skillet is calling.

    Ingredients

    Serves 4-6.

    • 3 lbs chicken pieces (drumsticks, thighs, or a mix)
    • 2 cups buttermilk
    • 2 cups all-purpose flour
    • 1 tablespoon salt
    • 1 tablespoon black pepper
    • 1 tablespoon paprika
    • 1 teaspoon garlic powder
    • 1 teaspoon onion powder
    • ½ teaspoon cayenne pepper (optional)
    • Oil for frying (peanut or vegetable)

    Step-by-Step Instructions

    Step 1: Brine the Chicken

    1. Place chicken in a bowl. Pour buttermilk over it. Cover and refrigerate for at least 4 hours (overnight is best).

    Step 2: Make the Seasoned Flour

    1. In a large bowl, whisk flour with salt, pepper, paprika, garlic powder, onion powder, and cayenne.

    Step 3: Double Dredge

    1. Remove chicken from buttermilk, letting excess drip off. Dredge in seasoned flour, shaking off excess.
    2. Dip back into buttermilk, then flour again. Press flour onto the chicken to create craggy bits. Let rest on a rack for 10 minutes.

    Step 4: Heat the Oil

    1. Pour 1½ inches of oil into a cast iron skillet or Dutch oven. Heat to 350°F (175°C).

    Step 5: Fry the Chicken

    1. Working in batches, add chicken skin-side down. Don’t crowd the pan.
    2. Fry for 10-12 minutes, flipping occasionally, until deep golden brown and internal temp reaches 165°F (74°C).
    3. Drain on a wire rack (not paper towels—it kills the crunch).

    Step 6: Serve

    1. Eat immediately. Hot. With pickles. Or on a biscuit. Or standing over the sink at 11pm. No rules.

    Summary

    Prep Time: 15 minutes (+ brining) | Cook Time: 25 minutes | Total Time: 40 minutes (plus brining)

    Yield: 4-6 servings

    Difficulty: Medium

    Storage Notes

    How to Store Leftovers:

    Refrigerate in an airtight container for up to 4 days. Reheat on a wire rack in a 375°F oven for 10-15 minutes. The microwave will murder your crunch.

    How to Reheat for Maximum Crunch:

    Air fryer at 375°F for 5-6 minutes. Second best? Skillet with a splash of water and a lid to steam then crisp.

    Pro Tip:

    That resting rack after frying is non-negotiable. Paper towels trap steam = soggy chicken. Rack = air circulation = crunch.

  • Baked Salmon (Foolproof, Flaky, and Done in 12 Minutes)

    Baked Salmon (Foolproof, Flaky, and Done in 12 Minutes)

    Baked salmon gets a bad reputation. Dry. Fishy. Overcooked. Not this one. This method is practically foolproof—a hot oven, a simple marinade, and a watchful eye. The result? Flaky, moist, buttery perfection that tastes like a restaurant but takes almost no effort.

    Sheet pan. Parchment paper. Twelve minutes. Let’s go.

    Ingredients

    Serves 2.

    • 2 salmon fillets (6 oz each), skin on or off
    • 2 tablespoons olive oil
    • 2 cloves garlic, minced
    • 1 tablespoon lemon juice
    • 1 teaspoon lemon zest
    • 1 teaspoon dried dill or 1 tablespoon fresh dill
    • ½ teaspoon salt
    • ¼ teaspoon black pepper
    • Lemon slices, for serving

    Step-by-Step Instructions

    Step 1: Preheat

    1. Preheat oven to 400°F (200°C). Line a baking sheet with parchment paper.

    Step 2: Make the Marinade

    1. In a small bowl, mix olive oil, garlic, lemon juice, lemon zest, dill, salt, and pepper.

    Step 3: Season the Salmon

    1. Place salmon fillets on the baking sheet. Brush marinade generously over the top and sides.

    Step 4: Bake

    1. Bake for 10-14 minutes, depending on thickness. Salmon is done when it flakes easily with a fork and internal temp reaches 135°F-140°F (57°C-60°C) for medium.
    2. Do not overbake. It will continue cooking slightly after coming out.

    Step 5: Serve

    1. Top with fresh lemon slices and extra dill. Serve with rice, roasted veggies, or a crisp salad.

    Summary

    Prep Time: 5 minutes | Cook Time: 12 minutes | Total Time: 17 minutes

    Yield: 2 servings

    Difficulty: Easy

    Storage Notes

    How to Store Leftovers:

    Refrigerate in an airtight container for up to 3 days. Eat cold over salads or gently reheat in a 275°F oven for 5-10 minutes. The microwave will make it dry and sad—avoid.

    Pro Tip:

    For extra insurance against dryness, bake salmon at 375°F instead of 400°F. Add 2-3 minutes to cook time. Gentler heat = juicier fish.

  • Ham and Cheese Pockets (Better Than Lunchables, Takes 20 Minutes)

    Ham and Cheese Pockets (Better Than Lunchables, Takes 20 Minutes)

    Remember Hot Pockets? These are those, but actually good.

    Flaky puff pastry wrapped around ham and melted cheese. Takes 20 minutes. Uses 5 ingredients. Perfect for lunchboxes, game day, or “I forgot to thaw anything” dinner.

    Ingredients

    Makes 4 pockets.

    • 1 sheet frozen puff pastry, thawed
    • 4 oz (115g) ham, diced or thinly sliced
    • 4 oz (115g) cheese (cheddar, Swiss, or provolone), shredded or sliced
    • 1 egg, beaten (for egg wash)
    • Optional: Dijon mustard, honey mustard, or everything bagel seasoning

    Step-by-Step Instructions

    Step 1: Prep

    1. Preheat oven to 400°F (200°C). Line a baking sheet with parchment paper.
    2. Unroll puff pastry on a lightly floured surface. Cut into 4 equal rectangles.

    Step 2: Fill

    1. On one half of each rectangle, layer ham and cheese. Add a smear of mustard if using.
    2. Fold the other half over to form a pocket. Press edges with a fork to seal.

    Step 3: Bake

    1. Brush tops with beaten egg. Sprinkle with seasoning if desired.
    2. Cut a small slit on top to let steam escape.
    3. Bake for 15-18 minutes until golden brown and puffed.

    Step 4: Cool Slightly

    1. Let rest for 2-3 minutes before serving. Cheese is lava-hot.

    Summary

    Prep Time: 5 minutes | Cook Time: 15 minutes | Total Time: 20 minutes

    Yield: 4 pockets

    Difficulty: Super Easy

    Storage Notes

    Store in the fridge for up to 3 days. Reheat in an air fryer at 350°F for 3-4 minutes or oven at 375°F for 5-7 minutes.

    Freeze (uncooked): Assemble pockets, freeze on a tray, then transfer to a bag. Bake from frozen at 400°F for 20-25 minutes.

  • Cheesy Garlic Bread (Golden, Gooey, Gone in 60 Seconds)

    Cheesy Garlic Bread (Golden, Gooey, Gone in 60 Seconds)

    Garlic bread is great. Cheesy garlic bread is a whole different universe.

    This one is crispy on the edges, soft in the middle, and absolutely loaded with melted cheese. You’re 15 minutes away from the best side dish of your life. Pasta night just got an upgrade.

    Ingredients

    Serves 4-6.

    • 1 loaf French or Italian bread (about 12 inches)
    • ½ cup (1 stick) unsalted butter, softened
    • 4 cloves garlic, minced (or 1 tablespoon garlic paste)
    • 1 cup shredded mozzarella cheese
    • ¼ cup grated parmesan cheese
    • 2 tablespoons fresh parsley, chopped (optional)
    • Pinch of salt

    Step-by-Step Instructions

    Step 1: Prep

    1. Preheat oven to 400°F (200°C). Line a baking sheet with parchment.
    2. Slice bread in half horizontally (like a hot dog bun).

    Step 2: Make Garlic Butter

    1. Mix softened butter, minced garlic, and a pinch of salt in a small bowl.
    2. Spread generously on both cut sides of the bread.

    Step 3: Add Cheese

    1. Sprinkle mozzarella and parmesan evenly over both halves.
    2. Place on baking sheet, cheese side up.

    Step 4: Bake

    1. Bake for 8-10 minutes until cheese is bubbly and edges are golden brown.
    2. Broil for 1 extra minute if you want darker, crispier spots.

    Step 5: Finish

    1. Sprinkle with fresh parsley. Slice and serve hot. Don’t blink or it’ll vanish.

    Summary

    Prep Time: 5 minutes | Cook Time: 10 minutes | Total Time: 15 minutes

    Yield: 4-6 servings

    Difficulty: Super Easy

    Storage Notes

    Best eaten fresh, but leftovers keep in the fridge for 2 days. Reheat in an air fryer at 350°F for 3 minutes or oven at 375°F for 5 minutes.

    Not microwave-friendly — it gets rubbery. Trust the oven or air fryer.

  • Fresh Vietnamese Spring Rolls (No Frying, All Vibes)

    Fresh Vietnamese Spring Rolls (No Frying, All Vibes)

    Summer rolls. Fresh rolls. Rice paper rolls. Call them what you want. Just call them delicious.

    These are the opposite of fried spring rolls—light, bright, and packed with shrimp, herbs, and crunchy veggies. The peanut sauce is mandatory and amazing. No cooking required (except the shrimp).

    Ingredients

    Makes 8 rolls.

    • 8 round rice paper wrappers (22cm/8.5 inch)
    • 12 medium shrimp, cooked, peeled, and sliced in half lengthwise
    • 4 oz rice vermicelli noodles
    • 1 cup butter lettuce or red leaf lettuce, torn
    • 1 carrot, julienned or shredded
    • 1 cucumber, julienned or cut into thin strips
    • ½ cup fresh mint leaves
    • ½ cup fresh cilantro leaves
    • Optional: Thai basil, bean sprouts, avocado

    For the Peanut Dipping Sauce:

    • ¼ cup creamy peanut butter
    • 2 tablespoons hoisin sauce
    • 1 tablespoon lime juice
    • 1 teaspoon soy sauce
    • ¼ cup warm water
    • Optional: 1 teaspoon sriracha (for heat)

    Step-by-Step Instructions

    Step 1: Prep Everything

    1. Cook vermicelli noodles according to package directions. Drain, rinse with cold water, and set aside.
    2. Prep all veggies, herbs, and shrimp. Put everything within arm’s reach.

    Step 2: Make the Peanut Sauce

    1. Whisk peanut butter, hoisin, lime juice, soy sauce, and warm water until smooth. Add sriracha if you want heat. Set aside.

    Step 3: Soften One Rice Paper

    1. Fill a wide shallow bowl with warm water. Dip one rice paper for 5-10 seconds—it should still feel firm. It will soften more as you work.
    2. Lay it flat on a damp cutting board or plate.

    Step 4: Fill and Roll

    1. Layer lettuce, noodles, carrots, cucumber, herbs, and 3 shrimp halves (pink side down so they show through).
    2. Fold the bottom edge over the filling. Fold in both sides. Roll tightly away from you.
    3. Place seam-side down on a plate. Repeat with remaining wrappers.

    Step 5: Serve

    1. Serve immediately with peanut sauce. Cover any waiting rolls with a damp paper towel so they don’t dry out.

    Summary

    Prep Time: 20 minutes | Cook Time: 5 minutes (noodles + shrimp) | Total Time: 25 minutes

    Yield: 8 rolls (2-4 servings)

    Difficulty: Easy (rolling takes practice)

    Storage Notes

    Spring rolls are best eaten the same day. Rice paper hardens and gets chewy in the fridge.

    Make ahead hack: Prep all ingredients and store separately. Assemble right before serving. The peanut sauce keeps in the fridge for up to a week.

  • Pork BBQ Skewers (Sweet, Sticky, and Smoky Filipino Street Food)

    Pork BBQ Skewers (Sweet, Sticky, and Smoky Filipino Street Food)

    Filipino pork BBQ skewers are the smell of every great block party, fiesta, and roadside grill. Sweet, savory, slightly smoky, and unapologetically sticky. The secret? Banana ketchup, calamansi, and a whole lot of garlic. The pork gets tender, the edges get charred, and you eat it straight off the stick like a happy caveman.

    No bamboo grilling skills needed. Just marinate, skewer, grill, and baste. Repeat the basting. Trust me.

    Ingredients

    Serves 4-6 (about 10-12 skewers).

    • 2 lbs (900g) pork shoulder, sliced thinly (¼-inch thick, 2-inch wide pieces)
    • 1 cup banana ketchup (or regular ketchup + 1 tbsp brown sugar)
    • ½ cup lemon-lime soda (7-Up or Sprite)
    • ¼ cup soy sauce
    • ¼ cup brown sugar
    • 6 cloves garlic, minced
    • 2 tablespoons calamansi juice (or lemon juice)
    • 1 teaspoon black pepper
    • Bamboo skewers (soaked in water for 30 minutes)

    Step-by-Step Instructions

    Step 1: Make the Marinade

    1. In a bowl, combine banana ketchup, soda, soy sauce, brown sugar, garlic, calamansi juice, and pepper. Whisk well.

    Step 2: Marinate the Pork

    1. Add pork slices and mix thoroughly. Cover and refrigerate for at least 4 hours (overnight is best). Reserve ½ cup marinade for basting.

    Step 3: Skewer the Meat

    1. Thread pork slices onto soaked bamboo skewers (1-2 pieces per skewer, weaving them flat like a ribbon).

    Step 4: Grill the Skewers

    1. Preheat grill to medium-high heat. Grill skewers for 3-4 minutes per side, basting frequently with reserved marinade.
    2. Cook until charred at the edges, slightly sticky, and cooked through (internal temp 145°F/63°C).

    Step 5: Serve

    1. Serve hot with steamed rice and more banana ketchup on the side. Pull the meat off the stick with your teeth. That’s the law.

    Summary

    Prep Time: 15 minutes | Cook Time: 10 minutes | Total Time: 25 minutes (plus marinating)

    Yield: 10-12 skewers

    Difficulty: Easy

    Storage Notes

    How to Store Leftovers:

    Refrigerate cooked skewers for up to 3 days. Reheat on a grill or in a hot pan (microwave makes them sad). Raw marinated pork freezes beautifully for up to 3 months.

    No Grill?

    Use a cast iron pan or broiler. High heat is key. You want char, not steam.

  • Scotch Eggs (Soft Jammy Yolk, Crispy Sausage Shell)

    Scotch Eggs (Soft Jammy Yolk, Crispy Sausage Shell)

    Scotch eggs look like they belong in a fancy pub. They’re actually just soft-boiled eggs wrapped in sausage meat, breaded, and fried. The trick? A jammy, runny yolk that spills out when you cut in. Crunchy outside, savory middle, golden inside. Let’s go.

    Ingredients

    Serves 4.

    • 4 large eggs (room temperature)
    • 1 lb breakfast sausage or ground pork
    • ½ cup all-purpose flour
    • 2 large eggs (for breading)
    • 1 cup panko breadcrumbs
    • ½ teaspoon salt
    • ½ teaspoon black pepper
    • ½ teaspoon paprika (optional)
    • Oil for frying (vegetable or canola)

    Step-by-Step Instructions

    Step 1: Soft Boil the Eggs

    1. Bring a pot of water to a boil. Gently lower in 4 eggs.
    2. Boil for 6 minutes (for jammy yolk) or 7 minutes (firmer).
    3. Transfer immediately to an ice bath. Cool completely.
    4. Peel carefully. Set aside.

    Step 2: Set Up Breading Station

    1. Place flour in one bowl. Beat 2 eggs in a second bowl. Place panko in a third bowl.
    2. Mix salt, pepper, and paprika into the panko.

    Step 3: Wrap in Sausage

    1. Divide sausage into 4 equal portions. Flatten each into a thin patty.
    2. Wrap each patty completely around a soft-boiled egg. Seal seams tightly.

    Step 4: Bread the Scotch Eggs

    1. Roll each sausage-wrapped egg in flour. Shake off excess.
    2. Dip into beaten egg. Let excess drip off.
    3. Roll in panko until fully coated.

    Step 5: Fry Until Golden

    1. Heat 2 inches of oil in a deep pot to 350°F.
    2. Fry scotch eggs in batches for 5-6 minutes, turning occasionally, until deep golden brown.
    3. Drain on a wire rack (not paper towels, to keep crisp).

    Step 6: Serve Warm or Room Temp

    1. Cut in half to reveal the jammy yolk. Sprinkle with flaky salt.
    2. Serve with mustard or hot sauce.

    Summary

    Prep Time: 20 minutes | Cook Time: 15 minutes | Total Time: 35 minutes (plus cooling)

    Yield: 4 scotch eggs

    Difficulty: Medium

    Storage Notes

    Scotch eggs keep in the fridge for up to 3 days. Serve cold or at room temperature—they’re traditional picnic food. To reheat crispy: air fry at 375°F for 5 minutes. Do not microwave (soggy sausage, rubbery yolk).

  • Latkes (Crispy Outside, Tender Inside, Gone in 5 Minutes)

    Latkes (Crispy Outside, Tender Inside, Gone in 5 Minutes)

    Latkes are simple: potatoes, onion, egg, flour, salt. But the difference between sad, soggy disks and transcendent, shatteringly crisp pancakes is one thing—water. Squeeze. Then squeeze again. That’s the secret. Serve with applesauce or sour cream. Watch them vanish.

    Ingredients

    Makes about 12 latkes (serves 4).

    • 2 lbs russet potatoes (about 4 medium)
    • 1 small onion
    • 2 large eggs, beaten
    • ¼ cup all-purpose flour or matzo meal
    • 1 teaspoon salt
    • ½ teaspoon black pepper
    • Oil for frying (vegetable or canola)
    • Applesauce and sour cream, for serving

    Step-by-Step Instructions

    Step 1: Grate the Potatoes and Onion

    1. Peel potatoes. Grate using a box grater or food processor with shredding disc.
    2. Grate onion as well.

    Step 2: SQUEEZE (Crucial Step)

    1. Transfer grated mixture to a clean kitchen towel or cheesecloth.
    2. Twist and squeeze HARD over a bowl until no more liquid comes out.
    3. Discard liquid, but keep the starchy white sediment at the bottom of the bowl—add it back to the potatoes.

    Step 3: Make the Batter

    1. In a large bowl, combine squeezed potato-onion mixture, eggs, flour, salt, and pepper.
    2. Mix well. The batter should be moist but not wet.

    Step 4: Heat the Oil

    1. Pour ¼ inch of oil into a large skillet over medium-high heat.
    2. Oil is ready when a shred of potato sizzles immediately.

    Step 5: Fry the Latkes

    1. Scoop about 2 tablespoons of batter per latke. Drop into oil and flatten slightly.
    2. Fry for 3-4 minutes per side until deep golden brown and crispy.
    3. Drain on a wire rack (not paper towels—paper traps steam).

    Step 6: Serve Immediately

    1. Serve hot with applesauce and sour cream on the side.
    2. Sprinkle with extra salt while still hot.

    Summary

    Prep Time: 15 minutes | Cook Time: 15 minutes | Total Time: 30 minutes

    Yield: About 12 latkes

    Difficulty: Easy

    Storage Notes

    Latkes reheat beautifully in a 400°F oven or air fryer for 5 minutes. Refrigerate for up to 3 days. Do not microwave—soggy disaster. Uncooked batter does not store well (potatoes oxidize). Make fresh.