Blog

  • Classic Chicken Cacciatore: The Ultimate Italian Hunter’s Chicken Recipe

    Classic Chicken Cacciatore: The Ultimate Italian Hunter’s Chicken Recipe

    Why You’ll Love This Chicken Cacciatore Recipe

    Chicken Cacciatore, also known as Italian hunter’s chicken, is beloved for its rustic flavors and simple preparation.

    Slow simmering allows the chicken to absorb the savory tomato and herb sauce, creating a comforting meal that tastes even better the next day.

    Reasons this recipe stands out:

    • Classic Italian comfort food
    • One-pan meal with simple ingredients
    • Perfect for meal prep and leftovers
    • Rich tomato garlic herb sauce
    • Beginner-friendly step-by-step method

    Ingredients for Chicken Cacciatore

    Using fresh herbs and quality tomatoes creates the best flavor for this traditional Chicken Cacciatore recipe.

    Main Ingredients

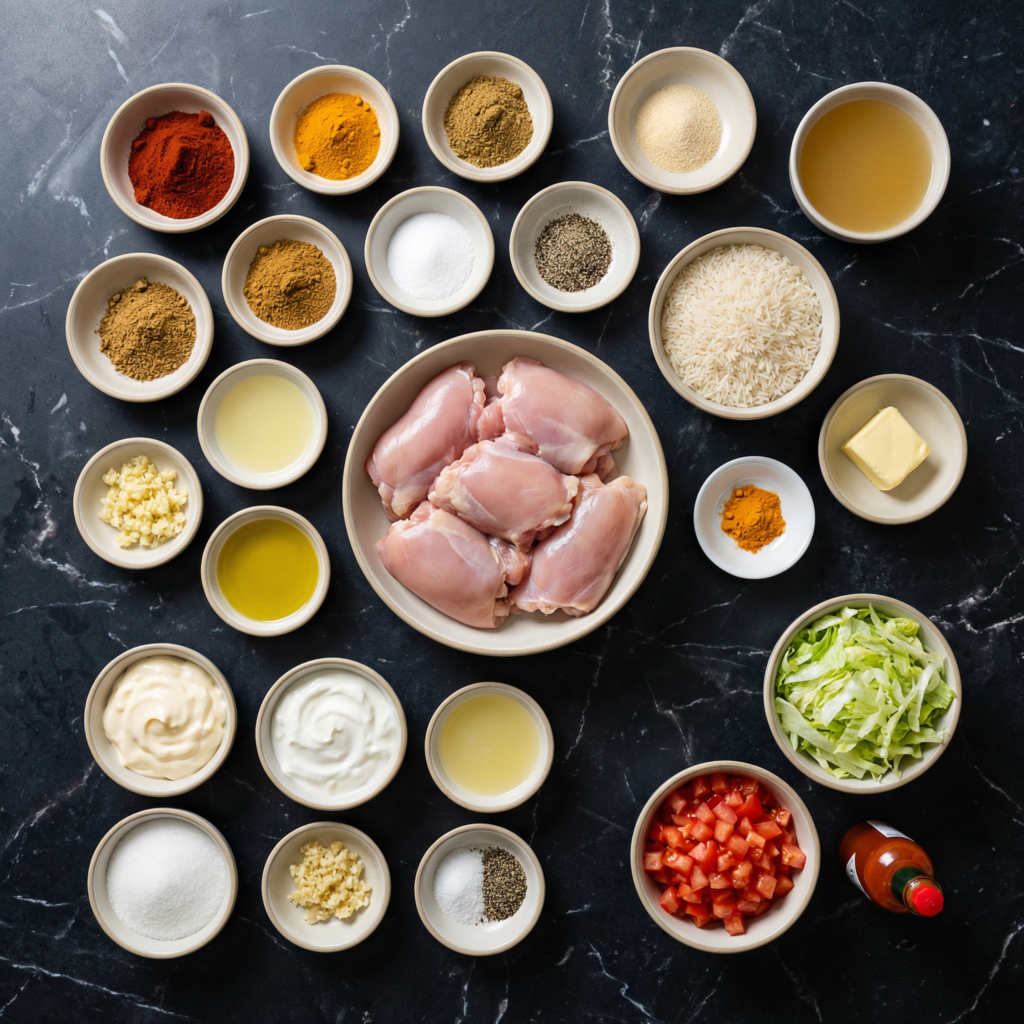
    • 6 bone-in, skin-on chicken thighs (or mixed chicken pieces)
    • Salt and black pepper
    • 2 tablespoons olive oil
    • 1 medium onion, sliced
    • 1 red bell pepper, sliced
    • 1 green bell pepper, sliced
    • 4 cloves garlic, minced

    Sauce

    • 1 can (28 oz) crushed tomatoes
    • ½ cup chicken broth
    • ½ cup dry red wine (optional but recommended)
    • 1 teaspoon dried oregano
    • 1 teaspoon dried basil
    • ½ teaspoon red pepper flakes (optional)
    • 1 bay leaf

    Finishing

    • Fresh parsley or basil for garnish

    How to Make Chicken Cacciatore (Step-by-Step)

    Step 1: Season the Chicken

    Pat the chicken pieces dry with paper towels and season generously with salt and black pepper. Proper seasoning before cooking ensures deeper flavor throughout the dish.


    Step 2: Sear the Chicken

    Heat olive oil in a large skillet or Dutch oven over medium-high heat. Place the chicken skin-side down and sear for 4–5 minutes until golden brown. Flip and cook another 3–4 minutes. Remove the chicken and set aside.

    Searing locks in flavor and helps build the base of the sauce.


    Step 3: Sauté the Vegetables

    In the same pan, add sliced onions and bell peppers. Cook for 5 minutes until softened. Stir in minced garlic and cook for another 30 seconds until fragrant.

    The browned bits left from the chicken add extra flavor to the vegetables.


    Step 4: Deglaze the Pan

    Pour in the red wine and scrape the bottom of the pan to release flavorful browned bits. Let the wine simmer for 2–3 minutes to cook off the alcohol while concentrating flavor.

    If not using wine, substitute additional chicken broth.


    Step 5: Add the Tomato Sauce

    Stir in crushed tomatoes, chicken broth, oregano, basil, red pepper flakes, and bay leaf. Mix well and bring the sauce to a gentle simmer.


    Step 6: Return the Chicken to the Pan

    Place the seared chicken pieces back into the sauce, skin-side up. Reduce heat to low, cover, and simmer for 35–40 minutes, or until the chicken is fully cooked and tender.

    Slow simmering allows the chicken to absorb the rich tomato herb flavors.


    Step 7: Adjust Seasoning

    Taste the sauce and adjust salt and pepper as needed. If the sauce is too thick, add a small splash of broth. For a thicker consistency, simmer uncovered for a few extra minutes.


    Step 8: Garnish and Serve

    Remove the bay leaf and garnish with freshly chopped parsley or basil. Serve hot over pasta, mashed potatoes, polenta, or crusty Italian bread for a complete classic Italian dinner.


    Pro Tips for Perfect Chicken Cacciatore

    • Use bone-in chicken for deeper flavor.
    • Brown the chicken well before simmering.
    • Allow the sauce to simmer gently, not boil.
    • Use quality canned tomatoes for richer taste.
    • Let the dish rest 5 minutes before serving for best flavor.

    Serving Suggestions

    This homemade Chicken Cacciatore pairs beautifully with:

    • Spaghetti or fettuccine
    • Creamy polenta
    • Garlic bread
    • Roasted vegetables
    • Simple green salad

    The rich tomato sauce also works perfectly spooned over rice or rustic country bread.


    Make-Ahead and Storage Tips

    Chicken Cacciatore tastes even better the next day as the flavors continue to develop.

    • Refrigerator: Store in an airtight container for up to 4 days
    • Freezer: Freeze portions for up to 2 months
    • Reheat: Warm gently on the stovetop with a splash of broth to loosen the sauce

    This makes it an excellent meal prep Italian chicken recipe for busy weeks.


    Easy Recipe Variations

    • Mushroom Chicken Cacciatore: Add sliced mushrooms when sautéing vegetables.
    • Slow Cooker Version: Transfer everything to a slow cooker and cook on low for 6–7 hours.
    • Boneless Chicken Option: Use boneless thighs for faster cooking.
    • Spicy Cacciatore: Increase red pepper flakes for extra heat.

    Frequently Asked Questions

    What does “Cacciatore” mean?
    “Cacciatore” means “hunter-style” in Italian, referring to rustic dishes cooked with tomatoes, herbs, onions, and peppers.

    Can I make Chicken Cacciatore without wine?
    Yes, simply substitute chicken broth for the wine while maintaining great flavor.

    What is the best cut of chicken for Chicken Cacciatore?
    Bone-in thighs are preferred because they remain juicy and flavorful during simmering.


    Final Thoughts

    This Classic Chicken Cacciatore recipe brings authentic Italian comfort food straight to your kitchen with minimal effort and maximum flavor.

    Tender braised chicken simmered in a rich tomato herb sauce creates a satisfying meal perfect for weeknight dinners or special gatherings.

    Once you try this easy homemade Chicken Cacciatore, it’s sure to become a staple recipe thanks to its hearty ingredients, simple cooking method, and timeless Italian taste.

  • Classic Beef Wellington Recipe: The Ultimate Step-by-Step Guide for Perfect Results

    Classic Beef Wellington Recipe: The Ultimate Step-by-Step Guide for Perfect Results

    If you’ve ever wanted to make a restaurant-quality Beef Wellington, this step-by-step recipe shows you exactly how to create a perfectly cooked beef tenderloin wrapped in mushroom duxelles, prosciutto, and golden puff pastry.

    This classic Beef Wellington recipe delivers a juicy center, crisp pastry exterior, and rich savory flavor that makes it ideal for holidays, dinner parties, or special occasions.

    This easy Beef Wellington guide simplifies every step so even home cooks can confidently prepare this elegant centerpiece.

    Why This Is the Best Beef Wellington Recipe

    Beef Wellington is famous for its luxurious flavor and impressive presentation. When done correctly, the contrast between flaky pastry and tender beef creates one of the most iconic dishes in classic French and British cuisine.

    Reasons to love this recipe:

    • Step-by-step instructions for beginners
    • Perfect medium-rare beef every time
    • Crispy puff pastry that doesn’t get soggy
    • Ideal for holidays, Christmas, and celebrations
    • Restaurant-style gourmet dinner at home

    Ingredients for Beef Wellington

    Using high-quality ingredients ensures the best flavor and texture.

    Main Ingredients

    • 2–3 lb beef tenderloin (center-cut)
    • Salt and freshly ground black pepper
    • 2 tablespoons olive oil
    • 2 tablespoons Dijon mustard

    Mushroom Duxelles

    • 1 lb mushrooms, finely chopped
    • 2 tablespoons butter
    • 2 cloves garlic, minced
    • 2 shallots, finely chopped
    • Salt and pepper to taste
    • Fresh thyme leaves

    Assembly

    • 8–10 slices prosciutto
    • 1 sheet puff pastry, thawed
    • 1 egg, beaten (egg wash)

    How to Make Beef Wellington (Step-by-Step)

    Step 1: Prepare the Beef Tenderloin

    Pat the beef dry with paper towels and season generously with salt and pepper.

    Heat olive oil in a large skillet over high heat and sear the beef on all sides until browned, about 1–2 minutes per side. This locks in flavor and creates a rich crust.

    Remove from heat and brush the tenderloin with Dijon mustard while still warm. Let cool completely before assembling.

    Step 2: Make the Mushroom Duxelles

    In the same pan, melt butter over medium heat. Add chopped mushrooms, shallots, garlic, thyme, salt, and pepper.

    Cook until the mixture becomes dry and paste-like, about 10–15 minutes. Removing excess moisture is essential to prevent soggy pastry.

    Transfer to a plate and allow the mixture to cool fully.

    Step 3: Wrap with Prosciutto

    Lay plastic wrap on your work surface and arrange prosciutto slices slightly overlapping to form a rectangle large enough to wrap the beef. Spread the cooled mushroom duxelles evenly over the prosciutto.

    Place the seared tenderloin on top and use the plastic wrap to roll everything tightly into a cylinder. Twist the ends to secure and refrigerate for 20–30 minutes to help maintain shape.

    Step 4: Wrap in Puff Pastry

    Roll out the puff pastry on a lightly floured surface until large enough to enclose the beef completely. Remove the beef from the plastic wrap and place it in the center of the pastry.

    Fold the pastry over the beef, sealing the edges tightly. Trim any excess pastry and place the Wellington seam-side down on a baking sheet lined with parchment paper.

    Brush the entire surface with egg wash for a glossy golden finish.

    Step 5: Chill Before Baking

    Refrigerate the assembled Wellington for another 15–20 minutes. Chilling helps the pastry stay crisp and prevents shrinking during baking.

    Step 6: Bake to Perfection

    Preheat the oven to 400°F (200°C). Bake the Beef Wellington for 40–45 minutes, or until the pastry is deep golden brown and an internal thermometer reads:

    • 125°F for rare
    • 135°F for medium-rare
    • 145°F for medium

    Let the Wellington rest for at least 10 minutes before slicing to retain juices.

    Pro Tips for Perfect Beef Wellington

    • Use center-cut beef tenderloin for even cooking.
    • Ensure the mushroom duxelles is dry to keep pastry crisp.
    • Chill between wrapping steps for better structure.
    • Use a meat thermometer for precise doneness.
    • Rest the meat before slicing to prevent juice loss.

    Serving Suggestions

    Beef Wellington pairs beautifully with classic steakhouse sides, including:

    • Garlic mashed potatoes
    • Roasted asparagus or green beans
    • Red wine reduction sauce
    • Creamy mushroom sauce
    • Buttered carrots or roasted root vegetables

    These sides balance the richness of the pastry and tender beef.

    Make-Ahead and Storage Tips

    You can assemble Beef Wellington up to 24 hours ahead and refrigerate until ready to bake. This makes it an excellent option for holiday meal preparation.

    Leftovers can be stored in the refrigerator for up to 3 days and reheated gently in the oven at 325°F to maintain pastry texture.

    Frequently Asked Questions

    What cut of beef is best for Beef Wellington?
    Beef tenderloin is ideal because of its tenderness and uniform shape, ensuring even cooking.

    How do I keep the pastry from getting soggy?
    Cook the mushroom mixture until dry, chill the wrapped beef before baking, and avoid excess moisture.

    Can I make individual Beef Wellingtons?
    Yes, smaller individual portions cook faster and are perfect for elegant dinner parties.

    Final Thoughts

    This classic Beef Wellington recipe is one of the most impressive dishes you can prepare at home.

    With tender beef, flavorful mushroom duxelles, savory prosciutto, and buttery puff pastry, it delivers a gourmet dining experience that rivals fine restaurants.

    By following these step-by-step Beef Wellington instructions, you can confidently create a stunning holiday centerpiece or celebratory meal that will leave guests truly impressed.

  • Beginner’s Guide to Making Sourdough Bread

    Beginner’s Guide to Making Sourdough Bread

    Transform your active sourdough starter into a magnificent, bakery-quality loaf with this comprehensive beginner’s guide. We break down the entire process—autolyse, stretch and folds, bulk fermentation, shaping, and baking—into manageable steps.

    With clear instructions and an emphasis on the “why” behind each technique, you’ll gain the confidence to bake a loaf with a crisp, caramelized crust and a soft, tangy interior dotted with those coveted irregular holes.

    The Science Behind the Perfect Loaf

    Sourdough baking is a dance between time, temperature, and gluten development. The wild yeast and bacteria in your starter work slowly, producing gas and acids during fermentation. This long, cool fermentation is what develops the bread’s complex flavor and strengthens the gluten network to trap those gases, creating an “open crumb.”

    The key techniques—stretch and folds during bulk fermentation—gently organize this gluten network without degassing the dough, building the structure it needs to rise sky-high in the oven (a phase called “oven spring”).

    Finally, scoring the dough just before baking isn’t just decorative; it provides a controlled weak point for the loaf to expand, preventing it from bursting at the seams. Baking in a preheated, covered Dutch oven replicates a professional steam-injected oven, ensuring maximum rise and a crisp, shiny crust.

    Ingredients & Equipment

    For the Bread (One Loaf):

    • 500g (about 4 cups) bread flour (highly recommended for best results)
    • 350g (about 1 ½ cups) lukewarm water (70°F/21°C)
    • 100g (about ½ cup) active, bubbly sourdough starter (at its peak)
    • 10g (2 teaspoons) fine sea salt

    Essential Equipment:

    • Kitchen scale (non-negotiable for accuracy)
    • Large mixing bowl
    • Dutch oven with lid
    • Bench scraper
    • Proofing basket (banneton) or a bowl lined with a floured cloth
    • Razor blade or lame for scoring
    • Parchment paper

    Instructions

    1. Feed Your Starter & Autolyse: 8-12 hours before you plan to mix your dough, feed your starter so it is active and at its peak (bubbly and doubled) when you begin. In a large bowl, combine the bread flour and 350g of water.

    Mix until no dry flour remains. Cover and let this shaggy mixture rest (autolyse) for 1 hour. This allows the flour to fully hydrate and gluten to begin developing, making the dough easier to work with.

    2. Mix in Starter & Salt: Add the 100g of active starter to the autolysed dough. Use wet hands to pinch and squeeze the dough for 2-3 minutes until the starter is fully incorporated and no streaks remain. Let the dough rest, covered, for 30 minutes.

    Then, sprinkle the salt over the dough, add a few drops of water to help it dissolve, and use the same pinching method to fully incorporate the salt. The dough will become smoother.

    3. Bulk Fermentation with Stretch & Folds: This is the main rising period. Cover the bowl and let the dough rise at room temperature (ideally 70-75°F / 21-24°C) for 4-6 hours. During the first 2 hours, perform 4 sets of “stretch and folds,” spaced 30 minutes apart.

    Wet your hand, grab one side of the dough, stretch it upward, and fold it over the center. Repeat on all four sides. This builds strength. After the final fold, let the dough rest undisturbed for the remainder of bulk fermentation. It should look puffy, have risen by about 30-50%, and be dotted with small bubbles.

    4. Shape the Dough & Cold Proof: Gently turn the dough out onto a lightly floured surface. Using a bench scraper, shape it into a tight ball (a “boule”) by folding the edges into the center and rotating. Let it rest seam-side down for 20 minutes (bench rest). For the final shape, flip the dough over (seam-side up), create surface tension by pulling the dough toward you, then place it seam-side up into a well-floured proofing basket (banneton).

    Alternatively, use a bowl lined with a floured tea towel. Cover and place in the refrigerator for 12-16 hours (overnight). This “cold proof” develops flavor and makes the dough easier to score.

    5. Preheat & Score: Place your Dutch oven (with lid on) in your oven and preheat to 450°F (230°C) for at least 45 minutes. Carefully remove the cold dough from the fridge. Place a sheet of parchment paper over the basket, flip it over, and gently lower the dough onto the paper. Using a razor blade (lame) held at a shallow angle, make one confident slash about ½-inch deep across the top of the loaf.

    6. Bake: Carefully remove the hot Dutch oven from your oven. Using the parchment as a sling, lift and lower the dough into the pot. Cover with the lid and bake for 25 minutes. This creates a steamy environment for maximum oven spring.

    Remove the lid, reduce the oven temperature to 425°F (220°C), and bake for another 20-25 minutes, until the crust is a deep, rich brown.

    7. Cool Completely: Transfer the baked loaf to a wire rack. This is critical: let it cool completely for at least 3-4 hours before slicing. The interior is still cooking and setting as it cools. Cutting too soon releases steam and results in a gummy crumb.

    Beginner’s Pro-Tips

    • Starter Readiness is Key: Your starter should pass the float test (a spoonful floats in water) and be at its peak activity, not after it has fallen.
    • Judge by Dough, Not Clock: Bulk fermentation time depends on your kitchen temperature. Look for the 30-50% rise and a bubbly, jiggly dough.
    • Handle Gently: Preserve those gas bubbles during shaping to achieve an open crumb.
    • Don’t Skip the Cold Proof: The overnight rest makes the process manageable and dramatically improves flavor.
    • Preheat Thoroughly: A blazing hot Dutch oven is essential for a good rise.
    • Score with Confidence: A quick, decisive slash works better than a hesitant, slow cut.
    • Resist the Urge to Cut: The cooling period is part of the baking process. Your patience will be rewarded with perfect texture.

    Welcome to the rewarding world of sourdough baking!

  • Beginner’s Sourdough Starter from Scratch

    Beginner’s Sourdough Starter from Scratch

    Embark on your sourdough journey by creating a living, breathing sourdough starter from just flour and water. This detailed 7-day guide demystifies the process of capturing wild yeast and beneficial bacteria from your environment to create a natural leavening agent.

    Watch as your mixture transforms from simple ingredients into a vibrant, bubbly ecosystem capable of lifting bread dough and imparting that signature tangy, complex flavor to all your baked goods.

    The Science of Microbial Cultivation

    Creating a starter is essentially domesticating a local microbiome. When flour and water mix, they create an ideal environment for microorganisms naturally present in the flour and your kitchen. Initially, various bacteria and yeasts compete, often causing early activity that then seems to “die” around days 3-4—this is normal as acid-producing bacteria lower the pH, creating an environment hostile to many early colonizers but perfect for the desired wild yeast and lactobacillus.

    The regular feeding schedule (discarding and refreshing) provides fresh food, selectively encouraging the growth of the strong, bread-leavening microbes while starving out less desirable ones. Over 7-10 days, a stable, predictable community establishes itself, visible through consistent doubling in volume 4-8 hours after feeding and a pleasantly sour, yogurt-like aroma.

    Ingredients & Equipment

    Ingredients (for the entire process):

    • Whole rye flour or whole wheat flour (for initial days, 50g)
    • Unbleached all-purpose or bread flour (for ongoing feedings, 500g+)
    • Filtered or tap water left out overnight (to dissipate chlorine)

    Essential Equipment:

    • 1 clean glass jar or container (quart/liter size)
    • Digital kitchen scale (highly recommended)
    • Rubber band or marker for tracking growth
    • Non-metal spoon or spatula for stirring

    Instructions: The 7-Day Process

    Day 1: The Beginning: In your clean jar, mix 50g of whole rye or whole wheat flour with 50g of lukewarm (75-80°F / 24-27°C) water until no dry flour remains. The consistency should be like thick pancake batter.

    Loosely cover the jar (a lid set ajar or cloth secured with rubber band) and place in a warm spot (70-75°F / 21-24°C is ideal). Mark the starting level with a rubber band.
    Day 2: Early Activity (or Not): You may see a few small bubbles or no change at all. Both are normal. Discard half (about 50g) of the mixture. To the remaining 50g, add 50g of all-purpose flour and 50g of lukewarm water. Stir well, re-cover, mark the new level, and return to its spot.
    Day 3 & 4: The “False Peak” & Slump: Activity often increases dramatically—bubbles, rise, and a pungent, sometimes cheesy or acetone smell. This is the bacterial bloom. It may collapse and smell strongly acidic. Don’t worry! Continue the daily routine: Discard all but 50g of starter. Feed with 50g all-purpose flour and 50g water. Stir, cover, mark.

    Day 5-7: Stability & Rise: After the bacterial activity subsides, true wild yeast establishes itself. The aroma should become more pleasant—fruity, yogurt-like, or tangy.

    You should see consistent bubbles throughout and the starter should reliably double in volume within 4-8 hours of feeding. This is the sign of readiness. Continue daily feedings until this happens consistently for 2-3 days.

    Maintaining Your Active Starter: Once established, you have two options: Room Temperature Maintenance: If baking daily, keep at room temp and feed every 12-24 hours.

    Refrigerator Storage: For weekly baking, feed the starter, let it peak (about 6-8 hours), then store in the fridge. Feed once a week. To use, take from fridge, feed, and let it become active again (may take 2 feedings).

    Testing Starter Readiness (The Float Test)

    To confirm your starter is ready for baking, perform the float test: Drop a small spoonful of your peak (bubbly, just-fed) starter into a glass of room-temperature water. If it floats, it’s sufficiently aerated and active to leaven bread. If it sinks, it needs another feeding or more time to mature.

    Pro-Tips for Starter Success

    • Consistency is Key: Feed at roughly the same time each day.
    • Use a Scale: Weight is far more accurate than volume for flour and water.
    • Watch Temperature: Starter thrives in consistent warmth. A cooler spot slows progress; a warmer spot (up to 85°F/29°C) speeds it up.
    • Don’t Fear the Discard: The “discard” is simply unfed starter. Store it in the fridge and use in discard recipes like pancakes, crackers, or quick breads.
    • Patience Over Perfection: Some starters take 10-14 days. Signs of health (bubbles, pleasant smell) are more important than the calendar.
    • Name Your Starter! It makes the process more personal.
    • Troubleshooting: A gray liquid (hooch) on top means it’s hungry—just stir it in and feed. A pink or orange tint indicates harmful bacteria—discard and start over.

    With care, your homemade sourdough starter can last a lifetime.

  • Artisan French Baguettes

    Artisan French Baguettes

    Master the art of traditional bread baking with these authentic Artisan French Baguettes. This recipe guides you through the precise techniques—from developing gluten through folds to creating steam in your home oven—required to achieve the iconic crisp, deeply golden crust and the soft, hole-filled crumb of a true Parisian bakery baguette.

    With patience and attention to detail, you’ll transform flour, water, yeast, and salt into a loaf that crackles when squeezed and smells like a professional boulangerie.

    The Science of Crust and Crumb

    The perfection of a baguette lies in the meticulous management of fermentation and oven environment. The extended, cool fermentation (often 18-24 hours) allows wild yeast and bacteria to develop complex flavors and acids that strengthen the gluten network.

    This creates the structure needed to trap gas and form the irregular, open crumb. The iconic crust is a product of two factors: surface gelatinization and steam. Scoring the dough just before baking controls where it expands, preventing random tearing. Introducing steam in the oven’s first minutes keeps the dough surface moist and elastic, allowing for maximum “oven spring” (rapid expansion) before the crust sets.

    As the steam evaporates, the starches on the surface gelatinize and then dry into a crisp, glassy, blistered shell—the hallmark of a perfectly baked baguette.

    Ingredients

    For the Dough:

    • 500g (about 4 cups) bread flour (high protein, 12-13%)
    • 360g (about 1 ½ cups) cool water (72°F/22°C)
    • 10g (2 teaspoons) fine sea salt
    • 2g (½ teaspoon) instant yeast (or 3g/1 teaspoon active dry yeast)

    For Baking:

    • Rice flour or semolina, for dusting
    • Ice cubes or water for steam

    Instructions

    1. Autolyse & Initial Mix: In a large bowl, combine the bread flour and water. Mix with a spatula or your hands until no dry flour remains. Cover and let rest (autolyse) for 30 minutes. This allows the flour to fully hydrate and gluten strands to begin forming naturally.

    2. Incorporate Yeast & Salt: Sprinkle the yeast and salt evenly over the dough. Use wet hands to pinch and fold the dough for 2-3 minutes until the yeast and salt are fully incorporated and the dough becomes smoother.

    3. Bulk Fermentation with Folds: Cover the bowl and let the dough rise at cool room temperature (68-72°F/20-22°C) for 12-14 hours, or until nearly doubled and bubbly. During the first 2 hours, perform a series of 4 “stretch and folds,” one every 30 minutes.

    To do this, wet your hand, grab one side of the dough, stretch it up, and fold it over the center. Repeat on all four sides. This builds strength without kneading.

    4. Divide, Pre-shape, & Rest: Gently turn the dough out onto a lightly floured surface. Divide into 3 equal pieces (~290g each). Handle gently to preserve gas bubbles. Pre-shape each piece into a loose rectangle, then cover with a damp cloth and let rest for 30 minutes (bench rest).

    5. Shape the Baguettes: Working with one piece at a time, gently flatten into a rectangle. Fold the top third down to the center and seal with the heel of your hand. Fold the bottom third up to the center and seal.

    Then, starting from the top, roll the dough into a tight cylinder, sealing the seam with your palm. Roll gently to elongate to about 14-16 inches. Place seam-side up into a well-floured couche (linen cloth) or a baguette pan, creating ridges between loaves to support their shape.

    6. Final Proof: Cover the shaped baguettes and let proof at room temperature for 60-90 minutes, until puffy and increased in size by about 50%. The dough should spring back slowly when gently pressed.

    7. Score & Bake with Steam: Preheat your oven with a baking stone or steel to 475°F (245°C) for at least 45 minutes. Place a metal pan on the bottom rack. Carefully transfer the proofed baguettes onto a piece of parchment on a peel or inverted baking sheet.

    Using a razor blade (lame) held at a 30-degree angle, make 4-5 swift, confident diagonal slashes along each loaf. Slide the parchment with the baguettes onto the hot stone. Immediately throw a handful of ice cubes into the preheated pan below to create steam.

    Bake for 20-25 minutes until deeply golden brown and crisp. For extra crispness, turn off the oven and leave the door ajar for 5 minutes at the end.

    8. Cool Completely: Transfer the baked baguettes to a wire rack. Let cool completely for at least 1 hour before slicing. The interior is still setting; cutting too soon releases steam and makes the crumb gummy.

    Pro-Tips for Bakery-Quality Baguettes

    • Use a Scale: Precision with hydration (72%) is critical for texture. Volume measurements are unreliable.
    • Bread Flour is Essential: Its high protein content develops the strong gluten network needed for an open crumb.
    • Handle Gently: Preserve those precious gas bubbles during shaping to achieve the irregular holes.
    • Create a Steamy Oven: Steam is non-negotiable for crust development. Ice cubes, a spray bottle, or pouring boiling water into the preheated pan all work.
    • Sharp Scoring Tool: A razor blade (lame) cuts cleanly without dragging the dough. Dull knives tear the surface.
    • Listen for the Crackle: A perfectly baked baguette will audibly crackle as it cools—this is the crust contracting and is a sign of success.
    • Storage: Baguettes are best the day they are baked. To recrisp, spritz with water and bake at 400°F (200°C) for 5-8 minutes.

    This Artisan French Baguette recipe rewards patience with extraordinary results.

  • Pumpkin Spice Tiramisu

    Pumpkin Spice Tiramisu

    Embrace the flavors of fall with this decadent, no-bake Pumpkin Spice Tiramisu. This elegant dessert layers delicate espresso-dipped ladyfinger cookies with an impossibly creamy, spiced pumpkin mascarpone filling.

    The classic tiramisu flavor profile gets a cozy update with pumpkin puree, warm spices, and a hint of maple, creating a perfect balance of bitter coffee, sweet cream, and aromatic autumn spice. Best made ahead, it’s an impressive, fuss-free showstopper for any holiday gathering.

    The Science of Stability & Flavor Layering

    This dessert’s success hinges on the structural integrity of the mascarpone cream and the controlled moisture absorption of the ladyfingers. The cream is a careful emulsion: whipped egg yolks and sugar cooked into a zabaglione (a warm, foamy custard) provide a stable protein network that sets as it cools.

    The mascarpone cheese, a delicate triple-cream, is gently folded in to maintain its fat structure without breaking and becoming grainy. The addition of pumpkin puree introduces moisture and fiber; this is balanced by the thickening power of the egg custard and the whipped cream folded in at the end for lightness.

    The ladyfingers must be dipped, not soaked, in the espresso mixture—a quick in-and-out to prevent them from disintegrating and making the final dessert soggy. This creates distinct, textured layers that hold their shape when served.

    Ingredients

    For the Pumpkin Mascarpone Cream:

    • 6 large egg yolks
    • ¾ cup (150g) granulated sugar
    • ⅔ cup (160ml) heavy cream, cold
    • 1 cup (225g) pumpkin puree (not pie filling)
    • 1 teaspoon vanilla extract
    • 1 ½ teaspoons pumpkin pie spice
    • ¼ teaspoon salt
    • 16 oz (450g) mascarpone cheese, cold

    For the Espresso Dip & Assembly:

    • 1 ½ cups (360ml) hot, strongly brewed espresso or very strong coffee
    • 2 tablespoons maple syrup or granulated sugar (optional)
    • 2 tablespoons coffee liqueur like Kahlúa (optional)
    • About 24-30 Savoiardi (Italian ladyfinger cookies)
    • Cocoa powder and ground cinnamon, for dusting

    Instructions

    1. Prepare the Pumpkin Zabaglione Base: Create a double boiler: simmer 1-2 inches of water in a medium saucepan. In a heatproof bowl that fits snugly over the saucepan (without touching the water), whisk the egg yolks and sugar constantly for 8-10 minutes until the mixture is pale yellow, thickened, hot to the touch, and has doubled in volume.

    It should form a ribbon when the whisk is lifted. Immediately remove from heat and transfer to a clean bowl to stop the cooking. Let cool for 15 minutes.

    2. Whip the Cream & Finish the Filling: In a separate chilled bowl, whip the cold heavy cream to stiff peaks. Set aside. To the cooled egg yolk mixture (zabaglione), whisk in the pumpkin puree, vanilla extract, pumpkin pie spice, and salt until completely smooth. In another large bowl, gently whisk the cold mascarpone just to loosen it (do not over-whip).

    Gently fold the pumpkin-egg mixture into the mascarpone until just combined and smooth. Finally, gently fold in the whipped cream in two additions until no white streaks remain. Cover and refrigerate while preparing the espresso dip.

    3. Prepare the Espresso Dip: In a shallow bowl or pie plate, combine the hot espresso, maple syrup (or sugar), and coffee liqueur (if using). Stir until any sugar dissolves. Let cool to room temperature.

    4. Assemble the Tiramisu: Quickly dip each ladyfinger into the cooled espresso mixture for 1-2 seconds per side (just to moisten, not saturate). Arrange a single layer of dipped ladyfingers in the bottom of a 9×9 inch dish or trifle bowl, breaking them to fit as needed.

    Spread half of the pumpkin mascarpone cream evenly over the ladyfingers. Repeat with a second layer of dipped ladyfingers, followed by the remaining cream. Smooth the top.

    5. Chill & Set: Cover the dish tightly with plastic wrap. Refrigerate for at least 6 hours, or ideally overnight (12-24 hours). This crucial chilling time allows the flavors to meld, the cream to firm up, and the ladyfingers to soften perfectly into a cake-like texture.

    6. Serve: Just before serving, dust the top generously with a mixture of cocoa powder and a light sprinkle of cinnamon. Use a sharp knife or spoon to serve. Store covered in the refrigerator for up to 3 days.

    Pro-Tips for the Perfect Layered Dessert

    • Use Cold Ingredients: Cold mascarpone and heavy cream whip and fold better, preventing a runny filling.
    • Don’t Over-Whip Mascarpone: Whisk it just to loosen; over-whipping breaks the fat and makes it grainy.
    • The Zabaglione is Key: Cook the egg yolks until truly thickened and hot; this pasteurizes them and creates the stable base.
    • Dip, Don’t Soak: The ladyfingers are very porous. Submerging them for more than a few seconds will make the dessert waterlogged.
    • Chill Thoroughly: This is a non-negotiable step for clean layers and perfect texture.
    • Dust Right Before Serving: The moisture from the cream will cause the cocoa powder to “melt” if dusted too early.
    • Quality Matters: Use real pumpkin puree, not pie filling, and good quality mascarpone for the best flavor and texture.

    This Pumpkin Spice Tiramisu is an unforgettable seasonal treat.

  • Lavender Lemon Bars with Shortbread Crust

    Lavender Lemon Bars with Shortbread Crust

    Transform traditional lemon bars into an elegant, fragrant dessert with the subtle floral notes of culinary lavender. These bars feature a rich, melt-in-your-mouth shortbread crust that perfectly complements the bright, tangy lavender-infused lemon curd topping.

    The lavender isn’t overpowering—it creates a sophisticated depth that enhances the citrus flavor. Topped with a snowy dusting of powdered sugar, these bars are as beautiful as they are delicious, making them perfect for spring gatherings, bridal showers, or any occasion that calls for something special.

    The Science of Infusion & Texture Contrast

    The magic of these bars lies in achieving two distinct, perfect textures and a harmonious flavor infusion. First, the shortbread crust relies on the precise ratio of butter to flour and a thorough baking time (called “blind baking”) to create a sturdy, crisp base that won’t become soggy under the wet filling.

    The key to the lavender-lemon curd is infusing the sugar with dried lavender buds before mixing. Heating the sugar with lavender releases its essential oils, imparting a subtle floral aroma without adding bitterness or texture.

    The curd itself sets through a combination of egg proteins coagulating and starch thickening from the flour, resulting in a creamy, sliceable filling that’s firm yet lusciously smooth. The final dusting of powdered sugar not only adds sweetness but also visually accentuates the beautiful yellow layer beneath.

    Ingredients

    For the Shortbread Crust:

    • 1 cup (2 sticks / 226g) unsalted butter, softened
    • ½ cup (100g) granulated sugar
    • 2 cups (250g) all-purpose flour
    • ¼ teaspoon salt

    For the Lavender-Lemon Curd Filling:

    • 1 ½ cups (300g) granulated sugar
    • 2 tablespoons culinary dried lavender buds
    • 4 large eggs, room temperature
    • ½ cup (65g) all-purpose flour
    • ¾ cup (180ml) fresh lemon juice (about 4-5 lemons)
    • Zest of 2 lemons
    • Powdered sugar, for dusting

    Instructions

    1. Infuse the Sugar & Prepare Crust: Preheat oven to 350°F (175°C). Line a 9×13 inch baking pan with parchment paper, leaving overhang on two sides for easy removal. In a food processor or small bowl, pulse or rub together the 1 ½ cups sugar and dried lavender buds for 1 minute until fragrant.

    Set aside to let the flavors meld. For the crust, in a medium bowl, cream the softened butter and ½ cup sugar until smooth. Gradually mix in the flour and salt until a soft dough forms. Press the dough evenly and firmly into the bottom of the prepared pan.

    2. Pre-Bake (Blind Bake) the Crust: Bake the crust for 18-20 minutes, or until the edges are just beginning to turn a very light golden brown. Remove from oven and let cool slightly while you prepare the filling. Leave the oven on.

    3. Prepare the Lavender-Lemon Filling: In a large bowl, whisk the lavender-infused sugar with the eggs until smooth and slightly pale. Whisk in the flour until no lumps remain. Finally, whisk in the fresh lemon juice and lemon zest until the mixture is smooth and uniform.

    4. Bake the Filled Bars: Pour the lavender-lemon filling over the warm, pre-baked crust. Return the pan to the oven and bake for 22-26 minutes, or until the filling is set. The center should no longer jiggle when the pan is gently shaken, and the top should have a light, matte finish.

    5. Cool Completely & Chill: Place the pan on a wire rack and allow the bars to cool to room temperature in the pan. Once cooled, cover and refrigerate for at least 3-4 hours, or ideally overnight. This chilling step is crucial for the filling to set firmly, ensuring clean slices.

    6. Slice & Serve: Using the parchment paper overhang, lift the entire slab of bars out of the pan and place it on a cutting board. Use a sharp knife to trim off any uneven edges, then slice into squares or rectangles. Dust generously with powdered sugar just before serving.

    Pro-Tips for Perfect Floral-Citrus Bars

    • Use Culinary-Grade Lavender: This is essential—ornamental or sprayed lavender can be bitter or unsafe. Culinary lavender has a mild, sweet flavor.
    • Press the Crust Firmly & Evenly: Use the bottom of a measuring cup to compact the dough. This prevents a crumbly base.
    • Don’t Over-Bake the Crust: It should be pale gold, not brown, as it will bake further with the filling.
    • Strain for Smoothness (Optional): For an ultra-smooth curd with no lavender bits, strain the infused sugar through a fine-mesh sieve before adding to the eggs.
    • Chill Thoroughly: Patience pays off. Proper chilling yields bars that cut cleanly without oozing.
    • Dust Right Before Serving: The powdered sugar will dissolve into the moist lemon layer if applied too early. For a beautiful presentation, wipe your knife clean between cuts.

    These Lavender Lemon Bars offer a delightful and elegant twist on a beloved classic.

  • Salsa Fresca (Pico de Gallo): Fresh Tomato & Onion Salsa Recipe

    Salsa Fresca (Pico de Gallo): Fresh Tomato & Onion Salsa Recipe

    Pico de Gallo, or Salsa Fresca, is the essence of fresh Mexican flavor. Unlike blended salsas, this condiment celebrates texture: a bright, chunky mixture of ripe tomatoes, crisp white onion, spicy jalapeño, and fragrant cilantro, all brought to life with a generous squeeze of lime juice.

    It’s incredibly simple to make but requires a few key techniques to balance flavors and achieve the perfect consistency. This versatile salsa is more than a dip; it’s a fresh topping for tacos, grilled fish, scrambled eggs, and a vibrant side for any meal.

    The Art of Freshness & Balance

    The success of Pico de Gallo hinges on the quality of ingredients and textural contrast. Using ripe, in-season tomatoes is non-negotiable for sweet, deep flavor. The key to taming the raw bite of onion is a brief soak in cold water or a rinse under running water, which washes away the harsh sulfur compounds.

    For consistent heat, remove the jalapeño seeds and ribs for mild salsa, or include them for more spice. The final, critical step is salting and resting. Salt draws moisture from the tomatoes and onions, creating a light, flavorful brine that coats every piece. Allowing the salsa to sit for 15-30 minutes before serving lets the flavors marry and mellow, transforming it from chopped ingredients into a cohesive, vibrant condiment.

    Ingredients

    For the Salsa (makes about 3 cups):

    • 1 ½ lbs (about 4-5 medium) ripe Roma or vine-ripened tomatoes
    • ½ medium white onion
    • 1-2 jalapeño peppers
    • ½ cup packed fresh cilantro leaves and tender stems, chopped
    • 2-3 tablespoons fresh lime juice (from 1-2 limes)
    • ¾ teaspoon fine sea salt, plus more to taste
    • Optional: 1 small clove garlic, minced

    For Serving: Tortilla chips, on tacos, with grilled meats or fish.

    Instructions

    1. The Prepared & Rinsed Diced Onion: Finely dice the white onion. Place the diced onion in a fine-mesh strainer and rinse thoroughly under cold running water for about 30 seconds. Shake off excess water and pat lightly with a paper towel. This step removes the pungent, sulfuric bite, leaving a crisp, clean onion flavor.

    2. The Diced & Seeded Ingredients: Core the tomatoes and cut them into a uniform ¼-inch dice. If desired, scoop out and discard some of the watery seed pulp for a less watery salsa. Finely dice the jalapeño(s), removing seeds and ribs for less heat. Roughly chop the cilantro.

    3. The Combined, Unseasoned Mixture: In a medium glass or ceramic bowl (not metal, which can react with the acid), gently combine the diced tomatoes, rinsed diced onion, diced jalapeño, and chopped cilantro. The mixture will look bright and colorful but dry and distinct.

    4. The Seasoned & Juicy Salsa: Drizzle the fresh lime juice over the vegetable mixture. Sprinkle the salt evenly over the top. Using a large spoon, gently fold everything together until just combined.

    5. The Rested & Marinated Final Salsa: Let the salsa sit at room temperature for at least 15 minutes, or up to 1 hour, stirring once or twice. During this time, the salt will draw out the tomatoes’ juices, creating a light, flavorful liquid in the bottom of the bowl. The flavors will meld and mellow. Taste and adjust with more salt or lime juice as needed. Serve immediately, or refrigerate for up to 3 days (flavor is best within 24 hours).

    Pro-Tips for Perfect Pico

    • Choose the Right Tomatoes: Firm Roma (plum) tomatoes are ideal as they have less watery pulp than beefsteaks.
    • Rinse the Onion: Don’t skip this step—it’s the secret to eliminating harsh onion breath and sharpness.
    • Control the Heat: For mild salsa, use only one jalapeño and remove all seeds and white ribs. For more heat, include the seeds or use serrano peppers.
    • Chop Consistently: Aim for a uniform dice so every scoop has a bit of everything.
    • Use Fresh Lime Juice: Bottled juice lacks the bright, floral notes of fresh lime.
    • Salt Liberally: Salt is what makes the flavors pop and draws out the juices. Don’t be shy.
    • Let it Rest: The resting period is when the magic happens, transforming chopped veggies into salsa.
    • Drain if Needed: If your tomatoes are very juicy, you can drain some of the excess liquid after resting before serving.
    • Make it Ahead: You can chop all ingredients (except salt and lime) a few hours ahead and store them separately in the fridge. Combine, season, and rest 30 minutes before serving.
  • Crispy Pork Schnitzel Recipe: Easy German-Style Classic in 30 Minutes

    Crispy Pork Schnitzel Recipe: Easy German-Style Classic in 30 Minutes

    If you’re craving a crispy pork schnitzel that’s golden on the outside, juicy on the inside, and unbelievably easy to make at home, you’re in the right place.

    This authentic German pork schnitzel recipe uses simple pantry ingredients and delivers restaurant-quality results in under 30 minutes.

    Perfect for busy weeknights or a comforting weekend meal, this easy pork schnitzel pairs beautifully with potatoes, salad, or spaetzle—and it’s a guaranteed crowd-pleaser.


    What Is Pork Schnitzel?

    Pork schnitzel is a breaded pork cutlet, pounded thin, coated in breadcrumbs, and pan-fried until crispy.

    Originating from Germany and Austria, this dish is known for its light, crunchy crust and tender meat.

    Ingredients for Crispy Pork Schnitzel

    • 4 boneless pork chops (center-cut or pork loin)
    • 1 cup all-purpose flour
    • 2 large eggs
    • 1½ cups breadcrumbs (panko or traditional)
    • 1 teaspoon salt
    • ½ teaspoon black pepper
    • ½ teaspoon paprika (optional)
    • Vegetable oil or canola oil, for frying
    • Lemon wedges, for serving

    Optional additions for extra flavor:

    • Garlic powder
    • Onion powder
    • Fresh parsley, chopped

    How to Make Pork Schnitzel

    Step 1: Pound the Pork Cutlets

    Place the pork chops between two pieces of plastic wrap or parchment paper. Using a meat mallet, pound them to about ¼-inch thickness. This ensures even cooking and ultra-tender schnitzel.


    Step 2: Set Up the Breading Station

    Prepare three shallow bowls:

    1. Flour seasoned with salt, pepper, and paprika
    2. Beaten eggs
    3. Breadcrumbs

    Step 3: Bread the Pork Schnitzel

    Dredge each pork cutlet in flour, shaking off excess. Dip into the eggs, then coat thoroughly in breadcrumbs. Press gently so the crumbs stick.

    For extra crunch, use panko breadcrumbs.


    Step 4: Heat the Oil

    Heat about ½ inch of oil in a large skillet over medium-high heat. The oil is ready when breadcrumbs sizzle immediately upon contact.


    Step 5: Fry Until Golden and Crispy

    Carefully place the pork schnitzel in the hot oil. Fry for 2–3 minutes per side, or until golden brown and cooked through.

    Do not overcrowd the pan.

    Step 6: Serve Immediately

    Serve hot with lemon wedges. The squeeze of fresh lemon enhances the crispy coating and balances the richness.


    Best Side Dishes for Pork Schnitzel

    • German potato salad
    • Mashed potatoes or fries
    • Cucumber salad
    • Spaetzle
    • Simple green salad

    Tips for the Best Pork Schnitzel

    • Don’t press the schnitzel while frying—it releases juices and ruins crispiness
    • Use neutral oil with a high smoke point
    • Serve immediately for maximum crunch
    • Avoid thick pork chops—they won’t cook evenly

    Frequently Asked Questions

    Can I bake pork schnitzel instead of frying?

    Yes! Bake at 425°F (220°C) for 18–22 minutes, flipping halfway.

    It won’t be as crispy as pan-fried but still delicious.

    Can I make pork schnitzel ahead of time?

    Schnitzel is best fresh, but you can bread the pork up to 8 hours ahead and refrigerate until ready to fry.


    Final Thoughts

    This crispy pork schnitzel recipe is everything you want in a classic comfort dish—fast, flavorful, and irresistibly crunchy.

    Whether you’re new to German cooking or just want a foolproof easy pork schnitzel recipe, this one delivers every time.

  • Marry Me Shrimp Pasta: Creamy Tuscan Garlic Shrimp You’ll Fall in Love With

    Marry Me Shrimp Pasta: Creamy Tuscan Garlic Shrimp You’ll Fall in Love With

    If you’re searching for the best Marry Me Shrimp Pasta recipe, you’re in the right place.

    This creamy shrimp pasta is rich, garlicky, and loaded with sun-dried tomatoes and parmesan—so good it might just inspire a proposal.

    Inspired by the viral Marry Me Chicken Pasta, this shrimp version is faster, lighter, and perfect for weeknight dinners, date nights, or special occasions.

    Why You’ll Love This Marry Me Shrimp Pasta

    • Ready in 30 minutes
    • Uses simple pantry ingredients
    • Restaurant-quality creamy garlic shrimp pasta
    • Perfect for date night, family dinners, or entertaining
    • High-protein and customizable

    Ingredients for Marry Me Shrimp Pasta

    For the Pasta

    • 12 oz pasta (fettuccine, linguine, or penne)
    • Salt (for boiling water)

    For the Shrimp

    • 1 lb large shrimp, peeled and deveined
    • 1 tsp paprika
    • ½ tsp Italian seasoning
    • Salt and black pepper, to taste
    • 1 tbsp olive oil

    For the Creamy Sauce

    • 2 tbsp butter
    • 4 cloves garlic, minced
    • ½ cup sun-dried tomatoes (in oil), chopped
    • 1 cup heavy cream
    • ½ cup chicken broth
    • ¾ cup freshly grated parmesan cheese
    • 1 tsp red pepper flakes (optional)
    • 1 tsp Italian seasoning

    Garnish

    • Fresh basil or parsley
    • Extra parmesan cheese

    How to Make Marry Me Shrimp Pasta (Step-by-Step)

    Step 1: Cook the Pasta

    Bring a large pot of salted water to a boil.

    Cook pasta according to package instructions until al dente.

    Reserve ½ cup of pasta water, then drain and set aside.

    Step 2: Season and Sear the Shrimp

    Pat shrimp dry and season with paprika, Italian seasoning, salt, and pepper.

    Heat olive oil in a large skillet over medium-high heat.

    Sear shrimp for 1–2 minutes per side until pink and opaque.

    Remove and set aside.

    Step 3: Build the Flavor Base

    In the same skillet, melt butter over medium heat.

    Add minced garlic and sauté for 30 seconds until fragrant.

    Stir in chopped sun-dried tomatoes.

    Step 4: Make the Creamy Marry Me Sauce

    Pour in chicken broth and heavy cream. Stir well and bring to a gentle simmer.

    Add parmesan cheese, Italian seasoning, and red pepper flakes. Stir until the sauce thickens.

    Step 5: Combine Everything

    Add cooked pasta and shrimp back into the skillet.

    Toss to coat evenly.

    If the sauce is too thick, add reserved pasta water a little at a time until silky smooth.

    Step 6: Garnish and Serve

    Remove from heat. Garnish with fresh basil or parsley and extra parmesan.

    Serve immediately while hot and creamy.

    Pro Tips for the Best Marry Me Shrimp Pasta

    • Use freshly grated parmesan (pre-shredded won’t melt as smoothly)
    • Don’t overcook shrimp—they turn rubbery fast
    • Add spinach or mushrooms for extra veggies
    • Swap cream for half-and-half for a lighter version

    What to Serve with Marry Me Shrimp Pasta

    • Garlic bread or focaccia
    • Caesar salad or arugula salad
    • Roasted asparagus or broccoli

    FAQs About Marry Me Shrimp Pasta

    Can I use frozen shrimp?
    Yes—just thaw completely and pat dry before cooking.

    Can I make this ahead of time?
    It’s best fresh, but leftovers can be stored in the fridge for up to 2 days.

    Is Marry Me Shrimp Pasta spicy?
    Only mildly. Skip red pepper flakes if you prefer no heat.

    Final Thoughts

    This Marry Me Shrimp Pasta recipe is creamy, indulgent, and irresistibly flavorful.

    Whether you’re cooking for someone special or treating yourself, this dish delivers serious “wow” factor with minimal effort.

    If you loved this recipe, save it, share it, and don’t be surprised if someone asks for your hand after one bite