Blog

  • Sweet, Spicy, and Smoky: How to Make Korean BBQ Chicken Skewers at Home

    Sweet, Spicy, and Smoky: How to Make Korean BBQ Chicken Skewers at Home

    Korean BBQ has taken the culinary world by storm, and for good reason. The bold, sweet, and savory flavors of gochujang, garlic, and soy come together to create an unforgettable bite every time.

    These Korean BBQ Chicken Skewers capture all of that flavor in an easy-to-make, finger-friendly dish that’s perfect for weeknight dinners, summer cookouts, or casual entertaining. Juicy, marinated chicken is threaded onto skewers, grilled to perfection, and finished with a drizzle of sauce and a sprinkle of sesame seeds—pure crowd-pleasing magic.

    This step-by-step guide will take you from preparing the marinade to serving tender, flavorful chicken skewers, plus tips for grilling, oven-baking, or air-frying for maximum convenience.


    Why You’ll Love These Korean BBQ Chicken Skewers

    • Sweet, savory, and spicy in every bite
    • Juicy, tender chicken with a flavorful glaze
    • Quick to prepare and perfect for entertaining
    • Works on grill, oven, or air fryer
    • Pairs beautifully with rice, veggies, or lettuce wraps

    The key to authentic Korean BBQ flavor lies in the marinade—a careful balance of heat, umami, and sweetness that caramelizes beautifully when cooked.


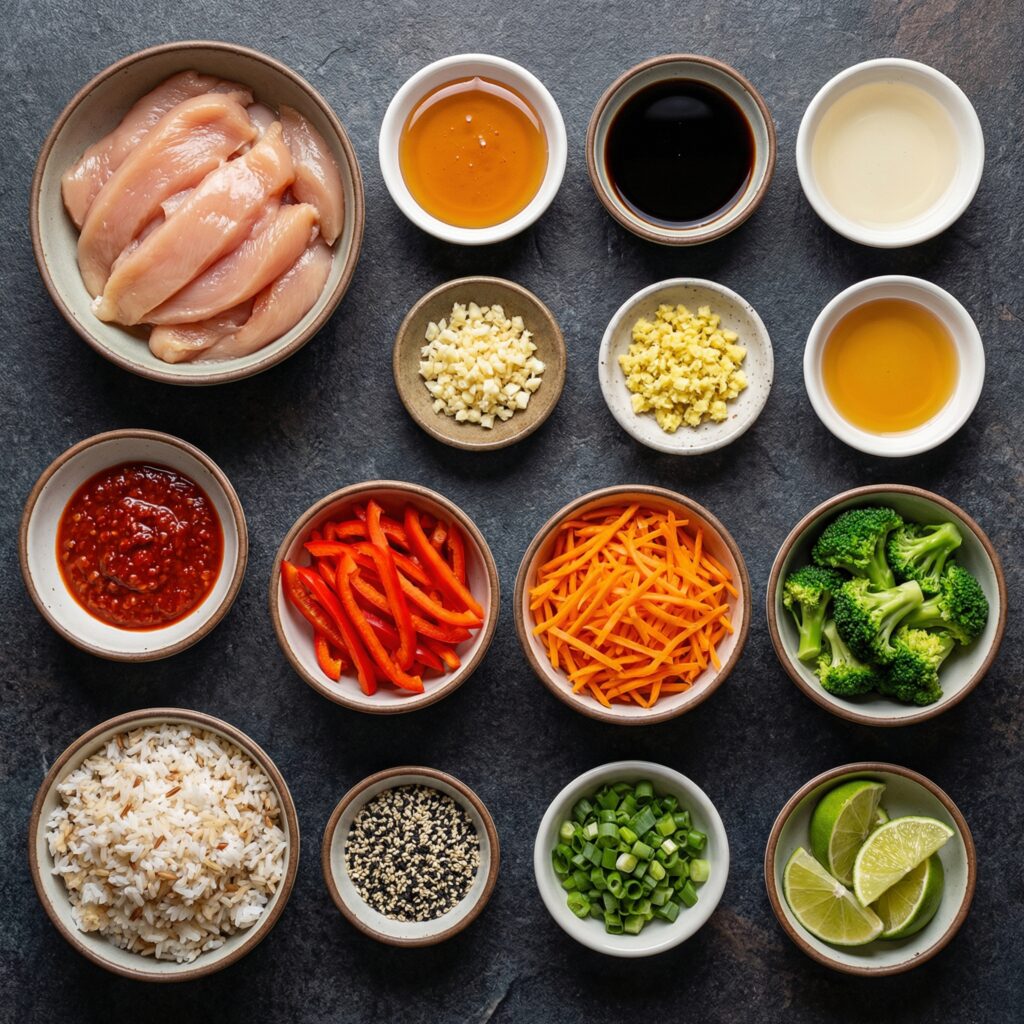
    Ingredients You’ll Need

    For the Chicken:

    • 1½ pounds boneless, skinless chicken thighs or breasts, cut into 1½-inch cubes
    • 1 tablespoon vegetable oil

    For the Marinade:

    • 3 tablespoons gochujang (Korean chili paste)
    • 3 tablespoons soy sauce
    • 2 tablespoons honey or brown sugar
    • 2 tablespoons rice vinegar or mirin
    • 2 tablespoons sesame oil
    • 3 garlic cloves, minced
    • 1 teaspoon freshly grated ginger
    • Optional: 1 teaspoon Korean chili flakes for extra heat

    For Serving:

    • Cooked rice or lettuce leaves
    • Sliced green onions
    • Sesame seeds
    • Pickled vegetables or kimchi (optional)

    Skewers:

    • Wooden skewers (soaked in water for 15–20 minutes) or metal skewers

    Step 1: Prepare the Marinade

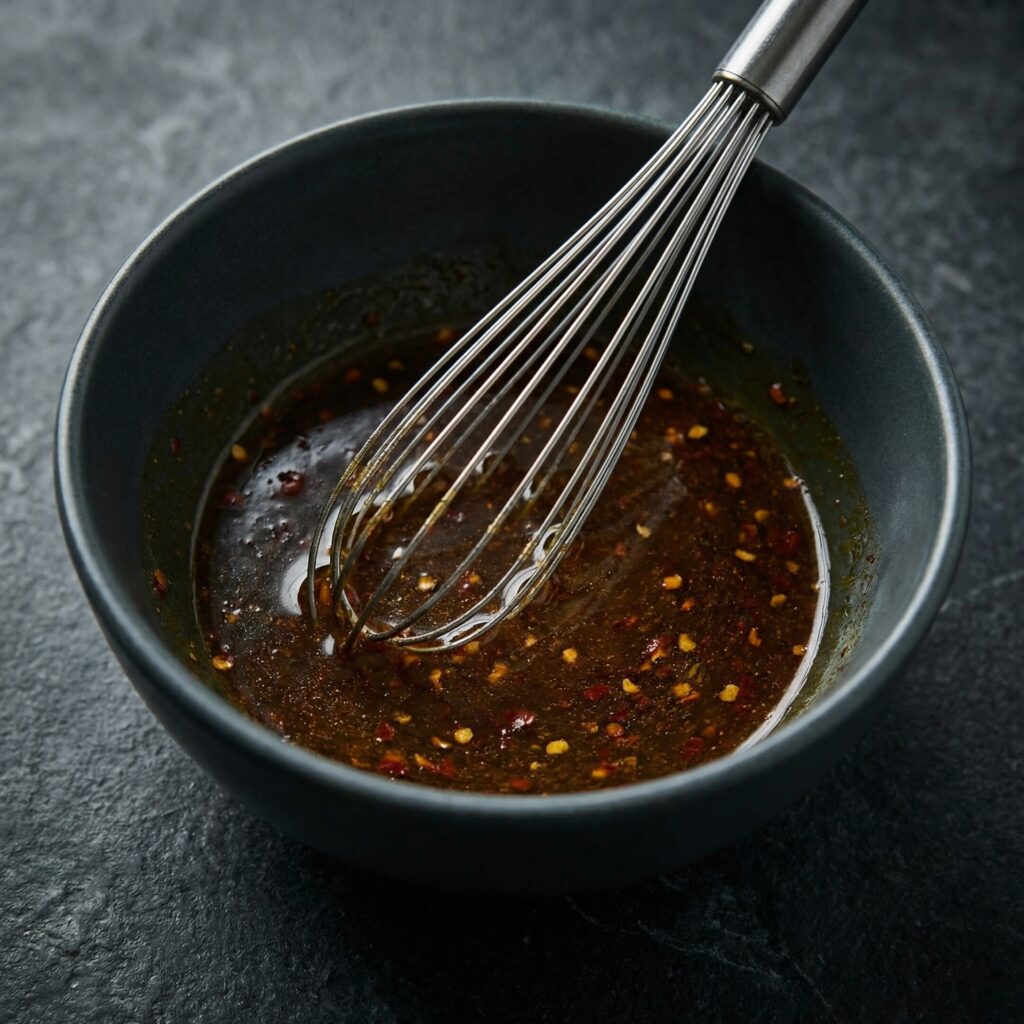
    In a medium bowl, whisk together gochujang, soy sauce, honey, rice vinegar, sesame oil, garlic, ginger, and chili flakes if using.

    Taste the marinade—it should be a perfect balance of sweet, savory, and mildly spicy. Adjust honey or chili according to your preference.


    Step 2: Marinate the Chicken

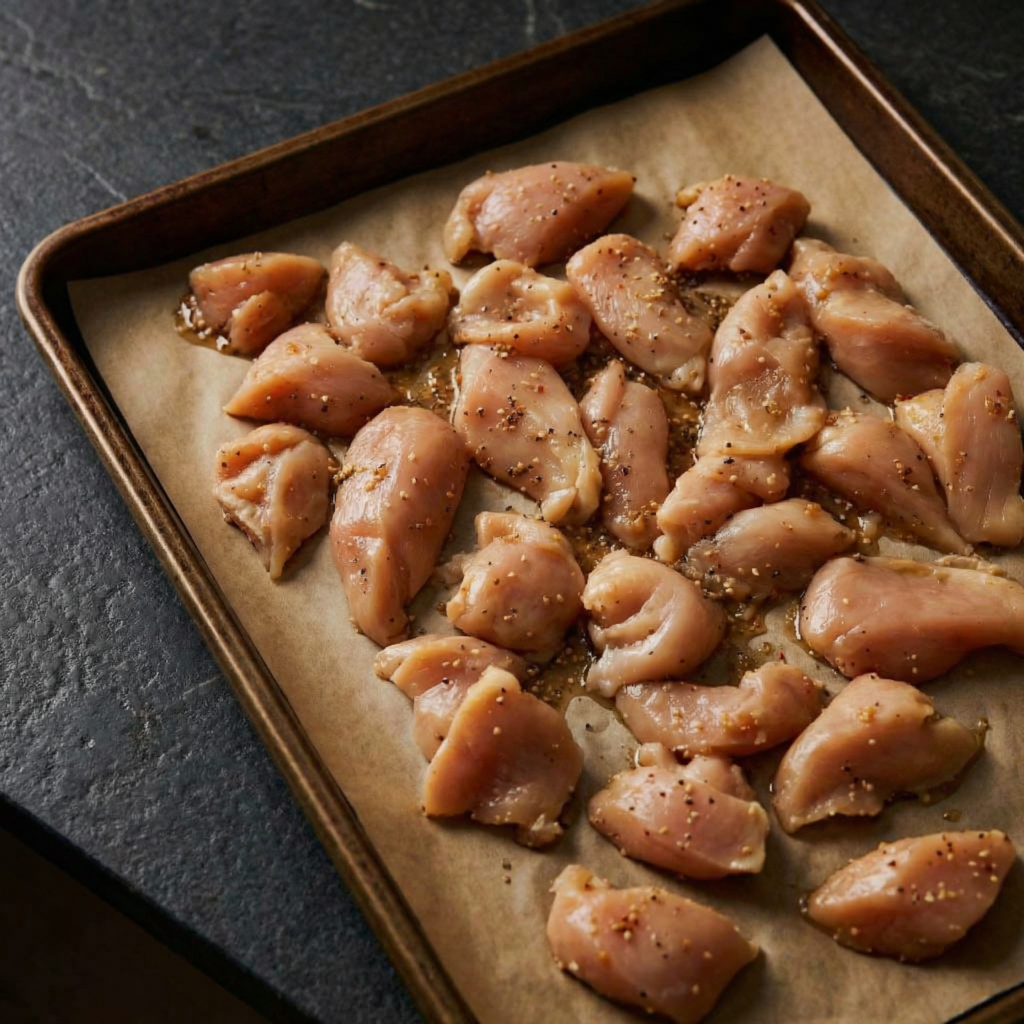
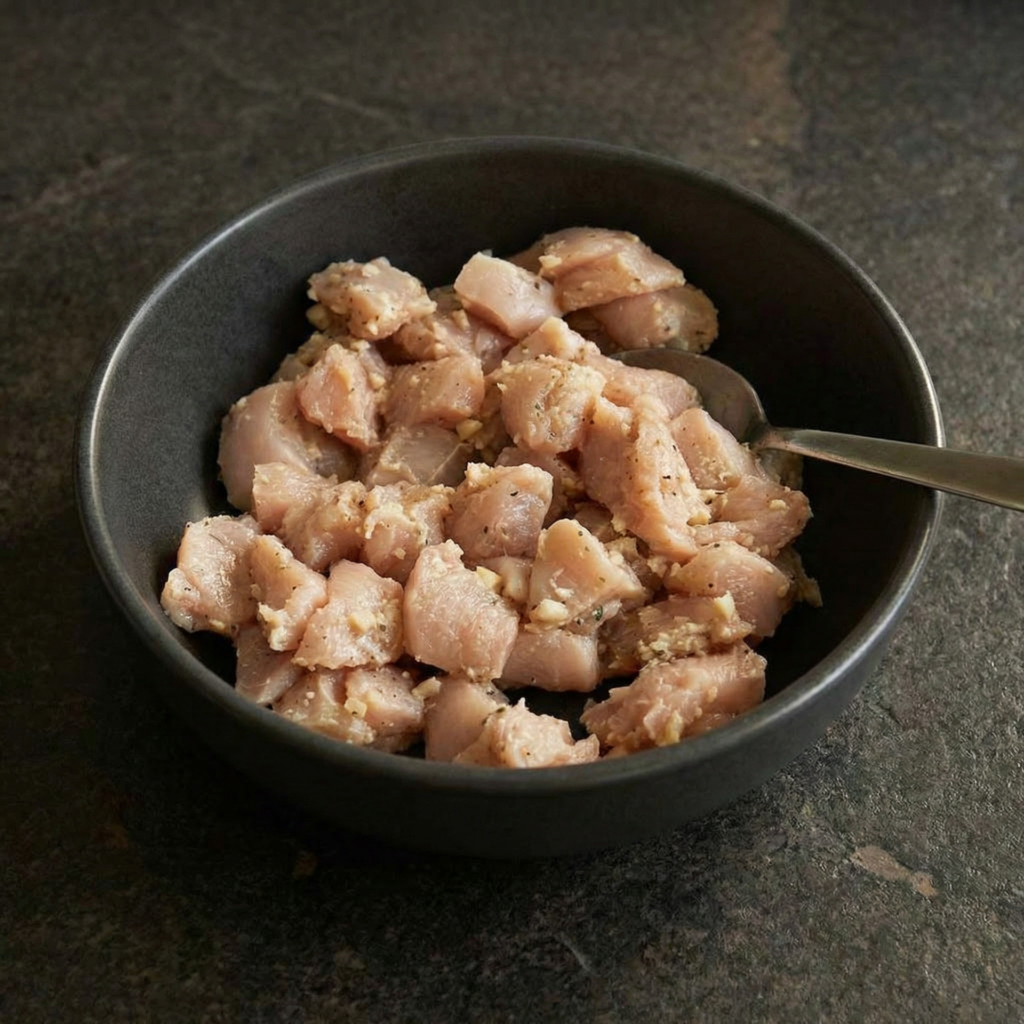
    Place the cubed chicken in a large resealable bag or shallow dish. Pour the marinade over the chicken and toss to coat evenly.

    Seal the bag or cover the dish and refrigerate for at least 1 hour, preferably 2–4 hours for maximum flavor penetration.

    The longer the chicken marinates, the juicier and more flavorful it will be.


    Step 3: Preheat the Grill or Oven

    If grilling: preheat to medium-high heat. Oil the grates lightly to prevent sticking.

    If baking: preheat your oven to 425°F (220°C) and line a baking sheet with foil or parchment. Place a wire rack on top for even cooking.

    If air-frying: preheat your air fryer to 400°F (200°C).


    Step 4: Thread the Chicken onto Skewers

    Remove chicken from the marinade, letting excess drip off to avoid flare-ups on the grill.

    Thread chicken cubes onto skewers, leaving a small gap between each piece to ensure even cooking and caramelization.


    Step 5: Cook the Skewers

    Grilling:

    Place skewers on the preheated grill. Cook for 10–12 minutes, turning every 2–3 minutes, until chicken is cooked through and slightly charred on the edges.

    Oven-Baking:

    Place skewers on the wire rack. Bake for 12–15 minutes, flipping halfway through, until chicken reaches 165°F (74°C). Broil for 1–2 minutes at the end for caramelization.

    Air-Frying:

    Place skewers in a single layer in the air fryer basket. Cook for 10–12 minutes, flipping halfway through, until golden and cooked through.


    Step 6: Rest the Chicken

    Let the skewers rest for 3–5 minutes after cooking. This allows the juices to redistribute, keeping the chicken tender and juicy.


    Step 7: Garnish and Serve

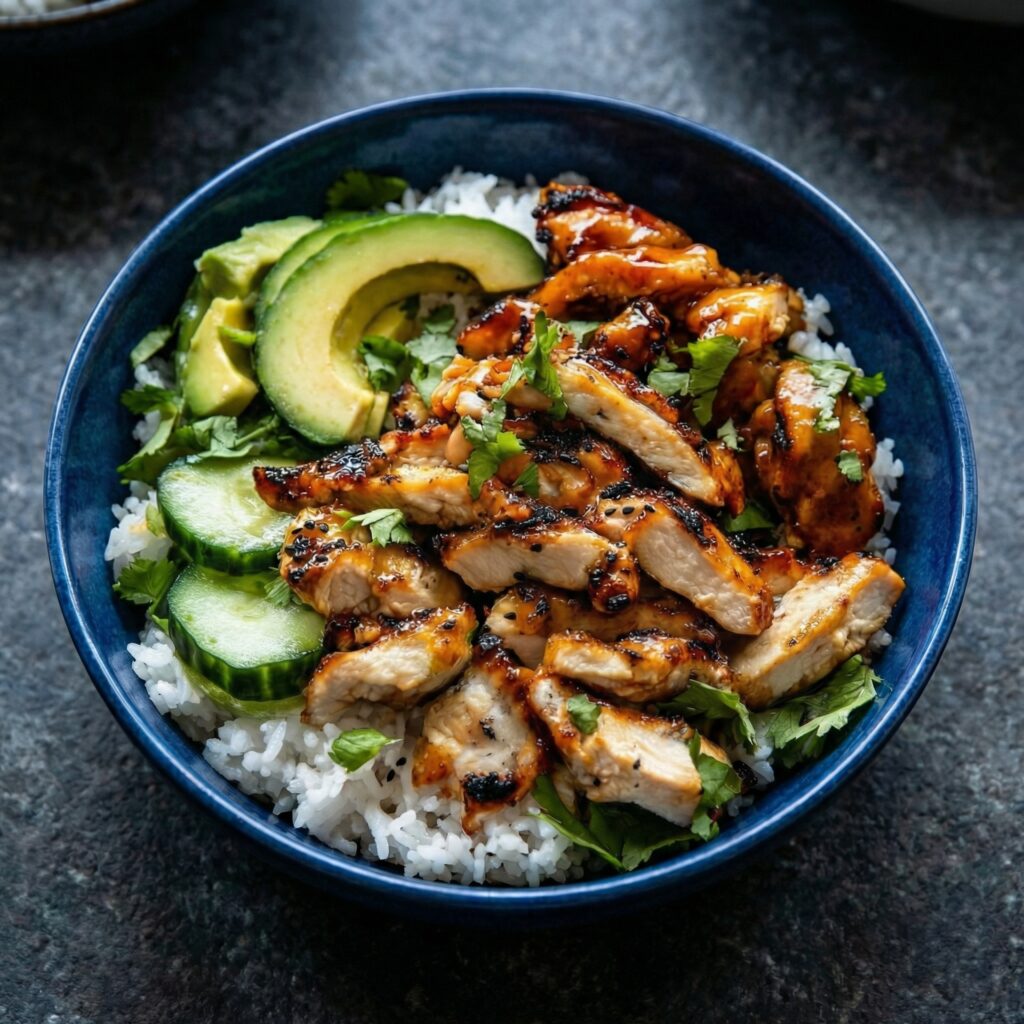
    Arrange the skewers on a serving platter. Sprinkle with sesame seeds and sliced green onions.

    Serve alongside steamed rice or wrapped in crisp lettuce leaves for a low-carb option. Add kimchi, pickled radishes, or other Korean-inspired sides for a complete meal.

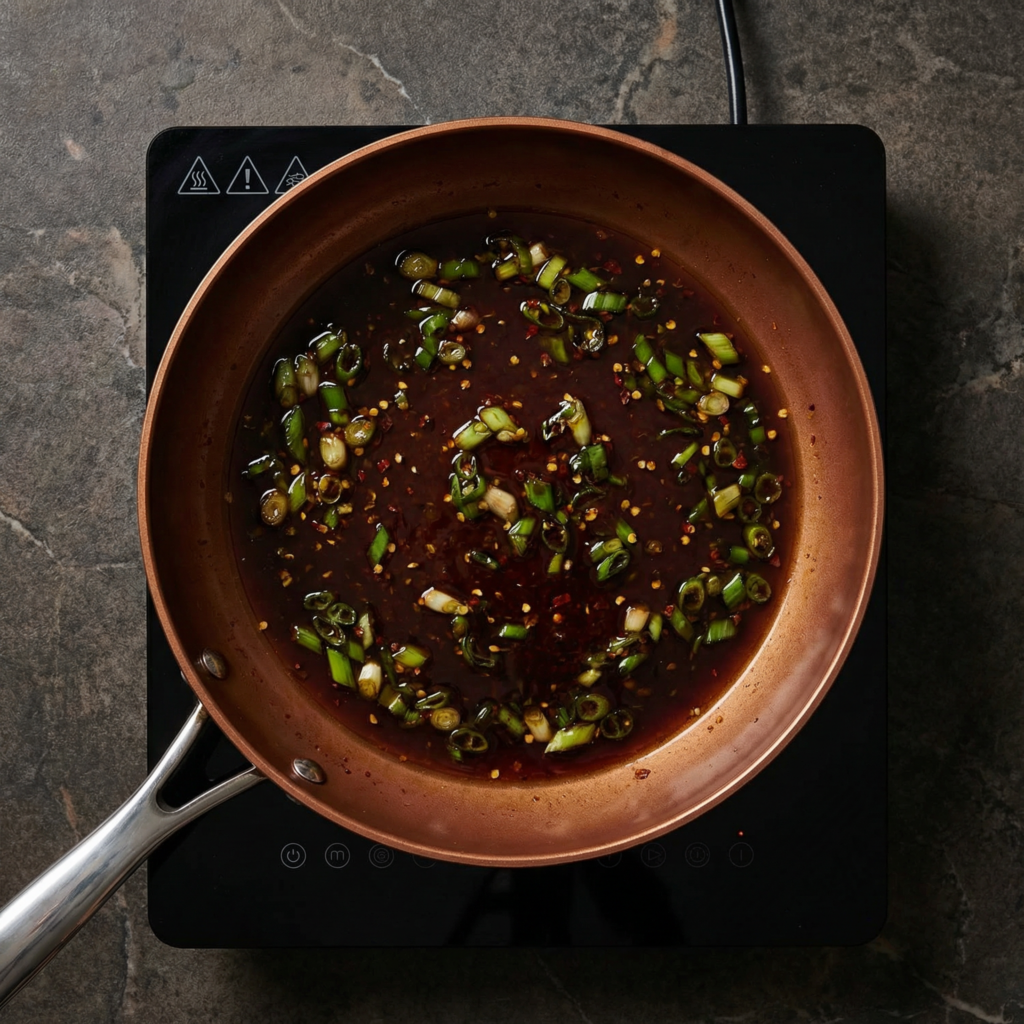
    Optional: drizzle with leftover marinade that has been boiled for 1–2 minutes to use as a sauce.


    Flavor and Texture Highlights

    • Juicy, tender chicken with a slightly sticky glaze
    • Sweet, savory, and mildly spicy marinade
    • Caramelized edges with a smoky, grilled aroma
    • Fresh crunch from garnishes and optional lettuce wraps

    Every bite captures the essence of Korean BBQ—bold, satisfying, and crave-worthy.


    Tips for Perfect Korean BBQ Chicken Skewers

    • Use thighs for more flavor and juiciness, though breasts work if you prefer leaner meat.
    • Don’t overcrowd skewers or pan—airflow is essential for even cooking.
    • Adjust spice level by adding or reducing gochugaru or chili flakes.
    • Soak wooden skewers to prevent burning.
    • Serve immediately for the best texture, or reheat gently without overcooking.

    Optional Variations

    • Vegetable Skewers: Alternate chicken with bell peppers, zucchini, or mushrooms for extra flavor.
    • Honey-Garlic Twist: Swap some gochujang with additional honey and garlic for a sweeter glaze.
    • Meal Prep Friendly: Cook skewers and store in the fridge; reheat gently during the week.
    • Lettuce Wrap Style: Serve with rice and sauce wrapped in romaine or butter lettuce for a fresh, handheld option.

    Storage and Make-Ahead

    • Marinated chicken can be stored in the refrigerator for up to 24 hours before cooking.
    • Cooked skewers can be stored in airtight containers for up to 3 days.
    • Reheat in the oven, air fryer, or skillet to maintain crisp edges and juicy center.

    Why This Recipe Works

    The combination of sweet, savory, and spicy marinade, along with high-heat cooking, gives these skewers authentic Korean BBQ flavor. The sticky glaze caramelizes beautifully, locking in juiciness, while garnishes and sides provide freshness and texture.

    These Korean BBQ Chicken Skewers are easy to make, impressive to serve, and endlessly satisfying—perfect for family dinners, summer grilling, or casual gatherings.


    With tender chicken, bold marinade, and fresh garnishes, these Korean BBQ Chicken Skewers deliver restaurant-quality flavor at home.

    Quick to prepare, versatile in cooking methods, and utterly delicious, they are a must-have for anyone craving that sweet, spicy, and smoky Korean BBQ experience.

  • Japanese Cloud Cake (Cotton Cheesecake)

    Japanese Cloud Cake (Cotton Cheesecake)

    Meet the cake that truly tastes like a cloud. This Japanese Cloud Cake—also known as Cotton Cheesecake or Soufflé Cheesecake—is a masterpiece of texture and restraint. It’s not as dense as New York cheesecake, nor as dry as ordinary sponge.

    Instead, it exists in a category of its own: impossibly airy, delicately jiggly, and sublimely creamy. Each slice practically dissolves on your tongue, leaving behind whispers of cream cheese and vanilla. The technique is precise, but the reward is a dessert of breathtaking elegance.

    The Science of the Cloud

    This cake achieves its signature ethereal texture through three critical techniques: a stable meringue, a gentle water bath, and gradual cooling. Unlike American cheesecake, which relies on dense cream cheese and eggs, Japanese Cloud Cake derives its lift almost entirely from whipped egg whites folded into a light cream cheese base.

    The meringue must reach stiff, glossy peaks—underwhipped and the cake falls flat; overwhipped and it deflates during folding. The water bath (bain-marie) surrounds the cake with gentle, moist heat, preventing the top from cracking and allowing the interior to cook through slowly and evenly without curdling.

    Finally, cooling the cake gradually in the turned-off oven prevents the sudden temperature shock that causes collapse. The result is a cake with a crumb so fine it’s often called “cotton”.

    Ingredients

    For the Japanese Cloud Cake (8-inch / 20cm round):

    • 200g (7 oz) cream cheese, softened to room temperature
    • 50g (3.5 tbsp) unsalted butter, softened
    • 100ml (⅓ cup + 1 tbsp) whole milk
    • 6 large eggs, separated (whites and yolks divided)
    • 100g (½ cup) granulated sugar, divided
    • 60g (½ cup) cake flour, sifted
    • 20g (2 tbsp) cornstarch, sifted
    • 1 teaspoon vanilla extract
    • Zest of ½ lemon (optional, for brightness)
    • ¼ teaspoon cream of tartar or 1 teaspoon lemon juice (for stabilizing meringue)
    • Pinch of salt

    For Dusting & Serving:

    • Powdered sugar, for dusting
    • Fresh berries or berry coulis
    • Lightly sweetened whipped cream

    Instructions

    1. Prepare the Pan & Water Bath: Preheat oven to 320°F (160°C). Line the bottom of an 8-inch (20cm) round springform pan with parchment paper. Wrap the outside of the pan tightly with heavy-duty aluminum foil to prevent water from seeping in during the water bath. Bring a kettle of water to a boil.

    2. Make the Cream Cheese Base: In a large bowl, beat the softened cream cheese and butter together until completely smooth and lump-free. Gradually add the milk and vanilla extract, mixing until fully incorporated. In a separate bowl, whisk the egg yolks with half the sugar (50g) until pale and slightly thickened.

    Sift the cake flour and cornstarch together, then fold them into the yolk mixture. Combine this yolk mixture with the cream cheese mixture, whisking until smooth. Add lemon zest if using.

    3. Whip the Meringue: In a clean, grease-free bowl, beat the egg whites with the cream of tartar (or lemon juice) and a pinch of salt on medium speed until foamy. Gradually add the remaining 50g of sugar in three additions, beating on medium-high speed until stiff, glossy peaks form. The meringue should hold its shape firmly when the whisk is lifted.

    4. Fold Gently: Add one-third of the meringue to the cream cheese mixture and fold gently with a spatula to lighten the batter. Carefully fold in the remaining meringue in two additions, using a cutting and folding motion. Be thorough but gentle—you want a uniform batter with no white streaks, but you must not deflate the air bubbles.

    5. Fill the Pan: Pour the batter into the prepared pan. Gently tap the pan on the counter 2-3 times to release any large air bubbles. Place the springform pan inside a larger roasting pan. Place the roasting pan on the oven rack, then carefully pour the hot water into the roasting pan until it reaches about 1 inch (2.5cm) up the sides of the springform pan.

    6. Bake Slowly: Bake for 60-75 minutes, until the cake is set, puffed, and golden brown on top. The center should still jiggle slightly when gently shaken—it will continue to set as it cools. If the top is browning too quickly, tent loosely with foil after 40 minutes.

    7. Cool Gradually: Turn off the oven and leave the door slightly ajar (prop it open with a wooden spoon). Let the cake cool in the oven for 1 hour. This gradual cooling prevents cracking and collapse. Remove from the oven and water bath, then let the cake cool completely in the pan on a wire rack. Once cool, refrigerate for at least 4 hours or overnight. This chilling step is essential for the perfect texture.

    8. Unmold & Serve: Run a thin, sharp knife around the edge of the pan, then release the springform. Invert the cake onto a plate, then flip it right-side up onto a serving platter. Dust generously with powdered sugar. For clean slices, use a knife dipped in hot water and wiped dry between each cut. Serve chilled or at room temperature with berries and whipped cream.

    Pro-Tips for Cloud-Like Perfection

    • Room Temperature Ingredients: Cold cream cheese and eggs create a lumpy batter and deflate the meringue. Set everything out 1-2 hours before starting.
    • Never Grease the Pan Sides: The batter needs to cling to the ungreased walls to climb high as it bakes. Only line the bottom.
    • Stiff, Not Dry Meringue: Whip until the peaks stand straight up but the meringue still looks glossy and moist. Dry, overwhipped meringue is impossible to fold in smoothly.
    • Fold, Don’t Stir: Aggressive stirring destroys the air bubbles. Use a gentle, decisive folding motion.
    • Water Bath is Non-Negotiable: This is what creates the signature moist, velvet texture and prevents cracking.
    • Don’t Skip the Overnight Chill: The cake is extremely fragile when warm. Chilling firms it up for clean, beautiful slices and deepens the flavor.
    • Flavor Variations: Add 1 tablespoon matcha powder (reduce flour slightly), 2 tablespoons cocoa powder, or replace lemon zest with orange zest.

    This Japanese Cloud Cake is the ultimate test of gentle technique—and the ultimate reward.

  • Bright & Fresh: Oven-Baked Salmon with Avocado Cucumber Salsa and Fluffy Rice

    Bright & Fresh: Oven-Baked Salmon with Avocado Cucumber Salsa and Fluffy Rice

    If you want a healthy, vibrant meal that feels elegant but requires minimal effort, this Oven-Baked Salmon with Avocado Cucumber Salsa and Rice is the perfect choice. Baking the salmon in the oven ensures even cooking, tender texture, and hands-off convenience—no splattering stovetop required.

    Paired with cool, creamy avocado cucumber salsa and fluffy rice, this dish delivers the perfect balance of warm and fresh, rich and bright. Let’s walk through it step by step so you can recreate this flavorful meal at home.


    Why Bake the Salmon?

    Oven-baking salmon is:

    • Easier and less messy than pan-searing
    • Great for cooking multiple fillets at once
    • Consistent and beginner-friendly
    • Perfect for juicy, evenly cooked fish

    The gentle heat keeps the salmon moist while allowing the seasoning to shine.


    Ingredients You’ll Need

    For the Rice:

    • 1½ cups jasmine or long-grain white rice
    • 2 cups water
    • ½ teaspoon salt

    For the Oven-Baked Salmon:

    • 4 salmon fillets (about 6 oz each)
    • 1 tablespoon olive oil
    • Salt and black pepper to taste
    • 1 teaspoon garlic powder
    • 1 teaspoon paprika
    • Juice of ½ lemon

    For the Avocado Cucumber Salsa:

    • 1 ripe avocado, diced
    • 1 cup cucumber, finely chopped
    • 2 tablespoons red onion, finely diced
    • Juice of ½ lemon or lime
    • Salt to taste
    • Optional: chopped fresh cilantro

    Step 1: Preheat the Oven

    Preheat your oven to 400°F (200°C).

    Line a baking sheet with parchment paper or lightly grease a baking dish. This prevents sticking and makes cleanup easy.


    Step 2: Cook the Rice

    Start the rice first so everything finishes at the same time.

    Rinse the rice under cold water until the water runs mostly clear. This removes excess starch and keeps the rice fluffy.

    In a medium saucepan, combine the rinsed rice, water, and salt. Bring to a boil over medium-high heat.

    Once boiling, reduce to low, cover, and simmer for 15 minutes. Do not lift the lid during cooking.

    After 15 minutes, remove from heat and let it sit covered for 5–10 minutes. Fluff gently with a fork before serving.


    Step 3: Prepare the Salmon

    Pat the salmon fillets dry with paper towels. Removing surface moisture helps the seasoning adhere better.

    Place the fillets on the prepared baking sheet.

    Drizzle olive oil evenly over the salmon. Season generously with salt, black pepper, garlic powder, and paprika. Squeeze fresh lemon juice over the top for brightness.

    Let the seasoned salmon sit for about 5–10 minutes while the oven finishes preheating.


    Step 4: Bake the Salmon

    Place the baking sheet in the preheated oven.

    Bake for 12–15 minutes, depending on thickness. A general rule is about 4–6 minutes per half-inch of thickness.

    The salmon is done when:

    • It flakes easily with a fork
    • The center is opaque
    • Internal temperature reaches about 125–130°F (52–54°C) for medium

    Avoid overcooking—salmon can dry out quickly.

    If you prefer slightly golden edges, broil for the last 1–2 minutes.


    Step 5: Prepare the Avocado Cucumber Salsa

    While the salmon bakes, make the salsa.

    In a bowl, gently combine diced avocado, chopped cucumber, and red onion.

    Add lemon or lime juice and a pinch of salt. Toss gently to combine without mashing the avocado.

    If using cilantro, fold it in last.

    Place the salsa in the refrigerator until ready to serve.

    Keeping it chilled enhances the refreshing contrast against the warm salmon.


    Step 6: Rest the Salmon

    Once baked, remove the salmon from the oven and let it rest for about 3–5 minutes.

    Resting allows the juices to redistribute and keeps the fish tender.


    Step 7: Assemble the Dish

    Spoon a generous serving of fluffy rice onto each plate or bowl.

    Place a warm salmon fillet on top.

    Spoon the chilled avocado cucumber salsa over the salmon.

    The cool salsa melts slightly against the warm fish, creating a beautiful temperature contrast.


    Flavor and Texture Balance

    This dish offers:

    • Tender, flaky baked salmon
    • Creamy avocado richness
    • Crisp cucumber crunch
    • Bright citrus notes
    • Soft, comforting rice

    Every bite feels fresh yet satisfying.


    Tips for Perfect Oven-Baked Salmon

    • Use salmon fillets of similar thickness for even cooking.
    • Don’t overcrowd the baking sheet.
    • Line the pan for easy cleanup.
    • Bake just until flaky—avoid drying it out.
    • Let it rest before serving.

    Optional Variations

    Want to customize?

    • Add diced mango to the salsa for sweetness.
    • Sprinkle red pepper flakes for heat.
    • Use coconut rice for a tropical twist.
    • Drizzle honey over salmon before baking for subtle caramelization.
    • Add a dollop of Greek yogurt mixed with lemon for extra creaminess.

    Storage and Meal Prep

    Store leftovers in airtight containers for up to 2 days.

    Keep salsa separate from salmon and rice to maintain freshness.

    Reheat salmon and rice gently in the microwave or oven at low heat. Add fresh salsa just before serving.

    This recipe makes an excellent meal prep option for healthy lunches.


    Why This Recipe Works

    Baking the salmon keeps the cooking simple and hands-off, while the fresh salsa adds brightness and texture. The rice anchors the dish, making it filling and balanced.

    It’s clean, flavorful, and visually beautiful—perfect for both casual dinners and special occasions.


    Oven-Baked Salmon with Avocado Cucumber Salsa and Rice proves that wholesome meals can be exciting and satisfying. With fresh ingredients and simple techniques, you’ll create a dish that feels vibrant, balanced, and restaurant-worthy—right from your own kitchen.

  • Creamy, Dreamy & No-Oven Needed: The Ultimate No-Bake Mango Float

    Creamy, Dreamy & No-Oven Needed: The Ultimate No-Bake Mango Float

    If there’s one dessert that perfectly captures tropical comfort in every bite, it’s the beloved no-bake mango float. With layers of sweet ripe mangoes, lightly sweetened cream, and soft graham crackers that melt into cake-like perfection, this chilled dessert is simple, nostalgic, and absolutely irresistible.

    Often served at celebrations and family gatherings, mango float is especially popular in the Philippines—and for good reason. It’s easy to prepare, requires no oven, and tastes even better after chilling overnight. Whether you’re making it for a party or just craving something refreshing and sweet, this step-by-step guide will walk you through creating the perfect no-bake mango float.


    Why You’ll Love This Recipe

    • No baking required
    • Minimal ingredients
    • Beginner-friendly
    • Make-ahead dessert
    • Perfect for warm weather

    The magic happens in the fridge, where the layers soften and meld together into a creamy, sliceable treat.


    Ingredients You’ll Need

    • 4–5 ripe mangoes (preferably sweet, golden varieties)
    • 2 cups heavy whipping cream (cold)
    • 1 can (14 oz) sweetened condensed milk
    • 2 packs graham crackers

    That’s it—just four simple ingredients for a dessert that tastes like sunshine.


    Step 1: Prepare the Mangoes

    Start by peeling the mangoes and slicing the flesh away from the pit. Cut the mangoes into thin, even slices.

    Try to choose mangoes that are ripe but firm. Overripe mangoes can become mushy and release too much juice, while underripe mangoes may taste tart.

    Set aside a handful of the prettiest slices for the top layer decoration.


    Step 2: Make the Cream Mixture

    In a large chilled mixing bowl, pour in the cold heavy whipping cream. Using a hand mixer or stand mixer, whip on medium speed until soft peaks begin to form.

    Gradually add the sweetened condensed milk while continuing to whip. Beat until the mixture thickens to stiff peaks. The cream should hold its shape but still look smooth and fluffy.

    Be careful not to overwhip, as this can cause the cream to become grainy.

    This cream layer is what gives mango float its rich, melt-in-your-mouth texture.


    Step 3: Prepare Your Dish

    Choose a rectangular glass or ceramic dish (8×8 or 9×13 inches works well depending on how thick you want the layers).

    There’s no need to grease the dish since this is a chilled dessert.


    Step 4: Create the First Layer

    Start by arranging a single layer of graham crackers on the bottom of the dish. Break crackers as needed to fully cover the base.

    Spread a generous layer of the whipped cream mixture evenly over the graham crackers.

    Use a spatula to smooth it out into an even layer.


    Step 5: Add the Mango Layer

    Arrange a layer of sliced mangoes over the cream. Try to cover the entire surface so each bite has fruit.

    Don’t overcrowd the mangoes—just enough for a balanced layer.


    Step 6: Repeat the Layers

    Repeat the layering process:

    1. Graham crackers
    2. Cream mixture
    3. Mango slices

    Continue layering until you run out of ingredients, finishing with a layer of cream on top.

    Most dishes will yield 3 to 4 layers depending on thickness.


    Step 7: Decorate the Top

    Use your reserved mango slices to decorate the top layer. You can create neat rows, overlapping slices, or even a simple fan pattern for a more elegant look.

    For extra flair, you can crush a graham cracker and sprinkle crumbs lightly over the top.


    Step 8: Chill to Set

    Cover the dish with plastic wrap and refrigerate for at least 6 hours, though overnight is best.

    During this time, the graham crackers absorb moisture from the cream and soften into a cake-like texture.

    This chilling step is essential—don’t rush it.


    Step 9: Slice and Serve

    Once fully chilled, slice into squares or rectangles using a sharp knife. Wipe the knife clean between cuts for neat slices.

    Serve cold straight from the refrigerator.

    Each bite should be creamy, fruity, and lightly sweet with a soft, layered texture.


    Tips for the Perfect Mango Float

    • Use cold cream for better whipping results.
    • Chill overnight for the best texture.
    • Use ripe, sweet mangoes for natural sweetness.
    • Don’t skip the layering balance—keep cream and fruit evenly distributed.
    • For cleaner slices, briefly chill the dish in the freezer for 20–30 minutes before cutting.

    Storage and Make-Ahead

    Mango float keeps well in the refrigerator for up to 3 days.

    Cover tightly to prevent it from absorbing other refrigerator odors.

    Freezing is optional if you prefer a firmer, ice cream-like texture. Just thaw slightly before serving.


    Optional Variations

    Want to customize your mango float?

    • Add a thin layer of crushed graham crumbs between layers for extra texture.
    • Drizzle a little caramel sauce between layers.
    • Mix small mango cubes into the cream for added fruit distribution.
    • Add a splash of vanilla extract to the whipped cream for deeper flavor.

    Why This Dessert Is So Loved

    No-bake mango float is more than just a dessert—it’s a celebration staple and comfort food classic. It’s simple enough for beginners yet impressive enough for gatherings.

    The contrast between soft graham layers, airy cream, and juicy mango slices makes it refreshing yet indulgent. Every spoonful feels light but satisfying.

    And the best part? You don’t need an oven, complicated techniques, or fancy tools—just layering and patience while it chills.


    If you’re looking for a guaranteed crowd-pleaser that tastes like tropical sunshine, this no-bake mango float delivers every single time. Creamy, fruity, and effortlessly delicious, it’s the kind of dessert that disappears fast—so you might want to make an extra batch.

  • No Oven, All Indulgence: The Ultimate No-Bake Banoffee Pie

    No Oven, All Indulgence: The Ultimate No-Bake Banoffee Pie

    If you’re craving something rich, creamy, and irresistibly sweet—but don’t want to turn on the oven—this No-Bake Banoffee Pie is exactly what you need. With a buttery biscuit crust, luscious caramel filling, fresh banana slices, and fluffy whipped cream, this dessert delivers big flavor with minimal effort.

    Banoffee pie, a beloved British classic, gets its name from “banana” and “toffee.” Traditionally baked, this version skips the oven entirely while keeping all the indulgence. It’s perfect for warm days, last-minute guests, or when you simply want an easy yet impressive dessert.

    Let’s walk through it step by step.


    Why You’ll Love This No-Bake Version

    • No oven required
    • Simple, accessible ingredients
    • Minimal prep time
    • Make-ahead friendly
    • Perfect balance of creamy, crunchy, and sweet

    The secret is creating a firm crust that sets in the refrigerator and layering it with rich dulce de leche and fresh bananas.


    Ingredients You’ll Need

    For the Crust:

    • 2 cups (200g) graham cracker crumbs or crushed digestive biscuits
    • ½ cup (113g) unsalted butter, melted
    • 2 tablespoons granulated sugar

    For the Filling:

    • 1½ cups dulce de leche (store-bought or canned caramel)
    • 3–4 ripe but firm bananas

    For the Topping:

    • 1½ cups heavy whipping cream
    • 2 tablespoons powdered sugar
    • 1 teaspoon vanilla extract

    Optional garnish:

    • Chocolate shavings or cocoa powder

    Step 1: Prepare the Crust

    In a medium mixing bowl, combine the graham cracker crumbs, melted butter, and sugar. Stir until the mixture resembles wet sand and holds together when pressed between your fingers.

    Press the mixture firmly into a 9-inch pie dish, covering the bottom and slightly up the sides. Use the bottom of a measuring cup to pack it down tightly—this helps it hold its shape once chilled.

    Place the crust in the refrigerator for at least 30–45 minutes to firm up.

    Tip: The firmer you press the crust, the cleaner your slices will be later.


    Step 2: Prepare the Caramel Layer

    While the crust chills, stir your dulce de leche until smooth and spreadable. If it’s too thick, warm it gently in the microwave for 10–15 seconds to loosen it.

    Once the crust is firm, spread the dulce de leche evenly across the base. Use an offset spatula or spoon to smooth it into an even layer.

    Return the pie to the refrigerator for about 15 minutes to let the caramel set slightly before adding bananas.

    This step keeps the layers neat and defined.


    Step 3: Slice and Layer the Bananas

    Peel the bananas and slice them into even rounds, about ¼-inch thick.

    Arrange the banana slices evenly over the caramel layer. You can slightly overlap them, but aim for a consistent layer across the pie.

    Choose bananas that are ripe but still firm. Overripe bananas can become mushy and overly sweet.

    Optional tip: Lightly brush the banana slices with lemon juice to slow browning if making ahead.


    Step 4: Whip the Cream

    In a chilled mixing bowl, add the heavy whipping cream, powdered sugar, and vanilla extract.

    Using a hand mixer or stand mixer, beat on medium-high speed until soft peaks form. Continue whipping until stiff peaks form, meaning the cream holds its shape when you lift the beaters.

    Be careful not to overwhip, as it can turn grainy or begin separating.

    The whipped cream should be thick, fluffy, and smooth.


    Step 5: Add the Final Layer

    Spoon the whipped cream over the banana layer. Spread evenly, or create decorative swirls with the back of a spoon.

    For a polished finish, garnish with chocolate shavings, grated dark chocolate, or a light dusting of cocoa powder.

    This topping adds visual appeal and a subtle chocolate note that pairs beautifully with banana and caramel.


    Step 6: Chill to Set

    Refrigerate the assembled pie for at least 2 hours before serving. This allows the layers to firm up and makes slicing much easier.

    For best results, chill 3–4 hours if time allows.

    The longer it chills (within reason), the better the structure.


    Step 7: Slice and Serve

    Use a sharp knife dipped in warm water for clean slices. Wipe the blade between cuts for neat presentation.

    Each slice should show distinct layers:

    • Firm, buttery crust
    • Thick caramel
    • Fresh banana
    • Cloud-like whipped cream

    Serve chilled for the best texture and flavor balance.


    Tips for the Perfect No-Bake Banoffee Pie

    • Press the crust very firmly to prevent crumbling.
    • Chill between layers to keep structure clean.
    • Use full-fat whipping cream for stable peaks.
    • Avoid overripe bananas.
    • Serve within 24 hours for the freshest appearance.

    Make-Ahead and Storage

    This pie can be made up to one day in advance. Store covered in the refrigerator.

    It’s best enjoyed within 1–2 days, as bananas may begin to brown and release moisture over time.

    Freezing is not recommended because whipped cream and bananas change texture when thawed.


    Optional Variations

    Want to customize it?

    • Add a thin layer of melted chocolate over the crust before caramel.
    • Sprinkle flaky sea salt over the caramel for a salted twist.
    • Use chocolate cookie crumbs instead of graham crackers.
    • Add a drizzle of chocolate sauce on top before serving.

    This No-Bake Banoffee Pie proves that you don’t need an oven to create a show-stopping dessert. With its buttery crust, silky caramel, fresh bananas, and fluffy whipped cream, it’s a guaranteed crowd-pleaser.

    It’s rich yet balanced, simple yet impressive, and easy enough for beginner bakers. Whether you’re hosting guests or treating yourself, this chilled dessert delivers comfort and indulgence in every bite.

    No baking. No stress. Just layers of sweet, creamy perfection.

  • Sweet, Savory & Tropical: 5-Ingredient Pineapple Pork with Coconut Rice

    Sweet, Savory & Tropical: 5-Ingredient Pineapple Pork with Coconut Rice

    If you’re craving something bold, comforting, and bursting with tropical flavor—but don’t want a long grocery list—this 5-Ingredient Pineapple Pork with Coconut Rice is your new go-to dinner.

    It’s sweet, savory, slightly tangy, and perfectly creamy all at once. Juicy pork simmers in pineapple until caramelized and tender, then gets spooned over fluffy coconut rice that soaks up every drop of flavor.

    Best of all? You only need five core ingredients to make it happen.


    The 5 Simple Ingredients

    1. 1½ pounds pork tenderloin (or pork shoulder, sliced thin)
    2. 1 (20 oz) can pineapple chunks (with juice)
    3. 1 cup soy sauce
    4. 1 (13.5 oz) can full-fat coconut milk
    5. 1½ cups jasmine rice

    That’s it. No complicated sauces, no specialty items—just pantry staples working together beautifully.


    Why This Recipe Works

    The magic lies in contrast:

    • Salty soy sauce balances sweet pineapple
    • Rich coconut milk softens and rounds out bold flavors
    • Jasmine rice absorbs everything for a complete, satisfying dish

    With minimal ingredients, technique matters most. Let’s walk through it step by step.


    Step 1: Rinse and Start the Coconut Rice

    Begin with the rice so it’s ready when the pork finishes.

    Rinse 1½ cups jasmine rice under cold water until the water runs mostly clear. This removes excess starch and keeps the rice fluffy instead of sticky.

    In a medium saucepan, combine:

    • Rinsed rice
    • 1 can coconut milk
    • ½ cup water (to balance thickness)

    Bring to a gentle boil over medium heat. Once bubbling, reduce to low, cover, and simmer for 15–18 minutes.

    Do not lift the lid while it cooks—steam is essential for even cooking.

    When finished, remove from heat and let sit covered for 5–10 minutes. Fluff with a fork before serving.


    Step 2: Prepare the Pork

    While the rice cooks, slice the pork into thin strips or bite-sized chunks. Thin slicing helps it cook quickly and evenly.

    If using pork tenderloin, trim any silver skin before slicing. If using pork shoulder, cut against the grain for tenderness.

    Pat the pork dry with paper towels. This helps it brown better in the pan.


    Step 3: Sear the Pork

    Heat a large skillet over medium-high heat. You don’t need extra oil if using well-marbled pork, but you can add a light drizzle if desired.

    Add the pork in a single layer. Avoid overcrowding—cook in batches if necessary.

    Let it sear undisturbed for 2–3 minutes to develop color. Then stir and cook another 2–3 minutes until browned on most sides.

    This browning step builds flavor and prevents the dish from tasting flat.


    Step 4: Add Pineapple and Soy Sauce

    Once the pork is nicely browned, pour in:

    • The entire can of pineapple chunks (juice included)
    • 1 cup soy sauce

    Stir to combine and bring to a simmer.

    The pineapple juice and soy sauce create a sweet-savory glaze that thickens as it reduces. The pineapple also begins to caramelize slightly, adding depth and brightness.


    Step 5: Simmer Until Tender and Glossy

    Reduce heat to medium-low and let the mixture simmer uncovered for 10–15 minutes.

    During this time:

    • The sauce reduces and thickens
    • The pork becomes tender
    • The pineapple softens and intensifies in flavor

    Stir occasionally to prevent sticking.

    If the sauce thickens too quickly, add a splash of water. You’re looking for a glossy, slightly syrupy consistency that coats the pork.


    Step 6: Taste and Adjust

    Because soy sauce brands vary in saltiness, give it a quick taste. The pineapple should balance the salt with sweetness.

    If it tastes too salty, add a spoonful of pineapple juice or a splash of water. If you prefer it deeper and saltier, let it reduce another minute or two.

    This simple balance step ensures restaurant-quality flavor.


    Step 7: Assemble the Dish

    Spoon a generous portion of coconut rice into bowls.

    Top with the pineapple pork mixture, making sure to drizzle some of that glossy sauce over the rice.

    The creamy coconut rice absorbs the sweet-savory glaze, creating the perfect bite every time.


    Texture and Flavor Notes

    This dish delivers:

    • Tender, juicy pork
    • Sweet bursts of caramelized pineapple
    • Savory umami depth from soy sauce
    • Creamy, fragrant coconut rice

    The flavors are bold but balanced, making it feel both comforting and exciting.


    Tips for Success

    Use full-fat coconut milk. Light coconut milk won’t give the same creamy texture.

    Don’t skip browning the pork. That golden crust adds essential depth.

    Let the sauce reduce. Thin sauce won’t cling to the meat or rice properly.

    Slice against the grain. This keeps the pork tender.


    Optional Add-Ins (If You Want to Go Beyond 5 Ingredients)

    While this recipe shines as-is, you can elevate it with:

    • A squeeze of lime
    • Fresh cilantro
    • Red pepper flakes for heat
    • Green onions for crunch

    But even without extras, it stands beautifully on its own.


    Storage and Reheating

    Store leftovers in an airtight container in the refrigerator for up to 3 days.

    Reheat gently in a skillet over medium-low heat with a splash of water to loosen the sauce. The microwave works too—just cover to retain moisture.

    This dish reheats surprisingly well and makes excellent next-day lunches.


    Why You’ll Make This Again

    This 5-Ingredient Pineapple Pork with Coconut Rice proves that you don’t need a complicated ingredient list to create bold, satisfying meals. It’s weeknight-friendly, budget-conscious, and feels like a mini tropical escape in a bowl.

    The contrast between creamy rice and glossy sweet-savory pork makes every bite layered and exciting. It’s comforting enough for family dinner yet impressive enough to serve guests.

    When you want something flavorful, simple, and deeply satisfying, this recipe delivers—no extra fuss required.

    One skillet. One saucepan. Five ingredients. Big flavor.

  • Chewy, Chocolatey, and Irresistible: The Ultimate Homemade Revel Bars Recipe

    Chewy, Chocolatey, and Irresistible: The Ultimate Homemade Revel Bars Recipe

    If you love the combination of buttery oats and rich, fudgy chocolate, then Revel Bars are about to become your new favorite dessert.

    These classic layered bars feature a soft oatmeal cookie crust and topping with a thick, gooey chocolate center that melts in your mouth.

    They’re simple enough for beginner bakers yet impressive enough for potlucks, bake sales, and family gatherings. Follow this detailed step-by-step guide to make perfectly chewy, chocolate-packed Revel Bars right in your own kitchen.


    What Are Revel Bars?

    Revel Bars are a vintage dessert bar made with a hearty oatmeal cookie dough that doubles as both the crust and crumb topping.

    The center is filled with a luscious chocolate mixture that bakes into a soft fudge-like layer. The contrast between chewy oats and silky chocolate is what makes these bars so special.


    Ingredients You’ll Need

    For the Oatmeal Cookie Base and Topping:

    • 1 cup (226g) unsalted butter, softened
    • 2 cups (400g) packed brown sugar
    • 2 large eggs
    • 1 teaspoon vanilla extract
    • 2½ cups (310g) all-purpose flour
    • 1 teaspoon baking soda
    • ½ teaspoon salt
    • 3 cups (270g) old-fashioned rolled oats

    For the Chocolate Filling:

    • 1 can (14 oz) sweetened condensed milk
    • 2 cups (340g) semi-sweet chocolate chips
    • 2 tablespoons unsalted butter
    • ½ teaspoon salt
    • 1 teaspoon vanilla extract

    Step 1: Preheat and Prepare the Pan

    Preheat your oven to 350°F (175°C).

    Grease a 9×13-inch baking pan or line it with parchment paper, leaving overhang on the sides for easy removal. Proper preparation ensures your bars release cleanly once cooled.


    Step 2: Cream Butter and Sugar

    In a large mixing bowl, beat the softened butter and brown sugar together until light and fluffy.

    This step incorporates air into the mixture, helping create a soft and chewy texture. Cream for about 2–3 minutes using a hand mixer or stand mixer.


    Step 3: Add Eggs and Vanilla

    Add the eggs one at a time, beating well after each addition. Stir in the vanilla extract.

    The mixture should be smooth and slightly creamy at this stage.


    Step 4: Combine Dry Ingredients

    In a separate bowl, whisk together the flour, baking soda, and salt.

    Gradually add the dry ingredients to the wet mixture, mixing just until combined. Avoid overmixing to keep the bars tender.


    Step 5: Fold in the Oats

    Stir in the old-fashioned rolled oats until evenly distributed.

    The dough will be thick and hearty—this is exactly what you want for that classic chewy texture.


    Step 6: Press the Base Layer

    Press about two-thirds of the oatmeal dough evenly into the bottom of the prepared baking pan.

    Use a spatula or lightly damp fingers to smooth it into an even layer. This will serve as the sturdy base for your chocolate filling.

    Set aside the remaining dough for the topping.


    Step 7: Prepare the Chocolate Filling

    In a medium saucepan over low heat, combine the sweetened condensed milk, chocolate chips, and butter. Stir continuously until the chocolate is fully melted and smooth.

    Remove from heat and stir in the salt and vanilla extract. The filling should be glossy, thick, and rich.


    Step 8: Spread the Chocolate Layer

    Pour the warm chocolate filling evenly over the oatmeal base in the pan. Use a spatula to spread it into an even layer, making sure it reaches all corners.


    Step 9: Add the Oatmeal Topping

    Crumble the remaining oatmeal dough evenly over the chocolate layer. Don’t worry about covering every inch—the chocolate peeking through creates that classic rustic look.


    Step 10: Bake to Perfection

    Bake in the preheated oven for 25–30 minutes, or until the top is lightly golden brown and set.

    The center may still look slightly soft, but it will firm up as it cools.

    Avoid overbaking, as this can dry out the bars.


    Step 11: Cool Completely

    Remove the pan from the oven and allow the bars to cool completely in the pan.

    This step is crucial—cutting them too early can cause the chocolate layer to ooze and fall apart.

    For clean slices, refrigerate the cooled bars for 1–2 hours before cutting.


    Step 12: Slice and Serve

    Use the parchment overhang to lift the bars out of the pan. With a sharp knife, cut into squares or rectangles.

    Wipe the knife clean between cuts for neat edges.

    Serve at room temperature for the perfect balance of chewy oatmeal and fudgy chocolate.


    Tips for Perfect Revel Bars

    1. Use old-fashioned oats, not quick oats, for the best texture.
    2. Line the pan with parchment for easy removal.
    3. Don’t overbake—slightly soft centers ensure a fudgy filling.
    4. Chill before slicing for cleaner cuts.
    5. Add chopped nuts like walnuts or pecans for extra crunch if desired.

    Storage and Freezing

    • Store Revel Bars in an airtight container at room temperature for up to 4 days.
    • Refrigerate for a firmer texture and longer freshness.
    • Freeze individually wrapped bars for up to 3 months. Thaw at room temperature before serving.

    Revel Bars are the perfect combination of nostalgic comfort and indulgent flavor.

    The chewy oatmeal layers contrast beautifully with the rich chocolate center, creating a dessert that feels both homey and decadent. Whether you’re baking for a gathering or simply satisfying a chocolate craving, these bars deliver every time.

    Once you try homemade Revel Bars, you’ll understand why this classic recipe has stood the test of time. With simple ingredients and easy steps, you can create a batch of irresistible bars that disappear almost as quickly as they cool.

  • Swirled with Sweet Spice: The Ultimate Cinnamon Quick Bread You’ll Make Again and Again

    Swirled with Sweet Spice: The Ultimate Cinnamon Quick Bread You’ll Make Again and Again

    There’s something timeless about the warm aroma of cinnamon drifting through your kitchen.

    Cinnamon quick bread is soft, tender, and beautifully swirled with sweet spice—perfect for breakfast, brunch, or an afternoon treat with coffee. Best of all, since it’s a quick bread, there’s no yeast and no rising time required.

    Just mix, swirl, bake, and enjoy. This step-by-step guide will show you exactly how to create a moist, bakery-style cinnamon quick bread with a rich cinnamon sugar ribbon in every slice.


    Ingredients You’ll Need

    For the Bread Batter:

    • 2 cups (250g) all-purpose flour
    • 1 cup (200g) granulated sugar
    • 1 teaspoon baking soda
    • ½ teaspoon baking powder
    • ½ teaspoon salt
    • 1 teaspoon ground cinnamon
    • 2 large eggs
    • 1 cup (240ml) buttermilk (or milk + 1 tablespoon vinegar)
    • ½ cup (120ml) vegetable oil or melted butter
    • 1 teaspoon vanilla extract

    For the Cinnamon Swirl:

    • ⅓ cup (65g) brown sugar
    • 1 tablespoon ground cinnamon
    • 1 tablespoon melted butter

    Optional Glaze:

    • ½ cup powdered sugar
    • 1–2 tablespoons milk
    • ¼ teaspoon vanilla extract

    Step 1: Preheat and Prepare Your Pan

    Preheat your oven to 350°F (175°C). Lightly grease a standard 9×5-inch loaf pan with butter or nonstick spray.

    For easy removal, you can also line the pan with parchment paper, leaving an overhang on the sides.

    Preparing the pan properly ensures your bread releases cleanly after baking.


    Step 2: Mix the Dry Ingredients

    In a large mixing bowl, whisk together the flour, sugar, baking soda, baking powder, salt, and cinnamon.

    Mixing the dry ingredients first ensures even distribution of the leavening agents and spice, giving the bread a consistent texture and flavor throughout.


    Step 3: Combine the Wet Ingredients

    In a separate bowl, whisk together the eggs, buttermilk, oil (or melted butter), and vanilla extract until smooth.

    The buttermilk adds moisture and a slight tang, while the oil keeps the bread soft and tender for days.


    Step 4: Combine Wet and Dry Mixtures

    Pour the wet ingredients into the bowl of dry ingredients. Using a spatula or wooden spoon, gently stir until just combined.

    Be careful not to overmix—this can develop too much gluten and make the bread dense. The batter should be smooth but slightly thick, with no visible streaks of flour.


    Step 5: Prepare the Cinnamon Swirl

    In a small bowl, mix together the brown sugar, ground cinnamon, and melted butter until combined.

    This mixture will create the sweet, gooey ribbon that makes cinnamon quick bread so irresistible.


    Step 6: Layer and Swirl

    Pour half of the batter into the prepared loaf pan and spread evenly. Sprinkle half of the cinnamon swirl mixture over the batter.

    Add the remaining batter on top and gently smooth it out. Sprinkle the rest of the cinnamon mixture over the top layer. Using a knife or skewer, gently swirl the cinnamon sugar into the batter with a few figure-eight motions. Avoid over-swirling—you want distinct ribbons of cinnamon throughout the bread.


    Step 7: Bake to Golden Perfection

    Place the loaf pan in the preheated oven and bake for 50–60 minutes, or until a toothpick inserted into the center comes out clean or with just a few moist crumbs.

    If the top begins to brown too quickly, loosely tent the bread with aluminum foil during the last 10–15 minutes of baking.


    Step 8: Cool Before Removing

    Once baked, remove the bread from the oven and let it cool in the pan for 10–15 minutes.

    Then carefully transfer it to a wire rack to cool completely. Cooling allows the crumb to set and prevents the bread from becoming gummy when sliced.


    Step 9: Add the Optional Glaze

    For an extra touch of sweetness, whisk together powdered sugar, milk, and vanilla extract until smooth.

    Drizzle the glaze over the cooled bread, allowing it to cascade down the sides. Let it set for 10–15 minutes before slicing.


    Step 10: Slice and Serve

    Use a sharp serrated knife to slice the bread. Each slice should reveal beautiful swirls of cinnamon sugar running throughout the soft, tender crumb.

    Serve warm with butter, alongside coffee or tea, or as a comforting afternoon snack.


    Tips for the Best Cinnamon Quick Bread

    1. Don’t overmix the batter – Stir just until combined to keep the bread tender.
    2. Use room-temperature ingredients – They incorporate more smoothly into the batter.
    3. Measure flour correctly – Spoon it into the measuring cup and level it off to avoid dense bread.
    4. Let it cool fully before slicing – This ensures clean slices and proper texture.
    5. Customize it – Add chopped nuts, raisins, or a streusel topping for extra texture.

    Storage and Freezing

    • Store cinnamon quick bread in an airtight container at room temperature for up to 3 days.
    • Refrigerate for up to 5 days if glazed.
    • Freeze slices individually wrapped for up to 3 months. Thaw at room temperature or warm gently in the microwave.

    Cinnamon quick bread is the kind of recipe you’ll turn to again and again. It’s simple enough for beginner bakers yet impressive enough to share with friends and family. The soft crumb, sweet cinnamon swirl, and optional glaze create a comforting loaf that feels both nostalgic and indulgent.

    With minimal prep and everyday ingredients, you can fill your kitchen with the warm scent of cinnamon and enjoy a homemade treat that tastes like it came straight from a bakery. One slice is never enough—and luckily, this recipe makes it easy to bake another loaf whenever the craving strikes.

  • Decadent & Delicate: How to Make Perfect Chocolate Macarons from Scratch

    Decadent & Delicate: How to Make Perfect Chocolate Macarons from Scratch

    Chocolate macarons are the ultimate show-stopping treat—crisp on the outside, chewy in the center, and filled with luscious chocolate ganache.

    These elegant French sandwich cookies may seem intimidating, but with careful technique and attention to detail, you can absolutely master them at home.

    This step-by-step guide will walk you through everything you need to know to create beautiful, bakery-style chocolate macarons with smooth tops, ruffled “feet,” and rich chocolate flavor in every bite.


    Ingredients You’ll Need

    For the Chocolate Macaron Shells:

    • 1 cup (100g) almond flour, finely sifted
    • 1 ¾ cups (200g) powdered sugar
    • 2 tablespoons unsweetened cocoa powder
    • 3 large egg whites (room temperature)
    • ¼ cup (50g) granulated sugar
    • ¼ teaspoon cream of tartar (optional, stabilizes meringue)
    • ½ teaspoon vanilla extract

    For the Chocolate Ganache Filling:

    • ¾ cup (120g) semi-sweet chocolate chips or chopped chocolate
    • ½ cup (120ml) heavy cream
    • 1 tablespoon unsalted butter (optional, for shine)

    Step 1: Prepare Your Workspace

    Macarons require precision. Line two baking sheets with parchment paper or silicone mats.

    If you want evenly sized macarons, place a printed template underneath the parchment as a guide.

    Make sure your mixing bowls and beaters are completely clean and grease-free—any oil can prevent the egg whites from whipping properly.


    Step 2: Sift the Dry Ingredients

    In a large bowl, sift together the almond flour, powdered sugar, and cocoa powder.

    Sifting is crucial to remove lumps and ensure smooth macaron shells. If needed, pulse the mixture briefly in a food processor before sifting to achieve a fine texture.

    Set aside while you prepare the meringue.


    Step 3: Make the Meringue

    In a clean mixing bowl, beat the room-temperature egg whites on medium speed until foamy. Add the cream of tartar if using. Gradually sprinkle in the granulated sugar while continuing to beat.

    Increase the speed to medium-high and whip until stiff, glossy peaks form. The meringue should hold its shape firmly when you lift the beaters. Add vanilla extract and mix briefly to combine.


    Step 4: The Macaronage (Folding Process)

    Add the sifted dry ingredients to the meringue in two additions. Using a silicone spatula, gently fold the mixture by sweeping around the bowl and cutting through the center. Rotate the bowl as you fold.

    This step—called macaronage—is critical. The batter should flow slowly like lava when lifted with a spatula. If it’s too thick, the shells will be lumpy; if overmixed, they will spread too much. Aim for a smooth, glossy batter that forms ribbons and settles back into itself within 10–15 seconds.


    Step 5: Pipe the Macarons

    Transfer the batter to a piping bag fitted with a round tip. Hold the bag vertically and pipe small, even circles onto the prepared baking sheets. Leave space between each macaron.

    Once piped, tap the baking sheets firmly on the counter several times to release air bubbles. Use a toothpick to pop any visible bubbles on the surface.


    Step 6: Rest the Shells

    Allow the piped macarons to rest at room temperature for 30–60 minutes, or until a thin skin forms on the surface. Gently touch the tops—if the batter doesn’t stick to your finger, they are ready to bake.

    This resting period helps develop the iconic “feet” at the base of each macaron.


    Step 7: Bake to Perfection

    Preheat your oven to 300°F (150°C). Bake one tray at a time on the center rack for 15–18 minutes. The macarons are done when they have risen with visible feet and do not wobble when gently touched.

    Remove from the oven and allow them to cool completely before attempting to remove them from the parchment. Trying to lift them too early may cause sticking.


    Step 8: Make the Chocolate Ganache

    While the shells cool, heat the heavy cream in a small saucepan until just simmering (do not boil). Pour the hot cream over the chopped chocolate in a heatproof bowl. Let sit for 1–2 minutes, then stir until smooth and glossy.

    Add butter if desired for extra shine and richness. Let the ganache cool until thick enough to pipe.


    Step 9: Assemble the Macarons

    Match similar-sized shells together. Pipe a small amount of ganache onto the flat side of one shell, then gently press another shell on top to form a sandwich.

    Repeat with remaining shells and filling.


    Step 10: Mature for Best Flavor

    For the best texture and flavor, place the assembled macarons in an airtight container and refrigerate for 24 hours. This resting period allows the filling to soften the shells slightly, creating the perfect chewy center.

    Bring to room temperature before serving.


    Tips for Perfect Chocolate Macarons

    1. Weigh your ingredients for accuracy. Macarons are sensitive to measurement errors.
    2. Avoid humidity—moist air can affect how shells dry and bake.
    3. Don’t skip resting time—it’s essential for developing feet.
    4. Use room-temperature egg whites for better volume.
    5. Practice patience—macarons improve with experience.

    Storage

    • Store filled macarons in the refrigerator for up to 5 days.
    • Freeze for up to 1 month in an airtight container. Thaw in the refrigerator before serving.

    Chocolate macarons are delicate, elegant, and deeply satisfying. With crisp shells, chewy centers, and silky ganache filling, they strike the perfect balance between texture and flavor.

    While they require attention to detail, the reward is a tray of bakery-worthy treats that look as stunning as they taste.

    Once you master these Chocolate Macarons, you’ll feel confident experimenting with flavors, fillings, and colors—turning your kitchen into your very own French pâtisserie.

  • Creamy, Cheesy, and Absolutely Decadent: How to Make Chicken Alfredo Lasagna at Home

    Creamy, Cheesy, and Absolutely Decadent: How to Make Chicken Alfredo Lasagna at Home

    If you love the rich, creamy flavors of Alfredo sauce but also crave the comforting layers of lasagna, then Chicken Alfredo Lasagna is the ultimate dish for you.

    This recipe combines tender, shredded chicken, smooth Alfredo sauce, perfectly cooked pasta, and layers of melty cheese to create a decadent, family-friendly meal.

    Unlike traditional tomato-based lasagna, this version is creamy, garlicky, and irresistibly cheesy, making it perfect for dinner parties, weekend indulgence, or a cozy family meal.

    Follow this step-by-step guide to make a restaurant-quality Chicken Alfredo Lasagna right in your own kitchen.


    Ingredients You’ll Need

    For the Chicken:

    • 2 cups cooked chicken, shredded (rotisserie chicken works perfectly)
    • 1 teaspoon garlic powder
    • Salt and black pepper, to taste

    For the Alfredo Sauce:

    • 4 tablespoons unsalted butter
    • 3 cloves garlic, minced
    • 2 tablespoons all-purpose flour
    • 2 cups whole milk
    • 1 cup heavy cream
    • 1 cup freshly grated Parmesan cheese
    • ½ teaspoon salt
    • ¼ teaspoon black pepper
    • ¼ teaspoon nutmeg (optional, adds warmth)

    For the Lasagna Layers:

    • 9–12 no-boil lasagna noodles (or traditional noodles, cooked)
    • 2 cups shredded mozzarella cheese
    • 1 cup shredded provolone or fontina cheese
    • Fresh parsley, chopped, for garnish

    Step 1: Prepare the Chicken

    If you haven’t done so already, cook and shred your chicken. Rotisserie chicken saves time and adds flavor, but you can also poach or bake chicken breasts.

    Season the shredded chicken with garlic powder, salt, and pepper. Set aside until ready to layer in the lasagna.


    Step 2: Make the Alfredo Sauce

    In a medium saucepan over medium heat, melt butter. Add minced garlic and sauté for 30–60 seconds until fragrant, taking care not to burn it. Sprinkle in flour and whisk continuously for 1–2 minutes to form a roux.

    Slowly pour in milk and heavy cream, whisking constantly to avoid lumps. Bring to a gentle simmer and let the sauce thicken, about 4–5 minutes. Remove from heat and stir in Parmesan cheese, salt, pepper, and optional nutmeg until smooth. Taste and adjust seasoning as needed.


    Step 3: Preheat the Oven

    Preheat your oven to 375°F (190°C).

    Lightly grease a 9×13-inch baking dish with butter or nonstick cooking spray to prevent sticking.


    Step 4: Layer the Lasagna

    Start by spreading a thin layer of Alfredo sauce on the bottom of the baking dish. This prevents the noodles from sticking and adds a creamy base.

    Next, place a layer of lasagna noodles over the sauce, slightly overlapping if necessary. Spread a portion of shredded chicken evenly over the noodles, then drizzle more Alfredo sauce on top. Sprinkle a mix of mozzarella and provolone cheeses evenly.

    Repeat the layers: noodles → chicken → sauce → cheese, until all ingredients are used. The final layer should be noodles topped generously with Alfredo sauce and shredded cheese.


    Step 5: Cover and Bake

    Cover the dish with aluminum foil to prevent the top from browning too quickly. Bake in the preheated oven for 25 minutes.

    Then remove the foil and bake for an additional 15–20 minutes, until the top is golden and bubbly.


    Step 6: Let It Rest

    Remove the lasagna from the oven and allow it to rest for 10–15 minutes before slicing.

    Resting helps the layers set and makes serving easier while keeping the creamy texture intact.


    Step 7: Serve and Garnish

    Slice the lasagna into squares and serve warm.

    Garnish with freshly chopped parsley for color and freshness.

    Pair with a crisp green salad or garlic bread to complete the meal.


    Tips for the Perfect Chicken Alfredo Lasagna

    1. Use freshly grated Parmesan – Pre-grated cheese can be coated with anti-caking agents, affecting how smoothly it melts.
    2. No-boil noodles save time – But ensure your sauce is generous enough to soften them completely.
    3. Shred chicken finely – This helps distribute it evenly and ensures each bite has chicken.
    4. Adjust cheese ratios – Use more mozzarella for stretchiness or add fontina for a richer flavor.
    5. Optional vegetables – Add spinach, mushrooms, or roasted red peppers between layers for extra flavor and texture.

    Storage and Reheating

    • Store leftover lasagna in an airtight container in the refrigerator for up to 3 days.
    • Reheat slices in the microwave or oven at 350°F (175°C) for 10–15 minutes until warmed through.
    • For freezing, wrap portions tightly in foil or plastic wrap and freeze for up to 2 months. Thaw overnight in the refrigerator before reheating.

    This Chicken Alfredo Lasagna is rich, cheesy, and creamy without being overwhelming.

    The tang of the Parmesan, the melt-in-your-mouth noodles, and the tender chicken make it a crowd-pleaser for family dinners, potlucks, or special occasions. Each bite is comfort food perfection, combining creamy sauce, cheesy layers, and hearty protein in a single, satisfying dish.

    With just a little prep and layering, you can enjoy homemade, restaurant-quality lasagna in the comfort of your kitchen. Once you try it, this creamy, cheesy, chicken-filled lasagna will become a staple for special dinners and family favorites alike.