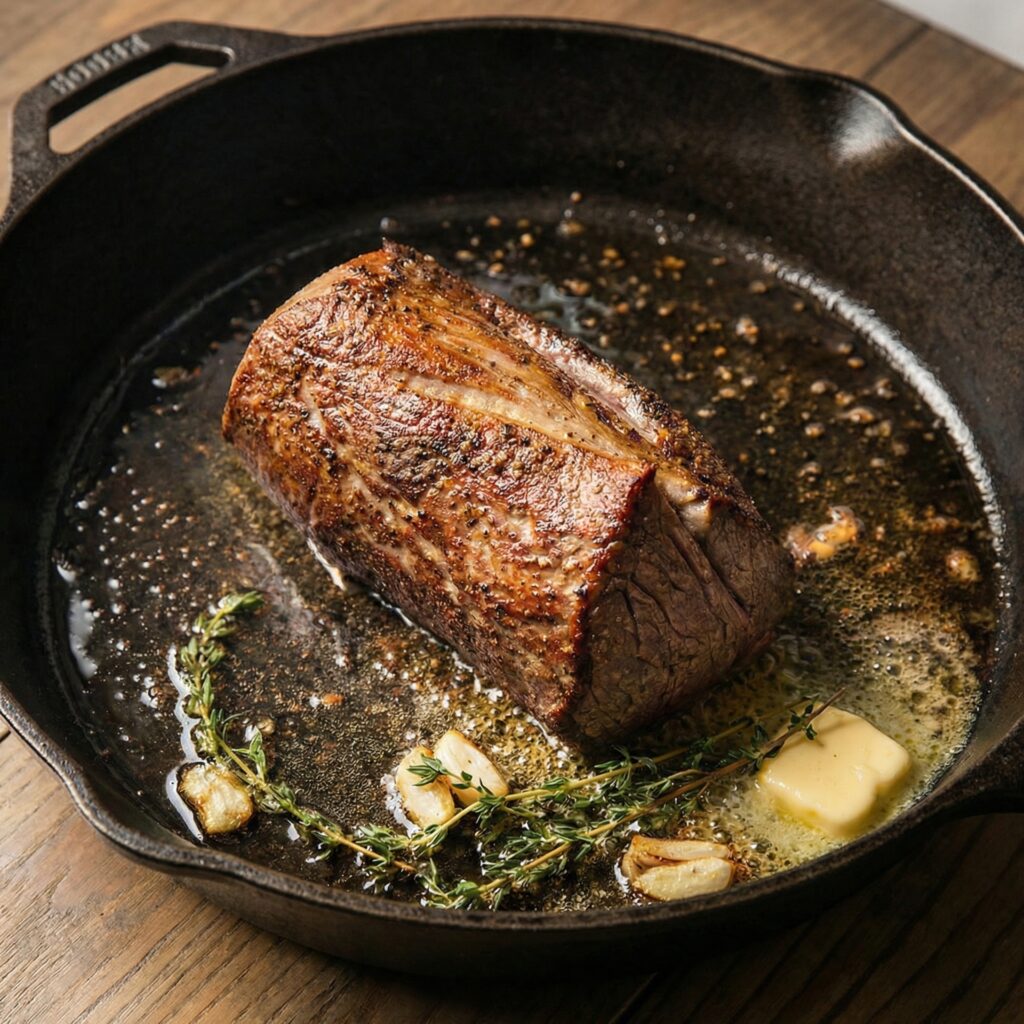
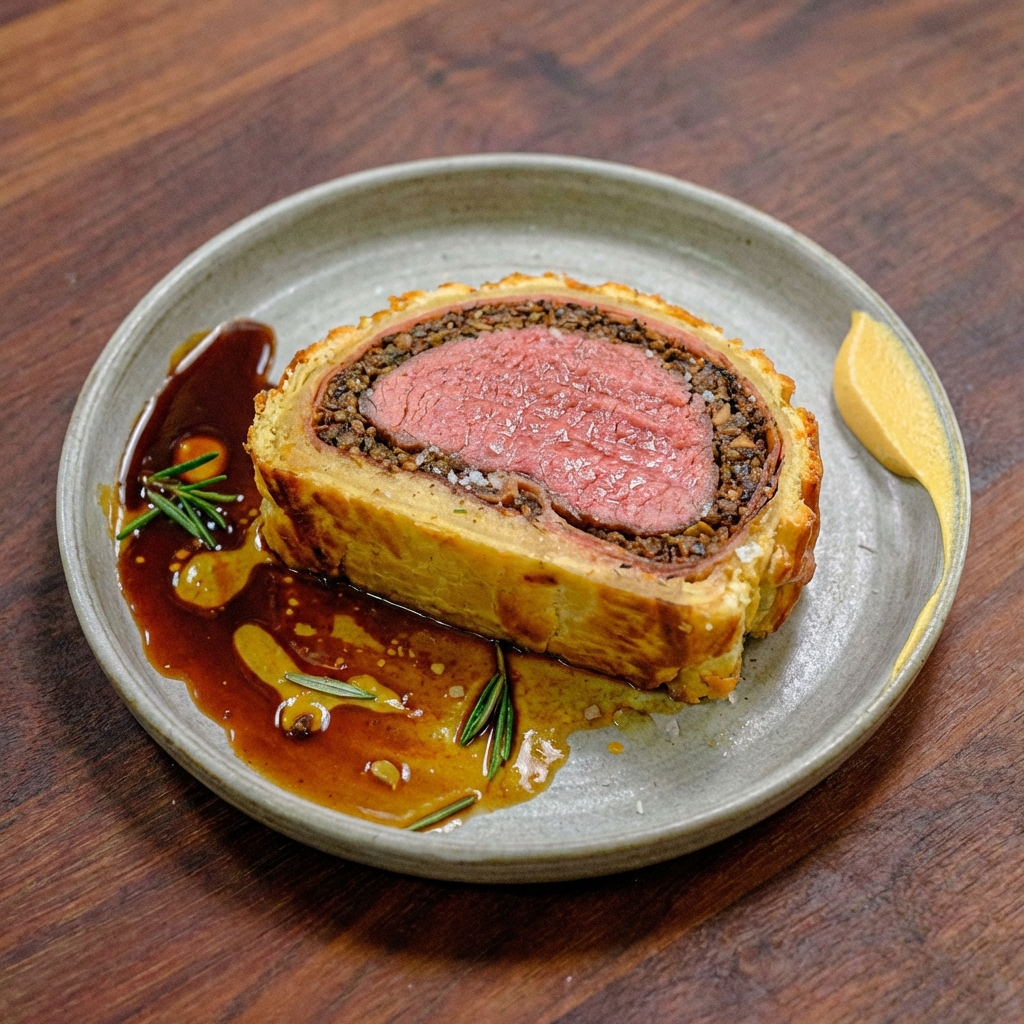
Category: Uncategorized

  • Flavor-Packed and Irresistible: How to Make Halal Cart-Style Chicken and Rice with White Sauce at Home

    Flavor-Packed and Irresistible: How to Make Halal Cart-Style Chicken and Rice with White Sauce at Home

    If you’ve ever wandered the streets of New York City and smelled the savory aroma of a Halal food cart, you know the magic of tender chicken over fluffy rice, drizzled with tangy white sauce, and paired with a kick of red hot sauce.

    It’s comforting, addictive, and packed with bold Middle Eastern-inspired flavors. The good news? You can recreate that Halal cart-style chicken and rice right in your own kitchen without waiting in line.

    This step-by-step guide will show you how to prepare juicy, spiced chicken, perfectly seasoned rice, and the signature creamy white sauce, so you can enjoy the ultimate Halal cart experience anytime.


    Why You’ll Love This Halal Cart-Style Chicken and Rice

    • Juicy, marinated chicken with Middle Eastern spices
    • Fluffy, aromatic rice with subtle seasoning
    • Creamy white sauce and optional hot sauce for flavor balance
    • Easy to make at home for dinner or meal prep
    • Customizable for protein, spice level, and sides

    The magic comes from layering flavors—from the garlic and spices in the chicken to the tangy, creamy white sauce that makes every bite irresistible.
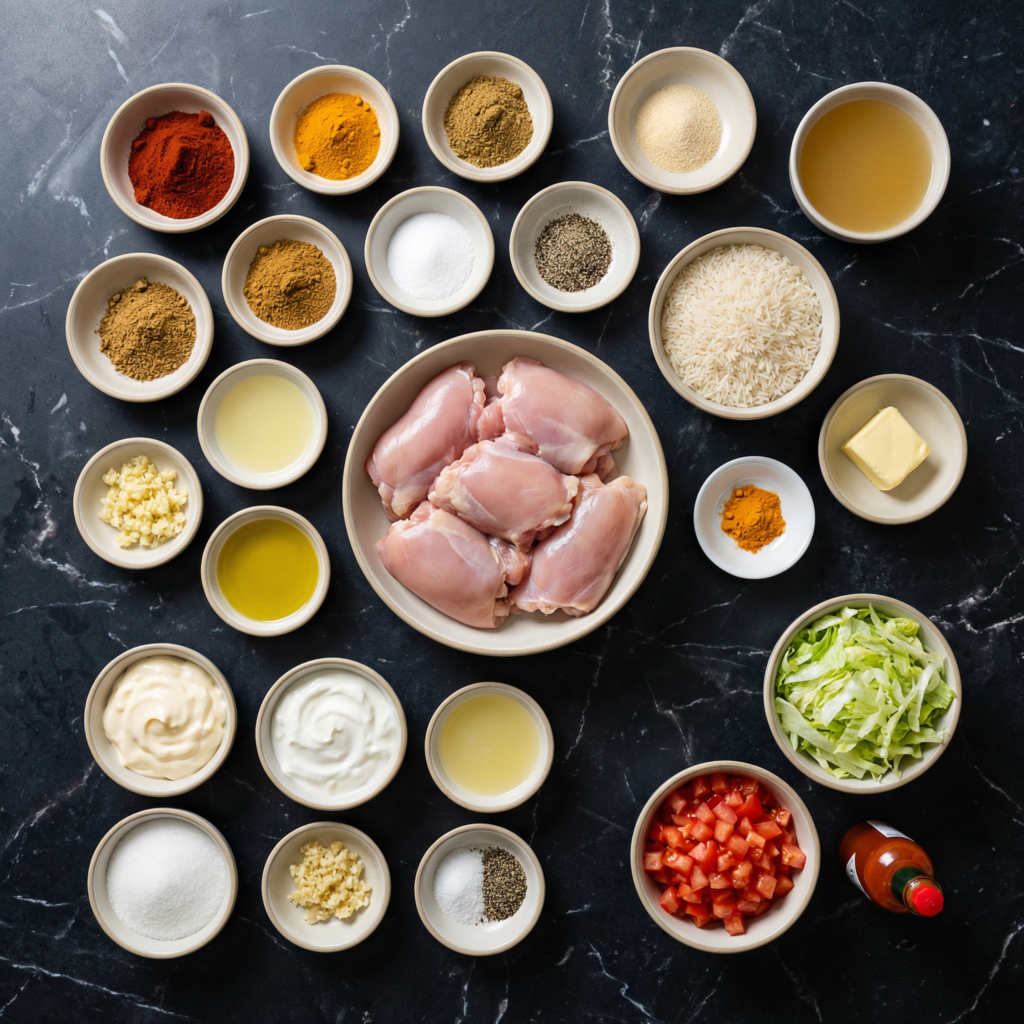

    Ingredients You’ll Need

    For the Chicken:

    • 1½ pounds boneless, skinless chicken thighs or breasts, cut into bite-sized pieces
    • 2 tablespoons olive oil
    • 2 teaspoons ground cumin
    • 1 teaspoon ground coriander
    • 1 teaspoon paprika
    • ½ teaspoon turmeric
    • ½ teaspoon ground cinnamon (optional)
    • 2 cloves garlic, minced
    • Juice of 1 lemon
    • Salt and black pepper, to taste

    For the Rice:

    • 2 cups long-grain white rice (or basmati for extra aroma)
    • 4 cups water or chicken broth
    • 1 tablespoon vegetable oil or butter
    • 1 teaspoon turmeric (for color)
    • 1 teaspoon ground cumin
    • ½ teaspoon garlic powder
    • Salt, to taste

    For the White Sauce (Signature Creamy Sauce):

    • ½ cup mayonnaise
    • ½ cup plain Greek yogurt or sour cream
    • 1 teaspoon garlic powder
    • 1 teaspoon sugar
    • 1 tablespoon lemon juice
    • Salt, to taste
    • Optional: 1–2 tablespoons water to thin

    Optional Hot Sauce:

    • Store-bought chili sauce or sriracha for added heat

    Garnish:

    • Chopped fresh parsley
    • Diced onions or pickled vegetables (optional)

    Step 1: Marinate the Chicken

    In a medium bowl, combine olive oil, cumin, coriander, paprika, turmeric, cinnamon (if using), minced garlic, lemon juice, salt, and black pepper.

    Add the chicken pieces and toss until evenly coated. Cover and refrigerate for at least 30 minutes, or up to 2 hours for deeper flavor.

    Marinating ensures the chicken is tender, flavorful, and packed with aromatic spices.


    Step 2: Cook the Rice

    Rinse the rice under cold water until the water runs clear to remove excess starch.

    In a medium saucepan, heat vegetable oil or butter over medium heat. Add the rice, turmeric, cumin, and garlic powder. Stir for 1–2 minutes to toast the spices lightly.

    Add water or chicken broth and a pinch of salt. Bring to a boil, then reduce heat to low, cover, and simmer for 15–18 minutes, or until rice is fluffy and water is absorbed.

    Fluff with a fork and set aside.


    Step 3: Cook the Chicken

    Heat a large skillet or sauté pan over medium-high heat. Add a drizzle of oil if needed.

    Add the marinated chicken in a single layer. Cook for 6–8 minutes, turning occasionally, until the chicken is golden brown on the edges and cooked through.

    Optional: For extra flavor, you can broil the chicken for 1–2 minutes at the end to mimic the slight char of a Halal cart grill.


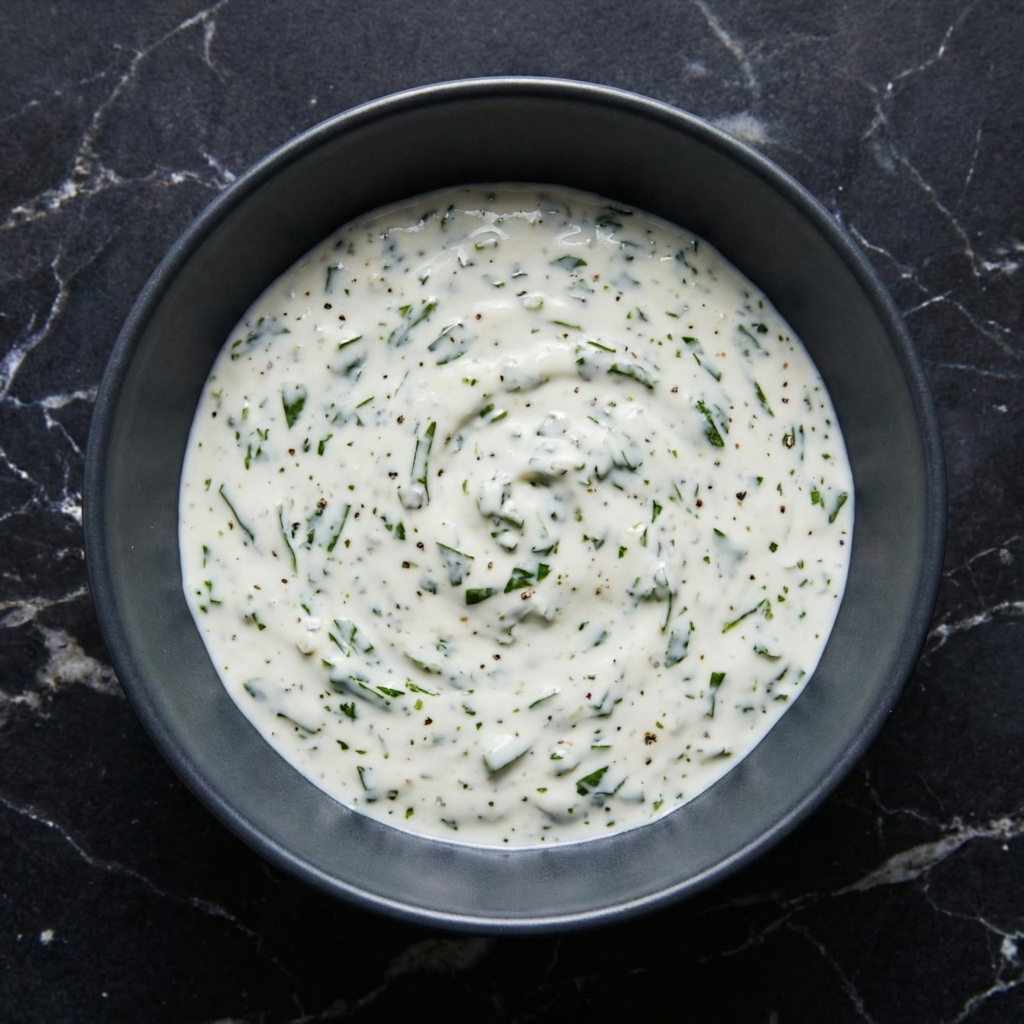
    Step 4: Prepare the White Sauce

    In a small bowl, combine mayonnaise, Greek yogurt or sour cream, garlic powder, sugar, lemon juice, and salt.

    Whisk until smooth. If the sauce is too thick, add 1–2 tablespoons of water to reach a pourable consistency.

    Taste and adjust: more lemon juice for tang, sugar for balance, or garlic for extra punch.

    Step 5: Assemble Your Halal Cart Chicken and Rice

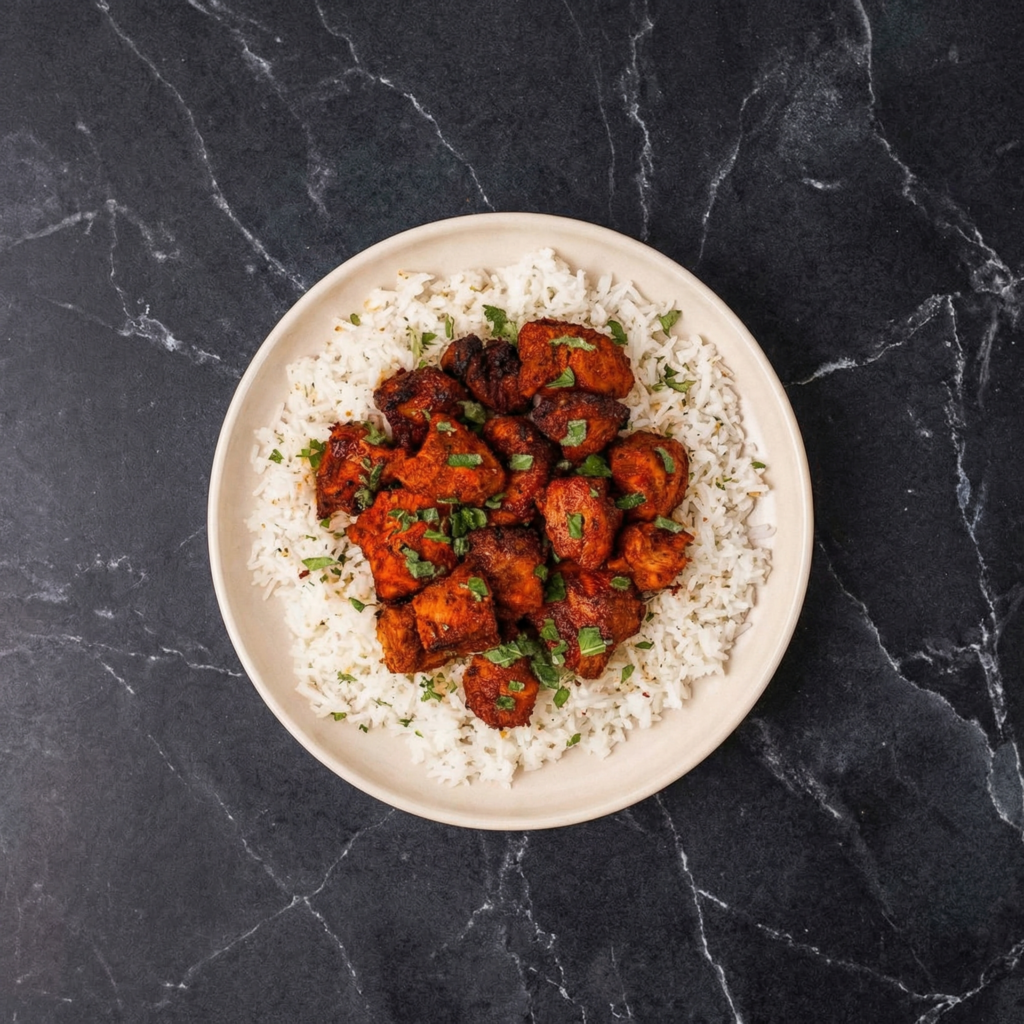
    Place a generous scoop of rice on each plate.

    Top with cooked chicken, ensuring even distribution.

    Drizzle the creamy white sauce generously over the chicken and rice.

    Add a few dashes of hot sauce if you like spice.

    Garnish with chopped parsley, diced onions, or pickled vegetables for an authentic finish.


    Flavor and Texture Highlights

    • Juicy, spiced chicken with a slightly caramelized edge
    • Fluffy, golden rice infused with cumin and turmeric
    • Tangy, creamy white sauce that balances the savory flavors
    • Optional heat from red chili sauce adds complexity
    • Fresh garnishes add crunch and brightness

    Every bite is layered, bold, and satisfying—just like the classic Halal cart experience.


    Tips for Perfect Halal Cart Chicken and Rice

    • Use chicken thighs for juicier, more flavorful meat.
    • Toast the rice with spices before simmering for extra aroma.
    • Marinate the chicken longer for more tender and flavorful results.
    • Drizzle sauce generously—the white sauce is key to authenticity.
    • Serve immediately for best texture, or store rice and chicken separately for meal prep.

    Optional Variations

    • Protein Swap: Use beef, lamb, or tofu for a different twist.
    • Brown Rice Version: Swap white rice for brown rice for added fiber.
    • Extra Veggies: Add roasted peppers, carrots, or zucchini for a complete meal.
    • Spice Level: Adjust hot sauce or add crushed red pepper flakes to taste.
    • Meal Prep Friendly: Store chicken, rice, and sauce separately for easy reheating during the week.

    Storage and Meal Prep

    • Cooked chicken and rice can be stored in airtight containers in the refrigerator for up to 3–4 days.
    • White sauce can be stored separately in a sealed container for up to a week.
    • Reheat chicken in a skillet or oven to maintain juiciness; reheat rice with a splash of water.

    Why This Recipe Works

    This Halal cart-style chicken and rice works because it balances tender, aromatic chicken with perfectly seasoned rice and a creamy, tangy sauce. Layering flavors and textures—from the spiced meat to the creamy drizzle and optional heat—replicates the authentic street food experience.

    It’s easy, customizable, and perfect for anyone craving that iconic Halal cart flavor from the comfort of home.


    With tender, spiced chicken, fluffy golden rice, and creamy white sauce, this Halal Cart-Style Chicken and Rice recipe brings the bold, iconic flavors of NYC street food right to your kitchen.

    Easy to prepare, customizable, and utterly satisfying, it’s a must-try for fans of flavorful, comforting meals.

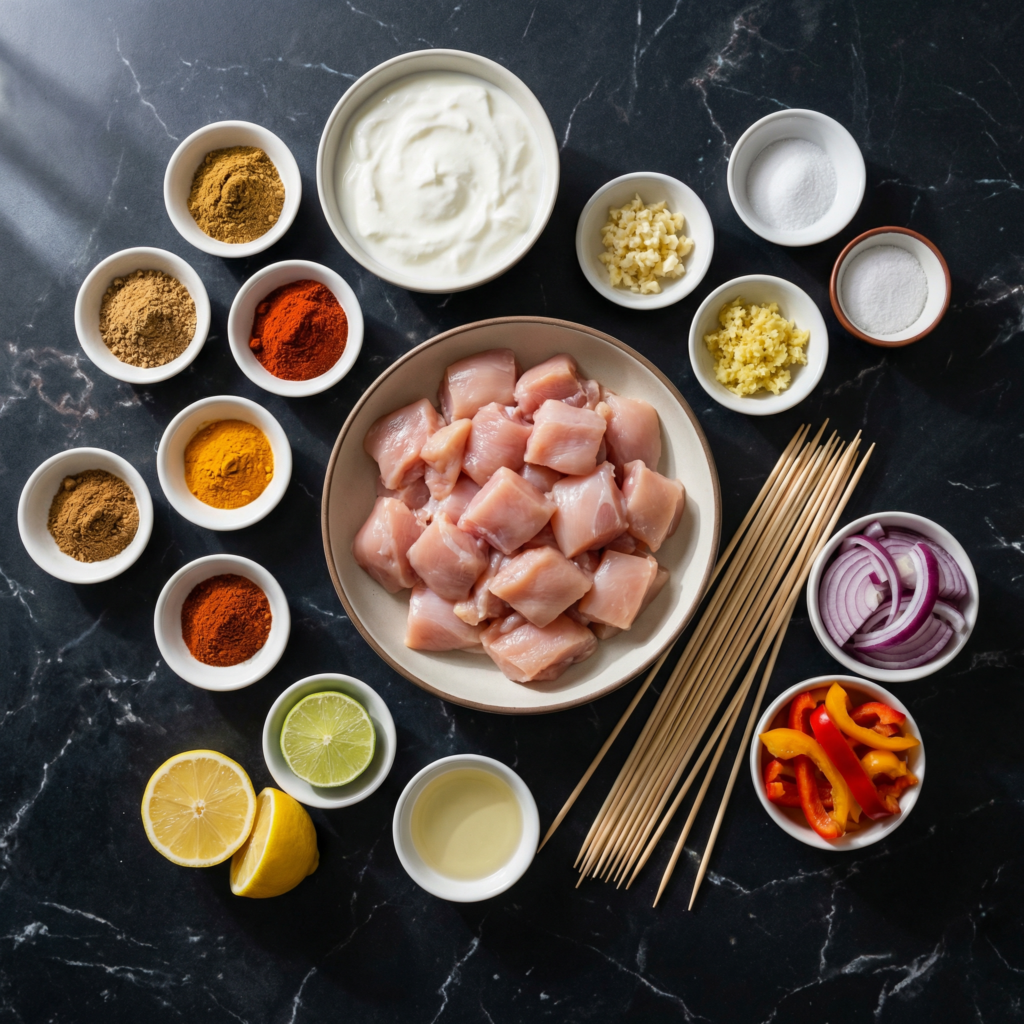
  • Bold, Smoky, and Bursting with Flavor: How to Make Tandoori Chicken Skewers at Home

    Bold, Smoky, and Bursting with Flavor: How to Make Tandoori Chicken Skewers at Home

    Few dishes capture the vibrant, aromatic flavors of Indian cuisine quite like Tandoori Chicken.

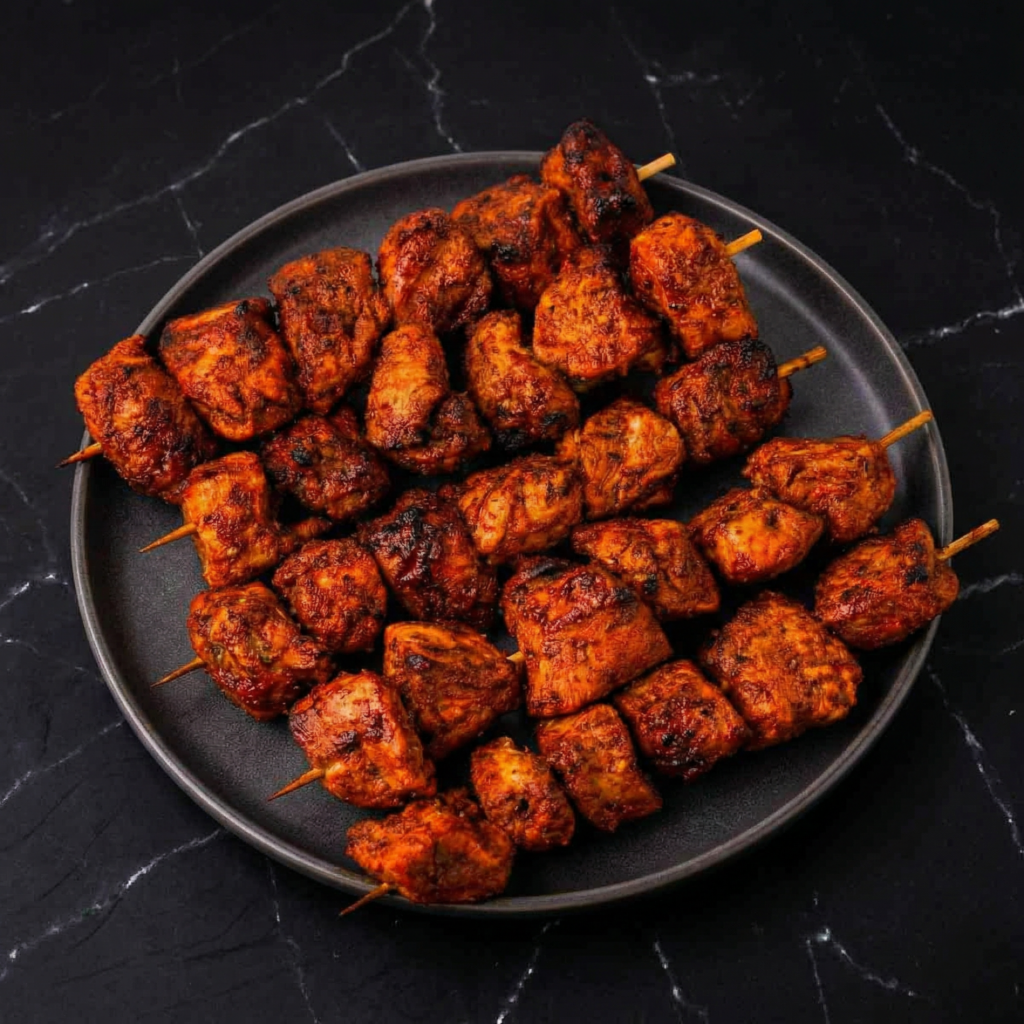
    These skewers feature juicy, marinated chicken infused with a rich blend of spices, yogurt, and citrus, then grilled to perfection until smoky and slightly charred. Perfect for a weeknight dinner, a summer barbecue, or a party appetizer, Tandoori Chicken Skewers are visually stunning, deeply flavorful, and surprisingly easy to make at home—no traditional tandoor oven required.

    This step-by-step guide will walk you through creating tender, flavorful skewers from scratch, including tips for marinating, grilling, and serving a dish that’s restaurant-quality yet home-friendly.


    Why You’ll Love Tandoori Chicken Skewers

    • Bold, smoky, and aromatic flavors
    • Juicy, tender chicken with a slightly charred exterior
    • Easy to prepare with simple ingredients
    • Works on grill, oven, or stovetop grill pan
    • Perfect for serving as a main, appetizer, or party dish

    The key is a marinade that balances yogurt, citrus, and traditional tandoori spices, which not only imparts flavor but also tenderizes the chicken for maximum juiciness.


    Ingredients You’ll Need

    For the Chicken:

    • 1½ pounds boneless, skinless chicken thighs or breasts, cut into 1½-inch cubes
    • Wooden or metal skewers (soak wooden skewers in water for 15–20 minutes)

    For the Marinade:

    • ½ cup plain yogurt (Greek or regular)
    • 2 tablespoons lemon juice
    • 2 tablespoons vegetable oil
    • 2 tablespoons tandoori masala powder (store-bought or homemade)
    • 1 teaspoon ground cumin
    • 1 teaspoon smoked paprika
    • 1 teaspoon turmeric
    • 1 teaspoon chili powder (adjust to taste)
    • 3 garlic cloves, minced
    • 1-inch piece ginger, grated
    • 1 teaspoon salt

    For Serving:

    • Lemon wedges
    • Fresh cilantro
    • Sliced red onion
    • Optional: mint chutney or yogurt sauce

    Step 1: Prepare the Marinade

    In a medium bowl, combine yogurt, lemon juice, vegetable oil, tandoori masala, cumin, paprika, turmeric, chili powder, minced garlic, grated ginger, and salt.

    Whisk until smooth and aromatic. This vibrant mixture is the heart of your tandoori flavor.


    Step 2: Marinate the Chicken

    Add the cubed chicken to the marinade, ensuring each piece is fully coated.

    Cover and refrigerate for at least 2 hours, preferably 4–6 hours, or even overnight for maximum flavor and tenderness.

    Marinating allows the yogurt and citrus to tenderize the chicken while the spices infuse deep, smoky flavor.


    Step 3: Preheat Grill or Oven

    If using a grill, preheat to medium-high heat and lightly oil the grates.

    For oven-baking, preheat the oven to 425°F (220°C) and line a baking sheet with foil. Place a wire rack on top for even heat circulation.

    If cooking on a stovetop, preheat a grill pan over medium-high heat and lightly brush with oil.


    Step 4: Thread the Chicken onto Skewers

    Remove chicken from the marinade, letting excess drip off to prevent flare-ups on the grill.

    Thread the chicken cubes onto skewers, leaving a small gap between pieces to ensure even cooking and slight charring.


    Step 5: Cook the Skewers

    Grilling:

    Place skewers on the preheated grill. Cook for 10–12 minutes, turning every 2–3 minutes, until chicken is cooked through and lightly charred.

    Oven-Baking:

    Place skewers on the wire rack and bake for 12–15 minutes, flipping halfway through. For extra char, broil for 1–2 minutes at the end.

    Stovetop Grill Pan:

    Cook skewers over medium-high heat for 10–12 minutes, rotating frequently to ensure even browning.

    Check that the internal temperature reaches 165°F (74°C) for safe consumption.


    Step 6: Rest the Chicken

    Let the skewers rest for 3–5 minutes after cooking to allow juices to redistribute, keeping the chicken tender and moist.


    Step 7: Garnish and Serve

    Arrange skewers on a serving platter. Garnish with fresh cilantro, lemon wedges, and thinly sliced red onion for brightness.

    Optional: serve with mint chutney or a simple yogurt dip to complement the smoky, spiced chicken.

    These skewers are perfect alongside rice, naan, or in a lettuce wrap for a low-carb option.


    Flavor and Texture Highlights

    • Juicy, tender chicken with a smoky exterior
    • Bold, aromatic spices balanced by yogurt and citrus
    • Slightly charred edges for added depth of flavor
    • Fresh garnishes that add brightness and contrast

    Every bite combines complex flavors and satisfying textures, making Tandoori Chicken Skewers irresistible.


    Tips for Perfect Tandoori Chicken

    • Use thighs for juicier meat; breasts are leaner but require careful monitoring to avoid drying.
    • Marinate long for maximum tenderness and depth of flavor.
    • Thread skewers evenly to ensure consistent cooking.
    • Don’t overcrowd the grill or pan to allow proper caramelization.
    • Serve immediately for optimal texture and flavor.

    Optional Variations

    • Vegetable Skewers: Alternate chicken with bell peppers, onions, or zucchini.
    • Spicy Variation: Add extra chili powder or fresh chilies to the marinade.
    • Creamier Marinade: Stir in a little coconut milk for a richer flavor.
    • Sheet Pan Meal: Bake chicken and vegetables together for a simple one-pan dinner.

    Storage and Meal Prep

    • Marinated chicken can be stored in the refrigerator for up to 24 hours before cooking.
    • Cooked skewers can be refrigerated for 2–3 days and reheated gently in the oven or on a grill.
    • The marinade can also double as a dipping sauce if boiled for 1–2 minutes to ensure safety.

    Why This Recipe Works

    Tandoori Chicken Skewers are a perfect combination of smoky, spicy, and tangy flavors. Yogurt tenderizes the chicken, while the blend of spices creates depth and aroma. Cooking on skewers ensures even heat distribution and a visually appealing presentation.

    These skewers are versatile, easy to prepare, and full of bold flavors, making them perfect for weeknight dinners, parties, or outdoor grilling.


    With tender, juicy chicken, vibrant spices, and fresh garnishes, Tandoori Chicken Skewers bring the bold flavors of Indian cuisine straight to your home kitchen.

    They’re easy to make, fun to serve, and utterly satisfying—proof that a simple skewer can deliver extraordinary taste.

  • Japanese Cloud Cake (Cotton Cheesecake)

    Japanese Cloud Cake (Cotton Cheesecake)

    Meet the cake that truly tastes like a cloud. This Japanese Cloud Cake—also known as Cotton Cheesecake or Soufflé Cheesecake—is a masterpiece of texture and restraint. It’s not as dense as New York cheesecake, nor as dry as ordinary sponge.

    Instead, it exists in a category of its own: impossibly airy, delicately jiggly, and sublimely creamy. Each slice practically dissolves on your tongue, leaving behind whispers of cream cheese and vanilla. The technique is precise, but the reward is a dessert of breathtaking elegance.

    The Science of the Cloud

    This cake achieves its signature ethereal texture through three critical techniques: a stable meringue, a gentle water bath, and gradual cooling. Unlike American cheesecake, which relies on dense cream cheese and eggs, Japanese Cloud Cake derives its lift almost entirely from whipped egg whites folded into a light cream cheese base.

    The meringue must reach stiff, glossy peaks—underwhipped and the cake falls flat; overwhipped and it deflates during folding. The water bath (bain-marie) surrounds the cake with gentle, moist heat, preventing the top from cracking and allowing the interior to cook through slowly and evenly without curdling.

    Finally, cooling the cake gradually in the turned-off oven prevents the sudden temperature shock that causes collapse. The result is a cake with a crumb so fine it’s often called “cotton”.

    Ingredients

    For the Japanese Cloud Cake (8-inch / 20cm round):

    • 200g (7 oz) cream cheese, softened to room temperature
    • 50g (3.5 tbsp) unsalted butter, softened
    • 100ml (⅓ cup + 1 tbsp) whole milk
    • 6 large eggs, separated (whites and yolks divided)
    • 100g (½ cup) granulated sugar, divided
    • 60g (½ cup) cake flour, sifted
    • 20g (2 tbsp) cornstarch, sifted
    • 1 teaspoon vanilla extract
    • Zest of ½ lemon (optional, for brightness)
    • ¼ teaspoon cream of tartar or 1 teaspoon lemon juice (for stabilizing meringue)
    • Pinch of salt

    For Dusting & Serving:

    • Powdered sugar, for dusting
    • Fresh berries or berry coulis
    • Lightly sweetened whipped cream

    Instructions

    1. Prepare the Pan & Water Bath: Preheat oven to 320°F (160°C). Line the bottom of an 8-inch (20cm) round springform pan with parchment paper. Wrap the outside of the pan tightly with heavy-duty aluminum foil to prevent water from seeping in during the water bath. Bring a kettle of water to a boil.

    2. Make the Cream Cheese Base: In a large bowl, beat the softened cream cheese and butter together until completely smooth and lump-free. Gradually add the milk and vanilla extract, mixing until fully incorporated. In a separate bowl, whisk the egg yolks with half the sugar (50g) until pale and slightly thickened.

    Sift the cake flour and cornstarch together, then fold them into the yolk mixture. Combine this yolk mixture with the cream cheese mixture, whisking until smooth. Add lemon zest if using.

    3. Whip the Meringue: In a clean, grease-free bowl, beat the egg whites with the cream of tartar (or lemon juice) and a pinch of salt on medium speed until foamy. Gradually add the remaining 50g of sugar in three additions, beating on medium-high speed until stiff, glossy peaks form. The meringue should hold its shape firmly when the whisk is lifted.

    4. Fold Gently: Add one-third of the meringue to the cream cheese mixture and fold gently with a spatula to lighten the batter. Carefully fold in the remaining meringue in two additions, using a cutting and folding motion. Be thorough but gentle—you want a uniform batter with no white streaks, but you must not deflate the air bubbles.

    5. Fill the Pan: Pour the batter into the prepared pan. Gently tap the pan on the counter 2-3 times to release any large air bubbles. Place the springform pan inside a larger roasting pan. Place the roasting pan on the oven rack, then carefully pour the hot water into the roasting pan until it reaches about 1 inch (2.5cm) up the sides of the springform pan.

    6. Bake Slowly: Bake for 60-75 minutes, until the cake is set, puffed, and golden brown on top. The center should still jiggle slightly when gently shaken—it will continue to set as it cools. If the top is browning too quickly, tent loosely with foil after 40 minutes.

    7. Cool Gradually: Turn off the oven and leave the door slightly ajar (prop it open with a wooden spoon). Let the cake cool in the oven for 1 hour. This gradual cooling prevents cracking and collapse. Remove from the oven and water bath, then let the cake cool completely in the pan on a wire rack. Once cool, refrigerate for at least 4 hours or overnight. This chilling step is essential for the perfect texture.

    8. Unmold & Serve: Run a thin, sharp knife around the edge of the pan, then release the springform. Invert the cake onto a plate, then flip it right-side up onto a serving platter. Dust generously with powdered sugar. For clean slices, use a knife dipped in hot water and wiped dry between each cut. Serve chilled or at room temperature with berries and whipped cream.

    Pro-Tips for Cloud-Like Perfection

    • Room Temperature Ingredients: Cold cream cheese and eggs create a lumpy batter and deflate the meringue. Set everything out 1-2 hours before starting.
    • Never Grease the Pan Sides: The batter needs to cling to the ungreased walls to climb high as it bakes. Only line the bottom.
    • Stiff, Not Dry Meringue: Whip until the peaks stand straight up but the meringue still looks glossy and moist. Dry, overwhipped meringue is impossible to fold in smoothly.
    • Fold, Don’t Stir: Aggressive stirring destroys the air bubbles. Use a gentle, decisive folding motion.
    • Water Bath is Non-Negotiable: This is what creates the signature moist, velvet texture and prevents cracking.
    • Don’t Skip the Overnight Chill: The cake is extremely fragile when warm. Chilling firms it up for clean, beautiful slices and deepens the flavor.
    • Flavor Variations: Add 1 tablespoon matcha powder (reduce flour slightly), 2 tablespoons cocoa powder, or replace lemon zest with orange zest.

    This Japanese Cloud Cake is the ultimate test of gentle technique—and the ultimate reward.

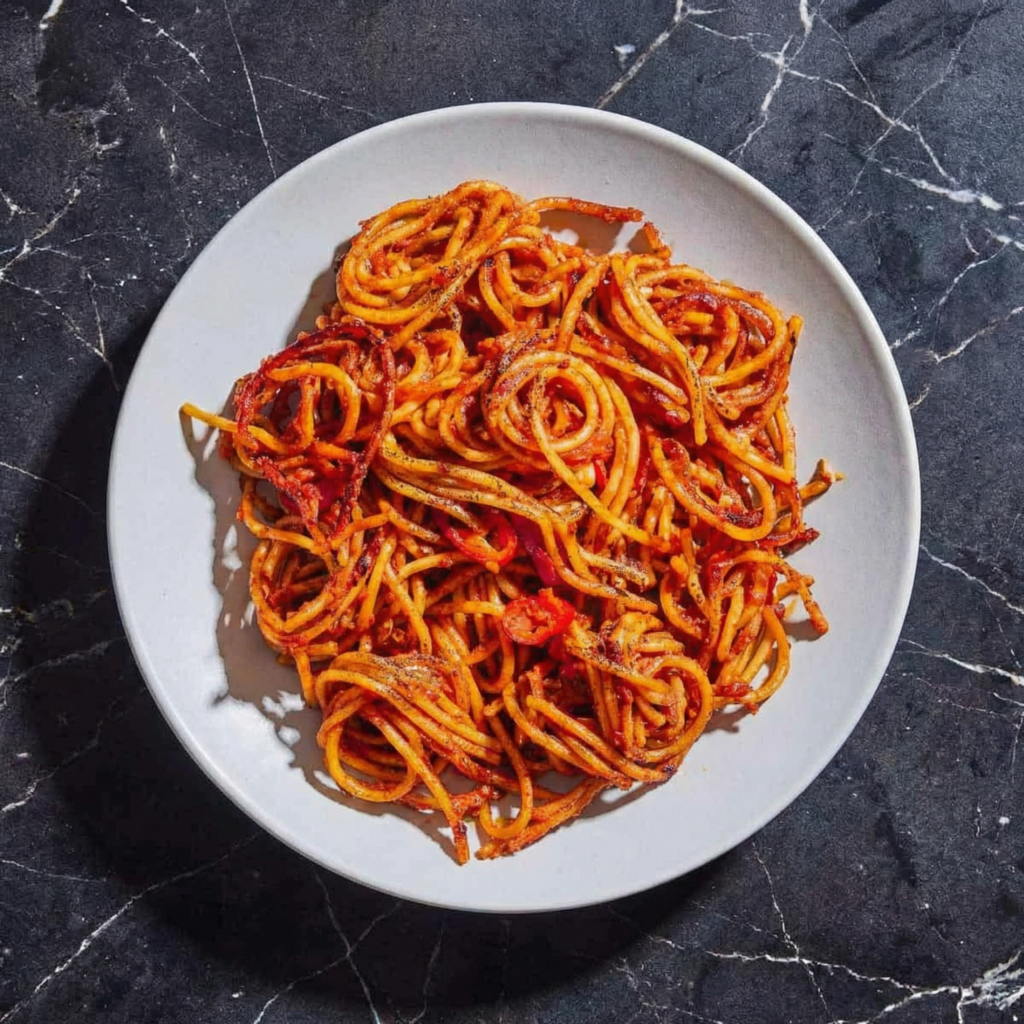
  • Fiery, Crispy, and Utterly Addictive: How to Make Spaghetti All’Assassina at Home

    Fiery, Crispy, and Utterly Addictive: How to Make Spaghetti All’Assassina at Home

    If you’re looking for a pasta dish that’s bold, intense, and completely unforgettable, Spaghetti All’Assassina is the answer.

    Hailing from Bari, Italy, this “killer spaghetti” earns its name from the dramatic, almost theatrical way it’s prepared—spaghetti is cooked directly in a spicy, rich tomato sauce that clings to every strand and forms a delectably crispy crust at the bottom of the pan.

    Unlike traditional pasta dishes, there’s no boiling water beforehand; the pasta cooks entirely in the sauce, absorbing every bit of flavor and spice. With this step-by-step guide, you can recreate this fiery, restaurant-quality pasta at home, guaranteed to impress anyone brave enough to take on the heat.


    Ingredients You’ll Need

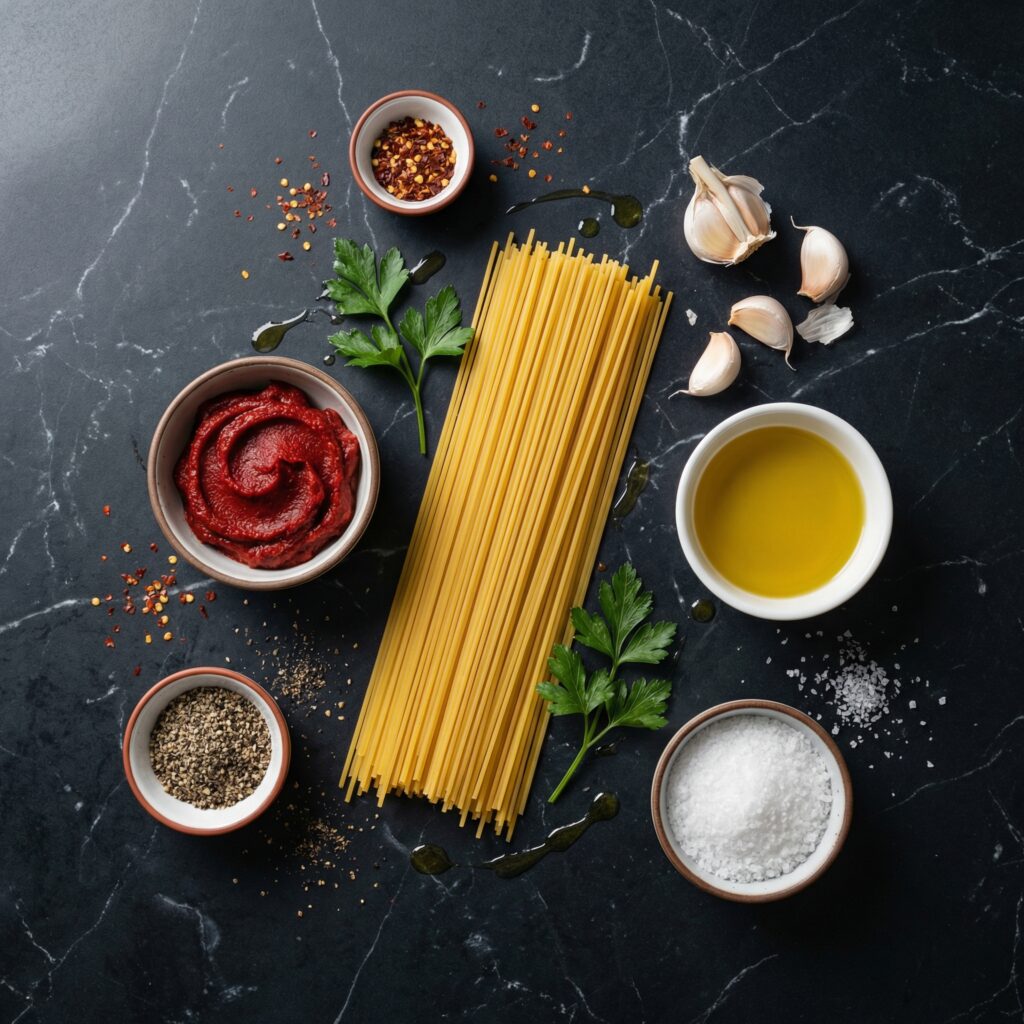
    For authentic Spaghetti All’Assassina, fresh, high-quality ingredients are key. Here’s what you’ll need for about 2–3 servings:

    • 200g spaghetti (preferably spaghetti No. 5)
    • 400g canned peeled tomatoes, crushed by hand or blended
    • 3 tbsp extra virgin olive oil
    • 3 cloves garlic, minced
    • 1–2 tsp red chili flakes (adjust based on spice tolerance)
    • 1 tsp sweet paprika (optional, adds depth)
    • 1 tsp tomato paste
    • 1 cup pasta cooking water (or more as needed)
    • Salt, to taste
    • Freshly ground black pepper, to taste
    • Optional: grated Pecorino Romano or Parmigiano-Reggiano for serving

    Step 1: Prepare the Ingredients

    Before you start, crush your tomatoes, mince the garlic, and measure out the chili flakes, olive oil, and tomato paste.

    Spaghetti All’Assassina is all about timing—having ingredients ready ensures that the pasta cooks evenly and absorbs maximum flavor.


    Step 2: Heat the Oil and Garlic

    In a large, heavy-bottomed skillet or sauté pan, heat olive oil over medium heat.

    Add the minced garlic and sauté for 30–45 seconds until fragrant, taking care not to burn it. The garlic infuses the oil with a rich aroma that forms the base of the sauce.


    Step 3: Add the Chili and Paprika

    Sprinkle in the red chili flakes and, if using, the sweet paprika. Stir for a few seconds to toast the spices lightly, releasing their natural oils and enhancing their flavor.

    This step gives the dish its signature kick and deep color.


    Step 4: Build the Sauce

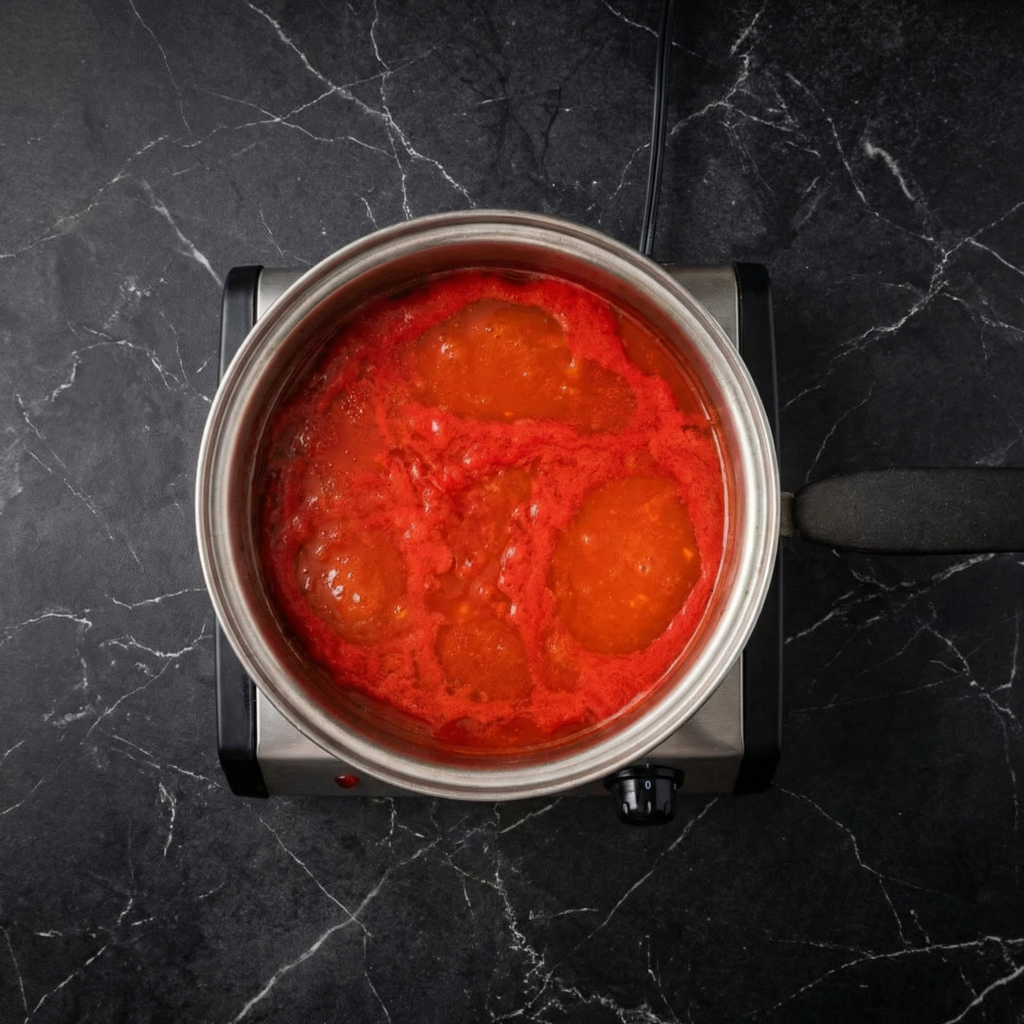
    Add the tomato paste and water to the pan, stirring to combine with the spiced oil. Then, pour in the crushed tomatoes. Season with salt and pepper to taste.

    Allow the sauce to simmer gently for 5–7 minutes, stirring occasionally, until it thickens slightly and the flavors meld.


    Step 5: Add the Spaghetti

    Unlike traditional pasta recipes, you do not boil the spaghetti first. Break the dry spaghetti in half if necessary and add it directly to the simmering sauce.

    Stir well to coat the strands with sauce, ensuring they don’t stick together. The pasta will gradually absorb the tomato sauce and the fiery flavors of the chili.


    Step 6: Create the Crispy Bottom (The “Soccarata”)

    One of the defining characteristics of Spaghetti All’Assassina is the crispy, caramelized layer of pasta that forms at the bottom of the pan, called the “soccarata.”

    Once the pasta is nearly done, stop stirring for a few minutes and let it sit over medium heat. The bottom will crisp slightly, creating a deep, toasted flavor that contrasts beautifully with the tender spaghetti above.


    Step 7: Check for Seasoning

    Taste the spaghetti and adjust salt, pepper, or chili flakes as needed.

    The dish should have a perfect balance of heat, acidity from the tomatoes, and savory depth from the garlic and oil.


    Step 8: Serve the Spaghetti

    Once the pasta is fully cooked and the bottom layer is golden and crisp, transfer the spaghetti to serving plates.

    Use a spatula to scoop some of the “soccarata” from the bottom for each portion—this crispy element is what makes Spaghetti All’Assassina truly special. Sprinkle with grated Pecorino Romano or Parmigiano-Reggiano if desired.


    Step 9: Enjoy Immediately

    Spaghetti All’Assassina is best enjoyed fresh and piping hot, straight from the pan.

    The contrast between tender pasta and the crispy, slightly charred bottom is what makes this dish unique. Pair with a simple green salad or crusty bread to complete the meal, and be prepared for an intense, flavorful experience.


    Tips for Perfect Spaghetti All’Assassina

    1. Don’t pre-boil the pasta – cooking it directly in the sauce is essential.
    2. Use a heavy-bottomed pan – this ensures even heat and helps form the soccarata.
    3. Adjust chili to taste – the dish should be spicy but balanced.
    4. Break the spaghetti if necessary – makes it easier to stir and coat with sauce.
    5. Patience is key – let the bottom crisp for a few minutes without stirring for the perfect texture.

    Spaghetti All’Assassina is a bold and unforgettable Italian dish that transforms simple ingredients into something extraordinary.

    The tender pasta, intense tomato-chili sauce, and crispy caramelized soccarata make it a meal that’s both dramatic and deeply satisfying. With this recipe, you can bring a taste of Bari’s streets into your home—fiery, crispy, and utterly addictive.


    Ready to experience the thrill of Spaghetti All’Assassina in your own kitchen?

    Follow these steps carefully, and you’ll have a pasta dish that’s tender, crispy, and packed with fiery Italian flavor in every bite.

  • Classic Chicken Cacciatore: The Ultimate Italian Hunter’s Chicken Recipe

    Classic Chicken Cacciatore: The Ultimate Italian Hunter’s Chicken Recipe

    Why You’ll Love This Chicken Cacciatore Recipe

    Chicken Cacciatore, also known as Italian hunter’s chicken, is beloved for its rustic flavors and simple preparation.

    Slow simmering allows the chicken to absorb the savory tomato and herb sauce, creating a comforting meal that tastes even better the next day.

    Reasons this recipe stands out:

    • Classic Italian comfort food
    • One-pan meal with simple ingredients
    • Perfect for meal prep and leftovers
    • Rich tomato garlic herb sauce
    • Beginner-friendly step-by-step method

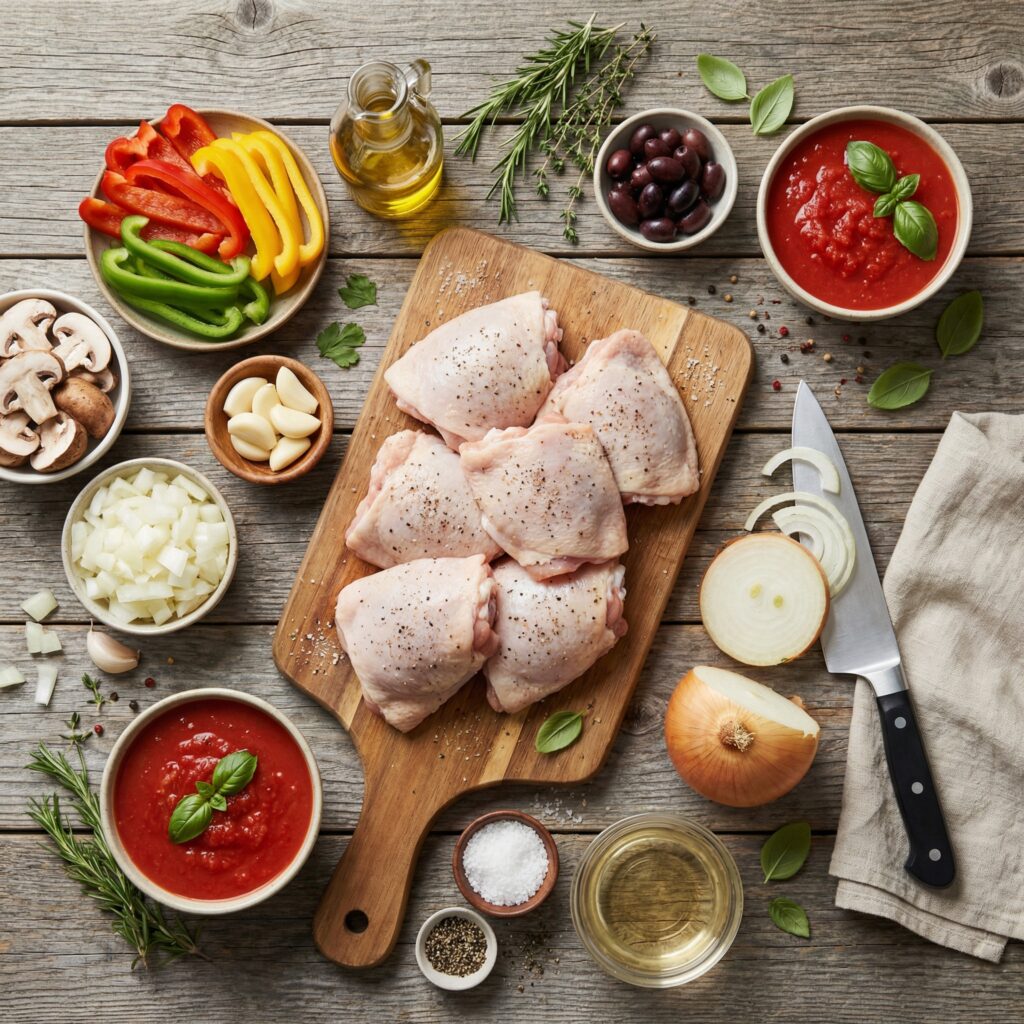
    Ingredients for Chicken Cacciatore

    Using fresh herbs and quality tomatoes creates the best flavor for this traditional Chicken Cacciatore recipe.

    Main Ingredients

    • 6 bone-in, skin-on chicken thighs (or mixed chicken pieces)
    • Salt and black pepper
    • 2 tablespoons olive oil
    • 1 medium onion, sliced
    • 1 red bell pepper, sliced
    • 1 green bell pepper, sliced
    • 4 cloves garlic, minced

    Sauce

    • 1 can (28 oz) crushed tomatoes
    • ½ cup chicken broth
    • ½ cup dry red wine (optional but recommended)
    • 1 teaspoon dried oregano
    • 1 teaspoon dried basil
    • ½ teaspoon red pepper flakes (optional)
    • 1 bay leaf

    Finishing

    • Fresh parsley or basil for garnish

    How to Make Chicken Cacciatore (Step-by-Step)

    Step 1: Season the Chicken

    Pat the chicken pieces dry with paper towels and season generously with salt and black pepper. Proper seasoning before cooking ensures deeper flavor throughout the dish.


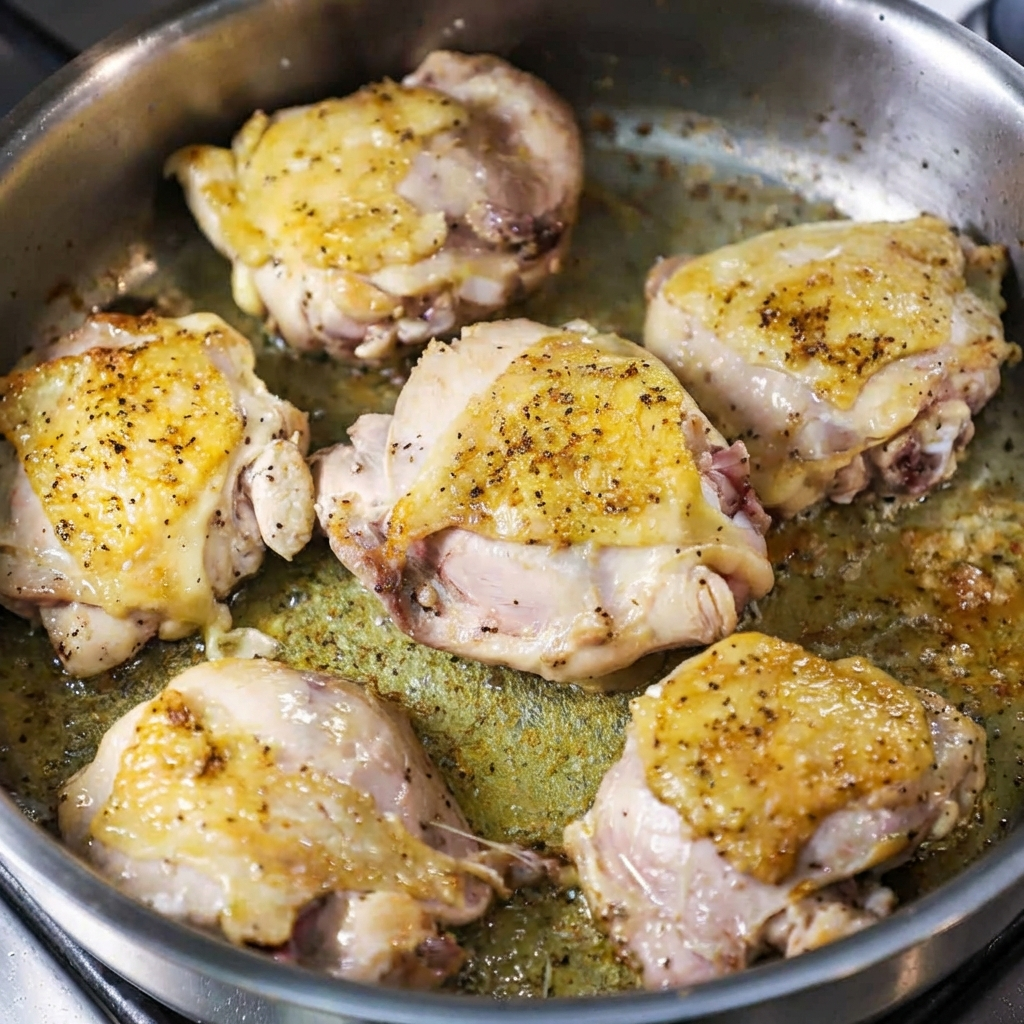
    Step 2: Sear the Chicken

    Heat olive oil in a large skillet or Dutch oven over medium-high heat. Place the chicken skin-side down and sear for 4–5 minutes until golden brown. Flip and cook another 3–4 minutes. Remove the chicken and set aside.

    Searing locks in flavor and helps build the base of the sauce.


    Step 3: Sauté the Vegetables

    In the same pan, add sliced onions and bell peppers. Cook for 5 minutes until softened. Stir in minced garlic and cook for another 30 seconds until fragrant.

    The browned bits left from the chicken add extra flavor to the vegetables.


    Step 4: Deglaze the Pan

    Pour in the red wine and scrape the bottom of the pan to release flavorful browned bits. Let the wine simmer for 2–3 minutes to cook off the alcohol while concentrating flavor.

    If not using wine, substitute additional chicken broth.


    Step 5: Add the Tomato Sauce

    Stir in crushed tomatoes, chicken broth, oregano, basil, red pepper flakes, and bay leaf. Mix well and bring the sauce to a gentle simmer.


    Step 6: Return the Chicken to the Pan

    Place the seared chicken pieces back into the sauce, skin-side up. Reduce heat to low, cover, and simmer for 35–40 minutes, or until the chicken is fully cooked and tender.

    Slow simmering allows the chicken to absorb the rich tomato herb flavors.


    Step 7: Adjust Seasoning

    Taste the sauce and adjust salt and pepper as needed. If the sauce is too thick, add a small splash of broth. For a thicker consistency, simmer uncovered for a few extra minutes.


    Step 8: Garnish and Serve

    Remove the bay leaf and garnish with freshly chopped parsley or basil. Serve hot over pasta, mashed potatoes, polenta, or crusty Italian bread for a complete classic Italian dinner.


    Pro Tips for Perfect Chicken Cacciatore

    • Use bone-in chicken for deeper flavor.
    • Brown the chicken well before simmering.
    • Allow the sauce to simmer gently, not boil.
    • Use quality canned tomatoes for richer taste.
    • Let the dish rest 5 minutes before serving for best flavor.

    Serving Suggestions

    This homemade Chicken Cacciatore pairs beautifully with:

    • Spaghetti or fettuccine
    • Creamy polenta
    • Garlic bread
    • Roasted vegetables
    • Simple green salad

    The rich tomato sauce also works perfectly spooned over rice or rustic country bread.


    Make-Ahead and Storage Tips

    Chicken Cacciatore tastes even better the next day as the flavors continue to develop.

    • Refrigerator: Store in an airtight container for up to 4 days
    • Freezer: Freeze portions for up to 2 months
    • Reheat: Warm gently on the stovetop with a splash of broth to loosen the sauce

    This makes it an excellent meal prep Italian chicken recipe for busy weeks.


    Easy Recipe Variations

    • Mushroom Chicken Cacciatore: Add sliced mushrooms when sautéing vegetables.
    • Slow Cooker Version: Transfer everything to a slow cooker and cook on low for 6–7 hours.
    • Boneless Chicken Option: Use boneless thighs for faster cooking.
    • Spicy Cacciatore: Increase red pepper flakes for extra heat.

    Frequently Asked Questions

    What does “Cacciatore” mean?
    “Cacciatore” means “hunter-style” in Italian, referring to rustic dishes cooked with tomatoes, herbs, onions, and peppers.

    Can I make Chicken Cacciatore without wine?
    Yes, simply substitute chicken broth for the wine while maintaining great flavor.

    What is the best cut of chicken for Chicken Cacciatore?
    Bone-in thighs are preferred because they remain juicy and flavorful during simmering.


    Final Thoughts

    This Classic Chicken Cacciatore recipe brings authentic Italian comfort food straight to your kitchen with minimal effort and maximum flavor.

    Tender braised chicken simmered in a rich tomato herb sauce creates a satisfying meal perfect for weeknight dinners or special gatherings.

    Once you try this easy homemade Chicken Cacciatore, it’s sure to become a staple recipe thanks to its hearty ingredients, simple cooking method, and timeless Italian taste.

  • Classic Beef Wellington Recipe: The Ultimate Step-by-Step Guide for Perfect Results

    Classic Beef Wellington Recipe: The Ultimate Step-by-Step Guide for Perfect Results

    If you’ve ever wanted to make a restaurant-quality Beef Wellington, this step-by-step recipe shows you exactly how to create a perfectly cooked beef tenderloin wrapped in mushroom duxelles, prosciutto, and golden puff pastry.

    This classic Beef Wellington recipe delivers a juicy center, crisp pastry exterior, and rich savory flavor that makes it ideal for holidays, dinner parties, or special occasions.

    This easy Beef Wellington guide simplifies every step so even home cooks can confidently prepare this elegant centerpiece.

    Why This Is the Best Beef Wellington Recipe

    Beef Wellington is famous for its luxurious flavor and impressive presentation. When done correctly, the contrast between flaky pastry and tender beef creates one of the most iconic dishes in classic French and British cuisine.

    Reasons to love this recipe:

    • Step-by-step instructions for beginners
    • Perfect medium-rare beef every time
    • Crispy puff pastry that doesn’t get soggy
    • Ideal for holidays, Christmas, and celebrations
    • Restaurant-style gourmet dinner at home

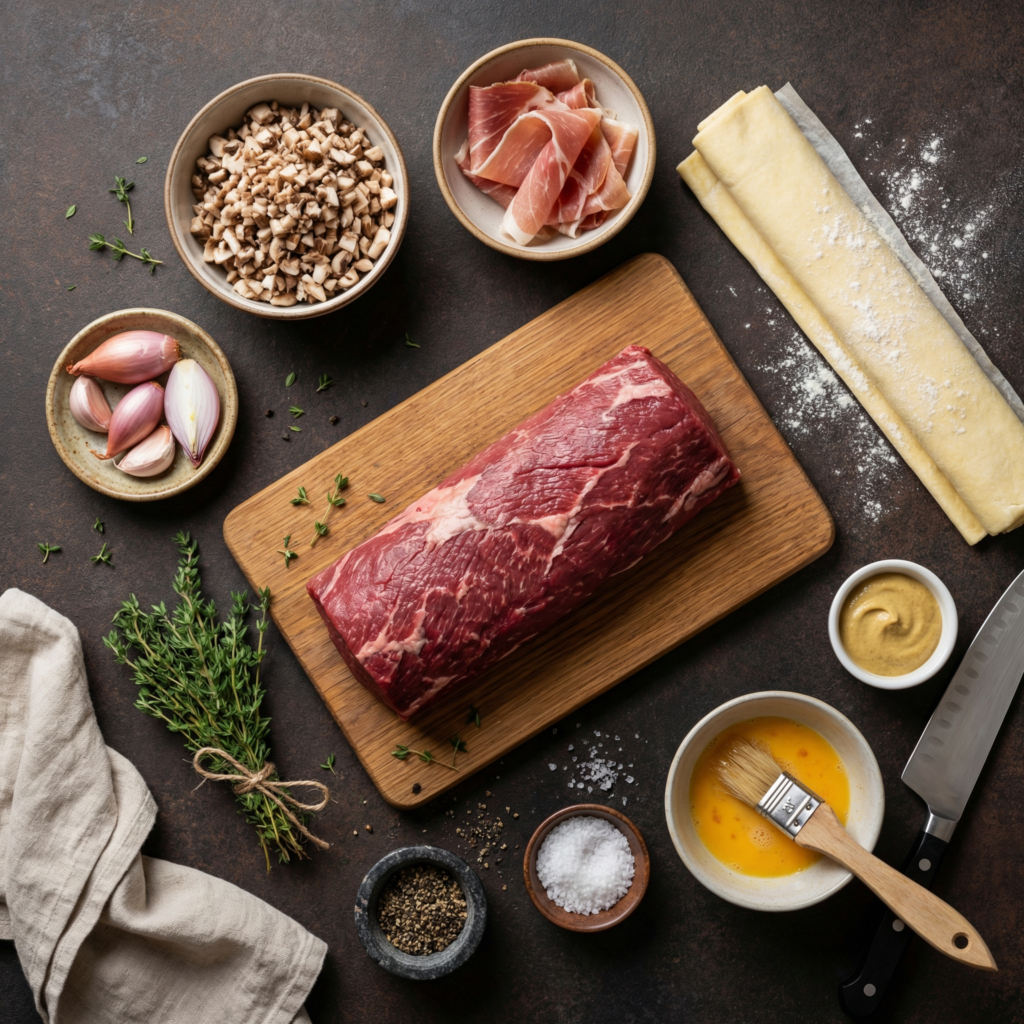
    Ingredients for Beef Wellington

    Using high-quality ingredients ensures the best flavor and texture.

    Main Ingredients

    • 2–3 lb beef tenderloin (center-cut)
    • Salt and freshly ground black pepper
    • 2 tablespoons olive oil
    • 2 tablespoons Dijon mustard

    Mushroom Duxelles

    • 1 lb mushrooms, finely chopped
    • 2 tablespoons butter
    • 2 cloves garlic, minced
    • 2 shallots, finely chopped
    • Salt and pepper to taste
    • Fresh thyme leaves

    Assembly

    • 8–10 slices prosciutto
    • 1 sheet puff pastry, thawed
    • 1 egg, beaten (egg wash)

    How to Make Beef Wellington (Step-by-Step)

    Step 1: Prepare the Beef Tenderloin

    Pat the beef dry with paper towels and season generously with salt and pepper.

    Heat olive oil in a large skillet over high heat and sear the beef on all sides until browned, about 1–2 minutes per side. This locks in flavor and creates a rich crust.

    Remove from heat and brush the tenderloin with Dijon mustard while still warm. Let cool completely before assembling.

    Step 2: Make the Mushroom Duxelles

    In the same pan, melt butter over medium heat. Add chopped mushrooms, shallots, garlic, thyme, salt, and pepper.

    Cook until the mixture becomes dry and paste-like, about 10–15 minutes. Removing excess moisture is essential to prevent soggy pastry.

    Transfer to a plate and allow the mixture to cool fully.

    Step 3: Wrap with Prosciutto

    Lay plastic wrap on your work surface and arrange prosciutto slices slightly overlapping to form a rectangle large enough to wrap the beef. Spread the cooled mushroom duxelles evenly over the prosciutto.

    Place the seared tenderloin on top and use the plastic wrap to roll everything tightly into a cylinder. Twist the ends to secure and refrigerate for 20–30 minutes to help maintain shape.

    Step 4: Wrap in Puff Pastry

    Roll out the puff pastry on a lightly floured surface until large enough to enclose the beef completely. Remove the beef from the plastic wrap and place it in the center of the pastry.

    Fold the pastry over the beef, sealing the edges tightly. Trim any excess pastry and place the Wellington seam-side down on a baking sheet lined with parchment paper.

    Brush the entire surface with egg wash for a glossy golden finish.

    Step 5: Chill Before Baking

    Refrigerate the assembled Wellington for another 15–20 minutes. Chilling helps the pastry stay crisp and prevents shrinking during baking.

    Step 6: Bake to Perfection

    Preheat the oven to 400°F (200°C). Bake the Beef Wellington for 40–45 minutes, or until the pastry is deep golden brown and an internal thermometer reads:

    • 125°F for rare
    • 135°F for medium-rare
    • 145°F for medium

    Let the Wellington rest for at least 10 minutes before slicing to retain juices.

    Pro Tips for Perfect Beef Wellington

    • Use center-cut beef tenderloin for even cooking.
    • Ensure the mushroom duxelles is dry to keep pastry crisp.
    • Chill between wrapping steps for better structure.
    • Use a meat thermometer for precise doneness.
    • Rest the meat before slicing to prevent juice loss.

    Serving Suggestions

    Beef Wellington pairs beautifully with classic steakhouse sides, including:

    • Garlic mashed potatoes
    • Roasted asparagus or green beans
    • Red wine reduction sauce
    • Creamy mushroom sauce
    • Buttered carrots or roasted root vegetables

    These sides balance the richness of the pastry and tender beef.

    Make-Ahead and Storage Tips

    You can assemble Beef Wellington up to 24 hours ahead and refrigerate until ready to bake. This makes it an excellent option for holiday meal preparation.

    Leftovers can be stored in the refrigerator for up to 3 days and reheated gently in the oven at 325°F to maintain pastry texture.

    Frequently Asked Questions

    What cut of beef is best for Beef Wellington?
    Beef tenderloin is ideal because of its tenderness and uniform shape, ensuring even cooking.

    How do I keep the pastry from getting soggy?
    Cook the mushroom mixture until dry, chill the wrapped beef before baking, and avoid excess moisture.

    Can I make individual Beef Wellingtons?
    Yes, smaller individual portions cook faster and are perfect for elegant dinner parties.

    Final Thoughts

    This classic Beef Wellington recipe is one of the most impressive dishes you can prepare at home.

    With tender beef, flavorful mushroom duxelles, savory prosciutto, and buttery puff pastry, it delivers a gourmet dining experience that rivals fine restaurants.

    By following these step-by-step Beef Wellington instructions, you can confidently create a stunning holiday centerpiece or celebratory meal that will leave guests truly impressed.

  • Beginner’s Guide to Making Sourdough Bread

    Beginner’s Guide to Making Sourdough Bread

    Transform your active sourdough starter into a magnificent, bakery-quality loaf with this comprehensive beginner’s guide. We break down the entire process—autolyse, stretch and folds, bulk fermentation, shaping, and baking—into manageable steps.

    With clear instructions and an emphasis on the “why” behind each technique, you’ll gain the confidence to bake a loaf with a crisp, caramelized crust and a soft, tangy interior dotted with those coveted irregular holes.

    The Science Behind the Perfect Loaf

    Sourdough baking is a dance between time, temperature, and gluten development. The wild yeast and bacteria in your starter work slowly, producing gas and acids during fermentation. This long, cool fermentation is what develops the bread’s complex flavor and strengthens the gluten network to trap those gases, creating an “open crumb.”

    The key techniques—stretch and folds during bulk fermentation—gently organize this gluten network without degassing the dough, building the structure it needs to rise sky-high in the oven (a phase called “oven spring”).

    Finally, scoring the dough just before baking isn’t just decorative; it provides a controlled weak point for the loaf to expand, preventing it from bursting at the seams. Baking in a preheated, covered Dutch oven replicates a professional steam-injected oven, ensuring maximum rise and a crisp, shiny crust.

    Ingredients & Equipment

    For the Bread (One Loaf):

    • 500g (about 4 cups) bread flour (highly recommended for best results)
    • 350g (about 1 ½ cups) lukewarm water (70°F/21°C)
    • 100g (about ½ cup) active, bubbly sourdough starter (at its peak)
    • 10g (2 teaspoons) fine sea salt

    Essential Equipment:

    • Kitchen scale (non-negotiable for accuracy)
    • Large mixing bowl
    • Dutch oven with lid
    • Bench scraper
    • Proofing basket (banneton) or a bowl lined with a floured cloth
    • Razor blade or lame for scoring
    • Parchment paper

    Instructions

    1. Feed Your Starter & Autolyse: 8-12 hours before you plan to mix your dough, feed your starter so it is active and at its peak (bubbly and doubled) when you begin. In a large bowl, combine the bread flour and 350g of water.

    Mix until no dry flour remains. Cover and let this shaggy mixture rest (autolyse) for 1 hour. This allows the flour to fully hydrate and gluten to begin developing, making the dough easier to work with.

    2. Mix in Starter & Salt: Add the 100g of active starter to the autolysed dough. Use wet hands to pinch and squeeze the dough for 2-3 minutes until the starter is fully incorporated and no streaks remain. Let the dough rest, covered, for 30 minutes.

    Then, sprinkle the salt over the dough, add a few drops of water to help it dissolve, and use the same pinching method to fully incorporate the salt. The dough will become smoother.

    3. Bulk Fermentation with Stretch & Folds: This is the main rising period. Cover the bowl and let the dough rise at room temperature (ideally 70-75°F / 21-24°C) for 4-6 hours. During the first 2 hours, perform 4 sets of “stretch and folds,” spaced 30 minutes apart.

    Wet your hand, grab one side of the dough, stretch it upward, and fold it over the center. Repeat on all four sides. This builds strength. After the final fold, let the dough rest undisturbed for the remainder of bulk fermentation. It should look puffy, have risen by about 30-50%, and be dotted with small bubbles.

    4. Shape the Dough & Cold Proof: Gently turn the dough out onto a lightly floured surface. Using a bench scraper, shape it into a tight ball (a “boule”) by folding the edges into the center and rotating. Let it rest seam-side down for 20 minutes (bench rest). For the final shape, flip the dough over (seam-side up), create surface tension by pulling the dough toward you, then place it seam-side up into a well-floured proofing basket (banneton).

    Alternatively, use a bowl lined with a floured tea towel. Cover and place in the refrigerator for 12-16 hours (overnight). This “cold proof” develops flavor and makes the dough easier to score.

    5. Preheat & Score: Place your Dutch oven (with lid on) in your oven and preheat to 450°F (230°C) for at least 45 minutes. Carefully remove the cold dough from the fridge. Place a sheet of parchment paper over the basket, flip it over, and gently lower the dough onto the paper. Using a razor blade (lame) held at a shallow angle, make one confident slash about ½-inch deep across the top of the loaf.

    6. Bake: Carefully remove the hot Dutch oven from your oven. Using the parchment as a sling, lift and lower the dough into the pot. Cover with the lid and bake for 25 minutes. This creates a steamy environment for maximum oven spring.

    Remove the lid, reduce the oven temperature to 425°F (220°C), and bake for another 20-25 minutes, until the crust is a deep, rich brown.

    7. Cool Completely: Transfer the baked loaf to a wire rack. This is critical: let it cool completely for at least 3-4 hours before slicing. The interior is still cooking and setting as it cools. Cutting too soon releases steam and results in a gummy crumb.

    Beginner’s Pro-Tips

    • Starter Readiness is Key: Your starter should pass the float test (a spoonful floats in water) and be at its peak activity, not after it has fallen.
    • Judge by Dough, Not Clock: Bulk fermentation time depends on your kitchen temperature. Look for the 30-50% rise and a bubbly, jiggly dough.
    • Handle Gently: Preserve those gas bubbles during shaping to achieve an open crumb.
    • Don’t Skip the Cold Proof: The overnight rest makes the process manageable and dramatically improves flavor.
    • Preheat Thoroughly: A blazing hot Dutch oven is essential for a good rise.
    • Score with Confidence: A quick, decisive slash works better than a hesitant, slow cut.
    • Resist the Urge to Cut: The cooling period is part of the baking process. Your patience will be rewarded with perfect texture.

    Welcome to the rewarding world of sourdough baking!

  • Juicy Ribeye Steak Recipe: Perfect Pan-Seared Ribeye Steak at Home

    Juicy Ribeye Steak Recipe: Perfect Pan-Seared Ribeye Steak at Home

    If you’ve been searching for how to cook ribeye steak, perfect pan-seared ribeye, or juicy ribeye steak recipe, you’re in the right place.

    This easy ribeye steak recipe delivers a restaurant-quality steak at home with a golden crust, buttery flavor, and tender center—no grill required.

    Whether you’re cooking for date night or a quick high-protein dinner, this ribeye steak recipe is simple, fast, and foolproof.

    Why Ribeye Steak Is the Best Cut

    Ribeye is known for its rich marbling, which melts during cooking and creates an incredibly juicy, flavorful steak.

    Compared to sirloin or filet mignon, ribeye delivers the best balance of tenderness and beefy flavor—making it ideal for pan-searing.

    Ingredients for Ribeye Steak

    • 1 ribeye steak (1–1½ inches thick)
    • 1 tablespoon olive oil
    • 2 tablespoons butter
    • 2 cloves garlic (crushed)
    • 2 sprigs fresh rosemary or thyme
    • Salt (kosher or sea salt)
    • Freshly Ground Black Pepper

    Step-by-Step: How to Cook Ribeye Steak

    Step 1: Bring Steak to Room Temperature

    Remove the ribeye steak from the refrigerator 30 minutes before cooking.

    This ensures even cooking and a tender result—one of the most important ribeye steak tips.

    Step 2: Season Generously

    Pat the steak dry with paper towels. Season both sides liberally with salt and black pepper.

    A dry surface helps create the perfect steak crust.

    Step 3: Heat the Pan

    Place a heavy skillet (cast iron is best) over high heat. Add olive oil and heat until it just begins to smoke.

    This is key for pan-searing ribeye steak.

    Step 4: Sear the Ribeye Steak

    Carefully place the steak in the hot pan.

    • Sear for 3–4 minutes per side without moving it
    • This creates a deep, golden-brown crust

    Step 5: Butter Baste for Flavor

    Lower heat to medium.

    Add butter, garlic, and herbs.

    Tilt the pan and continuously spoon the melted butter over the steak for 1–2 minutes. This step adds rich flavor and moisture.

    Step 6: Check Steak Doneness

    Use a meat thermometer for accuracy:

    • Rare: 120–125°F
    • Medium-Rare: 130–135°F
    • Medium: 140–145°F

    Step 7: Rest Before Serving

    Remove steak from pan and let it rest for 5–10 minutes.

    Resting allows the juices to redistribute, giving you a juicy ribeye steak every time.

    Best Side Dishes for Ribeye Steak

    • Garlic mashed potatoes
    • Roasted vegetables
    • Creamy mac and cheese
    • Fresh garden salad

    Pro Tips for the Best Ribeye Steak

    • Always use a thick-cut ribeye for best results
    • Don’t overcrowd the pan
    • Let the steak rest—never skip this step
    • Use cast iron for maximum sear

    Final Thoughts

    This easy ribeye steak recipe proves you don’t need a grill or fancy tools to make a perfect ribeye steak at home.

    With simple ingredients and the right technique, you’ll get a steak that’s tender, juicy, and packed with flavor every single time.

  • Limoncello Cannoli: Crispy Sicilian Pastries with Lemon Ricotta Filling

    Limoncello Cannoli: Crispy Sicilian Pastries with Lemon Ricotta Filling

    Bring the taste of a Sicilian pasticceria to your kitchen with these exquisite Limoncello Cannoli. This recipe guides you through making the iconic crispy, fried shells from scratch and filling them with a luscious, bright ricotta cream infused with Limoncello liqueur and fresh lemon zest.

    While it’s a project, each component can be made ahead, resulting in an impressive, authentic dessert that’s far superior to any store-bought version. The contrast of the crunchy shell, creamy filling, and vibrant lemon flavor is nothing short of spectacular.

    The Science of a Crisp Shell & Stable Filling

    Authentic cannoli shells achieve their signature crispness and blistered texture through two key factors: vodka (or wine) in the dough and hot oil frying. The alcohol inhibits gluten development, preventing the shells from becoming tough and ensuring they fry up shatteringly crisp.

    Rolling the dough incredibly thin is essential. The filling’s stability relies on draining the ricotta thoroughly—often overnight—to remove excess whey that would make it soggy. Beating the ricotta until smooth breaks down its graininess, while the addition of mascarpone cheese or whipped cream adds richness and helps the filling hold its shape.

    The Limoncello adds intense lemon flavor without adding water, which is crucial for maintaining the filling’s thick, pipeable consistency.

    Ingredients

    For the Cannoli Shells (makes 12-16):

    • 1 ½ cups (188g) all-purpose flour, plus more for dusting
    • 2 tablespoons granulated sugar
    • ½ teaspoon salt
    • 2 tablespoons unsalted butter, cold and cubed
    • 1 large egg yolk
    • ¼ cup (60ml) dry white wine or vodka
    • 1 tablespoon white wine vinegar or apple cider vinegar
    • 1 large egg white, lightly beaten (for sealing)
    • Vegetable or peanut oil, for frying
    • Cannoli tubes (metal molds)

    For the Limoncello Ricotta Filling:

    • 2 cups (500g) whole-milk ricotta cheese, drained overnight
    • 4 oz (113g) mascarpone cheese, cold
    • ¾ cup (90g) powdered sugar, sifted, plus more for dusting
    • 3 tablespoons Limoncello liqueur
    • Zest of 2 large lemons
    • ½ teaspoon vanilla extract
    • Pinch of salt

    For Garnish: Chopped pistachios, mini chocolate chips, powdered sugar, candied lemon peel.

    Instructions

    1. The Rested & Chilled Cannoli Dough: In a food processor, pulse flour, sugar, and salt. Add cold butter and pulse until sandy. Add egg yolk, wine/vodka, and vinegar. Pulse until dough forms a ball. Turn out, knead briefly until smooth, wrap in plastic, and refrigerate for at least 1 hour (up to overnight).

    2. The Rolled & Cut Dough Circles: Divide dough in half. On a lightly floured surface, roll one half out to an almost translucent thinness (about 1/16-inch thick). Using a 4- to 5-inch round cutter (or a bowl), cut out circles. Re-roll scraps. Place circles on a parchment-lined baking sheet, cover with a towel. Repeat with second dough half.

    3. The Fried & Cooled Cannoli Shells: Heat 2-3 inches of oil in a heavy pot to 365°F-375°F (185°C-190°C). Lightly brush a dough circle with beaten egg white. Wrap it around a cannoli tube, overlapping the ends slightly, and press to seal.

    Carefully lower into hot oil. Fry for 60-90 seconds until golden brown and bubbly. Using tongs, remove and drain on a paper-towel-lined rack. Let cool for 1 minute, then carefully twist and slide the shell off the tube. Let shells cool completely on the rack.

    4. The Smooth, Thick Limoncello Filling: Place the thoroughly drained ricotta in a food processor or stand mixer bowl. Process/beat for 1-2 minutes until very smooth and creamy.

    Add mascarpone, powdered sugar, Limoncello, lemon zest, vanilla, and salt. Beat again until completely smooth, thick, and well combined. Transfer to a piping bag fitted with a large round or star tip. Chill for 30 minutes.

    5. The Filled & Garnished Cannoli: Just before serving, pipe the chilled filling into a cooled shell from the center toward one end, then pipe into the other end (or fill from both ends).

    The filling should be generous and slightly mounded. Dip the exposed filling ends into chopped pistachios or mini chocolate chips. Dust the shells lightly with powdered sugar. Serve immediately for the crispiest texture.

    Pro-Tips for Cannoli Success

    • Drain Ricotta Overnight: Place ricotta in a fine-mesh strainer over a bowl in the fridge for 12-24 hours. This is the most important step for a thick filling.
    • Roll Dough Paper-Thin: The thinner the dough, the crispier the shell. You should almost be able to see through it.
    • Maintain Oil Temperature: Use a thermometer. Too cold = greasy shells. Too hot = burnt shells.
    • Cool Shells Completely: Shells must be room temperature before filling to prevent sogginess.
    • Fill Just Before Serving: Assemble no more than 1 hour ahead to preserve shell crispness.
    • Make-Ahead Strategy: Shells can be fried and stored in an airtight container at room temperature for 3 days. Filling can be made and refrigerated for 2 days. Keep separate until ready to serve.
    • No Tubes? Shape aluminum foil into 1-inch diameter logs as a makeshift mold.
    • Variation: For a classic cannoli, omit Limoncello and lemon zest, add ½ teaspoon cinnamon and ¼ cup mini chocolate chips to the filling.
  • Classic Chocolate Cake with Vanilla Buttercream: The Ultimate Celebration Cake

    Classic Chocolate Cake with Vanilla Buttercream: The Ultimate Celebration Cake

    This is the chocolate cake of your dreams and the one you’ll turn to for every celebration. The cake layers are incredibly moist, deeply chocolaty, and have a tender crumb that comes from using both butter and oil. Paired with a classic vanilla buttercream that’s creamy, not too sweet, and ideal for spreading or piping, it creates a perfect balance of flavors.

    This from-scratch recipe is straightforward but yields professional-looking results—a towering, beautiful cake that’s as much a joy to make as it is to share and eat.

    The Science of the Moist Cake & Stable Frosting

    This cake achieves its signature moistness through a combination of fats and the creaming method. Creaming butter and sugar incorporates air for lift, while oil ensures the crumb stays tender for days.

    Buttermilk adds acidity that tenderizes gluten and reacts with baking soda for a reliable rise. The “reverse creaming” method (adding dry ingredients first) can also be used for an exceptionally fine, velvety crumb.

    The vanilla buttercream is an American-style frosting, a simple emulsion of creamed butter and powdered sugar. The key to its smooth, non-grainy texture is properly softened butter and thoroughly sifted sugar.

    Beating for several minutes after adding liquid is crucial; it whips in air, making the frosting light and fluffy, while the butter’s fat crystals stabilize the mixture into a spreadable, pipeable consistency that holds its shape at room temperature.

    Ingredients

    For the Chocolate Cake (Makes three 8-inch rounds):

    • 2 ½ cups (312g) all-purpose flour
    • 1 ½ cups (300g) granulated sugar
    • ¾ cup (75g) unsweetened cocoa powder
    • 2 teaspoons baking soda
    • 1 teaspoon baking powder
    • 1 teaspoon salt
    • 3 large eggs, room temperature
    • 1 ½ cups (360ml) buttermilk, room temperature
    • ½ cup (120ml) vegetable oil
    • ½ cup (1 stick / 113g) unsalted butter, melted and cooled
    • 1 tablespoon vanilla extract
    • 1 cup (240ml) hot strong coffee or hot water

    For the Vanilla Buttercream Frosting:

    • 2 cups (4 sticks / 452g) unsalted butter, softened
    • 7-8 cups (840-960g) powdered sugar, sifted
    • ⅓ cup (80ml) heavy cream or milk, plus more as needed
    • 2 tablespoons vanilla extract
    • ¼ teaspoon salt

    Instructions

    1. The Sifted Dry Ingredients: In the bowl of a stand mixer, sift together the flour, sugar, cocoa powder, baking soda, baking powder, and salt. Whisk to combine thoroughly.

    2. The Combined Wet Ingredients: In a separate large bowl or measuring jug, whisk together the eggs, buttermilk, oil, melted butter, and vanilla extract until smooth and emulsified.

    3. The Smooth Cake Batter: With the mixer on low, gradually pour the wet ingredients into the dry ingredients. Mix just until combined and smooth. Carefully stir in the hot coffee or water. The batter will be thin.

    4. The Poured Cake Pans: Divide the batter evenly among three greased, floured, and parchment-lined 8-inch round cake pans. A kitchen scale ensures perfect layers.

    5. The Baked & Cooled Cake Layers: Bake at 350°F (175°C) for 25-30 minutes, until a toothpick inserted comes out clean. Cool in pans for 10 minutes, then turn out onto wire racks to cool completely.

    6. The Creamed Butter for Frosting: In a clean stand mixer bowl, beat the softened butter on medium-high speed for 5 minutes until it is very pale, creamy, and almost fluffy.

    7. The Fluffy Vanilla Buttercream: With the mixer on low, gradually add 6 cups of sifted powdered sugar, the salt, vanilla, and heavy cream. Beat on low until combined, then increase to medium-high and beat for 3-4 minutes until very light and fluffy. Add more sugar or cream to reach desired consistency.

    8. The Assembled & Crumb-Coated Cake: Place one cake layer on a cake stand. Spread with about ¾ cup of frosting. Repeat with remaining layers. Apply a thin “crumb coat” of frosting over the entire cake. Chill for 20 minutes to set.

    9. The Frosted & Decorated Cake: Apply the final, thick layer of frosting to the chilled cake, smoothing the sides and top. Pipe decorative borders or swirls with remaining frosting.

    Pro-Tips for Cake & Frosting Perfection

    • Room Temperature is Key: Cold ingredients can cause the batter to curdle and the frosting to be lumpy.
    • Don’t Overmix the Batter: Mix only until the ingredients are combined to avoid a tough, dense cake.
    • Use Hot Coffee: The hot liquid “blooms” the cocoa powder, intensifying the chocolate flavor without adding coffee taste.
    • Level Your Layers: For a professional look, use a serrated knife to level the domed tops of the cooled cakes so they stack evenly.
    • Sift the Powdered Sugar: This is non-negotiable for a perfectly smooth buttercream without gritty sugar lumps.
    • Beat the Frosting Long Enough: The extended whipping time incorporates air, making the frosting light and preventing it from being overly sweet.
    • Crumb Coat: Don’t skip the crumb coat! It traps loose crumbs and creates a smooth base for the final layer of frosting.
    • Make Ahead: Bake and freeze the cake layers up to a month ahead. Thaw before frosting. Frosting can be made 3 days ahead and stored covered in the fridge; let it come to room temp and re-whip before using.
    • Storage: Store the finished cake covered at cool room temperature for 2 days, or in the fridge for up to 5 days. Let chilled cake sit at room temp for an hour before serving for best texture.
    • Serving: For clean slices, use a sharp knife dipped in hot water and wiped between cuts.

    This Classic Chocolate Cake with Vanilla Buttercream is the celebratory dessert you’ll make for a lifetime.