Category: Uncategorized

  • Chocolate Banana Cake (The Best of Both Worlds)

    Chocolate Banana Cake (The Best of Both Worlds)

    Let’s be honest: chocolate and banana is one of the greatest flavor duos of all time. The deep, rich intensity of chocolate meets the sweet, mellow, almost caramel-like warmth of ripe bananas. It’s a match made in dessert heaven.

    This Chocolate Banana Cake takes that partnership and builds an entire masterpiece around it. We’re talking about two layers of the most incredibly moist, tender chocolate cake you’ve ever baked—so moist you’ll swear it’s magic. Each bite is infused with real banana flavor, studded with melty chocolate chips, and slathered in a silky, decadent chocolate frosting.

    Topped with a glossy ganache drip, this is the cake that will have people hovering around the kitchen island, waiting for a slice. Spoiler: there will be no leftovers.

    The Secret to an Ultra-Moist Cake That Stays Fresh for Days

    What makes this chocolate banana cake so impossibly moist? Three words: ripe bananas and buttermilk. Very ripe bananas (the ones that are practically black and begging to be used) contain more sugar and moisture than their yellow counterparts. They break down completely in the batter, infusing every crumb with flavor and tenderness.

    The buttermilk adds another layer of moisture while its gentle acidity tenderizes the gluten, ensuring a soft, fine crumb. And here’s the pro trick: using hot coffee in the batter. Coffee doesn’t make the cake taste like coffee; it actually enhances the chocolate flavor, making it deeper and more complex. The result is a cake that stays moist and delicious for days—if it lasts that long.

    Ingredients
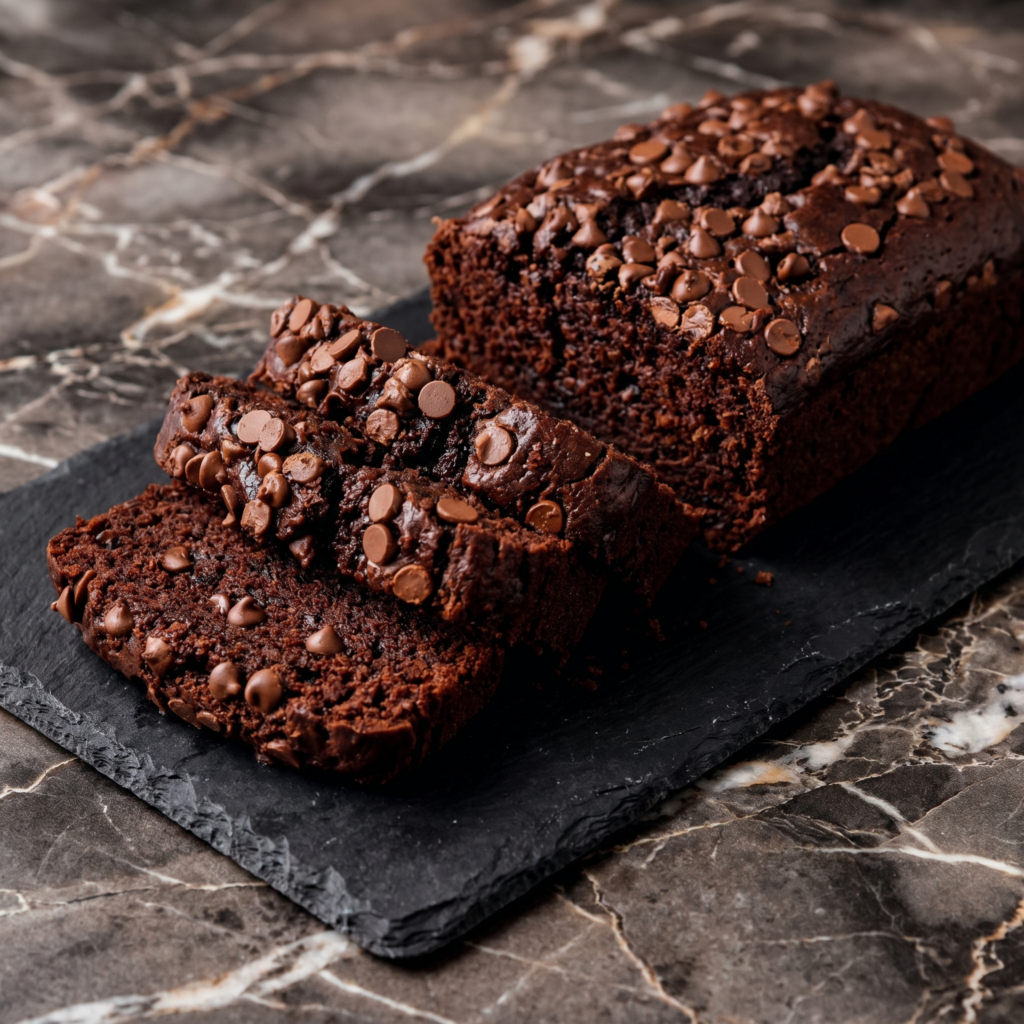
    For the Chocolate Banana Cake Layers:

    • 1 ¾ cups (219g) all-purpose flour
    • ¾ cup (65g) unsweetened cocoa powder (natural or Dutch-process)
    • 1 ½ teaspoons baking powder
    • 1 ½ teaspoons baking soda
    • ½ teaspoon salt
    • 1 cup (240ml) buttermilk, at room temperature
    • ½ cup (120ml) hot coffee (or hot water)
    • 1 cup (225g) mashed very ripe bananas (about 2-3 large bananas)
    • 1 teaspoon vanilla extract
    • ½ cup (113g) unsalted butter, softened
    • ½ cup (100g) vegetable oil (or canola oil)
    • 1 ½ cups (300g) granulated sugar
    • ½ cup (100g) light brown sugar, packed
    • 2 large eggs, at room temperature
    • 1 cup (170g) semi-sweet chocolate chips (optional, but highly recommended)

    For the Chocolate Frosting:

    • 1 ½ cups (340g) unsalted butter, slightly softened
    • 4 cups (480g) powdered sugar, sifted
    • ¾ cup (65g) unsweetened cocoa powder, sifted
    • ½ cup (120ml) heavy cream
    • 2 teaspoons vanilla extract
    • ¼ teaspoon salt

    For the Chocolate Ganache Drip:

    • ½ cup (120ml) heavy cream
    • 4 oz (113g) semi-sweet chocolate, finely chopped

    For Garnish (Optional):

    • Fresh banana slices (tossed in lemon juice to prevent browning)
    • Chocolate curls or shavings
    • Light dusting of cocoa powder

    Instructions

    1. Preheat and Prep: Preheat your oven to 350°F (175°C). Grease two 9-inch round cake pans, line the bottoms with parchment paper rounds, and lightly flour the sides. This guarantees your cakes will release perfectly .

    2. Mash Your Bananas: In a small bowl, mash your very ripe bananas with a fork until mostly smooth with a few small lumps remaining. Measure out 1 cup (225g) and set aside. The riper the bananas, the better the flavor .

    3. Combine Dry Ingredients: In a medium bowl, whisk together the flour, cocoa powder, baking powder, baking soda, and salt until well combined. Set aside .

    4. Combine Wet Ingredients: In a separate bowl or large measuring cup, whisk together the buttermilk, hot coffee (or water), mashed bananas, and vanilla extract. The mixture will look a little speckled and slightly curdled—that’s perfectly normal .

    5. Cream Butter, Oil, and Sugars: In a large bowl using a hand mixer or stand mixer with the paddle attachment, beat the softened butter, vegetable oil, granulated sugar, and brown sugar together on medium speed until light and fluffy, about 3-4 minutes. The mixture should look pale and aerated .

    6. Add Eggs: Add the eggs one at a time, beating well after each addition until fully incorporated. Scrape down the sides of the bowl as needed .

    7. Alternate Dry and Wet Ingredients: With the mixer on low speed, add about one-third of the dry ingredients, mixing just until combined. Add half of the wet ingredients, mixing until incorporated. Repeat with another third of the dry, the remaining wet, and finally the last of the dry. Mix just until no streaks of flour remain—do not overmix .

    8. Fold in Chocolate Chips: If using, gently fold the chocolate chips into the batter with a spatula. This adds little melty pockets of chocolate throughout the cake .

    9. Bake the Cake Layers: Divide the batter evenly between the two prepared pans. Bake for 30-35 minutes, or until a toothpick inserted into the center of each layer comes out clean or with a few moist crumbs. Let the cakes cool in the pans for 15 minutes, then carefully turn them out onto a wire rack to cool completely .

    10. Make the Chocolate Frosting: In a large bowl, beat the softened butter on medium speed until creamy and smooth, about 2-3 minutes. Gradually add the sifted powdered sugar and cocoa powder, one cup at a time, beating on low until combined. Add the heavy cream, vanilla extract, and salt. Beat on medium-high speed for 2-3 minutes until the frosting is light, fluffy, and spreadable .

    11. Make the Ganache Drip: Place the chopped chocolate in a small heatproof bowl. Heat the heavy cream in a small saucepan until just simmering (or microwave for 45-60 seconds). Pour the hot cream over the chocolate and let it sit for 2-3 minutes. Gently whisk until smooth and glossy. Let it cool for 10-15 minutes until it thickens slightly but is still pourable .

    12. Assemble and Frost: Place one cooled cake layer on your serving plate. Spread about ¾ cup of frosting evenly over the top. Place the second cake layer on top. Apply a thin crumb coat of frosting all over the cake and refrigerate for 20-30 minutes. Then, apply the final, beautiful layer of frosting, smoothing the sides and top .

    13. Add the Ganache Drip: Pour the slightly cooled ganache into a small piping bottle or zip-top bag with a tiny corner snipped off. Gently pipe drips around the edges of the cake, then fill in the center with the remaining ganache and spread it smooth with an offset spatula .

    14. Garnish and Serve: Garnish with fresh banana slices (tossed in lemon juice to prevent browning), chocolate curls, and a light dusting of cocoa powder. Slice, serve, and prepare for applause .

    Pro-Tips for Chocolate Banana Cake Greatness

    • Use Extremely Ripe Bananas: The blacker, the better. Super-ripe bananas are sweeter, more flavorful, and mash more easily into the batter .
    • Don’t Overmix the Batter: Once you add the flour, mix just until combined. Overmixing develops gluten and can make your cake tough instead of tender .
    • Room Temperature Ingredients: Ensure your butter, eggs, and buttermilk are at room temperature for a smooth, evenly mixed batter .
    • Cool Cakes Completely: Frosting a warm cake is a recipe for disaster. Wait until the layers are completely cool to the touch before assembling .
    • Chill Before Dripping: A chilled cake with a firm crumb coat will hold the ganache drips much better than a room-temperature cake .
  • Sweet Potato Cheesecake (The Fall Dessert You Didn’t Know You Needed)

    Sweet Potato Cheesecake (The Fall Dessert You Didn’t Know You Needed)

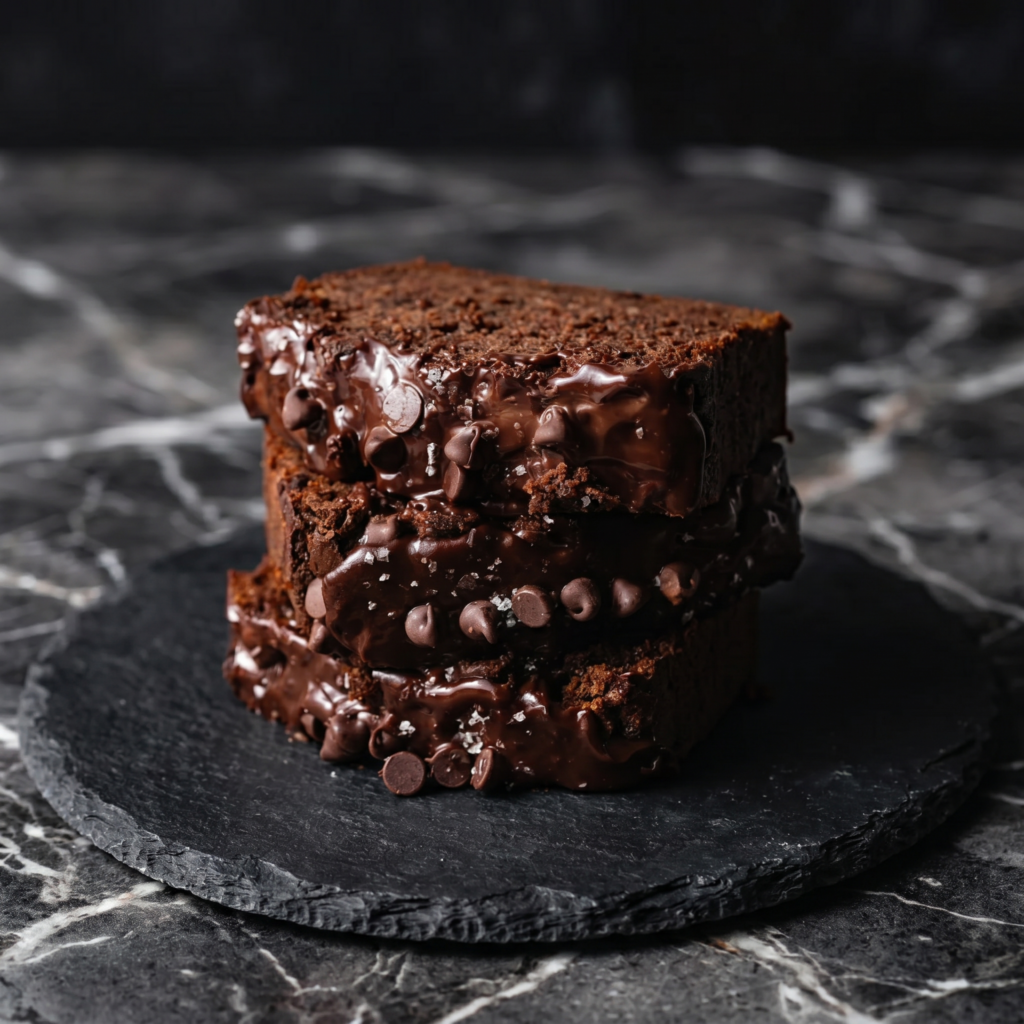
    Let’s settle something right now: sweet potatoes belong in dessert. Not just pie—cheesecake. This Sweet Potato Cheesecake is everything you love about both worlds. It has the dense, creamy, luxuriously silky texture of a classic New York-style cheesecake, but it’s infused with the warm, earthy sweetness of roasted sweet potatoes and a gentle blend of cinnamon, nutmeg, and vanilla.

    The crust isn’t just any crust—it’s a buttery graham cracker base with toasted pecans for extra warmth and crunch. And the finish? A beautiful caramel swirl across the top, because sweet potatoes and caramel are a match made in heaven. This is the dessert that will have everyone at your Thanksgiving table asking for the recipe. Spoiler: it’s easier than you think.

    The Secret to a Silky, Never-Cracked Cheesecake

    Cheesecake can be intimidating, but the secrets to a perfect, silky, crack-free cheesecake are simple. First, room temperature ingredients. Cold cream cheese creates a lumpy batter that bakes unevenly.

    Let everything—cream cheese, eggs, sour cream—sit on the counter for at least an hour before you start. Second, don’t overmix. Once you add the eggs, mix just until incorporated. Overmixing incorporates too much air, which can cause the cheesecake to puff up and then crack as it cools.

    Third, the water bath. Baking the cheesecake in a hot water bath creates a humid environment that prevents the top from drying out and cracking. And finally, cool slowly. Let the cheesecake rest in the oven with the door cracked open for an hour after baking, then room temperature, then overnight in the fridge. Patience is the secret to perfection.

    Ingredients

    For the Sweet Potato Puree:

    • 2 medium sweet potatoes (about 1 lb total)
    • 1 tablespoon maple syrup or brown sugar (optional, for extra sweetness)

    For the Graham Cracker Pecan Crust:

    • 1 ½ cups (150g) graham cracker crumbs (about 12 full sheets)
    • ½ cup (50g) pecans, finely chopped
    • ¼ cup (50g) granulated sugar
    • ½ cup (113g) unsalted butter, melted
    • ¼ teaspoon salt

    For the Sweet Potato Cheesecake Filling:

    • 24 oz (680g) cream cheese, softened to room temperature
    • 1 cup (200g) granulated sugar
    • ½ cup (100g) light brown sugar, packed
    • 1 cup (225g) sweet potato puree (from about 2 medium sweet potatoes)
    • ½ cup (120g) sour cream, at room temperature
    • 3 large eggs, at room temperature
    • 1 teaspoon vanilla extract
    • 1 teaspoon ground cinnamon
    • ½ teaspoon ground nutmeg
    • ¼ teaspoon ground ginger
    • Pinch of cloves (optional)

    For the Caramel Swirl & Topping:

    • ½ cup (120ml) caramel sauce (homemade or store-bought)
    • ¼ cup (25g) toasted pecans, for garnish

    Instructions

    1. Roast the Sweet Potatoes: Preheat your oven to 400°F (200°C). Pierce the sweet potatoes several times with a fork. Place them on a baking sheet and roast for 45-60 minutes, until very soft and tender. Let them cool slightly, then peel off the skin.

    Mash the flesh with a fork or puree in a food processor until completely smooth. Measure out 1 cup (225g) and let it cool completely. (This can be done up to 3 days ahead and refrigerated.) .

    2. Make the Crust: Reduce your oven temperature to 350°F (175°C). In a medium bowl, combine the graham cracker crumbs, finely chopped pecans, granulated sugar, and salt. Pour in the melted butter and stir with a fork until all the crumbs are evenly moistened .

    3. Press the Crust: Transfer the mixture to a 9-inch springform pan. Use the bottom of a measuring cup to press the crumbs firmly and evenly into the bottom and about 1 inch up the sides. A firm, compact crust is essential—it won’t crumble when you slice the cheesecake .

    4. Bake the Crust: Bake the crust for 10 minutes, until it’s fragrant and lightly golden. Set it aside to cool while you make the filling. Leave the oven on .

    5. Wrap the Pan for Water Bath: Double-wrap the outside of the springform pan with heavy-duty aluminum foil, covering the bottom and coming up the sides. This will prevent water from seeping in during the water bath .

    6. Make the Filling – Beat Cream Cheese: In a large bowl using a hand mixer or stand mixer with the paddle attachment, beat the softened cream cheese on medium speed until completely smooth and creamy, about 2 minutes. Scrape down the sides and bottom of the bowl well .

    7. Add Sugars and Sweet Potato: Add the granulated sugar and brown sugar and beat until smooth and well combined, about 1 minute. Add the cooled sweet potato puree and beat until incorporated, scraping the bowl as needed .

    8. Add Sour Cream and Spices: Add the sour cream, vanilla extract, cinnamon, nutmeg, ginger, and cloves. Beat on low speed until just combined .

    9. Add Eggs – One at a Time: Add the eggs one at a time, beating on low speed just until the yolk disappears into the batter. Do not overmix. After the last egg, give the batter a final gentle fold with a spatula to ensure everything is combined .

    10. Assemble and Swirl: Pour half of the cheesecake filling into the cooled crust. Drizzle with about ¼ cup of caramel sauce. Gently swirl with a knife or skewer. Pour the remaining filling over the top and smooth it with a spatula. Drizzle with another 2 tablespoons of caramel and gently swirl again, being careful not to over-swirl .

    11. Prepare the Water Bath: Place the wrapped springform pan into a large roasting pan. Place the roasting pan in the oven. Carefully pour boiling water into the roasting pan until it reaches about halfway up the sides of the springform pan .

    12. Bake the Cheesecake: Bake at 350°F (175°C) for 55-65 minutes, until the edges are set and the center is slightly jiggly (like Jell-O). The internal temperature should reach about 150°F (65°C) .

    13. Cool Slowly: Turn off the oven and crack the door open. Let the cheesecake cool in the oven for 1 hour. This gentle cooling helps prevent cracks. Then, remove the cheesecake from the water bath, remove the foil, and let it cool completely to room temperature on a wire rack .

    14. Refrigerate Overnight: Once cool, refrigerate the cheesecake uncovered for at least 4 hours, preferably overnight. This is essential for a clean slice .

    15. Garnish and Serve: Run a thin knife around the edge of the pan before releasing the springform. Drizzle the top with the remaining caramel sauce and sprinkle with toasted pecans. For clean slices, use a sharp knife wiped clean between each cut. Serve chilled .

    Pro-Tips for Cheesecake Perfection

    • Room Temperature is Non-Negotiable: Cold cream cheese and eggs will give you a lumpy, uneven batter. Let everything sit out for at least an hour, preferably two .
    • Don’t Overmix: Overmixing incorporates too much air, which can cause cracks. Mix on low speed and stop as soon as each ingredient is incorporated .
    • Use a Water Bath: This creates a humid environment that prevents the cheesecake from drying out and cracking. Don’t skip it .
    • Cool Gradually: Sudden temperature changes cause cracks. Letting the cheesecake rest in the oven with the door open, then at room temperature, then in the fridge ensures a smooth, flawless top .
    • Patience is a Virtue: Cheesecake needs at least 4 hours (preferably overnight) to set properly. Slicing it too early will result in a mess .
  • Golden & Buttery Perfection: The Ultimate Homemade Crab Cakes

    Golden & Buttery Perfection: The Ultimate Homemade Crab Cakes

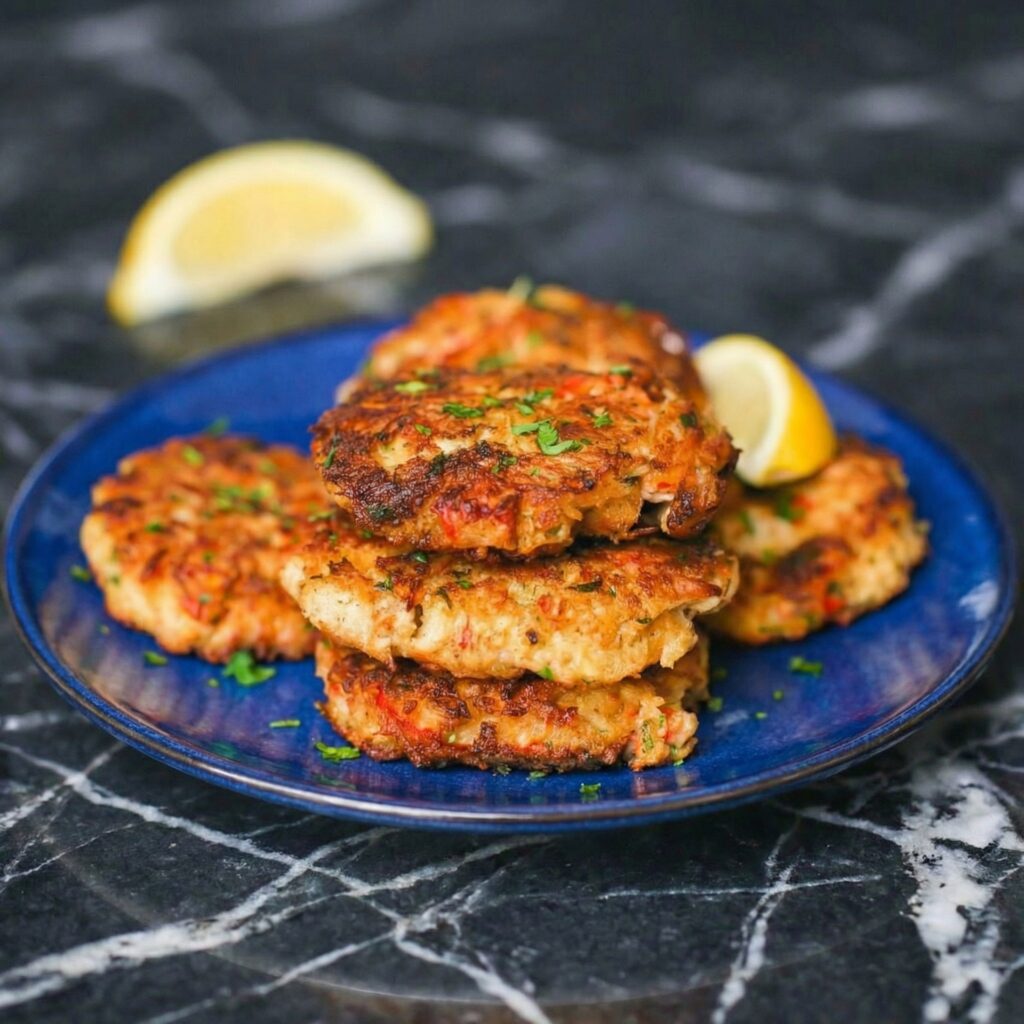
    There’s something undeniably special about perfectly made Crab Cakes. Crisp and golden on the outside, tender and packed with sweet crab meat on the inside, they feel elegant yet comforting at the same time.

    Whether served as an appetizer, light lunch, or dinner centerpiece, crab cakes always impress.

    The key to exceptional crab cakes is simple: let the crab shine. You want just enough binder to hold everything together without overpowering that delicate seafood flavor.

    In this step-by-step guide, you’ll learn exactly how to create restaurant-quality crab cakes right at home.

    Let’s get started.


    Why You’ll Love This Recipe

    • Packed with sweet lump crab meat
    • Crispy golden crust
    • Minimal filler
    • Easy to prepare ahead
    • Perfect for entertaining

    These crab cakes are flavorful, light, and wonderfully satisfying.


    Ingredients You’ll Need

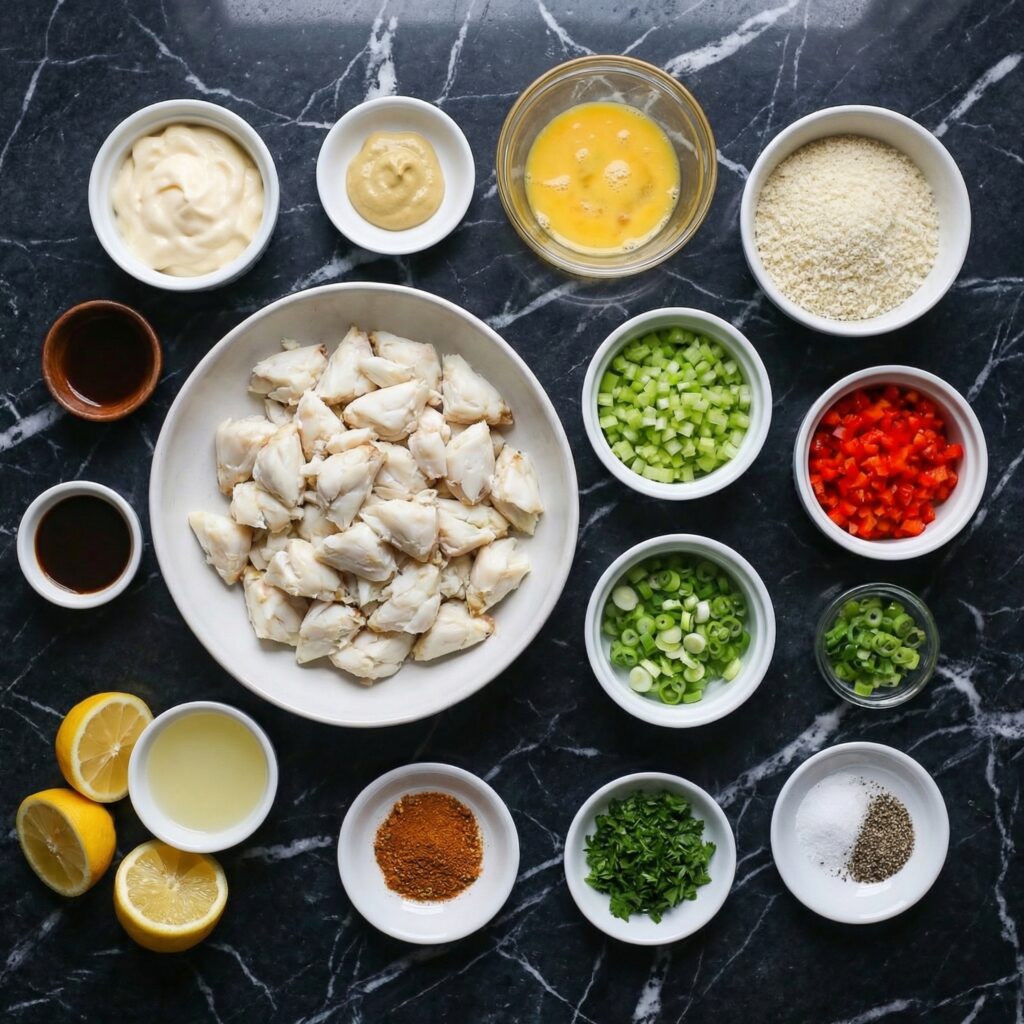
    • 1 pound lump crab meat (picked over for shells)
    • ½ cup mayonnaise
    • 1 large egg
    • 1 teaspoon Dijon mustard
    • 1 teaspoon Worcestershire sauce
    • 1 tablespoon fresh lemon juice
    • 1 teaspoon Old Bay seasoning
    • ¼ cup finely chopped parsley
    • ½ cup panko breadcrumbs (plus extra for coating, optional)
    • ½ teaspoon salt (adjust to taste)
    • ½ teaspoon black pepper
    • 2 tablespoons butter
    • 1 tablespoon olive oil

    For serving:

    • Lemon wedges
    • Tartar sauce or aioli

    Step 1: Prepare the Crab Meat

    Gently spread the crab meat onto a baking sheet or large plate.

    Carefully pick through it to remove any remaining shell fragments.

    Be gentle—you want to keep those beautiful lumps intact.


    Step 2: Make the Binding Mixture

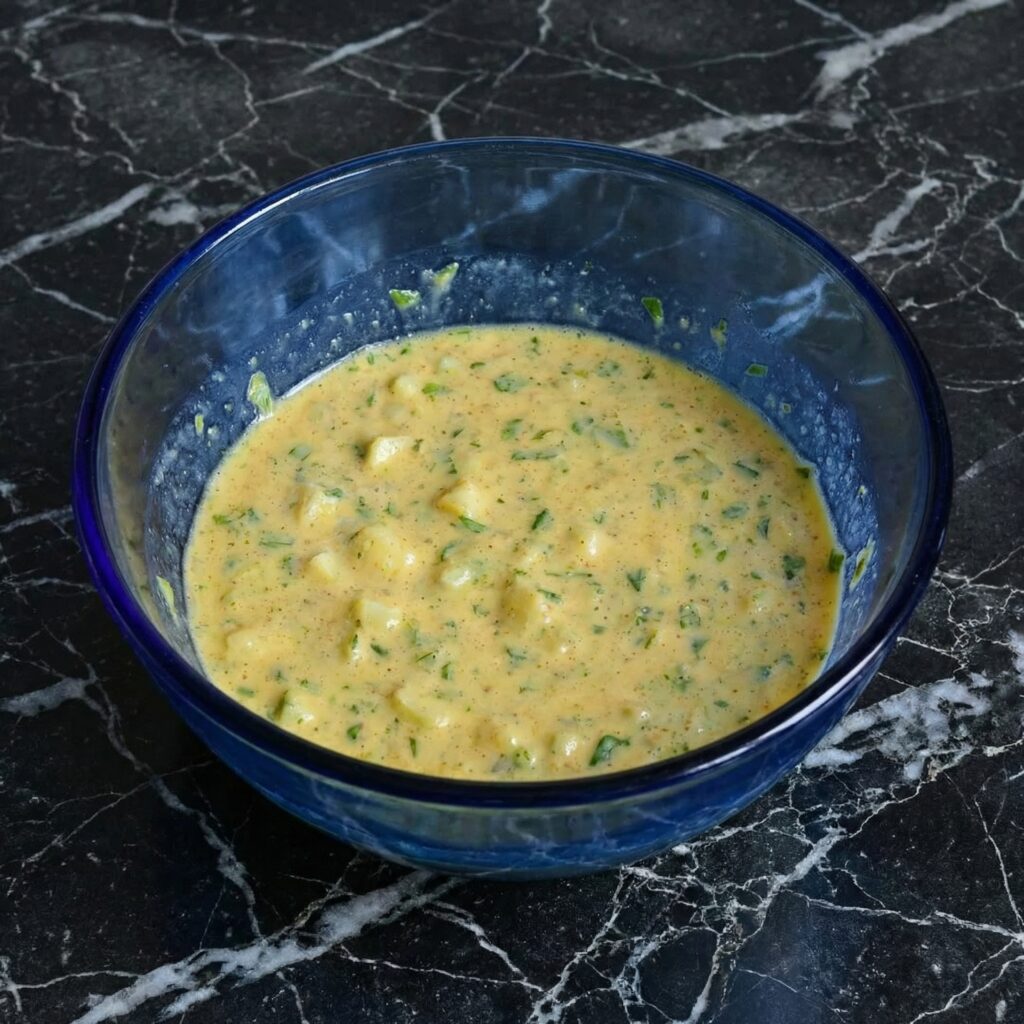
    In a large mixing bowl, whisk together mayonnaise, egg, Dijon mustard, Worcestershire sauce, lemon juice, and Old Bay seasoning.

    This mixture adds flavor while helping bind the cakes without making them dense.

    Stir in chopped parsley, salt, and black pepper.


    Step 3: Combine Gently

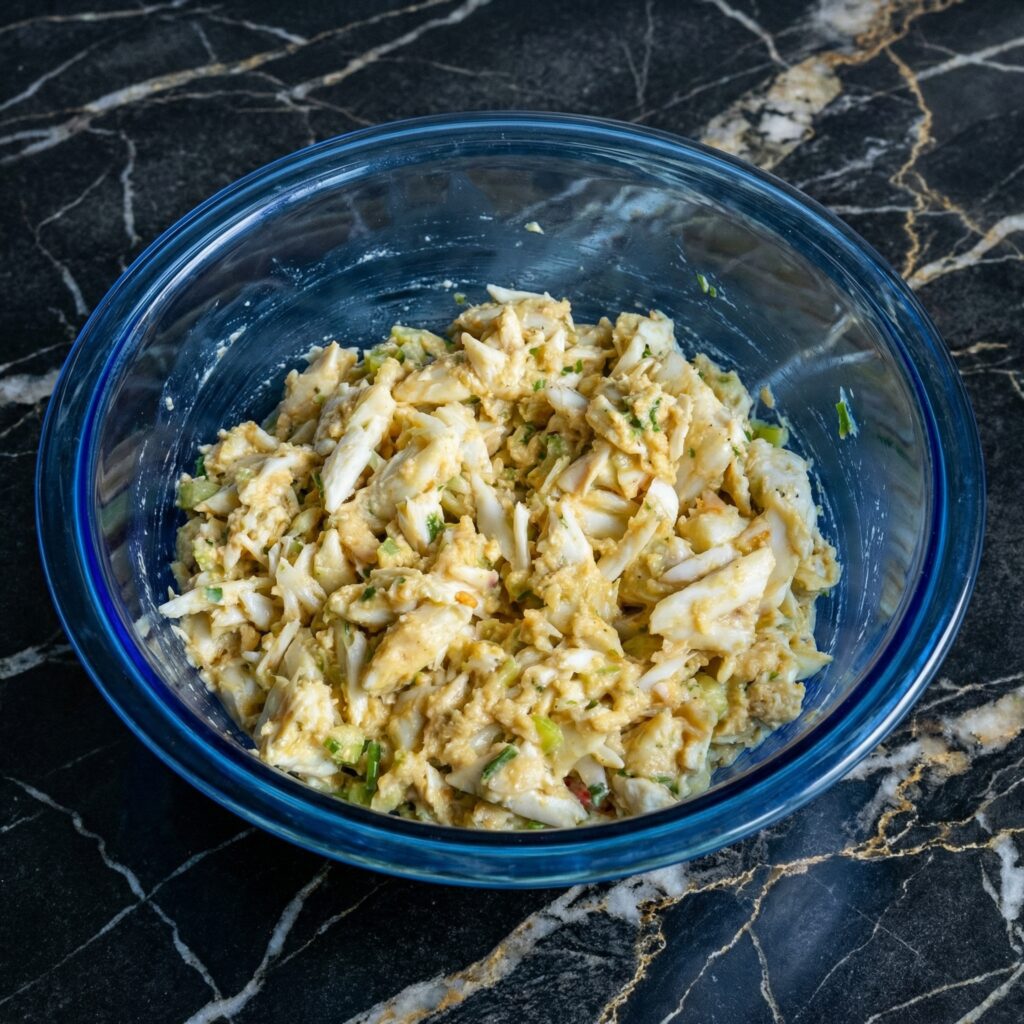
    Add the crab meat and panko breadcrumbs to the bowl.

    Using a spatula or clean hands, gently fold everything together.

    Avoid overmixing. The goal is to keep large pieces of crab visible throughout.

    If the mixture feels too wet, add a tablespoon more breadcrumbs. If too dry, add a small spoonful of mayonnaise.


    Step 4: Shape the Crab Cakes

    Divide the mixture into 6–8 equal portions.

    Gently form each portion into a patty about ¾-inch thick.

    Place shaped crab cakes on a parchment-lined plate or baking sheet.

    For extra crispiness, lightly coat the outside with additional panko breadcrumbs.


    Step 5: Chill Before Cooking

    Refrigerate the crab cakes for at least 30 minutes.

    Chilling helps them firm up and prevents them from falling apart during cooking.

    This step is crucial for structure and texture.


    Step 6: Heat the Pan

    In a large skillet over medium heat, melt the butter with olive oil.

    The butter adds flavor, while the oil prevents burning.

    You want the pan hot but not smoking.


    Step 7: Cook Until Golden

    Carefully place the chilled crab cakes into the skillet.

    Cook for 3–4 minutes per side until golden brown and crisp.

    Avoid flipping too early—allow a crust to form first.

    Work in batches if needed to avoid overcrowding.


    Step 8: Drain and Rest

    Transfer cooked crab cakes to a paper towel-lined plate or wire rack.

    Let them rest for a few minutes before serving.

    This helps maintain their shape and allows flavors to settle.


    Step 9: Serve with Bright Accompaniments

    Serve warm with lemon wedges for squeezing over the top.

    Pair with tartar sauce, garlic aioli, or a light salad.

    The acidity of lemon enhances the natural sweetness of the crab beautifully.


    Tips for Perfect Crab Cakes

    • Use high-quality lump crab meat.
    • Don’t overmix the filling.
    • Chill before cooking.
    • Flip carefully using a thin spatula.
    • Cook over medium heat to avoid burning.

    Attention to these small details ensures tender interiors and crispy exteriors.


    Baking Option

    If you prefer baking:

    Preheat oven to 400°F (200°C).

    Place crab cakes on a lightly greased baking sheet.

    Bake for 12–15 minutes, flipping halfway through, until golden and heated through.

    While pan-frying gives the crispiest crust, baking offers a lighter alternative.


    Make-Ahead Instructions

    You can shape the crab cakes up to 24 hours in advance.

    Store covered in the refrigerator until ready to cook.

    You can also freeze uncooked crab cakes for up to 2 months. Thaw overnight in the refrigerator before cooking.


    Flavor Variations

    Customize your crab cakes with:

    • Finely diced red bell pepper for sweetness
    • A pinch of cayenne for heat
    • Fresh chives instead of parsley
    • A spoonful of finely diced celery for crunch

    Keep additions minimal to preserve the crab flavor.


    Storage and Reheating

    Store leftovers in an airtight container in the refrigerator for up to 3 days.

    Reheat gently in a skillet over medium-low heat until warmed through.

    Avoid microwaving if possible, as it can make them soggy.


    Final Thoughts

    Homemade Crab Cakes are simple, elegant, and bursting with fresh seafood flavor. With a delicate balance of seasoning and minimal filler, they highlight the natural sweetness of crab while delivering a satisfying crispy crust.

    Whether served as a refined appetizer or a comforting main dish, these crab cakes are sure to impress. Once you master this technique, you’ll have a reliable go-to recipe for entertaining, special occasions, or whenever you’re craving something truly delicious.

    Golden on the outside, tender on the inside—this is crab cake perfection at its finest.

  • Coconut Cake with Coconut Frosting (A Coconut Lover’s Dream)

    Coconut Cake with Coconut Frosting (A Coconut Lover’s Dream)

    There are cakes, and then there’s this cake. This Coconut Cake with Coconut Frosting is the kind of dessert that makes people close their eyes when they take the first bite. It’s the cake you remember from childhood birthdays, the one your grandmother made, the one that always disappeared first at potlucks.

    We’re talking about the most tender, buttery, incredibly moist white cake you’ve ever baked, infused with real coconut flavor in every single crumb.

    And the frosting? It’s a silky, creamy, coconut-packed dream that’s then completely blanketed in fluffy, golden-toasted coconut. It’s a showstopper, it’s pure nostalgia, and yes, you can absolutely make it at home.

    The Secret to an Incredibly Moist Cake with Real Coconut Flavor

    Great coconut cake can sometimes be dry or artificial-tasting. Not this one. The secret to an incredibly moist crumb lies in a combination of buttermilk and cake flour. Buttermilk adds tenderness and a subtle tang that balances the sweetness, while cake flour’s lower protein content guarantees a soft, fine, delicate texture.

    The real coconut flavor comes from two sources: coconut milk in the batter and coconut extract in both the cake and frosting. Using full-fat coconut milk adds richness and a deep, authentic coconut taste that canned frosting could never replicate.

    And the final flourish? Toasting the shredded coconut for the exterior. This simple step transforms it from sweet and chewy to nutty, crunchy, and deeply flavorful—the perfect finishing touch for a truly unforgettable cake.

    Ingredients

    For the Coconut Cake:

    • 1 ½ cups (170g) cake flour (not all-purpose)
    • 1 ½ teaspoons baking powder
    • ¼ teaspoon salt
    • ½ cup (113g) unsalted butter, softened
    • 1 cup (200g) granulated sugar
    • 2 large egg whites, at room temperature
    • 1 teaspoon coconut extract
    • ½ teaspoon vanilla extract
    • ½ cup (120ml) full-fat coconut milk, shaken well
    • ¼ cup (60ml) buttermilk, at room temperature

    For the Coconut Frosting:

    • ¾ cup (170g) unsalted butter, slightly softened
    • 3 cups (360g) powdered sugar, sifted
    • 2 tablespoons full-fat coconut milk
    • ½ teaspoon coconut extract
    • ¼ teaspoon vanilla extract
    • Pinch of salt

    For the Toasted Coconut Coating:

    • 1 ½ cups (120g) sweetened shredded coconut

    Instructions

    1. Toast the Coconut (for Coating): Preheat your oven to 325°F (160°C). Spread the 1 ½ cups of shredded coconut evenly on a baking sheet. Bake for 5-8 minutes, stirring once halfway through, until the coconut is golden brown and fragrant. Keep a close eye on it—it burns quickly! Remove from the oven and let it cool completely .

    2. Preheat and Prep for Cake: Increase your oven temperature to 350°F (175°C). Grease an 8 or 9-inch round cake pan, line the bottom with a parchment paper round, and lightly flour the sides. This guarantees your cake will release perfectly .

    3. Combine Dry Ingredients: In a medium bowl, whisk together the cake flour, baking powder, and salt until well combined. Set aside .

    4. Cream Butter and Sugar: In a large bowl using a hand mixer or stand mixer with the paddle attachment, beat the softened butter on medium speed until creamy, about 1 minute. Gradually add the granulated sugar and beat on medium-high speed until light and fluffy, about 3-4 minutes. The mixture should look pale and aerated .

    5. Add Egg Whites and Extracts: Add the egg whites one at a time, beating well after each addition until fully incorporated. Scrape down the sides of the bowl as needed. Beat in the coconut extract and vanilla extract .

    6. Combine Coconut Milk and Buttermilk: In a small bowl or measuring cup, whisk together the full-fat coconut milk and buttermilk .

    7. Alternate Dry and Wet Ingredients: With the mixer on low speed, add about one-third of the dry ingredients, mixing just until combined. Add half of the coconut milk mixture, mixing until incorporated.

    Repeat with another third of the dry, the remaining coconut milk, and finally the last of the dry. Mix just until no streaks of flour remain—do not overmix. The batter will be thick, smooth, and luxurious .

    8. Bake the Cake: Pour the batter into the prepared pan and spread it evenly. Bake for 30-35 minutes, or until a toothpick inserted into the center comes out clean or with a few moist crumbs. Let the cake cool in the pan for 15 minutes, then carefully turn it out onto a wire rack to cool completely .

    9. Make the Coconut Frosting: In a large bowl, beat the softened butter on medium speed until creamy and smooth, about 2-3 minutes. Gradually add the sifted powdered sugar, one cup at a time, beating on low until combined.

    Add the coconut milk, coconut extract, vanilla extract, and salt. Beat on medium-high speed for 2-3 minutes until the frosting is light, fluffy, and spreadable. If it’s too thick, add an extra teaspoon of coconut milk .

    10. Frost the Cake: Once the cake is completely cool, spread the coconut frosting generously over the top and sides. An offset spatula makes this easy, but a butter knife works beautifully too .

    11. Coat with Toasted Coconut: Working quickly while the frosting is still soft, gently press handfuls of the cooled toasted coconut onto the sides and top of the cake. Use your hands to pat it gently into place, covering every surface. The coconut will stick to the frosting and create that gorgeous, textured look .

    12. Slice and Serve: For clean slices, use a sharp, thin-bladed knife, wiping it clean between each cut. Serve at room temperature for the best flavor and texture. Store leftovers in an airtight container in the refrigerator for up to 4 days .

    Pro-Tips for Coconut Cake Greatness

    • Use Cake Flour, Not All-Purpose: Cake flour has lower protein content, which guarantees a softer, more tender, fine-crumbed cake. It’s worth seeking out for this recipe .
    • Room Temperature Ingredients are Non-Negotiable: Cold egg whites and buttermilk will not emulsify properly, resulting in a dense, uneven crumb. Leave them on the counter for an hour before baking .
    • Shake Your Coconut Milk Well: Full-fat coconut milk separates in the can. Shake it vigorously before measuring to ensure you get the creamy, consistent liquid you need .
    • Don’t Overbake: Check your cake a few minutes early. Overbaking dries it out, and we’re here for moist perfection .
    • Toast Your Coconut: This step is non-negotiable. Toasting transforms shredded coconut from sweet and chewy to nutty, crunchy, and deeply flavorful. It’s the easiest way to add professional flair .
  • Banana Chocolate Chip Oat Muffins (Basically Breakfast, Basically Dessert)

    Banana Chocolate Chip Oat Muffins (Basically Breakfast, Basically Dessert)

    Let’s be honest: the only thing that makes Monday morning bearable is knowing there’s a really good muffin waiting for you. These Banana Chocolate Chip Oat Muffins are that muffin.

    They’re everything you could want—hearty and wholesome from the oats, naturally sweet from extra-ripe bananas, and completely irresistible thanks to generous handfuls of melty chocolate chips scattered throughout.

    They’re tender, they’re satisfying, and they have that perfect domed top that makes a muffin feel like a bakery treat. Plus, they’re packed with enough oats and fruit that you can absolutely justify one (or two) for breakfast. Or a snack. Or dessert. Basically, they’re perfect anytime.

    The Secret to Tender, Never-Dry Oat Muffins

    Oat muffins can sometimes veer into dry, dense territory. Not these. The secret to a tender, moist oat muffin lies in two things: soaking the oats and using very ripe bananas. By letting the oats sit in the buttermilk for a few minutes before mixing, they absorb some of the liquid and soften, which keeps them from stealing moisture from the rest of the batter.

    The bananas do double duty—their natural sugars add sweetness, and their moisture content keeps every bite incredibly tender. The other trick? Don’t overmix. Once the dry ingredients hit the wet, mix just until combined. A few lumps are your friend. Overmixing develops gluten, which can make muffins tough, and we’re here for soft, pillowy perfection.

    Ingredients

    For the Banana Chocolate Chip Oat Muffins:

    • 1 ½ cups (180g) old-fashioned rolled oats (not quick oats)
    • 1 cup (240ml) buttermilk, at room temperature
    • 1 cup (125g) all-purpose flour
    • 1 teaspoon baking powder
    • ½ teaspoon baking soda
    • ½ teaspoon salt
    • 1 teaspoon ground cinnamon
    • ½ cup (113g) unsalted butter, melted and cooled slightly
    • ½ cup (100g) light brown sugar, packed
    • ¼ cup (50g) granulated sugar
    • 2 large eggs, at room temperature
    • 1 teaspoon vanilla extract
    • 1 ½ cups (340g) mashed very ripe bananas (about 3-4 large bananas)
    • 1 ½ cups (255g) semi-sweet chocolate chips, divided

    For Topping (Optional but Highly Recommended):

    • 2 tablespoons old-fashioned rolled oats
    • 2 tablespoons semi-sweet chocolate chips
    • 1 tablespoon turbinado sugar (for sparkly crunch)

    Instructions

    1. Preheat and Prep: Preheat your oven to 375°F (190°C). Line a 12-cup standard muffin pan with paper liners or generously grease each cup with butter or non-stick spray .

    2. Soak the Oats: In a small bowl, combine the 1 ½ cups old-fashioned rolled oats with the buttermilk. Stir to combine and let it sit for 10-15 minutes while you prepare the rest of the ingredients. This softens the oats and ensures a tender muffin .

    3. Mash the Bananas: In a separate bowl, mash your very ripe bananas with a fork until mostly smooth with a few small lumps remaining. Measure out 1 ½ cups (340g) and set aside. The riper the bananas, the better the flavor .

    4. Combine Dry Ingredients: In a large bowl, whisk together the flour, baking powder, baking soda, salt, and cinnamon until well combined .

    5. Combine Wet Ingredients: In another large bowl, whisk together the melted butter, brown sugar, granulated sugar, eggs, and vanilla extract until smooth. Whisk in the mashed bananas. The mixture should be well combined and slightly thick .

    6. Add the Oat Mixture: Pour the soaked oats and buttermilk into the wet ingredients and stir until combined .

    7. Combine Wet and Dry: Pour the wet ingredients into the dry ingredients. Use a spatula to fold them together gently, mixing just until no streaks of flour remain. The batter will be thick and lumpy—do not overmix! .

    8. Fold in Chocolate Chips: Gently fold in 1 ¼ cups of the chocolate chips, reserving about ¼ cup for topping. Fold just a few times until they’re evenly distributed .

    9. Fill the Muffin Cups: Divide the batter evenly among the 12 muffin cups. They will be very full—almost to the top. This is intentional and helps create those beautiful domed tops. Sprinkle the remaining chocolate chips, 2 tablespoons of oats, and turbinado sugar over the tops of each muffin .

    10. Bake: Bake for 18-22 minutes, until a toothpick inserted into the center of a muffin comes out clean or with a few moist crumbs (avoid hitting a melted chocolate chip for an accurate test). The tops should be golden brown and spring back when lightly touched .

    11. Cool: Let the muffins cool in the pan for 10 minutes. This allows them to set properly. Then, carefully transfer them to a wire rack to cool completely, or serve warm for the ultimate melty-chocolate experience .

    12. Serve and Store: Enjoy these muffins warm or at room temperature. Store any leftovers in an airtight container at room temperature for up to 3 days. They also freeze beautifully for up to 3 months .

    Pro-Tips for Muffin Mastery

    • Use Old-Fashioned Rolled Oats: Quick oats will break down too much and won’t give you the same hearty texture. Old-fashioned oats are the way to go .
    • Don’t Skip the Oat Soak: This 10-minute step is the secret to tender muffins. It allows the oats to absorb liquid and soften, preventing them from stealing moisture from the batter .
    • Very Ripe Bananas Are Non-Negotiable: The blacker, the better. Super-ripe bananas are sweeter, more flavorful, and mash more easily into the batter .
    • Fill to the Top: Don’t be shy! Filling the muffin cups almost to the brim is what gives you those beautiful, overflowing, bakery-style domes .
    • Reserve Chocolate Chips for Topping: Sprinkling extra chips on top before baking gives you those gorgeous, melty chocolate pools that make these muffins look (and taste) irresistible .
  • Strawberries and Cream Cookies (They Taste Like Summer)

    Strawberries and Cream Cookies (They Taste Like Summer)

    Close your eyes and imagine the perfect summer bite: juicy, sun-ripened strawberries and a scoop of rich, cold cream. Now imagine that flavor packed into a soft, thick, bakery-style cookie. That’s exactly what these Strawberries and Cream Cookies deliver.

    We’re using a trick—freeze-dried strawberries—to pack intense, fruity flavor into every single bite without adding excess moisture that would ruin the texture.

    Paired with creamy white chocolate chips and a secret ingredient (a little cream cheese!) for the softest, most tender cookie you’ve ever made. These cookies disappear fast. Consider yourself warned.

    The Magic of Freeze-Dried Fruit & The Secret to a Soft Cookie

    Fresh strawberries contain so much water that if you add them to cookie dough, they’ll turn your bake into a soggy, pink mess. Enter the hero: freeze-dried strawberries. They provide all the intense, tart-sweet strawberry flavor without the moisture, and they crumble into the dough to create beautiful pink specks throughout.

    The other secret here is a small amount of cream cheese. It might seem unusual, but cream cheese adds a slight tang that mimics the “cream” part of strawberries and cream, and its fat content inhibits gluten development, guaranteeing a cookie that stays soft and tender for days. The result is a cookie with crisp edges, a chewy center, and a flavor that’s pure nostalgia.

    Ingredients

    For the Strawberry Cream Cookies:

    • 1 cup (226g) unsalted butter, softened
    • 4 oz (113g) cream cheese, softened
    • 1 cup (200g) granulated sugar
    • ½ cup (100g) light brown sugar, packed
    • 1 large egg, at room temperature
    • 2 teaspoons vanilla extract
    • 2 ½ cups (313g) all-purpose flour
    • 1 teaspoon baking soda
    • ½ teaspoon salt
    • 1.2 oz (34g) freeze-dried strawberries (one standard package)
    • 1 ½ cups (255g) white chocolate chips

    Instructions

    1. Prep Your Strawberries: Place the freeze-dried strawberries in a zip-top bag and seal it, removing as much air as possible. Use a rolling pin or the bottom of a heavy pan to gently crush them into fine powder and small pieces. You want a mix of both—some will dissolve into the dough for color, and some will remain as visible pink bits. Set aside .

    2. Cream the Fats and Sugars: In a large bowl using a hand mixer or stand mixer with the paddle attachment, beat the softened butter, cream cheese, granulated sugar, and brown sugar together on medium speed until light, fluffy, and well-combined, about 2-3 minutes. Scrape down the sides of the bowl .

    3. Add Wet Ingredients: Beat in the egg and vanilla extract until fully incorporated. The mixture should look smooth and creamy .

    4. Combine Dry Ingredients: In a separate medium bowl, whisk together the flour, baking soda, and salt. Gradually add the dry ingredients to the wet ingredients, mixing on low speed just until no streaks of flour remain. Be careful not to overmix, or the cookies will be tough .

    5. Add the Strawberry Magic: Gently fold in the crushed freeze-dried strawberries and the white chocolate chips with a spatula until they’re evenly distributed throughout the dough. The dough will be thick and slightly sticky, with beautiful pink swirls .

    6. Chill the Dough: Cover the bowl tightly with plastic wrap and refrigerate for at least 30 minutes, or up to 2-3 days. Chilling is essential—it prevents spreading and deepens the flavor .

    7. Preheat and Prep: When you’re ready to bake, preheat your oven to 350°F (175°C). Line two large baking sheets with parchment paper .

    8. Scoop and Bake: Scoop rounded tablespoons of dough (about 1.5 tablespoons each) and roll them into balls. Place them on the prepared baking sheets, leaving about 2 inches of space between each for spreading. Bake for 10-12 minutes, or until the edges are just set and lightly golden. The centers will look soft and slightly underbaked—that’s exactly what you want for a chewy cookie .

    9. Cool on the Pan: Let the cookies cool on the baking sheet for 5-10 minutes. This allows them to set up properly. Then, carefully transfer them to a wire rack to cool completely .

    10. Serve and Store: Serve slightly warm or at room temperature with a cold glass of milk. Store any leftovers (if you have any!) in an airtight container at room temperature for up to 5 days .

    Pro-Tips for Strawberry Perfection

    • Don’t Skip the Freeze-Dried: Fresh or frozen strawberries will make your cookies soggy and grey. Freeze-dried is the non-negotiable secret to success here .
    • Crush to Perfection: You want a mix of powder and small chunks. The powder gives the dough its pink hue, while the chunks provide little bursts of concentrated strawberry flavor .
    • Chill the Dough: I know you’re eager, but please don’t skip this step. Chilling firms up the butter and cream cheese, which prevents the cookies from spreading into flat, greasy puddles in the oven .
    • Underbake Slightly: The secret to soft cookies is pulling them out when the edges are set but the centers still look a little underdone. They’ll continue to bake on the hot pan.
    • Room Temperature Matters: Make sure your butter, cream cheese, and egg are at room temperature. This ensures they cream together smoothly, creating a uniform dough and the perfect texture .
  • Quite Possibly The Best Coconut Cream Pie You’ll Ever Eat

    Quite Possibly The Best Coconut Cream Pie You’ll Ever Eat

    Let’s be honest: coconut cream pie should be amazing. Creamy, dreamy, with that perfect tropical vibe. But too often, it’s… meh. Not this one. This recipe delivers a silky-smooth, from-scratch coconut custard nestled in a buttery, flaky crust, all topped with a cloud of real whipped cream and a generous shower of crunchy, golden-toasted coconut.

    It’s a showstopper that tastes like a vacation, and while it takes a little love to make, every single step is worth it. Get ready to bake your new favorite pie.

    The Secret to a Silky, Never-Watery Coconut Custard

    The heart of any great coconut cream pie is the custard. The magic lies in a technique that balances richness with stability. We’re using a combination of whole eggs and egg yolks for the perfect texture—firm enough to slice beautifully, yet so creamy it melts on your tongue.

    The toasting of the coconut isn’t just for show; it deepens the flavor, adding a nutty, caramelized note that elevates the entire pie. And the key to avoiding a watery pie? It’s all in the cooling process. Allowing the custard to set properly before adding the whipped cream ensures every single slice is picture-perfect .

    Ingredients

    For the All-Butter Pie Crust:

    • 1 ¼ cups (156g) all-purpose flour
    • ½ teaspoon salt
    • 1 teaspoon granulated sugar
    • ½ cup (113g) unsalted butter, very cold, cut into small cubes
    • 4-6 tablespoons ice water

    For the Coconut Custard Filling:

    • 2 cups (480ml) whole milk
    • 1 cup (240ml) full-fat coconut milk
    • 1 cup (200g) granulated sugar
    • ½ cup (60g) cornstarch
    • ¼ teaspoon salt
    • 4 large egg yolks
    • 2 large eggs
    • 1 ½ cups (120g) sweetened shredded coconut, divided
    • 2 teaspoons vanilla extract
    • 2 tablespoons unsalted butter

    For the Whipped Cream Topping:

    • 1 ½ cups (360ml) heavy whipping cream, very cold
    • ½ cup (60g) powdered sugar
    • 1 teaspoon vanilla extract

    Instructions

    1. Make the Pie Crust: In a large bowl, whisk together the flour, salt, and sugar. Add the cold butter cubes and toss to coat. Using a pastry blender or your fingertips, cut the butter into the flour until the mixture resembles coarse meal with some pea-sized butter pieces remaining.

    Gradually add ice water, one tablespoon at a time, mixing with a fork until the dough just comes together when squeezed. Form into a disk, wrap in plastic, and refrigerate for at least 1 hour .

    2. Blind Bake the Crust: On a lightly floured surface, roll the chilled dough into a 12-inch circle. Transfer it to a 9-inch pie plate, gently pressing it into the corners. Trim and crimp the edges. Prick the bottom all over with a fork. Freeze for 15 minutes. Meanwhile, preheat your oven to 375°F (190°C).

    Line the chilled crust with parchment paper and fill with pie weights or dried beans. Bake for 20 minutes, then remove the parchment and weights. Bake for another 8-10 minutes, until the bottom is golden and set. Cool completely on a wire rack .

    3. Toast the Coconut: While the crust cools, spread 1 cup of the shredded coconut on a baking sheet. Bake at 350°F (175°C) for 5-8 minutes, stirring once, until it’s golden brown and fragrant. Keep a close eye on it—it burns quickly! Set aside to cool. This will be your topping.

    4. Make the Coconut Custard: In a medium saucepan, combine the whole milk, coconut milk, and the remaining ½ cup of untoasted shredded coconut. Heat over medium until steaming, but do not boil . In a separate large bowl, whisk together the sugar, cornstarch, and salt. Whisk in the egg yolks and whole eggs until the mixture is smooth and pale yellow .

    5. Temper the Eggs: Slowly drizzle about 1 cup of the hot milk mixture into the egg mixture, whisking constantly to temper the eggs and prevent them from scrambling. Gradually pour the tempered egg mixture back into the saucepan with the remaining hot milk, whisking continuously .

    6. Thicken the Custard: Cook the mixture over medium heat, whisking constantly, until it comes to a boil and thickens dramatically. This will take about 2-4 minutes. Once bubbling, cook for one more minute to ensure the cornstarch is fully cooked and the custard is smooth .

    7. Finish the Filling: Remove the saucepan from the heat. Whisk in the vanilla extract and the 2 tablespoons of butter until completely melted and smooth. The custard will be very thick .

    8. Fill the Pie: Pour the hot custard directly into the cooled, pre-baked pie crust. Spread it evenly. To prevent a skin from forming, press a piece of plastic wrap directly onto the surface of the custard. Refrigerate for at least 4 hours, or preferably overnight, until completely chilled and firm .

    9. Make the Whipped Cream: In a large chilled bowl, beat the cold heavy cream, powdered sugar, and vanilla extract with an electric mixer on medium-high speed until stiff peaks form. Be careful not to overbeat .

    10. Assemble and Serve: Spread or pipe the whipped cream over the fully chilled custard. Sprinkle generously with the toasted coconut. Slice, serve, and prepare for compliments. Store leftovers in the refrigerator for up to 3 days .

    Pro-Tips for Coconut Cream Pie Glory

    • Use Full-Fat Everything: This is not the time for shortcuts. Full-fat coconut milk and whole milk are essential for a rich, creamy, and stable custard .
    • Toast Your Coconut: Don’t skip this! Toasting transforms shredded coconut from sweet and chewy to nutty, crunchy, and deeply flavorful. It’s the easiest way to add professional flair .
    • Keep Whisking: When making the custard, never stop whisking once the heat is on. This prevents lumps and ensures a silky-smooth texture.
    • Patience, Young Grasshopper: The hardest part is waiting for the pie to chill. The custard needs a solid 4 hours (overnight is best) to fully set. Cutting it early will result in a soupy mess.
    • Chill Your Bowl and Cream: For the fluffiest, most stable whipped cream, put your mixing bowl and beaters in the freezer for 10-15 minutes before you start .
  • White Chocolate Raspberry Cake (Elegant Layer Cake)

    White Chocolate Raspberry Cake (Elegant Layer Cake)

    Meet your new signature dessert: a White Chocolate Raspberry Cake that is as beautiful as it is delicious. This recipe features three layers of incredibly moist vanilla cake, each infused with real white chocolate and sandwiched with a luscious, homemade raspberry filling that provides the perfect tart counterpoint.

    All of it is enveloped in a dreamy, silky white chocolate buttercream. Designed for bakers of all levels, this guide provides the techniques and confidence to build a stunning, bakery-worthy cake that will be the centerpiece of any celebration.

    The Art of the Perfect Layer Cake: Flavor, Texture & Structure

    Building a great layer cake is about more than just following a recipe; it’s about understanding the balance of flavors and textures. The sweetness of white chocolate in both the cake and frosting needs the bright, sharp acidity of raspberries to cut through and create a complex, memorable taste.

    The texture of the crumb is equally important. Using room-temperature ingredients and the right mixing method creates a tender, fine-crumbed cake that’s sturdy enough to hold the filling without becoming soggy.

    Finally, the structural integrity of the cake relies on a few key techniques: creating a “dam” of frosting to contain the jammy filling, and applying a “crumb coat” to seal in any loose bits before the final, beautiful layer of frosting is applied.

    Ingredients

    For the White Chocolate Cake Layers:

    • 8 oz (225g) high-quality white chocolate, finely chopped
    • ¾ cup (170g) unsalted butter, softened
    • 1 ½ cups (300g) granulated sugar
    • 4 large eggs, at room temperature
    • ½ cup (120g) sour cream, at room temperature
    • 1 teaspoon vanilla extract
    • 2 ½ cups (313g) all-purpose flour
    • 3 teaspoons baking powder
    • ½ teaspoon salt
    • ¾ cup (180ml) whole milk, at room temperature

    For the Raspberry Filling:

    • 12 oz (340g) fresh or frozen raspberries (about 2 cups)
    • ½ cup (100g) granulated sugar
    • 2 tablespoons cornstarch
    • 1 tablespoon lemon juice
    • 1 tablespoon water

    For the White Chocolate Buttercream Frosting:

    • 8 oz (225g) high-quality white chocolate, finely chopped
    • 2 cups (454g) unsalted butter, slightly softened
    • 6 cups (720g) powdered sugar, sifted
    • 2 teaspoons vanilla extract
    • 4 tablespoons heavy cream
    • Pinch of salt

    For Garnish (Optional):

    • Fresh raspberries
    • White chocolate curls or shavings

    Instructions

    1. Prepare the Pans and Ingredients: Preheat your oven to 350°F (175°C). Grease three 8-inch round cake pans, line the bottoms with parchment paper rounds, and lightly flour the sides. Ensure all refrigerated ingredients (eggs, sour cream, milk) are at room temperature.

    2. Melt White Chocolate for Cake: Combine the chopped white chocolate (8 oz for the cake) with the milk in a microwave-safe bowl. Heat in 30-second intervals, stirring thoroughly between each, until the chocolate is melted and the mixture is smooth. Set aside to cool for 15-20 minutes.

    3. Make the Cake Batter: In a large bowl, cream the softened butter and granulated sugar with an electric mixer on medium speed until light and fluffy, about 3-4 minutes. Add the eggs one at a time, beating well after each addition. Mix in the sour cream and vanilla extract until combined

    4. Combine Dry and Wet Ingredients: In a separate bowl, whisk together the flour, baking powder, and salt. Gradually add the dry ingredients to the wet mixture, mixing on low speed just until combined. Be careful not to overmix. Slowly pour in the cooled white chocolate-milk mixture and mix until the batter is smooth.

    5. Bake the Cake Layers: Divide the batter evenly among the three prepared pans. Bake for 24-28 minutes, or until a toothpick inserted into the center of each layer comes out clean or with a few moist crumbs. Let the cakes cool in the pans for 10-15 minutes, then carefully turn them out onto a wire rack to cool completely. Once cool, you can level the tops with a serrated knife if needed.

    6. Make the Raspberry Filling: While the cakes bake and cool, combine the raspberries and sugar in a medium saucepan over medium heat. Cook, stirring frequently, until the berries break down and release their juices, about 8-10 minutes. In a small bowl, whisk together the cornstarch, lemon juice, and water to form a slurry.

    Gradually pour the slurry into the hot raspberry mixture, stirring constantly. Continue to cook for another 1-2 minutes until the filling thickens and becomes clear. Remove from heat and let it cool completely. It will continue to thicken as it cools.

    7. Make the White Chocolate Buttercream: Place the 8 oz of chopped white chocolate for the frosting in a microwave-safe bowl. Melt in 30-second intervals, stirring until smooth. Let it cool to room temperature (it should no longer be warm to the touch). In a large bowl, beat the softened butter on medium speed until creamy and smooth, about 2-3 minutes.

    Gradually add the sifted powdered sugar, one cup at a time, beating on low until combined. Pour in the cooled, melted white chocolate, vanilla extract, heavy cream, and salt. Beat on medium-high speed for 2-3 minutes until the frosting is light, fluffy, and smooth.

    8. Assemble the Cake: Place one cooled cake layer on your serving plate or cake stand. Spread a thin layer of frosting on top. Transfer about 1 cup of frosting to a piping bag (or a zip-top bag with a corner snipped off) and pipe a thick “dam” of frosting around the very edge of the cake layer.

    This will prevent the filling from leaking out. Spoon half of the cooled raspberry filling inside the dam and spread it evenly. Carefully place the second cake layer on top and repeat the process: a thin layer of frosting, a piped dam, and the remaining raspberry filling. Top with the final cake layer.

    9. Apply the Crumb Coat and Final Frost: Apply a thin layer of frosting all over the assembled cake. This is the “crumb coat” – it doesn’t need to be pretty, just even. It will trap any loose crumbs. Refrigerate the cake for 20-30 minutes to set the crumb coat. Once firm, use the remaining frosting to apply the final, beautiful layer, smoothing the sides and top with an offset spatula or bench scraper.

    10. Decorate and Serve: Decorate the top with fresh raspberries and white chocolate curls. For neat slices, use a sharp, thin-bladed knife, cleaning it between each cut. Serve at room temperature for the best flavor and texture. Store leftovers in an airtight container in the refrigerator for up to 5 days.

    Pro-Tips for a Picture-Perfect Cake

    • Room Temperature is Key: Ensure your butter, eggs, sour cream, and milk are at room temperature. This creates a smooth, emulsified batter that bakes into a tender, evenly-risen cake.
    • Weigh Your Flour: Too much flour makes a dense cake. For best results, use a kitchen scale. If using cups, spoon the flour into the cup and level it off—don’t scoop it.
    • Don’t Overbake: Bake just until a toothpick comes out with a few moist crumbs. Overbaking dries out the layers.
    • Cool Fillings Completely: Adding warm raspberry filling to your cake will melt the buttercream and cause the layers to slide. Be patient and let it cool to room temperature, then chill it.
    • Chill Before Decorating: A well-chilled cake (after the crumb coat) is much easier to frost smoothly. It firms up the layers and filling, creating a sturdy canvas for the final coat.
    • Use Quality White Chocolate: Real white chocolate (with cocoa butter) melts more smoothly and has a far superior flavor to candy melts or compound coatings, making a huge difference in the final taste.
  • Philly-Style Tomato Pie

    Philly-Style Tomato Pie

    If you’ve never experienced Philly-Style Tomato Pie, prepare to discover a new obsession. Neither pizza nor pie in the traditional sense, this Italian bakery classic features a thick, airy, focaccia-like crust topped generously with a rich, slow-simmered tomato sauce.

    Unlike pizza, it’s traditionally served at room temperature with just a dusting of Pecorino Romano cheese. It’s a Philadelphia institution, found in old-school Italian bakeries and on every Eagles game day table.

    The Science of the Perfect Philly Tomato Pie Crust

    A true Philly tomato pie is defined by its thick, chewy-yet-tender crust—more focaccia than pizza . The secret lies in a high-hydration dough and long, slow fermentation. Using bread flour (with its high protein content) creates the strong gluten network necessary for that signature chewy structure.

    The high water content (typically 65-70% hydration) yields a moist, open crumb. A 24-hour cold ferment (or at least a long room-temperature rise) allows enzymes to break down complex carbohydrates, developing deep, complex flavor and that airy interior. The generous amount of olive oil in the pan and on top of the dough ensures a crispy, golden bottom and adds richness throughout.

    The sauce itself is a study in simplicity and concentration. Unlike pizza sauce, Philly tomato pie sauce is slow-simmered to concentrate flavors and thicken it, preventing a soggy crust. A touch of sugar balances the acidity of the tomatoes, while garlic and oregano provide the classic Italian bakery aroma.

    Ingredients

    For the Dough (Makes one 13×18-inch sheet pan pie):

    • 6 ¾ cups bread flour
    • 2 ⅓ cups warm water
    • 1 ½ tsp active dry yeast
    • 4 tsp granulated sugar
    • 1 tbsp fine sea salt
    • ¾ cup extra-virgin olive oil, divided

    For the Tomato Sauce:

    • Two 28-oz (794g) cans crushed tomatoes
    • 4 cloves garlic, minced or grated
    • ¼ cup extra-virgin olive oil
    • 2 teaspoons dried oregano
    • 1 tablespoon granulated sugar
    • 1 tablespoon fine sea salt
    • ¼ teaspoon red pepper flakes (optional)

    For Topping:

    • Pecorino Romano cheese, grated
    • Dried oregano, for sprinkling
    • Extra-virgin olive oil, for drizzling

    Instructions

    1. Make the Dough: In the bowl of a stand mixer fitted with a dough hook, combine the warm water and yeast. Let sit for 5 minutes until foamy. Add the flour and mix on low until well combined. Cover and let rest for 25 minutes.

    Add the sugar and salt, then mix on low. With the mixer running, slowly drizzle in 2 tablespoons of olive oil. Increase speed to medium-high and mix for 5-8 minutes until the dough is smooth and slightly tacky.

    2. Cold Ferment (Optional but Recommended): Transfer the dough to a large, oiled bowl. Cover tightly and refrigerate for 24 hours. This long, slow rise develops deep flavor. If possible, after 6-8 hours, fold the dough over itself once to redistribute.

    3. Prepare the Sauce: While the dough rises, make the sauce. In a medium saucepan, combine the crushed tomatoes, minced garlic, olive oil, oregano, sugar, salt, and red pepper flakes. Bring to a simmer over medium heat.

    Reduce heat to low and simmer, uncovered, for 30-45 minutes, stirring occasionally, until the sauce has thickened. Remove from heat and let cool completely. (The sauce can be made ahead and refrigerated.)

    4. Prepare the Pan & Second Rise: Pour ⅓ cup of olive oil into a 13×18-inch rimmed baking sheet, spreading it to coat the bottom. After the dough has fermented, gently turn it out onto the oiled pan. Drizzle the top with another 2 tablespoons of olive oil. Cover with plastic wrap and let rise at room temperature for 3-4 hours, until the dough has doubled or tripled in size and is very relaxed.

    5. Shape & Dimple: Using your fingertips, gently press and stretch the dough to the edges of the pan, being careful not to tear it. If it resists, let it rest for 15 minutes and try again. Once it reaches the edges, dimple the entire surface with your fingertips.

    6. First Bake (Blind Bake): Preheat oven to 425°F (220°C). Place the pan in the oven and bake the crust alone for 7-10 minutes, until it just begins to set but is not yet browned.

    7. Add Sauce & Finish Baking: Remove the pan from the oven. Spread a generous, even layer of the cooled sauce over the crust, leaving a ½-inch border around the edges. You will not use all the sauce—reserve about 1 cup. Return to the oven and bake for 15-20 more minutes, until the edges are deep golden brown and the bottom of the crust is crisp.

    8. Cool & Serve: Remove from the oven and let cool completely in the pan on a wire rack. Once cool, drizzle with additional olive oil and sprinkle generously with grated Pecorino Romano and a pinch of dried oregano. Transfer to a cutting board, slice into squares, and serve at room temperature.

    Pro-Tips for Authentic Philly Tomato Pie

    • High Hydration Dough: Don’t be alarmed by the sticky dough. That high water content is what creates the airy, focaccia-like crumb. Wet your hands when handling it.
    • Cold Ferment for Flavor: The 24-hour rest in the fridge is non-negotiable for that authentic, complex, slightly tangy flavor.
    • Cool the Sauce Completely: Warm sauce will make the dough gummy and compromise the texture. Make it ahead and let it come to room temperature before spreading.
    • Don’t Skimp on Oil: The olive oil in the pan and on top is essential for a crispy, flavorful crust. It also prevents sticking.
    • Check the Bottom: Use a spatula to lift the pie and check the bottom before removing it from the oven—it should be deep golden brown and crisp.
    • Serve at Room Temp: This isn’t pizza. It’s meant to be eaten at room temperature, which allows the crust and sauce flavors to meld perfectly.
    • Storage: Leftovers (if any!) can be wrapped in foil and kept at room temperature for up to 2 days. Reheat slices in a 350°F oven for 5-7 minutes.

    This Philly-Style Tomato Pie is a true taste of Italian bakery tradition.

  • Perfect Vanilla Cupcakes with Buttercream Frosting

    Perfect Vanilla Cupcakes with Buttercream Frosting

    There’s nothing quite like a perfect vanilla cupcake—light, tender, and ethereally fluffy, with a delicate crumb and the unmistakable fragrance of real vanilla. Crowned with a cloud of silky, not-too-sweet vanilla buttercream, this is the cupcake against which all others are measured. Whether for a birthday party, a bake sale, or just because, this foolproof recipe delivers bakery-quality results every single time.

    The Science of the Perfect Vanilla Crumb

    These cupcakes achieve their signature light, fluffy texture through proper creaming and the right liquid balance. Creaming room-temperature butter and sugar creates thousands of tiny air pockets that expand in the oven, providing lift and structure.

    Using cake flour (with its lower protein content) ensures a tender, delicate crumb—all-purpose flour can be used but will yield a slightly denser result. The combination of buttermilk and both baking powder and baking soda provides a double lift: the baking powder activates immediately upon mixing, while the buttermilk’s acidity reacts with baking soda to create additional rise in the oven.

    Room-temperature ingredients emulsify properly, creating a smooth, homogenous batter that bakes evenly. The result is a perfectly domed, moist, and tender cupcake every time.

    Ingredients

    For the Vanilla Cupcakes (Makes 12):

    • 1 ½ cups (180g) cake flour (not self-rising)
    • 1 ¼ teaspoons baking powder
    • ¼ teaspoon baking soda
    • ½ teaspoon salt
    • ½ cup (1 stick / 113g) unsalted butter, softened to room temperature
    • 1 cup (200g) granulated sugar
    • 2 large eggs, room temperature
    • 2 teaspoons pure vanilla extract (use the real stuff!)
    • ½ cup (120ml) buttermilk, room temperature

    No buttermilk? Add ½ tablespoon lemon juice or white vinegar to ½ cup milk and let sit for 5 minutes.

    For the Vanilla Buttercream Frosting:

    • 1 cup (2 sticks / 226g) unsalted butter, softened
    • 3 ½ cups (420g) powdered sugar, sifted
    • 2 teaspoons pure vanilla extract
    • 2-3 tablespoons heavy cream or whole milk
    • ¼ teaspoon salt

    For Decoration:

    • Rainbow sprinkles, sanding sugar, or edible glitter

    Instructions

    1. Preheat & Prep: Preheat oven to 350°F (175°C). Line a 12-cup muffin tin with paper cupcake liners.

    2. Combine Dry Ingredients: In a medium bowl, whisk together the cake flour, baking powder, baking soda, and salt until well combined.

    3. Cream Butter & Sugar: In a large bowl using a hand mixer or stand mixer with paddle attachment, beat the softened butter on medium-high speed until smooth and creamy, about 1 minute. Add the granulated sugar and beat for 3-5 minutes until light, fluffy, and pale in color. Scrape down the sides and bottom of the bowl as needed.

    4. Add Eggs & Vanilla: Add the eggs one at a time, beating well after each addition until fully incorporated. Beat in the vanilla extract.

    5. Alternate Dry & Wet: With the mixer on low speed, add the dry ingredients in three additions, alternating with the buttermilk in two additions (begin and end with dry). Mix just until combined after each addition. Do not overmix—stop as soon as the flour disappears. The batter will be smooth and thick.

    6. Fill & Bake: Divide the batter evenly among the prepared cupcake liners, filling each about ⅔ full. Bake for 18-22 minutes, until a toothpick inserted into the center of a cupcake comes out clean or with a few moist crumbs. Let cool in the pan for 5 minutes, then transfer to a wire rack to cool completely before frosting.

    7. Make the Buttercream: In a large bowl, beat the softened butter on medium speed until smooth and creamy, about 2 minutes. Gradually add the sifted powdered sugar, 1 cup at a time, beating on low speed until combined.

    Add the vanilla extract, 2 tablespoons of cream, and salt. Increase speed to medium-high and beat for 3-5 minutes until light, fluffy, and smooth. If too thick, add more cream 1 tablespoon at a time until desired consistency is reached.

    8. Frost & Decorate: Once cupcakes are completely cool, frost using a piping bag with a star tip or a simple offset spatula. Decorate with sprinkles immediately after frosting. Serve at room temperature.

    Pro-Tips for Perfect Vanilla Cupcakes

    • Use Cake Flour: Its lower protein content guarantees a tender, delicate crumb. All-purpose flour will work but may be slightly denser.
    • Room Temperature Everything: Cold butter won’t cream properly, and cold liquids can cause the batter to curdle. Set ingredients out 1-2 hours before starting.
    • Cream Thoroughly: Don’t rush the creaming step. Properly creamed butter and sugar should be pale and fluffy—this is where the cupcake gets its lift.
    • Don’t Overmix: Overmixing develops gluten, leading to tough, dense cupcakes with peaked tops. Mix just until the flour disappears.
    • Real Vanilla Matters: This is a vanilla-forward recipe; use pure vanilla extract, not imitation. For even more flavor, use vanilla bean paste.
    • Fill Liners Evenly: An ice cream scoop makes filling liners mess-free and ensures uniform cupcakes.
    • Cool Completely: Warm cupcakes will melt your beautiful buttercream into a puddle.
    • Frosting Consistency: For piping, the frosting should be thick but smooth. If it’s too soft, refrigerate for 15 minutes before piping.

    These Perfect Vanilla Cupcakes are the classic you’ll turn to again and again.