Category: baking

  • Loaded Potato Skins (The Game Day MVP Everyone Fights Over)

    Loaded Potato Skins (The Game Day MVP Everyone Fights Over)

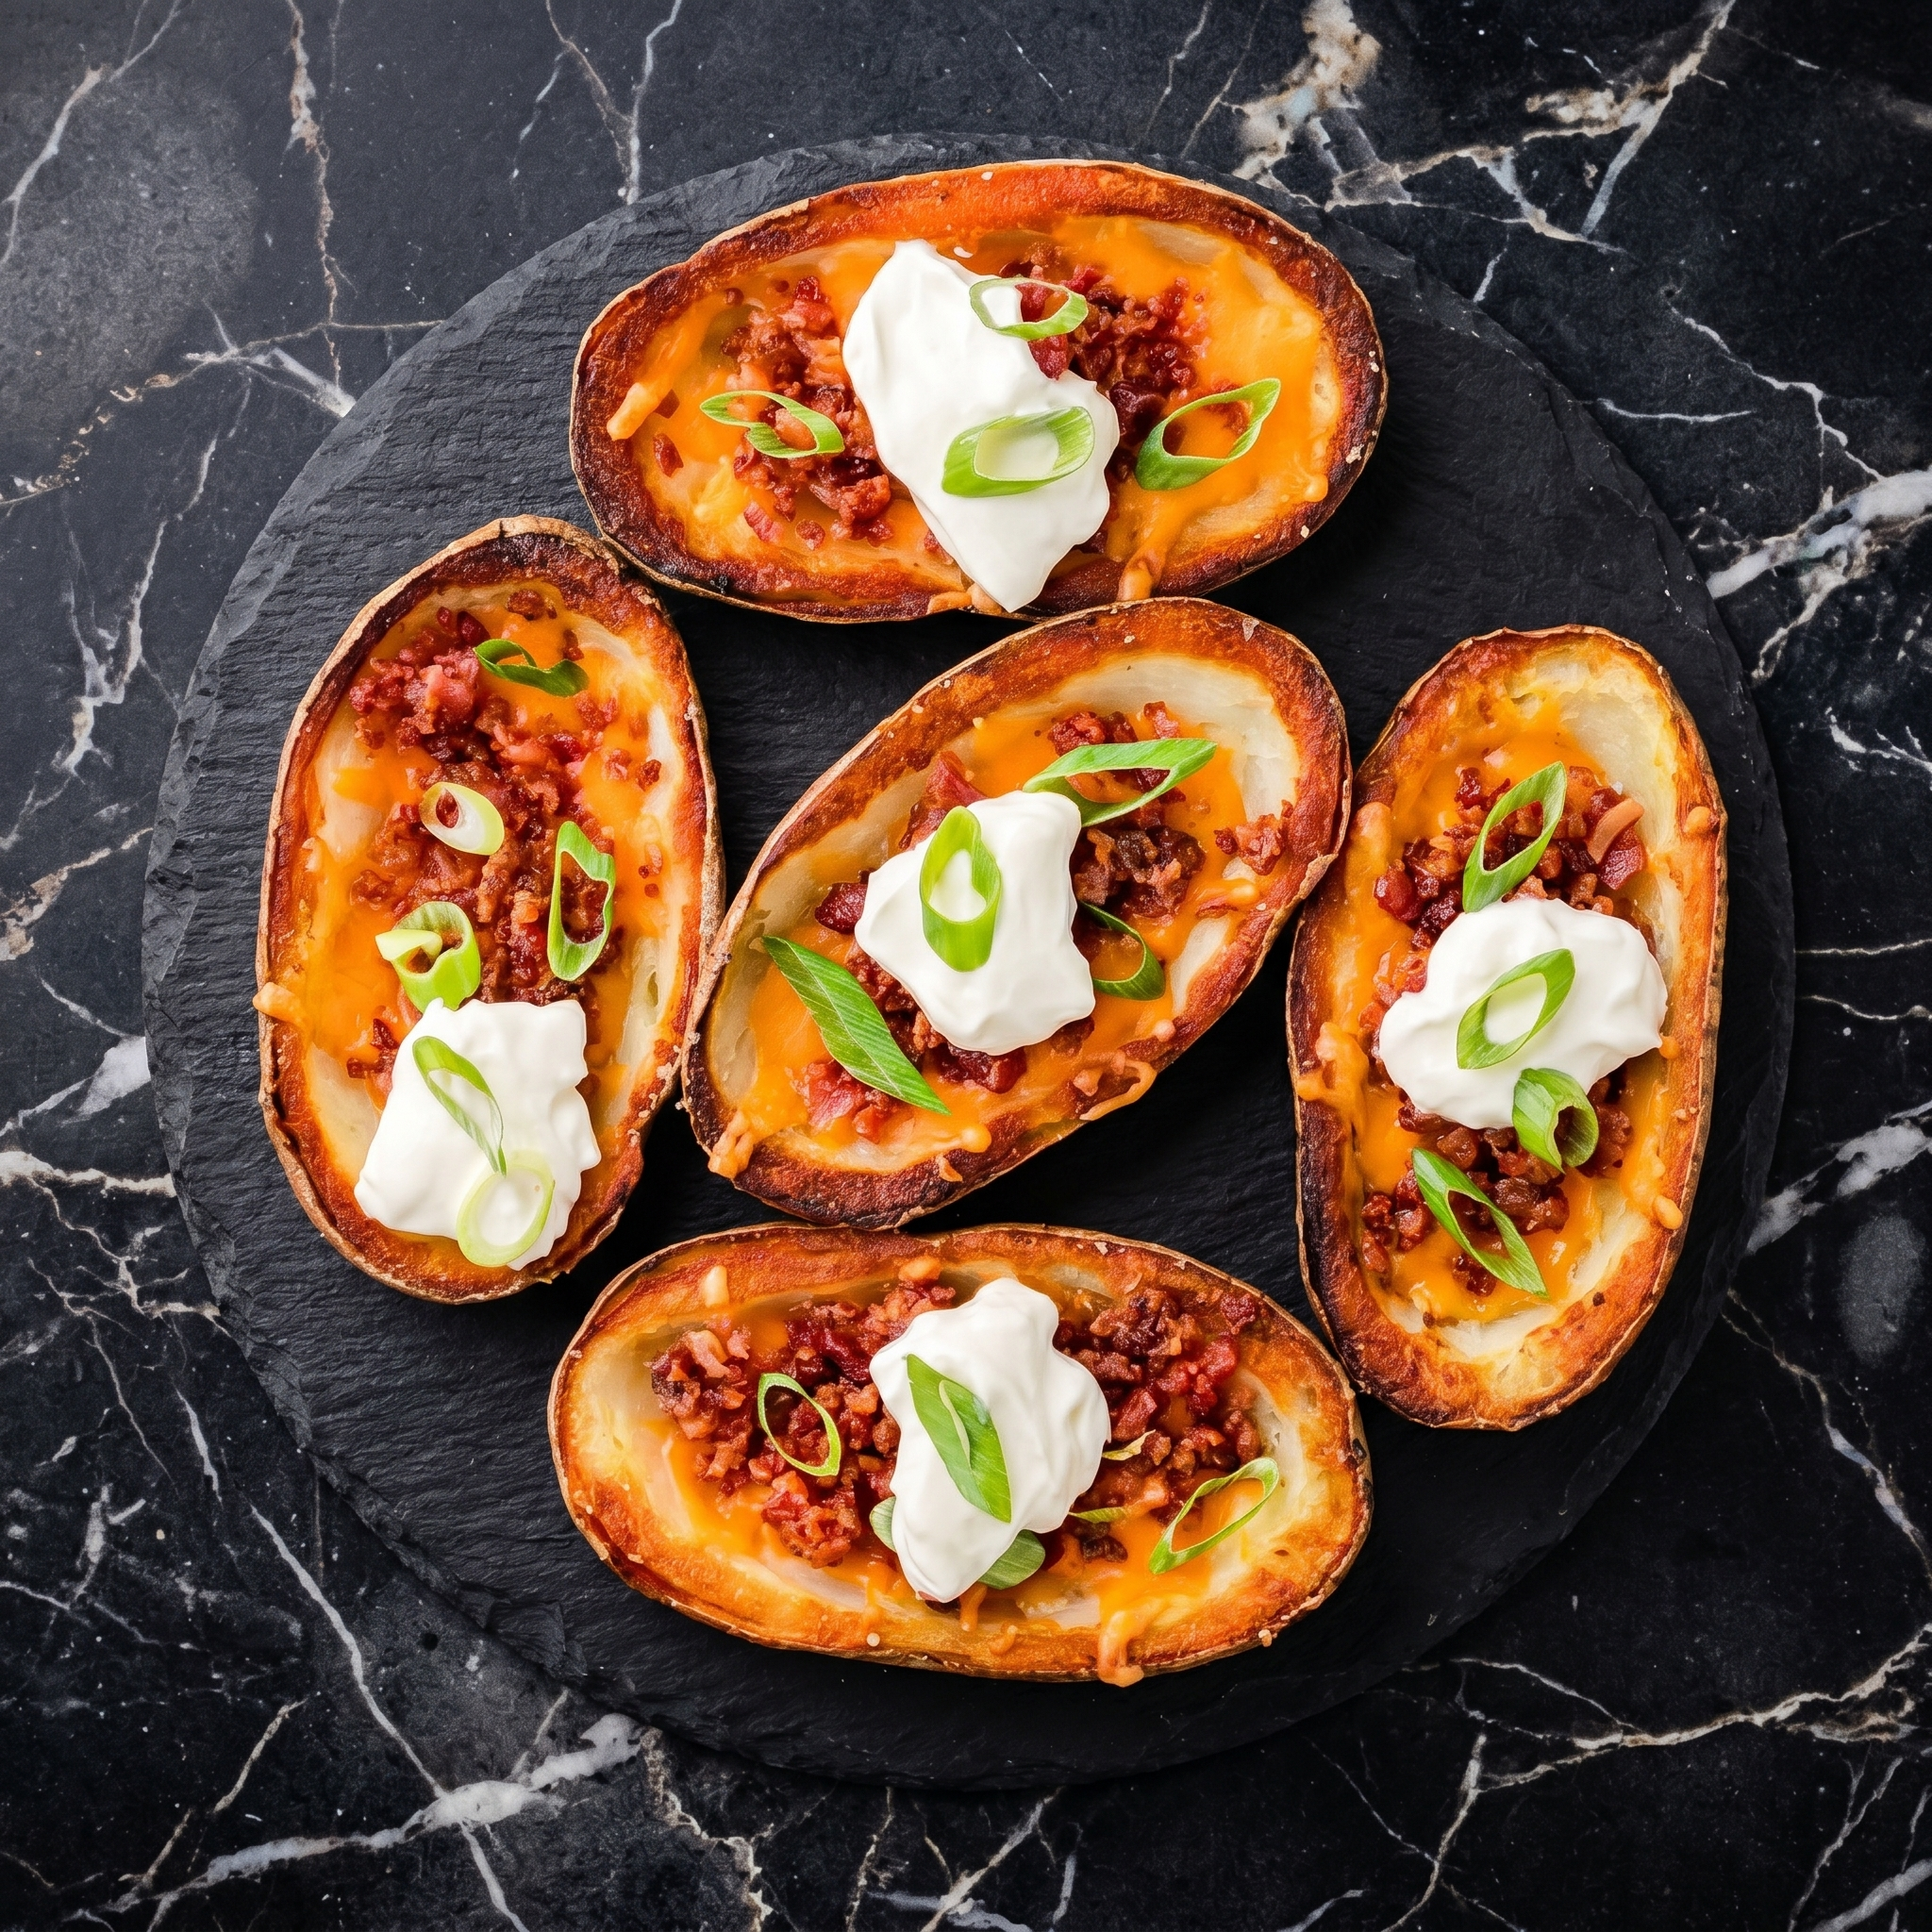
    Potato skins disappear fast. Plan accordingly.

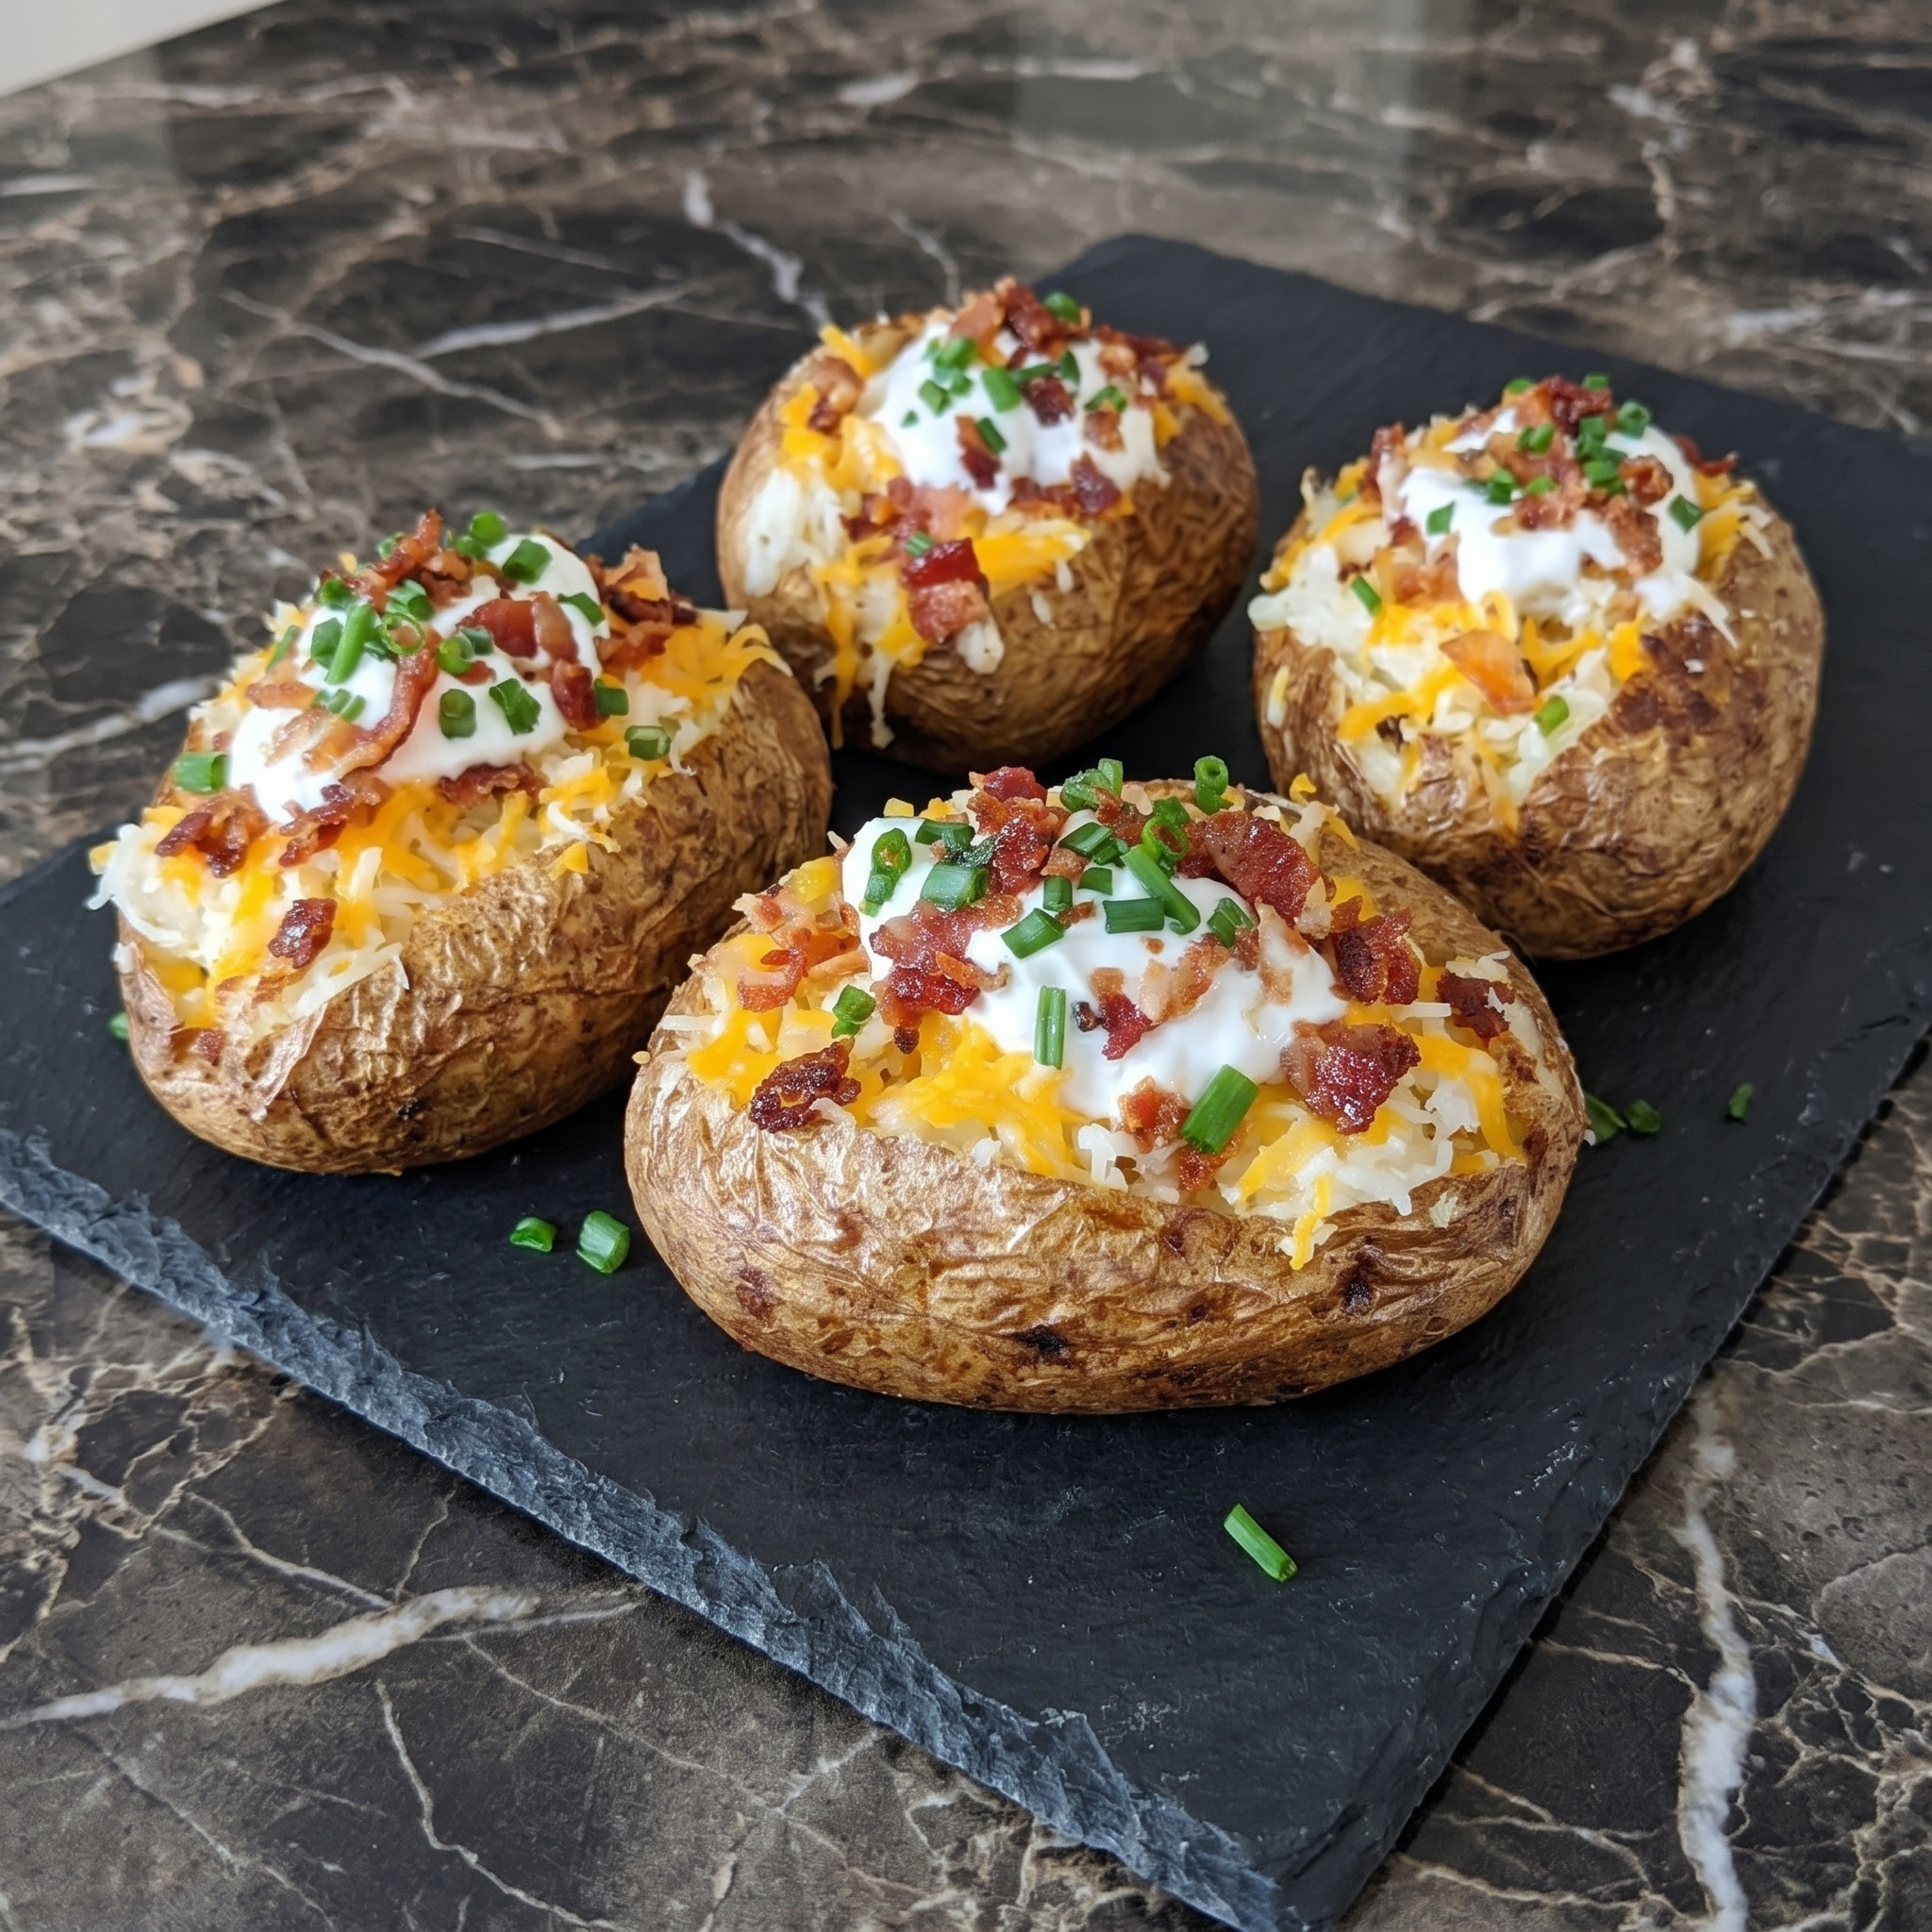
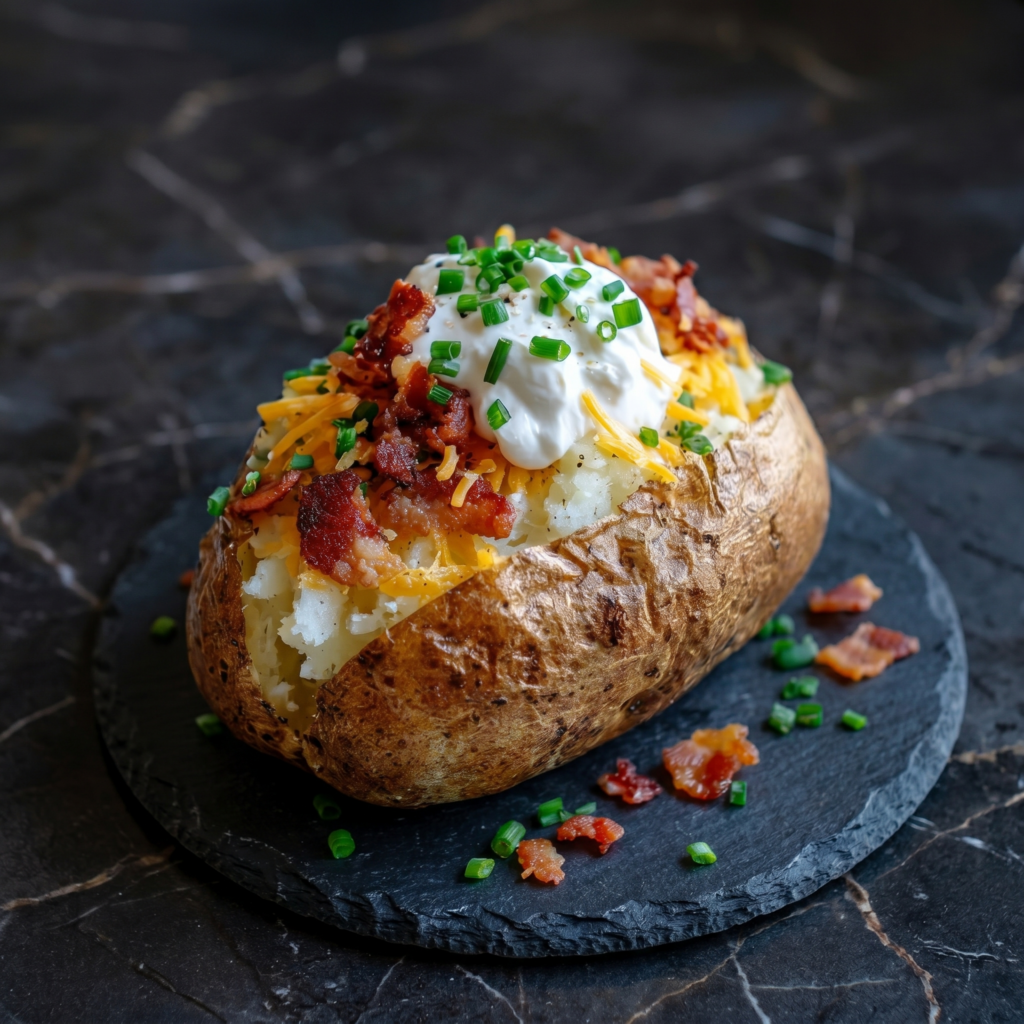
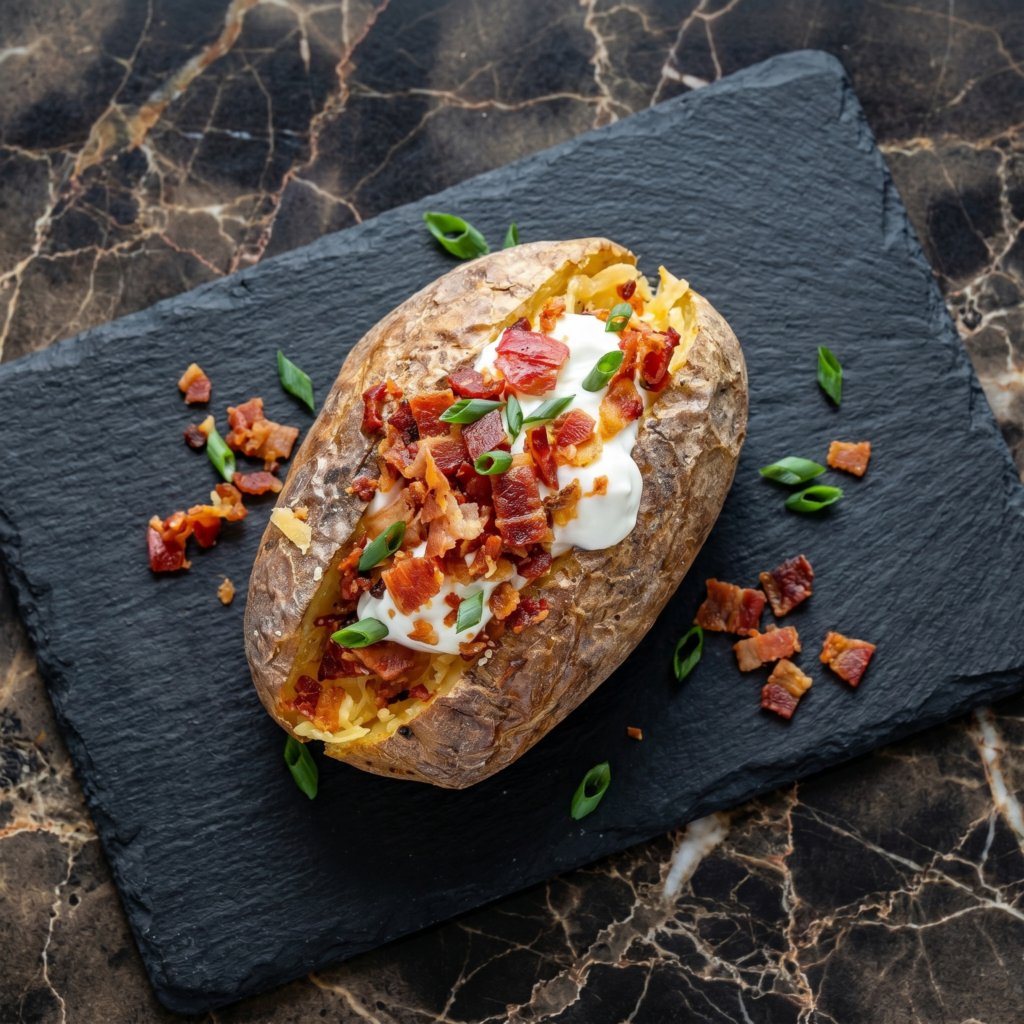
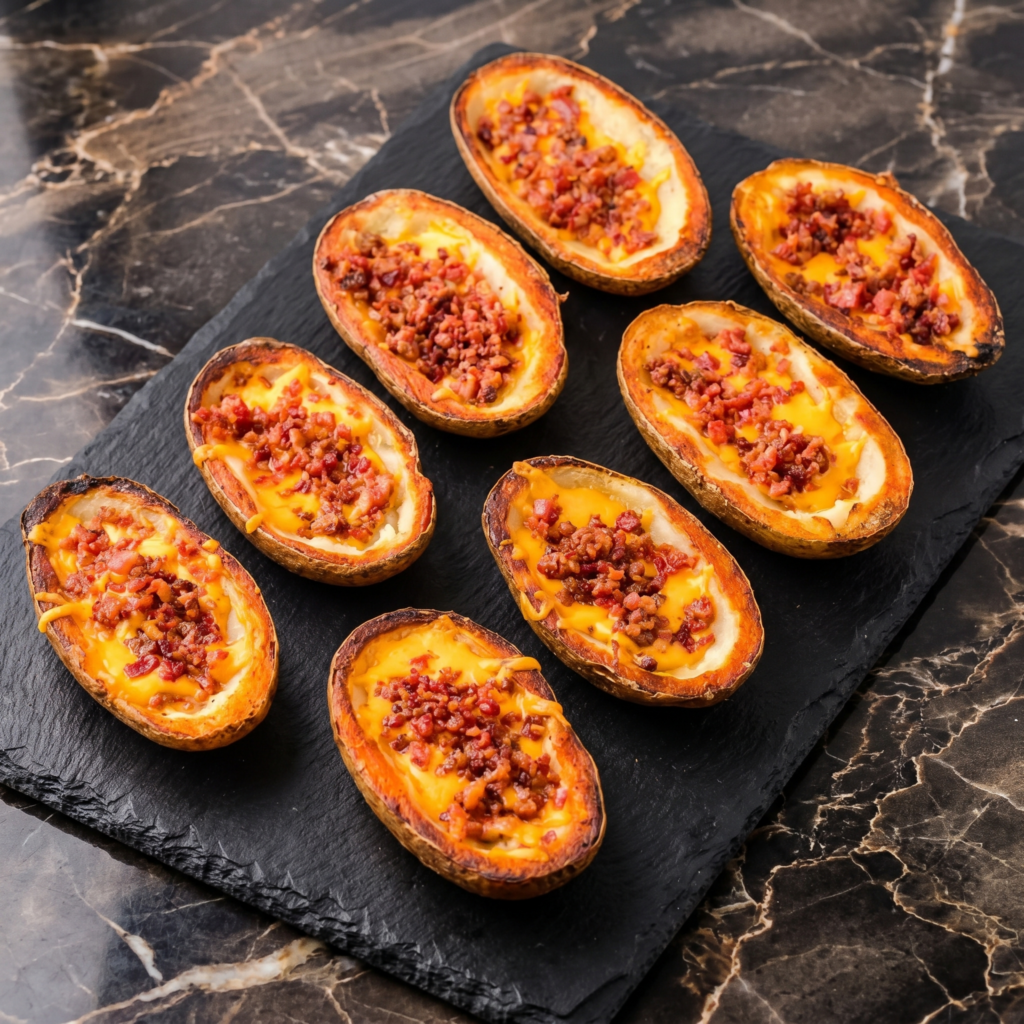
    These are everything you want: crispy edges, fluffy centers, salty bacon, melted cheddar, and a cool dollop of sour cream. Bake, scoop, fill, bake again. No deep fryer required. Just a hot oven and hungry people.

    Ingredients

    Serves 4 as appetizer (8 skins).

    • 4 medium russet potatoes
    • 2 tablespoons olive oil
    • 1 teaspoon salt
    • ½ teaspoon black pepper
    • 1 cup shredded cheddar cheese
    • 4 slices bacon, cooked crisp and crumbled
    • 2 green onions, thinly sliced
    • Sour cream for serving

    Step-by-Step Instructions

    Step 1: Bake Potatoes

    1. Preheat oven to 400°F (200°C). Prick potatoes with a fork.
    2. Bake directly on rack for 50-60 minutes until tender.

    Step 2: Scoop

    1. Let potatoes cool until handleable. Cut in half lengthwise.
    2. Scoop out flesh, leaving a ¼-inch wall. Save flesh for mashed potatoes later.

    Step 3: Crisp the Skins

    1. Brush skins inside and out with olive oil. Sprinkle with salt and pepper.
    2. Place on a baking sheet, skin-side up. Bake 10 minutes. Flip. Bake another 5 minutes.

    Step 4: Fill and Melt

    1. Fill each skin with cheddar, bacon, and green onions.
    2. Bake 5 more minutes until cheese is bubbly.

    Step 5: Serve

    1. Top with a dollop of sour cream and extra green onions. Serve hot.

    Summary

    Prep Time: 15 minutes | Cook Time: ~75 minutes | Total Time: ~90 minutes

    Yield: 8 potato skins

    Difficulty: Easy

    Storage Notes

    Refrigerate:

    Store fully baked skins in an airtight container for up to 3 days. Reheat at 375°F for 8-10 minutes. Not microwave-friendly (soggy disaster).

    Freeze Before Second Bake:

    After scooping and crisping, freeze skins on a tray. Then transfer to a bag. Bake from frozen: fill with toppings, bake at 400°F for 12-15 minutes.

    Pro Tip:

    Don’t toss the scooped potato! Make quick mashed potatoes or add to soup.

    AIR FRYER OPTION:

    After scooping, air fry skins at 375°F for 5 minutes. Fill. Air fry 3 more minutes. Faster and extra crispy.

  • Spinach Fatayer (Little Savory Pies That Steal the Show)

    Spinach Fatayer (Little Savory Pies That Steal the Show)

    Meet your new favorite handheld pie.

    Fatayer are soft, triangular pastries filled with lemony spinach, onions, and a touch of sumac. They’re tangy, savory, and somehow light despite being bread. Eat them warm, at room temperature, or straight from the freezer (kidding… mostly).

    Ingredients

    Makes 12 fatayer.

    For the Dough:

    • 2 cups (260g) all-purpose flour
    • 1 teaspoon instant yeast
    • ½ teaspoon salt
    • 1 teaspoon sugar
    • 3 tablespoons olive oil
    • ½ cup (120ml) warm water

    For the Filling:

    • 10 oz (280g) fresh spinach, finely chopped
    • 1 small onion, finely diced
    • 3 tablespoons lemon juice
    • 2 tablespoons olive oil
    • 1 teaspoon sumac (or more to taste)
    • ½ teaspoon salt
    • ¼ teaspoon black pepper

    Step-by-Step Instructions

    Step 1: Make Dough

    1. In a bowl, mix flour, yeast, salt, and sugar.
    2. Add olive oil and warm water. Mix until a soft dough forms.
    3. Knead 5 minutes until smooth. Cover and let rise 1 hour.

    Step 2: Prep Filling

    1. Chop spinach finely. Squeeze out excess moisture (very important!).
    2. In a bowl, combine spinach, onion, lemon juice, olive oil, sumac, salt, and pepper.
    3. Do NOT cook the filling—it cooks inside the dough.

    Step 3: Shape

    1. Preheat oven to 400°F (200°C). Line a baking sheet with parchment.
    2. Divide dough into 12 balls. Roll each into a 4-inch circle.
    3. Place 1-2 tablespoons filling in the center.

    Step 4: Form Triangles

    1. Pinch two edges together to form a triangle. Leave a small opening at the top (traditional) or seal completely.

    Step 5: Bake

    1. Bake 12-15 minutes until golden brown on bottom and edges.
    2. Serve warm or at room temperature with lemon wedges.

    Summary

    Prep Time: 20 minutes | Rise Time: 1 hour | Cook Time: 15 minutes | Total Time: ~1.5 hours

    Yield: 12 fatayer

    Difficulty: Medium (easy dough)

    Storage Notes

    Refrigerate Baked:

    Store in an airtight container for up to 4 days. Reheat at 350°F for 5-7 minutes or eat at room temperature.

    Freeze (Best Method):

    Freeze unbaked fatayer on a tray, then transfer to a bag. Bake from frozen at 400°F for 15-18 minutes.

    Filling Warning:

    Do NOT pre-cook the spinach filling. Raw spinach releases liquid as it bakes, keeping the inside moist. Pre-cooked = dry.

    Sumac Substitute:

    No sumac? Use lemon zest + a pinch of paprika. But sumac is worth finding.

  • Chicken and Cheese Taquitos: Rolled, Crispy, Irresistible

    Chicken and Cheese Taquitos: Rolled, Crispy, Irresistible

    Taquitos are the perfect handheld crunch. A crispy, golden cylinder packed with seasoned chicken and melted cheese. Dip them in everything.

    Bake them for easier cleanup or fry them for extra crunch. Either way, they’ll disappear before you sit down.

    Ingredients

    Makes 12-16 taquitos (serves 4).

    • 12-16 corn tortillas (small, 5-6 inch)
    • 2 cups cooked chicken, shredded
    • 1½ cups shredded cheese (Monterey Jack, cheddar, or Mexican blend)
    • 4 oz cream cheese, softened
    • ¼ cup salsa or canned diced green chiles
    • ½ teaspoon cumin
    • ½ teaspoon chili powder
    • ¼ teaspoon garlic powder
    • ¼ teaspoon salt
    • Cooking spray or oil for brushing

    For Serving:

    • Salsa, sour cream, guacamole, or hot sauce

    Step-by-Step Instructions

    Step 1: Preheat and Prep

    1. Preheat oven to 425°F (220°C). Line a baking sheet with parchment paper or foil.
    2. If baking, spray the sheet with cooking spray.

    Step 2: Make the Filling

    1. In a bowl, mix shredded chicken, shredded cheese, cream cheese, salsa, cumin, chili powder, garlic powder, and salt until well combined.

    Step 3: Warm the Tortillas

    1. Wrap corn tortillas in damp paper towels. Microwave for 30-45 seconds until soft and pliable (prevents cracking when rolling).

    Step 4: Fill and Roll

    1. Place 2 tablespoons of filling in a line across the lower third of each tortilla.
    2. Roll tightly from bottom to top. Place seam-side down on the baking sheet.
    3. Repeat with remaining tortillas.

    Step 5: Bake Until Crispy

    1. Spray or brush taquitos lightly with oil.
    2. Bake for 15-20 minutes until golden brown and crispy, flipping halfway.

    Step 6: Serve Immediately

    1. Let cool for 2 minutes (filling is lava hot). Serve with salsa, sour cream, and guac.

    Summary

    Prep Time: 15 minutes | Cook Time: 20 minutes | Total Time: 35 minutes

    Yield: 12-16 taquitos (4 servings)

    Difficulty: Easy

    Storage Notes

    Fridge:

    Store baked taquitos in an airtight container for up to 4 days. They soften but re-crisp well.

    Reheating (Best):

    Air fryer at 375°F for 5-6 minutes. Oven at 400°F for 8-10 minutes. Microwave is fine but won’t be crispy.

    Freezing:

    Freeze unbaked taquitos on a tray, then transfer to a bag. Freeze for up to 3 months. Bake from frozen at 425°F for 20-25 minutes.

    Frying Option:

    Heat ½ inch oil to 350°F. Fry taquitos seam-side down for 2-3 minutes until golden. Flip and fry 1-2 minutes more. Drain on wire rack.

    Pro Tip:

    Use leftover rotisserie chicken. It’s perfect here and saves time.

  • Bacon, Egg & Cheese Croissants: Breakfast Never Looked This Good

    Bacon, Egg & Cheese Croissants: Breakfast Never Looked This Good

    The croissant changes everything. Flaky, buttery, shattering into a million delicious crumbs. Fill it with bacon, eggs, and cheese? Now we’re talking about the best breakfast sandwich of your life.

    Ten minutes. One pan. Zero regrets. Make two.

    Ingredients

    Serves 2 (or 1 very hungry person).

    • 2 large croissants (day-old is fine—toast revives them)
    • 4 slices bacon
    • 4 large eggs
    • 2 tablespoons milk or cream (optional, for fluffy eggs)
    • 2 slices cheddar, Swiss, or American cheese
    • 1 tablespoon butter (for eggs)
    • Salt and pepper to taste
    • Optional: hot sauce, avocado, or tomato slices

    Step-by-Step Instructions

    Step 1: Cook the Bacon

    1. In a skillet over medium heat, cook bacon until crispy, 5-7 minutes.
    2. Transfer to a paper towel-lined plate. Pour off most of the bacon grease, leaving about 1 tablespoon.

    Step 2: Scramble the Eggs

    1. In a bowl, whisk eggs, milk (if using), salt, and pepper until frothy.
    2. Reduce skillet heat to low-medium. Add butter and let it melt.
    3. Pour in eggs. Gently scramble with a spatula, pushing cooked eggs toward the center.
    4. Remove from heat just before they look done (they’ll finish cooking off the heat).

    Step 3: Toast the Croissants

    1. Slice croissants in half horizontally.
    2. Toast in a toaster oven, regular oven at 350°F for 3 minutes, or in the same skillet cut-side down until golden.

    Step 4: Assemble the Sandwiches

    1. Place a slice of cheese on the bottom half of each warm croissant (heat melts it slightly).
    2. Top with scrambled eggs, then bacon (break slices in half).
    3. Add hot sauce, avocado, or tomato if using.
    4. Close with the top croissant half.

    Step 5: Serve Immediately

    1. Press down gently. Serve with napkins. So many napkins. Crumbs everywhere. Worth it.

    Summary

    Prep Time: 5 minutes | Cook Time: 10 minutes | Total Time: 15 minutes

    Yield: 2 sandwiches

    Difficulty: Easy

    Storage Notes

    Leftovers?

    Assembled sandwiches don’t keep well—croissants get soggy. Store components separately if you must.

    Make-Ahead Components:

    • Cooked bacon: fridge for 5 days
    • Scrambled eggs: 2 days (reheat gently)
    • Croissants: room temp, toast before using

    Reheating Croissant Sandwiches:

    Wrap in foil. Bake at 350°F for 8-10 minutes. Air fryer at 350°F for 4-5 minutes. Microwave makes croissants rubbery (avoid).

    Pro Tip:

    Day-old croissants are actually better for sandwiches—they’re sturdier and toast up crispier. Fresh croissants get smushed.

    Make It Fancy:

    Add a drizzle of honey. Yes, honey on bacon and eggs. Trust me.

  • Baked Meatballs: Hands-Off, No-Flip, Perfect Every Time

    Baked Meatballs: Hands-Off, No-Flip, Perfect Every Time

    Pan-frying meatballs means constant turning, uneven browning, and grease everywhere. Baking solves all of it.

    These meatballs go into the oven and come out perfectly browned, tender, and ready for sauce, subs, or spaghetti. No flipping. No mess. Just meatball magic.

    Ingredients

    Makes about 20 meatballs.

    • 1 lb (450g) ground beef (80/20 is best)
    • ½ lb (225g) ground pork (or all beef, but pork keeps them juicy)
    • ½ cup breadcrumbs (panko or regular)
    • ⅓ cup milk
    • 1 large egg
    • ½ cup grated Parmesan cheese
    • 2 cloves garlic, minced
    • 1 teaspoon salt
    • ½ teaspoon black pepper
    • 1 teaspoon dried oregano
    • Fresh parsley (optional, for garnish)

    Step-by-Step Instructions

    Step 1: Prep the Oven and Pan

    1. Preheat oven to 400°F (200°C).
    2. Line a baking sheet with parchment paper or foil (spray foil with oil so they don’t stick).

    Step 2: Make the Panade (The Juicy Secret)

    1. In a small bowl, combine breadcrumbs and milk. Let sit for 5 minutes until pasty.
    2. This panade keeps meatballs tender, not dense.

    Step 3: Mix Everything

    1. In a large bowl, combine ground beef, ground pork, panade, egg, Parmesan, garlic, salt, pepper, and oregano.
    2. Mix gently with your hands until just combined. Overmixing = tough meatballs.

    Step 4: Roll and Bake

    1. Roll mixture into 1.5-inch balls (about 2 tablespoons each).
    2. Place on baking sheet with a little space between them.
    3. Bake for 18-20 minutes until browned and cooked through (internal temp 165°F).

    Step 5: Serve or Sauce

    1. Add directly to marinara sauce, pile onto subs, or eat them plain like a gremlin. No judgment.

    Summary

    Prep Time: 10 minutes | Cook Time: 20 minutes | Total Time: 30 minutes

    Yield: 20 meatballs

    Difficulty: Easy

    Storage Notes

    Fridge:

    Store cooked meatballs in an airtight container for up to 5 days. Reheat in sauce or microwave.

    Freezer (Do This):

    Freeze baked and cooled meatballs on a tray, then transfer to a bag. Frozen meatballs last 3 months. Reheat from frozen in sauce (simmer 15 minutes) or oven (350°F for 15 minutes).

    Meal Prep Move:

    Double the batch. Freeze half. You’ll thank yourself on a busy Tuesday.

  • Chicken Enchiladas: Roll, Smother, Bake, Devour

    Chicken Enchiladas: Roll, Smother, Bake, Devour

    Enchiladas are the casserole that doesn’t feel like a casserole. Soft tortillas stuffed with savory chicken and cheese, then drowned in sauce and baked until bubbly.

    This version is fast, uses a sauce hack (no simmering for hours), and delivers exactly what you want: cheesy, saucy, slightly spicy perfection.

    Ingredients

    Serves 4-6.

    • 2 cups cooked shredded chicken (rotisserie chicken saves the day)
    • 8 small flour or corn tortillas
    • 2 cups shredded Monterey Jack or Mexican blend cheese
    • 1 can (19 oz) red enchilada sauce
    • ½ cup diced onion
    • Optional toppings: sour cream, cilantro, diced avocado, hot sauce

    Step-by-Step Instructions

    Step 1: Prep and Preheat

    1. Preheat oven to 375°F (190°C).
    2. Spread ½ cup enchilada sauce on the bottom of a 9×13 baking dish.

    Step 2: Make the Filling

    1. In a bowl, mix shredded chicken, 1 cup of cheese, and diced onion.

    Step 3: Roll the Enchiladas

    1. Warm tortillas in the microwave for 30 seconds (prevents cracking).
    2. Spoon filling down the center of each tortilla.
    3. Roll tightly and place seam-side down in the baking dish.

    Step 4: Smother and Top

    1. Pour remaining enchilada sauce over the rolled tortillas.
    2. Sprinkle with remaining 1 cup of cheese.

    Step 5: Bake and Finish

    1. Bake uncovered for 20 minutes until sauce is bubbly and cheese is melted.
    2. Let rest 5 minutes (so they hold their shape). Top with sour cream, cilantro, and whatever else you love.

    Summary

    Prep Time: 15 minutes | Cook Time: 20 minutes | Total Time: 35 minutes

    Yield: 8 enchiladas (4-6 servings)

    Difficulty: Easy

    Storage Notes

    Leftovers:

    Store in the fridge for up to 4 days. The tortillas will soften, but the flavor gets even better.

    Freezing:

    Assemble the enchiladas (without baking) in a freezer-safe dish. Cover tightly and freeze for up to 3 months. Bake from frozen at 375°F for 40-45 minutes.

    Reheating:

    Microwave individual portions for 1-2 minutes. For a whole dish, cover with foil and bake at 350°F for 15 minutes.

  • Cheesy Egg Muffins: Breakfast That Makes Itself

    Cheesy Egg Muffins: Breakfast That Makes Itself

    Mornings are hard. Breakfast shouldn’t be. These cheesy egg muffins are the answer: grab, reheat, and go.

    They’re fluffy, cheesy, and packed with whatever add-ins you have lurking in the fridge. Make a batch on Sunday. Thank yourself all week.

    Ingredients

    Makes 12 muffins.

    • 8 large eggs
    • ½ cup milk (any kind works)
    • 1 cup shredded cheddar cheese
    • ½ teaspoon salt
    • ¼ teaspoon black pepper
    • Optional add-ins (pick 1-2):
      – ½ cup cooked bacon or sausage, crumbled
      – ¼ cup diced bell peppers
      – ¼ cup chopped spinach
      – ¼ cup diced onion

    Step-by-Step Instructions

    Step 1: Prep the Pan

    1. Preheat oven to 375°F (190°C).
    2. Grease a 12-cup muffin tin generously with nonstick spray or butter (don’t skimp or they’ll stick).

    Step 2: Whisk the Eggs

    1. In a large bowl, whisk eggs, milk, salt, and pepper until frothy and well combined.

    Step 3: Add Cheese and Mix-ins

    1. Stir in shredded cheese and your chosen add-ins.

    Step 4: Fill and Bake

    1. Pour egg mixture evenly into muffin cups (about ¾ full).
    2. Bake for 18-20 minutes until puffed and golden on top.
    3. A toothpick inserted in the center should come out clean.

    Step 5: Cool and Pop Out

    1. Let cool in the pan for 5 minutes. Run a knife around the edges and pop them out. They will deflate slightly—that’s normal.

    Summary

    Prep Time: 10 minutes | Cook Time: 20 minutes | Total Time: 30 minutes

    Yield: 12 muffins

    Difficulty: Easy

    Storage Notes

    Fridge:

    Store in an airtight container for up to 5 days. Reheat in the microwave for 20-30 seconds.

    Freezer (Best for Meal Prep):

    Cool completely. Freeze in a single layer on a tray, then transfer to a freezer bag. Store for up to 3 months. Reheat from frozen for 45-60 seconds.

    Pro Tip:

    Reheat in an air fryer at 300°F for 3-4 minutes for slightly crispy edges instead of soft ones.

  • Sweet Potato Fries: Crispy, Salty, Sweet Perfection

    Sweet Potato Fries: Crispy, Salty, Sweet Perfection

    Sweet potato fries have one problem: they get floppy. Not these. The secret is cornstarch and a hot oven.

    You’ll get fries with a crunchy exterior, a soft and sweet interior, and a smoky, salty kick. Dip them in aioli or spicy mayo and try not to eat the whole tray.

    Ingredients

    Serves 2-3.

    • 2 large sweet potatoes
    • 2 tablespoons cornstarch (the crispy secret)
    • 2 tablespoons olive or avocado oil
    • ½ teaspoon salt
    • ½ teaspoon smoked paprika
    • ¼ teaspoon garlic powder
    • ¼ teaspoon black pepper
    • Optional: pinch of cayenne for heat

    Step-by-Step Instructions

    Step 1: Prep and Cut

    1. Preheat oven to 425°F (220°C). Line a baking sheet with parchment paper.
    2. Peel sweet potatoes (or scrub well and leave skin on).
    3. Cut into even ¼-inch fries. Thinner = crispier.

    Step 2: The Cornstarch Trick

    1. Place cut fries in a large bowl. Sprinkle with cornstarch and toss to coat evenly.
    2. Add oil, salt, paprika, garlic powder, pepper, and cayenne. Toss again.

    Step 3: Bake, Don’t Crowd

    1. Arrange fries in a single layer on the baking sheet. Leave space between them or they’ll steam (not crisp).
    2. Bake for 15 minutes. Flip with a spatula. Bake for 10-15 more minutes until edges are dark and crispy.

    Step 4: Serve Fast

    1. These get less crispy as they sit. Serve immediately with ketchup, chipotle mayo, or garlic aioli.

    Summary

    Prep Time: 10 minutes | Cook Time: 25 minutes | Total Time: 35 minutes

    Yield: 2-3 servings

    Difficulty: Easy

    Storage Notes

    Leftovers:

    Sweet potato fries do not reheat well—they get soft. If you must, reheat in an air fryer at 400°F for 3-4 minutes or in a hot oven on a wire rack.

    Make-Ahead Prep:

    Cut the fries and store them in a bowl of cold water in the fridge for up to 24 hours. Dry them VERY thoroughly before adding cornstarch and oil.

    Never Microwave:

    Microwaving = sad, limp fries. Just don’t.

  • Stuffed Bell Peppers: A Whole Meal in a Colorful Bowl

    Stuffed Bell Peppers: A Whole Meal in a Colorful Bowl

    Stuffed bell peppers are dinner magic. The pepper gets tender and sweet, the filling is savory and hearty, and the cheese on top turns into a golden, bubbly crown.

    This version uses basic pantry ingredients and bakes everything in one dish. No boiling peppers first. No complicated steps. Just dinner that actually works.

    Ingredients

    Serves 4.

    • 4 large bell peppers (any color, but red and yellow are sweetest)
    • 1 lb (450g) ground beef (or ground turkey)
    • 1 cup cooked rice (white or brown)
    • 1 small onion, diced
    • 2 cloves garlic, minced
    • 1 can (15 oz) diced tomatoes, drained
    • 1 cup shredded mozzarella or cheddar cheese
    • 1 teaspoon salt, ½ teaspoon black pepper
    • Optional: fresh parsley for garnish

    Step-by-Step Instructions

    Step 1: Prep the Peppers

    1. Preheat oven to 375°F (190°C).
    2. Slice the tops off each pepper and remove seeds and membranes.
    3. Arrange peppers standing up in a baking dish.

    Step 2: Cook the Filling

    1. In a skillet over medium heat, cook ground beef until browned. Drain excess fat.
    2. Add onion and garlic, cook for 2 minutes until soft.
    3. Stir in cooked rice, drained tomatoes, salt, and pepper. Remove from heat.

    Step 3: Stuff and Top

    1. Spoon the filling into each pepper, packing it gently.
    2. Sprinkle cheese generously over the top of each pepper.

    Step 4: Bake Until Tender

    1. Add ¼ cup of water to the bottom of the baking dish (steams the peppers).
    2. Cover with foil and bake for 30 minutes.
    3. Remove foil and bake for 10 more minutes until cheese is bubbly and browned.

    Step 5: Serve Hot

    1. Garnish with parsley and serve immediately. Those peppers are juicy, so watch for drips.

    Summary

    Prep Time: 15 minutes | Cook Time: 40 minutes | Total Time: 55 minutes

    Yield: 4 servings

    Difficulty: Easy

    Storage Notes

    Leftovers:

    Store in an airtight container in the fridge for up to 4 days. The peppers get softer but still taste great.

    Freezing:

    Freeze fully cooked and cooled peppers for up to 3 months. Thaw overnight in the fridge, then reheat in a 350°F oven for 20 minutes.

    Meal Prep:

    Assemble the stuffed peppers (without baking) up to 2 days ahead. Cover and refrigerate. Add water to the dish and bake when ready.

  • The Loaded Baked Potato That Steals the Show

    The Loaded Baked Potato That Steals the Show

    Let’s be honest: the toppings are why we’re here. A perfect loaded baked potato is a buttery, fluffy cloud cradled in a salty, crispy shell, then absolutely buried in cheese, bacon, and chives. It’s cheap, it’s easy, and it makes everyone happy.

    This recipe skips the fuss. You’ll get a potato with crispy skin, a tender inside, and a topping-to-potato ratio that respects your time and taste buds.

    Ingredients

    Serves 4.

    • 4 medium russet potatoes (the best for baking)
    • 2 tablespoons olive oil
    • 1 teaspoon kosher salt
    • 1 cup shredded cheddar cheese
    • 6 slices cooked bacon, crumbled
    • ½ cup sour cream
    • ¼ cup chopped fresh chives or green onions
    • Optional: butter, black pepper, hot sauce

    Step-by-Step Instructions

    Step 1: Prep the Potatoes

    1. Preheat oven to 400°F (200°C).
    2. Scrub potatoes dry, then prick each one several times with a fork.
    3. Rub with olive oil and sprinkle with salt all over.

    Step 2: Bake Until Tender

    1. Place potatoes directly on the middle oven rack.
    2. Bake for 50–60 minutes, until a knife slides in easily with no resistance.

    Step 3: Fluff the Inside

    1. Cut a slit down the middle of each potato.
    2. Gently squeeze the ends toward the center to open it up.
    3. Use a fork to fluff the inside while adding a pat of butter if you’re feeling fancy.

    Step 4: Load It Up

    1. Pile on the cheddar cheese (it will melt instantly).
    2. Sprinkle with crumbled bacon and chives.
    3. Top with a generous dollop of sour cream.
    4. Finish with black pepper or hot sauce.

    Step 5: Serve Immediately

    1. These potatoes do not wait. Serve hot, with extra toppings on the side for the over-achievers at your table.

    Summary

    Prep Time: 10 minutes | Cook Time: 1 hour | Total Time: 1 hour 10 minutes

    Yield: 4 servings

    Difficulty: Easy

    Storage Notes

    Leftover Potatoes:

    Store baked (but unloaded) potatoes in the fridge for up to 4 days. Reheat in a 350°F oven or air fryer to crisp the skin again.

    Do Not Store Fully Loaded:

    Soggy bacon and sad sour cream are not the vibe. Keep toppings separate and assemble fresh.

    Meal Prep Trick:

    Bake a batch of potatoes on Sunday. Refrigerate. During the week, just reheat and load in 5 minutes.