Author: user

  • Snickerdoodles: Soft, Pillowy & Bursting with Cinnamon

    Snickerdoodles: Soft, Pillowy & Bursting with Cinnamon

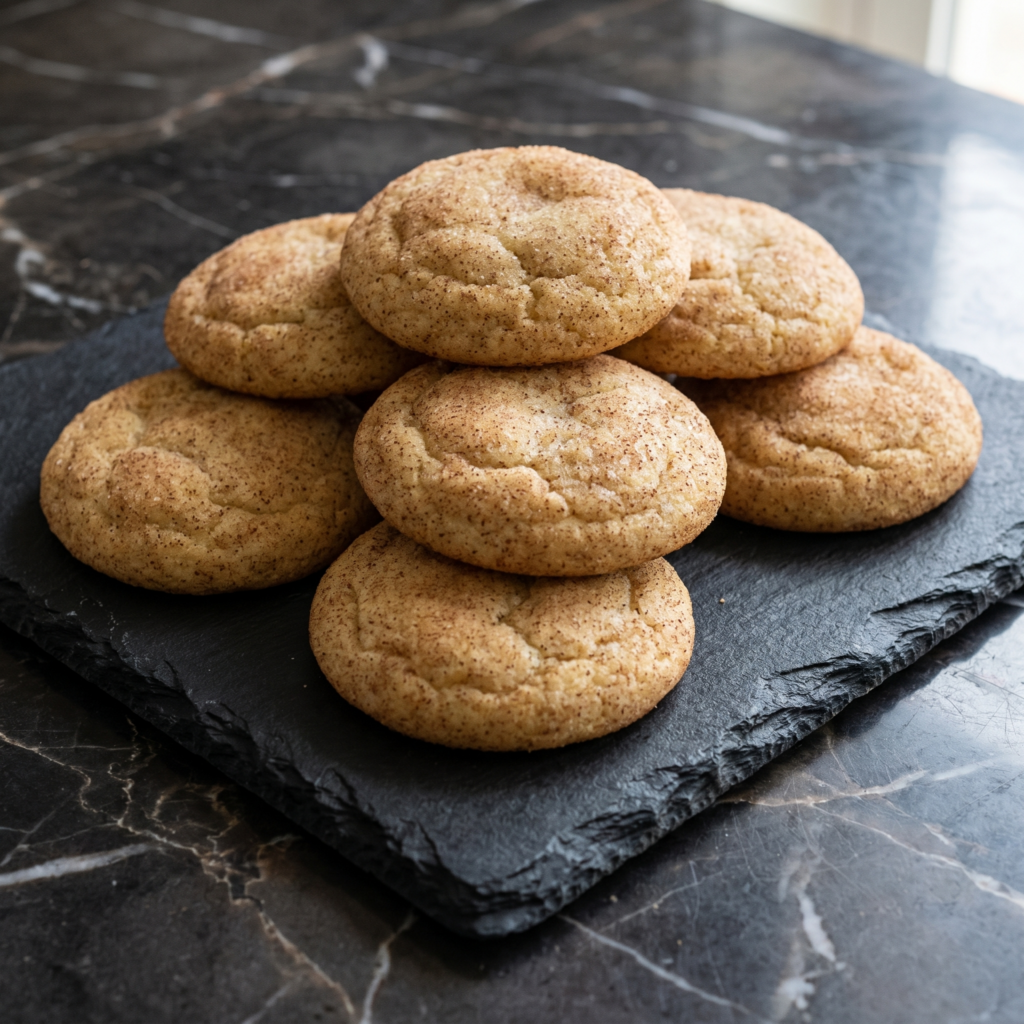
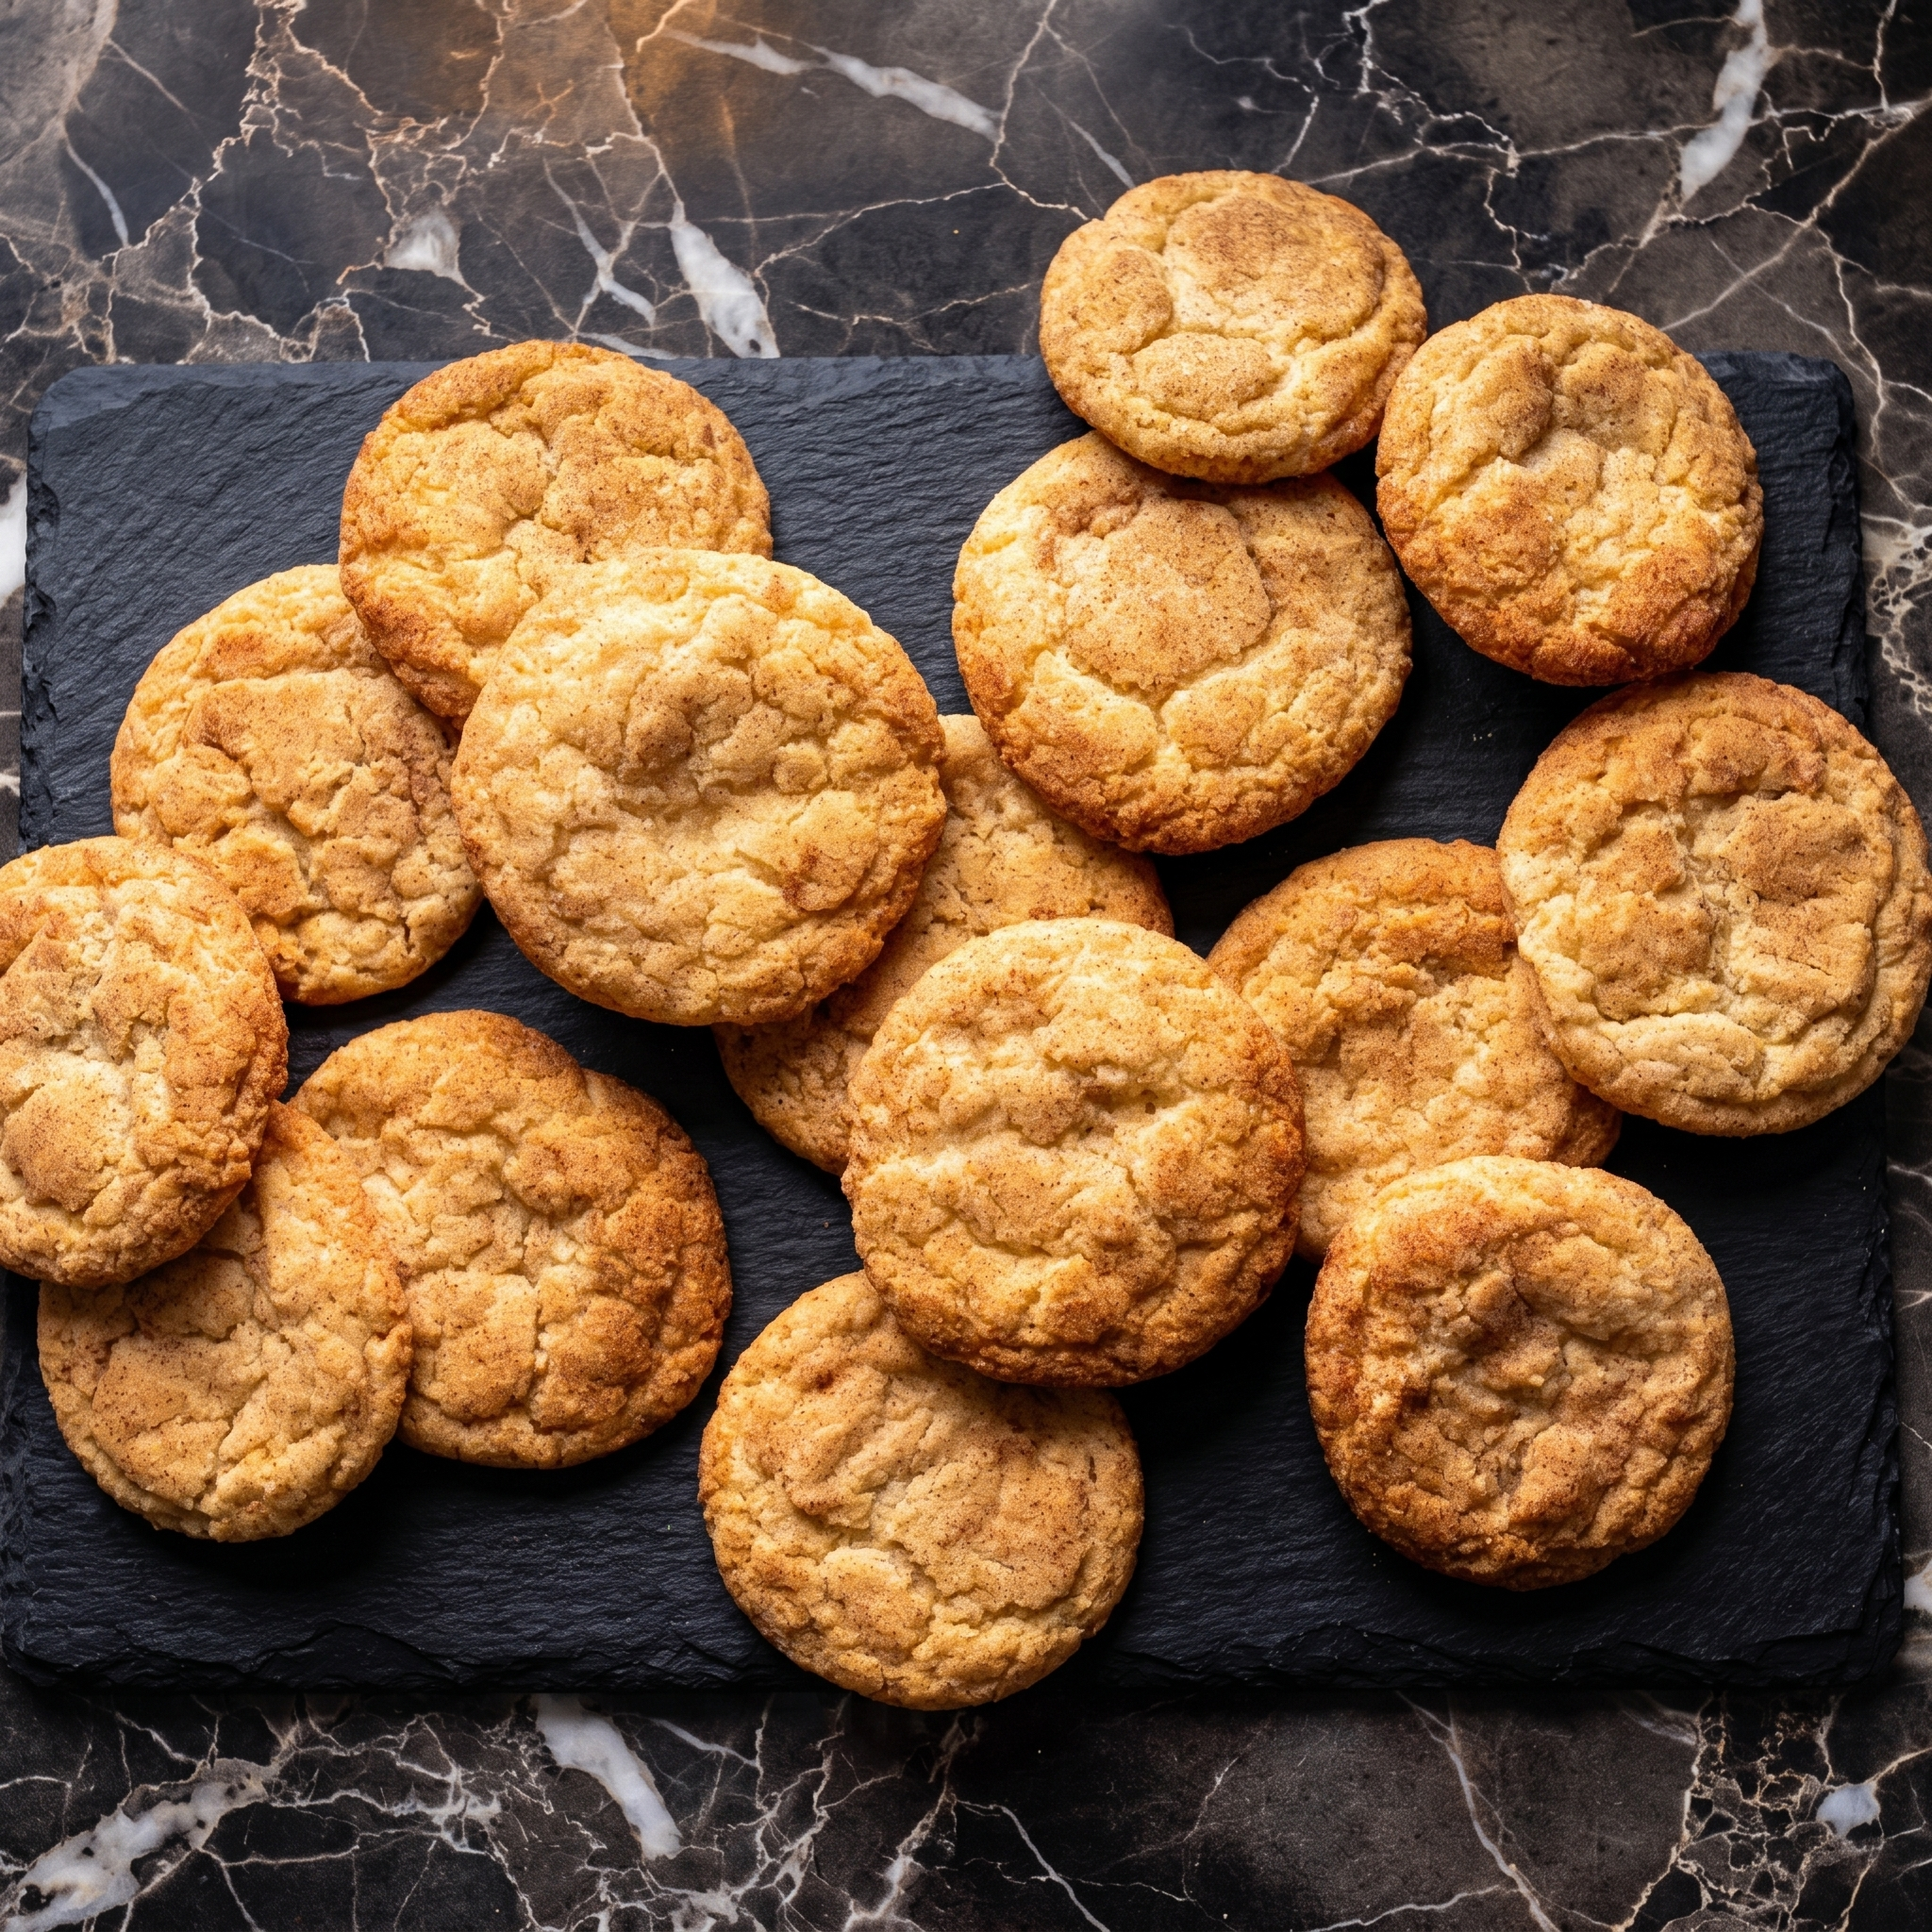
    Say it with me: snick-er-doo-dle. Even the name is fun. But these cookies aren’t just fun to say—they’re absolutely irresistible to eat.

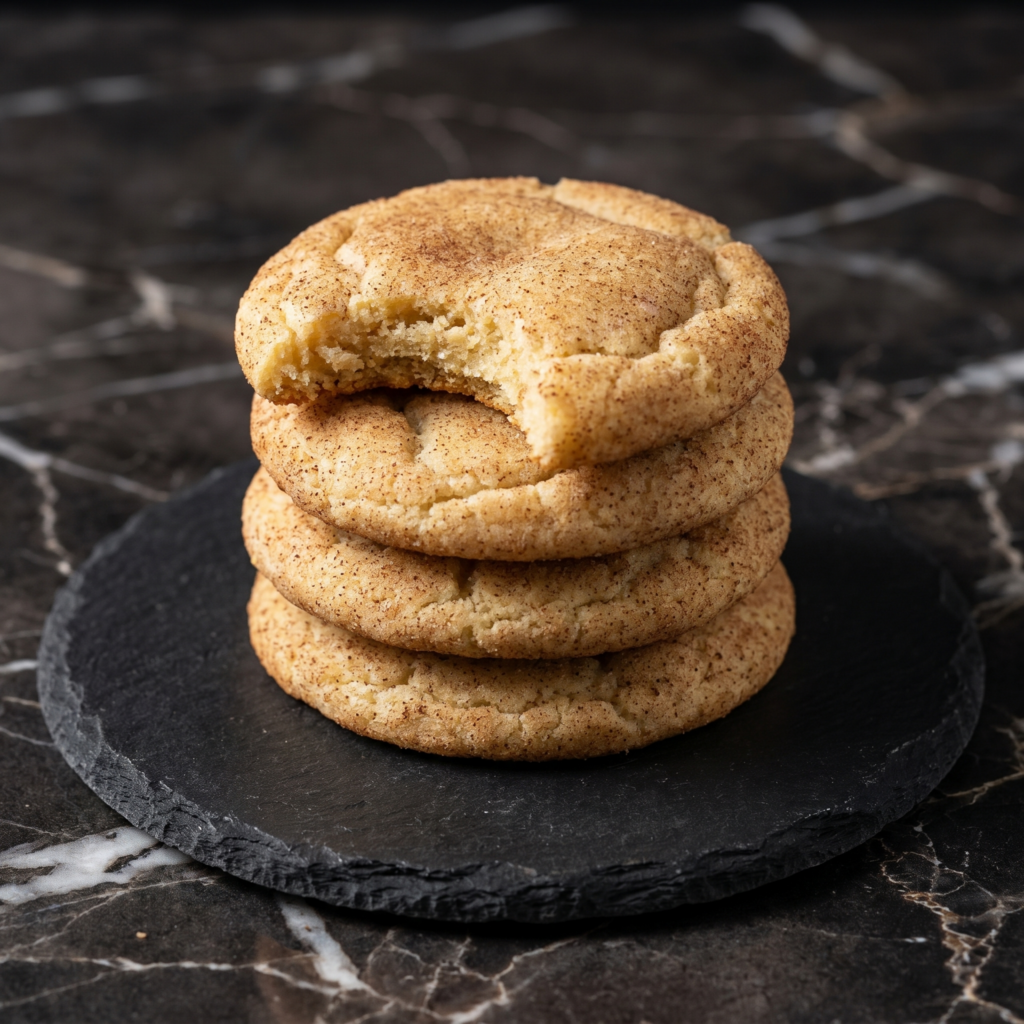
    Snickerdoodles are the cookies you remember from childhood: soft and pillowy, with a slight tang from cream of tartar and a generous coating of cinnamon sugar that creates the perfect crackly top.

    Ingredients

    Yields about 24-30 cookies.

    For the Snickerdoodles:

    • 2 ¾ cups (345g) all-purpose flour
    • 2 teaspoons cream of tartar
    • 1 teaspoon baking soda
    • ½ teaspoon salt
    • 1 cup (225g) unsalted butter, softened
    • 1 ½ cups (300g) granulated sugar
    • 2 large eggs, at room temperature
    • 1 teaspoon vanilla extract

    For the Cinnamon Sugar Coating:

    • ¼ cup (50g) granulated sugar
    • 2 tablespoons ground cinnamon

    Step-by-Step Instructions

    1. Preheat and Prepare:

    1. Preheat your oven to 375°F (190°C). Line two baking sheets with parchment paper or silicone baking mats.

    2. Combine Dry Ingredients:

    1. In a medium bowl, whisk together the flour, cream of tartar, baking soda, and salt. Set aside.

    3. Cream Butter and Sugar:

    1. In a large bowl, beat the softened butter and granulated sugar together with an electric mixer until light and fluffy, about 2-3 minutes. Scrape down the sides and bottom of the bowl as needed.

    4. Add Eggs and Vanilla:

    1. Add the eggs one at a time, beating well after each addition. Scrape down the bowl again.
    2. Beat in the vanilla extract until combined.

    5. Combine Wet and Dry:

    1. Gradually add the dry ingredients to the wet ingredients, mixing on low speed until just combined. Do not overmix. The dough will be soft but not sticky.

    6. Make the Cinnamon Sugar Coating:

    1. In a small bowl, whisk together the ¼ cup granulated sugar and 2 tablespoons cinnamon until well combined.

    7. Shape and Coat:

    1. Scoop tablespoon-sized portions of dough (about 1.5 tablespoons) and roll into balls.
    2. Roll each ball generously in the cinnamon sugar mixture until completely coated.
    3. Place on the prepared baking sheets, spacing about 2 inches apart. They will spread, so give them room.

    8. Bake:

    1. Bake for 10-12 minutes, until the edges are set and the cookies are puffed and crackly. The centers will still look soft and slightly underdone—that’s perfect.
    2. Let the cookies cool on the baking sheet for 5-10 minutes. They will continue to set as they cool.
    3. Transfer to a wire rack to cool completely.

    9. Serve:

    1. Serve with a cold glass of milk or a hot cup of coffee. Store leftovers in an airtight container.

    Summary

    Prep Time: 15 minutes | Bake Time: 10-12 minutes | Total Time: 25-30 minutes

    Yield: 24-30 cookies

    Difficulty: Easy

    Storage and Make-Ahead Tips

    How to Store:

    Store snickerdoodles in an airtight container at room temperature for up to 5 days. Place a slice of white bread in the container to keep them extra soft—the cookies will absorb moisture from the bread.

    Can You Freeze the Dough?

    Absolutely! Scoop the dough into balls, roll in cinnamon sugar, and place on a parchment-lined baking sheet. Freeze until solid, then transfer the frozen dough balls to a freezer bag. Bake from frozen, adding 1-2 minutes to the baking time. Fresh cookies anytime!

    Freezing Baked Cookies:

    Baked snickerdoodles freeze beautifully. Place them in a single layer in a freezer-safe container with parchment between layers. Freeze for up to 3 months. Thaw at room temperature.

    Make-Ahead Dough:

    The dough can be refrigerated for up to 3 days before baking. Let it sit at room temperature for 10-15 minutes to soften slightly before scooping and rolling in cinnamon sugar.

  • Oatmeal Raisin Cookies So Good, You’ll Convert Even the Haters

    Oatmeal Raisin Cookies So Good, You’ll Convert Even the Haters

    I know what you’re thinking. Oatmeal raisin? The “I thought this was chocolate chip” cookie. The one that sits sadly in the tin while everyone grabs the others. But hear me out—these oatmeal raisin cookies are different.

    These are the kind that convert haters. They’re soft and chewy in the middle with slightly crisp edges, perfectly spiced with cinnamon and nutmeg, and packed with plump, juicy raisins that add little bursts of sweetness in every bite.

    They’re not a sad substitute for chocolate chip—they’re a contender in their own right. Whether you’re already a fan or need convincing, these oatmeal raisin cookies are about to become your new favorite.

    Ingredients

    Yields about 24-30 cookies.

    For the Oatmeal Raisin Cookies:

    • 1 ½ cups (190g) all-purpose flour
    • 1 teaspoon baking soda
    • 1 teaspoon ground cinnamon
    • ½ teaspoon ground nutmeg
    • ½ teaspoon salt
    • 1 cup (225g) unsalted butter, softened
    • 1 cup (200g) light brown sugar, packed
    • ½ cup (100g) granulated sugar
    • 2 large eggs, at room temperature
    • 2 teaspoons vanilla extract
    • 3 cups (270g) old-fashioned rolled oats (not quick oats)
    • 1 ½ cups (225g) raisins

    Optional Add-Ins:

    • ½ cup chopped walnuts or pecans
    • 1 tablespoon molasses for deeper flavor
    • ½ teaspoon orange zest

    Step-by-Step Instructions

    1. Plump the Raisins (Don’t Skip This!):

    1. Place the raisins in a small bowl and cover with hot water. Let them sit for 10-15 minutes while you prepare the rest of the ingredients. This plumps them up and makes them juicy and soft instead of dry and chewy.
    2. Drain well and pat dry with paper towels before adding to the dough.

    2. Preheat and Prepare:

    1. Preheat your oven to 350°F (175°C). Line two baking sheets with parchment paper or silicone baking mats.

    3. Combine Dry Ingredients:

    1. In a medium bowl, whisk together the flour, baking soda, cinnamon, nutmeg, and salt. Set aside.

    4. Cream Butter and Sugars:

    1. In a large bowl, beat the softened butter, brown sugar, and granulated sugar together with an electric mixer until light and fluffy, about 2-3 minutes. Scrape down the sides and bottom of the bowl as needed.

    5. Add Eggs and Vanilla:

    1. Add the eggs one at a time, beating well after each addition. Scrape down the bowl again.
    2. Beat in the vanilla extract (and molasses if using).

    6. Combine Wet and Dry:

    1. Gradually add the flour mixture to the wet ingredients, mixing on low speed until just combined. Do not overmix.
    2. Fold in the oats with a spatula until evenly distributed.
    3. Gently fold in the plumped raisins (and nuts or zest if using).

    7. Chill the Dough:

    1. Cover the bowl and refrigerate the dough for at least 30 minutes. This step is important—it prevents spreading and allows the flavors to meld.
    2. If you’re in a hurry, you can skip this, but 30 minutes makes a noticeable difference.

    8. Scoop and Bake:

    1. Scoop tablespoon-sized portions of dough (about 1.5 tablespoons) and roll into balls. Place on the prepared baking sheets, spacing about 2 inches apart.
    2. Bake for 10-12 minutes, until the edges are lightly golden and set. The centers will still look soft and slightly underdone—that’s perfect.
    3. Let the cookies cool on the baking sheet for 5-10 minutes. They will continue to set as they cool.
    4. Transfer to a wire rack to cool completely.

    9. Serve:

    1. Serve with a cold glass of milk or a hot cup of coffee. These cookies are soft, chewy, and absolutely irresistible.

    Summary

    Prep Time: 20 minutes | Chill Time: 30 minutes | Bake Time: 10-12 minutes | Total Time: 1 hour

    Yield: 24-30 cookies

    Difficulty: Easy

    Storage and Make-Ahead Tips

    How to Store:

    Store oatmeal raisin cookies in an airtight container at room temperature for up to 5 days. They actually stay soft and chewy thanks to the oats and raisins. Place a slice of white bread in the container to keep them extra soft—the cookies will absorb moisture from the bread.

    Can You Freeze the Dough?

    Absolutely! Scoop the dough into balls and place on a parchment-lined baking sheet. Freeze until solid, then transfer the frozen dough balls to a freezer bag. Bake from frozen, adding 1-2 minutes to the baking time. Fresh cookies anytime!

    Freezing Baked Cookies:

    Baked oatmeal cookies freeze beautifully. Place them in a single layer in a freezer-safe container with parchment between layers. Freeze for up to 3 months. Thaw at room temperature.

    Make-Ahead Dough:

    The dough can be refrigerated for up to 3 days before baking. Let it sit at room temperature for 10-15 minutes to soften slightly before scooping.

  • Mini Pizzas: The Cutest Little Pizzas You’ll Ever Eat

    Mini Pizzas: The Cutest Little Pizzas You’ll Ever Eat

    Is there anything better than pizza? Yes—mini pizzas! These adorable little pies are everything you love about pizza, but cuter, more customizable, and somehow even more fun to eat.

    Whether you’re hosting a party, feeding a crowd with different topping preferences, or just want to make dinner feel special, mini pizzas are the answer. The possibilities are endless: classic pepperoni, margherita, veggie-loaded, or whatever your heart desires.

    And the best part? They come together in no time, especially if you use store-bought dough as a shortcut. Get the kids involved, set up a topping bar, and let everyone build their own perfect little pizza. Dinner just got a whole lot more fun.

    Ingredients

    Makes 8-10 mini pizzas (depending on size).

    For the Pizza Dough:

    • 1 lb (450g) pizza dough (homemade or store-bought)
    • All-purpose flour, for dusting
    • Cornmeal, for dusting (optional)

    For the Pizza Sauce:

    • 1 cup (240ml) pizza sauce or marinara sauce
    • 1 teaspoon dried oregano
    • ½ teaspoon garlic powder
    • Pinch of red pepper flakes (optional)

    For the Cheese:

    • 2 cups (225g) shredded mozzarella cheese
    • ¼ cup (25g) grated Parmesan cheese

    Classic Topping Ideas:

    • Pepperoni slices
    • Cooked Italian sausage, crumbled
    • Cooked bacon, crumbled
    • Mushrooms, thinly sliced
    • Bell peppers, thinly sliced
    • Red onion, thinly sliced
    • Black olives, sliced
    • Fresh basil leaves
    • Cherry tomatoes, halved

    Step-by-Step Instructions

    1. Preheat and Prepare:

    1. Preheat your oven to 450°F (230°C). If you have a pizza stone, place it in the oven to preheat as well. Otherwise, line two baking sheets with parchment paper or sprinkle with cornmeal to prevent sticking.

    2. Prepare the Sauce:

    1. In a small bowl, combine the pizza sauce with oregano, garlic powder, and red pepper flakes (if using). Set aside to let the flavors meld.

    3. Divide the Dough:

    1. On a lightly floured surface, divide the pizza dough into 8-10 equal pieces. For mini pizzas, each piece should be about 2-3 ounces (about the size of a golf ball).
    2. Roll each piece into a smooth ball. Cover with a clean kitchen towel and let rest for 10-15 minutes. This relaxes the gluten and makes the dough easier to shape.

    4. Shape the Mini Crusts:

    1. Working with one ball at a time, flatten it with your fingers or roll it out with a small rolling pin into a 4-5 inch circle. The edges can be slightly thicker than the center for that classic pizza crust.
    2. If the dough springs back, let it rest a few more minutes before continuing.
    3. Place the shaped crusts on the prepared baking sheets (or on parchment paper if using a pizza stone).

    5. Assemble the Mini Pizzas:

    1. Spread about 1-2 tablespoons of sauce onto each crust, leaving a small border for the crust.
    2. Sprinkle with mozzarella cheese and a pinch of Parmesan.
    3. Add your desired toppings. Don’t overload—mini pizzas cook quickly and too many toppings can make them soggy.

    6. Bake:

    1. If using a pizza stone, carefully transfer the parchment paper with the pizzas onto the hot stone. If using baking sheets, simply place them in the oven.
    2. Bake for 8-12 minutes, until the crusts are golden brown and the cheese is bubbly and slightly browned in spots.
    3. For crispier crusts, bake directly on the oven rack (without a pan) if you have a stone or steel.

    7. Finish and Serve:

    1. Remove from the oven and let cool for 2-3 minutes before serving.
    2. If desired, top with fresh basil leaves and a drizzle of olive oil or balsamic glaze.
    3. Serve warm and watch them disappear!

    Summary

    Prep Time: 20 minutes | Bake Time: 8-12 minutes | Total Time: 30-35 minutes

    Yield: 8-10 mini pizzas

    Difficulty: Easy

    Storage and Make-Ahead Tips

    How to Store Leftovers:

    Store leftover mini pizzas in an airtight container in the refrigerator for up to 3 days. They’re great for lunch the next day!

    Reheating:

    For best results, reheat in a skillet over medium heat for 2-3 minutes per side, or in a 350°F oven for 5-7 minutes. The microwave works but the crust won’t be as crisp.

    Can You Freeze Mini Pizzas?

    Absolutely! Two great options:

    • Freeze baked pizzas: Cool completely, wrap individually in plastic wrap and foil, and freeze for up to 3 months. Reheat directly from frozen in a 375°F oven.
    • Freeze unbaked assembled pizzas: Assemble on parchment-lined baking sheets, freeze until solid, then transfer to freezer bags. Bake from frozen, adding 2-3 minutes to the baking time.

    Make-Ahead Prep:

    Prep your toppings ahead of time and store in the refrigerator. Make the sauce up to 5 days ahead. On pizza night, all you have to do is shape and assemble.

  • Spicy Garlic Shrimp (5-Minute Flavor Bomb)

    Spicy Garlic Shrimp (5-Minute Flavor Bomb)

    Shrimp is the fastest food on earth. This spicy garlic version takes five minutes and tastes like a restaurant splurge. Butter. Garlic. Red pepper. Lemon. Boom.

    Serve with bread, rice, or just a fork. No judgment.

    Ingredients

    Serves 4.

    • 1.5 lbs (675g) large shrimp, peeled and deveined
    • 4 tablespoons butter
    • 8 cloves garlic, minced (yes, eight)
    • 1 teaspoon red pepper flakes (more if you dare)
    • ½ teaspoon salt
    • ¼ cup fresh parsley, chopped
    • Juice of 1 lemon
    • Lemon wedges for serving

    Step-by-Step Instructions

    Step 1: Pat Shrimp Dry

    1. Pat shrimp completely dry with paper towels. Season with salt.

    Step 2: Sear Shrimp

    1. Melt 2 tablespoons butter in a large skillet over medium-high heat.
    2. Add shrimp in a single layer. Cook 1-2 minutes per side until pink and curled. Remove.

    Step 3: Make Garlic Butter Sauce

    1. Reduce heat to medium. Add remaining 2 tablespoons butter, garlic, and red pepper flakes.
    2. Cook 30-60 seconds until fragrant (don’t burn the garlic!).

    Step 4: Toss & Serve

    1. Return shrimp to pan. Add lemon juice and parsley. Toss to coat.
    2. Serve immediately with lemon wedges and crusty bread.

    Summary

    Prep Time: 5 minutes | Cook Time: 5 minutes | Total Time: 10 minutes

    Yield: 4 servings

    Difficulty: Stupid Easy (don’t overcook the shrimp)

    Storage Notes

    How to Store:

    • Best fresh. Shrimp gets rubbery when reheated.
    • Leftovers: Fridge for 1 day. Eat cold over salad or rice.
    • Reheat: Low heat skillet for 30 seconds max. Microwave not recommended.
  • Loaded Potato Skins: The Super Bowl MVP (Crispy, Cheesy, Bacon-y)

    Loaded Potato Skins: The Super Bowl MVP (Crispy, Cheesy, Bacon-y)

    The best part of a baked potato is the skin. Prove me wrong. Crispy, salty, and sturdy enough to hold mountains of cheese and bacon. These loaded potato skins are the undisputed king of game day snacks.

    Crispy outside. Gooey inside. Gone in 10 minutes.

    Ingredients

    Serves 4 (makes 8 skins).

    • 4 medium russet potatoes
    • 2 tablespoons olive oil
    • 1 teaspoon salt
    • ½ teaspoon black pepper
    • 1 cup shredded cheddar cheese
    • 6 slices bacon, cooked and crumbled
    • 3 green onions, thinly sliced
    • Sour cream (for serving)

    Step-by-Step Instructions

    Step 1: Bake the Potatoes

    1. Preheat oven to 400°F (200°C). Pierce potatoes with a fork.
    2. Bake 50-60 minutes until tender. Let cool until handleable.

    Step 2: Scoop and Prep

    1. Cut each potato in half lengthwise. Scoop out most of the flesh, leaving a ¼-inch thick shell.
    2. Save the scooped potato for mashed potatoes later.

    Step 3: Crisp the Skins

    1. Brush inside and outside with olive oil. Sprinkle with salt and pepper.
    2. Place skin-side up on a baking sheet. Bake 10 minutes. Flip and bake 5 more minutes.

    Step 4: Load Them Up

    1. Fill each skin with cheddar cheese and crumbled bacon.
    2. Bake 5 minutes until cheese is melted and bubbly.

    Step 5: Finish and Serve

    1. Top with green onions. Add a dollop of sour cream. Serve hot.

    Summary

    Prep Time: 10 minutes | Cook Time: 1 hour 15 minutes | Total Time: 1 hour 25 minutes

    Yield: 8 skins

    Difficulty: Easy

    Storage Notes

    How to Store:

    • Fridge: Keeps 3-4 days. Reheat in oven or air fryer at 375°F for 5-7 minutes. (Microwave kills the crisp.)
    • Freezer: Freeze fully loaded (before sour cream) on a tray, then bag. Reheat from frozen at 400°F for 12-15 minutes.

    Pro Tip:

    Don’t throw away the scooped potato! Mix with butter and milk for instant mashed potatoes. Also, double the recipe—trust me, one batch is never enough.

  • Beef Wellington (Showstopper You Can Actually Make)

    Beef Wellington (Showstopper You Can Actually Make)

    Beef Wellington scares people. It shouldn’t. Yes, it’s fancy. Yes, it’s impressive. But it’s also just steak wrapped in mushrooms, ham, and puff pastry. Follow these steps. You’ve got this.

    Your guests will lose their minds.

    Ingredients

    Serves 4-6.

    • 1.5 lbs (675g) beef tenderloin (center-cut)
    • Salt and pepper
    • 2 tablespoons oil
    • 8 oz (225g) mushrooms, finely chopped
    • 2 shallots, minced
    • 2 cloves garlic, minced
    • 6 slices prosciutto
    • 1 sheet puff pastry, thawed
    • 1 egg, beaten (for egg wash)
    • Fresh thyme (optional)

    Step-by-Step Instructions

    Step 1: Sear Beef

    1. Season beef with salt and pepper. Sear in hot oil 2-3 minutes per side until browned. Cool.

    Step 2: Make Duxelles

    1. In same pan, cook mushrooms, shallots, and garlic until dry (no liquid left). Cool.

    Step 3: Wrap

    1. Lay prosciutto on plastic wrap, overlapping. Spread mushroom mixture on top.
    2. Place beef in center. Roll tightly using plastic wrap. Chill 20 minutes.

    Step 4: Pastry Wrap

    1. Roll out puff pastry. Unwrap beef, place on pastry. Brush edges with egg, seal tightly.
    2. Chill 20 minutes. Preheat oven to 400°F (200°C).

    Step 5: Bake

    1. Brush pastry with egg. Score decorative lines. Bake 35-40 minutes (internal temp 125°F for medium-rare).
    2. Rest 10 minutes. Slice. Watch jaws drop.

    Summary

    Prep Time: 30 minutes (plus chilling) | Cook Time: 45 minutes | Total Time: ~2 hours

    Yield: 4-6 servings

    Difficulty: Medium (chilling steps = your friend)

    Storage Notes

    How to Store:

    • Best fresh. Wellington is a star on day one.
    • Leftovers: Fridge up to 2 days. Pastry won’t be crispy.
    • Reheat: 350°F oven for 10-12 minutes. Microwave ruins the pastry.
  • Better Than Takeout Honey Walnut Shrimp (Crispy, Creamy, Irresistible)

    Better Than Takeout Honey Walnut Shrimp (Crispy, Creamy, Irresistible)

    Let’s be real: takeout honey walnut shrimp is delicious, but it’s also expensive and arrives slightly soggy. This homemade version solves both problems. You get that same iconic combo—crispy shrimp, candied walnuts, creamy sweet sauce—in about 20 minutes. Plus, it stays crunchy way longer than anything from a delivery bag.

    Ingredients

    Serves 3-4.

    For the Candied Walnuts:

    • ½ cup walnuts
    • 2 tablespoons honey
    • 1 tablespoon sugar
    • 1 tablespoon water

    For the Shrimp & Batter:

    • 1 lb large shrimp, peeled and deveined
    • ½ cup cornstarch
    • ¼ cup flour
    • ½ cup cold water
    • 1 egg
    • Oil for frying (vegetable or canola)

    For the Creamy Sauce:

    • ¼ cup mayonnaise
    • 2 tablespoons sweetened condensed milk
    • 1 tablespoon honey
    • 1 teaspoon lemon juice

    Step-by-Step Instructions

    Step 1: Candy the Walnuts

    1. In a small pan over medium heat, combine walnuts, honey, sugar, and water.
    2. Stir constantly for 3-4 minutes until syrup thickens and coats the walnuts.
    3. Transfer to parchment paper to cool and harden.

    Step 2: Make the Sauce

    1. Whisk together mayonnaise, sweetened condensed milk, honey, and lemon juice until smooth.
    2. Set aside.

    Step 3: Prepare the Batter

    1. In a bowl, whisk cornstarch, flour, cold water, and egg until just combined. Don’t overmix—lumps are fine.

    Step 4: Fry the Shrimp

    1. Heat 1 inch of oil in a deep pan to 350°F (175°C).
    2. Dip each shrimp into batter, letting excess drip off.
    3. Fry in batches for 2-3 minutes until golden and crispy.
    4. Drain on paper towels.

    Step 5: Toss and Serve

    1. In a large bowl, gently toss crispy shrimp with the creamy sauce until lightly coated.
    2. Top with candied walnuts.
    3. Serve immediately over rice or steamed broccoli.

    Summary

    Prep Time: 10 minutes | Cook Time: 10 minutes | Total Time: 20 minutes

    Yield: 3-4 servings

    Difficulty: Easy

    Storage Notes

    Honey walnut shrimp is best eaten fresh—the batter loses crispiness within a few hours. To reheat leftovers, use an air fryer at 375°F for 3-4 minutes. Do not microwave (soggy disaster). Store sauce separately if meal prepping.

  • The Only Pork Schnitzel You’ll Ever Need (Crispy, Tender, 15 Minutes)

    The Only Pork Schnitzel You’ll Ever Need (Crispy, Tender, 15 Minutes)

    Pork schnitzel sounds fancy, but here’s the secret: it’s just a really good breaded cutlet, and it takes 15 minutes from fridge to plate. No travel to Vienna required. This version stays crispy, never greasy, and uses a simple technique that works every single time.

    Ingredients

    Serves 4.

    • 4 boneless pork chops (about 1 lb total)
    • ½ cup all-purpose flour
    • 2 large eggs
    • 1 cup breadcrumbs (panko or regular)
    • Salt and black pepper
    • ½ teaspoon paprika (optional)
    • Vegetable oil or clarified butter for frying
    • Lemon wedges, for serving
    • Fresh parsley, for garnish

    Step-by-Step Instructions

    Step 1: Pound the Pork

    1. Place each pork chop between two sheets of plastic wrap.
    2. Pound with a meat mallet or rolling pin until ¼-inch thin. This is non-negotiable—thick pork = chewy schnitzel.

    Step 2: Set Up the Breading Station

    1. Season pounded pork with salt, pepper, and paprika.
    2. Place flour in one shallow bowl, beaten eggs in a second, breadcrumbs in a third.

    Step 3: Bread the Cutlets

    1. Dredge each cutlet in flour (shake off excess).
    2. Dip into egg, letting excess drip off.
    3. Press firmly into breadcrumbs until fully coated.

    Step 4: Fry to Golden Perfection

    1. Heat ¼ inch of oil in a large skillet over medium-high heat.
    2. Fry schnitzels for 2-3 minutes per side until deep golden brown.
    3. Don’t crowd the pan—work in batches.

    Step 5: Drain and Serve

    1. Transfer to a paper towel-lined plate or wire rack.
    2. Squeeze fresh lemon over the top, garnish with parsley, and serve immediately.

    Summary

    Prep Time: 5 minutes | Cook Time: 10 minutes | Total Time: 15 minutes

    Yield: 4 servings

    Difficulty: Easy

    Storage Notes

    Schnitzel is best fresh and hot. Leftovers can be refrigerated for 2 days. Reheat in an air fryer at 375°F for 4-5 minutes or in a dry skillet—never microwave, or you’ll lose all that beautiful crunch.

  • Beijing Beef That Crushes Panda Express (Sweet, Tangy, Crispy)

    Beijing Beef That Crushes Panda Express (Sweet, Tangy, Crispy)

    Beijing beef is the unsung hero of the Panda Express menu—crispy, saucy, sweet, with a little tangy kick. This homemade version skips the mystery ingredients and delivers that same craveable crunch in 20 minutes. No drive-through required.

    Ingredients

    Serves 3-4.

    For the Beef & Batter:

    • 1 lb flank steak or sirloin, thinly sliced against the grain
    • ½ cup cornstarch
    • ¼ cup flour
    • 1 egg
    • Oil for frying

    For the Sauce:

    • ¼ cup hoisin sauce
    • 2 tablespoons rice vinegar
    • 2 tablespoons brown sugar
    • 2 tablespoons soy sauce
    • 1 tablespoon ketchup
    • 1 teaspoon sriracha (optional)
    • 2 cloves garlic, minced

    For the Stir Fry:

    • 1 red bell pepper, sliced
    • 1 green bell pepper, sliced
    • ½ onion, sliced

    Step-by-Step Instructions

    Step 1: Batter the Beef

    1. Toss sliced beef with cornstarch, flour, and egg until fully coated.

    Step 2: Fry Until Crispy

    1. Heat 1 inch of oil in a wok or deep pan to 350°F.
    2. Fry beef in batches for 3-4 minutes until golden and crispy.
    3. Drain on paper towels.

    Step 3: Make the Sauce

    1. In a bowl, whisk hoisin, rice vinegar, brown sugar, soy sauce, ketchup, sriracha, and garlic.

    Step 4: Stir Fry Veggies

    1. Pour out all but 1 tablespoon of oil from the wok.
    2. Stir fry bell peppers and onion for 1-2 minutes until slightly charred but still crunchy.

    Step 5: Toss Everything Together

    1. Add sauce to the wok and cook for 30 seconds until bubbling.
    2. Add crispy beef and toss quickly to coat—don’t overmix or you’ll lose the crunch.
    3. Serve immediately over rice.

    Summary

    Prep Time: 10 minutes | Cook Time: 12 minutes | Total Time: 22 minutes

    Yield: 3-4 servings

    Difficulty: Easy-Medium

    Storage Notes

    Beijing beef loses crispiness within hours—best eaten fresh. Leftovers can be refrigerated for 2 days. Reheat in an air fryer at 375°F for 5 minutes or in a hot dry skillet. Never microwave unless you like sad, soggy beef.

  • Perfect New York Cheesecake (Creamy, Rich & Crack-Free)

    Perfect New York Cheesecake (Creamy, Rich & Crack-Free)

    A great New York cheesecake is a thing of beauty. It’s dense and creamy, rich but not heavy, with a tangy-sweet flavor that’s perfectly balanced. The crust is buttery and slightly sandy, the filling is silky smooth, and the top is a pristine, crack-free canvas ready for whatever toppings you desire.

    For years, I was intimidated by cheesecake. Water baths, cracks, sinking centers—it all seemed so complicated. But after countless tests and tweaks, I’ve developed a recipe that takes the fear out of cheesecake making.

    This version delivers that classic New York style with a foolproof method that works every time. Whether you’re a beginner or a seasoned baker, this cheesecake will make you feel like a pro.

    Ingredients

    Makes one 9-inch cheesecake (12-16 servings).

    For the Graham Cracker Crust:

    • 2 cups (240g) graham cracker crumbs (about 16 full sheets)
    • ¼ cup (50g) granulated sugar
    • ½ cup (115g) unsalted butter, melted
    • ¼ teaspoon salt

    For the Cheesecake Filling:

    • 32 oz (900g) full-fat cream cheese, softened to room temperature
    • 1 ¼ cups (250g) granulated sugar
    • ¼ cup (30g) cornstarch
    • 1 tablespoon vanilla extract
    • 4 large eggs, at room temperature
    • ½ cup (120ml) sour cream, at room temperature
    • ½ cup (120ml) heavy cream, at room temperature
    • 2 teaspoons lemon zest (optional, adds brightness)

    For Serving (Optional):

    • Fresh berries
    • Berry compote or strawberry sauce
    • Whipped cream
    • Chocolate ganache
    • Caramel sauce

    Step-by-Step Instructions

    1. Preheat and Prepare the Pan:

    1. Preheat your oven to 325°F (160°C).
    2. Wrap the outside of a 9-inch springform pan with a double layer of heavy-duty aluminum foil, making sure it goes all the way up the sides. This will prevent water from seeping in during the water bath.
    3. Lightly grease the inside of the pan with butter or non-stick spray.

    2. Make the Crust:

    1. In a medium bowl, combine the graham cracker crumbs, sugar, and salt. Stir until well mixed.
    2. Pour in the melted butter and stir until all crumbs are moistened and the mixture resembles wet sand.
    3. Press the mixture firmly into the bottom of the prepared springform pan and about 1 inch up the sides. Use the bottom of a measuring cup or glass to press it down firmly and evenly.
    4. Bake for 10 minutes. Set aside to cool while you make the filling. Reduce oven temperature to 300°F (150°C).

    3. Make the Filling:

    1. In a large bowl, beat the softened cream cheese with an electric mixer on medium speed until completely smooth and creamy, with no lumps, about 2-3 minutes. Scrape down the sides and bottom of the bowl well.
    2. Add the sugar and cornstarch, and beat until combined, about 1 minute. Scrape the bowl again.
    3. Add the vanilla extract and beat until incorporated.
    4. Add the eggs one at a time, beating on low speed just until each egg is incorporated. Do not overbeat—overmixing incorporates too much air, which can cause cracks.
    5. Add the sour cream, heavy cream, and lemon zest (if using). Beat on low speed just until combined and smooth. Scrape the bowl one last time and gently fold by hand with a spatula to ensure everything is well mixed.

    4. Prepare the Water Bath:

    1. Place the foil-wrapped springform pan into a large roasting pan or deep baking dish.
    2. Pour the cheesecake filling into the cooled crust and smooth the top with a spatula.
    3. Place the roasting pan in the oven, then carefully pour hot water into the roasting pan until it reaches about halfway up the sides of the springform pan. Be careful not to splash water onto the cheesecake.

    5. Bake:

    1. Bake at 300°F (150°C) for 60-75 minutes. The edges should be set, but the center will still be slightly jiggly (like Jell-O, not liquid).
    2. Turn off the oven, crack the oven door open, and let the cheesecake cool in the oven for 1 hour. This gradual cooling helps prevent cracks.
    3. Remove the cheesecake from the water bath and remove the foil. Run a thin knife around the edge of the pan to loosen the cheesecake (this prevents cracking as it cools).
    4. Let the cheesecake cool completely at room temperature, then cover and refrigerate for at least 6 hours, preferably overnight. Chilling is essential for the perfect texture.

    6. Serve:

    1. When ready to serve, remove the sides of the springform pan.
    2. Slice with a sharp, thin-bladed knife, wiping the blade clean between each cut for neat slices.
    3. Serve plain or with your favorite toppings like fresh berries, compote, or whipped cream.

    Summary

    Prep Time: 30 minutes | Bake Time: 60-75 minutes | Cooling/Chilling Time: 8 hours (including overnight) | Total Time: About 9-10 hours (mostly hands-off)

    Yield: One 9-inch cheesecake (12-16 servings)

    Difficulty: Intermediate

    Storage and Make-Ahead Tips

    How to Store:

    Store cheesecake covered in the refrigerator for up to 5 days. Keep it in the springform pan or transfer to an airtight container. The flavor actually improves after a day or two!

    Can You Freeze Cheesecake?

    Absolutely! Cheesecake freezes beautifully. Freeze the whole cheesecake or individual slices. Place in the freezer uncovered for 1-2 hours until firm, then wrap tightly in plastic wrap and foil. Freeze for up to 3 months. Thaw overnight in the refrigerator.

    Make-Ahead for Parties:

    Cheesecake is the perfect make-ahead dessert. Make it 1-2 days before your event and keep it refrigerated. Add toppings just before serving for the freshest presentation.

    Freezing Crust:

    You can freeze an unbaked crust for up to 3 months. Press into the pan, wrap tightly, and freeze. Bake directly from frozen, adding a few minutes to the baking time.

    Can You Freeze Cheesecake with Toppings?

    It’s best to freeze cheesecake without toppings. Add fresh berries, sauces, or whipped cream after thawing.