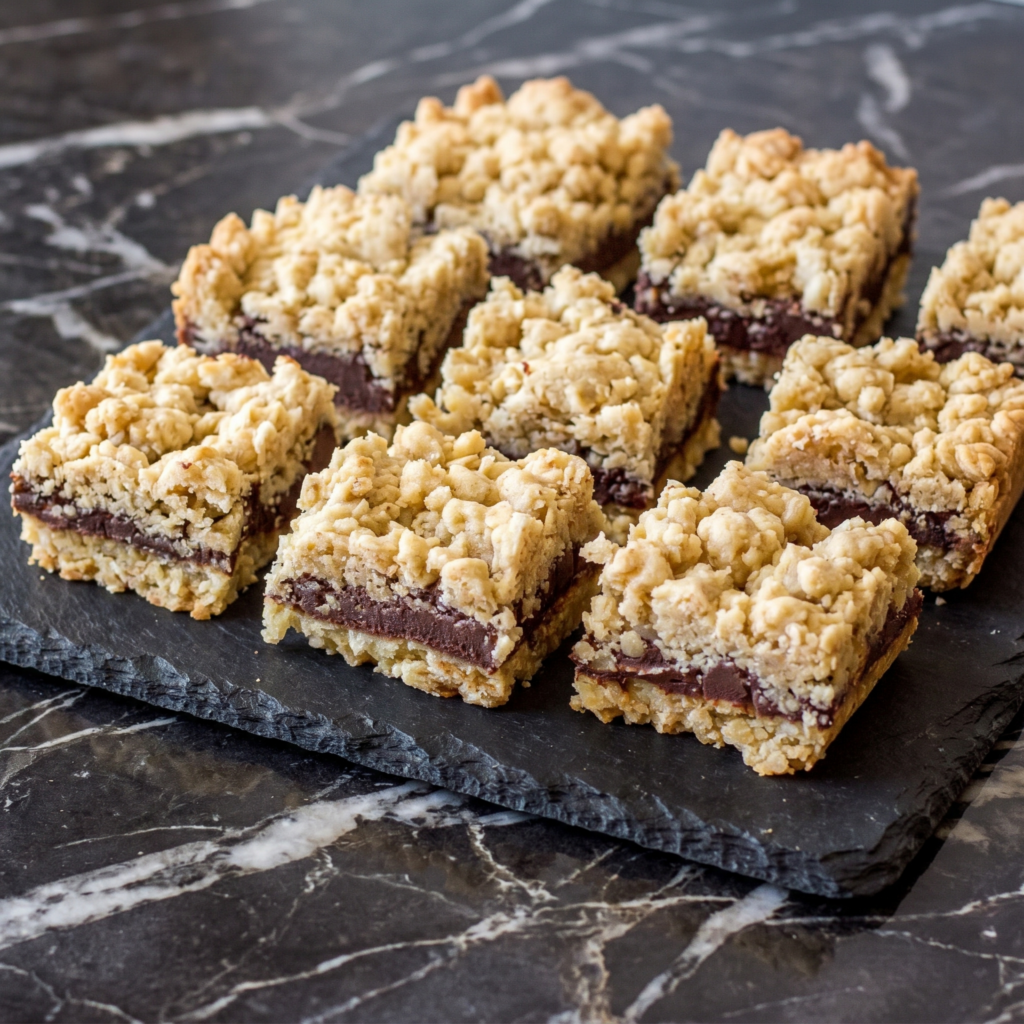
Revel bars are the dessert nobody talks about but everyone devours. Imagine a buttery oatmeal cookie, a layer of sweetened condensed milk caramel, and melted chocolate swirled through the top. They’re rich, chewy, crunchy at the edges, and impossible to eat just one. This is your new potluck secret weapon.
Ingredients
Makes one 9×13 pan (24 bars).
For the Oatmeal Base & Topping:
1 cup (2 sticks) unsalted butter, softened
1 cup brown sugar, packed
½ cup granulated sugar
2 large eggs
2 teaspoons vanilla extract
2 cups all-purpose flour
1 teaspoon baking soda
½ teaspoon salt
3 cups old-fashioned rolled oats
For the Caramel Filling:
1 can (14 oz) sweetened condensed milk
2 tablespoons butter
1 cup semi-sweet chocolate chips (for swirling on top)
Step-by-Step Instructions
Step 1: Make the Oatmeal Dough
Preheat oven to 350°F (175°C). Grease a 9×13 pan.
Cream butter and sugars until fluffy. Add eggs and vanilla.
Mix in flour, baking soda, and salt. Stir in oats.
Press ⅔ of the dough into the bottom of the pan.
Step 2: Make the Caramel Layer
In a small saucepan, heat condensed milk and 2 tablespoons butter over medium-low.
Stir constantly until thickened and golden, about 5-7 minutes.
Pour caramel over the oatmeal base. Spread evenly.
Step 3: Top and Swirl
Crumble remaining oatmeal dough over the caramel layer.
Sprinkle chocolate chips on top. Bake for 20 minutes.
Remove from oven. Use a knife to gently swirl the softened chocolate into the top.
Return to oven for 5-10 more minutes until golden brown.
Step 4: Cool Completely
Let bars cool in the pan for at least 2 hours (or they’ll fall apart).
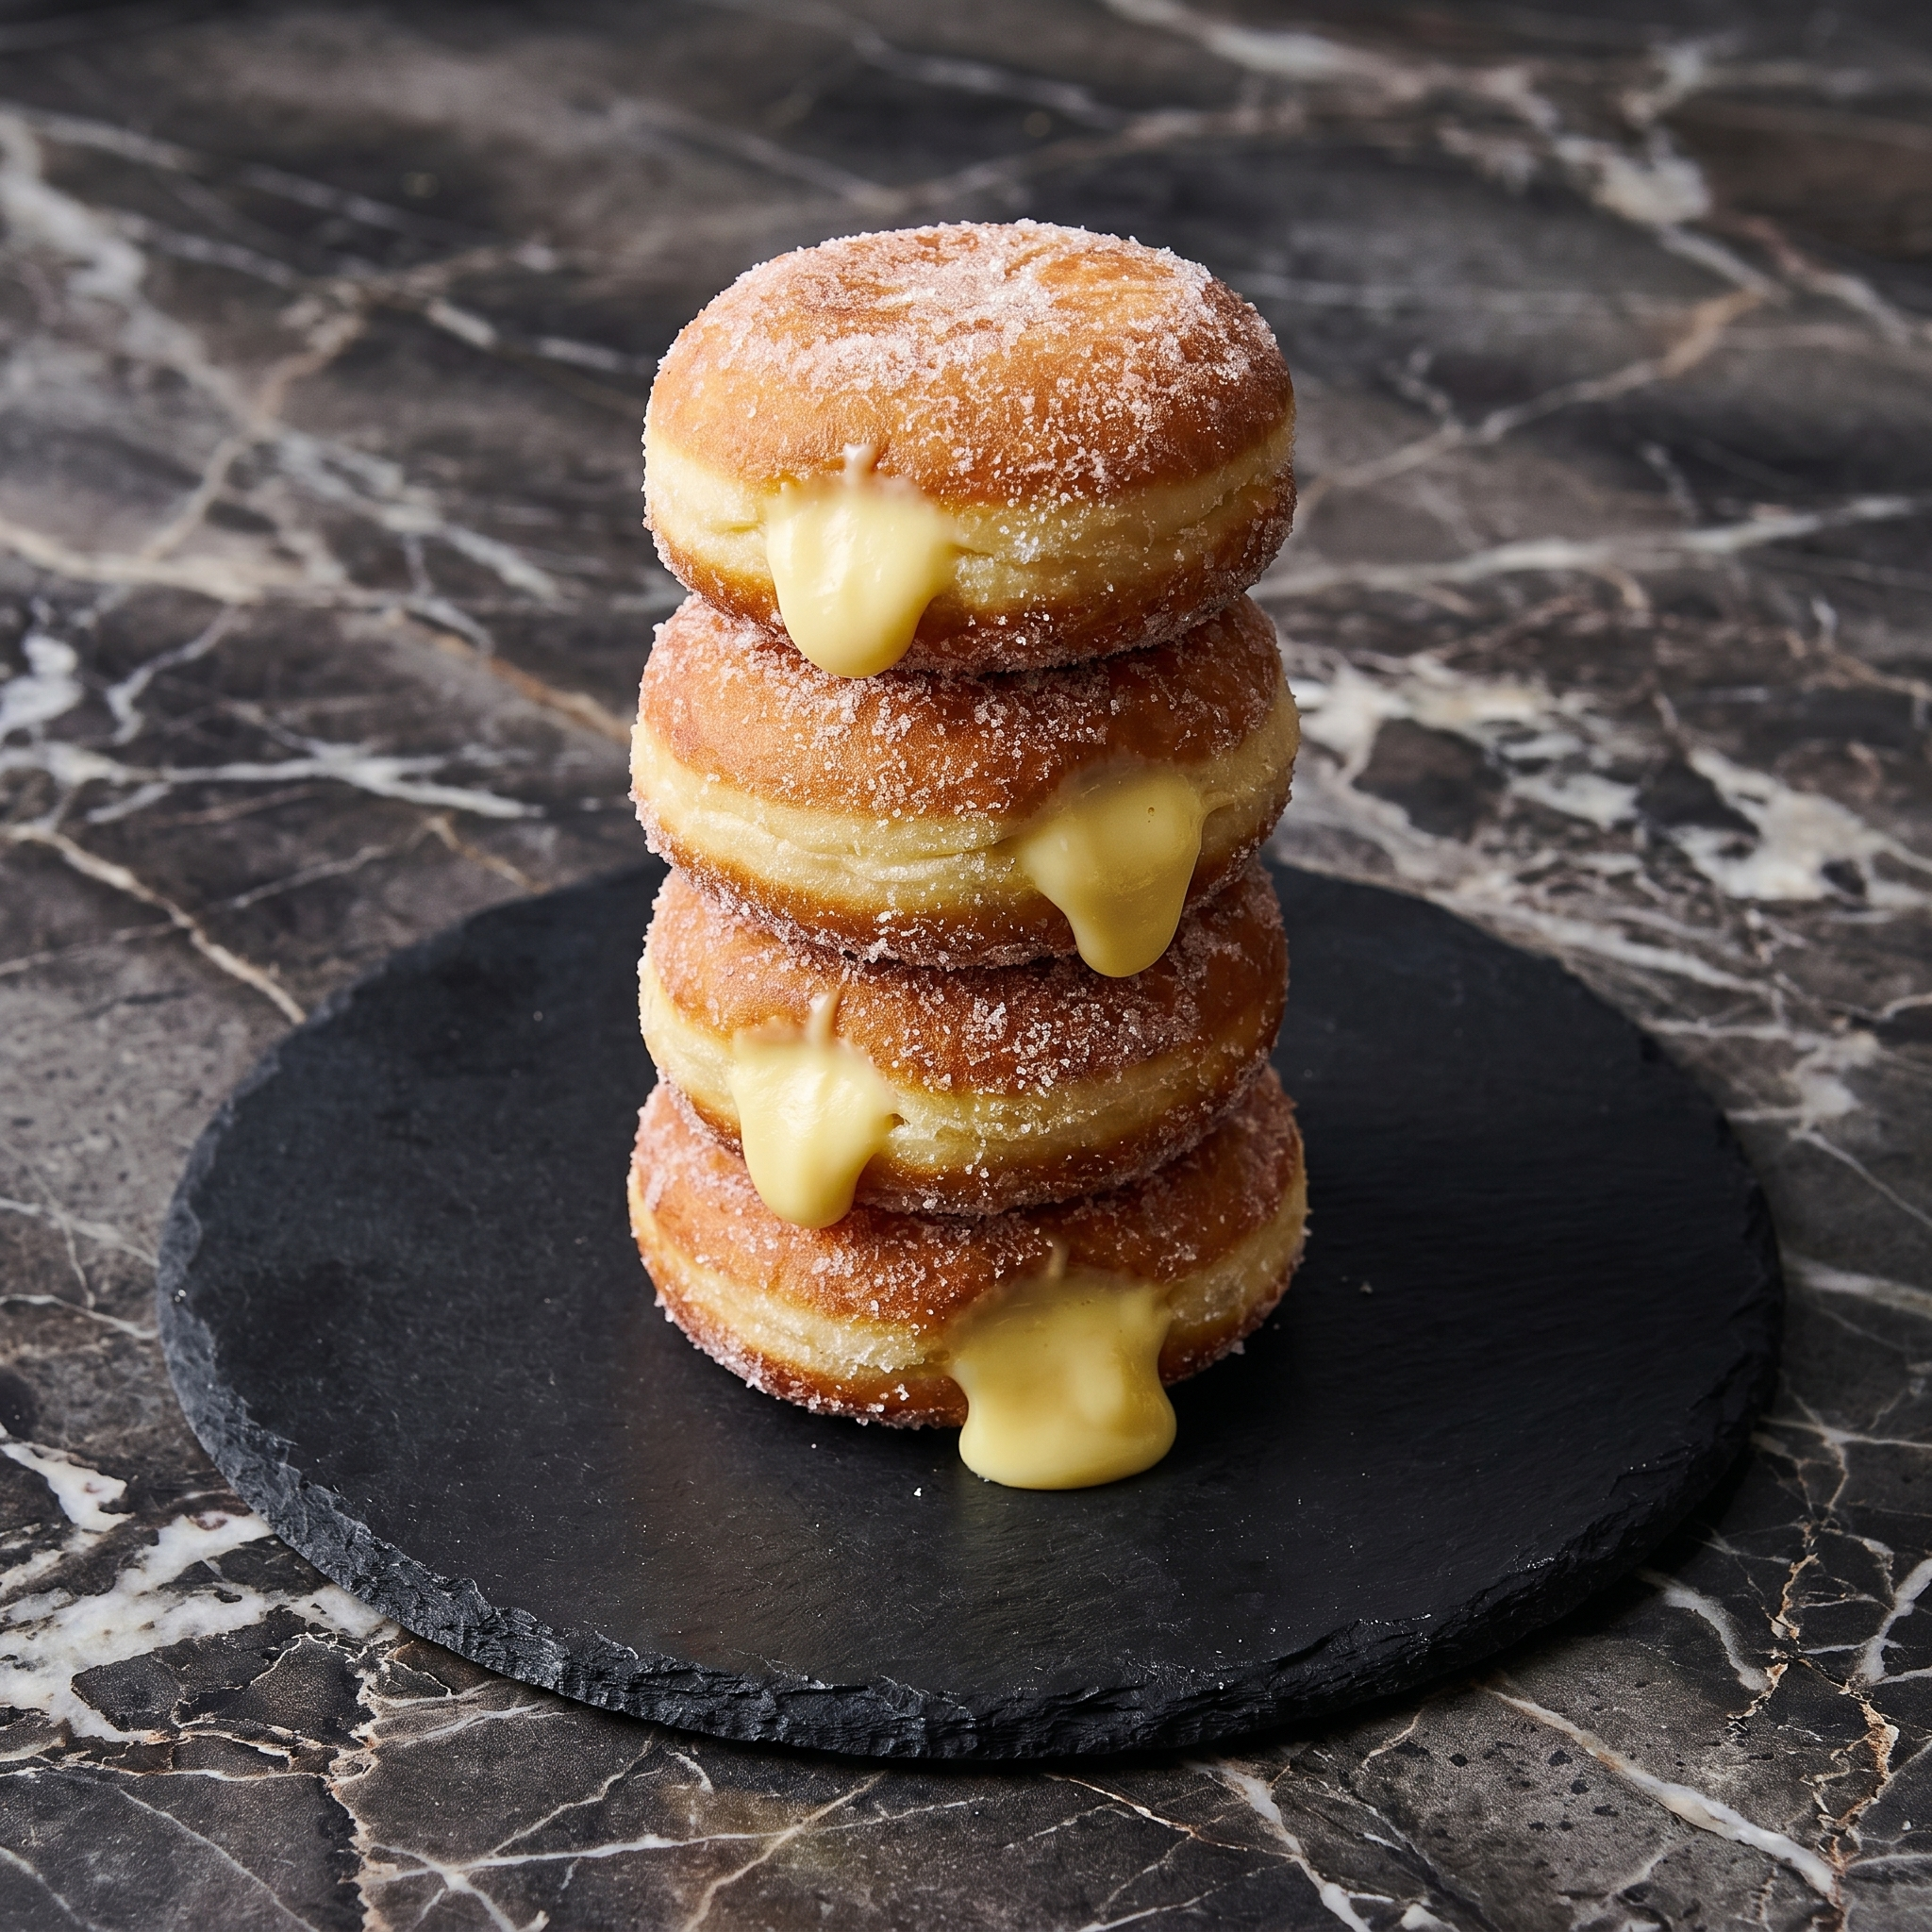
These Italian stuffed donuts are softer, richer, and sexier than your average glazed ring. Rolled in sugar, filled with velvety custard or warm Nutella. They’re actually easy to make at home. No deep fryer? Bake ’em. Let’s go.
Ingredients
Makes 12 bomboloni.
For the Dough:
3 cups all-purpose flour
¼ cup sugar
1 packet (2 ¼ tsp) instant yeast
½ teaspoon salt
3 large egg yolks
½ cup warm milk (about 110°F)
4 tablespoons unsalted butter, softened
For the Filling (Pick One):
1 cup vanilla pastry cream (recipe below) OR
½ cup Nutella
For the Coating:
½ cup granulated sugar
Oil for frying (or baking method below)
Step-by-Step Instructions
Step 1: Make the Dough
In a bowl, whisk flour, sugar, yeast, and salt.
Add egg yolks and warm milk. Mix until a sticky dough forms.
Add softened butter and knead for 8-10 minutes until smooth.
Let rise in a greased bowl for 1-2 hours until doubled.
Step 2: Shape & Rise Again
Punch down dough. Roll into 12 balls (about 2 inches each).
Place on a parchment-lined tray. Cover and rise for 30 minutes.
Step 3: Fry or Bake
Fry: Heat oil to 350°F (175°C). Fry 2-3 at a time for 1-2 minutes per side until golden. Drain on paper towels.
Bake: Brush with melted butter. Bake at 375°F for 12-15 minutes until golden.
Step 4: Coat & Fill
Roll warm bomboloni in granulated sugar until fully coated.
Use a piping bag or a chopstick to poke a hole and fill with custard or Nutella.
Bomboloni are best eaten day-of. Store unfilled leftovers in an airtight container for 1 day (filling makes them soggy). Reheat in an air fryer at 350°F for 3 minutes, then re-roll in sugar. Never microwave.
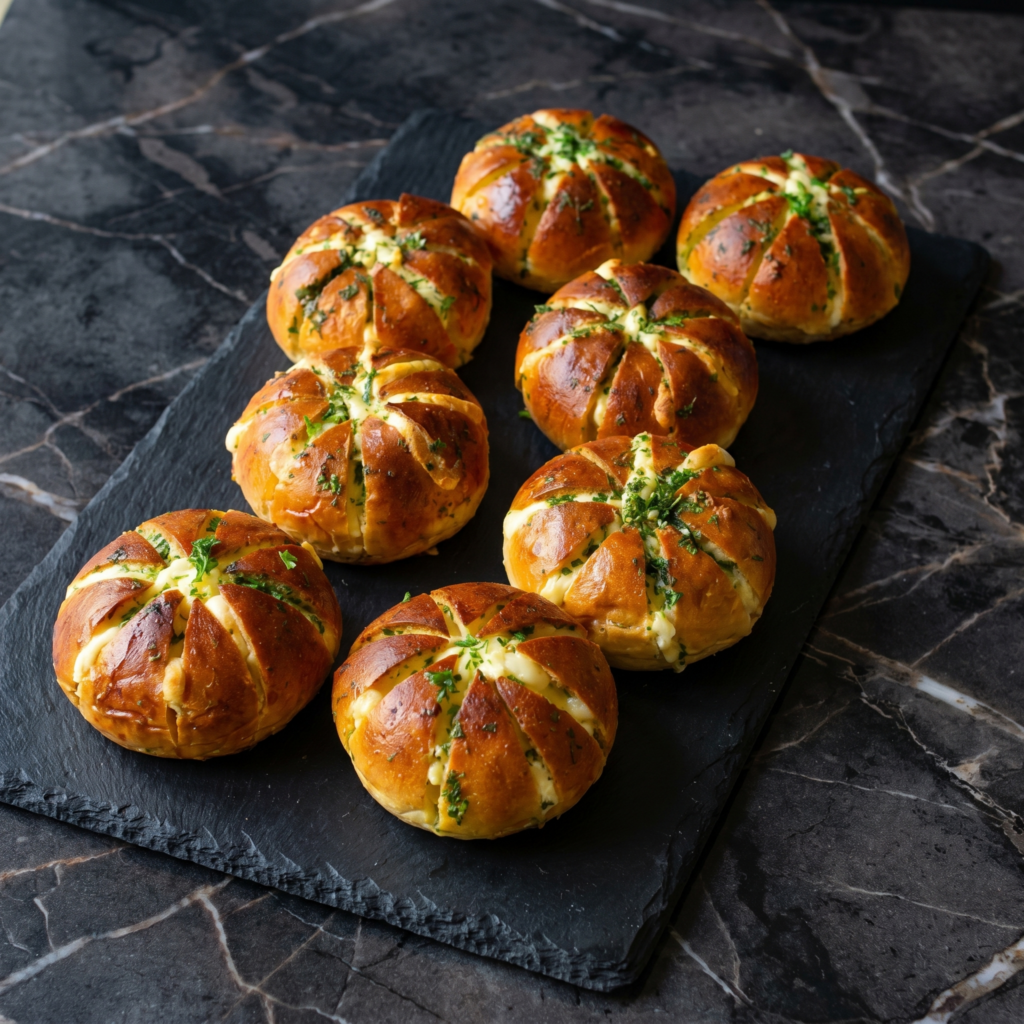
Korean bakeries know something we don’t. Actually, they know this bread.
It’s absurdly soft. Like, cloud-soft. Inside, a sweet, tangy cream cheese filling that’s not too heavy. Topped with a dusting of powdered sugar and a sprinkle of nostalgia. This is the bread that disappears before it cools.
Ingredients
Makes 6 buns.
For the Dough:
2 ½ cups all-purpose flour
¼ cup sugar
1 packet (2 ¼ tsp) instant yeast
½ teaspoon salt
½ cup warm milk
¼ cup warm water
1 large egg
3 tablespoons unsalted butter, softened
For the Cream Cheese Filling:
8 oz cream cheese, softened
¼ cup sugar
1 teaspoon vanilla extract
2 tablespoons heavy cream (optional, for fluffiness)
For Topping:
Powdered sugar for dusting
Step-by-Step Instructions
Step 1: Make the Dough
Whisk flour, sugar, yeast, and salt in a large bowl.
Add warm milk, warm water, and egg. Mix into a shaggy dough.
Knead for 8 minutes. Add softened butter and knead 5 more minutes until smooth.
Let rise in a greased bowl for 1 hour, until doubled.
Step 2: Make the Filling
Beat cream cheese, sugar, vanilla, and heavy cream until smooth and fluffy.
Refrigerate while dough rises.
Step 3: Fill & Shape
Punch down dough. Divide into 6 equal balls.
Flatten each ball into a 4-inch circle. Place 2 tablespoons of cream cheese filling in the center.
Pinch edges to seal tightly. Place seam-side down on a parchment-lined baking sheet.
Let rise for 30 minutes.
Step 4: Bake & Dust
Preheat oven to 350°F (175°C).
Bake for 18-20 minutes until golden brown.
Cool for 5 minutes. Dust generously with powdered sugar.
Serve slightly warm. Watch people lose their minds.
Store in an airtight container in the fridge for up to 4 days. Bring to room temperature or microwave for 10 seconds before serving. Freeze unfilled dough for up to 2 months. Filled buns do not freeze well (the cream cheese gets grainy).
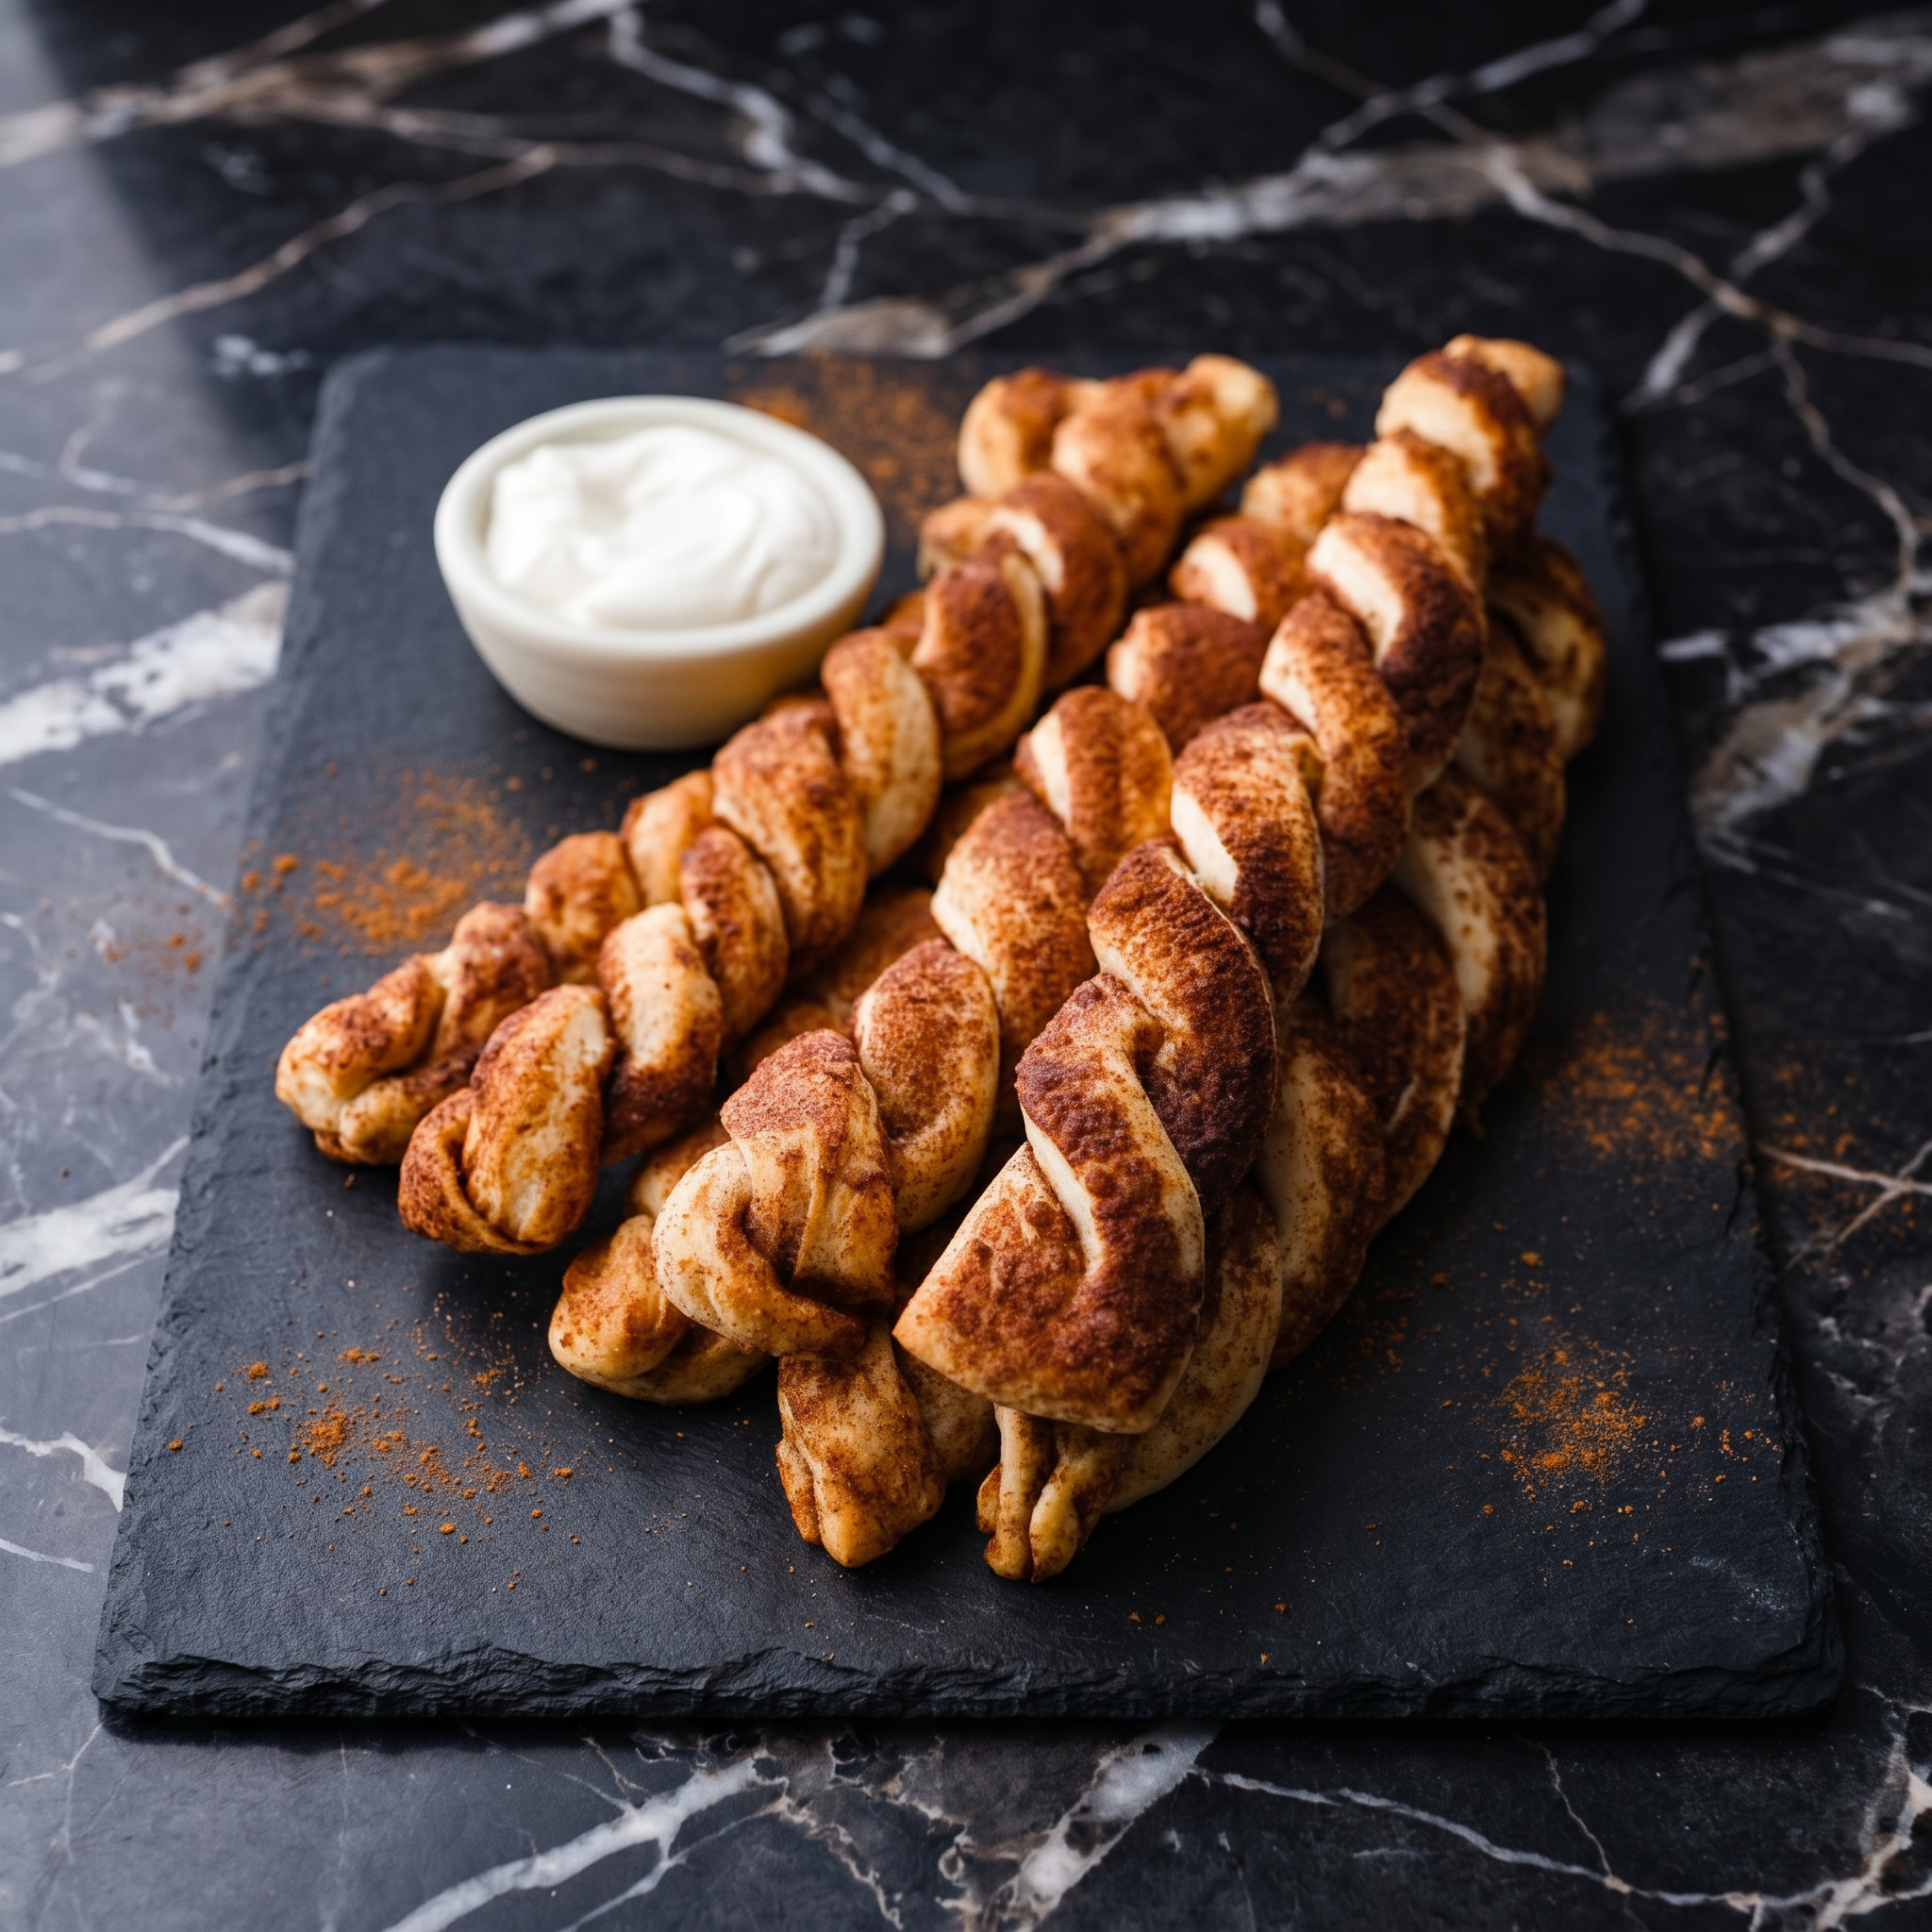
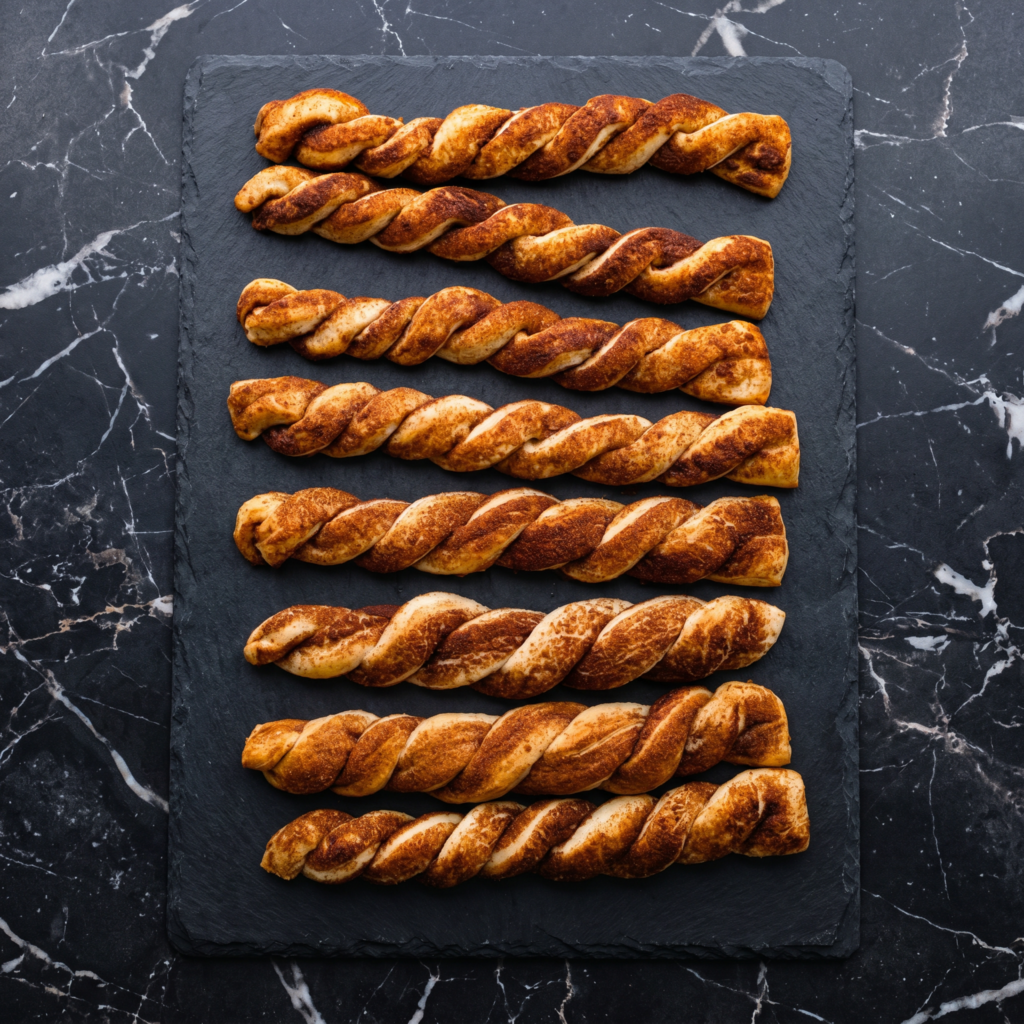
Don’t have time for cinnamon rolls? Same. Enter cinnamon twists.
These are faster, crunchier, and somehow more addictive. Puff pastry + butter + cinnamon sugar + a quick twist = a snack that disappears before the coffee is done brewing. Let’s twist.
Ingredients
Makes 12 twists.
For the Twists:
1 sheet frozen puff pastry, thawed
3 tablespoons unsalted butter, melted
½ cup granulated sugar
1 tablespoon ground cinnamon
For the Glaze (Optional but Mandatory):
½ cup powdered sugar
1-2 tablespoons milk
¼ teaspoon vanilla extract
Step-by-Step Instructions
Step 1: Prep
Preheat oven to 375°F (190°C). Line a baking sheet with parchment.
Mix sugar and cinnamon in a shallow bowl.
Step 2: Assemble
Roll puff pastry into a 10×12-inch rectangle.
Brush generously with melted butter.
Sprinkle cinnamon sugar evenly over the entire surface.
Fold the pastry in half lengthwise, like closing a book.
Step 3: Twist
Cut the folded pastry into 12 strips (each about 1 inch wide).
Hold each strip at both ends and twist in opposite directions 3-4 times.
Place twists on the baking sheet, pressing down the ends gently.
Step 4: Bake & Glaze
Bake for 12-15 minutes until golden brown and puffed.
Whisk powdered sugar, milk, and vanilla until smooth.
Drizzle glaze over warm twists. Let set for 5 minutes. Then fight for the last one.
Store in an airtight container for up to 3 days. To re-crisp, pop in an air fryer at 350°F for 3 minutes or in an oven for 5 minutes. They’re still good cold, but warm is a religious experience.
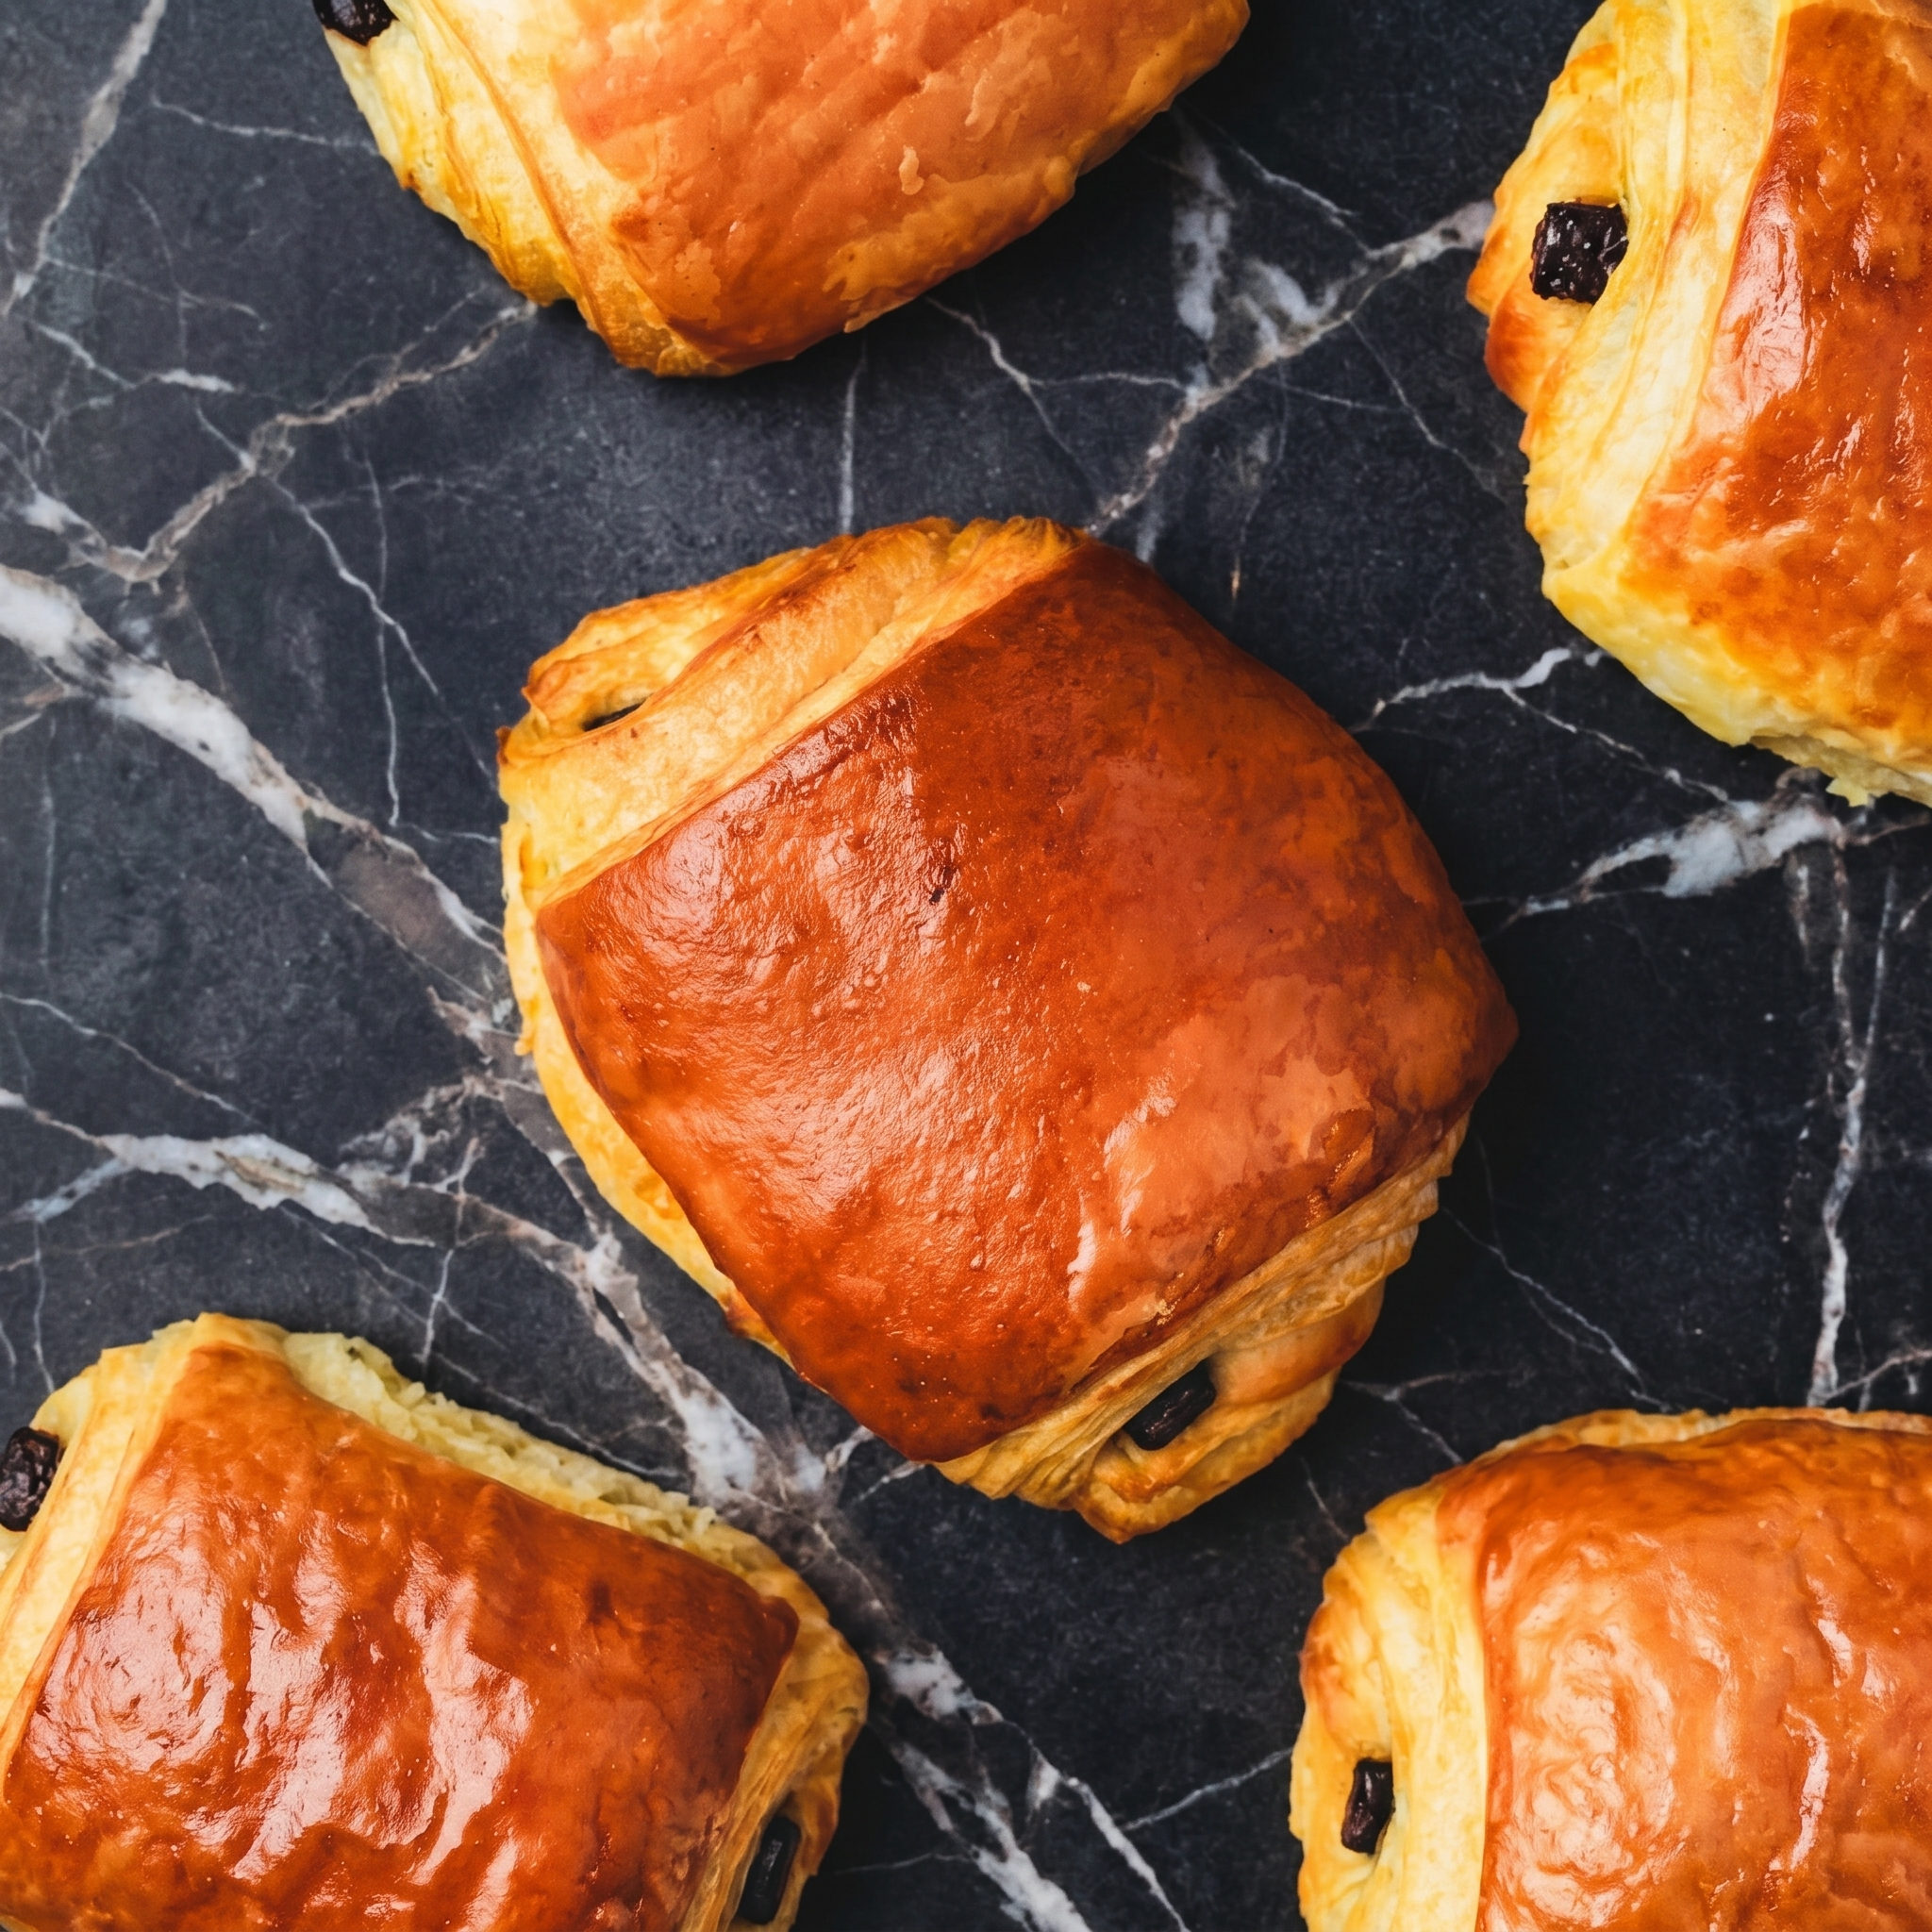
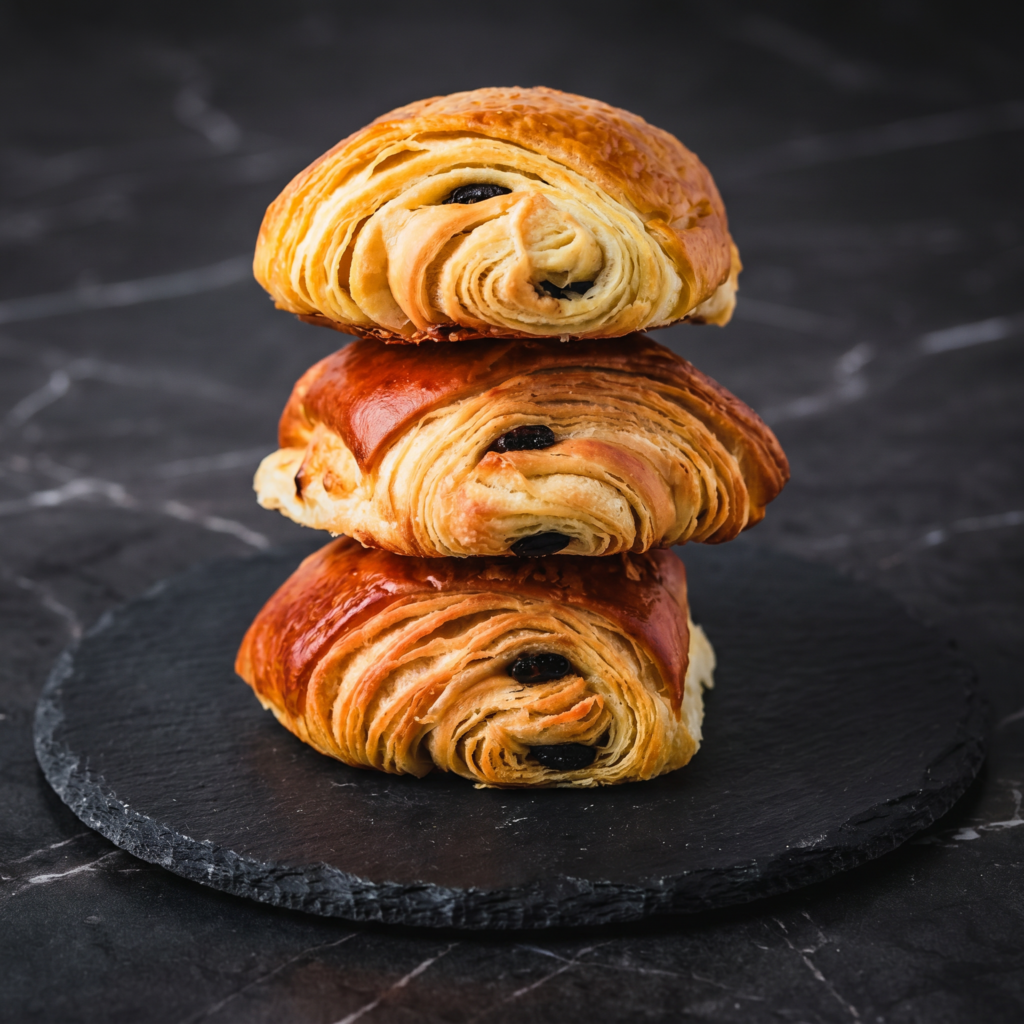
Pain au Chocolat means “chocolate bread.” But really, it means “the best thing to ever happen to breakfast.”
This version uses store-bought puff pastry. No lamination. No butter blocks. No tears. Just crispy, golden layers and warm, melty chocolate. Ten minutes of assembly. Eight minutes in the oven. You’re welcome.
Ingredients
Makes 8 pastries.
1 sheet frozen puff pastry (thawed, about 9×10 inches)
4 oz dark or semi-sweet chocolate (baking bar, not chips)
1 large egg, beaten (for egg wash)
Optional: powdered sugar for dusting
Step-by-Step Instructions
Step 1: Prep
Preheat oven to 400°F (200°C). Line a baking sheet with parchment.
Cut chocolate bar into 8 equal sticks (about 2 inches long and ½ inch thick).
Step 2: Cut the Dough
Roll puff pastry slightly to smooth it. Cut into 8 rectangles (about 4×5 inches each).
Step 3: Fill & Roll
Place 2 chocolate sticks at one short end of each rectangle.
Roll the dough tightly around the chocolate, like a sleeping bag.
Place seam-side down on the baking sheet.
Step 4: Egg Wash & Bake
Brush tops with beaten egg.
Bake for 15-18 minutes until puffed, golden, and crispy.
Cool for 5 minutes. Dust with powdered sugar. Eat while chocolate is still lava.
Best eaten day-of. Store leftovers in an airtight container for up to 2 days. Reheat in an oven or air fryer at 350°F for 5 minutes. Never microwave—you’ll destroy the flaky layers and turn the chocolate into a weapon.
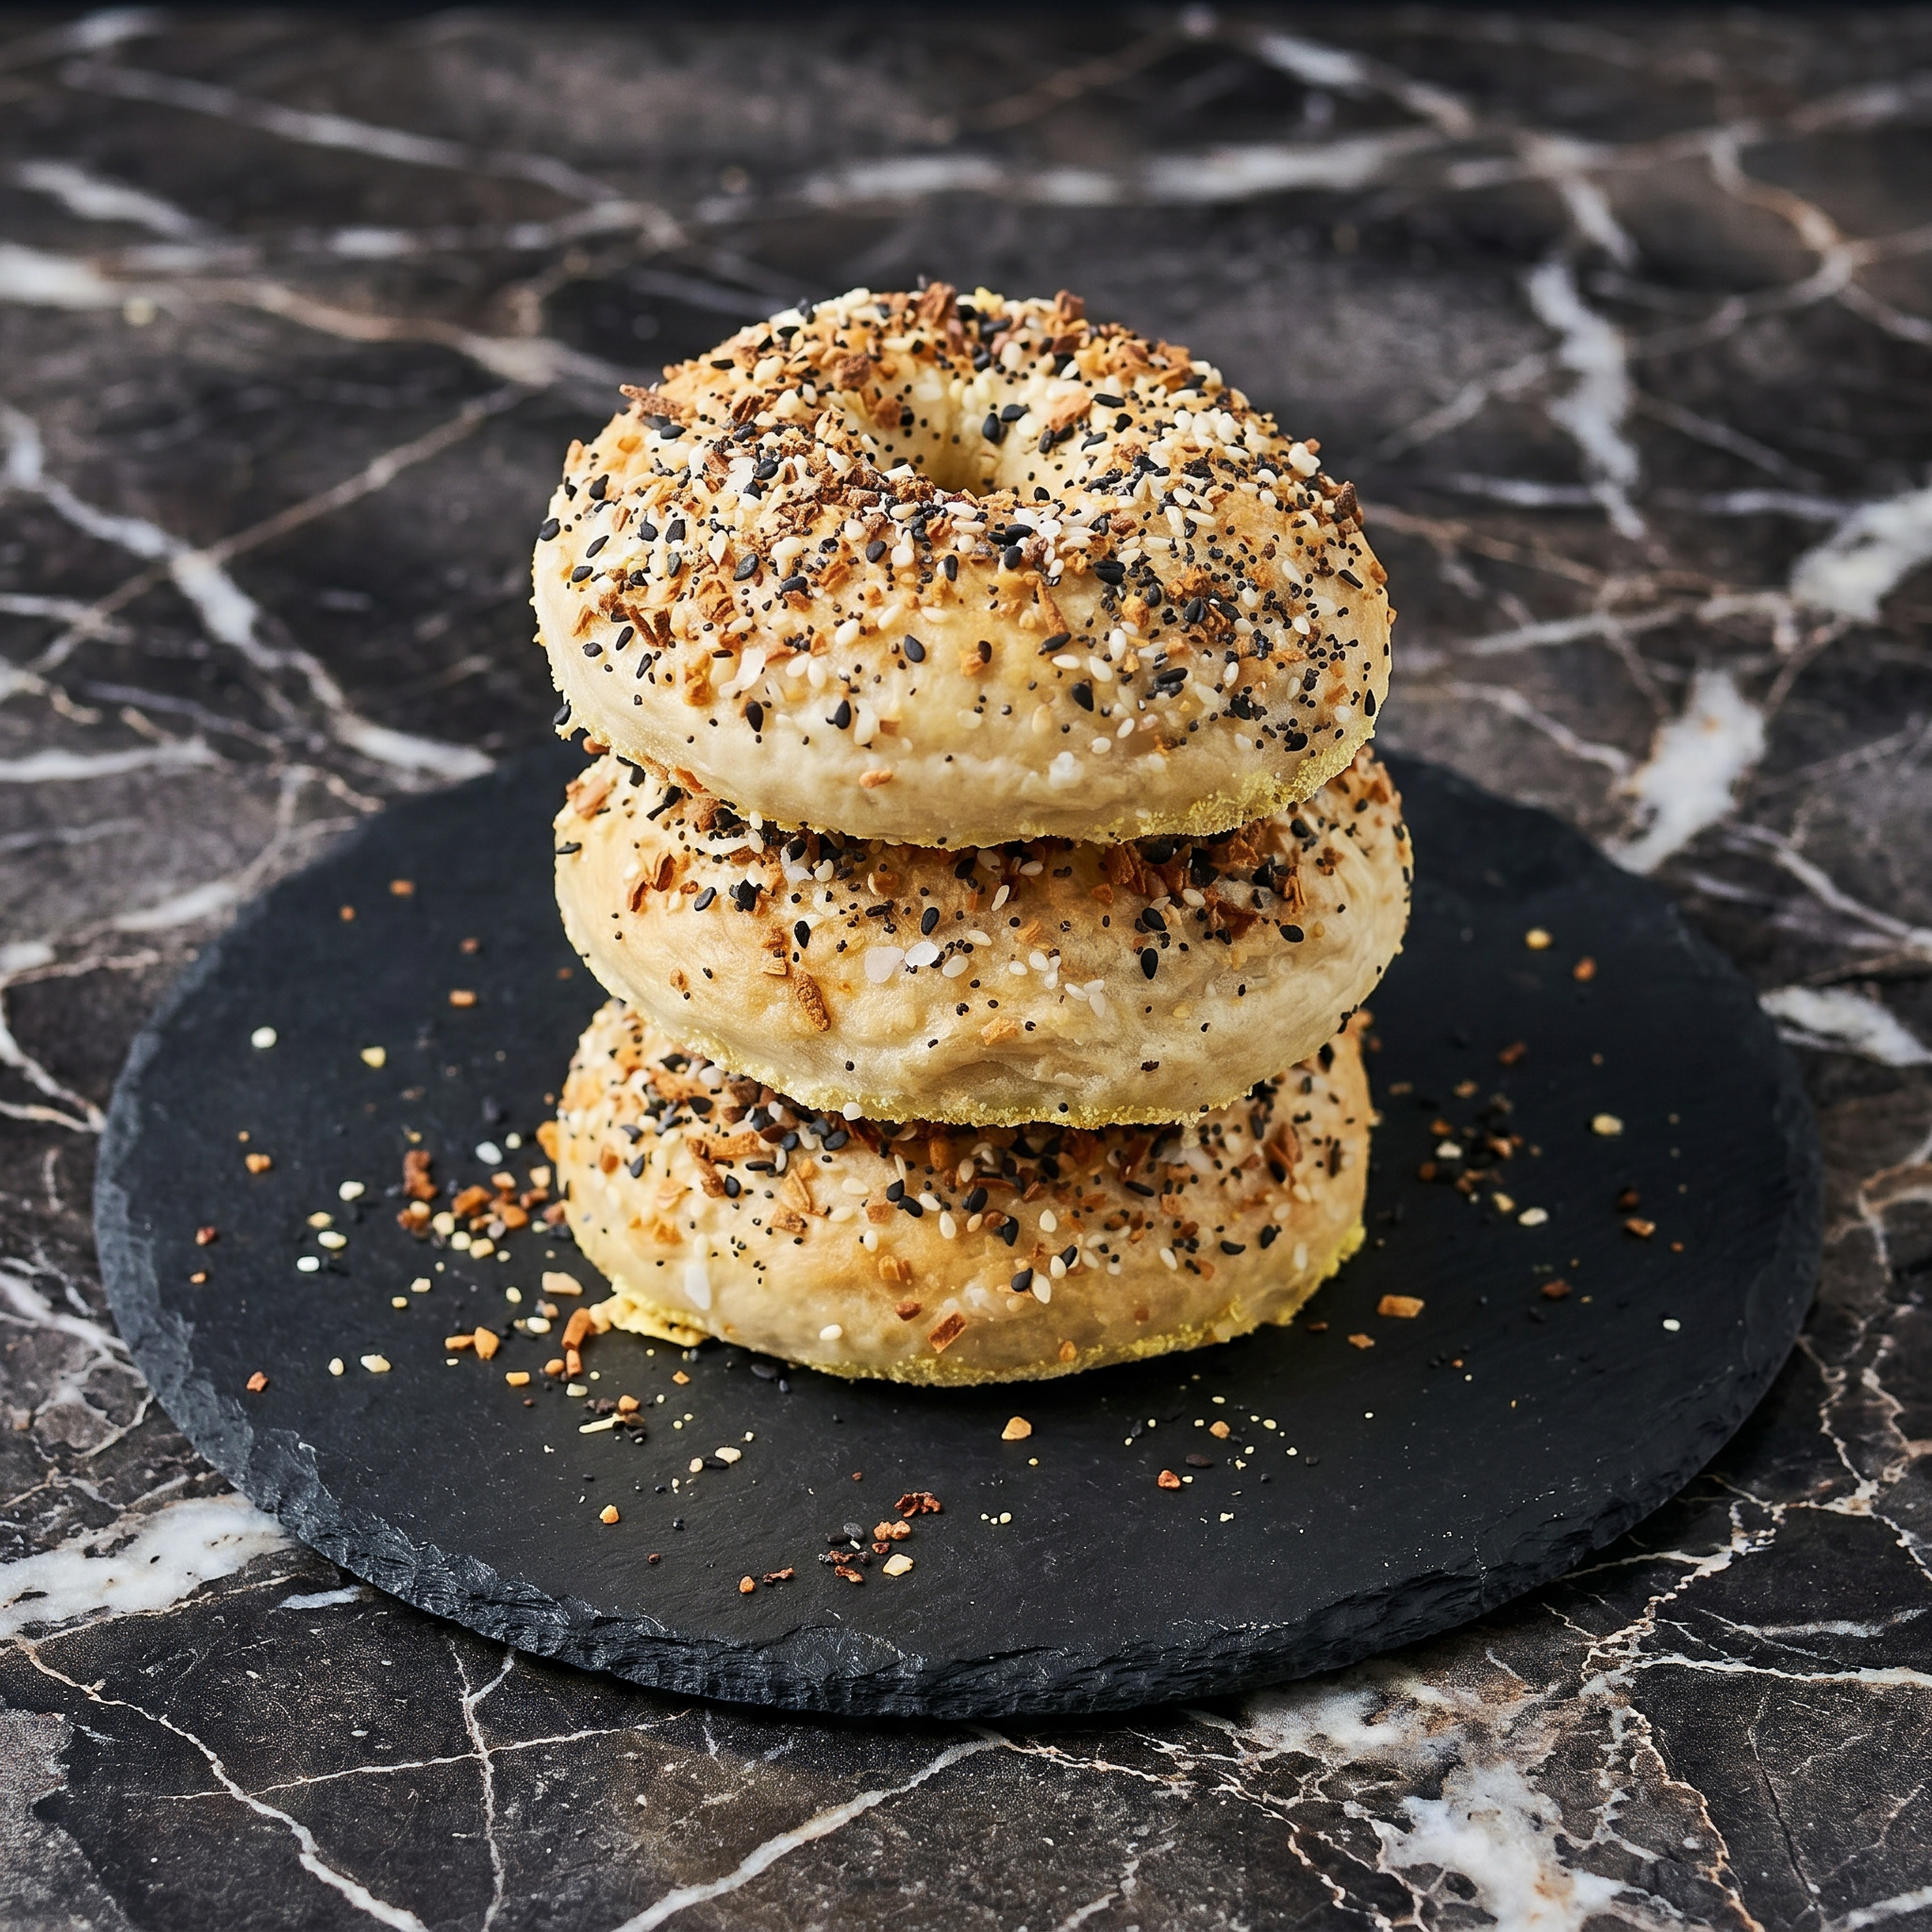
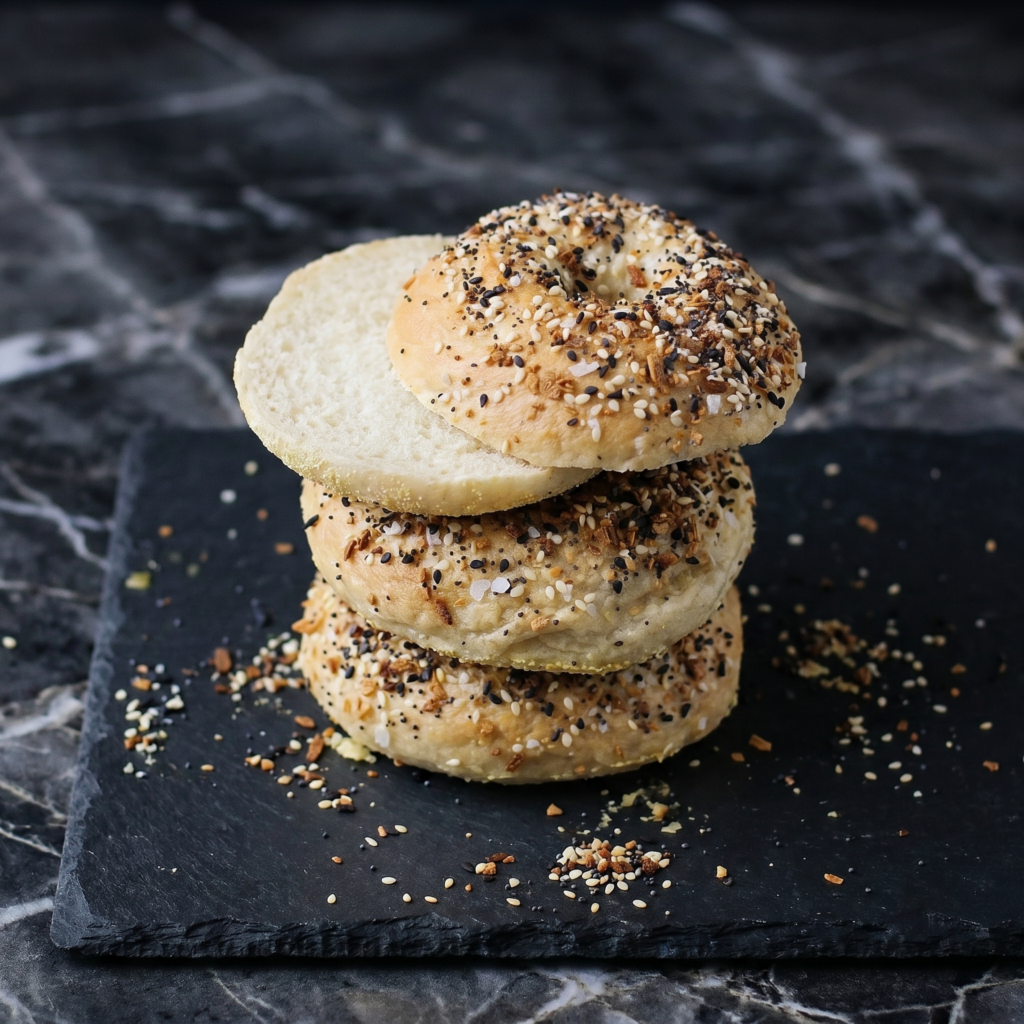
Store-bought bagels are lying to you. Real bagels are boiled. That’s what gives them that chewy, snappy crust.
These everything bagels are the real deal. Golden, blistered, coated in garlicky, seedy goodness. Make a batch once and you’ll never go back to the sad supermarket ones again.
Ingredients
Makes 8 bagels.
For the Dough:
4 cups bread flour (or all-purpose)
1 packet (2 ¼ tsp) instant yeast
1 ½ teaspoons salt
1 tablespoon brown sugar
1 ¼ cups warm water (about 110°F)
For the Boil:
10 cups water
1 tablespoon brown sugar or honey
For Topping:
¼ cup everything bagel seasoning (store-bought or homemade)
1 egg white beaten with 1 tablespoon water (for sticking)
Step-by-Step Instructions
Step 1: Make the Dough
In a large bowl, whisk flour, yeast, salt, and brown sugar.
Add warm water. Mix until a shaggy dough forms.
Knead for 8-10 minutes until smooth and elastic.
Let rise in a greased bowl for 1 hour, until doubled.
Step 2: Shape the Bagels
Punch down dough. Divide into 8 equal pieces.
Roll each into a ball. Poke a hole through the center with your thumb.
Gently stretch the hole to about 1 inch wide.
Place on a parchment-lined baking sheet. Cover and rest for 10 minutes.
Step 3: Boil ‘Em
Preheat oven to 425°F (220°C).
Bring 10 cups water and 1 tablespoon brown sugar to a boil.
Drop 2-3 bagels into the water. Boil for 45 seconds per side.
Remove with a slotted spoon. Return to baking sheet.
Step 4: Top & Bake
Brush bagels with egg white wash.
Sprinkle generously with everything seasoning (press it in gently).
Bake for 18-20 minutes until deep golden brown.
Cool on a wire rack for 10 minutes. Then schmear, eat, repeat.
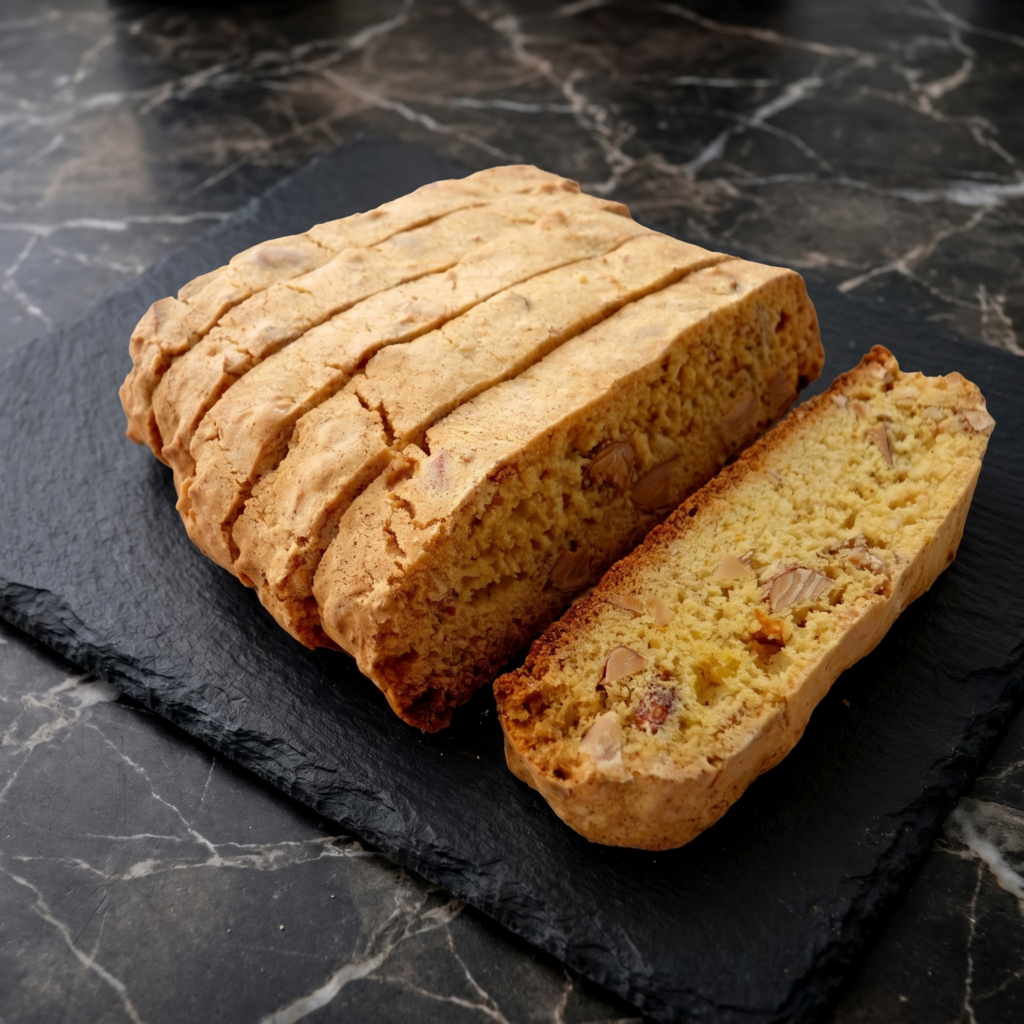
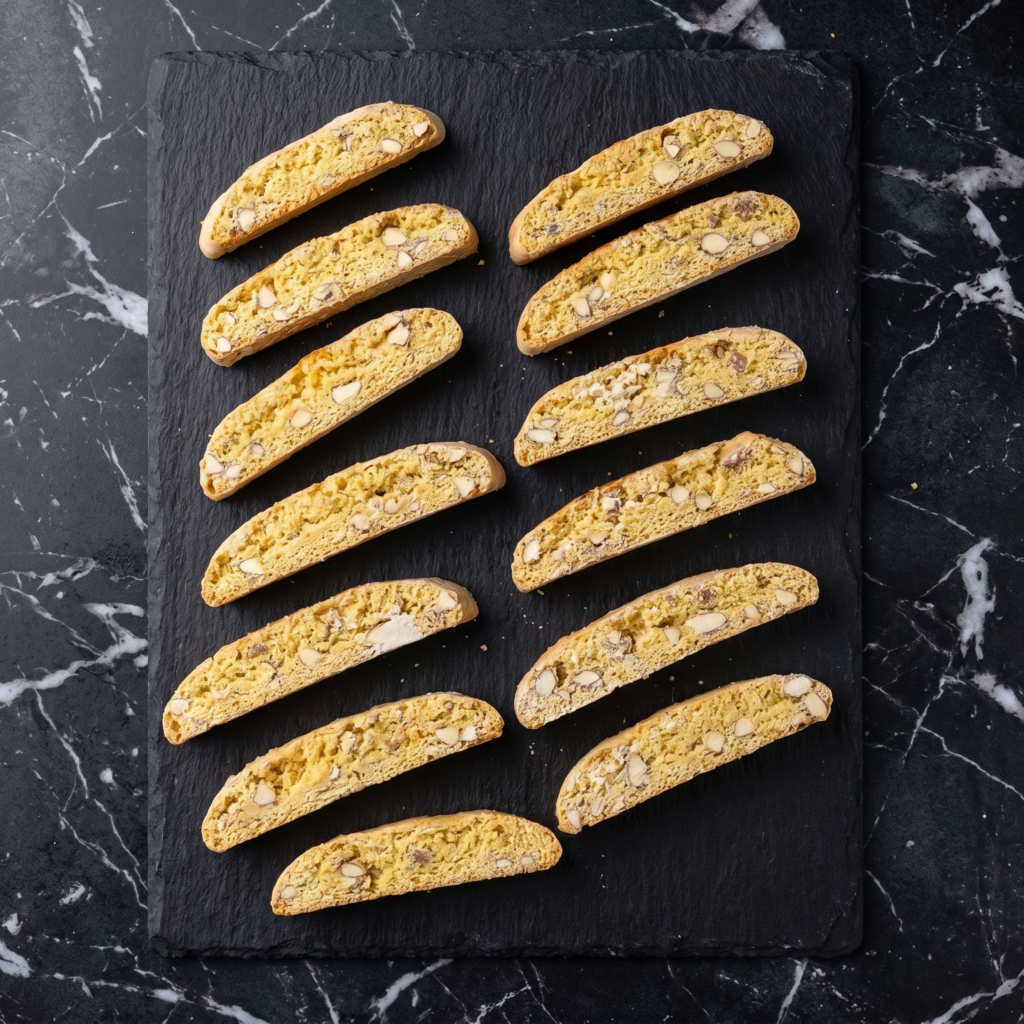
Let’s be honest: most store-bought biscotti are glorified jawbreakers. Not these.
These classic almond biscotti are crunchy but not tooth-shattering, lightly sweet, and absolutely perfect for dunking. They’re twice-baked, which sounds fancy, but really just means you get a cookie that stays crisp for weeks. No stand mixer needed. No weird ingredients. Just butter, sugar, almonds, and a little patience.
Ingredients
Makes about 24 biscotti.
2 cups (260g) all-purpose flour
1 cup (200g) granulated sugar
1 teaspoon baking powder
¼ teaspoon salt
3 large eggs
4 tablespoons (60g) unsalted butter, melted and cooled
1 teaspoon vanilla extract
½ teaspoon almond extract
1 cup (120g) whole raw almonds, lightly toasted
Step-by-Step Instructions
Step 1: Heat Up
Preheat oven to 350°F (175°C). Line a baking sheet with parchment paper.
Step 2: Mix Dry
In a medium bowl, whisk together flour, sugar, baking powder, and salt.
Step 3: Mix Wet
In a large bowl, whisk eggs, melted butter, vanilla, and almond extract until combined.
Step 4: Combine
Pour dry ingredients into wet. Stir with a spatula until a sticky dough forms.
Fold in the toasted almonds.
Step 5: Shape First Log
Divide dough in half. On the prepared baking sheet, shape each half into a log about 10 inches long and 2 inches wide.
Wet your hands slightly to prevent sticking—the dough is sticky by design.
Step 6: First Bake
Bake logs for 25 minutes, until golden and firm to the touch.
Remove from oven and let cool on the sheet for 10 minutes. Don’t turn off the oven—reduce heat to 325°F (160°C).
Step 7: Slice
Transfer logs to a cutting board. Use a serrated knife to slice each log diagonally into ½-inch thick cookies.
Place slices cut-side down back on the baking sheet.
Step 8: Second Bake
Bake for 10 minutes, flip each biscotti, then bake another 10 minutes.
They should be golden, dry, and lightly browned at the edges.
Step 9: Cool and Crunch
Let biscotti cool completely on the baking sheet. They will crisp up further as they cool.
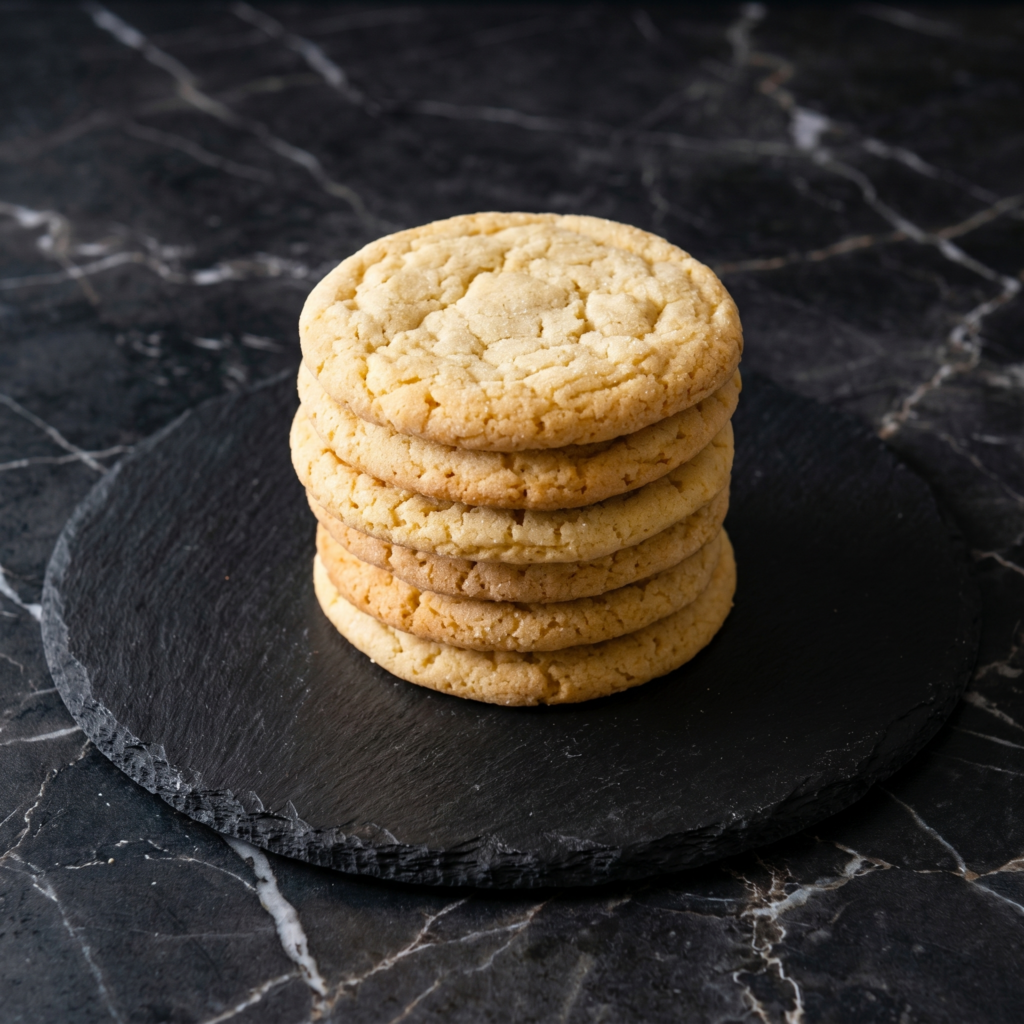
Sometimes you just need a sugar cookie, and you need it now. Not in three hours after the dough has chilled. Not after a complicated rolling and cutting session. Just a soft, buttery, perfectly sweet cookie that comes together quickly and tastes absolutely delicious.
These easy sugar cookies are exactly that. They require no chill time, no fancy equipment, and they come out perfectly every single time—soft and tender in the middle with just a hint of golden crispness around the edges.
They’re sturdy enough for decorating with royal icing, but honestly, they’re so good you’ll want to eat them plain, straight off the baking sheet. Let me show you how to make your new favorite sugar cookie.
Ingredients
Yields about 24-30 cookies (depending on size).
For the Sugar Cookies:
2 ¾ cups (345g) all-purpose flour
1 teaspoon baking soda
½ teaspoon baking powder
½ teaspoon salt
1 cup (225g) unsalted butter, softened
1 ½ cups (300g) granulated sugar, plus more for rolling
1 large egg, at room temperature
2 teaspoons vanilla extract
2 tablespoons milk or heavy cream
For the Simple Glaze (Optional):
1 ½ cups (180g) powdered sugar, sifted
2-3 tablespoons milk or heavy cream
½ teaspoon vanilla extract
Food coloring (optional)
Sprinkles for decorating
Step-by-Step Instructions
1. Preheat and Prepare:
Preheat your oven to 350°F (175°C). Line two baking sheets with parchment paper or silicone baking mats.
2. Combine Dry Ingredients:
In a medium bowl, whisk together the flour, baking soda, baking powder, and salt. Set aside.
3. Cream Butter and Sugar:
In a large bowl, beat the softened butter and granulated sugar together with an electric mixer on medium speed until light and fluffy, about 2-3 minutes. Scrape down the sides as needed.
4. Add Wet Ingredients:
Add the egg and vanilla extract, and beat until well combined. Scrape down the sides again.
Beat in the milk or heavy cream until incorporated.
5. Combine Wet and Dry:
Gradually add the dry ingredients to the wet ingredients, mixing on low speed or folding with a spatula until just combined. Do not overmix. The dough should be soft but not sticky.
6. Shape the Cookies:
Place about ½ cup of granulated sugar in a shallow bowl for rolling.
Scoop tablespoon-sized portions of dough (about 1.5 tablespoons) and roll into balls.
Roll each ball in the granulated sugar until coated, then place on the prepared baking sheets, spacing about 2 inches apart.
For slightly thicker cookies, gently press down with the bottom of a glass or leave as balls for a more domed cookie.
7. Bake:
Bake for 10-12 minutes, until the edges are just set and lightly golden. The centers will still look soft and slightly underdone—that’s perfect.
Let the cookies cool on the baking sheet for 5 minutes before transferring to a wire rack to cool completely.
8. Decorate (Optional):
If making the glaze, whisk together powdered sugar, 2 tablespoons milk, and vanilla until smooth. Add more milk a few drops at a time until you reach a thick but drizzle-able consistency.
Drizzle over cooled cookies or dip the tops, then add sprinkles immediately before the glaze sets.
Store undecorated sugar cookies in an airtight container at room temperature for up to 1 week. Glazed or iced cookies should be stored in a single layer or with parchment between layers to prevent sticking.
Can You Freeze the Dough?
Absolutely! This dough freezes beautifully. Shape into balls, place on a parchment-lined baking sheet, and freeze until solid. Transfer to a freezer bag and freeze for up to 3 months. Bake from frozen, adding 1-2 minutes to the baking time.
Freezing Baked Cookies:
Baked and undecorated cookies freeze well for up to 3 months. Place in a freezer-safe container with parchment between layers. Thaw at room temperature before decorating.
Make-Ahead for Holidays:
This recipe is perfect for holiday baking marathons. Make multiple batches of dough ahead of time, refrigerate for up to 3 days, or freeze for longer storage. Bake fresh when you’re ready.
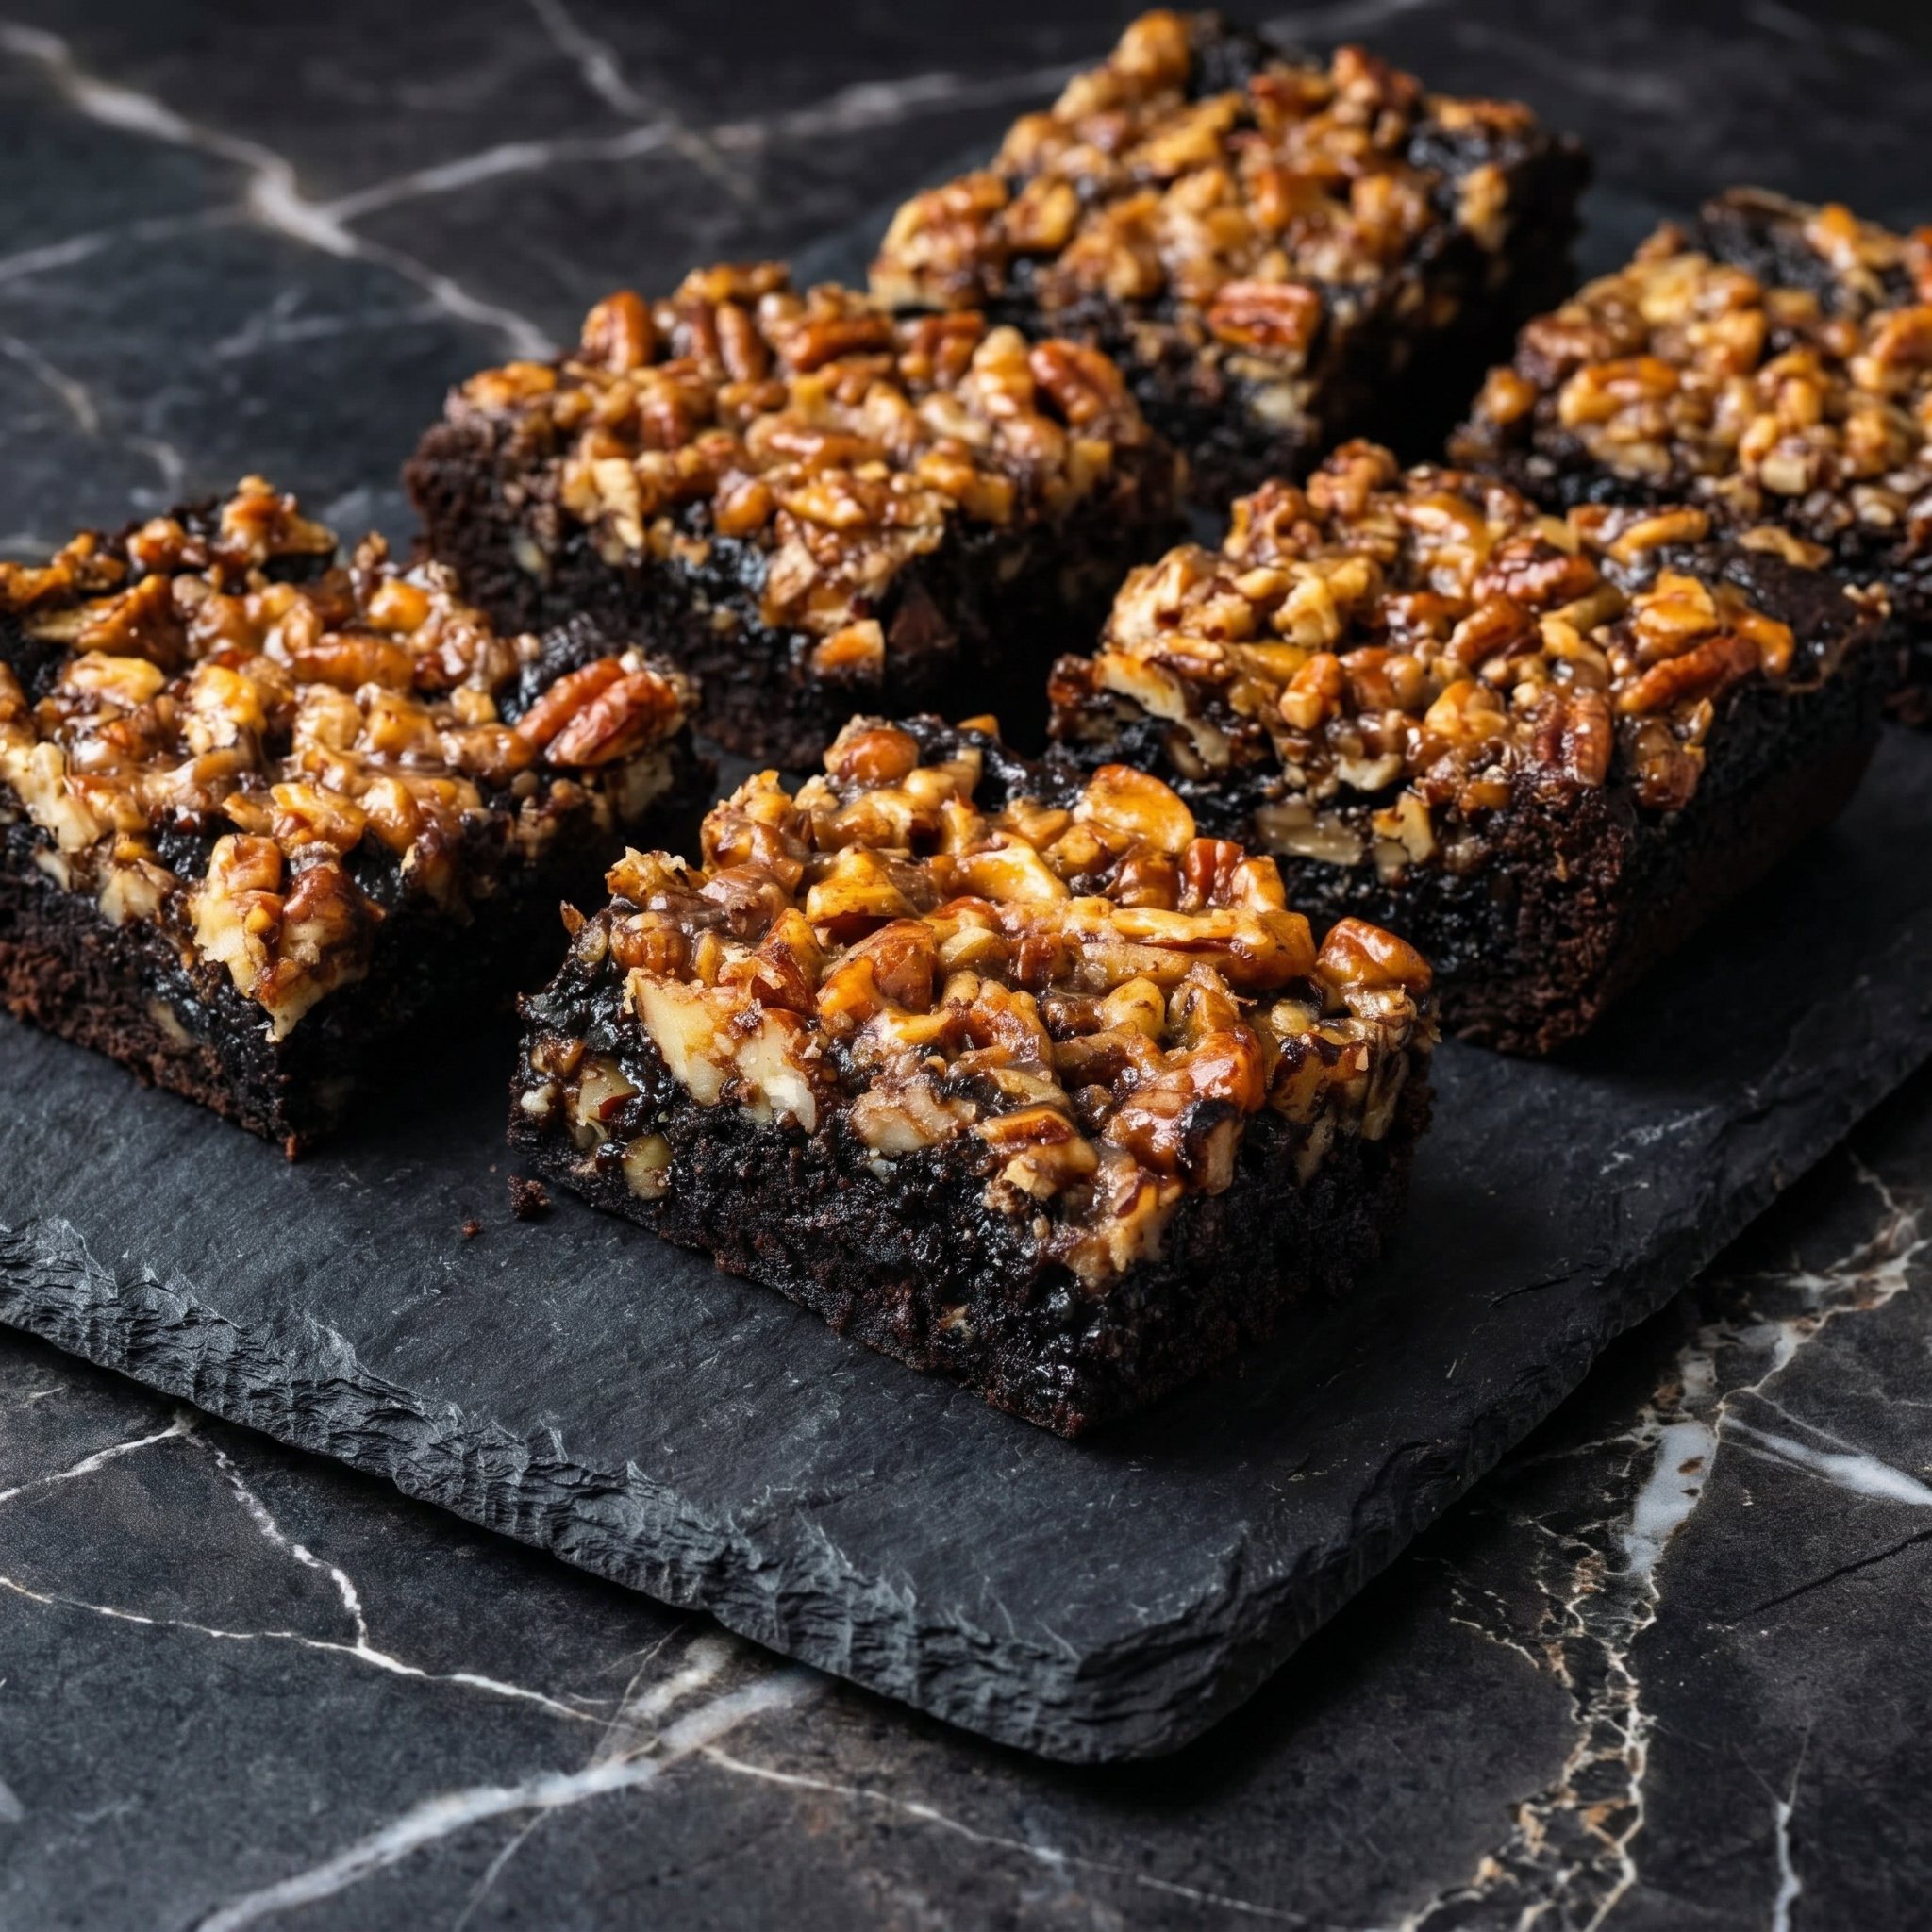
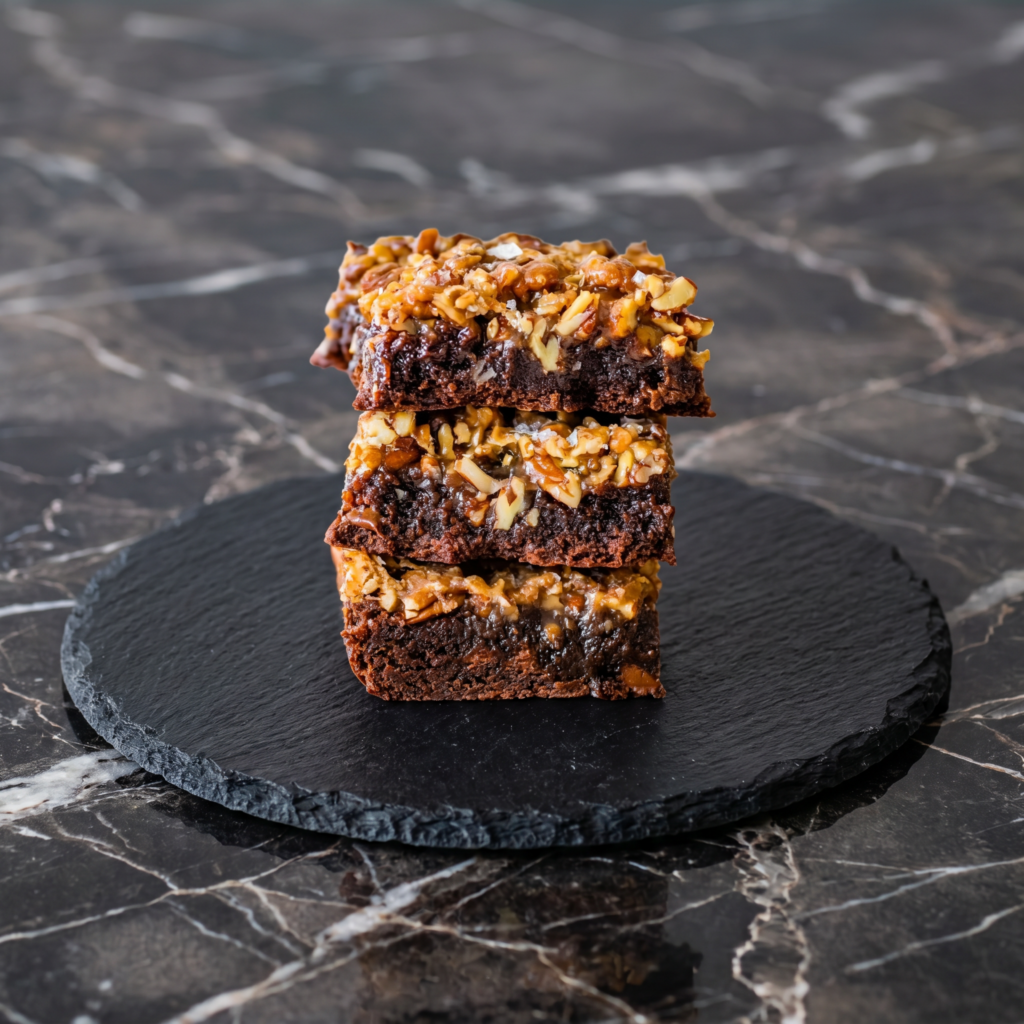
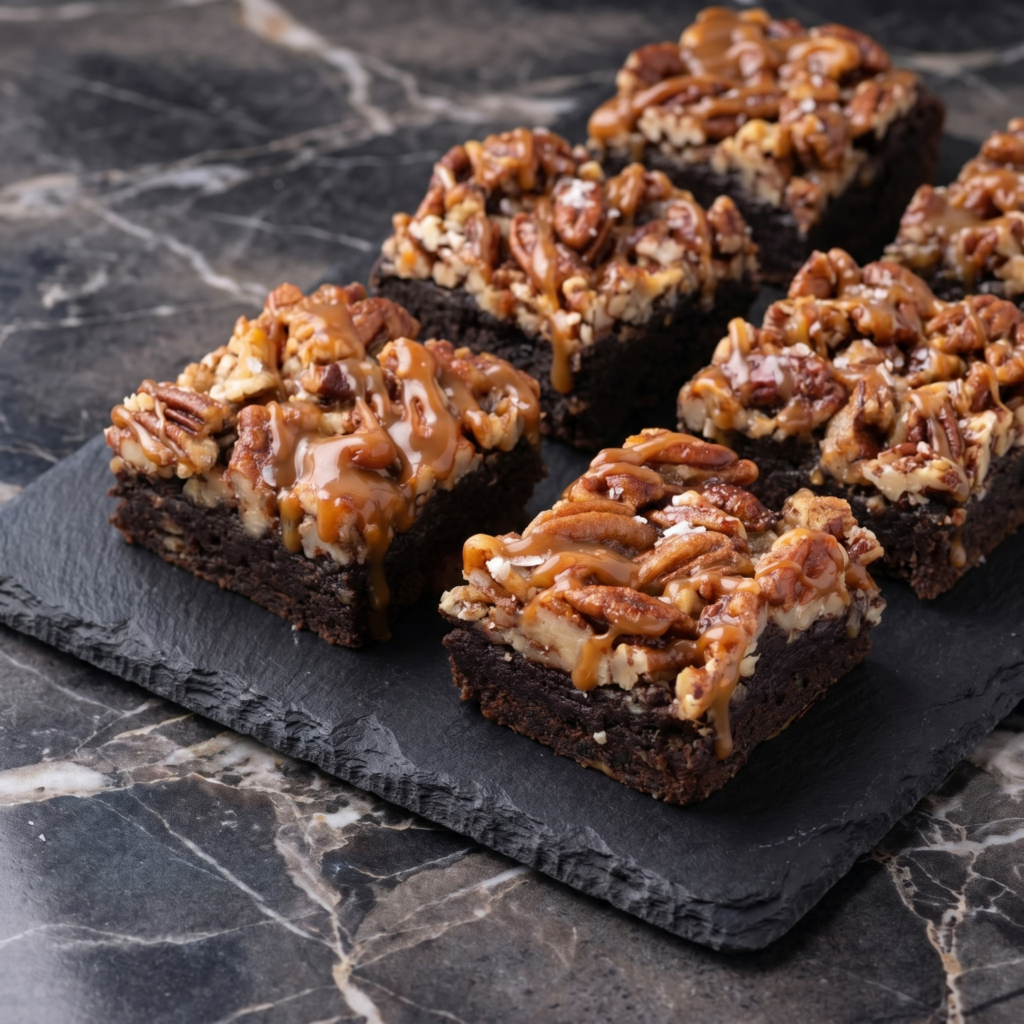
If you’ve ever found yourself torn between a rich chocolate brownie and a sticky-sweet slice of pecan pie, this recipe is your dream come true. Pecan Pie Brownies layer a dense, fudgy chocolate base with a buttery, caramel-like pecan topping that bubbles into golden perfection in the oven. The result? A decadent dessert with contrasting textures—chewy, gooey, crunchy, and melt-in-your-mouth tender—all in one irresistible bite.
Whether you’re baking for the holidays, a potluck, or just a weekend treat, these brownies are guaranteed to impress. Let’s walk through every step to ensure your batch turns out flawless.
Ingredients You’ll Need
Gather your ingredients before starting for a smooth baking experience.
For the Brownie Layer:
1 cup (226g) unsalted butter, melted
1 ½ cups granulated sugar
½ cup brown sugar
3 large eggs, room temperature
1 tablespoon vanilla extract
1 cup all-purpose flour
¾ cup unsweetened cocoa powder
½ teaspoon salt
For the Pecan Pie Topping:
1 cup brown sugar
½ cup light corn syrup
½ cup unsalted butter, melted
2 large eggs
1 teaspoon vanilla extract
¼ teaspoon salt
2 cups pecan halves
Step 1: Preheat and Prepare the Pan
Preheat your oven to 350°F (175°C). Line a 9×13-inch baking pan with parchment paper, leaving some overhang on the sides for easy lifting later. Lightly grease the parchment to prevent sticking. Proper pan preparation ensures clean removal and beautifully cut squares.
Step 2: Make the Brownie Batter
In a large mixing bowl, whisk together the melted butter, granulated sugar, and brown sugar until smooth and glossy. Add the eggs one at a time, mixing thoroughly after each addition. Stir in the vanilla extract.
In a separate bowl, sift together the flour, cocoa powder, and salt. Gradually fold the dry ingredients into the wet mixture using a spatula. Mix just until combined—overmixing can make brownies tough. The batter should be thick and rich.
Step 3: Bake the Brownie Base
Spread the brownie batter evenly into your prepared pan. Bake for 18–22 minutes, or until the top is set but the center is still slightly soft. The brownies should not be fully baked at this stage—they will continue cooking once the pecan topping is added. Remove from the oven and let sit while you prepare the topping.
Step 4: Prepare the Pecan Pie Filling
In a medium bowl, whisk together the brown sugar, corn syrup, melted butter, eggs, vanilla extract, and salt until smooth and fully incorporated. The mixture should look glossy and slightly thick.
Fold in the pecan halves, ensuring they are evenly coated with the sweet filling. This mixture will create the classic gooey pecan pie texture once baked.
Step 5: Assemble the Layers
Carefully pour the pecan mixture over the partially baked brownie layer. Use a spatula to gently spread the pecans into an even layer. Avoid pressing down too hard—you want the layers to remain distinct.
Step 6: Final Bake
Return the pan to the oven and bake for an additional 30–35 minutes. The topping should be bubbling gently and set around the edges, with the center slightly soft but not liquid.
If the pecans begin browning too quickly, loosely tent the pan with aluminum foil during the last 10–15 minutes of baking.
Step 7: Cool Completely
Once done, remove the pan from the oven and allow the brownies to cool completely at room temperature. This is crucial. The pecan topping needs time to firm up, and slicing too soon will result in messy bars.
For best results, refrigerate the brownies for 1–2 hours after they’ve cooled to achieve clean, sharp cuts.
Step 8: Slice and Serve
Lift the brownies out of the pan using the parchment overhang. Place on a cutting board and slice into squares using a sharp knife. Wipe the blade clean between cuts for neat edges.
Serve at room temperature or slightly chilled. For an extra indulgent touch, top with vanilla ice cream or a drizzle of warm chocolate sauce.
Pro Tips for Perfect Results
Room-temperature eggs blend more smoothly into batters.
Don’t overbake the brownie layer before adding the topping.
Toast the pecans for 5–7 minutes before mixing for deeper flavor.
Let them fully cool for clean slicing.
Use good-quality cocoa powder for a richer chocolate base.
Flavor Variations
Bourbon Pecan Brownies: Add 1 tablespoon bourbon to the pecan mixture.
Dark Chocolate Boost: Stir chocolate chips into the brownie batter.
Salted Caramel Twist: Sprinkle flaky sea salt over the topping before baking.
Espresso Kick: Add 1 teaspoon espresso powder to the brownie batter to intensify the chocolate flavor.
Why You’ll Love These Brownies
These Pecan Pie Brownies combine the best of two beloved desserts into one show-stopping treat. The brownie layer is dense, moist, and deeply chocolatey, while the topping brings buttery sweetness and crunchy texture. Every bite delivers balance—rich but not overwhelming, sweet but layered with nutty depth.
They’re perfect for Thanksgiving, Christmas, bake sales, or anytime you want a dessert that feels special. Plus, they store beautifully in an airtight container for up to four days, making them ideal for make-ahead baking.
Final Thoughts
Pecan Pie Brownies are more than just a dessert—they’re a celebration of texture and flavor. With a fudgy chocolate base and a gooey pecan topping, they deliver comfort and indulgence in every square. While they look impressive, the step-by-step process makes them approachable for bakers of all skill levels.
Once you bake these, don’t be surprised if they become your new signature dessert. Slice them thick, serve them proudly, and enjoy the sweet reward of combining two classics into one unforgettable treat.
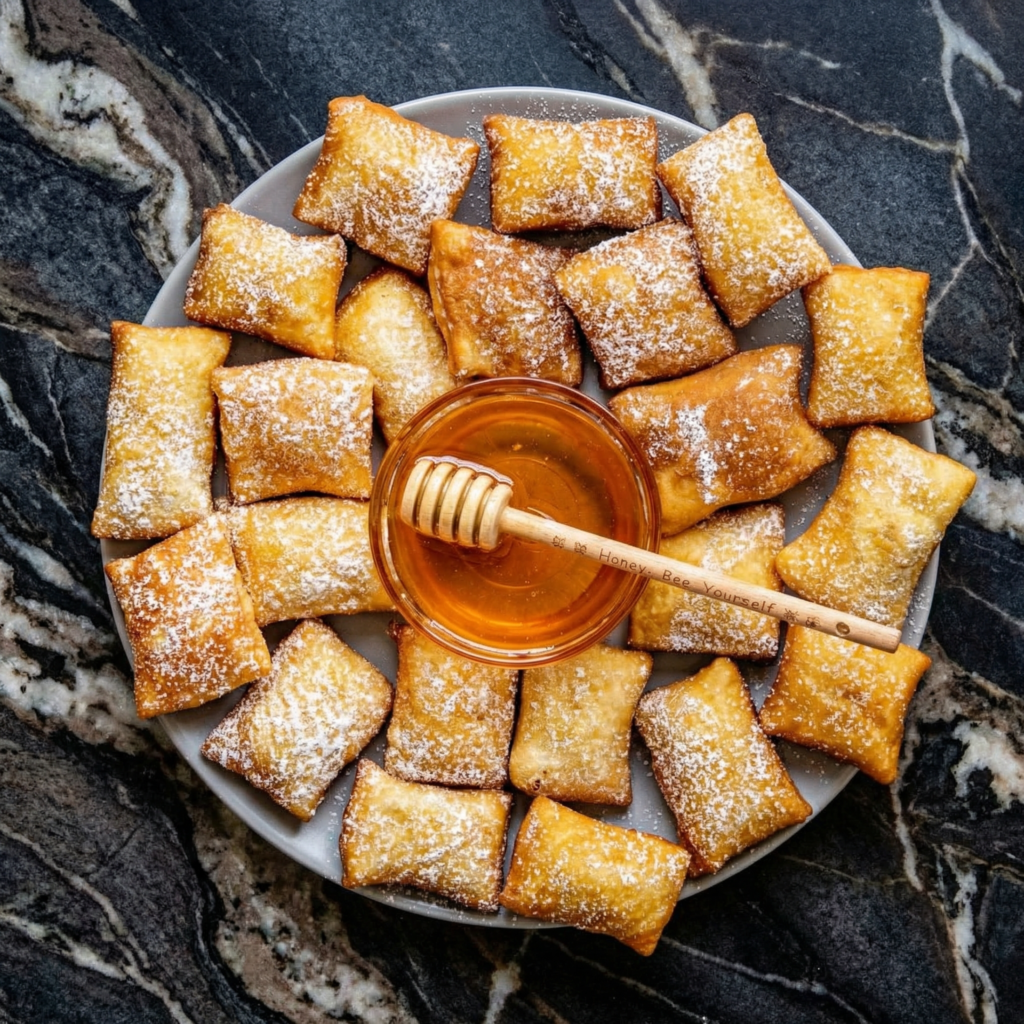
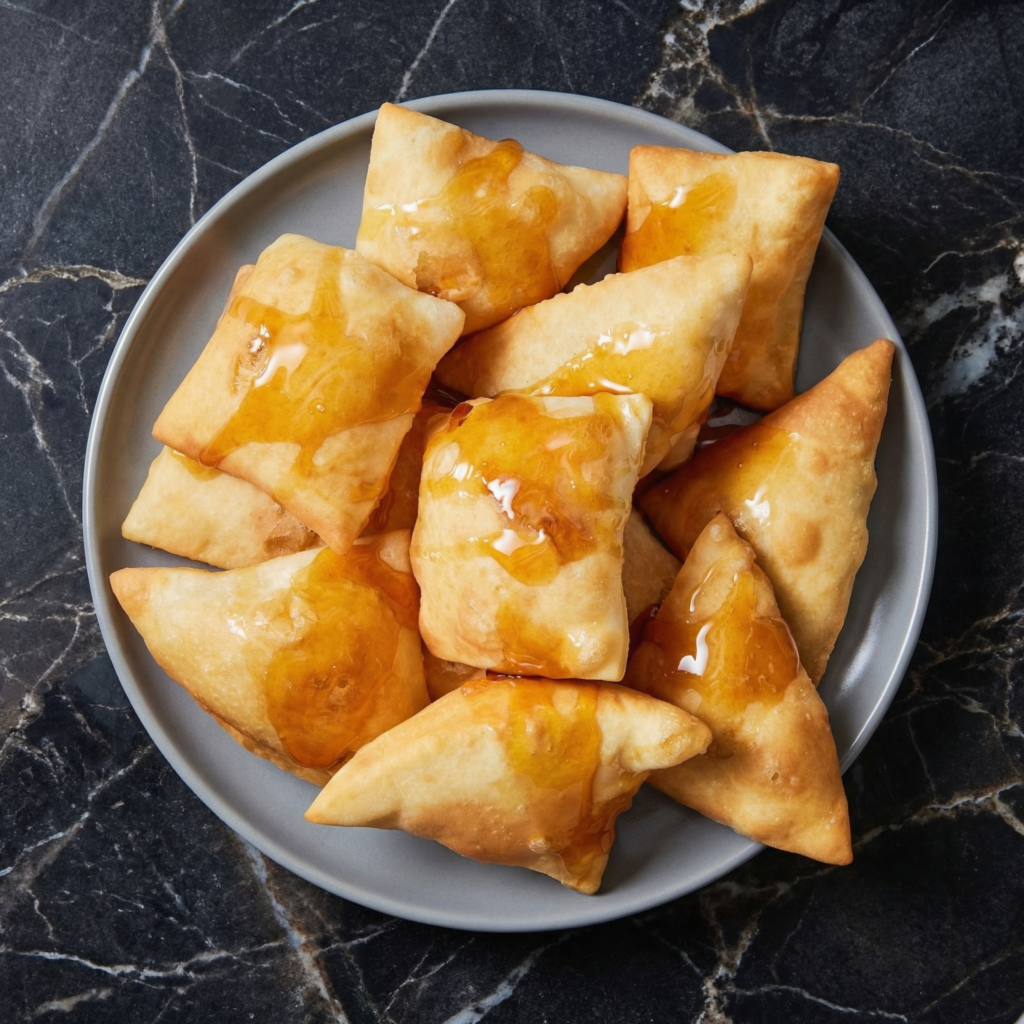
Sopapillas are magic in dough form. A simple mixture of flour, baking powder, and a little fat transforms into puffy, golden pillows when they hit hot oil. They puff up like little balloons, hollow inside, just waiting to be drizzled with honey, dusted with cinnamon sugar, or stuffed with savory fillings.
In New Mexico, they’re the perfect end to any meal—served warm, dripping with honey, often with a sprinkle of cinnamon. They’re also a side dish, sometimes stuffed with beans and cheese. But mostly? They’re the reason you save room for dessert. Make them once, and they’ll become a regular request.
Ingredients
Serves 6 (makes about 12-16 sopapillas).
For the Sopapillas:
2 cups all-purpose flour
1½ tsp baking powder
½ tsp salt
2 tbsp vegetable shortening or lard (or butter)
¾ cup warm water (110°F)
Neutral oil, for frying (vegetable, canola, or peanut)
For Serving:
Honey, for drizzling (lots of it)
Cinnamon sugar (¼ cup sugar + 1 tbsp cinnamon)
Powdered sugar (optional)
For Savory Version (optional):
Shredded cheddar or cotija cheese
Refried beans
Shredded chicken or beef
Salsa and sour cream
Step-by-Step Instructions
Step 1: Make the Dough
In a large bowl, whisk together flour, baking powder, and salt.
Cut in the shortening using your fingers or a pastry cutter until the mixture resembles coarse crumbs.
Slowly add warm water, stirring until a soft dough forms. Add more water if needed—dough should be soft but not sticky.
Step 2: Knead and Rest
Turn dough onto a lightly floured surface. Knead for 3-5 minutes until smooth and elastic.
Cover with a clean kitchen towel and let rest for 20-30 minutes. This allows the gluten to relax, making the dough easier to roll and ensuring a light, airy texture.
Step 3: Roll and Cut
Roll dough out to about ⅛-inch thickness (slightly thinner than pie crust).
Cut into triangles, squares, or rectangles—traditional sopapillas are diamond-shaped, but any shape works.
Cover cut pieces with a towel to prevent drying while the oil heats.
Step 4: Heat the Oil
Pour oil into a heavy-bottomed pot or Dutch oven to a depth of about 2 inches.
Heat oil to 375°F (190°C). Use a thermometer—temperature control is critical for that perfect puff.
Step 5: Fry to Puffy Perfection
Working in small batches, carefully drop a few pieces of dough into the hot oil. Don’t crowd the pot.
Watch them puff up! Within seconds, the dough will start to swell and become golden. After 30-45 seconds, flip and fry the other side until golden brown.
Remove with a slotted spoon and drain on paper towels.
Step 6: Serve Immediately
Arrange hot sopapillas on a platter. Drizzle generously with honey.
Sprinkle with cinnamon sugar or powdered sugar if desired.
For savory version, split open and stuff with beans, cheese, or shredded meat.
Take a bite. Feel that crispy exterior give way to a soft, pillowy interior. The honey drips. This is pure comfort.
Sopapillas are best eaten fresh—they lose their crispiness within a few hours. Store leftovers in an airtight container at room temperature for up to 1 day.
Reheating (Bring Back the Puff):
Oven (best): 375°F for 3-5 minutes. Air fryer: 350°F for 2-3 minutes. Microwave: Not recommended—they’ll become chewy and sad.
Make Ahead (Freezer-Friendly):
Freeze uncooked, cut sopapillas in a single layer on a baking sheet, then transfer to a zip-top bag. Fry directly from frozen—add 15-30 seconds to cook time. This is the secret to having fresh sopapillas anytime.