Tag: Easy Meals

  • Sweet, Spicy, and Smoky: How to Make Korean BBQ Chicken Skewers at Home

    Sweet, Spicy, and Smoky: How to Make Korean BBQ Chicken Skewers at Home

    Korean BBQ has taken the culinary world by storm, and for good reason. The bold, sweet, and savory flavors of gochujang, garlic, and soy come together to create an unforgettable bite every time.

    These Korean BBQ Chicken Skewers capture all of that flavor in an easy-to-make, finger-friendly dish that’s perfect for weeknight dinners, summer cookouts, or casual entertaining. Juicy, marinated chicken is threaded onto skewers, grilled to perfection, and finished with a drizzle of sauce and a sprinkle of sesame seeds—pure crowd-pleasing magic.

    This step-by-step guide will take you from preparing the marinade to serving tender, flavorful chicken skewers, plus tips for grilling, oven-baking, or air-frying for maximum convenience.


    Why You’ll Love These Korean BBQ Chicken Skewers

    • Sweet, savory, and spicy in every bite
    • Juicy, tender chicken with a flavorful glaze
    • Quick to prepare and perfect for entertaining
    • Works on grill, oven, or air fryer
    • Pairs beautifully with rice, veggies, or lettuce wraps

    The key to authentic Korean BBQ flavor lies in the marinade—a careful balance of heat, umami, and sweetness that caramelizes beautifully when cooked.

    Ingredients You’ll Need

    For the Chicken:

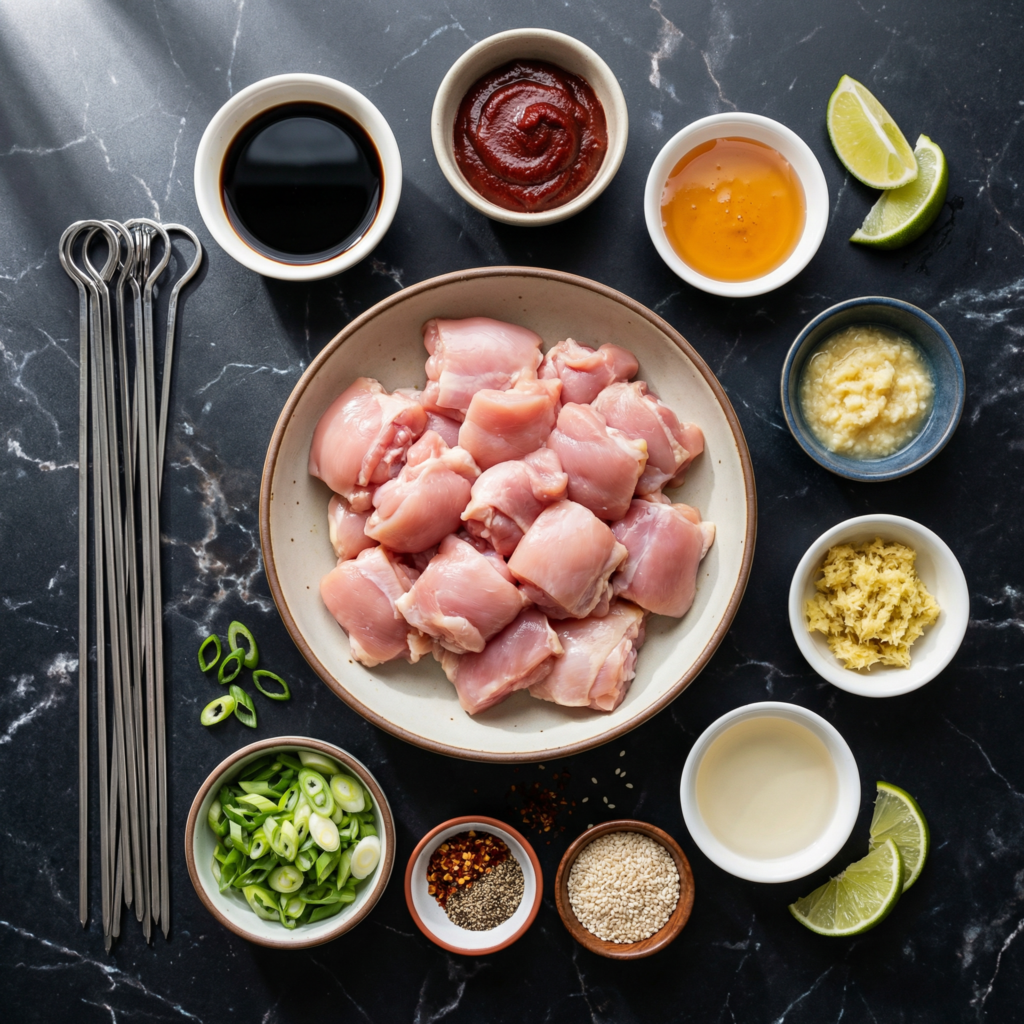
    • 1½ pounds boneless, skinless chicken thighs or breasts, cut into 1½-inch cubes
    • 1 tablespoon vegetable oil

    For the Marinade:

    • 3 tablespoons gochujang (Korean chili paste)
    • 3 tablespoons soy sauce
    • 2 tablespoons honey or brown sugar
    • 2 tablespoons rice vinegar or mirin
    • 2 tablespoons sesame oil
    • 3 garlic cloves, minced
    • 1 teaspoon freshly grated ginger
    • Optional: 1 teaspoon Korean chili flakes for extra heat

    For Serving:

    • Cooked rice or lettuce leaves
    • Sliced green onions
    • Sesame seeds
    • Pickled vegetables or kimchi (optional)

    Skewers:

    • Wooden skewers (soaked in water for 15–20 minutes) or metal skewers

    Step 1: Prepare the Marinade

    In a medium bowl, whisk together gochujang, soy sauce, honey, rice vinegar, sesame oil, garlic, ginger, and chili flakes if using.

    Taste the marinade—it should be a perfect balance of sweet, savory, and mildly spicy. Adjust honey or chili according to your preference.


    Step 2: Marinate the Chicken

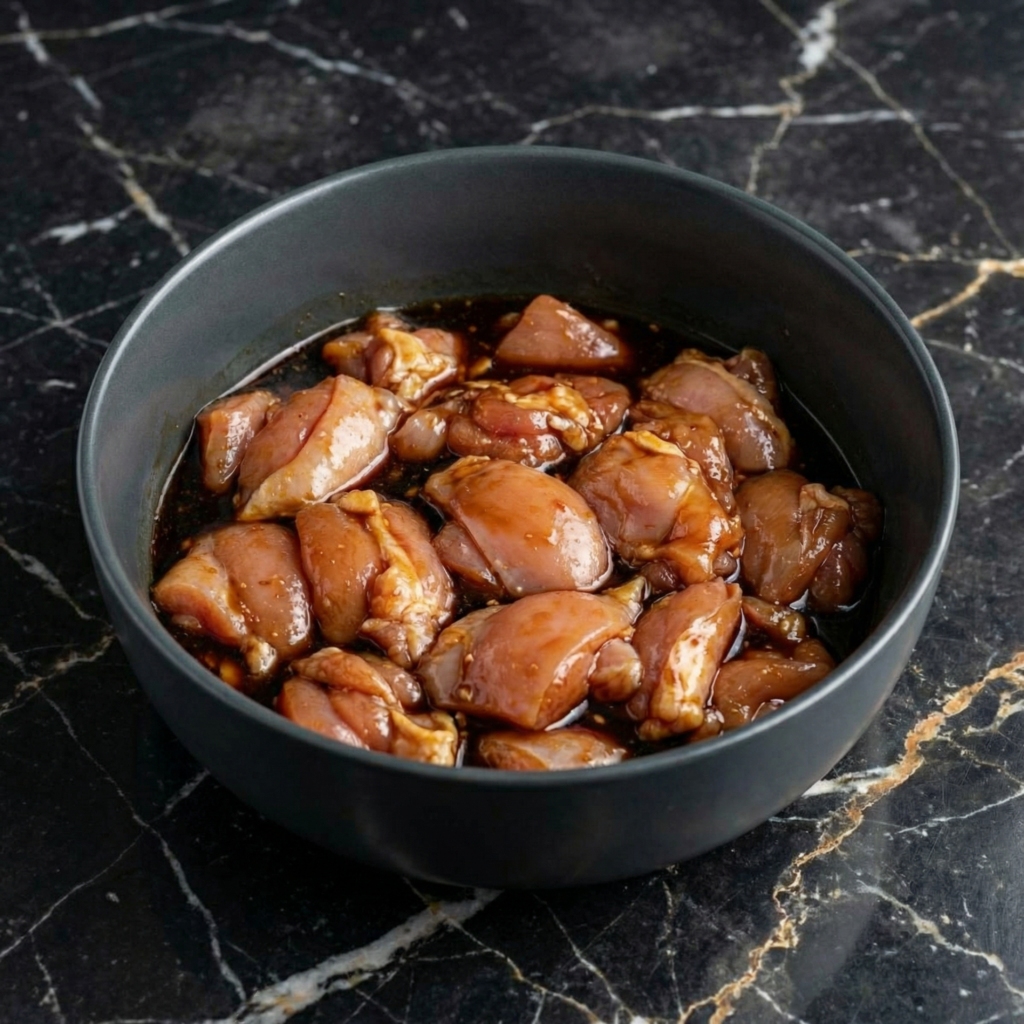
    Place the cubed chicken in a large resealable bag or shallow dish. Pour the marinade over the chicken and toss to coat evenly.

    Seal the bag or cover the dish and refrigerate for at least 1 hour, preferably 2–4 hours for maximum flavor penetration.

    The longer the chicken marinates, the juicier and more flavorful it will be.

    Step 3: Preheat the Grill or Oven

    If grilling: preheat to medium-high heat. Oil the grates lightly to prevent sticking.

    If baking: preheat your oven to 425°F (220°C) and line a baking sheet with foil or parchment. Place a wire rack on top for even cooking.

    If air-frying: preheat your air fryer to 400°F (200°C).


    Step 4: Thread the Chicken onto Skewers

    Remove chicken from the marinade, letting excess drip off to avoid flare-ups on the grill.

    Thread chicken cubes onto skewers, leaving a small gap between each piece to ensure even cooking and caramelization.
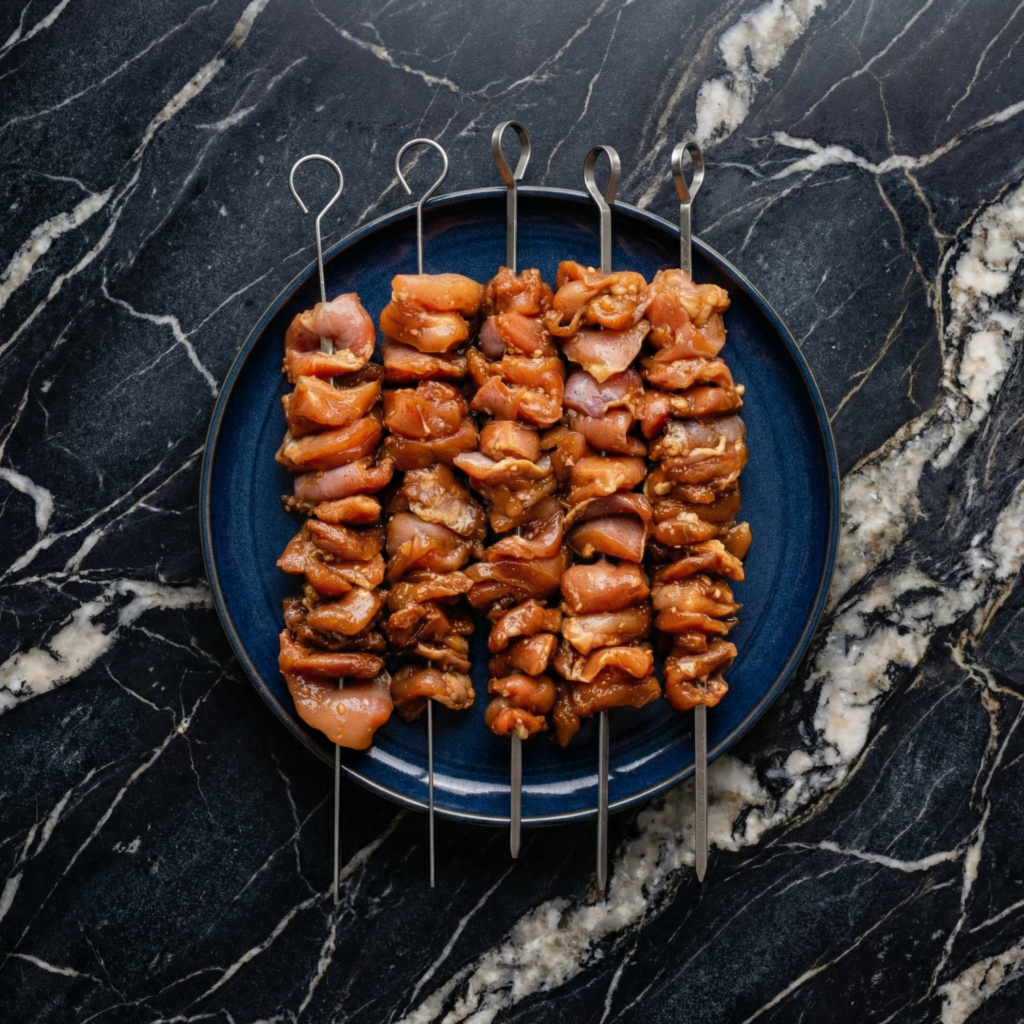

    Step 5: Cook the Skewers

    Grilling:

    Place skewers on the preheated grill. Cook for 10–12 minutes, turning every 2–3 minutes, until chicken is cooked through and slightly charred on the edges.

    Oven-Baking:

    Place skewers on the wire rack. Bake for 12–15 minutes, flipping halfway through, until chicken reaches 165°F (74°C). Broil for 1–2 minutes at the end for caramelization.

    Air-Frying:

    Place skewers in a single layer in the air fryer basket. Cook for 10–12 minutes, flipping halfway through, until golden and cooked through.


    Step 6: Rest the Chicken

    Let the skewers rest for 3–5 minutes after cooking. This allows the juices to redistribute, keeping the chicken tender and juicy.


    Step 7: Garnish and Serve

    Arrange the skewers on a serving platter. Sprinkle with sesame seeds and sliced green onions.

    Serve alongside steamed rice or wrapped in crisp lettuce leaves for a low-carb option. Add kimchi, pickled radishes, or other Korean-inspired sides for a complete meal.

    Optional: drizzle with leftover marinade that has been boiled for 1–2 minutes to use as a sauce.


    Flavor and Texture Highlights

    • Juicy, tender chicken with a slightly sticky glaze
    • Sweet, savory, and mildly spicy marinade
    • Caramelized edges with a smoky, grilled aroma
    • Fresh crunch from garnishes and optional lettuce wraps

    Every bite captures the essence of Korean BBQ—bold, satisfying, and crave-worthy.


    Tips for Perfect Korean BBQ Chicken Skewers

    • Use thighs for more flavor and juiciness, though breasts work if you prefer leaner meat.
    • Don’t overcrowd skewers or pan—airflow is essential for even cooking.
    • Adjust spice level by adding or reducing gochugaru or chili flakes.
    • Soak wooden skewers to prevent burning.
    • Serve immediately for the best texture, or reheat gently without overcooking.

    Optional Variations

    • Vegetable Skewers: Alternate chicken with bell peppers, zucchini, or mushrooms for extra flavor.
    • Honey-Garlic Twist: Swap some gochujang with additional honey and garlic for a sweeter glaze.
    • Meal Prep Friendly: Cook skewers and store in the fridge; reheat gently during the week.
    • Lettuce Wrap Style: Serve with rice and sauce wrapped in romaine or butter lettuce for a fresh, handheld option.

    Storage and Make-Ahead

    • Marinated chicken can be stored in the refrigerator for up to 24 hours before cooking.
    • Cooked skewers can be stored in airtight containers for up to 3 days.
    • Reheat in the oven, air fryer, or skillet to maintain crisp edges and juicy center.

    Why This Recipe Works

    The combination of sweet, savory, and spicy marinade, along with high-heat cooking, gives these skewers authentic Korean BBQ flavor. The sticky glaze caramelizes beautifully, locking in juiciness, while garnishes and sides provide freshness and texture.

    These Korean BBQ Chicken Skewers are easy to make, impressive to serve, and endlessly satisfying—perfect for family dinners, summer grilling, or casual gatherings.


    With tender chicken, bold marinade, and fresh garnishes, these Korean BBQ Chicken Skewers deliver restaurant-quality flavor at home.

    Quick to prepare, versatile in cooking methods, and utterly delicious, they are a must-have for anyone craving that sweet, spicy, and smoky Korean BBQ experience.

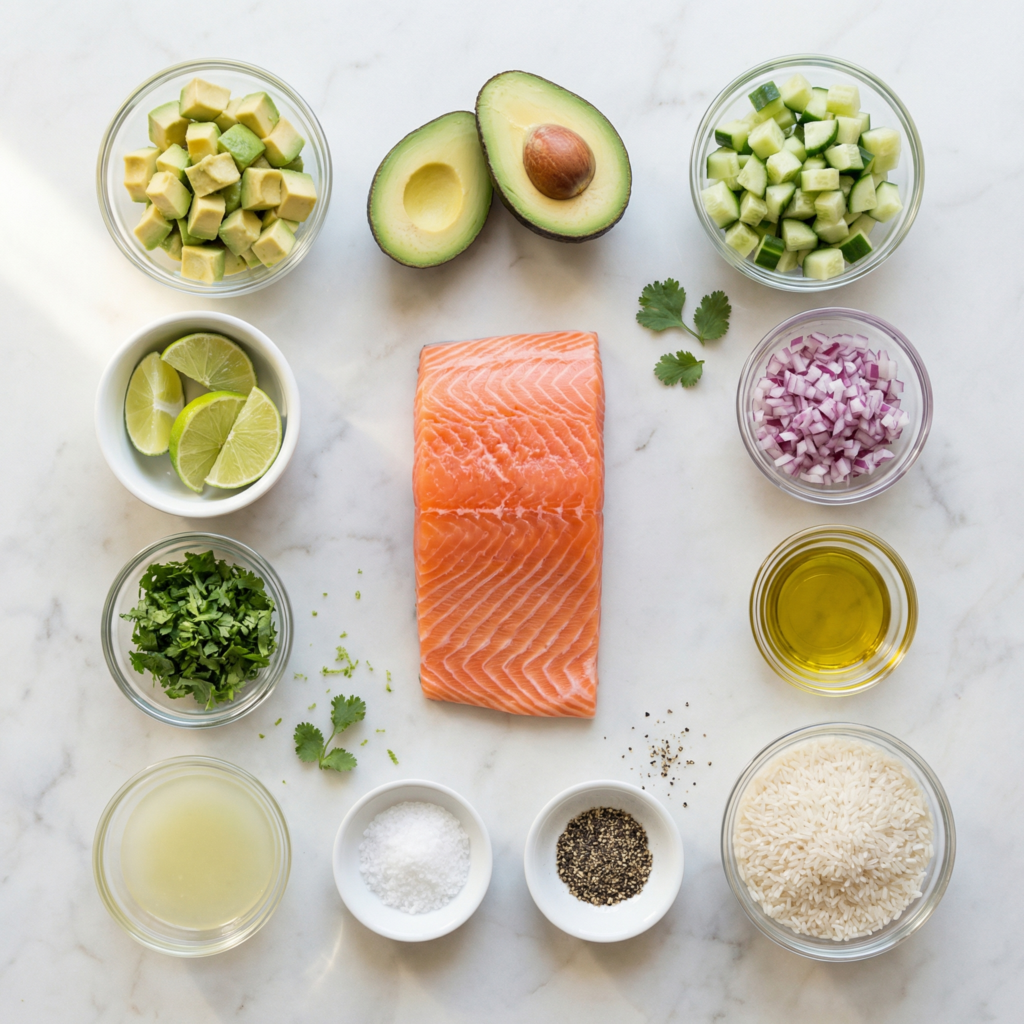
  • Bright & Fresh: Oven-Baked Salmon with Avocado Cucumber Salsa and Fluffy Rice

    Bright & Fresh: Oven-Baked Salmon with Avocado Cucumber Salsa and Fluffy Rice

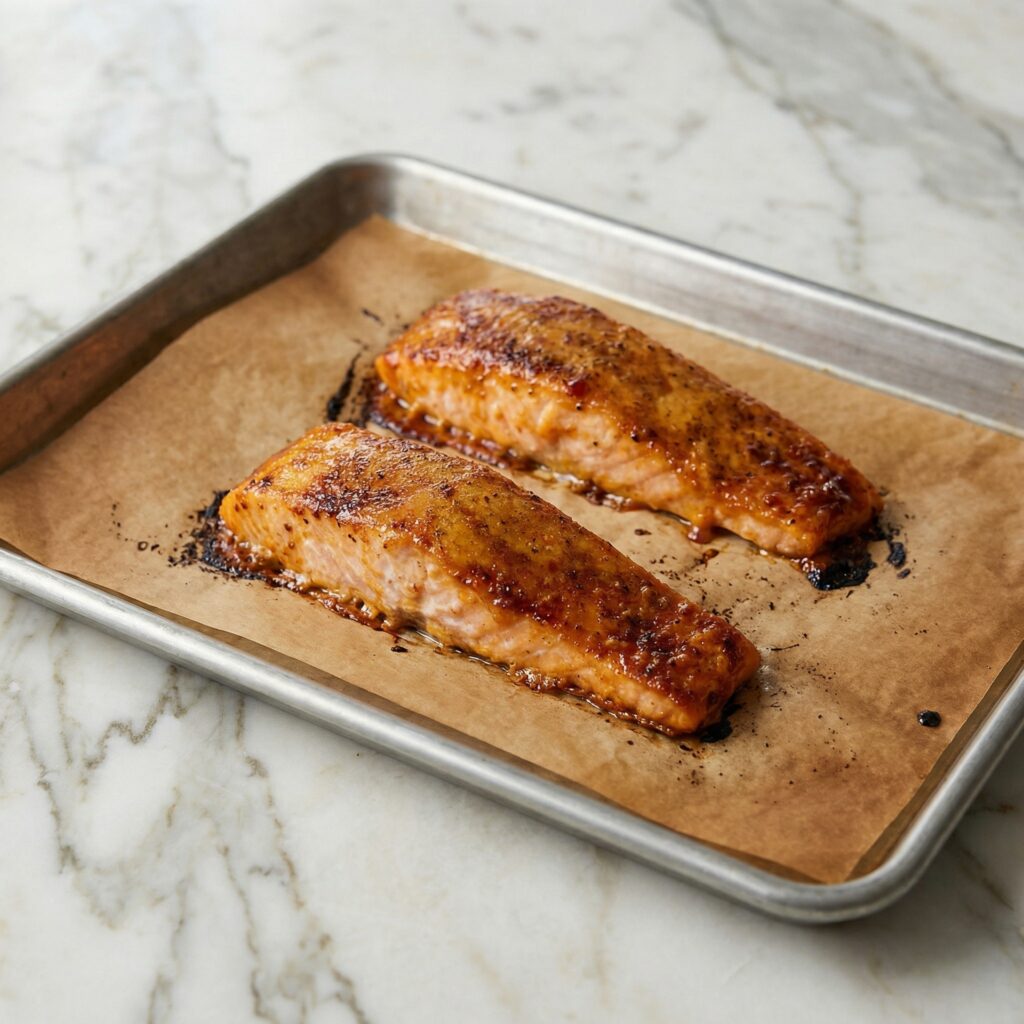
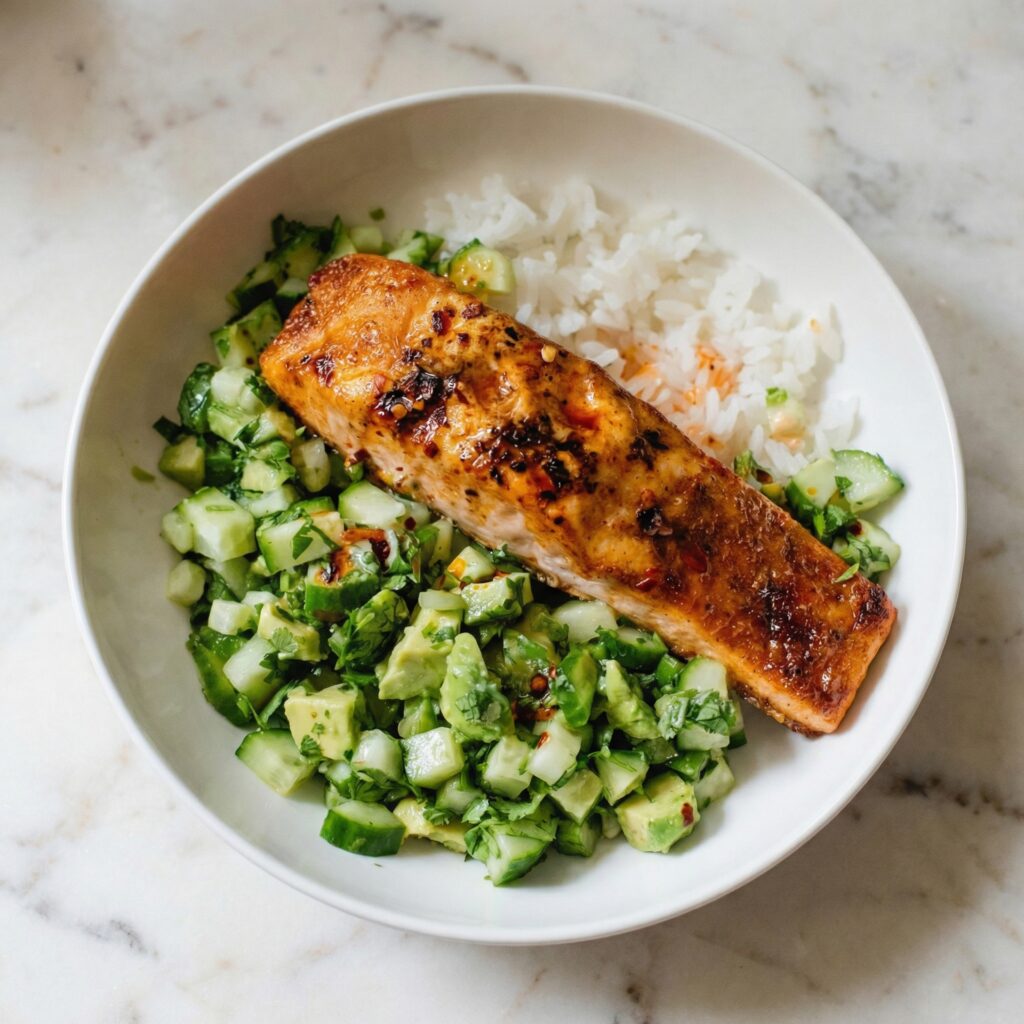
    If you want a healthy, vibrant meal that feels elegant but requires minimal effort, this Oven-Baked Salmon with Avocado Cucumber Salsa and Rice is the perfect choice. Baking the salmon in the oven ensures even cooking, tender texture, and hands-off convenience—no splattering stovetop required.

    Paired with cool, creamy avocado cucumber salsa and fluffy rice, this dish delivers the perfect balance of warm and fresh, rich and bright. Let’s walk through it step by step so you can recreate this flavorful meal at home.


    Why Bake the Salmon?

    Oven-baking salmon is:

    • Easier and less messy than pan-searing
    • Great for cooking multiple fillets at once
    • Consistent and beginner-friendly
    • Perfect for juicy, evenly cooked fish

    The gentle heat keeps the salmon moist while allowing the seasoning to shine.


    Ingredients You’ll Need

    For the Rice:

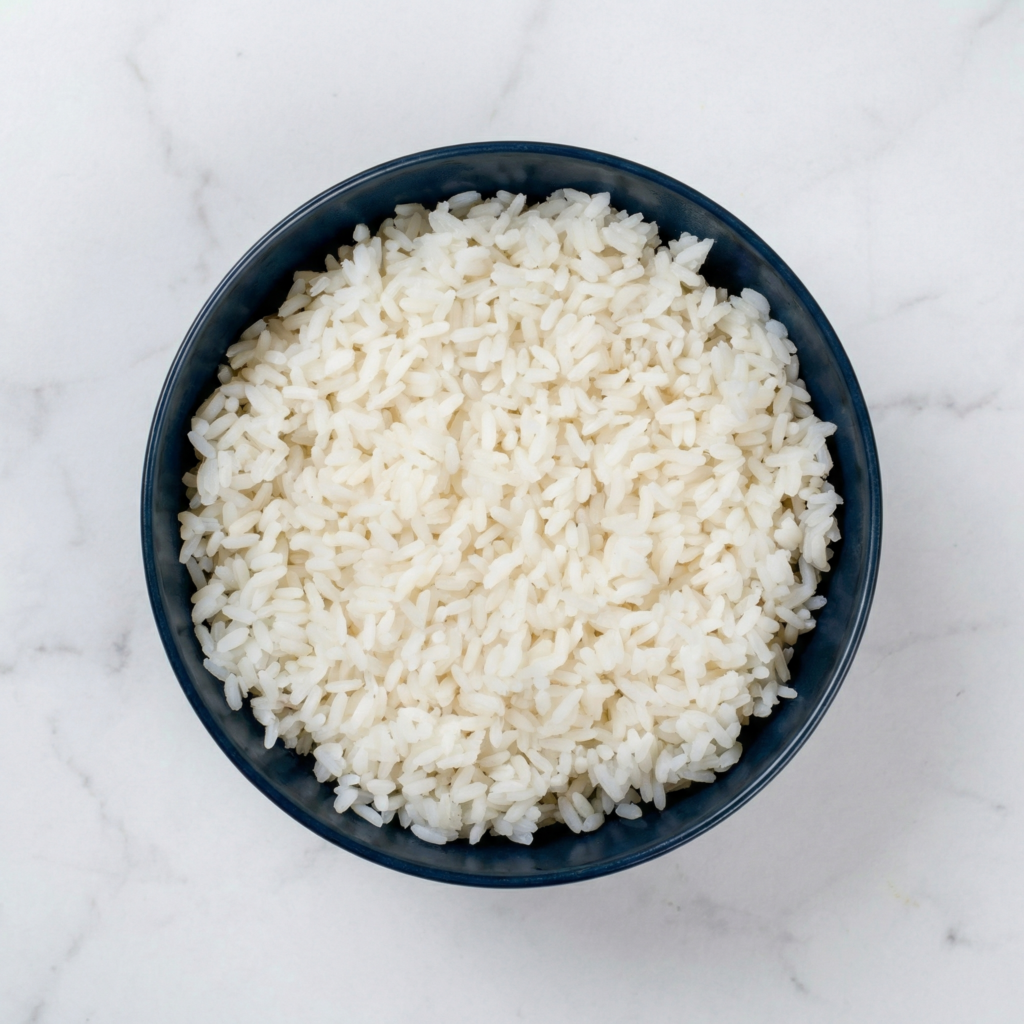
    • 1½ cups jasmine or long-grain white rice
    • 2 cups water
    • ½ teaspoon salt

    For the Oven-Baked Salmon:

    • 4 salmon fillets (about 6 oz each)
    • 1 tablespoon olive oil
    • Salt and black pepper to taste
    • 1 teaspoon garlic powder
    • 1 teaspoon paprika
    • Juice of ½ lemon

    For the Avocado Cucumber Salsa:

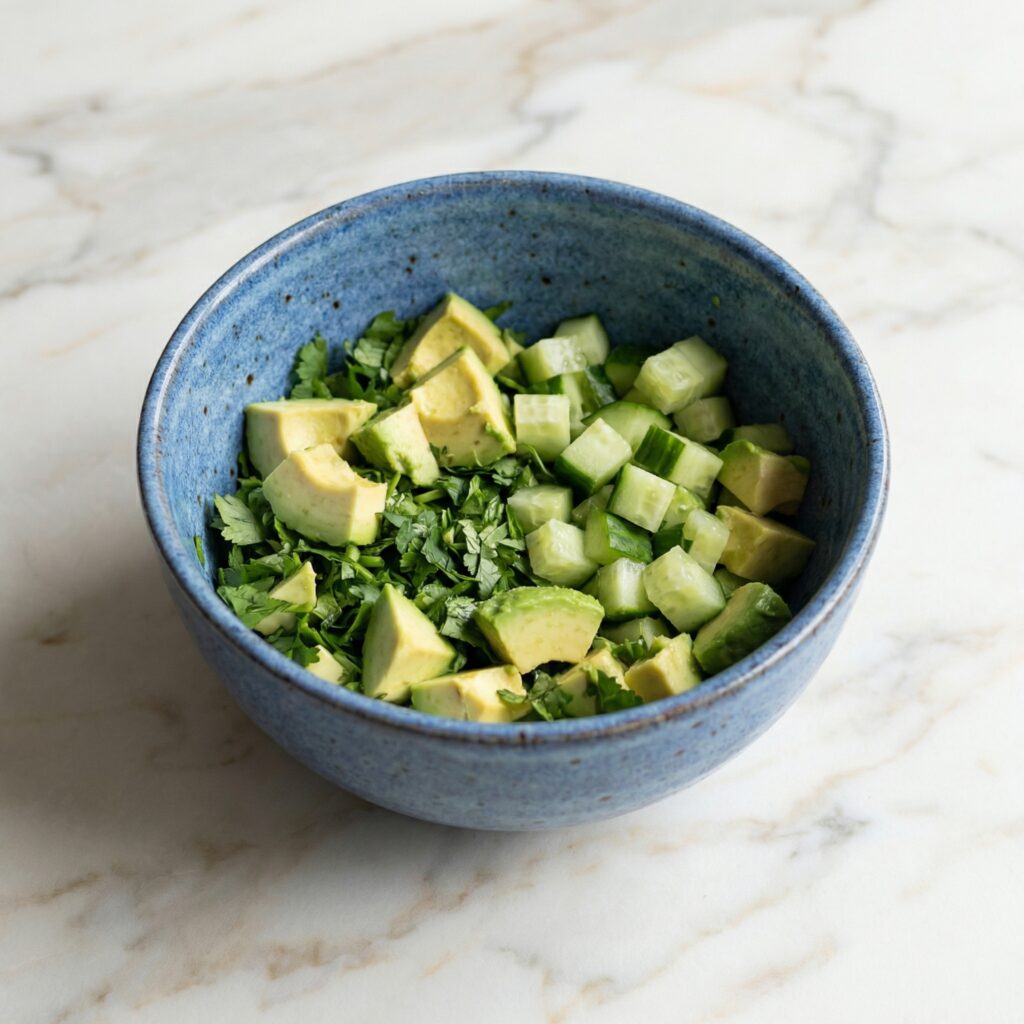
    • 1 ripe avocado, diced
    • 1 cup cucumber, finely chopped
    • 2 tablespoons red onion, finely diced
    • Juice of ½ lemon or lime
    • Salt to taste
    • Optional: chopped fresh cilantro

    Step 1: Preheat the Oven

    Preheat your oven to 400°F (200°C).

    Line a baking sheet with parchment paper or lightly grease a baking dish. This prevents sticking and makes cleanup easy.


    Step 2: Cook the Rice

    Start the rice first so everything finishes at the same time.

    Rinse the rice under cold water until the water runs mostly clear. This removes excess starch and keeps the rice fluffy.

    In a medium saucepan, combine the rinsed rice, water, and salt. Bring to a boil over medium-high heat.

    Once boiling, reduce to low, cover, and simmer for 15 minutes. Do not lift the lid during cooking.

    After 15 minutes, remove from heat and let it sit covered for 5–10 minutes. Fluff gently with a fork before serving.


    Step 3: Prepare the Salmon

    Pat the salmon fillets dry with paper towels. Removing surface moisture helps the seasoning adhere better.

    Place the fillets on the prepared baking sheet.

    Drizzle olive oil evenly over the salmon. Season generously with salt, black pepper, garlic powder, and paprika. Squeeze fresh lemon juice over the top for brightness.

    Let the seasoned salmon sit for about 5–10 minutes while the oven finishes preheating.


    Step 4: Bake the Salmon

    Place the baking sheet in the preheated oven.

    Bake for 12–15 minutes, depending on thickness. A general rule is about 4–6 minutes per half-inch of thickness.

    The salmon is done when:

    • It flakes easily with a fork
    • The center is opaque
    • Internal temperature reaches about 125–130°F (52–54°C) for medium

    Avoid overcooking—salmon can dry out quickly.

    If you prefer slightly golden edges, broil for the last 1–2 minutes.


    Step 5: Prepare the Avocado Cucumber Salsa

    While the salmon bakes, make the salsa.

    In a bowl, gently combine diced avocado, chopped cucumber, and red onion.

    Add lemon or lime juice and a pinch of salt. Toss gently to combine without mashing the avocado.

    If using cilantro, fold it in last.

    Place the salsa in the refrigerator until ready to serve.

    Keeping it chilled enhances the refreshing contrast against the warm salmon.


    Step 6: Rest the Salmon

    Once baked, remove the salmon from the oven and let it rest for about 3–5 minutes.

    Resting allows the juices to redistribute and keeps the fish tender.


    Step 7: Assemble the Dish

    Spoon a generous serving of fluffy rice onto each plate or bowl.

    Place a warm salmon fillet on top.

    Spoon the chilled avocado cucumber salsa over the salmon.

    The cool salsa melts slightly against the warm fish, creating a beautiful temperature contrast.


    Flavor and Texture Balance

    This dish offers:

    • Tender, flaky baked salmon
    • Creamy avocado richness
    • Crisp cucumber crunch
    • Bright citrus notes
    • Soft, comforting rice

    Every bite feels fresh yet satisfying.


    Tips for Perfect Oven-Baked Salmon

    • Use salmon fillets of similar thickness for even cooking.
    • Don’t overcrowd the baking sheet.
    • Line the pan for easy cleanup.
    • Bake just until flaky—avoid drying it out.
    • Let it rest before serving.

    Optional Variations

    Want to customize?

    • Add diced mango to the salsa for sweetness.
    • Sprinkle red pepper flakes for heat.
    • Use coconut rice for a tropical twist.
    • Drizzle honey over salmon before baking for subtle caramelization.
    • Add a dollop of Greek yogurt mixed with lemon for extra creaminess.

    Storage and Meal Prep

    Store leftovers in airtight containers for up to 2 days.

    Keep salsa separate from salmon and rice to maintain freshness.

    Reheat salmon and rice gently in the microwave or oven at low heat. Add fresh salsa just before serving.

    This recipe makes an excellent meal prep option for healthy lunches.


    Why This Recipe Works

    Baking the salmon keeps the cooking simple and hands-off, while the fresh salsa adds brightness and texture. The rice anchors the dish, making it filling and balanced.

    It’s clean, flavorful, and visually beautiful—perfect for both casual dinners and special occasions.


    Oven-Baked Salmon with Avocado Cucumber Salsa and Rice proves that wholesome meals can be exciting and satisfying. With fresh ingredients and simple techniques, you’ll create a dish that feels vibrant, balanced, and restaurant-worthy—right from your own kitchen.

  • Sweet, Savory & Tropical: 5-Ingredient Pineapple Pork with Coconut Rice

    Sweet, Savory & Tropical: 5-Ingredient Pineapple Pork with Coconut Rice

    If you’re craving something bold, comforting, and bursting with tropical flavor—but don’t want a long grocery list—this 5-Ingredient Pineapple Pork with Coconut Rice is your new go-to dinner.

    It’s sweet, savory, slightly tangy, and perfectly creamy all at once. Juicy pork simmers in pineapple until caramelized and tender, then gets spooned over fluffy coconut rice that soaks up every drop of flavor.

    Best of all? You only need five core ingredients to make it happen.


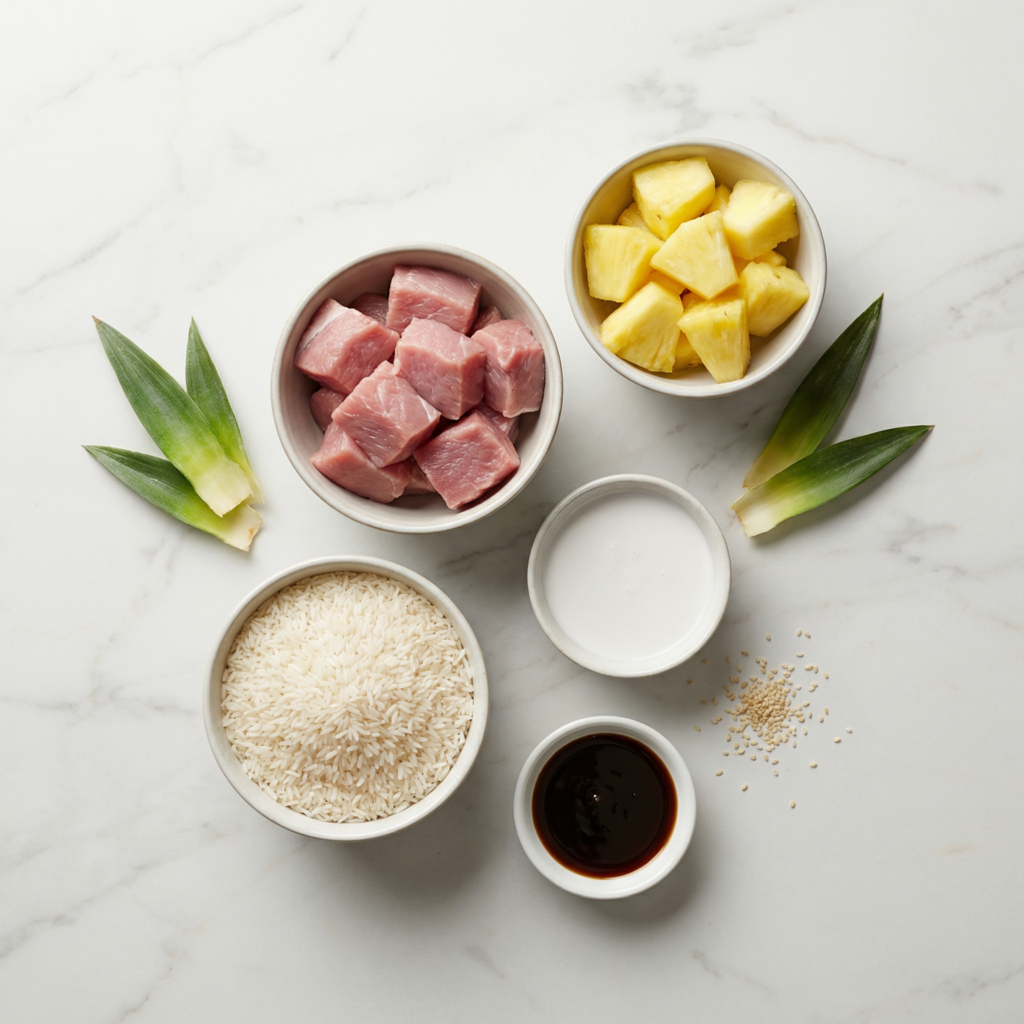
    The 5 Simple Ingredients

    1. 1½ pounds pork tenderloin (or pork shoulder, sliced thin)
    2. 1 (20 oz) can pineapple chunks (with juice)
    3. 1 cup soy sauce
    4. 1 (13.5 oz) can full-fat coconut milk
    5. 1½ cups jasmine rice

    That’s it. No complicated sauces, no specialty items—just pantry staples working together beautifully.


    Why This Recipe Works

    The magic lies in contrast:

    • Salty soy sauce balances sweet pineapple
    • Rich coconut milk softens and rounds out bold flavors
    • Jasmine rice absorbs everything for a complete, satisfying dish

    With minimal ingredients, technique matters most. Let’s walk through it step by step.


    Step 1: Rinse and Start the Coconut Rice

    Begin with the rice so it’s ready when the pork finishes.

    Rinse 1½ cups jasmine rice under cold water until the water runs mostly clear. This removes excess starch and keeps the rice fluffy instead of sticky.

    In a medium saucepan, combine:

    • Rinsed rice
    • 1 can coconut milk
    • ½ cup water (to balance thickness)

    Bring to a gentle boil over medium heat. Once bubbling, reduce to low, cover, and simmer for 15–18 minutes.

    Do not lift the lid while it cooks—steam is essential for even cooking.

    When finished, remove from heat and let sit covered for 5–10 minutes. Fluff with a fork before serving.


    Step 2: Prepare the Pork

    While the rice cooks, slice the pork into thin strips or bite-sized chunks. Thin slicing helps it cook quickly and evenly.

    If using pork tenderloin, trim any silver skin before slicing. If using pork shoulder, cut against the grain for tenderness.

    Pat the pork dry with paper towels. This helps it brown better in the pan.


    Step 3: Sear the Pork

    Heat a large skillet over medium-high heat. You don’t need extra oil if using well-marbled pork, but you can add a light drizzle if desired.

    Add the pork in a single layer. Avoid overcrowding—cook in batches if necessary.

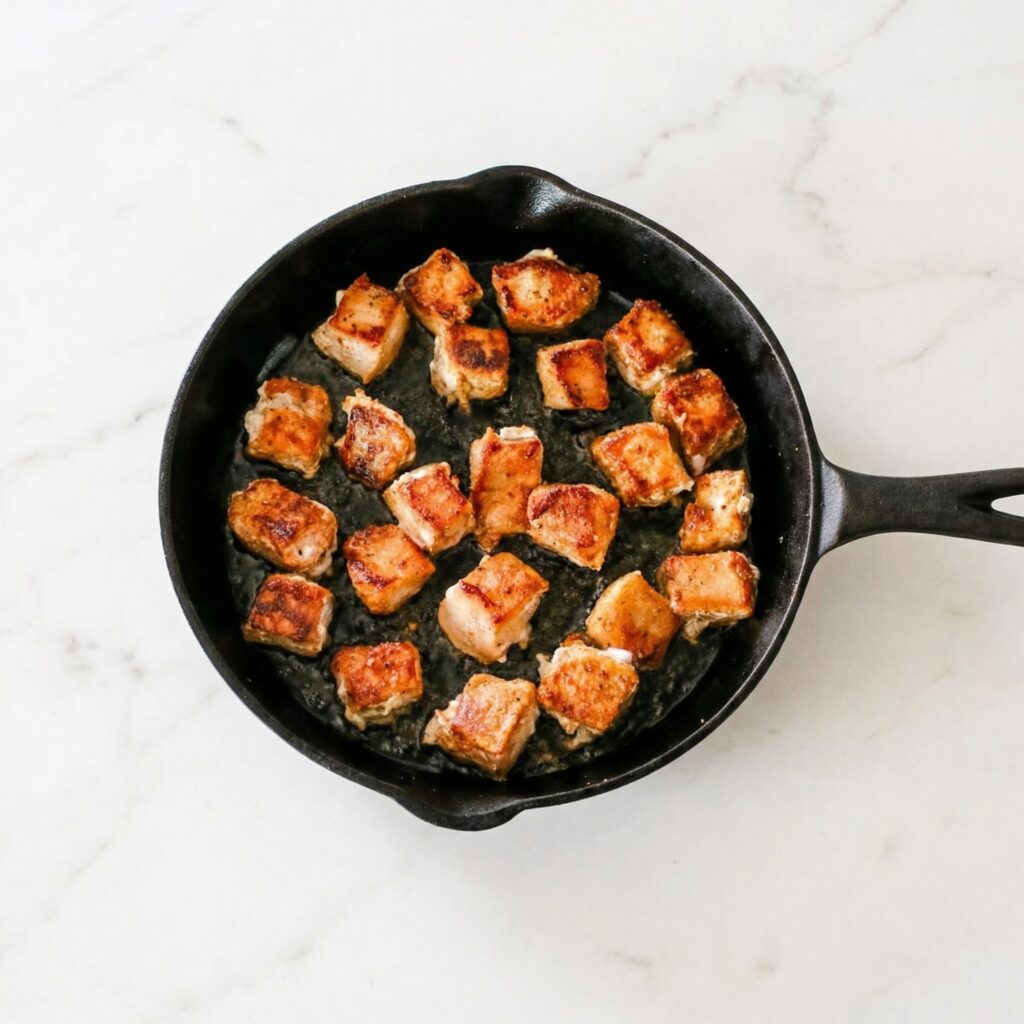
    Let it sear undisturbed for 2–3 minutes to develop color. Then stir and cook another 2–3 minutes until browned on most sides.

    This browning step builds flavor and prevents the dish from tasting flat.


    Step 4: Add Pineapple and Soy Sauce

    Once the pork is nicely browned, pour in:

    • The entire can of pineapple chunks (juice included)
    • 1 cup soy sauce

    Stir to combine and bring to a simmer.

    The pineapple juice and soy sauce create a sweet-savory glaze that thickens as it reduces. The pineapple also begins to caramelize slightly, adding depth and brightness.


    Step 5: Simmer Until Tender and Glossy

    Reduce heat to medium-low and let the mixture simmer uncovered for 10–15 minutes.

    During this time:

    • The sauce reduces and thickens
    • The pork becomes tender
    • The pineapple softens and intensifies in flavor

    Stir occasionally to prevent sticking.

    If the sauce thickens too quickly, add a splash of water. You’re looking for a glossy, slightly syrupy consistency that coats the pork.


    Step 6: Taste and Adjust

    Because soy sauce brands vary in saltiness, give it a quick taste. The pineapple should balance the salt with sweetness.

    If it tastes too salty, add a spoonful of pineapple juice or a splash of water. If you prefer it deeper and saltier, let it reduce another minute or two.

    This simple balance step ensures restaurant-quality flavor.


    Step 7: Assemble the Dish

    Spoon a generous portion of coconut rice into bowls.

    Top with the pineapple pork mixture, making sure to drizzle some of that glossy sauce over the rice.

    The creamy coconut rice absorbs the sweet-savory glaze, creating the perfect bite every time.


    Texture and Flavor Notes

    This dish delivers:

    • Tender, juicy pork
    • Sweet bursts of caramelized pineapple
    • Savory umami depth from soy sauce
    • Creamy, fragrant coconut rice

    The flavors are bold but balanced, making it feel both comforting and exciting.


    Tips for Success

    Use full-fat coconut milk. Light coconut milk won’t give the same creamy texture.

    Don’t skip browning the pork. That golden crust adds essential depth.

    Let the sauce reduce. Thin sauce won’t cling to the meat or rice properly.

    Slice against the grain. This keeps the pork tender.


    Optional Add-Ins (If You Want to Go Beyond 5 Ingredients)

    While this recipe shines as-is, you can elevate it with:

    • A squeeze of lime
    • Fresh cilantro
    • Red pepper flakes for heat
    • Green onions for crunch

    But even without extras, it stands beautifully on its own.


    Storage and Reheating

    Store leftovers in an airtight container in the refrigerator for up to 3 days.

    Reheat gently in a skillet over medium-low heat with a splash of water to loosen the sauce. The microwave works too—just cover to retain moisture.

    This dish reheats surprisingly well and makes excellent next-day lunches.


    Why You’ll Make This Again

    This 5-Ingredient Pineapple Pork with Coconut Rice proves that you don’t need a complicated ingredient list to create bold, satisfying meals. It’s weeknight-friendly, budget-conscious, and feels like a mini tropical escape in a bowl.

    The contrast between creamy rice and glossy sweet-savory pork makes every bite layered and exciting. It’s comforting enough for family dinner yet impressive enough to serve guests.

    When you want something flavorful, simple, and deeply satisfying, this recipe delivers—no extra fuss required.

    One skillet. One saucepan. Five ingredients. Big flavor.

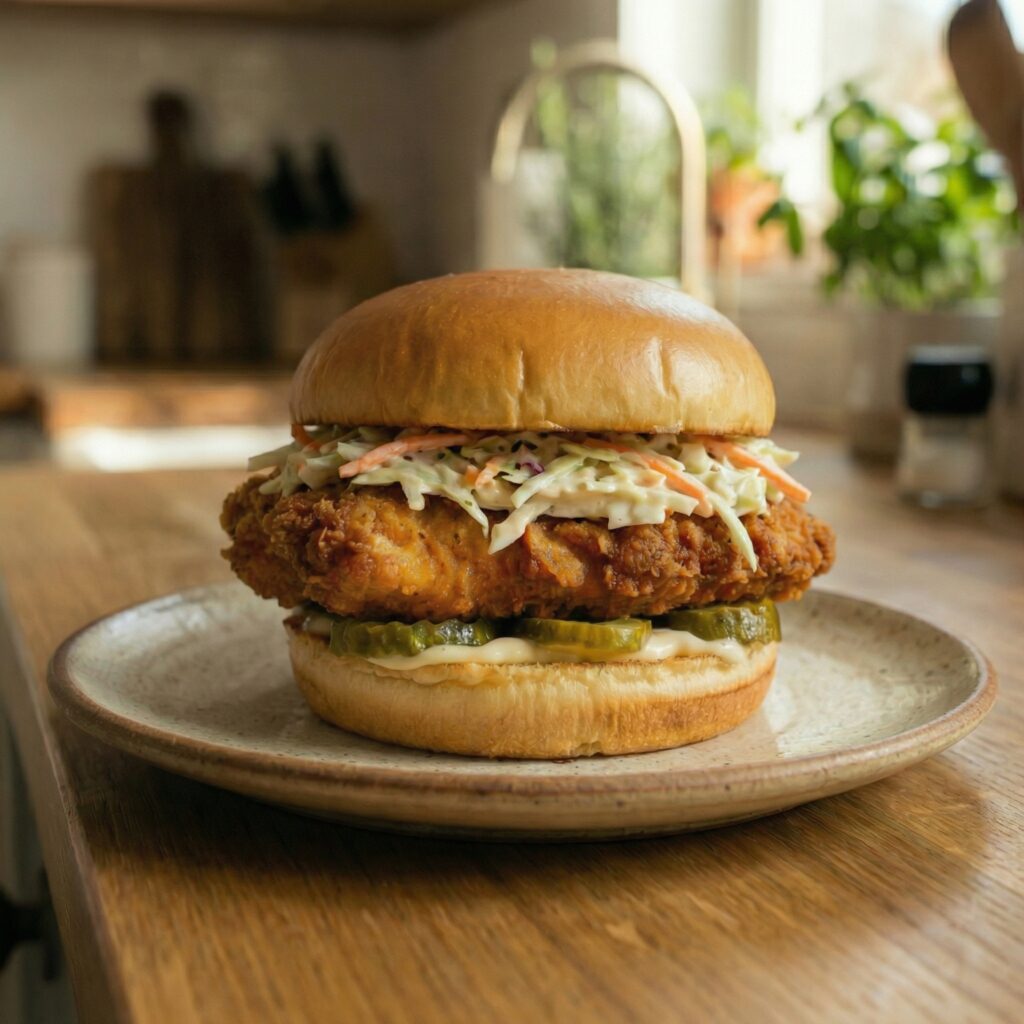
  • The Ultimate Fried Chicken Sandwich: Crispy, Juicy, and Worth the Mess

    The Ultimate Fried Chicken Sandwich: Crispy, Juicy, and Worth the Mess

    Few things hit harder than a perfectly made fried chicken sandwich. We’re talking shatteringly crisp coating, tender and juicy chicken, a soft toasted bun, and just enough sauce to bring everything together.

    It’s indulgent, comforting, and incredibly satisfying—and the best part is that you can make a restaurant-quality version right at home.

    This step-by-step guide walks you through everything, from seasoning the chicken to building the sandwich so every bite delivers crunch, flavor, and balance. Whether you’re cooking for friends or treating yourself, this fried chicken sandwich is a guaranteed favorite.


    Why This Fried Chicken Sandwich Works

    A great fried chicken sandwich is all about contrast:

    • Crispy exterior paired with juicy chicken
    • Savory seasoning balanced with a touch of sweetness
    • Soft buns against crunchy coating

    This recipe focuses on technique just as much as ingredients, ensuring consistent results even if it’s your first time frying.


    Ingredients You’ll Need

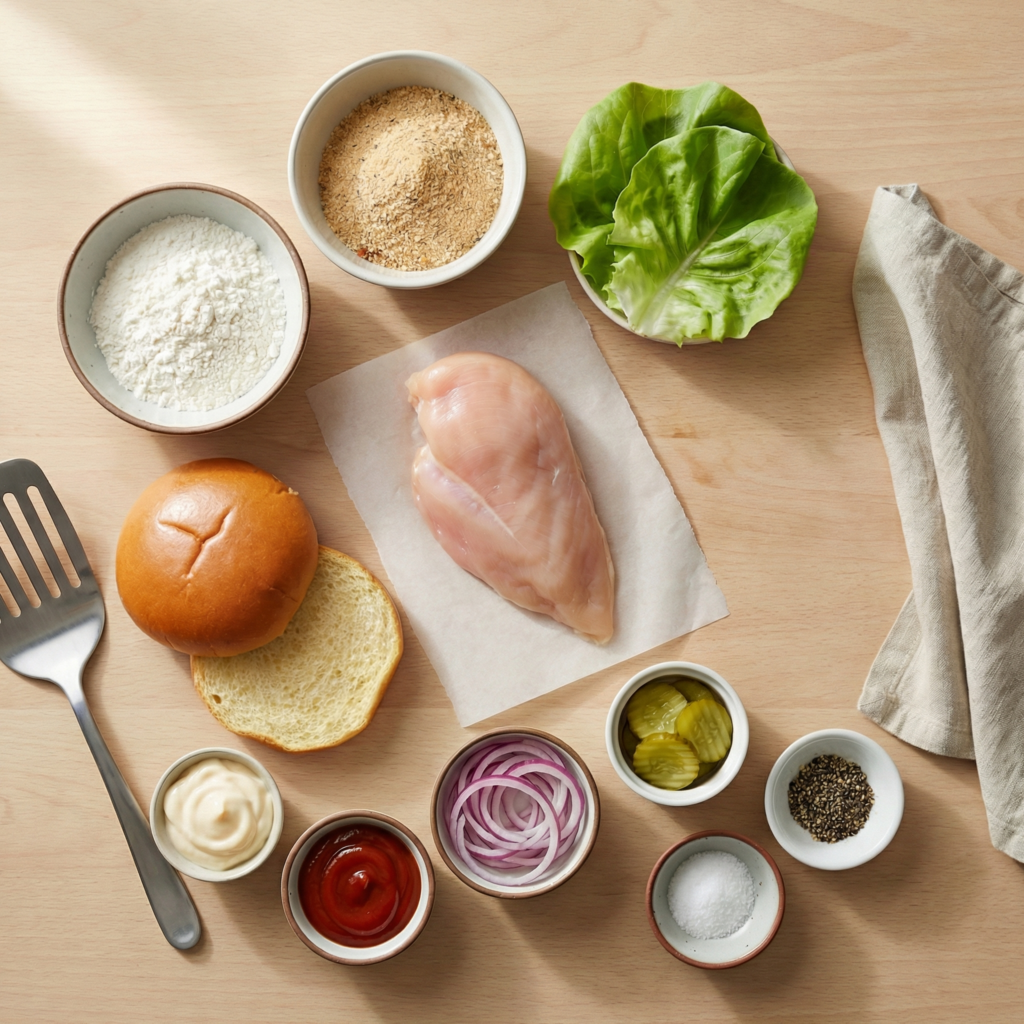
    Gather everything before you start—organization makes frying much easier.

    For the chicken:

    • 2 large boneless, skinless chicken breasts
    • 1 cup buttermilk
    • 1 teaspoon salt
    • ½ teaspoon black pepper
    • ½ teaspoon paprika
    • ½ teaspoon garlic powder

    For the breading:

    • 1 ½ cups all-purpose flour
    • 1 teaspoon salt
    • 1 teaspoon paprika
    • ½ teaspoon cayenne pepper (optional)
    • ½ teaspoon onion powder

    For frying:

    • Vegetable or canola oil

    For assembling:

    • 4 brioche buns
    • Butter for toasting
    • Dill pickles
    • Lettuce (optional)
    • Mayo or spicy sauce of choice

    Step-by-Step Instructions

    Step 1: Prepare the Chicken

    Slice each chicken breast horizontally to create thinner cutlets. This helps the chicken cook evenly and keeps the sandwich from being too bulky.

    Place the chicken in a bowl and add buttermilk, salt, pepper, paprika, and garlic powder. Mix well, cover, and refrigerate for at least 30 minutes—or up to overnight for deeper flavor.


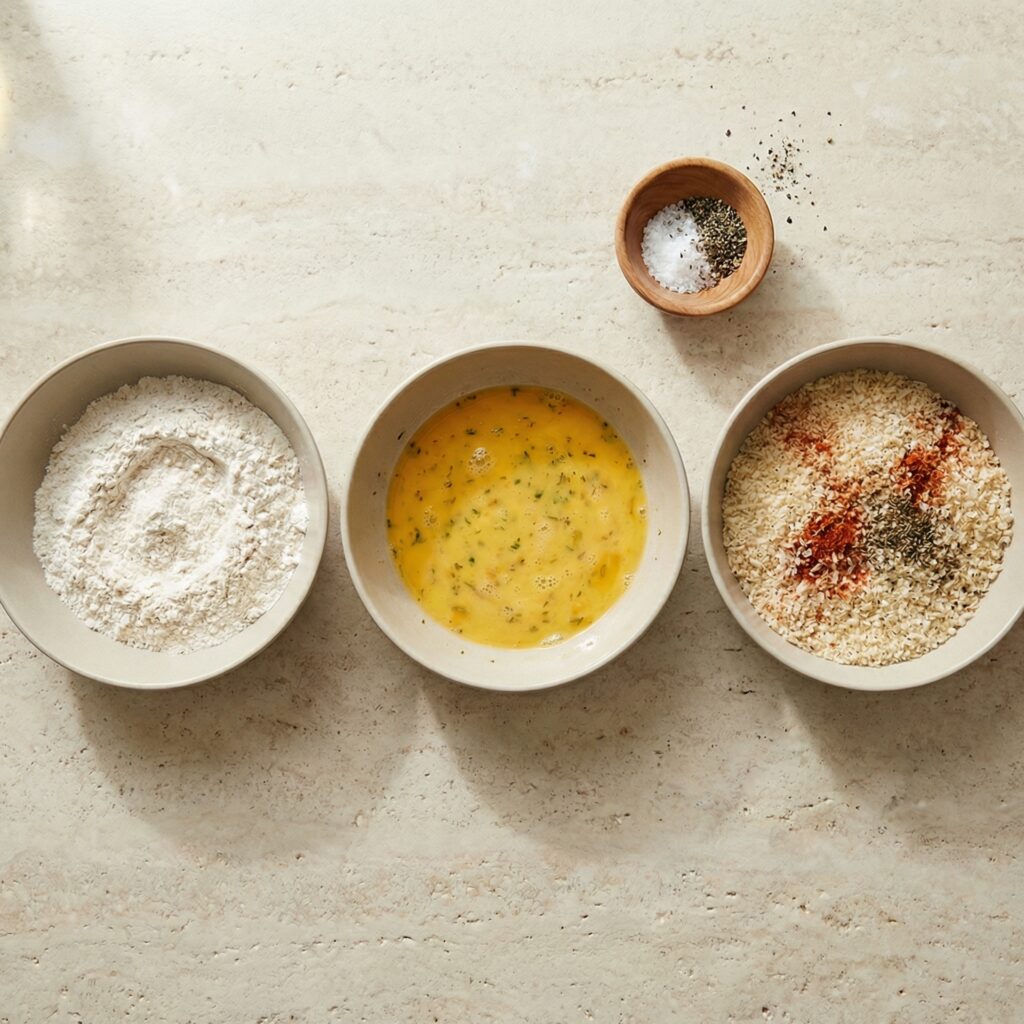
    Step 2: Set Up the Breading Station

    In a shallow bowl, whisk together the flour, salt, paprika, cayenne, and onion powder.

    Remove the chicken from the buttermilk, allowing excess to drip off, then dredge each piece thoroughly in the seasoned flour. Press firmly so the coating sticks well.

    For extra crunch, dip the chicken back into the buttermilk and then into the flour a second time.


    Step 3: Heat the Oil

    Pour oil into a deep skillet or heavy-bottomed pan until it reaches about 1½ inches deep. Heat to 175°C / 350°F.

    If you don’t have a thermometer, test the oil by dropping in a small pinch of flour—it should sizzle immediately.


    Step 4: Fry the Chicken

    Carefully place the breaded chicken into the hot oil, working in batches to avoid overcrowding. Fry for 5–7 minutes per side, turning once, until golden brown and fully cooked.

    Transfer to a wire rack or paper towel-lined plate to drain excess oil.


    Step 5: Toast the Buns

    While the chicken rests, butter the cut sides of the brioche buns and toast them in a skillet until golden brown. Toasting adds flavor and keeps the buns from getting soggy.


    Step 6: Build the Sandwich

    Start with the bottom bun and spread a generous layer of mayo or sauce. Add lettuce if using, followed by the crispy fried chicken. Top with dill pickles for brightness and crunch.

    Finish with the top bun and press gently to set the sandwich.


    Step 7: Serve Hot

    Serve immediately while the chicken is at its crispiest. Pair with fries, coleslaw, or a simple salad for a complete meal.


    Tips for Extra-Crispy Fried Chicken

    • Don’t rush the marinade—buttermilk tenderizes the chicken
    • Double dredge for thicker, crunchier coating
    • Maintain oil temperature for even frying
    • Rest after frying to lock in juices

    These small steps make a huge difference.


    Variations to Try

    Once you master the classic, experiment:

    • Add hot honey for a sweet-spicy twist
    • Use spicy mayo or chipotle sauce
    • Swap lettuce for crunchy slaw
    • Add melted cheese for an indulgent upgrade

    The fried chicken sandwich is endlessly customizable.


    Final Thoughts

    This fried chicken sandwich recipe proves you don’t need a deep fryer or fast-food drive-thru to enjoy an incredible sandwich.

    With the right seasoning, proper frying technique, and thoughtful assembly, you get a sandwich that’s crispy, juicy, and completely irresistible.

    Once you make it at home, it’s hard to go back to anything else.

  • Smash Burger Tacos: The Ultimate Crispy Smashburger Taco Recipe Everyone Is Obsessed With

    Smash Burger Tacos: The Ultimate Crispy Smashburger Taco Recipe Everyone Is Obsessed With

    If you love juicy smash burgers and crispy tacos, this viral Smash Burger Tacos recipe combines both into one irresistible dish.

    Featuring seasoned ground beef smashed directly onto tortillas, crispy seared edges, melted cheese, and fresh toppings, these easy smash burger tacos deliver bold flavor in under 30 minutes. Perfect for weeknight dinners, game-day meals, or casual entertaining, this recipe has quickly become one of the most popular TikTok smash burger taco recipes for good reason.

    This step-by-step guide shows you exactly how to make restaurant-style smash burger tacos at home with simple ingredients and perfect results every time.


    Why You’ll Love These Smash Burger Tacos

    This smashburger taco recipe combines the best textures and flavors—crispy beef, soft tortillas, melted cheese, and fresh toppings.

    Reasons this recipe stands out:

    • Quick and easy 30-minute meal
    • Crispy smash burger edges for maximum flavor
    • Family-friendly and customizable
    • Perfect for parties, cookouts, or taco nights
    • Minimal ingredients with big flavor payoff

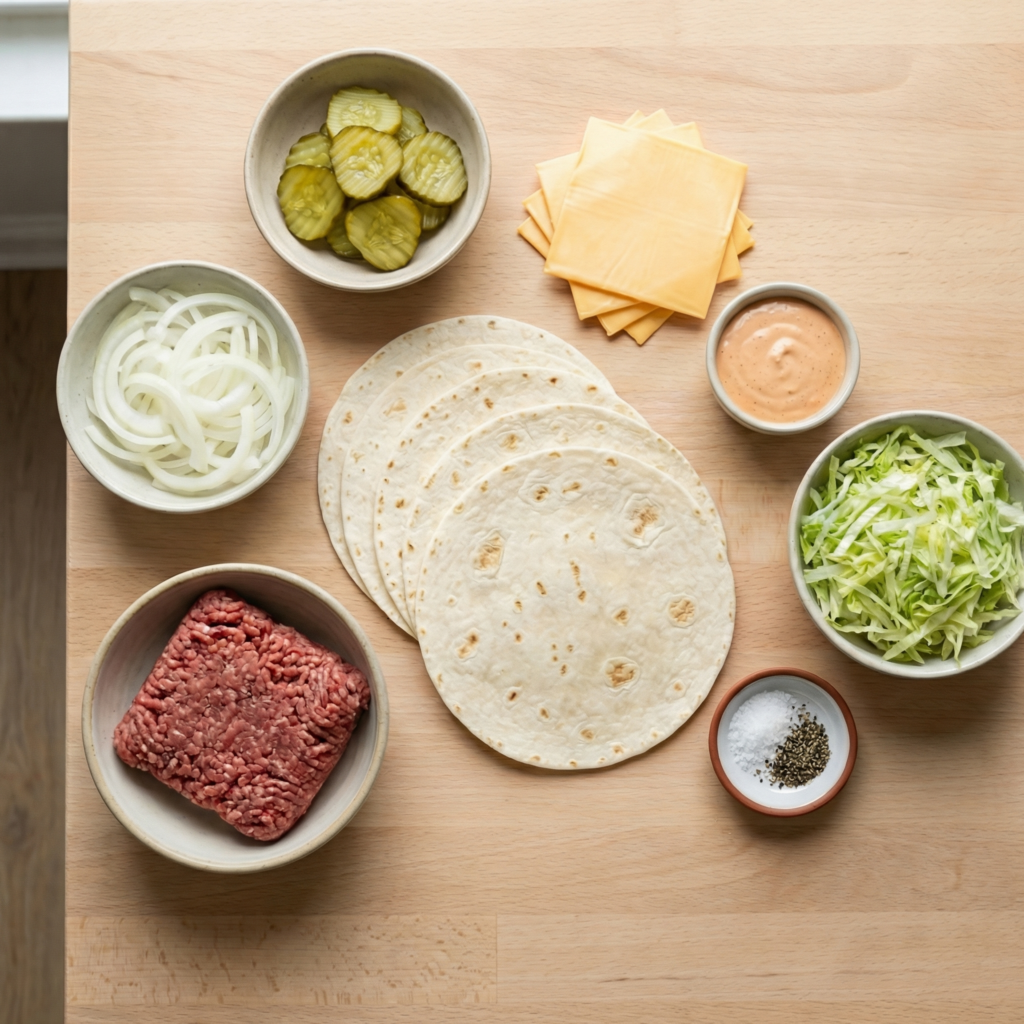
    Ingredients for Smash Burger Tacos

    Using simple ingredients makes this recipe fast and accessible.

    Main Ingredients

    • 1 pound ground beef (80/20 recommended)
    • 8 small flour tortillas
    • Salt and black pepper
    • 8 slices American cheese or cheddar cheese
    • 1 tablespoon cooking oil (if needed)

    Classic Burger Toppings

    • Shredded lettuce
    • Diced tomatoes
    • Pickles
    • Sliced onions

    Burger Sauce (Optional but Recommended)

    • ½ cup mayonnaise
    • 2 tablespoons ketchup
    • 1 tablespoon mustard
    • 1 tablespoon pickle relish
    • ½ teaspoon garlic powder

    How to Make Smash Burger Tacos (Step-by-Step)

    Step 1: Prepare the Burger Sauce

    In a small bowl, mix mayonnaise, ketchup, mustard, relish, and garlic powder until smooth. Refrigerate while preparing the tacos so the flavors blend together. This simple homemade sauce adds the classic burger taco flavor.


    Step 2: Divide the Ground Beef

    Divide the ground beef into 8 equal portions (about 2 ounces each). Roll lightly into balls without packing too tightly to keep the burgers tender.


    Step 3: Press Beef onto Tortillas

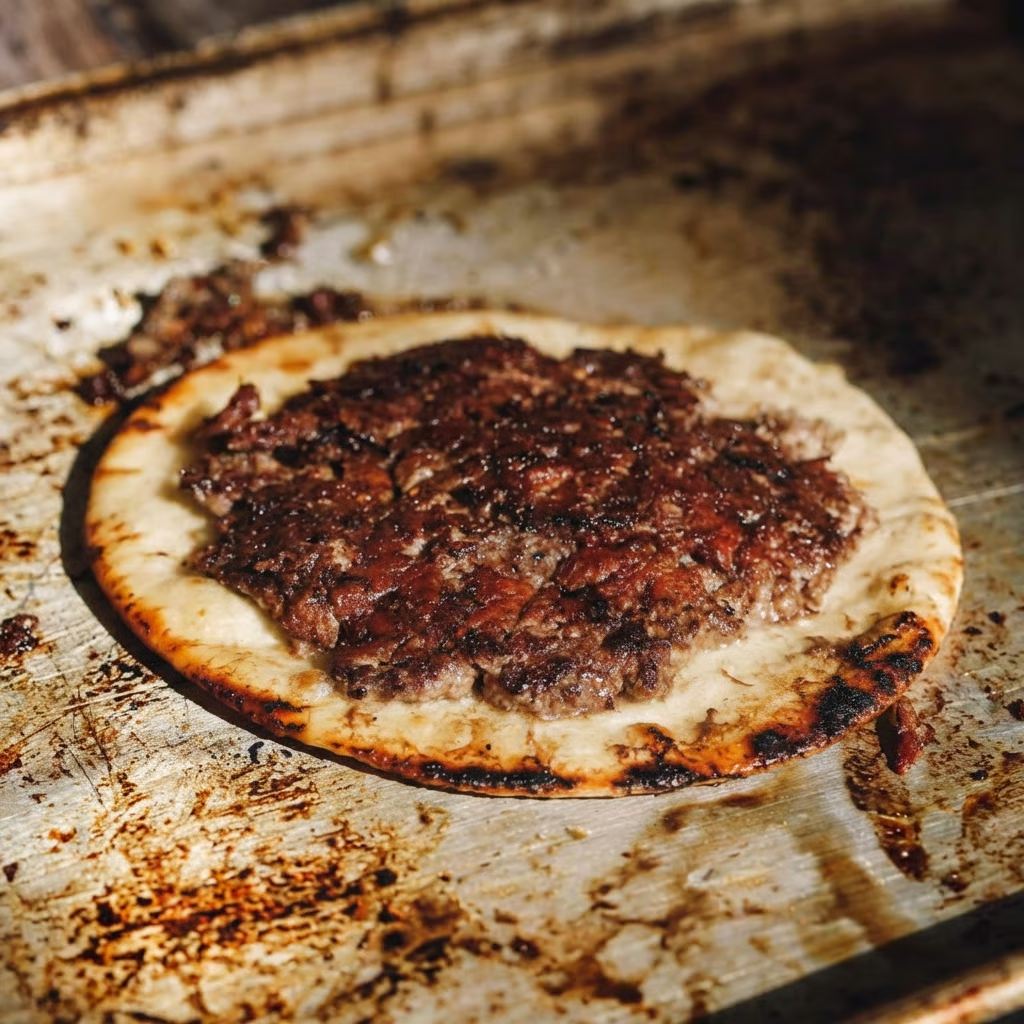
    Place each tortilla flat on a clean surface. Spread one portion of ground beef evenly across one side of the tortilla, pressing it thin so it covers most of the surface. Season lightly with salt and pepper.

    This step is key to achieving the signature crispy smash burger taco crust.


    Step 4: Heat the Skillet

    Heat a large cast-iron skillet or flat-top griddle over medium-high heat. If your pan is well-seasoned, oil may not be necessary, but lightly greasing the surface can help prevent sticking.


    Step 5: Cook the Beef Side First

    Place each tortilla beef-side down onto the hot skillet. Press gently with a spatula to ensure even contact with the pan. Cook for about 2–3 minutes until the beef develops a crispy brown crust.


    Step 6: Flip and Add Cheese

    Carefully flip the tortilla so the tortilla side touches the pan. Immediately place a slice of cheese on top of the cooked beef. Cook for another 1–2 minutes until the tortilla becomes lightly golden and the cheese melts.


    Step 7: Remove and Add Toppings

    Transfer the cooked smash burger taco to a plate. Add shredded lettuce, diced tomatoes, onions, pickles, and a drizzle of the prepared burger sauce.


    Step 8: Fold and Serve

    Fold the taco in half and serve immediately while hot and crispy. Repeat with remaining tortillas and beef portions.


    Pro Tips for the Best Smash Burger Tacos

    • Use 80/20 ground beef for the best flavor and crisp edges.
    • Spread the beef thinly to create a proper smashburger crust.
    • Cook on high heat for better caramelization.
    • Add cheese immediately after flipping for perfect melting.
    • Serve immediately to maintain crispiness.

    Easy Smash Burger Taco Variations

    This burger taco recipe is easy to customize depending on flavor preferences.

    Popular variations include:

    • Bacon Smash Burger Tacos: Add crispy bacon strips before folding.
    • Spicy Smash Tacos: Add jalapeños or spicy mayo.
    • BBQ Burger Tacos: Drizzle barbecue sauce instead of burger sauce.
    • Double Cheeseburger Tacos: Add extra cheese slices.
    • Low-Carb Version: Use low-carb tortillas.

    Serving Suggestions

    These crispy smash burger tacos pair perfectly with:

    • French fries
    • Onion rings
    • Coleslaw
    • Pickle spears
    • Potato wedges
    • Classic milkshakes

    They also make excellent party foods when served in smaller taco portions for gatherings.


    Storage and Reheating Tips

    Smash burger tacos are best eaten fresh, but leftovers can be stored in an airtight container in the refrigerator for up to 2 days. Reheat in a skillet over medium heat to restore crispness. Avoid microwaving if possible, as it softens the tortilla.

    For meal prep, prepare toppings and sauce ahead of time, then cook tacos fresh for the best texture.


    Frequently Asked Questions

    Can I use corn tortillas instead of flour tortillas?
    Yes, but flour tortillas hold the beef better and provide the classic smash burger taco texture.

    What cheese works best for smash burger tacos?
    American cheese melts smoothly and gives the classic burger flavor, but cheddar, Monterey Jack, or pepper jack also work well.

    Why are my smash burger tacos not crispy?
    The pan may not be hot enough, or the beef layer may be too thick. Ensure high heat and press the beef thinly onto the tortilla.


    Final Thoughts

    These Smash Burger Tacos are the ultimate fusion comfort food, combining the crispy edges of a smashburger with the convenience of handheld tacos.

    With juicy seasoned beef, melted cheese, fresh toppings, and creamy burger sauce wrapped in a lightly toasted tortilla, this viral recipe delivers bold flavor with minimal effort.

    Whether you’re planning taco night, a casual family dinner, or a game-day spread, this easy smash burger tacos recipe is guaranteed to become a repeat favorite thanks to its simplicity, crunch, and irresistible burger-inspired taste.

  • Classic Chicken Cacciatore: The Ultimate Italian Hunter’s Chicken Recipe

    Classic Chicken Cacciatore: The Ultimate Italian Hunter’s Chicken Recipe

    Why You’ll Love This Chicken Cacciatore Recipe

    Chicken Cacciatore, also known as Italian hunter’s chicken, is beloved for its rustic flavors and simple preparation.

    Slow simmering allows the chicken to absorb the savory tomato and herb sauce, creating a comforting meal that tastes even better the next day.

    Reasons this recipe stands out:

    • Classic Italian comfort food
    • One-pan meal with simple ingredients
    • Perfect for meal prep and leftovers
    • Rich tomato garlic herb sauce
    • Beginner-friendly step-by-step method

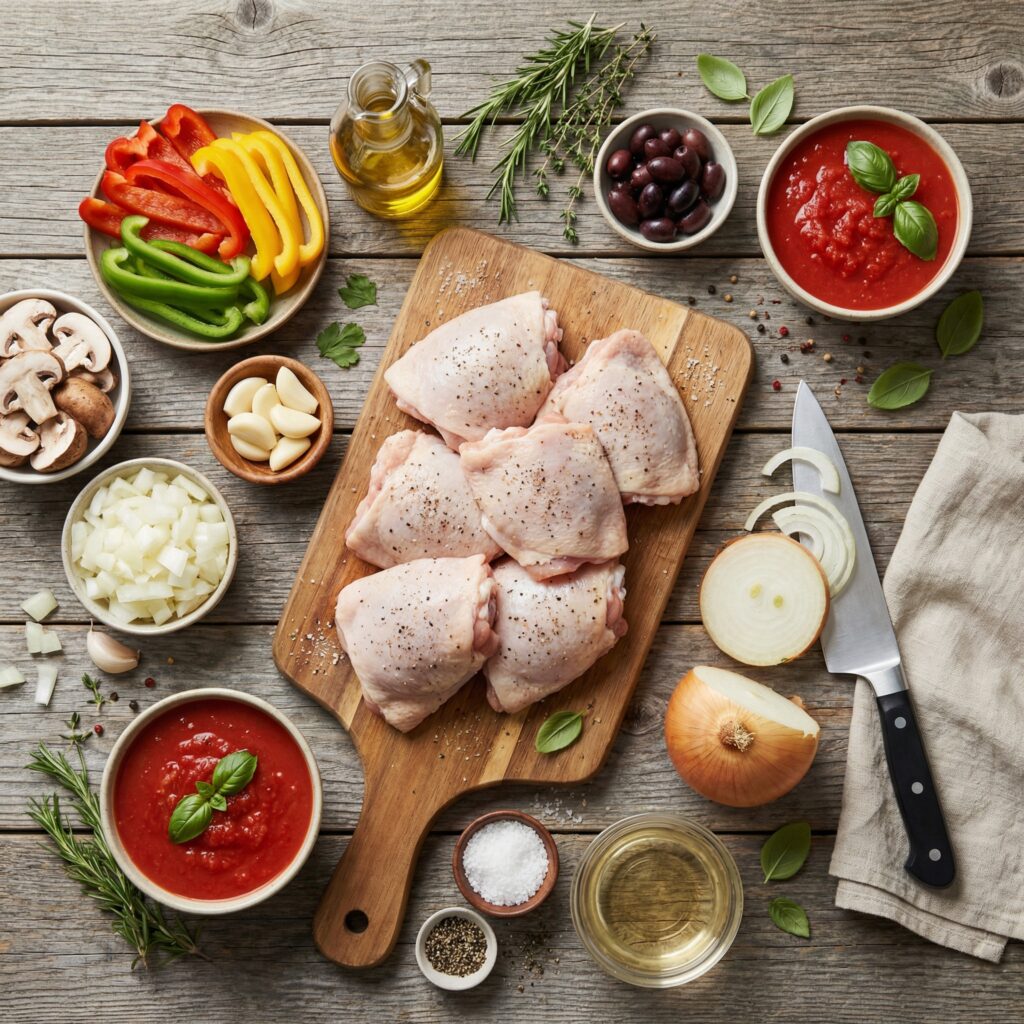
    Ingredients for Chicken Cacciatore

    Using fresh herbs and quality tomatoes creates the best flavor for this traditional Chicken Cacciatore recipe.

    Main Ingredients

    • 6 bone-in, skin-on chicken thighs (or mixed chicken pieces)
    • Salt and black pepper
    • 2 tablespoons olive oil
    • 1 medium onion, sliced
    • 1 red bell pepper, sliced
    • 1 green bell pepper, sliced
    • 4 cloves garlic, minced

    Sauce

    • 1 can (28 oz) crushed tomatoes
    • ½ cup chicken broth
    • ½ cup dry red wine (optional but recommended)
    • 1 teaspoon dried oregano
    • 1 teaspoon dried basil
    • ½ teaspoon red pepper flakes (optional)
    • 1 bay leaf

    Finishing

    • Fresh parsley or basil for garnish

    How to Make Chicken Cacciatore (Step-by-Step)

    Step 1: Season the Chicken

    Pat the chicken pieces dry with paper towels and season generously with salt and black pepper. Proper seasoning before cooking ensures deeper flavor throughout the dish.


    Step 2: Sear the Chicken

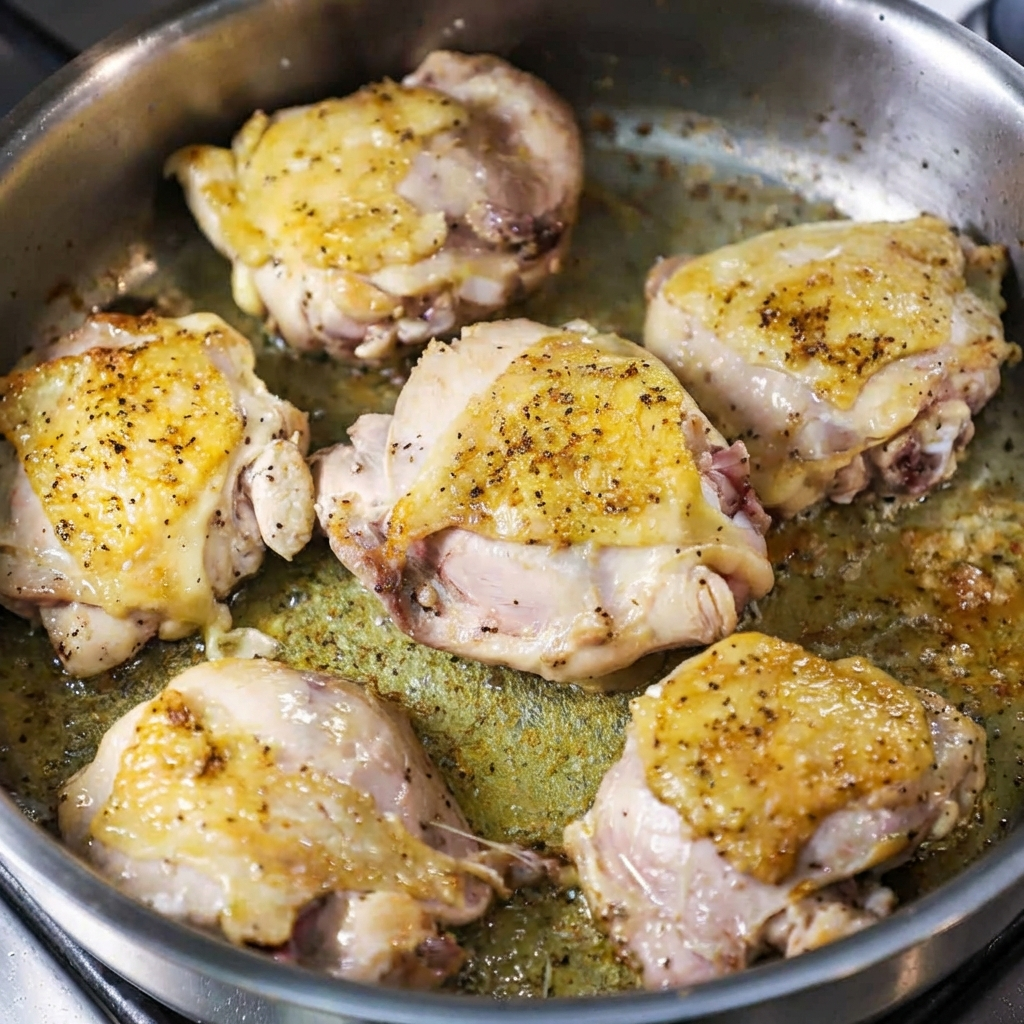
    Heat olive oil in a large skillet or Dutch oven over medium-high heat. Place the chicken skin-side down and sear for 4–5 minutes until golden brown. Flip and cook another 3–4 minutes. Remove the chicken and set aside.

    Searing locks in flavor and helps build the base of the sauce.


    Step 3: Sauté the Vegetables

    In the same pan, add sliced onions and bell peppers. Cook for 5 minutes until softened. Stir in minced garlic and cook for another 30 seconds until fragrant.

    The browned bits left from the chicken add extra flavor to the vegetables.


    Step 4: Deglaze the Pan

    Pour in the red wine and scrape the bottom of the pan to release flavorful browned bits. Let the wine simmer for 2–3 minutes to cook off the alcohol while concentrating flavor.

    If not using wine, substitute additional chicken broth.


    Step 5: Add the Tomato Sauce

    Stir in crushed tomatoes, chicken broth, oregano, basil, red pepper flakes, and bay leaf. Mix well and bring the sauce to a gentle simmer.


    Step 6: Return the Chicken to the Pan

    Place the seared chicken pieces back into the sauce, skin-side up. Reduce heat to low, cover, and simmer for 35–40 minutes, or until the chicken is fully cooked and tender.

    Slow simmering allows the chicken to absorb the rich tomato herb flavors.


    Step 7: Adjust Seasoning

    Taste the sauce and adjust salt and pepper as needed. If the sauce is too thick, add a small splash of broth. For a thicker consistency, simmer uncovered for a few extra minutes.


    Step 8: Garnish and Serve

    Remove the bay leaf and garnish with freshly chopped parsley or basil. Serve hot over pasta, mashed potatoes, polenta, or crusty Italian bread for a complete classic Italian dinner.


    Pro Tips for Perfect Chicken Cacciatore

    • Use bone-in chicken for deeper flavor.
    • Brown the chicken well before simmering.
    • Allow the sauce to simmer gently, not boil.
    • Use quality canned tomatoes for richer taste.
    • Let the dish rest 5 minutes before serving for best flavor.

    Serving Suggestions

    This homemade Chicken Cacciatore pairs beautifully with:

    • Spaghetti or fettuccine
    • Creamy polenta
    • Garlic bread
    • Roasted vegetables
    • Simple green salad

    The rich tomato sauce also works perfectly spooned over rice or rustic country bread.


    Make-Ahead and Storage Tips

    Chicken Cacciatore tastes even better the next day as the flavors continue to develop.

    • Refrigerator: Store in an airtight container for up to 4 days
    • Freezer: Freeze portions for up to 2 months
    • Reheat: Warm gently on the stovetop with a splash of broth to loosen the sauce

    This makes it an excellent meal prep Italian chicken recipe for busy weeks.


    Easy Recipe Variations

    • Mushroom Chicken Cacciatore: Add sliced mushrooms when sautéing vegetables.
    • Slow Cooker Version: Transfer everything to a slow cooker and cook on low for 6–7 hours.
    • Boneless Chicken Option: Use boneless thighs for faster cooking.
    • Spicy Cacciatore: Increase red pepper flakes for extra heat.

    Frequently Asked Questions

    What does “Cacciatore” mean?
    “Cacciatore” means “hunter-style” in Italian, referring to rustic dishes cooked with tomatoes, herbs, onions, and peppers.

    Can I make Chicken Cacciatore without wine?
    Yes, simply substitute chicken broth for the wine while maintaining great flavor.

    What is the best cut of chicken for Chicken Cacciatore?
    Bone-in thighs are preferred because they remain juicy and flavorful during simmering.


    Final Thoughts

    This Classic Chicken Cacciatore recipe brings authentic Italian comfort food straight to your kitchen with minimal effort and maximum flavor.

    Tender braised chicken simmered in a rich tomato herb sauce creates a satisfying meal perfect for weeknight dinners or special gatherings.

    Once you try this easy homemade Chicken Cacciatore, it’s sure to become a staple recipe thanks to its hearty ingredients, simple cooking method, and timeless Italian taste.

  • Crispy Pork Schnitzel Recipe: Easy German-Style Classic in 30 Minutes

    Crispy Pork Schnitzel Recipe: Easy German-Style Classic in 30 Minutes

    If you’re craving a crispy pork schnitzel that’s golden on the outside, juicy on the inside, and unbelievably easy to make at home, you’re in the right place.

    This authentic German pork schnitzel recipe uses simple pantry ingredients and delivers restaurant-quality results in under 30 minutes.

    Perfect for busy weeknights or a comforting weekend meal, this easy pork schnitzel pairs beautifully with potatoes, salad, or spaetzle—and it’s a guaranteed crowd-pleaser.


    What Is Pork Schnitzel?

    Pork schnitzel is a breaded pork cutlet, pounded thin, coated in breadcrumbs, and pan-fried until crispy.

    Originating from Germany and Austria, this dish is known for its light, crunchy crust and tender meat.

    Ingredients for Crispy Pork Schnitzel

    • 4 boneless pork chops (center-cut or pork loin)
    • 1 cup all-purpose flour
    • 2 large eggs
    • 1½ cups breadcrumbs (panko or traditional)
    • 1 teaspoon salt
    • ½ teaspoon black pepper
    • ½ teaspoon paprika (optional)
    • Vegetable oil or canola oil, for frying
    • Lemon wedges, for serving

    Optional additions for extra flavor:

    • Garlic powder
    • Onion powder
    • Fresh parsley, chopped

    How to Make Pork Schnitzel

    Step 1: Pound the Pork Cutlets

    Place the pork chops between two pieces of plastic wrap or parchment paper. Using a meat mallet, pound them to about ¼-inch thickness. This ensures even cooking and ultra-tender schnitzel.


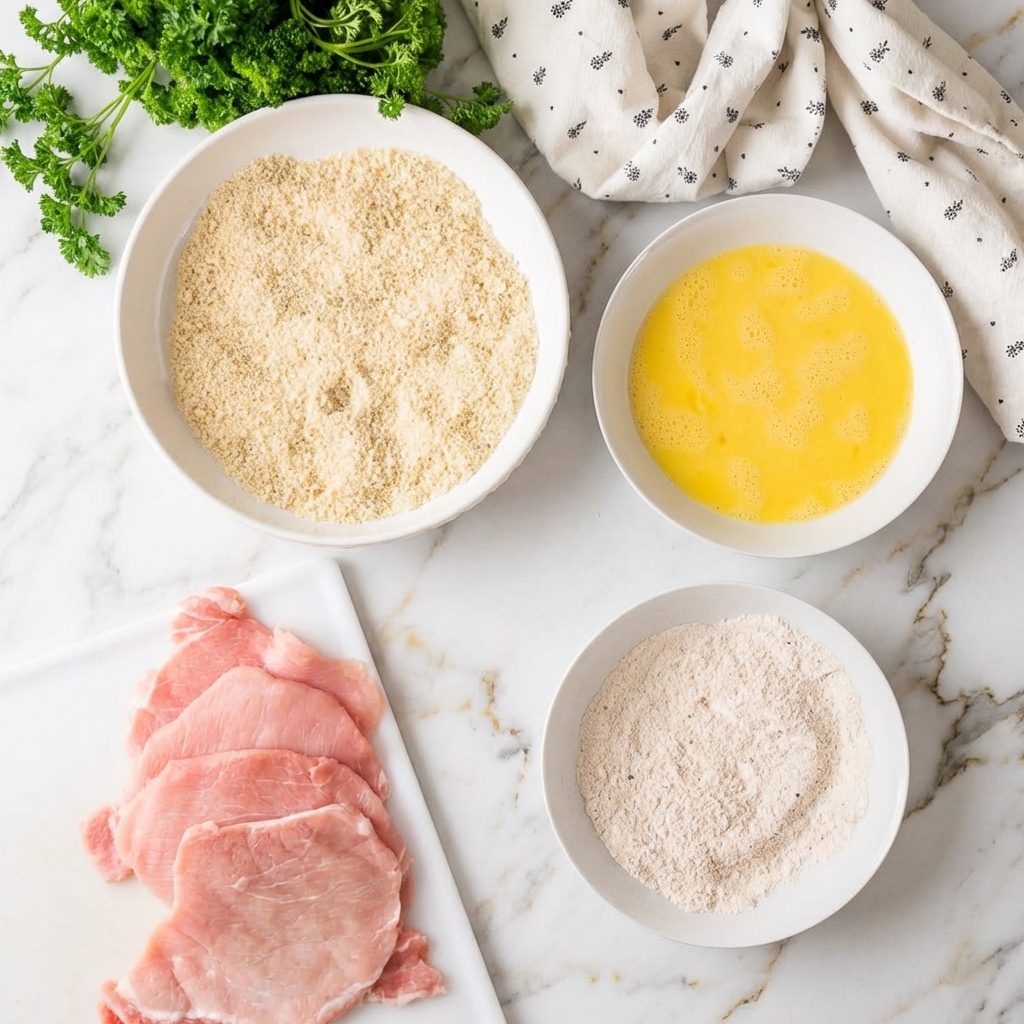
    Step 2: Set Up the Breading Station

    Prepare three shallow bowls:

    1. Flour seasoned with salt, pepper, and paprika
    2. Beaten eggs
    3. Breadcrumbs

    Step 3: Bread the Pork Schnitzel

    Dredge each pork cutlet in flour, shaking off excess. Dip into the eggs, then coat thoroughly in breadcrumbs. Press gently so the crumbs stick.

    For extra crunch, use panko breadcrumbs.


    Step 4: Heat the Oil

    Heat about ½ inch of oil in a large skillet over medium-high heat. The oil is ready when breadcrumbs sizzle immediately upon contact.


    Step 5: Fry Until Golden and Crispy

    Carefully place the pork schnitzel in the hot oil. Fry for 2–3 minutes per side, or until golden brown and cooked through.

    Do not overcrowd the pan.

    Step 6: Serve Immediately

    Serve hot with lemon wedges. The squeeze of fresh lemon enhances the crispy coating and balances the richness.


    Best Side Dishes for Pork Schnitzel

    • German potato salad
    • Mashed potatoes or fries
    • Cucumber salad
    • Spaetzle
    • Simple green salad

    Tips for the Best Pork Schnitzel

    • Don’t press the schnitzel while frying—it releases juices and ruins crispiness
    • Use neutral oil with a high smoke point
    • Serve immediately for maximum crunch
    • Avoid thick pork chops—they won’t cook evenly

    Frequently Asked Questions

    Can I bake pork schnitzel instead of frying?

    Yes! Bake at 425°F (220°C) for 18–22 minutes, flipping halfway.

    It won’t be as crispy as pan-fried but still delicious.

    Can I make pork schnitzel ahead of time?

    Schnitzel is best fresh, but you can bread the pork up to 8 hours ahead and refrigerate until ready to fry.


    Final Thoughts

    This crispy pork schnitzel recipe is everything you want in a classic comfort dish—fast, flavorful, and irresistibly crunchy.

    Whether you’re new to German cooking or just want a foolproof easy pork schnitzel recipe, this one delivers every time.