Tag: Easy Meals

  • Stuffed to Perfection: How to Make Sausage Manicotti

    Stuffed to Perfection: How to Make Sausage Manicotti

    There’s nothing quite like a dish that combines tender pasta, savory sausage, creamy cheese, and rich tomato sauce.

    Sausage manicotti is one of those comfort-food classics that feels indulgent but is surprisingly approachable to make at home.

    With tubular pasta stuffed with a flavorful sausage and cheese mixture, topped with marinara sauce and melted mozzarella, this dish is perfect for family dinners, holiday gatherings, or any time you want a hearty, satisfying meal.

    Follow this step-by-step guide, and you’ll create manicotti that’s cheesy, savory, and irresistible.
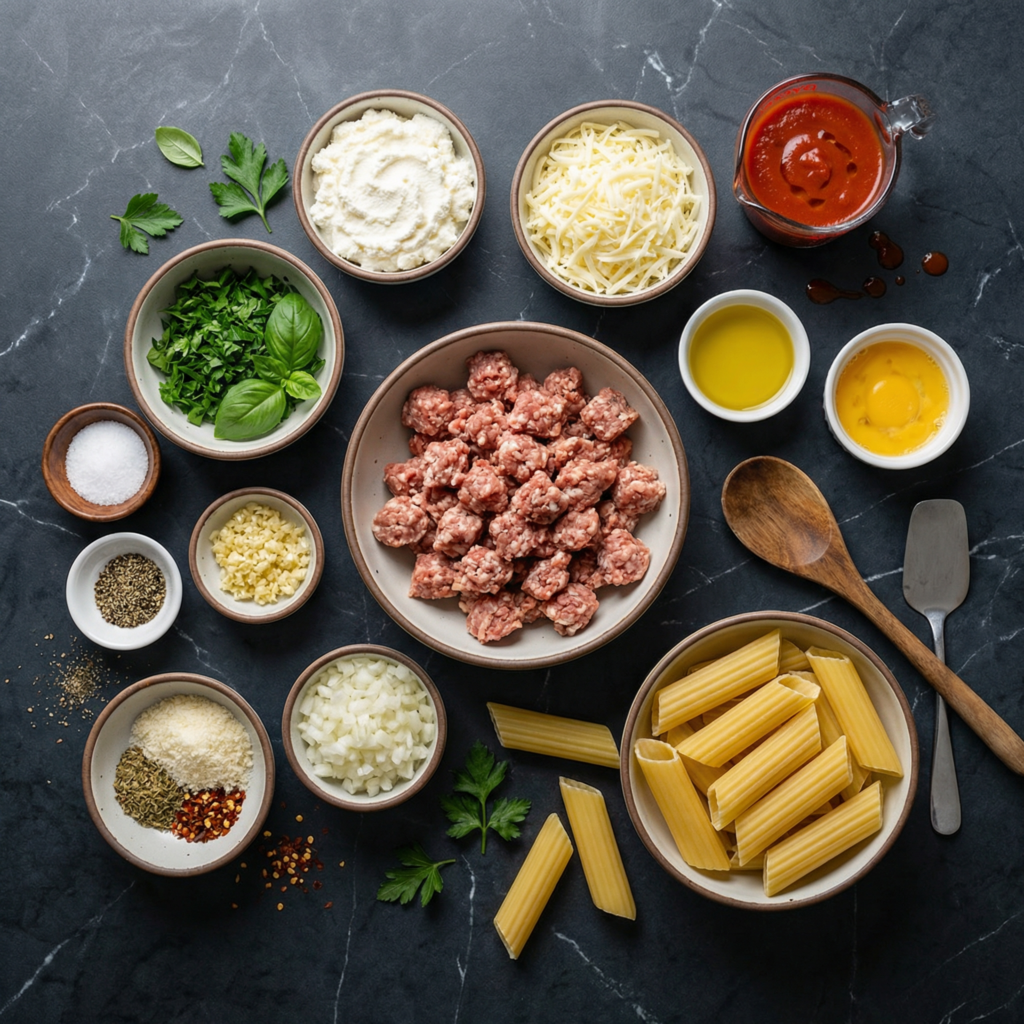

    Ingredients You’ll Need

    Gather all ingredients before you begin to ensure a smooth cooking process.

    For the pasta:

    • 8 manicotti shells (uncooked or boiled according to package instructions)

    For the sausage filling:

    • 1 pound (450g) Italian sausage (mild or spicy, removed from casings)
    • 1 small onion, finely chopped
    • 2 cloves garlic, minced
    • 1 ½ cups ricotta cheese
    • 1 cup shredded mozzarella cheese
    • ½ cup grated Parmesan cheese
    • 1 large egg
    • 1 teaspoon dried Italian seasoning
    • Salt and black pepper, to taste
    • Optional: 2 tablespoons fresh parsley, chopped

    For the sauce and topping:

    • 3 cups marinara sauce (homemade or store-bought)
    • 1 cup shredded mozzarella cheese
    • ¼ cup grated Parmesan cheese
    • Fresh basil or parsley for garnish

    Step 1: Preheat the Oven

    Preheat your oven to 375°F (190°C).

    Lightly grease a 9×13-inch baking dish with olive oil or cooking spray to prevent sticking.


    Step 2: Cook the Sausage Filling

    In a large skillet over medium heat, cook the Italian sausage until browned, breaking it into small pieces with a spatula.

    Add the chopped onion and cook until translucent, about 3–4 minutes.

    Stir in the minced garlic and cook for another 30 seconds until fragrant. Remove the skillet from heat and let the mixture cool slightly.

    In a large mixing bowl, combine the cooked sausage mixture with ricotta cheese, shredded mozzarella, Parmesan, egg, Italian seasoning, salt, pepper, and parsley if using. Mix thoroughly until all ingredients are evenly combined.

    This filling will be rich, creamy, and full of savory flavor.


    Step 3: Prepare the Pasta

    If using uncooked manicotti shells, boil them according to package instructions until just al dente, then drain and let cool slightly.

    If using pre-cooked shells, skip this step. It’s important to avoid overcooking, as the pasta will bake further in the oven.


    Step 4: Fill the Manicotti

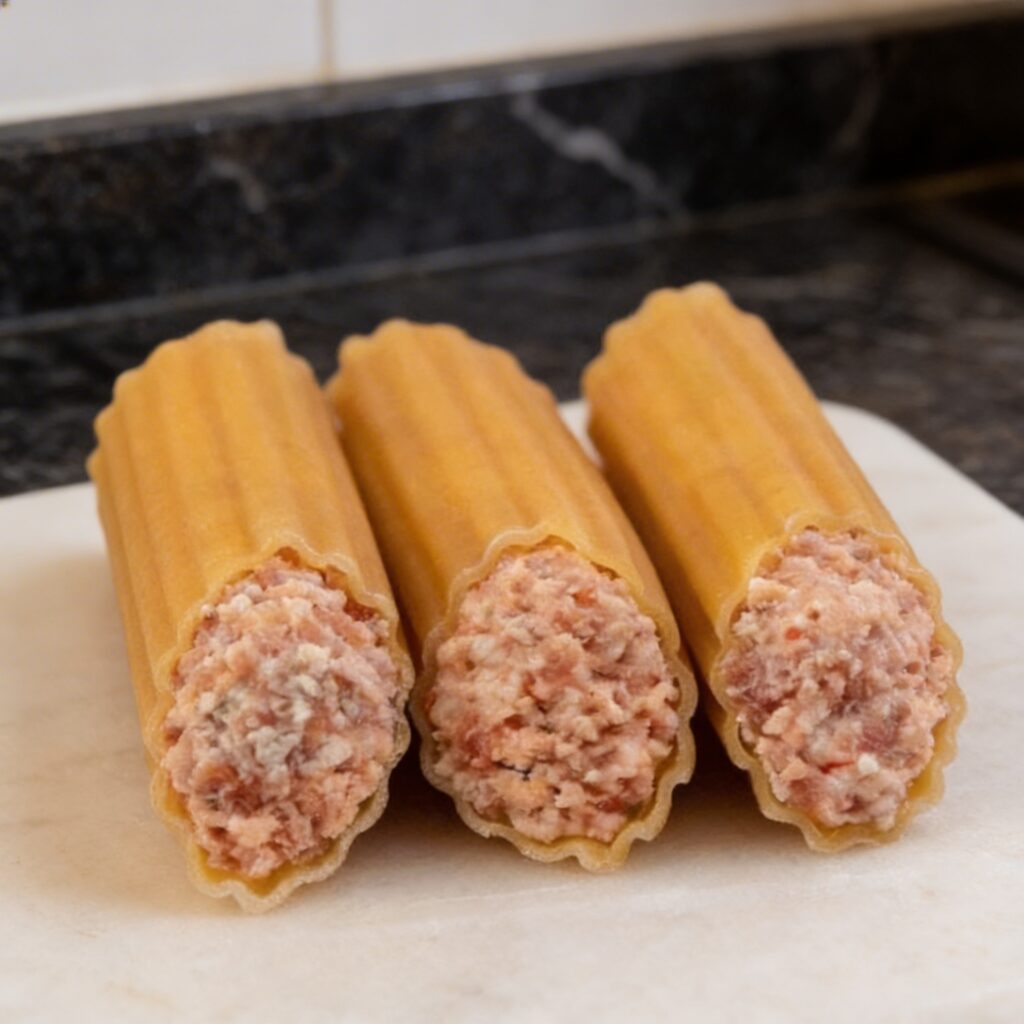
    Using a small spoon or a piping bag, carefully fill each manicotti shell with the sausage and cheese mixture.

    Fill them generously but leave a small gap at each end to prevent spilling.

    Place the filled shells in the prepared baking dish, arranging them in a single layer.

    Step 5: Add the Sauce

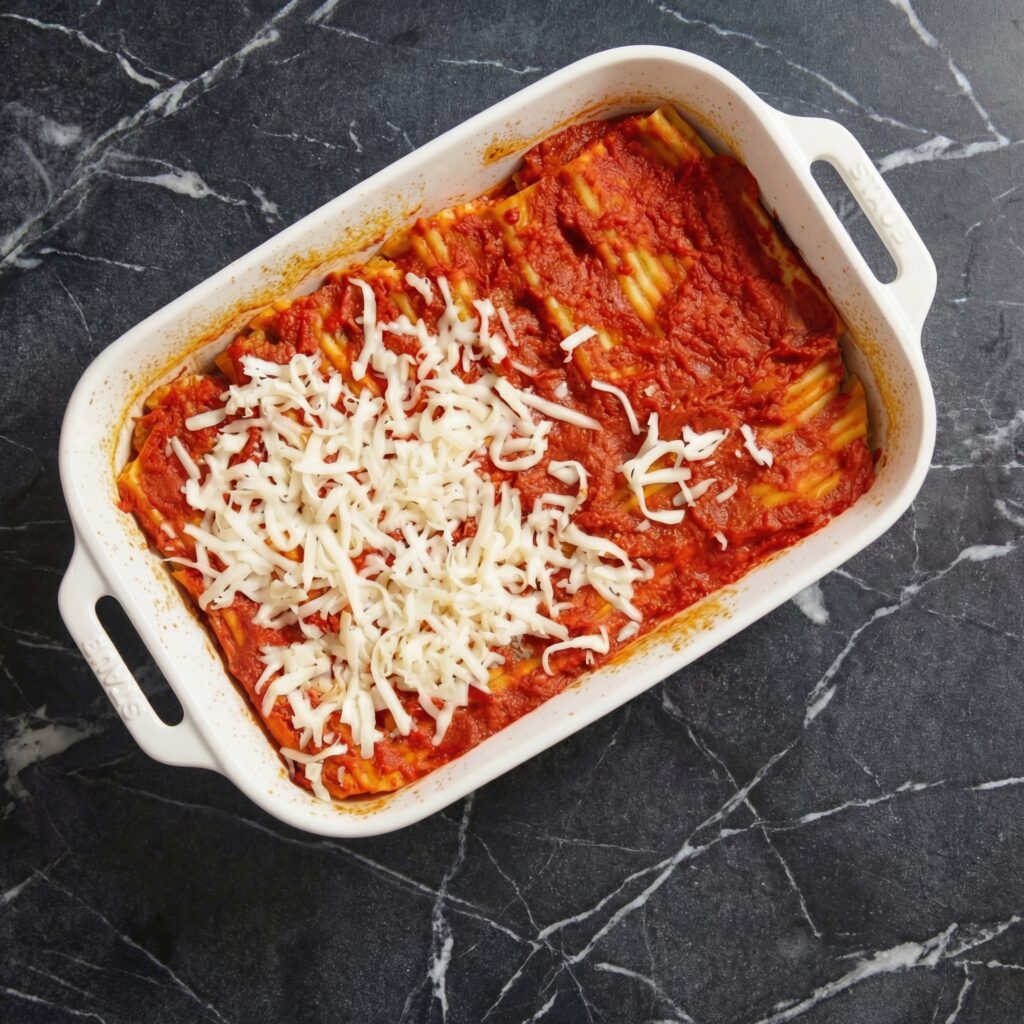
    Pour the marinara sauce evenly over the filled manicotti shells, making sure each shell is well-coated.

    The sauce will keep the pasta moist while baking and infuse it with flavor.


    Step 6: Top with Cheese

    Sprinkle shredded mozzarella and grated Parmesan evenly over the top of the sauced manicotti.

    This creates a golden, bubbling cheese layer that adds richness and visual appeal.

    Step 7: Bake the Manicotti

    Cover the baking dish with aluminum foil and bake in the preheated oven for 25 minutes.

    Remove the foil and bake for an additional 10–15 minutes, or until the cheese is melted and slightly golden on top.


    Step 8: Cool and Garnish

    Remove the manicotti from the oven and allow it to cool for 5 minutes.

    This rest time allows the filling to set slightly and makes serving easier. Garnish with fresh basil or parsley for color and a burst of freshness.


    Step 9: Serve

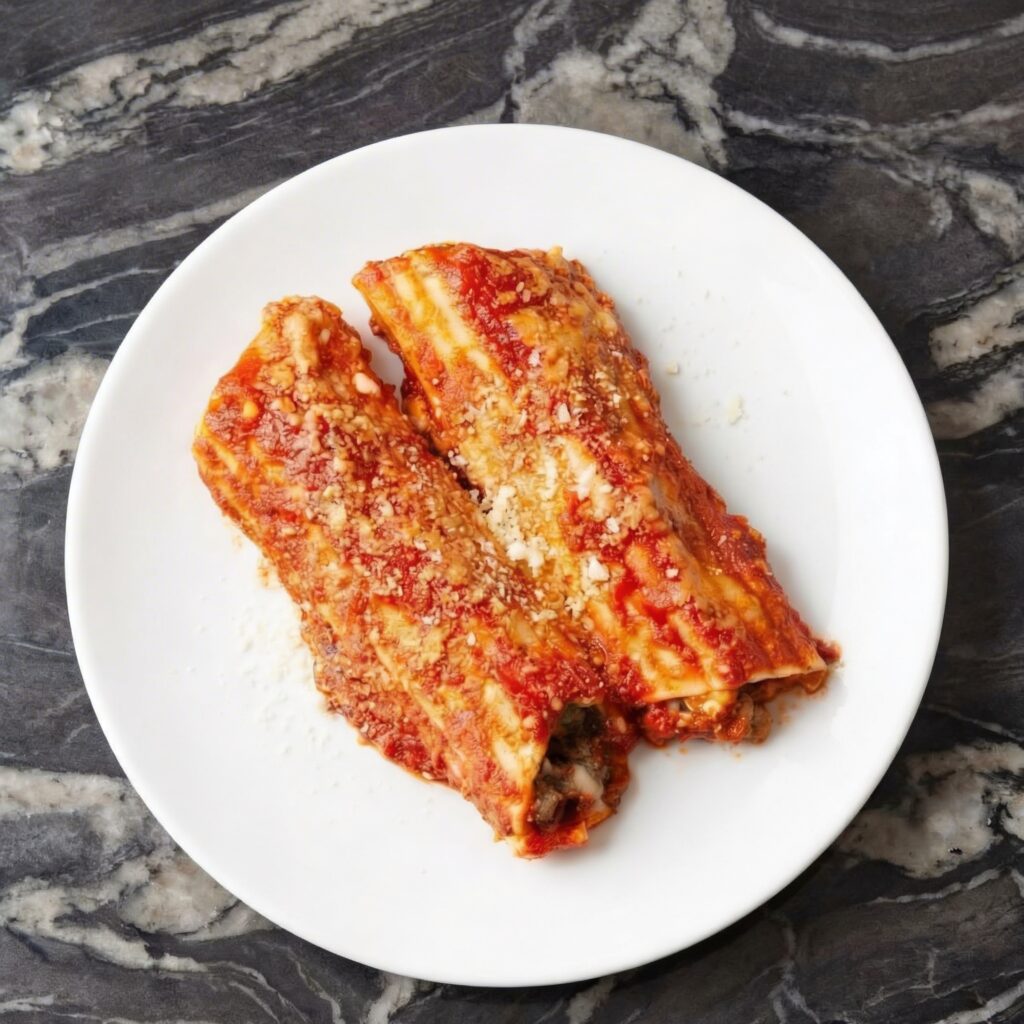
    Use a spatula to carefully transfer individual manicotti shells to plates. Serve hot, ideally with garlic bread or a simple green salad.

    Each bite combines tender pasta, rich sausage filling, and melty cheese, all balanced by the tangy marinara sauce—a true comfort food masterpiece.


    Pro Tips for Perfect Sausage Manicotti

    1. Cook the sausage thoroughly – Browning the sausage fully brings out its flavor and reduces excess grease.
    2. Don’t overfill the shells – Leaving small gaps at the ends prevents cheese and sausage from spilling during baking.
    3. Use a piping bag – It makes filling manicotti easier and less messy.
    4. Even sauce coverage – Ensures pasta stays moist and flavorful during baking.
    5. Allow it to rest – Cooling slightly before serving makes it easier to cut and keeps the filling intact.

    Variations and Twists

    • Vegetable Sausage Manicotti: Substitute mushrooms, spinach, or zucchini for a veggie-packed version.
    • Spicy Sausage Manicotti: Use hot Italian sausage and add a pinch of red pepper flakes for extra heat.
    • Cheese Lover’s Delight: Mix in provolone or Fontina with the ricotta for an even creamier filling.
    • Creamy Alfredo Sauce: Swap marinara for Alfredo sauce for a rich, white-sauce version.

    Wrapping Up

    Sausage manicotti is a comforting, hearty dish that brings the flavors of Italian cuisine to your table without requiring hours of work.

    The combination of tender pasta, savory sausage, creamy cheeses, and rich tomato sauce makes it a guaranteed crowd-pleaser.

    Whether for a weeknight dinner, a family gathering, or a special occasion, this recipe delivers a dish that’s both indulgent and approachable.

    With a little preparation and careful assembly, you can serve manicotti that tastes like it came from a fine Italian restaurant—golden, cheesy, and bursting with flavor.

    From filling each shell with savory sausage and creamy cheese to topping it with gooey, bubbling mozzarella, every step brings you closer to the perfect baked pasta dish.

    Serve with garlic bread, a fresh salad, and a sprinkle of fresh herbs for a complete, satisfying meal. Sausage manicotti is comfort food at its finest—warm, cheesy, and absolutely irresistible.
  • One-Pot Comfort Classic: Homemade Hamburger Helper from Scratch

    One-Pot Comfort Classic: Homemade Hamburger Helper from Scratch

    If you grew up loving those cozy boxed dinners, you’re going to adore this upgraded version of Classic Hamburger Helper made completely from scratch.

    Creamy, cheesy, hearty, and packed with savory beef flavor, this one-pot meal is the definition of comfort food.

    The best part?

    You control the ingredients—no preservatives, no mystery powders—just real pantry staples transformed into a rich, satisfying dinner.

    This homemade classic hamburger helper comes together in about 30 minutes, making it perfect for busy weeknights.

    Let’s walk through it step by step so you can master this nostalgic favorite.


    Why You’ll Love This Recipe

    • One pot, easy cleanup
    • Ready in 30 minutes
    • Rich and creamy texture
    • Family-friendly flavor
    • Made with simple pantry ingredients

    It’s hearty, affordable, and endlessly comforting.


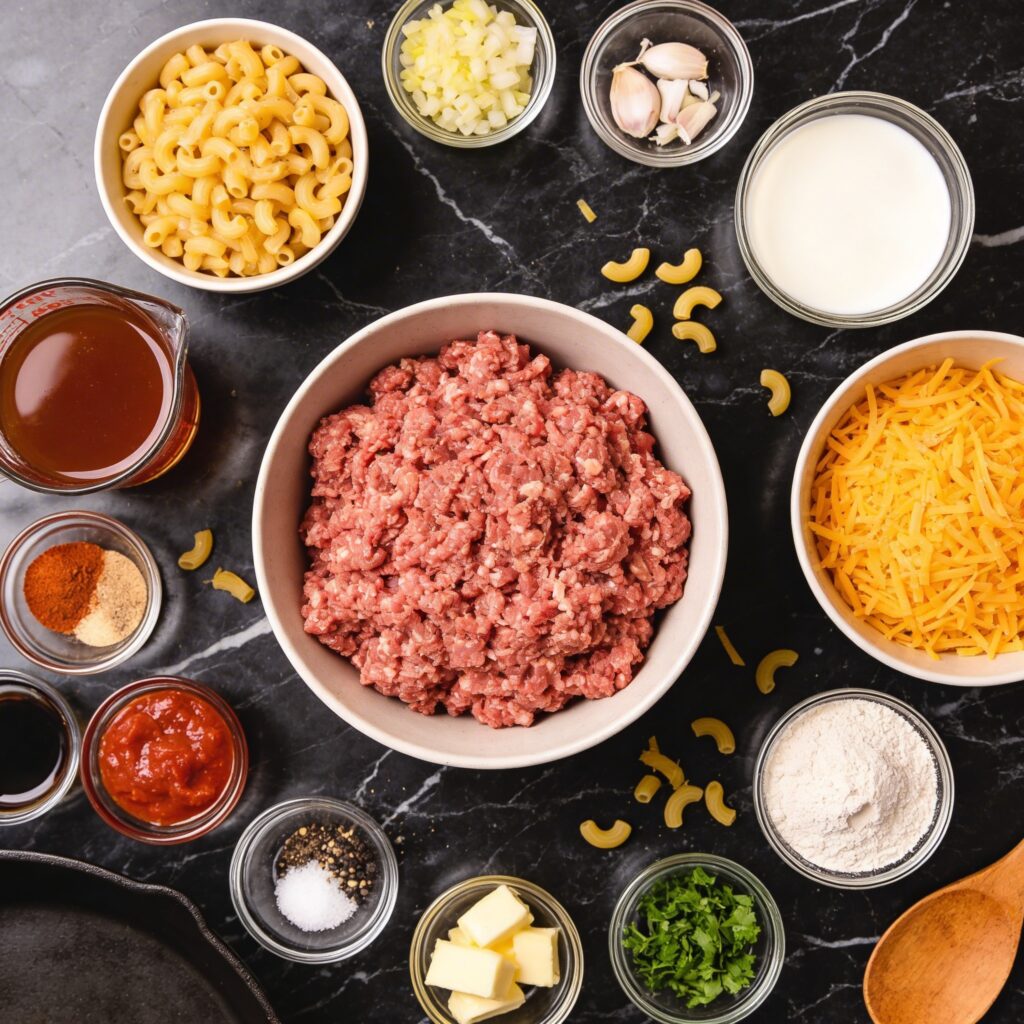
    Ingredients You’ll Need

    • 1 pound ground beef (80/20 for best flavor)
    • 1 small yellow onion, diced
    • 3 cloves garlic, minced
    • 2 cups beef broth
    • 1 ½ cups milk
    • 2 cups elbow macaroni (uncooked)
    • 1 tablespoon tomato paste
    • 1 teaspoon paprika
    • ½ teaspoon dried oregano
    • ½ teaspoon salt (adjust to taste)
    • ½ teaspoon black pepper
    • 1 ½ cups shredded sharp cheddar cheese
    • 1 tablespoon olive oil (if needed)

    Optional additions:

    • ½ teaspoon chili powder for heat
    • ½ cup diced bell peppers
    • 2 tablespoons cream cheese for extra creaminess

    Step 1: Brown the Ground Beef

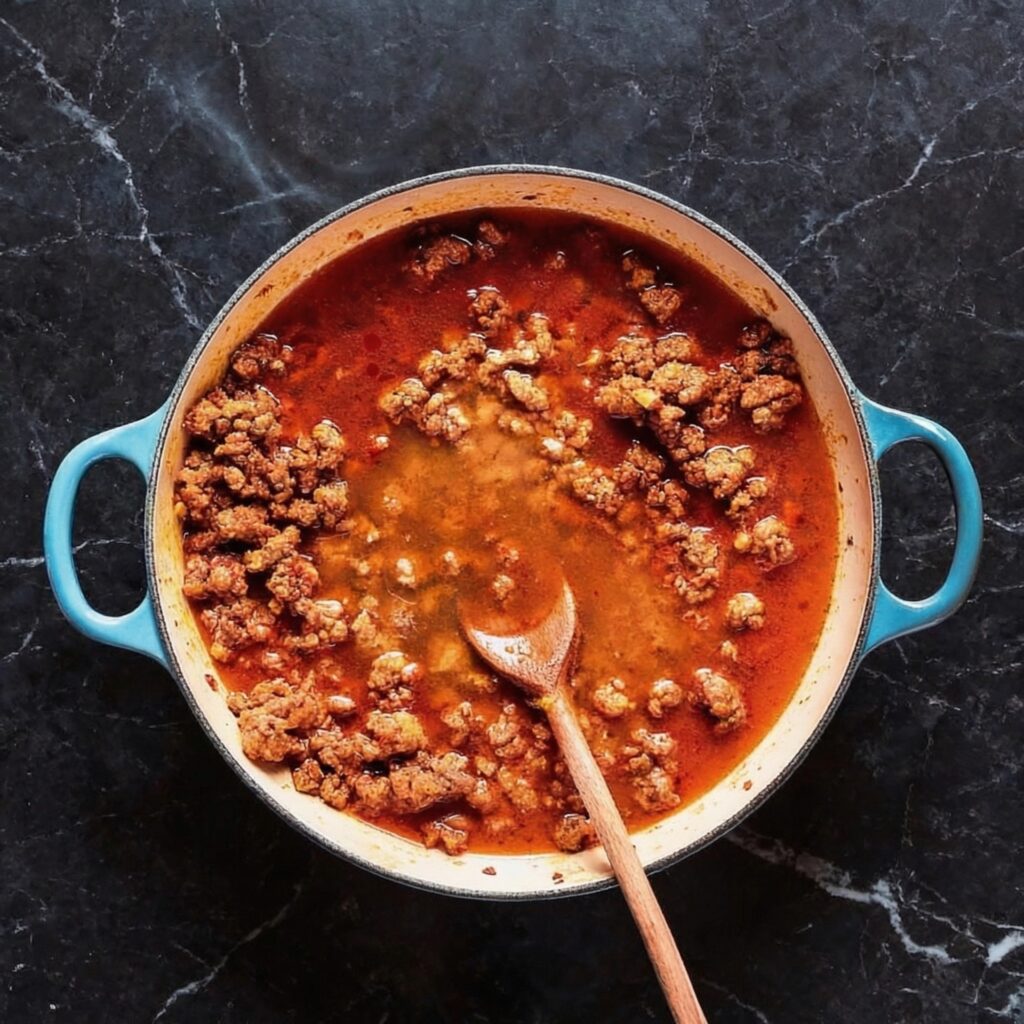
    Heat a large deep skillet or Dutch oven over medium-high heat.

    Add the ground beef and break it apart with a wooden spoon.

    Cook for 5–7 minutes until fully browned and no pink remains.

    If there’s excessive grease, drain most of it, leaving about a tablespoon for flavor.

    Proper browning builds the foundation of rich flavor in this dish.


    Step 2: Add Onion and Garlic

    Add diced onion directly to the browned beef.

    Cook for 3–4 minutes until softened and translucent.

    Stir in the minced garlic and cook for 30 seconds until fragrant.

    The aromatics elevate the dish beyond the boxed version.


    Step 3: Build the Flavor Base

    Stir in tomato paste, paprika, oregano, salt, and black pepper.

    Cook for 1–2 minutes to allow the tomato paste to caramelize slightly.

    This deepens the overall flavor and adds subtle richness.

    If using chili powder or bell peppers, add them now.


    Step 4: Add Liquids and Pasta

    Pour in the beef broth and milk.

    Stir well, scraping up any browned bits from the bottom of the pan.

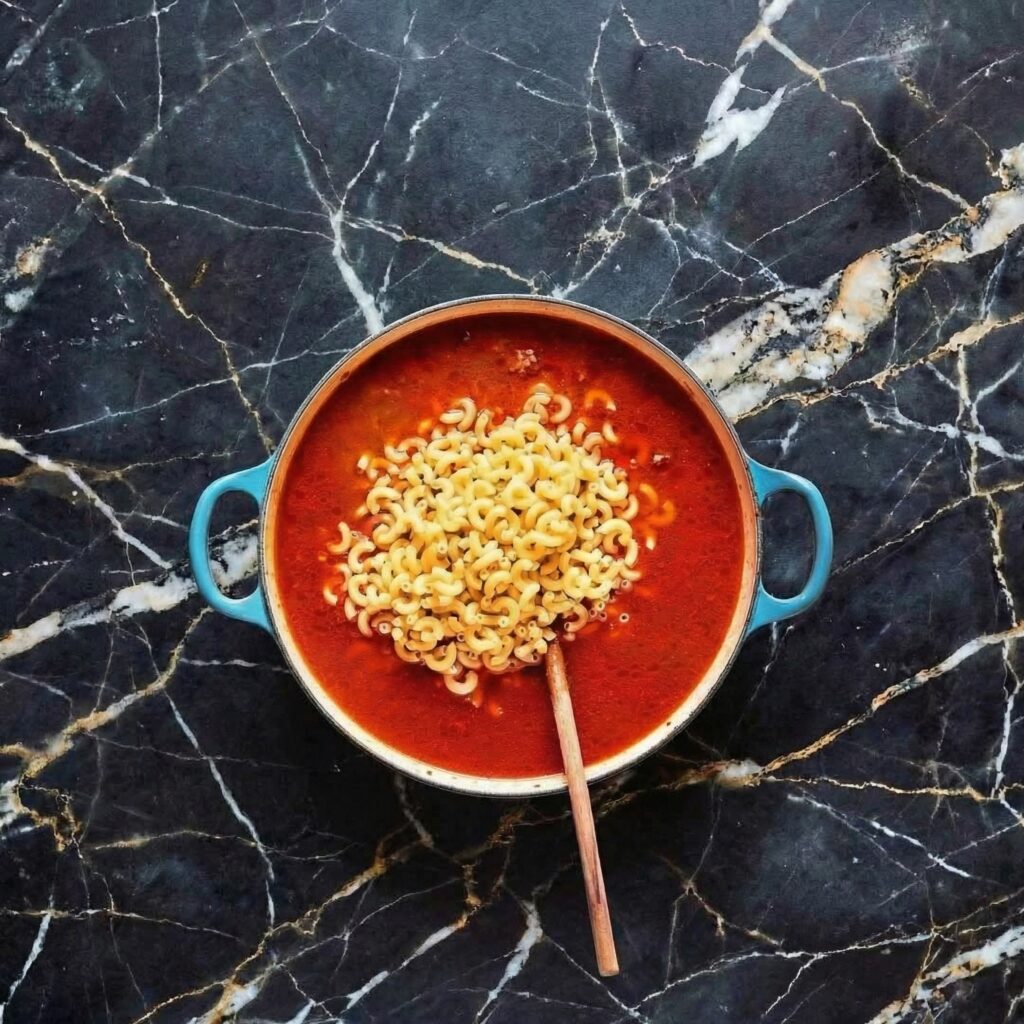
    Add the uncooked elbow macaroni and stir to combine.

    Bring the mixture to a gentle boil.


    Step 5: Simmer Until Tender

    Reduce heat to medium-low and cover.

    Simmer for 10–12 minutes, stirring occasionally to prevent sticking.

    The pasta will absorb the liquid as it cooks, creating a thick, creamy sauce.

    If the mixture becomes too thick before pasta is tender, add a splash of milk or broth.

    The goal is tender pasta coated in a creamy sauce—not dry, not soupy.


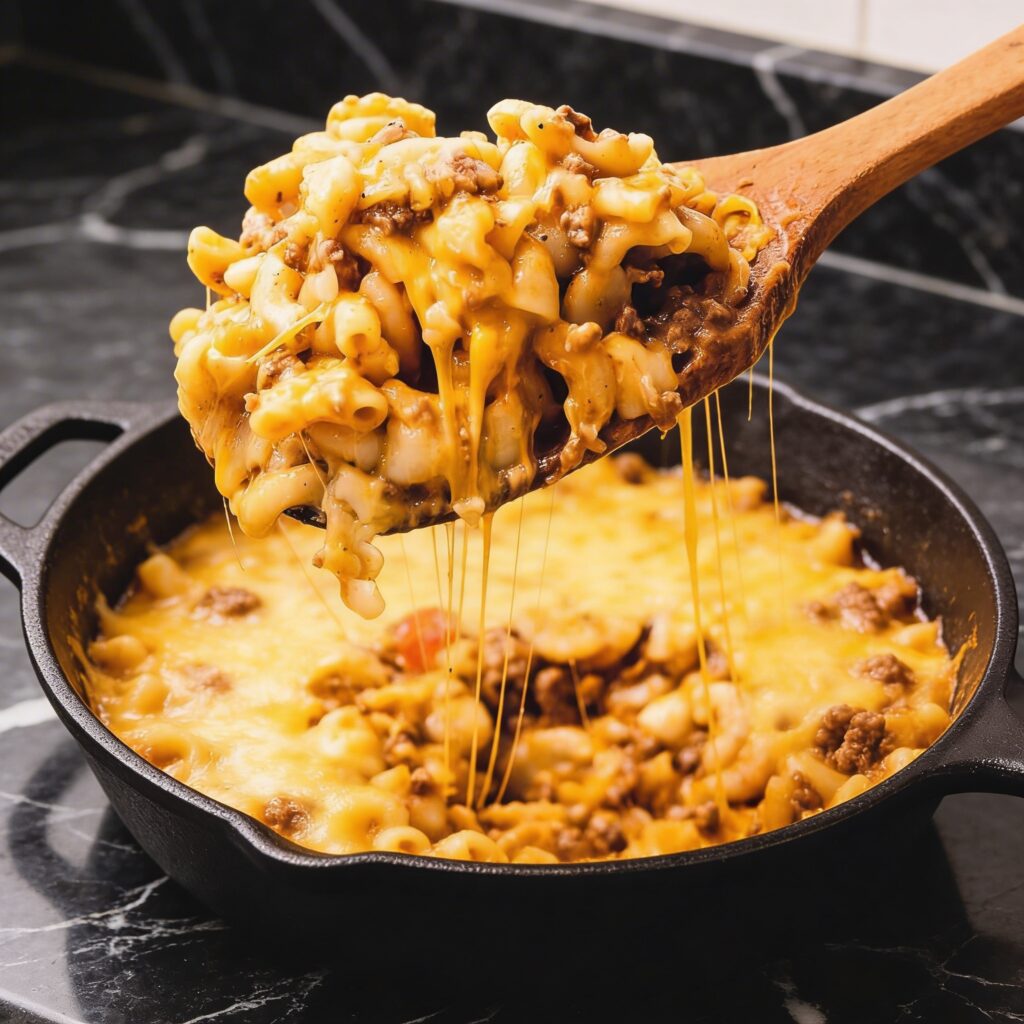
    Step 6: Add the Cheese

    Once the pasta is fully cooked, reduce heat to low.

    Stir in the shredded cheddar cheese.

    Continue stirring until completely melted and smooth.

    For extra creaminess, add cream cheese at this stage.

    The sauce should be velvety and coat the pasta evenly.


    Step 7: Taste and Adjust

    Taste the mixture and adjust seasoning as needed.

    Add more salt, pepper, or a pinch of paprika depending on preference.

    Balance is key—savory, cheesy, and slightly tangy.


    Step 8: Rest Before Serving

    Turn off the heat and let the dish sit uncovered for 3–5 minutes.

    This allows the sauce to thicken further and settle.

    The texture will become even creamier as it rests.


    Step 9: Serve and Garnish

    Spoon into bowls and serve hot.

    Optional garnishes:

    • Fresh chopped parsley
    • Extra shredded cheese
    • Cracked black pepper
    • A sprinkle of red pepper flakes

    Pair with a simple side salad or steamed vegetables for a complete meal.


    Tips for Perfect Homemade Classic Hamburger Helper

    • Use freshly shredded cheese for smoother melting.
    • Stir occasionally while simmering to prevent sticking.
    • Keep heat moderate to avoid scorching milk.
    • Adjust liquid if pasta absorbs too quickly.
    • Don’t overcook pasta—it should be tender but not mushy.

    Small adjustments make a big difference in final texture.


    Customization Ideas

    This recipe is incredibly flexible.

    Try adding:

    • Sautéed mushrooms
    • Spinach stirred in at the end
    • Pepper jack cheese for spice
    • Ground turkey instead of beef
    • A dash of Worcestershire sauce for depth

    You can even turn it into a baked casserole by transferring it to a baking dish, topping with cheese, and broiling briefly.


    Storage and Reheating

    Store leftovers in an airtight container in the refrigerator for up to 4 days.

    Reheat gently on the stove with a splash of milk to restore creaminess.

    Avoid high microwave heat, which can dry out the sauce.

    This dish also freezes well for up to 2 months.


    Final Thoughts

    Homemade classic hamburger helper brings nostalgic comfort to the table—but better. By using real ingredients and building flavor step by step, you get a richer, creamier, more satisfying version of the beloved classic.

    It’s hearty without being heavy, simple without being boring, and customizable to suit your tastes. Whether you’re cooking for a busy family dinner or craving a cozy bowl of comfort, this one-pot meal delivers every time.

    Savory beef, tender pasta, and melty cheddar come together in perfect harmony—proof that sometimes the simplest meals are the most satisfying.

  • Crispy, Golden & Irresistible: Classic Potato Pancakes Done Right

    Crispy, Golden & Irresistible: Classic Potato Pancakes Done Right

    There’s something deeply comforting about classic potato pancakes.

    Crispy on the outside, tender on the inside, and packed with savory flavor, these golden beauties are a timeless favorite.

    Whether you grew up enjoying them during holidays, as a cozy weekend breakfast, or as a hearty side dish, potato pancakes never go out of style.

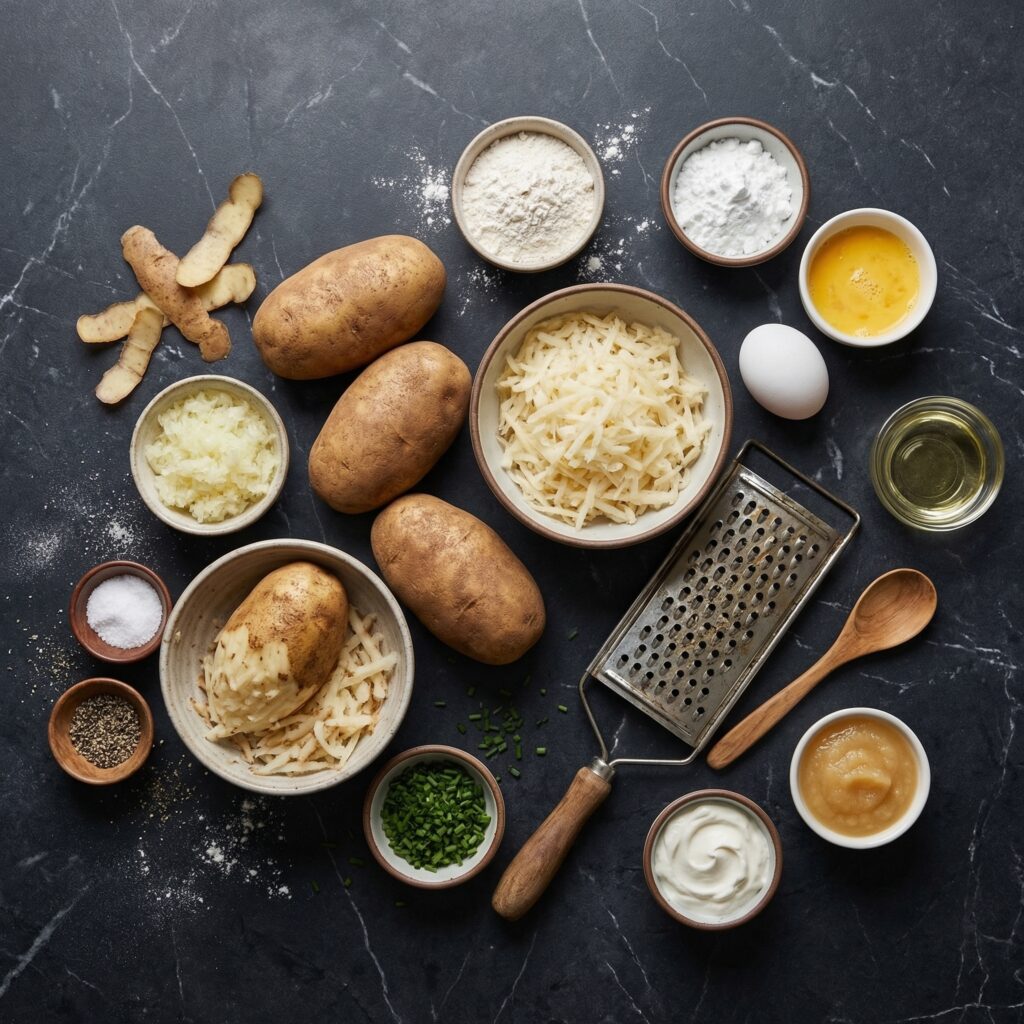
    Made from simple ingredients—grated potatoes, onion, eggs, and flour—this dish transforms pantry staples into something truly special.

    The key is achieving that perfect crispy crust while keeping the interior soft and flavorful.

    Let’s walk step by step through how to make classic potato pancakes perfectly every time.


    Why You’ll Love This Recipe

    • Crispy, golden exterior
    • Soft, fluffy interior
    • Simple, affordable ingredients
    • Perfect for breakfast, brunch, or dinner
    • Customizable with toppings

    These pancakes are humble yet incredibly satisfying.


    Ingredients You’ll Need

    • 2 pounds russet potatoes (about 4–5 large potatoes)
    • 1 small yellow onion
    • 2 large eggs
    • ¼ cup all-purpose flour
    • 1 teaspoon salt
    • ½ teaspoon freshly ground black pepper
    • ½ teaspoon baking powder (optional, for lighter texture)
    • Vegetable oil for frying

    Optional for serving:

    • Sour cream
    • Applesauce
    • Fresh chives
    • Smoked salmon

    Step 1: Prepare the Potatoes

    Peel the potatoes and place them in a bowl of cold water to prevent browning.

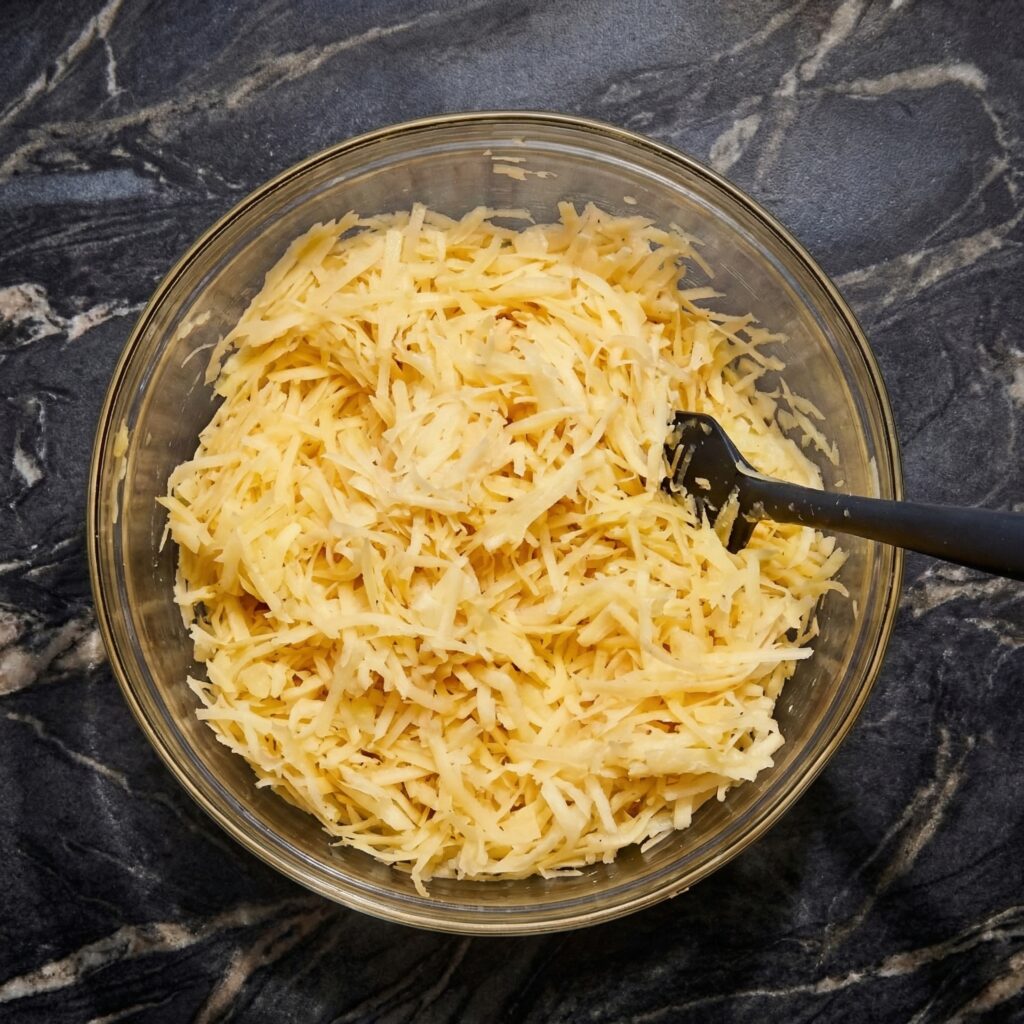
    Using a box grater or food processor, grate the potatoes into long shreds.

    Immediately transfer the grated potatoes to a clean kitchen towel or cheesecloth.

    Squeeze out as much liquid as possible. This step is critical—removing excess moisture ensures crispy pancakes instead of soggy ones.

    Discard the liquid, but you may notice a layer of starch settling at the bottom of the bowl. You can add that starch back into the potato mixture for extra binding power.


    Step 2: Grate the Onion

    Grate the onion using the same grater.

    The onion adds moisture and flavor, so mix it directly with the squeezed potatoes.

    The slight sharpness of raw onion mellows beautifully once fried.


    Step 3: Mix the Batter

    Transfer the potato and onion mixture to a large bowl.

    Add eggs, flour, salt, pepper, and baking powder if using.

    Stir until everything is evenly combined.

    The mixture should hold together when pressed but not feel overly wet.

    If it seems too loose, add an extra tablespoon of flour.


    Step 4: Heat the Oil

    Pour about ¼ inch of vegetable oil into a large skillet.

    Heat over medium-high heat until shimmering but not smoking.

    To test readiness, drop a small bit of the mixture into the oil. It should sizzle immediately.

    Proper oil temperature is key to achieving that crispy golden crust.


    Step 5: Shape the Pancakes

    Scoop about 2 tablespoons of the potato mixture and gently flatten it into a small patty in your hands.

    Carefully place it into the hot oil.

    Repeat without overcrowding the pan.

    Flatten slightly with a spatula to ensure even cooking.


    Step 6: Fry Until Golden

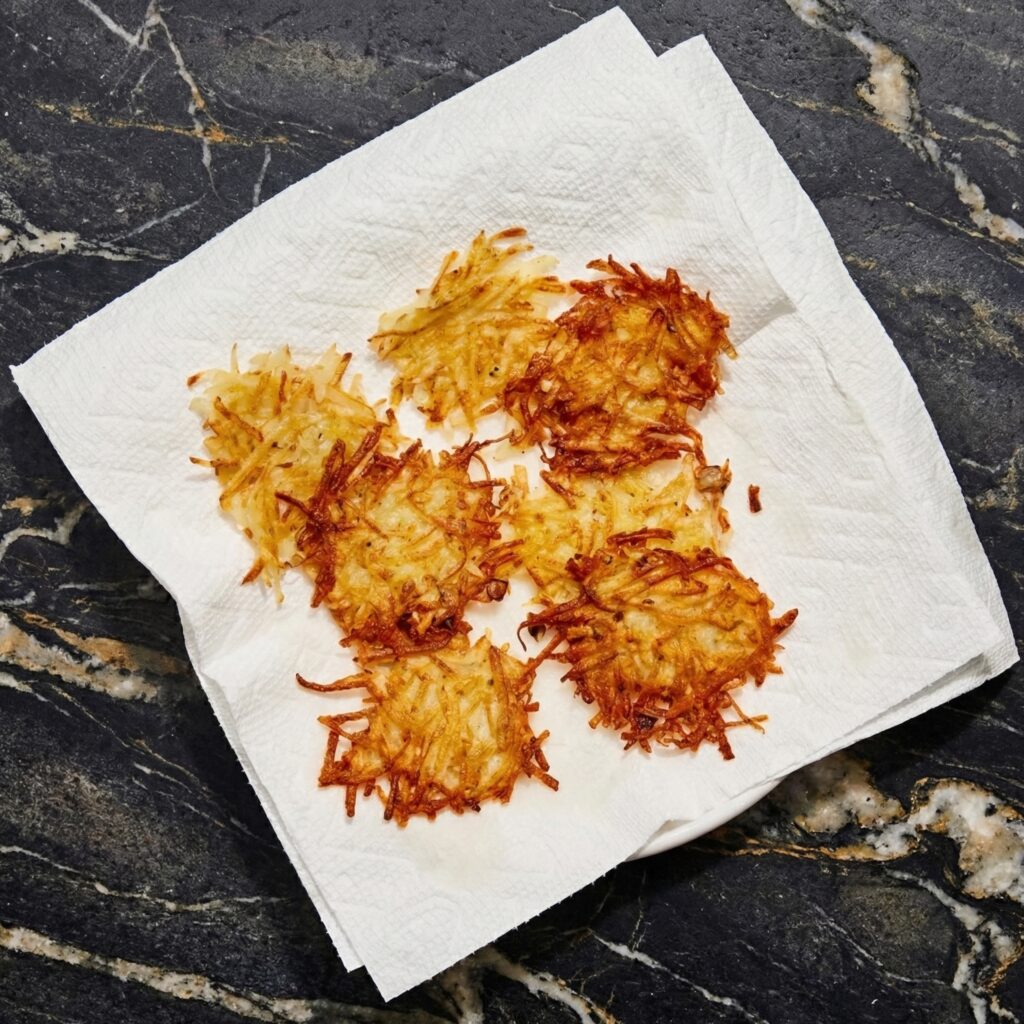
    Cook each pancake for 3–4 minutes per side.

    The edges should turn deep golden brown and crisp.

    Flip carefully once the underside is fully set.

    Avoid flipping too early, as this can cause them to fall apart.

    Adjust heat as needed to prevent burning while allowing the inside to cook through.


    Step 7: Drain and Keep Warm

    Transfer the cooked pancakes to a plate lined with paper towels to drain excess oil.

    For large batches, keep finished pancakes warm in a 200°F (95°C) oven while you finish frying the rest.

    This keeps them crisp and ready to serve.


    Step 8: Serve Immediately

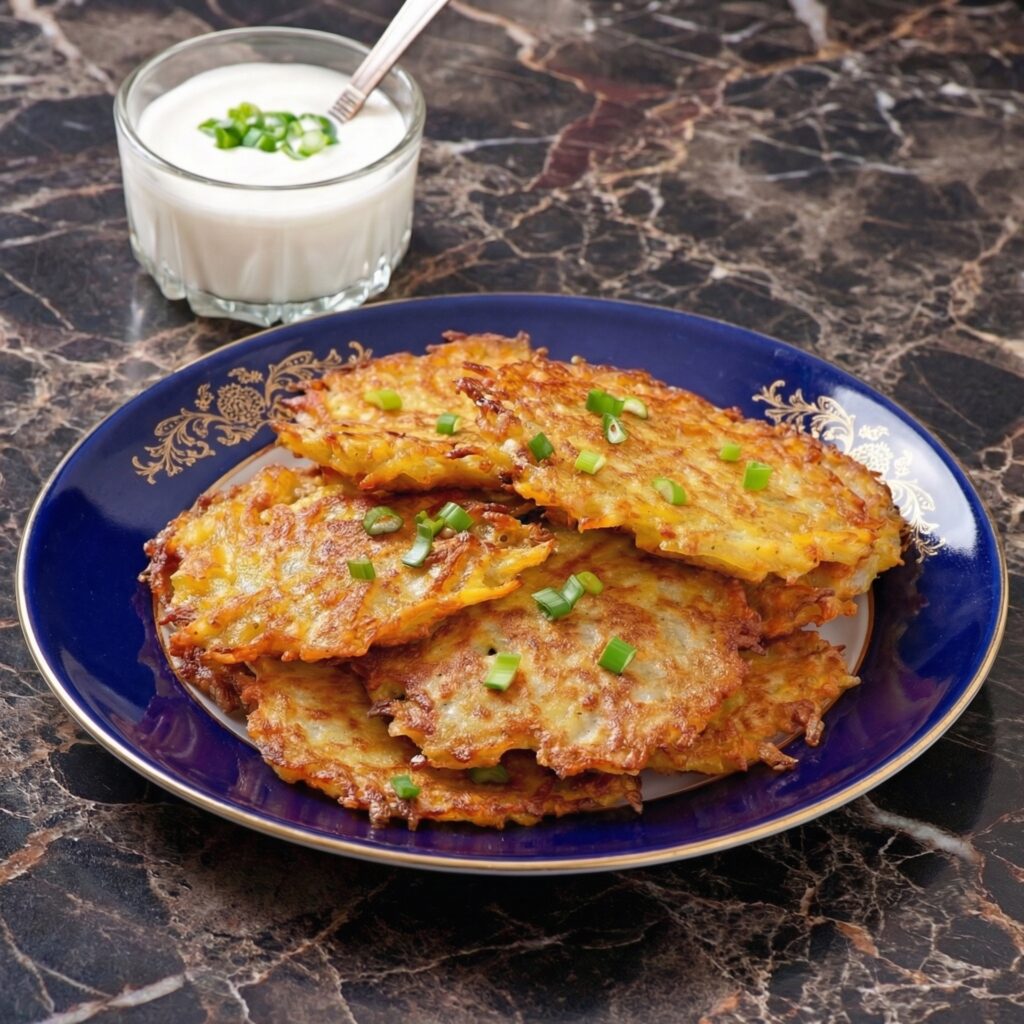
    Classic potato pancakes are best enjoyed hot and fresh.

    Serve with:

    • A generous dollop of sour cream
    • A spoonful of applesauce for sweet contrast
    • Fresh chives for brightness
    • Smoked salmon for an elevated twist

    The contrast of crispy potato with cool, creamy toppings is irresistible.

    Tips for Extra Crispy Pancakes

    • Squeeze out as much liquid as possible from the potatoes.
    • Use russet potatoes for higher starch content.
    • Maintain consistent oil temperature.
    • Avoid overcrowding the pan.
    • Drain on a rack instead of stacking.

    Attention to moisture control is the secret to perfect texture.


    Make-Ahead and Storage

    While best fresh, leftovers can be stored in the refrigerator for up to 3 days.

    Reheat in a skillet over medium heat or in a 375°F oven to restore crispiness.

    Avoid microwaving, as it softens the crust.

    You can also freeze cooked pancakes in a single layer, then reheat directly from frozen in the oven.


    Flavor Variations

    Once you master the classic version, try:

    • Adding grated carrot or zucchini
    • Mixing in shredded cheddar cheese
    • Seasoning with garlic powder or paprika
    • Adding chopped herbs like parsley or dill

    Each variation adds personality while keeping the crispy base intact.


    Final Thoughts

    Classic potato pancakes are a celebration of simplicity. With just a few ingredients and proper technique, you can create golden, crispy patties that are comforting, satisfying, and full of flavor.

    The magic lies in the contrast—the crunchy exterior giving way to a soft, tender center. Whether served as a side dish, appetizer, or main course, they always bring warmth and nostalgia to the table.

    Once you master the art of squeezing, frying, and seasoning, you’ll find yourself returning to this recipe again and again.

    Crispy, golden, and utterly irresistible—this is potato perfection.

  • Creamy, Cheesy, Classic: How to Make Old-Fashioned Macaroni and Cheese

    Creamy, Cheesy, Classic: How to Make Old-Fashioned Macaroni and Cheese

    Few comfort foods are as universally beloved as old-fashioned macaroni and cheese.

    With tender pasta enveloped in a rich, creamy cheese sauce and a golden, slightly crunchy topping, it’s the kind of dish that evokes childhood memories and satisfies every craving for warmth and indulgence.

    While boxed mac and cheese has its place, nothing beats the real deal—made from scratch with love, simple ingredients, and a focus on creamy, cheesy perfection.

    Here’s your ultimate guide to making old-fashioned macaroni and cheese, step by step.


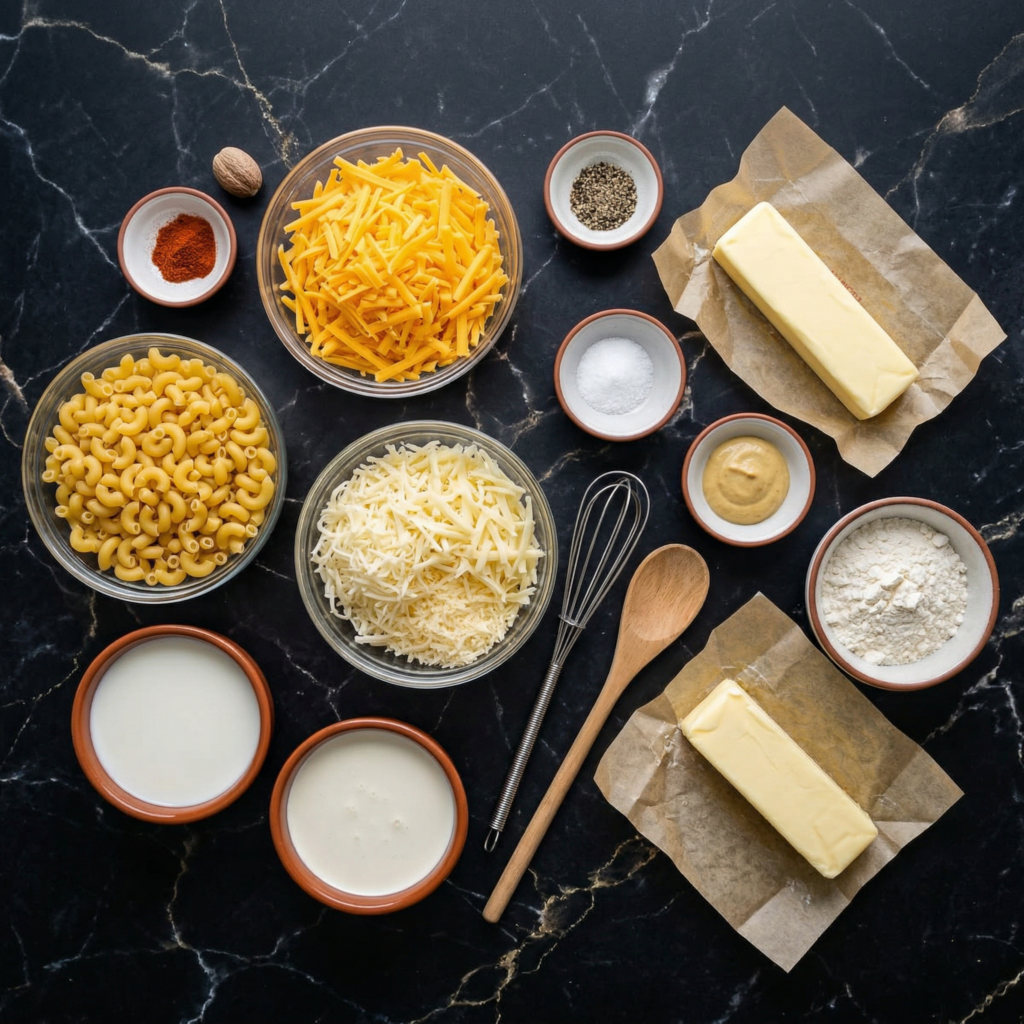
    Ingredients You’ll Need

    Gather your ingredients ahead of time for a smooth cooking process.

    For the pasta:

    • 12 oz elbow macaroni (or any small pasta shape)
    • 1 teaspoon salt (for the boiling water)

    For the cheese sauce:

    • 4 tablespoons unsalted butter
    • 4 tablespoons all-purpose flour
    • 3 cups milk (whole milk preferred)
    • 1 teaspoon Dijon mustard (optional, for depth)
    • ½ teaspoon salt
    • ¼ teaspoon black pepper
    • ¼ teaspoon paprika (optional, for color and subtle flavor)
    • 2 cups sharp cheddar cheese, shredded
    • 1 cup Gruyère or Monterey Jack cheese, shredded (optional for creaminess)

    For the topping:

    • ½ cup breadcrumbs (plain or panko)
    • 2 tablespoons unsalted butter, melted
    • 2 tablespoons Parmesan cheese, grated
    • Pinch of paprika for color (optional)

    Step 1: Preheat the Oven

    Preheat your oven to 350°F (175°C).

    Greasing a 9×13-inch baking dish or lightly spraying it with nonstick cooking spray will prevent sticking and make cleanup easier.


    Step 2: Cook the Pasta

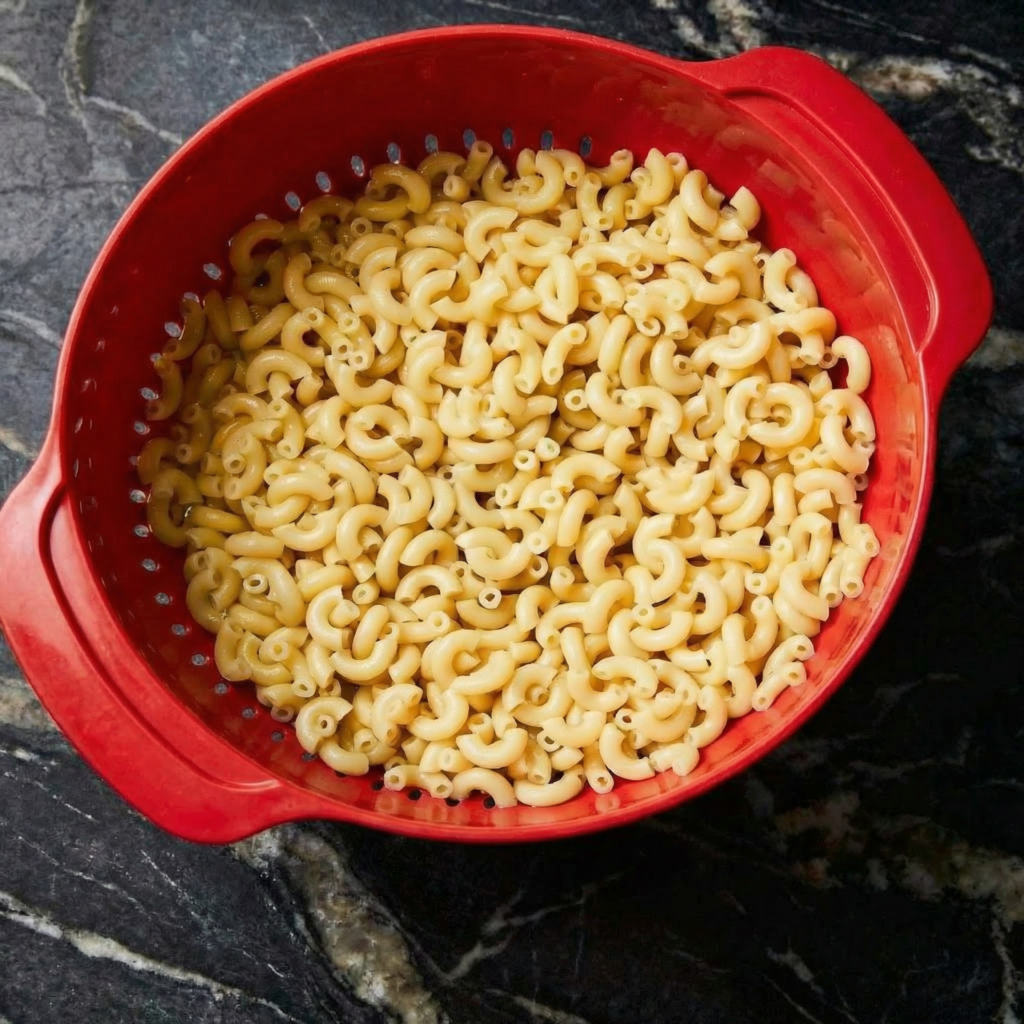
    Bring a large pot of salted water to a boil.

    Add the macaroni and cook according to package instructions until just al dente.

    Remember, the pasta will continue to cook slightly in the oven, so avoid overcooking.

    Drain the pasta and set aside.


    Step 3: Make the Cheese Sauce

    In a medium saucepan over medium heat, melt the butter until fully melted and slightly foamy.

    Sprinkle in the flour, whisking constantly to form a smooth roux.

    Cook for 1–2 minutes to remove the raw flour taste.

    Gradually add the milk, whisking continuously to prevent lumps.

    Bring the mixture to a gentle simmer until it thickens, about 3–5 minutes.

    Stir in the Dijon mustard, salt, black pepper, and paprika.

    Remove the sauce from the heat and stir in the shredded cheeses until smooth and fully melted.

    Taste and adjust seasoning if needed.

    The cheese sauce should be creamy, rich, and slightly thickened.


    Step 4: Combine Pasta and Cheese Sauce

    Add the drained pasta to the cheese sauce, stirring until every piece is coated evenly.

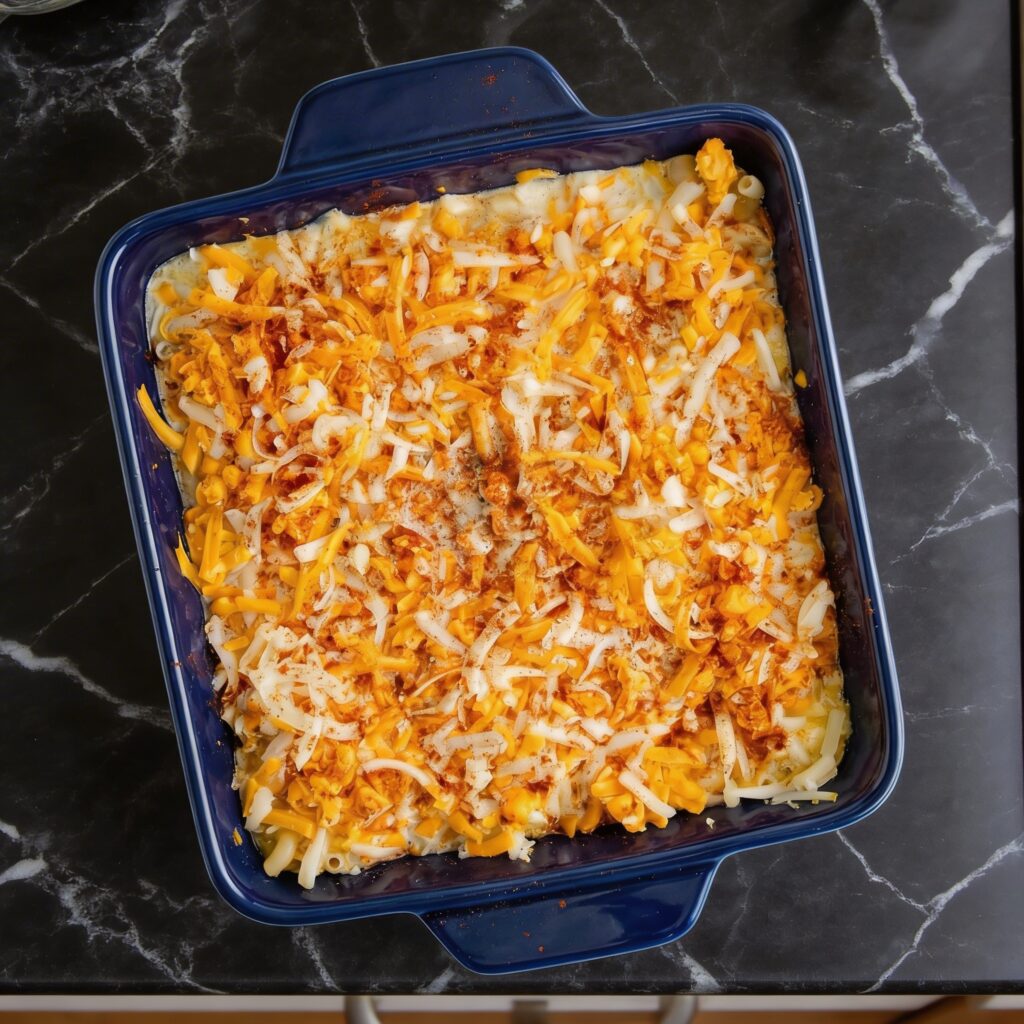
    Pour the cheesy macaroni mixture into the prepared baking dish, spreading it out evenly.


    Step 5: Prepare the Topping

    In a small bowl, combine the breadcrumbs, melted butter, Parmesan cheese, and a pinch of paprika.

    Mix until the crumbs are evenly coated. Sprinkle the breadcrumb mixture evenly over the macaroni and cheese.

    This topping will give your dish that golden, crunchy texture that contrasts beautifully with the creamy pasta underneath.


    Step 6: Bake the Macaroni and Cheese

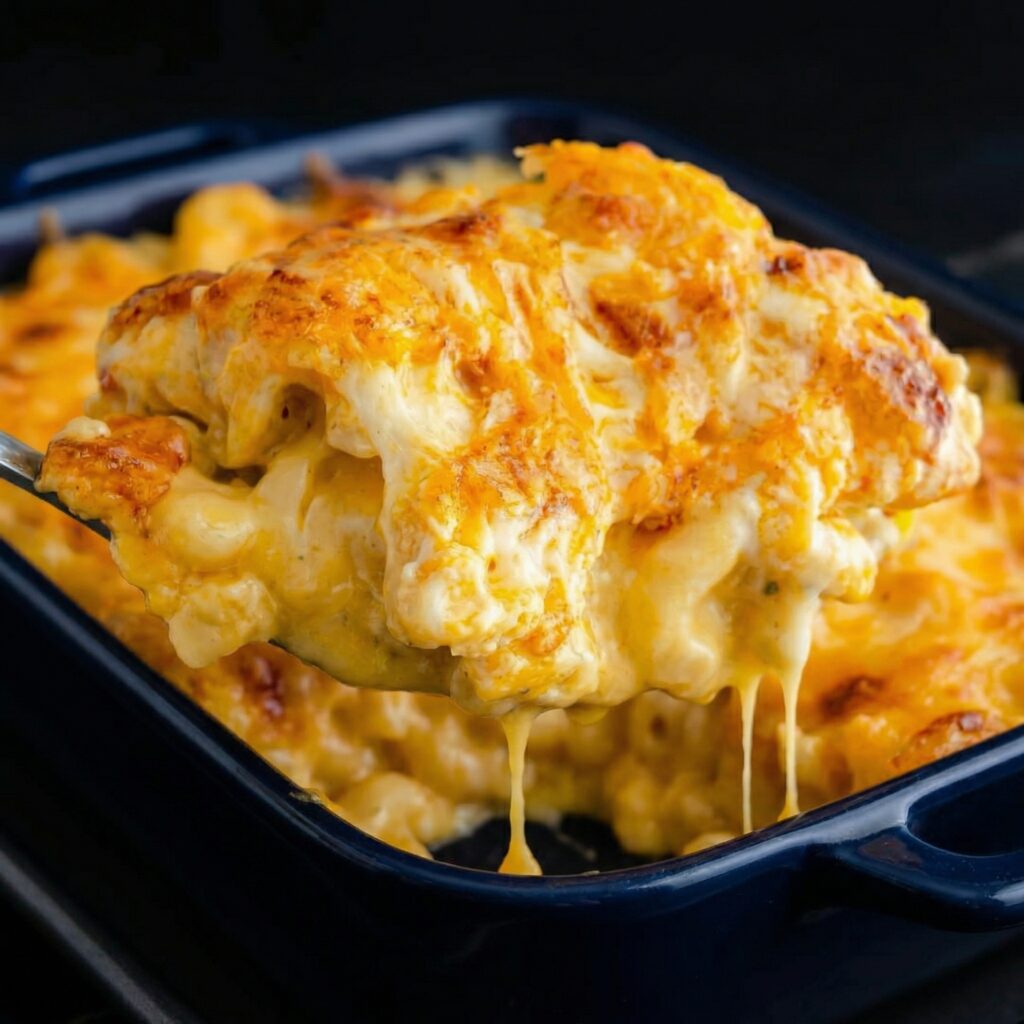
    Place the baking dish in the preheated oven and bake for 25–30 minutes, or until the top is golden brown and crispy and the cheese sauce is bubbling around the edges.

    For an extra-crispy topping, broil for the last 2–3 minutes, watching closely to prevent burning.


    Step 7: Cool Slightly and Serve

    Remove the macaroni and cheese from the oven and let it cool for 5 minutes before serving.

    This allows the cheese sauce to set slightly, making it easier to scoop perfect portions.


    Pro Tips for Perfect Old-Fashioned Macaroni and Cheese

    1. Use sharp cheddar – The bold flavor balances the creaminess perfectly.
    2. Don’t overcook pasta – Al dente pasta absorbs flavors without becoming mushy.
    3. Make a roux carefully – Cooking the butter and flour removes the raw taste and ensures a silky sauce.
    4. Add a little extra cheese to the sauce – This ensures maximum creaminess and flavor.
    5. Top with panko breadcrumbs – Panko gives a superior crunch compared to regular breadcrumbs.

    Variations to Try

    • Extra Cheesy Mac & Cheese: Mix in extra cheddar or add cream cheese for richness.
    • Bacon Mac & Cheese: Stir in crispy bacon bits before baking for a smoky flavor.
    • Spicy Mac & Cheese: Add a pinch of cayenne pepper or diced jalapeños to the cheese sauce.
    • Veggie Mac & Cheese: Fold in cooked broccoli, peas, or roasted red peppers for added nutrition and color.

    Wrapping Up

    Old-fashioned macaroni and cheese is more than just a meal—it’s nostalgia in a dish.

    The creamy cheese sauce, tender pasta, and golden breadcrumb topping create a perfect combination of flavors and textures that will satisfy kids and adults alike.

    Unlike boxed versions, homemade mac and cheese allows you to control the ingredients, the cheese blend, and the richness, making every bite a decadent treat.

    Whether served as a main course for dinner, a side dish for a holiday meal, or a comfort-food indulgence on a cozy night in, old-fashioned macaroni and cheese never fails to impress.

    With these step-by-step instructions, you can make a perfectly creamy, golden, cheesy casserole that will have everyone asking for seconds.

    So grab your cheese, pasta, and butter, and get ready to enjoy the ultimate in creamy, cheesy, golden-baked comfort food.

    There’s nothing quite like homemade mac and cheese straight from the oven—a classic dish done right.

  • Comfort in a Crust: How to Make Classic Chicken Pot Pie

    Comfort in a Crust: How to Make Classic Chicken Pot Pie

    Few dishes evoke the warmth and nostalgia of home quite like chicken pot pie.

    With tender chunks of chicken, hearty vegetables, and a creamy, savory sauce nestled under a golden, flaky crust, it’s the ultimate comfort food.

    Whether you’re cooking for your family or preparing a meal to impress guests, making chicken pot pie from scratch is easier than it seems—and the results are far superior to store-bought versions.

    Follow this step-by-step guide, and you’ll create a pot pie that’s rich, flavorful, and utterly satisfying.


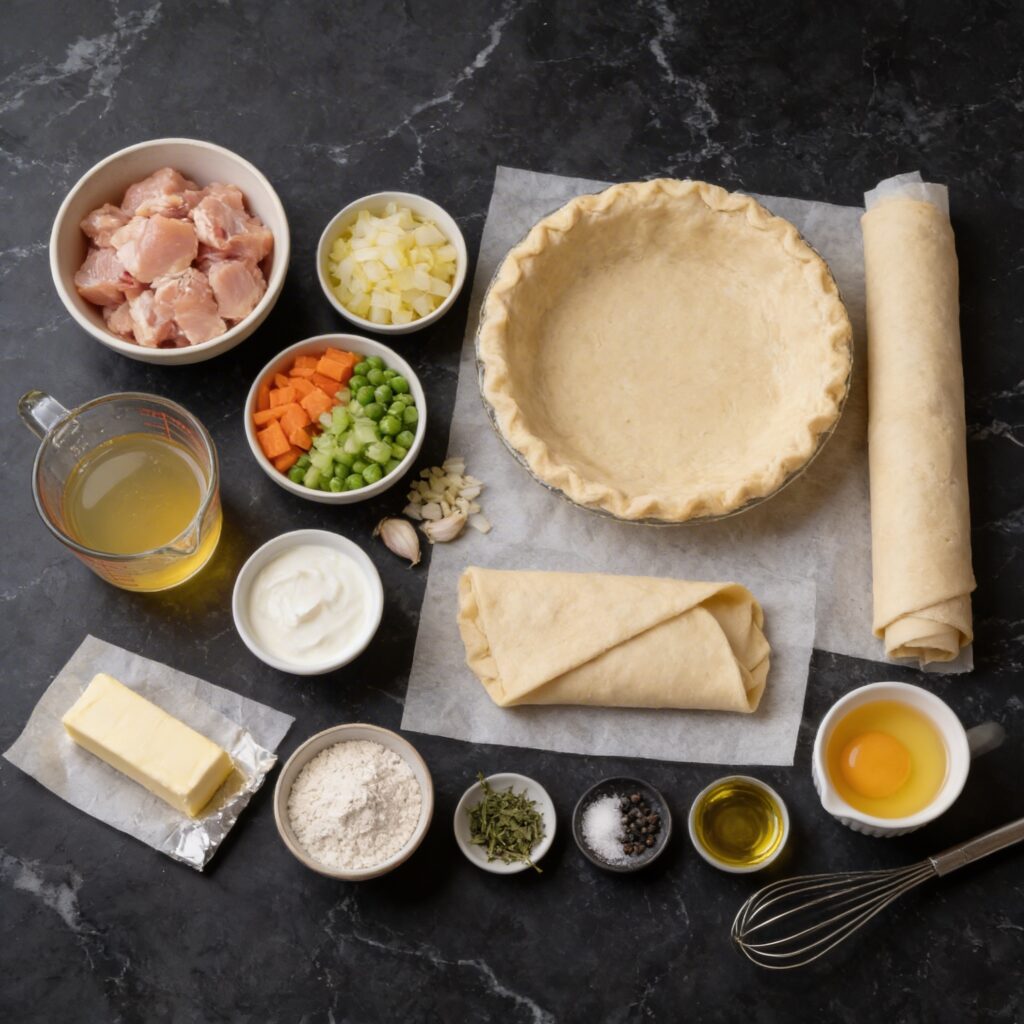
    Ingredients You’ll Need

    Gather all ingredients before starting to make the process smooth and stress-free.

    For the filling:

    • 2 tablespoons unsalted butter
    • 1 small onion, finely chopped
    • 2 cloves garlic, minced
    • 2 medium carrots, diced
    • 2 celery stalks, diced
    • 1 cup frozen peas
    • 2 cups cooked chicken, shredded or diced (rotisserie chicken works great)
    • ¼ cup all-purpose flour
    • 2 cups chicken broth
    • 1 cup whole milk or heavy cream
    • 1 teaspoon dried thyme
    • ½ teaspoon salt
    • ¼ teaspoon black pepper

    For the crust:

    • 1 package (2 sheets) refrigerated pie crusts, or homemade pie dough
    • 1 egg, beaten (for egg wash)

    Optional garnish: Fresh parsley, chopped


    Step 1: Preheat the Oven

    Preheat your oven to 400°F (200°C).

    Grease a 9-inch pie dish with butter or nonstick cooking spray to prevent sticking. If using a deep-dish pie pan, you may need to adjust cooking time slightly.


    Step 2: Cook the Vegetables

    In a large skillet over medium heat, melt the butter.

    Add the onion, carrots, and celery, cooking for about 5–6 minutes until the vegetables are tender but not mushy.

    Add the garlic and cook for another 30 seconds, until fragrant.


    Step 3: Make the Creamy Filling

    Sprinkle the flour over the cooked vegetables and stir well to coat. Cook for 1–2 minutes to eliminate the raw flour taste.

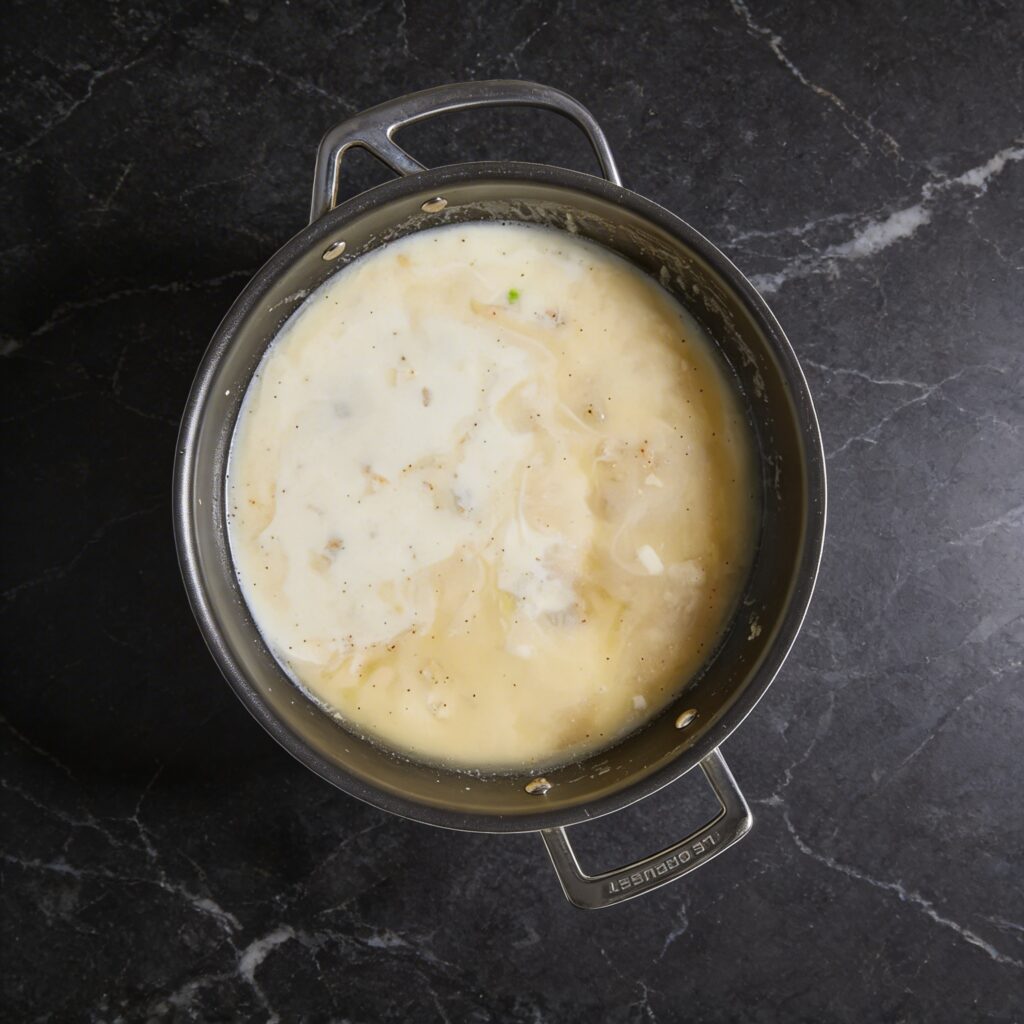
    Gradually add the chicken broth while stirring constantly to prevent lumps. Bring the mixture to a simmer until it thickens slightly.

    Add the milk or cream, dried thyme, salt, and black pepper, stirring until the sauce is smooth and creamy. Stir in the shredded chicken and frozen peas.

    Simmer for 2–3 minutes, then remove from heat.

    The filling should be thick enough to hold together but still saucy enough to coat the vegetables and chicken.


    Step 4: Prepare the Pie Crust

    Roll out one sheet of pie crust and fit it into the bottom of the greased pie dish.

    Make sure the crust covers the bottom and sides evenly.

    Pour the chicken and vegetable filling into the crust, spreading it evenly.

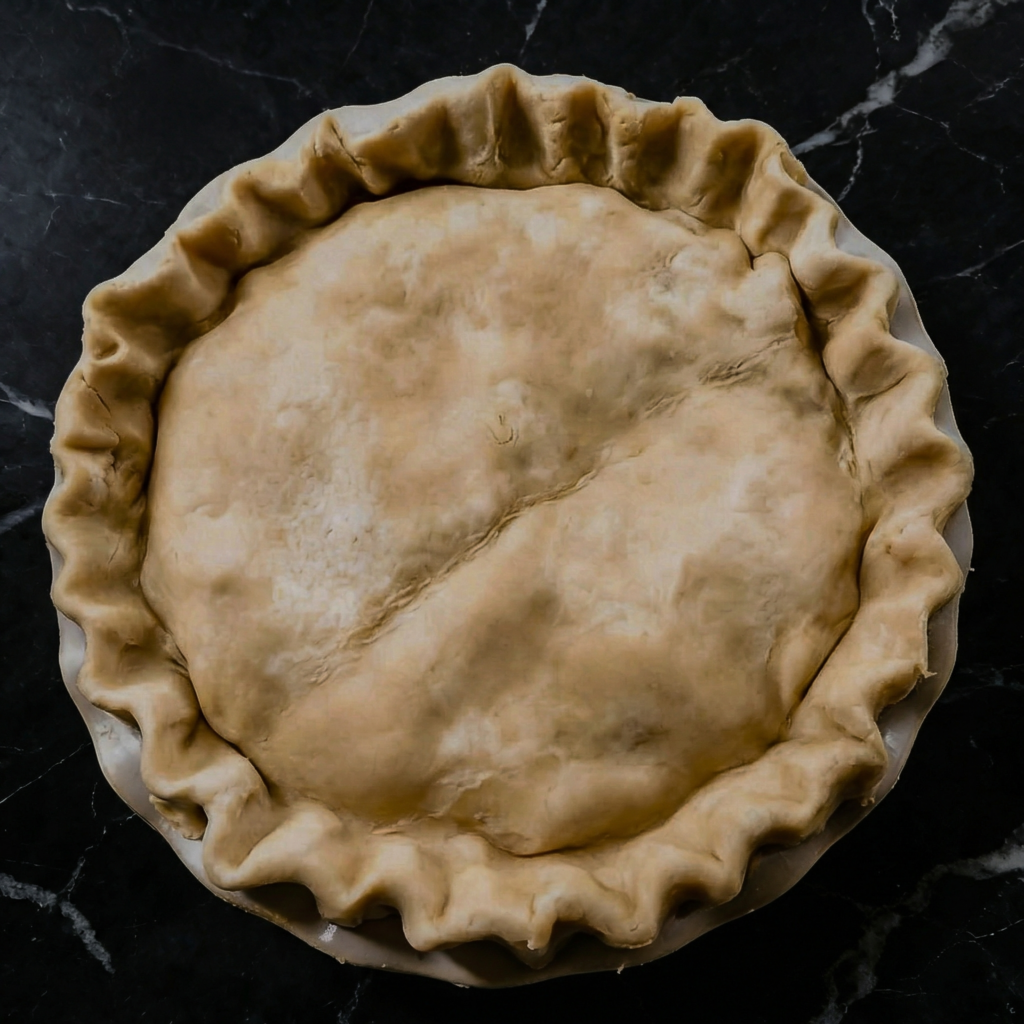
    Roll out the second pie crust and place it over the filling.

    Trim any excess dough around the edges and crimp the edges together with a fork or your fingers to seal the pie.

    Cut a few small slits in the top crust to allow steam to escape during baking.


    Step 5: Apply Egg Wash

    Brush the top crust with the beaten egg.

    This will give your pie a beautiful golden-brown finish.

    You can also sprinkle a little salt or freshly cracked black pepper on top for extra flavor.


    Step 6: Bake the Chicken Pot Pie

    Place the pie in the preheated oven and bake for 30–40 minutes, or until the crust is golden brown and the filling is bubbling through the vents.

    If the crust begins to brown too quickly, cover the edges with foil to prevent burning.


    Step 7: Cool Slightly and Serve

    Remove the pie from the oven and let it cool for 5–10 minutes before slicing.

    This resting time allows the filling to set slightly, making it easier to serve without spilling.

    Garnish with fresh parsley if desired.


    Step 8: Slice and Enjoy

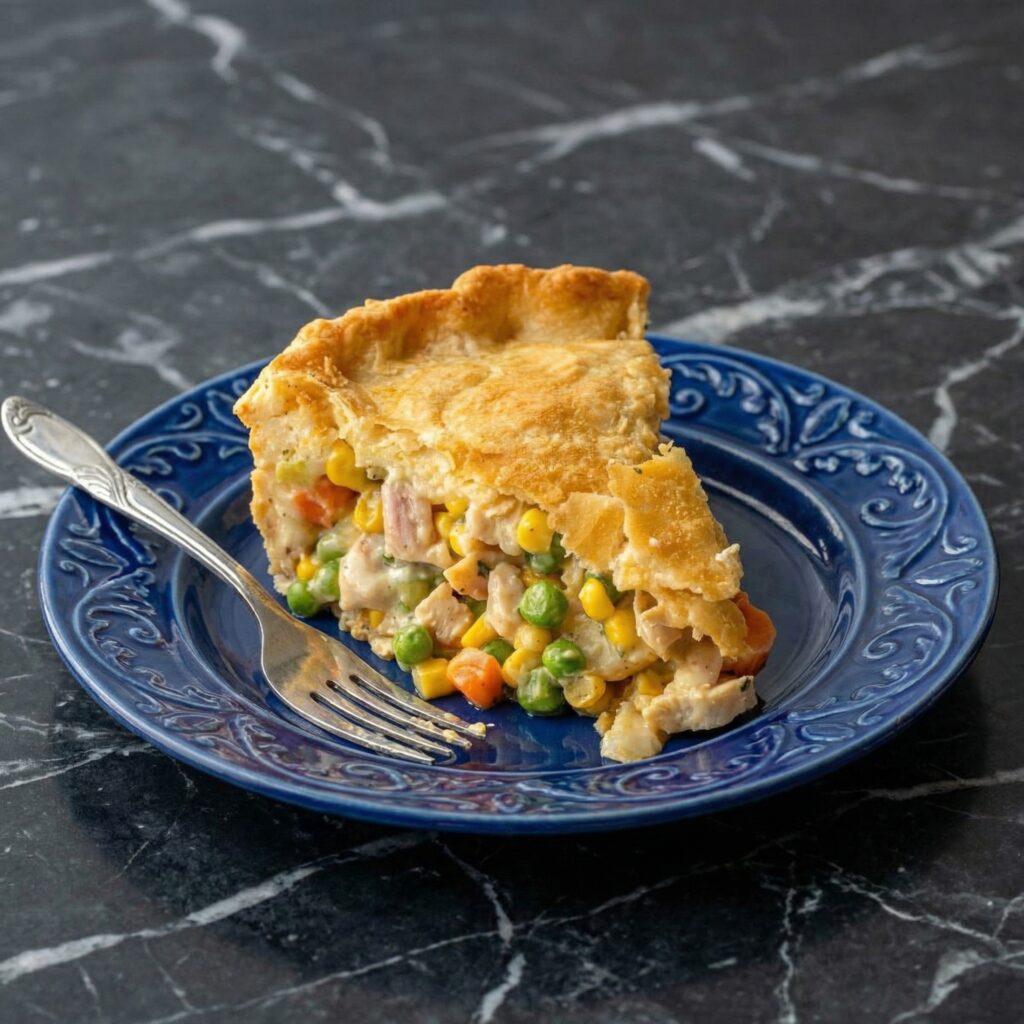
    Use a sharp knife to cut the pie into wedges.

    Each slice should reveal a creamy, savory filling encased in a flaky, golden crust.

    Serve warm with a side salad or steamed vegetables for a complete meal.


    Pro Tips for Perfect Chicken Pot Pie

    1. Use cooked chicken – Rotisserie chicken or leftover roasted chicken works perfectly.
    2. Don’t overcook vegetables – Slightly tender vegetables hold up well in the creamy filling.
    3. Thicken properly – Make sure your filling isn’t too runny, or the pie may become soggy.
    4. Egg wash matters – Brushing the crust with egg gives a shiny, golden finish.
    5. Vent the top crust – Small slits allow steam to escape and prevent a soggy top.

    Variations to Try

    • Cheesy Chicken Pot Pie: Add ½ cup shredded cheddar or Gruyère to the filling for extra richness.
    • Herb-Infused: Mix in fresh thyme, rosemary, or parsley for a fragrant flavor boost.
    • Vegetarian Version: Replace chicken with mushrooms, cauliflower, and other hearty vegetables.
    • Mini Pot Pies: Use muffin tins or small ramekins for individual servings—perfect for parties.

    Wrapping Up

    Chicken pot pie is the ultimate comfort food: creamy, savory, and enveloped in a golden, flaky crust.

    Making it from scratch allows you to control the flavors, textures, and quality of ingredients, resulting in a meal that’s far superior to frozen or store-bought options.

    Whether for a cozy weeknight dinner or a special family gathering, this recipe delivers a hearty, satisfying dish that pleases everyone at the table.

    The combination of tender chicken, vegetables, creamy sauce, and buttery crust is timeless, making chicken pot pie a staple for any comfort-food lover.

    With this guide, you can confidently prepare a pot pie that’s perfectly balanced—rich and indulgent, yet homey and comforting.

    Serve it with a simple salad or steamed veggies, and enjoy the ultimate in warm, cheesy, savory satisfaction. Chicken pot pie isn’t just a meal—it’s a hug in a dish.

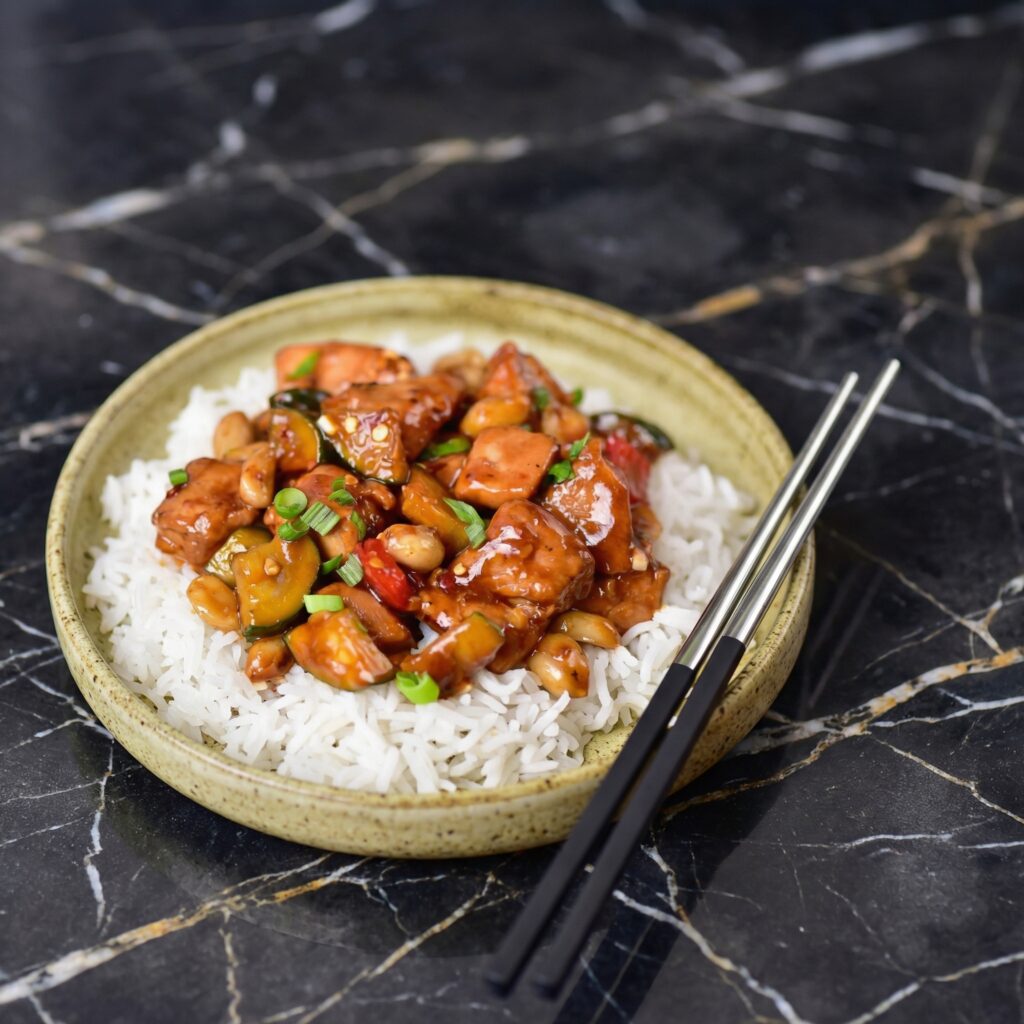
  • Sizzling and Flavorful: How to Make Classic Kung Pao Chicken at Home

    Sizzling and Flavorful: How to Make Classic Kung Pao Chicken at Home

    Few dishes pack the perfect balance of heat, sweetness, and savory depth like Kung Pao Chicken.

    This classic Sichuan stir-fry combines tender chicken, crisp vegetables, and crunchy peanuts all coated in a flavorful, slightly spicy sauce that leaves your taste buds tingling.

    Making it at home is easier than you think, and the results are far superior to takeout, with fresh ingredients, vibrant textures, and bold flavors.

    This step-by-step guide will show you how to master Kung Pao Chicken from start to finish, ensuring every bite bursts with authentic taste.

    Whether you’re cooking for a weeknight dinner or impressing guests, this recipe delivers a flavorful punch with every bite.


    Why You’ll Love This Recipe

    • Quick and easy stir-fry, ready in under 30 minutes
    • Sweet, savory, and mildly spicy sauce
    • Crisp vegetables and crunchy peanuts for texture
    • Customizable spice level
    • Made with fresh ingredients, no mystery sauces

    Kung Pao Chicken is a perfect dish for anyone who loves bold, layered flavors without spending hours in the kitchen.


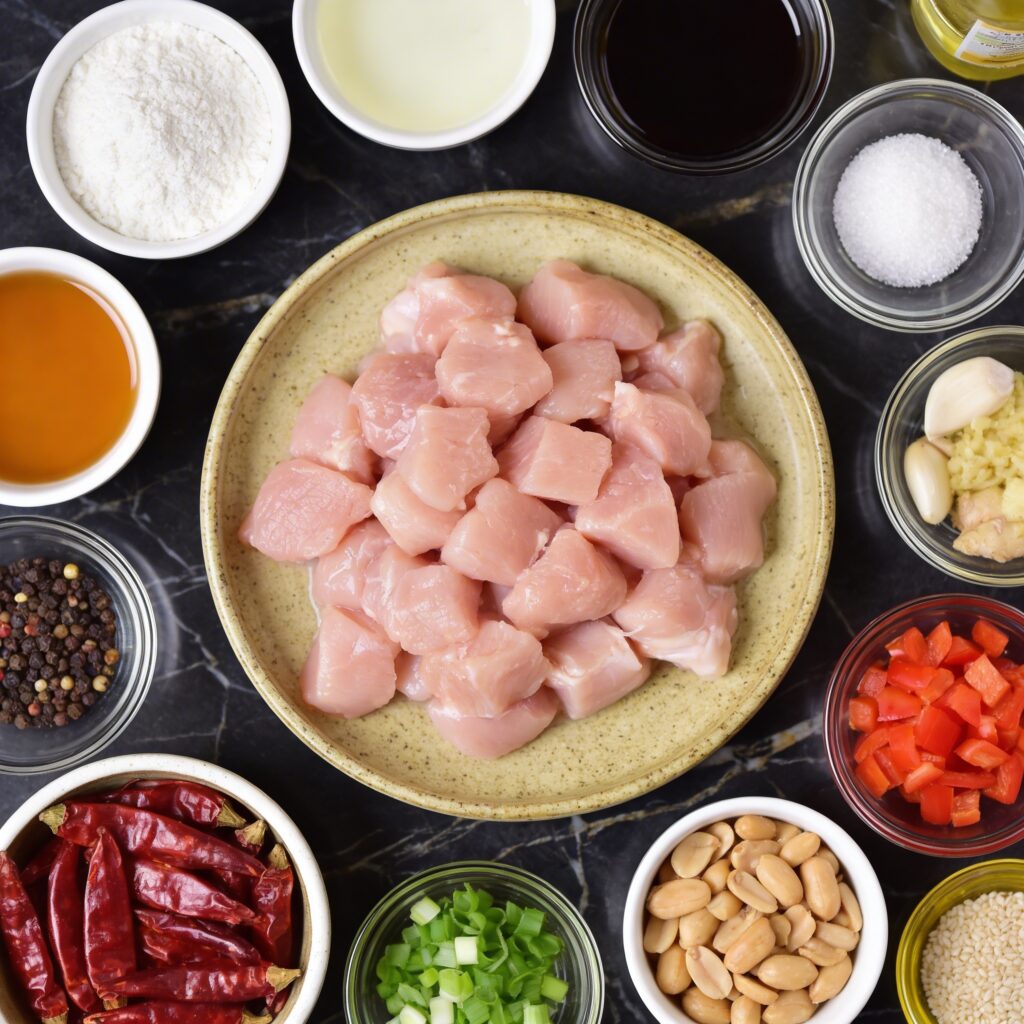
    Ingredients You’ll Need

    For the Chicken:

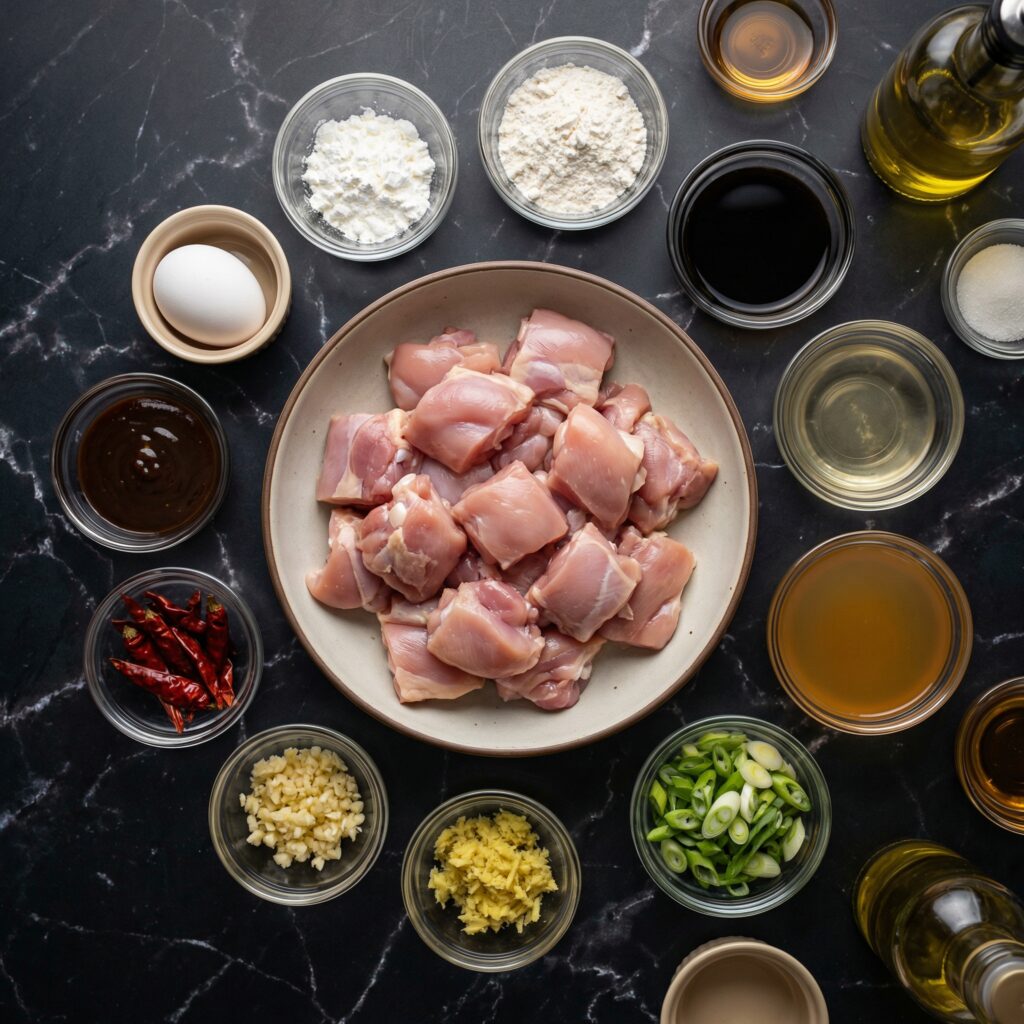
    • 1 pound boneless, skinless chicken thighs or breasts, cut into bite-sized pieces
    • 1 tablespoon soy sauce
    • 1 tablespoon Shaoxing wine (or dry sherry)
    • 1 teaspoon cornstarch
    • ½ teaspoon salt

    For the Sauce:

    • 3 tablespoons soy sauce
    • 1 tablespoon rice vinegar
    • 1 tablespoon hoisin sauce
    • 1 tablespoon sugar
    • 1 teaspoon sesame oil
    • 1 teaspoon cornstarch
    • 2 tablespoons water

    For the Stir-Fry:

    • 2 tablespoons vegetable oil
    • 8–10 dried red chilies, halved and seeds removed (adjust to taste)
    • 3 cloves garlic, minced
    • 1-inch piece ginger, minced
    • 4 green onions, chopped
    • 1 red bell pepper, diced
    • ½ cup unsalted roasted peanuts

    Optional for garnish: toasted sesame seeds


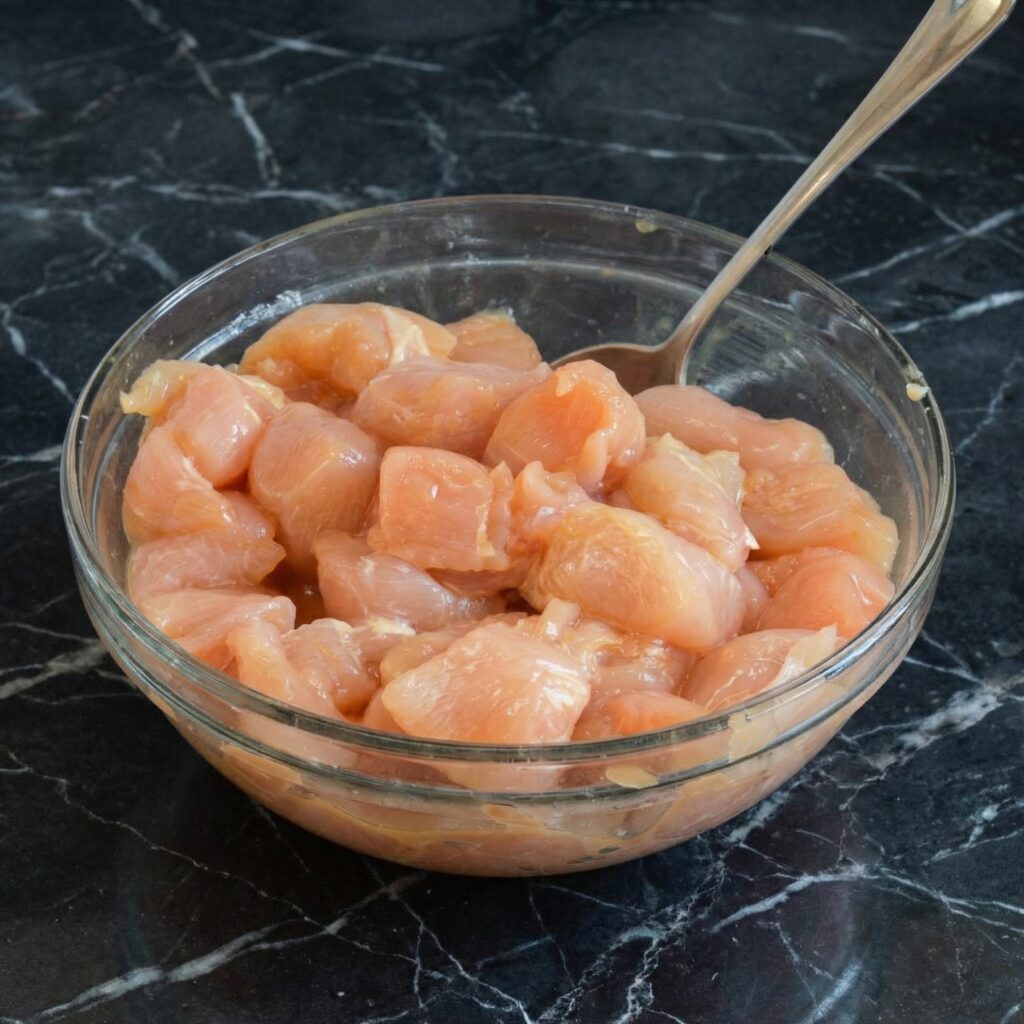
    Step 1: Marinate the Chicken

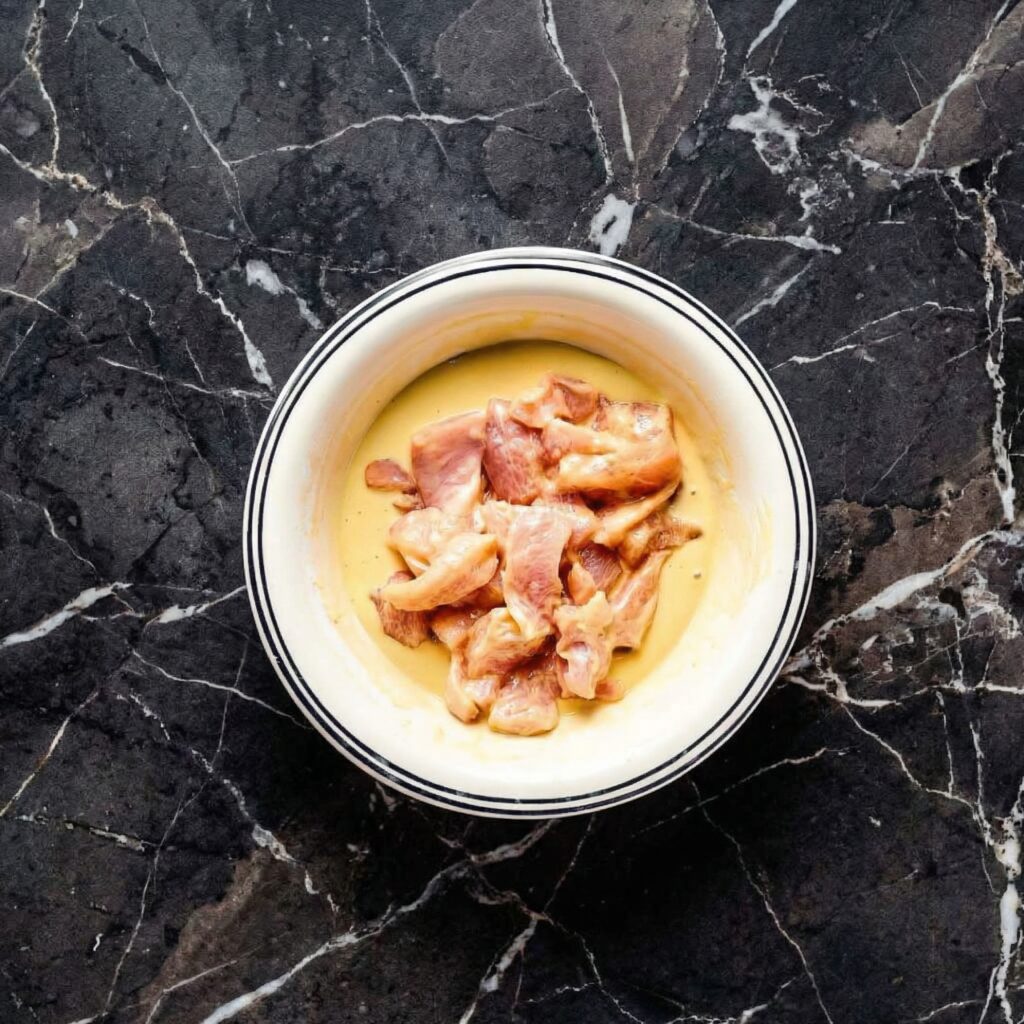
    In a medium bowl, combine chicken pieces with soy sauce, Shaoxing wine, cornstarch, and salt.

    Mix well and let it sit for at least 15 minutes.

    Marinating the chicken ensures tenderness and helps the cornstarch create a light coating when stir-fried, which allows the sauce to cling better.


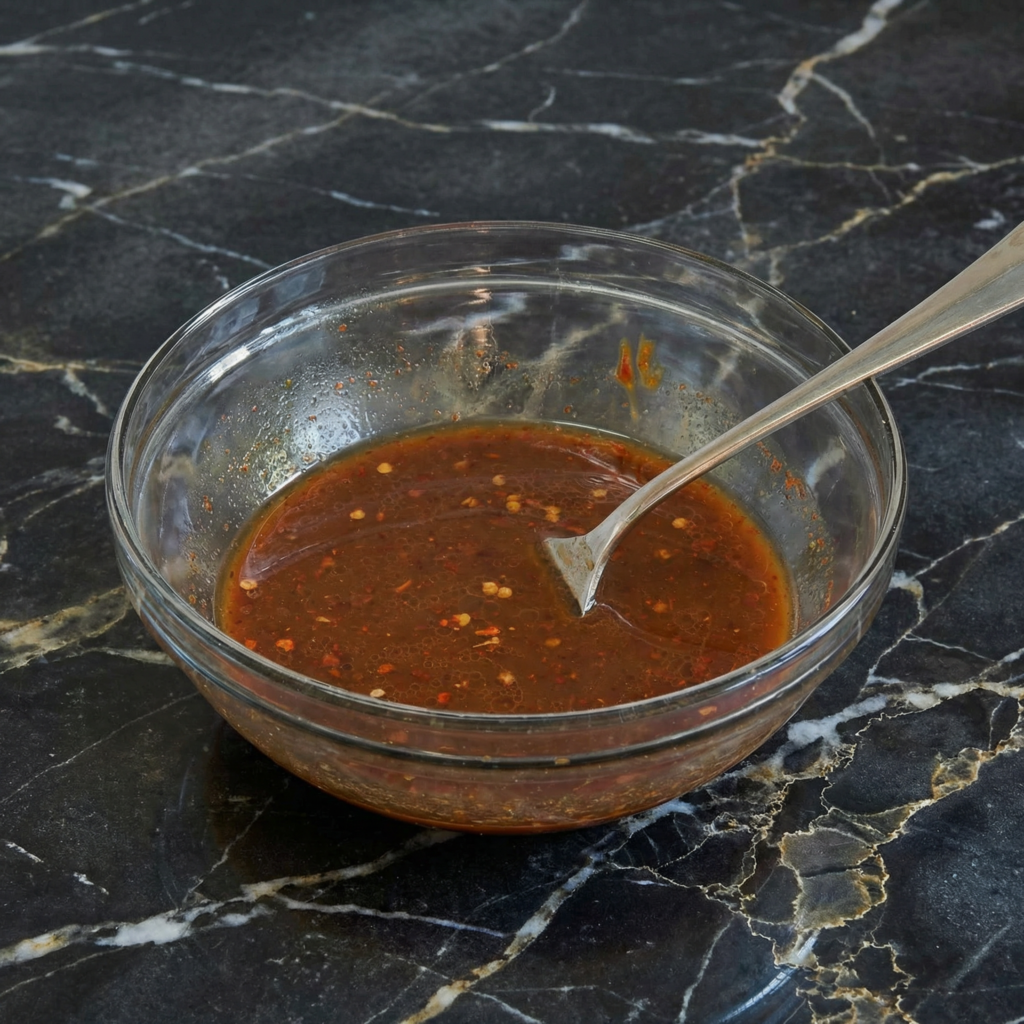
    Step 2: Prepare the Sauce

    In a small bowl, whisk together soy sauce, rice vinegar, hoisin sauce, sugar, sesame oil, cornstarch, and water until smooth.

    Set aside. This sauce will thicken quickly once added to the hot stir-fry.


    Step 3: Prep the Vegetables and Aromatics

    Dice the red bell pepper and chop green onions.

    Mince garlic and ginger finely.

    Remove seeds from dried red chilies if you prefer a milder dish.

    Having all ingredients prepped before cooking is essential, as stir-frying happens fast.


    Step 4: Stir-Fry the Chicken

    Heat a wok or large skillet over medium-high heat and add vegetable oil.

    Add the marinated chicken in a single layer.

    Cook for 3–4 minutes, stirring occasionally, until the chicken is lightly golden and almost cooked through.

    Remove chicken from the wok and set aside.

    This ensures the chicken stays tender and doesn’t overcook while you stir-fry the aromatics.


    Step 5: Toast the Dried Chilies and Aromatics

    In the same wok, add the dried red chilies and stir-fry for about 30 seconds until fragrant.

    Add garlic and ginger and stir-fry another 30 seconds, being careful not to burn them.

    The toasted chilies release their smoky, spicy aroma, which forms the foundation of the dish’s signature flavor.


    Step 6: Stir-Fry the Vegetables

    Add red bell pepper and the white parts of the green onions to the wok.

    Stir-fry for 2–3 minutes until the peppers are slightly tender but still crisp.

    Crisp vegetables add a vibrant texture contrast to the tender chicken and crunchy peanuts.


    Step 7: Combine Chicken and Sauce

    Return the cooked chicken to the wok.

    Give the prepared sauce a quick stir, then pour it over the chicken and vegetables.

    Stir continuously as the sauce thickens and coats every piece evenly, creating a glossy, flavorful finish.

    This step takes about 1–2 minutes, depending on the heat.


    Step 8: Add Peanuts and Green Onion Tops

    Add the roasted peanuts and the green parts of the onions.

    Toss everything together for another 30 seconds.

    The peanuts add crunch, while the green onion tops provide a fresh, aromatic finish.


    Step 9: Serve Immediately

    Serve your Kung Pao Chicken hot over steamed jasmine rice or alongside fried rice.

    Optional garnishes include a sprinkle of toasted sesame seeds for extra texture and visual appeal.

    Enjoy the contrast of tender chicken, crisp vegetables, and nutty crunch coated in a rich, slightly spicy sauce.


    Tips for Perfect Kung Pao Chicken

    • Prep everything first: Stir-frying is fast, so ingredients must be ready.
    • Control the spice: Adjust the number of dried chilies to suit your heat tolerance.
    • Cook in batches if needed: Overcrowding the wok lowers the heat and leads to steaming rather than stir-frying.
    • Use high heat: This ensures quick cooking and helps vegetables stay crisp.
    • Toss quickly: Continuous stirring prevents burning and ensures even coating with the sauce.

    Attention to these details makes a huge difference in flavor and texture.


    Make-Ahead and Storage

    Leftovers can be stored in an airtight container in the refrigerator for up to 3 days.

    Reheat gently in a skillet over medium heat, adding a splash of water if the sauce has thickened too much.

    Avoid microwaving for long periods, which can soften vegetables and make the chicken less tender.


    Flavor Variations

    Once you’ve mastered the classic version, try these variations:

    • Swap peanuts for cashews for a slightly different texture
    • Add sliced zucchini or snow peas for extra veggies
    • Include a drizzle of chili oil for more heat
    • Replace chicken with shrimp or tofu for a protein twist

    Each variation maintains the core flavors while adding your personal touch.


    Final Thoughts

    Kung Pao Chicken is a perfect example of how simple ingredients and proper technique can create a dish bursting with flavor and texture.

    The combination of tender chicken, crisp vegetables, crunchy peanuts, and a spicy, savory sauce makes it a family favorite and a go-to weeknight meal.

    Cooking it at home allows you to balance spice, sweetness, and tang, delivering a more flavorful, fresher version than most takeout options.

    With this step-by-step guide, you’ll be able to create classic Kung Pao Chicken that’s crispy, aromatic, and utterly satisfying every time.

    Sizzling, flavorful, and perfectly balanced—this homemade Kung Pao Chicken will soon become a staple in your dinner rotation.

  • Crispy, Fiery, and Unforgettable: Mastering Classic Spicy Fried Chicken

    Crispy, Fiery, and Unforgettable: Mastering Classic Spicy Fried Chicken

    Few dishes can match the irresistible combination of crispy skin, juicy meat, and bold, fiery flavor that defines classic spicy fried chicken. From backyard cookouts to late-night cravings, this dish is comfort food elevated with a kick.

    Making it at home allows you to control every element—from the heat level to the crunch—resulting in a perfectly golden, mouthwatering masterpiece.

    This step-by-step guide will teach you how to make classic spicy fried chicken that’s crunchy on the outside, tender on the inside, and packed with flavor.

    Whether you’re a beginner or a seasoned cook, you’ll love how achievable this iconic dish is.


    Why You’ll Love This Recipe

    • Extra-crispy coating with a perfect crunch
    • Juicy, flavorful chicken with a spicy kick
    • Perfect for dinners, gatherings, or meal prep
    • Simple pantry ingredients with big flavor
    • Completely customizable heat level

    Classic spicy fried chicken is all about technique and seasoning, and once mastered, it becomes an all-time favorite.


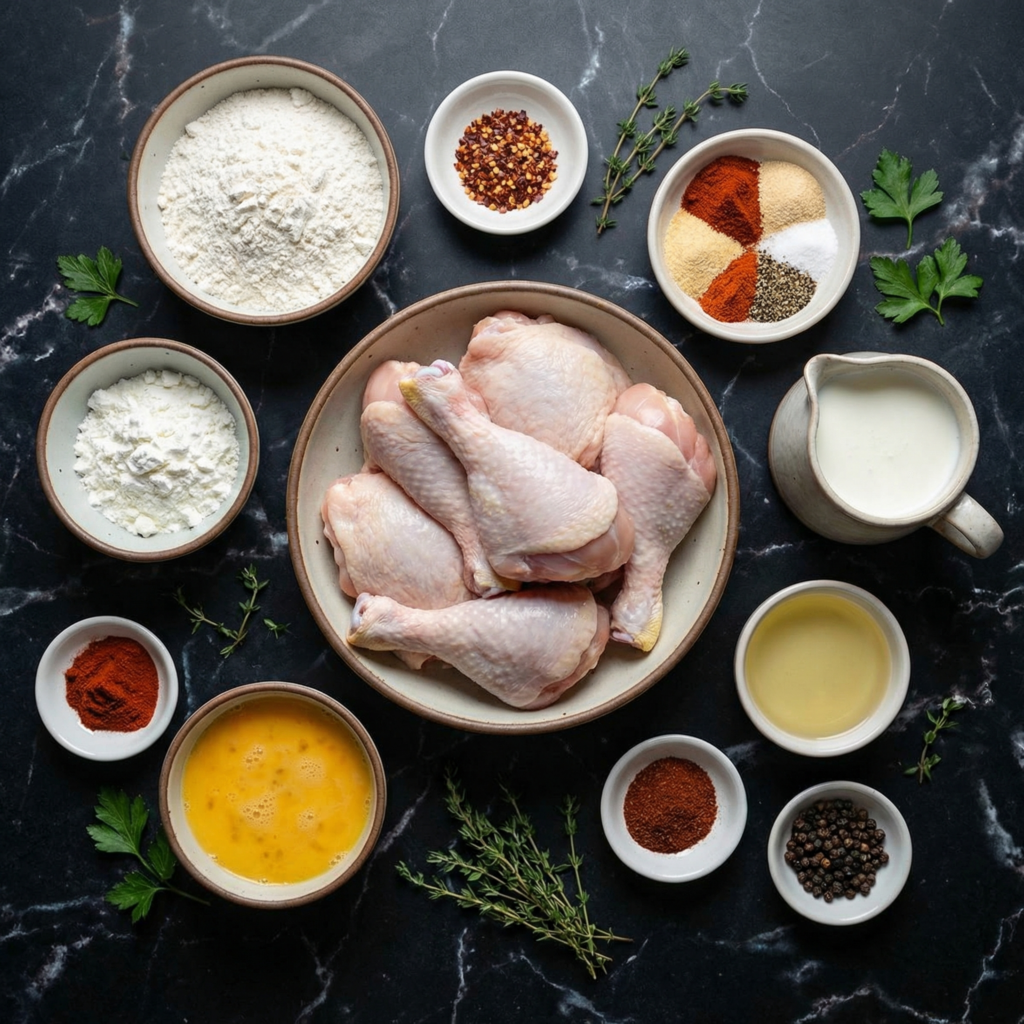
    Ingredients You’ll Need

    For the Chicken:

    • 3–4 pounds chicken pieces (legs, thighs, wings, or breasts)
    • 2 cups buttermilk
    • 1 teaspoon hot sauce (optional, for extra heat)
    • Salt and black pepper to taste

    For the Coating:

    • 2 cups all-purpose flour
    • 1 tablespoon paprika
    • 1 tablespoon cayenne pepper (adjust to taste)
    • 1 teaspoon garlic powder
    • 1 teaspoon onion powder
    • 1 teaspoon dried thyme or oregano
    • ½ teaspoon black pepper
    • 1 teaspoon salt

    For Frying:

    • Vegetable oil or canola oil, for deep frying (enough to fill 2–3 inches in a heavy skillet or Dutch oven)

    Optional for serving: lemon wedges, honey, or hot sauce for drizzling.


    Step 1: Brine the Chicken (Optional but Recommended)

    For extra juiciness, soak the chicken in a simple brine for 1–2 hours or overnight.

    A basic brine can be made with 4 cups water, ¼ cup salt, and ¼ cup sugar. Rinse the chicken after brining and pat dry.

    Brining ensures each bite is tender and flavorful all the way through.


    Step 2: Marinate in Buttermilk

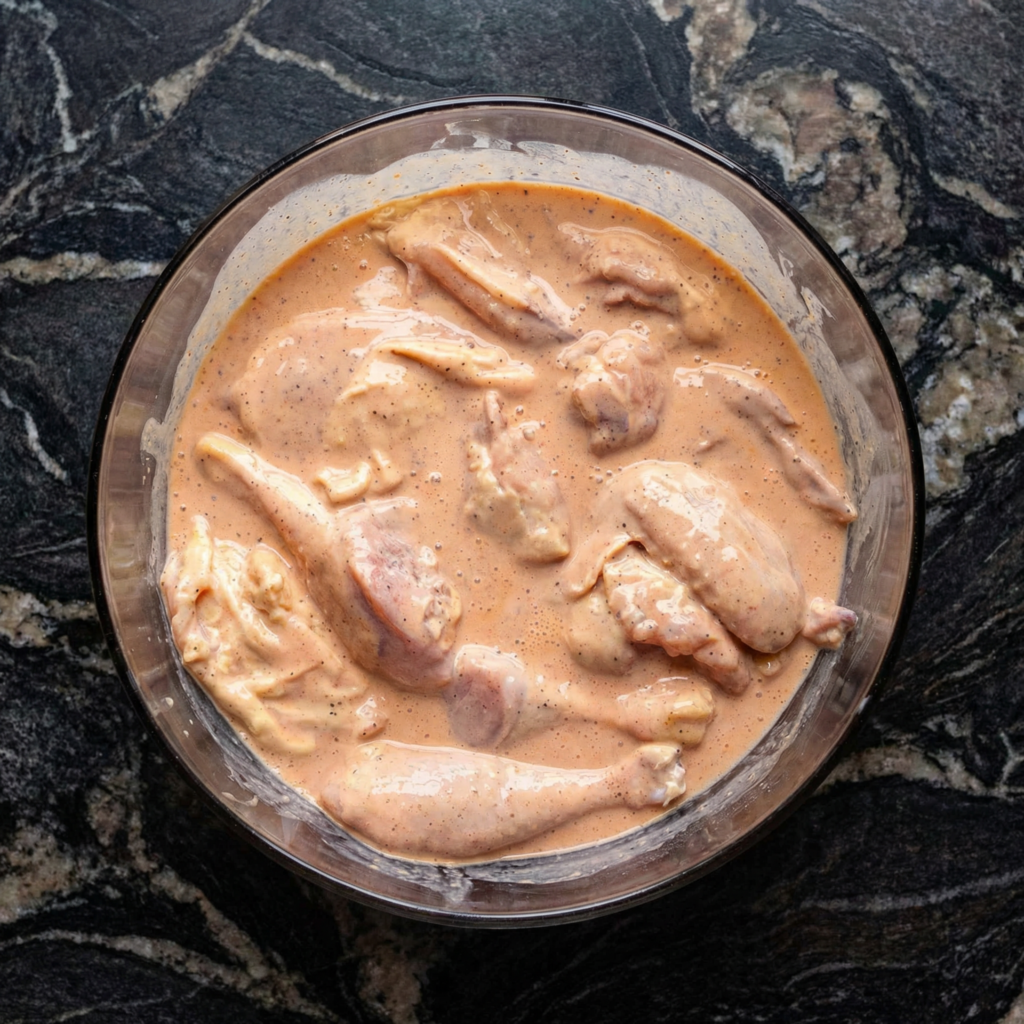
    In a large bowl, mix the buttermilk with 1 teaspoon hot sauce and a pinch of salt and pepper.

    Submerge the chicken pieces completely and refrigerate for at least 2 hours, preferably overnight.

    The acidity of the buttermilk tenderizes the meat while imparting subtle tang that complements the spicy coating.


    Step 3: Prepare the Flour Coating

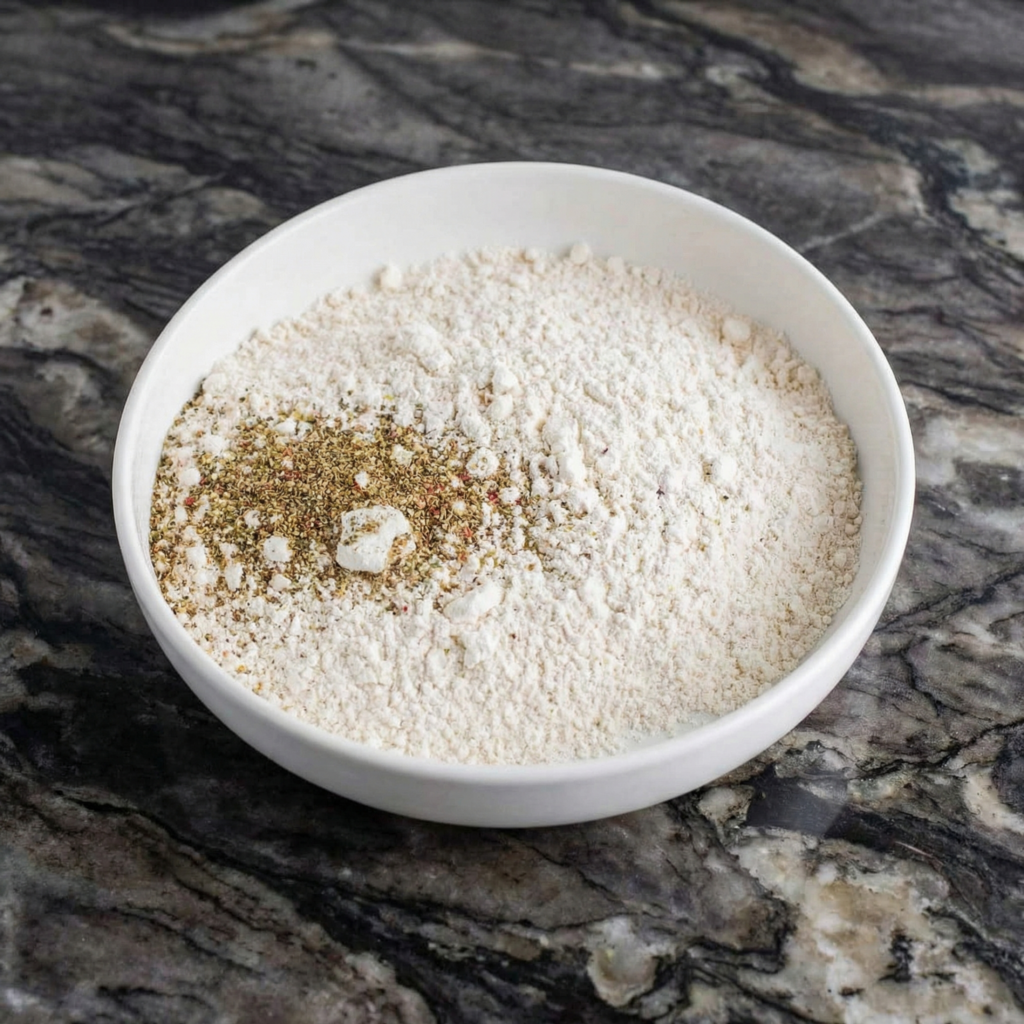
    In a shallow dish, combine flour, paprika, cayenne pepper, garlic powder, onion powder, dried thyme, salt, and black pepper.

    Mix thoroughly so that all spices are evenly distributed.

    This seasoned flour is the secret to achieving that flavorful, fiery crust.


    Step 4: Dredge the Chicken

    Remove the chicken from the buttermilk, allowing excess to drip off.

    Coat each piece thoroughly in the seasoned flour mixture. Press gently so the flour adheres well.

    For extra crunch, double dredge by dipping back into the buttermilk and then into the flour again.

    Place coated pieces on a wire rack while preparing the oil. Avoid stacking to prevent sticking.


    Step 5: Heat the Oil

    Pour oil into a heavy skillet, deep frying pan, or Dutch oven until it reaches 2–3 inches deep.

    Heat to 350°F (175°C) using a candy or deep-fry thermometer.

    Maintaining the proper temperature is crucial: too low and the chicken absorbs oil; too high and the coating burns before the meat cooks.


    Step 6: Fry the Chicken

    Carefully lower a few pieces of chicken into the hot oil. Do not overcrowd the pan.

    Fry for 12–15 minutes for wings or smaller pieces, and 18–20 minutes for larger thighs or breasts, turning occasionally for even browning.

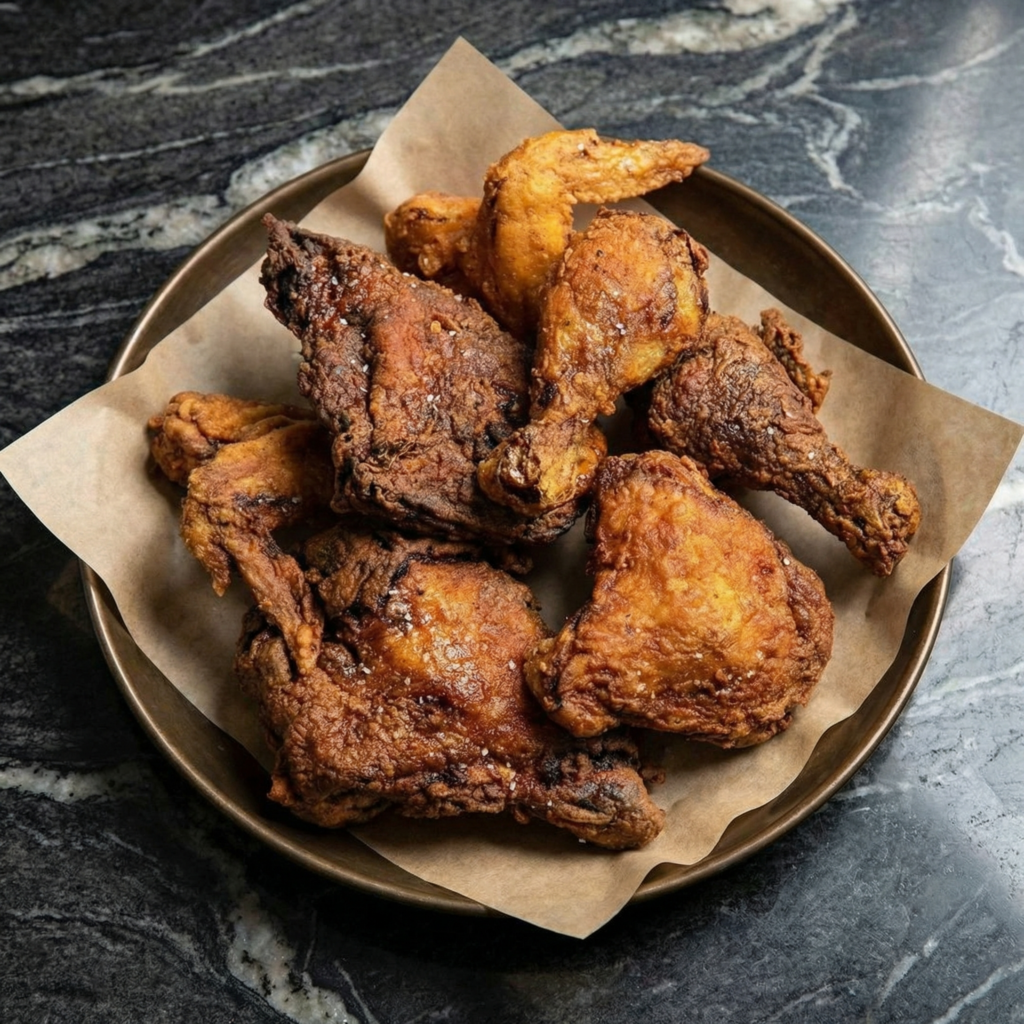
    The crust should turn golden brown, crispy, and flavorful.

    Check doneness with a thermometer: chicken should reach an internal temperature of 165°F (74°C).


    Step 7: Drain and Rest

    Remove chicken from the oil and place on a wire rack set over a baking sheet.

    This allows excess oil to drain and keeps the crust crunchy. Avoid paper towels, which can make the coating soggy.

    Let rest for 5–10 minutes before serving.


    Step 8: Serve and Enjoy

    Serve your classic spicy fried chicken hot with your favorite sides: coleslaw, mashed potatoes, cornbread, or pickles.

    Optional extras: drizzle honey for a sweet-spicy contrast or squeeze fresh lemon for brightness.

    The combination of heat, crunch, and juicy meat makes this dish irresistible.


    Tips for Extra Crispy, Spicy Chicken

    • Keep the chicken cold before frying for better crust adherence.
    • Maintain oil temperature for even cooking.
    • Double dredge for extra crunchy exterior.
    • Use a wire rack instead of paper towels to preserve crispiness.
    • Adjust cayenne pepper to control heat level.

    Small adjustments can make a big difference in texture and flavor.


    Make-Ahead and Storage

    Cooked fried chicken can be stored in the refrigerator for up to 3 days.

    Reheat in a 375°F oven for 10–12 minutes to restore crispiness.

    Avoid microwaving, which can make the coating soft and chewy.

    Leftover chicken also makes excellent sandwiches or salads.


    Variations

    Once you’ve mastered the classic version, try these variations:

    • Honey Hot Chicken: drizzle honey over the fried chicken before serving.
    • Buttermilk-Brined Extra Hot: increase cayenne and add hot sauce to the brine.
    • Southern Style: add a teaspoon of smoked paprika and a pinch of cayenne for deeper flavor.
    • Crunchy Cornflake Coating: mix crushed cornflakes with the flour for extra crunch.

    The possibilities are endless while maintaining the crispy, spicy foundation.


    Final Thoughts

    Classic spicy fried chicken is a dish that never goes out of style. With its crispy, golden exterior, tender, juicy interior, and bold kick of spice, it’s comfort food at its finest.

    While it might seem intimidating, this recipe shows that with proper preparation, attention to temperature, and seasoning, you can make restaurant-quality fried chicken at home.

    Whether for family dinners, parties, or a weekend indulgence, this spicy fried chicken will become a go-to favorite. Crispy, flavorful, and fiery, it’s a dish that will leave everyone coming back for seconds.

    Golden, spicy, and utterly irresistible—classic fried chicken done right.

  • Crispy, Sticky, and Better Than Takeout: The Ultimate General Tso’s Chicken

    Crispy, Sticky, and Better Than Takeout: The Ultimate General Tso’s Chicken

    If you’ve ever craved that perfect balance of crispy chicken coated in a glossy, sweet-and-spicy sauce, General Tso’s Chicken is likely at the top of your list.

    This beloved takeout favorite delivers bold flavor, satisfying crunch, and just the right kick of heat—all wrapped up in one irresistible dish.

    The good news?

    You don’t need to order delivery to enjoy it. With a few pantry staples and the right technique, you can recreate restaurant-quality General Tso’s Chicken right in your own kitchen.

    Follow this step-by-step guide to achieve crispy, golden chicken tossed in a rich, sticky sauce that clings beautifully to every bite.

    Let’s get cooking.


    Why You’ll Love This Recipe

    • Ultra crispy chicken pieces
    • Perfect balance of sweet, savory, and spicy
    • Better flavor than takeout
    • Ready in about 40 minutes
    • Family-friendly with adjustable heat

    Once you make it at home, you may never go back to ordering out.


    Ingredients You’ll Need

    For the Chicken:

    • 1½ pounds boneless, skinless chicken thighs, cut into bite-sized pieces
    • 1 cup cornstarch
    • 2 large eggs, beaten
    • ½ teaspoon salt
    • ½ teaspoon black pepper
    • Oil for frying (vegetable or canola)

    For the Sauce:

    • ½ cup chicken broth
    • ¼ cup soy sauce
    • 3 tablespoons hoisin sauce
    • 3 tablespoons rice vinegar
    • 3 tablespoons brown sugar
    • 1 tablespoon cornstarch
    • 2 cloves garlic, minced
    • 1 teaspoon grated fresh ginger
    • 1–2 teaspoons red chili flakes (adjust to taste)
    • 1 tablespoon sesame oil

    Garnish:

    • Sliced green onions
    • Sesame seeds

    Step 1: Prepare the Chicken

    Start by patting the chicken pieces dry with paper towels.

    Season lightly with salt and black pepper.

    Place cornstarch in a shallow bowl and beaten eggs in another.

    Dip each piece of chicken into the egg, then coat thoroughly in cornstarch. Press gently so the coating sticks well.

    Set coated pieces aside on a plate.


    Step 2: Heat the Oil

    Pour oil into a deep skillet or heavy pot, filling about 2 inches deep.

    Heat to 350°F (175°C). If you don’t have a thermometer, test with a small piece of coated chicken—it should sizzle immediately.

    Maintaining proper temperature is key to achieving that signature crispy exterior.


    Step 3: Fry the Chicken

    Carefully lower chicken pieces into the hot oil in small batches.

    Fry for 3–4 minutes until golden and cooked through.

    Remove and drain on a wire rack.

    For extra crispiness, you can double-fry: fry once, let rest for 2 minutes, then fry again for 1–2 minutes until deeply golden.

    Repeat with remaining chicken.


    Step 4: Prepare the Sauce Mixture

    In a bowl, whisk together chicken broth, soy sauce, hoisin sauce, rice vinegar, brown sugar, and cornstarch until smooth.

    Set aside.

    This sauce is what gives General Tso’s Chicken its iconic sticky coating and sweet heat.


    Step 5: Sauté Aromatics

    In a large skillet or wok over medium heat, add a small drizzle of oil.

    Add minced garlic and grated ginger, cooking for about 30 seconds until fragrant.

    Stir in red chili flakes for heat.

    Be careful not to burn the garlic—it should smell aromatic, not bitter.


    Step 6: Thicken the Sauce

    Pour the prepared sauce mixture into the skillet with the aromatics.

    Cook over medium heat, stirring constantly, until the sauce thickens and becomes glossy—about 2–3 minutes.

    The cornstarch activates as it heats, creating that classic sticky texture.


    Step 7: Toss the Chicken

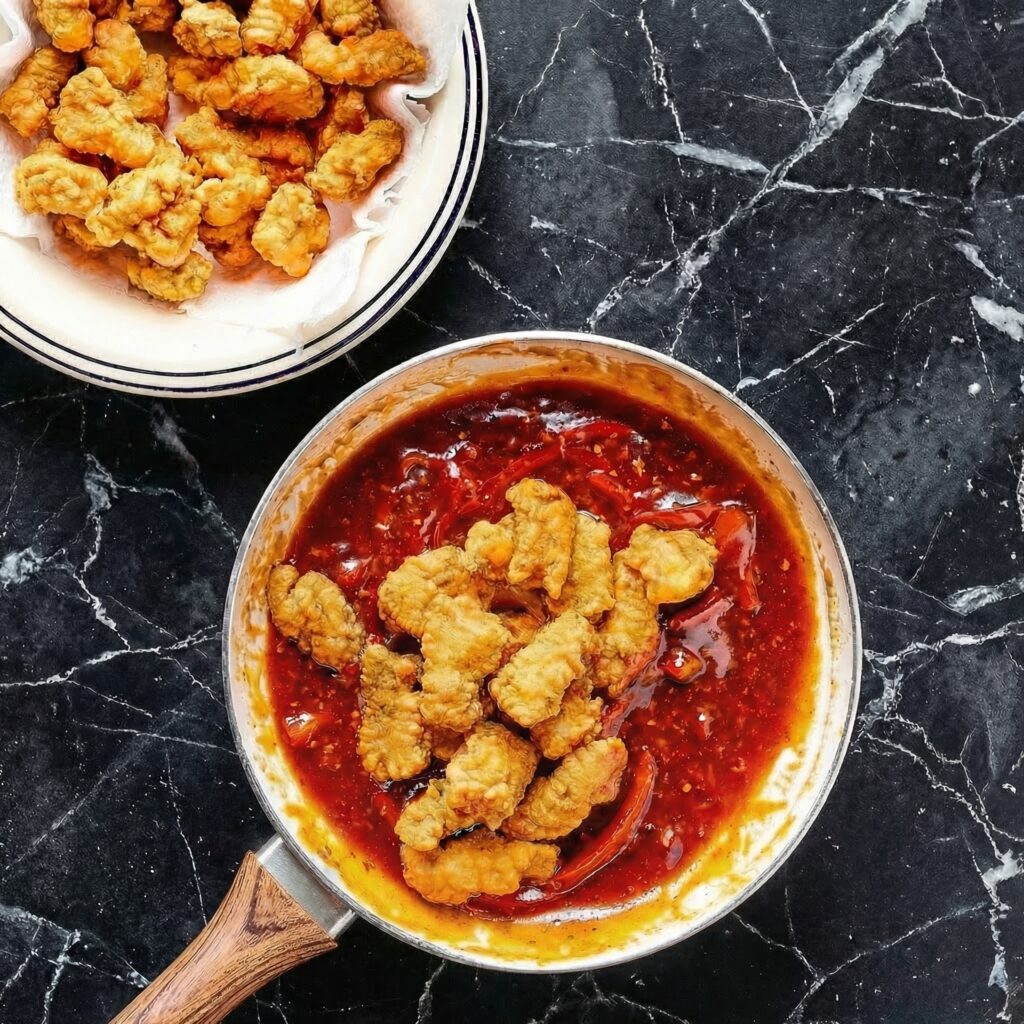
    Add the crispy chicken pieces to the thickened sauce.

    Toss gently but thoroughly until every piece is coated.

    Cook for an additional 1–2 minutes so the sauce adheres fully to the chicken.

    Avoid overcooking at this stage to maintain crispness.


    Step 8: Garnish and Serve

    Transfer the coated chicken to a serving dish.

    Sprinkle with sliced green onions and sesame seeds for freshness and crunch.

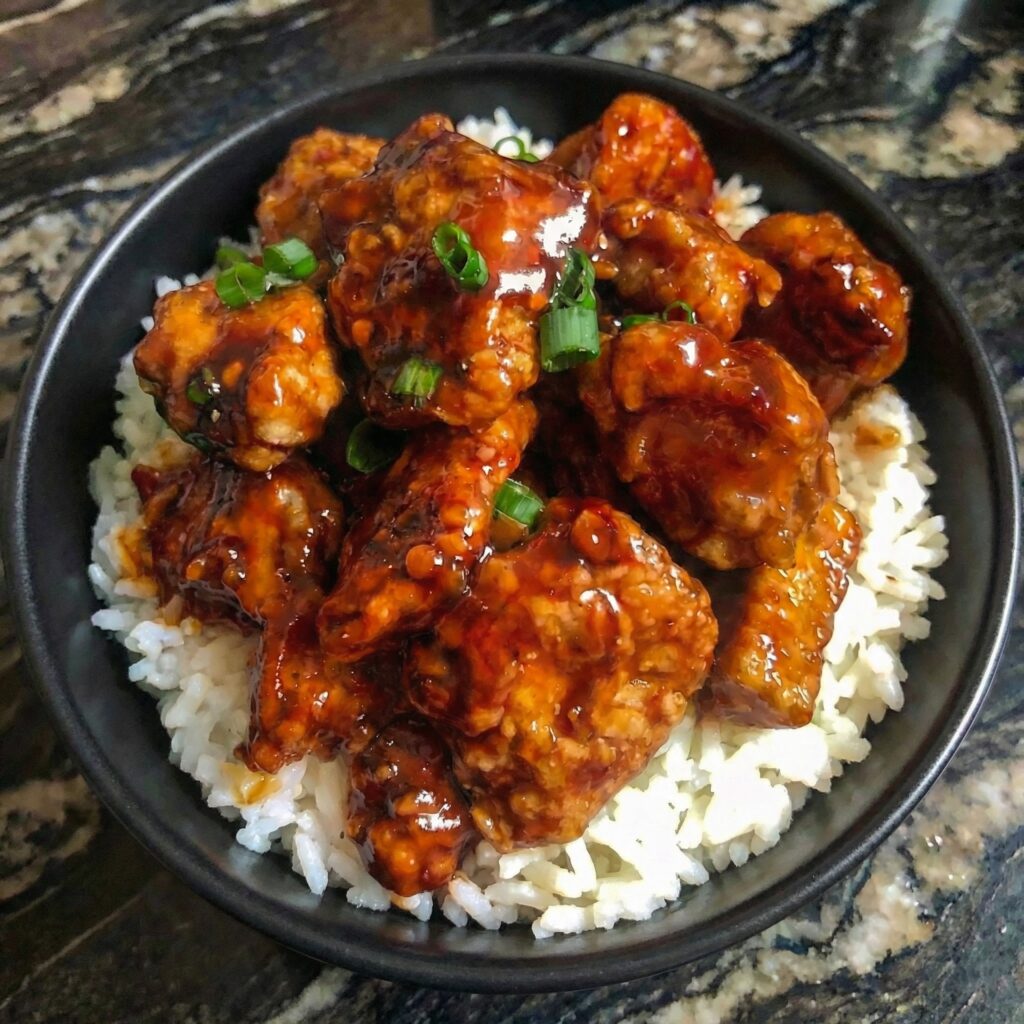
    Serve immediately over steamed white rice or fried rice.

    The contrast of fluffy rice and sticky, crispy chicken is unbeatable.

    Tips for Perfect General Tso’s Chicken

    • Use chicken thighs for juicier results.
    • Keep oil temperature steady.
    • Fry in batches to prevent crowding.
    • Double-fry for maximum crispiness.
    • Toss in sauce just before serving.

    These details make all the difference between soggy and spectacular.


    Adjusting the Spice Level

    You can easily control the heat:

    • Use fewer chili flakes for milder flavor.
    • Add a splash of hot sauce for extra spice.
    • Balance with additional brown sugar if needed.

    The beauty of homemade General Tso’s Chicken is customizing it to your taste.


    Make It Lighter

    If you prefer a lighter version:

    • Air fry coated chicken at 400°F for 12–15 minutes, flipping halfway.
    • Bake on a wire rack at 425°F for 20–25 minutes.

    While frying yields the crispiest texture, these alternatives still deliver great flavor.


    Storage and Reheating

    Store leftovers in an airtight container in the refrigerator for up to 3 days.

    Reheat in a skillet over medium heat to help restore texture.

    Avoid microwaving too long, as it can soften the coating.


    Final Thoughts

    General Tso’s Chicken is the perfect combination of crispy, sweet, savory, and spicy. When made fresh at home, the flavors are brighter, the texture is crispier, and the satisfaction is unbeatable.

    With this step-by-step guide, you now have everything you need to recreate this takeout classic in your own kitchen. Whether you’re cooking for family, entertaining friends, or simply craving comfort food, this dish delivers every single time.
    Golden, sticky, and bursting with flavor—this homemade General Tso’s Chicken is guaranteed to impress.
  • Sizzling, Cheesy, and Loaded with Flavor: The Ultimate Homemade Philly Cheesesteaks

    Sizzling, Cheesy, and Loaded with Flavor: The Ultimate Homemade Philly Cheesesteaks

    Few sandwiches are as iconic and crave-worthy as Philly Cheesesteaks.

    Thinly sliced steak, perfectly caramelized onions, melted cheese, and a soft hoagie roll come together to create a sandwich that’s rich, savory, and completely satisfying.

    While it may seem like something best left to restaurants, making authentic-tasting Philly Cheesesteaks at home is easier than you think.

    With the right cut of beef, proper cooking technique, and a little attention to detail, you can recreate this legendary sandwich in your own kitchen.

    Follow this step-by-step guide and get ready for sizzling, cheesy perfection.


    Why You’ll Love This Recipe

    • Juicy, thinly sliced steak
    • Perfectly melted cheese
    • Simple ingredients
    • Ready in about 30 minutes
    • Customizable with your favorite toppings

    It’s hearty comfort food done right.


    Ingredients You’ll Need

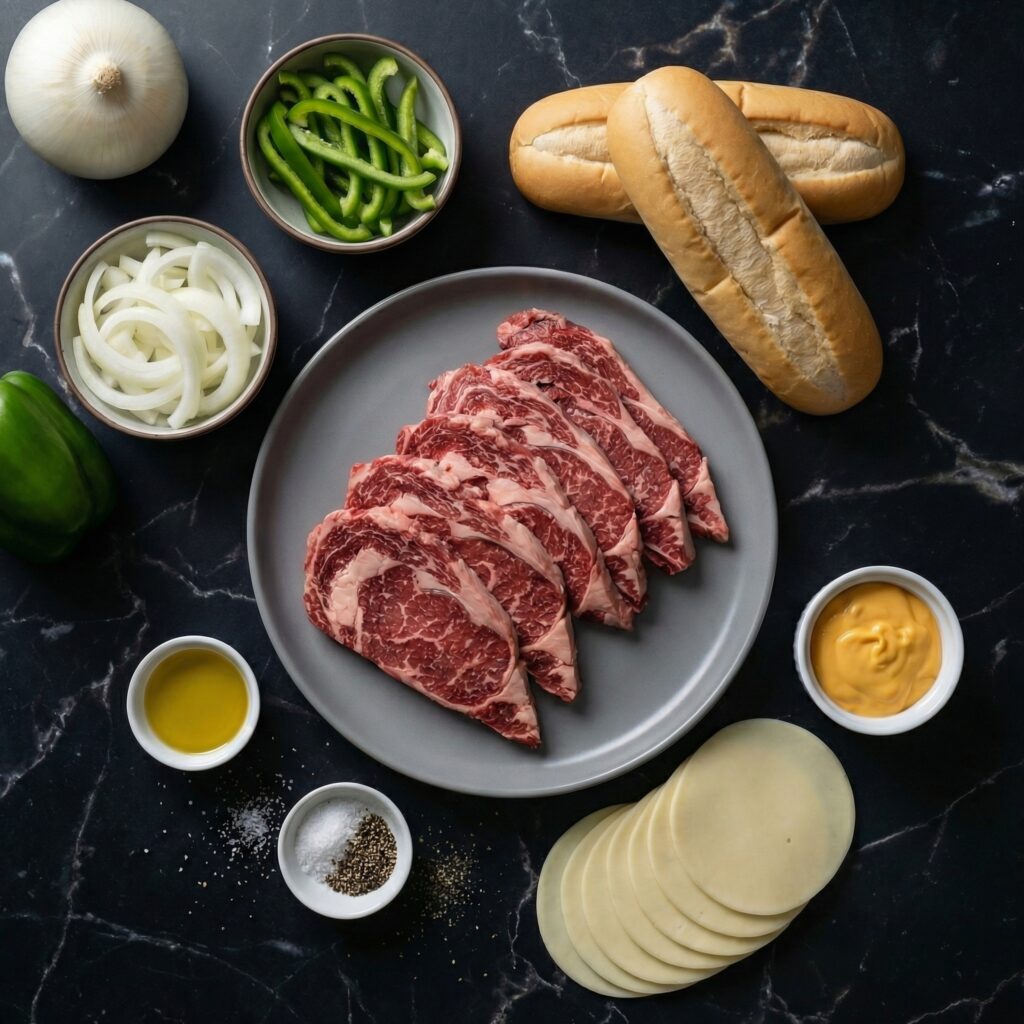
    • 1½ pounds ribeye steak (thinly sliced)
    • 4 hoagie rolls (soft but sturdy)
    • 8 slices provolone cheese (or Cheez Whiz, if preferred)
    • 1 large yellow onion, thinly sliced
    • 1 green bell pepper, thinly sliced (optional)
    • 2 tablespoons butter
    • 1 tablespoon olive oil
    • 1 teaspoon salt
    • ½ teaspoon black pepper
    • ½ teaspoon garlic powder

    Optional additions: sautéed mushrooms, hot peppers, or extra cheese.


    Step 1: Prepare the Steak

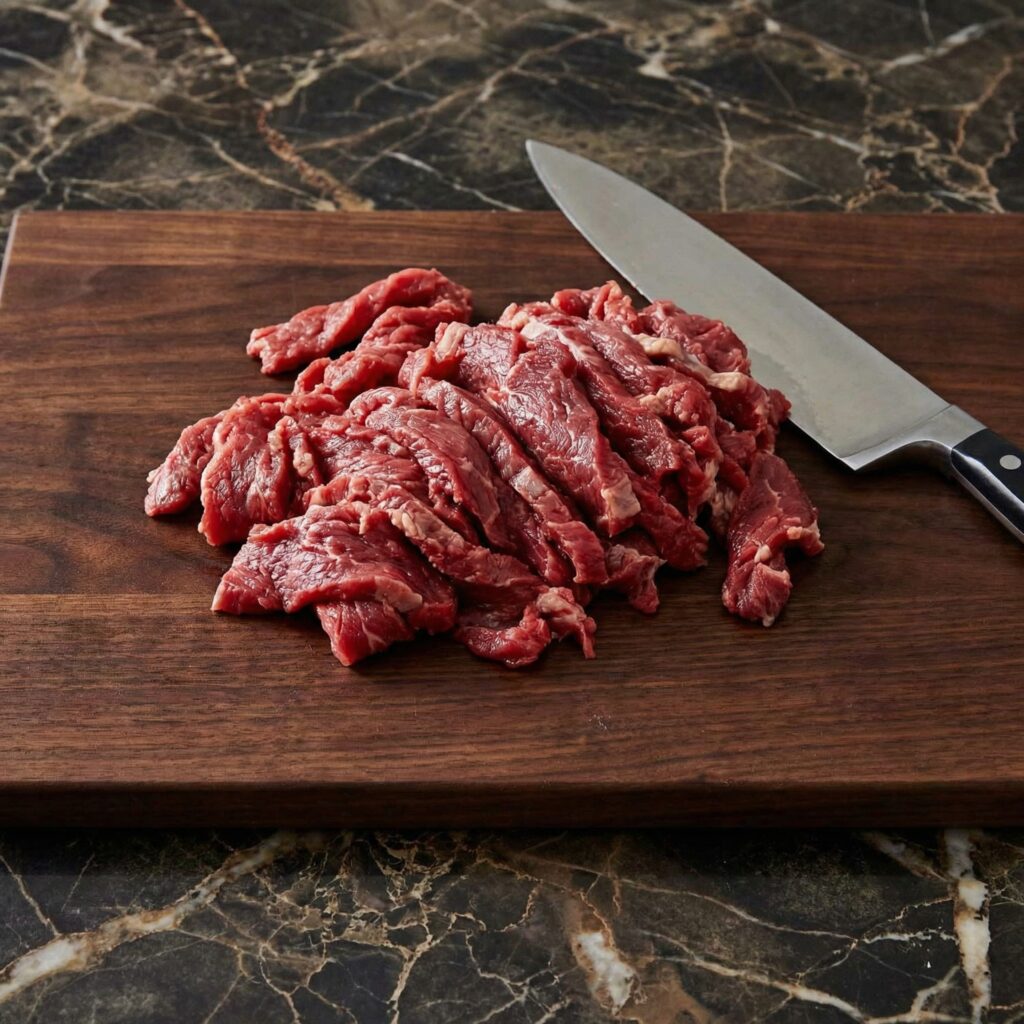
    For the best texture, place the ribeye steak in the freezer for about 30–40 minutes before slicing. This firms it up and makes it easier to cut into thin strips.

    Using a sharp knife, slice the steak as thinly as possible against the grain. Thin slices cook quickly and stay tender.

    Season lightly with salt, pepper, and garlic powder.


    Step 2: Prepare the Vegetables

    Slice the onion into thin strips. If using bell peppers or mushrooms, slice them thinly as well.

    Thin slicing ensures even cooking and allows the vegetables to blend seamlessly into the sandwich.


    Step 3: Toast the Rolls

    Preheat your oven to 350°F (175°C).

    Slice the hoagie rolls lengthwise without cutting all the way through.

    Place them on a baking sheet and toast for 3–5 minutes until lightly crisp on the inside but still soft on the outside.

    Set aside. A lightly toasted roll prevents sogginess while holding all the fillings.


    Step 4: Caramelize the Onions

    Heat a large skillet or griddle over medium heat.

    Add 1 tablespoon butter and the olive oil.

    Once melted, add the sliced onions (and peppers if using).

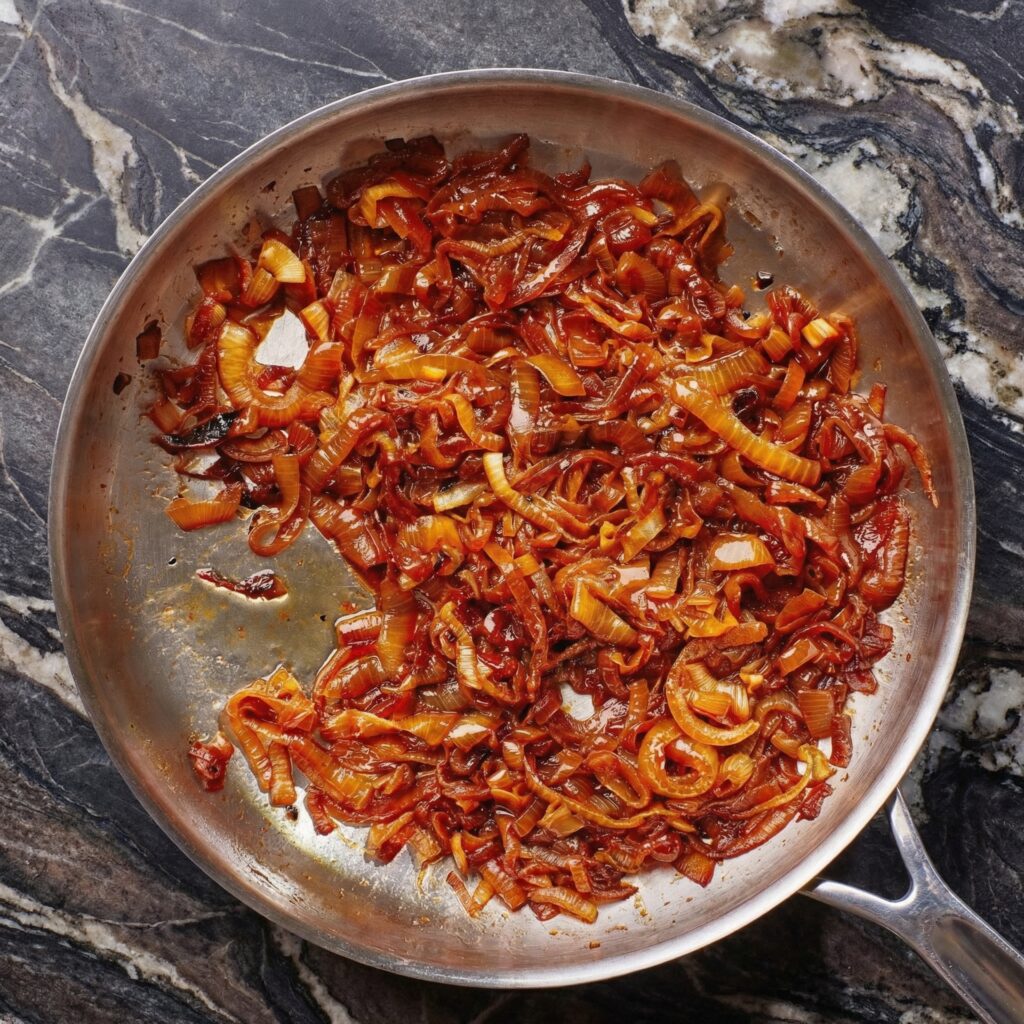
    Cook for 8–10 minutes, stirring occasionally, until softened and lightly caramelized.

    Season with a small pinch of salt.

    Remove from the skillet and set aside.


    Step 5: Cook the Steak

    Increase heat to medium-high.

    Add the remaining butter to the skillet.

    Once hot, spread the thinly sliced steak in an even layer.

    Let it cook undisturbed for about 1–2 minutes to develop browning.

    Using a spatula, chop and flip the meat, cooking for another 2–3 minutes until just cooked through.

    Avoid overcooking, as thin steak can become tough quickly.


    Step 6: Combine Steak and Onions

    Return the caramelized onions (and other vegetables) to the skillet with the cooked steak.

    Toss everything together until evenly mixed and heated through.

    Taste and adjust seasoning if needed.


    Step 7: Melt the Cheese

    Divide the steak mixture into four equal portions in the skillet.

    Place two slices of provolone over each portion.

    Allow the cheese to melt naturally from the heat of the meat, about 1–2 minutes.

    If needed, cover the skillet briefly to speed up melting.

    If using Cheez Whiz, warm it separately and drizzle over the meat before assembling.


    Step 8: Assemble the Sandwiches

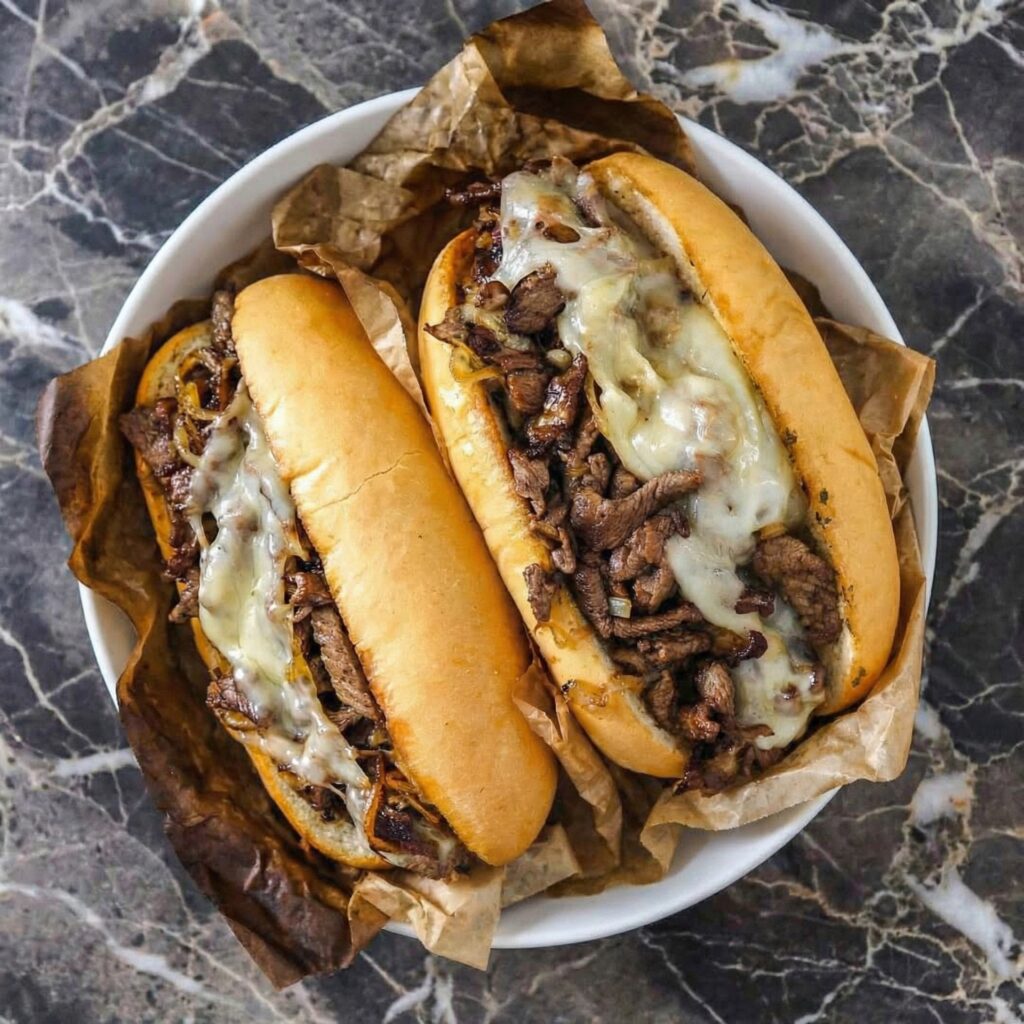
    Using a spatula, scoop each cheesy steak portion directly into a toasted hoagie roll.

    Make sure the filling is evenly distributed from end to end.

    Press gently to secure the sandwich.

    Serve immediately while hot and melty.


    Tips for Perfect Philly Cheesesteaks

    • Use ribeye for the most tender and flavorful result.
    • Slice the steak very thin for authentic texture.
    • Cook over high heat for quick searing.
    • Don’t overload the vegetables unless preferred.
    • Toast the rolls lightly to maintain structure.

    These small steps make a big difference in flavor and texture.


    Cheese Options Explained

    Provolone offers a mild, creamy melt that complements the steak beautifully.

    Cheez Whiz delivers a classic, ultra-creamy, nostalgic flavor.

    Some prefer American cheese for its smooth melt and mild taste.

    Choose the cheese that suits your preference—it’s all about personal taste.


    Customization Ideas

    Make your Philly Cheesesteaks your own with:

    • Sautéed mushrooms
    • Hot cherry peppers
    • Jalapeños for spice
    • Extra garlic butter brushed on the rolls
    • A sprinkle of fresh parsley for brightness

    While traditional versions keep it simple, there’s room for creativity.


    Storage and Reheating

    Store leftover steak filling in an airtight container in the refrigerator for up to 3 days.

    Reheat in a skillet over medium heat until warmed through.

    Assemble fresh sandwiches when ready to serve for best texture.

    Avoid microwaving assembled sandwiches, as it can make the bread soggy.


    Final Thoughts

    Philly Cheesesteaks are the ultimate comfort sandwich—savory, cheesy, and deeply satisfying. With tender ribeye, caramelized onions, and perfectly melted cheese tucked into a soft roll, every bite delivers bold flavor and indulgent texture.

    By following these simple steps, you can create restaurant-quality Philly Cheesesteaks at home with ease. Whether you’re feeding family, hosting friends, or simply craving something hearty and delicious, this classic sandwich never disappoints.

    Sizzling steak, gooey cheese, and warm bread—this is sandwich perfection at its finest.

  • Savory, Sweet, and Soul-Warming: The Ultimate Homemade Gyudon

    Savory, Sweet, and Soul-Warming: The Ultimate Homemade Gyudon

    If you’re craving a comforting, flavor-packed rice bowl that comes together quickly, Gyudon is the answer.

    This beloved Japanese dish features thinly sliced beef simmered in a savory-sweet sauce with tender onions, all spooned generously over a bowl of steaming rice. It’s simple, satisfying, and packed with umami depth.

    Gyudon translates to “beef bowl,” but it’s so much more than that. The magic lies in the balance of soy sauce, mirin, sugar, and dashi, which create a rich broth that soaks into the rice while keeping the beef tender and flavorful. Let’s walk through how to make this classic dish step by step.


    Why You’ll Love This Recipe

    • Quick and easy (ready in about 30 minutes)
    • Comforting and deeply savory
    • Minimal ingredients with maximum flavor
    • Perfect for weeknight dinners
    • Easily customizable with toppings

    Gyudon is ideal when you want something hearty but don’t want to spend hours in the kitchen.


    Ingredients You’ll Need

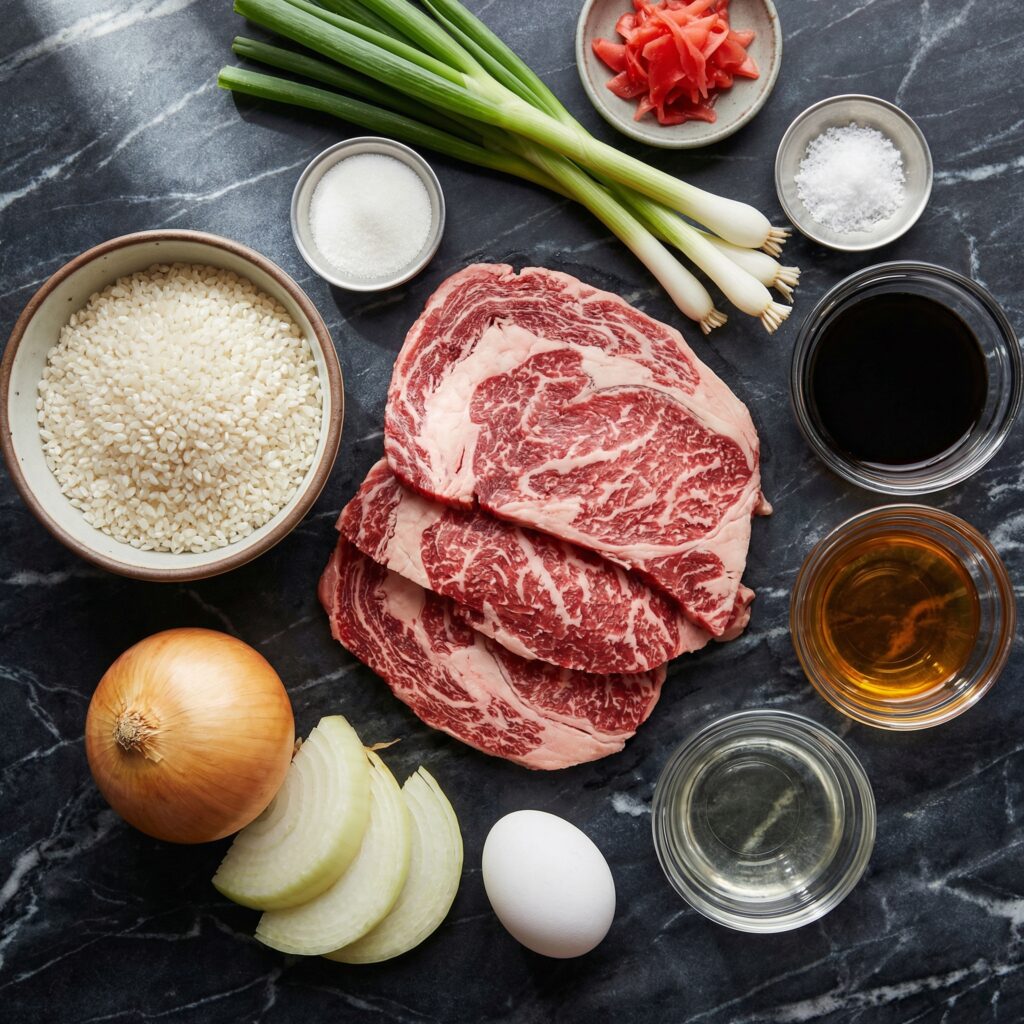
    For the Beef and Sauce:

    • 1 pound thinly sliced beef (ribeye or sirloin works best)
    • 1 large onion, thinly sliced
    • 1 cup dashi (or substitute with beef broth if needed)
    • 3 tablespoons soy sauce
    • 2 tablespoons mirin
    • 1 tablespoon sake (optional but recommended)
    • 1 tablespoon sugar
    • 1 teaspoon grated fresh ginger

    For Serving:

    • 3–4 cups cooked Japanese short-grain rice
    • 2 soft-poached or soft-boiled eggs (optional)
    • Sliced green onions
    • Pickled red ginger (beni shoga)
    • Shichimi togarashi (Japanese chili spice)

    Step 1: Prepare the Rice

    Start by cooking Japanese short-grain rice according to package instructions. The rice should be fluffy, slightly sticky, and warm when serving.

    Keep the rice covered and warm while preparing the beef. Freshly cooked rice is essential, as it absorbs the flavorful sauce beautifully.


    Step 2: Slice the Onion

    Thinly slice the onion into half-moons. Thin slices ensure they soften quickly and blend seamlessly into the sauce.

    The onions play an important role—they add sweetness and soak up the savory broth.


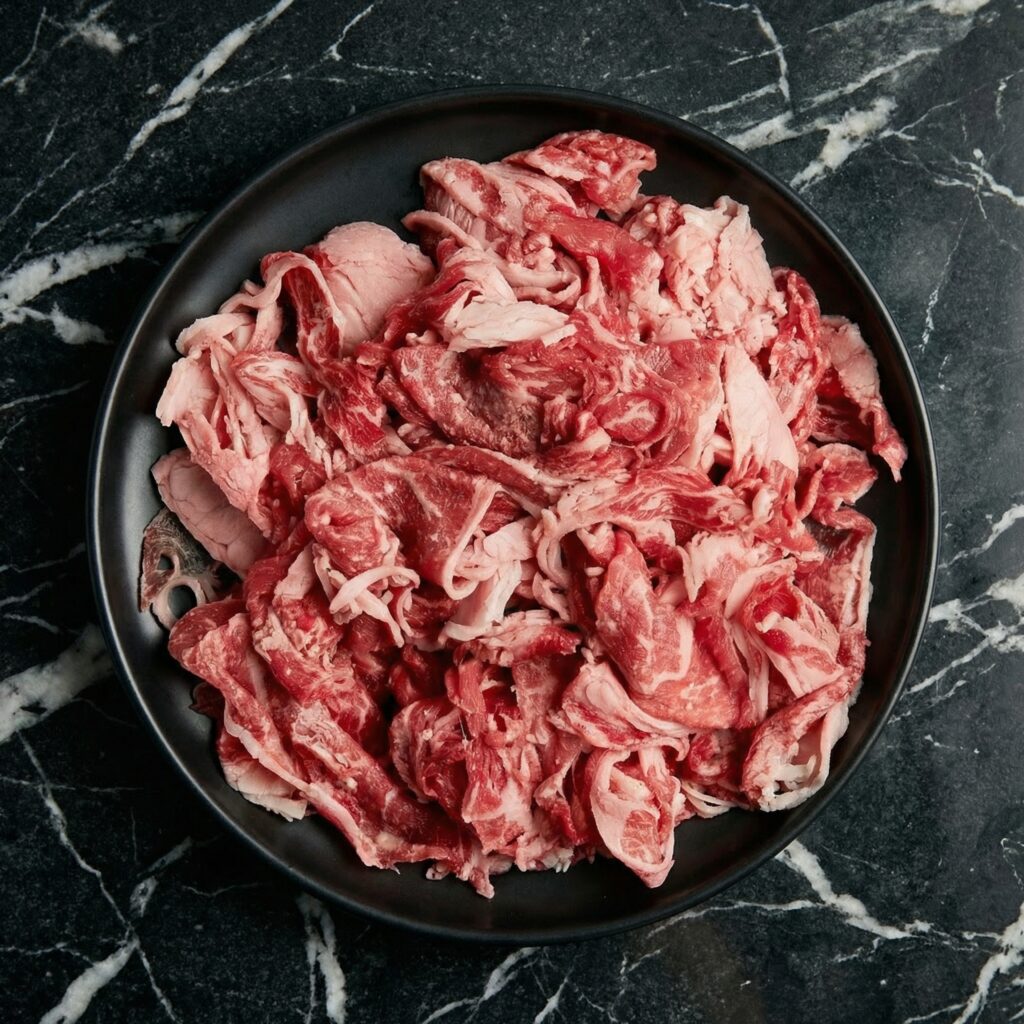
    Step 3: Prepare the Beef

    If your beef isn’t pre-sliced, place it in the freezer for 20–30 minutes to firm up slightly. This makes it easier to slice very thinly.

    Slice against the grain into thin strips. Thin beef cooks quickly and stays tender in the simmering broth.


    Step 4: Build the Sauce Base

    In a large skillet or shallow pan, combine dashi, soy sauce, mirin, sake, sugar, and grated ginger.

    Bring the mixture to a gentle simmer over medium heat. Stir until the sugar dissolves completely.

    The aroma should be savory with a subtle sweetness.


    Step 5: Cook the Onions

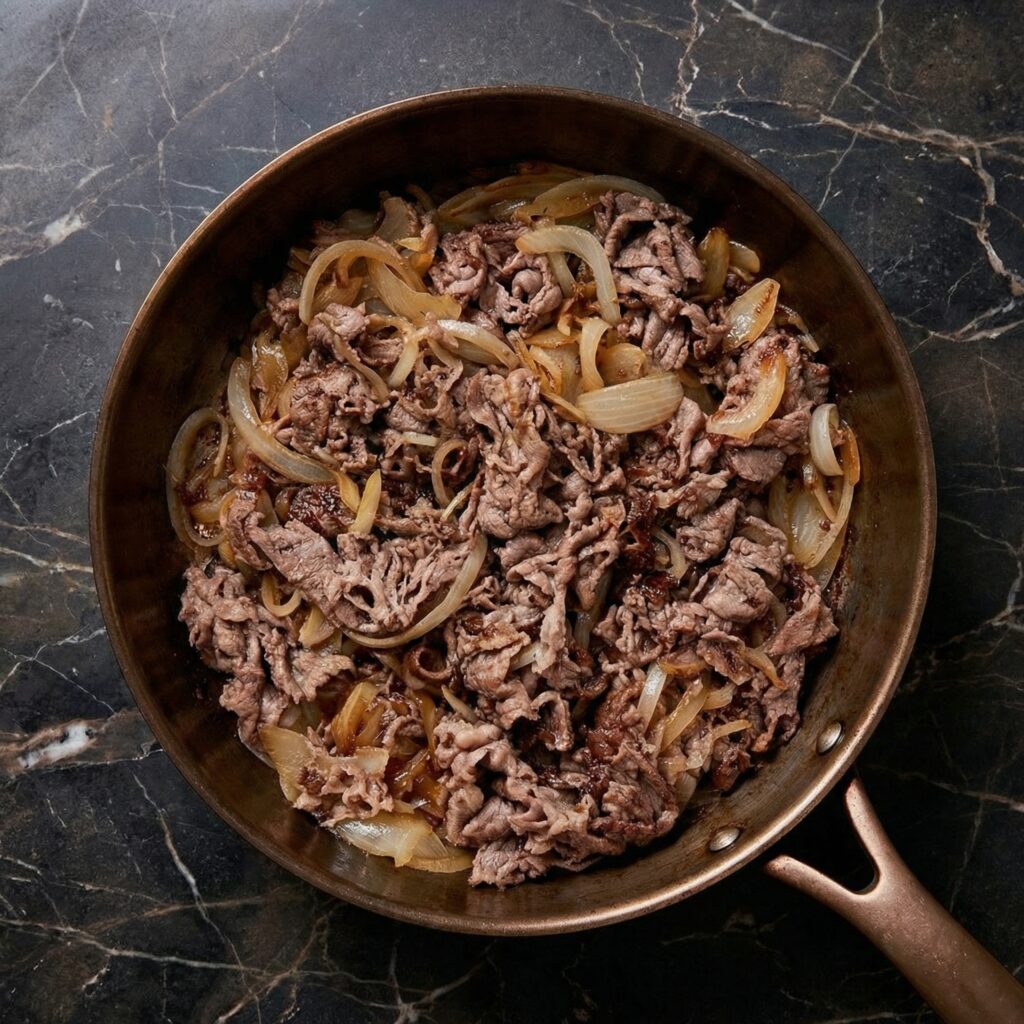
    Add the sliced onions to the simmering broth.

    Cook for 5–7 minutes until softened and slightly translucent. The onions will release their sweetness into the sauce, enhancing the depth of flavor.


    Step 6: Add the Beef

    Spread the thinly sliced beef evenly over the onions in the pan.

    Let it simmer gently for about 3–5 minutes. Use chopsticks or tongs to separate the slices so they cook evenly.

    Avoid overcooking—the beef should be tender and just cooked through.

    As it simmers, the beef absorbs the savory-sweet sauce, becoming incredibly flavorful.


    Step 7: Adjust the Flavor

    Taste the sauce.

    If you prefer a sweeter profile, add a little more sugar or mirin. If you want deeper savoriness, add a splash more soy sauce.

    Let the mixture simmer for another minute to allow the flavors to meld.

    The sauce should be slightly brothy but concentrated enough to coat the beef and rice.


    Step 8: Prepare Optional Eggs

    For an extra layer of richness, prepare soft-poached or soft-boiled eggs.

    To soft-boil: simmer eggs for 6–7 minutes, then transfer to an ice bath before peeling. The yolk should be jammy and luscious.

    You can also crack eggs directly into the simmering beef during the last few minutes and cover the pan to cook gently.


    Step 9: Assemble the Bowls

    Spoon a generous portion of warm rice into serving bowls.

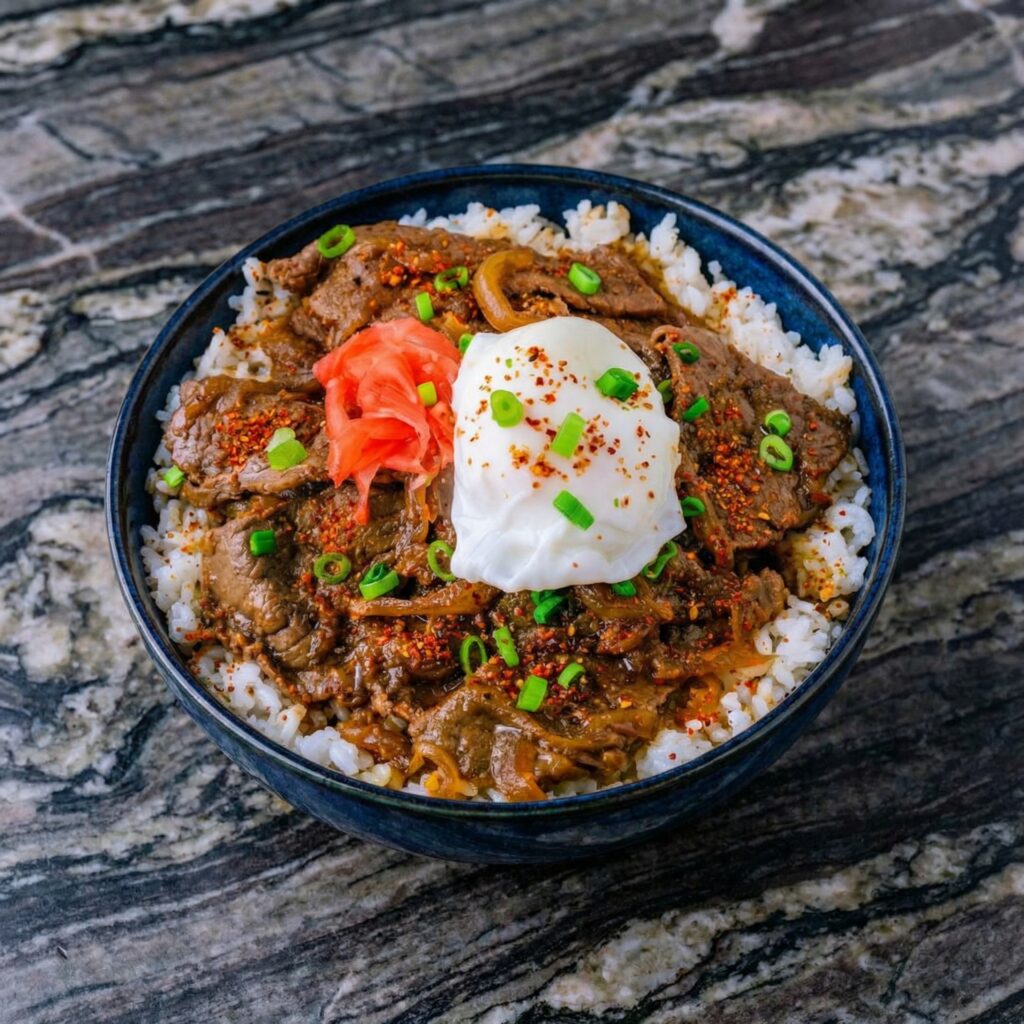
    Using a ladle, place the beef and onions over the rice. Spoon extra sauce over the top to soak into the grains.

    The rice should absorb the savory broth, creating layers of flavor in every bite.


    Step 10: Garnish and Serve

    Top each bowl with sliced green onions, pickled red ginger, and a sprinkle of shichimi togarashi for gentle heat.

    If using a soft-boiled egg, slice it in half and place it on top of the beef.

    Serve immediately while warm.


    Tips for Perfect Gyudon

    • Use thinly sliced beef for tenderness.
    • Keep the simmer gentle to avoid tough meat.
    • Don’t over-reduce the sauce—it should remain slightly brothy.
    • Use authentic dashi for the most traditional flavor.
    • Serve immediately for best texture and taste.

    Flavor Variations

    • Add sliced mushrooms for earthiness.
    • Include tofu cubes for extra protein.
    • Top with sautéed spinach or blanched greens.
    • Drizzle with a little sesame oil for nutty depth.

    These variations allow you to customize the bowl while keeping the heart of the dish intact.


    Storage and Reheating

    Store leftover beef and onions separately from rice in airtight containers for up to 3 days.

    Reheat gently in a skillet over medium-low heat. Add a splash of water or broth if needed to loosen the sauce.

    Prepare fresh rice for best results when serving leftovers.


    Final Thoughts

    Gyudon is the ultimate comfort bowl—simple ingredients transformed into something deeply satisfying. The tender beef, sweet onions, and savory sauce combine beautifully with warm rice to create a meal that feels both hearty and balanced.

    It’s quick enough for busy weeknights but comforting enough to crave again and again. Once you master this homemade Gyudon, you’ll always have a reliable, flavor-packed meal just 30 minutes away.

    Savory, sweet, and utterly comforting—this classic Japanese beef bowl is pure, delicious simplicity.