Blog

  • Keto Blueberry Muffins: Low-Carb, Grain-Free & Deliciously Moist

    Keto Blueberry Muffins: Low-Carb, Grain-Free & Deliciously Moist

    Who says you have to give up fluffy, moist blueberry muffins on a keto diet? This recipe delivers all the comfort and flavor of the classic, but with a fraction of the carbs.

    Using finely ground almond flour as the base, these muffins bake up tender and satisfying, sweetened just right with your favorite keto-friendly sweetener, and bursting with fresh blueberries in every bite.

    They’re easy to make, freeze beautifully, and are the ultimate answer to your low-carb breakfast or snack cravings.

    The Science of Grain-Free Structure & Moisture

    Recreating a light, cake-like texture without traditional flour is a challenge met by almond flour. Its fine texture and high fat content mimic some properties of flour but require extra binding agents. Eggs are crucial here, providing structure as their proteins coagulate during baking.

    To prevent a dense, eggy result, we use a leavening combination of baking powder and, often, baking soda to create ample lift. The biggest enemy in grain-free baking is dryness. This is countered by including moisture-rich ingredients like sour cream or yogurt and plenty of fat (butter or oil).
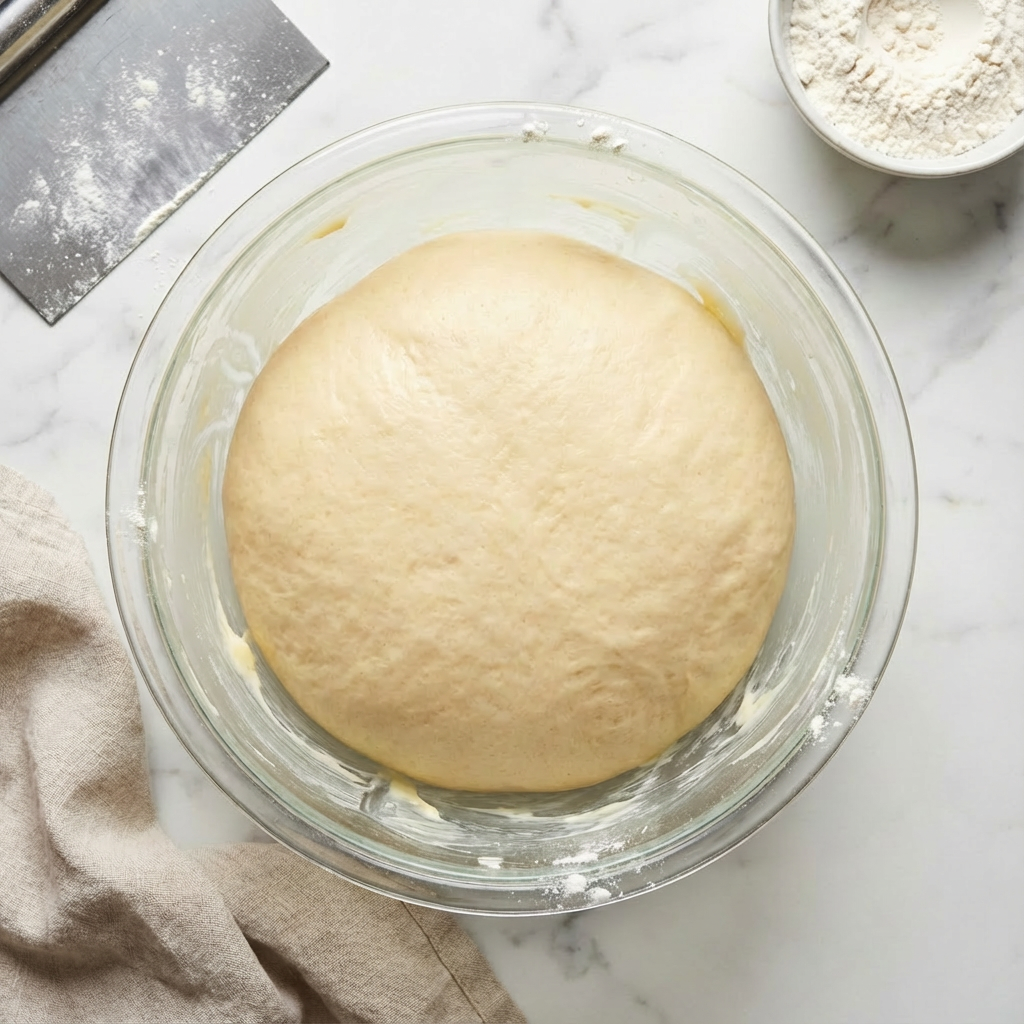
    The fat coats the almond flour proteins, ensuring tenderness. Xanthan gum (optional but helpful) acts as a gluten substitute, trapping air and providing a more familiar, cohesive crumb. Fresh blueberries add pockets of juice, but tossing them in a bit of the almond flour prevents them from sinking and bleeding excessively into the batter.

    Ingredients

    For 9-10 Muffins:

    • 2 ½ cups (250g) blanched almond flour, finely ground
    • ⅓ cup (65-80g) keto-friendly sweetener* (e.g., erythritol or monk fruit blend)
    • 2 teaspoons baking powder
    • ¼ teaspoon salt
    • ½ teaspoon xanthan gum (optional, for improved texture)
    • 3 large eggs, room temperature
    • ⅓ cup (80ml) melted butter or coconut oil
    • ⅓ cup (80g) sour cream or full-fat Greek yogurt
    • 1 teaspoon vanilla extract
    • 1 teaspoon lemon zest (optional, brightens flavor)
    • 1 cup (150g) fresh blueberries**

    *Use a granulated sweetener that measures 1:1 like sugar. Adjust to taste.
    **Frozen blueberries can be used—do not thaw, and expect more color bleed.

    Instructions

    1. Prep: Preheat oven to 350°F (175°C). Line a muffin tin with 9-10 parchment liners or grease well.

    2. Mix Dry Ingredients: In a medium bowl, whisk together the almond flour, sweetener, baking powder, salt, and xanthan gum (if using).

    3. Mix Wet Ingredients: In a large bowl, whisk the eggs until frothy. Whisk in the melted butter (cooled slightly), sour cream, vanilla, and lemon zest until smooth.

    4. Combine: Add the dry ingredients to the wet ingredients. Gently fold with a spatula until just combined and no dry streaks remain. Do not overmix.

    5. Fold in Blueberries: Toss the blueberries in 1 teaspoon of the dry almond flour mixture (this helps prevent sinking). Gently fold them into the batter.

    6. Portion & Bake: Divide the batter evenly among the prepared muffin cups, filling each nearly to the top. Bake for 22-26 minutes, until the tops are golden and a toothpick inserted into the center comes out clean.

    7. Cool: Let the muffins cool in the pan for 10 minutes, then transfer to a wire rack to cool completely. They are delicate when warm.

    8. Storage: Store cooled muffins in an airtight container in the refrigerator for up to 5 days, or freeze for up to 3 months.

    Pro-Tips for Keto Muffin Success

    • Use Blanched Almond Flour: Blanched (skinless) almond flour gives a finer texture than almond meal.
    • Room Temperature Eggs: They incorporate more easily, leading to a better rise and texture.
    • Don’t Overmix: Overmixing can make the muffins dense. Fold just until combined.
    • Fill Muffin Cups Full: Almond flour batter doesn’t rise as dramatically as wheat-based batter, so filling them nearly full ensures a good muffin shape.
    • The Toothpick Test is Key: Almond flour can stay moist inside even when done. The toothpick should have no wet batter, but a few moist crumbs are okay.
    • Cool Completely: These muffins set and firm up as they cool. They taste best at room temperature.
    • Sweetener Notes: Some sweeteners (like pure erythritol) can have a cooling aftertaste. A monk fruit/erythritol blend often tastes more neutral.
    • Variations: Add ½ cup of sugar-free chocolate chips or chopped nuts. Replace blueberries with raspberries or blackberries.

    These Keto Blueberry Muffins are a delicious testament that low-carb eating is anything but restrictive.

  • Cherry Blossom Cookies: Delicate Shortbread with a Chocolate Center

    Cherry Blossom Cookies: Delicate Shortbread with a Chocolate Center

    Capture the fleeting beauty of spring with these charming and elegant Cherry Blossom Cookies. A simple, tender shortbread dough is stamped with a floral pattern and baked until just golden, then crowned with a milk chocolate Hershey’s Kiss while still warm.

    The result is a cookie that’s as lovely to look at as it is delicious to eat—buttery, not too sweet, with a delightful melt-in-your-mouth texture. They require no fancy piping skills, just a pretty stamp, making them a perfect, impressive treat for spring celebrations, bridal showers, or afternoon tea.

    The Science of Tender, Stampable Shortbread

    The perfect canvas for stamping is a dough that holds an impression without spreading. This is achieved with a high-fat, low-moisture shortbread base. A 1:2:3 ratio of sugar, butter, and flour is classic.

    The high proportion of butter coats the flour proteins, inhibiting gluten formation and ensuring a tender, crumbly texture. The minimal liquid (often just from the butter and vanilla) means less steam is produced in the oven, preventing excessive spread and allowing the stamped design to remain sharp.

    Using cornstarch is a secret weapon; it acts as a tenderizer, replacing some of the gluten-forming flour and giving the cookies a delicate, sandy melt-away quality that’s ideal for holding intricate designs. Chilling the stamped dough briefly before baking solidifies the butter, locking the design in place as the cookie sets.

    Ingredients

    For the Shortbread Cookies (Makes 24-30):

    • 1 cup (2 sticks / 226g) unsalted butter, softened
    • ½ cup (60g) powdered sugar, sifted
    • ¼ cup (50g) granulated sugar
    • 1 teaspoon vanilla extract or almond extract
    • ¼ teaspoon salt
    • 2 ¼ cups (281g) all-purpose flour
    • ¼ cup (30g) cornstarch

    For Assembly:

    • 24-30 milk chocolate Hershey’s Kisses, unwrapped
    • Optional: Pink sanding sugar or edible pink glitter
    • 1 egg white, lightly beaten (for adhering sugar)

    Equipment: Cherry blossom cookie stamp (or any floral design).

    Instructions

    1. Make the Dough: In a large bowl, use an electric mixer to cream the softened butter, powdered sugar, and granulated sugar until light and fluffy, about 2-3 minutes. Beat in the vanilla and salt.

    2. Add Dry Ingredients: In a separate bowl, whisk together the flour and cornstarch. With the mixer on low, gradually add the flour mixture to the butter mixture until just combined and a soft dough forms. Do not overmix.

    3. Preheat & Prep: Preheat oven to 325°F (165°C). Line baking sheets with parchment paper.

    4. Shape & Stamp: Scoop dough into 1-inch balls (about 1 tablespoon each). Roll smooth between your palms. Place on the baking sheet, spacing 2 inches apart. Dip your cookie stamp in flour and tap off excess. Firmly press the stamp straight down onto each dough ball to flatten and imprint the design.

    5. Optional Sugar Topping: For a hint of color, lightly brush the stamped surface with beaten egg white and sprinkle with pink sanding sugar.

    6. Bake: Bake for 12-15 minutes, just until the cookies are set and the edges are very lightly golden. The centers should remain pale.

    7. Add the Chocolate: Immediately upon removing the cookies from the oven, gently press one unwrapped Hershey’s Kiss into the center of each warm cookie. The heat will slightly melt the base, helping it adhere.

    8. Cool & Serve: Let cookies cool on the baking sheet for 5 minutes, then transfer to a wire rack to cool completely. The chocolate will set as they cool.

    Pro-Tips for Perfect Stamped Cookies

    • Butter Temperature: Butter should be softened (cool to the touch but easily indented). Too cold won’t cream; too melted will cause spread.
    • Powdered Sugar: Using powdered sugar (instead of all granulated) contributes to a finer, more tender crumb.
    • Flour Your Stamp: Dip the stamp in flour before each press to prevent sticking. A quick tap removes excess.
    • Press Firmly & Evenly: Apply firm, even pressure to get a clear impression. Lift straight up to avoid smudging.
    • Low & Slow Baking: A lower oven temperature prevents browning too quickly, preserving the delicate design and pale color.
    • Add Kisses Immediately: The cookies must be hot to soften the base of the Kiss for a secure bond.
    • Storage: Store in a single layer in an airtight container at cool room temperature for up to 5 days.
    • Variations: Use dark chocolate or white chocolate Kisses, or flavor the dough with lemon zest for a citrus twist.

    These Cherry Blossom Cookies are a simple yet stunning way to celebrate the season.

  • White Apple Pie Bars: Easy, Sliceable Apple Crumble Bars

    White Apple Pie Bars: Easy, Sliceable Apple Crumble Bars

    Imagine the cozy, spiced flavor of a perfect apple pie, but in a handheld, easy-to-share bar form. That’s the magic of these White Apple Pie Bars. They start with a simple, press-in shortbread crust, get filled with a juicy, cinnamon-spiced apple layer, and are topped with a buttery crumble.

    Finished with a drizzle of sweet white icing, they deliver every element of the classic dessert without the fuss of pie dough. They’re the ultimate make-ahead treat for potlucks, school bake sales, or a delicious autumnal snack with coffee.

    The Science of the Perfect Bar Structure

    The success of these bars lies in the distinct, balanced layers. The shortbread crust is a 1:2:3 ratio of sugar, butter, and flour—a classic that bakes into a sturdy, crisp, and buttery base that can support the moist filling without getting soggy.

    The fat in the butter coats the flour proteins, inhibiting gluten formation for a tender, crumbly texture. The apple filling uses a combination of fresh apples and a small amount of flour or cornstarch. As the bars bake, the apples release their juices, which are immediately thickened by the starch, creating a cohesive, jam-like layer that slices cleanly.

    The crumble topping uses the same base as the crust but with less liquid, creating distinct clumps that bake up crisp and golden. The final powdered sugar icing is more than decoration; its slight acidity from milk or cream balances the sweetness, and as it sets, it adds a delicate, crackly textural contrast.

    Ingredients

    For the Crust & Crumble:

    • 2 cups (250g) all-purpose flour
    • ½ cup (100g) granulated sugar
    • ½ teaspoon baking powder
    • ¼ teaspoon salt
    • 1 cup (2 sticks / 226g) cold unsalted butter, cubed
    • 1 large egg yolk

    For the Apple Filling:

    • 4-5 medium tart apples (like Granny Smith), peeled and finely diced*
    • 3 tablespoons granulated sugar
    • 2 tablespoons all-purpose flour or cornstarch
    • 1 ½ teaspoons ground cinnamon
    • ¼ teaspoon ground nutmeg
    • 1 tablespoon lemon juice

    For the White Icing:

    • ½ cup (60g) powdered sugar, sifted
    • 1-2 tablespoons milk or cream
    • ¼ teaspoon vanilla extract

    *Finely dicing ensures the apples soften completely and the bars slice neatly.

    Instructions

    1. Prep: Preheat oven to 350°F (175°C). Line a 9×13 inch baking pan with parchment paper, leaving an overhang on two sides.

    2. Make Crust & Crumble: In a food processor or large bowl, combine flour, sugar, baking powder, and salt. Add the cold, cubed butter. Pulse or cut in with a pastry cutter until the mixture resembles coarse crumbs. Remove 1 heaping cup of this mixture and set aside for the crumble topping.

    3. Form the Crust: To the remaining mixture in the bowl, add the egg yolk. Mix with a fork or your hands until it comes together into a crumbly dough. Press this mixture firmly and evenly into the bottom of the prepared pan.

    4. Make Apple Filling: In a large bowl, toss the diced apples with sugar, flour (or cornstarch), cinnamon, nutmeg, and lemon juice until evenly coated.

    5. Assemble: Spread the apple mixture evenly over the pressed crust. Sprinkle the reserved crumble topping over the apples.

    6. Bake: Bake for 40-50 minutes, until the topping is golden brown and the filling is bubbly. Let the bars cool completely in the pan on a wire rack.

    7. Make Icing & Finish: Once cool, lift the bars out of the pan using the parchment overhang. Whisk powdered sugar, 1 tablespoon of milk, and vanilla until smooth. Add more milk if needed for a drizzling consistency. Drizzle over the bars in a zig-zag pattern.

    8. Slice & Serve: Let the icing set for 15 minutes, then slice into squares. Serve at room temperature.

    Pro-Tips for Bar Excellence

    • Use Cold Butter: This is essential for a flaky, crumbly crust and topping.
    • Finely Dice the Apples: Larger chunks can create gaps and make the bars harder to slice. A small, even dice ensures a uniform layer that bakes through.
    • Press the Crust Firmly: Use the bottom of a measuring cup to press the crust into a compact, even layer. This prevents it from crumbling when cut.
    • Don’t Skip the Lemon Juice: It prevents the apples from browning and adds a bright note that balances the sweetness.
    • Cool Completely: The filling needs time to set. Cutting into warm bars will result in a messy, crumbly slice.
    • Customize the Spice: Add a pinch of cardamom or cloves to the apple mixture for extra warmth.
    • Add Nuts: Mix ½ cup of chopped pecans or walnuts into the crumble topping before sprinkling.
    • Storage: Store bars in an airtight container at room temperature for up to 3 days, or refrigerate for up to 5 days.

    These White Apple Pie Bars are the effortless, crowd-feeding answer to your apple pie cravings.

  • Egg Bread: A Beautiful, Braided Loaf for Any Table

    Egg Bread: A Beautiful, Braided Loaf for Any Table

    Challah is more than just bread—it’s a centerpiece. This enriched Jewish egg bread is known for its soft, slightly sweet, and tender interior, its beautiful braided shape, and its deeply golden, glossy crust. Baking challah is a deeply satisfying ritual.

    The process of kneading the supple dough, mastering the braid, and watching it transform in the oven yields a loaf that’s as impressive to look at as it is delicious to eat. Whether for a Friday night Shabbat dinner, French toast on Sunday morning, or simply to elevate any meal, homemade challah is a gift from the oven.

    The Science of the Rich, Tender Crumb & Shiny Crust

    Challah’s distinct texture and appearance come from its enriched dough. The high proportion of eggs and oil (or sometimes butter) adds fat, which coats the flour proteins, tenderizing the gluten and creating a soft, rich crumb with a slight yellow hue.

    The sugar feeds the yeast for a robust rise and contributes to browning. The key to challah’s signature shine is the egg wash applied before baking. The proteins in the egg coagulate quickly in the oven’s heat, creating a thin, sealed layer that traps steam, allowing the loaf to expand fully before setting. Meanwhile, the sugars in the egg caramelize, producing that deep, mahogany brown, glossy crust.

    The braiding isn’t just for beauty; it creates a structured loaf that bakes evenly and offers a delightful pull-apart texture.

    Ingredients

    For One Large Loaf:

    • 4 ½ cups (563g) bread flour or all-purpose flour, plus more as needed
    • ¼ cup (50g) granulated sugar
    • 2 ¼ teaspoons instant yeast (1 packet)
    • 2 teaspoons salt
    • 2 large eggs, room temperature
    • 1 large egg yolk (save the white for the wash)
    • ¾ cup (180ml) warm water (110°F/43°C)
    • ¼ cup (60ml) vegetable or neutral oil
    • Optional: ¼ cup (85g) honey (replace the sugar for a deeper flavor)

    For the Egg Wash & Topping:

    • 1 egg white + 1 tablespoon water, beaten
    • Sesame seeds or poppy seeds for sprinkling

    Instructions

    1. Make the Dough: In the bowl of a stand mixer fitted with the dough hook, combine flour, sugar, yeast, and salt. In a separate bowl or measuring cup, whisk together the 2 whole eggs, 1 egg yolk, warm water, and oil (and honey, if using).

    2. Knead: With the mixer on low, gradually pour the wet ingredients into the dry. Once combined, increase speed to medium and knead for 6-8 minutes until the dough is smooth, elastic, and slightly tacky but not sticky. Add a tablespoon of flour if needed, but avoid a dry dough.

    3. First Rise: Place dough in a lightly oiled bowl, turn to coat, and cover with a damp towel or plastic wrap. Let rise in a warm place until doubled in size, about 1.5 to 2 hours.

    4. Divide & Braid: Punch down the dough. Turn it out onto a lightly floured surface. For a classic 3-strand braid, divide the dough into 3 equal pieces. Roll each piece into a long rope, about 18 inches long, thicker in the middle and tapered at the ends.

    5. Braid the Loaf: Pinch the tops of the three ropes together. Braid them tightly, then pinch the ends together and tuck both pinched ends under the loaf. Transfer the braid to a parchment-lined baking sheet.

    6. Second Rise: Cover the braided loaf loosely and let rise until puffy and nearly doubled, about 45 minutes to 1 hour. Preheat oven to 375°F (190°C).

    7. Bake: Gently brush the loaf all over with the egg wash. Sprinkle with seeds if desired. Bake for 25-35 minutes, until the crust is a deep, glossy golden brown and the loaf sounds hollow when tapped on the bottom.

    8. Cool: Transfer the challah to a wire rack and let it cool completely before slicing.

    Pro-Tips for Challah Mastery

    • Flour Choice: Bread flour gives a chewier, more structured loaf; all-purpose yields a more tender crumb. Both work.
    • Proper Hydration: The dough should be soft and slightly tacky. Resist the urge to add too much flour during kneading, as this will make the bread dry.
    • Even Rolling: When forming the ropes, roll them evenly so your braid is uniform. Let the ropes rest for 5 minutes if they keep snapping back.
    • Tight Braid, Loose Proof: Braid tightly so it holds its shape, but don’t pull too hard. The final proof will relax and expand the braid.
    • The Egg Wash Secret: For maximum shine, do a double wash: apply a thin coat 10 minutes into the final proof, then a second coat right before baking.
    • Testing for Doneness: The hollow sound is the best test. An internal temperature of 190°F (88°C) is perfect.
    • Braid Variations: Challenge yourself with a 4 or 6-strand braid for an even more impressive look.
    • Storage: Keep challah in a bread bag or wrapped in foil at room temp for 2-3 days. It makes phenomenal French toast or bread pudding.

    Baking Challah is a rewarding craft that fills your home with warmth and your table with beauty.

  • Perfect Carrot Cupcakes with Cream Cheese Frosting

    Perfect Carrot Cupcakes with Cream Cheese Frosting

    Carrot cupcakes are the quintessential treat that feels like a celebration but is grounded in wholesome goodness. This recipe delivers everything you love: an incredibly moist, spice-kissed crumb studded with sweet carrots and pecans, all crowned by a luxurious, tangy cream cheese frosting that’s not too sweet.

    They’re surprisingly easy to make, and the result is a cupcake that’s perfectly balanced, utterly delicious, and sure to become a requested favorite for birthdays, Easter, or any spring gathering.

    The Science of Moisture & Flavor Development

    The legendary moistness of carrot cake comes from a combination of oil-based hydration and vegetable-derived moisture. Using vegetable oil instead of butter keeps the crumb tender and locks in moisture for days, as oil coats flour proteins more thoroughly than solid fat.

    The finely grated carrots are the star, releasing their natural sugars and water during baking, which steams the cake from within. The warm spices—cinnamon, nutmeg, and ginger—are fat-soluble, meaning their aromatic compounds are best released and carried by the oil in the batter, creating a deep, complex flavor profile.

    The cream cheese frosting relies on the emulsion of fat and acid. Using full-fat, brick-style cream cheese and properly softened butter is crucial for a stable, pipeable frosting that won’t be runny. The slight acidity of the cream cheese cuts through the sweetness of the cupcakes, creating the perfect balance.

    Ingredients

    For the Carrot Cupcakes (Makes 14-16):

    • 1 ½ cups (188g) all-purpose flour
    • 1 teaspoon baking powder
    • ½ teaspoon baking soda
    • 1 ½ teaspoons ground cinnamon
    • ¼ teaspoon ground nutmeg
    • ¼ teaspoon ground ginger
    • ½ teaspoon salt
    • 2 large eggs, room temperature
    • ¾ cup (150g) granulated sugar
    • ¾ cup (165g) packed light brown sugar
    • ⅔ cup (160ml) vegetable or canola oil
    • 1 teaspoon vanilla extract
    • 2 cups (about 220g) finely grated carrots (about 3 medium)
    • ½ cup (60g) chopped pecans or walnuts (optional)

    For the Cream Cheese Frosting:

    • 8 oz (226g) full-fat brick cream cheese, softened
    • ½ cup (1 stick / 113g) unsalted butter, softened
    • 3 cups (360g) powdered sugar, sifted
    • 1 teaspoon vanilla extract
    • Pinch of salt

    Instructions

    1. Make the Cupcakes: Preheat oven to 350°F (175°C). Line a muffin tin with paper liners. In a medium bowl, whisk together flour, baking powder, baking soda, cinnamon, nutmeg, ginger, and salt.

    2. Mix Wet Ingredients: In a large bowl, whisk eggs, both sugars, oil, and vanilla until smooth and well combined.

    3. Combine & Add Carrots: Add the dry ingredients to the wet ingredients and mix with a spatula until just combined. Fold in the grated carrots and chopped nuts (if using). The batter will be thick.

    4. Bake: Divide batter evenly among liners, filling each about ⅔ full. Bake for 18-22 minutes, until a toothpick inserted comes out clean. Cool in pan for 5 minutes, then transfer to a wire rack to cool completely.

    5. Make the Frosting: While cupcakes cool, beat the softened cream cheese and butter together with an electric mixer on medium speed until completely smooth and creamy, about 2 minutes.

    6. Finish Frosting: With the mixer on low, gradually add the sifted powdered sugar, then the vanilla and salt. Once incorporated, beat on high speed for 1-2 minutes until light and fluffy. If frosting is too soft to pipe, refrigerate for 15-20 minutes.

    7. Frost & Serve: Once cupcakes are completely cool, pipe or spread the frosting on top. Garnish with a sprinkle of cinnamon, extra chopped nuts, or a fondant carrot.

    8. Storage: Store frosted cupcakes in an airtight container in the refrigerator for up to 4 days. Let sit at room temperature for 20 minutes before serving for the best texture.

    Pro-Tips for Cupcake Perfection

    • Grate Carrots Finely: Use the small holes of a box grater. This ensures they distribute evenly and soften completely during baking.
    • Don’t Drain the Carrots: Their natural moisture is essential to the cake. Squeezing them out will result in a drier cupcake.
    • Room Temperature Ingredients: Cold eggs or cream cheese won’t emulsify properly, leading to a broken batter or grainy frosting.
    • Measure Flour Correctly: For accuracy, spoon flour into the measuring cup and level it off. Packing the cup can lead to dense cupcakes.
    • The Toothpick Test: Check a few minutes before the minimum bake time. Overbaking is the enemy of moisture.
    • Cool Completely Before Frosting: The slightest warmth will melt the cream cheese frosting. Patience is key.
    • Frosting Consistency: If your frosting seems too soft after mixing, it’s likely because the cream cheese or butter was too warm. Chilling it briefly will fix it.
    • Add-In Ideas: For extra texture and flavor, fold in ½ cup of crushed pineapple (well-drained) or ½ cup of raisins with the carrots.

    These Perfect Carrot Cupcakes are a timeless, beloved classic for a very good reason.

  • How to Build the Ultimate Snack Board (Charcuterie for Beginners)

    How to Build the Ultimate Snack Board (Charcuterie for Beginners)

    Entertaining should be fun, not frantic. The sight of a beautifully abundant snack board—or charcuterie board, if you want to be fancy—has a magical way of making any gathering feel special, welcoming, and effortlessly stylish. But for many, the idea of assembling one is intimidating. Where do you start? How much do you buy? This guide is here to demystify the process.

    Think of it not as a rigid recipe, but as a foolproof formula and a permission slip to play with your food. We’ll break down the components into simple categories, offer easy shopping lists, and walk you through the relaxing, creative process of building a board that looks like it came from a gourmet shop but is truly achievable for anyone.

    The goal is abundance, variety, and most importantly, deliciousness. Let’s build a centerpiece that will have your guests gathering around in awe (and digging in with joy).

    The Snack Board Philosophy: Balance, Variety, and Ease

    A great snack board is a study in contrasts and complements. It’s about offering a little something for everyone and creating delightful flavor combinations in every bite. The foundation is built on a balance of textures (creamy, crunchy, chewy) and flavors (salty, sweet, tangy, rich).

    You don’t need expensive, exotic items. A few well-chosen staples from your local grocery store can create a stunning display. The key is shopping with categories in mind: something cheesy, something meaty, something crunchy, something sweet, something briny, and something for dipping. Arrangement is your secret weapon. Start with anchors like cheese wedges and small bowls for dips, then fill in the gaps with piles and clusters.

    Let the colors and shapes guide you—a board should look bountiful, not bare. Remember, there are no mistakes here. If it tastes good together, it belongs on the board.

    The Formula & Shopping List (Serves 6-8)

    Use this as your flexible blueprint. Choose 1-2 items from each category.

    The Cheese (Choose 3-4):

    • Hard: Aged Cheddar, Manchego, Gouda
    • Soft/Creamy: Brie, Goat Cheese, Burrata
    • Funky/Bold: Blue Cheese, Pepper Jack

    The Meats (Choose 2-3):

    • Prosciutto, Salame, Soppressata, Coppa
    • Pre-sliced packs from the deli are perfect.

    The Crunch (Choose 3-4):

    • Water Crackers, Baguette Slices, Breadsticks
    • Pretzels, Potato Chips, Crostini

    The Sweet (Choose 2-3):

    • Grapes, Apple or Pear Slices, Berries
    • Dried Apricots, Figs, Honey or Jam

    The Briny & Extras (Choose 2-3):

    • Mixed Olives, Cornichons, Marinated Artichokes
    • Whole-Grain Mustard, Hummus, Almonds, Walnuts

    Step-by-Step Assembly Instructions

    1. Gather & Prep Your Components: Choose a large board, platter, or even a clean baking sheet. Take all cheeses out of the fridge 30-60 minutes before serving so they can come to room temperature (this maximizes flavor and spreadability). Wash and dry fruits. Slice apples/pears and toss with a little lemon juice to prevent browning. Slice baguettes. Have small bowls or ramekins ready for loose items like olives or dips.

    2. Place Your Anchors: Start by placing your small bowls on the board, spacing them out. Then, arrange your cheese wedges and blocks around the board. Cut a few slices or crumble a bit of one cheese to make it inviting. Variety in cheese shape is visually appealing.

    3. Add the Meats: Fan out sliced meats or arrange them in loose, casual folds or rolls near the cheeses. Cluster different meats together for a plentiful look.

    4. Fill in with Crunch & Bulk: Place piles of crackers and bread in a few different areas. Tuck in breadsticks. This creates “bread zones” so guests aren’t all reaching for the same spot.

    5. Scatter the Fruits, Nuts, and Extras: Now, fill all the empty spaces. Create clusters of grapes, piles of dried fruit, small mounds of nuts, and spoonfuls of jam or honey. Scatter olives and cornichons. The goal is to cover the board surface, creating an abundant, “grazing” feel.

    6. Final Touches & Garnish: Add utensils: small cheese knives, spreaders, and cocktail picks for olives. Tuck in fresh herbs like rosemary or thyme for a beautiful, fragrant garnish. Add a drizzle of honey over a cheese wedge or a sprinkle of flaky salt over nuts.

    Pro Tips for Effortless Entertaining

    • Shop Smart: The grocery store olive bar, pre-sliced meat packs, and a well-stocked cheese section are your best friends.
    • No Board? No Problem: Use a large cutting board, a ceramic platter, a slab of slate, or even a clean piece of marble.
    • Make-Ahead: You can prep components (slice cheese, wash fruit, fill bowls) a few hours ahead. Cover the board loosely with plastic wrap and refrigerate. Add crackers and bread right before serving to keep them crisp.
    • Scale It: For a cozy date night, use a small board with just one cheese, one meat, some crackers, and fruit. The formula scales perfectly.
    • The Rule of Odd Numbers: Arranging items in groups of 3 or 5 is more visually appealing than even numbers.

    Most importantly, relax and have fun with it. A snack board is a generous, welcoming gesture, and its imperfection is part of its charm.

    Frequently Asked Questions (FAQ): 

    I’m on a tight budget. Can I still make an impressive board?

    Absolutely! Focus on value. Choose one excellent cheese (like a sharp cheddar) and one affordable meat (like a salami). Use in-season fruits and vegetables (like apples, carrots, or radishes). Bulk it out with affordable crackers, popcorn, and mixed nuts from the bulk bin. A little creativity goes a long way.

    How much food should I buy per person?

    Cheese: 2-3 ounces per person
    Meat: 2-3 ounces per person
    Crackers/Bread: 3-4 pieces per person
    Accoutrements (fruit, nuts, etc.): ¼ to ⅓ cup per person
    It’s always better to have a little extra!

    Can I make a snack board ahead of time?

    Yes, with smart prep! You can slice cheeses, wash and dry fruits, fill small bowls with dips and olives, and even arrange meats on the board. Cover the entire board tightly with plastic wrap and refrigerate for up to 4-6 hours. Add crackers, bread, and any delicate fresh herbs RIGHT BEFORE serving to prevent sogginess.

    What are some good vegetarian alternatives to cured meats?

    Plenty! Focus on a variety of cheeses. Add hearty elements like marinated artichoke hearts, roasted peppers, sundried tomatoes, seasoned chickpeas, falafel bites, or vegetarian pâté. Smoked almonds or savory roasted nuts also add a “meaty” depth of flavor.

    My board looks a little sparse. How do I make it look fuller?

    Use the “cluster and fill” technique. Don’t spread things out thinly. Group items like nuts and dried fruit in small, abundant piles. Use fresh herbs (like bunches of grapes on the vine or rosemary sprigs) to take up visual space. Fill every gap with something, even if it’s just a few extra crackers tucked in.

    Can I make a kid-friendly snack board?

    Definitely! Kids love boards. Use familiar cheeses (mozzarella pearls, mild cheddar cubes), sliced turkey or ham rolls, pretzels, goldfish crackers, apple slices, grapes, berries, and small cookies. Use fun cookie cutters on cheeses and meats. Skip the strong olives and blue cheese.

  • Strawberry Lemon Cheesecake Rolls: A Bright & Berry-Filled Breakfast

    Strawberry Lemon Cheesecake Rolls: A Bright & Berry-Filled Breakfast

    Wake up to a burst of spring flavor with these stunning Strawberry Lemon Cheesecake Rolls. Imagine soft, pillowy sweet roll dough wrapped around a ribbon of creamy, tangy cheesecake filling and juicy fresh strawberries, all finished with a zesty lemon glaze.

    They combine the comforting warmth of a homemade roll with the bright, fresh taste of strawberries and lemon. While they look like they came from a fancy bakery, the process is straightforward—a simple enriched dough, an easy no-cook filling, and a glaze that comes together in minutes. Perfect for Easter, Mother’s Day, or a special weekend brunch, these rolls are guaranteed to impress and delight everyone at the table.

    The Science of a Tender Roll & Stable Filling

    The perfection of these rolls hinges on two key elements: the enriched dough and the stabilized filling. The dough is enriched with butter, eggs, and milk, which tenderize the gluten, resulting in a soft, fluffy, and rich crumb that can hold the moist filling without becoming soggy. A proper rise is crucial for developing flavor and texture.

    The cheesecake filling gets its pipeable, non-runny consistency from a clever technique: combining cream cheese with a thickener. Cornstarch (or flour) is mixed with the sugar before being blended into the cream cheese. This starch absorbs excess moisture released from the strawberries during baking, preventing a soggy, leaking filling. Macerating the strawberries with a little sugar draws out some juice beforehand, which further protects the dough’s structure. This balance ensures every bite has a defined, creamy swirl and tender bread.

    Ingredients

    For the Sweet Roll Dough:

    • ¾ cup (180ml) whole milk, warmed to about 110°F
    • 2 ¼ teaspoons (1 packet) instant yeast
    • ⅓ cup (65g) granulated sugar
    • 1 large egg, room temperature
    • ¼ cup (½ stick / 57g) unsalted butter, melted and cooled
    • 1 teaspoon vanilla extract
    • ½ teaspoon salt
    • 3 – 3 ½ cups (375-440g) all-purpose flour, divided

    For the Strawberry Cheesecake Filling:

    • 8 oz (one block) full-fat cream cheese, softened
    • ¼ cup (50g) granulated sugar
    • 1 tablespoon cornstarch or all-purpose flour
    • 1 teaspoon vanilla extract
    • 1 ½ cups (225g) fresh strawberries, finely diced
    • 1 tablespoon granulated sugar (for macerating strawberries)

    For the Lemon Glaze:

    • 1 cup (120g) powdered sugar, sifted
    • 2-3 tablespoons fresh lemon juice
    • 1 teaspoon lemon zest
    • 1 tablespoon heavy cream or milk (optional, for creaminess)

    Instructions

    1. Make the Dough: In the bowl of a stand mixer, combine warm milk, yeast, and ⅓ cup sugar. Let sit for 5 minutes until foamy. Add egg, melted butter, vanilla, salt, and 3 cups of flour. Using the dough hook, mix on low until combined, then increase speed to medium and knead for 5-7 minutes, adding more flour 1 tablespoon at a time if needed, until dough is soft, smooth, and slightly tacky. Place in a greased bowl, cover, and let rise in a warm place for 1-2 hours, until doubled.

    2. Macerate Strawberries & Make Filling: While dough rises, toss diced strawberries with 1 tablespoon sugar and set aside for 20 minutes. Drain excess liquid. For the filling, beat cream cheese, ¼ cup sugar, cornstarch, and vanilla until completely smooth. Gently fold in the drained strawberries.

    3. Shape the Rolls: Punch down risen dough. On a lightly floured surface, roll into a 10×15 inch rectangle. Spread the strawberry cheesecake filling evenly over the dough, leaving a ½-inch border on one long edge. Tightly roll up the dough, starting from the long side with filling. Pinch the seam to seal.

    4. Cut & Second Rise: Using a sharp knife or unflavored dental floss, cut the log into 12 even rolls. Place them in a greased 9×13 inch baking dish. Cover and let rise for 30-45 minutes, until puffy.

    5. Bake: Preheat oven to 350°F (175°C). Bake rolls for 25-30 minutes, until golden brown on top. If the filling bubbles heavily, it’s normal.

    6. Make Glaze & Finish: While rolls bake, whisk together powdered sugar, 2 tablespoons lemon juice, zest, and cream (if using) until smooth. Add more juice for a thinner consistency. Let rolls cool in pan for 10 minutes, then drizzle generously with lemon glaze.

    7. Serve: Serve warm. Store leftovers covered in the refrigerator for up to 3 days. Reheat gently.

    Pro-Tips for Perfect, Leak-Free Rolls

    • Proper Dough Texture: The dough should be soft and slightly sticky, but not so wet that it can’t be handled. Adding flour gradually is key.
    • Drain Those Berries: Draining the macerated strawberries is the most important step to prevent a soggy, leaking mess. Pat them gently with a paper towel if needed.
    • Cornstarch is Your Friend: The cornstarch in the filling acts as a stabilizer, absorbing berry juices during baking. Don’t skip it.
    • Sharp Cutting Tool: Use a sharp serrated knife or dental floss to cut the rolls cleanly without squishing them.
    • Don’t Overbake: The rolls are done when they’re golden. Overbaking can dry out the dough.
    • Glaze Consistency: For a thick glaze that sits on top, use less lemon juice. For a thinner, drizzle-able glaze that soaks in slightly, add more juice.
    • Make Ahead: Assemble the rolls up through step 4, cover tightly, and refrigerate overnight. In the morning, let them sit at room temp for 30 minutes while the oven preheats, then bake as directed.

    These Strawberry Lemon Cheesecake Rolls are a beautiful, flavorful celebration in every bite.

  • Cinnamon Roll Focaccia: The Cozy, No-Knead Breakfast Mashup

    Cinnamon Roll Focaccia: The Cozy, No-Knead Breakfast Mashup

    Imagine all the warm, gooey goodness of a cinnamon roll, but in a beautifully rustic, no-fuss, one-pan format. That’s Cinnamon Roll Focaccia. This genius recipe takes the famously easy no-knead focaccia method and gives it a sweet twist, swirled with buttery cinnamon sugar and baked until puffed and golden.

    Forget rolling and cutting individual rolls—this is a dump, dimple, and bake situation. Topped with a simple cream cheese glaze while still warm, it’s the ultimate shareable treat for a lazy weekend brunch, holiday morning, or any time you want the comfort of cinnamon rolls without the work. Rip off a piece and enjoy the perfect blend of crispy edges and soft, sweet centers.

    The Science of a Sweet, Swirled No-Knead Dough

    This recipe works because of the forgiving nature of high-hydration, no-knead dough. A wet dough (lots of water relative to flour) develops gluten slowly over a long fermentation, creating those signature large, irregular air pockets (alveoli) without any kneading. The extended rise, especially a cold overnight proof, allows enzymes to break down starches into simple sugars, which the yeast consumes, producing gas for rise and complex flavor.

    The swirling technique is key: spreading softened butter over the dimpled dough creates a barrier and fat layer. The cinnamon-sugar mixture then sits on top of this butter. During baking, the butter melts and the sugar partially dissolves, creating rivers of caramel that seep into the dimples and swirls, flavoring every bite while the top bakes into a crisp, crackly crust. It’s a lesson in how minimal effort and maximum time can create spectacular results.

    Ingredients

    For the Sweet Focaccia Dough:

    • 3 ½ cups (440g) all-purpose or bread flour
    • 2 teaspoons instant yeast
    • 1 teaspoon salt
    • ¼ cup (50g) granulated sugar
    • 1 ½ cups (360ml) lukewarm water
    • ⅓ cup (80ml) olive oil or melted butter, plus more for the pan

    For the Cinnamon Swirl & Topping:

    • 4 tablespoons (½ stick / 57g) unsalted butter, very soft
    • ½ cup (100g) packed light brown sugar
    • 1 ½ tablespoons ground cinnamon
    • Coarse sugar, for sprinkling (optional)

    For the Cream Cheese Glaze:

    • 2 oz (¼ block) cream cheese, softened
    • ¾ cup (90g) powdered sugar, sifted
    • 2-3 tablespoons milk or heavy cream
    • ½ teaspoon vanilla extract

    Instructions

    1. Mix the Dough (Day 1 or at least 2 hours ahead): In a large bowl, whisk together flour, yeast, salt, and sugar. Add the lukewarm water and ⅓ cup oil/butter. Stir with a sturdy spoon or spatula until a sticky, shaggy dough forms and no dry flour remains. Cover tightly with plastic wrap.

    2. First Rise (Bulk Ferment): Let the dough rise at room temperature for 1-2 hours until puffy and bubbly. Then, refrigerate for at least 12 hours or up to 3 days (for best flavor).

    3. Pan the Dough (Baking Day): Generously coat a 9×13 inch baking pan with olive oil or melted butter (2-3 tablespoons). Scrape the cold, risen dough directly into the pan. Using oiled hands, gently stretch and press the dough to mostly fill the pan. It’s okay if it doesn’t reach the corners perfectly yet.

    4. Second Rise: Drizzle the dough’s surface with a little more oil. Cover loosely with plastic and let rise at room temperature for 1.5 to 2 hours, until puffy and nearly filling the pan.

    5. Preheat & Dimple: Preheat oven to 375°F (190°C). Using oiled fingers, press straight down firmly all over the dough to create deep dimples that reach the bottom of the pan.

    6. Add the Cinnamon Swirl: Spread the very soft 4 tablespoons of butter evenly over the entire dimpled surface. In a small bowl, mix brown sugar and cinnamon. Sprinkle this mixture evenly over the butter, getting it into all the dimples.

    7. Bake: Bake for 25-30 minutes, until the top is deep golden brown, the sugar is bubbling, and the edges are pulling away from the pan.

    8. Cool Slightly & Glaze: Let the focaccia cool in the pan on a wire rack for 15-20 minutes. While it cools, make the glaze: whisk together softened cream cheese, powdered sugar, 2 tablespoons milk, and vanilla until smooth. Add more milk if needed for a drizzle-able consistency.

    9. Finish & Serve: Drizzle the warm focaccia with the cream cheese glaze. Slice into squares or rectangles and serve warm. It’s best enjoyed the day it’s made.

    10. Store: Cover and store leftovers at room temperature for 1 day or in the fridge for up to 3 days. Reheat gently in the oven or microwave.

    Pro-Tips for the Perfect Sweet & Swirled Focaccia

    • Embrace the Wet Dough: The dough will be very sticky—this is correct and essential for an open, airy crumb. Use a spatula and oiled hands to handle it.
    • Cold Ferment for Flavor: Don’t skip the overnight fridge rest. It develops a lovely depth of flavor that mimics traditional cinnamon roll dough.
    • Butter Temperature is Key: The butter for the swirl must be very soft (almost melted) to spread easily without tearing the delicate, risen dough.
    • Press Dimples with Confidence: Don’t be shy! Pressing all the way to the pan creates pockets that hold the cinnamon sugar and create fantastic textural contrast.
    • Watch for Doneness: The focaccia is done when it’s a rich golden brown and the bubbling sugar looks caramelized. The center should spring back lightly when touched.
    • Glaze When Warm: Drizzling the glaze on the warm (not hot) focaccia allows it to seep slightly into the cracks and dimples, creating delicious pockets of sweetness.
    • Add Mix-Ins: Press a handful of raisins, chopped apples, or toasted pecans into the dimples along with the cinnamon sugar.

    This Cinnamon Roll Focaccia is the ultimate low-effort, high-reward breakfast centerpiece.

  • Old-Fashioned Sour Cream Donuts: Tender, Cakey & Glazed to Perfection

    Old-Fashioned Sour Cream Donuts: Tender, Cakey & Glazed to Perfection

    Step into your favorite old-school bakery without leaving your kitchen. These Sour Cream Donuts are the epitome of the classic cake donut: dense yet tender, with a slightly crisp exterior and a soft, springy crumb that melts in your mouth.

    The secret ingredient, sour cream, adds a subtle tang and incredible richness that keeps them moist for days. Fried until golden brown and dipped in a crackly vanilla glaze, they are a nostalgic treat that’s surprisingly simple to make. One bite of these warm, homemade donuts, and you’ll understand why they’re a timeless favorite.

    The Science of the Tender, Moist Crumb

    The exceptional texture of these donuts is a masterclass in fat and acid chemistry. Sour cream is the star, performing multiple roles. Its high fat content enriches the dough, while its acidity tenderizes the gluten in the flour, preventing a tough, chewy texture and ensuring a fine, delicate crumb. The acid also reacts with the baking soda, creating carbon dioxide bubbles for lift.

    Using cake flour (or a homemade substitute with cornstarch) is another key. Cake flour has a lower protein content than all-purpose flour, which means less gluten forms, resulting in a more tender, cake-like bite. The donuts are fried at a precise temperature (365°F/185°C). This is hot enough to quickly set the exterior, creating a thin, crisp shell that seals in moisture, but not so hot that the outside burns before the inside cooks through. The quick fry ensures the interior steams, becoming light and cooked through without absorbing excess oil.

    Ingredients

    For the Donuts (Makes 10-12 donuts + holes):

    • 2 ¼ cups (281g) cake flour*
    • 1 ½ teaspoons baking powder
    • 1 teaspoon baking soda
    • ¾ teaspoon salt
    • ½ teaspoon ground nutmeg (classic flavor)
    • ¾ cup (150g) granulated sugar
    • 2 large eggs, room temperature
    • ½ cup (120ml) full-fat sour cream, room temperature
    • ¼ cup (60ml) whole milk, room temperature
    • 2 tablespoons unsalted butter, melted
    • 1 teaspoon vanilla extract
    • Vegetable or canola oil, for frying

    For the Vanilla Glaze:

    • 2 cups (240g) powdered sugar, sifted
    • ¼ cup (60ml) whole milk or cream
    • 1 teaspoon vanilla extract
    • Pinch of salt

    *No cake flour? Make your own: For 1 cup, measure 1 cup all-purpose flour, remove 2 tablespoons, and add 2 tablespoons cornstarch. Sift together.

    Instructions

    1. Make the Dough: In a medium bowl, whisk together cake flour, baking powder, baking soda, salt, and nutmeg. In a large bowl, whisk sugar and eggs until thick and pale, about 1 minute. Whisk in sour cream, milk, melted butter, and vanilla until smooth. Gently fold the dry ingredients into the wet until just combined—do not overmix. The dough will be soft and sticky. Cover and chill for 30-60 minutes to firm up.

    2. Roll & Cut: On a generously floured surface, pat the chilled dough to ½-inch thickness. Use a floured 3-inch donut cutter (or two round cutters) to cut out donuts, dipping the cutter in flour between cuts. Re-roll scraps once.

    3. Heat the Oil: In a heavy pot or Dutch oven, heat 2-3 inches of oil to 365°F (185°C). Use a thermometer for accuracy.

    4. Fry the Donuts: Carefully slide 2-3 donuts into the hot oil. Fry for 60-90 seconds per side until deep golden brown. Fry the holes separately for 45-60 seconds total. Drain on a wire rack set over a baking sheet.

    5. Make the Glaze: While donuts cool slightly, whisk all glaze ingredients in a shallow bowl until smooth. It should be thick but pourable.

    6. Glaze the Donuts: Once donuts are cool enough to handle but still warm (about 5 minutes out of the fryer), dip the top of each donut into the glaze. Lift, let excess drip off, and return to the wire rack. The glaze will set as it cools.

    7. Serve: Enjoy slightly warm or at room temperature. They are best the day they are made.

    8. Storage: Store leftover donuts in a single layer in an airtight container at room temperature for 1-2 days.

    Pro-Tips for Donut Success

    • Chill the Dough: This is essential for handling. Cold dough is less sticky and will hold its shape better when cut and fried.
    • Use a Thermometer: Maintaining the correct oil temperature is the single most important factor for donuts that aren’t greasy. Adjust heat as needed.
    • Don’t Overmix: Mix the dough just until the flour disappears. Overmixing develops gluten, leading to tough donuts.
    • Fry in Batches: Frying too many at once will cause the oil temperature to plummet, resulting in oily donuts.
    • The Nutmeg: Don’t skip it! It’s the signature flavor of an old-fashioned cake donut.
    • Glaze While Warm: Glazing while the donuts are warm helps the glaze stick and creates that classic, slightly crackly shell.
    • Room Temperature Dairy: Using cold sour cream or milk can cause the melted butter to solidify and create lumps in the batter.
    • Troubleshooting: If your oil is at the right temperature but the donuts are browning too fast, your baking soda may be too fresh/active. Reduce it to ½ tsp next time.

    These Old-Fashioned Sour Cream Donuts are a rewarding project that delivers a taste of pure, homemade nostalgia.

  • Homemade Churros: Crispy, Cinnamon-Sugar Coated & Perfect Every Time

    Homemade Churros: Crispy, Cinnamon-Sugar Coated & Perfect Every Time

    Bring the magic of the carnival or street market right into your kitchen with these irresistible homemade churros. This classic recipe transforms a simple, cooked flour paste into golden, ridged wands of fried dough that are impossibly crispy on the outside, tender and airy on the inside, and coated in a blanket of warm cinnamon sugar.

    Paired with a silky chocolate dipping sauce, they are a celebration in dessert form. While they seem fancy, the technique is straightforward—master the “choux” paste and the frying, and you’ll have a show-stopping treat that’s far superior to any fair-bought version.

    The Science of the Crisp Shell & Hollow Center

    Churro dough is a variation of pâte à choux, the same dough used for cream puffs and éclairs. The magic happens when water, butter, and salt are boiled together, and flour is stirred in. This cooking process gelatinizes the starch in the flour, which allows it to absorb a high amount of water and fat. When eggs are beaten in, they provide structure and steam.

    During frying in hot oil (375°F/190°C), the exterior sets almost instantly, trapping the steam inside. This steam expands, puffing the dough and creating the characteristic hollow, airy interior. The ridges from the piping tip are crucial—they increase the surface area, leading to more crispy, golden-brown edges in every bite. The immediate roll in cinnamon sugar while hot allows the sugar to adhere and partially caramelize, creating that iconic crackly-sweet shell.

    Ingredients

    For the Churros:

    • 1 cup (240ml) water
    • 4 tablespoons (½ stick / 57g) unsalted butter
    • 1 tablespoon granulated sugar
    • ¼ teaspoon salt
    • 1 cup (125g) all-purpose flour
    • 2 large eggs, room temperature
    • 1 teaspoon vanilla extract
    • Vegetable or canola oil, for frying

    For the Cinnamon Sugar Coating:

    • ½ cup (100g) granulated sugar
    • 1 teaspoon ground cinnamon

    For the Chocolate Dipping Sauce (Optional):

    • ½ cup (85g) semi-sweet chocolate chips
    • ½ cup (120ml) heavy cream

    Instructions

    1. Make the Dough: In a medium saucepan, combine water, butter, sugar, and salt. Bring to a rolling boil over medium-high heat. Reduce heat to low and immediately add the flour all at once. Stir vigorously with a wooden spoon until the mixture forms a smooth ball that pulls away from the sides of the pan, about 1 minute. Transfer dough to a mixing bowl and let cool for 5 minutes.

    2. Add Eggs: Using an electric mixer or vigorous stirring by hand, add the eggs one at a time, beating fully after each addition until the dough is smooth and shiny. Beat in the vanilla. The dough should be thick and pipeable.

    3. Prep for Frying: Heat 2 inches of oil in a heavy pot or Dutch oven to 375°F (190°C). Line a baking sheet with paper towels. Mix the ½ cup sugar and cinnamon in a shallow dish.

    4. Pipe & Fry: Spoon dough into a piping bag fitted with a large open star tip (like a Wilton 1M or 8B). Carefully pipe 4-6 inch strips of dough directly into the hot oil, using kitchen scissors to cut the dough from the tip. Fry 3-4 at a time for 2-3 minutes per side, until deep golden brown.

    5. Drain & Coat: Use a slotted spoon to transfer fried churros to the paper towel-lined sheet to drain for 30 seconds. While still hot, roll each churro in the cinnamon sugar mixture until fully coated.

    6. Make Sauce (Optional): For the chocolate sauce, heat the heavy cream until steaming. Pour over chocolate chips in a bowl, let sit for 2 minutes, then whisk until smooth.

    7. Serve Immediately: Churros are best served hot and fresh. Arrange on a platter with the chocolate dipping sauce on the side.

    8. Pro-Tip for Leftovers: Re-crisp leftover churros in an air fryer or 350°F oven for 5 minutes.

    Pro-Tips for Churro Success

    • Oil Temperature is Key: Use a thermometer. Oil that’s too cool makes greasy, soggy churros; too hot burns the outside before the inside cooks.
    • Cook the Flour Paste Thoroughly: Stirring the flour in over heat for a full minute cooks out the raw flour taste and dries the mixture enough to absorb the eggs properly.
    • Room Temperature Eggs: Cold eggs can cool the dough and make it harder to incorporate, potentially causing the dough to separate.
    • Pipe Directly into Oil: Piping onto parchment and sliding them in can cause deflation. Piping straight in gives the best puff.
    • Don’t Crowd the Pot: Frying too many at once lowers the oil temperature dramatically.
    • The Right Piping Tip: A large open star tip (at least ½-inch opening) creates the classic ridges. A closed star tip will not work as well.
    • Coat While Hot: The cinnamon sugar will only stick to the churros while they are still warm and slightly oily from frying.
    • Safety First: Be extremely cautious when working with hot oil. Keep kids and pets away from the stove.

    These Homemade Churros are a fun, rewarding project that delivers pure, crispy joy.