Blog

  • Perfect White Bread for the Bread Machine: Effortless Homemade Loaves

    Perfect White Bread for the Bread Machine: Effortless Homemade Loaves

    There’s nothing quite like the aroma and taste of freshly baked bread, and with a bread machine, it’s easier than ever to achieve. This recipe is your gateway to perfect, consistent loaves every time. Simply add the ingredients to the pan in the correct order, press a button, and let the machine handle the mixing, kneading, rising, and baking.

    The result is a beautifully tall, soft, and tender white loaf with a light, golden crust—ideal for sandwiches, toast, or simply slathered with butter. It’s homemade bread made truly hassle-free.

    The Science of the Machine-Made Loaf

    The bread machine automates the three critical stages of bread making: kneading, proofing, and baking, each in a controlled environment. During the knead cycle, the paddle thoroughly mixes and develops the gluten network, which is essential for the bread’s structure and chew.

    The proofing cycle provides a warm, humid environment for the yeast to ferment, producing carbon dioxide that makes the dough rise. Finally, the baking cycle applies consistent, surrounding heat that sets the structure, browns the crust, and creates that irresistible aroma.

    The order of adding ingredients (typically liquids first, then dry, with yeast last) is crucial to prevent the yeast from activating prematurely. This precise, hands-off process removes the guesswork and variables of traditional baking, guaranteeing a perfect loaf with minimal effort.

    Ingredients

    For a 1.5 lb Loaf (Standard Bread Machine Pan):

    • 1 cup + 2 tablespoons (270ml) warm water (105-115°F / 40-46°C)
    • 2 tablespoons (28g) unsalted butter, softened or melted
    • 2 tablespoons (25g) granulated sugar
    • 1 ¼ teaspoons salt
    • 3 cups (375g) bread flour*
    • 2 ¼ teaspoons (1 packet / 7g) active dry yeast or bread machine yeast

    *Bread flour is recommended for its higher protein content, which yields a better rise and chewier texture. All-purpose flour can be used but may produce a slightly denser loaf.

    Instructions

    1. The Measured Liquid Ingredients in the Pan: To the bread machine pan, add the warm water, softened or melted butter, sugar, and salt.

    2. The Added Flour Mound: Add the bread flour to the pan, carefully pouring it over the liquid to cover the surface completely.

    3. The Yeast in its Well: Use your finger to make a small well (indentation) in the top center of the flour mound. This keeps the yeast dry until mixing begins. Pour the yeast into this well.

    4. The Pan Locked in the Machine: Securely place the bread pan into the bread machine. Close and lock the lid.

    5. The Selected Cycle & Settings: Select the appropriate cycle for a basic white loaf. Typically, this is the “Basic” or “White Bread” cycle. Choose your desired crust color (Light, Medium, or Dark) and the loaf size (1.5 lb). Press start.

    6. The Baked Loaf in the Pan: At the end of the cycle, the machine will beep. The bread will be fully baked, with a deep golden-brown crust, and the pan will be very hot.

    7. The Loaf Removed from the Pan: Using oven mitts, carefully remove the hot pan from the machine. Tip the loaf out onto a clean kitchen towel or cooling rack. The loaf should release easily. Remove the kneading paddle from the bottom of the loaf if it’s stuck inside.

    8. The Cooling Loaf: Allow the bread to cool completely on a wire rack for at least 1 hour before slicing. This allows the interior crumb to set and prevents a gummy texture.

    9. The Sliced Loaf: Once completely cool, use a serrated bread knife to slice the loaf. The interior should be soft, fluffy, and uniform with a fine, tender crumb.

    Pro-Tips for Bread Machine Success

    • Ingredient Temperature Matters: Use warm water (not hot) to activate the yeast without killing it. Cold ingredients can slow or prevent rising.
    • Follow the Manufacturer’s Order: Most machines require liquids first, then dry, with yeast last. Always check your manual.
    • Measure Accurately: Use measuring cups for liquids and a kitchen scale for flour for the most consistent results.
    • Don’t Open the Lid: Resist the urge to check during the rise or bake cycles, as it releases heat and humidity crucial for the bread’s success.
    • Remove Promptly: Take the loaf out of the machine as soon as the cycle ends to prevent condensation from making the crust soggy.
    • Cool Completely: This is the hardest but most important rule. Slicing warm bread compresses the crumb and makes it seem doughy.
    • Troubleshooting: If your loaf is too dense, your yeast may be old. If it collapses, there may be too much liquid or the room was too warm.
    • Customize It: Add ½ cup of raisins or dried cranberries at the beep (if your machine has a fruit/nut add signal). For a richer loaf, replace water with milk and add an egg.
    • Storage: Store cooled bread in a plastic bag at room temperature for 2-3 days, or slice and freeze for longer storage.
    • Clean the Pan: Let the pan and paddle soak in warm, soapy water to easily remove any baked-on dough.

    This Perfect White Bread recipe unlocks the full, simple potential of your bread machine.

  • Carrot Cake Pancakes: Your Favorite Dessert for Breakfast

    Carrot Cake Pancakes: Your Favorite Dessert for Breakfast

    Imagine the cozy, spiced flavor of carrot cake in a form you can happily eat for breakfast. These Carrot Cake Pancakes deliver exactly that: light, fluffy pancakes packed with finely shredded carrots, warm cinnamon and ginger, and studded with toasted walnuts or pecans. They’re wholesome enough to feel like a proper meal but special enough to feel like a treat.

    Drizzled with a tangy-sweet cream cheese glaze instead of maple syrup, they transform your weekend brunch or holiday morning into a celebration. It’s the perfect way to enjoy the essence of dessert, first thing in the morning.

    The Science of the Moist, Fluffy Cake-Pancake

    These pancakes achieve their distinct texture—moist yet fluffy—through a careful balance of wet and dry ingredients and the power of baking powder. The shredded carrot adds natural moisture and sweetness but can weigh down the batter.

    To counter this, the batter uses a combination of baking powder and baking soda for a strong, immediate rise that creates airy pockets. The acidity in buttermilk (or the DIY substitute) activates the baking soda, producing carbon dioxide bubbles that further lighten the batter. The fat from oil or melted butter coats the flour proteins, ensuring tenderness.

    The result is a pancake that has the spiced, moist crumb of carrot cake but the light, airy structure of a perfect breakfast pancake, capable of holding all those delicious add-ins without becoming dense.

    Ingredients

    For the Pancakes:

    • 1 ¼ cups (156g) all-purpose flour
    • 2 teaspoons baking powder
    • 1 teaspoon baking soda
    • 1 teaspoon ground cinnamon
    • ½ teaspoon ground ginger
    • ¼ teaspoon ground nutmeg
    • ¼ teaspoon salt
    • 1 large egg
    • ¼ cup (50g) light brown sugar, packed
    • 1 cup (240ml) buttermilk*
    • ¼ cup (60ml) vegetable oil or melted butter
    • 1 teaspoon vanilla extract
    • 1 ½ cups (about 150g) finely grated carrots (from 2-3 medium carrots)
    • ⅓ cup (40g) chopped toasted walnuts or pecans (optional)
    • ⅓ cup (55g) raisins (optional)

    *No buttermilk? Make a DIY version: add 1 tbsp lemon juice or vinegar to a measuring cup, then add milk to reach 1 cup. Stir and let sit 5 minutes.

    For the Cream Cheese Glaze:

    • 4 oz (113g) cream cheese, softened
    • ¾ cup (90g) powdered sugar, sifted
    • ¼ cup (60ml) milk or cream
    • ½ teaspoon vanilla extract

    Instructions

    1. The Whisked Dry Ingredients: In a large bowl, whisk together the flour, baking powder, baking soda, cinnamon, ginger, nutmeg, and salt until thoroughly combined.

    2. The Prepared Wet Ingredients: In a separate medium bowl, whisk the egg and brown sugar until smooth. Whisk in the buttermilk, oil (or melted butter), and vanilla extract until the mixture is homogenous.

    3. The Grated Carrots: Peel and finely grate fresh carrots using a box grater. You should have about 1 ½ cups of lightly packed, fluffy grated carrot.

    4. The Combined Pancake Batter: Pour the wet ingredients into the dry ingredients. Stir with a spatula until just combined and no large dry streaks remain; the batter will be lumpy. Gently fold in the grated carrots, and optional nuts and raisins.

    5. The Cooking Pancakes on the Griddle: Heat a lightly greased griddle or non-stick skillet over medium heat. For each pancake, pour about ¼ cup of batter. Cook until bubbles form on the surface and the edges look set, about 2-3 minutes.

    6. The Flipped, Golden Pancakes: Flip the pancakes and cook for another 1-2 minutes on the second side, until golden brown and cooked through.

    7. The Stack of Cooked Pancakes: Transfer cooked pancakes to a warm plate or baking sheet in a low oven. Continue with the remaining batter. You should have about 8-10 medium pancakes.

    8. The Smooth Cream Cheese Glaze: While pancakes cook, make the glaze. In a medium bowl, beat the softened cream cheese until smooth. Gradually beat in the powdered sugar, milk, and vanilla until you have a smooth, drizzle-able consistency.

    9. The Finished, Glazed Pancake Stack: Drizzle the warm stack of pancakes generously with the cream cheese glaze. Sprinkle with extra chopped nuts if desired. Serve immediately.

    Pro-Tips for Perfect Pancakes

    • Finely Grate the Carrots: Large shreds can make the pancakes prone to breaking and give a stringy texture. A fine grate blends in seamlessly.
    • Don’t Overmix the Batter: Lumps are good! Overmixing develops gluten, leading to tough pancakes. Mix until the flour is just incorporated.
    • Rest the Batter (Optional but Helpful): Letting the batter sit for 5-10 minutes after mixing allows the flour to fully hydrate and can result in slightly fluffier pancakes.
    • Medium Heat is Key: Too hot and the outside burns before the inside cooks; too low and they’ll be pale and greasy.
    • Keep Them Warm: Place cooked pancakes on a baking sheet in a 200°F (95°C) oven while you finish the batch.
    • Glaze Consistency: Adjust the milk in the glaze a teaspoon at a time until it’s thick but pourable. For a thicker frosting, use less milk.
    • Make Ahead: The dry mix can be pre-measured. The glaze can be made 1-2 days ahead and stored in the fridge; let it come to room temp and stir before using.
    • Freezing: Cooked, unglazed pancakes freeze beautifully. Reheat in a toaster or oven.
    • Variations: Add a handful of shredded coconut to the batter. For a pineapple-carrot cake version, add ⅓ cup of crushed, drained pineapple.
    • Serving: While the cream cheese glaze is classic, these are also delicious with maple syrup, Greek yogurt, or a simple dusting of powdered sugar.

    These Carrot Cake Pancakes turn an ordinary morning into something truly special.

  • Fresh Strawberry Pie: The Ultimate No-Bake Summer Dessert

    Fresh Strawberry Pie: The Ultimate No-Bake Summer Dessert

    When strawberries are at their peak of sweetness, there’s no better way to showcase them than in this glorious Fresh Strawberry Pie. A buttery, press-in graham cracker crust provides the perfect crunchy base for a towering pile of whole, glistening berries.

    A simple cooked glaze, made from a portion of the strawberries, binds the fruit together with a shiny, sweet-tart coating that amplifies their natural flavor. Chilled until set and crowned with billowy whipped cream, this pie is refreshing, vibrant, and requires no oven for the filling—making it the ideal dessert for hot summer days and effortless entertaining.

    The Science of the Glaze & The Stable Crust

    The structural integrity of this pie relies on the pectin in the strawberries and the stabilizing power of cornstarch. To make the glaze, a portion of the berries is cooked down with sugar and mashed.

    The heat breaks down the fruit’s cell walls, releasing natural pectin—a soluble fiber that acts as a gelling agent. Cornstarch is added to further thicken the liquid by forming a gel network as it heats. When this hot glaze is poured over the remaining fresh, uncooked berries, it cools and sets, creating a glossy matrix that holds the berries firmly in place without making them mushy.

    The graham cracker crust is pre-baked to toast the crumbs and melt the butter, which then re-solidifies upon cooling into a sturdy, crisp shell that can support the weight of the juicy filling without getting soggy.

    Ingredients

    For the Graham Cracker Crust:

    • 1 ½ cups (150g) graham cracker crumbs (about 12 full sheets)
    • ⅓ cup (66g) granulated sugar
    • 6 tablespoons (85g) unsalted butter, melted
    • Pinch of salt

    For the Strawberry Filling:

    • 2 quarts (about 2 lbs / 900g) fresh strawberries, hulled
    • ¾ cup (150g) granulated sugar
    • 3 tablespoons cornstarch
    • ⅓ cup (80ml) water
    • 1 tablespoon lemon juice
    • 1-2 drops red food coloring (optional, for vibrancy)

    For the Topping:

    • 1 cup (240ml) heavy whipping cream, cold
    • 2 tablespoons powdered sugar
    • ½ teaspoon vanilla extract

    Instructions

    1. The Pressed Graham Cracker Crust: In a medium bowl, mix graham cracker crumbs, sugar, and salt. Stir in melted butter until the mixture resembles wet sand. Press firmly and evenly into the bottom and up the sides of a 9-inch pie plate. Bake at 375°F (190°C) for 8 minutes, then cool completely.

    2. The Prepared Fresh Strawberries: Hull all strawberries. Set aside the most beautiful, similar-sized berries (about 1 quart) for arranging. Halve or quarter any larger ones so they are all roughly bite-sized.

    3. The Cooking Berries for Glaze: Take the remaining 1 quart of strawberries and slice or mash them. In a medium saucepan, combine these mashed berries, sugar, cornstarch, water, and lemon juice. Cook over medium heat, stirring constantly, until thickened, clear, and bubbly.

    4. The Strawberry Glaze with Food Coloring (Optional): If a deeper red color is desired, stir in 1-2 drops of red food coloring into the hot glaze until uniform. Let the glaze cool for 10-15 minutes, stirring occasionally.

    5. The Combined Berries & Glaze: In a large bowl, gently fold the prepared fresh strawberries (the ones set aside for arranging) into the slightly cooled glaze until every berry is evenly coated.

    6. The Filled Pie Shell: Pour the glazed strawberry mixture into the cooled graham cracker crust. Spread into an even layer, mounding the berries slightly higher in the center. Arrange a few perfect berries on top if desired.

    7. The Chilled & Set Pie: Refrigerate the pie for at least 4 hours, or until the filling is completely set and no longer jiggles when the pan is nudged.

    8. The Whipped Cream Topping: Just before serving, in a chilled bowl, whip the heavy cream, powdered sugar, and vanilla to stiff peaks.

    9. The Finished & Served Pie: Spread or pipe the whipped cream over the chilled pie. Garnish with a few fresh strawberry halves or mint leaves. Slice with a sharp knife and serve cold.

    Pro-Tips for Pie Perfection

    • Use the Best Strawberries: Flavor is paramount. Seek out ripe, in-season, fragrant berries for the best results.
    • Press the Crust Firmly: A well-compacted crust holds together when sliced. Use the bottom of a measuring cup to press it evenly.
    • Cool the Glaze Slightly: Pouring boiling hot glaze over fresh berries will cook them and make them soft. Let it cool until warm but still fluid.
    • Don’t Skip the Lemon Juice: The acidity brightens the flavor and balances the sweetness.
    • Chill Thoroughly: This step is non-negotiable for clean slices. Overnight chilling is ideal.
    • Whip Cream Just Before Serving: For the best texture and to prevent weeping, top the pie with whipped cream right before you serve it.
    • Make Ahead: The crust can be baked a day ahead. The filled, un-topped pie can be refrigerated for up to 24 hours.
    • Variations: Use a traditional pastry crust if preferred. Add a layer of sweetened cream cheese under the berries for a strawberry cheesecake pie effect.
    • Slicing: Use a sharp, thin-bladed knife dipped in hot water for the cleanest cuts through the glaze and crust.
    • Storage: Store any leftovers covered in the refrigerator for up to 2 days (the crust will soften over time).

    This Fresh Strawberry Pie is a celebration of simplicity and seasonal fruit at its finest.

  • Ice Cream Bread: The 2-Ingredient, Magically Easy Quick Bread

    Ice Cream Bread: The 2-Ingredient, Magically Easy Quick Bread

    This recipe is the ultimate kitchen hack that seems too good to be true—but it absolutely works. With just a pint of melted ice cream and self-rising flour, you can create a moist, sweet, cake-like quick bread that carries the subtle flavor of whatever ice cream you choose. It’s a fascinating lesson in food science and the easiest path to homemade bread imaginable.

    Perfect for beginners, a fun project with kids, or when you need a last-minute sweet treat, this bread is a delightful surprise that will have everyone asking, “You made this from ice cream?”

    The Science of the 2-Ingredient Wonder

    The magic here is all about ingredient composition and chemical leavening. Ice cream contains the three essential components for a simple quick bread: fat (from cream), sugar, and liquid (milk). Self-rising flour contains both flour and the precise amount of baking powder and salt needed for leavening.

    When combined, the sugar and fat from the ice cream tenderize the bread, while the liquid activates the baking powder in the flour. As the loaf bakes, the baking powder produces carbon dioxide bubbles, causing the bread to rise. The result is a bread with a tight, tender crumb, similar to a pound cake or muffin.

    The flavor will be subtly sweet and carry notes of the ice cream’s base flavor, making vanilla, chocolate, or strawberry excellent starting points.

    Ingredients

    For the Basic Loaf:

    • 2 cups (500ml) melted ice cream, any flavor (approx. 1 pint)
    • 1 ½ cups (188g) self-rising flour*

    *If you don’t have self-rising flour, use 1 ½ cups (188g) all-purpose flour + 2 ¼ teaspoons baking powder + ¾ teaspoon salt, whisked together.

    Optional Add-Ins: ½ cup chocolate chips, sprinkles, chopped nuts, or a swirl of fruit preserves.

    Instructions

    1. The Melted Ice Cream: Scoop the ice cream into a microwave-safe bowl or let it sit at room temperature until completely melted and smooth. Stir well to ensure it’s a uniform liquid.

    2. The Combined Self-Rising Flour: Measure the self-rising flour into a separate bowl. If making your own, whisk the all-purpose flour, baking powder, and salt together thoroughly here.

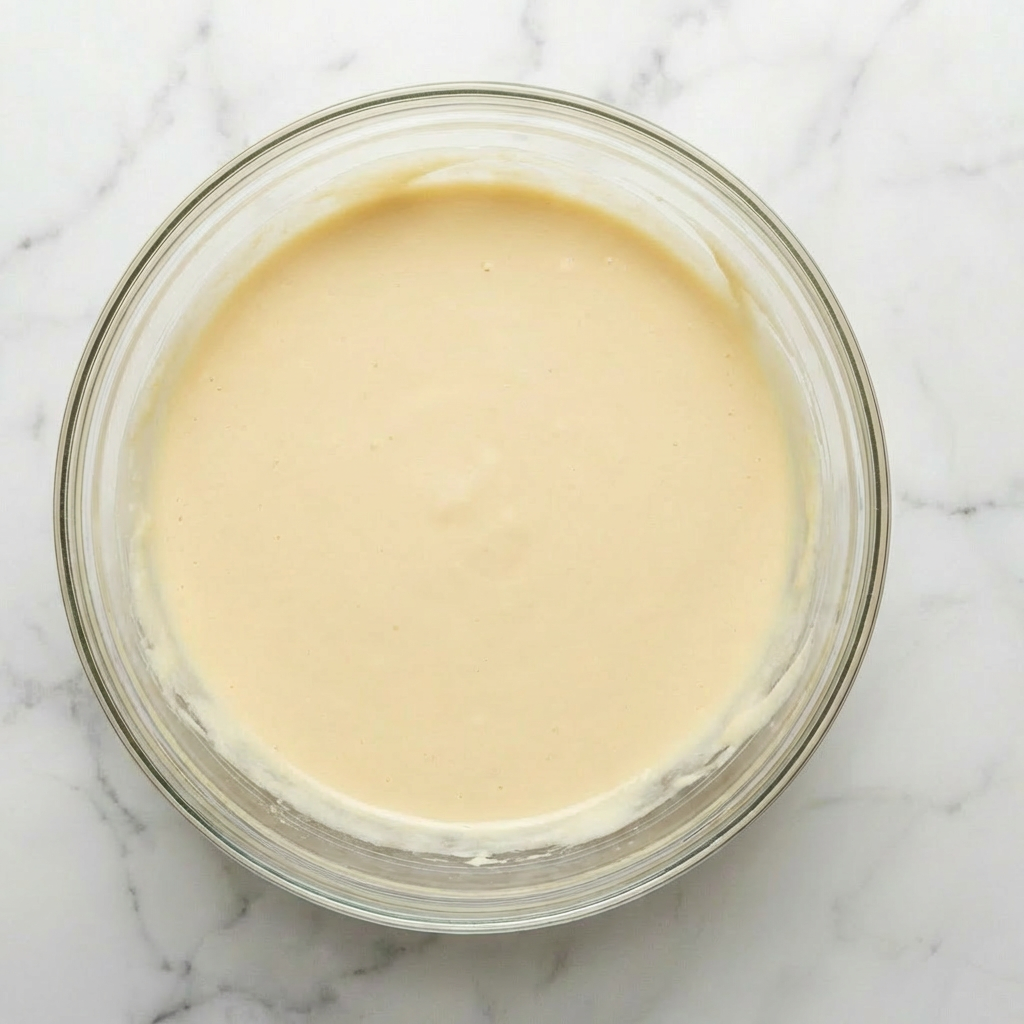
    3. The Mixed, Lumpy Batter: Add the melted ice cream to the bowl with the flour. Using a spatula, stir gently until just combined. The batter will be very thick and lumpy—this is perfect. Do not overmix.

    4. The Panned Batter with Mix-Ins: If using add-ins like chocolate chips, fold them in now. Transfer the thick batter to a greased or parchment-lined 9×5 inch loaf pan. Smooth the top slightly with the spatula.

    5. The Baked & Golden Loaf: Bake at 350°F (175°C) for 40-50 minutes, until the top is deep golden brown and a toothpick inserted into the center comes out clean or with a few dry crumbs.

    6. The Cooled Loaf Removed from Pan: Let the loaf cool in the pan for 10 minutes. Then, run a knife around the edges and turn it out onto a wire rack to cool completely. The loaf will have a rustic, craggy top.

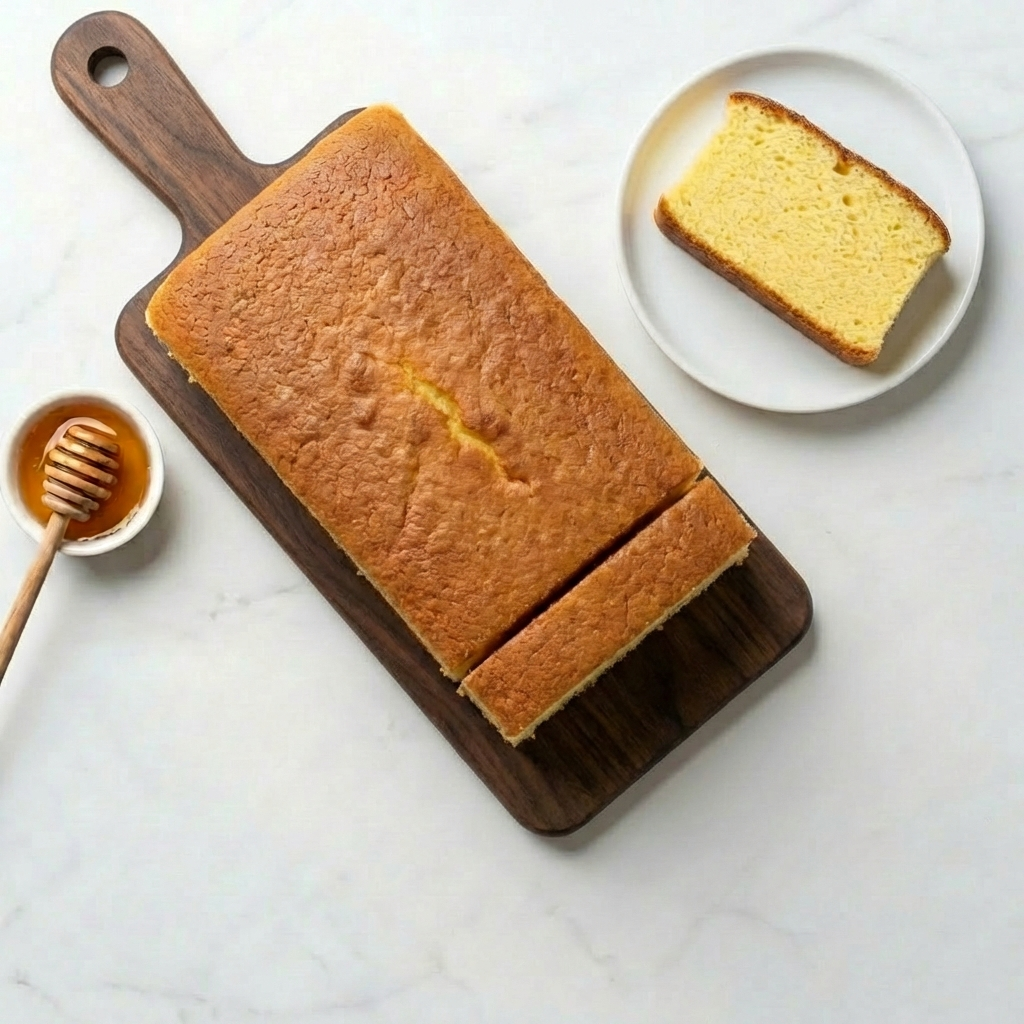
    7. The Sliced Loaf Revealing the Crumb: Once completely cool, slice the loaf with a serrated knife. The interior will be tender, moist, and have a fine, even crumb similar to cake.

    Pro-Tips for Ice Cream Bread Success

    • Choose Your Ice Cream Wisely: Full-fat, premium ice cream yields the richest, most tender bread. Low-fat or non-dairy alternatives will work but produce a drier, less flavorful loaf.
    • Flavor Forecast: Vanilla is a classic. Chocolate makes a chocolate bread. Cookie dough or strawberry ice cream will impart subtle notes. Avoid chunky ice creams with large mix-ins, as they can sink or burn.
    • Melt Completely: Ensure the ice cream is fully liquid and at room temperature for even mixing with the flour.
    • Do Not Overmix: Stir just until the flour is incorporated. Overmixing develops gluten, leading to a tough, dense bread. Lumps are good!
    • Pan Prep: Grease the loaf pan well or use parchment paper, as the high sugar content can cause sticking.
    • Test for Doneness: Ovens vary. The loaf should be deeply golden and sound hollow when tapped. The toothpick test is the best indicator.
    • Cool Completely: This bread is very tender when warm and can tear. Let it cool fully on a rack for clean slices.
    • Flavor Boosts: Add 1 teaspoon of vanilla or almond extract to vanilla ice cream batter. Swirl in a tablespoon of peanut butter or a sprinkle of cinnamon sugar before baking.
    • Storage: Store wrapped in plastic at room temperature for 2 days, or freeze slices for longer storage.
    • Serving: Enjoy plain, toasted with butter, or as a base for bread pudding or French toast.

    Ice Cream Bread is a wonderfully simple, endlessly customizable baking adventure.

  • Chocolate Pudding Pie: The Ultimate No-Bake, Make-Ahead Dessert

    Chocolate Pudding Pie: The Ultimate No-Bake, Make-Ahead Dessert

    This pie is the epitome of comfort and elegance, all in one no-bake package. It starts with a simple, crunchy cookie crust that requires just minutes to make.

    The star is the pudding—a luxurious, from-scratch chocolate custard cooked on the stovetop until it’s thick enough to coat a spoon. Poured into the waiting crust and chilled, it sets into a sliceable, intensely chocolatey filling that’s far superior to any mix.

    Topped with freshly whipped cream, it’s a dessert that feels special enough for a dinner party but is straightforward enough for a weeknight treat. The best part? It must be made ahead, taking all the stress out of dessert timing.

    The Science of the Set & The Crust

    The perfection of this pie relies on two types of setting: chemical and physical. The cookie crust sets through the melting and re-solidification of butter. When mixed with fine cookie crumbs and baked (or chilled), the butter acts as a binder, creating a firm, cohesive base as it cools.

    The homemade pudding is a starch-thickened custard. Cornstarch granules swell and burst when heated with liquid, creating a gel network that traps water and milk, resulting in a thick, smooth texture. The egg yolks add richness and a velvety mouthfeel, while the chocolate contributes both flavor and additional structure as its cocoa butter solidifies upon chilling.

    This combination of starch gelatinization and fat solidification creates a filling that is firm enough to slice cleanly yet melts luxuriously on the tongue.

    Ingredients

    For the Cookie Crust:

    • 24 chocolate sandwich cookies (like Oreos)
    • 5 tablespoons (70g) unsalted butter, melted
    • Pinch of salt

    For the Chocolate Pudding Filling:

    • ¾ cup (150g) granulated sugar
    • ⅓ cup (40g) cornstarch
    • ⅓ cup (30g) unsweetened cocoa powder
    • ½ teaspoon salt
    • 3 cups (720ml) whole milk
    • 4 large egg yolks
    • 4 oz (115g) semi-sweet or bittersweet chocolate, finely chopped
    • 2 tablespoons (28g) unsalted butter
    • 2 teaspoons vanilla extract

    For the Topping:

    • 1 cup (240ml) heavy whipping cream, cold
    • 2 tablespoons powdered sugar
    • Chocolate shavings or grated chocolate, for garnish

    Instructions

    1. The Prepared Crumb Crust: In a food processor, pulse the cookies (creams and all) into fine, uniform crumbs. Mix with melted butter and salt until it resembles wet sand. Press firmly and evenly into the bottom and up the sides of a 9-inch pie plate.

    2. The Chilled or Baked Crust: For a no-bake option, chill the crust in the freezer for 15 minutes to set. For a firmer crust, bake at 350°F (175°C) for 8-10 minutes, then cool completely.

    3. The Cooked, Thickened Pudding Base: In a medium saucepan, whisk together sugar, cornstarch, cocoa, and salt. Gradually whisk in the milk until smooth. Cook over medium heat, whisking constantly, until the mixture thickens, becomes glossy, and reaches a low boil.

    4. The Tempered Egg Mixture: In a separate bowl, whisk the egg yolks. While whisking constantly, slowly pour about 1 cup of the hot pudding mixture into the yolks to temper them. Then, whisk this yolk mixture back into the saucepan.

    5. The Finished, Enriched Pudding: Return the saucepan to low heat. Cook for 2 more minutes, whisking constantly. Remove from heat. Whisk in the chopped chocolate, butter, and vanilla until completely smooth, melted, and glossy.

    6. The Filled Pie Shell: Immediately pour the hot pudding into the prepared crust. Smooth the top with a spatula. Press plastic wrap directly onto the surface of the pudding to prevent a skin from forming.

    7. The Fully Chilled & Set Pie: Refrigerate the pie for at least 4 hours, or preferably overnight, until the pudding is completely cold and firmly set.

    8. The Topped & Finished Pie: Just before serving, whip the cream and powdered sugar to stiff peaks. Spread or pipe it over the chilled pie. Garnish with chocolate shavings.

    Pro-Tips for Pie Perfection

    • Use a Food Processor: For the most uniform, fine crumbs that pack into a solid crust.
    • Press the Crust Firmly: Use a flat-bottomed cup to press the crumbs firmly into the plate, especially in the corners, to prevent crumbling when sliced.
    • Constant Whisking is Key: When cooking the pudding, never stop whisking to prevent lumps and scorching on the bottom of the pan.
    • Temper the Eggs: This gradual heating prevents the eggs from scrambling when added to the hot mixture.
    • Chop Chocolate Finely: Smaller pieces melt instantly into the hot pudding, ensuring a smooth finish.
    • Press Plastic Directly: This crucial step prevents a rubbery skin from forming on the pudding surface.
    • Chill Thoroughly: Patience is essential for a clean slice. Overnight chilling is best.
    • Whip Cream Cold: Chill your bowl and beaters for the fluffiest whipped cream.
    • Make Ahead: This pie is perfect for making 1-2 days in advance. Add the whipped cream topping just a few hours before serving.
    • Storage: Store covered in the refrigerator for up to 3 days. The crust will soften over time but will still be delicious.

    This Chocolate Pudding Pie is a timeless, foolproof dessert that never goes out of style.

  • Peanut Butter Brownies: The Ultimate Swirled Fudgy Dessert

    Peanut Butter Brownies: The Ultimate Swirled Fudgy Dessert

    Why choose between chocolate and peanut butter when you can have both in every bite? These brownies start with an incredibly rich, one-bowl fudgy chocolate base. A simple, creamy peanut butter mixture is then swirled on top, creating pockets of salty-sweet flavor that perfectly complement the deep chocolate.

    The result is a brownie that’s visually stunning, supremely moist, and hits all the right notes of sweet, salty, and decadent. They’re surprisingly easy to make but look and taste like they came from a professional bakery, making them the ultimate treat for any occasion.

    The Science of the Swirl & Fudgy Texture

    The magic of these brownies lies in two areas: fat content and viscosity. The fudgy brownie base gets its dense, moist texture from a higher fat-to-flour ratio, using both butter and chocolate, and minimal leavening. This creates a batter that sets firmly but remains tender.

    The peanut butter swirl is engineered to have a slightly thicker consistency than the brownie batter. This difference in viscosity allows the two batters to remain distinct when swirled together with a knife or skewer. As they bake, the peanut butter mixture softens and sinks slightly but doesn’t fully incorporate, creating those beautiful marbled pockets.

    The salt in the peanut butter layer also heightens the flavor of the chocolate, making it taste even richer through the principle of taste contrast. This careful balance ensures every square delivers the perfect ratio of chocolate to peanut butter.

    Ingredients

    For the Fudgy Brownie Base:

    • ½ cup (1 stick / 113g) unsalted butter
    • 6 oz (170g) semi-sweet chocolate, chopped
    • ¾ cup (150g) granulated sugar
    • ⅓ cup (70g) packed brown sugar
    • 2 large eggs + 1 egg yolk, room temperature
    • 1 teaspoon vanilla extract
    • ½ cup (63g) all-purpose flour
    • 2 tablespoons unsweetened cocoa powder
    • ½ teaspoon salt

    For the Peanut Butter Swirl:

    • ½ cup (125g) creamy peanut butter
    • 3 tablespoons powdered sugar
    • 1 tablespoon all-purpose flour
    • 1 tablespoon milk or cream
    • ¼ teaspoon vanilla extract
    • Pinch of salt

    Instructions

    1. The Melted Chocolate & Butter: In a medium heatproof bowl set over a saucepan of simmering water (or using a microwave in short bursts), melt the butter and chopped chocolate together. Stir until completely smooth and glossy. Remove from heat and let cool slightly.

    2. The Thickened Brownie Batter: Whisk the granulated sugar, brown sugar, eggs, egg yolk, and vanilla into the slightly cooled chocolate mixture until the batter is thick, smooth, and slightly paler in color. Gently fold in the flour, cocoa powder, and salt until just combined.

    3. The Spread Brownie Base: Line an 8×8 inch baking pan with parchment paper. Pour the brownie batter into the pan and use a spatula to spread it into an even layer.

    4. The Mixed Peanut Butter Swirl: In a small bowl, stir together the peanut butter, powdered sugar, flour, milk, vanilla, and salt until completely smooth and slightly thickened.

    5. The Dolloped & Ready-to-Swirl Pan: Drop spoonfuls of the peanut butter mixture randomly over the surface of the brownie batter.

    6. The Swirled Pan Before Baking: Use a knife or a skewer to gently swirl the peanut butter dollops into the brownie batter. Drag the tool in wide arcs and figure-eights to create a marbled pattern, being careful not to over-mix.

    7. The Baked & Cooled Brownies: Bake at 350°F (175°C) for 25-30 minutes, until the edges are set and a toothpick inserted into a chocolatey part comes out with a few moist crumbs. The center should still look slightly soft. Let cool completely in the pan on a wire rack.

    8. The Cut & Served Brownies: Once completely cool, lift the brownie slab from the pan using the parchment paper. Place on a cutting board and slice into squares with a sharp knife.

    Pro-Tips for Brownie Perfection

    • Don’t Overmix the Batter: Once you add the flour, fold gently until just combined to avoid developing gluten, which would make the brownies cakey.
    • Cool the Chocolate Slightly: Adding eggs to very hot chocolate can cook them. Let the mixture cool for 5-10 minutes.
    • Room Temperature Eggs: They incorporate more easily and help create a shiny, crackly top.
    • Consistent Peanut Butter: Use a standard, creamy commercial peanut butter (not natural/oily) for the most reliable swirl consistency.
    • Swirl, Don’t Mix: The goal is a marbled effect. Use a gentle hand and make just 4-5 passes with the knife.
    • Undercook Slightly: For the fudgiest texture, err on the side of under-baking. The brownies will continue to set as they cool.
    • Cool Completely: Cutting warm brownies leads to a messy, crumbly result. Patience is key for clean squares.
    • Storage: Store in an airtight container at room temperature for 3 days, or freeze for up to 3 months.
    • Flavor Boost: Add ½ cup of chocolate chips to the brownie batter, or a pinch of espresso powder to deepen the chocolate flavor.
    • Serving: For an extra treat, serve slightly warm with a scoop of vanilla ice cream.

    These Peanut Butter Brownies are a guaranteed crowd-pleaser and a testament to a perfect flavor pairing.

  • No-Bake Cheesecake: The Easiest, Creamiest Dessert with 6 Ingredients

    No-Bake Cheesecake: The Easiest, Creamiest Dessert with 6 Ingredients

    Craving the rich, tangy delight of cheesecake without turning on the oven? This No-Bake Cheesecake is your ultimate dessert savior. With just six simple ingredients and about 20 minutes of active time, you can create a luxuriously smooth, perfectly set cheesecake that rivals any baked version.

    The secret is in the gentle setting power of whipped cream and the stability of cream cheese, which together create a cloud-like, mousse-like filling that slices beautifully. Resting on a classic, buttery graham cracker crust and topped with your favorite fruit or sauce, this dessert is foolproof, elegant, and guaranteed to impress at any summer gathering, potluck, or weeknight treat.

    The Science of a Firm, No-Bake Set

    Unlike its baked cousin that relies on eggs for structure, this cheesecake gets its firm, sliceable texture from a combination of fat stabilization and chilling. The filling is essentially a stabilized mousse.

    The cream cheese provides a dense, tangy base rich in fat, which helps solidify when cold. The whipped heavy cream is the key: when beaten, its fat molecules trap air, creating a light foam. Folding this foam into the sweetened cream cheese creates millions of tiny air pockets. As the cheesecake chills for several hours, these air pockets set within the firm fat matrix of the cream cheese, creating a structure that’s light yet firm enough to hold its shape when sliced.

    The crust, pre-baked or set with butter, provides a sturdy, crunchy foundation that contrasts perfectly with the creamy filling.

    Ingredients

    For the Graham Cracker Crust:

    • 2 cups (200g) graham cracker crumbs (about 14-16 full sheets)
    • ½ cup (1 stick / 113g) unsalted butter, melted
    • 2 tablespoons granulated sugar

    For the No-Bake Filling:

    • 16 oz (two 8 oz blocks) full-fat cream cheese, softened to room temperature
    • 1 cup (120g) powdered sugar, sifted
    • 1 tablespoon fresh lemon juice
    • 1 teaspoon pure vanilla extract
    • 1 ¼ cups (300ml) cold heavy whipping cream

    For Topping (Optional): Fresh berries, fruit sauce, or lemon curd.

    Instructions

    1. Make the Crust: In a medium bowl, mix graham cracker crumbs, melted butter, and sugar until combined and the texture resembles wet sand. Press the mixture firmly and evenly into the bottom and slightly up the sides of a 9-inch springform pan or pie dish. Use the bottom of a glass to compact it. Refrigerate while you make the filling.

    2. Make the Cheesecake Filling Base: In a large bowl, beat the softened cream cheese with an electric mixer until completely smooth and lump-free, about 2 minutes. Beat in the sifted powdered sugar, lemon juice, and vanilla extract until fully incorporated and creamy. Scrape down the bowl.

    3. Whip the Cream: In a separate, chilled bowl, whip the cold heavy cream until it forms stiff peaks. Be careful not to over-whip into butter.

    4. Combine & Fold: Gently fold about one-third of the whipped cream into the cream cheese mixture to lighten it. Then, carefully fold in the remaining whipped cream using a large spatula. Use a gentle, broad folding motion until no white streaks remain, being careful not to deflate the mixture.

    5. Assemble & Chill: Pour the fluffy filling into the prepared crust and smooth the top with an offset spatula. Cover loosely with plastic wrap and refrigerate for at least 6 hours, or preferably overnight, to set completely.

    6. Serve: Run a thin knife around the edge of the springform pan before releasing the collar. If using a pie dish, slice directly from the dish. Top with fresh berries, a fruit sauce, or enjoy plain. Slice with a clean, hot knife for the neatest cuts.

    7. Store: Keep covered in the refrigerator for up to 4 days. The crust will soften slightly over time but will remain delicious.

    Pro-Tips for a Perfectly Set, Silky Cheesecake

    • Room Temperature Cream Cheese is Non-Negotiable: This is the single most important tip. Cold cream cheese will leave lumps that are impossible to beat out, resulting in a grainy filling.
    • Chill Your Bowl & Cream: For the best volume when whipping the cream, chill your mixer bowl and beaters in the freezer for 10-15 minutes beforehand.
    • Don’t Over-Whip the Cream: Whip just until stiff peaks form. Over-whipped cream becomes grainy and buttery, which will make your filling greasy and less stable.
    • Fold Gently: Preserve the air in the whipped cream by folding gently. Overmixing will deflate the filling, making it dense.
    • The Long Chill: Do not shortcut the chilling time. The cheesecake needs a full 6+ hours to firm up properly for clean slices. Overnight is ideal.
    • Clean Slices: For picture-perfect slices, dip your knife in hot water and wipe it clean between each cut.
    • Flavor Variations: Add ½ cup of lemon curd or passionfruit puree to the filling. For a chocolate version, fold in 1 cup of melted and cooled chocolate after step 2.

    This No-Bake Cheesecake is the ultimate easy, elegant dessert that delivers on every promise.

  • Ultimate Carrot Cake: Super Moist with Cream Cheese Frosting

    Ultimate Carrot Cake: Super Moist with Cream Cheese Frosting

    This isn’t just a carrot cake; it’s the carrot cake—a legendary recipe celebrated for its unbeatable moisture, complex flavor, and perfect balance of spice and sweetness. Loaded with freshly grated carrots, crushed pineapple, toasted walnuts, and a hint of cinnamon, each bite is a textural delight.

    The secret? Using oil instead of butter and incorporating pineapple ensures a supremely tender crumb that stays fresh for days. Enrobed in a classic, tangy-sweet cream cheese frosting, this cake is the star of any holiday table, birthday party, or special gathering. It’s a labor of love that yields a timeless, crowd-pleasing masterpiece.

    The Science of Unbeatable Moisture & Flavor

    The legendary moistness of this cake comes from a powerful combination of wet ingredients and clever add-ins. The primary source is, of course, the freshly grated carrots, which release moisture and natural sugars during baking.

    The secret weapon, however, is crushed pineapple (undrained). Its juice and fibers contribute significant moisture while its acidity tenderizes the gluten, and its subtle tang balances the sweetness. Using oil instead of butter is a non-negotiable choice; oil remains liquid at room temperature, coating the flour proteins more thoroughly than solid fat and guaranteeing a moist crumb that stays tender for days.

    Finally, the blooming of spices in the batter—cinnamon, nutmeg, ginger—allows their volatile oils to fully integrate, creating a deep, warm flavor profile that permeates every bite. This is a masterclass in building a moist, flavorful cake through ingredient science.

    Ingredients

    For the Carrot Cake:

    • 2 cups (250g) all-purpose flour
    • 2 teaspoons baking powder
    • 1 ½ teaspoons baking soda
    • 1 teaspoon salt
    • 2 teaspoons ground cinnamon
    • ½ teaspoon ground nutmeg
    • ¼ teaspoon ground ginger
    • 1 cup (200g) granulated sugar
    • 1 cup (200g) packed light brown sugar
    • 1 ¼ cups (300ml) vegetable or canola oil
    • 4 large eggs, room temperature
    • 1 teaspoon vanilla extract
    • 3 cups (300g) finely grated carrots (about 4-5 medium)
    • 1 (8 oz) can crushed pineapple, undrained
    • 1 cup (120g) chopped walnuts or pecans, toasted
    • ½ cup (80g) raisins (optional)

    For the Cream Cheese Frosting:

    • 1 cup (2 sticks / 226g) unsalted butter, softened
    • 16 oz (two 8 oz blocks) full-fat cream cheese, cold*
    • 1 teaspoon vanilla extract
    • Pinch of salt
    • 6-7 cups (720-840g) powdered sugar, sifted

    *Using cold cream cheese helps maintain a stable, pipeable frosting.

    Instructions

    1. Prep: Preheat oven to 350°F (175°C). Grease and flour two 9-inch round cake pans and line the bottoms with parchment paper.

    2. Mix Dry Ingredients: In a medium bowl, whisk together flour, baking powder, baking soda, salt, cinnamon, nutmeg, and ginger.

    3. Mix Wet Ingredients & Sugar: In a large bowl, whisk together granulated sugar, brown sugar, and oil until well combined. Whisk in eggs one at a time, then the vanilla.

    4. Combine Wet & Dry: Add the dry ingredients to the wet ingredients in two additions, mixing with a spatula until just combined. Do not overmix.

    5. Fold in Add-Ins: Gently fold in the grated carrots, undrained crushed pineapple, toasted nuts, and raisins (if using) until evenly distributed.

    6. Bake: Divide the batter evenly between the prepared pans. Bake for 30-35 minutes, or until a toothpick inserted into the center comes out clean or with a few moist crumbs. The cakes will be deeply golden.

    7. Cool: Let cakes cool in pans for 15 minutes, then run a knife around the edges and invert onto a wire rack. Peel off parchment and let cool completely before frosting (about 2 hours).

    8. Make the Frosting: In a large bowl, beat the softened butter until smooth. Add the cold cream cheese, vanilla, and salt. Beat on medium speed just until combined and smooth—do not overbeat. Gradually add the sifted powdered sugar, starting with 6 cups, and beat until creamy and spreadable. Add more sugar if needed for a thicker consistency.

    9. Assemble the Cake: Place one cake layer on a serving plate. Spread with a generous layer of frosting. Top with the second layer. Frost the top and sides of the cake with a thin “crumb coat,” chill for 20 minutes, then apply the final, thick layer of frosting. Press additional chopped nuts onto the sides if desired.

    10. Serve & Store: For best flavor, let the cake sit for at least an hour before slicing. Store covered in the refrigerator for up to 5 days. Bring to room temperature for 30 minutes before serving.

    Pro-Tips for a Perfect, Bakery-Worthy Cake

    • Grate Your Own Carrots: Pre-shredded bagged carrots are often too dry and thick. Use the small holes of a box grater for the finest texture that melts into the cake.
    • Toast the Nuts: Toasting walnuts or pecans in a dry skillet or the oven for 5-7 minutes dramatically enhances their flavor and crunch.
    • Don’t Drain the Pineapple: That juice is liquid gold for moisture and flavor. Include every last drop.
    • Cool Completely: Frosting a warm cake is a recipe for disaster. The cream cheese frosting will melt and slide off. Patience is key.
    • Frosting Stability: Using cold cream cheese and not over-beating it after adding the powdered sugar prevents a runny frosting. If your kitchen is warm, chill the frosting for 15 minutes before using.
    • Make Ahead: Baked, unfrosted cake layers can be wrapped tightly and frozen for up to 3 months. Thaw overnight in the fridge before frosting.

    This Ultimate Carrot Cake is a labor of love that yields the most delicious, memorable reward.

  • Classic Walnut Cake: Moist, Rich & Elegantly Simple

    Classic Walnut Cake: Moist, Rich & Elegantly Simple

    Sometimes the simplest desserts are the most memorable. This Walnut Cake is a testament to that—a humble, single-layer cake where toasted walnuts are the undisputed star. The cake itself is incredibly moist and tender, with a subtle warmth from cinnamon and a rich, nutty flavor in every bite.

    Topped with a complementary coffee or vanilla frosting, it strikes the perfect balance between homey comfort and elegant simplicity. It’s the kind of cake that doesn’t need a special occasion but makes any afternoon feel a little more special.

    The Science of a Moist, Nut-Forward Crumb

    This cake achieves its moist, dense-yet-tender texture through a combination of oil-based hydration and the unique properties of toasted walnuts. Using vegetable oil instead of butter coats the flour proteins more thoroughly, inhibiting gluten formation and locking in moisture for a softer crumb that stays fresh for days.

    The toasted walnuts do more than add flavor; when finely ground, they release their natural oils, which further enriches the batter and contributes to the cake’s moistness. The toasting process is crucial—it deepens their flavor via the Maillard reaction, transforming them from bland and bitter to rich and aromatic.

    The small amount of cinnamon enhances the nutty flavor without overpowering it. The frosting, whether coffee or vanilla, uses confectioners’ sugar for a smooth texture that beautifully complements the cake’s rustic texture without being overly sweet.

    Ingredients

    For the Walnut Cake:

    • 1 ½ cups (150g) walnuts, toasted and cooled*
    • 1 ½ cups (188g) all-purpose flour
    • 2 teaspoons baking powder
    • ½ teaspoon baking soda
    • ½ teaspoon salt
    • ½ teaspoon ground cinnamon
    • ¾ cup (150g) granulated sugar
    • ½ cup (120ml) vegetable or canola oil
    • 2 large eggs, room temperature
    • 1 teaspoon vanilla extract
    • ⅔ cup (160ml) buttermilk, room temperature

    For the Coffee Frosting (or Vanilla):

    • ½ cup (1 stick / 113g) unsalted butter, softened
    • 2 cups (240g) confectioners’ sugar, sifted
    • 2-3 teaspoons strong brewed coffee, cooled (or milk for vanilla)
    • 1 teaspoon vanilla extract
    • Pinch of salt
    • Extra walnut halves for garnish

    *Toast walnuts at 350°F for 8-10 minutes until fragrant. Let cool completely before using.

    Instructions

    1. Prep: Preheat oven to 350°F (175°C). Grease and flour a 9-inch round cake pan, or line with parchment paper. Toast walnuts, let cool, then finely chop or pulse in a food processor until they resemble coarse meal (some larger pieces are fine).

    2. Mix Dry Ingredients: In a medium bowl, whisk together the flour, baking powder, baking soda, salt, and cinnamon. Stir in the processed walnuts.

    3. Mix Wet Ingredients: In a large bowl, whisk together the sugar and oil until combined. Whisk in the eggs one at a time, then the vanilla.

    4. Combine: Add about one-third of the dry ingredients to the wet, mixing just until combined. Stir in half of the buttermilk. Repeat with another third of the dry, the remaining buttermilk, and finally the last of the dry ingredients. Mix until just combined—do not overmix.

    5. Bake: Pour batter into prepared pan and smooth the top. Bake for 30-35 minutes, until a toothpick inserted in the center comes out clean.

    6. Cool: Let cake cool in the pan for 10 minutes, then turn out onto a wire rack to cool completely.

    7. Make Frosting: While cake cools, beat softened butter until smooth. Gradually add sifted confectioners’ sugar on low speed. Add vanilla, salt, and coffee (or milk) one teaspoon at a time until the frosting is creamy and spreadable. Beat on high for 1-2 minutes until fluffy.

    8. Frost & Serve: Once cake is completely cool, spread frosting over the top. Garnish with a ring of toasted walnut halves. Slice and serve.

    Pro-Tips for Cake Perfection

    • Toast Your Nuts: This is non-negotiable for deep, rich flavor. Cool them completely before grinding to prevent releasing oils that can make the cake greasy.
    • Buttermilk Magic: Its acidity tenderizes the gluten and reacts with the baking soda for a light, tender crumb. No buttermilk? Add 2 tsp lemon juice to ⅔ cup milk and let sit 5 minutes.
    • Room Temperature Ingredients: Cold eggs or buttermilk can cause the oil to solidify and result in a dense cake.
    • The Alternating Method: Adding the dry and wet ingredients in stages prevents overmixing and ensures a smooth, well-hydrated batter.
    • Cool Completely Before Frosting: Any residual warmth will melt the butter-based frosting.
    • Frosting Consistency: For a thick, pipeable frosting, use less liquid. For a smooth, spreadable glaze, add a touch more coffee or milk.
    • Storage: Store covered at room temperature for up to 3 days. The flavors meld and improve overnight.
    • Flavor Variations: Add ½ cup of raisins or chopped dates to the batter, or use maple syrup in place of some sugar for an autumnal twist.

    This Classic Walnut Cake is a delicious celebration of simplicity and flavor.

  • Perfect English Scones: Light, Flaky & Ready in 20 Minutes

    Perfect English Scones: Light, Flaky & Ready in 20 Minutes

    Experience the quintessential treat of a British afternoon tea with these authentic, plain English Scones. Unlike their denser, sweeter American cousins, these scones are lightly sweetened, focusing on a buttery, tender, and impossibly flaky texture that provides the perfect canvas for rich clotted cream and tart jam.

    With a few simple techniques—cold ingredients and a light touch—you can have warm, heavenly scones on the table in less time than it takes to brew the pot of tea. They’re easier than you think and far superior to any shop-bought version.

    The Science of the Flaky, Tender Rise

    The iconic flaky layers and tall rise of a proper scone are achieved through precise fat distribution and gentle handling. Using very cold butter (or sometimes frozen, grated butter) is essential. When small, solid pieces of cold fat are incorporated into the flour, they create pockets. In the hot oven, these pockets melt, releasing steam that pushes the layers apart, creating flakiness.

    The liquid, typically cold buttermilk or milk, should be added just to bind the dough. Overworking the dough is the cardinal sin—it develops gluten, leading to tough, chewy scones instead of a tender, crumbly texture. A combination of baking powder and baking soda (with buttermilk) provides a powerful, instant lift.

    The key is to handle the dough as little as possible, patting (not rolling) it and cutting straight down with a sharp cutter without twisting, which seals the edges and inhibits the rise.

    Ingredients

    For 8-10 Scones:

    • 2 cups (250g) all-purpose flour, plus extra for dusting
    • ¼ cup (50g) granulated sugar
    • 1 tablespoon baking powder
    • ½ teaspoon salt
    • 6 tablespoons (85g) unsalted butter, cold and cubed
    • ¾ cup (180ml) cold buttermilk or whole milk, plus extra for brushing
    • 1 teaspoon vanilla extract (optional, for a hint of flavor)

    For Serving:

    • Clotted cream or softly whipped heavy cream
    • Strawberry jam or lemon curd

    Instructions

    1. Prep: Preheat oven to 425°F (220°C). Line a baking sheet with parchment paper. Ensure all ingredients are cold.

    2. Mix Dry Ingredients: In a large bowl, whisk together the flour, sugar, baking powder, and salt.

    3. Cut in the Butter: Add the cold, cubed butter. Using a pastry cutter, two forks, or your fingertips, quickly work the butter into the flour until the mixture resembles coarse breadcrumbs with some pea-sized pieces of butter remaining.

    4. Add Liquid: Make a well in the center. Pour in the cold buttermilk (and vanilla, if using). Using a fork or a spatula, gently stir just until a shaggy dough begins to form and no dry flour is visible.

    5. Shape the Dough: Turn the shaggy mixture out onto a lightly floured surface. Gently pat and fold it over itself a few times until it just comes together into a cohesive mass—do not knead. Pat into a round disc about 1-inch thick.

    6. Cut the Scones: Using a sharp, floured 2.5-inch round cutter, press straight down into the dough (do not twist). Place the scones on the prepared baking sheet, touching slightly for taller sides. Re-roll scraps once, minimally.

    7. Bake: Brush the tops lightly with buttermilk. Bake for 12-15 minutes, until well risen, golden brown on top, and the bottoms are lightly golden.

    8. Serve: Transfer to a wire rack to cool for a few minutes. Serve warm, split open, and topped with clotted cream and jam.

    Pro-Tips for Scone Success

    • Keep Everything Cold: Cold butter and milk are non-negotiable for flaky layers. Some bakers even freeze the butter and grate it in.
    • Handle with Care: The less you work the dough, the better. A shaggy, rough dough is preferable to a smooth one.
    • The No-Twist Rule: When cutting, press the cutter straight down and lift straight up. Twisting compresses the edges and prevents a good rise.
    • Buttermilk vs. Milk: Buttermilk yields a more tender crumb and slight tang due to its acidity reacting with the baking powder. Whole milk works but results in a slightly less tender scone.
    • Thickness Matters: Pat the dough to a full 1-inch thickness. Thinner dough will yield shorter scones.
    • Baking Temperature: A very hot oven is key for immediate steam production and a good rise.
    • Fresh Baking Powder: Ensure your baking powder is fresh for maximum lift.
    • The Cream or Jam First Debate: In Cornwall, it’s jam then cream. In Devon, it’s cream then jam.

    Choose your allegiance! These Perfect English Scones are a simple, rewarding bake that brings a touch of elegance to any day.