Blog

  • Ultimate Loaded Nachos (Game Day Perfection)

    Ultimate Loaded Nachos (Game Day Perfection)

    Nachos are more than just a snack—they’re an event. A massive platter of crispy tortilla chips loaded with seasoned meat, melted cheese, refried beans, and all the fresh toppings, served right in the middle of the table for everyone to dig in. Whether it’s game day, movie night, or just a Tuesday that needs some excitement, loaded nachos deliver.

    The key is layering: every chip should get some of the good stuff. Not just cheese on top, but cheese throughout, so every bite is perfect. This recipe walks you through building the ultimate nacho platter, with seasoned ground beef, a silky cheese sauce (or melted shredded cheese), and all the classic toppings.

    Ingredients

    For the Seasoned Ground Beef:

    • 1 lb (450g) ground beef (80/20)
    • 1 small onion, finely diced
    • 2 cloves garlic, minced
    • 1 tablespoon chili powder
    • 1 teaspoon ground cumin
    • 1 teaspoon smoked paprika
    • ½ teaspoon salt
    • ¼ teaspoon black pepper
    • ¼ cup (60ml) water or beef broth

    For the Cheese Sauce (Optional, but amazing):

    • 2 tablespoons unsalted butter
    • 2 tablespoons all-purpose flour
    • 1 cup (240ml) whole milk
    • 2 cups (200g) shredded sharp cheddar cheese
    • ½ cup (50g) shredded Monterey Jack cheese
    • ¼ teaspoon salt
    • Pinch of cayenne pepper (optional)

    For Assembly:

    • 1 large bag (13-16 oz) restaurant-style tortilla chips (sturdy chips are essential)
    • 1 can (15 oz) refried beans, warmed
    • 2 cups (200g) shredded cheese (cheddar, Monterey Jack, or a mix) if not using cheese sauce
    • Pickled jalapeño slices, to taste
    • ½ cup black olives, sliced

    For Fresh Toppings:

    • Pico de gallo or fresh salsa
    • Sour cream
    • Guacamole or sliced avocado
    • Fresh cilantro, chopped
    • Green onions, sliced
    • Lime wedges

    Instructions

    1. Cook the Ground Beef: In a large skillet over medium-high heat, cook the ground beef, breaking it up with a spoon, until browned and cooked through, about 5-7 minutes. Add the diced onion and cook until softened, about 3-4 minutes. Add the garlic and cook for 1 minute until fragrant. Drain excess fat if needed.

    2. Season the Beef: Add the chili powder, cumin, smoked paprika, salt, and pepper to the beef. Stir to coat. Add the water or broth and simmer until the liquid reduces and the beef is nicely coated, about 2-3 minutes. Remove from heat and set aside.

    3. Make the Cheese Sauce (Optional): In a medium saucepan over medium heat, melt the butter. Whisk in the flour and cook for 1-2 minutes until golden and bubbly. Gradually whisk in the milk, stirring constantly until thickened, about 3-4 minutes. Reduce heat to low and add the shredded cheeses, a handful at a time, stirring until smooth. Season with salt and cayenne. Keep warm.

    4. Warm the Refried Beans: In a small saucepan or microwave-safe bowl, warm the refried beans until soft and spreadable. Add a tablespoon of water if needed to thin.

    5. Preheat the Oven: Preheat your oven to 375°F (190°C). Line a large baking sheet with parchment paper or foil.

    6. First Layer of Chips: Spread half the tortilla chips in an even layer on the prepared baking sheet.

    7. Add First Layer of Toppings: Dollop half the refried beans in small spoonfuls over the chips. Sprinkle half the seasoned ground beef over the beans. If using shredded cheese, sprinkle half over this layer. If using cheese sauce, drizzle half over everything. Add half the jalapeños and olives.

    8. Second Layer of Chips: Top with the remaining chips.

    9. Add Second Layer of Toppings: Repeat with remaining refried beans, ground beef, cheese, jalapeños, and olives.

    10. Bake: Bake for 8-10 minutes, until the cheese is melted and bubbly and the edges of the chips are just starting to brown. Watch carefully—chips can burn quickly.

    11. Add Fresh Toppings: Remove from the oven and immediately drizzle with cheese sauce (if using) and add dollops of sour cream, pico de gallo, and guacamole. Sprinkle with fresh cilantro and green onions.

    12. Serve Immediately: Serve hot, with lime wedges on the side for squeezing. Place the baking sheet right on the table for everyone to dig in.

    Pro-Tips for Nacho Perfection

    • Use Sturdy Chips: Thin, flimsy chips will break under the weight of toppings. Look for “restaurant-style” or “thick-cut” tortilla chips.
    • Layer, Layer, Layer: Don’t just pile toppings on top—layer chips and toppings so every chip gets some love.
    • Warm the Beans: Cold, stiff beans are hard to spread and don’t melt well. Warm them until soft and spreadable.
    • Don’t Overbake: Chips go from perfectly crisp to burnt quickly. Watch closely and pull when cheese is melted.
    • Fresh Toppings at the End: Add cold toppings like sour cream, guacamole, and pico after baking so they stay fresh and cool.
    • Serve on the Baking Sheet: Nachos are meant to be shared. Bring the whole baking sheet to the table for that authentic experience.
    • Customize: Try shredded chicken, carnitas, or black beans. Add corn, pickled red onions, or cotija cheese.

    These Ultimate Loaded Nachos are game day perfection.

  • Ultimate Mozzarella Sticks (Crispy, Cheesy, Stretchy)

    Ultimate Mozzarella Sticks (Crispy, Cheesy, Stretchy)

    Let’s be honest—mozzarella sticks are the appetizer everyone fights over. That moment when you pull one apart and the cheese stretches for what seems like forever, the crispy, seasoned coating giving way to hot, melty, glorious cheese inside. Making them at home is easier than you think, and the result is so much better than anything from the freezer aisle.

    The secret is a triple-coating process that creates an extra-crunchy shell that won’t leak, and freezing the sticks long enough that the cheese stays inside while it melts. Serve them with warm marinara, and you’ve got pure magic.

    Ingredients

    For the Mozzarella Sticks (makes about 16-20 sticks):

    • 1 lb (450g) block of low-moisture mozzarella cheese
    • 1 cup (125g) all-purpose flour
    • 2 teaspoons salt, divided
    • 1 teaspoon black pepper
    • 3 large eggs
    • 2 tablespoons water or milk
    • 2 cups (200g) Italian-seasoned breadcrumbs (or plain breadcrumbs mixed with 1 tsp Italian seasoning)
    • ½ cup (50g) grated Parmesan cheese
    • Vegetable or peanut oil, for frying

    For Serving:

    • 2 cups marinara sauce, warmed
    • Fresh basil leaves, for garnish
    • Additional grated Parmesan

    Instructions

    1. Cut the Cheese: Cut the mozzarella block into sticks about ½ inch thick and 3-4 inches long. You should get about 16-20 sticks depending on the size of the block.

    2. Set Up Your Dredging Station: In a shallow dish, combine the flour with 1 teaspoon salt and ½ teaspoon pepper. In a second shallow dish, beat the eggs with the water or milk. In a third shallow dish, combine the breadcrumbs, grated Parmesan, remaining 1 teaspoon salt, and ½ teaspoon pepper.

    3. First Dredge: Working in batches, dredge each mozzarella stick in the flour mixture, shaking off excess. Dip in the egg mixture, allowing excess to drip off. Roll in the breadcrumb mixture, pressing gently to adhere.

    4. Second Dredge (for extra crunch): For a thicker, extra-crispy coating, repeat the process: dip back into the egg mixture, then back into the breadcrumb mixture for a second coating. Press firmly to ensure the breadcrumbs stick.

    5. Freeze: Place the coated sticks on a parchment-lined baking sheet in a single layer, making sure they’re not touching. Freeze for at least 2 hours, preferably 3-4 hours, until completely solid. This step is essential—do not skip!

    6. Heat the Oil: In a heavy-bottomed pot or deep fryer, heat about 3 inches of oil to 350°F (175°C). Use a thermometer to maintain temperature.

    7. Fry in Batches: Working in small batches to avoid overcrowding, carefully add frozen mozzarella sticks to the hot oil. Fry for 2-3 minutes, turning occasionally, until golden brown and crispy. Do not overcook or the cheese will burst.

    8. Drain: Remove with a slotted spoon or spider strainer and drain on a wire rack (not paper towels—they’ll get soggy). Immediately sprinkle with a little salt while hot.

    9. Keep Warm: Keep finished sticks in a warm oven (200°F) while frying remaining batches.

    10. Serve: Arrange on a platter with warm marinara sauce for dipping. Garnish with fresh basil and additional Parmesan. Serve immediately—the cheese stretch is waiting!

    Pro-Tips for Mozzarella Stick Perfection

    • Use Low-Moisture Mozzarella: Fresh mozzarella contains too much water and will leak everywhere. Use the block-style low-moisture mozzarella.
    • Freeze Solid: This is non-negotiable. Frozen cheese ensures the coating crisps before the cheese melts.
    • Double Coat for Extra Crunch: The second coating creates a thicker, more durable crust that’s less likely to leak.
    • Don’t Overcrowd the Fryer: Too many sticks at once lowers oil temperature, resulting in greasy, soggy coatings.
    • Fry from Frozen: Never thaw—they go straight from freezer to fryer.
    • Watch the Clock: Overcooking causes the cheese to burst. As soon as they’re golden, they’re done.
    • Serve Immediately: Mozzarella sticks wait for no one. The cheese stretch is best right out of the fryer.
    • Spice It Up: Add red pepper flakes to the breadcrumbs for heat, or try different herbs.

    These Ultimate Mozzarella Sticks are crispy, cheesy, and absolutely stretchy perfection.

  • Ultimate Jalapeño Poppers (Spicy, Cheesy, Bacon-Wrapped)

    Ultimate Jalapeño Poppers (Spicy, Cheesy, Bacon-Wrapped)

    Jalapeño poppers are the ultimate spicy appetizer—fresh jalapeños stuffed with a creamy, cheesy filling, wrapped in smoky bacon, and baked until the bacon is crisp and the cheese is bubbly. They’re everything you want in a party snack: spicy, creamy, smoky, and utterly addictive.

    Whether you’re watching the big game, hosting a backyard BBQ, or just craving something indulgent, these poppers deliver. This recipe gives you options—classic cream cheese filling, extra cheesy with cheddar, or even a spicy chorizo version. However you make them, they’ll disappear fast.

    Ingredients

    For the Jalapeño Poppers (makes about 20-24 poppers):

    • 12 large fresh jalapeño peppers (look for straight, uniform peppers)
    • 8 oz (225g) cream cheese, softened
    • 1 cup (100g) shredded sharp cheddar cheese
    • ¼ cup (25g) grated Parmesan cheese
    • 2 cloves garlic, minced
    • ¼ cup chopped fresh cilantro or parsley
    • 1 teaspoon chili powder
    • ½ teaspoon cumin
    • ¼ teaspoon salt
    • 12-16 slices thin-cut bacon, cut in half crosswise

    Optional Add-Ins:

    • ¼ cup cooked and crumbled chorizo or breakfast sausage
    • 2 green onions, thinly sliced
    • Pickled jalapeños for extra heat

    For Serving:

    • Ranch dressing or sour cream
    • Fresh cilantro, chopped
    • Lime wedges

    Instructions

    1. Prep the Jalapeños: Preheat your oven to 400°F (200°C). Line a baking sheet with foil and place a wire rack on top. Wearing gloves (highly recommended!), cut each jalapeño in half lengthwise. Use a small spoon to scrape out the seeds and white membranes. For milder poppers, remove all membranes; for spicier, leave some. Set aside.

    2. Make the Filling: In a medium bowl, combine the softened cream cheese, shredded cheddar, Parmesan, minced garlic, chopped cilantro, chili powder, cumin, and salt. Mix until well combined. If using any optional add-ins, fold them in now.

    3. Fill the Jalapeños: Using a small spoon or a piping bag, fill each jalapeño half generously with the cream cheese mixture. Slightly overfill—it will create a nice dome.

    4. Wrap with Bacon: Wrap each filled jalapeño half with a half-slice of bacon, stretching it slightly as you wrap to cover as much of the pepper as possible. Secure with a toothpick if needed. Place on the wire rack, seam-side down.

    5. Bake: Bake for 20-25 minutes, until the bacon is crispy and browned and the filling is bubbly. For extra crispy bacon, broil for 1-2 minutes at the end, watching carefully to avoid burning.

    6. Cool Slightly: Let the poppers rest on the rack for 5-10 minutes before serving—the filling will be extremely hot.

    7. Serve: Arrange on a platter, garnish with fresh cilantro and lime wedges. Serve warm with ranch dressing or sour cream for dipping.

    Pro-Tips for Jalapeño Popper Perfection

    • Wear Gloves: Jalapeño oils can burn your skin and eyes. Wear disposable gloves when handling and seeding the peppers.
    • Choose Straight Peppers: Straight jalapeños are easier to fill and wrap evenly.
    • Uniform Size: Pick peppers of similar size so they cook evenly.
    • Don’t Skip the Wire Rack: A rack allows air to circulate around the poppers, ensuring crispy bacon on all sides.
    • Use Thin-Cut Bacon: Thick bacon may not cook through before the peppers overcook. Thin-cut works best.
    • Stretch the Bacon: Gently stretching each bacon slice makes it thinner and helps it wrap more completely.
    • Make Ahead: You can assemble poppers up to 24 hours ahead, cover, and refrigerate. Add 5-10 minutes to baking time.
    • Air Fryer Option: Cook at 375°F for 10-12 minutes for extra crispy results.

    These Ultimate Jalapeño Poppers are spicy, cheesy, and absolutely irresistible.

  • Classic New York Cheesecake (Creamy, Dense, Perfect)

    Classic New York Cheesecake (Creamy, Dense, Perfect)

    New York cheesecake is the king of cheesecakes—dense, rich, and impossibly creamy, with a tangy cream cheese flavor that’s perfectly balanced by a buttery graham cracker crust. It’s the kind of dessert that makes an impression: tall, proud, and absolutely luxurious. This authentic recipe delivers that iconic texture—no cracks, no sinking, just pure silky perfection.

    The secret is in the technique: room temperature ingredients, a water bath, and gentle mixing to avoid incorporating too much air. The result is a cheesecake that slices like a dream and tastes like heaven. Serve it plain, with fresh berries, or a drizzle of raspberry sauce. Either way, it’s unforgettable.

    Ingredients

    For the Graham Cracker Crust:

    • 1 ½ cups (150g) graham cracker crumbs (about 12 full sheets)
    • 2 tablespoons granulated sugar
    • ¼ teaspoon salt
    • 5 tablespoons (70g) unsalted butter, melted

    For the Cheesecake Filling:

    • 4 packages (32 oz / 900g total) full-fat cream cheese, softened to room temperature
    • 1 ¼ cups (250g) granulated sugar
    • ½ cup (120g) sour cream, room temperature
    • 2 teaspoons vanilla extract
    • 4 large eggs, room temperature

    For Serving (Optional):

    • Raspberry sauce, strawberry sauce, or caramel
    • Fresh berries
    • Whipped cream

    Instructions

    1. Prep and Preheat: Preheat your oven to 325°F (165°C). Wrap the outside of a 9-inch springform pan with a double layer of heavy-duty aluminum foil, covering the bottom and up the sides. This will prevent water from seeping in during the water bath.

    2. Make the Crust: In a medium bowl, combine the graham cracker crumbs, sugar, and salt. Pour in the melted butter and stir with a fork until all crumbs are moistened.

    Press the mixture firmly into the bottom of the prepared springform pan, using the bottom of a measuring cup to create an even layer. Bake for 10 minutes. Remove from oven and set aside to cool. Reduce oven temperature to 300°F (150°C).

    3. Prepare the Water Bath: Bring a large kettle or pot of water to a boil. Place a large roasting pan or baking dish in the oven on the lower rack to preheat with the oven.

    4. Make the Filling: In a large bowl or stand mixer fitted with the paddle attachment, beat the softened cream cheese on medium speed until completely smooth and creamy, about 2-3 minutes, scraping down the sides and bottom well.

    5. Add Sugar: Gradually add the sugar and beat until smooth and well combined, scraping down the sides as needed.

    6. Add Sour Cream and Vanilla: Add the sour cream and vanilla, and beat on low speed until just combined.

    7. Add Eggs One at a Time: Add the eggs one at a time, beating on low speed just until each egg is incorporated before adding the next. Scrape down the bowl between additions. Do not overmix—you want a smooth, silky batter without excess air.

    8. Pour the Filling: Pour the filling over the cooled crust. Gently tap the pan on the counter a few times to release any air bubbles.

    9. Water Bath: Place the springform pan into the preheated roasting pan. Carefully pour the boiling water into the roasting pan until it reaches about halfway up the sides of the springform pan.

    10. Bake: Bake at 300°F (150°C) for 60-75 minutes, until the edges are set but the center still jiggles slightly when gently shaken. It should look firm around the edges and slightly wobbly in the very center.

    11. Cool Gradually: Turn off the oven, prop the door open slightly with a wooden spoon, and let the cheesecake cool in the oven for 1 hour. This gradual cooling helps prevent cracks.

    12. Cool to Room Temperature: Remove the cheesecake from the water bath and carefully remove the foil. Place on a wire rack and let cool completely to room temperature.

    13. Chill: Refrigerate the cheesecake for at least 4 hours, preferably overnight, until fully chilled and set.

    14. Serve: Run a thin knife around the edge of the pan before releasing the springform latch. Slice with a sharp, thin-bladed knife, wiping clean between cuts. Serve plain or with desired toppings.

    Pro-Tips for Cheesecake Perfection

    • Room Temperature Everything: Cold cream cheese creates lumps. Set all ingredients out 1-2 hours before starting.
    • Don’t Overmix: Overmixing incorporates too much air, which can cause cracks and a cakey texture. Mix just until smooth.
    • Wrap the Pan Well: Double-layer heavy-duty foil prevents water from seeping into the cheesecake during the water bath.
    • Water Bath Is Essential: The gentle, moist heat prevents cracking and ensures even baking.
    • Don’t Overbake: The center should still jiggle slightly when done. It will continue to set as it cools.
    • Cool Gradually: Sudden temperature changes cause cracks. The slow cool in the oven, then at room temperature, then in the fridge is key.
    • Chill Thoroughly: Cheesecake needs at least 4 hours, preferably overnight, to set properly.
    • Clean Slices: Use a thin, sharp knife dipped in hot water and wiped clean between cuts for picture-perfect slices.

    This Classic New York Cheesecake is creamy, dense, and absolutely perfect.

  • Authentic Falafel (Crispy, Fluffy, Herbaceous)

    Authentic Falafel (Crispy, Fluffy, Herbaceous)

    Falafel is one of the world’s great vegetarian foods—crispy, golden-brown balls or patties made from ground chickpeas, fresh herbs, and warm spices. When done right, they’re crunchy on the outside and impossibly fluffy and green within, bursting with flavor from parsley, cilantro, and cumin.

    Stuff them into warm pita with fresh vegetables and a generous drizzle of tahini sauce, and you have one of the most satisfying meals imaginable. This authentic recipe uses dried chickpeas (never canned!) and a blend of fresh herbs to create falafel that’s far superior to anything from a mix or freezer aisle.

    Ingredients

    For the Falafel (makes about 20-24 balls):

    • 1 cup (200g) dried chickpeas (do not use canned)
    • ½ cup (about 30g) fresh parsley, roughly chopped
    • ½ cup (about 30g) fresh cilantro, roughly chopped
    • ¼ cup (about 15g) fresh dill (optional)
    • 4 cloves garlic
    • 1 small onion, roughly chopped
    • 1 teaspoon ground cumin
    • 1 teaspoon ground coriander
    • ½ teaspoon cayenne pepper (optional, for heat)
    • 1 teaspoon salt
    • ½ teaspoon black pepper
    • 1 teaspoon baking soda
    • 2 tablespoons sesame seeds (optional)
    • Vegetable or peanut oil, for frying

    For Serving:

    • Pita bread, warmed
    • Tahini sauce
    • Hummus
    • Chopped tomatoes, cucumbers, and red onion
    • Pickled turnips or radishes
    • Fresh parsley and lemon wedges

    For the Tahini Sauce:

    • ½ cup (120g) tahini
    • ¼ cup (60ml) water, plus more as needed
    • 3 tablespoons lemon juice
    • 2 cloves garlic, minced
    • ¼ teaspoon salt

    Instructions

    1. Soak the Chickpeas: Place the dried chickpeas in a large bowl and cover with cold water by at least 3 inches. Soak for 12-24 hours at room temperature. They will triple in volume. Drain well and pat dry before using.

    2. Make the Falafel Mixture: In a food processor, combine the soaked, drained chickpeas, parsley, cilantro, dill (if using), garlic, onion, cumin, coriander, cayenne, salt, and pepper. Pulse until the mixture is finely ground but not pasty. It should resemble coarse sand and hold together when squeezed. Scrape down the sides as needed.

    3. Add Baking Soda: Transfer the mixture to a bowl. Sprinkle the baking soda over the top and mix well. This will help the falafel become light and fluffy when fried.

    4. Chill: Cover the bowl and refrigerate for at least 30 minutes, up to 2 hours. Chilling helps the mixture hold together during frying.

    5. Make the Tahini Sauce: While the mixture chills, whisk together all sauce ingredients in a small bowl. Add more water as needed to reach a pourable consistency. Set aside.

    6. Shape the Falafel: Using your hands or a falafel scoop, form the chilled mixture into small balls or patties, about 1½ tablespoons each. If using, roll in sesame seeds to coat.

    7. Heat the Oil: In a heavy-bottomed pot or deep fryer, heat about 3 inches of oil to 350°F (175°C). Use a thermometer to maintain temperature.

    8. Fry the Falafel: Working in small batches to avoid overcrowding, carefully drop the falafel into the hot oil. Fry for 3-4 minutes, turning occasionally, until deep golden brown and crispy on all sides.

    9. Drain: Remove with a slotted spoon or spider strainer and drain on a wire rack (not paper towels—they’ll get soggy).

    10. Serve: Serve warm in pita with tahini sauce, hummus, fresh vegetables, and pickles.

    Pro-Tips for Falafel Perfection

    • Never Use Canned Chickpeas: Canned chickpeas are too soft and will cause your falafel to fall apart during frying. You must start with dried chickpeas that have been soaked but not cooked.
    • Don’t Overprocess: The mixture should be finely ground but not a paste. It should still have some texture.
    • Chill Thoroughly: Chilling helps the mixture firm up and hold together during frying. Don’t skip this step.
    • Test a Small Ball First: Fry one test falafel to check seasoning and texture. Adjust the mixture if needed.
    • Maintain Oil Temperature: Use a thermometer and fry in small batches to keep the oil at a steady 350°F. Too cool = greasy falafel; too hot = burnt outside, raw inside.
    • Drain on a Rack: Paper towels trap steam and make falafel soggy. A wire rack keeps them crispy.
    • Make Ahead: You can form the falafel and refrigerate for up to 24 hours before frying. They also freeze well—freeze on a baking sheet, then transfer to a bag and fry from frozen, adding a minute or two to cooking time.
    • Baking Option: For a healthier version, brush with oil and bake at 375°F for 25-30 minutes, flipping halfway. They won’t be as crispy but are still delicious.

    These Authentic Falafel are crispy, fluffy, and absolutely perfect.

  • Authentic Karaage (Japanese Fried Chicken)

    Authentic Karaage (Japanese Fried Chicken)

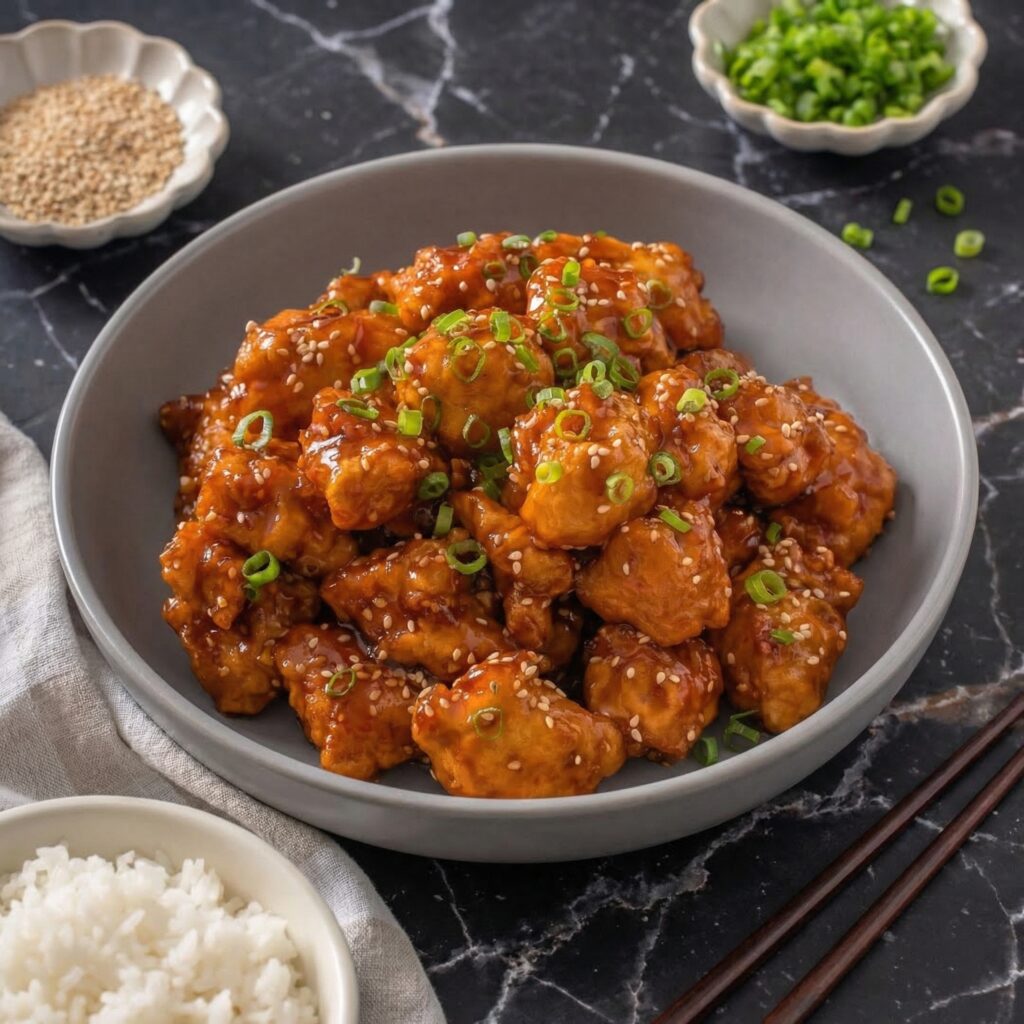
    Karaage is Japan’s beloved fried chicken—and once you try it, you’ll understand why. Bite-sized pieces of chicken are marinated in a savory mixture of soy sauce, sake, ginger, and garlic, then coated in potato starch and fried to golden, shatteringly crispy perfection.

    The result is chicken that’s impossibly juicy inside and outrageously crunchy outside. Served with a wedge of lemon and maybe a dollop of mayonnaise, it’s the perfect snack, appetizer, or main course. Whether you’re making it for a party, a bento box, or just because you deserve something amazing, karaage delivers.

    Ingredients

    For the Karaage (serves 4 as an appetizer):

    • 1 lb (450g) boneless, skinless chicken thighs
    • 2 tablespoons soy sauce
    • 1 tablespoon sake
    • 1 tablespoon mirin (optional, for sweetness)
    • 1 teaspoon grated fresh ginger
    • 2 cloves garlic, minced
    • ½ teaspoon salt
    • Freshly ground black pepper, to taste
    • ½ cup (about 70g) potato starch or cornstarch
    • Vegetable or peanut oil, for frying

    For Serving:

    • Lemon wedges
    • Japanese mayonnaise (Kewpie)
    • Shichimi togarashi (Japanese seven spice)
    • Fresh shiso leaves (optional)

    Instructions

    1. Prep the Chicken: Cut the chicken thighs into bite-sized pieces, about 1½ inches. Pat dry with paper towels.

    2. Make the Marinade: In a medium bowl, combine the soy sauce, sake, mirin (if using), grated ginger, minced garlic, salt, and pepper.

    3. Marinate the Chicken: Add the chicken pieces to the marinade and toss to coat. Cover and refrigerate for at least 30 minutes, or up to 4 hours. The longer, the more flavorful.

    4. Drain and Coat: Remove the chicken from the marinade, letting excess drip off. Place the potato starch in a shallow dish. Dredge each piece of chicken in the starch, coating completely, and shake off excess. Place on a wire rack while you heat the oil.

    5. Heat the Oil: In a heavy-bottomed pot or deep fryer, heat about 2 inches of oil to 325°F (160°C). Use a thermometer to maintain temperature.

    6. First Fry: Working in small batches to avoid overcrowding, carefully add the chicken to the hot oil. Fry for 2-3 minutes until lightly golden and cooked through. The chicken should not brown too much at this stage. Remove with a slotted spoon and drain on a wire rack. Repeat with all chicken.

    7. Rest: Let the chicken rest for 5-10 minutes. This allows the carryover cooking to finish and ensures juiciness.

    8. Second Fry: Increase the oil temperature to 375°F (190°C). Working in batches again, fry the chicken for 1-2 minutes until deep golden brown and incredibly crispy. Remove and drain on a wire rack.

    9. Serve: Serve immediately, hot and crispy, with lemon wedges, Japanese mayonnaise, and a sprinkle of shichimi togarashi. Garnish with shiso leaves if desired.

    Pro-Tips for Karaage Perfection

    • Use Chicken Thighs: Thighs stay juicier and more flavorful than breasts. Don’t substitute.
    • Marinate Long Enough: At least 30 minutes, but 4 hours is even better. The marinade tenderizes and flavors the chicken.
    • Don’t Skip the Double-Fry: This is the secret to ultra-crispy karaage. The first fry cooks the chicken; the second fry creates the crunch.
    • Use Potato Starch: Potato starch creates a lighter, crispier coating than cornstarch or flour. Look for it at Asian markets or online.
    • Drain on a Wire Rack: Paper towels trap steam and make the coating soggy. A wire rack keeps it crispy.
    • Serve Immediately: Karaage is best hot and fresh. Have your lemon wedges and sauces ready.
    • Make It a Meal: Serve with rice, a simple salad, and miso soup for a complete Japanese meal.
    • Bento Perfect: Karaage is a classic bento box addition. Make extra for lunch the next day.

    This Authentic Karaage is crispy, juicy, and absolutely perfect.
  • Perfect French Omelette (Soft, Creamy, Elegant)

    Perfect French Omelette (Soft, Creamy, Elegant)

    The French omelette is a thing of beauty—smooth and pale yellow on the outside, soft and creamy within, rolled into a perfect cylinder. It’s the dish that separates home cooks from true chefs, a test of patience and technique. But here’s the secret: with a little practice and the right method, anyone can master it.

    This omelette has no browning, no color, just pure, velvety eggs that are barely set and incredibly creamy. It’s simple, elegant, and absolutely delicious. Serve it with a sprinkle of fresh herbs and a slice of crusty bread for a breakfast that feels like a Parisian café.

    Ingredients

    For the French Omelette (serves 1):

    • 3 large eggs, preferably farm-fresh
    • 1 tablespoon cold unsalted butter, divided
    • 1 teaspoon finely chopped fresh chives or parsley
    • Salt and white pepper to taste

    For Serving (Optional):

    • Fresh chives, chopped
    • Crusty baguette
    • Simple green salad

    Instructions

    1. Prep the Eggs: Crack the eggs into a small bowl. Using a fork (not a whisk), beat them gently until the whites and yolks are just combined but not frothy. You want them homogenous but with no bubbles. Season with salt and white pepper.

    2. Heat the Pan: Place an 8-inch non-stick skillet over medium-low heat. Add ½ tablespoon of the butter and let it melt, swirling to coat the pan. The butter should foam gently but not brown.

    3. Add the Eggs: Pour the beaten eggs into the pan. Let them set for just a few seconds, then immediately begin stirring with a rubber spatula. Use a circular motion, scraping the bottom of the pan constantly.

    4. Stir Constantly: Continue stirring over medium-low heat, moving the spatula around the pan to form small, soft curds. The eggs should never stop moving. This takes about 45-60 seconds. The eggs will gradually thicken but remain soft and creamy.

    5. Stop Stirring: When the eggs are about 75% set (still quite soft and creamy, with some liquid remaining), stop stirring and let them rest for 5-10 seconds. The bottom will set slightly.

    6. Tilt and Tap: Tilt the pan away from you at a 45-degree angle. Use the spatula to gently fold the top edge of the omelette toward the center. Tap the pan handle to encourage the omelette to slide and roll.

    7. Roll the Omelette: Continue rolling the omelette toward the edge of the pan, using the spatula to guide it. It should form a neat cylinder. Invert onto a plate, seam-side down.

    8. Shape and Finish: Use your hands (careful—it’s hot!) or a clean towel to gently shape the omelette into a perfect cylinder. Rub the remaining ½ tablespoon of butter over the top for a beautiful sheen.

    9. Garnish and Serve: Sprinkle with fresh chives and serve immediately with crusty bread and a simple salad.

    Pro-Tips for Omelette Perfection

    • Use the Right Pan: An 8-inch non-stick skillet is essential. The eggs won’t stick, and the sloped sides help with rolling.
    • Low and Slow: Medium-low heat is crucial. If the heat is too high, the eggs will brown and become tough.
    • Stir Constantly: Constant motion creates those soft, creamy curds. Don’t stop until the eggs are 75% set.
    • Take It Off Early: The eggs will continue to cook from residual heat. Remove them from the pan while still slightly underdone.
    • No Color: A true French omelette has no browning—just pure, pale yellow.
    • Fresh Eggs Matter: Farm-fresh eggs have better flavor and texture.
    • Practice Makes Perfect: The French omelette takes practice. Don’t be discouraged if your first few aren’t perfect.
    • Add Fillings (Optional): For a filled omelette, add cheese, herbs, or sautéed mushrooms just before rolling.

    This Perfect French Omelette is soft, creamy, and absolutely elegant.

  • Chocolate Cake (Rich, Moist, and Absolutely Perfect)

    Chocolate Cake (Rich, Moist, and Absolutely Perfect)

    Let’s talk about the cake that never goes out of style. Chocolate cake—rich, moist, and deeply chocolatey—is the dessert that makes every occasion special. Birthday parties, anniversaries, Sunday dinners, or just because it’s Tuesday.

    This is the chocolate cake of your dreams. With a tender crumb that stays moist for days, a silky chocolate buttercream that’s not too sweet, and that perfect balance of flavor, it’s the only chocolate cake recipe you’ll ever need. Let’s bake something unforgettable.

    Ingredients

    For the Chocolate Cake (Makes 2 8-inch or 9-inch layers):

    • 1 ¾ cups (220g) all-purpose flour
    • 2 cups (400g) granulated sugar
    • ¾ cup (75g) unsweetened cocoa powder
    • 2 teaspoons baking soda
    • 1 teaspoon baking powder
    • 1 teaspoon salt
    • 2 large eggs, at room temperature
    • 1 cup (240ml) buttermilk, at room temperature
    • 1 cup (240ml) hot coffee (or hot water)
    • ½ cup (120ml) vegetable oil
    • 2 teaspoons vanilla extract

    For the Chocolate Buttercream Frosting:

    • 1 ½ cups (340g) unsalted butter, slightly softened
    • 5 cups (600g) powdered sugar, sifted
    • 1 cup (100g) unsweetened cocoa powder, sifted
    • ½ cup (120ml) heavy cream or milk
    • 2 teaspoons vanilla extract
    • ¼ teaspoon salt

    For Garnish (Optional):

    • Chocolate curls
    • Cocoa powder for dusting

    Instructions

    1. Preheat and Prep: Preheat your oven to 350°F (175°C). Grease two 8-inch or 9-inch round cake pans, line the bottoms with parchment paper, and lightly flour the sides .

    2. Combine Dry Ingredients: In a large bowl, whisk together the flour, sugar, cocoa powder, baking soda, baking powder, and salt .

    3. Combine Wet Ingredients: In a separate bowl or large measuring cup, whisk together the eggs, buttermilk, hot coffee, vegetable oil, and vanilla extract until smooth .

    4. Mix Wet and Dry: Pour the wet ingredients into the dry ingredients. Whisk gently until just combined—about 30 seconds. The batter will be thin. That’s normal. Do not overmix .

    5. Bake: Divide the batter evenly between the prepared pans. Bake for 30-35 minutes (for 8-inch) or 25-30 minutes (for 9-inch) until a toothpick inserted into the center comes out clean. Let cool in pans for 15 minutes, then turn out onto wire racks to cool completely .

    6. Make the Chocolate Buttercream: In a large bowl, beat the softened butter on medium speed until creamy and smooth, about 2-3 minutes. Gradually add the sifted powdered sugar and cocoa powder, one cup at a time, beating on low until combined. Add the heavy cream, vanilla extract, and salt. Beat on medium-high speed for 2-3 minutes until the frosting is light, fluffy, and spreadable .

    7. Level the Cakes (Optional): If your cakes have domed tops, use a serrated knife to level them for even stacking .

    8. Assemble the Cake: Place one cooled cake layer on a serving plate. Spread about ¾ cup of frosting evenly over the top. Place the second layer on top. Apply a thin crumb coat all over and refrigerate for 30 minutes. Then apply the final layer of frosting, smoothing the sides and top with an offset spatula .

    9. Decorate: Garnish with chocolate curls and a light dusting of cocoa powder if desired .

    10. Slice and Serve: Slice and serve at room temperature .

    11. Store: Store in an airtight container at room temperature for up to 3 days, or in the refrigerator for up to 5 days. Bring to room temperature before serving .

    Pro-Tips for Chocolate Cake Greatness

    • Use Hot Coffee: It deepens the chocolate flavor without making the cake taste like coffee. Don’t skip it .
    • Room Temperature Ingredients: Eggs and buttermilk should be at room temperature for a smooth, evenly mixed batter .
    • Don’t Overmix: Mix just until the flour disappears. Overmixing = tough cake .
    • Cool Completely Before Frosting: If the cake is even slightly warm, your frosting will melt and slide right off .
    • Chill Before Slicing: For clean slices, refrigerate the assembled cake for 30-60 minutes before cutting .
  • Cornbread (Golden, Buttery, and Perfectly Moist)

    Cornbread (Golden, Buttery, and Perfectly Moist)

    Let’s talk about the perfect side dish. Cornbread—golden-brown crust, tender crumb, and just the right amount of sweetness—is the ultimate companion to chili, barbecue, soups, and stews. Slather it with honey butter for breakfast, or serve it alongside your favorite comfort food dinner.

    This cornbread is everything you want: moist, not dry; tender, not crumbly; and absolutely delicious. Made in a cast iron skillet for that perfect crispy edge, it’s the recipe you’ll come back to again and again.

    Ingredients

    For the Cornbread (Makes 1 10-inch skillet or 8×8 pan):

    • 1 cup (120g) cornmeal (preferably medium-grind)
    • 1 cup (125g) all-purpose flour
    • ½ cup (100g) granulated sugar (adjust to taste)
    • 1 tablespoon baking powder
    • ½ teaspoon salt
    • 1 cup (240ml) buttermilk, at room temperature
    • 2 large eggs, at room temperature
    • ½ cup (113g) unsalted butter, melted (plus more for the skillet)
    • 2 tablespoons honey (optional, for extra sweetness)

    For Serving:

    • Honey butter (softened butter mixed with honey)
    • Additional butter

    Instructions

    1. Preheat Oven and Skillet: Preheat your oven to 400°F (200°C). Place a 10-inch cast iron skillet (or 8×8 baking pan) in the oven to preheat while you mix the batter.

    2. Combine Dry Ingredients: In a large bowl, whisk together the cornmeal, flour, sugar, baking powder, and salt.

    3. Combine Wet Ingredients: In a separate bowl or large measuring cup, whisk together the buttermilk, eggs, melted butter, and honey (if using) until well combined.

    4. Mix Wet and Dry: Pour the wet ingredients into the dry ingredients. Stir gently with a spatula until just combined. Do not overmix—a few lumps are fine.

    5. Prepare the Skillet: Carefully remove the hot skillet or pan from the oven. Add a tablespoon of butter and swirl to coat the bottom and sides.

    6. Add Batter: Pour the batter into the hot skillet or pan and spread evenly. It should sizzle as it hits the pan.

    7. Bake: Bake for 20-25 minutes until the top is golden brown and a toothpick inserted into the center comes out clean.

    8. Cool Slightly: Let the cornbread cool in the skillet or pan for 10-15 minutes before serving.

    9. Serve: Slice into wedges and serve warm with honey butter.

    10. Store: Store leftovers in an airtight container at room temperature for up to 3 days, or in the refrigerator for up to a week.

    Pro-Tips for Cornbread Greatness

    • Preheat Your Skillet: A hot skillet gives you that signature crispy, golden crust. Don’t skip this step
    • Use Buttermilk: It adds tanginess and tenderness that regular milk can’t match
    • Don’t Overmix: A few lumps are fine. Overmixing = tough cornbread
    • Adjust Sweetness: Like your cornbread less sweet? Reduce the sugar to ¼ cup. Want it sweeter? Add an extra tablespoon of honey
    • Serve Warm: Cornbread is at its absolute best fresh and warm from the oven

  • Baked Sweet Potato Fries (Crispy, Salty, and Actually Healthy)

    Baked Sweet Potato Fries (Crispy, Salty, and Actually Healthy)

    Let’s be honest: sweet potato fries are the best kind of fries. They’re sweet, they’re salty, they’re satisfying, and they feel just a little bit healthier than regular fries. But getting them crispy in the oven can be a challenge—too often they turn out limp and soggy. Not these.

    These baked sweet potato fries are the real deal: crispy on the outside, tender on the inside, and perfectly seasoned with salt, pepper, and a touch of smoked paprika. They’re baked, not fried, so you can feel good about eating a whole batch. Serve them with your favorite dipping sauce and prepare to be amazed. Oven-baked perfection.

    Ingredients

    For the Baked Sweet Potato Fries (Serves 4):

    • 3 large sweet potatoes (about 2 pounds)
    • 2 tablespoons olive oil or avocado oil
    • 1 tablespoon cornstarch (optional, but helps with crispiness)
    • 1 teaspoon smoked paprika
    • ½ teaspoon garlic powder
    • ½ teaspoon salt (plus more for finishing)
    • ¼ teaspoon black pepper
    • Pinch of cayenne pepper (optional, for heat)
    • Fresh parsley, chopped, for garnish

    For Dipping (Choose Your Adventure):

    • Garlic aioli
    • Sriracha mayo
    • Honey mustard
    • Chipotle sauce
    • Plain ketchup (classic!)

    Instructions

    1. Prep the Sweet Potatoes: Scrub the sweet potatoes well (peeling is optional—skin adds texture and nutrients). Cut them into even sticks, about ¼ to ½ inch thick. Try to keep them uniform for even baking.

    2. Soak the Fries: Place the cut fries in a large bowl and cover with cold water. Let them soak for at least 30 minutes, or up to overnight in the refrigerator. This removes excess starch and is the secret to crispiness.

    3. Preheat and Prep: Preheat your oven to 425°F (220°C). Line two large baking sheets with parchment paper (for easy cleanup).

    4. Dry Thoroughly: Drain the fries and spread them on a clean kitchen towel or several layers of paper towels. Pat them completely dry. Any moisture left will prevent crispiness.

    5. Season the Fries: In a large bowl, combine the dried fries with olive oil, cornstarch (if using), smoked paprika, garlic powder, salt, pepper, and cayenne. Toss well until every fry is evenly coated.

    6. Arrange on Baking Sheets: Spread the fries in a single layer on the prepared baking sheets, making sure they’re not touching or overlapping. Give them space—crowding leads to steaming, not crisping.

    7. Bake: Bake for 15 minutes, then flip the fries with a spatula. Rotate the pans and bake for another 10-15 minutes until the fries are golden brown and crispy on the edges.

    8. Cool Slightly: Let the fries cool on the baking sheets for 5 minutes—they’ll continue to crisp up as they cool.

    9. Season and Garnish: Sprinkle with additional salt to taste and fresh chopped parsley.

    10. Serve: Serve immediately with your favorite dipping sauces.

    Pro-Tips for Sweet Potato Fry Greatness

    • Don’t Skip the Soak: This step removes excess starch and is the number one secret to crispy fries. At least 30 minutes, longer is better.
    • Dry Thoroughly: Any moisture left behind will steam your fries instead of crisping them. Pat them bone-dry.
    • Don’t Overcrowd: Give each fry room to breathe. Use two pans if needed.
    • Flip Halfway: Flipping ensures even browning on all sides.
    • Customize Your Spices: Try cumin, chili powder, or cinnamon for different flavor profiles.