Blog

  • Sweet Soy Braised Pork Belly

    Sweet Soy Braised Pork Belly

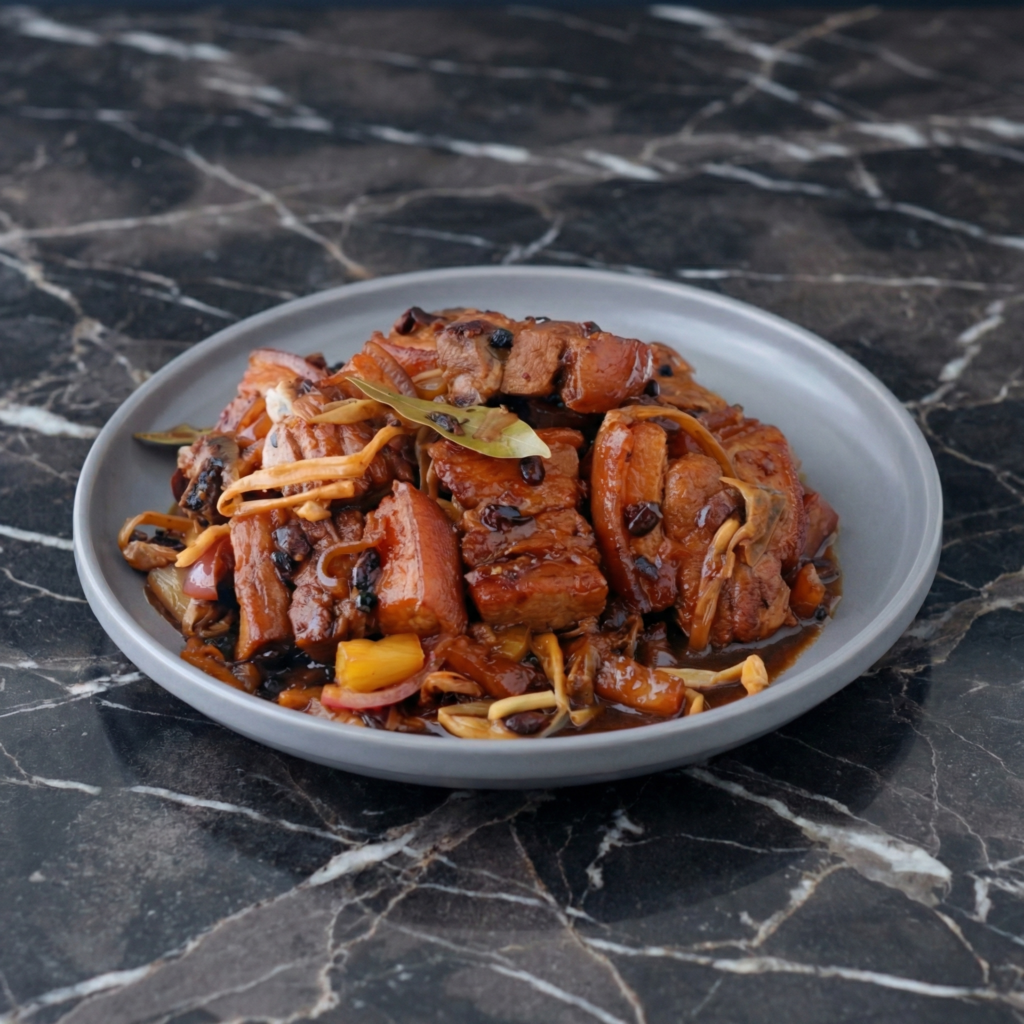
    There are braised meats, and then there is sweet soy braised pork belly—the kind of dish that fills your home with the intoxicating aroma of soy, star anise, and caramelizing sugar, promising something extraordinary.

    This is comfort food at its finest: thick slabs of pork belly simmered low and slow until the fat renders, the collagen transforms into silky gelatin, and the meat becomes so tender it practically melts on your tongue. The sauce—a rich balance of sweet palm sugar, savory soy, and aromatic spices—reduces to a glossy glaze that clings to every bite.

    Whether served over steamed rice with a soft-boiled egg (the Vietnamese way) or as part of a Chinese banquet, this dish is pure magic. A little patience yields a meal that tastes like it simmered all day, even though most of it is hands-off time.

    Ingredients
    For the Braised Pork Belly:

    • 2 lbs (900g) pork belly, cut into 1½-inch cubes
    • 2 tablespoons vegetable oil or coconut oil
    • 4 cloves garlic, smashed
    • 2 shallots, thinly sliced (or ½ onion)
    • 1 piece ginger (about 1 inch), sliced
    • ½ cup (120ml) soy sauce (preferably dark soy for color, or regular)
    • 2 tablespoons fish sauce
    • ½ cup (100g) palm sugar or brown sugar, packed
    • 2 cups (480ml) coconut water or water
    • 2 star anise
    • 1 cinnamon stick
    • ½ teaspoon black pepper
    • 3 to 4 soft-boiled eggs (optional, for serving)

    For Garnish and Serving:

    • Steamed jasmine rice
    • 2 green onions, thinly sliced
    • 1 tablespoon toasted sesame seeds
    • Fresh cilantro, chopped (optional)
    • Fresh chili slices (optional)

    Instructions

    1. Prepare the Pork: Pat the pork belly cubes completely dry with paper towels. If time permits, score the skin side lightly with a sharp knife—this helps render fat and allows the sauce to penetrate. Season lightly with salt and pepper.

    2. Sear the Pork: Heat the oil in a large Dutch oven or heavy-bottomed pot over medium-high heat. Working in batches to avoid overcrowding, add the pork belly cubes in a single layer. Sear for 3 to 4 minutes per side, until deeply golden brown on all sides. This step builds flavor through the Maillard reaction. Remove and set aside.

    3. Sauté the Aromatics: Reduce heat to medium. Add the garlic, shallots, and ginger to the pot. Sauté for 2 to 3 minutes until fragrant and softened, scraping up the browned bits from the bottom of the pan.

    4. Build the Braising Liquid: Return the pork to the pot. Add the soy sauce, fish sauce, palm sugar, coconut water, star anise, cinnamon stick, and black pepper. Stir to combine. The liquid should come about three-quarters of the way up the pork—add a little more water if needed.

    5. Braise the Pork: Bring the liquid to a gentle simmer, then reduce the heat to low. Cover and cook for 1½ to 2 hours, stirring occasionally, until the pork is fork-tender and the meat easily pulls apart. If using eggs, add them during the last 30 minutes of cooking.

    6. Reduce the Sauce: Remove the lid and increase the heat to medium. Simmer uncovered for 10 to 15 minutes, stirring occasionally, until the sauce has thickened into a rich, glossy glaze that coats the back of a spoon. The pork should be glistening and deeply caramelized.

    7. Rest and Serve: Let the pork rest for 5 to 10 minutes. Discard the star anise and cinnamon stick. Serve over steamed jasmine rice with the eggs, spooning extra sauce generously over everything. Garnish with sliced green onions, sesame seeds, and fresh cilantro or chili if desired.

    This Sweet Soy Braised Pork Belly is the ultimate comfort food—deeply flavorful, impossibly tender, and utterly satisfying.
  • Pork Belly Bao Buns (Guabao)

    Pork Belly Bao Buns (Guabao)

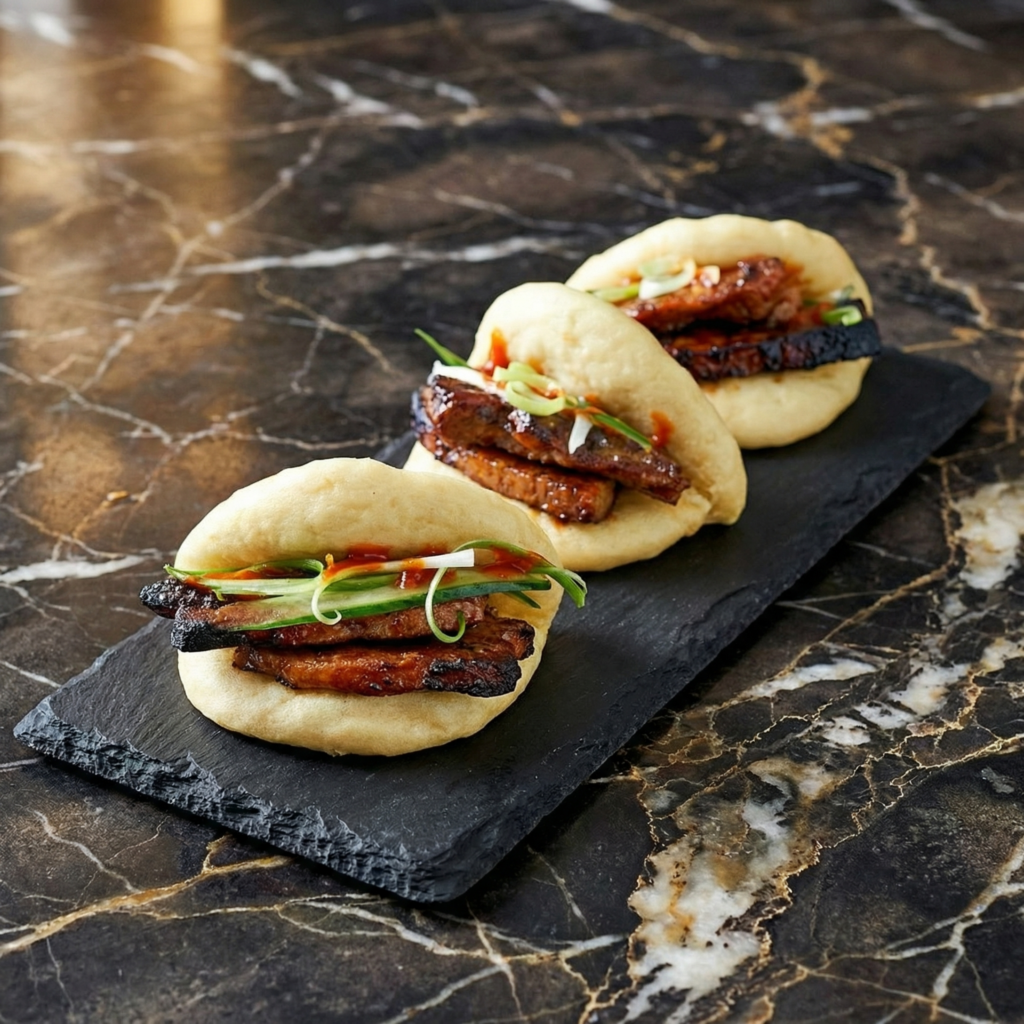
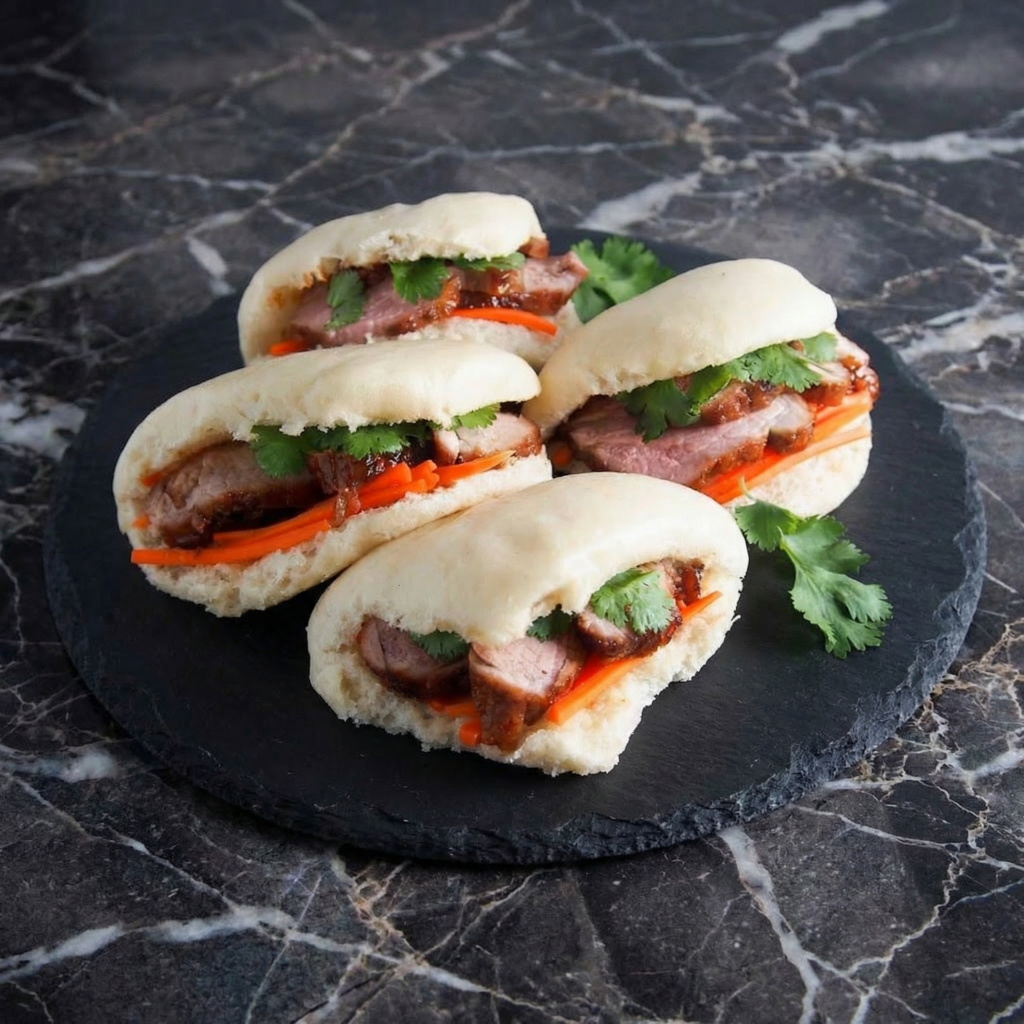
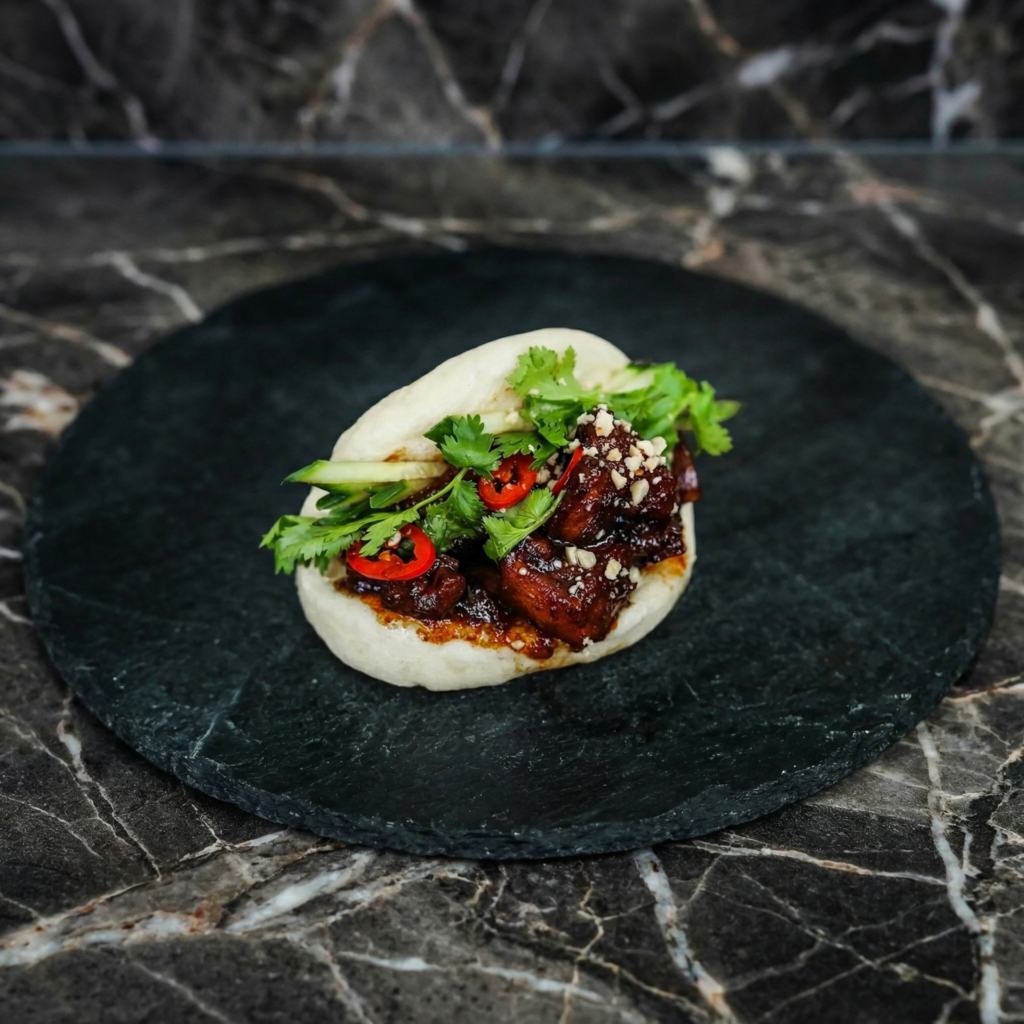
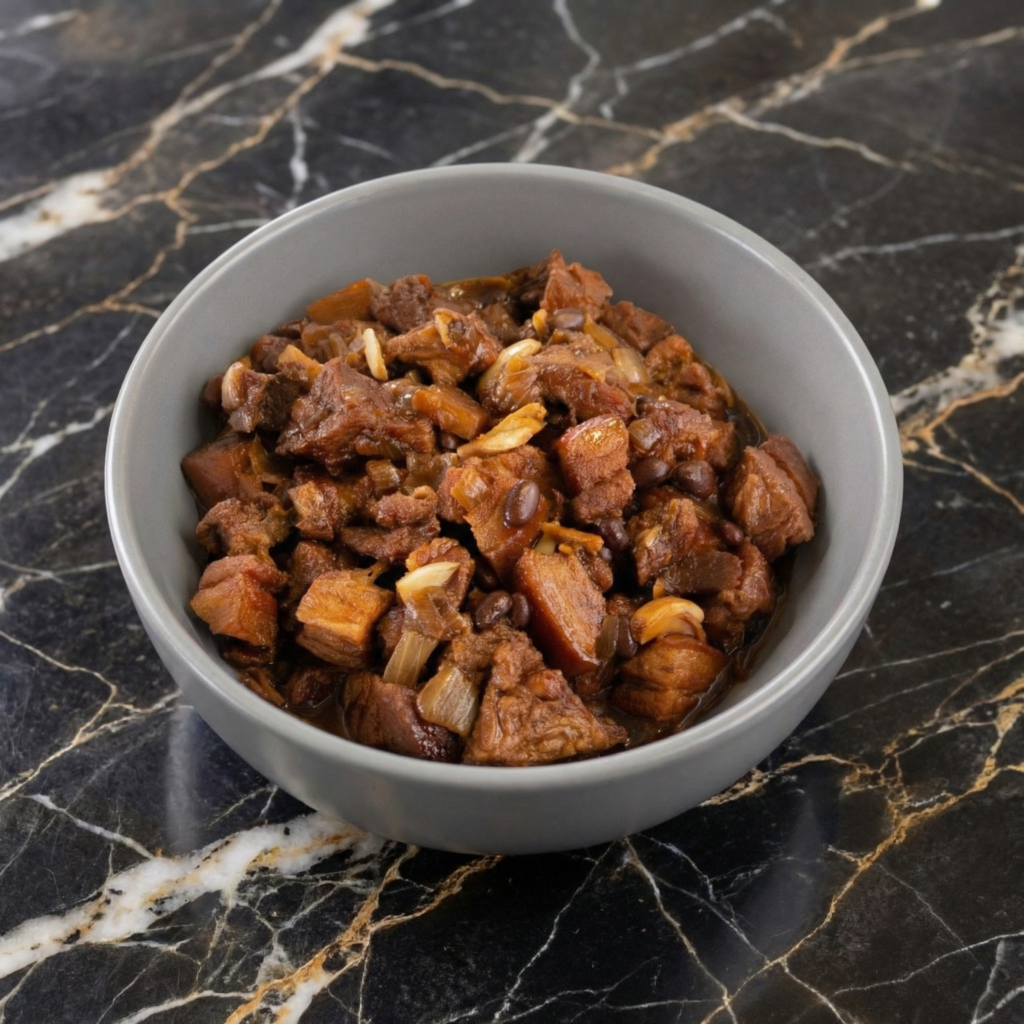
    Few foods capture the imagination quite like guabao—those impossibly fluffy, cloud-like steamed buns cradling tender, caramelized pork belly, bright pickled vegetables, and a drizzle of savory-sweet hoisin sauce. Originating from Taiwan, this iconic street food has become a global sensation, and for good reason.

    Each bite is a study in contrast: the soft, pillowy bun gives way to rich, melt-in-your-mouth pork, while crunchy peanuts and tangy pickles provide texture and brightness. While they look like the domain of professional chefs, bao buns are surprisingly approachable at home.

    The dough comes together with simple ingredients, and the pork belly rewards patience with unparalleled tenderness. Whether you’re hosting a dinner party or simply treating yourself, these pork belly bao buns are a showstopping experience worth every minute of effort.

    Ingredients

    For the Bao Buns:

    • 3 cups (360g) all-purpose flour, plus more for dusting
    • 1 tablespoon granulated sugar
    • 1 teaspoon instant yeast
    • 1 teaspoon baking powder
    • ½ teaspoon salt
    • ¾ cup (180ml) warm water (110°F / 43°C)
    • 1 tablespoon vegetable oil

    For the Braised Pork Belly:

    • 2 lbs (900g) pork belly, skin-on or skin-off, cut into ½-inch thick slices
    • 1 tablespoon vegetable oil
    • 4 cloves garlic, smashed
    • 2 slices fresh ginger
    • ½ cup (120ml) soy sauce
    • ¼ cup (60ml) dark soy sauce (or regular soy sauce)
    • ½ cup (120ml) Shaoxing wine or dry sherry
    • ¼ cup (50g) brown sugar, packed
    • 2 cups (480ml) water or chicken broth
    • 2 star anise
    • 1 cinnamon stick

    For Assembly:

    • ½ cup hoisin sauce
    • 1 cup pickled mustard greens (or quick-pickled cucumbers)
    • ¼ cup crushed roasted peanuts
    • Fresh cilantro sprigs
    • Thinly sliced red chili (optional, for heat)

    Instructions

    1. Make the Bao Dough: In a large bowl or stand mixer, combine the flour, sugar, instant yeast, baking powder, and salt. Add the warm water and vegetable oil. Mix until a shaggy dough forms. Knead for 8 to 10 minutes until smooth and elastic. Place in a lightly oiled bowl, cover, and let rise for 1 to 1½ hours, until doubled in size.

    2. Shape the Buns: Punch down the dough and turn onto a lightly floured surface. Roll into a 12-inch log and cut into 8 to 10 equal pieces. Roll each piece into a smooth ball. Using a rolling pin, roll each ball into an oval about 4×6 inches.

    Brush the top half of each oval lightly with oil, then fold in half to create a bun. Place each bun on a small square of parchment paper. Cover and let rise for 30 to 45 minutes, until puffy.

    3. Braise the Pork Belly: While the dough rises, prepare the pork. Pat the pork belly slices dry. In a Dutch oven or heavy pot, heat the oil over medium-high heat. Sear the pork in batches until golden brown on both sides, about 3 to 4 minutes per side. Remove and set aside.

    Add the garlic and ginger, sauté for 1 minute until fragrant. Add the soy sauce, dark soy sauce, Shaoxing wine, brown sugar, water, star anise, and cinnamon stick. Bring to a simmer. Return the pork to the pot.

    Cover and simmer over low heat for 1½ to 2 hours, until the pork is fork-tender. Remove the pork and set aside. Strain the sauce and skim excess fat. For extra caramelization, broil the pork for 2 to 3 minutes before serving.

    4. Steam the Buns: Set up a steamer basket over simmering water. Working in batches, place the buns (still on parchment) in the steamer, leaving space between them. Steam for 8 to 10 minutes, until the buns are puffed, shiny, and cooked through. Keep covered until ready to serve.

    5. Assemble the Bao: Gently open each steamed bun. Spread a thin layer of hoisin sauce on the inside. Place a slice of braised pork belly in the bun. Top with pickled mustard greens, crushed peanuts, fresh cilantro, and sliced chili if desired. Close the bun gently.

    6. Serve Immediately: Serve the bao buns warm, passing extra hoisin sauce at the table. These buns are best enjoyed fresh, while the buns are soft and the pork is warm.

    These Pork Belly Bao Buns capture the magic of Taiwanese street food—a beautiful balance of textures and flavors that’s as fun to make as it is to eat.

  • Falafel Pita Sandwich

    Falafel Pita Sandwich

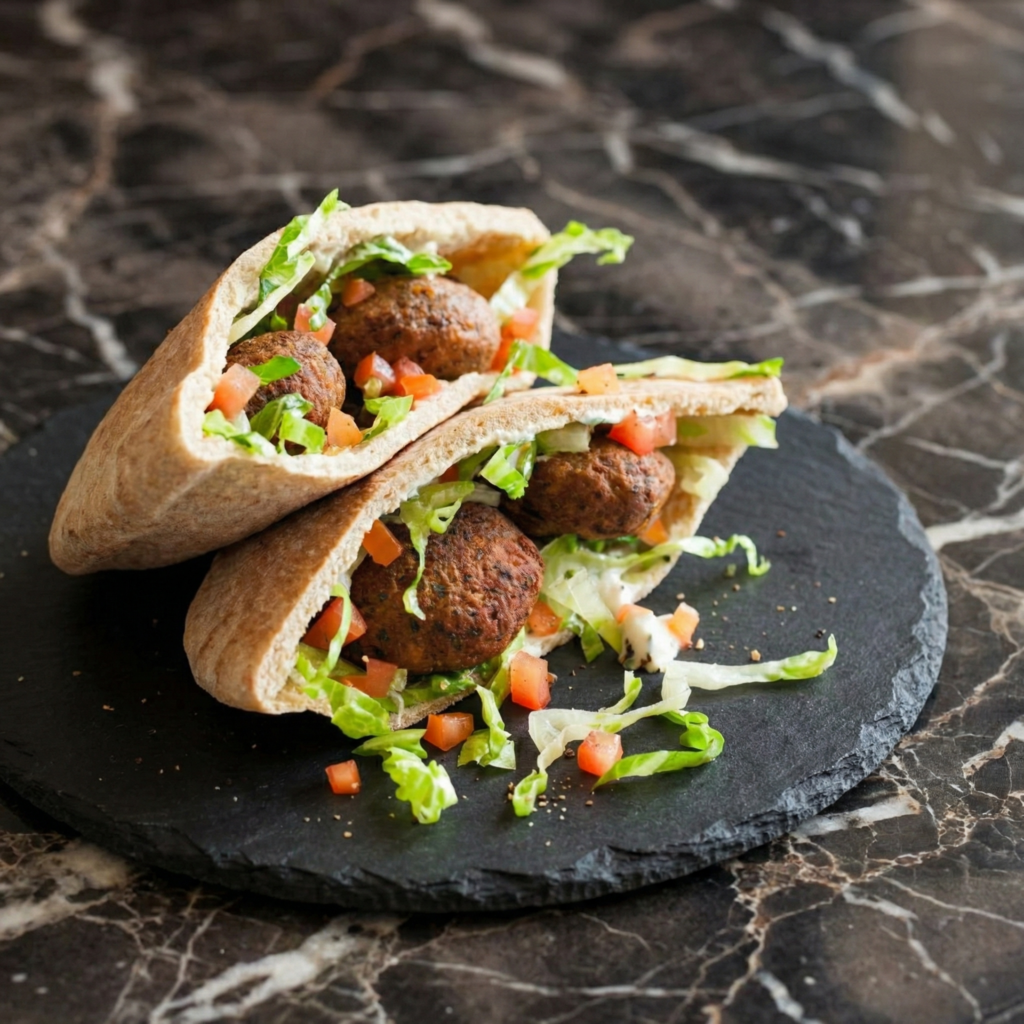
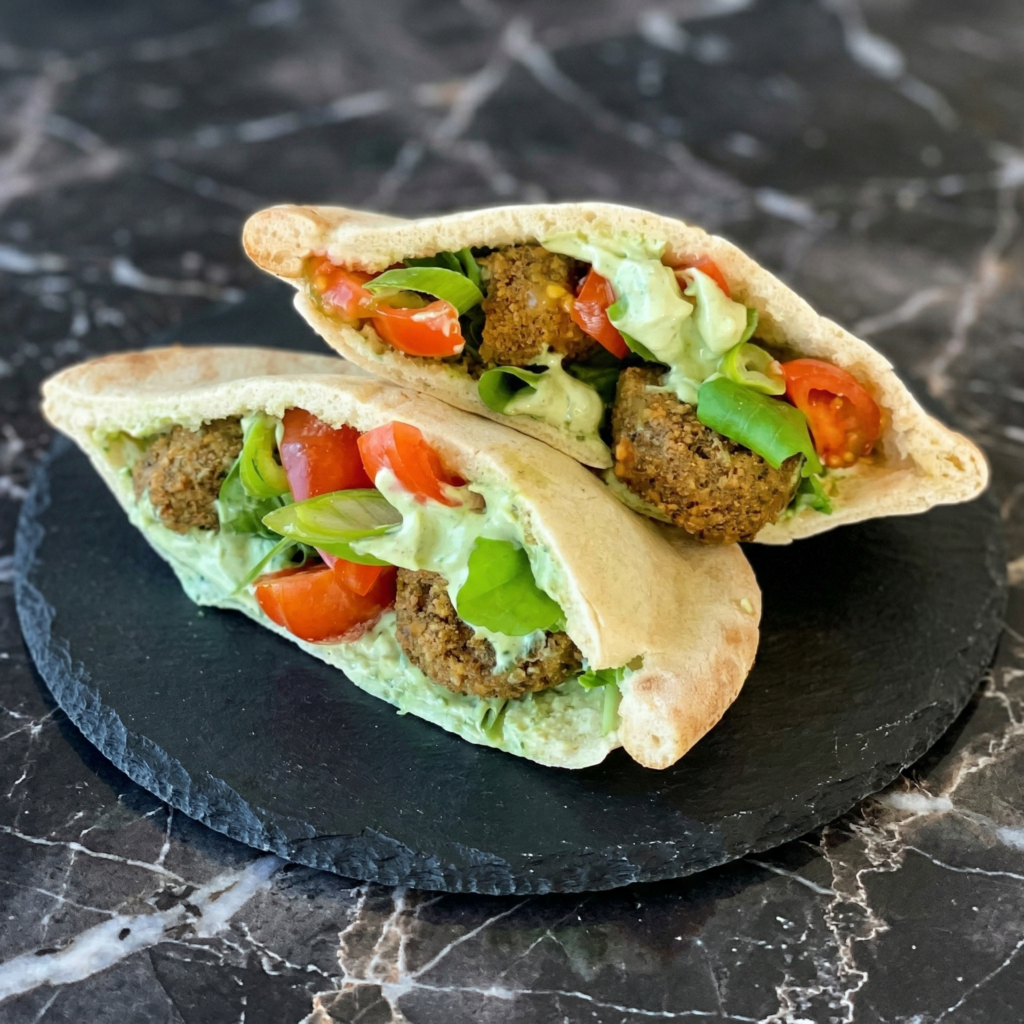
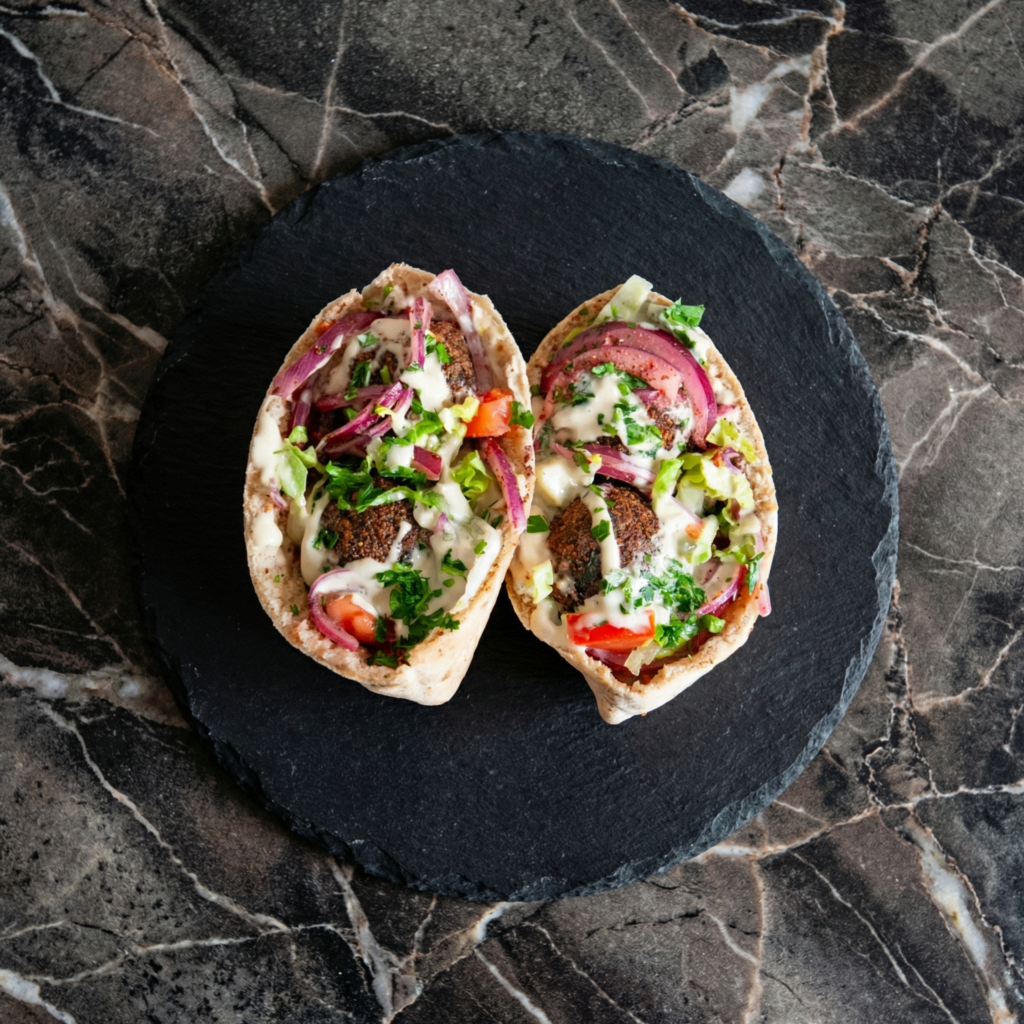
    Walk through the bustling streets of Cairo, Beirut, or Jerusalem, and you’ll find them sizzling in hot oil at corner stalls: falafel—crispy, golden fritters made from ground chickpeas and fresh herbs, served tucked into warm pita with a rainbow of fresh vegetables and a generous drizzle of tahini sauce.

    This falafel pita sandwich is a celebration of texture and flavor: the satisfying crunch of the falafel exterior gives way to a light, fluffy interior, while the cool, crisp vegetables and creamy, nutty tahini provide the perfect counterpoint.

    Made from scratch using dried chickpeas (not canned), these falafel achieve the ideal texture—tender and airy, never dense or pasty. Whether you’re a longtime falafel enthusiast or trying it for the first time, this sandwich is a revelation in plant-based eating.

    Ingredients

    For the Falafel:

    • 1½ cups (270g) dried chickpeas (do not use canned)
    • 1 teaspoon baking soda, divided
    • ½ cup fresh parsley, packed
    • ½ cup fresh cilantro, packed
    • ¼ cup fresh dill (optional, but traditional)
    • 1 small onion, quartered (about ½ cup)
    • 4 cloves garlic, peeled
    • 1 teaspoon ground cumin
    • 1 teaspoon ground coriander
    • ½ teaspoon cayenne pepper (optional)
    • 1 teaspoon salt
    • ½ teaspoon black pepper
    • 1 tablespoon chickpea flour or all-purpose flour (optional, for binding)
    • 1 teaspoon baking powder
    • Neutral oil for frying (vegetable, canola, or avocado oil)

    For the Tahini Sauce:

    • ½ cup (120ml) tahini (sesame seed paste)
    • ¼ cup (60ml) fresh lemon juice (about 1½ lemons)
    • 1 small garlic clove, minced
    • ¼ cup (60ml) cold water, plus more as needed
    • ¼ teaspoon salt

    For Assembly:

    • 4 large pita breads (preferably with pockets)
    • Romaine lettuce, shredded
    • 2 tomatoes, diced
    • 1 cucumber, diced
    • ½ red onion, thinly sliced
    • ½ cup pickles or pickled turnips
    • Fresh parsley, chopped, for garnish

    Instructions

    1. Soak the Chickpeas: Place the dried chickpeas in a large bowl. Add ½ teaspoon of baking soda and cover with plenty of water (the chickpeas will triple in volume). Soak for 12 to 24 hours, or overnight. Drain and rinse thoroughly before using.

    2. Make the Falafel Mixture: In a food processor, combine the soaked chickpeas, remaining ½ teaspoon baking soda, parsley, cilantro, dill (if using), onion, garlic, cumin, coriander, cayenne, salt, and pepper.

    Pulse until the mixture is finely ground but not pureed—it should resemble coarse sand with small flecks of herbs visible. Avoid over-processing, which can make the falafel dense. Transfer to a bowl, cover, and refrigerate for at least 1 hour (or up to 24 hours). This chilling step is essential for texture.

    3. Make the Tahini Sauce: In a small bowl, combine the tahini, lemon juice, minced garlic, and salt. Whisk until the mixture thickens and seizes. Slowly add the cold water, whisking constantly, until the sauce becomes smooth, creamy, and pourable. Adjust consistency with additional water if needed. Set aside.

    4. Form the Falafel: Remove the falafel mixture from the refrigerator. Add the baking powder and flour (if using) and mix well. Using a small scoop or your hands, form the mixture into 1½-inch balls or patties.

    Do not pack too tightly—loose balls yield fluffier falafel. Place on a parchment-lined baking sheet. Chill for another 15 to 30 minutes while the oil heats.

    5. Fry the Falafel: In a heavy-bottomed pot or Dutch oven, heat 2 to 3 inches of oil to 350°F to 375°F (175°C to 190°C). Carefully add the falafel in batches, avoiding overcrowding. Fry for 3 to 4 minutes, turning occasionally, until deep golden brown and crispy. Drain on a wire rack or paper towels. Repeat with remaining falafel.

    6. Assemble the Pitas: Warm the pita breads in a dry skillet, oven, or microwave until soft and pliable. If using pocket pitas, carefully open the pocket. Fill with shredded lettuce, diced tomatoes, cucumbers, red onion, and pickles. Add 4 to 5 falafel balls. Drizzle generously with tahini sauce. Garnish with fresh parsley.

    7. Serve Immediately: Serve the falafel pitas immediately while the falafel are still warm and crispy. Pass extra tahini sauce at the table.

    This Falafel Pita Sandwich brings the vibrant flavors and textures of Middle Eastern street food to your kitchen—crispy, fresh, creamy, and utterly satisfying.
  • Grilled Veggie Panini

    Grilled Veggie Panini

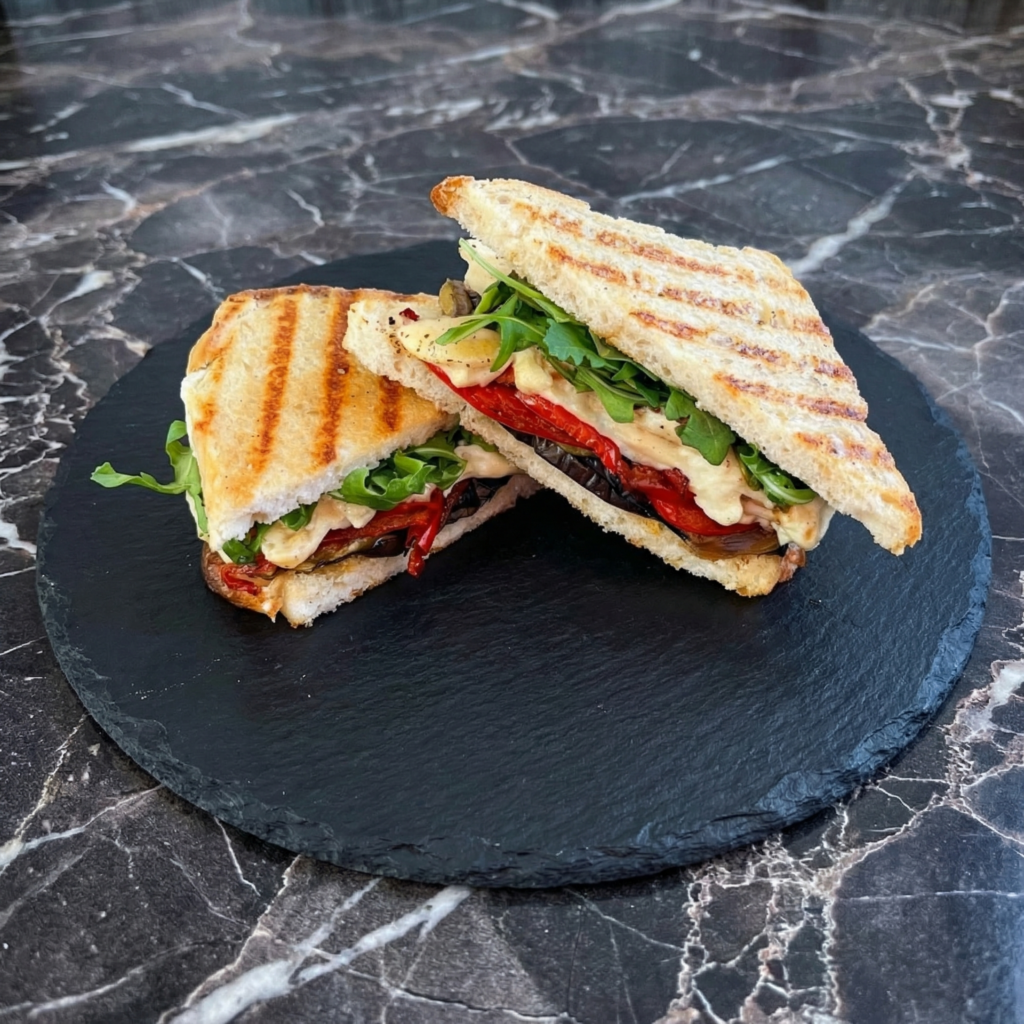
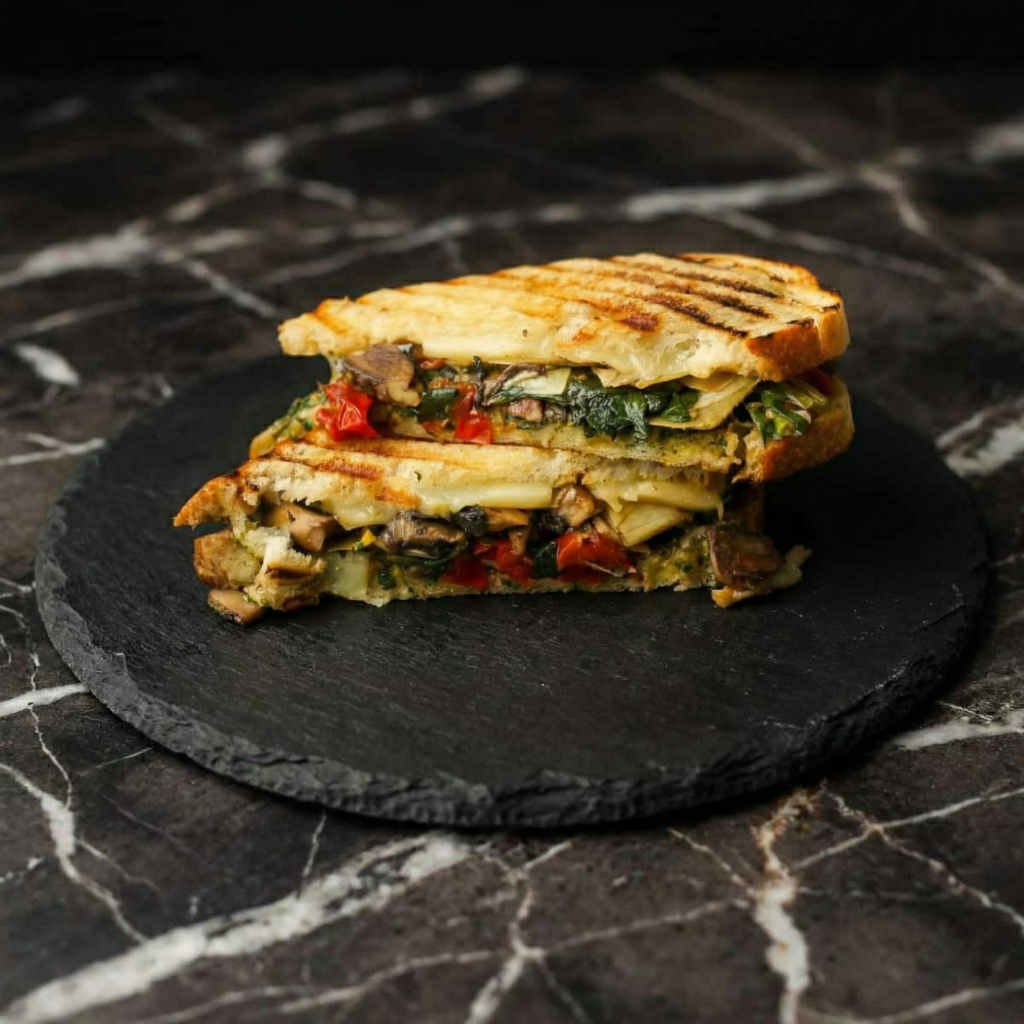
    There’s something magical about a perfectly pressed panini—the way the bread transforms into a crispy, golden shell, the way the fillings meld together into one cohesive, delicious bite. This grilled veggie panini takes that magic and runs with it, layering smoky charred vegetables, creamy melted provolone, and bright, herbaceous pesto between crusty artisan bread.

    It’s the kind of sandwich that makes you forget meat entirely, proving that vegetables can be the star of the show. Whether you’re looking for a quick weeknight dinner, a satisfying lunch, or a sandwich to impress company, this panini delivers on every level. Best of all, it comes together in under 30 minutes, making it as practical as it is delicious.

    Ingredients

    For the Grilled Vegetables:

    • 1 medium zucchini, sliced lengthwise into ¼-inch planks
    • 1 red bell pepper, seeded and sliced into wide strips
    • ½ red onion, sliced into ½-inch rounds
    • 1 small eggplant (optional), sliced into ¼-inch rounds
    • 2 tablespoons olive oil
    • ½ teaspoon salt
    • ¼ teaspoon black pepper
    • ½ teaspoon dried oregano or Italian seasoning (optional)

    For the Pesto:

    • 2 cups fresh basil leaves, packed
    • ¼ cup pine nuts or walnuts
    • 2 cloves garlic
    • ½ cup (60g) grated Parmesan cheese
    • ½ cup (120ml) extra virgin olive oil
    • Salt, to taste

    For the Panini:

    • 1 loaf artisan bread (ciabatta, focaccia, or sourdough), cut into 4 sandwich-sized pieces
    • 8 slices provolone cheese (or mozzarella)
    • 2 cups fresh baby spinach
    • 2 tablespoons olive oil or softened butter, for brushing

    Instructions

    1. Make the Pesto: In a food processor, combine the basil, pine nuts, and garlic. Pulse until coarsely chopped. With the motor running, slowly drizzle in the olive oil until the mixture is smooth. Add the Parmesan cheese and pulse to combine. Season with salt to taste. Set aside. (Pesto can be made up to 3 days ahead and refrigerated.)

    2. Grill the Vegetables: Preheat a grill pan or cast iron skillet over medium-high heat. In a large bowl, toss the zucchini, bell pepper, red onion, and eggplant (if using) with olive oil, salt, pepper, and oregano.

    Working in batches to avoid overcrowding, place the vegetables in a single layer on the hot grill pan. Cook for 3 to 4 minutes per side, until tender and marked with deep char lines. Remove and set aside.

    3. Assemble the Panini: Slice the bread horizontally if not already split. Brush the cut sides lightly with olive oil or spread a thin layer of butter. On the bottom half of each piece of bread, spread a generous layer of pesto.

    Layer with provolone cheese, grilled vegetables, fresh spinach, and another slice of provolone. Close the sandwich with the top half of bread.

    4. Press the Panini: Heat a panini press or a large skillet over medium heat. If using a skillet, place the sandwiches in the pan and top with a heavy skillet or cast iron weight to press down.

    Cook for 3 to 4 minutes per side, until the bread is golden brown, crispy, and the cheese is fully melted. If using a panini press, cook according to manufacturer’s instructions until golden and pressed.

    5. Slice and Serve: Remove the panini from the press and let rest for 1 minute. Slice in half diagonally. Serve immediately with extra pesto for dipping.

    This Grilled Veggie Panini is proof that vegetables, when treated with care and layered with bold flavors, can create a sandwich that’s deeply satisfying, beautifully vibrant, and impossible to resist.

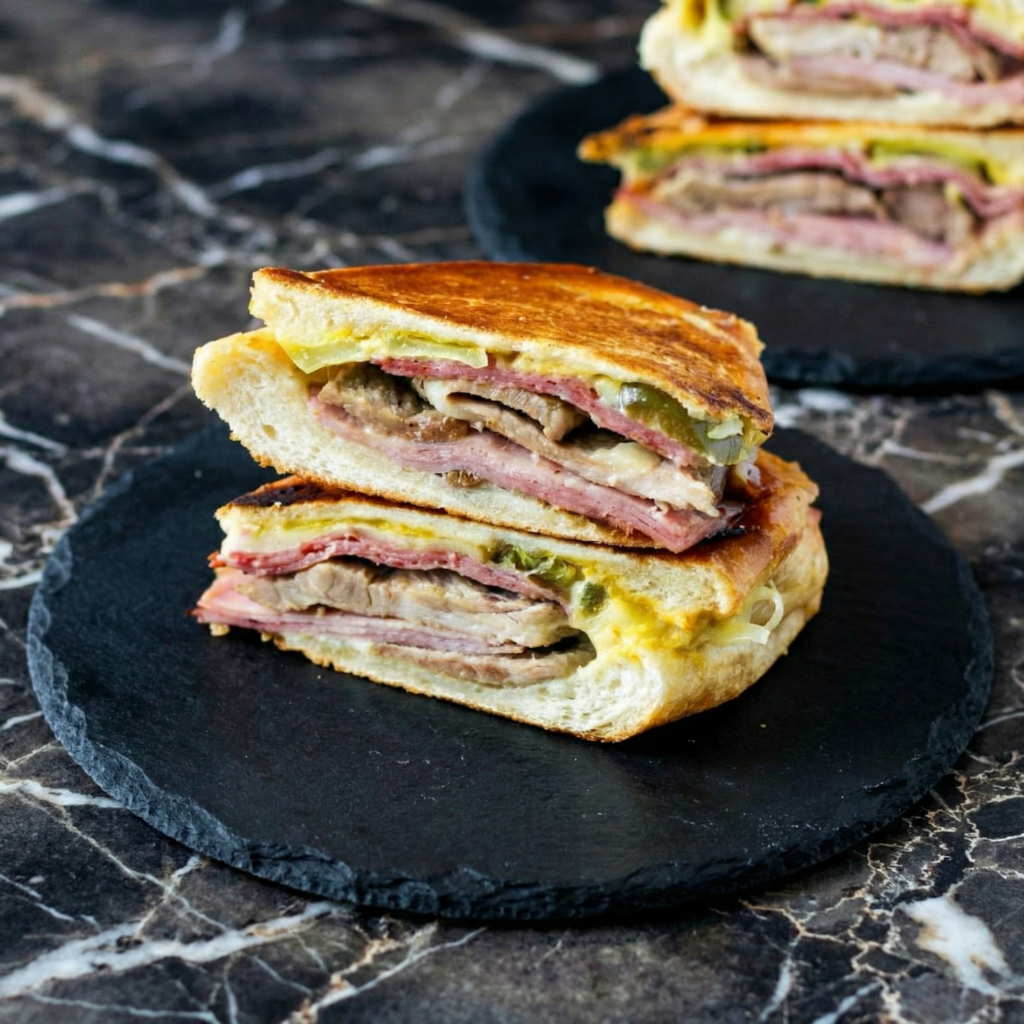
  • Cuban Sandwich (Cubano)

    Cuban Sandwich (Cubano)

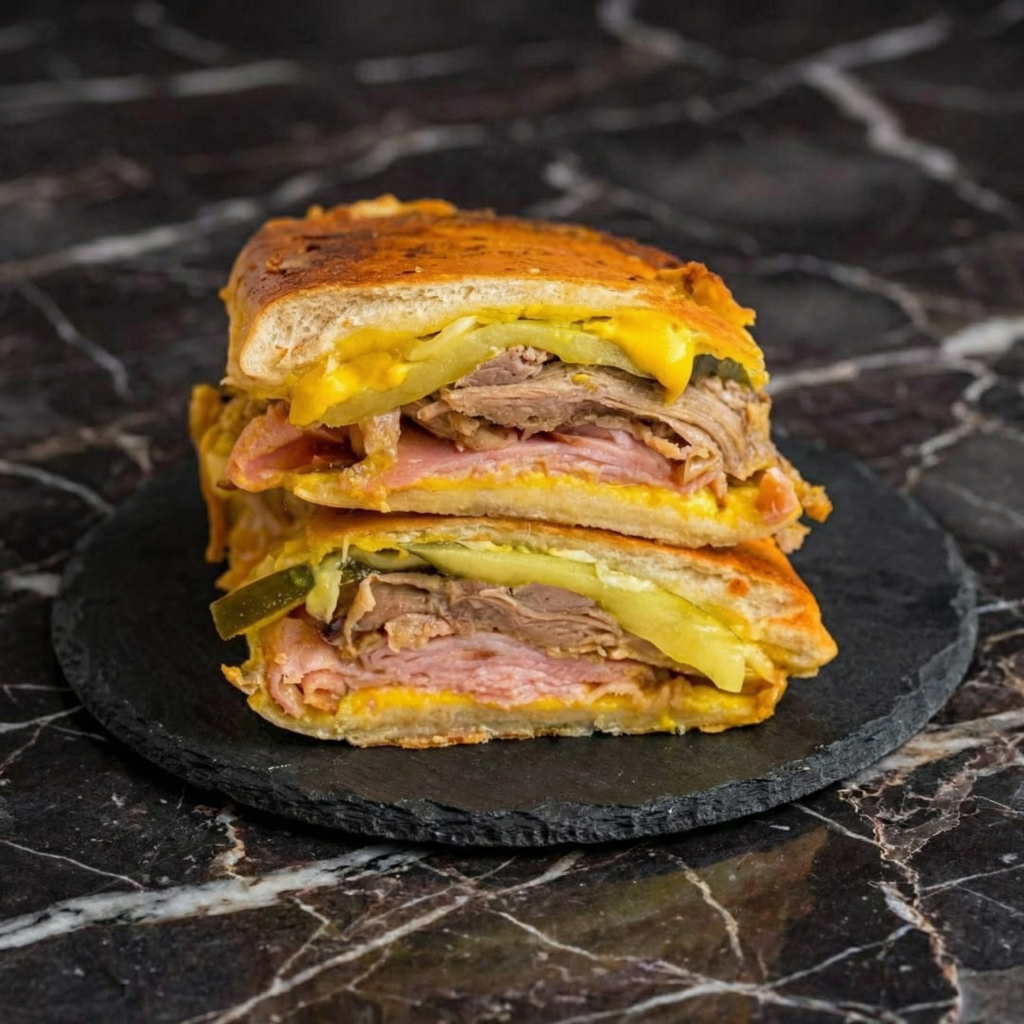
    Few sandwiches inspire the kind of devotion that the Cuban sandwich—or Cubano—commands. Born in the vibrant Cuban communities of Florida, this pressed masterpiece layers tender, garlicky roasted pork, savory ham, melted Swiss cheese, tangy pickles, and yellow mustard between crisp, buttery bread.

    The magic happens on the press, where the sandwich is flattened and toasted until the exterior shatters, the cheese melts into every crevice, and the flavors meld into one harmonious bite. While the roasted pork is a labor of love, it’s also what makes this sandwich truly exceptional.

    Make a batch of mojo-marinated pork on the weekend, and you’ll have the foundation for the ultimate Cubano ready in minutes. Whether you’re in Miami, Tampa, or anywhere in between, this sandwich is a taste of Cuban-American heritage you can recreate at home.

    Ingredients

    For the Mojo-Marinated Roasted Pork:

    • 2 lbs (900g) pork shoulder or pork butt
    • ½ cup (120ml) sour orange juice (or ¼ cup orange juice + ¼ cup lime juice)
    • 6 cloves garlic, minced
    • 1 teaspoon ground cumin
    • 1 teaspoon dried oregano
    • 1 teaspoon salt
    • ½ teaspoon black pepper
    • 2 tablespoons olive oil

    For the Cuban Sandwich (per sandwich):

    • 1 Cuban bread loaf (or Italian or French bread, about 8-10 inches)
    • 2 tablespoons yellow mustard
    • 4 ounces (115g) roasted pork, thinly sliced or shredded
    • 4 ounces (115g) deli ham, thinly sliced
    • 4 slices Swiss cheese
    • ¼ cup dill pickle slices (sandwich slices)
    • 2 tablespoons unsalted butter, softened

    For Serving:

    • Plantain chips or potato chips
    • Mojo sauce for dipping (optional)

    Instructions

    1. Make the Mojo-Marinated Roasted Pork: In a bowl, combine sour orange juice, minced garlic, cumin, oregano, salt, pepper, and olive oil. Place pork in a large resealable bag or baking dish and pour marinade over. Refrigerate for at least 4 hours, ideally overnight.

    Preheat oven to 325°F (165°C). Transfer pork and marinade to a Dutch oven or roasting pan. Cover and roast for 2½ to 3 hours, until fork-tender. Shred or slice. (Pork can be made up to 3 days ahead.)

    2. Prepare the Bread: Cut the Cuban bread loaf in half lengthwise. Spread yellow mustard generously on both cut sides. On the bottom half, layer Swiss cheese, roasted pork, ham, and dill pickles. Top with the remaining cheese slices, then close the sandwich with the top half of bread.

    3. Butter and Press: Spread the softened butter evenly over the outside of the sandwich—both top and bottom. This creates the golden, crispy crust. Heat a large skillet, griddle, or panini press over medium heat. If using a skillet, place the sandwich in the pan and place a heavy skillet or cast iron weight on top to press it down.

    Cook for 3 to 4 minutes per side, pressing firmly, until the bread is golden brown, crispy, and the cheese is fully melted. If using a panini press, cook according to manufacturer’s instructions until golden and pressed.

    4. Slice and Serve: Remove the sandwich from the press and let rest for 1 minute. Slice in half diagonally. Serve immediately with plantain chips and mojo sauce for dipping, if desired.

    This Cuban Sandwich captures the essence of a beloved cultural classic—crispy, melty, tangy, and deeply satisfying.

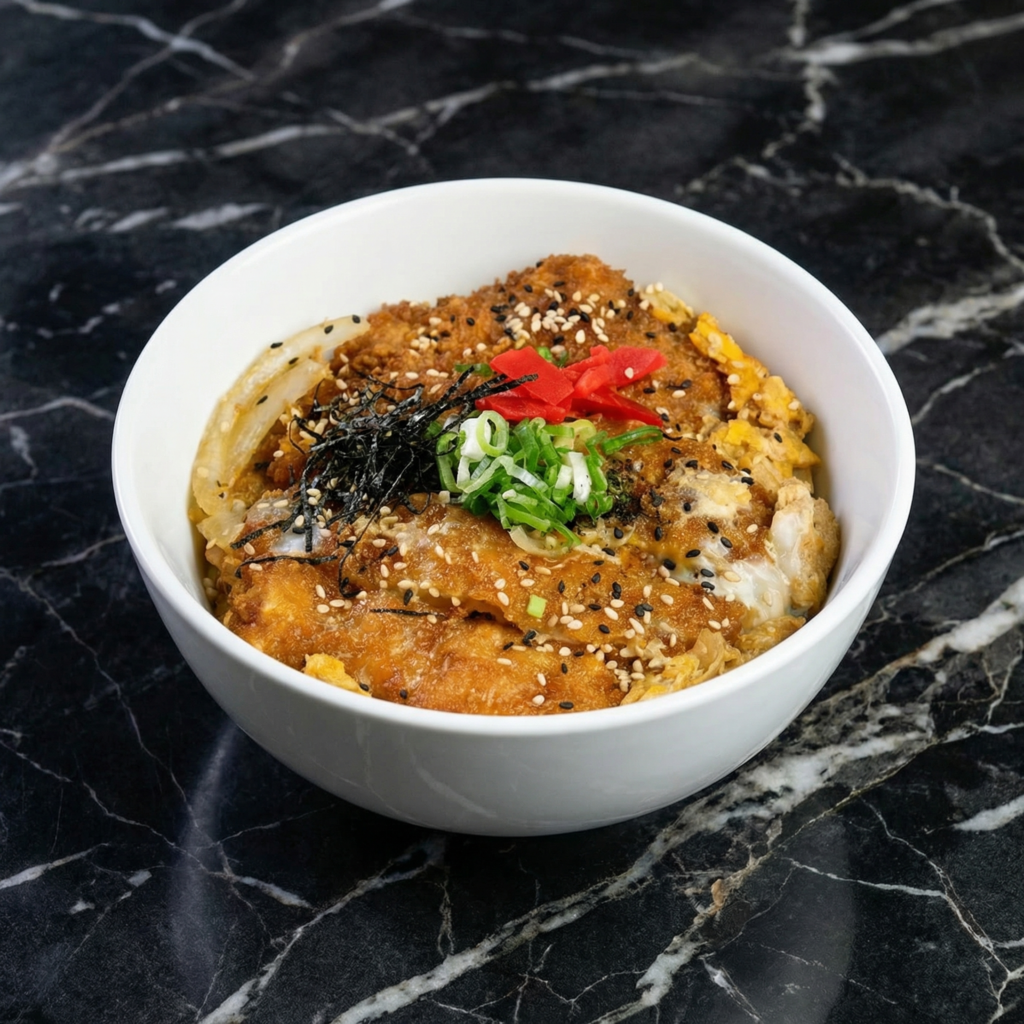
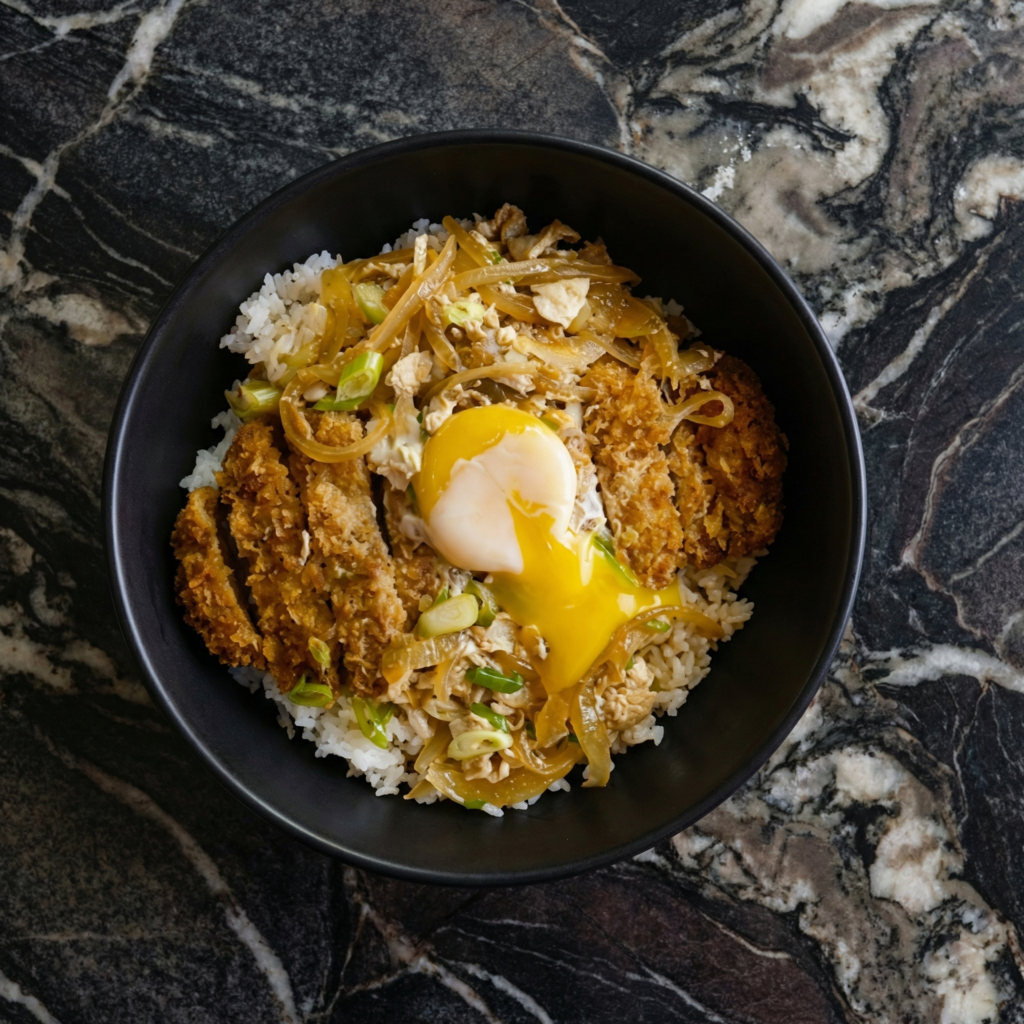
  • Katsudon (Japanese Pork Cutlet Bowl)

    Katsudon (Japanese Pork Cutlet Bowl)

    There are comfort foods, and then there’s katsudon—a dish so beloved in Japan that it’s said to bring good luck before exams (katsu means “to win”). This iconic donburi (rice bowl) combines a crispy, golden panko-crusted pork cutlet with a sweet-savory simmering broth, caramelized onions, and a softly set egg, all served over a steaming bed of rice.

    The magic lies in the contrast: the cutlet’s shatteringly crisp exterior, the tender pork within, the silky egg, and the fragrant broth that seeps into the rice beneath. While it may look like a restaurant-only dish, katsudon is surprisingly approachable at home. With a few key techniques—perfect panko breading, gentle simmering, and the art of the soft-set egg—you can bring this Japanese comfort food classic to your own table.

    Ingredients

    For the Tonkatsu (Pork Cutlet):

    • 2 boneless pork chops (about ½ to ¾ inch thick), preferably center-cut loin
    • Salt and black pepper, to taste
    • ¼ cup (30g) all-purpose flour
    • 1 large egg, beaten
    • 1 cup (100g) panko breadcrumbs
    • Neutral oil for frying (vegetable, canola, or rice bran oil)

    For the Katsudon Sauce (per serving):

    • ½ cup (120ml) dashi (or water with ¼ tsp dashi powder)
    • 2 tablespoons soy sauce
    • 1 tablespoon mirin (sweet Japanese rice wine)
    • 1 tablespoon sake (or dry white wine)
    • 1 teaspoon granulated sugar
    • ½ medium onion, thinly sliced
    • 2 large eggs, lightly beaten (do not overmix)

    For Serving:

    • 3 to 4 cups cooked Japanese short-grain rice (or sushi rice)
    • 2 green onions, thinly sliced, for garnish
    • Nori (dried seaweed), thinly sliced, for garnish (optional)
    • Mitsuba or parsley (optional)

    Instructions

    1. Prepare the Pork Cutlets: Pat the pork chops dry with paper towels. Season both sides with salt and pepper. Using a sharp knife, make small cuts along the edges of each chop to prevent curling during frying.

    Dredge each chop in flour, shaking off excess. Dip into the beaten egg, allowing any excess to drip off. Finally, coat thoroughly in panko breadcrumbs, pressing gently to adhere. Place on a plate and let rest for 10 to 15 minutes—this helps the coating set.

    2. Fry the Tonkatsu: In a heavy-bottomed pot or deep skillet, heat about 1 inch of oil to 340°F to 350°F (170°C to 175°C). Carefully add the breaded pork chops (work in batches if necessary).

    Fry for 3 to 4 minutes per side, until deeply golden brown and cooked through (internal temperature of 145°F / 63°C). Transfer to a wire rack to drain. Let rest for 5 minutes, then slice each cutlet into ½-inch strips.

    3. Prepare the Simmering Broth: While the pork rests, prepare the sauce. In a small skillet or donburi pan (or a small saucepan), combine the dashi, soy sauce, mirin, sake, and sugar. Add the thinly sliced onions. Bring to a simmer over medium heat and cook for 3 to 4 minutes, until the onions have softened and the sauce has slightly reduced.

    4. Add the Pork and Egg: Place the sliced tonkatsu over the simmering onions, arranging the pieces in a single layer. Slowly pour the lightly beaten eggs over and around the pork. Cover and cook for 1 to 2 minutes, until the eggs are just set but still soft and silky. The eggs should be opaque but not dry—they should have a custard-like consistency.

    5. Assemble the Bowl: Divide the cooked rice between two deep bowls. Carefully slide the contents of the skillet—pork, onions, and egg—over the rice, allowing the broth to seep into the grains. The sauce should pool slightly around the base.

    6. Garnish and Serve: Garnish with sliced green onions and nori (if using). Serve immediately while hot. The combination of crispy pork, silky egg, savory broth, and fluffy rice is best enjoyed fresh.

    This Katsudon is the ultimate Japanese comfort food—crispy, savory, silky, and deeply satisfying.
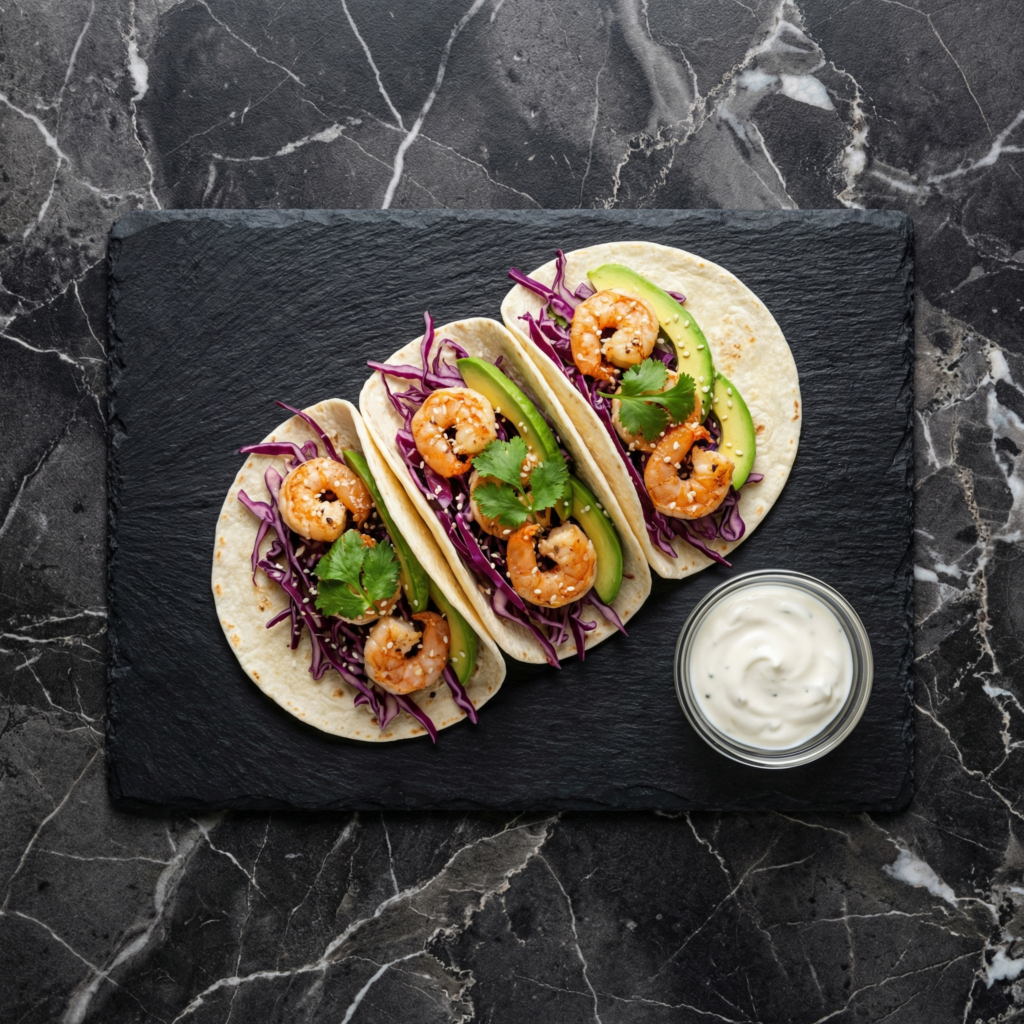
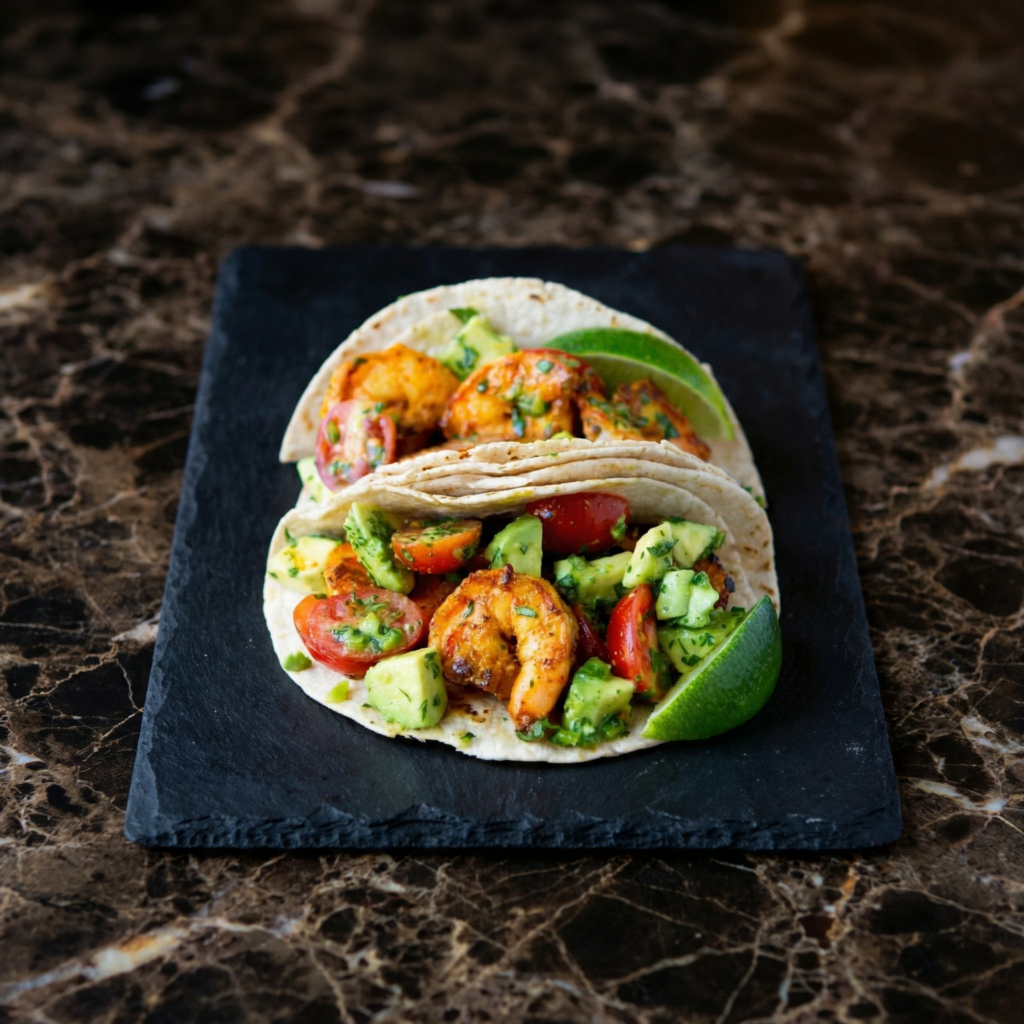
  • Shrimp Tacos with Cilantro Lime Crema

    Shrimp Tacos with Cilantro Lime Crema

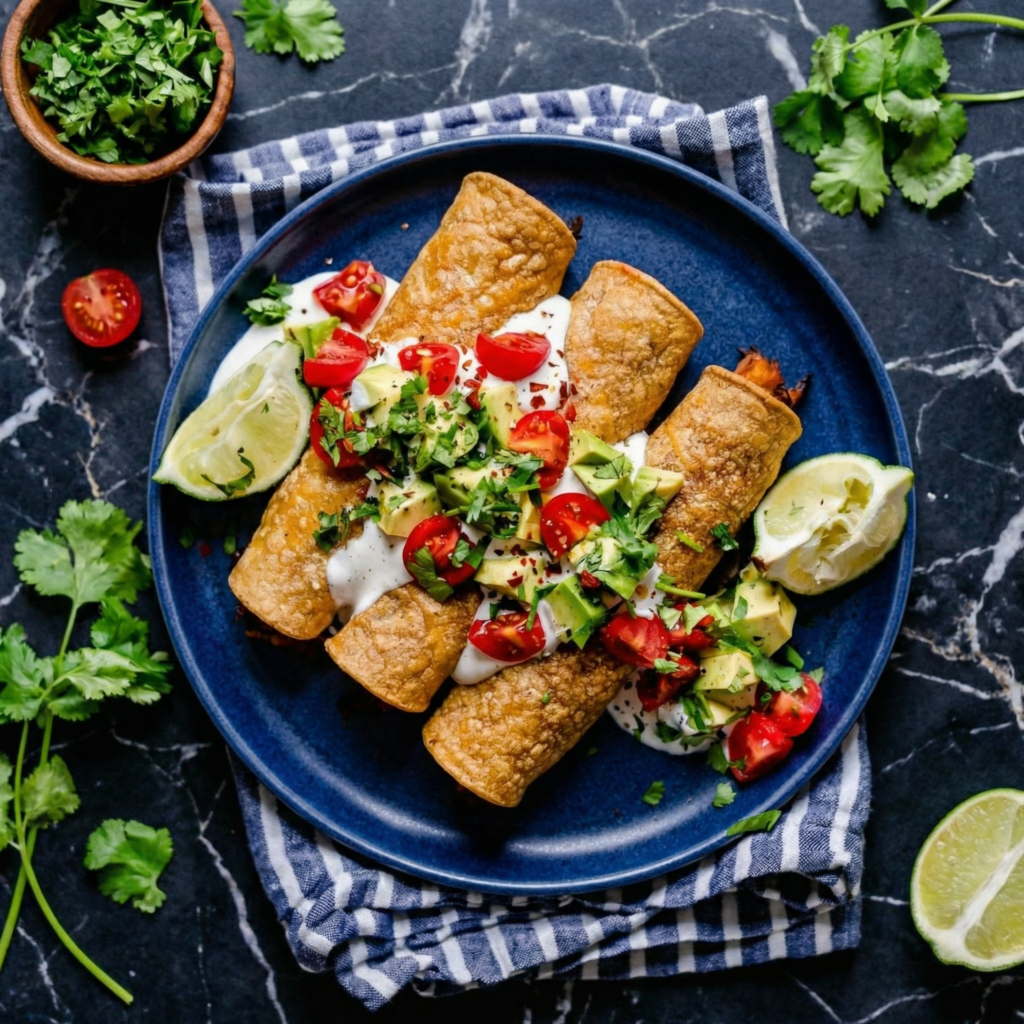
    If you’re looking for a taco that’s light, fresh, and bursting with flavor, shrimp tacos are the answer. Juicy, succulent shrimp are quickly seared with a blend of warm spices, then nestled into warm corn tortillas and topped with a vibrant slaw and the star of the show—a creamy, zesty cilantro lime crema.

    The crema brings everything together with its bright, tangy, herbaceous notes that perfectly complement the sweet, savory shrimp. Best of all, this entire meal comes together in under 30 minutes, making it ideal for busy weeknights, casual entertaining, or taco Tuesdays. Whether you’re a seafood lover or just looking to shake up your taco routine, these shrimp tacos are guaranteed to impress.

    Ingredients

    For the Shrimp:

    • 1½ lbs (680g) large shrimp, peeled and deveined (tails optional)
    • 2 tablespoons olive oil or avocado oil
    • 1 teaspoon chili powder
    • ½ teaspoon ground cumin
    • ½ teaspoon smoked paprika
    • ½ teaspoon garlic powder
    • ½ teaspoon salt
    • ¼ teaspoon black pepper
    • Pinch of cayenne pepper (optional, for heat)

    For the Cilantro Lime Crema:

    • ½ cup (120g) sour cream or Mexican crema
    • ¼ cup (60ml) mayonnaise
    • ½ cup fresh cilantro leaves, packed, finely chopped
    • 2 tablespoons fresh lime juice (about 1 lime)
    • 1 teaspoon lime zest
    • 1 small garlic clove, minced
    • ½ jalapeño, seeded and minced (optional)
    • Salt, to taste

    For the Slaw and Assembly:

    • 2 cups shredded purple cabbage or coleslaw mix
    • 8 to 10 small corn tortillas
    • Fresh cilantro leaves, for garnish
    • Lime wedges, for serving
    • 1 avocado, sliced (optional)
    • Pickled red onions (optional)

    Instructions

    1. Make the Cilantro Lime Crema: In a small bowl, combine the sour cream, mayonnaise, chopped cilantro, lime juice, lime zest, minced garlic, and jalapeño (if using). Whisk until smooth. Season with salt to taste. Cover and refrigerate while you prepare the rest of the meal. The flavors will meld and deepen as it sits.

    2. Prepare the Shrimp: Pat the shrimp completely dry with paper towels—removing excess moisture ensures a good sear. In a medium bowl, combine the chili powder, cumin, smoked paprika, garlic powder, salt, pepper, and cayenne (if using). Toss the shrimp with the spice mixture until evenly coated.

    3. Warm the Tortillas: While the shrimp rests, warm the corn tortillas. Heat a dry skillet or griddle over medium-high heat. Warm each tortilla for 20 to 30 seconds per side until pliable and lightly charred. Stack and wrap in a clean kitchen towel to keep warm.

    4. Cook the Shrimp: Heat the olive oil in a large skillet over medium-high heat. When the oil is shimmering, add the shrimp in a single layer—work in batches if necessary to avoid overcrowding.

    Cook for 1½ to 2 minutes per side, until the shrimp are opaque, pink, and curled into a loose “C” shape. Overcooked shrimp curl into a tight “O” and become rubbery. Transfer the cooked shrimp to a plate.

    5. Assemble the Tacos: Place a small handful of shredded cabbage in each warm tortilla. Top with 3 to 4 shrimp. Drizzle generously with cilantro lime crema. Garnish with fresh cilantro, a squeeze of lime, and avocado slices or pickled red onions if desired.

    6. Serve Immediately: Serve the tacos immediately while the shrimp are warm and the tortillas are soft. Pass extra crema and lime wedges at the table.

    These Shrimp Tacos with Cilantro Lime Crema are a celebration of fresh, bold flavors—quick enough for a weeknight, impressive enough for company.

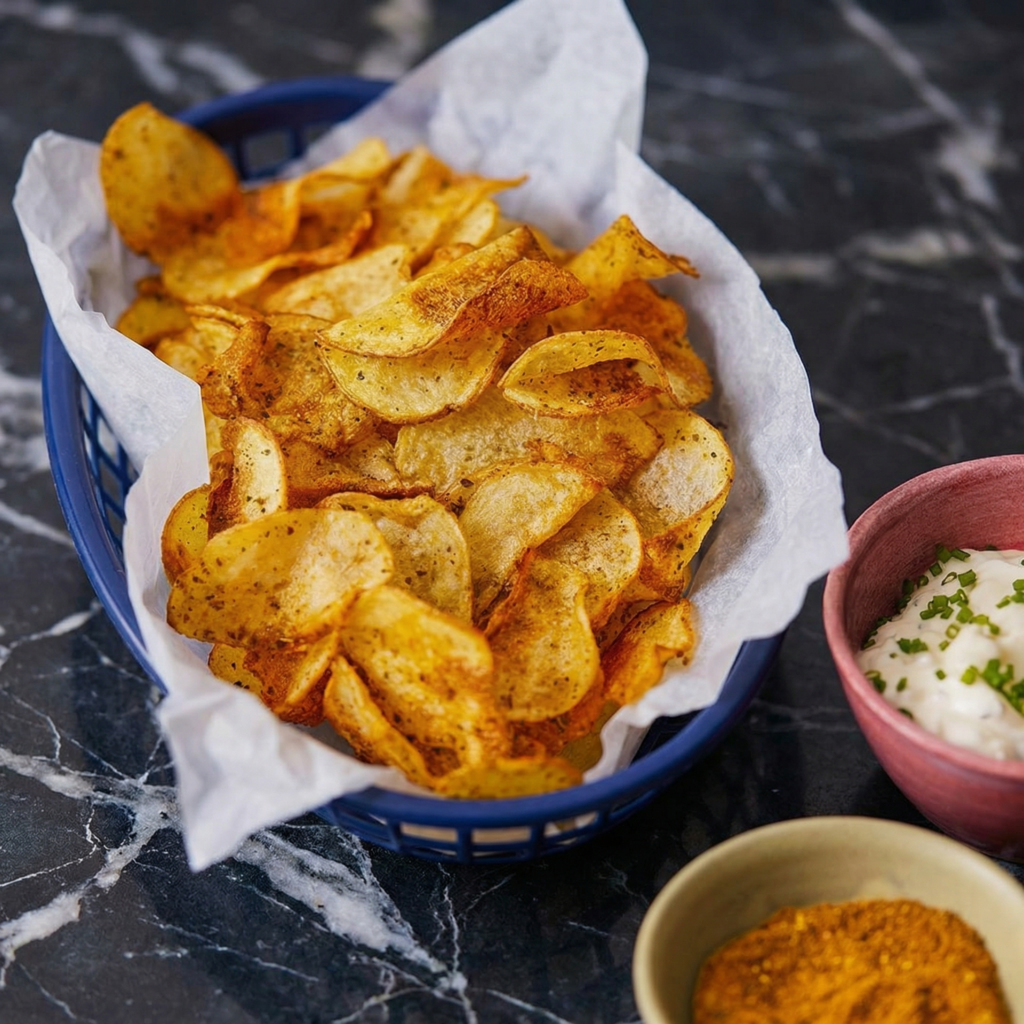
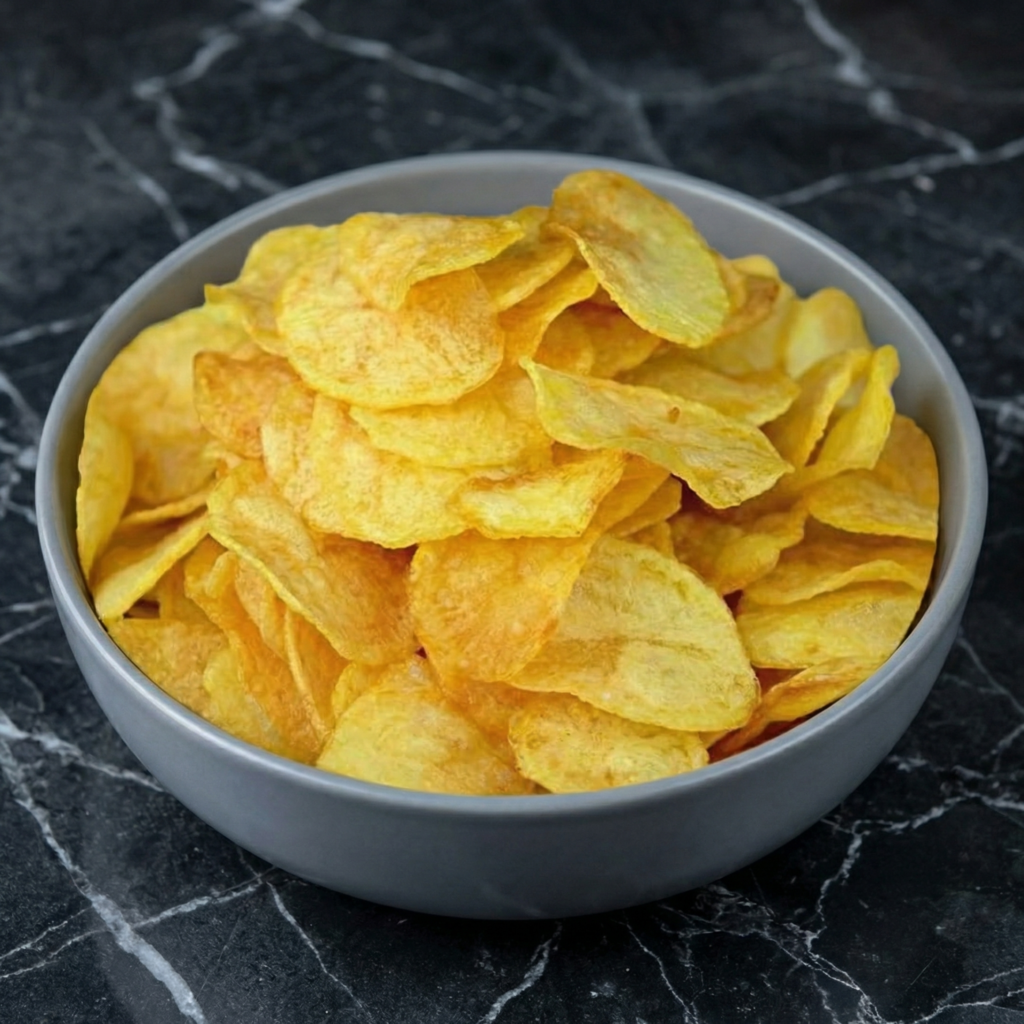
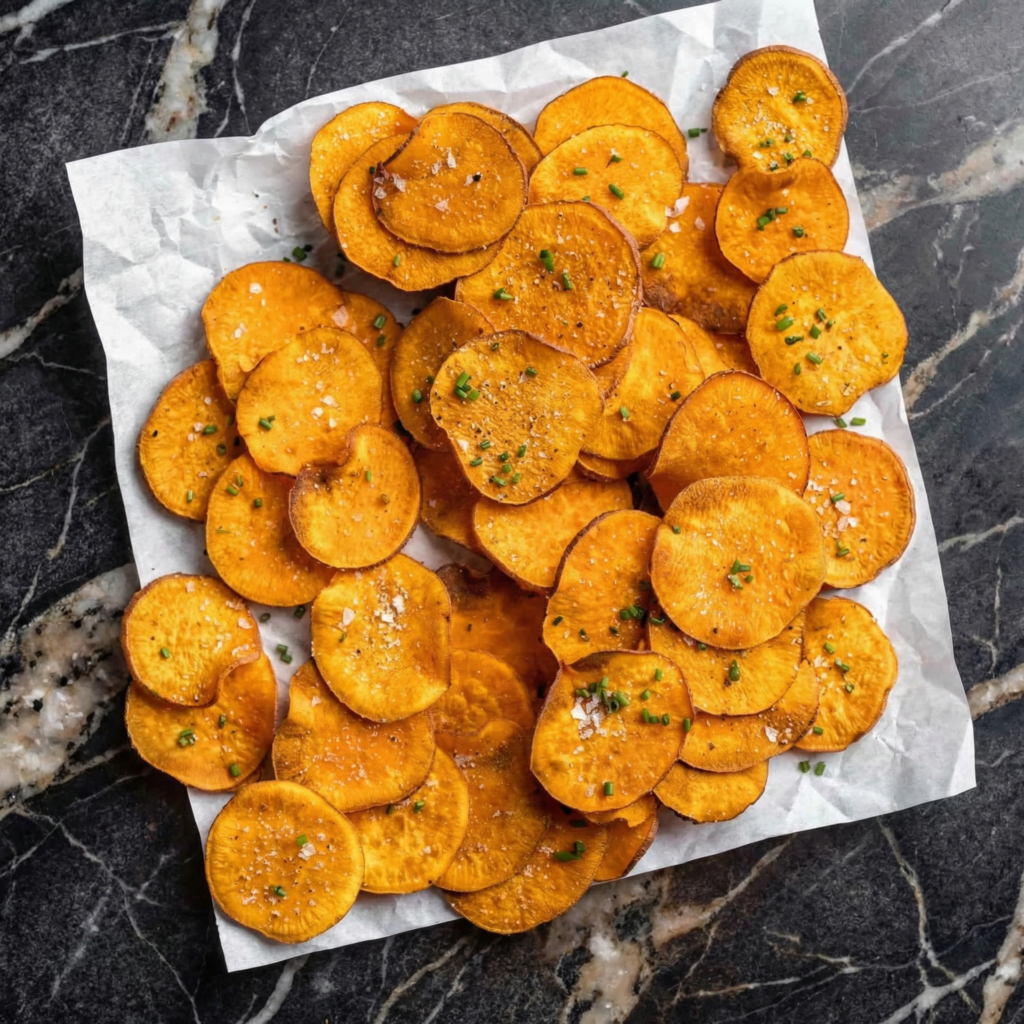
  • Crispy Homemade Potato Chips

    Crispy Homemade Potato Chips

    There is something magical about a potato chip made from scratch—thin enough to see light through, shatteringly crisp, and seasoned exactly to your taste. These homemade potato chips deliver that magic with just potatoes, oil, and salt. No dehydrators, no specialized equipment, and no mystery ingredients.

    Whether you’re craving the nostalgic simplicity of classic salted chips or want to experiment with your own seasonings, this recipe produces a batch of golden, kettle-style chips that rival anything from a bag. Perfect for game day spreads, backyard barbecues, or simply satisfying a salty snack craving.

    Ingredients

    For the Chips:

    • 2 large russet potatoes (about 1½ lbs / 680g), or Yukon Gold potatoes
    • 4 to 6 cups neutral oil for frying (vegetable, canola, or peanut oil)
    • Fine sea salt or flaky salt, to taste

    Optional Seasonings:

    • Freshly ground black pepper
    • Smoked paprika
    • Garlic powder
    • Ranch seasoning blend
    • Vinegar powder (for salt & vinegar chips)

    Instructions

    1. Slice the Potatoes: Scrub the potatoes clean. Using a mandoline slicer or a very sharp knife, slice the potatoes into uniformly thin rounds, about ⅛ inch thick or thinner. Consistency in thickness is essential for even cooking. As you slice, place the rounds into a large bowl of ice water to remove excess starch and prevent browning.

    2. Soak and Rinse: Let the potato slices soak in the ice water for at least 30 minutes, or up to 2 hours. This step removes surface starch, which helps the chips crisp up rather than stick together. Drain and rinse the slices under cold running water until the water runs clear. Spread them onto clean kitchen towels and pat thoroughly dry. Any remaining moisture will cause dangerous oil splatter.

    3. Heat the Oil: In a heavy-bottomed pot or Dutch oven, add oil to a depth of about 2 inches. Heat the oil to 325°F (165°C). Use a deep-fry or candy thermometer to monitor temperature accurately.

    4. Fry the Chips: Working in small batches to avoid crowding, carefully add a single layer of potato slices to the hot oil. Fry for 4 to 6 minutes, stirring occasionally with a spider skimmer or slotted spoon to prevent sticking.

    The chips will bubble vigorously at first as water evaporates, then the bubbling will subside. When the chips turn pale golden and the bubbling slows significantly, increase the heat to bring the oil to 350°F (175°C) and fry for an additional 1 to 2 minutes until deeply golden and crisp.

    5. Drain and Season: Using a spider skimmer, transfer the finished chips to a paper towel-lined baking sheet to drain excess oil. While still hot and glistening, season immediately with fine sea salt or your desired seasoning blend.

    The residual oil helps the seasoning adhere. Repeat with remaining batches, allowing the oil to return to 325°F between batches.

    6. Cool and Store: Allow the chips to cool completely on the baking sheet—they will continue to crisp as they cool. Store in an airtight container at room temperature for up to 5 days, though they are best enjoyed within the first 24 hours.

    Pro-Tips for Picture-Perfect Chips

    • Use a Mandoline: Achieving uniformly thin slices is nearly impossible by knife alone. A mandoline ensures consistency and prevents thick spots that won’t crisp properly.
    • Choose the Right Potato: Russet potatoes are ideal for chips due to their high starch and low moisture content. Yukon Golds produce a creamier, slightly richer chip but require slightly longer frying. Avoid waxy potatoes like red or new potatoes.
    • Don’t Skip the Soak: Soaking removes excess starch that can cause chips to stick together and inhibits crisping. For extra-crispy results, you can soak for up to 24 hours in the refrigerator.
    • Maintain Oil Temperature: Adding cold potatoes drops the oil temperature. Adjust your heat to maintain a steady 325°F to 350°F range throughout frying.
    • Season Immediately: Salt and seasonings stick only to hot, freshly fried chips. Waiting even a few minutes results in seasoning that slides right off.

    These Crispy Homemade Potato Chips are a revelation—proof that the simplest ingredients, handled with care, produce something extraordinary.

  • Crispy Chicken Taquitos

    Crispy Chicken Taquitos

    Chicken taquitos are the ultimate crispy, rolled tacos—golden, crunchy corn tortillas wrapped around a savory filling of shredded chicken, cheese, and spices. They’re perfect for parties, game day, or any time you’re craving something crunchy and satisfying.
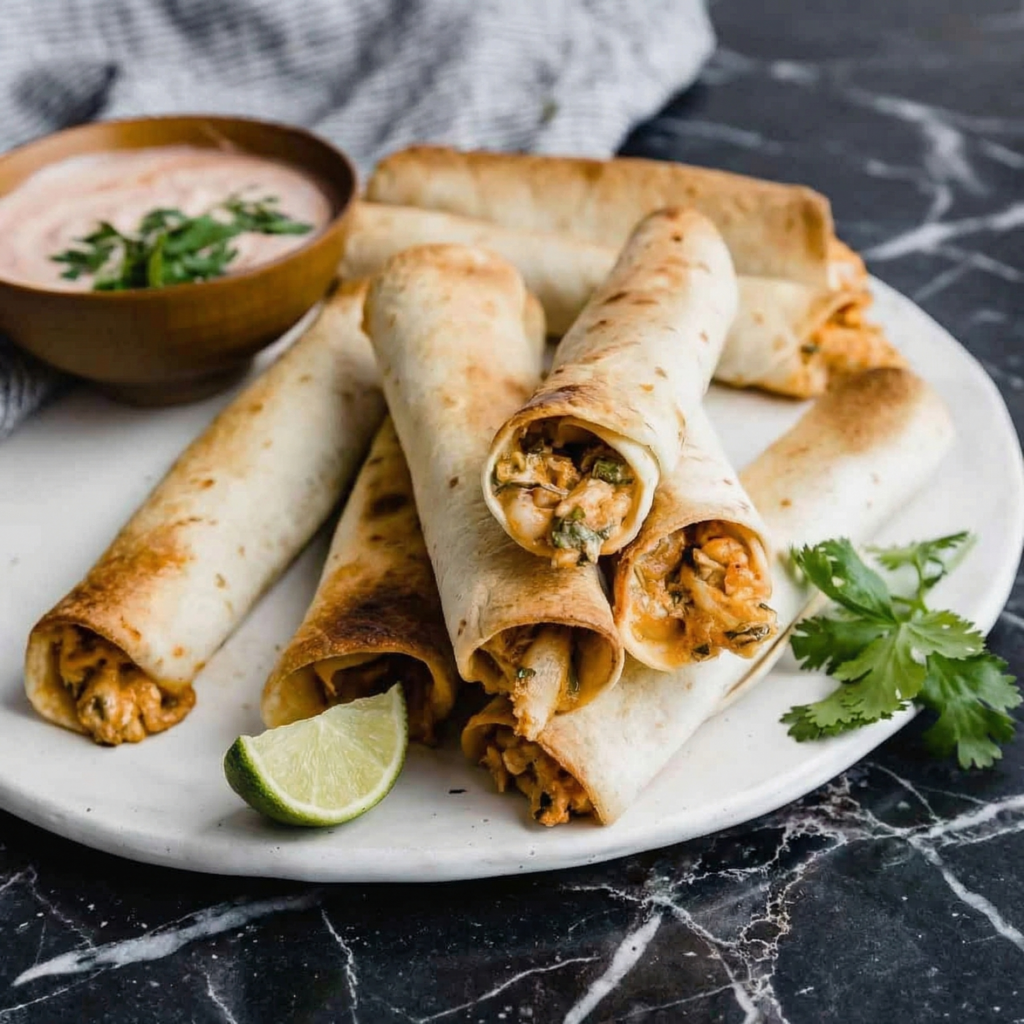
    This recipe delivers taquitos that are perfectly crisp on the outside, warm and cheesy within. Serve them with guacamole, sour cream, and salsa for dipping, and watch them disappear.

    Ingredients

    For the Chicken Filling:

    • 2 cups cooked shredded chicken (from rotisserie or poached breasts)
    • 4 oz (115g) cream cheese, softened
    • ½ cup (50g) shredded Monterey Jack or cheddar cheese
    • ¼ cup salsa verde or red salsa
    • 2 tablespoons chopped fresh cilantro
    • ½ teaspoon cumin
    • ½ teaspoon chili powder
    • ¼ teaspoon garlic powder
    • Salt to taste

    For the Taquitos:

    • 12-16 corn tortillas
    • Vegetable oil, for frying

    For Serving:

    • Guacamole
    • Sour cream or crema
    • Salsa or hot sauce
    • Fresh cilantro
    • Lime wedges

    Instructions

    1. Make the Filling: In a medium bowl, combine the shredded chicken, cream cheese, shredded cheese, salsa, cilantro, cumin, chili powder, garlic powder, and salt. Mix until well combined.

    2. Warm the Tortillas: Wrap corn tortillas in a damp paper towel and microwave for 30-60 seconds until warm and pliable. Alternatively, heat in a dry skillet for 10-15 seconds per side.

    3. Fill and Roll: Place about 2 tablespoons of filling along the lower third of each tortilla. Roll tightly, securing with a toothpick if needed. Place seam-side down on a baking sheet.

    4. Heat the Oil: In a large skillet, heat about ½ inch of oil to 350°F (175°C).

    5. Fry the Taquitos: Working in batches, place taquitos seam-side down in the hot oil. Fry for 2-3 minutes until golden brown and crispy. Flip and fry the other side for 1-2 minutes. Drain on a wire rack.

    6. Serve: Serve immediately with guacamole, sour cream, salsa, and lime wedges.

    Pro-Tips for Chicken Taquito Perfection

    • Use Corn Tortillas: They crisp up better than flour. If they crack, warm them longer.
    • Don’t Overfill: Too much filling makes rolling difficult and can cause splitting.
    • Roll Tightly: A tight roll prevents them from unraveling during frying.
    • Fry Seam-Side Down First: This seals the seam and keeps them closed.
    • Drain on a Rack: Paper towels trap steam and make them soggy.
    • Baking Option: Brush with oil and bake at 425°F for 12-15 minutes, flipping halfway.
    • Freezer Friendly: Freeze uncooked taquitos on a baking sheet, then transfer to a bag. Fry from frozen, adding 1-2 minutes to cooking time.
    • Variations: Try beef, pork, or bean fillings.

    These Crispy Chicken Taquitos are rolled, fried, and absolutely irresistible.

  • Baked Banana Oat Cups: Healthy Grab-and-Go Breakfast

    Baked Banana Oat Cups: Healthy Grab-and-Go Breakfast

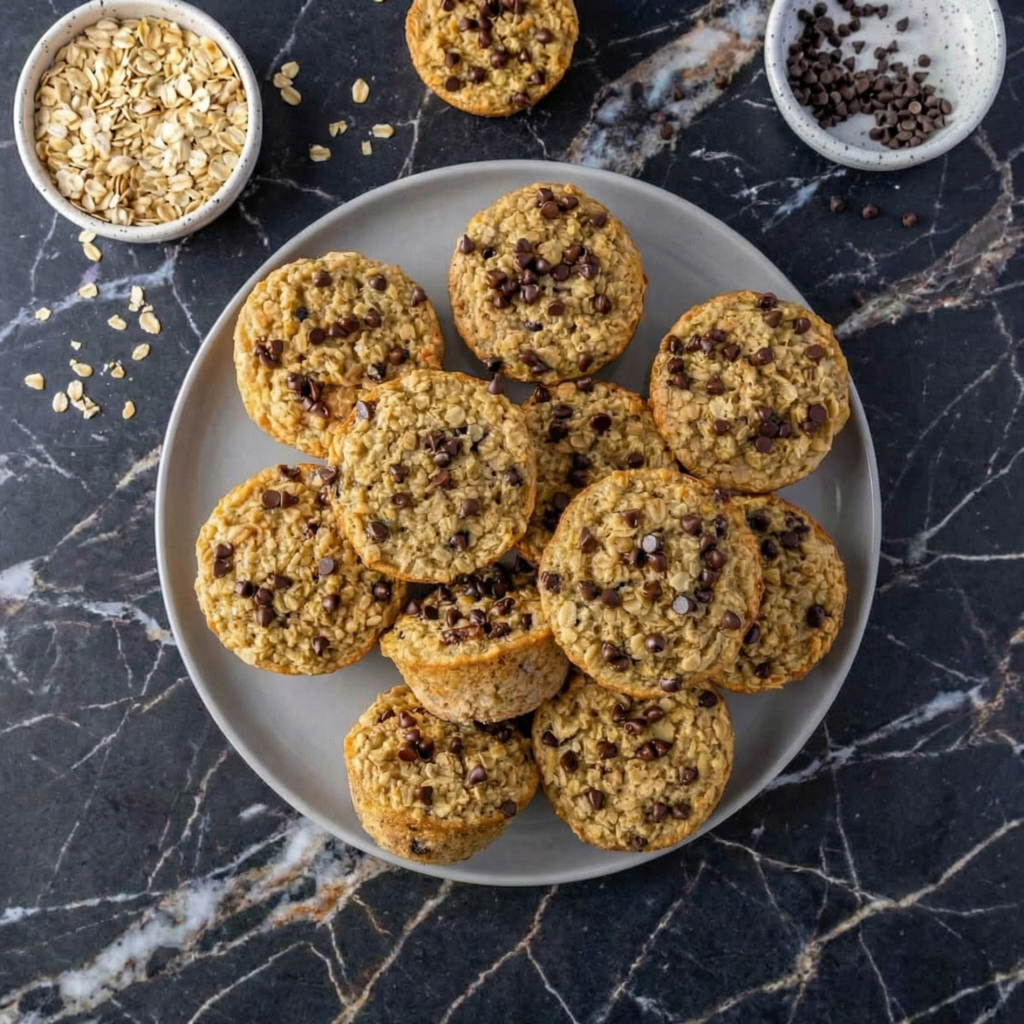
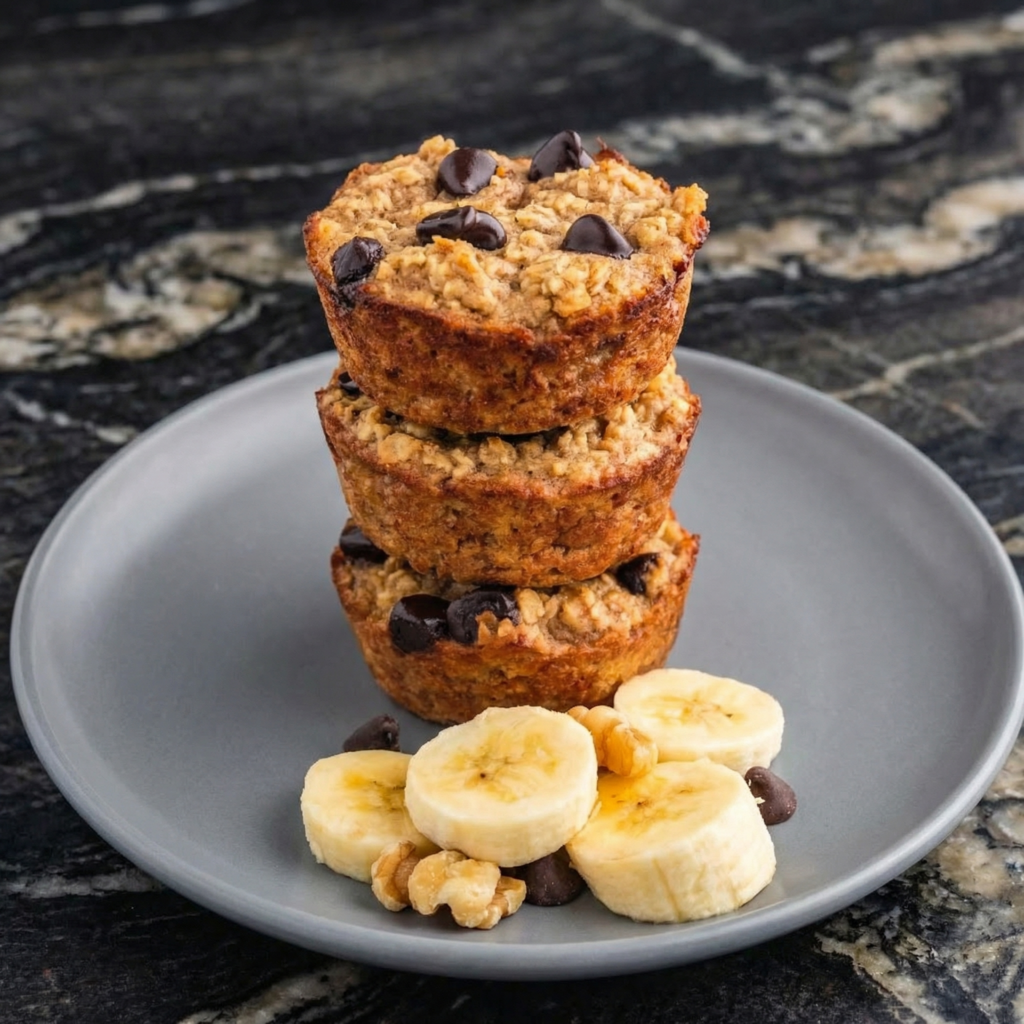
    These baked banana oat cups are the perfect solution for busy mornings—soft, naturally sweet, and packed with wholesome oats and ripe bananas. They’re like a bowl of oatmeal in a portable, grab-and-go form.

    Perfect for meal prep, these cups come together in minutes and keep you satisfied all morning. Naturally gluten-free (if using certified oats), dairy-free, and with no added sugar, they’re a healthy breakfast or snack the whole family will love.

    Ingredients

    For the Banana Oat Cups (makes 12 cups):

    • 3 very ripe bananas, mashed (about 1½ cups)
    • 2 large eggs
    • 1 cup (240ml) milk (dairy or non-dairy)
    • 2 tablespoons maple syrup or honey (optional)
    • 1 teaspoon vanilla extract
    • 3 cups (270g) old-fashioned rolled oats
    • 1 teaspoon baking powder
    • ½ teaspoon ground cinnamon
    • ¼ teaspoon salt

    Optional Add-Ins:

    • ½ cup chocolate chips
    • ½ cup chopped walnuts or pecans
    • ½ cup blueberries or diced apple
    • 2 tablespoons chia seeds or flaxseed meal

    For Serving:

    • Greek yogurt
    • Fresh fruit
    • Drizzle of honey or maple syrup

    Instructions

    1. Prep and Preheat: Preheat your oven to 375°F (190°C). Generously grease a 12-cup muffin tin or line with paper liners.

    2. Mash the Bananas: In a large bowl, mash the bananas with a fork until smooth.

    3. Add Wet Ingredients: Whisk in the eggs, milk, maple syrup (if using), and vanilla until well combined.

    4. Add Dry Ingredients: Stir in the oats, baking powder, cinnamon, and salt. Mix until everything is evenly combined. If using any add-ins, fold them in now. Let the mixture sit for 10-15 minutes to allow the oats to absorb the liquid.

    5. Fill the Muffin Tin: Divide the mixture evenly among the 12 muffin cups, filling them almost to the top. Press down gently to compact.

    6. Bake: Bake for 20-25 minutes, until the tops are golden brown and the cups are set. A toothpick inserted in the center should come out clean.

    7. Cool: Let the cups cool in the pan for 10 minutes, then transfer to a wire rack to cool completely.

    8. Serve or Store: Serve warm or at room temperature. Store in an airtight container in the refrigerator for up to 5 days, or freeze for up to 3 months.

    Pro-Tips for Banana Oat Cup Perfection

    • Use Very Ripe Bananas: The riper, the sweeter and more flavorful. Brown-spotted bananas are ideal.
    • Let the Mixture Rest: Allowing the oats to soak for 10-15 minutes creates a softer, more cohesive texture.
    • Grease the Pan Well: These can stick—use non-stick spray or butter generously, or use paper liners.
    • Customize Add-Ins: Chocolate chips, nuts, berries, or a swirl of nut butter are all delicious.
    • Make It Vegan: Use flax eggs (2 tablespoons flaxseed meal + 5 tablespoons water) and non-dairy milk.
    • Make Ahead: These are perfect for meal prep. Make a batch on Sunday and enjoy all week.
    • Freezer Friendly: Wrap individually and freeze for up to 3 months. Reheat in the microwave or toaster oven.

    These Baked Banana Oat Cups are healthy, delicious, and perfect for busy mornings.