Category: healthy

  • Crispy, Golden & Comforting: Classic Salmon Patties Made Easy

    Crispy, Golden & Comforting: Classic Salmon Patties Made Easy

    If you’re looking for a budget-friendly, flavor-packed meal that feels nostalgic and satisfying, these Salmon Patties are the perfect choice.

    Crispy on the outside, tender and flaky on the inside, salmon patties are simple to prepare and come together with pantry staples you likely already have on hand.

    Whether you’re making them for a quick weeknight dinner, meal prep, or a comforting family meal, this step-by-step guide will help you achieve perfectly golden patties every time.

    Let’s get started.

    Why You’ll Love This Recipe

    • Crispy golden crust
    • Tender, flaky interior
    • Made with simple pantry ingredients
    • Budget-friendly and filling
    • Ready in under 30 minutes

    Salmon patties are versatile, easy, and packed with protein. They’re also a great way to transform canned salmon into something truly special.


    Ingredients You’ll Need

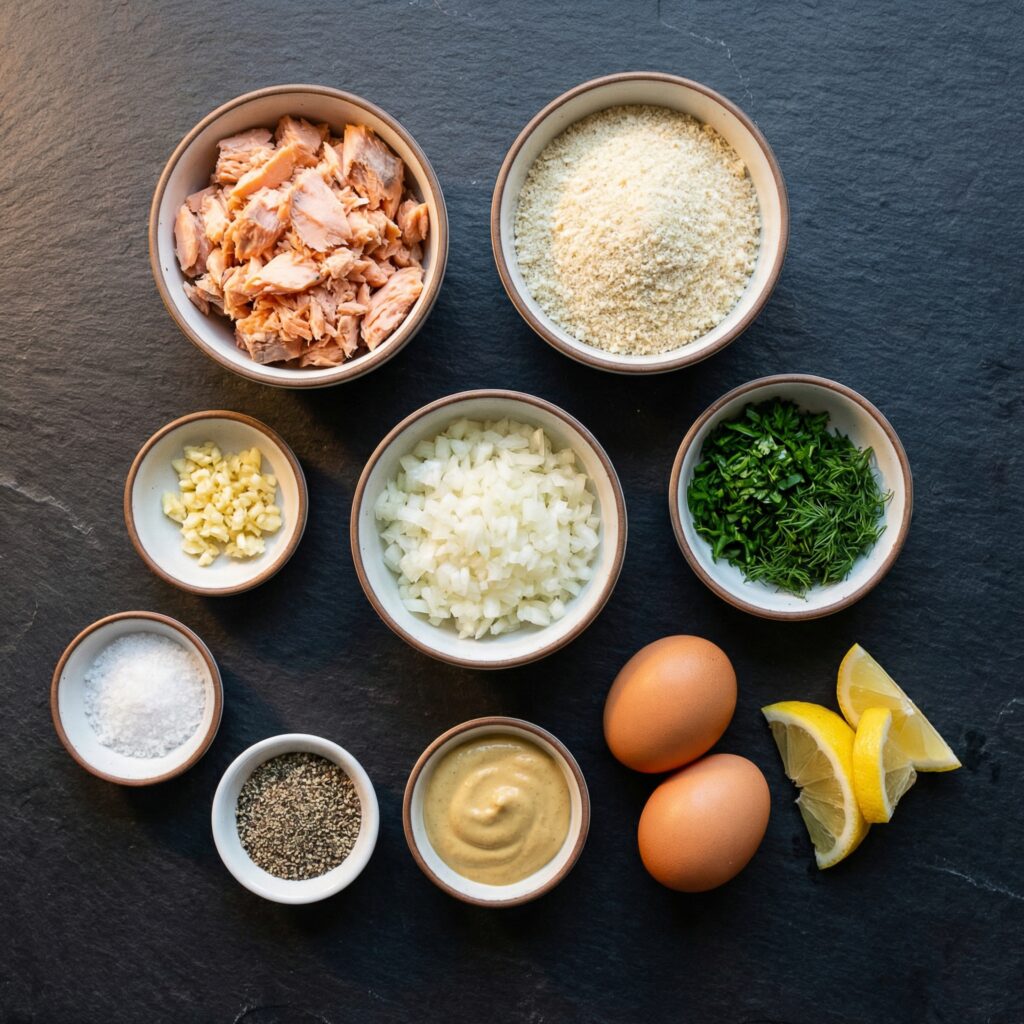
    • 2 (14–15 ounce) cans salmon, drained
    • 1 large egg
    • ½ cup breadcrumbs (plus more if needed)
    • ¼ cup finely diced onion
    • 2 tablespoons mayonnaise
    • 1 tablespoon Dijon mustard
    • 1 tablespoon lemon juice
    • 1 tablespoon fresh parsley, chopped (optional)
    • ½ teaspoon garlic powder
    • ½ teaspoon paprika
    • Salt and black pepper, to taste
    • 2–3 tablespoons oil for frying (vegetable or olive oil)

    Step 1: Prepare the Salmon

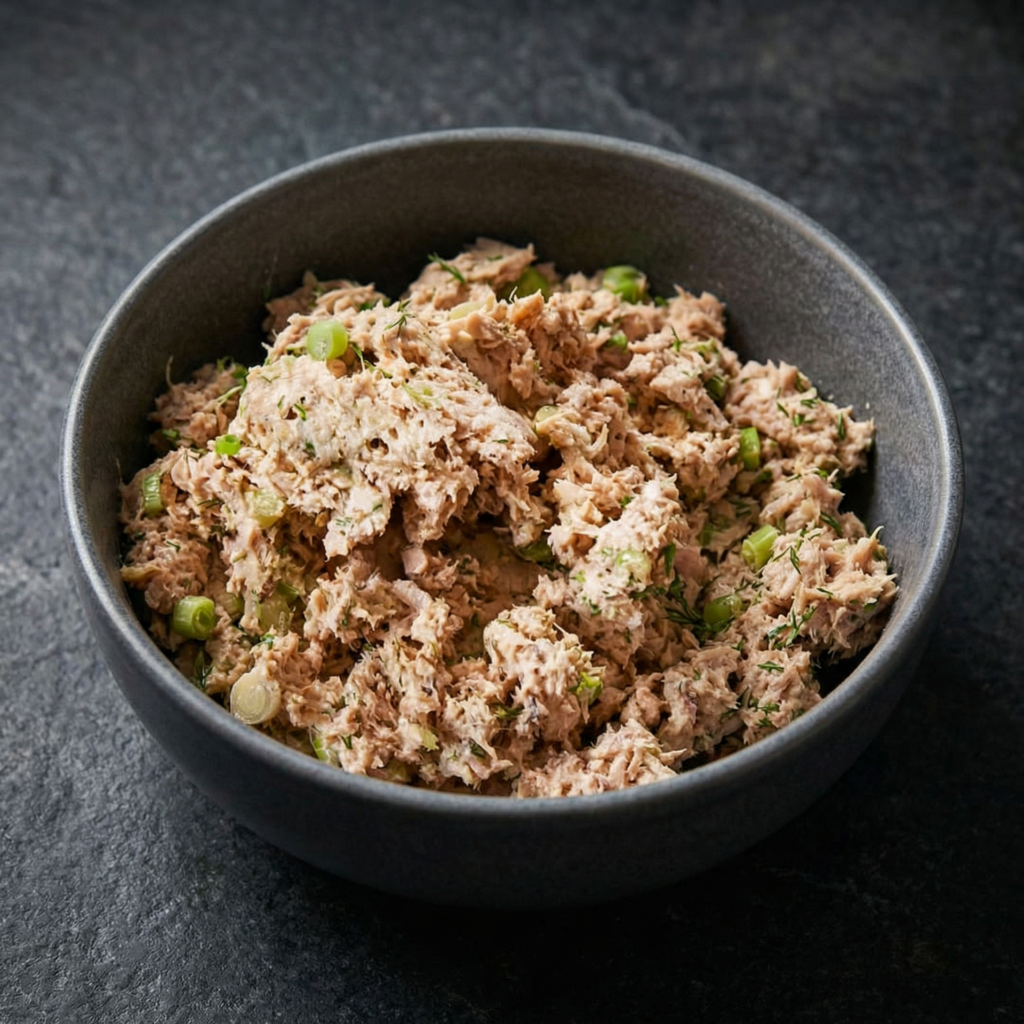
    Drain the canned salmon thoroughly. Transfer it to a large mixing bowl.

    Use a fork to gently flake the salmon into smaller pieces. If your canned salmon contains bones, you can either remove them or mash them in—they are soft, edible, and rich in calcium.

    Flaking the salmon ensures even mixing and consistent texture in every patty.


    Step 2: Mix the Binding Ingredients

    Add the egg, mayonnaise, Dijon mustard, and lemon juice to the bowl. Stir gently to combine.

    The egg and breadcrumbs act as binders, helping the patties hold their shape. The mayonnaise adds moisture, while mustard and lemon juice bring brightness and depth of flavor.


    Step 3: Add Seasonings and Texture

    Stir in breadcrumbs, diced onion, parsley, garlic powder, paprika, salt, and pepper.

    Mix just until combined. The mixture should hold together when pressed but not feel overly wet. If it’s too loose, add a tablespoon of breadcrumbs at a time until it firms up.

    Avoid overmixing, as this can make the patties dense.

    Step 4: Shape the Patties

    Using your hands, scoop about ⅓ cup of mixture and shape it into a patty about ½ inch thick.

    Place formed patties on a plate or baking sheet. You should get about 6–8 patties depending on size.

    For best results, refrigerate the patties for 15–20 minutes before cooking. This helps them firm up and prevents breaking during frying.


    Step 5: Heat the Pan

    Heat oil in a large skillet over medium heat. The oil should shimmer but not smoke.

    A properly heated pan ensures a crisp crust without absorbing excess oil.


    Step 6: Fry Until Golden

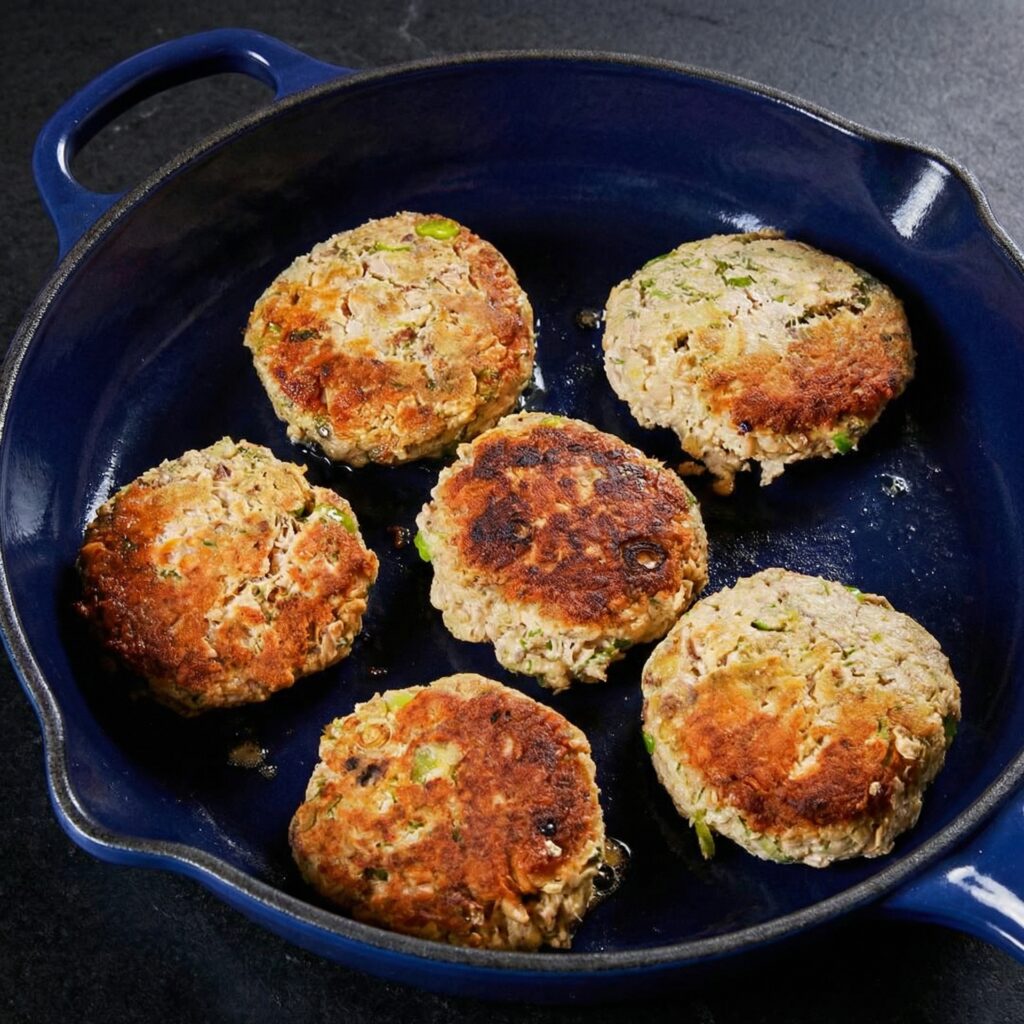
    Carefully place patties into the skillet in a single layer. Do not overcrowd the pan.

    Cook for about 3–4 minutes per side, or until golden brown and crispy.

    Flip gently using a spatula. Salmon patties are delicate, so patience is key.

    Once both sides are crisp and heated through, transfer them to a plate lined with paper towels.

    Step 7: Serve Warm

    Serve the salmon patties immediately while hot and crispy.

    They pair beautifully with:

    • Tartar sauce
    • Lemon wedges
    • A fresh green salad
    • Mashed potatoes
    • Coleslaw

    You can also serve them on buns as salmon burgers or tuck them into wraps.


    Tips for Perfect Salmon Patties

    • Drain salmon thoroughly to avoid soggy patties.
    • Chill before frying for better structure.
    • Use medium heat—too high can burn the outside before heating through.
    • If flipping is tricky, let them cook longer before turning; they release more easily once a crust forms.

    Flavor Variations

    Want to customize your salmon patties? Try these ideas:

    • Add finely diced bell peppers for sweetness and crunch.
    • Mix in a dash of hot sauce for heat.
    • Substitute crushed crackers for breadcrumbs.
    • Add grated Parmesan for extra savory depth.
    • Incorporate fresh dill for a brighter, herb-forward version.

    These small tweaks can completely transform the flavor profile.


    Baking Option

    Prefer not to fry? You can bake them instead.

    Preheat your oven to 400°F (200°C). Place patties on a parchment-lined baking sheet. Lightly brush or spray with oil.

    Bake for 12–15 minutes, flipping halfway through, until golden and heated through.

    They won’t be quite as crispy as pan-fried, but they’re still delicious and lighter.


    Storage & Reheating

    Store leftovers in an airtight container in the refrigerator for up to 3 days.

    To reheat, warm them in a skillet over medium heat to restore crispiness. You can also reheat in an air fryer at 350°F for 4–5 minutes.

    Salmon patties also freeze well. Freeze cooked patties in a single layer, then transfer to a freezer bag for up to 2 months.


    Final Thoughts

    Salmon Patties are a timeless comfort food that proves simple ingredients can create something incredibly satisfying. With their crisp golden crust and tender, flavorful center, they’re easy enough for weeknights yet impressive enough for guests.

    Whether you enjoy them classic-style with tartar sauce or elevate them with fresh herbs and bright lemon, these patties deliver comfort and flavor in every bite.

    Grab a skillet, open a can of salmon, and enjoy a meal that’s crispy, hearty, and wonderfully nostalgic.

  • Perfectly Seared Sesame Tuna with Fluffy Rice: A Restaurant-Style Dinner at Home

    Perfectly Seared Sesame Tuna with Fluffy Rice: A Restaurant-Style Dinner at Home

    If you’re craving a light, flavorful, and elegant dinner, Sesame Seared Tuna with Rice is a showstopper.

    With a tender, pink center, a nutty sesame crust, and perfectly cooked rice on the side, this dish feels gourmet without requiring hours in the kitchen. It’s fresh, healthy, and bursting with umami, making it ideal for weeknight dinners, date nights, or any time you want a meal that impresses both the eyes and the palate.

    In this step-by-step guide, you’ll learn how to sear tuna perfectly, create a crisp sesame crust, and pair it with fluffy rice for a balanced, restaurant-quality plate.


    Why You’ll Love This Sesame Seared Tuna

    • Quick and easy: ready in under 30 minutes
    • Tender tuna with a crisp, nutty crust
    • Balanced, healthy meal with protein and grains
    • Elegant enough for entertaining
    • Customizable with vegetables or sauces

    This recipe proves that a few high-quality ingredients, treated with care, can produce a dish that tastes extraordinary.


    Ingredients You’ll Need

    For the Tuna:

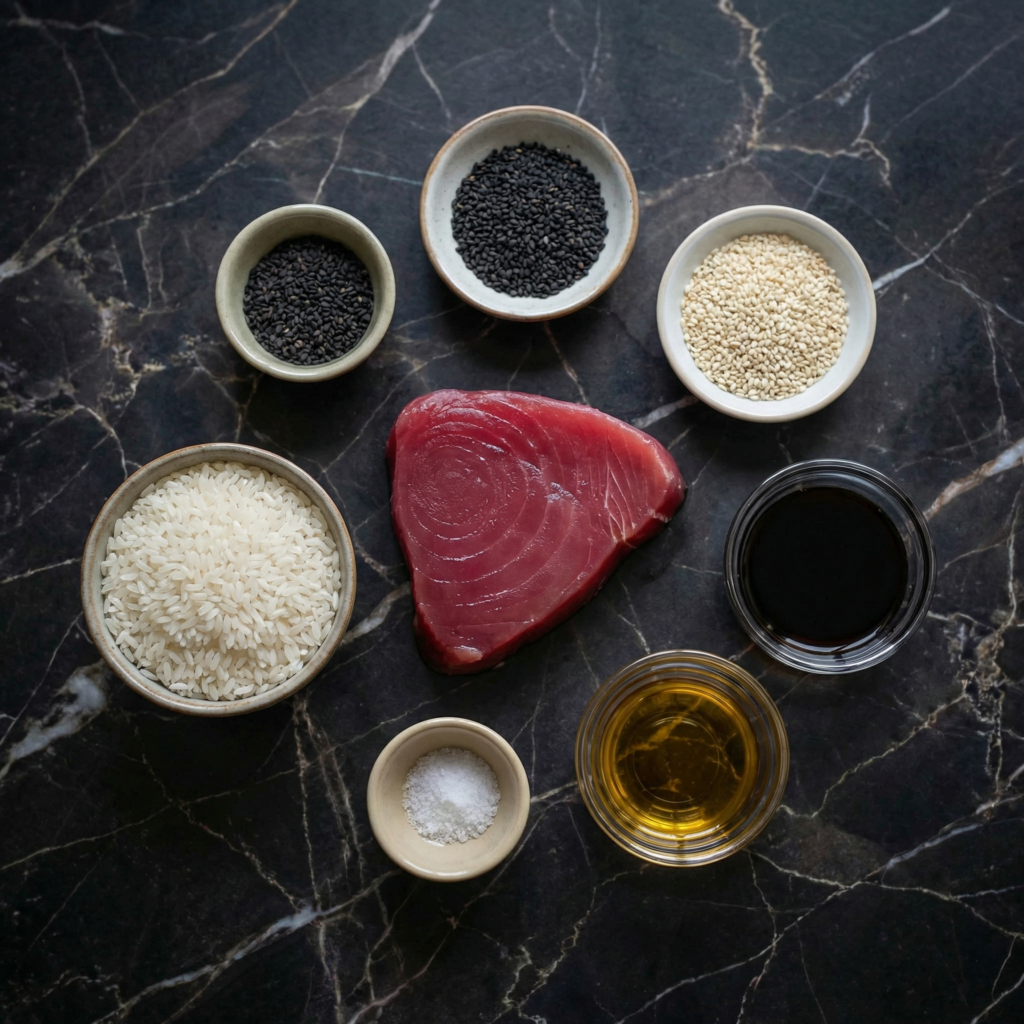
    • 2 tuna steaks (about 6 ounces each)
    • 2 tablespoons sesame seeds (white, black, or a mix)
    • 1 tablespoon olive oil
    • Salt and pepper to taste

    For the Rice:

    • 1 cup jasmine or sushi rice
    • 2 cups water or low-sodium chicken/vegetable broth
    • Pinch of salt

    Optional Accompaniments:

    • Soy sauce or tamari
    • Sliced avocado
    • Steamed or sautéed vegetables (like bok choy, snap peas, or carrots)
    • Pickled ginger

    Step 1: Prepare the Rice

    Rinse 1 cup of rice under cold water until the water runs clear. This removes excess starch, ensuring fluffy, separate grains.

    In a medium saucepan, combine the rice with 2 cups of water or broth and a pinch of salt. Bring to a boil over medium-high heat.

    Once boiling, reduce the heat to low, cover, and simmer for 15–18 minutes, or until all liquid is absorbed. Turn off the heat and let it sit, covered, for 5 minutes. Fluff with a fork before serving.

    Perfectly cooked rice serves as the neutral, slightly fragrant base for the rich, savory tuna.


    Step 2: Prepare the Tuna

    Pat the tuna steaks dry with paper towels. Moisture will prevent a proper sear.

    Season both sides lightly with salt and pepper.

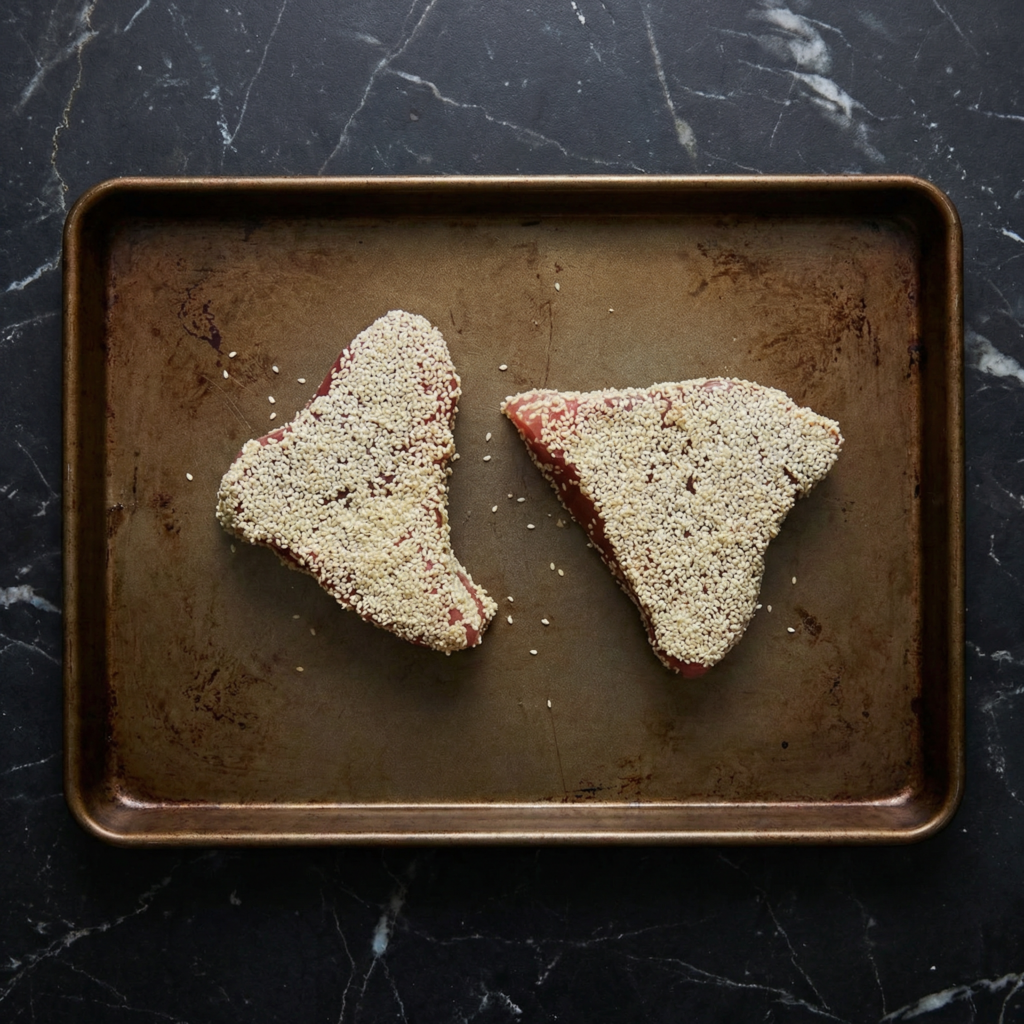
    Place sesame seeds on a shallow plate. Press each side of the tuna steak into the sesame seeds so that both sides are evenly coated. The sesame seeds create a nutty crust and add visual appeal.


    Step 3: Heat the Pan

    Heat a non-stick or cast-iron skillet over medium-high heat.

    Add 1 tablespoon of olive oil and allow it to shimmer but not smoke.

    The pan must be hot enough to sear quickly, locking in juices while creating a crisp, golden crust.


    Step 4: Sear the Tuna

    Place the tuna steaks in the hot pan. Sear without moving for about 1–2 minutes per side, depending on thickness.

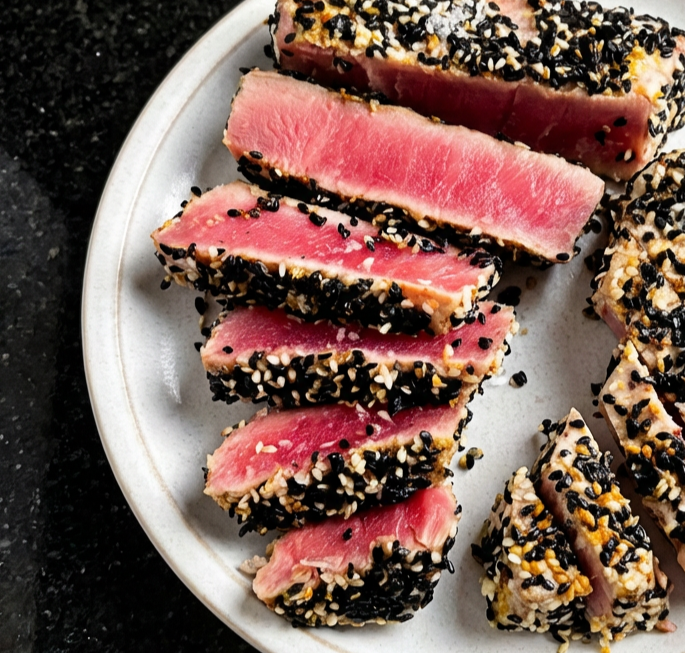
    For a rare center, aim for 1 minute per side. For medium-rare, cook 2 minutes per side. Avoid overcooking—tuna is best served pink in the center for tenderness.

    Remove the tuna from the pan and let it rest for a few minutes. Resting allows juices to redistribute for maximum flavor.


    Step 5: Slice and Plate

    Using a sharp knife, slice the tuna against the grain into ¼-inch thick slices. Arrange neatly over a bed of fluffy rice.

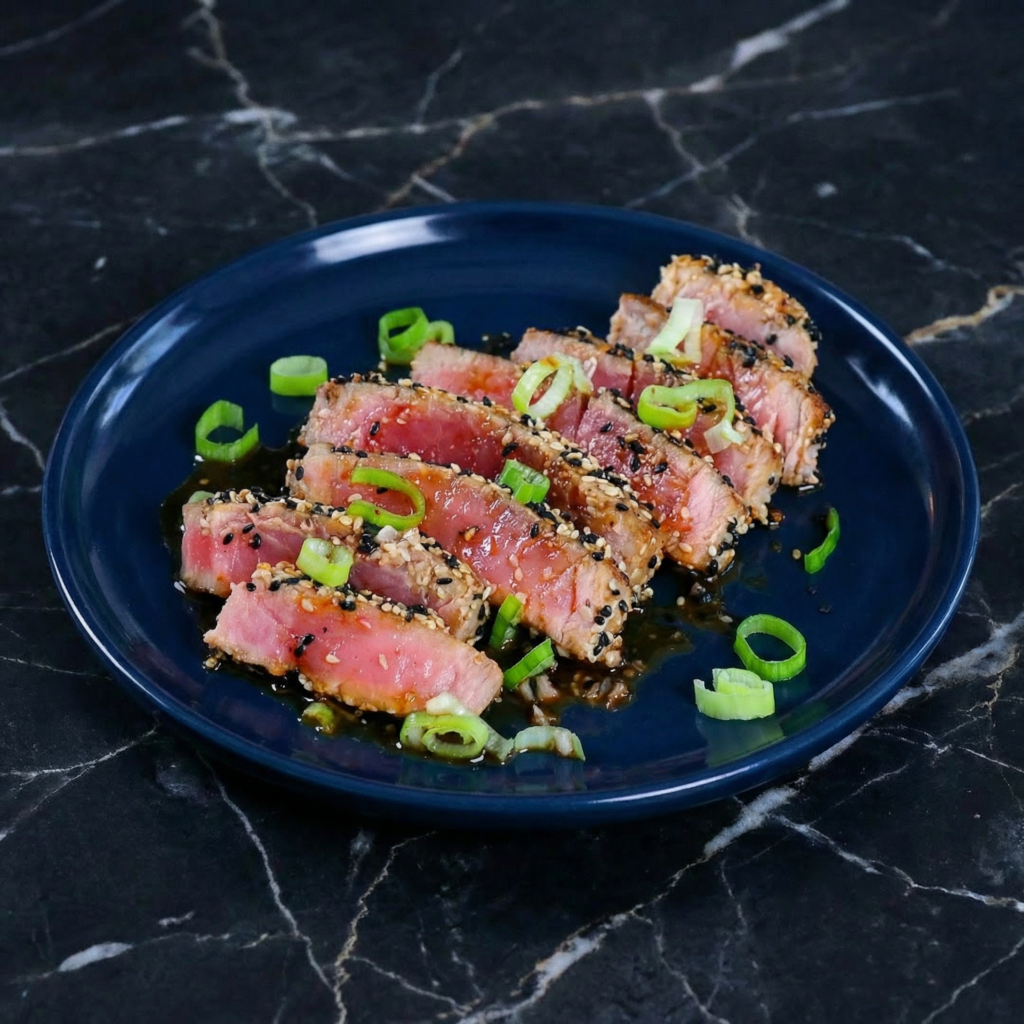
    If desired, add steamed or sautéed vegetables alongside. Top with soy sauce, a drizzle of sesame oil, or pickled ginger for added flavor complexity.


    Flavor and Texture Highlights

    • Crispy sesame crust adds nutty flavor and crunch
    • Tender, juicy tuna melts in your mouth
    • Fluffy, aromatic rice balances the rich protein
    • Optional vegetables add freshness and texture contrast

    Every bite delivers layers of flavor: savory, nutty, slightly salty, and fresh.


    Tips for Perfect Sesame Seared Tuna

    • Use sushi-grade tuna: Ensures safety and optimal flavor for rare preparation.
    • Pat dry: Moisture prevents proper searing.
    • Don’t overcook: Tuna cooks quickly; aim for rare to medium-rare for tenderness.
    • Even sesame coating: Press firmly so seeds stick well.
    • Hot pan: Quick sear ensures crisp crust without overcooking the center.

    Optional Variations

    • Spicy Tuna: Brush with sriracha or chili oil before searing.
    • Ginger Soy Glaze: Drizzle a mixture of soy sauce, rice vinegar, and grated ginger over tuna.
    • Sesame Rice: Stir a teaspoon of toasted sesame oil into the rice for extra flavor.
    • Avocado & Cucumber Salad: Serve alongside for a fresh, creamy element.
    • Ponzu Sauce: Add a citrusy, tangy ponzu drizzle for a light, zesty twist.

    Storage and Meal Prep

    • Tuna is best enjoyed fresh, but rice can be cooked in advance and stored in an airtight container for up to 3 days.
    • Leftover rice pairs well with eggs, vegetables, or stir-fries.
    • If you need to prep ahead, sear tuna last and slice just before serving for best texture.

    Why This Recipe Works

    This Sesame Seared Tuna with Rice works because of contrast: the crunchy, nutty sesame crust meets the silky, rare tuna, and fluffy, slightly seasoned rice provides a neutral base.

    Cooking tuna quickly at high heat preserves moisture and natural flavor, while sesame seeds add texture and aromatic richness. A few simple seasonings and fresh accompaniments elevate this dish to restaurant quality without complicated techniques.


    Serving Suggestions

    • Serve as a light, elegant weeknight dinner.
    • Pair with a crisp white wine like Sauvignon Blanc or a light sake.
    • Add a small side salad for balance.
    • Garnish with sesame seeds, microgreens, or thinly sliced scallions for presentation.

    With its delicate, seared exterior, nutty sesame flavor, and perfectly cooked rice, this Sesame Seared Tuna with Rice is a dish that looks impressive and tastes incredible.

    Minimal ingredients, maximum flavor, and quick preparation make it ideal for busy nights, special dinners, or when you want to treat yourself to a healthy, gourmet meal at home.

    Tender, seared, nutty, and fresh—each bite is a perfectly balanced combination of textures and flavors, proving that restaurant-quality meals can be effortlessly recreated in your own kitchen.

  • Fresh, Zesty & Vibrant: How to Make Lemongrass Vermicelli Salad at Home

    Fresh, Zesty & Vibrant: How to Make Lemongrass Vermicelli Salad at Home

    There’s nothing quite like a dish that feels light, refreshing, and packed with bold flavors all at once.

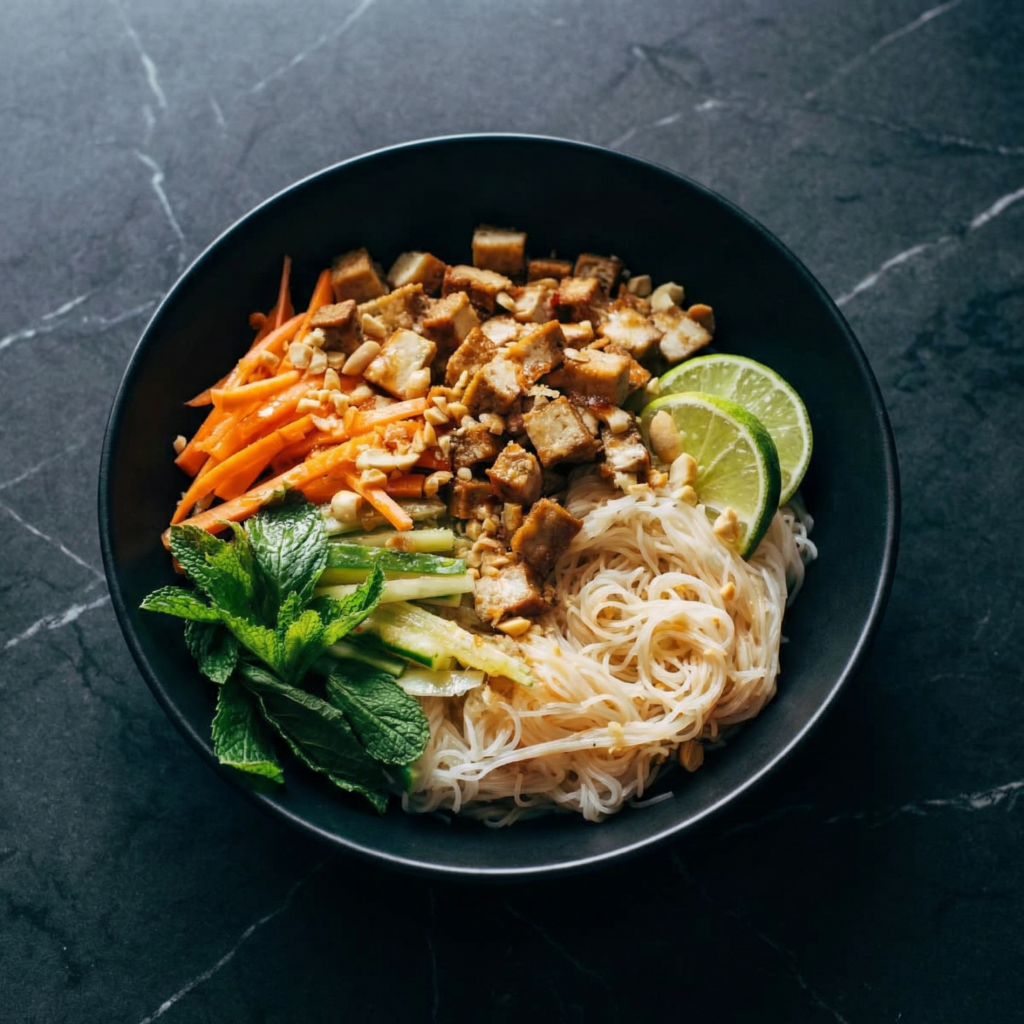
    Enter the Lemongrass Vermicelli Salad—a Vietnamese-inspired bowl that combines tender vermicelli noodles, fragrant lemongrass, crisp vegetables, fresh herbs, and a tangy, savory dressing. Perfect for lunch, dinner, or even a make-ahead meal, this salad is an explosion of texture and flavor in every bite.

    Whether you’re a fan of Asian cuisine or just looking for a vibrant, healthy dish, this step-by-step guide will help you assemble a restaurant-quality Lemongrass Vermicelli Salad that’s fresh, balanced, and utterly delicious.


    Why You’ll Love This Salad

    • Light, healthy, and refreshing
    • Perfectly balanced flavors: tangy, savory, and slightly sweet
    • Quick to prepare with simple ingredients
    • Fully customizable with proteins or extra vegetables
    • Ideal for meal prep, parties, or solo lunches

    The magic of this salad lies in the lemongrass—its fragrant, citrusy aroma infuses the noodles and dressing for a uniquely bright flavor profile.


    Ingredients You’ll Need

    For the Vermicelli Salad:

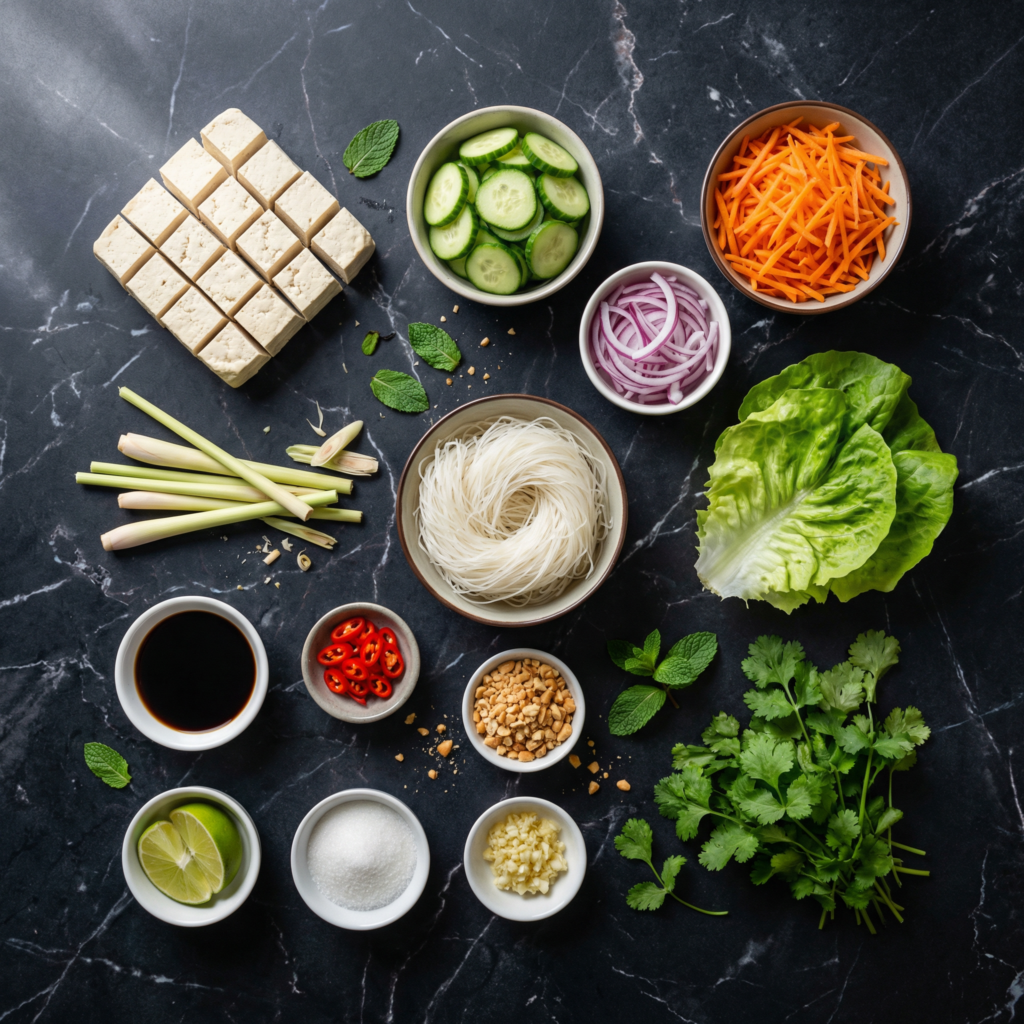
    • 6 oz (170 g) rice vermicelli noodles
    • 1 cup shredded carrots
    • 1 cup cucumber, julienned
    • 1 red bell pepper, thinly sliced
    • ½ cup bean sprouts (optional)
    • ½ cup fresh herbs: mint, cilantro, and Thai basil
    • Optional protein: grilled chicken, shrimp, or tofu

    For the Lemongrass:

    • 2 stalks lemongrass, finely minced (white parts only)
    • 1 teaspoon vegetable oil
    • 1 clove garlic, minced
    • 1 teaspoon sugar

    For the Dressing (Nuoc Cham-inspired):

    • 3 tablespoons fish sauce (or soy sauce for vegetarian)
    • 2 tablespoons lime juice
    • 1 tablespoon sugar
    • 1 garlic clove, minced
    • 1 small chili, minced (optional for heat)
    • 2 tablespoons water

    For Garnish:

    • Crushed roasted peanuts
    • Lime wedges
    • Extra herbs

    Step 1: Prepare the Vermicelli Noodles

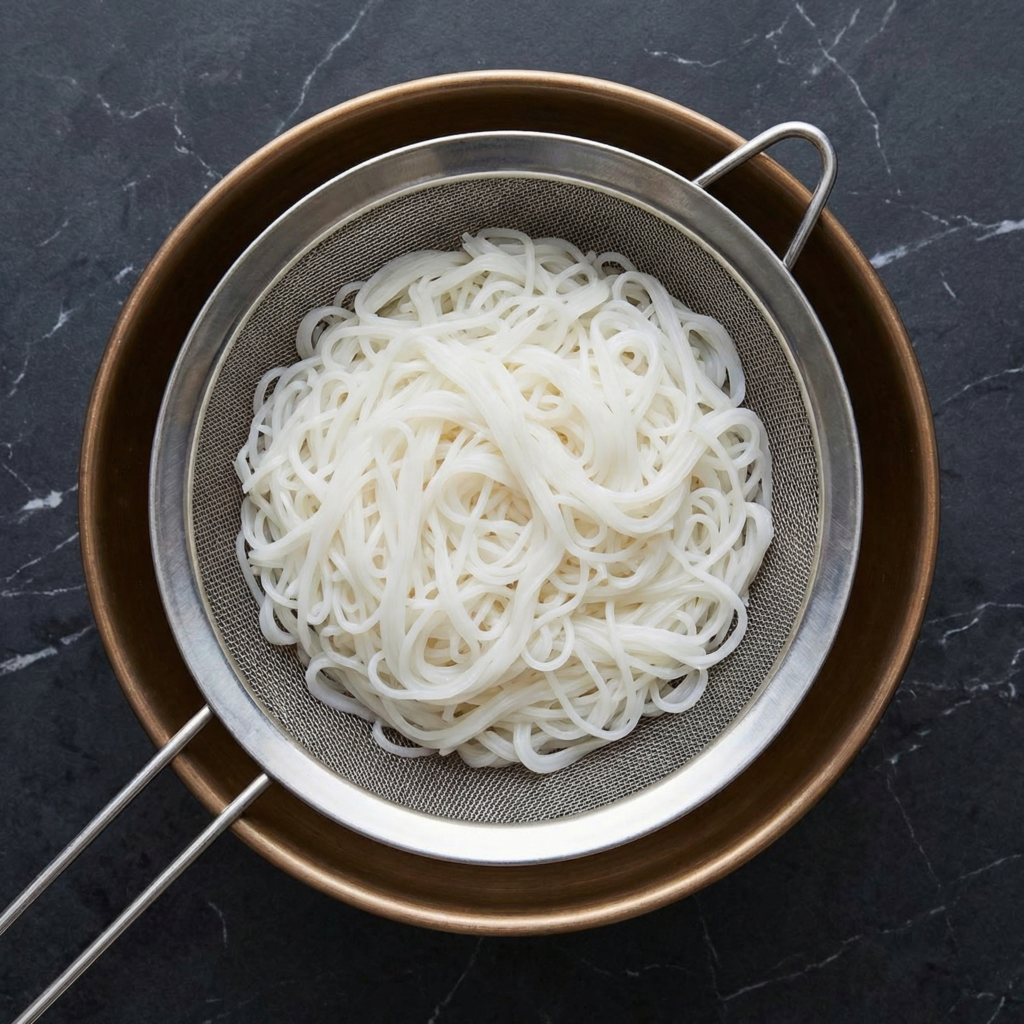
    Bring a large pot of water to a boil. Remove from heat, add the rice vermicelli noodles, and let them soak for 4–5 minutes or until tender but firm.

    Drain and rinse under cold water to stop the cooking process. Toss lightly with a teaspoon of vegetable oil to prevent sticking and set aside.


    Step 2: Sauté the Lemongrass

    Heat 1 teaspoon vegetable oil in a small skillet over medium heat. Add minced lemongrass, garlic, and sugar.

    Sauté for 1–2 minutes until fragrant, being careful not to burn the garlic.

    This lemongrass mixture will add a fragrant, citrusy note to your noodles and enhance the salad’s overall flavor.


    Step 3: Make the Dressing

    In a small bowl, whisk together fish sauce, lime juice, sugar, minced garlic, chili (if using), and water until the sugar dissolves.

    Taste and adjust balance—add more lime for acidity, sugar for sweetness, or fish sauce for saltiness.


    Step 4: Prep the Vegetables and Herbs

    While the noodles soak and the lemongrass sautés, prepare the vegetables:

    • Shred carrots
    • Julienne cucumber
    • Thinly slice red bell pepper
    • Wash and roughly chop fresh herbs

    For proteins, grill or pan-sear chicken, shrimp, or tofu until fully cooked and flavorful. Slice into bite-sized pieces for easy mixing.


    Step 5: Combine the Noodles and Lemongrass

    Place the drained noodles in a large mixing bowl. Add the sautéed lemongrass and garlic mixture, tossing gently to coat the noodles evenly.

    This step infuses the noodles with subtle citrusy aroma and sweetness, creating the base for the salad.


    Step 6: Assemble the Salad

    Add the prepared vegetables, herbs, and optional protein to the noodles. Pour the dressing over the top and toss gently to combine, ensuring everything is coated evenly.

    Balance is key—each forkful should have noodles, vegetables, herbs, and a hint of protein.


    Step 7: Garnish and Serve

    Transfer the salad to serving bowls. Sprinkle with crushed roasted peanuts and additional fresh herbs for extra flavor and crunch.

    Serve immediately with lime wedges for a fresh citrus boost.

    Optional: drizzle extra dressing on top if desired for more tanginess.


    Flavor and Texture Highlights

    A perfect Lemongrass Vermicelli Salad balances:

    • Tender, fragrant noodles
    • Crisp, fresh vegetables
    • Bright, citrusy lemongrass aroma
    • Savory-sweet-tangy dressing
    • Crunchy peanuts and fresh herbs

    Every bite combines soft, crunchy, and aromatic elements for an unforgettable experience.


    Tips for the Perfect Salad

    • Use only the white, tender parts of lemongrass for the best flavor.
    • Rinse noodles under cold water to stop cooking and prevent clumping.
    • Chop vegetables uniformly for even texture and visual appeal.
    • Make dressing ahead of time—flavors deepen as it sits.
    • Adjust heat by adding more chili or leaving it out entirely.

    Optional Variations

    • Protein Swap: Add grilled shrimp, pork, or marinated tofu.
    • Noodle Alternatives: Try soba noodles, rice sticks, or spiralized vegetables for a low-carb option.
    • Extra Crunch: Toasted cashews or sesame seeds make a delicious topping.
    • Vegan Dressing: Use soy sauce or tamari instead of fish sauce for vegetarian or vegan versions.
    • Spicy Kick: Add sriracha, chili oil, or fresh chilies to elevate heat.

    Storage and Meal Prep

    Store noodles, vegetables, and protein separately in airtight containers in the fridge for up to 2–3 days.

    Assemble bowls when ready to eat to maintain freshness and crispness of the vegetables.

    Dressing can be stored in a sealed container for up to a week.


    Why This Recipe Works

    The Lemongrass Vermicelli Salad works because it balances bright, fragrant, and savory flavors with multiple textures. The tender noodles, crisp vegetables, fresh herbs, and zesty dressing create a harmony that feels light yet satisfying.

    It’s customizable, quick to prepare, and ideal for any occasion—from weekday lunches to dinner parties.


    With fresh herbs, zesty lemongrass, and vibrant vegetables, this Lemongrass Vermicelli Salad is a refreshing, crave-worthy dish you can make at home.

    Perfectly balanced, customizable, and full of color, it proves that healthy meals can be just as exciting and flavorful as indulgent ones.

  • Sweet, Spicy, and Smoky: How to Make Korean BBQ Chicken Skewers at Home

    Sweet, Spicy, and Smoky: How to Make Korean BBQ Chicken Skewers at Home

    Korean BBQ has taken the culinary world by storm, and for good reason. The bold, sweet, and savory flavors of gochujang, garlic, and soy come together to create an unforgettable bite every time.

    These Korean BBQ Chicken Skewers capture all of that flavor in an easy-to-make, finger-friendly dish that’s perfect for weeknight dinners, summer cookouts, or casual entertaining. Juicy, marinated chicken is threaded onto skewers, grilled to perfection, and finished with a drizzle of sauce and a sprinkle of sesame seeds—pure crowd-pleasing magic.

    This step-by-step guide will take you from preparing the marinade to serving tender, flavorful chicken skewers, plus tips for grilling, oven-baking, or air-frying for maximum convenience.


    Why You’ll Love These Korean BBQ Chicken Skewers

    • Sweet, savory, and spicy in every bite
    • Juicy, tender chicken with a flavorful glaze
    • Quick to prepare and perfect for entertaining
    • Works on grill, oven, or air fryer
    • Pairs beautifully with rice, veggies, or lettuce wraps

    The key to authentic Korean BBQ flavor lies in the marinade—a careful balance of heat, umami, and sweetness that caramelizes beautifully when cooked.


    Ingredients You’ll Need

    For the Chicken:

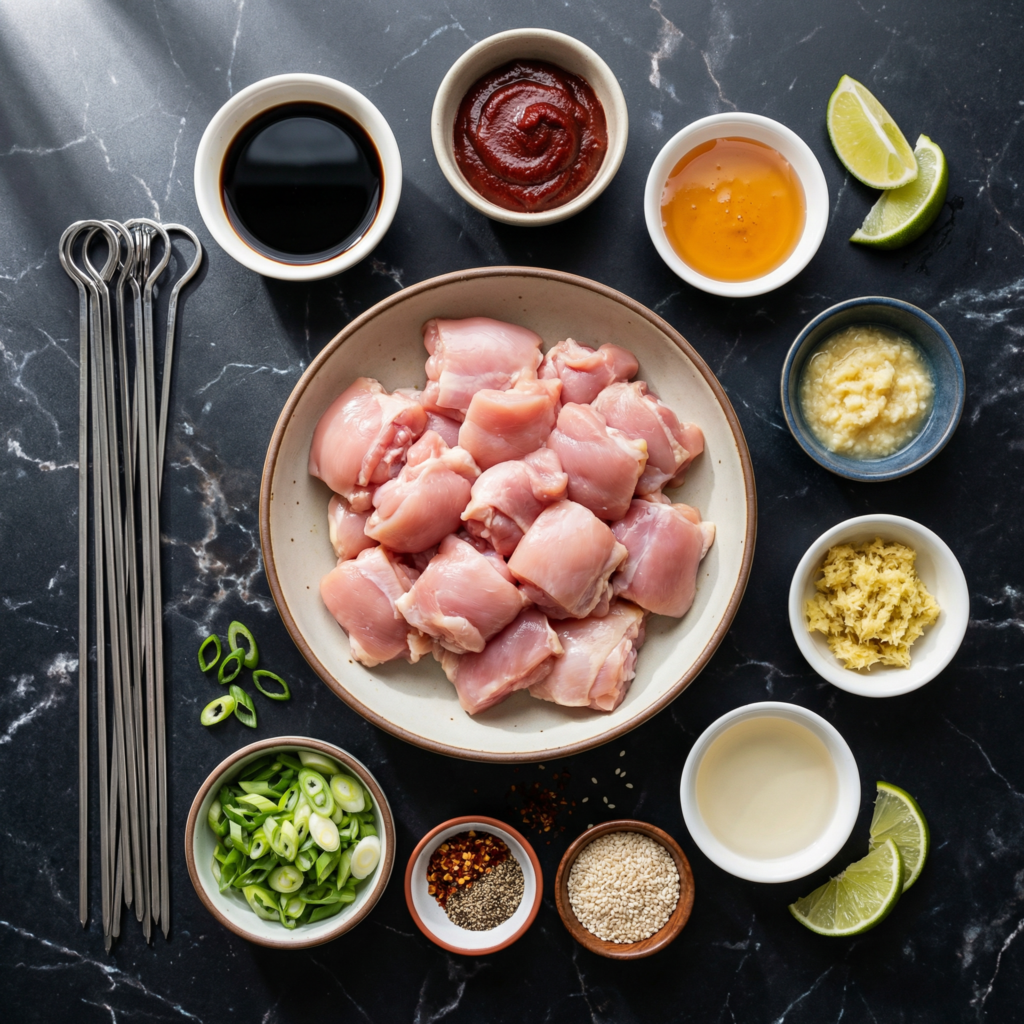
    • 1½ pounds boneless, skinless chicken thighs or breasts, cut into 1½-inch cubes
    • 1 tablespoon vegetable oil

    For the Marinade:

    • 3 tablespoons gochujang (Korean chili paste)
    • 3 tablespoons soy sauce
    • 2 tablespoons honey or brown sugar
    • 2 tablespoons rice vinegar or mirin
    • 2 tablespoons sesame oil
    • 3 garlic cloves, minced
    • 1 teaspoon freshly grated ginger
    • Optional: 1 teaspoon Korean chili flakes for extra heat

    For Serving:

    • Cooked rice or lettuce leaves
    • Sliced green onions
    • Sesame seeds
    • Pickled vegetables or kimchi (optional)

    Skewers:

    • Wooden skewers (soaked in water for 15–20 minutes) or metal skewers

    Step 1: Prepare the Marinade

    In a medium bowl, whisk together gochujang, soy sauce, honey, rice vinegar, sesame oil, garlic, ginger, and chili flakes if using.

    Taste the marinade—it should be a perfect balance of sweet, savory, and mildly spicy. Adjust honey or chili according to your preference.


    Step 2: Marinate the Chicken

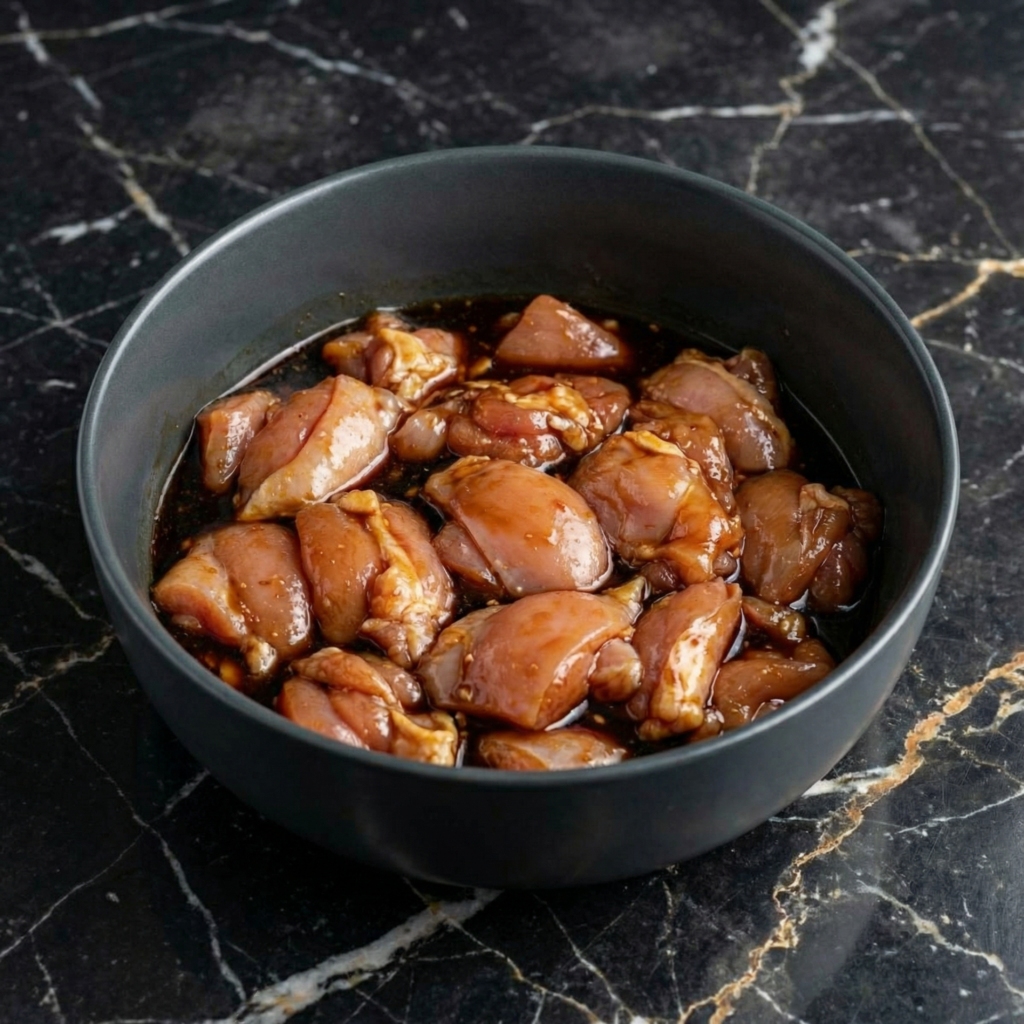
    Place the cubed chicken in a large resealable bag or shallow dish. Pour the marinade over the chicken and toss to coat evenly.

    Seal the bag or cover the dish and refrigerate for at least 1 hour, preferably 2–4 hours for maximum flavor penetration.

    The longer the chicken marinates, the juicier and more flavorful it will be.


    Step 3: Preheat the Grill or Oven

    If grilling: preheat to medium-high heat. Oil the grates lightly to prevent sticking.

    If baking: preheat your oven to 425°F (220°C) and line a baking sheet with foil or parchment. Place a wire rack on top for even cooking.

    If air-frying: preheat your air fryer to 400°F (200°C).


    Step 4: Thread the Chicken onto Skewers

    Remove chicken from the marinade, letting excess drip off to avoid flare-ups on the grill.

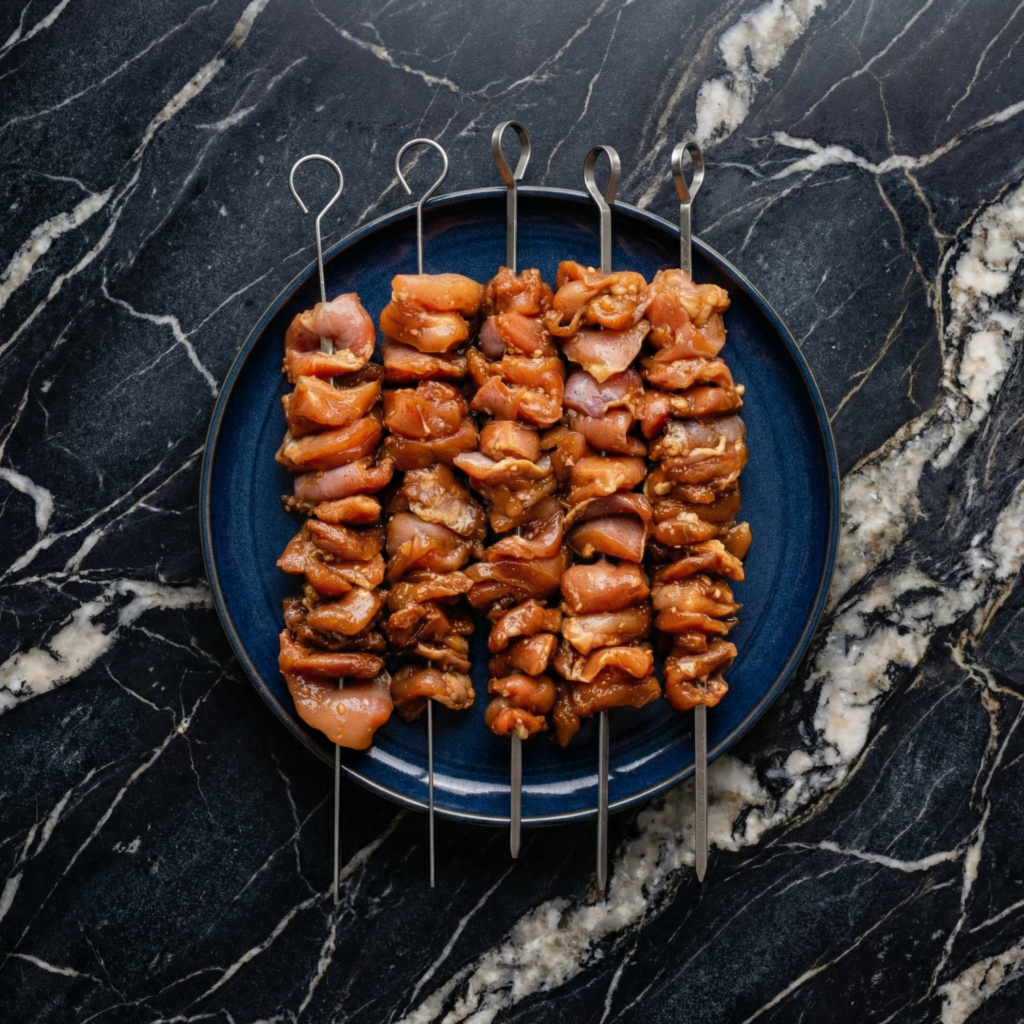
    Thread chicken cubes onto skewers, leaving a small gap between each piece to ensure even cooking and caramelization.


    Step 5: Cook the Skewers

    Grilling:

    Place skewers on the preheated grill. Cook for 10–12 minutes, turning every 2–3 minutes, until chicken is cooked through and slightly charred on the edges.

    Oven-Baking:

    Place skewers on the wire rack. Bake for 12–15 minutes, flipping halfway through, until chicken reaches 165°F (74°C). Broil for 1–2 minutes at the end for caramelization.

    Air-Frying:

    Place skewers in a single layer in the air fryer basket. Cook for 10–12 minutes, flipping halfway through, until golden and cooked through.


    Step 6: Rest the Chicken

    Let the skewers rest for 3–5 minutes after cooking. This allows the juices to redistribute, keeping the chicken tender and juicy.


    Step 7: Garnish and Serve

    Arrange the skewers on a serving platter. Sprinkle with sesame seeds and sliced green onions.

    Serve alongside steamed rice or wrapped in crisp lettuce leaves for a low-carb option. Add kimchi, pickled radishes, or other Korean-inspired sides for a complete meal.

    Optional: drizzle with leftover marinade that has been boiled for 1–2 minutes to use as a sauce.


    Flavor and Texture Highlights

    • Juicy, tender chicken with a slightly sticky glaze
    • Sweet, savory, and mildly spicy marinade
    • Caramelized edges with a smoky, grilled aroma
    • Fresh crunch from garnishes and optional lettuce wraps

    Every bite captures the essence of Korean BBQ—bold, satisfying, and crave-worthy.


    Tips for Perfect Korean BBQ Chicken Skewers

    • Use thighs for more flavor and juiciness, though breasts work if you prefer leaner meat.
    • Don’t overcrowd skewers or pan—airflow is essential for even cooking.
    • Adjust spice level by adding or reducing gochugaru or chili flakes.
    • Soak wooden skewers to prevent burning.
    • Serve immediately for the best texture, or reheat gently without overcooking.

    Optional Variations

    • Vegetable Skewers: Alternate chicken with bell peppers, zucchini, or mushrooms for extra flavor.
    • Honey-Garlic Twist: Swap some gochujang with additional honey and garlic for a sweeter glaze.
    • Meal Prep Friendly: Cook skewers and store in the fridge; reheat gently during the week.
    • Lettuce Wrap Style: Serve with rice and sauce wrapped in romaine or butter lettuce for a fresh, handheld option.

    Storage and Make-Ahead

    • Marinated chicken can be stored in the refrigerator for up to 24 hours before cooking.
    • Cooked skewers can be stored in airtight containers for up to 3 days.
    • Reheat in the oven, air fryer, or skillet to maintain crisp edges and juicy center.

    Why This Recipe Works

    The combination of sweet, savory, and spicy marinade, along with high-heat cooking, gives these skewers authentic Korean BBQ flavor. The sticky glaze caramelizes beautifully, locking in juiciness, while garnishes and sides provide freshness and texture.

    These Korean BBQ Chicken Skewers are easy to make, impressive to serve, and endlessly satisfying—perfect for family dinners, summer grilling, or casual gatherings.


    With tender chicken, bold marinade, and fresh garnishes, these Korean BBQ Chicken Skewers deliver restaurant-quality flavor at home.

    Quick to prepare, versatile in cooking methods, and utterly delicious, they are a must-have for anyone craving that sweet, spicy, and smoky Korean BBQ experience.

  • Bright & Fresh: Oven-Baked Salmon with Avocado Cucumber Salsa and Fluffy Rice

    Bright & Fresh: Oven-Baked Salmon with Avocado Cucumber Salsa and Fluffy Rice

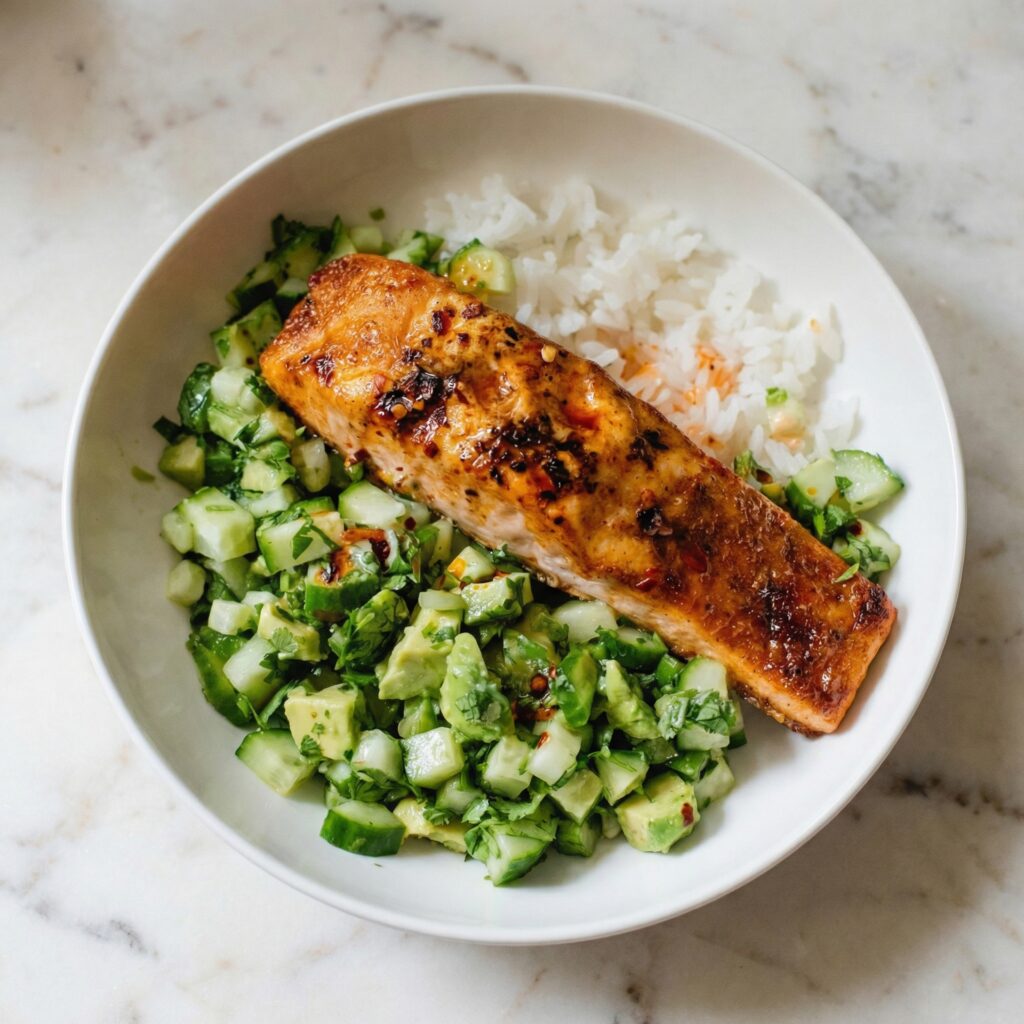
    If you want a healthy, vibrant meal that feels elegant but requires minimal effort, this Oven-Baked Salmon with Avocado Cucumber Salsa and Rice is the perfect choice. Baking the salmon in the oven ensures even cooking, tender texture, and hands-off convenience—no splattering stovetop required.

    Paired with cool, creamy avocado cucumber salsa and fluffy rice, this dish delivers the perfect balance of warm and fresh, rich and bright. Let’s walk through it step by step so you can recreate this flavorful meal at home.


    Why Bake the Salmon?

    Oven-baking salmon is:

    • Easier and less messy than pan-searing
    • Great for cooking multiple fillets at once
    • Consistent and beginner-friendly
    • Perfect for juicy, evenly cooked fish

    The gentle heat keeps the salmon moist while allowing the seasoning to shine.


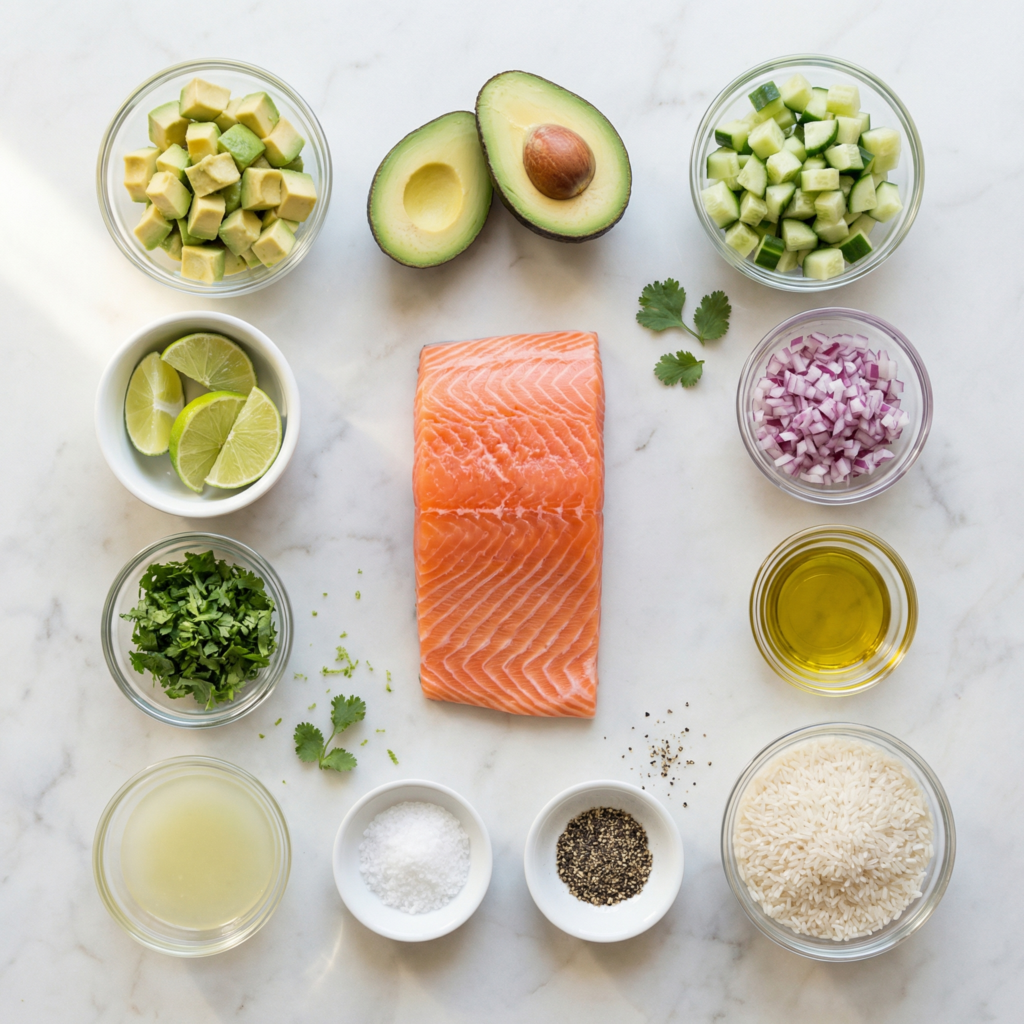
    Ingredients You’ll Need

    For the Rice:

    • 1½ cups jasmine or long-grain white rice
    • 2 cups water
    • ½ teaspoon salt

    For the Oven-Baked Salmon:

    • 4 salmon fillets (about 6 oz each)
    • 1 tablespoon olive oil
    • Salt and black pepper to taste
    • 1 teaspoon garlic powder
    • 1 teaspoon paprika
    • Juice of ½ lemon

    For the Avocado Cucumber Salsa:

    • 1 ripe avocado, diced
    • 1 cup cucumber, finely chopped
    • 2 tablespoons red onion, finely diced
    • Juice of ½ lemon or lime
    • Salt to taste
    • Optional: chopped fresh cilantro

    Step 1: Preheat the Oven

    Preheat your oven to 400°F (200°C).

    Line a baking sheet with parchment paper or lightly grease a baking dish. This prevents sticking and makes cleanup easy.


    Step 2: Cook the Rice

    Start the rice first so everything finishes at the same time.

    Rinse the rice under cold water until the water runs mostly clear. This removes excess starch and keeps the rice fluffy.

    In a medium saucepan, combine the rinsed rice, water, and salt. Bring to a boil over medium-high heat.

    Once boiling, reduce to low, cover, and simmer for 15 minutes. Do not lift the lid during cooking.

    After 15 minutes, remove from heat and let it sit covered for 5–10 minutes. Fluff gently with a fork before serving.


    Step 3: Prepare the Salmon

    Pat the salmon fillets dry with paper towels. Removing surface moisture helps the seasoning adhere better.

    Place the fillets on the prepared baking sheet.

    Drizzle olive oil evenly over the salmon. Season generously with salt, black pepper, garlic powder, and paprika. Squeeze fresh lemon juice over the top for brightness.

    Let the seasoned salmon sit for about 5–10 minutes while the oven finishes preheating.


    Step 4: Bake the Salmon

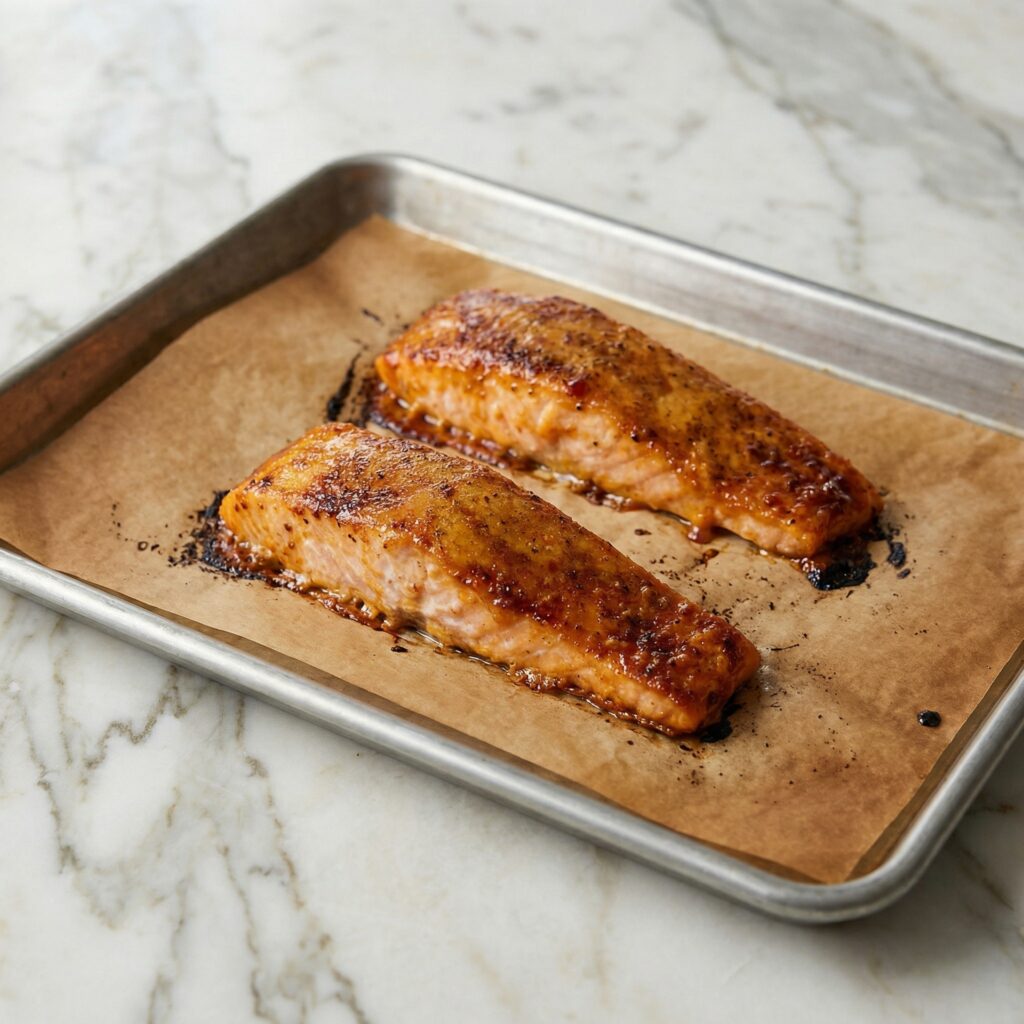
    Place the baking sheet in the preheated oven.

    Bake for 12–15 minutes, depending on thickness. A general rule is about 4–6 minutes per half-inch of thickness.

    The salmon is done when:

    • It flakes easily with a fork
    • The center is opaque
    • Internal temperature reaches about 125–130°F (52–54°C) for medium

    Avoid overcooking—salmon can dry out quickly.

    If you prefer slightly golden edges, broil for the last 1–2 minutes.


    Step 5: Prepare the Avocado Cucumber Salsa

    While the salmon bakes, make the salsa.

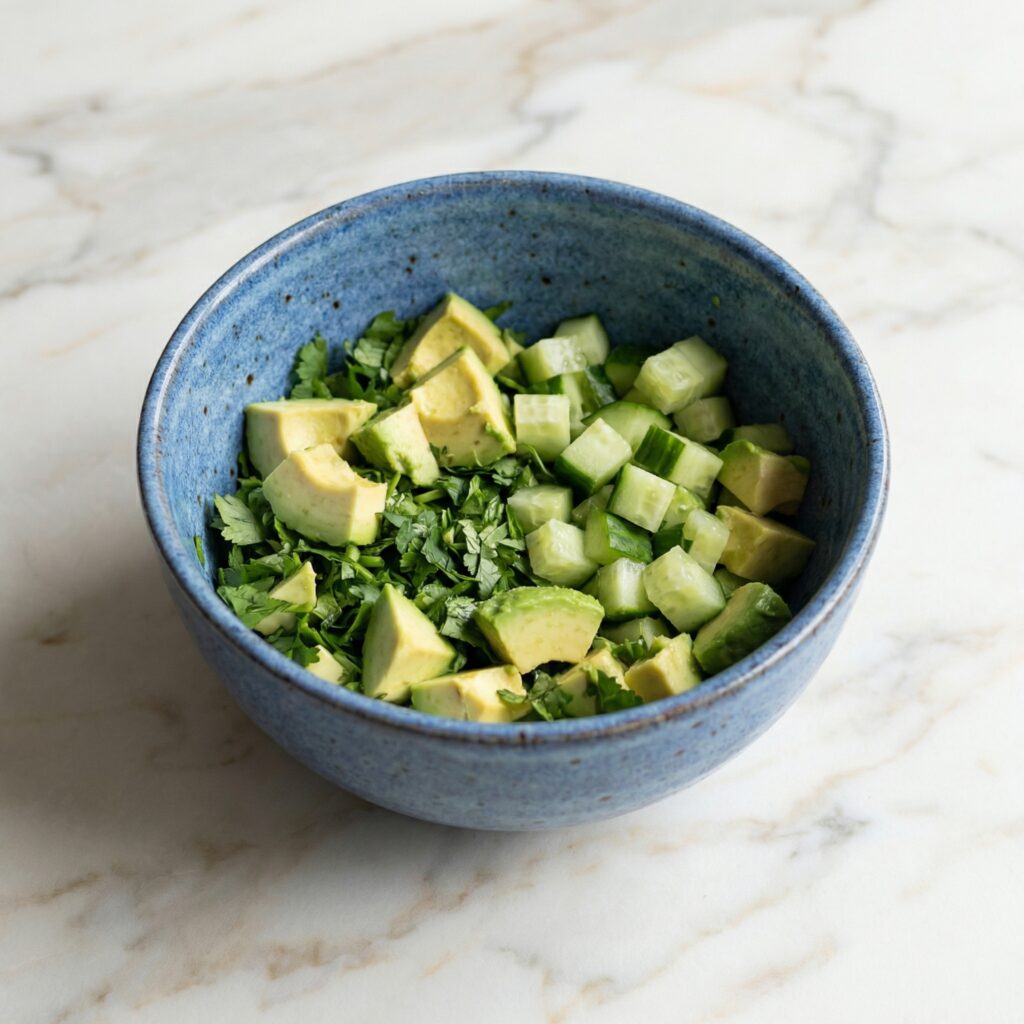
    In a bowl, gently combine diced avocado, chopped cucumber, and red onion.

    Add lemon or lime juice and a pinch of salt. Toss gently to combine without mashing the avocado.

    If using cilantro, fold it in last.

    Place the salsa in the refrigerator until ready to serve.

    Keeping it chilled enhances the refreshing contrast against the warm salmon.


    Step 6: Rest the Salmon

    Once baked, remove the salmon from the oven and let it rest for about 3–5 minutes.

    Resting allows the juices to redistribute and keeps the fish tender.


    Step 7: Assemble the Dish

    Spoon a generous serving of fluffy rice onto each plate or bowl.

    Place a warm salmon fillet on top.

    Spoon the chilled avocado cucumber salsa over the salmon.

    The cool salsa melts slightly against the warm fish, creating a beautiful temperature contrast.


    Flavor and Texture Balance

    This dish offers:

    • Tender, flaky baked salmon
    • Creamy avocado richness
    • Crisp cucumber crunch
    • Bright citrus notes
    • Soft, comforting rice

    Every bite feels fresh yet satisfying.


    Tips for Perfect Oven-Baked Salmon

    • Use salmon fillets of similar thickness for even cooking.
    • Don’t overcrowd the baking sheet.
    • Line the pan for easy cleanup.
    • Bake just until flaky—avoid drying it out.
    • Let it rest before serving.

    Optional Variations

    Want to customize?

    • Add diced mango to the salsa for sweetness.
    • Sprinkle red pepper flakes for heat.
    • Use coconut rice for a tropical twist.
    • Drizzle honey over salmon before baking for subtle caramelization.
    • Add a dollop of Greek yogurt mixed with lemon for extra creaminess.

    Storage and Meal Prep

    Store leftovers in airtight containers for up to 2 days.

    Keep salsa separate from salmon and rice to maintain freshness.

    Reheat salmon and rice gently in the microwave or oven at low heat. Add fresh salsa just before serving.

    This recipe makes an excellent meal prep option for healthy lunches.


    Why This Recipe Works

    Baking the salmon keeps the cooking simple and hands-off, while the fresh salsa adds brightness and texture. The rice anchors the dish, making it filling and balanced.

    It’s clean, flavorful, and visually beautiful—perfect for both casual dinners and special occasions.


    Oven-Baked Salmon with Avocado Cucumber Salsa and Rice proves that wholesome meals can be exciting and satisfying. With fresh ingredients and simple techniques, you’ll create a dish that feels vibrant, balanced, and restaurant-worthy—right from your own kitchen.

  • Smash Burger Tacos: The Ultimate Crispy Smashburger Taco Recipe Everyone Is Obsessed With

    Smash Burger Tacos: The Ultimate Crispy Smashburger Taco Recipe Everyone Is Obsessed With

    If you love juicy smash burgers and crispy tacos, this viral Smash Burger Tacos recipe combines both into one irresistible dish.

    Featuring seasoned ground beef smashed directly onto tortillas, crispy seared edges, melted cheese, and fresh toppings, these easy smash burger tacos deliver bold flavor in under 30 minutes. Perfect for weeknight dinners, game-day meals, or casual entertaining, this recipe has quickly become one of the most popular TikTok smash burger taco recipes for good reason.

    This step-by-step guide shows you exactly how to make restaurant-style smash burger tacos at home with simple ingredients and perfect results every time.


    Why You’ll Love These Smash Burger Tacos

    This smashburger taco recipe combines the best textures and flavors—crispy beef, soft tortillas, melted cheese, and fresh toppings.

    Reasons this recipe stands out:

    • Quick and easy 30-minute meal
    • Crispy smash burger edges for maximum flavor
    • Family-friendly and customizable
    • Perfect for parties, cookouts, or taco nights
    • Minimal ingredients with big flavor payoff

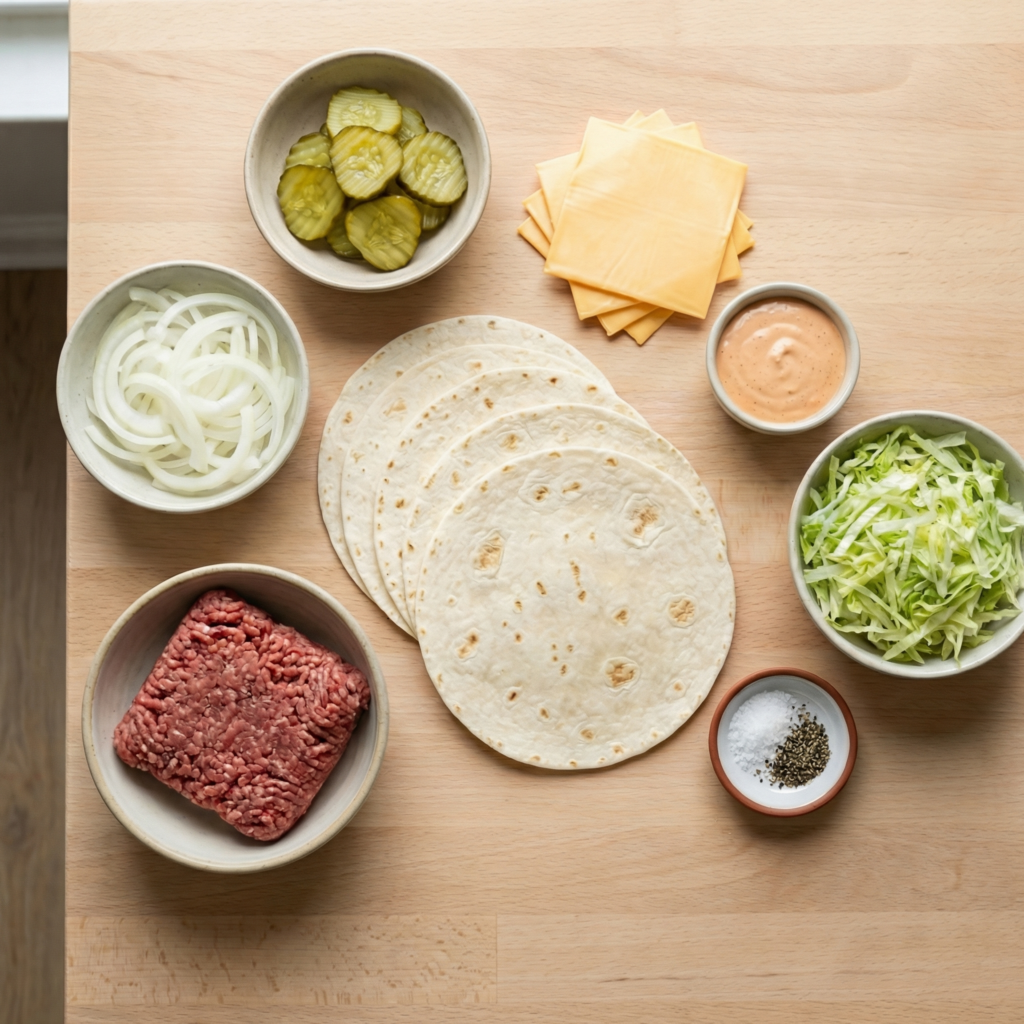
    Ingredients for Smash Burger Tacos

    Using simple ingredients makes this recipe fast and accessible.

    Main Ingredients

    • 1 pound ground beef (80/20 recommended)
    • 8 small flour tortillas
    • Salt and black pepper
    • 8 slices American cheese or cheddar cheese
    • 1 tablespoon cooking oil (if needed)

    Classic Burger Toppings

    • Shredded lettuce
    • Diced tomatoes
    • Pickles
    • Sliced onions

    Burger Sauce (Optional but Recommended)

    • ½ cup mayonnaise
    • 2 tablespoons ketchup
    • 1 tablespoon mustard
    • 1 tablespoon pickle relish
    • ½ teaspoon garlic powder

    How to Make Smash Burger Tacos (Step-by-Step)

    Step 1: Prepare the Burger Sauce

    In a small bowl, mix mayonnaise, ketchup, mustard, relish, and garlic powder until smooth. Refrigerate while preparing the tacos so the flavors blend together. This simple homemade sauce adds the classic burger taco flavor.


    Step 2: Divide the Ground Beef

    Divide the ground beef into 8 equal portions (about 2 ounces each). Roll lightly into balls without packing too tightly to keep the burgers tender.


    Step 3: Press Beef onto Tortillas

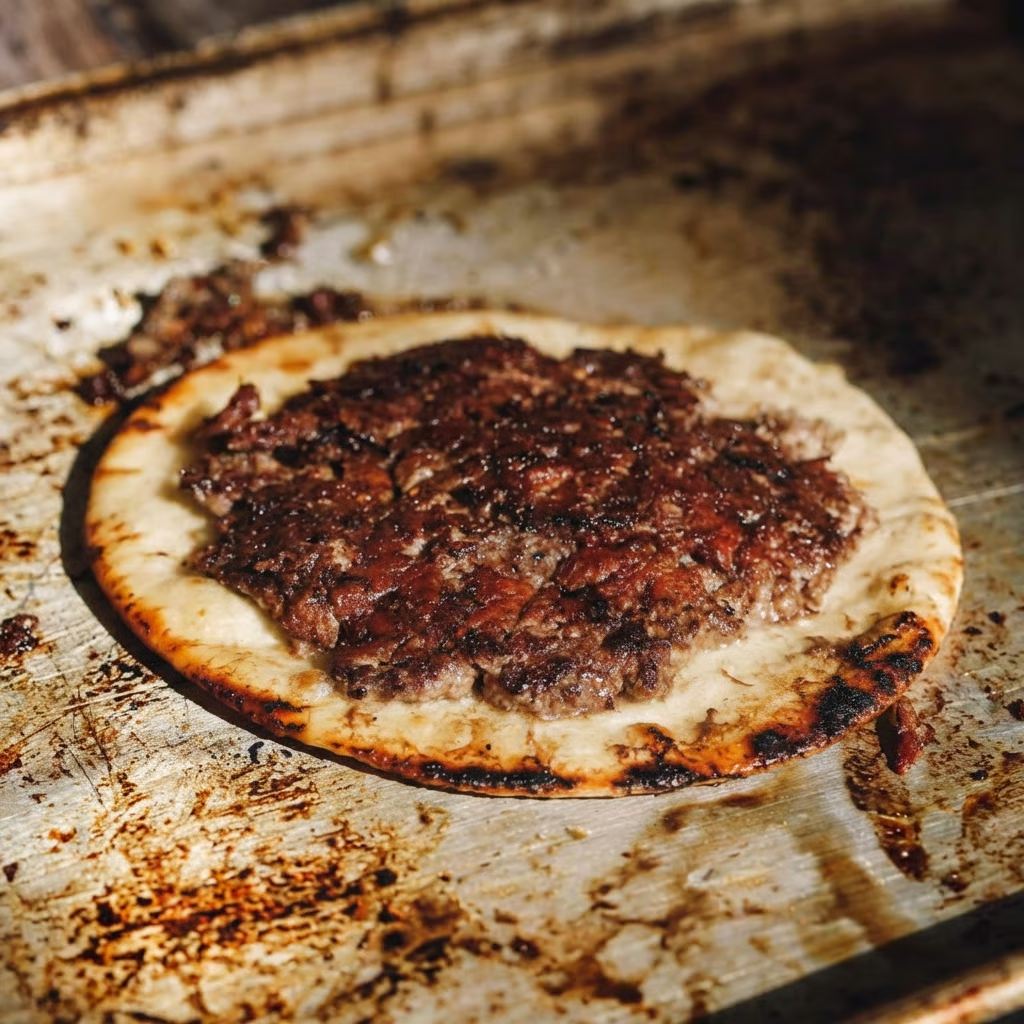
    Place each tortilla flat on a clean surface. Spread one portion of ground beef evenly across one side of the tortilla, pressing it thin so it covers most of the surface. Season lightly with salt and pepper.

    This step is key to achieving the signature crispy smash burger taco crust.


    Step 4: Heat the Skillet

    Heat a large cast-iron skillet or flat-top griddle over medium-high heat. If your pan is well-seasoned, oil may not be necessary, but lightly greasing the surface can help prevent sticking.


    Step 5: Cook the Beef Side First

    Place each tortilla beef-side down onto the hot skillet. Press gently with a spatula to ensure even contact with the pan. Cook for about 2–3 minutes until the beef develops a crispy brown crust.


    Step 6: Flip and Add Cheese

    Carefully flip the tortilla so the tortilla side touches the pan. Immediately place a slice of cheese on top of the cooked beef. Cook for another 1–2 minutes until the tortilla becomes lightly golden and the cheese melts.


    Step 7: Remove and Add Toppings

    Transfer the cooked smash burger taco to a plate. Add shredded lettuce, diced tomatoes, onions, pickles, and a drizzle of the prepared burger sauce.


    Step 8: Fold and Serve

    Fold the taco in half and serve immediately while hot and crispy. Repeat with remaining tortillas and beef portions.


    Pro Tips for the Best Smash Burger Tacos

    • Use 80/20 ground beef for the best flavor and crisp edges.
    • Spread the beef thinly to create a proper smashburger crust.
    • Cook on high heat for better caramelization.
    • Add cheese immediately after flipping for perfect melting.
    • Serve immediately to maintain crispiness.

    Easy Smash Burger Taco Variations

    This burger taco recipe is easy to customize depending on flavor preferences.

    Popular variations include:

    • Bacon Smash Burger Tacos: Add crispy bacon strips before folding.
    • Spicy Smash Tacos: Add jalapeños or spicy mayo.
    • BBQ Burger Tacos: Drizzle barbecue sauce instead of burger sauce.
    • Double Cheeseburger Tacos: Add extra cheese slices.
    • Low-Carb Version: Use low-carb tortillas.

    Serving Suggestions

    These crispy smash burger tacos pair perfectly with:

    • French fries
    • Onion rings
    • Coleslaw
    • Pickle spears
    • Potato wedges
    • Classic milkshakes

    They also make excellent party foods when served in smaller taco portions for gatherings.


    Storage and Reheating Tips

    Smash burger tacos are best eaten fresh, but leftovers can be stored in an airtight container in the refrigerator for up to 2 days. Reheat in a skillet over medium heat to restore crispness. Avoid microwaving if possible, as it softens the tortilla.

    For meal prep, prepare toppings and sauce ahead of time, then cook tacos fresh for the best texture.


    Frequently Asked Questions

    Can I use corn tortillas instead of flour tortillas?
    Yes, but flour tortillas hold the beef better and provide the classic smash burger taco texture.

    What cheese works best for smash burger tacos?
    American cheese melts smoothly and gives the classic burger flavor, but cheddar, Monterey Jack, or pepper jack also work well.

    Why are my smash burger tacos not crispy?
    The pan may not be hot enough, or the beef layer may be too thick. Ensure high heat and press the beef thinly onto the tortilla.


    Final Thoughts

    These Smash Burger Tacos are the ultimate fusion comfort food, combining the crispy edges of a smashburger with the convenience of handheld tacos.

    With juicy seasoned beef, melted cheese, fresh toppings, and creamy burger sauce wrapped in a lightly toasted tortilla, this viral recipe delivers bold flavor with minimal effort.

    Whether you’re planning taco night, a casual family dinner, or a game-day spread, this easy smash burger tacos recipe is guaranteed to become a repeat favorite thanks to its simplicity, crunch, and irresistible burger-inspired taste.

  • Classic Sweet Potato Casserole with Pecan Streusel

    Classic Sweet Potato Casserole with Pecan Streusel

    No holiday table is complete without this beloved Sweet Potato Casserole. It beautifully bridges the line between side dish and dessert. The base is luxuriously smooth and creamy, made from roasted or boiled sweet potatoes enriched with butter, cream, and warm spices.

    The crowning glory is a crunchy, buttery pecan streusel that bakes into a irresistible caramelized topping. Every bite offers the perfect contrast of soft, sweet potatoes and crisp, nutty crumble. It’s a make-ahead dream and always a crowd favorite.

    The Science of the Creamy Base & Crisp Topping

    The perfection of this casserole lies in managing two distinct textures. The creamy sweet potato base gets its smooth, spreadable consistency from the natural starches in the potatoes, which gelatinize when cooked and mashed.

    Adding fat (butter, cream) and eggs coats the starch molecules and adds richness, while the eggs also help the mixture set as it bakes, preventing it from being runny. The pecan streusel topping achieves its crunch through the Maillard reaction and the careful ratio of fat to dry ingredients.

    Brown sugar caramelizes, butter solids brown, and the nuts toast, all contributing deep flavor. The flour provides structure, creating distinct crumbles that stay crisp rather than melting into the soft filling below, thanks to the insulating layer formed during baking.

    Ingredients

    For the Sweet Potato Filling:

    • 3 lbs (about 4-5 medium) sweet potatoes, peeled and cubed
    • ½ cup (1 stick / 113g) unsalted butter, melted
    • ⅓ cup (80ml) heavy cream or whole milk
    • ½ cup (110g) packed light brown sugar
    • 2 large eggs, lightly beaten
    • 1 teaspoon vanilla extract
    • 1 teaspoon ground cinnamon
    • ½ teaspoon ground nutmeg
    • ¼ teaspoon salt

    For the Pecan Streusel Topping:

    • 1 cup (110g) chopped pecans
    • ½ cup (65g) all-purpose flour
    • ½ cup (110g) packed light brown sugar
    • ¼ cup (½ stick / 57g) unsalted butter, cold and cubed
    • ¼ teaspoon salt

    Instructions

    1. The Cooked & Mashed Sweet Potatoes: Cook the peeled, cubed sweet potatoes in boiling water until very tender, about 15 minutes. Drain well and return to the pot. Mash until completely smooth with no lumps.

    2. The Combined Filling Ingredients: To the mashed sweet potatoes, add the melted butter, cream, brown sugar, beaten eggs, vanilla, cinnamon, nutmeg, and salt. Stir vigorously until the mixture is very smooth, creamy, and uniformly combined.

    3. The Spread Filling in the Dish: Transfer the sweet potato mixture to a greased 9×13 inch baking dish. Use a spatula to spread it into a perfectly smooth, even layer.

    4. The Mixed Streusel Topping: In a medium bowl, combine the chopped pecans, flour, brown sugar, and salt. Add the cold, cubed butter. Using your fingers or a pastry cutter, work the butter into the dry ingredients until the mixture resembles coarse crumbs with some pea-sized pieces.

    5. The Topped Casserole Before Baking: Sprinkle the streusel topping evenly over the entire surface of the sweet potato filling, covering it completely.

    6. The Baked, Golden-Brown Casserole: Bake at 350°F (175°C) for 30-35 minutes, until the filling is set (it should not jiggle when shaken) and the streusel topping is deep golden brown and crisp.

    7. The Slightly Cooled Casserole: Let the casserole cool on a wire rack for 15-20 minutes before serving. This allows the filling to set further for cleaner slices.

    8. The Scooped Serving: Use a large spoon to scoop out portions, making sure to get both the creamy filling and the crunchy topping in each serving.

    9. The Plated Side Dish: Transfer a generous scoop to a serving plate or bowl. It’s now ready to be enjoyed as the star side dish of your holiday meal.

    Pro-Tips for Casserole Perfection

    • Choose the Right Potatoes: Jewel or Garnet sweet potatoes (with orange flesh) are sweeter and have a smoother texture than white-fleshed varieties.
    • Get a Smooth Puree: For an ultra-silky texture, pass the mashed potatoes through a ricer or food mill, or even blend with an immersion blender.
    • Balance the Sweetness: Taste your filling before baking. Sweet potato sweetness varies. Adjust brown sugar to your preference.
    • Cold Butter for Streusel: Using cold butter is crucial for achieving a crumbly, crisp topping rather than a greasy, melted one.
    • Make Ahead: Assemble the entire casserole (through step 5), cover, and refrigerate for up to 24 hours. Let sit at room temp for 30 minutes before baking. You may need to add 5-10 minutes to the bake time.
    • Marshmallow Option: For a traditional marshmallow top, omit the streusel. Bake the filling for 20 minutes, then top with 2-3 cups of mini marshmallows and bake 5-10 more minutes until golden and puffed.
    • Storage & Reheating: Store leftovers covered in the fridge for up to 4 days. Reheat in the oven at 350°F for best texture (microwave will soften the topping).
    • Nut-Free Variation: Replace pecans with old-fashioned rolled oats for a similar crunchy texture.
    • Serving: This is rich! A little goes a long way. It pairs beautifully with savory main dishes like roast turkey or ham.

    This Classic Sweet Potato Casserole is a guaranteed highlight of any festive gathering.

  • Carrot Cake Pancakes: Your Favorite Dessert for Breakfast

    Carrot Cake Pancakes: Your Favorite Dessert for Breakfast

    Imagine the cozy, spiced flavor of carrot cake in a form you can happily eat for breakfast. These Carrot Cake Pancakes deliver exactly that: light, fluffy pancakes packed with finely shredded carrots, warm cinnamon and ginger, and studded with toasted walnuts or pecans. They’re wholesome enough to feel like a proper meal but special enough to feel like a treat.

    Drizzled with a tangy-sweet cream cheese glaze instead of maple syrup, they transform your weekend brunch or holiday morning into a celebration. It’s the perfect way to enjoy the essence of dessert, first thing in the morning.

    The Science of the Moist, Fluffy Cake-Pancake

    These pancakes achieve their distinct texture—moist yet fluffy—through a careful balance of wet and dry ingredients and the power of baking powder. The shredded carrot adds natural moisture and sweetness but can weigh down the batter.

    To counter this, the batter uses a combination of baking powder and baking soda for a strong, immediate rise that creates airy pockets. The acidity in buttermilk (or the DIY substitute) activates the baking soda, producing carbon dioxide bubbles that further lighten the batter. The fat from oil or melted butter coats the flour proteins, ensuring tenderness.

    The result is a pancake that has the spiced, moist crumb of carrot cake but the light, airy structure of a perfect breakfast pancake, capable of holding all those delicious add-ins without becoming dense.

    Ingredients

    For the Pancakes:

    • 1 ¼ cups (156g) all-purpose flour
    • 2 teaspoons baking powder
    • 1 teaspoon baking soda
    • 1 teaspoon ground cinnamon
    • ½ teaspoon ground ginger
    • ¼ teaspoon ground nutmeg
    • ¼ teaspoon salt
    • 1 large egg
    • ¼ cup (50g) light brown sugar, packed
    • 1 cup (240ml) buttermilk*
    • ¼ cup (60ml) vegetable oil or melted butter
    • 1 teaspoon vanilla extract
    • 1 ½ cups (about 150g) finely grated carrots (from 2-3 medium carrots)
    • ⅓ cup (40g) chopped toasted walnuts or pecans (optional)
    • ⅓ cup (55g) raisins (optional)

    *No buttermilk? Make a DIY version: add 1 tbsp lemon juice or vinegar to a measuring cup, then add milk to reach 1 cup. Stir and let sit 5 minutes.

    For the Cream Cheese Glaze:

    • 4 oz (113g) cream cheese, softened
    • ¾ cup (90g) powdered sugar, sifted
    • ¼ cup (60ml) milk or cream
    • ½ teaspoon vanilla extract

    Instructions

    1. The Whisked Dry Ingredients: In a large bowl, whisk together the flour, baking powder, baking soda, cinnamon, ginger, nutmeg, and salt until thoroughly combined.

    2. The Prepared Wet Ingredients: In a separate medium bowl, whisk the egg and brown sugar until smooth. Whisk in the buttermilk, oil (or melted butter), and vanilla extract until the mixture is homogenous.

    3. The Grated Carrots: Peel and finely grate fresh carrots using a box grater. You should have about 1 ½ cups of lightly packed, fluffy grated carrot.

    4. The Combined Pancake Batter: Pour the wet ingredients into the dry ingredients. Stir with a spatula until just combined and no large dry streaks remain; the batter will be lumpy. Gently fold in the grated carrots, and optional nuts and raisins.

    5. The Cooking Pancakes on the Griddle: Heat a lightly greased griddle or non-stick skillet over medium heat. For each pancake, pour about ¼ cup of batter. Cook until bubbles form on the surface and the edges look set, about 2-3 minutes.

    6. The Flipped, Golden Pancakes: Flip the pancakes and cook for another 1-2 minutes on the second side, until golden brown and cooked through.

    7. The Stack of Cooked Pancakes: Transfer cooked pancakes to a warm plate or baking sheet in a low oven. Continue with the remaining batter. You should have about 8-10 medium pancakes.

    8. The Smooth Cream Cheese Glaze: While pancakes cook, make the glaze. In a medium bowl, beat the softened cream cheese until smooth. Gradually beat in the powdered sugar, milk, and vanilla until you have a smooth, drizzle-able consistency.

    9. The Finished, Glazed Pancake Stack: Drizzle the warm stack of pancakes generously with the cream cheese glaze. Sprinkle with extra chopped nuts if desired. Serve immediately.

    Pro-Tips for Perfect Pancakes

    • Finely Grate the Carrots: Large shreds can make the pancakes prone to breaking and give a stringy texture. A fine grate blends in seamlessly.
    • Don’t Overmix the Batter: Lumps are good! Overmixing develops gluten, leading to tough pancakes. Mix until the flour is just incorporated.
    • Rest the Batter (Optional but Helpful): Letting the batter sit for 5-10 minutes after mixing allows the flour to fully hydrate and can result in slightly fluffier pancakes.
    • Medium Heat is Key: Too hot and the outside burns before the inside cooks; too low and they’ll be pale and greasy.
    • Keep Them Warm: Place cooked pancakes on a baking sheet in a 200°F (95°C) oven while you finish the batch.
    • Glaze Consistency: Adjust the milk in the glaze a teaspoon at a time until it’s thick but pourable. For a thicker frosting, use less milk.
    • Make Ahead: The dry mix can be pre-measured. The glaze can be made 1-2 days ahead and stored in the fridge; let it come to room temp and stir before using.
    • Freezing: Cooked, unglazed pancakes freeze beautifully. Reheat in a toaster or oven.
    • Variations: Add a handful of shredded coconut to the batter. For a pineapple-carrot cake version, add ⅓ cup of crushed, drained pineapple.
    • Serving: While the cream cheese glaze is classic, these are also delicious with maple syrup, Greek yogurt, or a simple dusting of powdered sugar.

    These Carrot Cake Pancakes turn an ordinary morning into something truly special.

  • Keto Blueberry Muffins: Low-Carb, Grain-Free & Deliciously Moist

    Keto Blueberry Muffins: Low-Carb, Grain-Free & Deliciously Moist

    Who says you have to give up fluffy, moist blueberry muffins on a keto diet? This recipe delivers all the comfort and flavor of the classic, but with a fraction of the carbs.

    Using finely ground almond flour as the base, these muffins bake up tender and satisfying, sweetened just right with your favorite keto-friendly sweetener, and bursting with fresh blueberries in every bite.

    They’re easy to make, freeze beautifully, and are the ultimate answer to your low-carb breakfast or snack cravings.

    The Science of Grain-Free Structure & Moisture

    Recreating a light, cake-like texture without traditional flour is a challenge met by almond flour. Its fine texture and high fat content mimic some properties of flour but require extra binding agents. Eggs are crucial here, providing structure as their proteins coagulate during baking.

    To prevent a dense, eggy result, we use a leavening combination of baking powder and, often, baking soda to create ample lift. The biggest enemy in grain-free baking is dryness. This is countered by including moisture-rich ingredients like sour cream or yogurt and plenty of fat (butter or oil).

    The fat coats the almond flour proteins, ensuring tenderness. Xanthan gum (optional but helpful) acts as a gluten substitute, trapping air and providing a more familiar, cohesive crumb. Fresh blueberries add pockets of juice, but tossing them in a bit of the almond flour prevents them from sinking and bleeding excessively into the batter.

    Ingredients

    For 9-10 Muffins:

    • 2 ½ cups (250g) blanched almond flour, finely ground
    • ⅓ cup (65-80g) keto-friendly sweetener* (e.g., erythritol or monk fruit blend)
    • 2 teaspoons baking powder
    • ¼ teaspoon salt
    • ½ teaspoon xanthan gum (optional, for improved texture)
    • 3 large eggs, room temperature
    • ⅓ cup (80ml) melted butter or coconut oil
    • ⅓ cup (80g) sour cream or full-fat Greek yogurt
    • 1 teaspoon vanilla extract
    • 1 teaspoon lemon zest (optional, brightens flavor)
    • 1 cup (150g) fresh blueberries**

    *Use a granulated sweetener that measures 1:1 like sugar. Adjust to taste.
    **Frozen blueberries can be used—do not thaw, and expect more color bleed.

    Instructions

    1. Prep: Preheat oven to 350°F (175°C). Line a muffin tin with 9-10 parchment liners or grease well.

    2. Mix Dry Ingredients: In a medium bowl, whisk together the almond flour, sweetener, baking powder, salt, and xanthan gum (if using).

    3. Mix Wet Ingredients: In a large bowl, whisk the eggs until frothy. Whisk in the melted butter (cooled slightly), sour cream, vanilla, and lemon zest until smooth.

    4. Combine: Add the dry ingredients to the wet ingredients. Gently fold with a spatula until just combined and no dry streaks remain. Do not overmix.

    5. Fold in Blueberries: Toss the blueberries in 1 teaspoon of the dry almond flour mixture (this helps prevent sinking). Gently fold them into the batter.

    6. Portion & Bake: Divide the batter evenly among the prepared muffin cups, filling each nearly to the top. Bake for 22-26 minutes, until the tops are golden and a toothpick inserted into the center comes out clean.

    7. Cool: Let the muffins cool in the pan for 10 minutes, then transfer to a wire rack to cool completely. They are delicate when warm.

    8. Storage: Store cooled muffins in an airtight container in the refrigerator for up to 5 days, or freeze for up to 3 months.

    Pro-Tips for Keto Muffin Success

    • Use Blanched Almond Flour: Blanched (skinless) almond flour gives a finer texture than almond meal.
    • Room Temperature Eggs: They incorporate more easily, leading to a better rise and texture.
    • Don’t Overmix: Overmixing can make the muffins dense. Fold just until combined.
    • Fill Muffin Cups Full: Almond flour batter doesn’t rise as dramatically as wheat-based batter, so filling them nearly full ensures a good muffin shape.
    • The Toothpick Test is Key: Almond flour can stay moist inside even when done. The toothpick should have no wet batter, but a few moist crumbs are okay.
    • Cool Completely: These muffins set and firm up as they cool. They taste best at room temperature.
    • Sweetener Notes: Some sweeteners (like pure erythritol) can have a cooling aftertaste. A monk fruit/erythritol blend often tastes more neutral.
    • Variations: Add ½ cup of sugar-free chocolate chips or chopped nuts. Replace blueberries with raspberries or blackberries.

    These Keto Blueberry Muffins are a delicious testament that low-carb eating is anything but restrictive.

  • Easy Baked Oatmeal: Your Make-Ahead Breakfast Game Changer

    Easy Baked Oatmeal: Your Make-Ahead Breakfast Game Changer

    Imagine a breakfast that feels like a warm hug, can be made ahead on a Sunday, and reheats to perfection all week long. That’s the magic of baked oatmeal. This dish transforms humble rolled oats into a hearty, sliceable cake with a custardy interior and a lightly sweet, crisp top.

    It’s the perfect cross between a bowl of oatmeal and an oat bar—substantial enough to keep you full for hours, yet comforting and delicious. Best of all, it’s a blank canvas: throw in your favorite fruits, nuts, and spices for a breakfast that never gets boring. Say goodbye to rushed mornings and hello to a new breakfast staple.

    The Science of the Custardy, Sliceable Texture

    Baked oatmeal achieves its unique texture through a precise liquid-to-oat ratio and the power of eggs. Old-fashioned rolled oats are ideal because they retain their shape and chewy texture during baking, unlike quick oats which turn mushy. The liquid—typically a combination of milk and a binder like mashed banana, applesauce, or yogurt—hydrates the oats.

    The game-changer is the eggs. As they bake, the eggs coagulate, setting the structure and binding the oats and liquid into a cohesive, sliceable custard, rather than a loose porridge. The baking powder provides a slight lift, creating a lighter texture. The key is letting it rest after baking; this allows the residual heat to fully set the starches in the oats, ensuring clean slices that hold their shape without being dry or gummy.

    Ingredients

    For the Base (Serves 6-9):

    • 2 cups (180g) old-fashioned rolled oats (do not use quick oats)
    • ½ cup (100g) packed light brown sugar or maple syrup
    • 1 teaspoon baking powder
    • 1 ½ teaspoons ground cinnamon
    • ½ teaspoon salt
    • 2 large eggs
    • 2 cups (480ml) milk (any kind)
    • ⅓ cup (80g) unsweetened applesauce, mashed banana, or Greek yogurt
    • 2 tablespoons melted butter or coconut oil
    • 1 teaspoon vanilla extract

    Customizable Add-Ins (Choose 1-2 cups total):

    • 1 cup fresh or frozen berries (blueberries, raspberries)
    • 1 diced apple or pear
    • ½ cup chopped nuts (walnuts, pecans)
    • ½ cup chocolate chips

    Instructions

    1. Prep: Preheat oven to 375°F (190°C). Grease an 8×8 inch or 9×9 inch baking dish.

    2. Mix Dry Ingredients: In a large bowl, combine the rolled oats, brown sugar, baking powder, cinnamon, and salt.

    3. Mix Wet Ingredients: In a separate bowl or large measuring cup, whisk the eggs vigorously. Then whisk in the milk, applesauce (or banana/yogurt), melted butter, and vanilla until smooth.

    4. Combine & Add Mix-Ins: Pour the wet ingredients over the dry ingredients. Stir with a spatula until just combined. Gently fold in your chosen add-ins (berries, nuts, etc.).

    5. Bake: Pour the mixture into the prepared baking dish. Bake for 35-45 minutes, until the top is golden brown, the edges are set, and the center is just set (it may still look slightly soft, but shouldn’t be liquid).

    6. Rest & Serve: Remove from oven and let cool in the pan for at least 15-20 minutes. This allows it to fully set for slicing. Serve warm, at room temperature, or cold.

    7. Storage & Reheating: Once cooled, cover and refrigerate for up to 5 days. Reheat individual portions in the microwave for 60-90 seconds, or warm the whole dish in a 350°F oven for 10-15 minutes.

    8. Pro-Tip for Meal Prep: Assemble the wet and dry ingredients separately the night before. In the morning, simply combine, pour into the dish, and bake for a fresh breakfast with no morning fuss.

    Pro-Tips for Baked Oatmeal Perfection

    • Use Rolled Oats: This is crucial. Quick oats will absorb too much liquid and become a gummy brick.
    • Don’t Overmix: Stir just until combined. Overmixing can lead to a tougher texture.
    • Bake Until Just Set: The center should look set but still moist. Overbaking leads to dry oatmeal.
    • The Rest is Key: Letting it cool allows the custard to set, making it sliceable. Cutting into it immediately will result in a soupy mess.
    • Double the Batch: This recipe doubles perfectly for a 9×13 inch pan to feed a crowd or for more meal-prep portions.
    • Boost Protein: Use a higher-protein milk like soy or cow’s milk, or stir in a scoop of vanilla protein powder with the dry ingredients.
    • Serve It Your Way: Top with a splash of cold milk, a dollop of yogurt, a drizzle of nut butter, or extra maple syrup.

    This Easy Baked Oatmeal is the reliable, delicious foundation for effortless mornings.