Category: healthy

  • Homemade Spicy Tuna Roll (Sushi Night Favorite)

    Homemade Spicy Tuna Roll (Sushi Night Favorite)

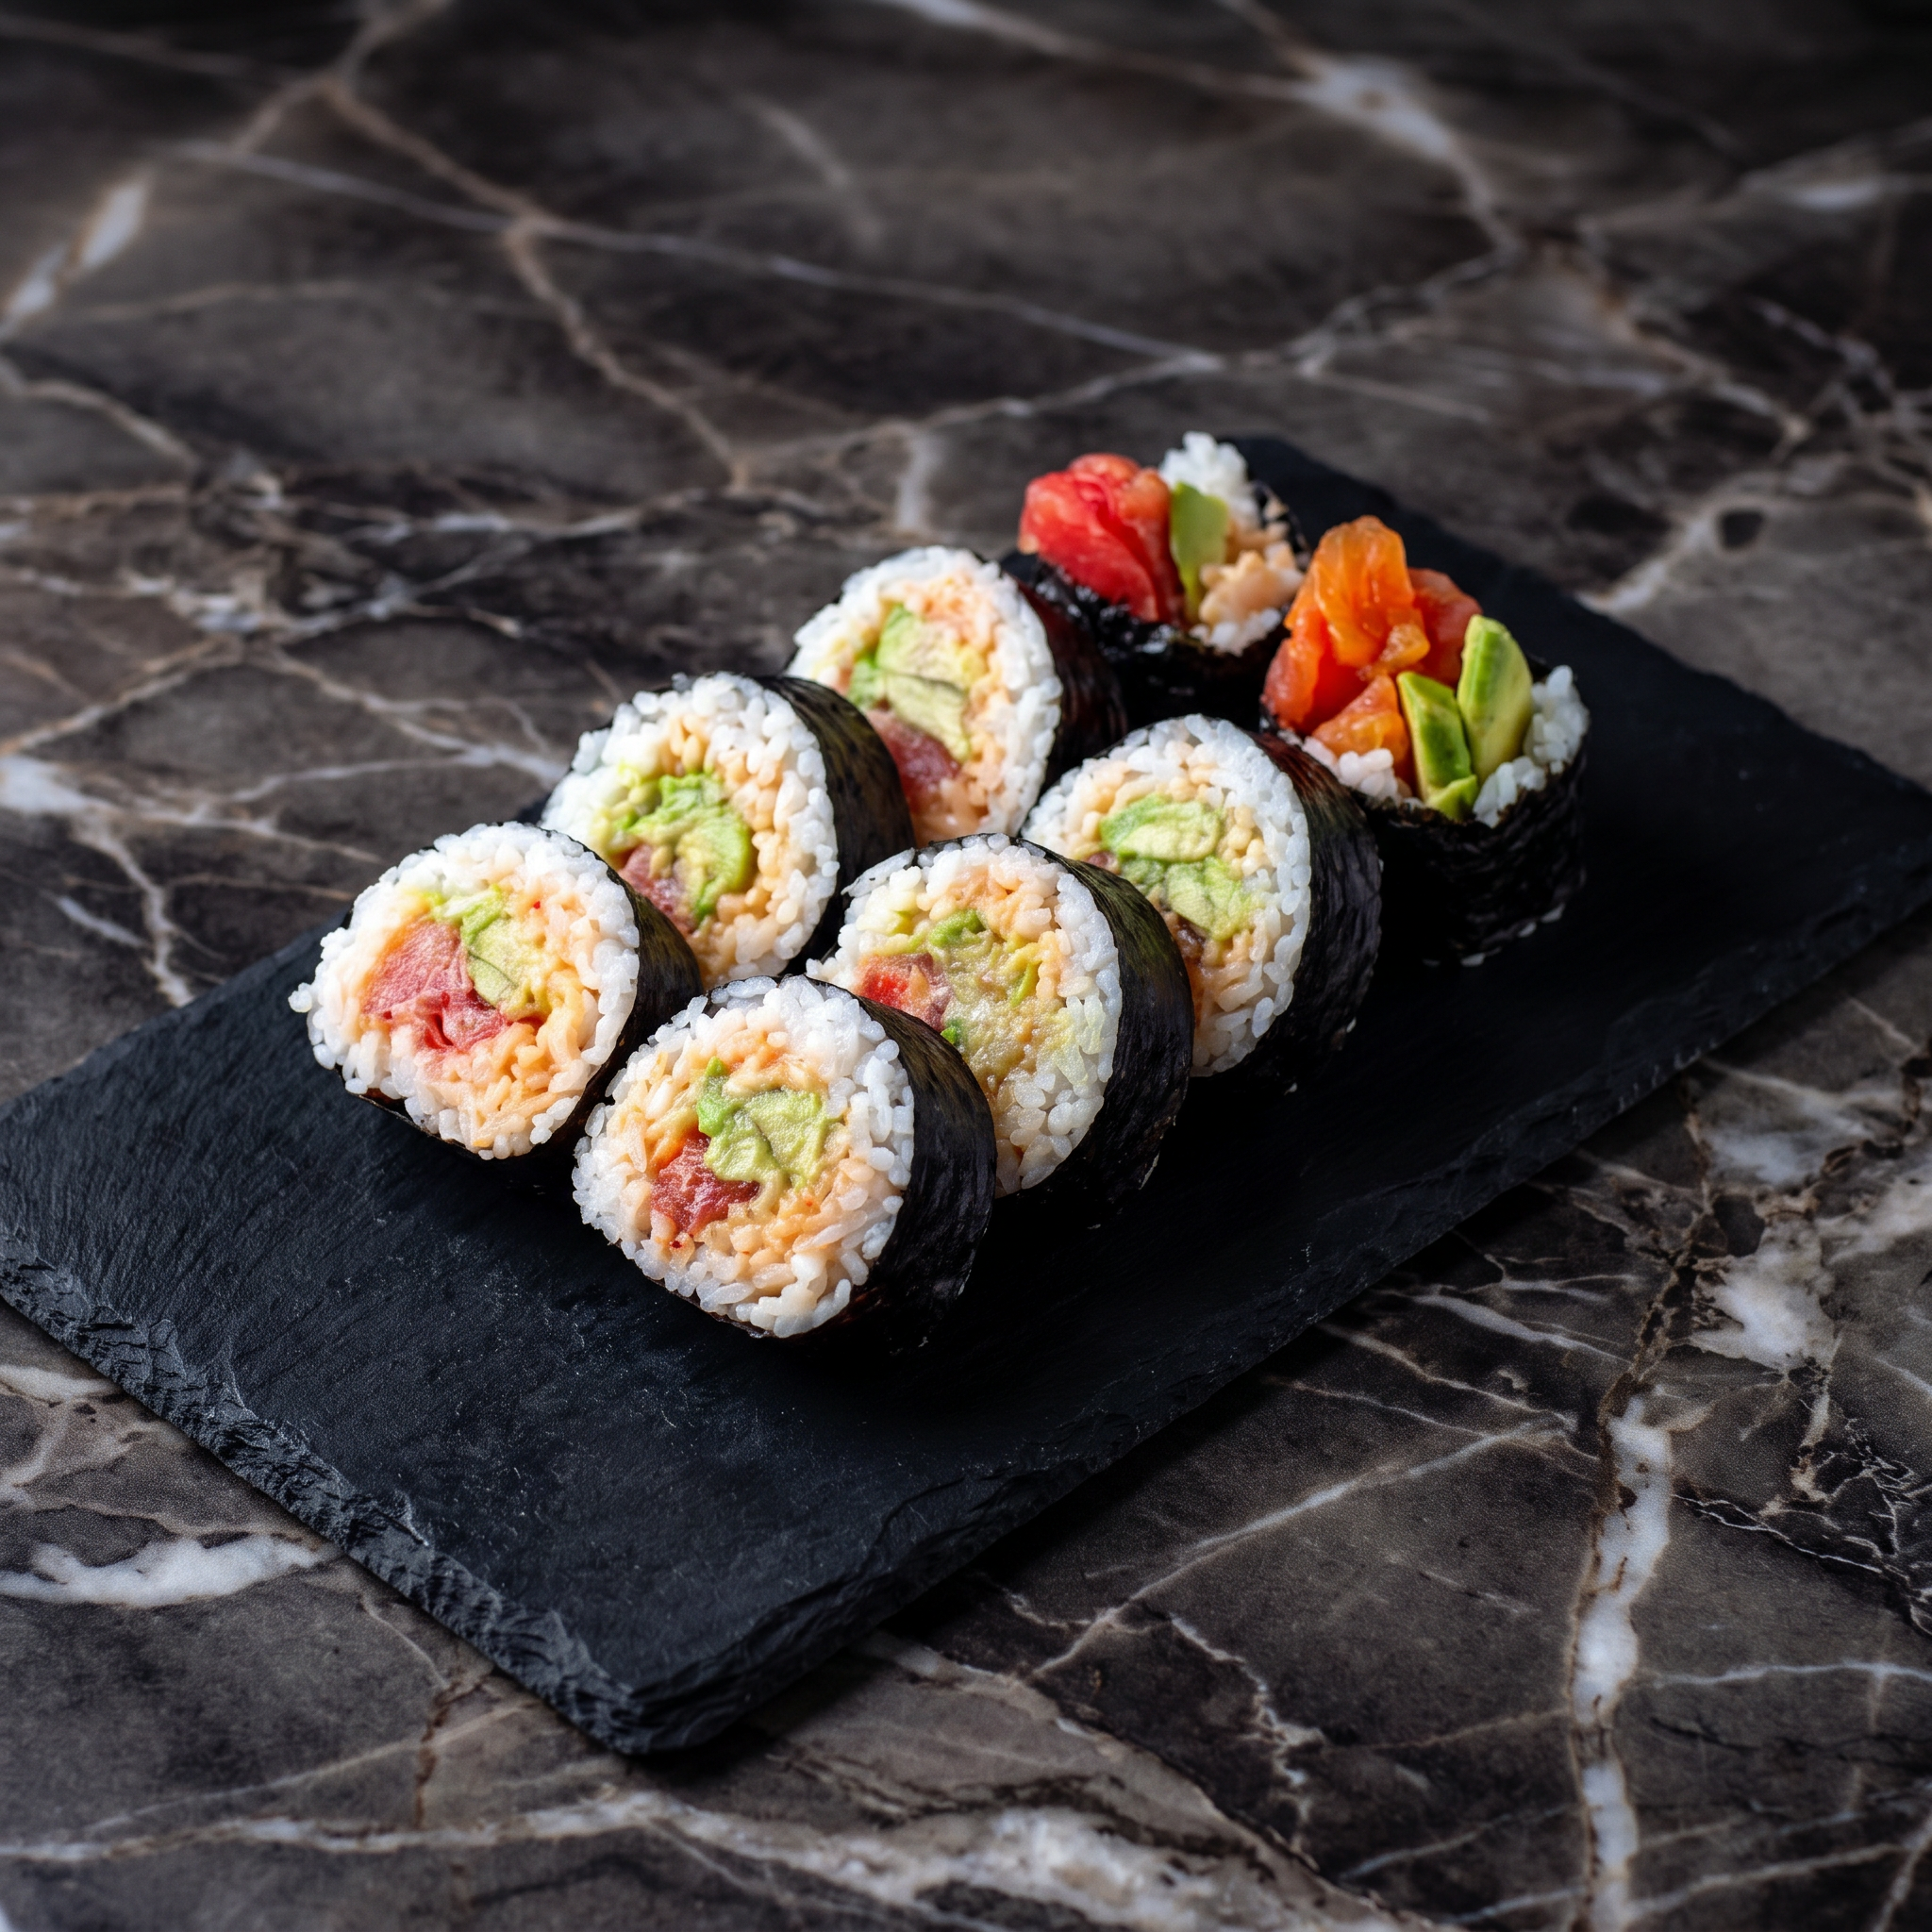
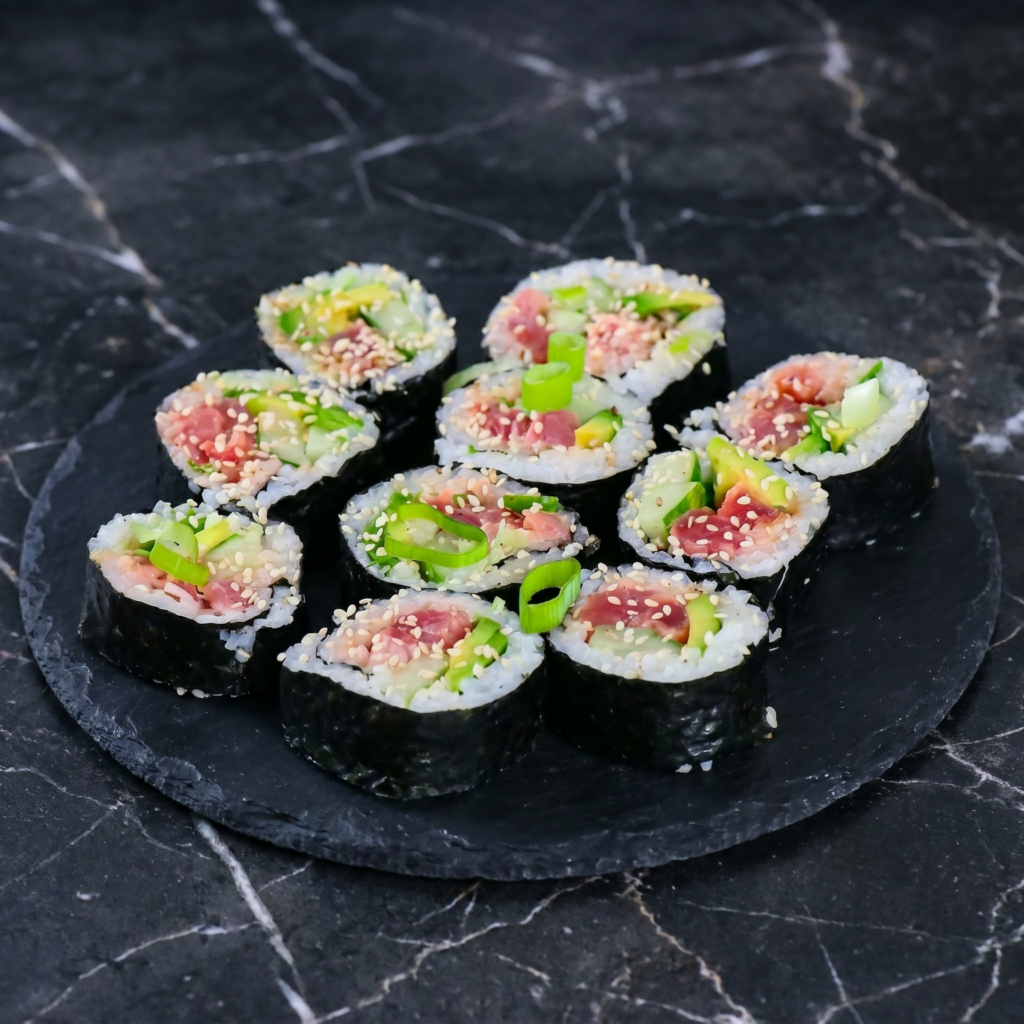
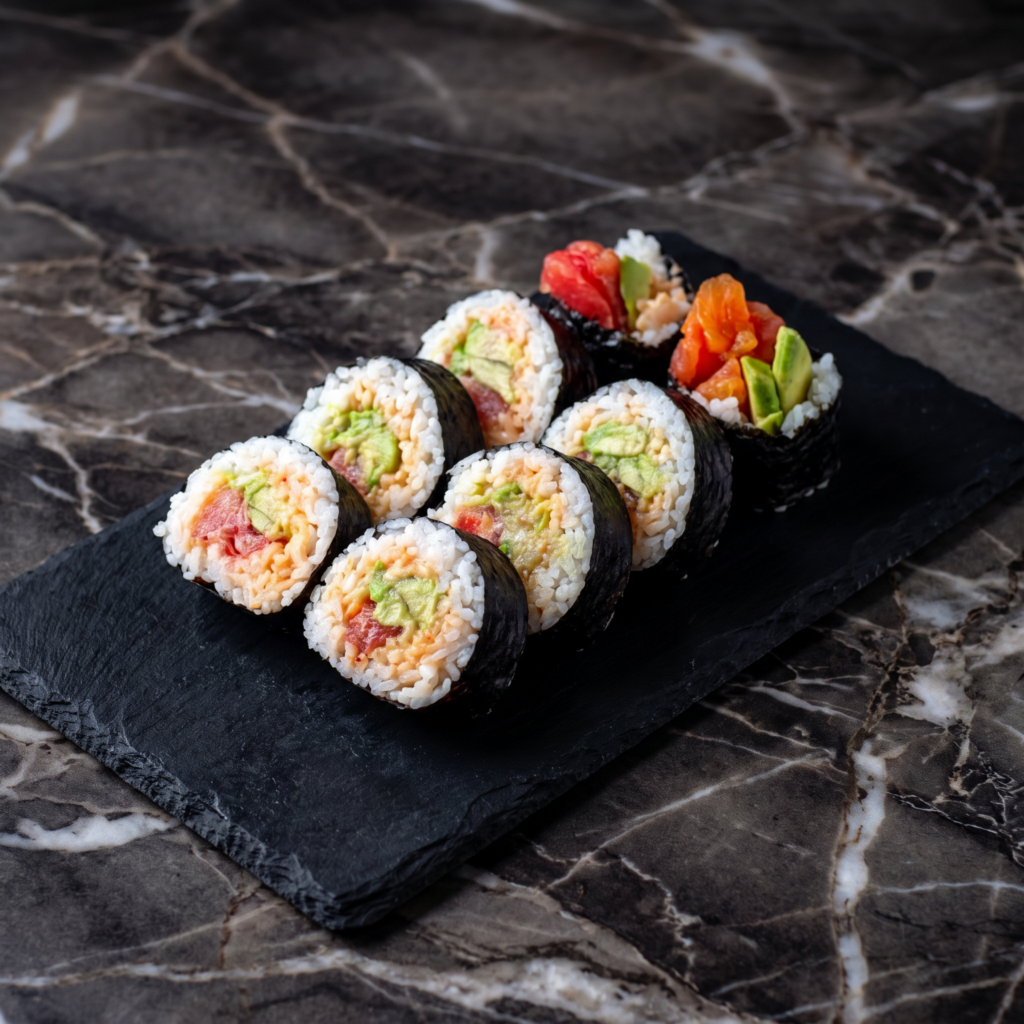
    The spicy tuna roll is a sushi bar classic—creamy, spicy, and utterly satisfying. Chunks of fresh sashimi-grade tuna are mixed with spicy mayo and sometimes cucumber or avocado, then rolled up in perfectly seasoned sushi rice and nori.

    Each bite offers a contrast of textures: the tender rice, the crisp nori, the creamy, spicy tuna, and the cool crunch of cucumber. Making them at home is easier than you might think, and the result rivals any restaurant.

    This guide walks you through everything: selecting the right tuna, making the spicy mayo, preparing the rice, and rolling like a pro.

    Ingredients
    For the Sushi Rice:

    • 2 cups (360g) short-grain Japanese rice (sushi rice)
    • 2 ¼ cups (540ml) water
    • ⅓ cup (80ml) rice vinegar
    • 3 tablespoons granulated sugar
    • 1 teaspoon salt

    For the Spicy Tuna Filling:

    • 8 oz (225g) sashimi-grade tuna
    • ¼ cup (60ml) Japanese mayonnaise (Kewpie preferred)
    • 1-2 tablespoons sriracha or chili garlic sauce (to taste)
    • 1 teaspoon sesame oil
    • 1 teaspoon soy sauce (optional)
    • 2 green onions, thinly sliced
    • Optional: 2 tablespoons tempura bits (tenkasu) for crunch

    For the Rolls:

    • 4 sheets nori (dried seaweed)
    • ½ cucumber, seeded and cut into thin strips
    • 1 avocado, sliced (optional)
    • Sesame seeds (white or black), for garnish

    For Serving:

    • Soy sauce
    • Wasabi paste
    • Pickled ginger (gari)
    • Extra spicy mayo for drizzling

    Equipment:

    • Bamboo rolling mat (makisu), wrapped in plastic wrap
    • Sharp knife
    • Rice paddle

    Instructions

    1. Cook the Sushi Rice: Rinse the rice in a fine-mesh strainer under cold water until the water runs clear (about 2-3 minutes). Drain well. Combine rice and water in a rice cooker or heavy-bottomed pot. If using a pot, bring to a boil, cover, reduce heat to low, and simmer for 15 minutes. Remove from heat and let steam, covered, for 10 minutes. Do not lift the lid!

    2. Season the Rice: While the rice cooks, combine rice vinegar, sugar, and salt in a small saucepan. Warm over low heat, stirring, until sugar and salt dissolve. Do not boil. Transfer the cooked rice to a large bowl or hangiri (wooden sushi tub).

    Gradually add the vinegar mixture while gently folding with a rice paddle using a slicing motion. Be gentle—you want to separate the grains, not mash them. Fan the rice as you mix to cool it quickly and give it a glossy sheen. Cover with a damp towel and set aside.

    3. Prepare the Tuna: Using a very sharp knife, cut the tuna into small pieces (about ¼-inch chunks). You can chop it finely or leave it slightly chunky—your preference. Place in a bowl.

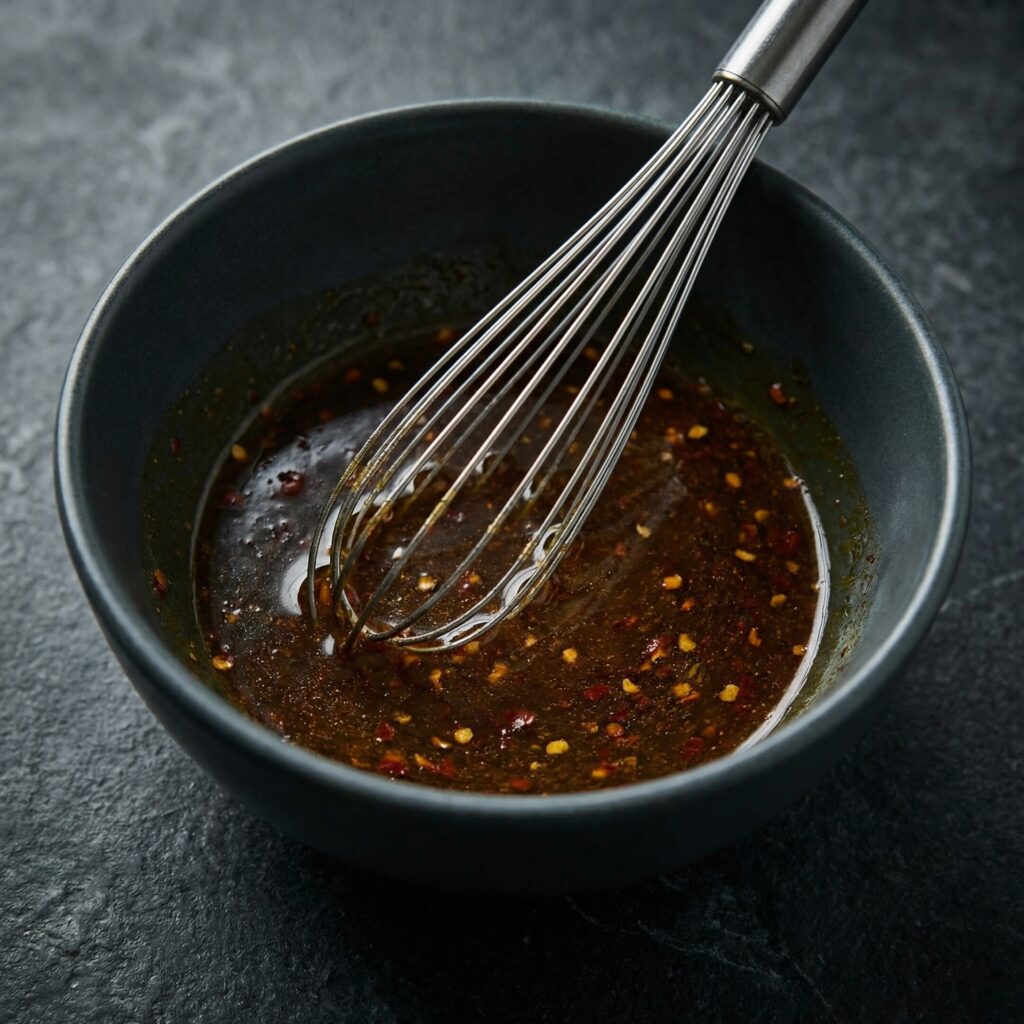
    4. Make the Spicy Mayo Mixture: In a small bowl, combine the Japanese mayonnaise, sriracha, sesame oil, and soy sauce (if using). Mix well. Adjust spice level to your taste.

    5. Combine the Tuna Filling: Add the spicy mayo mixture to the chopped tuna, along with the sliced green onions and tempura bits (if using). Fold gently until well combined. Be careful not to mash the tuna—you want distinct pieces. Refrigerate until ready to use.

    6. Prep the Vegetables: Cut the cucumber into thin strips, about ¼ inch thick and 3-4 inches long. If using avocado, slice thinly.

    7. Set Up Your Rolling Station: Place your bamboo mat on a clean work surface, with the slats running horizontally. Have a small bowl of water with a little vinegar for wetting your hands nearby.

    8. Roll the Spicy Tuna Rolls (Inside-Out Style): Place a sheet of nori shiny-side down on the mat. Wet your hands and spread about ¾ cup of sushi rice evenly over the nori, leaving a ½-inch border at the top. Flip the nori over so the rice is now facing down on the mat. This creates an inside-out roll (rice on the outside).

    9. Add Fillings: Arrange a line of spicy tuna mixture along the center of the nori, about 1 inch wide. Add cucumber strips alongside.

    10. Roll: Lift the bottom edge of the mat with your thumbs, holding the fillings in place with your fingers. Roll the mat over the fillings, tucking the edge of the nori under. Apply even pressure to shape the roll. Continue rolling until the roll is complete. Gently squeeze the mat along the length to firm it up.

    11. Slice the Roll: Using a very sharp knife, wipe the blade with a damp cloth. Cut the roll in half, then cut each half into thirds (for 6-8 pieces total). Wipe the knife clean between cuts for clean slices.

    12. Garnish and Serve: Arrange the sushi pieces on a platter. Drizzle with extra spicy mayo, sprinkle with sesame seeds, and garnish with additional green onions if desired. Serve immediately with soy sauce, wasabi, and pickled ginger.

    Pro-Tips for Perfect Spicy Tuna Rolls

    • Sashimi-Grade Tuna Is Essential: Always use fish labeled for raw consumption from a trusted source.
    • Chill the Tuna: Slightly cold tuna is easier to chop cleanly.
    • Kewpie Mayo Makes a Difference: Japanese mayonnaise is creamier and tangier than American mayo—it’s worth seeking out.
    • Don’t Overmix: Fold the tuna gently to keep some texture—chunky is good.
    • Keep Hands Wet: A bowl of vinegar-water prevents rice from sticking to your hands.
    • Sharp Knife: A dull knife will squish the roll instead of slicing cleanly. Wet the blade between cuts.
    • Inside-Out vs. Traditional: Spicy tuna rolls are often served as inside-out rolls (rice on the outside). This recipe uses that style, but you can also make traditional nori-on-the-outside rolls.
    • Get Creative: Add avocado, cream cheese, or mango for fusion variations.

    These Homemade Spicy Tuna Rolls will make your sushi night legendary.
  • Takoyaki: Golden Octopus Balls, Osaka Soul

    Takoyaki: Golden Octopus Balls, Osaka Soul

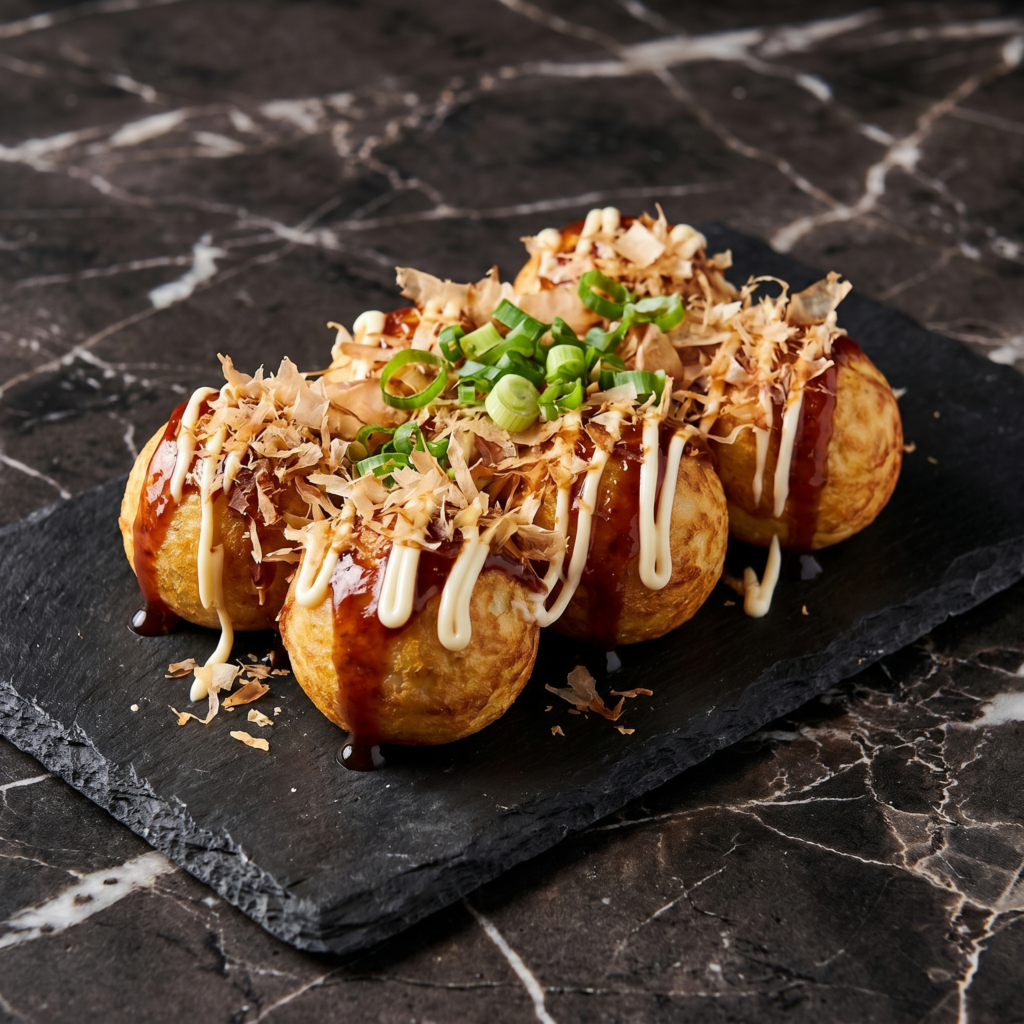
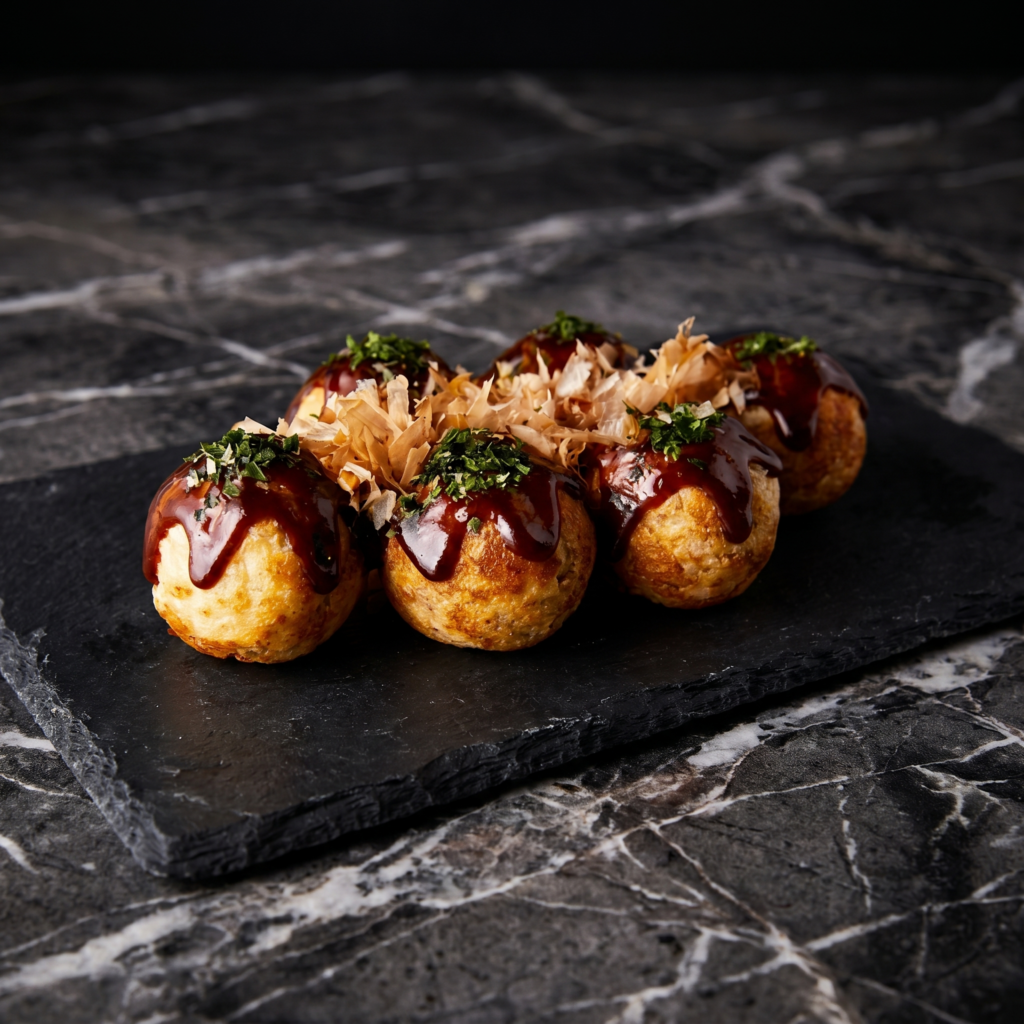
    Takoyaki (たこ焼き) translates to “octopus fried” — but that doesn’t capture the magic. These golden spheres from Osaka are crispy and brown on the outside, soft and almost molten on the inside, with a tender piece of octopus in the center. They’re cooked in a special cast-iron pan with semi-spherical molds, then turned repeatedly until perfectly round. Topped with sweet-salty takoyaki sauce, creamy Japanese mayonnaise, dancing bonito flakes, and green seaweed powder, they’re pure street food joy. Yes, you need the pan. No, you won’t regret buying it.

    The Science of the Custardy Interior & Why You Need Dashi

    Takoyaki’s unique texture comes from a batter that’s much thinner and wetter than pancake batter. The high liquid content (dashi, eggs, flour) creates steam as it cooks, which puffs up the balls and leaves the inside soft and almost pudding-like. The dashi is non-negotiable — it’s a Japanese stock made from kombu (kelp) and bonito flakes. Dashi provides umami and a subtle oceanic flavor that defines authentic takoyaki. Water or plain broth will not work. The cooking method is a low-and-slow rotation. Unlike pancakes that you flip once, takoyaki requires constant turning over 5–7 minutes. This repeated rotation creates the round shape while the exterior sets into a crisp shell and the interior remains custardy. The octopus is parcooked before adding — raw octopus would release water into the batter and make the inside soggy.

    Ingredients

    For the Batter:

    • 1 cup (120g) all-purpose flour
    • 2 cups (480 ml) dashi (Japanese stock — see note)
    • 2 large eggs
    • 1 teaspoon soy sauce
    • ½ teaspoon salt

    For the Fillings:

    • 4 oz (115g) cooked octopus, cut into ½-inch (1.25 cm) chunks (about 24–30 pieces)
    • ¼ cup (30g) green onions (scallions), finely chopped
    • ¼ cup (30g) pickled red ginger (beni shoga or kizami shoga), finely chopped
    • Vegetable oil for greasing the pan

    For the Toppings:

    • Takoyaki sauce (or okonomiyaki sauce)
    • Japanese mayonnaise (Kewpie brand recommended)
    • Aonori (dried green seaweed flakes)
    • Bonito flakes (katsuobushi)
    • Extra pickled ginger (optional)

    Special Equipment:

    • Takoyaki pan (cast iron or electric, 16–24 molds)
    • Takoyaki turning picks or bamboo skewers

    Instructions

    1. Make the Dashi (if not using instant): If using instant dashi powder, dissolve 1 teaspoon powder in 2 cups hot water. If making from scratch, simmer a 4-inch piece of kombu in 2 cups water (don’t boil), remove kombu, add a handful of bonito flakes, steep for 5 minutes, then strain. Set aside to cool slightly.

    2. Make the Batter: In a large bowl, whisk together the flour, dashi, eggs, soy sauce, and salt until smooth. The batter should be thin and runny—thinner than pancake batter. Let it rest for 15–20 minutes. This allows the flour to hydrate fully and reduces lumps.

    3. Prep the Fillings: Finely chop the green onions and pickled ginger. Cut the cooked octopus into small, bite-sized chunks (about ½ inch). Keep each filling in separate small bowls near the stove.

    4. Heat the Takoyaki Pan: Place the takoyaki pan over medium heat. Generously brush each semi-spherical mold with vegetable oil, including the flat surface between molds. Heat until the oil shimmers—a drop of batter should sizzle immediately.

    5. Fill the Molds: Pour the batter into a measuring cup with a spout for easy pouring. Fill each mold completely to the brim—the batter will overflow slightly. This is correct. Working quickly, drop 1–2 pieces of octopus into each mold, followed by a sprinkle of green onions and pickled ginger.

    6. The First Turn (30–45 seconds): After 30–45 seconds, the bottom of each ball will have set and turned golden-brown. Using a takoyaki pick or bamboo skewer, drag the excess batter from between the molds into each ball, then turn each ball 90 degrees. The uncooked batter will spill out—this becomes the next side. Don’t worry about perfection yet.

    7. Continue Turning (Every 30 seconds): Over the next 5–7 minutes, keep turning each ball every 30–45 seconds. Use two picks for better control. The balls will gradually become round as the batter cooks and sets. Add small drizzles of extra batter into any holes or gaps. The outside should become deep golden-brown and crisp, while the inside stays soft.

    8. Final Crisping: Once the balls are perfectly round and uniformly golden-brown (about 6–8 minutes total), brush a tiny amount of oil over them and let them cook for another 30 seconds to crisp the exterior.

    9. Sauce and Serve: Transfer the takoyaki to a plate. Drizzle generously with takoyaki sauce (dark brown, sweet-savory), then zigzag with Japanese mayonnaise. Sprinkle with aonori (green seaweed powder) and a generous handful of bonito flakes—they will dance and move from the heat. Top with extra pickled ginger if desired. Serve immediately with toothpicks or small forks.

    Pro-Tips for Takoyaki Perfection

    • Dashi is essential: Do not substitute water or chicken broth. Dashi’s umami is what makes takoyaki taste like takoyaki. Instant dashi powder (hondashi) is fine and widely available at Asian grocery stores or online.
    • Cooked octopus only: Buy pre-cooked octopus at Japanese or Korean markets. Boil raw octopus for 20–30 minutes until tender, then cool before cutting.
    • Rest the batter: Those 15–20 minutes allow the gluten to relax and the flour to hydrate, resulting in a softer interior.
    • Don’t be afraid of overflow: Overfilling the molds is correct. The excess batter becomes the material you use to build the round shape during turning.
    • Use two turning picks: One pick is frustrating. Two picks give you control to rotate each ball smoothly.
    • Low and slow heat: Medium heat is ideal. Too high and the outside burns before the inside sets. Too low and the balls become dense and greasy.
    • Kewpie mayonnaise is worth it: Japanese mayonnaise has a different flavor (more egg yolk, MSG, and rice vinegar) that pairs perfectly with takoyaki. American mayo is not the same.
    • Bonito flakes dance: The heat from the takoyaki makes the paper-thin bonito flakes curl and move. This is not a defect—it’s the visual signature of the dish.
    • Leftover batter: Use extra batter to make okonomiyaki or Japanese pancakes. The first few takoyaki will be ugly. By the end of the batch, you’ll be a pro. This is the taste of Osaka festivals, and now it’s your kitchen.
  • Taco Stuffed Sweet Potatoes: Healthy, Flavorful and Easy

    Taco Stuffed Sweet Potatoes: Healthy, Flavorful and Easy

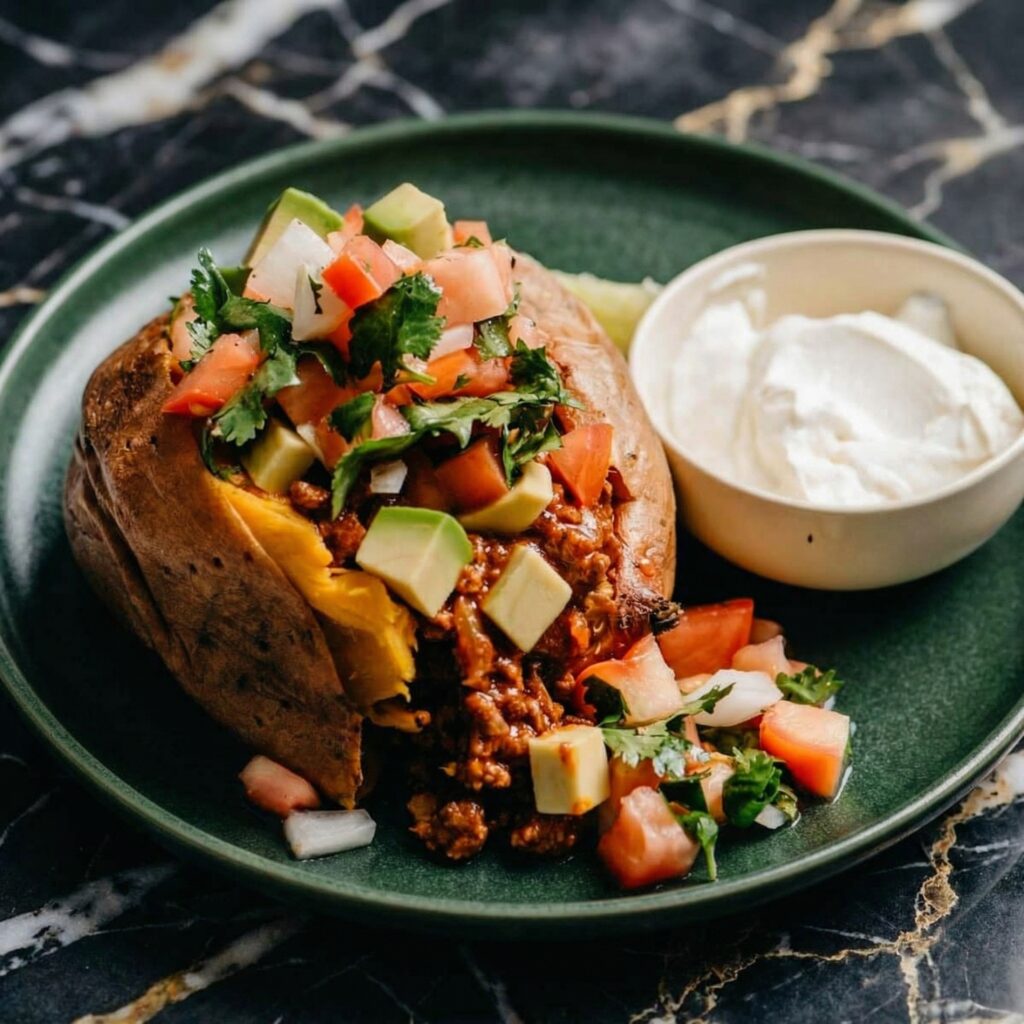
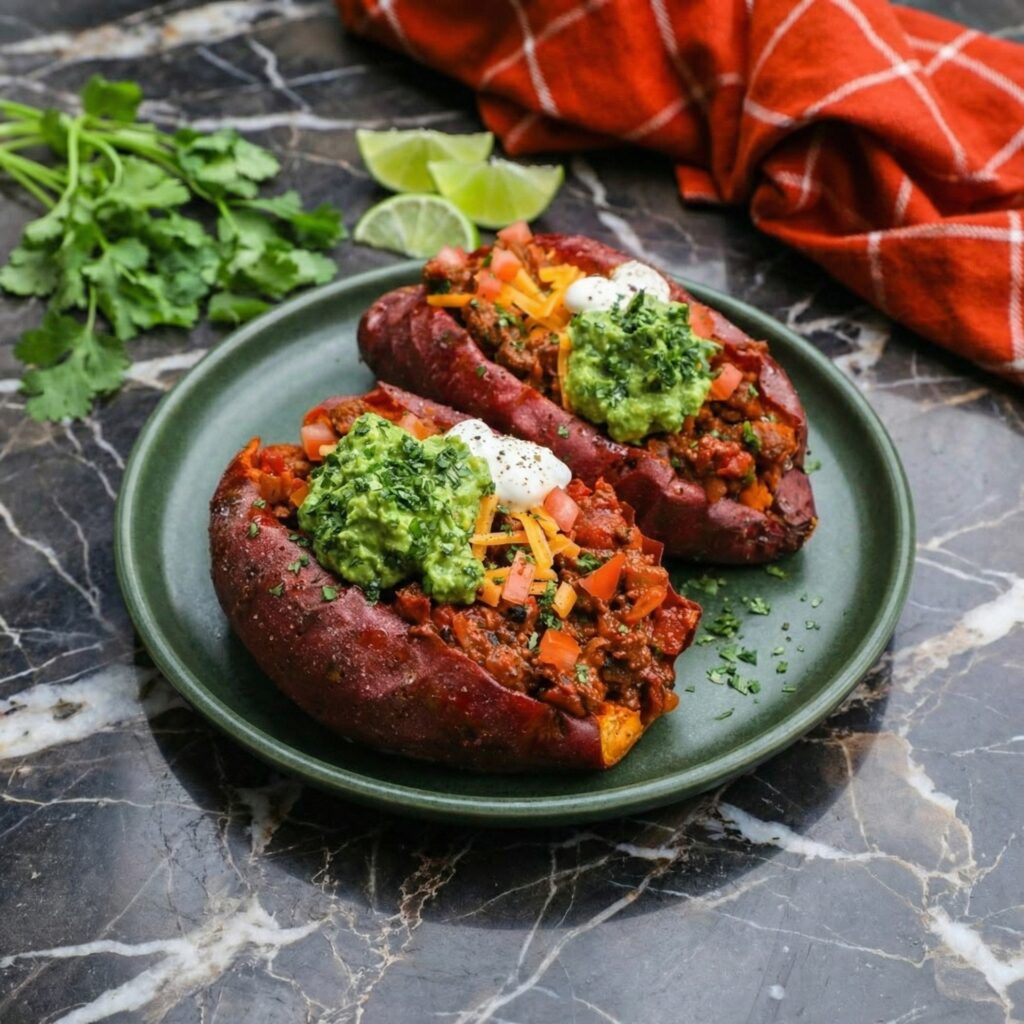
    If you love tacos but want a healthier twist, taco stuffed sweet potatoes are the answer. Roasted sweet potatoes become the perfect vessel for all your favorite taco fillings—seasoned ground beef or turkey, black beans, corn, and a rainbow of fresh toppings.

    It’s a complete meal that’s naturally gluten-free, packed with nutrients, and absolutely delicious. Perfect for meal prep, busy weeknights, or when you’re craving something satisfying without the guilt.

    Ingredients

    For the Sweet Potatoes:

    • 4 medium sweet potatoes
    • 1 tablespoon olive oil
    • Salt and pepper to taste

    For the Taco Filling:

    • 1 lb (450g) ground beef, turkey, or chicken
    • 1 small onion, finely chopped
    • 2 cloves garlic, minced
    • 1 tablespoon chili powder
    • 1 teaspoon ground cumin
    • ½ teaspoon smoked paprika
    • ½ teaspoon salt
    • ¼ teaspoon black pepper
    • ½ cup water or beef broth
    • 1 can (15 oz / 425g) black beans, drained and rinsed
    • 1 cup frozen corn, thawed

    For Toppings:

    • Shredded lettuce
    • Diced tomatoes
    • Avocado or guacamole
    • Sour cream or Greek yogurt
    • Shredded cheese (cheddar, Monterey Jack, or cotija)
    • Salsa or pico de gallo
    • Fresh cilantro, chopped
    • Lime wedges

    Instructions

    1. Roast the Sweet Potatoes: Preheat your oven to 400°F (200°C). Scrub the sweet potatoes and pat dry. Pierce each potato several times with a fork. Rub with olive oil and season with salt and pepper. Place on a baking sheet and roast for 45-60 minutes, until tender and easily pierced with a fork.
    2. Make the Taco Filling: While the sweet potatoes roast, heat a large skillet over medium-high heat. Add the ground meat and cook, breaking it up with a spoon, until browned, about 5-7 minutes. Add the onion and cook until softened, about 3-4 minutes.

    Add the garlic and cook for 1 minute until fragrant. Stir in the chili powder, cumin, paprika, salt, and pepper. Add the water and simmer for 3-5 minutes until the liquid has mostly evaporated. Stir in the black beans and corn, and heat through.

    3. Assemble: When the sweet potatoes are done, let them cool slightly. Split each potato open with a knife, fluff the insides with a fork. Generously fill with the taco meat mixture.
    4. Add Toppings: Top with shredded lettuce, diced tomatoes, avocado, sour cream, cheese, salsa, and fresh cilantro. Squeeze fresh lime juice over the top.

    5. Serve: Serve immediately.

    Pro-Tips for Taco Stuffed Sweet Potato Perfection

    • Choose Uniform Sweet Potatoes: Pick potatoes of similar size so they cook evenly.
    • Pierce Before Roasting: This allows steam to escape and prevents bursting.
    • Don’t Overcook the Filling: The taco meat mixture should be moist but not watery.
    • Customize the Toppings: Set up a topping bar and let everyone build their own.
    • Make It Vegetarian: Skip the meat and double the beans or add sautéed mushrooms.
    • Meal Prep Friendly: Roast sweet potatoes and prepare the filling ahead of time—assemble when ready to eat.
    • Spice It Up: Add jalapeños or hot sauce for extra heat.
    • Leftovers: Leftover filling is great for tacos, burritos, or nachos.

    These Taco Stuffed Sweet Potatoes are healthy, flavorful, and absolutely delicious.

  • Baked Sweet Potato Fries (Crispy, Salty, and Actually Healthy)

    Baked Sweet Potato Fries (Crispy, Salty, and Actually Healthy)

    Let’s be honest: sweet potato fries are the best kind of fries. They’re sweet, they’re salty, they’re satisfying, and they feel just a little bit healthier than regular fries. But getting them crispy in the oven can be a challenge—too often they turn out limp and soggy. Not these.

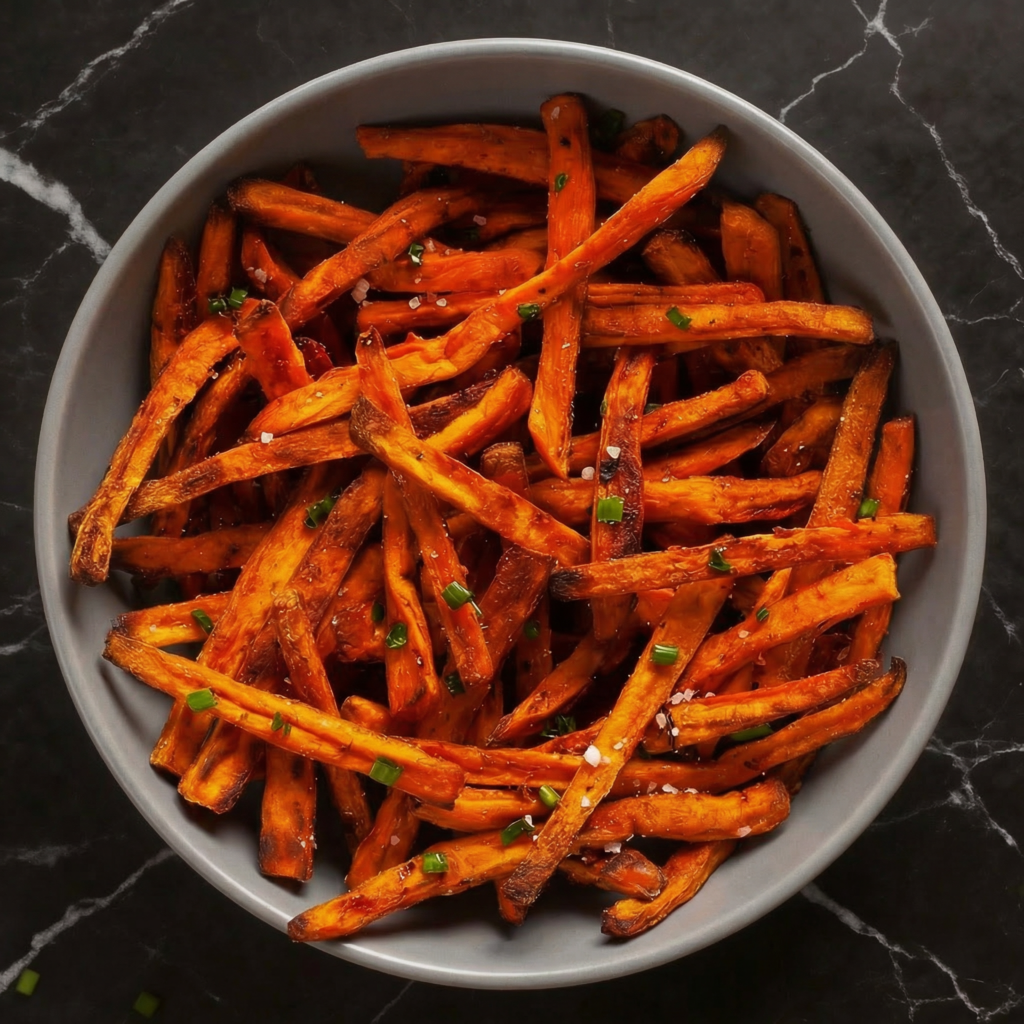
    These baked sweet potato fries are the real deal: crispy on the outside, tender on the inside, and perfectly seasoned with salt, pepper, and a touch of smoked paprika. They’re baked, not fried, so you can feel good about eating a whole batch. Serve them with your favorite dipping sauce and prepare to be amazed. Oven-baked perfection.

    Ingredients

    For the Baked Sweet Potato Fries (Serves 4):

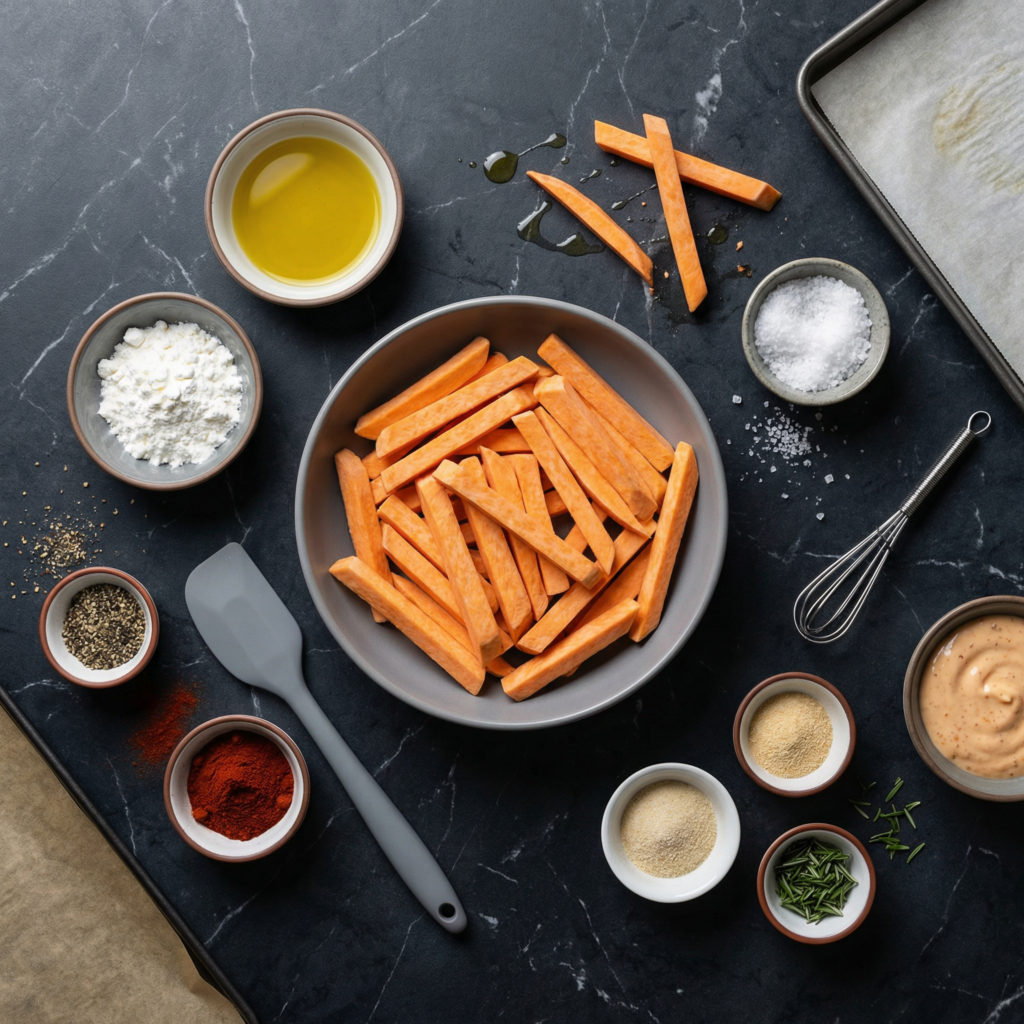
    • 3 large sweet potatoes (about 2 pounds)
    • 2 tablespoons olive oil or avocado oil
    • 1 tablespoon cornstarch (optional, but helps with crispiness)
    • 1 teaspoon smoked paprika
    • ½ teaspoon garlic powder
    • ½ teaspoon salt (plus more for finishing)
    • ¼ teaspoon black pepper
    • Pinch of cayenne pepper (optional, for heat)
    • Fresh parsley, chopped, for garnish

    For Dipping (Choose Your Adventure):

    • Garlic aioli
    • Sriracha mayo
    • Honey mustard
    • Chipotle sauce
    • Plain ketchup (classic!)

    Instructions

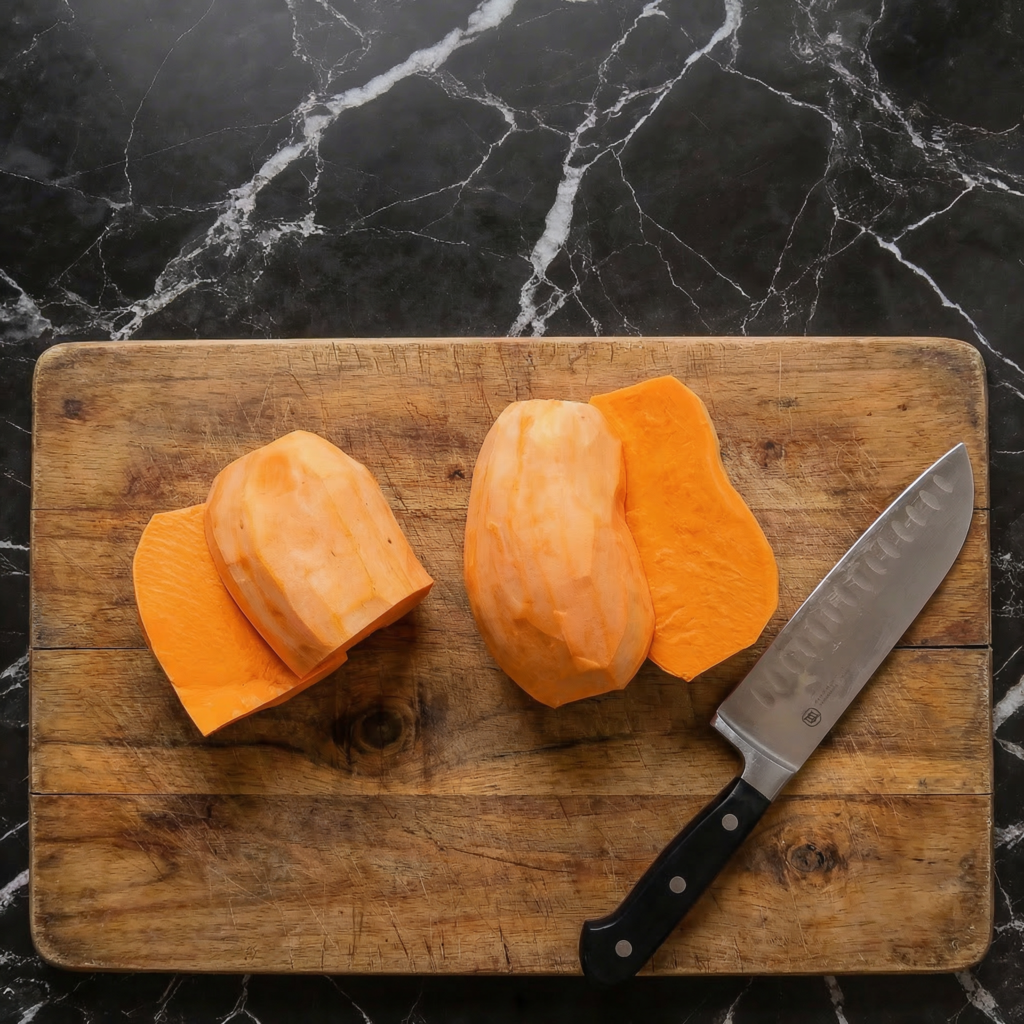
    1. Prep the Sweet Potatoes: Scrub the sweet potatoes well (peeling is optional—skin adds texture and nutrients). Cut them into even sticks, about ¼ to ½ inch thick. Try to keep them uniform for even baking.

    2. Soak the Fries: Place the cut fries in a large bowl and cover with cold water. Let them soak for at least 30 minutes, or up to overnight in the refrigerator. This removes excess starch and is the secret to crispiness.

    3. Preheat and Prep: Preheat your oven to 425°F (220°C). Line two large baking sheets with parchment paper (for easy cleanup).

    4. Dry Thoroughly: Drain the fries and spread them on a clean kitchen towel or several layers of paper towels. Pat them completely dry. Any moisture left will prevent crispiness.

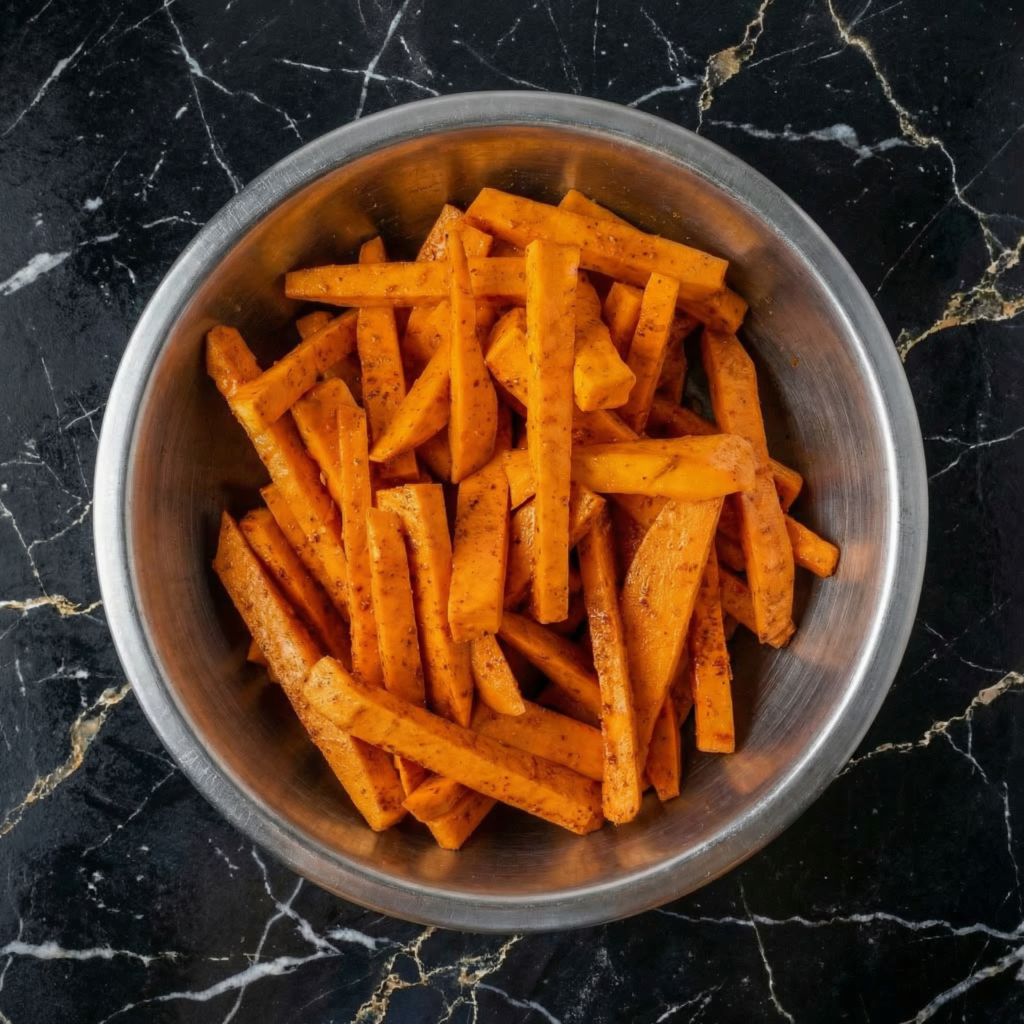
    5. Season the Fries: In a large bowl, combine the dried fries with olive oil, cornstarch (if using), smoked paprika, garlic powder, salt, pepper, and cayenne. Toss well until every fry is evenly coated.

    6. Arrange on Baking Sheets: Spread the fries in a single layer on the prepared baking sheets, making sure they’re not touching or overlapping. Give them space—crowding leads to steaming, not crisping.

    7. Bake: Bake for 15 minutes, then flip the fries with a spatula. Rotate the pans and bake for another 10-15 minutes until the fries are golden brown and crispy on the edges.

    8. Cool Slightly: Let the fries cool on the baking sheets for 5 minutes—they’ll continue to crisp up as they cool.

    9. Season and Garnish: Sprinkle with additional salt to taste and fresh chopped parsley.

    10. Serve: Serve immediately with your favorite dipping sauces.

    Pro-Tips for Sweet Potato Fry Greatness

    • Don’t Skip the Soak: This step removes excess starch and is the number one secret to crispy fries. At least 30 minutes, longer is better.
    • Dry Thoroughly: Any moisture left behind will steam your fries instead of crisping them. Pat them bone-dry.
    • Don’t Overcrowd: Give each fry room to breathe. Use two pans if needed.
    • Flip Halfway: Flipping ensures even browning on all sides.
    • Customize Your Spices: Try cumin, chili powder, or cinnamon for different flavor profiles.

  • Baked Chicken Fingers (Crispy, Golden, and Kid-Approved)

    Baked Chicken Fingers (Crispy, Golden, and Kid-Approved)

    Let’s be honest: chicken fingers are a universal love language. Kids crave them, adults secretly (or not so secretly) love them, and they’re the perfect comfort food anytime. But deep-fried versions can be heavy and messy. Enter baked chicken fingers—crispy, golden, perfectly seasoned, and so much healthier.

    They have all the crunch you want, none of the oil, and come together in about 30 minutes. The coating is flavorful and crunchy, the chicken stays juicy and tender, and they’re absolutely irresistible dipped in honey mustard, BBQ sauce, or your favorite condiment. Make a batch for dinner, game day, or just because you deserve something delicious.

    Ingredients

    For the Baked Chicken Fingers (Serves 4):

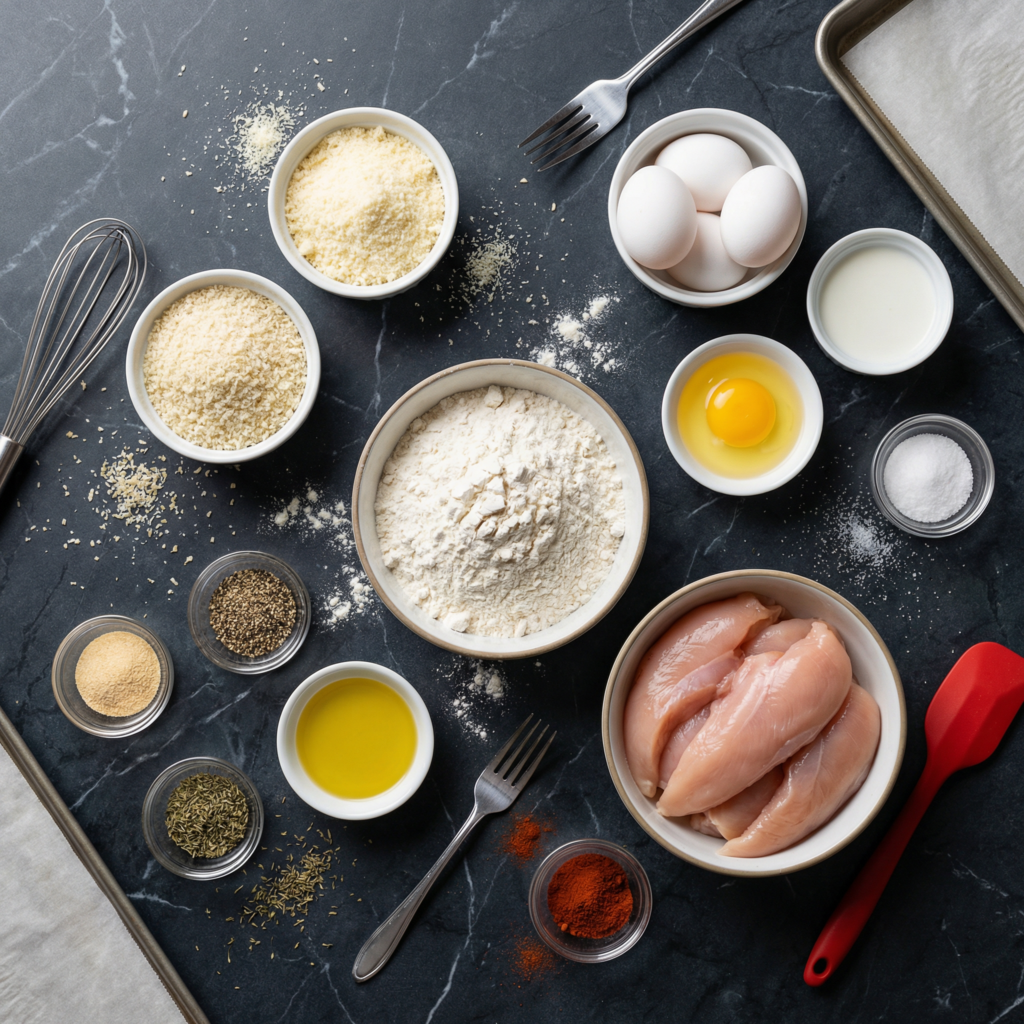
    • 1 ½ pounds (680g) chicken tenders or boneless skinless chicken breasts, cut into strips
    • ½ cup (65g) all-purpose flour
    • 1 teaspoon garlic powder
    • 1 teaspoon onion powder
    • ½ teaspoon smoked paprika
    • ½ teaspoon salt
    • ¼ teaspoon black pepper
    • 2 large eggs
    • 1 tablespoon water
    • 2 cups (200g) panko breadcrumbs
    • ½ cup (50g) grated Parmesan cheese
    • 1 teaspoon dried parsley (or 1 tablespoon fresh)
    • Cooking spray or olive oil spray

    For Serving:

    • Honey mustard
    • BBQ sauce
    • Ranch dressing
    • Ketchup

    Instructions

    1. Preheat and Prep: Preheat your oven to 400°F (200°C). Place a wire rack on a baking sheet and spray it lightly with cooking spray to prevent sticking .

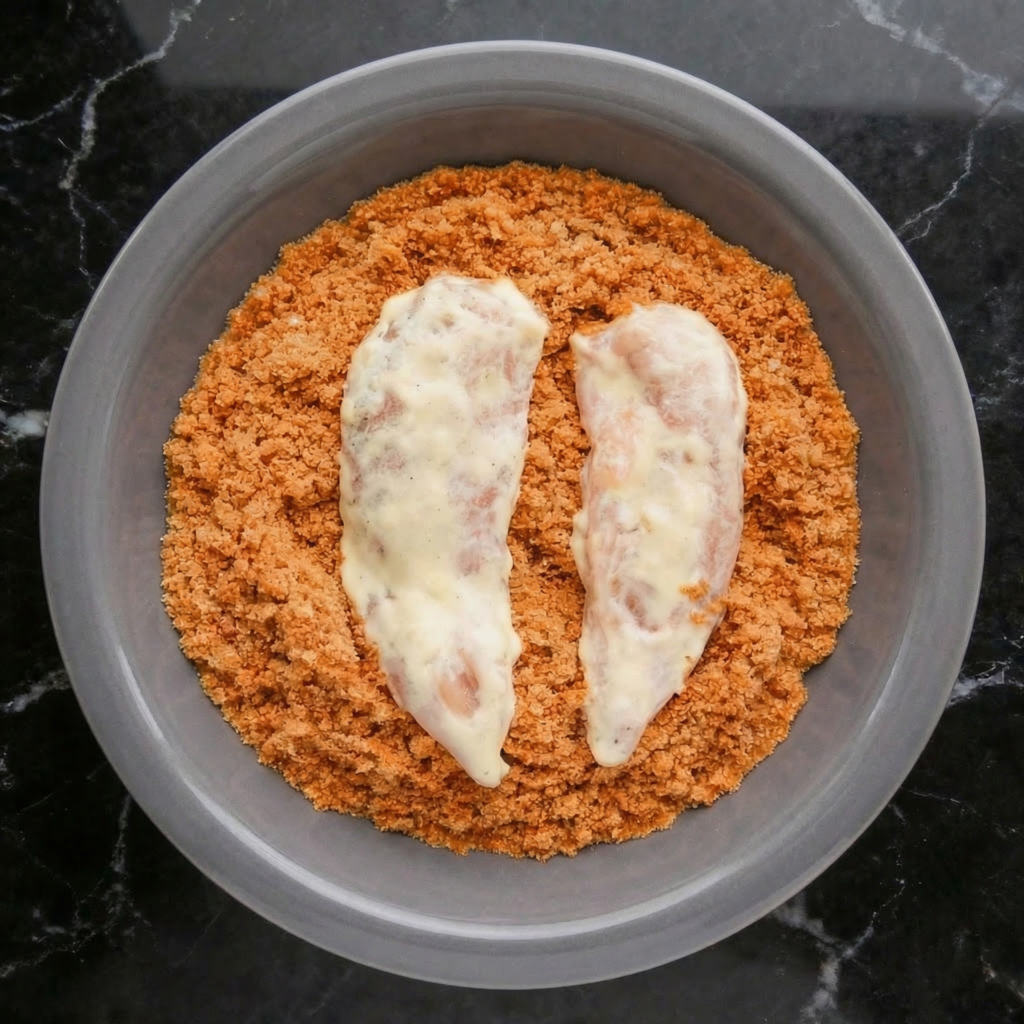
    2. Set Up Dredging Station: You’ll need three shallow bowls. In the first bowl, combine the flour, garlic powder, onion powder, smoked paprika, salt, and pepper. In the second bowl, whisk the eggs with 1 tablespoon of water until smooth. In the third bowl, combine the panko breadcrumbs, grated Parmesan, and dried parsley .

    3. Coat the Chicken: Pat the chicken strips dry with paper towels. Working one piece at a time, dredge in the seasoned flour, shaking off excess. Dip into the egg wash, letting excess drip off. Finally, press into the panko mixture, coating all sides evenly. Place on the prepared wire rack .

    4. Spray with Oil: Lightly spray the tops of the chicken fingers with cooking spray. This helps them brown and get extra crispy .

    5. Bake: Bake for 15-18 minutes, until the chicken is cooked through (internal temperature of 165°F) and the coating is golden brown and crispy .

    6. Rest: Let the chicken fingers rest for 5 minutes before serving. This helps keep them juicy .

    7. Serve: Serve warm with your favorite dipping sauces .

    8. Store: Store leftovers in an airtight container in the refrigerator for up to 3 days. Reheat in the oven at 375°F for 5-10 minutes to restore crispiness .

    Pro-Tips for Chicken Finger Greatness

    • Use a Wire Rack: This allows air to circulate all around the chicken, ensuring even crispiness without flipping .
    • Don’t Skip the Spray Oil: A light mist of oil helps the panko brown and get extra crunchy .
    • Panko is Key: Regular breadcrumbs won’t give you the same crispy texture. Panko is worth seeking out .
    • Make Extra: These disappear fast. Double the batch if you’re feeding a crowd .
    • Customize Your Seasonings: Add cayenne for heat, swap in different herbs, or use gluten-free breadcrumbs if needed .

  • Homemade Granola Bars (Chewy, Crunchy, and Way Better Than Store-Bought)

    Homemade Granola Bars (Chewy, Crunchy, and Way Better Than Store-Bought)

    Let’s be honest: store-bought granola bars are fine. They’re convenient, they’re there, they do the job. But fine is not what we’re after here. These homemade granola bars are the real deal—chewy, crunchy, perfectly sweet, and packed with exactly the things you love.

    No weird ingredients, no preservatives, no mystery “natural flavors.” Just oats, nuts, dried fruit, honey, and a little magic. They come together in one bowl, require absolutely no baking, and are endlessly customizable.

    Want chocolate chips? Add them. Prefer almonds over pecans? Go for it. Craving a little sea salt on top? You’re in charge. Snack time just got a serious upgrade.

    The Secret to Bars That Hold Together (No Crumbling Allowed)

    The biggest challenge with homemade granola bars is getting them to actually stay in bar form instead of becoming delicious granola rubble. The secret is the binder. A combination of honey (or maple syrup) and nut butter, gently heated, creates a sticky, glorious glue that holds everything together.

    The other secret? Packing them down firmly. When you press the mixture into the pan, you need to apply serious pressure—like, really lean into it. A flat-bottomed measuring cup or glass is your best friend here. The more compact the mixture, the better the bars will hold together.

    And finally, chill thoroughly. These bars need time in the fridge to set up properly. Patience is rewarded with perfect, sliceable, portable granola bars.

    Ingredients

    For the Homemade Granola Bars (Makes 8-10 bars):

    • 2 cups (180g) old-fashioned rolled oats (not quick oats)
    • 1 cup (120g) nuts (almonds, pecans, walnuts, or a mix), roughly chopped
    • ½ cup (75g) seeds (pumpkin, sunflower, or sesame) – optional
    • ½ cup (80g) dried fruit (cranberries, raisins, apricots, cherries), chopped if large
    • ½ cup (120ml) honey or maple syrup
    • ½ cup (130g) nut butter (peanut, almond, or cashew)
    • 1 teaspoon vanilla extract
    • ½ teaspoon salt
    • ½ teaspoon cinnamon (optional)

    Optional Add-Ins:

    • ¼ cup chocolate chips (add after pressing, gently pressed in)
    • 2 tablespoons coconut flakes
    • 1 tablespoon chia seeds or flaxseed

    Instructions

    1. Line Your Pan: Line an 8×8-inch (or 9×9-inch) baking pan with parchment paper, leaving overhang on two sides for easy removal. This is non-negotiable—you’ll thank yourself later .

    2. Toast the Oats and Nuts (Optional but Recommended): For deeper flavor, spread the oats and chopped nuts on a baking sheet and toast at 350°F (175°C) for 8-10 minutes until fragrant and lightly golden. This step is optional but adds so much .

    3. Combine Dry Ingredients: In a large bowl, combine the toasted oats and nuts, seeds (if using), dried fruit, salt, and cinnamon. Stir until evenly mixed .

    4. Heat the Binder: In a small saucepan over medium-low heat, combine the honey (or maple syrup) and nut butter. Warm gently, stirring constantly, until the mixture is smooth, runny, and well combined. Do not boil. Remove from heat and stir in the vanilla extract .

    5. Combine Wet and Dry: Pour the warm nut butter mixture over the dry ingredients. Stir vigorously with a spatula until everything is evenly coated. The mixture will be thick and sticky—this is good .

    6. Add Chocolate Chips (If Using): If you’re adding chocolate chips, let the mixture cool for 5-10 minutes first, or they’ll melt completely. Then fold them in gently .

    7. Transfer to Pan: Scrape the mixture into the prepared pan. Spread it as evenly as possible with the spatula .

    8. Press FIRMLY: This is the most important step. Place a piece of parchment paper over the mixture and use a flat-bottomed measuring cup or glass to press down firmly and evenly. Really lean into it. The more compact, the better the bars will hold together. Pay special attention to the edges and corners .

    9. Chill: Refrigerate for at least 2 hours, preferably 3-4, until completely firm and set. Don’t rush this step .

    10. Slice: Use the parchment overhang to lift the entire block out of the pan. Place on a cutting board and use a sharp knife to slice into bars or squares. A serrated knife works well with a gentle sawing motion .

    11. Store: Store bars in an airtight container in the refrigerator for up to 2 weeks, or at room temperature for up to 5 days. They also freeze beautifully for up to 3 months .

    12. Enjoy: Grab one on your way out the door, pack it in a lunchbox, or crumble it over yogurt for breakfast .

    Pro-Tips for Granola Bar Greatness

    • Press. Press. Press. The number one reason granola bars crumble is insufficient pressing. Really pack that mixture down
    • Don’t Skip the Chill: These bars need time in the fridge to set up. Rushing leads to crumbly sadness
    • Customize Freely: This recipe is a template. Swap nuts, seeds, dried fruits, and add-ins based on what you love or what’s in your pantry
    • Warm Honey = Sticky Success: Heating the honey and nut butter creates a better binder. Don’t skip this step
    • Chocolate Chips at the End: Add them after the mixture has cooled slightly, or they’ll melt into a chocolate swirl (which is also delicious, but not what we’re going for here).
  • Peanut Butter Cottage Cheese Ice Cream (Wait, What?)

    Peanut Butter Cottage Cheese Ice Cream (Wait, What?)

    Yes, you read that right. Cottage cheese. Ice cream. Together. Before you scroll past, hear us out: this is the creamiest, most protein-packed, ridiculously delicious frozen treat you’ll ever make. It’s thick, luscious, and tastes exactly like peanut butter frozen yogurt—but with zero ice cream maker, zero added sugar (if you choose), and a secret ingredient that’s been hiding in your fridge this whole time.

    The cottage cheese blends into absolute silky perfection, leaving no trace of its existence except for a massive protein boost and a texture that’ll make you do a double take. One scoop and you’ll be a believer. Cottage cheese ice cream is here, and it’s amazing.

    The Secret to Silky Smooth Cottage Cheese Ice Cream

    Let’s address the elephant in the room: cottage cheese has a texture. But here’s the thing—when you blend it long enough, it transforms completely. The secret is high-speed blending for a full 2-3 minutes until every last curd is pulverized into absolute silkiness. A good blender is your best friend here.

    The other secret? Freeze your banana. A frozen ripe banana adds natural sweetness and that creamy, scoopable texture that makes this feel like real ice cream. And finally, a little pinch of salt elevates the peanut butter flavor and balances everything. The result is a dessert that’s protein-packed, naturally sweetened, and so good you’ll never believe what’s in it.

    Ingredients

    For the Peanut Butter Cottage Cheese Ice Cream (Makes about 2 servings):

    • 1 cup (225g) cottage cheese (full-fat or 2%, small curd)
    • 1 large ripe banana, peeled and frozen
    • ¼ cup (65g) creamy peanut butter
    • 1-2 tablespoons maple syrup or honey (optional, depending on sweetness preference)
    • ½ teaspoon vanilla extract
    • Pinch of salt
    • 2-3 tablespoons milk (dairy or plant-based), only if needed to blend

    For Topping (Optional but Highly Recommended):

    • Extra drizzle of peanut butter
    • Chopped peanuts
    • Chocolate chips or shaved dark chocolate

    Instructions

    1. Freeze Your Banana: The night before or at least 4 hours ahead, peel a ripe banana, slice it into chunks, and place it in a freezer bag or container. Freeze until solid .

    2. Gather Your Ingredients: Measure out your cottage cheese, peanut butter, maple syrup (if using), vanilla, and salt. Having everything ready makes the blending process smooth .

    3. Combine in Blender: Add the cottage cheese, frozen banana chunks, peanut butter, maple syrup, vanilla extract, and salt to a high-speed blender. A small blender or food processor works best for this .

    4. Blend Until Silky: Start blending on low, gradually increasing to high. Blend for a full 2-3 minutes, stopping to scrape down the sides as needed. The mixture will go from chunky to thick to impossibly smooth and creamy. Be patient—this takes time .

    5. Check Consistency: The mixture should be thick, smooth, and the consistency of soft-serve ice cream. If it’s too thick to blend, add milk one tablespoon at a time just until it moves. You want it as thick as possible while still blending .

    6. Taste and Adjust: Give it a taste. Want it sweeter? Add a little more maple syrup. More peanut butter-y? Another spoonful of peanut butter. Blend briefly to incorporate .

    7. Serve Immediately (Soft-Serve Style): For soft-serve consistency, scoop the mixture into a bowl immediately. It will be thick, creamy, and ready to eat right away .

    8. Freeze for Scoopable Ice Cream: For a firmer, scoopable texture, transfer the mixture to a freezer-safe container. Smooth the top, cover, and freeze for 2-3 hours. If freezing longer than 3 hours, let it sit at room temperature for 10-15 minutes to soften before scooping .

    9. Add Toppings: Before serving, drizzle with extra peanut butter, sprinkle with chopped peanuts, or add chocolate chips for extra indulgence .

    10. Enjoy: Scoop, savor, and marvel at the fact that this is basically healthy .

    Pro-Tips for Cottage Cheese Ice Cream Greatness

    • Use Full-Fat Cottage Cheese: It yields the creamiest, richest result. Low-fat works but will be slightly less luxurious .
    • Blend Longer Than You Think: A full 2-3 minutes is non-negotiable for breaking down those curds into silky smoothness. Don’t rush it .
    • Frozen Banana is Key: It adds natural sweetness and that creamy, ice-cream-like texture. Don’t skip it .
    • Small Blender = Better Results: A smaller blender or food processor handles small batches better than a large one. If using a big blender, you may need to double the recipe .
    • Customize Endlessly: Swap peanut butter for almond butter or cookie butter. Add cocoa powder for chocolate version. Toss in chocolate chips or swirl in jam .
  • Homemade Yogurt (It’s Like Magic, But You’re the Wizard)

    Homemade Yogurt (It’s Like Magic, But You’re the Wizard)

    Let’s be honest: making your own yogurt sounds like something that requires a degree in microbiology or at least a very intimidating piece of equipment. But here’s the truth: homemade yogurt is nothing short of magic, and you are absolutely the wizard. All it takes is milk, a little store-bought yogurt to get things started, a pot, a jar, and some patience. That’s it.

    No fancy machines, no complicated techniques. Just you, transforming plain old milk into thick, creamy, probiotic-rich yogurt that tastes better than anything you can buy. It’s cheaper, you control the ingredients, and there’s something deeply satisfying about eating food you made with nothing but heat and time. Ready to feel like a wizard? Let’s do this.

    The Science of Yogurt: How Milk Becomes Magic

    Yogurt-making is a beautiful example of friendly bacteria doing amazing things. When milk is heated, its proteins unwind and restructure, creating a thicker final texture. Then, when it cools to the right temperature (about 110°F), you add a small amount of existing yogurt containing live active cultures.

    These bacteria—Lactobacillus bulgaricus and Streptococcus thermophilus—get to work, feasting on the lactose in the milk and producing lactic acid. That acid causes the milk proteins to coagulate and thicken, transforming liquid milk into silky, tangy yogurt.

    The magic happens during the incubation period, when the mixture is kept warm for several hours. The longer it incubates, the tangier and thicker it becomes. You’re not just making food; you’re hosting a bacterial party, and the result is delicious.

    Ingredients

    For the Homemade Yogurt:

    • 4 cups (1 liter) whole milk (or 2%, but whole milk = creamier yogurt)
    • 2 tablespoons plain yogurt with live active cultures (store-bought or from a previous batch)

    Optional Add-Ins After Yogurt is Made:

    • Honey or maple syrup, for sweetness
    • Vanilla extract
    • Fresh fruit or jam
    • Granola

    Instructions

    1. Heat the Milk: Pour the milk into a heavy-bottomed saucepan. Heat it over medium heat, stirring occasionally to prevent scorching, until it reaches 180°F (82°C) on a kitchen thermometer.

    This step denatures the proteins, which helps create a thicker yogurt. If you don’t have a thermometer, heat until the milk is steaming and small bubbles form around the edges—do not let it come to a full boil .

    2. Cool the Milk: Remove the pot from the heat and let the milk cool to 110°F (43°C). You can speed this up by placing the pot in an ice bath or cold water, stirring occasionally. Patience here is key—if the milk is too hot, it will kill the good bacteria; too cold, and they won’t activate .

    3. Temper the Starter: In a small bowl, place the 2 tablespoons of plain yogurt with live active cultures. Add a few tablespoons of the warm (110°F) milk and whisk until smooth. This tempers the yogurt and prevents temperature shock .

    4. Combine: Pour the tempered yogurt mixture back into the pot of warm milk. Whisk gently but thoroughly to ensure the cultures are evenly distributed throughout the milk .

    5. Incubate (The Magic Step): Pour the milk mixture into a clean glass jar or container with a lid. Now you need to keep it warm (around 110°F) for 6-12 hours to allow the cultures to work. Here are some foolproof methods:


    Oven with light on: Place the jar in the oven with the oven light on (do not turn the oven on). The light bulb provides gentle, consistent warmth.


    Cooler with warm water: Place the jar in a small cooler and fill with warm water (around 110°F) until it reaches the level of the yogurt. Close the cooler.


    Instant Pot: Use the yogurt setting if you have one.


    Wrapped in a towel: Wrap the jar in a thick towel or blanket and place it in a warm spot (like near a radiator or in a sunny window).
    Let it incubate undisturbed for at least 6 hours. The longer it incubates, the tangier and thicker it becomes .

    6. Check for Doneness: After 6-8 hours, gently tilt the jar. The yogurt should be set, thick, and custard-like. It may have a thin layer of yellowish liquid (whey) on top—that’s normal and can be stirred in or poured off .

    7. Refrigerate: Place the lid on the jar and transfer the yogurt to the refrigerator. Chill for at least 4 hours to stop the fermentation process and allow it to fully set. It will continue to thicken as it cools .

    8. Save Some for Next Time: Before you dig in, spoon out 2 tablespoons of your homemade yogurt into a small container. This becomes your starter for your next batch. Label it and keep it in the fridge for up to a week .

    9. Serve and Enjoy: Spoon your beautiful homemade yogurt into a bowl. Add honey, fresh berries, granola, or anything your heart desires. Taste that tangy, creamy perfection and feel immensely proud of yourself .

    10. Store: Keep your homemade yogurt refrigerated in an airtight container for up to 2 weeks .

    Pro-Tips for Yogurt Greatness

    • Use Whole Milk for Creamiest Results: Whole milk yields thick, luxurious yogurt. Lower-fat milks work but will be thinner. For extra thickness, add ¼ cup of powdered milk to the milk before heating .
    • Temperature Matters: Too hot kills the cultures; too cold and they won’t activate. An instant-read thermometer is your best friend here .
    • Patience is a Virtue: The longer you incubate, the tangier and thicker your yogurt becomes. If you like mild yogurt, go for 6-7 hours. For serious tang, let it go 10-12 hours .
    • Save Your Starter: Always reserve a few tablespoons of your homemade yogurt to start the next batch. It’s like having a never-ending yogurt supply .
    • Strain for Greek Yogurt: For thick, Greek-style yogurt, line a strainer with cheesecloth or a clean kitchen towel and place it over a bowl. Spoon in your yogurt and let it drain in the refrigerator for 2-4 hours. The longer it drains, the thicker it gets. Save the whey—it’s great in smoothies!
  • The Best Green Smoothie (It’s Green. It’s Dreamy. It’s Actually Delicious.)

    The Best Green Smoothie (It’s Green. It’s Dreamy. It’s Actually Delicious.)

    Let’s be real: green smoothies have a reputation. They’re often described as “earthy” or “an acquired taste,” which is code for “kinda tastes like lawn clippings.” This is not that smoothie. This is the green smoothie that converts skeptics, the one that makes you actually excited to drink your vegetables.

    It’s creamy, perfectly sweet, and impossibly smooth, with zero grassy flavor and everything delicious. The secret? A handful of spinach (you genuinely can’t taste it), a ripe banana for creaminess, frozen fruit for that thick, milkshake-like texture, and a splash of almond milk to bring it all together.

    It’s packed with nutrients, takes five minutes to make, and tastes like a tropical treat. Breakfast? Snack? Post-workout fuel? Yes, yes, and yes.

    The Secret to a Smooth, Creamy, Never-Gritty Green Smoothie

    There’s an art to the perfect green smoothie texture. Nobody wants a gritty, watery, or separated drink. The secrets are all in the order of ingredients and the right ratio. First, always add your liquid first. This helps the blades move freely and creates a vortex that pulls everything down.

    Second, the banana factor. A ripe (or even better, frozen) banana is the secret to creaminess. Its natural pectin and soft texture create that thick, smooth, milkshake-like consistency.

    Third, frozen fruit over fresh. Frozen fruit eliminates the need for ice, which can water down the flavor, and gives you that thick, frosty texture that makes smoothies feel indulgent.

    And finally, blend long enough. Give it a full 60-90 seconds to ensure every last bit of spinach is completely pulverized. The result? A smooth, creamy, vibrant green dream.

    Ingredients

    For The Best Green Smoothie (Makes 1 large or 2 small servings):

    • 1 cup (240ml) unsweetened almond milk (or milk of choice)
    • 1 large handful fresh spinach (about 2 cups, loosely packed)
    • 1 medium ripe banana (fresh or frozen)
    • 1 cup (140g) frozen mango chunks (or frozen pineapple)
    • ½ cup (75g) frozen strawberries or banana (optional, for extra sweetness)
    • 1 tablespoon chia seeds or ground flaxseed (optional, for fiber and omega-3s)
    • ½ scoop vanilla protein powder (optional, for a protein boost)

    For Garnish (Optional but Pretty):

    • Chia seeds
    • Fresh mint sprig
    • Slice of banana or strawberry

    Instructions

    1. Liquid First: Pour the almond milk (or your milk of choice) into your blender first. This helps the blades move freely and ensures everything blends smoothly .

    2. Add the Spinach: Toss in the large handful of fresh spinach. Don’t worry about packing it down—just let it float on top of the liquid .

    3. Add the Banana: Peel the banana and break it into chunks. Add it to the blender. If you’re using a fresh banana, your smoothie will be delicious but slightly thinner. For a thicker, creamier texture, use a frozen banana (peel and slice before freezing) .

    4. Add Frozen Fruit: Add the frozen mango chunks and any other frozen fruit you’re using. The frozen fruit is what gives the smoothie that thick, frosty, milkshake-like texture without needing ice .

    5. Add Boosters (Optional): If you’re using chia seeds, flaxseed, or protein powder, add them now. These add fiber, healthy fats, and staying power .

    6. Blend: Start blending on low speed, gradually increasing to high. Blend for a full 60-90 seconds, until the smoothie is completely smooth and creamy. You shouldn’t see any flecks of spinach or fruit—it should be a uniform, vibrant green .

    7. Check Consistency: If the smoothie is too thick, add a splash more liquid and blend again. If it’s too thin, add a few more frozen fruit chunks and blend again .

    8. Taste and Adjust: Give it a taste. If you’d like it sweeter, add a teaspoon of honey or maple syrup, or a few extra frozen strawberries. Blend briefly to incorporate .

    9. Pour and Garnish: Pour the smoothie into a tall glass. Sprinkle with a few chia seeds, add a fresh mint sprig, or perch a slice of banana or strawberry on the rim for that extra touch of beauty .

    10. Enjoy Immediately: Green smoothies are best enjoyed right away while they’re cold, thick, and fresh. Sip slowly and feel amazing about all those nutrients .

    Pro-Tips for Smoothie Greatness

    • Liquid First, Always: This simple step prevents air pockets and helps everything blend smoothly. It also protects your blender blades .
    • Use Frozen Fruit, Not Ice: Ice melts and waters down your smoothie. Frozen fruit keeps it thick, cold, and flavorful. Stock your freezer with bags of frozen mango and strawberries .
    • Ripe Bananas Are Key: The riper the banana, the sweeter and creamier your smoothie. Spotty, brown bananas are perfect. Peel and freeze them for an even thicker texture .
    • Don’t Fear the Spinach: A full handful of spinach sounds like a lot, but we promise you cannot taste it. The fruit completely masks it, and you get all the nutrients.
    • Blend Longer Than You Think: Give it a full 60-90 seconds to ensure every last bit of spinach is pulverized. A quick blitz leaves flecks of green and a less smooth texture .
  • Sweet, Spicy, and Totally Irresistible: Spicy Honey-Ginger Chicken Bowls with Tender Chicken Strips

    Sweet, Spicy, and Totally Irresistible: Spicy Honey-Ginger Chicken Bowls with Tender Chicken Strips

    If you’re craving a meal that’s bold, sticky, and bursting with flavor, these Spicy Honey-Ginger Chicken Bowls are exactly what you need.

    Juicy chicken strips are seared until golden and caramelized, then coated in a sticky honey-ginger sauce that balances sweet, spicy, and savory notes perfectly. Served over fluffy rice with crisp vegetables, this dish is colorful, satisfying, and packed with flavor in every bite.

    Cutting the chicken into strips ensures quick, even cooking and creates maximum surface area for that glossy, irresistible glaze. Whether for a weeknight dinner or a meal prep favorite, this recipe will become a go-to.


    Why You’ll Love This Recipe

    • Tender, juicy chicken strips with a crispy exterior
    • Sweet, spicy, and savory honey-ginger glaze
    • Quick to make and packed with flavor
    • Perfect for bowls, meal prep, or casual dinners
    • Fully customizable with vegetables and toppings

    The combination of sticky sauce, fresh vegetables, and fluffy rice makes every bite a balanced and satisfying experience.


    Ingredients You’ll Need

    For the Chicken:

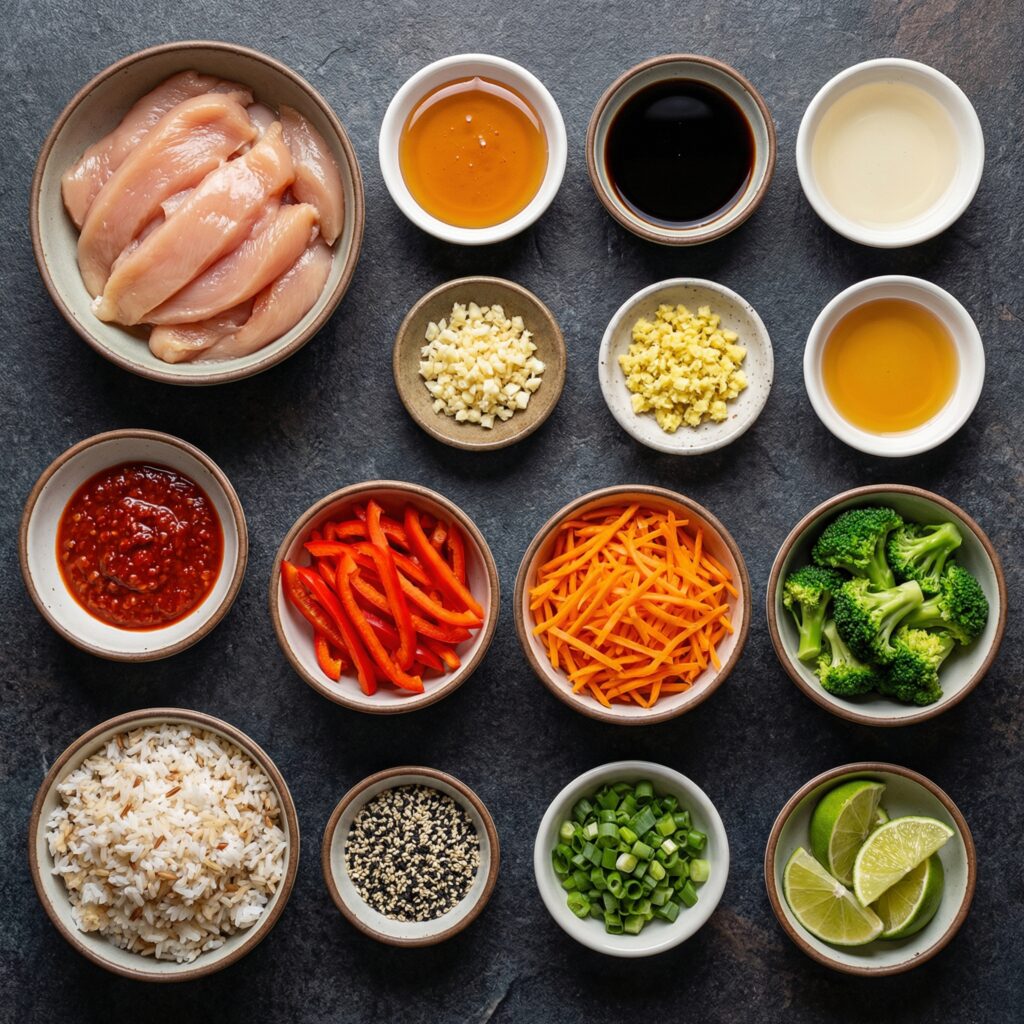
    • 1½ pounds boneless, skinless chicken breasts or thighs, cut into strips
    • Salt and black pepper, to taste
    • 2 tablespoons cornstarch
    • 1 tablespoon olive oil

    For the Spicy Honey-Ginger Sauce:

    • ⅓ cup low-sodium soy sauce
    • 3 tablespoons honey
    • 1 tablespoon rice vinegar
    • 1 tablespoon freshly grated ginger
    • 3 cloves garlic, minced
    • 1 teaspoon sesame oil
    • 1–2 teaspoons sriracha (adjust to taste)
    • 1 tablespoon cornstarch mixed with 2 tablespoons water (slurry)

    For the Bowls:

    • 3 cups cooked jasmine rice
    • 1 cup steamed broccoli
    • 1 cup shredded carrots
    • 1 cup sliced cucumbers
    • ½ cup shelled edamame
    • 2 green onions, sliced
    • Sesame seeds for garnish

    Step 1: Cook the Rice

    Start by preparing your rice according to package instructions. Fluff with a fork once cooked and keep warm.

    Jasmine rice works beautifully due to its soft texture and subtle fragrance, though brown rice or quinoa are excellent alternatives.


    Step 2: Prep the Chicken Strips

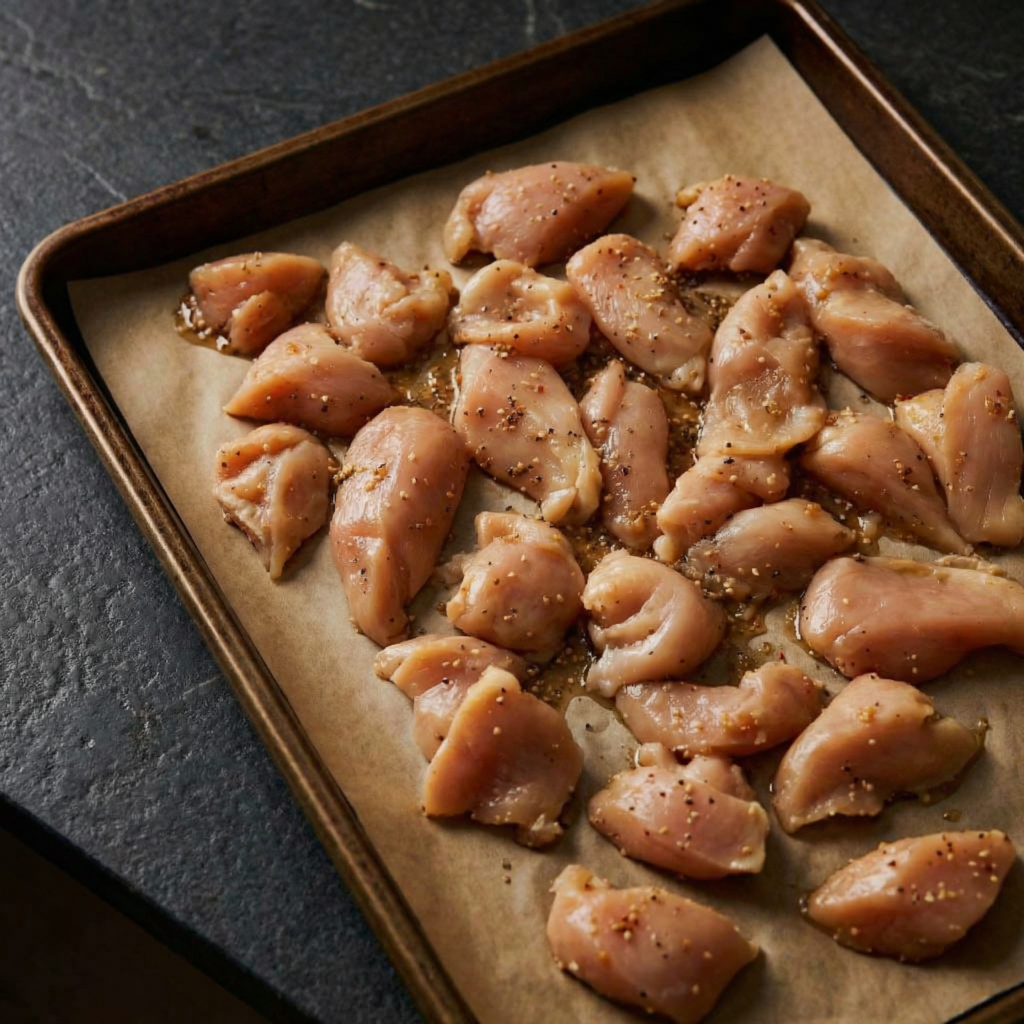
    Slice the chicken into even strips, about ½ inch thick. Pat the strips dry with paper towels—this is crucial for proper browning.

    Season both sides with salt and black pepper, then toss lightly with cornstarch. The cornstarch helps create a delicate crust that clings perfectly to the honey-ginger sauce later.


    Step 3: Sear the Chicken

    Heat olive oil in a large skillet over medium-high heat.

    Place the chicken strips in a single layer, being careful not to overcrowd the pan.

    Cook for 3–4 minutes on the first side without moving them to get a nice sear. Flip and cook for another 2–3 minutes until golden brown and cooked through (internal temperature should reach 165°F/75°C).

    Remove the chicken from the skillet and set aside.


    Step 4: Make the Honey-Ginger Sauce

    Lower the heat to medium. In the same skillet (don’t wipe it clean—the browned bits add flavor), combine soy sauce, honey, rice vinegar, grated ginger, garlic, sesame oil, and sriracha.

    Stir and let the mixture simmer for 2–3 minutes so the garlic and ginger infuse the sauce.

    Add the cornstarch slurry and stir continuously until the sauce thickens into a glossy glaze, about 1–2 minutes.


    Step 5: Coat the Chicken in the Sauce

    Return the cooked chicken strips to the skillet.

    Toss gently to coat each strip in the honey-ginger glaze. Let simmer for 2–3 minutes so the sauce clings to the chicken and becomes sticky and luscious.


    Step 6: Prepare the Vegetables

    While the chicken simmers, prepare the vegetables:

    • Steam the broccoli until tender-crisp.
    • Slice the cucumbers thinly.
    • Shred the carrots if needed.
    • Warm the edamame if frozen.

    These fresh, crisp vegetables add texture and color, balancing the richness of the sauce.


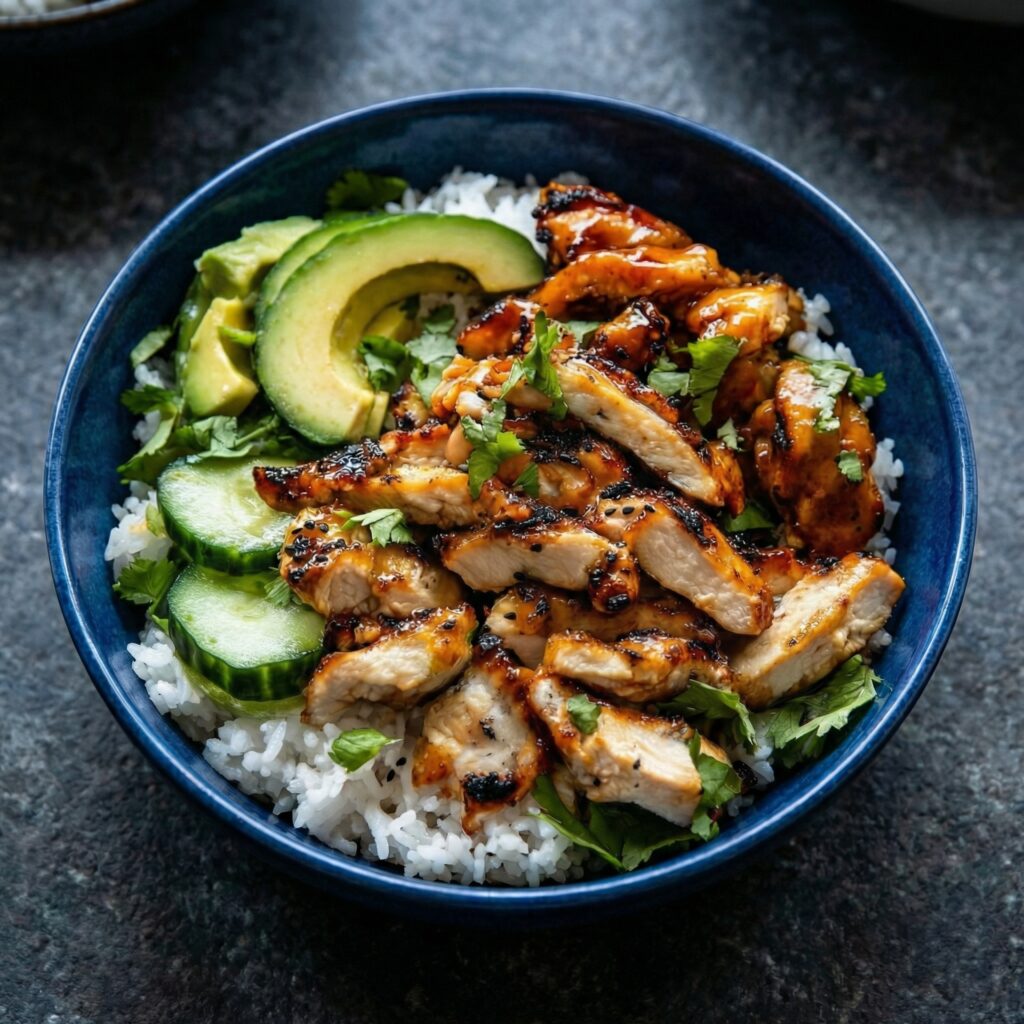
    Step 7: Assemble the Bowls

    Divide the warm rice among serving bowls.

    Place the glazed chicken strips on top.

    Arrange broccoli, carrots, cucumbers, and edamame around the chicken.

    Drizzle extra sauce from the skillet over the rice, and sprinkle with sliced green onions and sesame seeds.


    Step 8: Serve and Enjoy

    Serve immediately while hot and glossy.

    For added brightness, squeeze fresh lime over the bowls. If you like more heat, drizzle additional sriracha.

    Every bite should have tender chicken, sticky glaze, fluffy rice, and refreshing vegetables—a perfect balance of flavors and textures.


    Tips for Success

    • Cut chicken evenly for uniform cooking.
    • Don’t overcrowd the skillet; sear in batches if needed.
    • Pat chicken dry to get a proper crust.
    • Adjust honey and sriracha to taste for your preferred sweet-heat balance.
    • If the sauce thickens too much, add a splash of water to loosen it.

    Flavor Variations

    • Swap broccoli for snap peas or bell peppers.
    • Top with crushed peanuts for crunch.
    • Add a soft-boiled egg for extra richness.
    • Serve over noodles instead of rice.

    These simple tweaks make the dish versatile and customizable to your preference.


    Storage & Meal Prep

    Store chicken, sauce, rice, and vegetables separately in airtight containers in the refrigerator for up to 4 days.

    Reheat the chicken gently in a skillet with a splash of water to loosen the sauce. Assemble bowls fresh for the best texture.


    Final Thoughts

    Spicy Honey-Ginger Chicken Bowls are a vibrant, flavorful, and balanced meal. Cutting the chicken into strips ensures fast cooking and maximum surface area for that sticky glaze, while crisp vegetables and fluffy rice provide perfect contrast.

    With a combination of sweet, savory, and spicy notes in every bite, this dish is satisfying, colorful, and simple enough for weeknights but impressive enough for entertaining.

    Prepare this recipe, and you’ll have a crowd-pleasing, restaurant-quality bowl that’s full of bold flavor and comfort in every bite.