Category: desserts

  • Oatmeal Cream Pies (The Lunchbox Classic, But Better)

    Oatmeal Cream Pies (The Lunchbox Classic, But Better)

    Remember those little plastic-wrapped oatmeal cream pies from your childhood? The ones you’d find in your lunchbox and trade with friends? This is that cookie—but better. So much better.

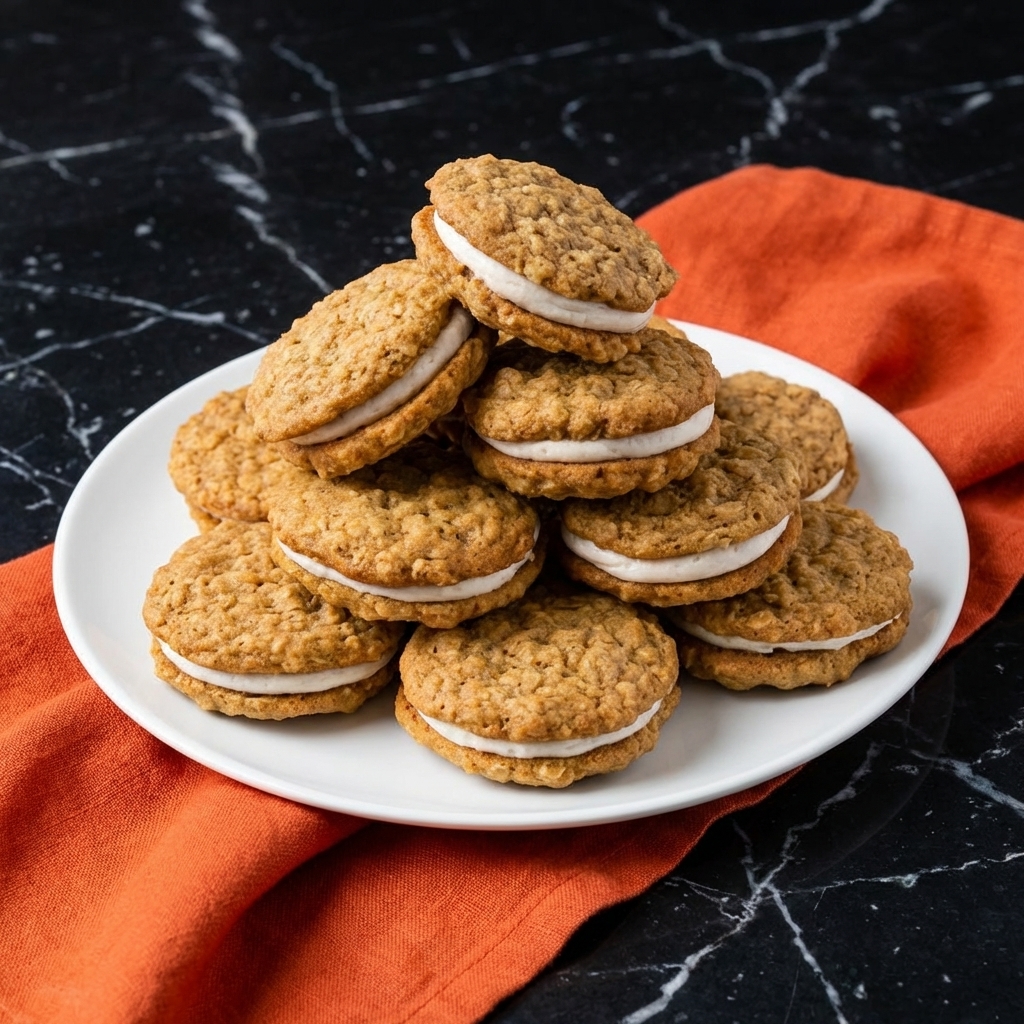
    Soft, chewy oatmeal cookies, perfectly spiced with cinnamon and packed with old-fashioned oats, are sandwiched together with a thick, fluffy, marshmallow-like vanilla cream filling that’s absolutely irresistible.

    They’re nostalgic, they’re comforting, and they’re way easier to make than you’d think. One bite and you’ll be transported back to the cafeteria—only now, you’re the one in charge of the recipe. Childhood dreams do come true.

    The Secret to Soft, Chewy Oatmeal Cookies

    The key to perfect oatmeal cream pies is the cookie texture. They need to be soft and chewy, not crisp, so they don’t shatter when you bite into them. The secret is brown sugar and butter. A higher ratio of brown sugar to white sugar adds moisture and that deep, caramel-like flavor.

    Using melted butter instead of creamed butter creates a denser, chewier texture—perfect for sandwich cookies. And don’t overbake. Pull them when the edges are just set and the centers still look slightly underdone; they’ll continue to bake on the hot sheet.

    The other secret? Old-fashioned rolled oats. Quick oats will turn to mush; old-fashioned oats give you that perfect chewy texture and hearty oat flavor in every bite.

    Ingredients

    For the Oatmeal Cookies (Makes about 16-18 sandwich cookies):

    • 1 cup (226g) unsalted butter, melted and slightly cooled
    • 1 cup (200g) packed brown sugar
    • ½ cup (100g) granulated sugar
    • 2 large eggs, at room temperature
    • 1 tablespoon vanilla extract
    • 1 ½ cups (190g) all-purpose flour
    • 1 teaspoon baking soda
    • 1 teaspoon ground cinnamon
    • ½ teaspoon salt
    • 3 cups (270g) old-fashioned rolled oats (not quick oats)
    • 1 cup (150g) raisins (optional, but classic)

    For the Vanilla Cream Filling:

    • 1 cup (226g) unsalted butter, slightly softened
    • 2 cups (240g) powdered sugar, sifted
    • 1 jar (7 oz/200g) marshmallow fluff (about 2 cups)
    • 2 teaspoons vanilla extract
    • Pinch of salt
    • 1-2 tablespoons heavy cream (if needed for consistency)

    Instructions

    1. Preheat and Prep: Preheat your oven to 350°F (175°C). Line two large baking sheets with parchment paper .

    2. Combine Wet Ingredients: In a large bowl, whisk together the melted butter, brown sugar, and granulated sugar until smooth. Whisk in the eggs and vanilla extract until well combined .

    3. Combine Dry Ingredients: In a separate bowl, whisk together the flour, baking soda, cinnamon, and salt .

    4. Mix Wet and Dry: Add the dry ingredients to the wet mixture and stir with a spatula until just combined. Do not overmix .

    5. Add Oats and Raisins: Fold in the rolled oats and raisins (if using) until evenly distributed. The dough will be thick and sticky .

    6. Scoop the Cookies: Using a cookie scoop or tablespoon, scoop rounded tablespoons of dough onto the prepared baking sheets, spacing them about 2 inches apart. They will spread slightly .

    7. Bake: Bake for 10-12 minutes, until the edges are set and lightly golden but the centers still look soft and slightly underdone. Do not overbake—this is key for soft cookies .

    8. Cool: Let the cookies cool on the baking sheet for 5 minutes, then transfer to a wire rack to cool completely .

    9. Make the Cream Filling: In a large bowl, beat the softened butter on medium speed until creamy and smooth, about 2 minutes. Gradually add the powdered sugar, beating until combined. Add the marshmallow fluff, vanilla extract, and salt.

    Beat on medium-high speed for 2-3 minutes until light, fluffy, and smooth. If the filling is too thick, add heavy cream 1 tablespoon at a time until it reaches a spreadable consistency .

    10. Pair the Cookies: Match up cookies by size, placing them in pairs with the flat sides facing each other .

    11. Fill the Cookies: Spoon or pipe a generous amount of cream filling onto the flat side of one cookie. Gently press the second cookie on top, flat-side down, until the filling spreads to the edges. Don’t squish too hard or the filling will burst out .

    12. Serve and Store: Serve immediately or store in an airtight container at room temperature for up to 3 days, or in the refrigerator for up to a week .

    Pro-Tips for Oatmeal Cream Pie Greatness
    • Don’t Overbake the Cookies: Pull them when the edges are set but the centers still look soft. They’ll continue to bake on the hot sheet and stay perfectly chewy .
    • Use Old-Fashioned Oats: Quick oats will give you a mushy texture. Old-fashioned oats are essential for that perfect chewy bite .
    • Room Temperature Butter for Filling: Softened butter creams smoothly into the filling. Cold butter will give you lumps .
    • Pipe the Filling: For neat, even filling, use a piping bag with a large round tip. It’s easier and looks professional .
    • Let Filled Pies Rest: If you can wait, let the assembled pies sit for an hour—the cookies soften slightly against the cream, becoming even more like the classic lunchbox version .
  • Chocolate Cupcakes (The Ones You’ll Make Forever)

    Chocolate Cupcakes (The Ones You’ll Make Forever)

    Some recipes you try once and forget. Others become part of your life—the ones you make for birthdays, bake sales, and those random Tuesday nights when only chocolate will do. These chocolate cupcakes are the ones you’ll make forever. They’re rich, moist, and deeply chocolatey, with that perfect domed top and a tender crumb that stays fresh for days.

    They come together easily with simple ingredients, and they’re absolutely irresistible topped with a silky, swoon-worthy chocolate buttercream. Whether you’re a seasoned baker or making cupcakes for the first time, this recipe delivers perfection every single time. Chocolate dreams really do come true.

    The Secret to Deeply Chocolatey, Super Moist Cupcakes

    The secret to the best chocolate cupcakes lies in two ingredients: hot coffee and buttermilk. Hot coffee doesn’t make the cupcakes taste like coffee—it actually enhances the chocolate flavor, making it deeper and more complex. The coffee interacts with the cocoa powder to bring out its richness in a way water simply can’t.

    Buttermilk adds tenderness and moisture, ensuring a soft, fine crumb that stays fresh for days. The other secret? Don’t overmix. Once the flour meets the wet ingredients, mix just until combined. Overmixing develops gluten, which can make your cupcakes tough instead of tender. Follow these rules, and you’ll have the most perfect, chocolatey cupcakes of your life.

    Ingredients

    For the Chocolate Cupcakes (Makes 12-14 cupcakes):

    • 1 cup (125g) all-purpose flour
    • 1 cup (200g) granulated sugar
    • ½ cup (45g) unsweetened cocoa powder (natural or Dutch-process)
    • 1 teaspoon baking soda
    • ½ teaspoon baking powder
    • ½ teaspoon salt
    • ½ cup (120ml) buttermilk, at room temperature
    • ½ cup (120ml) hot coffee (or hot water)
    • ⅓ cup (80ml) vegetable oil
    • 1 large egg, at room temperature
    • 1 teaspoon vanilla extract

    For the Chocolate Buttercream Frosting:

    • 1 cup (226g) unsalted butter, slightly softened
    • 3 ½ cups (420g) powdered sugar, sifted
    • ¾ cup (65g) unsweetened cocoa powder, sifted
    • ½ cup (120ml) heavy cream (or milk)
    • 2 teaspoons vanilla extract
    • ¼ teaspoon salt

    For Topping (Optional):

    • Sprinkles, chocolate shavings, or chocolate chips

    Instructions

    1. Preheat and Prep: Preheat your oven to 350°F (175°C). Line a 12-cup muffin pan with paper liners (you may have enough batter for 2 extra cupcakes—line a second pan or bake in batches).

    2. Combine Dry Ingredients: In a large bowl, whisk together the flour, sugar, cocoa powder, baking soda, baking powder, and salt until well combined.

    3. Combine Wet Ingredients: In a separate bowl or large measuring cup, whisk together the buttermilk, hot coffee, vegetable oil, egg, and vanilla extract until smooth.

    4. Mix Wet and Dry: Pour the wet ingredients into the dry ingredients. Whisk gently until just combined—about 30 seconds. The batter will be thin. That’s normal. Do not overmix.

    5. Fill the Liners: Divide the batter evenly among the cupcake liners, filling each about ⅔ full. A cookie scoop makes this easy.

    6. Bake: Bake for 18-22 minutes, until a toothpick inserted into the center of a cupcake comes out clean or with a few moist crumbs. The tops should spring back when lightly touched.

    7. Cool: Let the cupcakes cool in the pan for 5-10 minutes, then transfer to a wire rack to cool completely before frosting.

    8. Make the Chocolate Buttercream: In a large bowl, beat the softened butter on medium speed until creamy and smooth, about 2-3 minutes. Gradually add the sifted powdered sugar and cocoa powder, one cup at a time, beating on low until combined.

    Add the heavy cream, vanilla extract, and salt. Beat on medium-high speed for 2-3 minutes until the frosting is light, fluffy, and spreadable.

    9. Frost the Cupcakes: Once the cupcakes are completely cool, frost them using a piping bag fitted with your favorite tip (like a large star tip for a classic swirl) or simply spread the frosting with an offset spatula.

    10. Decorate: Add sprinkles, chocolate shavings, or a chocolate chip on top if desired.

    11. Serve and Store: Serve at room temperature. Store any leftovers in an airtight container at room temperature for up to 3 days, or in the refrigerator for up to 5 days.

    Pro-Tips for Chocolate Cupcake Greatness

    • Use Hot Coffee: It deepens the chocolate flavor without making the cupcakes taste like coffee. Don’t skip it.
    • Room Temperature Ingredients: Buttermilk and egg should be at room temperature for a smooth, evenly mixed batter.
    • Don’t Overmix: Mix just until the flour disappears. Overmixing = tough cupcakes.
    • Cool Completely Before Frosting: If the cupcakes are even slightly warm, your frosting will melt and slide right off.
    • Use a Cookie Scoop: A cookie scoop ensures even, perfectly sized cupcakes every time.
  • Sugar Cookie Icing (The One That Sets Perfectly Shiny)

    Sugar Cookie Icing (The One That Sets Perfectly Shiny)

    Let’s talk about cookie icing. The kind that goes on smooth, stays exactly where you put it, and dries to a beautiful, glossy, crack-free finish. The kind that makes your decorated cookies look like they came from a fancy bakery instead of your kitchen table. This is that icing. It’s made with just a few simple ingredients, comes together in minutes, and is endlessly customizable.

    Outline, flood, drizzle, dunk—whatever your cookie decorating heart desires, this icing delivers. And the best part? It sets hard enough to stack but stays soft enough to bite into without shattering. Christmas cookies, birthday treats, or just because—let’s make some magic.

    The Secret to Perfect Consistency (Flood vs. Outline)

    The magic of sugar cookie icing is all about consistency. Too thick, and it won’t smooth out; too thin, and it’ll run right off your cookies. The secret is understanding the two main consistencies: outline consistency (thicker, like toothpaste) for piping borders and details, and flood consistency (thinner, like honey) for filling in large areas.

    You start with a thick base icing, then thin it down gradually with tiny amounts of water until it reaches that perfect flow. The other secret? Patience between layers. Let your outlines dry for 15-20 minutes before flooding, and let flooded cookies dry completely (4-6 hours or overnight) before adding details or stacking. A little patience gives you that flawless, professional finish.

    Ingredients

    For the Sugar Cookie Icing (Makes about 2 cups):

    • 4 cups (480g) powdered sugar, sifted
    • 3 tablespoons meringue powder (NOT protein powder—this is key)
    • 5-6 tablespoons warm water, divided
    • ½ teaspoon light corn syrup (optional, adds extra shine)
    • ½ teaspoon vanilla extract or almond extract (optional, for flavor)
    • Gel food coloring (liquid food coloring will thin the icing too much)

    Instructions

    1. Combine Dry Ingredients: In a large bowl (or the bowl of a stand mixer fitted with the paddle attachment), combine the sifted powdered sugar and meringue powder. Whisk together to break up any lumps.

    2. Add Water and Mix: Add 5 tablespoons of warm water and the corn syrup (if using). Beat on low speed until combined, then increase to medium speed and beat for 3-4 minutes until the icing is thick, smooth, and glossy. It should look like thick, spreadable marshmallow fluff.

    3. Check Consistency (For Outlining): Lift the beater or a spoon—the icing should fall back into the bowl in a thick ribbon and disappear back into the surface within 10-15 seconds. This is your base outline consistency. If it’s too thick, add water ½ teaspoon at a time.

    4. Add Flavor (Optional): Stir in vanilla or almond extract if desired. Be aware that extract will thin the icing slightly.

    5. Divide for Colors: If using multiple colors, divide the icing into separate bowls. Leave one bowl white, and color the others with gel food coloring. Gel is essential—liquid coloring will ruin your consistency.

    6. Adjust for Flood Consistency: For the icing you’ll use to fill in (flood), you need a thinner consistency. Take a portion of your outline icing and add water ¼ teaspoon at a time, stirring gently.

    Test by lifting a spoon—the icing should fall back into the bowl and the ribbon should disappear into the surface within 5-8 seconds. It should be thin enough to smooth itself out, but not so thin that it runs off the cookie.

    7. Transfer to Piping Bags: Fit piping bags with small round tips (or just snip a tiny corner off a disposable bag). Fill with your outline and flood icings. Keep unused icing covered with a damp paper towel to prevent drying.

    8. Outline Your Cookies: Pipe a border around the edge of each cookie using your outline consistency icing. This “dam” will hold the flood icing inside. Let outlines dry for 15-20 minutes until a light crust forms.

    9. Flood the Cookies: Using your flood consistency icing, fill in the area inside the outline. Use a toothpick or scribe tool to guide the icing into corners and pop any air bubbles. Let the icing settle and smooth itself.

    10. Add Details: While the flood icing is still wet, you can add additional colors or details for a layered effect. For details on top of dried icing, wait 4-6 hours (or overnight) until completely set.

    11. Let Dry Completely: Allow decorated cookies to dry uncovered at room temperature for at least 4-6 hours, preferably overnight. The icing should be completely hard to the touch and shiny.

    12. Store: Once dry, store cookies in an airtight container at room temperature for up to 2 weeks. Do not refrigerate—humidity will ruin the shine.

    Pro-Tips for Icing Greatness

    • Meringue Powder is Non-Negotiable: It stabilizes the icing, helps it dry hard, and gives that beautiful matte-shiny finish. Don’t substitute.
    • Gel Food Coloring Only: Liquid coloring adds too much moisture and ruins your carefully adjusted consistency.
    • Cover Unused Icing: This icing dries out fast. Keep bowls covered with a damp paper towel or plastic wrap at all times.
    • Practice on Parchment: If you’re new to decorating, practice outlining and flooding on a piece of parchment paper before touching your cookies.
    • Patience is Everything: Let outlines dry before flooding. Let flooded cookies dry before stacking. Rushing leads to smudges and sadness.
  • Apple Crisp (The One with the Buttery, Crunchy Topping)

    Apple Crisp (The One with the Buttery, Crunchy Topping)

    Some desserts are fancy. This is not one of them. Apple crisp is the dessert that feels like a warm hug, the one that fills your kitchen with the smell of cinnamon and baked apples, the one that requires exactly zero fuss and delivers maximum comfort.

    Tender, cinnamon-spiced apples bubbling away under a blanket of buttery, oat-filled, brown sugar crunch—it’s simple, it’s soul-warming, and it’s absolutely irresistible. The best part? It comes together in minutes with ingredients you probably already have.

    Serve it warm with a scoop of vanilla ice cream melting into every bite, and you’ve got a dessert that feels special without any of the stress. This is the apple crisp you’ll come back to again and again.

    The Secret to the Perfect Crispy, Never-Soggy Topping

    The line between perfect apple crisp and sad, soggy topping is a thin one. The secret to a topping that stays crunchy is cold butter and the right ratio. Cold butter cut into the dry ingredients creates those glorious, craggy clumps that crisp up in the oven instead of melting into a paste.

    The other secret is old-fashioned rolled oats. Quick oats will turn to mush; old-fashioned oats hold their shape and give you that satisfying crunch. And don’t forget the nuts—pecans or walnuts add extra texture and flavor.

    As for the apples, you want a mix of firm, tart apples (like Granny Smith) and sweeter ones (like Honeycrisp) for the perfect balance of flavor and texture. They hold their shape during baking while becoming perfectly tender.

    Ingredients

    For the Apple Filling:

    • 6 cups (about 6-7 medium apples) peeled, cored, and sliced ¼-inch thick
    • 2 tablespoons granulated sugar
    • ¼ cup (50g) packed brown sugar
    • 1 tablespoon lemon juice
    • 1 teaspoon vanilla extract
    • 1 tablespoon all-purpose flour
    • 1 teaspoon ground cinnamon
    • ¼ teaspoon ground nutmeg
    • Pinch of salt

    For the Crisp Topping:

    • 1 cup (120g) old-fashioned rolled oats (not quick oats)
    • ½ cup (65g) all-purpose flour
    • ½ cup (100g) packed brown sugar
    • ½ teaspoon ground cinnamon
    • ¼ teaspoon salt
    • ½ cup (113g) cold unsalted butter, cut into small cubes
    • ½ cup (60g) chopped pecans or walnuts (optional, but highly recommended)

    For Serving:

    • Vanilla ice cream or whipped cream
    • Caramel drizzle (optional)

    Instructions

    1. Preheat and Prep: Preheat your oven to 350°F (175°C). Grease a 9×9-inch (or similar 2-quart) baking dish .
    2. Prepare the Apples: Peel, core, and slice the apples into ¼-inch thick slices. Try to make them uniform so they cook evenly .
    3. Make the Apple Filling: In a large bowl, combine the sliced apples, granulated sugar, brown sugar, lemon juice, vanilla extract, flour, cinnamon, nutmeg, and salt. Toss everything together until the apples are evenly coated .

    4. Transfer to Baking Dish: Pour the apple mixture into the prepared baking dish and spread it into an even layer .

    5. Make the Crisp Topping: In a separate medium bowl, combine the rolled oats, flour, brown sugar, cinnamon, and salt. Whisk to combine.

    Add the cold butter cubes and use a pastry blender, fork, or your fingertips to cut the butter into the dry ingredients until the mixture resembles coarse crumbs with pea-sized butter pieces. Stir in the chopped nuts if using .

    6. Top the Apples: Sprinkle the crisp topping evenly over the apples, covering them completely. Don’t press it down—you want those craggy bits to get crispy .

    7. Bake: Place the baking dish on a baking sheet to catch any bubbling juices. Bake for 40-45 minutes until the topping is golden brown and crisp, and the apples are tender and bubbling around the edges .

    8. Cool Slightly: Let the apple crisp cool for at least 10-15 minutes before serving. This allows the juices to settle and thicken slightly .

    9. Serve Warm: Scoop into bowls while still warm. Top with a generous scoop of vanilla ice cream and a drizzle of caramel if desired .

    10. Store Leftovers (If Any): Cover and refrigerate for up to 3 days. Reheat in the oven at 350°F for 10-15 minutes to re-crisp the topping .

    Pro-Tips for Apple Crisp Greatness

    • Use a Mix of Apples: Tart Granny Smiths hold their shape; sweeter Honeycrisp or Fuji add flavor. A mix gives you the best texture and taste .
    • Keep Butter Cold: Cold butter is essential for a crispy topping. If the butter softens, pop the topping in the fridge for 10 minutes before baking .
    • Don’t Overmix the Topping: You want pea-sized butter chunks, not a uniform paste. Those chunks create the crispy, craggy bits .
    • Bake on a Sheet Pan: Apple crisp loves to bubble over. A baking sheet underneath saves your oven from a sticky mess .
    • Serve Warm with Ice Cream: The contrast of warm, spiced apples and cold, creamy ice cream is the whole point. Don’t skip it .
  • Banana Chocolate Chip Bread (The One with Melty Chocolate in Every Bite)

    Banana Chocolate Chip Bread (The One with Melty Chocolate in Every Bite)

    Let’s be honest: banana bread is great. But banana bread with chocolate chips? That’s greatness. This is the loaf you make when you want something comforting, something familiar, but also something that feels a little bit like a treat.

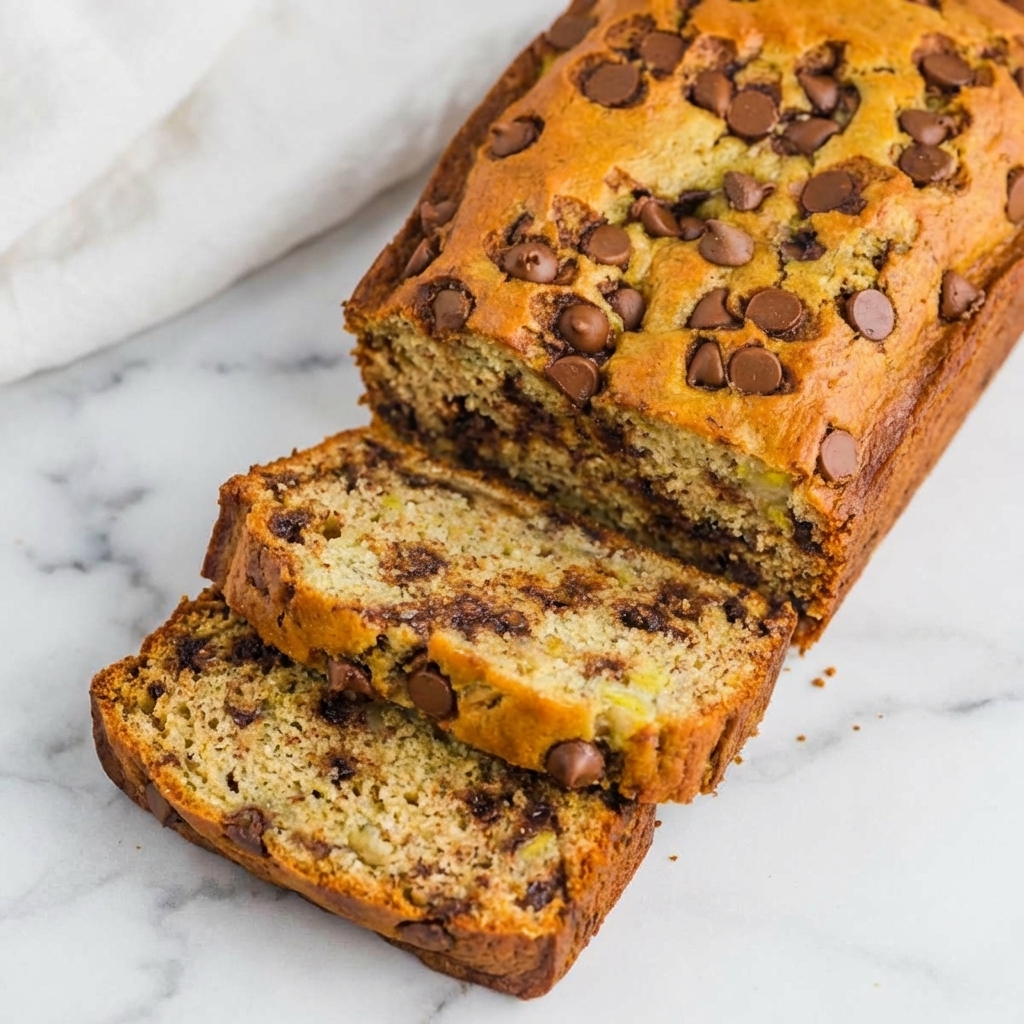
    It’s impossibly moist—thanks to those spotty, overripe bananas—and absolutely studded with melty chocolate chips in every single bite. The chocolate isn’t an afterthought; it’s a feature. It melts into little pools of richness throughout the tender, banana-y crumb.

    Breakfast with a pat of butter? Perfect. Afternoon snack with a glass of milk? Divine. Late-night slice standing in front of the fridge? No judgment here. This is the banana bread that disappears fast.

    The Secret to the Moistest Banana Bread (Every Single Time)

    The secret to outrageously moist banana bread is simple: use really, really ripe bananas. We’re talking bananas that are practically black, the ones you might normally toss. Those spotty, overripe bananas are sweeter and softer than their yellow counterparts, and they break down completely in the batter, infusing every crumb with moisture and flavor.

    The other secret? Don’t overmix. Once the flour goes in, mix just until combined. A few lumps are fine. Overmixing develops gluten, which can make your bread tough instead of tender. And finally, reserve a handful of chocolate chips to sprinkle on top before baking. It makes the loaf look gorgeous and guarantees those melty chocolate pockets on the very first slice.

    Ingredients

    For the Banana Chocolate Chip Bread:

    • 1 ¾ cups (220g) all-purpose flour
    • 1 teaspoon baking soda
    • ½ teaspoon salt
    • ½ cup (113g) unsalted butter, softened
    • ¾ cup (150g) packed brown sugar (light or dark)
    • 2 large eggs, at room temperature
    • 1 teaspoon vanilla extract
    • 1 ½ cups (340g) mashed very ripe bananas (about 3-4 large bananas)
    • ¼ cup (60ml) sour cream or Greek yogurt, at room temperature
    • 1 ½ cups (255g) semi-sweet chocolate chips, divided

    Instructions

    1. Preheat and Prep: Preheat your oven to 350°F (175°C). Grease a 9×5-inch loaf pan and line it with a strip of parchment paper, leaving overhang on the long sides for easy removal .

    2. Mash the Bananas: In a medium bowl, mash your very ripe bananas with a fork until mostly smooth with a few small lumps remaining. Measure out 1 ½ cups (340g) and set aside. The riper the bananas, the better the flavor .

    3. Combine Dry Ingredients: In a separate medium bowl, whisk together the flour, baking soda, and salt. Set aside .

    4. Cream Butter and Sugar: In a large bowl using a hand mixer or stand mixer with the paddle attachment, beat the softened butter and brown sugar together on medium speed until light and fluffy, about 2-3 minutes .

    5. Add Eggs, Vanilla, and Bananas: Add the eggs one at a time, beating well after each addition. Beat in the vanilla extract. Add the mashed bananas and sour cream (or yogurt) and mix until combined. The mixture may look slightly curdled—that’s perfectly normal .

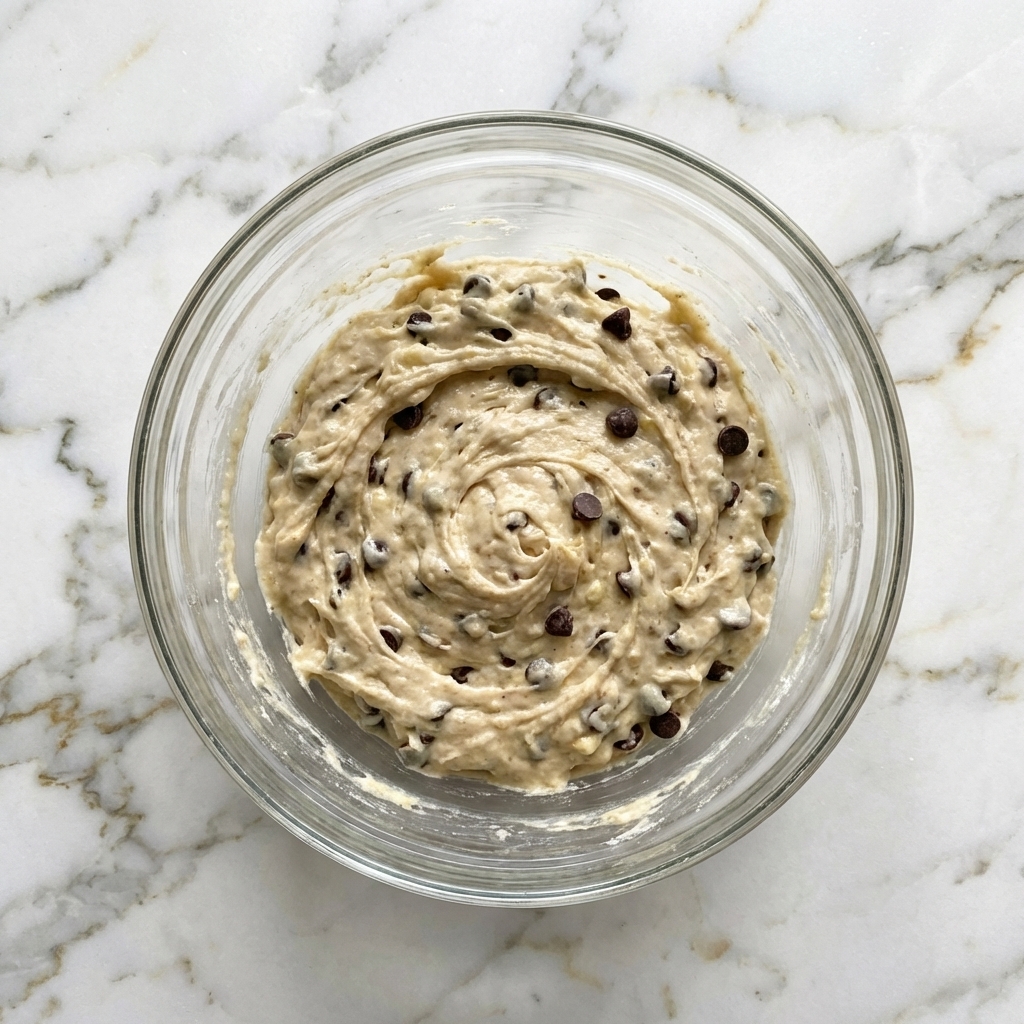
    6. Add Dry Ingredients: Gradually add the dry ingredients to the wet mixture, mixing on low speed just until no streaks of flour remain. Do not overmix. The batter will be thick and lovely .

    7. Fold in Chocolate Chips: Gently fold in 1 ¼ cups of the chocolate chips with a spatula, reserving about ¼ cup for topping .

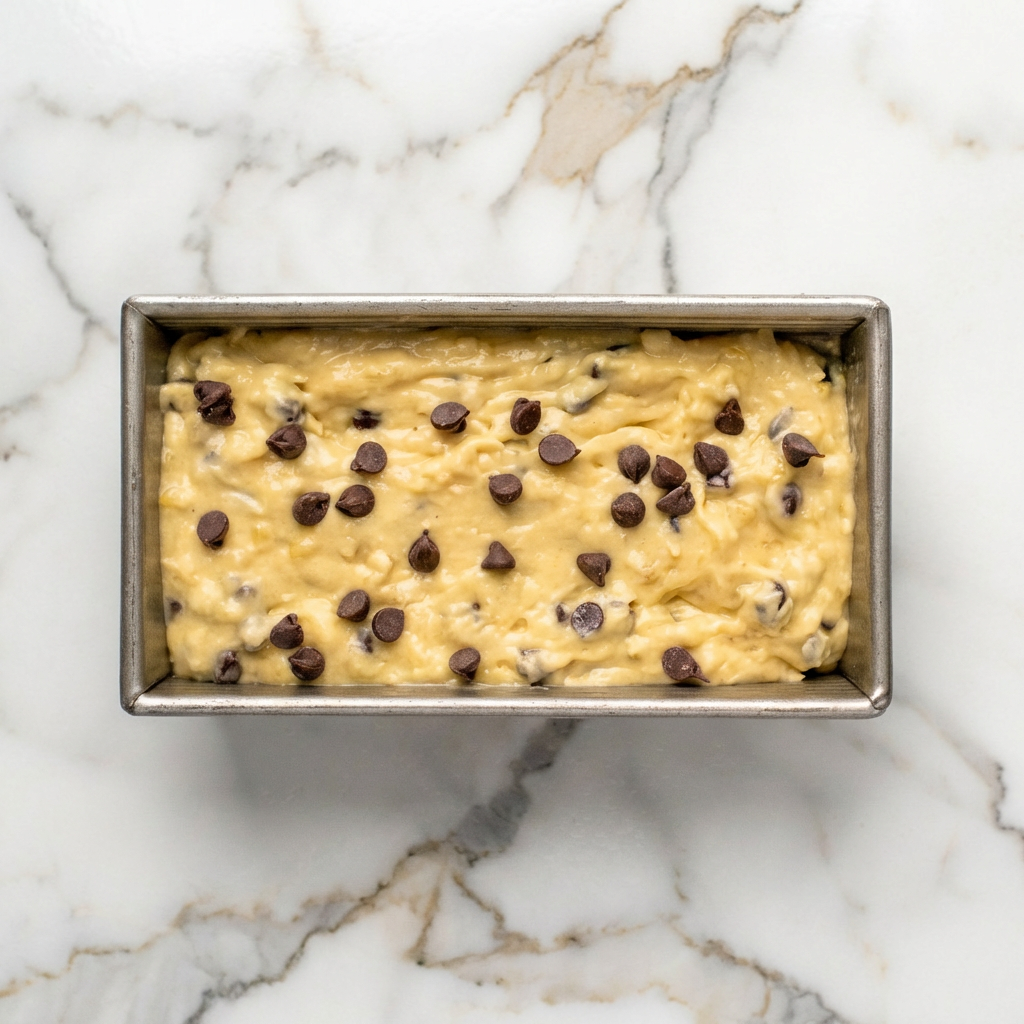
    8. Transfer to Pan: Pour the batter into the prepared loaf pan and spread it evenly. Sprinkle the reserved chocolate chips over the top .

    9. Bake: Bake for 55-65 minutes, until a toothpick inserted into the center comes out clean or with a few moist crumbs (avoid hitting a chocolate chip for an accurate test). If the top is browning too quickly, tent loosely with foil for the last 15-20 minutes .

    10. Cool in Pan: Let the bread cool in the pan for 15-20 minutes. Then, using the parchment overhang, lift it out and transfer to a wire rack to cool completely .

    11. Slice and Serve: Once completely cool, slice and serve. Extra delicious warm with a pat of butter .

    12. Store: Store in an airtight container at room temperature for up to 4 days, or refrigerate for up to a week. It also freezes beautifully for up to 3 months .

    Pro-Tips for Banana Bread Greatness

    • Use Very Ripe Bananas: The blacker, the better. Super-ripe bananas are sweeter, more flavorful, and mash more easily into the batter .
    • Reserve Chips for Topping: Sprinkling chocolate chips on top before baking makes the loaf look gorgeous and guarantees melty chocolate on the first slice .
    • Don’t Overmix: Mix just until the flour disappears. Overmixing = tough bread .
    • Room Temperature Ingredients: Butter, eggs, and sour cream should be at room temperature for a smooth, evenly mixed batter .
    • Test for Doneness Carefully: If you hit a chocolate chip with your toothpick, it will come out wet. Test in a few spots to be sure .
  • Orange Loaf Cake (Sunshine in Loaf Form)

    Orange Loaf Cake (Sunshine in Loaf Form)

    Some desserts are complicated. This is not one of them. This orange loaf cake is simple, humble, and absolutely perfect. It’s the kind of cake you make when you want something beautiful but don’t feel like pulling out the stand mixer and three different bowls. It comes together in minutes, fills your kitchen with the most incredible citrus scent, and emerges from the oven golden, crackly-topped, and begging for a drizzle of orange glaze.

    The crumb is tender and moist, the orange flavor is bright and present without being overwhelming, and that glaze? It soaks into the top just enough to make every bite sing. Breakfast with coffee, dessert with a dollop of whipped cream, or a 3pm slice just because—this cake is sunshine in loaf form.

    The Secret to Maximum Orange Flavor

    If you want a cake that actually tastes like oranges (not just vaguely citrus-adjacent), you need to use oranges in two ways: zest and juice. The zest contains the essential oils that give orange its intense, aromatic flavor.

    Rubbing the zest into the sugar before mixing releases those oils and distributes them evenly throughout the batter. The juice adds brightness and moisture, but it also needs a little help to keep the cake tender—that’s where the buttermilk comes in. Its gentle acidity balances the sweetness and ensures a soft, fine crumb.

    And the glaze? More orange juice and zest, because you can never have too much of a good thing. The result is an orange cake that actually tastes like oranges. Revolutionary, right?

    Ingredients

    For the Orange Loaf Cake:

    • 1 ½ cups (190g) all-purpose flour
    • 1 ½ teaspoons baking powder
    • ½ teaspoon salt
    • ½ cup (113g) unsalted butter, softened
    • 1 cup (200g) granulated sugar
    • 2 tablespoons orange zest (from about 2 large oranges)
    • 2 large eggs, at room temperature
    • 1 teaspoon vanilla extract
    • ½ cup (120ml) buttermilk, at room temperature
    • ¼ cup (60ml) fresh orange juice

    For the Orange Glaze:

    • 1 cup (120g) powdered sugar, sifted
    • 2-3 tablespoons fresh orange juice
    • ½ teaspoon orange zest (optional, for extra zing)

    Instructions

    1. Preheat and Prep: Preheat your oven to 350°F (175°C). Grease a 9×5-inch loaf pan and line it with a strip of parchment paper, leaving overhang on the long sides for easy removal .

    2. Zest and Sugar: In a large bowl, combine the granulated sugar and orange zest. Use your fingertips to rub the zest into the sugar for about a minute, until the sugar is fragrant and slightly orange-tinted. This releases the essential oils and maximizes flavor .

    3. Cream Butter and Orange Sugar: Add the softened butter to the bowl with the orange sugar. Beat with a hand mixer or stand mixer on medium speed until light and fluffy, about 2-3 minutes .

    4. Add Eggs and Vanilla: Add the eggs one at a time, beating well after each addition. Beat in the vanilla extract .

    5. Combine Dry Ingredients: In a separate small bowl, whisk together the flour, baking powder, and salt .

    6. Combine Buttermilk and Orange Juice: In a measuring cup or small bowl, whisk together the buttermilk and fresh orange juice .

    7. Alternate Dry and Wet: With the mixer on low speed, add about one-third of the dry ingredients, mixing just until combined. Add half of the buttermilk mixture, mixing until incorporated. Repeat with another third of the dry, the remaining buttermilk, and finally the last of the dry. Mix just until no streaks of flour remain—do not overmix .

    8. Transfer to Pan: Pour the batter into the prepared loaf pan and spread it evenly .

    9. Bake: Bake for 50-60 minutes, until a toothpick inserted into the center comes out clean or with a few moist crumbs. If the top is browning too quickly, tent loosely with foil for the last 15-20 minutes .

    10. Cool in Pan: Let the cake cool in the pan for 15-20 minutes. Then, using the parchment overhang, lift it out and transfer to a wire rack to cool completely .

    11. Make the Glaze: In a small bowl, whisk together the sifted powdered sugar, 2 tablespoons of orange juice, and orange zest until smooth. The glaze should be thick but pourable. Add the remaining tablespoon of juice if needed .

    12. Glaze and Serve: Once the cake is completely cool, drizzle the glaze generously over the top, letting it cascade down the sides. Let the glaze set for about 15 minutes before slicing. Serve and enjoy .

    Pro-Tips for Orange Cake Greatness

    • Zest First, Juice Second: It’s much easier to zest a whole orange than a squishy, juiced one. Always zest before juicing .
    • Rub Zest into Sugar: This simple step releases the essential oils and makes your cake taste intensely orange. Don’t skip it .
    • Room Temperature Ingredients: Butter, eggs, and buttermilk should be at room temperature for a smooth, evenly mixed batter .
    • Don’t Overmix: Mix just until the flour disappears. Overmixing = tough cake .
    • Cool Completely Before Glazing: If the cake is even slightly warm, your glaze will melt and soak right in instead of sitting beautifully on top .
  • Chia Seed Pudding (Overnight Magic in a Jar)

    Chia Seed Pudding (Overnight Magic in a Jar)

    Let’s talk about breakfast magic. You know, the kind where you do almost nothing and wake up to something amazing? That’s chia seed pudding. It’s the breakfast that makes itself while you sleep, transforming a few simple ingredients into a creamy, dreamy, pudding-like masterpiece by morning.

    Chia seeds are tiny powerhouses—they absorb liquid, plump up, and create this incredible tapioca-like texture that’s both satisfying and nourishing. Packed with protein, fiber, and omega-3s, it’s a breakfast that actually keeps you full.

    And the best part? It’s a blank canvas. Chocolate, vanilla, berry, coconut—you decide. Mix it in a jar before bed, grab it from the fridge in the morning, and spend your extra time feeling brilliant.

    The Science of Chia: How Tiny Seeds Become Pudding

    Chia seeds are little magicians. When they meet liquid, they form a gel-like coating around each seed thanks to their soluble fiber. This process, called gelation, is what transforms a thin liquid into a thick, creamy pudding. The seeds absorb up to 10 times their weight in liquid, plumping up and creating that signature tapioca-like texture.

    The key to perfect chia pudding is ratio and patience. Too many seeds and you get a solid block; too few and it never sets. The magic ratio is 4 tablespoons of chia seeds to 1 cup of liquid. And patience is non-negotiable—they need at least 4 hours (overnight is best) to work their magic. Stir them once after 15-20 minutes to break up any clumps, then let them do their thing. Science never tasted so good.

    Ingredients

    For the Base Chia Pudding (Makes 2 servings):

    • ½ cup (80g) chia seeds (white or black)
    • 2 cups (480ml) milk of choice (dairy, almond, oat, coconut, etc.)
    • 1-2 tablespoons maple syrup, honey, or agave (adjust to taste)
    • 1 teaspoon vanilla extract
    • Pinch of salt

    Flavor Variations (Choose Your Adventure):

    • Chocolate: Add 2 tablespoons cocoa powder
    • Berry: Swirl in ¼ cup berry puree after setting
    • Coconut: Use coconut milk and add ¼ cup shredded coconut
    • Peanut Butter: Add 2 tablespoons peanut butter

    For Topping (The Best Part):

    • Fresh berries, sliced banana, mango, etc.
    • Granola or chopped nuts
    • Shredded coconut
    • Drizzle of nut butter
    • Mint sprigs for garnish

    Instructions

    1. Choose Your Container: Grab a jar, bowl, or any container with a lid. Mason jars are perfect because you can make, store, and eat from the same vessel .

    2. Add Chia Seeds: Pour ½ cup of chia seeds into your container. No need to rinse them—they’re ready to go .

    3. Add Sweetener and Flavorings: Add your maple syrup (or honey), vanilla extract, pinch of salt, and any flavor additions like cocoa powder or peanut butter .

    4. Add Milk: Pour in 2 cups of your chosen milk. Give it a quick stir to begin combining .

    5. Whisk Thoroughly: Whisk vigorously for about 1 minute to break up any clumps of chia seeds. This initial mixing is crucial for a smooth, clump-free pudding .

    6. Wait and Whisk Again: Let the mixture sit for 15-20 minutes, then whisk again. This second whisking breaks up any seeds that have started to clump together at the bottom. It’s the secret to perfectly uniform texture .

    7. Cover and Refrigerate: Put the lid on your container and place it in the refrigerator. Let it set for at least 4 hours, but overnight is best. The longer it sits, the thicker and creamier it becomes .

    8. Check Consistency: In the morning, your pudding should be thick, creamy, and spoonable. If it’s too thick for your liking, stir in a splash of milk until it reaches your desired consistency .

    9. Stir and Portion: Give the pudding a good stir. If you made a big batch, portion it into individual jars or bowls for the week ahead .

    10. Top and Serve: Add your favorite toppings—fresh berries, granola, a drizzle of peanut butter, shredded coconut. The toppings are where you can get creative every single day .

    11. Enjoy: Grab a spoon and dig into your overnight masterpiece. Breakfast is served, and you barely did a thing .

    Pro-Tips for Chia Pudding Greatness

    • Whisk Twice: The initial whisk and the 15-minute re-whisk are non-negotiable for clump-free pudding. Don’t skip it .
    • Patience is a Virtue: Chia pudding needs time. 4 hours minimum, overnight ideal. Rushing it results in runny pudding .
    • Adjust to Your Taste: Like it thicker? Add more chia seeds next time. Like it thinner? Add a splash more milk. You’re in control .
    • Meal Prep Hero: Make a big batch on Sunday and portion into jars for grab-and-go breakfasts all week. It keeps for up to 5 days .
    • Toppings Right Before Serving: Add granola and fresh fruit just before eating to keep them crunchy and fresh, not soggy .
  • Peanut Butter Cottage Cheese Ice Cream (Wait, What?)

    Peanut Butter Cottage Cheese Ice Cream (Wait, What?)

    Yes, you read that right. Cottage cheese. Ice cream. Together. Before you scroll past, hear us out: this is the creamiest, most protein-packed, ridiculously delicious frozen treat you’ll ever make. It’s thick, luscious, and tastes exactly like peanut butter frozen yogurt—but with zero ice cream maker, zero added sugar (if you choose), and a secret ingredient that’s been hiding in your fridge this whole time.

    The cottage cheese blends into absolute silky perfection, leaving no trace of its existence except for a massive protein boost and a texture that’ll make you do a double take. One scoop and you’ll be a believer. Cottage cheese ice cream is here, and it’s amazing.

    The Secret to Silky Smooth Cottage Cheese Ice Cream

    Let’s address the elephant in the room: cottage cheese has a texture. But here’s the thing—when you blend it long enough, it transforms completely. The secret is high-speed blending for a full 2-3 minutes until every last curd is pulverized into absolute silkiness. A good blender is your best friend here.

    The other secret? Freeze your banana. A frozen ripe banana adds natural sweetness and that creamy, scoopable texture that makes this feel like real ice cream. And finally, a little pinch of salt elevates the peanut butter flavor and balances everything. The result is a dessert that’s protein-packed, naturally sweetened, and so good you’ll never believe what’s in it.

    Ingredients

    For the Peanut Butter Cottage Cheese Ice Cream (Makes about 2 servings):

    • 1 cup (225g) cottage cheese (full-fat or 2%, small curd)
    • 1 large ripe banana, peeled and frozen
    • ¼ cup (65g) creamy peanut butter
    • 1-2 tablespoons maple syrup or honey (optional, depending on sweetness preference)
    • ½ teaspoon vanilla extract
    • Pinch of salt
    • 2-3 tablespoons milk (dairy or plant-based), only if needed to blend

    For Topping (Optional but Highly Recommended):

    • Extra drizzle of peanut butter
    • Chopped peanuts
    • Chocolate chips or shaved dark chocolate

    Instructions

    1. Freeze Your Banana: The night before or at least 4 hours ahead, peel a ripe banana, slice it into chunks, and place it in a freezer bag or container. Freeze until solid .

    2. Gather Your Ingredients: Measure out your cottage cheese, peanut butter, maple syrup (if using), vanilla, and salt. Having everything ready makes the blending process smooth .

    3. Combine in Blender: Add the cottage cheese, frozen banana chunks, peanut butter, maple syrup, vanilla extract, and salt to a high-speed blender. A small blender or food processor works best for this .

    4. Blend Until Silky: Start blending on low, gradually increasing to high. Blend for a full 2-3 minutes, stopping to scrape down the sides as needed. The mixture will go from chunky to thick to impossibly smooth and creamy. Be patient—this takes time .

    5. Check Consistency: The mixture should be thick, smooth, and the consistency of soft-serve ice cream. If it’s too thick to blend, add milk one tablespoon at a time just until it moves. You want it as thick as possible while still blending .

    6. Taste and Adjust: Give it a taste. Want it sweeter? Add a little more maple syrup. More peanut butter-y? Another spoonful of peanut butter. Blend briefly to incorporate .

    7. Serve Immediately (Soft-Serve Style): For soft-serve consistency, scoop the mixture into a bowl immediately. It will be thick, creamy, and ready to eat right away .

    8. Freeze for Scoopable Ice Cream: For a firmer, scoopable texture, transfer the mixture to a freezer-safe container. Smooth the top, cover, and freeze for 2-3 hours. If freezing longer than 3 hours, let it sit at room temperature for 10-15 minutes to soften before scooping .

    9. Add Toppings: Before serving, drizzle with extra peanut butter, sprinkle with chopped peanuts, or add chocolate chips for extra indulgence .

    10. Enjoy: Scoop, savor, and marvel at the fact that this is basically healthy .

    Pro-Tips for Cottage Cheese Ice Cream Greatness

    • Use Full-Fat Cottage Cheese: It yields the creamiest, richest result. Low-fat works but will be slightly less luxurious .
    • Blend Longer Than You Think: A full 2-3 minutes is non-negotiable for breaking down those curds into silky smoothness. Don’t rush it .
    • Frozen Banana is Key: It adds natural sweetness and that creamy, ice-cream-like texture. Don’t skip it .
    • Small Blender = Better Results: A smaller blender or food processor handles small batches better than a large one. If using a big blender, you may need to double the recipe .
    • Customize Endlessly: Swap peanut butter for almond butter or cookie butter. Add cocoa powder for chocolate version. Toss in chocolate chips or swirl in jam .
  • Creamy, Dreamy & No-Oven Needed: The Ultimate No-Bake Mango Float

    Creamy, Dreamy & No-Oven Needed: The Ultimate No-Bake Mango Float

    If there’s one dessert that perfectly captures tropical comfort in every bite, it’s the beloved no-bake mango float. With layers of sweet ripe mangoes, lightly sweetened cream, and soft graham crackers that melt into cake-like perfection, this chilled dessert is simple, nostalgic, and absolutely irresistible.

    Often served at celebrations and family gatherings, mango float is especially popular in the Philippines—and for good reason. It’s easy to prepare, requires no oven, and tastes even better after chilling overnight. Whether you’re making it for a party or just craving something refreshing and sweet, this step-by-step guide will walk you through creating the perfect no-bake mango float.


    Why You’ll Love This Recipe

    • No baking required
    • Minimal ingredients
    • Beginner-friendly
    • Make-ahead dessert
    • Perfect for warm weather

    The magic happens in the fridge, where the layers soften and meld together into a creamy, sliceable treat.


    Ingredients You’ll Need

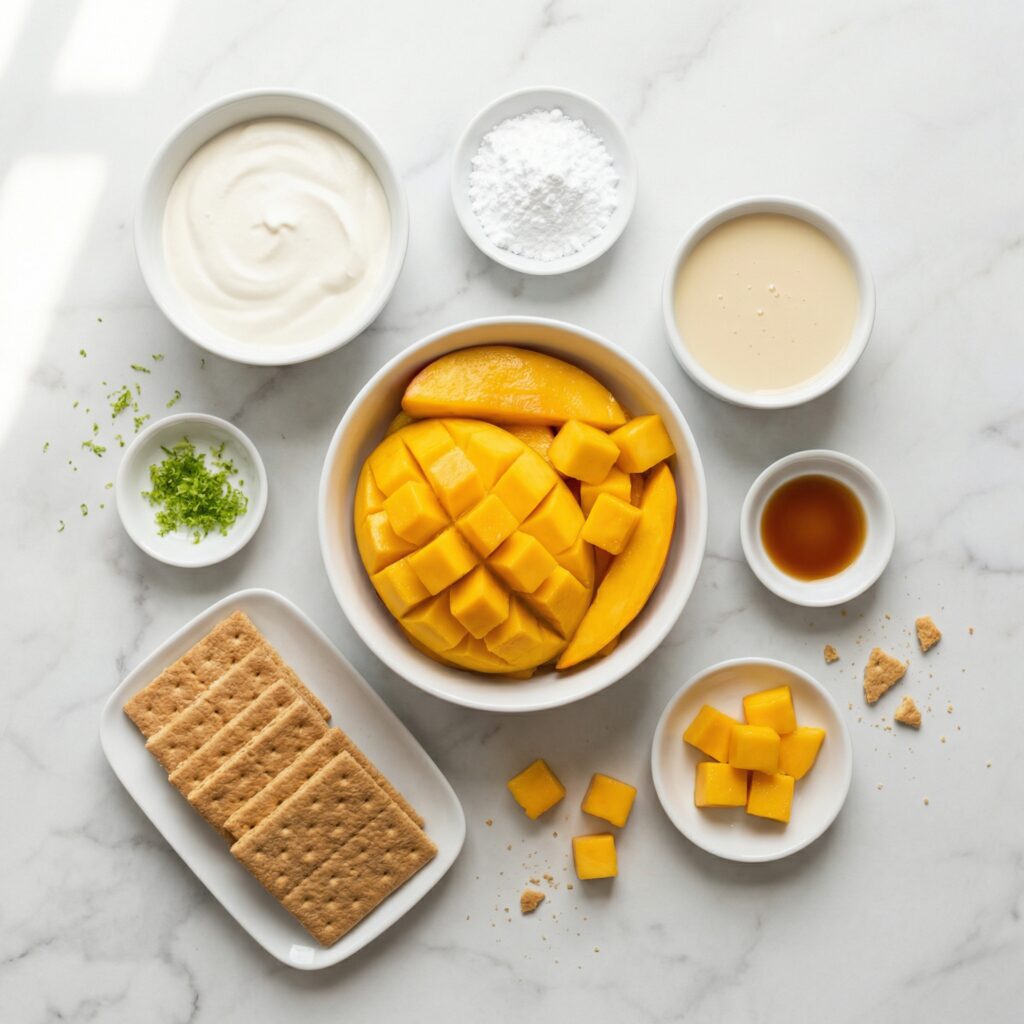
    • 4–5 ripe mangoes (preferably sweet, golden varieties)
    • 2 cups heavy whipping cream (cold)
    • 1 can (14 oz) sweetened condensed milk
    • 2 packs graham crackers

    That’s it—just four simple ingredients for a dessert that tastes like sunshine.


    Step 1: Prepare the Mangoes

    Start by peeling the mangoes and slicing the flesh away from the pit. Cut the mangoes into thin, even slices.

    Try to choose mangoes that are ripe but firm. Overripe mangoes can become mushy and release too much juice, while underripe mangoes may taste tart.

    Set aside a handful of the prettiest slices for the top layer decoration.


    Step 2: Make the Cream Mixture

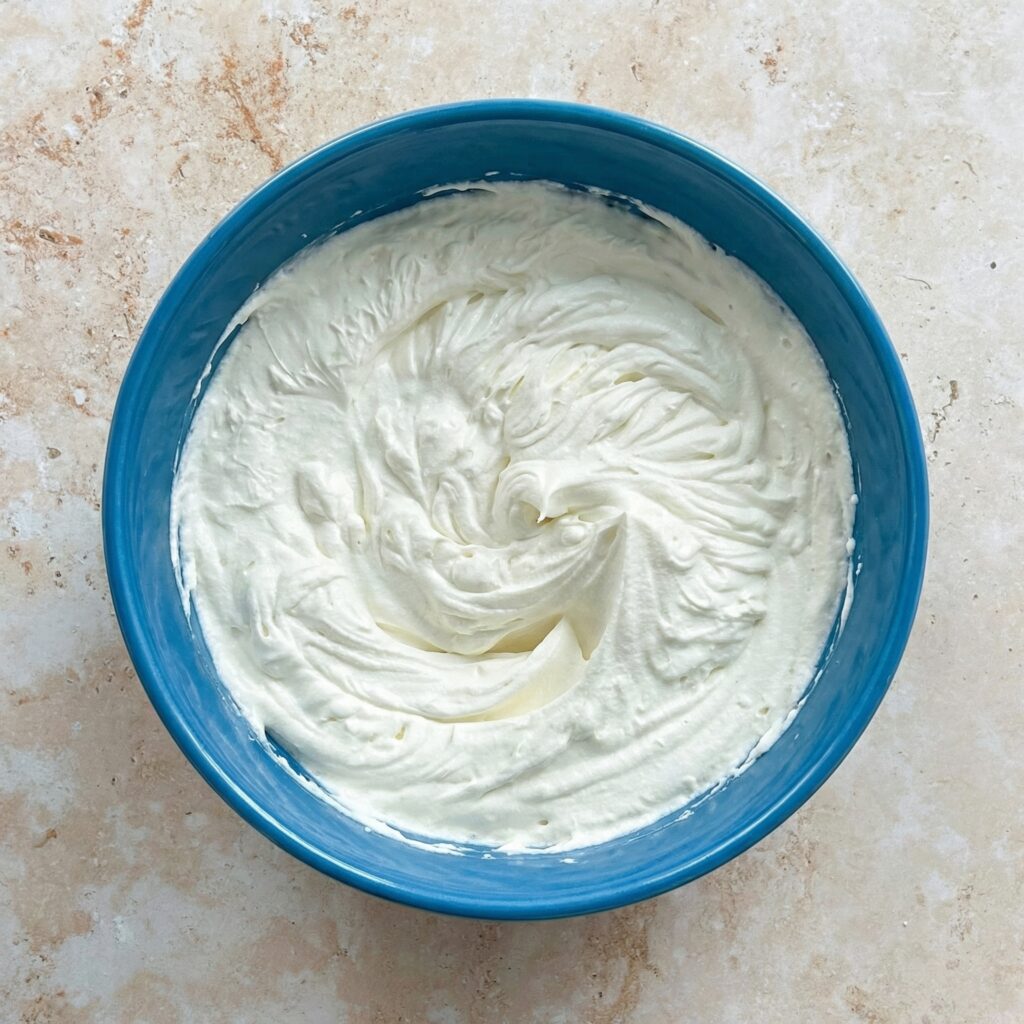
    In a large chilled mixing bowl, pour in the cold heavy whipping cream. Using a hand mixer or stand mixer, whip on medium speed until soft peaks begin to form.

    Gradually add the sweetened condensed milk while continuing to whip. Beat until the mixture thickens to stiff peaks. The cream should hold its shape but still look smooth and fluffy.

    Be careful not to overwhip, as this can cause the cream to become grainy.

    This cream layer is what gives mango float its rich, melt-in-your-mouth texture.


    Step 3: Prepare Your Dish

    Choose a rectangular glass or ceramic dish (8×8 or 9×13 inches works well depending on how thick you want the layers).

    There’s no need to grease the dish since this is a chilled dessert.


    Step 4: Create the First Layer

    Start by arranging a single layer of graham crackers on the bottom of the dish. Break crackers as needed to fully cover the base.

    Spread a generous layer of the whipped cream mixture evenly over the graham crackers.

    Use a spatula to smooth it out into an even layer.


    Step 5: Add the Mango Layer

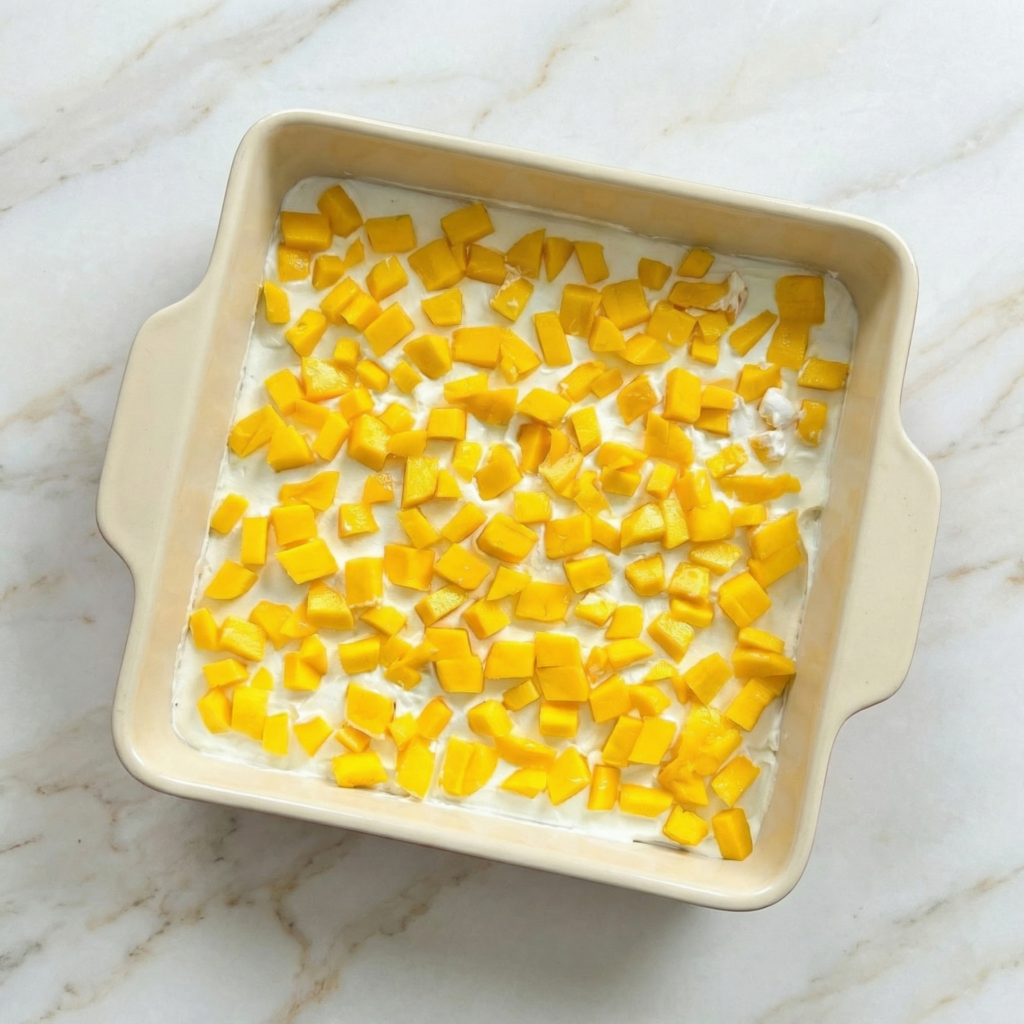
    Arrange a layer of sliced mangoes over the cream. Try to cover the entire surface so each bite has fruit.

    Don’t overcrowd the mangoes—just enough for a balanced layer.


    Step 6: Repeat the Layers

    Repeat the layering process:

    1. Graham crackers
    2. Cream mixture
    3. Mango slices

    Continue layering until you run out of ingredients, finishing with a layer of cream on top.

    Most dishes will yield 3 to 4 layers depending on thickness.


    Step 7: Decorate the Top

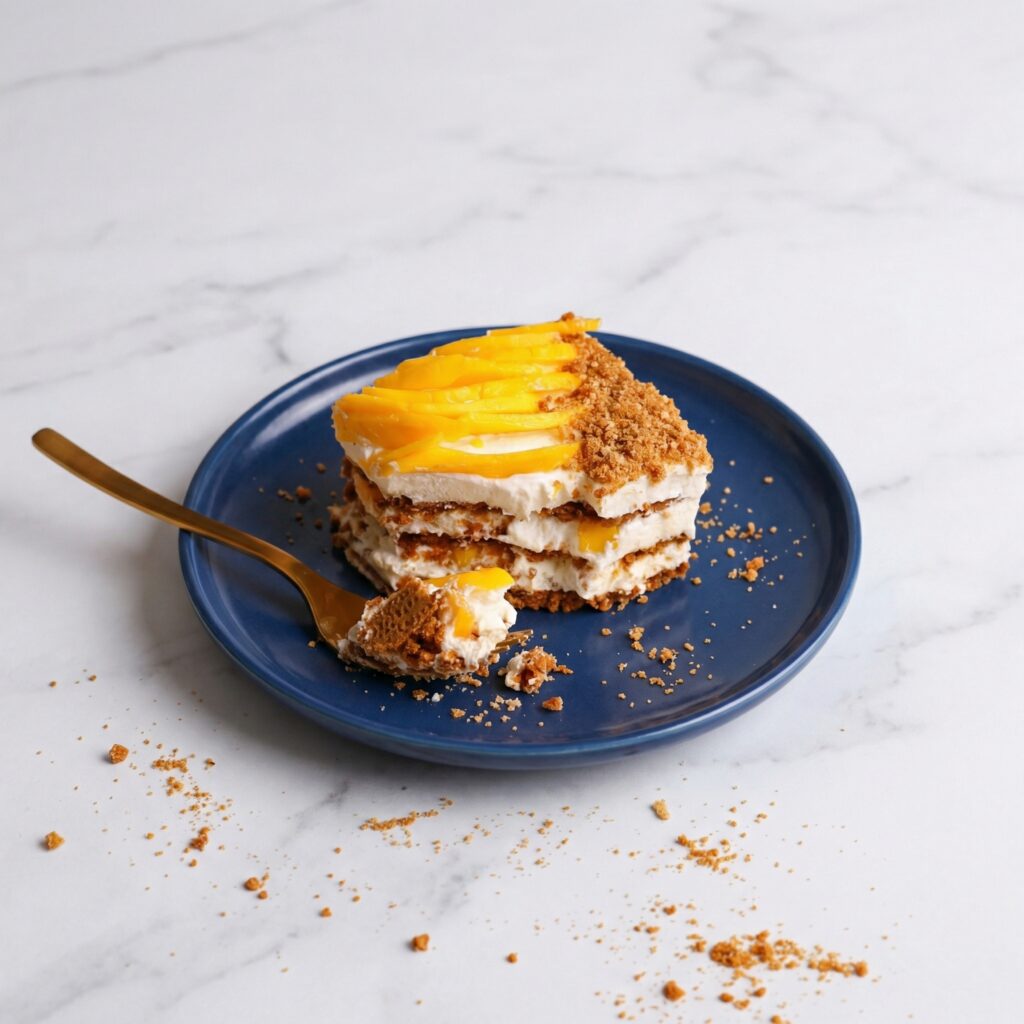
    Use your reserved mango slices to decorate the top layer. You can create neat rows, overlapping slices, or even a simple fan pattern for a more elegant look.

    For extra flair, you can crush a graham cracker and sprinkle crumbs lightly over the top.


    Step 8: Chill to Set

    Cover the dish with plastic wrap and refrigerate for at least 6 hours, though overnight is best.

    During this time, the graham crackers absorb moisture from the cream and soften into a cake-like texture.

    This chilling step is essential—don’t rush it.


    Step 9: Slice and Serve

    Once fully chilled, slice into squares or rectangles using a sharp knife. Wipe the knife clean between cuts for neat slices.

    Serve cold straight from the refrigerator.

    Each bite should be creamy, fruity, and lightly sweet with a soft, layered texture.


    Tips for the Perfect Mango Float

    • Use cold cream for better whipping results.
    • Chill overnight for the best texture.
    • Use ripe, sweet mangoes for natural sweetness.
    • Don’t skip the layering balance—keep cream and fruit evenly distributed.
    • For cleaner slices, briefly chill the dish in the freezer for 20–30 minutes before cutting.

    Storage and Make-Ahead

    Mango float keeps well in the refrigerator for up to 3 days.

    Cover tightly to prevent it from absorbing other refrigerator odors.

    Freezing is optional if you prefer a firmer, ice cream-like texture. Just thaw slightly before serving.


    Optional Variations

    Want to customize your mango float?

    • Add a thin layer of crushed graham crumbs between layers for extra texture.
    • Drizzle a little caramel sauce between layers.
    • Mix small mango cubes into the cream for added fruit distribution.
    • Add a splash of vanilla extract to the whipped cream for deeper flavor.

    Why This Dessert Is So Loved

    No-bake mango float is more than just a dessert—it’s a celebration staple and comfort food classic. It’s simple enough for beginners yet impressive enough for gatherings.

    The contrast between soft graham layers, airy cream, and juicy mango slices makes it refreshing yet indulgent. Every spoonful feels light but satisfying.

    And the best part? You don’t need an oven, complicated techniques, or fancy tools—just layering and patience while it chills.


    If you’re looking for a guaranteed crowd-pleaser that tastes like tropical sunshine, this no-bake mango float delivers every single time. Creamy, fruity, and effortlessly delicious, it’s the kind of dessert that disappears fast—so you might want to make an extra batch.

  • No Oven, All Indulgence: The Ultimate No-Bake Banoffee Pie

    No Oven, All Indulgence: The Ultimate No-Bake Banoffee Pie

    If you’re craving something rich, creamy, and irresistibly sweet—but don’t want to turn on the oven—this No-Bake Banoffee Pie is exactly what you need. With a buttery biscuit crust, luscious caramel filling, fresh banana slices, and fluffy whipped cream, this dessert delivers big flavor with minimal effort.

    Banoffee pie, a beloved British classic, gets its name from “banana” and “toffee.” Traditionally baked, this version skips the oven entirely while keeping all the indulgence. It’s perfect for warm days, last-minute guests, or when you simply want an easy yet impressive dessert.

    Let’s walk through it step by step.


    Why You’ll Love This No-Bake Version

    • No oven required
    • Simple, accessible ingredients
    • Minimal prep time
    • Make-ahead friendly
    • Perfect balance of creamy, crunchy, and sweet

    The secret is creating a firm crust that sets in the refrigerator and layering it with rich dulce de leche and fresh bananas.


    Ingredients You’ll Need

    For the Crust:

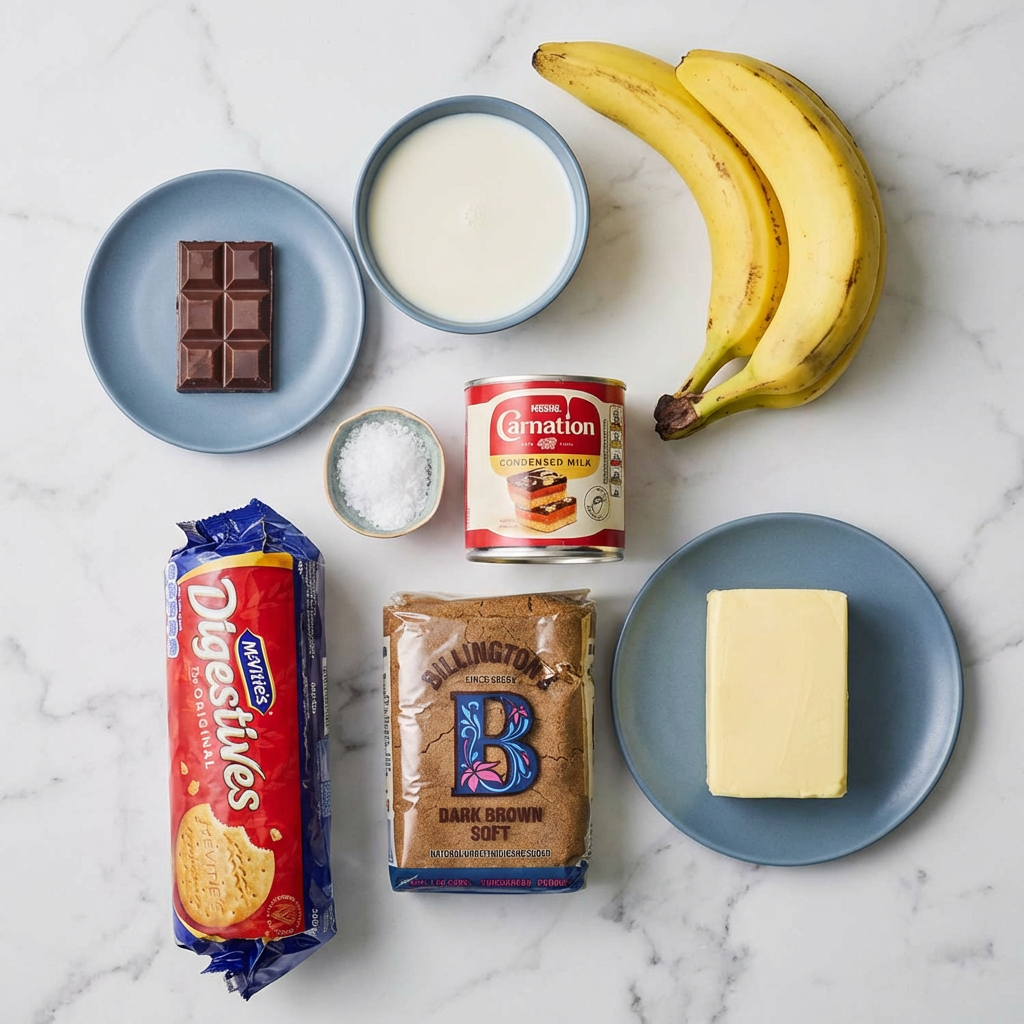
    • 2 cups (200g) graham cracker crumbs or crushed digestive biscuits
    • ½ cup (113g) unsalted butter, melted
    • 2 tablespoons granulated sugar

    For the Filling:

    • 1½ cups dulce de leche (store-bought or canned caramel)
    • 3–4 ripe but firm bananas

    For the Topping:

    • 1½ cups heavy whipping cream
    • 2 tablespoons powdered sugar
    • 1 teaspoon vanilla extract

    Optional garnish:

    • Chocolate shavings or cocoa powder

    Step 1: Prepare the Crust

    In a medium mixing bowl, combine the graham cracker crumbs, melted butter, and sugar. Stir until the mixture resembles wet sand and holds together when pressed between your fingers.

    Press the mixture firmly into a 9-inch pie dish, covering the bottom and slightly up the sides. Use the bottom of a measuring cup to pack it down tightly—this helps it hold its shape once chilled.

    Place the crust in the refrigerator for at least 30–45 minutes to firm up.

    Tip: The firmer you press the crust, the cleaner your slices will be later.


    Step 2: Prepare the Caramel Layer

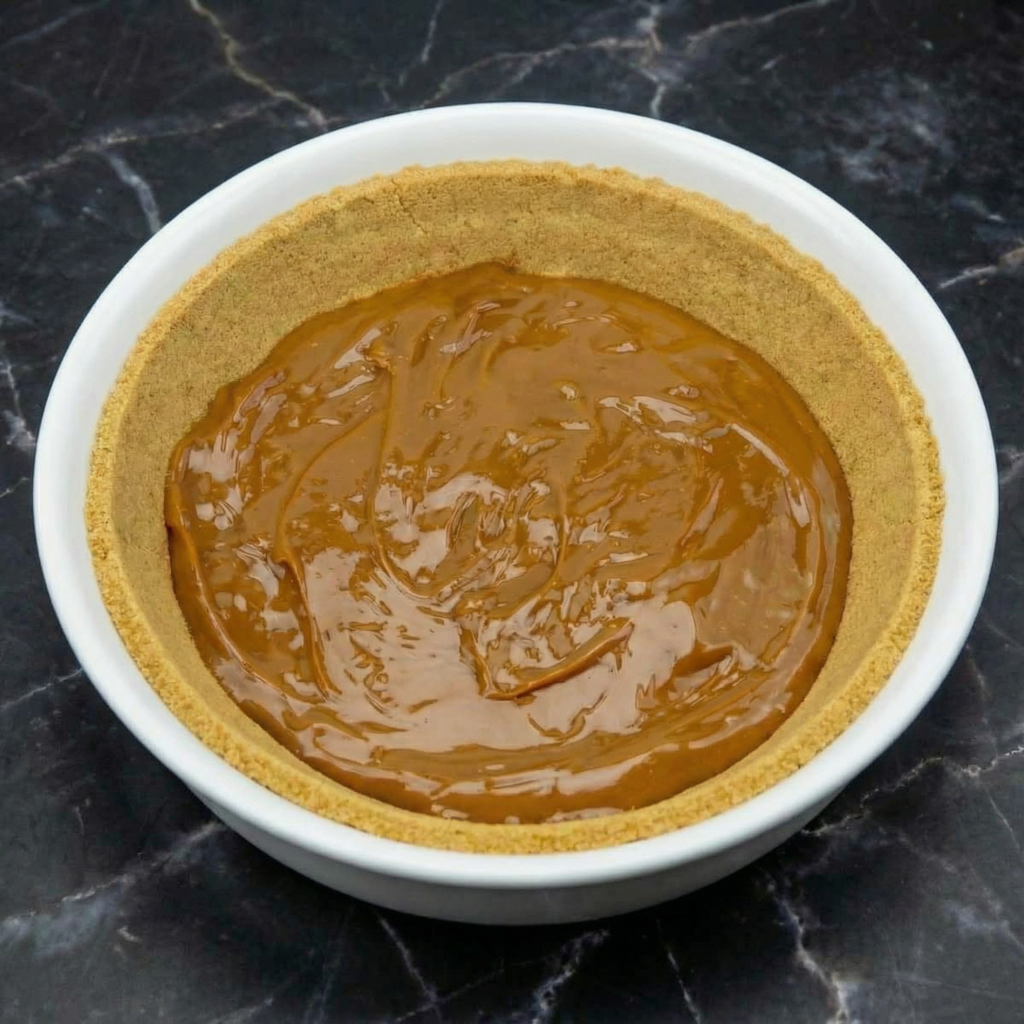
    While the crust chills, stir your dulce de leche until smooth and spreadable. If it’s too thick, warm it gently in the microwave for 10–15 seconds to loosen it.

    Once the crust is firm, spread the dulce de leche evenly across the base. Use an offset spatula or spoon to smooth it into an even layer.

    Return the pie to the refrigerator for about 15 minutes to let the caramel set slightly before adding bananas.

    This step keeps the layers neat and defined.


    Step 3: Slice and Layer the Bananas

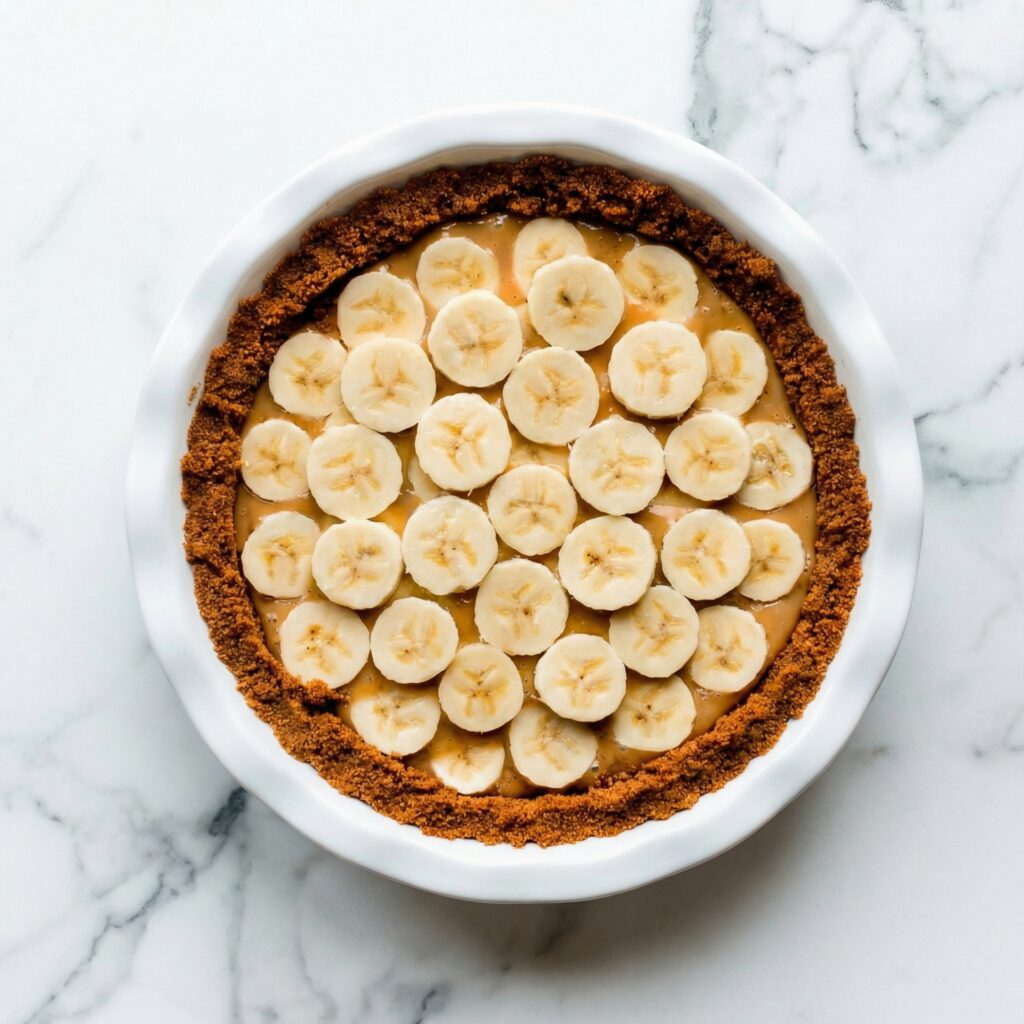
    Peel the bananas and slice them into even rounds, about ¼-inch thick.

    Arrange the banana slices evenly over the caramel layer. You can slightly overlap them, but aim for a consistent layer across the pie.

    Choose bananas that are ripe but still firm. Overripe bananas can become mushy and overly sweet.

    Optional tip: Lightly brush the banana slices with lemon juice to slow browning if making ahead.


    Step 4: Whip the Cream

    In a chilled mixing bowl, add the heavy whipping cream, powdered sugar, and vanilla extract.

    Using a hand mixer or stand mixer, beat on medium-high speed until soft peaks form. Continue whipping until stiff peaks form, meaning the cream holds its shape when you lift the beaters.

    Be careful not to overwhip, as it can turn grainy or begin separating.

    The whipped cream should be thick, fluffy, and smooth.


    Step 5: Add the Final Layer

    Spoon the whipped cream over the banana layer. Spread evenly, or create decorative swirls with the back of a spoon.

    For a polished finish, garnish with chocolate shavings, grated dark chocolate, or a light dusting of cocoa powder.

    This topping adds visual appeal and a subtle chocolate note that pairs beautifully with banana and caramel.


    Step 6: Chill to Set

    Refrigerate the assembled pie for at least 2 hours before serving. This allows the layers to firm up and makes slicing much easier.

    For best results, chill 3–4 hours if time allows.

    The longer it chills (within reason), the better the structure.


    Step 7: Slice and Serve

    Use a sharp knife dipped in warm water for clean slices. Wipe the blade between cuts for neat presentation.

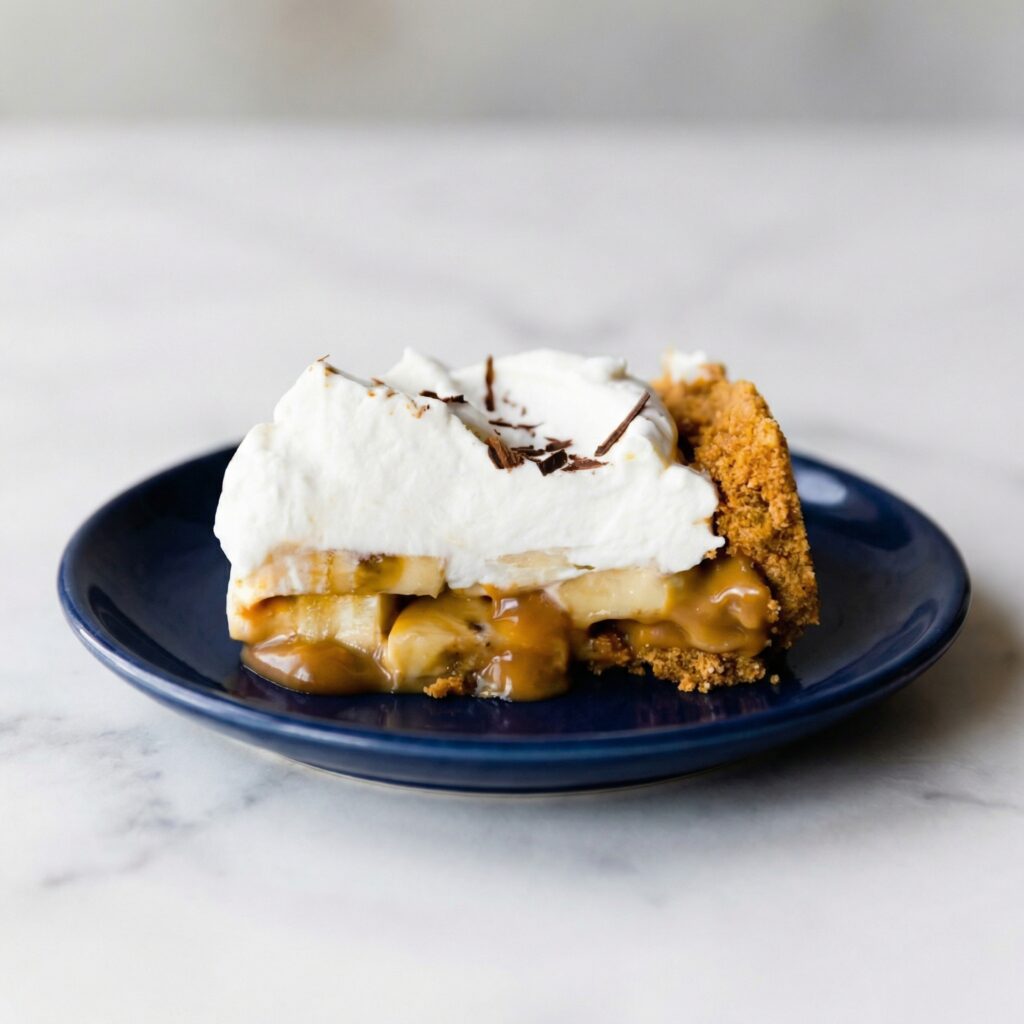
    Each slice should show distinct layers:

    • Firm, buttery crust
    • Thick caramel
    • Fresh banana
    • Cloud-like whipped cream

    Serve chilled for the best texture and flavor balance.


    Tips for the Perfect No-Bake Banoffee Pie

    • Press the crust very firmly to prevent crumbling.
    • Chill between layers to keep structure clean.
    • Use full-fat whipping cream for stable peaks.
    • Avoid overripe bananas.
    • Serve within 24 hours for the freshest appearance.

    Make-Ahead and Storage

    This pie can be made up to one day in advance. Store covered in the refrigerator.

    It’s best enjoyed within 1–2 days, as bananas may begin to brown and release moisture over time.

    Freezing is not recommended because whipped cream and bananas change texture when thawed.


    Optional Variations

    Want to customize it?

    • Add a thin layer of melted chocolate over the crust before caramel.
    • Sprinkle flaky sea salt over the caramel for a salted twist.
    • Use chocolate cookie crumbs instead of graham crackers.
    • Add a drizzle of chocolate sauce on top before serving.

    This No-Bake Banoffee Pie proves that you don’t need an oven to create a show-stopping dessert. With its buttery crust, silky caramel, fresh bananas, and fluffy whipped cream, it’s a guaranteed crowd-pleaser.

    It’s rich yet balanced, simple yet impressive, and easy enough for beginner bakers. Whether you’re hosting guests or treating yourself, this chilled dessert delivers comfort and indulgence in every bite.

    No baking. No stress. Just layers of sweet, creamy perfection.