Author: seasonadmin

  • Pumpkin Spice Tiramisu

    Pumpkin Spice Tiramisu

    Embrace the flavors of fall with this decadent, no-bake Pumpkin Spice Tiramisu. This elegant dessert layers delicate espresso-dipped ladyfinger cookies with an impossibly creamy, spiced pumpkin mascarpone filling.

    The classic tiramisu flavor profile gets a cozy update with pumpkin puree, warm spices, and a hint of maple, creating a perfect balance of bitter coffee, sweet cream, and aromatic autumn spice. Best made ahead, it’s an impressive, fuss-free showstopper for any holiday gathering.

    The Science of Stability & Flavor Layering

    This dessert’s success hinges on the structural integrity of the mascarpone cream and the controlled moisture absorption of the ladyfingers. The cream is a careful emulsion: whipped egg yolks and sugar cooked into a zabaglione (a warm, foamy custard) provide a stable protein network that sets as it cools.

    The mascarpone cheese, a delicate triple-cream, is gently folded in to maintain its fat structure without breaking and becoming grainy. The addition of pumpkin puree introduces moisture and fiber; this is balanced by the thickening power of the egg custard and the whipped cream folded in at the end for lightness.

    The ladyfingers must be dipped, not soaked, in the espresso mixture—a quick in-and-out to prevent them from disintegrating and making the final dessert soggy. This creates distinct, textured layers that hold their shape when served.

    Ingredients

    For the Pumpkin Mascarpone Cream:

    • 6 large egg yolks
    • ¾ cup (150g) granulated sugar
    • ⅔ cup (160ml) heavy cream, cold
    • 1 cup (225g) pumpkin puree (not pie filling)
    • 1 teaspoon vanilla extract
    • 1 ½ teaspoons pumpkin pie spice
    • ¼ teaspoon salt
    • 16 oz (450g) mascarpone cheese, cold

    For the Espresso Dip & Assembly:

    • 1 ½ cups (360ml) hot, strongly brewed espresso or very strong coffee
    • 2 tablespoons maple syrup or granulated sugar (optional)
    • 2 tablespoons coffee liqueur like Kahlúa (optional)
    • About 24-30 Savoiardi (Italian ladyfinger cookies)
    • Cocoa powder and ground cinnamon, for dusting

    Instructions

    1. Prepare the Pumpkin Zabaglione Base: Create a double boiler: simmer 1-2 inches of water in a medium saucepan. In a heatproof bowl that fits snugly over the saucepan (without touching the water), whisk the egg yolks and sugar constantly for 8-10 minutes until the mixture is pale yellow, thickened, hot to the touch, and has doubled in volume.

    It should form a ribbon when the whisk is lifted. Immediately remove from heat and transfer to a clean bowl to stop the cooking. Let cool for 15 minutes.

    2. Whip the Cream & Finish the Filling: In a separate chilled bowl, whip the cold heavy cream to stiff peaks. Set aside. To the cooled egg yolk mixture (zabaglione), whisk in the pumpkin puree, vanilla extract, pumpkin pie spice, and salt until completely smooth. In another large bowl, gently whisk the cold mascarpone just to loosen it (do not over-whip).

    Gently fold the pumpkin-egg mixture into the mascarpone until just combined and smooth. Finally, gently fold in the whipped cream in two additions until no white streaks remain. Cover and refrigerate while preparing the espresso dip.

    3. Prepare the Espresso Dip: In a shallow bowl or pie plate, combine the hot espresso, maple syrup (or sugar), and coffee liqueur (if using). Stir until any sugar dissolves. Let cool to room temperature.

    4. Assemble the Tiramisu: Quickly dip each ladyfinger into the cooled espresso mixture for 1-2 seconds per side (just to moisten, not saturate). Arrange a single layer of dipped ladyfingers in the bottom of a 9×9 inch dish or trifle bowl, breaking them to fit as needed.

    Spread half of the pumpkin mascarpone cream evenly over the ladyfingers. Repeat with a second layer of dipped ladyfingers, followed by the remaining cream. Smooth the top.

    5. Chill & Set: Cover the dish tightly with plastic wrap. Refrigerate for at least 6 hours, or ideally overnight (12-24 hours). This crucial chilling time allows the flavors to meld, the cream to firm up, and the ladyfingers to soften perfectly into a cake-like texture.

    6. Serve: Just before serving, dust the top generously with a mixture of cocoa powder and a light sprinkle of cinnamon. Use a sharp knife or spoon to serve. Store covered in the refrigerator for up to 3 days.

    Pro-Tips for the Perfect Layered Dessert

    • Use Cold Ingredients: Cold mascarpone and heavy cream whip and fold better, preventing a runny filling.
    • Don’t Over-Whip Mascarpone: Whisk it just to loosen; over-whipping breaks the fat and makes it grainy.
    • The Zabaglione is Key: Cook the egg yolks until truly thickened and hot; this pasteurizes them and creates the stable base.
    • Dip, Don’t Soak: The ladyfingers are very porous. Submerging them for more than a few seconds will make the dessert waterlogged.
    • Chill Thoroughly: This is a non-negotiable step for clean layers and perfect texture.
    • Dust Right Before Serving: The moisture from the cream will cause the cocoa powder to “melt” if dusted too early.
    • Quality Matters: Use real pumpkin puree, not pie filling, and good quality mascarpone for the best flavor and texture.

    This Pumpkin Spice Tiramisu is an unforgettable seasonal treat.

  • Lavender Lemon Bars with Shortbread Crust

    Lavender Lemon Bars with Shortbread Crust

    Transform traditional lemon bars into an elegant, fragrant dessert with the subtle floral notes of culinary lavender. These bars feature a rich, melt-in-your-mouth shortbread crust that perfectly complements the bright, tangy lavender-infused lemon curd topping.

    The lavender isn’t overpowering—it creates a sophisticated depth that enhances the citrus flavor. Topped with a snowy dusting of powdered sugar, these bars are as beautiful as they are delicious, making them perfect for spring gatherings, bridal showers, or any occasion that calls for something special.

    The Science of Infusion & Texture Contrast

    The magic of these bars lies in achieving two distinct, perfect textures and a harmonious flavor infusion. First, the shortbread crust relies on the precise ratio of butter to flour and a thorough baking time (called “blind baking”) to create a sturdy, crisp base that won’t become soggy under the wet filling.

    The key to the lavender-lemon curd is infusing the sugar with dried lavender buds before mixing. Heating the sugar with lavender releases its essential oils, imparting a subtle floral aroma without adding bitterness or texture.

    The curd itself sets through a combination of egg proteins coagulating and starch thickening from the flour, resulting in a creamy, sliceable filling that’s firm yet lusciously smooth. The final dusting of powdered sugar not only adds sweetness but also visually accentuates the beautiful yellow layer beneath.

    Ingredients

    For the Shortbread Crust:

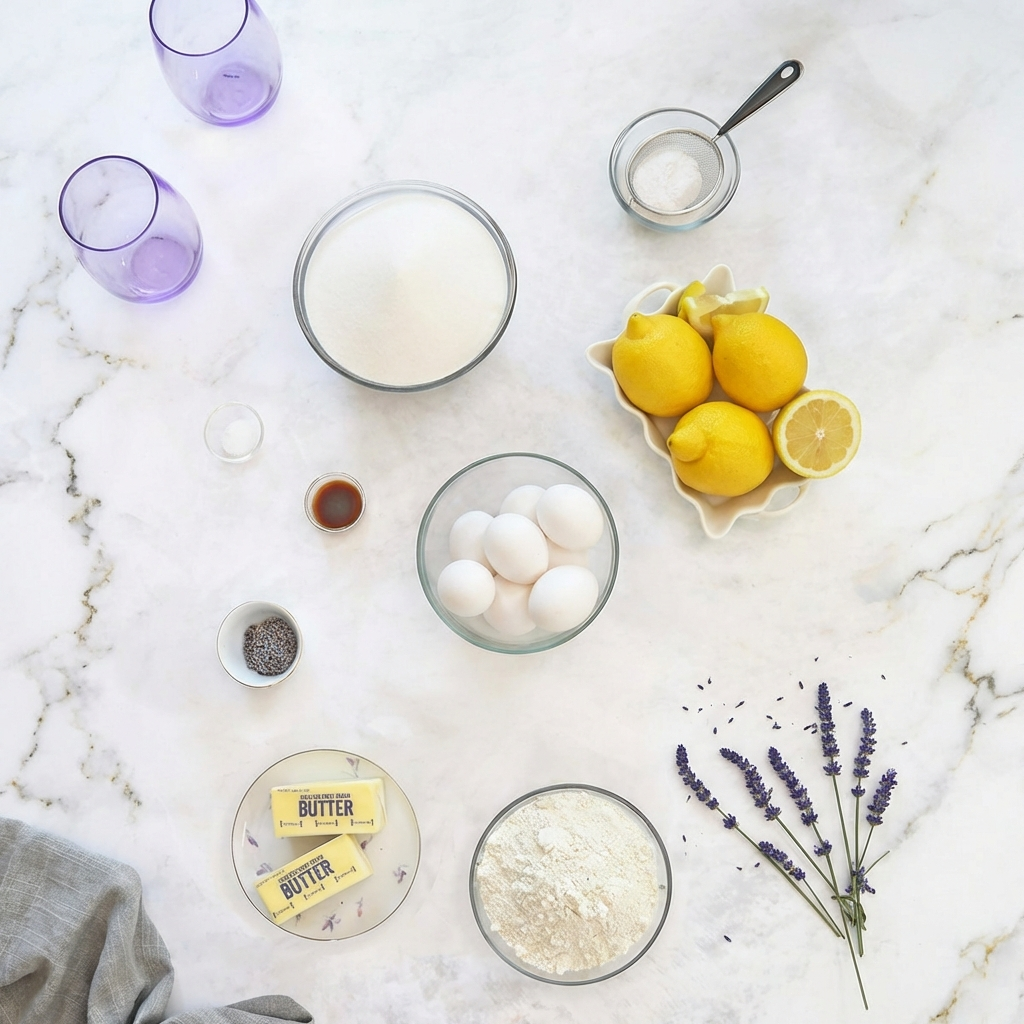
    • 1 cup (2 sticks / 226g) unsalted butter, softened
    • ½ cup (100g) granulated sugar
    • 2 cups (250g) all-purpose flour
    • ¼ teaspoon salt

    For the Lavender-Lemon Curd Filling:

    • 1 ½ cups (300g) granulated sugar
    • 2 tablespoons culinary dried lavender buds
    • 4 large eggs, room temperature
    • ½ cup (65g) all-purpose flour
    • ¾ cup (180ml) fresh lemon juice (about 4-5 lemons)
    • Zest of 2 lemons
    • Powdered sugar, for dusting

    Instructions

    1. Infuse the Sugar & Prepare Crust: Preheat oven to 350°F (175°C). Line a 9×13 inch baking pan with parchment paper, leaving overhang on two sides for easy removal. In a food processor or small bowl, pulse or rub together the 1 ½ cups sugar and dried lavender buds for 1 minute until fragrant.

    Set aside to let the flavors meld. For the crust, in a medium bowl, cream the softened butter and ½ cup sugar until smooth. Gradually mix in the flour and salt until a soft dough forms. Press the dough evenly and firmly into the bottom of the prepared pan.

    2. Pre-Bake (Blind Bake) the Crust: Bake the crust for 18-20 minutes, or until the edges are just beginning to turn a very light golden brown. Remove from oven and let cool slightly while you prepare the filling. Leave the oven on.

    3. Prepare the Lavender-Lemon Filling: In a large bowl, whisk the lavender-infused sugar with the eggs until smooth and slightly pale. Whisk in the flour until no lumps remain. Finally, whisk in the fresh lemon juice and lemon zest until the mixture is smooth and uniform.

    4. Bake the Filled Bars: Pour the lavender-lemon filling over the warm, pre-baked crust. Return the pan to the oven and bake for 22-26 minutes, or until the filling is set. The center should no longer jiggle when the pan is gently shaken, and the top should have a light, matte finish.

    5. Cool Completely & Chill: Place the pan on a wire rack and allow the bars to cool to room temperature in the pan. Once cooled, cover and refrigerate for at least 3-4 hours, or ideally overnight. This chilling step is crucial for the filling to set firmly, ensuring clean slices.

    6. Slice & Serve: Using the parchment paper overhang, lift the entire slab of bars out of the pan and place it on a cutting board. Use a sharp knife to trim off any uneven edges, then slice into squares or rectangles. Dust generously with powdered sugar just before serving.

    Pro-Tips for Perfect Floral-Citrus Bars

    • Use Culinary-Grade Lavender: This is essential—ornamental or sprayed lavender can be bitter or unsafe. Culinary lavender has a mild, sweet flavor.
    • Press the Crust Firmly & Evenly: Use the bottom of a measuring cup to compact the dough. This prevents a crumbly base.
    • Don’t Over-Bake the Crust: It should be pale gold, not brown, as it will bake further with the filling.
    • Strain for Smoothness (Optional): For an ultra-smooth curd with no lavender bits, strain the infused sugar through a fine-mesh sieve before adding to the eggs.
    • Chill Thoroughly: Patience pays off. Proper chilling yields bars that cut cleanly without oozing.
    • Dust Right Before Serving: The powdered sugar will dissolve into the moist lemon layer if applied too early. For a beautiful presentation, wipe your knife clean between cuts.

    These Lavender Lemon Bars offer a delightful and elegant twist on a beloved classic.

  • Salsa Fresca (Pico de Gallo): Fresh Tomato & Onion Salsa Recipe

    Salsa Fresca (Pico de Gallo): Fresh Tomato & Onion Salsa Recipe

    Pico de Gallo, or Salsa Fresca, is the essence of fresh Mexican flavor. Unlike blended salsas, this condiment celebrates texture: a bright, chunky mixture of ripe tomatoes, crisp white onion, spicy jalapeño, and fragrant cilantro, all brought to life with a generous squeeze of lime juice.

    It’s incredibly simple to make but requires a few key techniques to balance flavors and achieve the perfect consistency. This versatile salsa is more than a dip; it’s a fresh topping for tacos, grilled fish, scrambled eggs, and a vibrant side for any meal.

    The Art of Freshness & Balance

    The success of Pico de Gallo hinges on the quality of ingredients and textural contrast. Using ripe, in-season tomatoes is non-negotiable for sweet, deep flavor. The key to taming the raw bite of onion is a brief soak in cold water or a rinse under running water, which washes away the harsh sulfur compounds.

    For consistent heat, remove the jalapeño seeds and ribs for mild salsa, or include them for more spice. The final, critical step is salting and resting. Salt draws moisture from the tomatoes and onions, creating a light, flavorful brine that coats every piece. Allowing the salsa to sit for 15-30 minutes before serving lets the flavors marry and mellow, transforming it from chopped ingredients into a cohesive, vibrant condiment.

    Ingredients

    For the Salsa (makes about 3 cups):

    • 1 ½ lbs (about 4-5 medium) ripe Roma or vine-ripened tomatoes
    • ½ medium white onion
    • 1-2 jalapeño peppers
    • ½ cup packed fresh cilantro leaves and tender stems, chopped
    • 2-3 tablespoons fresh lime juice (from 1-2 limes)
    • ¾ teaspoon fine sea salt, plus more to taste
    • Optional: 1 small clove garlic, minced

    For Serving: Tortilla chips, on tacos, with grilled meats or fish.

    Instructions

    1. The Prepared & Rinsed Diced Onion: Finely dice the white onion. Place the diced onion in a fine-mesh strainer and rinse thoroughly under cold running water for about 30 seconds. Shake off excess water and pat lightly with a paper towel. This step removes the pungent, sulfuric bite, leaving a crisp, clean onion flavor.

    2. The Diced & Seeded Ingredients: Core the tomatoes and cut them into a uniform ¼-inch dice. If desired, scoop out and discard some of the watery seed pulp for a less watery salsa. Finely dice the jalapeño(s), removing seeds and ribs for less heat. Roughly chop the cilantro.

    3. The Combined, Unseasoned Mixture: In a medium glass or ceramic bowl (not metal, which can react with the acid), gently combine the diced tomatoes, rinsed diced onion, diced jalapeño, and chopped cilantro. The mixture will look bright and colorful but dry and distinct.

    4. The Seasoned & Juicy Salsa: Drizzle the fresh lime juice over the vegetable mixture. Sprinkle the salt evenly over the top. Using a large spoon, gently fold everything together until just combined.

    5. The Rested & Marinated Final Salsa: Let the salsa sit at room temperature for at least 15 minutes, or up to 1 hour, stirring once or twice. During this time, the salt will draw out the tomatoes’ juices, creating a light, flavorful liquid in the bottom of the bowl. The flavors will meld and mellow. Taste and adjust with more salt or lime juice as needed. Serve immediately, or refrigerate for up to 3 days (flavor is best within 24 hours).

    Pro-Tips for Perfect Pico

    • Choose the Right Tomatoes: Firm Roma (plum) tomatoes are ideal as they have less watery pulp than beefsteaks.
    • Rinse the Onion: Don’t skip this step—it’s the secret to eliminating harsh onion breath and sharpness.
    • Control the Heat: For mild salsa, use only one jalapeño and remove all seeds and white ribs. For more heat, include the seeds or use serrano peppers.
    • Chop Consistently: Aim for a uniform dice so every scoop has a bit of everything.
    • Use Fresh Lime Juice: Bottled juice lacks the bright, floral notes of fresh lime.
    • Salt Liberally: Salt is what makes the flavors pop and draws out the juices. Don’t be shy.
    • Let it Rest: The resting period is when the magic happens, transforming chopped veggies into salsa.
    • Drain if Needed: If your tomatoes are very juicy, you can drain some of the excess liquid after resting before serving.
    • Make it Ahead: You can chop all ingredients (except salt and lime) a few hours ahead and store them separately in the fridge. Combine, season, and rest 30 minutes before serving.
  • Lemon Macarons: Classic French Meringue Cookies with Zesty Lemon Buttercream

    Lemon Macarons: Classic French Meringue Cookies with Zesty Lemon Buttercream

    Lemon Macarons are the epitome of a delicate, sophisticated treat. This guide walks you through the precise French meringue method to achieve the elusive smooth top, crisp shell, and iconic ruffled “foot.” Filled with a luscious, tangy lemon buttercream, each bite is a perfect balance of sweet and citrus.

    While macarons have a reputation for being tricky, this detailed recipe demystifies the process, helping you create bakery-worthy results that are sure to impress.

    The Science of Macaron Success

    The structure of a macaron is a delicate dance of meringue stability and macaronage (the folding technique). The French meringue—egg whites whipped with granulated sugar—must reach stiff, glossy peaks to provide lift and structure.

    The key step is macaronage: folding the almond flour and powdered sugar mixture into the meringue. You must fold just enough to deflate the meringue slightly and achieve a “lava-like” consistency that flows slowly but still holds a ribbon. Under-mix, and the shells will be lumpy and won’t spread; over-mix, and they will be flat and lack feet.

    The resting period before baking is non-negotiable; it allows the shells to form a skin, which helps them rise upwards in the oven, creating the iconic foot.

    Ingredients

    For the Macaron Shells (makes ~30 filled macarons):

    • 100g (about 3 large) egg whites, aged* at room temperature
    • 100g granulated sugar
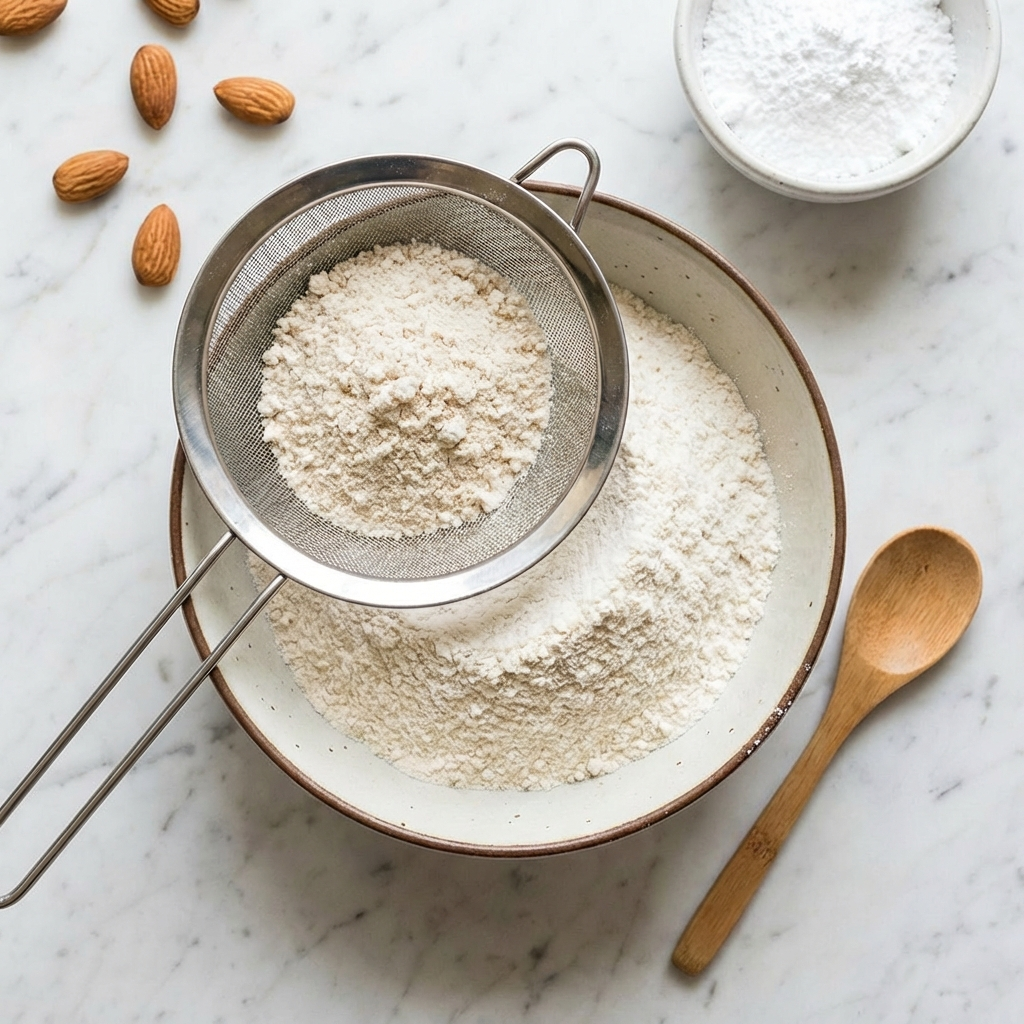
    • 105g almond flour, finely sifted
    • 105g powdered sugar, sifted
    • ¼ teaspoon cream of tartar (optional, for stability)
    • Yellow gel food coloring (optional)

    Aged: Separate eggs 24-48 hours ahead, cover whites, and refrigerate. Bring to room temperature before use.

    For the Lemon Buttercream Filling:

    • ½ cup (1 stick / 113g) unsalted butter, softened
    • 2 cups (240g) powdered sugar, sifted
    • 2 tablespoons fresh lemon juice
    • 1 tablespoon heavy cream or milk
    • Zest of 1 large lemon
    • Pinch of salt
    • Yellow gel food coloring (optional, for brighter color)

    Optional: A small batch of lemon curd for an extra-tangy filling variation.

    Instructions

    1. The Sifted Almond-Powdered Sugar Mixture: In a medium bowl, whisk together the sifted almond flour and sifted powdered sugar until thoroughly combined and lump-free. Sift the entire mixture a second time to ensure absolute fineness.

    2. The Stiff, Glossy French Meringue: In a perfectly clean, grease-free bowl of a stand mixer fitted with the whisk attachment, combine the room-temperature egg whites and cream of tartar (if using). Begin whisking on medium speed until foamy. Gradually add the granulated sugar, about 1 tablespoon at a time.

    Increase speed to medium-high and whip until stiff, glossy peaks form. The meringue should be very thick and hold its shape firmly. If using food coloring, add a small drop at the end and whisk briefly to incorporate.

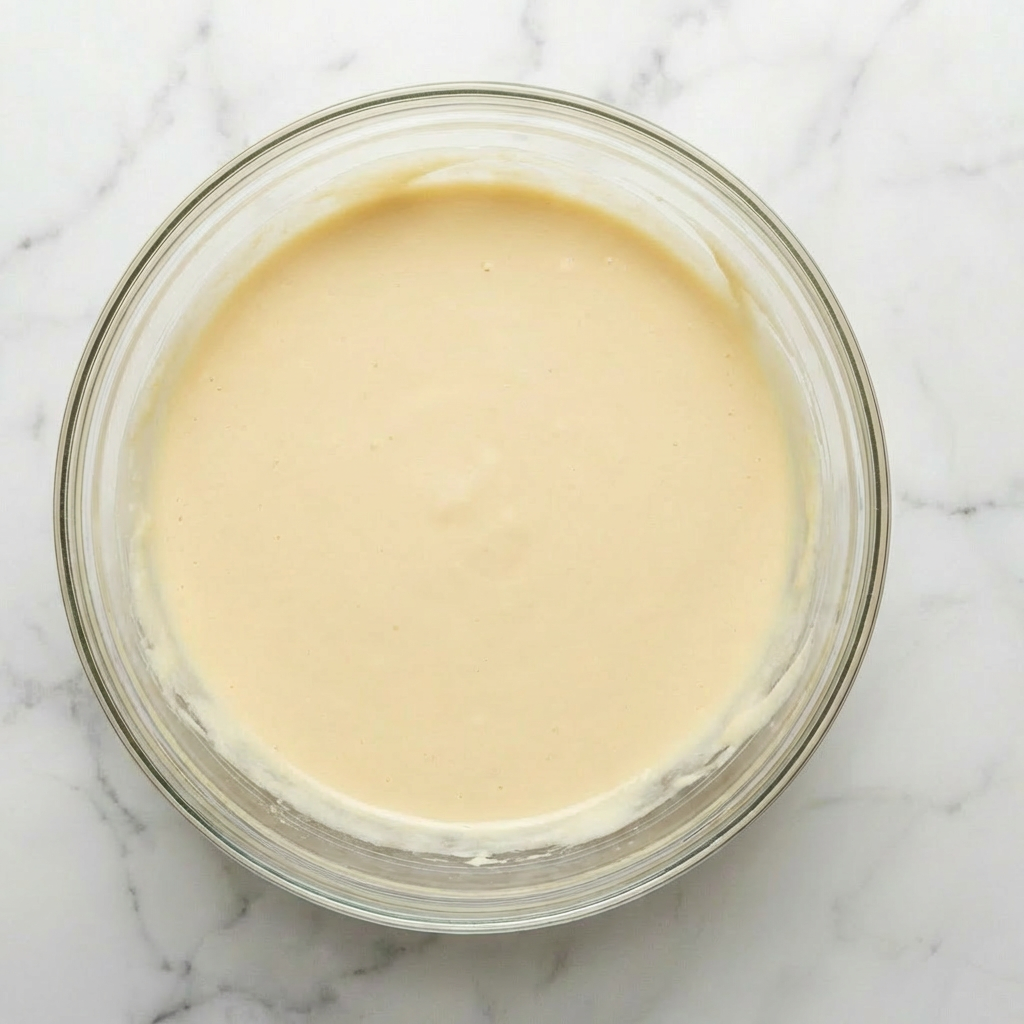
    3. The “Lava-Like” Macaronage Batter: Add about one-third of the almond-sugar mixture to the meringue. Fold gently with a flexible silicone spatula until mostly incorporated. Add the remaining dry ingredients.

    Continue folding, using a circular motion that scrapes the bottom and sides of the bowl, until the batter flows like thick lava and falls off the spatula in a continuous ribbon. When you lift the spatula, the batter should slowly sink back into the bowl and a figure-eight shape should hold for a few seconds before melting back.

    4. The Piped, Skinned Macaron Shells: Fit a piping bag with a ½-inch round tip. Fill with batter. Pipe 1.5-inch rounds onto parchment-lined baking sheets, spacing them about 1 inch apart. Firmly tap the baking sheets several times on the counter to release air bubbles.

    Use a toothpick to pop any remaining surface bubbles. Let the piped shells sit at room temperature for 30-60 minutes, until a dry skin forms on the surface (they should not be sticky to a gentle touch).

    5. The Baked Shells with “Feet”: While shells rest, preheat oven to 300°F (150°C). Bake one sheet at a time in the center of the oven for 15-18 minutes. The shells are done when they look set, have developed ruffled “feet” at the base, and do not wiggle when gently nudged. Let cool completely on the baking sheet before attempting to remove.

    6. The Finished, Filled Macarons: While shells cool, make the filling: beat butter until creamy. Gradually add powdered sugar, then lemon juice, zest, cream, and salt. Beat until light and fluffy. Match up similar-sized shells. Pipe a small dollop of buttercream onto the flat side of one shell, then sandwich with its match.

    Press gently until the filling reaches the edges. For best flavor and texture, store filled macarons in an airtight container in the refrigerator for 24 hours (this “maturation” allows the shells to soften slightly and the flavors to meld). Bring to room temperature before serving.

    Pro-Tips for Macaron Mastery

    • Weigh Your Ingredients: Precision is critical; use a digital kitchen scale.
    • Sift, Don’t Skip: Sifting the almond flour and powdered sugar together multiple times is essential for smooth tops.
    • Room Temperature Egg Whites: They whip to a greater volume than cold ones.
    • No Grease: Ensure your bowl and whisk are impeccably clean.
    • Master Macaronage: This is the most crucial skill. Stop folding when the batter flows slowly like lava.
    • Rest Until Skinned: The dry skin prevents cracking and forces the rise to go outwards, creating the feet.
    • Oven Thermometer: Oven temperature accuracy is vital.
    • One Tray at a Time: Bake in the center of the oven for even heat.
    • Maturation: The 24-hour rest after filling truly transforms the texture.
    • Troubleshooting: Hollow shells often indicate over-whipped meringue or under-mixed batter. Cracked tops usually mean insufficient drying time.
  • Chocolate Tiramisu: Decadent No-Bake Dessert with Mascarpone & Cocoa

    Chocolate Tiramisu: Decadent No-Bake Dessert with Mascarpone & Cocoa

    This is tiramisu reimagined through a chocolate lover’s lens. We keep the soul of the classic—silky mascarpone cream, coffee-soaked ladyfingers—but infuse every layer with rich chocolate. The mascarpone filling is lightened with whipped cream and deepened with melted chocolate, creating a mousse-like cloud.

    Layered with espresso-dipped Savoiardi biscuits and finished with a dramatic dusting of cocoa, it’s a sophisticated, do-ahead dessert that requires no baking and guarantees rave reviews.

    The Science of a Stable, No-Bake Cream

    The magic of tiramisu lies in its ethereal yet sliceable texture. The key is the mascarpone base—a fresh Italian cheese high in fat and low in moisture, which provides richness without making the cream watery.

    To incorporate chocolate without seizing or weighing it down, we use a chocolate custard (zabaglione) base made by gently cooking egg yolks, sugar, and marsala with melted chocolate. This cooked egg base is safe and adds stability. Lightly whipped cream is then folded in for volume.

    The ladyfingers (Savoiardi) are dipped in cold, strong espresso just briefly—a quick “dip and flip”—to absorb flavor without becoming soggy and collapsing. Chilling overnight is non-negotiable, as it allows the flavors to marry and the dessert to set into perfect, clean layers.

    Ingredients

    For the Espresso Dip:

    • 1 ½ cups (360ml) strong brewed espresso or very strong coffee, cooled to room temperature
    • 2 tablespoons coffee liqueur (e.g., Kahlúa) or marsala wine (optional)
    • 1 tablespoon granulated sugar (optional)

    For the Chocolate Mascarpone Cream:

    • 4 large egg yolks
    • ½ cup (100g) granulated sugar
    • ⅓ cup (80ml) marsala wine or coffee liqueur (or strong coffee for alcohol-free)
    • 6 oz (170g) dark chocolate (60-70%), finely chopped
    • 16 oz (450g) mascarpone cheese, cold
    • 1 ½ cups (360ml) heavy whipping cream, cold
    • 1 teaspoon vanilla extract
    • Pinch of salt

    For Assembly:

    • 24-30 ladyfinger cookies (Savoiardi)
    • ½ cup (50g) unsweetened cocoa powder, for dusting (Dutch-process preferred)
    • Dark chocolate shavings for garnish (optional)

    Instructions

    1. The Cooled Espresso Mixture: Combine the cooled espresso, optional liqueur, and sugar (if using) in a shallow bowl or pie plate. Stir until the sugar dissolves. The mixture should be at room temperature or cooler.

    2. The Thick, Cooked Chocolate Zabaglione: Create a double boiler: simmer an inch of water in a saucepan, place a heatproof bowl on top (ensure the bottom doesn’t touch the water). Whisk egg yolks, sugar, and marsala in the bowl.

    Cook, whisking constantly, for 8-10 minutes until thick, pale, and doubled in volume (ribbon stage). Remove from heat. Add the chopped dark chocolate and whisk until completely melted and smooth. Let this chocolate custard cool to room temperature, stirring occasionally.
    3. The Lightened Chocolate Mascarpone Mixture: In a large bowl, whisk the cold mascarpone just until smooth and loosened. Gently fold the cooled chocolate zabaglione into the mascarpone until uniform. In a separate chilled bowl, whip the cold heavy cream with vanilla and salt to medium-stiff peaks.

    Fold one-third of the whipped cream into the chocolate-mascarpone to lighten it, then gently fold in the remaining cream until no white streaks remain. The mixture will be thick, fluffy, and mousse-like.

    4. The Dipped Ladyfingers: Working one at a time, quickly dip each ladyfinger into the espresso mixture for 1-2 seconds per side. They should be moistened but not saturated or they will fall apart. Immediately arrange them in a single layer in the bottom of a 9×13-inch dish or your serving vessel.

    5. The Layered & Chilled Dessert: Spread half of the chocolate mascarpone cream evenly over the layer of dipped ladyfingers. Repeat with a second layer of dipped ladyfingers, then the remaining cream. Cover with plastic wrap directly on the surface. Refrigerate for at least 6 hours, preferably overnight.

    6. The Finished Tiramisu: Just before serving, using a fine-mesh sieve, dust the entire surface generously and evenly with cocoa powder. For a clean design, you can use a stencil. Garnish with chocolate shavings if desired. Slice or scoop to serve, revealing the beautiful layers.

    Pro-Tips for Elegant Layers

    • Cold Ingredients are Key: Use cold mascarpone and cream straight from the fridge for best whipping results.
    • Don’t Over-soften Mascarpone: Just whisk it briefly; over-whipping can cause it to separate and become grainy.
    • Dip Ladyfingers Quickly: The goal is flavor, not saturation. They will soften further as they chill.
    • Cool Everything: The espresso dip and chocolate zabaglione must be at room temp or cooler before assembling to prevent melting the cream.
    • Chill Thoroughly: Overnight chilling is essential for the dessert to set, allowing clean cuts and melded flavors.
    • Dust Cocoa at the End: Dusting with cocoa powder right before serving prevents it from absorbing moisture and becoming blotchy.
    • Use a Hot Knife: For clean slices, dip your knife in hot water and wipe it dry between each cut.
    • Make it Alcohol-Free: Simply omit the liqueur/marsala and use all strong coffee in both the dip and the zabaglione.
  • Nutella Popcorn: Sweet & Salty Chocolate Hazelnut Popcorn Clusters

    Nutella Popcorn: Sweet & Salty Chocolate Hazelnut Popcorn Clusters

    This is not your average popcorn. We’re transforming simple popcorn into a gourmet, crave-worthy treat by coating it in a luxurious glaze made from just Nutella and a touch of coconut oil. Baked until crisp, it forms into addictive sweet-and-salty clusters that are impossible to put down.

    Ready in under 30 minutes, it’s the perfect upgrade for your next movie night, a unique holiday gift, or a spectacular party snack that will have everyone asking for the recipe.

    The Science of the Simple Glaze & Clustering

    The magic lies in a two-ingredient glaze that behaves like chocolate. Nutella provides the flavor, sugar, and fat, while a small amount of refined coconut oil (or another neutral oil) thins it just enough to make it pourable and coat every nook and cranny of the popcorn. When heated and stirred together, they form a fluid, homogenous sauce.

    As this warm glaze coats the popcorn and then cools in the oven, it sets firmly, binding the kernels into those delightful clusters. The optional sea salt sprinkled on top is crucial—it cuts the sweetness and amplifies both the chocolate and popcorn flavors, creating the perfect balance.

    Ingredients

    For the Popcorn & Glaze:

    • 10 cups plain popped popcorn (about ½ cup unpopped kernels or 1 standard microwave bag, unflavored)
    • ¾ cup (225g) Nutella or chocolate-hazelnut spread
    • 2 tablespoons refined coconut oil (or vegetable/canola oil)

    Essential Additions:

    • ½ teaspoon flaky sea salt (plus more for finishing)
    • Non-stick cooking spray or parchment paper

    Optional Mix-Ins & Toppings (Add after baking):

    • ½ cup roasted, salted peanuts or hazelnuts
    • ¼ cup mini marshmallows
    • 2 tablespoons mini chocolate chips
    • A dusting of powdered sugar or cocoa powder

    Instructions

    1. The Prepared Popcorn Base: Pop your popcorn using your preferred method. Place the 10 cups of plain, warm popcorn in an extra-large mixing bowl. Pick out and discard any unpopped kernels. If using microwave popcorn, ensure it is completely plain (no butter or salt). Lightly grease a large, rimmed baking sheet with non-stick spray or line it with parchment paper.

    2. The Liquid Nutella Glaze: In a medium, microwave-safe bowl, combine the Nutella and coconut oil. Heat in the microwave in 30-second bursts, stirring well after each, until the mixture is completely smooth, fluid, and pourable—about 60-90 seconds total.

    Alternatively, you can melt them together in a small saucepan over the lowest possible heat, stirring constantly.

    3. Coating the Popcorn: Immediately pour the warm, liquid Nutella glaze over the popcorn in the large bowl. Using two large spoons or a silicone spatula, gently but thoroughly fold and toss the popcorn until every single piece is evenly coated with a shiny layer of the glaze. Work quickly before the glaze begins to set.

    4. Baking for Crisp Clusters: Spread the coated popcorn in a single layer onto your prepared baking sheet. Sprinkle evenly with the ½ teaspoon of flaky sea salt. Bake in a preheated 300°F (150°C) oven for 15 minutes.

    5. Cooling into Perfect Clusters: Remove the baking sheet from the oven. The popcorn will be glossy and warm. Do NOT stir it. Let it cool completely on the baking sheet for at least 45 minutes to 1 hour.

    As it cools, the glaze will harden, naturally forming the popcorn into the characteristic clusters. Once completely cool and crisp, break it apart with your hands into desired cluster sizes.

    Pro-Tips for Snack Perfection

    • Start with Plain Popcorn: Butter or salt on pre-made popcorn will make the final product too salty or greasy.
    • Remove Unpopped Kernels: This is a tooth-saving essential step!
    • Work Fast with the Glaze: The glaze sets as it cools. Have your popcorn ready and your baking sheet prepared before you melt the Nutella.
    • Low and Slow Baking: The low oven temperature gently crisps the popcorn without burning the sugar in the Nutella.
    • The No-Stir Rule: Resisting the urge to stir during baking and cooling is what allows the clusters to form.
    • Storage: Store in an airtight container at room temperature for up to 5 days. For maximum crunch, add optional nuts or marshmallows only to the portion you plan to serve immediately, as they can soften over time.
    • Gift Idea: Package cooled clusters in cellophane bags tied with ribbon for a delicious homemade gift.
  • Classic, Moist Fruitcake: A Rich, Boozy Holiday Tradition

    Classic, Moist Fruitcake: A Rich, Boozy Holiday Tradition

    Redeem the reputation of fruitcake with this classic, deeply flavorful recipe. This is a proper, aged fruitcake—dense, moist, and rich with the complex flavors of rum or brandy-soaked dried fruits, warm spices, and toasted nuts.

    The secret is in the preparation: the fruits are soaked for days (or even weeks) before baking, and the finished cake is regularly “fed” with spirits for a month, allowing the flavors to mature and mellow into something truly special. Baked in a lined pan for gentle, even cooking, this cake is a cherished holiday project that results in a gift-worthy dessert meant to be sliced thin and savored.

    The Alchemy of Aging: Why Soaking & Feeding is Essential

    A great fruitcake is not baked; it’s cured. The process begins with soaking the dried fruits in alcohol (rum, brandy, or whiskey) for an extended period. This rehydrates the fruit, plumping it with flavor and preventing it from absorbing too much moisture from the batter during baking, which would lead to a dry cake.

    The batter itself is high in fat and eggs, creating a dense, sturdy structure that can support the heavy fruit and nut load. After baking, the “feeding” process begins. Small amounts of spirits are brushed onto the cooled cake every few days. The high sugar and alcohol content act as natural preservatives, while the alcohol slowly evaporates and carries the flavors deeper into the cake.

    Over 3-4 weeks, the sharp alcohol notes mellow, the spices bloom, and the textures homogenize into a moist, sliceable confection that can last for months. This is the antithesis of a dry, bland fruitcake.

    Ingredients

    For the Soaked Fruit (Soak for at least 24 hours, up to 1 week):

    • 3 cups (450g) mixed dried fruit (raisins, sultanas, currants, chopped dates, figs, apricots, cherries)
    • 1 cup (120g) candied citrus peel (optional, or substitute with more dried fruit)
    • ½ cup (120ml) dark rum, brandy, or whiskey, plus more for feeding
    • Zest of 1 orange and 1 lemon

    For the Cake Batter:

    • 1 cup (2 sticks / 226g) unsalted butter, softened
    • 1 cup (220g) packed dark brown sugar
    • 4 large eggs, room temperature
    • ½ cup (120ml) molasses or dark corn syrup
    • 2 cups (250g) all-purpose flour
    • 1 teaspoon baking powder
    • ½ teaspoon baking soda
    • 2 teaspoons ground cinnamon
    • 1 teaspoon ground allspice
    • ½ teaspoon ground nutmeg
    • ½ teaspoon salt
    • 1 cup (120g) toasted nuts (walnuts, pecans, or almonds), roughly chopped
    • ¼ cup (60ml) milk or apple cider

    For the Syrup & Feeding: ¼ cup rum or brandy, for brushing after baking and weekly feeding.

    Instructions

    1. The Soaked & Plumped Dried Fruit (Result of Soaking): At least a day before baking, combine all dried fruits, candied peel, and citrus zest in a large bowl. Pour over ½ cup of rum or brandy. Stir, cover tightly, and let macerate at room temperature, stirring occasionally. The fruit will become plump, fragrant, and have absorbed most of the liquid.

    2. The Creamed Butter & Sugar Base (Result of Creaming): On baking day, preheat oven to 300°F (150°C). Grease, then line a 9×5 inch loaf pan or an 8-inch round pan with a double layer of parchment paper (sides and bottom). In a large bowl, beat the softened butter and brown sugar until light and fluffy, about 3-4 minutes. Beat in the eggs one at a time, then the molasses.

    3. The Fruit & Nut-Studded Batter (Result of Final Mixing): In another bowl, whisk flour, baking powder, baking soda, spices, and salt. Gradually add the dry ingredients to the butter mixture, alternating with the milk, mixing on low until just combined. Fold in the soaked fruit (and any remaining liquid) and the toasted nuts. The batter will be very thick and densely packed with fruit.

    4. The Prepared Pan Ready for Baking (Result of Pan Filling): Spoon the incredibly thick batter into the prepared, parchment-lined pan. Use a wet spoon to smooth the top into a slight dome. For even baking, you can place a pan of hot water on the oven rack below.

    5. The Freshly Baked & Syruped Cake (Result of Baking & Initial Brushing): Bake for 2 to 2 ½ hours, or until a skewer inserted into the center comes out clean (it may hit a sticky fruit piece, so test in a few spots). Let cool in the pan for 30 minutes. Poke holes all over the top with a skewer and brush generously with 2-3 tablespoons of rum or brandy. Let cool completely in the pan.

    6. The Wrapped Cake Ready for Aging (Result of Initial Wrapping): Once completely cool, remove the cake from the pan but leave the parchment paper on. Wrap tightly in a double layer of plastic wrap, then in aluminum foil. Store in an airtight container at cool room temperature.

    7. The Aged & Finished Cake (Result of Feeding Process): Once a week for 3-4 weeks, unwrap the cake, poke it with a skewer, and brush with 1-2 tablespoons of spirits. Rewrap tightly. The cake is ready to slice when it feels uniformly moist and fragrant. Optionally, brush with a final glaze of warmed apricot jam before serving.

    8. Serve & Store: Slice very thinly with a sharp, serrated knife. Serve at room temperature. Properly fed and wrapped, the cake can be stored for several months in a cool, dark place.

    Pro-Tips for a Legendary, Long-Lasting Fruitcake

    • Soak Your Fruit: Do not skip this step. Longer soaking (up to a week) yields a more flavorful, moist cake.
    • Low & Slow Baking: The low oven temperature prevents the outside from burning before the dense center is cooked through.
    • Parchment is Your Friend: Thorough lining prevents dark, hard edges and allows for easy removal.
    • Feed Consistently: The weekly “feeding” is what transforms a good cake into a great one. Don’t rush the aging process.
    • Choosing Spirits: Use a spirit you enjoy drinking. Dark rum and brandy are classics, but bourbon, sherry, or even strong black tea (for non-alcoholic) work.
    • High Fruit-to-Batter Ratio: This cake should be mostly fruit and nuts, held together by just enough batter. Don’t be alarmed by the thick mixture.
    • The Gifting Cake: Small, well-fed fruitcakes make exceptional holiday gifts. Wrap them in cheesecloth soaked in brandy before gifting.

    This Classic Fruitcake is a celebration of time, tradition, and transformed ingredients.

  • Japanese Castella Cake: The Iconic Jiggly, Honey-Sweet Sponge Cake

    Japanese Castella Cake: The Iconic Jiggly, Honey-Sweet Sponge Cake

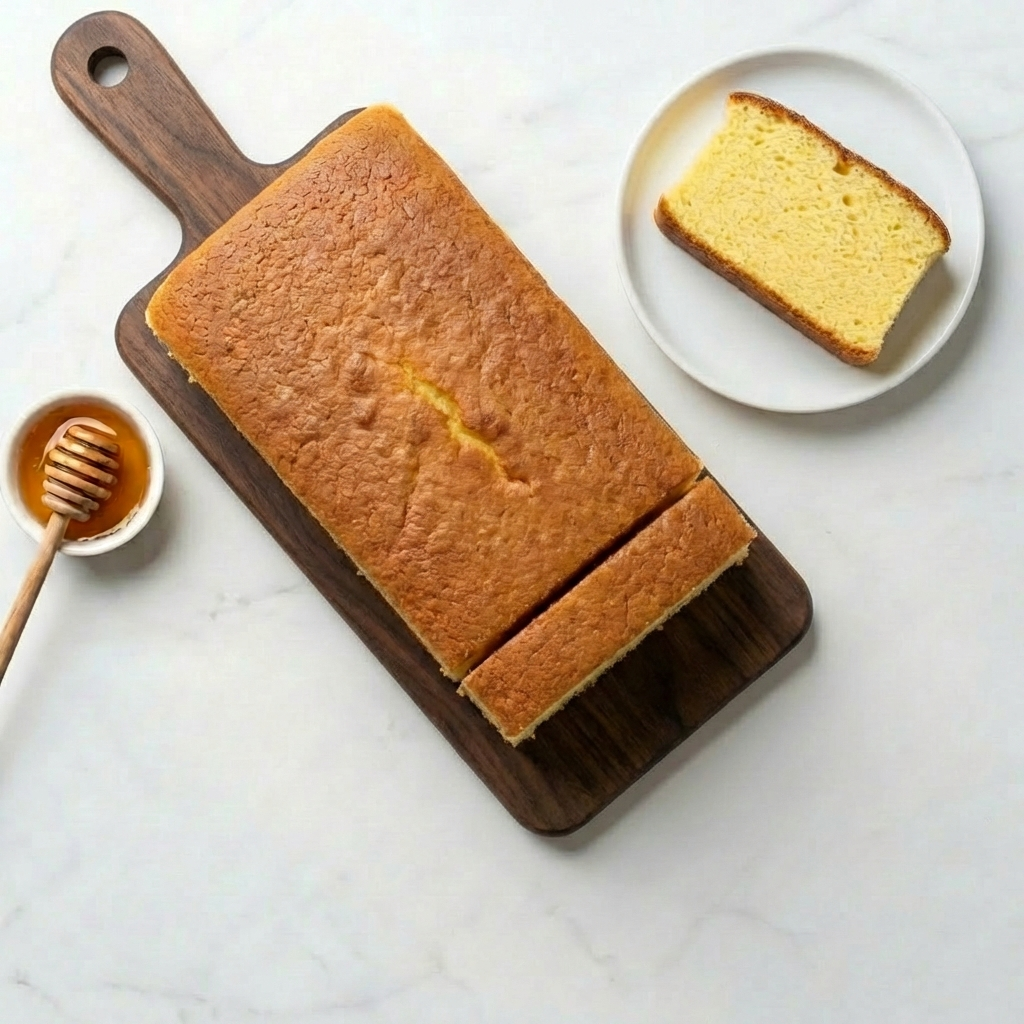
    Castella is a legendary Japanese sponge cake with Portuguese origins, perfected in Nagasaki. Known for its signature rectangular shape, flat top, and incredibly soft, moist, and elastic texture, it’s a dessert that feels like a cloud yet has a satisfying richness.

    The recipe is deceptively simple—eggs, sugar, flour, and honey—but the technique is everything. Through careful folding, a special water bath, and a long, slow bake, the cake develops a fine, velvety crumb that is both jiggly and substantial.

    Traditionally baked in a wooden box (which insulates and steams the cake), it’s a subtly sweet, comforting treat enjoyed with tea and celebrated for its beautiful simplicity.

    The Science of the Jiggly, Moist Crumb

    The magical texture of Castella comes from two key techniques: extreme aeration of the eggs and gentle, steam-assisted baking. The eggs and sugar are warmed slightly (often over a water bath) and then whipped for an extended period—up to 10-15 minutes—until they reach a thick, pale, ribbon-like consistency.

    This creates a stable foam with thousands of tiny air bubbles that form the cake’s structure. The flour is then folded in with extreme care to avoid deflating this precious foam. The cake is baked in a hot water bath (bain-marie) at a relatively low temperature.

    The steam from the water bath ensures gentle, even heat, preventing the cake from drying out or forming a hard crust. It promotes a slow rise and sets the egg proteins gently, resulting in an exceptionally moist, springy, and tender cake with its characteristic flat top. The honey in the batter not only sweetens but also helps retain moisture for days.

    Ingredients

    For the Castella Cake (fits an 8×4 inch loaf pan or traditional wooden box):

    • 5 large eggs, room temperature*
    • 1 cup (200g) granulated sugar
    • 2 tablespoons (30ml) honey (plus 1 extra tablespoon for glaze)
    • 2 tablespoons (30ml) warm water or milk
    • 1 cup (125g) bread flour or high-protein cake flour, sifted 3 times**
    • 2 tablespoons (30g) unsalted butter, melted and cooled

    Room temperature eggs whip to a much greater volume. **Bread flour provides the signature chewy-yet-soft texture. All-purpose flour can be used for a slightly lighter cake.

    Instructions

    1. The Ribbon-Stage Egg Foam (Result of Whipping): Preheat oven to 320°F (160°C). Line an 8×4 inch loaf pan with parchment paper, leaving overhang on all sides for easy removal. In a large heatproof bowl, combine eggs and sugar.

    Place the bowl over a pot of simmering water (double boiler), ensuring the bottom doesn’t touch the water. Whisk constantly for 5-7 minutes until the sugar is completely dissolved and the mixture is warm to the touch (about 105°F / 40°C).

    Remove from heat. Using a hand mixer or stand mixer, whip on high speed for 8-10 minutes until the mixture is very thick, pale yellow, and forms a thick ribbon that holds its shape for a few seconds when the whisk is lifted.

    2. The Lightened Honey-Milk Mixture (Result of Tempering): In a small bowl, mix the 2 tablespoons of honey and warm water/milk until combined. Take about 1 cup of the whipped egg foam and gently whisk it into the honey mixture to lighten it. This makes it easier to incorporate without deflating the main foam.

    3. The Folded Batter (Result of Incorporating Dry Ingredients): Sift the bread flour over the remaining egg foam in three additions. Using a large flexible spatula, fold gently after each addition until just combined—do not overmix.

    Pour the lightened honey mixture around the edge of the bowl and fold gently to incorporate. Finally, drizzle the cooled melted butter around the edge and fold gently until the batter is smooth, shiny, and flowing like thick pancake batter.

    4. The Prepared Pan in Water Bath (Result of Pan Prep): Pour the batter from a low height into the prepared loaf pan. Tap the pan firmly on the counter 2-3 times to release large air bubbles. Place the loaf pan inside a larger roasting pan. Pour hot water into the roasting pan until it comes halfway up the sides of the loaf pan.

    5. The Freshly Baked Cake (Result of Baking): Bake for 55-65 minutes. The cake is done when the top is a deep golden brown, springs back when lightly touched, and a skewer inserted comes out clean. If the top browns too quickly, tent loosely with foil.

    6. The Inverted & Wrapped Cake (Result of Immediate Post-Bake Steps): As soon as the cake comes out of the oven, run a thin knife around the edges (not lined by parchment) and immediately invert it onto a sheet of parchment paper on a flat surface.

    Peel off the parchment from the bottom (now top) of the cake. While still hot, brush the top with 1 tablespoon of honey mixed with ½ teaspoon of water. Carefully re-invert the cake so the honey-brushed side is up. Wrap the entire warm cake tightly in plastic wrap while it’s still in its rectangular shape. This traps steam and ensures even moisture distribution.

    7. The Cooled, Pressed & Sliced Cake (Result of Resting): Place the wrapped cake in a sealed container or bag and refrigerate for 6-8 hours or overnight. Before slicing, place the unwrapped cake between two flat boards or plates with a light weight on top for 1-2 hours to create perfectly straight sides. Slice with a sharp, serrated knife dipped in hot water.

    8. Serve & Store: Serve at room temperature. Store wrapped in the refrigerator for up to 5 days. The flavor and texture improve after 1-2 days.

    Pro-Tips for the Perfect Jiggly Castella

    • Whip Until Truly Ribbon Stage: This is the most important step. The batter should be so thick that you can write a “figure 8” that holds for 3 seconds.
    • Fold with a Light Hand: Use a spatula in a gentle “J” motion, scraping from the bottom. Overmixing deflates the batter and leads to a dense cake.
    • Bread Flour is Traditional: The higher gluten content gives Castella its unique springy, slightly chewy texture. For a softer cake, use cake flour.
    • The Hot Inversion & Wrap: Inverting the cake immediately prevents shrinkage and creates a flat top. Wrapping it warm is crucial for achieving the signature moist, tight crumb.
    • Press for Perfect Slices: The weighting step creates the classic, perfectly rectangular slices with clean edges seen in Japanese bakeries.
    • Patience is Key: The overnight rest allows the flavors to meld and the texture to set.

    Castella is a testament to the beauty of technique and restraint.

  • Medovik: The Legendary Russian Honey Cake with Sour Cream Frosting

    Medovik: The Legendary Russian Honey Cake with Sour Cream Frosting

    Medovik is a masterpiece of Slavic baking—a stunning layer cake known for its tender, soft honey-infused layers and luxuriously tangy sour cream frosting. Unlike typical cakes, the magic of Medovik happens after assembly. As it chills overnight, the crisp-baked layers soften from the frosting, transforming into a melt-in-your-mouth, harmoniously sweet-and-tangy dessert.

    While making the many layers is a labor of love, the process is simple and deeply rewarding. Topped with a blanket of fine honey-crumb dust, this cake is a showstopper for special occasions and a beloved tradition that gets better with every bite.

    The Science of Softening Layers & Stable Frosting

    Medovik’s unique texture is a study in culinary patience. The cake layers start as a cooked honey syrup (often with baking soda, which helps them brown and rise slightly), which is then mixed into flour to form a soft dough. Each layer is rolled thin, baked quickly until golden and slightly crisp, then trimmed to perfect circles.

    The sour cream frosting is the transformative agent. Made by whipping thick sour cream (or smetana) with sugar and sometimes butter, it is spread generously between the layers. As the cake rests under weight in the refrigerator for 12-24 hours, the moisture from the frosting gradually migrates into the dry layers, softening them to a pliable, cake-like consistency without becoming soggy.

    The key is using full-fat sour cream and stabilizing the frosting, sometimes with whipped cream or a cooked flour mixture, to prevent it from separating. The final crumb coating, made from the trimmed layer edges, seals in moisture and adds visual texture.

    Ingredients

    For the Honey Cake Layers (Makes 8-10 layers):

    • ½ cup (170g) honey (preferably a flavorful variety like wildflower)
    • ¾ cup (150g) granulated sugar
    • ½ cup (1 stick / 113g) unsalted butter
    • 3 large eggs, room temperature
    • 1 teaspoon baking soda
    • 3 ½ cups (440g) all-purpose flour, plus more for dusting

    For the Sour Cream Frosting:

    • 32 oz (900g) full-fat sour cream, chilled (or smetana)
    • 1 ½ cups (180g) powdered sugar, sifted (or to taste)
    • 1 teaspoon vanilla extract (optional)
    • Pinch of salt
    • Optional Stabilizer: 1 cup (240ml) heavy cream, whipped to stiff peaks, folded in at the end.

    Instructions

    1. The Cooked Honey-Butter Syrup (Result of Cooking): In a medium saucepan, combine honey, sugar, and butter. Heat over medium, stirring until melted and combined. Bring to a gentle simmer and cook for 3-4 minutes, stirring occasionally.

    Remove from heat. Whisk in baking soda—the mixture will foam up dramatically. Let cool for 10-15 minutes until warm, not hot.

    2. The Soft Honey Dough (Result of Mixing Dough): In a large bowl, lightly beat the eggs. Gradually pour the warm (not hot) honey syrup into the eggs while whisking constantly.

    Gradually add the flour, mixing first with a spoon, then with your hands, until a soft, slightly sticky dough forms. It should pull away from the bowl. Cover and let rest at room temperature for 30 minutes.

    3. The Baked & Trimmed Cake Layers (Result of Baking & Trimming): Preheat oven to 350°F (175°C). Divide dough into 8-10 equal pieces. On a well-floured surface, roll each piece into a very thin circle (about 8-9 inches in diameter), using a plate as a guide. Transfer to a parchment-lined baking sheet.

    Bake for 4-6 minutes each until golden brown with darker spots. They will be pliable when hot but crisp as they cool. While still warm, trim each layer to a perfect 8-inch circle using a plate and knife. Reserve all trimmings.

    4. The Prepared Sour Cream Frosting (Result of Whipping): While layers cool, make the frosting. In a large bowl, whisk the chilled sour cream, powdered sugar, vanilla, and salt until smooth and thickened. If using the whipped cream stabilizer, gently fold it in now. The frosting should be thick and spreadable.

    5. The Assembled, Un-set Cake (Result of Layering): Place one cake layer on a serving plate. Spread with a generous ⅓ to ½ cup of frosting, all the way to the edges. Repeat with all layers, ending with a layer of cake. Spread a thin layer of frosting over the top and sides to seal in crumbs (a crumb coat). Use remaining frosting for a final, thicker coat. Do not worry if layers seem uneven or crisp—they will soften.

    6. The Cake Ready for Resting (Result of Crumb Coating): Process the reserved cake trimmings in a food processor into fine crumbs. Press the crumbs firmly onto the top and sides of the frosted cake, covering it completely. Cover the cake loosely and refrigerate for at least 12 hours, preferably 24.

    7. Serve & Store: After resting, the cake will have softened perfectly. Slice with a sharp, serrated knife. Store covered in the refrigerator for up to 5 days.

    Pro-Tips for the Perfect Medovik

    • Don’t Skip the Syrup Cook: Cooking the honey mixture deepens its flavor and ensures the right dough consistency.
    • Roll the Layers Thin: Aim for 1/8-inch thickness or less. They bake quickly and will soften properly.
    • Embrace Imperfect Circles: Slight unevenness is part of the charm, but trimming ensures a neat final shape.
    • Frosting Consistency: If your sour cream is watery, strain it in a cheesecloth-lined sieve for 1-2 hours before using.
    • The Long Rest is Mandatory: This is not a cake you can serve immediately. The 12-24 hour rest is what creates the signature soft, cohesive texture.
    • Weigh the Cake: For exceptionally even layers, place a pot lid or second plate on top of the assembled cake before chilling.
    • Flavor Variations: Add a tablespoon of rum or cognac to the frosting, or sprinkle ground walnuts between the layers.

    Medovik is more than a cake; it’s a delicious lesson in patience rewarded.

  • Basque Burnt Cheesecake: The Rustic, Custardy Cheesecake with No Crust

    Basque Burnt Cheesecake: The Rustic, Custardy Cheesecake with No Crust

    Hailing from San Sebastián, the Basque Burnt Cheesecake is a revelation in simplicity and flavor. This crustless wonder forgoes the fuss of a water bath or perfect smoothing, instead celebrating high heat and dramatic contrast.

    The result is a cheesecake with a bold, bittersweet caramelized “burnt” top and a rich, velvety, almost soufflé-like interior that remains luxuriously jiggly in the center.

    Baked in a parchment-lined pan that creates beautiful rustic folds, it requires just a handful of ingredients and one bowl. It’s a sophisticated dessert that’s unexpectedly easy to master, perfect for impressing guests with its stunning, wabi-sabi beauty.

    The Science of the “Burnt” Top & Custardy Center

    The magic of this cheesecake lies in its high-temperature bake. While a New York cheesecake is baked low and slow to prevent cracking, the Basque version is blasted at 400-450°F (200-230°C). This intense heat rapidly caramelizes the sugars on the surface, creating the signature dark, complex top while the inside remains undercooked and custardy.

    The lack of a crust and simple ingredient list—cream cheese, sugar, eggs, heavy cream, and a bit of flour—creates a batter with a high moisture content. The small amount of flour provides just enough structure to set the edges while allowing the center to stay gloriously loose.

    As it cools, the center falls slightly, creating the classic sunken appearance. The “burnt” top is not a mistake but a deliberate layer of deep, bittersweet flavor that perfectly balances the sweet, creamy interior.

    Ingredients

    For the Cheesecake (use a 9-inch or 10-inch springform pan):

    • 32 oz (904g / 4 blocks) full-fat cream cheese, softened to room temperature
    • 1 ½ cups (300g) granulated sugar
    • 5 large eggs, room temperature
    • 2 cups (480ml) heavy cream or whipping cream, room temperature
    • ⅓ cup (40g) all-purpose flour, sifted
    • 1 teaspoon fine sea salt
    • 1 teaspoon pure vanilla extract (optional but classic)

    Note: Room temperature ingredients are critical for a smooth, lump-free batter.

    Instructions

    1. The Prepared Parchment-Lined Pan (Result of Pan Prep): Preheat oven to 400°F (200°C). Take a large sheet of parchment paper and crumple it into a ball, then uncrumple it. This makes it more pliable.

    Line a 9-inch springform pan with the parchment, pressing it into the bottom and up the sides. It will have rustic, dramatic folds—this is part of the charm. Trim any excess paper hanging more than 2 inches above the rim.

    2. The Smooth, Liquid Cheesecake Batter (Result of Mixing): In a large bowl using a hand mixer or stand mixer with the paddle attachment, beat the softened cream cheese on medium speed until completely smooth and creamy, about 2 minutes. Add the sugar and beat for another 1-2 minutes until well combined. Add the eggs, one at a time, beating well after each addition and scraping down the bowl.

    With the mixer on low, slowly pour in the heavy cream, then add the sifted flour, salt, and vanilla (if using). Mix just until the batter is smooth, homogenous, and liquid—it will have the consistency of a very thick pancake batter.

    3. The Filled Pan Ready for Baking (Result of Pouring): Pour the batter through a fine-mesh sieve into the prepared parchment-lined pan. This ensures an ultra-smooth final texture. Tap the pan gently on the counter to release any large air bubbles. The batter will come up high in the pan.

    4. The Freshly Baked, Puffed Cheesecake (Result of Baking): Bake on the middle rack for 50-60 minutes. The cake will rise dramatically, the top will become deeply dark brown to nearly black, and it will still have a pronounced, wobbly jiggle in the center when you gently shake the pan. The edges will be set and slightly pulled away from the parchment.

    5. The Cooled & Sunken Cheesecake (Result of Cooling): Let the cheesecake cool completely in the pan on a wire rack. As it cools, it will deflate and the center will sink, creating a beautiful, uneven surface with dramatic cracks and folds. This is exactly what you want. Refrigerate for at least 4 hours, or preferably overnight, to allow it to fully set.

    6. Serve & Store: To serve, carefully remove the springform ring and peel down the parchment paper. Slice with a hot, clean knife (wiped between cuts). Serve chilled or at cool room temperature. Store leftovers covered in the refrigerator for up to 5 days.

    Pro-Tips for the Perfect Rustic Burnt Cheesecake

    • Room Temperature is Non-Negotiable: Cold cream cheese or eggs will create a lumpy batter that cannot be smoothed out. Plan ahead.
    • Embrace the Dark Top: Do not be afraid of the color. A deeply caramelized, nearly black top provides the essential bittersweet counterpoint to the sweet, rich filling. It should smell toasty, not acrid.
    • The Jiggle Test: The center should look underbaked and jiggle like Jell-O when you pull it from the oven. It will set as it cools. Overbaking leads to a dry, cakey texture.
    • Strain the Batter: Straining may seem fussy, but it guarantees the signature velvety, custardy texture without any tiny lumps of cream cheese.
    • Chill Thoroughly: The cheesecake must be completely chilled to be sliceable. The flavor also deepens overnight.
    • Variations: Add the zest of one lemon for brightness, or a tablespoon of brandy or rum for depth. For a chocolate version, add ½ cup (50g) sifted cocoa powder with the flour.

    The Basque Burnt Cheesecake is a testament to the beauty of imperfection and the power of simple ingredients transformed by fire.