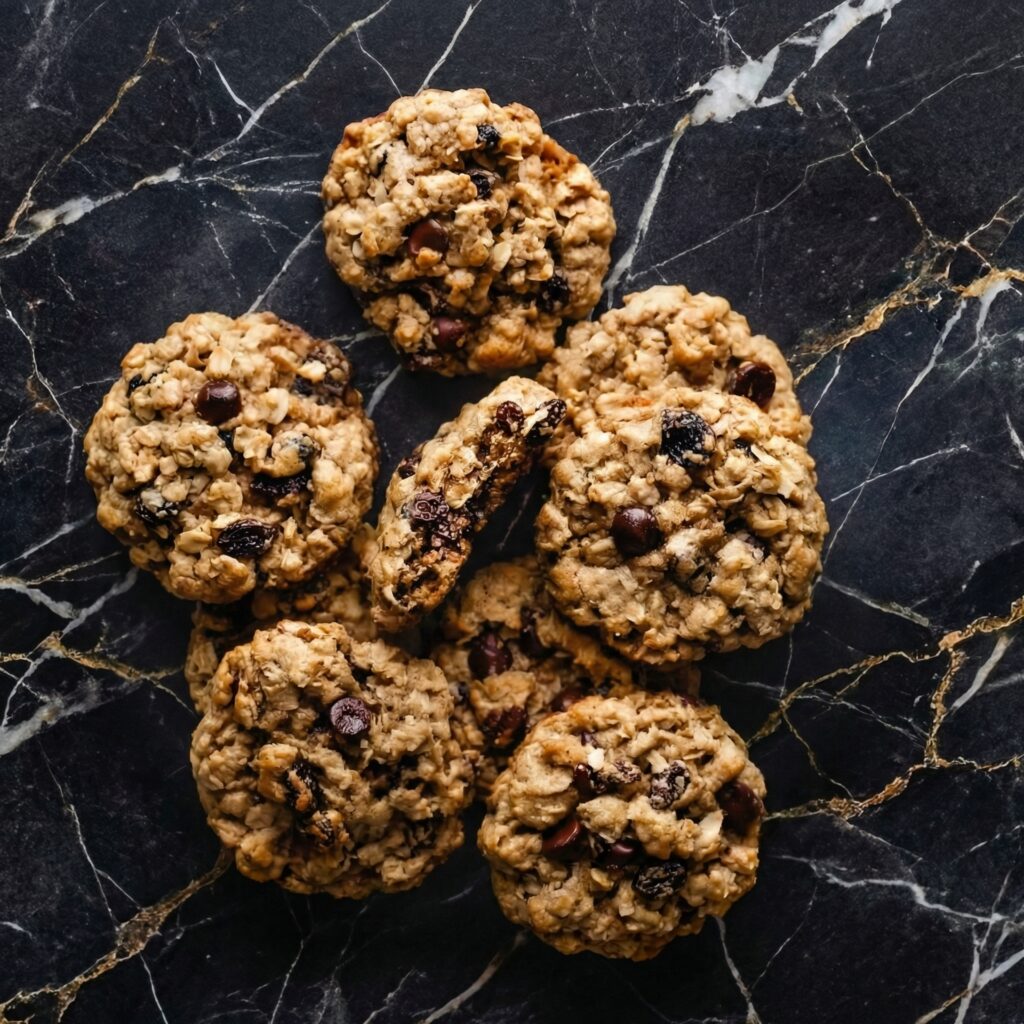
Oatmeal cookies get a bad rap. People expect dry, bland, health-food imposters. Not these. These are chewy, buttery, cinnamon-warm, and dangerously good. The raisins are optional. The deliciousness is not.
One bowl. No mixer required. Ready in 20 minutes. Let’s fix oatmeal cookies’ reputation.
Ingredients
Makes 20-24 cookies.
1 cup (225g) unsalted butter, softened
1 cup (200g) brown sugar, packed
½ cup (100g) granulated sugar
2 large eggs
1 teaspoon vanilla extract
1½ cups (190g) all-purpose flour
1 teaspoon baking soda
1 teaspoon cinnamon
½ teaspoon salt
3 cups (240g) old-fashioned rolled oats
1 cup (150g) raisins or chocolate chips (optional)
Step-by-Step Instructions
Step 1: Cream Butter and Sugars
Preheat oven to 350°F (175°C). Line baking sheets with parchment.
Beat butter, brown sugar, and granulated sugar until light and fluffy.
Step 2: Add Wet Ingredients
Add eggs one at a time, then vanilla. Mix until combined.
Step 3: Add Dry Ingredients
Whisk flour, baking soda, cinnamon, and salt in a separate bowl.
Gradually add to wet mixture. Mix just until combined.
Step 4: Add Oats and Mix-ins
Stir in oats until incorporated. Fold in raisins or chocolate chips if using.
Bake for 10-12 minutes until edges are golden, centers still look soft.
Cool on baking sheet for 5 minutes, then transfer to a wire rack.
Summary
Prep Time: 10 mins | Cook Time: 12 mins | Total Time: 22 minutes
Yield: 20-24 cookies
Difficulty: Easy
Storage Notes
Store in an airtight container at room temperature for up to 1 week. Freeze dough balls for up to 3 months—bake from frozen, add 2-3 minutes. These cookies also freeze beautifully after baking. Pro tip: add a slice of bread to the container to keep them soft.
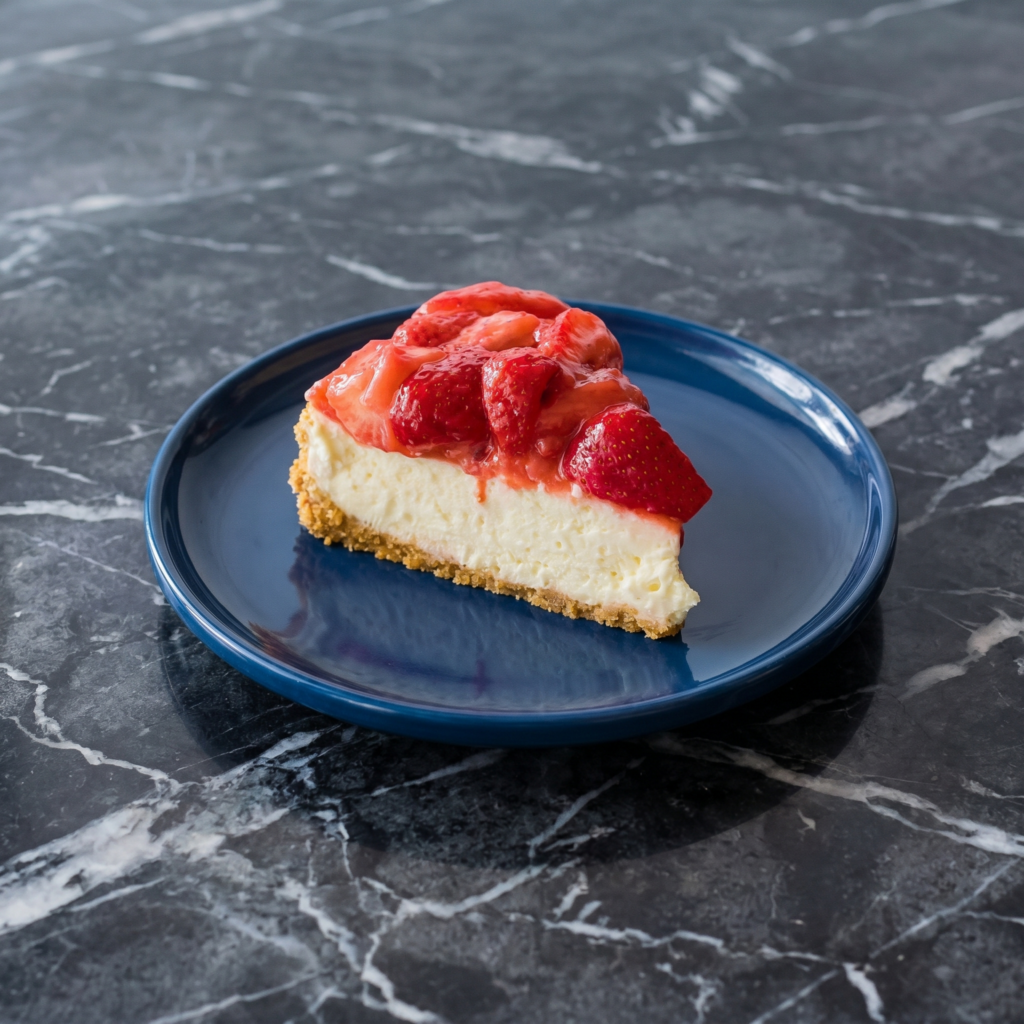
Strawberry cheesecake is the people’s champion. It’s creamy. It’s fruity. It’s pink and pretty. And this version skips all the drama—no water bath, no cracks, no fuss.
We’re making a silky, dense cheesecake (New York style) and topping it with a glossy, sweet strawberry sauce made from real berries. Fresh or frozen? Either works. Just be prepared to fight for the last slice.
Ingredients
Serves 8-10.
For the Crust:
1½ cups (150g) graham cracker crumbs
¼ cup (50g) sugar
6 tbsp (85g) unsalted butter, melted
For the Cheesecake Filling:
32 oz (900g) cream cheese, softened
1 cup (200g) sugar
3 large eggs, room temp
1 cup (240g) sour cream, room temp
1 tbsp vanilla extract
For the Strawberry Topping:
2 cups (300g) fresh or frozen strawberries, chopped
¼ cup (50g) sugar
1 tbsp lemon juice
1 tsp cornstarch + 1 tbsp water
Step-by-Step Instructions
Step 1: Make the Crust
Preheat oven to 350°F (175°C). Grease a 9-inch springform pan.
Mix crumbs, sugar, and butter. Press firmly into bottom.
Bake 10 minutes. Cool. Reduce oven to 325°F (160°C).
Step 2: Make the Filling
Beat cream cheese and sugar until smooth.
Add eggs one at a time (low speed = no cracks).
Mix in sour cream and vanilla.
Step 3: Bake
Pour filling over crust. Smooth top.
Bake at 325°F for 50-60 minutes. Edges set, center still jiggly.
Turn off oven. Crack door. Cool inside for 1 hour.
Refrigerate at least 6 hours.
Step 4: Make Strawberry Topping
Simmer strawberries, sugar, and lemon juice for 5 minutes.
Add cornstarch slurry. Cook 1 minute until thickened. Cool completely.
Spoon over chilled cheesecake. Slice. Devour.
Summary
Prep Time: 20 mins | Bake Time: 60 mins | Chill: 7+ hours | Total: ~9 hours
Yield: 8-10 slices
Difficulty: Easy (patience required)
Storage Notes
Store covered in fridge for up to 5 days. Freeze slices (without topping) for 3 months. Thaw overnight. Add fresh topping after thawing. Don’t freeze with berries—they get weepy.
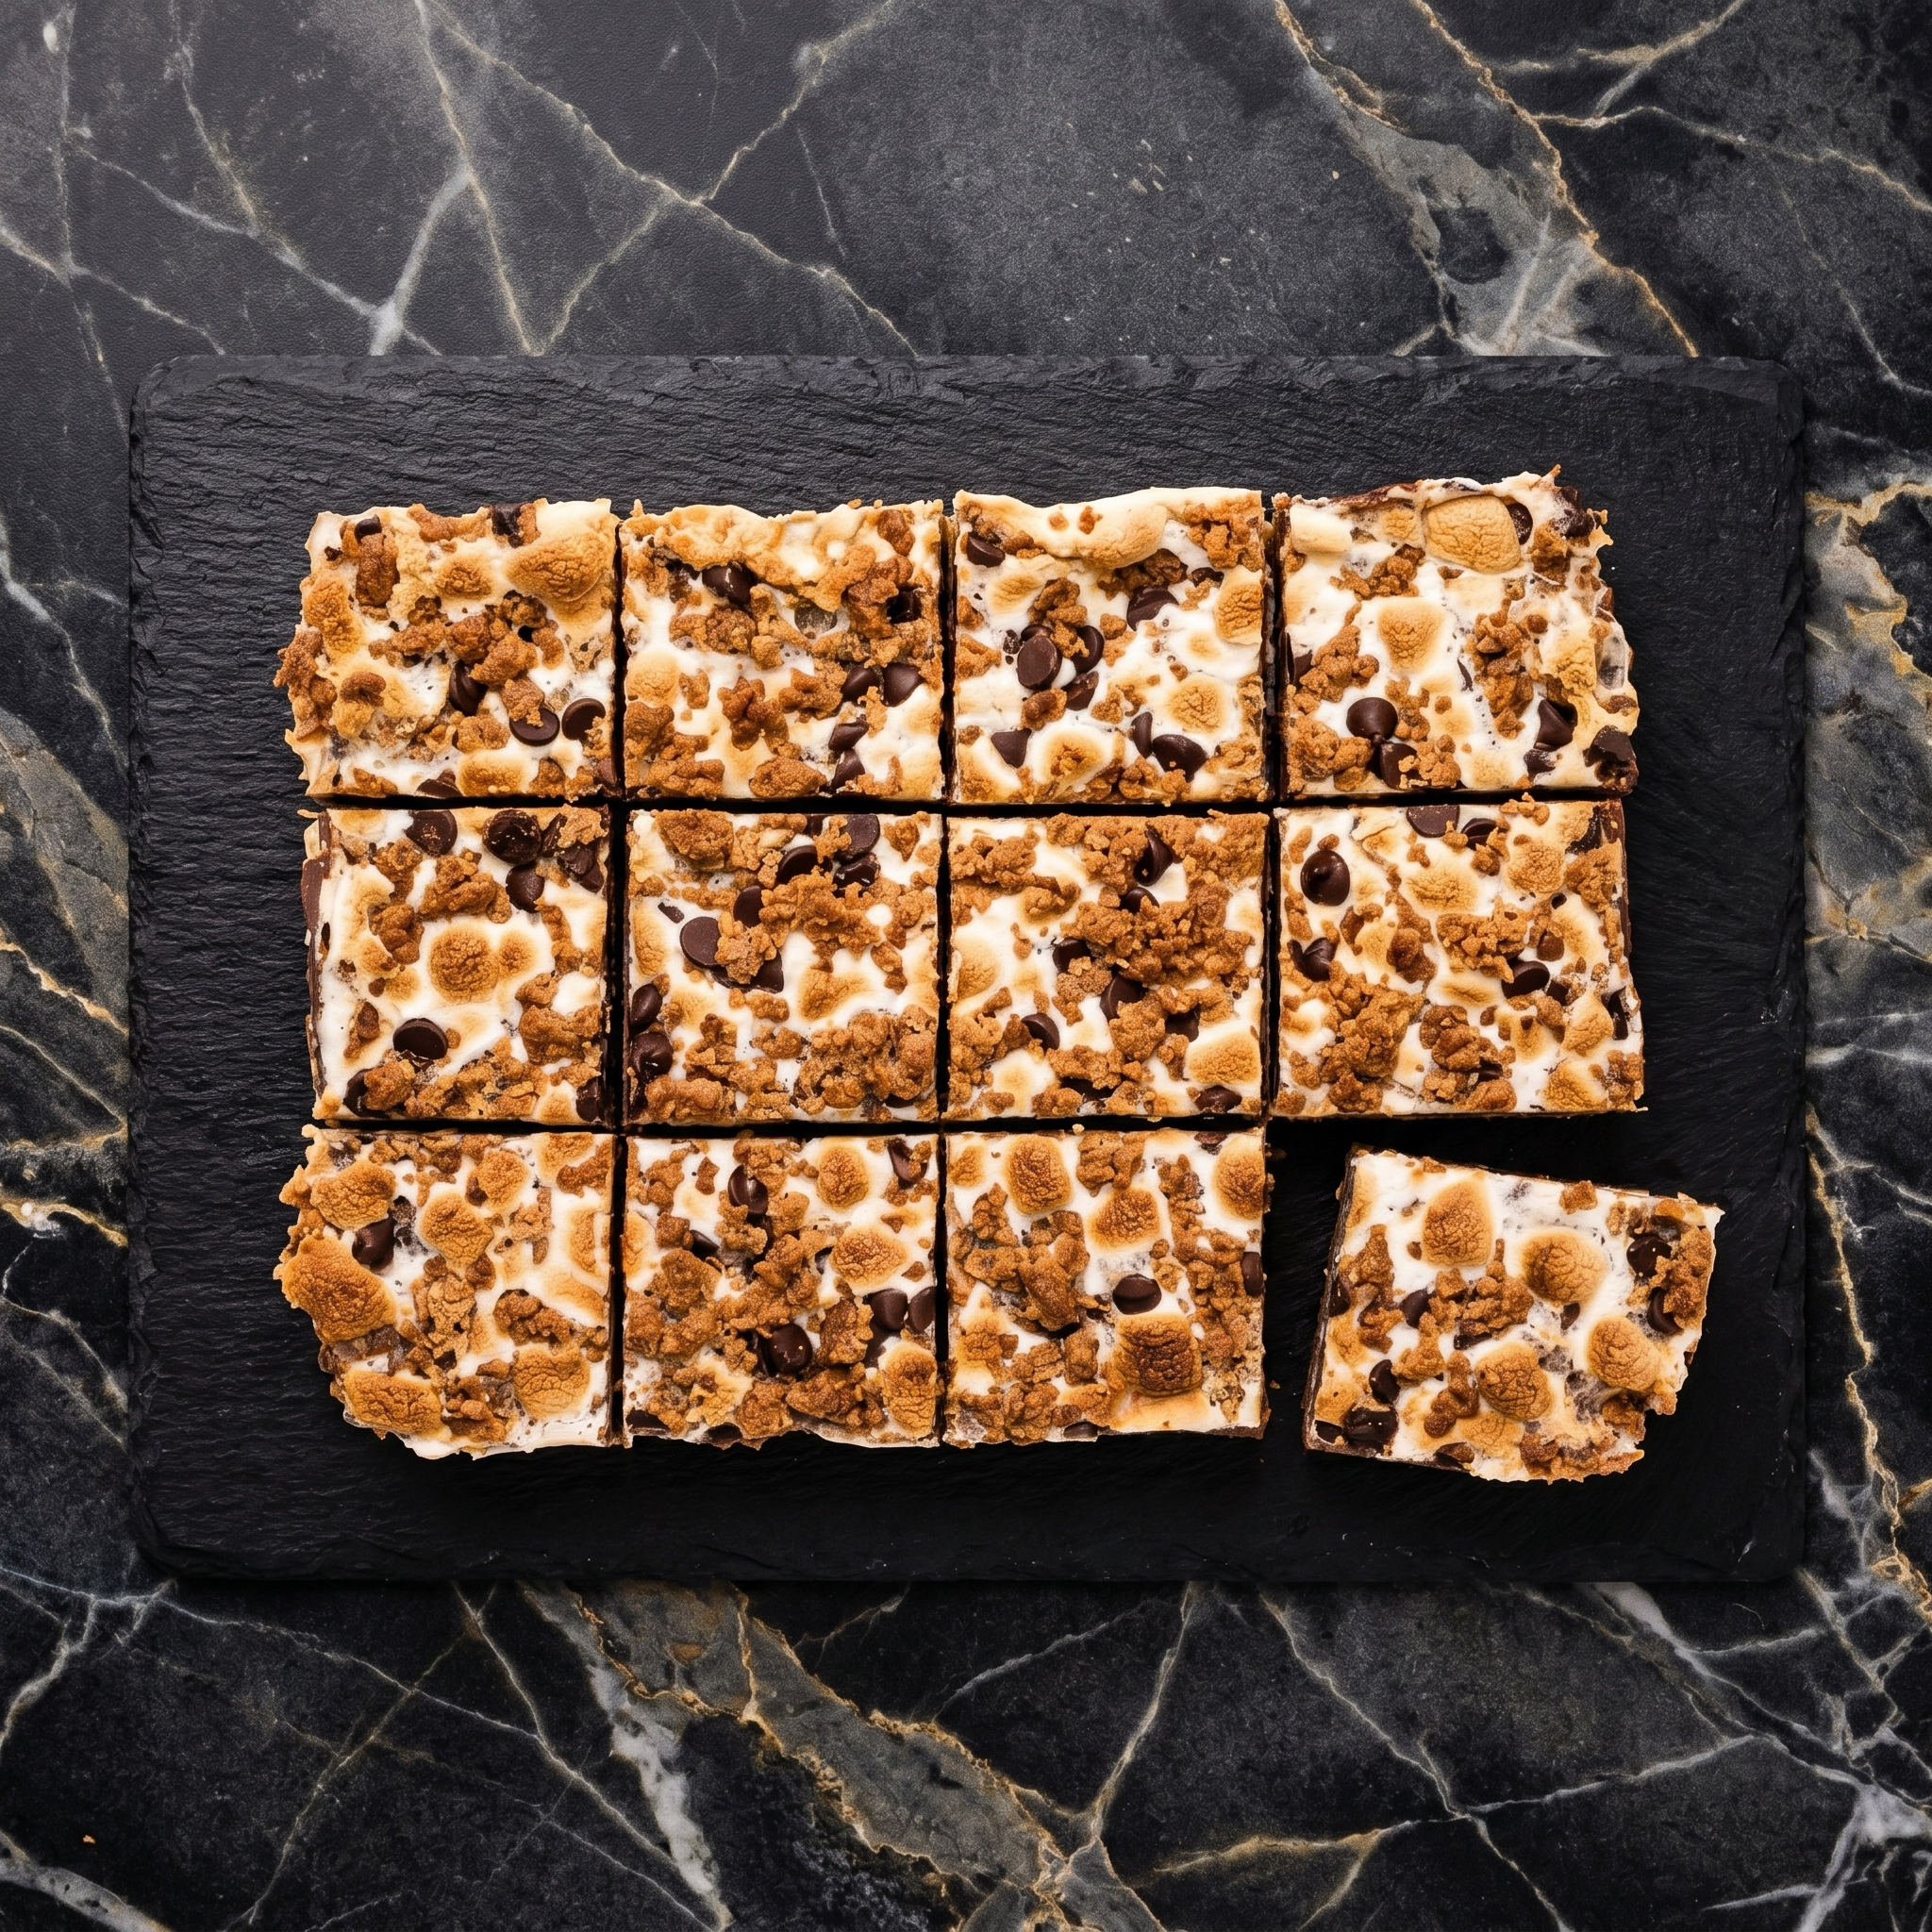
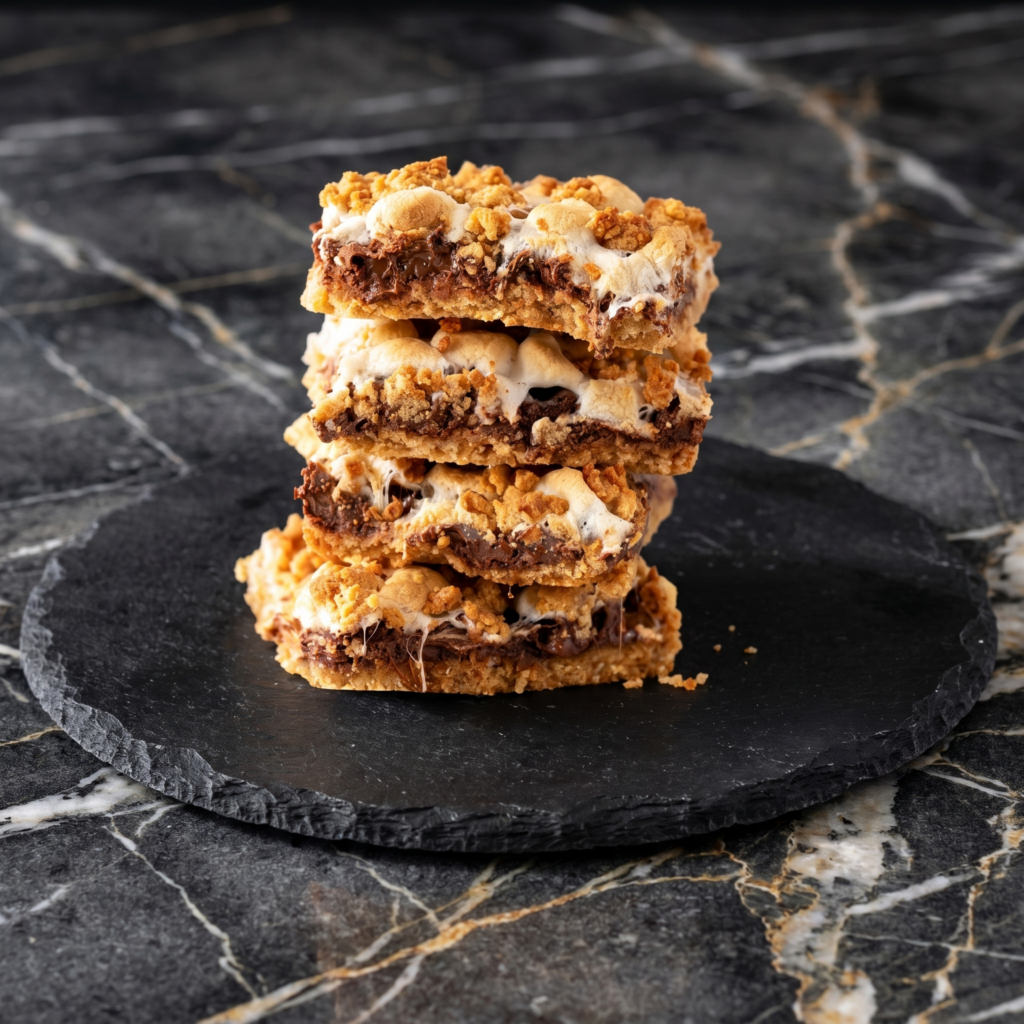
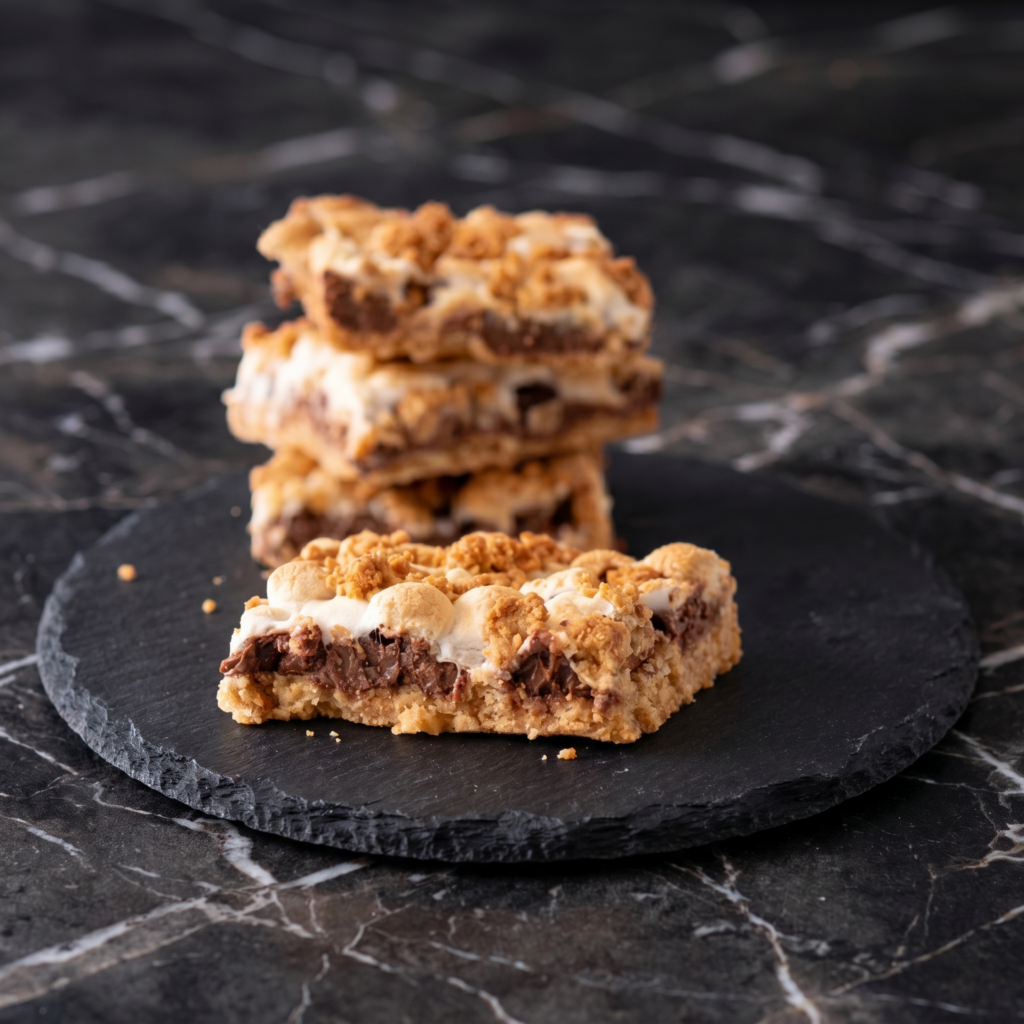
S’mores are amazing. Building a campfire to have one? Less amazing. Enter s’mores bars. A buttery graham cracker crust gets layered with chocolate chips and marshmallows, then baked until the marshmallows turn golden and the chocolate gets all melty. No skewers. No flames. Just pure, sticky, chocolatey perfection in bar form. Cut them warm for maximum goo or cool for clean slices. Either way, gone in minutes.
Ingredients
Makes one 9×9 pan (9-12 bars).
2 cups graham cracker crumbs (about 14 full sheets)
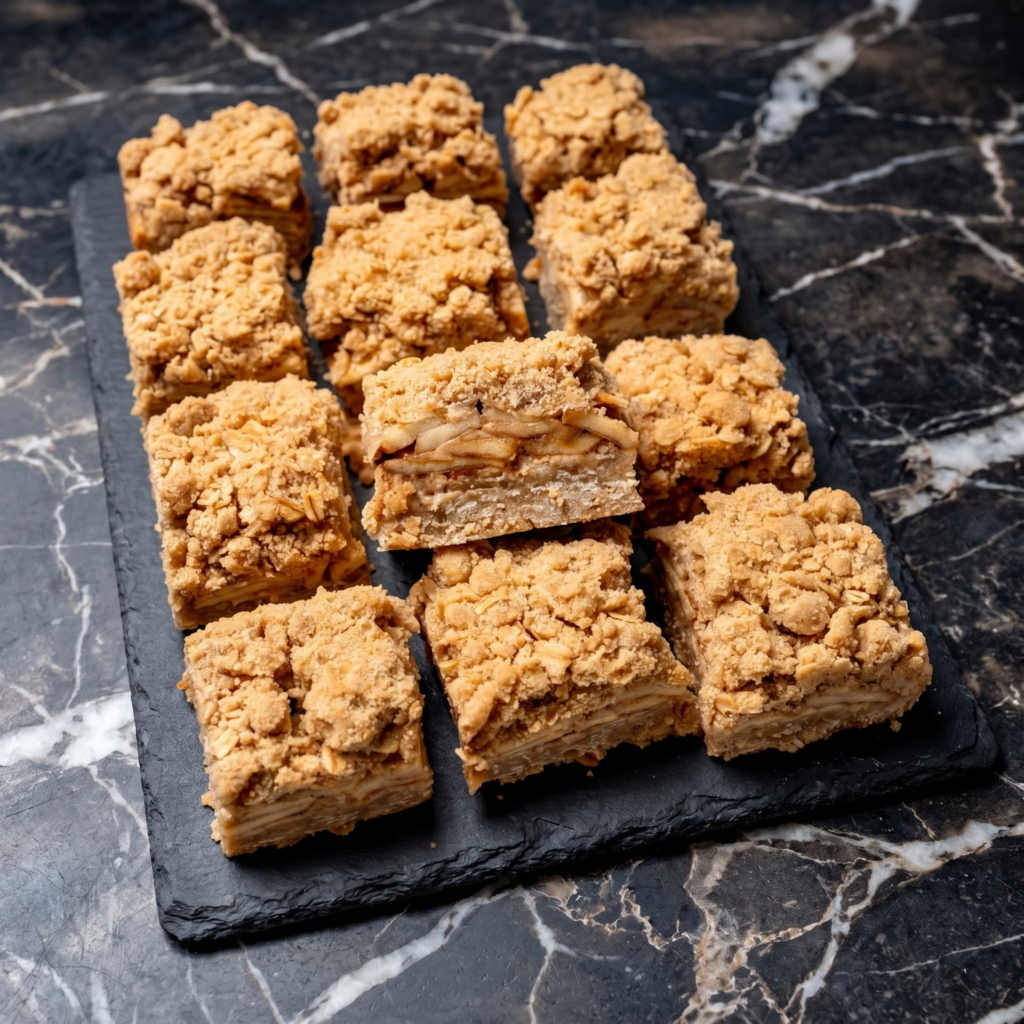
Love apple pie? Hate rolling dough? Meet apple pie bars. A buttery shortbread crust gets pressed into the pan—no rolling pin required. Top it with tender cinnamon apples and a brown sugar oat crumble. Bake, cool, and slice into perfect portable squares. They taste exactly like homemade pie, but you’ll finish making them in the time it takes to chill pie dough. This is apple pie for lazy geniuses.
Ingredients
Makes one 9×13 pan (15-20 bars).
For the Crust:
1 cup (2 sticks) unsalted butter, softened
½ cup granulated sugar
2 cups all-purpose flour
¼ teaspoon salt
For the Apple Filling:
4 cups apples, peeled and diced (about 4 medium apples, Granny Smith or Honeycrisp)
¼ cup granulated sugar
2 tablespoons brown sugar
1 tablespoon lemon juice
1 teaspoon cinnamon
¼ teaspoon nutmeg
2 tablespoons cornstarch
For the Crumble Topping:
1 cup old-fashioned oats
½ cup brown sugar, packed
½ cup all-purpose flour
½ teaspoon cinnamon
½ cup (1 stick) cold butter, cubed
Step-by-Step Instructions
Step 1: Make the Crust
Preheat oven to 350°F (175°C). Line a 9×13 pan with parchment paper.
Beat softened butter and sugar until creamy. Mix in flour and salt until crumbly.
Press mixture firmly and evenly into the bottom of the pan.
Bake for 15 minutes until lightly golden.
Step 2: Prep the Apples
In a bowl, toss diced apples with sugars, lemon juice, cinnamon, nutmeg, and cornstarch.
Step 3: Make the Crumble Topping
In a separate bowl, mix oats, brown sugar, flour, and cinnamon.
Cut in cold butter using a pastry cutter or your fingers until mixture resembles coarse crumbs.
Step 4: Assemble and Bake
Spread apple filling evenly over the baked crust.
Sprinkle crumble topping all over the apples.
Bake for 35-40 minutes until apples are bubbly and topping is golden brown.
Step 5: Cool and Slice
Let bars cool completely in the pan (at least 2 hours).
Lift out using parchment paper. Slice into squares.
Dust with powdered sugar if feeling fancy. Devour.
Keep apple pie bars in an airtight container at room temperature for up to 3 days, or in the fridge for up to a week. They’re delicious cold, room temp, or warmed up.
Reheating:
Microwave a bar for 15 seconds and top with vanilla ice cream. You’re welcome.
Freezing:
Freeze baked and cooled bars (whole or sliced) for up to 3 months. Wrap tightly in plastic wrap then foil. Thaw overnight in the fridge or at room temperature for 30 minutes.
Pro Tip:
Don’t skip the cooling step. Cutting into warm bars = crumbly mess. Patience yields perfect clean slices.
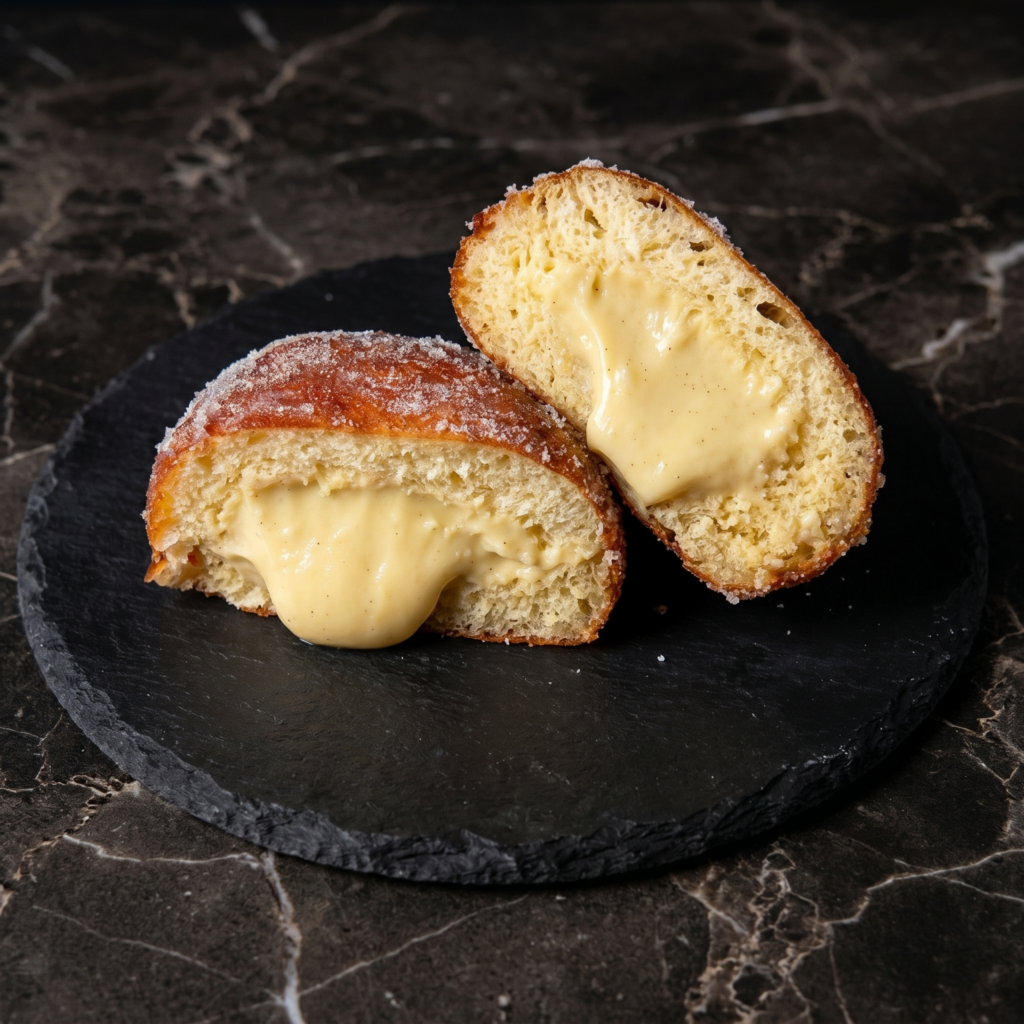
Light, airy, deep-fried to golden perfection. Rolled in sugar. Stuffed with creamy pastry cream, warm Nutella, or tangy jam. They’re Italy’s gift to the world. And you can make them in your kitchen with no special equipment.
Ingredients
Makes 12-15 bomboloni.
For the Dough:
3½ cups (440g) bread flour or all-purpose flour
¼ cup (50g) sugar
2¼ teaspoons instant yeast (one packet)
½ teaspoon salt
3 large eggs, room temperature
½ cup (120ml) warm milk
¼ cup (55g) unsalted butter, softened
For Frying and Coating:
Oil for frying (vegetable or canola)
1 cup (200g) granulated sugar (for rolling)
Fillings (pick your favorite):
Nutella or chocolate hazelnut spread
Pastry cream (vanilla custard)
Raspberry or apricot jam
Step-by-Step Instructions
Step 1: Make the Dough
Mix flour, sugar, yeast, and salt. Add eggs and warm milk. Mix until shaggy.
Add softened butter one tablespoon at a time. Knead 8-10 minutes until smooth and elastic.
Cover and let rise 1-2 hours until doubled.
Step 2: Shape and Rise Again
Punch down dough. Roll or pat to ½-inch thickness.
Cut into 2-3 inch rounds (use a biscuit cutter or glass). Place on parchment.
Cover and rise for 45-60 minutes until puffy.
Step 3: Fry
Heat 2 inches of oil to 350°F (175°C).
Fry 2-3 bomboloni at a time, 1-2 minutes per side, until deep golden brown.
Drain on paper towels. While still warm, roll in sugar.
Step 4: Fill and Devour
Let cool slightly. Fill a piping bag with your chosen filling.
Poke a hole in each bombolone and pipe in filling until heavy.
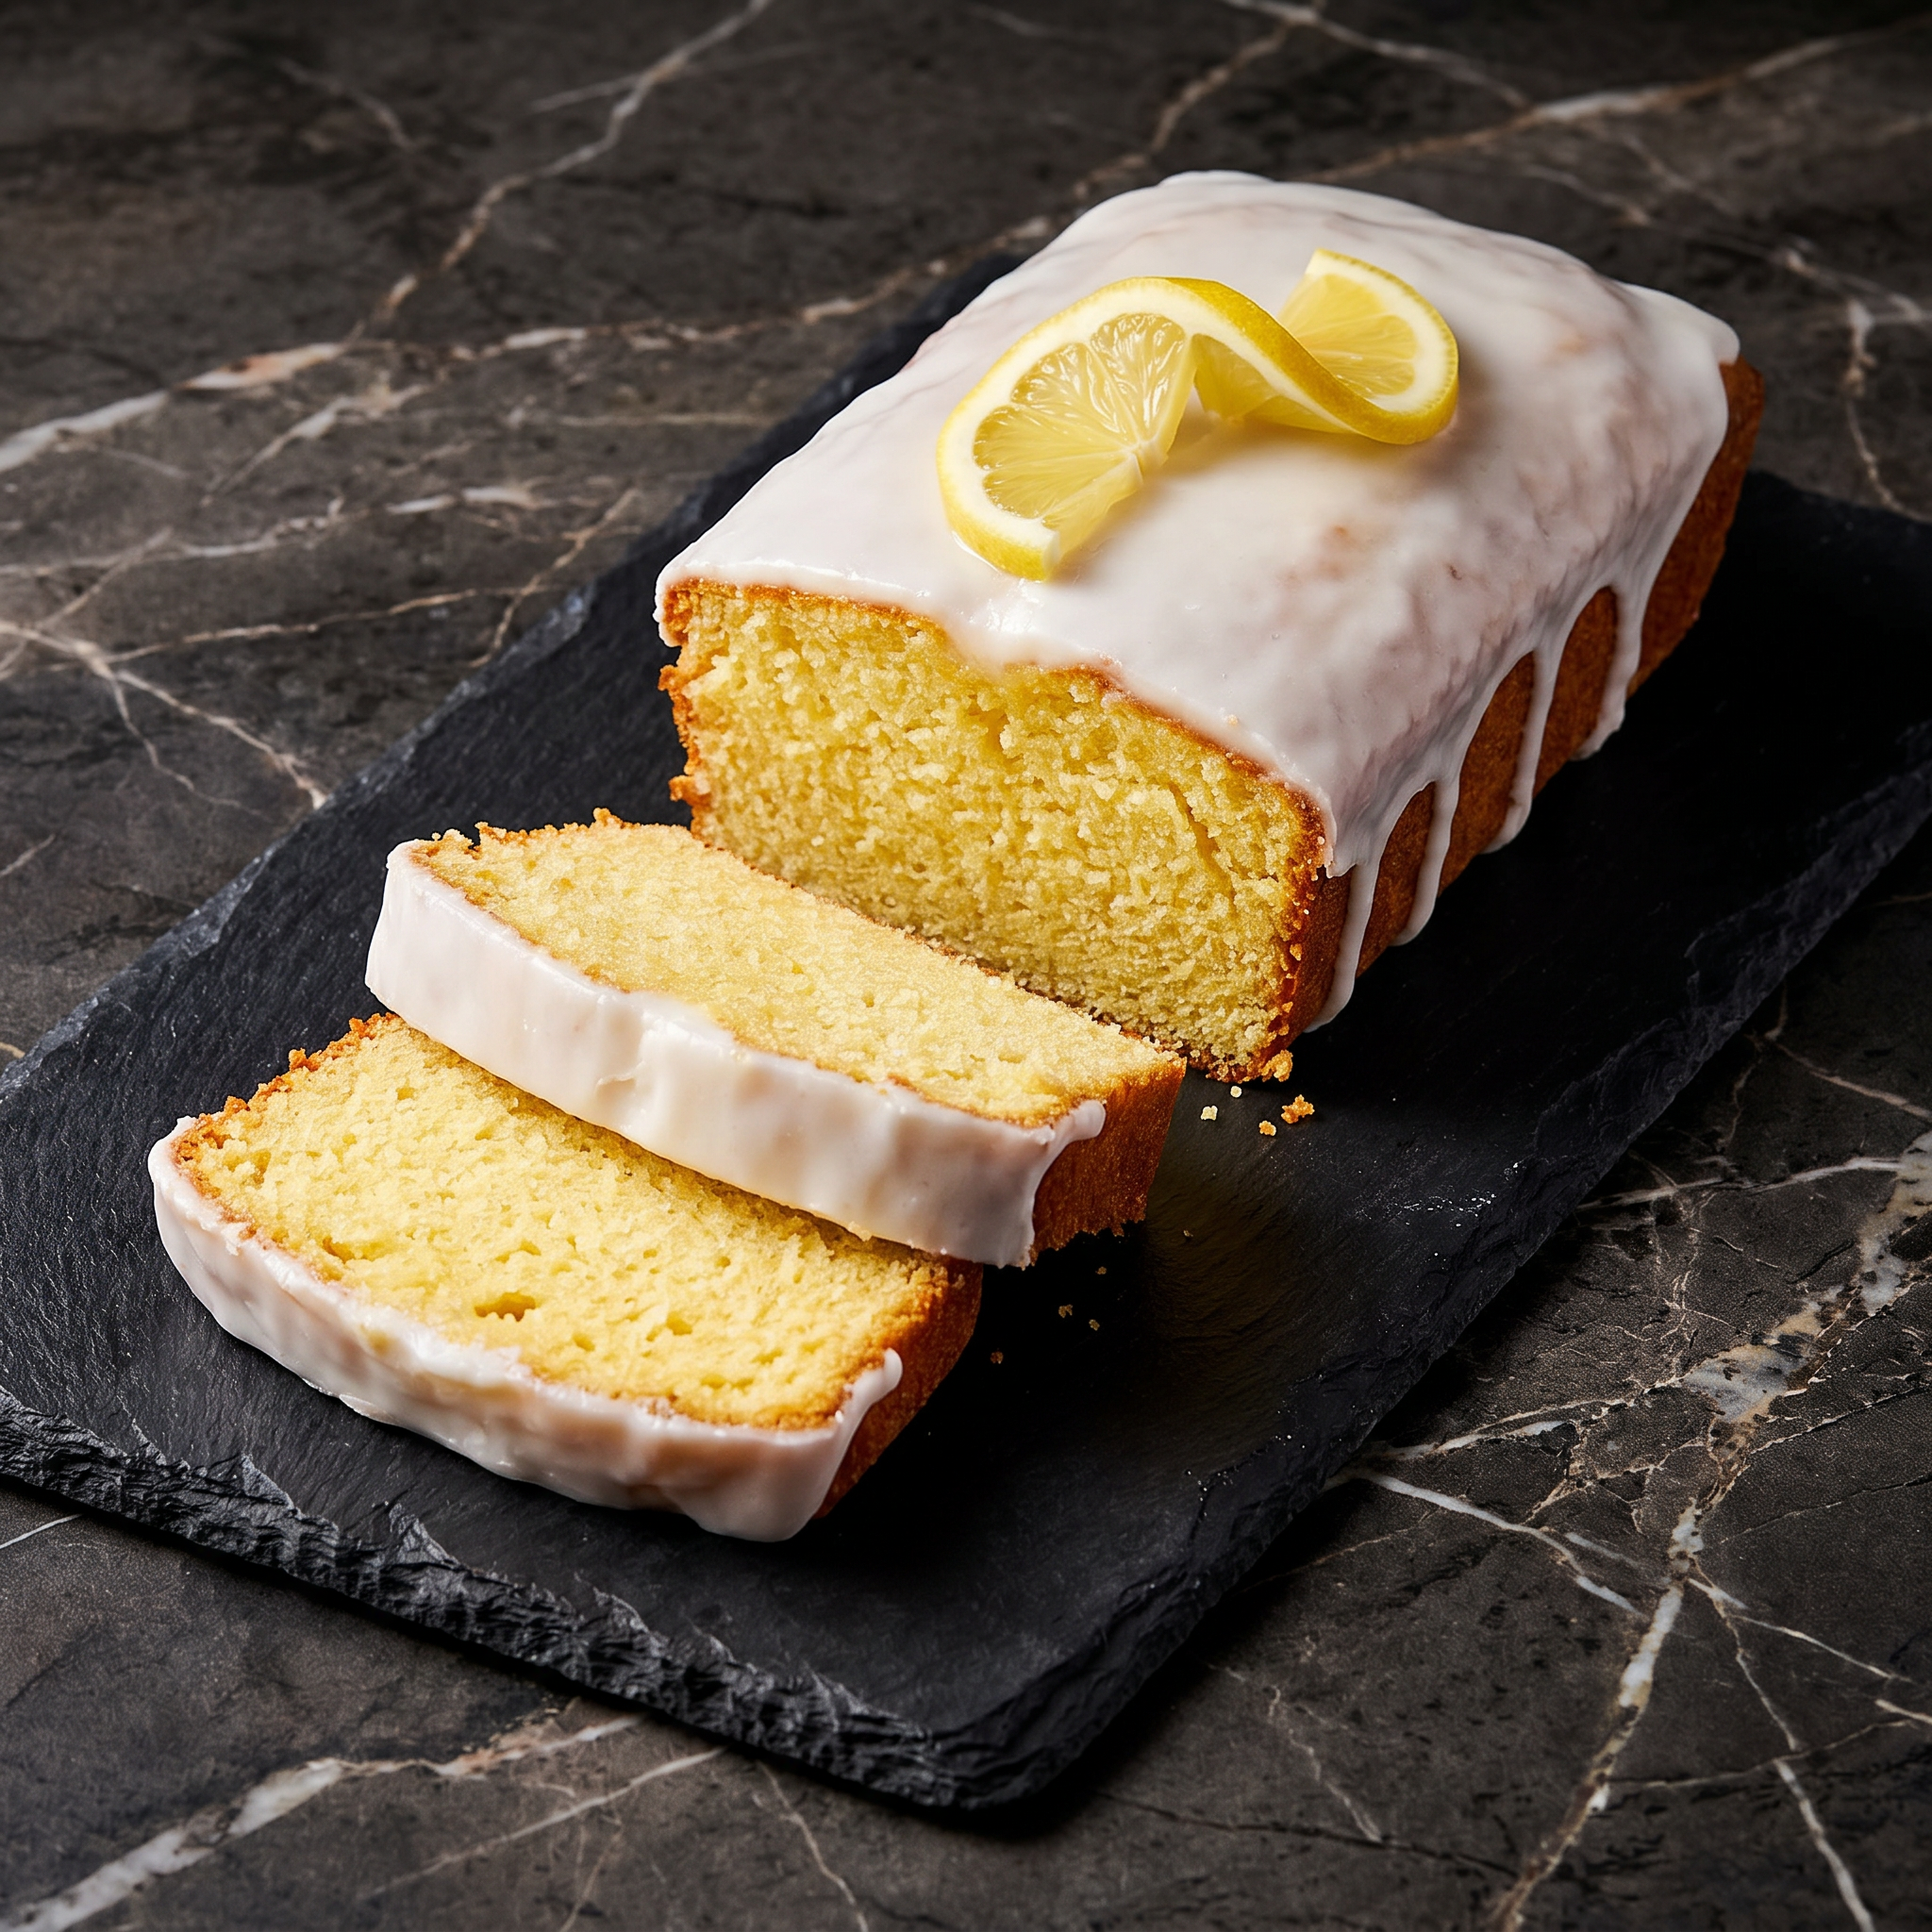
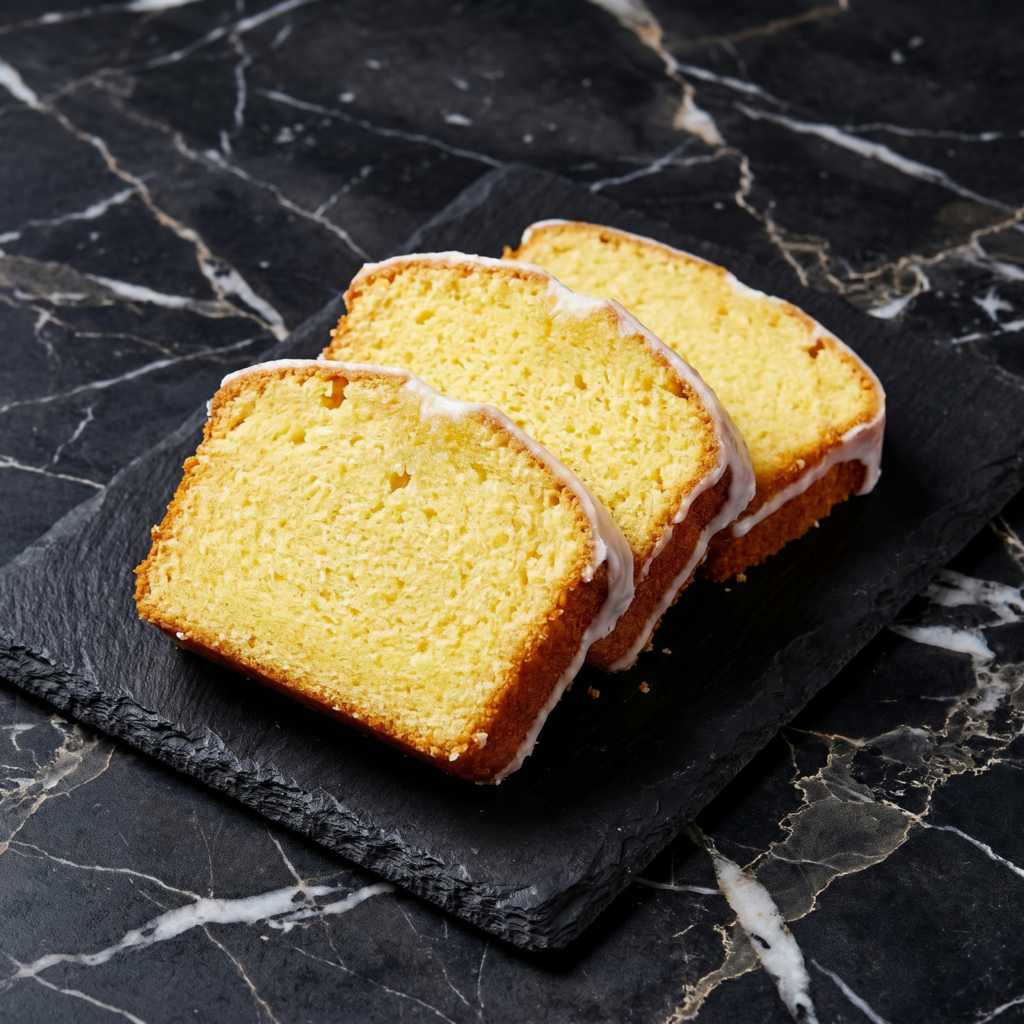
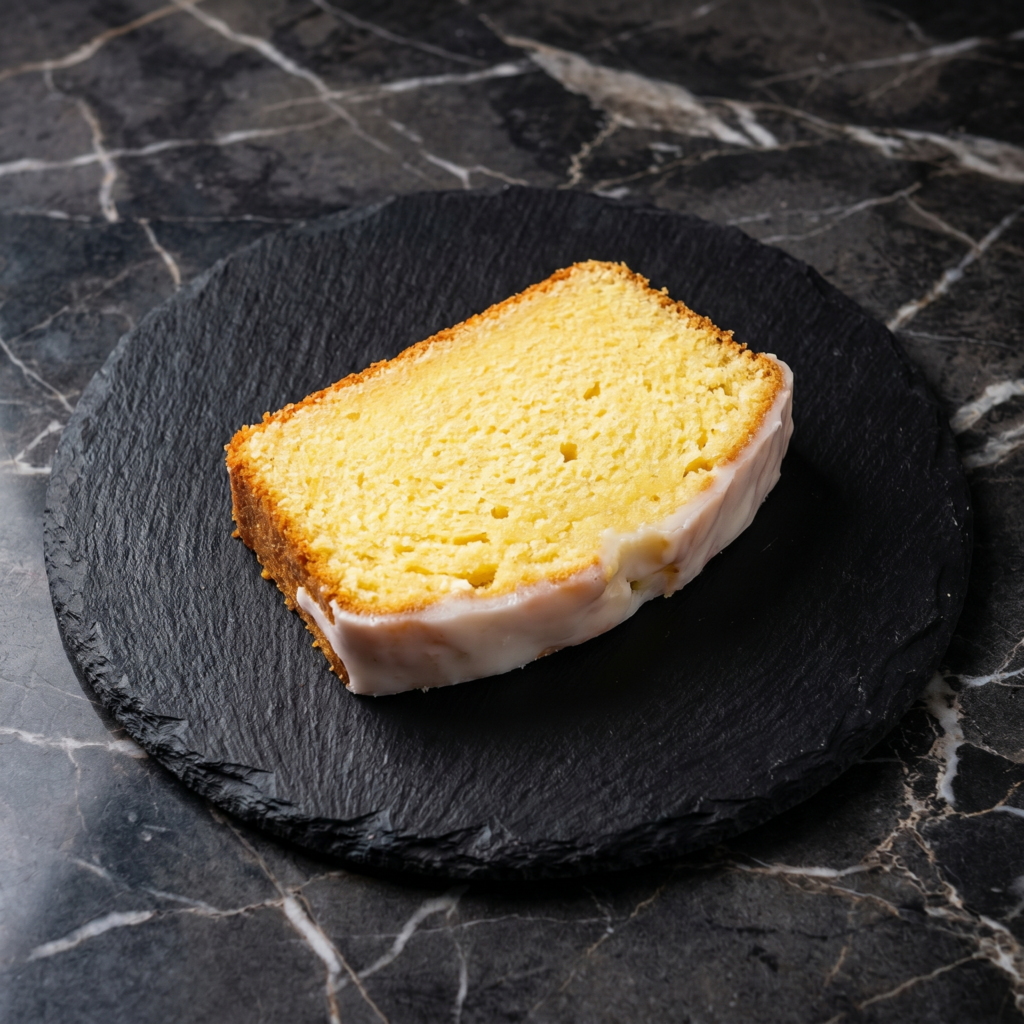
There’s something special about a classic pound cake. It’s dense without being heavy, buttery without being greasy, and satisfying in a way that lighter cakes just can’t match. Add bright, fresh lemon to that equation, and you have something truly extraordinary.
This lemon pound cake is everything you want it to be. The crumb is tight and tender, rich with butter and tangy with fresh lemon juice and zest. But the real magic happens when you pour the simple lemon glaze over the warm cake—it soaks into the top, creating a slightly crisp, incredibly flavorful crust that will have you coming back for slice after slice.
Whether you serve it with afternoon tea, bring it to a brunch, or just keep it on the counter for snacking, this cake disappears fast.
Ingredients
Makes one 9×5 inch loaf cake (8-10 servings).
For the Lemon Pound Cake:
1 ½ cups (190g) all-purpose flour
½ teaspoon baking powder
¼ teaspoon baking soda
½ teaspoon salt
1 cup (225g) unsalted butter, softened
1 cup (200g) granulated sugar
3 large eggs, at room temperature
2 tablespoons fresh lemon zest (about 2-3 lemons)
2 tablespoons fresh lemon juice
1 teaspoon vanilla extract
½ cup (120g) sour cream or plain Greek yogurt, at room temperature
For the Lemon Glaze:
1 ½ cups (180g) powdered sugar, sifted
2-3 tablespoons fresh lemon juice
1 tablespoon milk or cream (if needed for consistency)
1 teaspoon lemon zest (optional, for extra flavor)
Step-by-Step Instructions
1. Preheat and Prepare:
Preheat your oven to 325°F (160°C). Grease a 9×5 inch loaf pan thoroughly, then dust with flour, tapping out the excess. Alternatively, line with parchment paper, leaving overhang on the long sides for easy removal.
2. Combine Dry Ingredients:
In a medium bowl, whisk together the flour, baking powder, baking soda, and salt. Set aside.
3. Cream Butter and Sugar:
In a large bowl, beat the softened butter with an electric mixer on medium speed until creamy, about 1 minute.
Gradually add the sugar and continue beating until light and fluffy, about 3-5 minutes. Scrape down the sides and bottom of the bowl as needed. This step is crucial for a tender pound cake.
4. Add Eggs and Flavorings:
Add the eggs one at a time, beating well after each addition and scraping down the bowl as needed. The mixture should be smooth and glossy.
Beat in the lemon zest, lemon juice, and vanilla extract until combined.
5. Alternate Dry and Wet:
With the mixer on low speed, add half of the flour mixture, mixing until just combined.
Add all of the sour cream, mixing until just combined.
Add the remaining flour mixture and mix until just combined and no streaks of flour remain. Do not overmix. Scrape the bottom of the bowl with a spatula to ensure everything is incorporated.
6. Bake:
Pour the batter into the prepared loaf pan and spread it evenly. Tap the pan gently on the counter a few times to release any air bubbles.
Bake for 60-70 minutes, until a toothpick inserted into the center comes out clean or with a few moist crumbs.
If the top is browning too quickly, tent loosely with foil for the last 15-20 minutes of baking.
Let the cake cool in the pan for 15 minutes, then carefully turn it out onto a wire rack placed over a baking sheet (to catch glaze drips).
7. Make the Glaze:
While the cake cools slightly, make the glaze. In a small bowl, whisk together the sifted powdered sugar and 2 tablespoons of lemon juice until smooth. Add more lemon juice, a teaspoon at a time, until you reach a thick but pourable consistency. The glaze should be thick enough to coat the back of a spoon but still drizzle easily.
If the glaze becomes too thin, add more powdered sugar. Stir in the lemon zest if using.
8. Glaze the Cake:
While the cake is still warm (but not hot), pour the glaze slowly over the top, allowing it to drip down the sides. Use a spatula to spread it evenly if needed.
Let the cake cool completely on the wire rack. The glaze will set into a beautiful, slightly crisp shell.
9. Serve:
Slice and serve at room temperature. The flavor is even better the next day!
Store lemon pound cake tightly wrapped in plastic wrap or in an airtight container at room temperature for up to 4 days. The glaze will stay beautifully set. The flavor actually improves after a day!
Can You Freeze Pound Cake?
Absolutely! Pound cake freezes beautifully. For best results, freeze the unglazed cake. Wrap the cooled cake tightly in plastic wrap, then in foil, and place in a freezer bag. Freeze for up to 3 months. Thaw at room temperature, then prepare and add the glaze.
Freezing Glazed Cake:
You can freeze the glazed cake, but the glaze may lose some of its crispness. Freeze as directed above, and refresh in a 300°F oven for 5-10 minutes if desired.
Make-Ahead for Parties:
This cake is perfect for making ahead. Bake it a day before, store at room temperature, and glaze the day you plan to serve. The glaze is best when fresh.
Freezing Lemon Zest:
If you have extra lemons, zest them and freeze the zest in a small bag. It thaws instantly and is perfect for future baking.
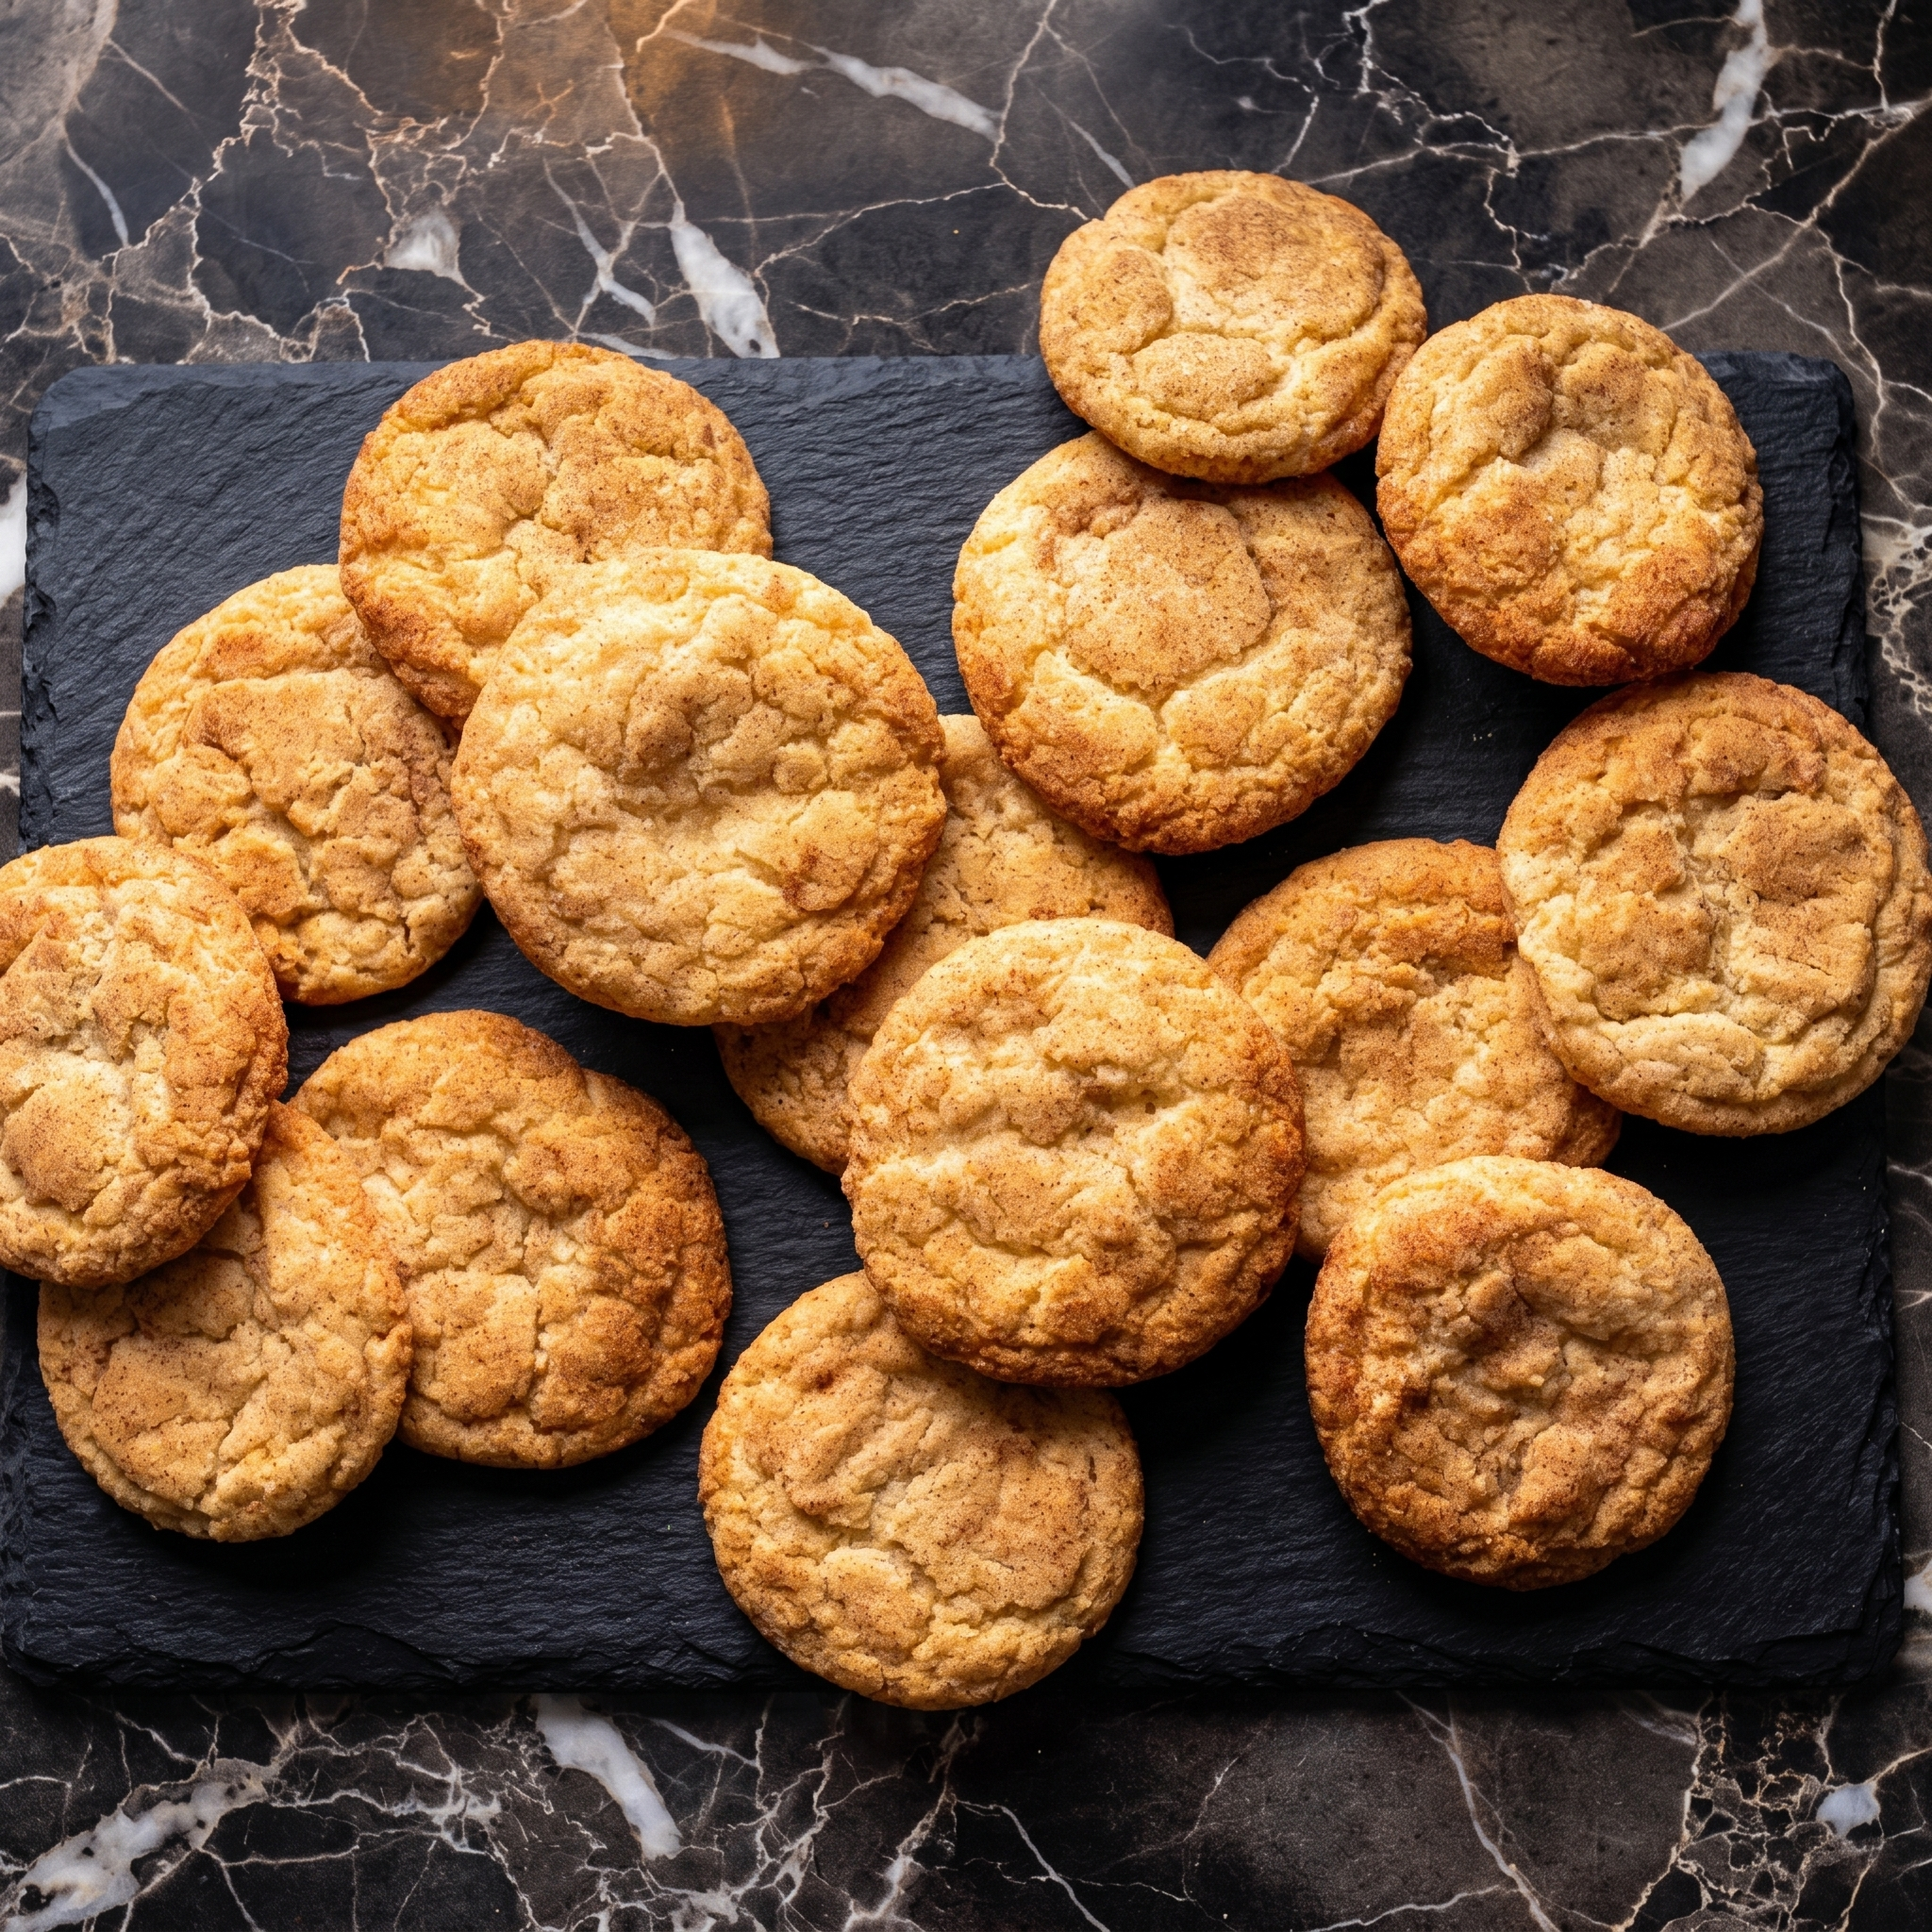
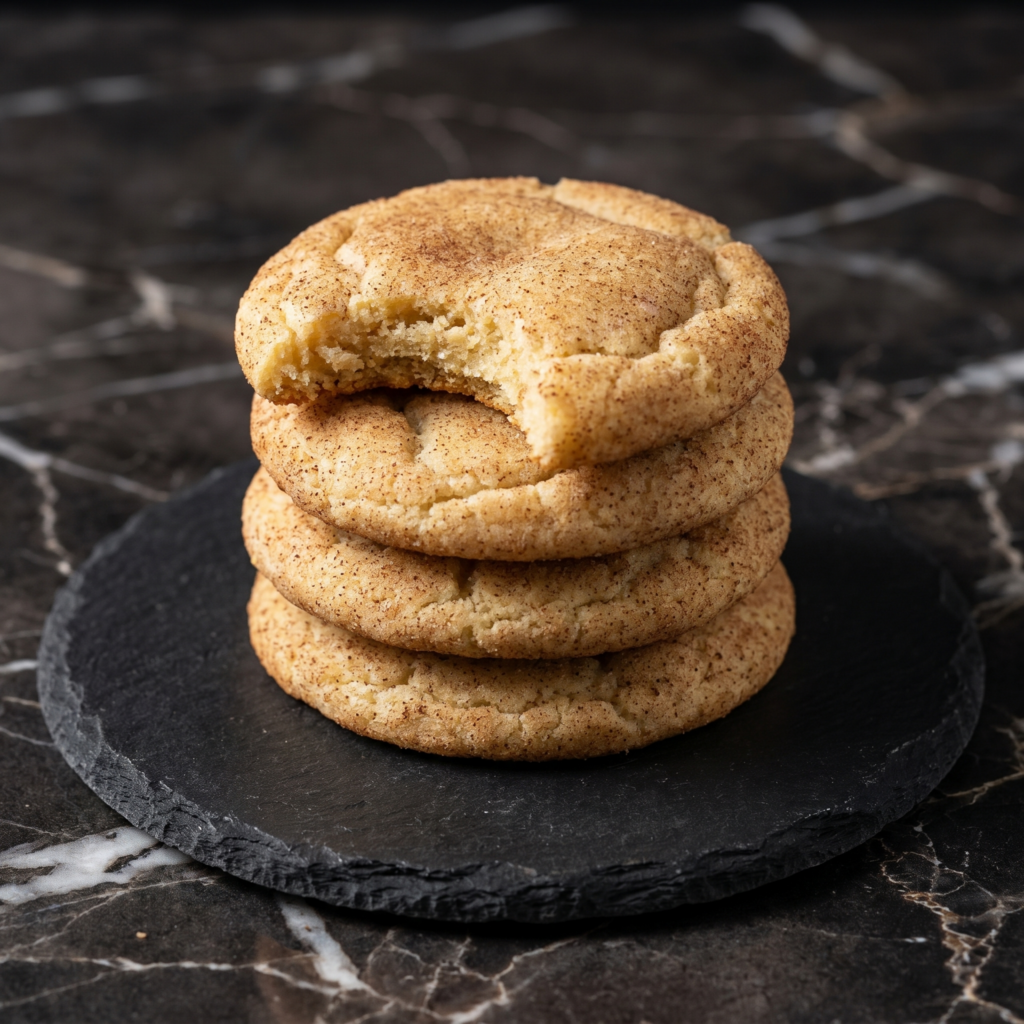
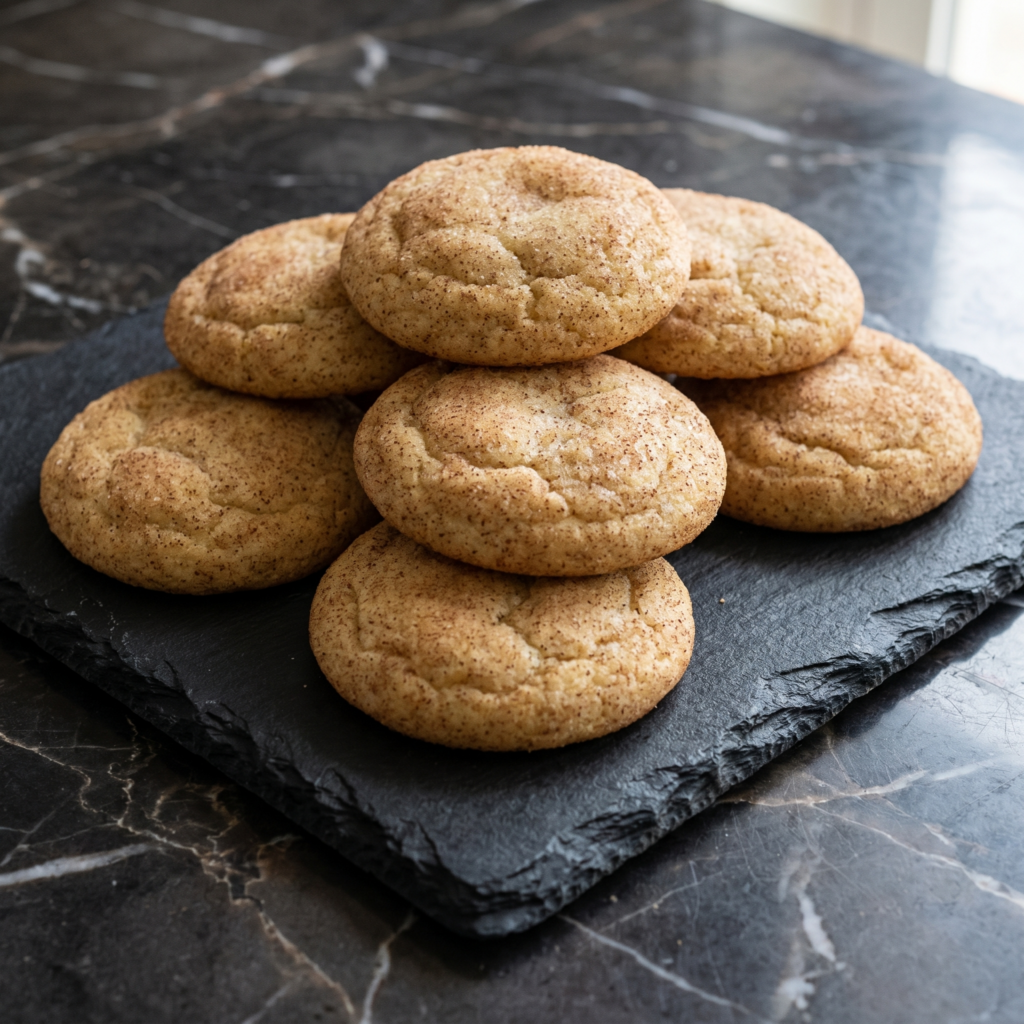
Say it with me: snick-er-doo-dle. Even the name is fun. But these cookies aren’t just fun to say—they’re absolutely irresistible to eat.
Snickerdoodles are the cookies you remember from childhood: soft and pillowy, with a slight tang from cream of tartar and a generous coating of cinnamon sugar that creates the perfect crackly top.
Ingredients
Yields about 24-30 cookies.
For the Snickerdoodles:
2 ¾ cups (345g) all-purpose flour
2 teaspoons cream of tartar
1 teaspoon baking soda
½ teaspoon salt
1 cup (225g) unsalted butter, softened
1 ½ cups (300g) granulated sugar
2 large eggs, at room temperature
1 teaspoon vanilla extract
For the Cinnamon Sugar Coating:
¼ cup (50g) granulated sugar
2 tablespoons ground cinnamon
Step-by-Step Instructions
1. Preheat and Prepare:
Preheat your oven to 375°F (190°C). Line two baking sheets with parchment paper or silicone baking mats.
2. Combine Dry Ingredients:
In a medium bowl, whisk together the flour, cream of tartar, baking soda, and salt. Set aside.
3. Cream Butter and Sugar:
In a large bowl, beat the softened butter and granulated sugar together with an electric mixer until light and fluffy, about 2-3 minutes. Scrape down the sides and bottom of the bowl as needed.
4. Add Eggs and Vanilla:
Add the eggs one at a time, beating well after each addition. Scrape down the bowl again.
Beat in the vanilla extract until combined.
5. Combine Wet and Dry:
Gradually add the dry ingredients to the wet ingredients, mixing on low speed until just combined. Do not overmix. The dough will be soft but not sticky.
6. Make the Cinnamon Sugar Coating:
In a small bowl, whisk together the ¼ cup granulated sugar and 2 tablespoons cinnamon until well combined.
7. Shape and Coat:
Scoop tablespoon-sized portions of dough (about 1.5 tablespoons) and roll into balls.
Roll each ball generously in the cinnamon sugar mixture until completely coated.
Place on the prepared baking sheets, spacing about 2 inches apart. They will spread, so give them room.
8. Bake:
Bake for 10-12 minutes, until the edges are set and the cookies are puffed and crackly. The centers will still look soft and slightly underdone—that’s perfect.
Let the cookies cool on the baking sheet for 5-10 minutes. They will continue to set as they cool.
Transfer to a wire rack to cool completely.
9. Serve:
Serve with a cold glass of milk or a hot cup of coffee. Store leftovers in an airtight container.
Store snickerdoodles in an airtight container at room temperature for up to 5 days. Place a slice of white bread in the container to keep them extra soft—the cookies will absorb moisture from the bread.
Can You Freeze the Dough?
Absolutely! Scoop the dough into balls, roll in cinnamon sugar, and place on a parchment-lined baking sheet. Freeze until solid, then transfer the frozen dough balls to a freezer bag. Bake from frozen, adding 1-2 minutes to the baking time. Fresh cookies anytime!
Freezing Baked Cookies:
Baked snickerdoodles freeze beautifully. Place them in a single layer in a freezer-safe container with parchment between layers. Freeze for up to 3 months. Thaw at room temperature.
Make-Ahead Dough:
The dough can be refrigerated for up to 3 days before baking. Let it sit at room temperature for 10-15 minutes to soften slightly before scooping and rolling in cinnamon sugar.
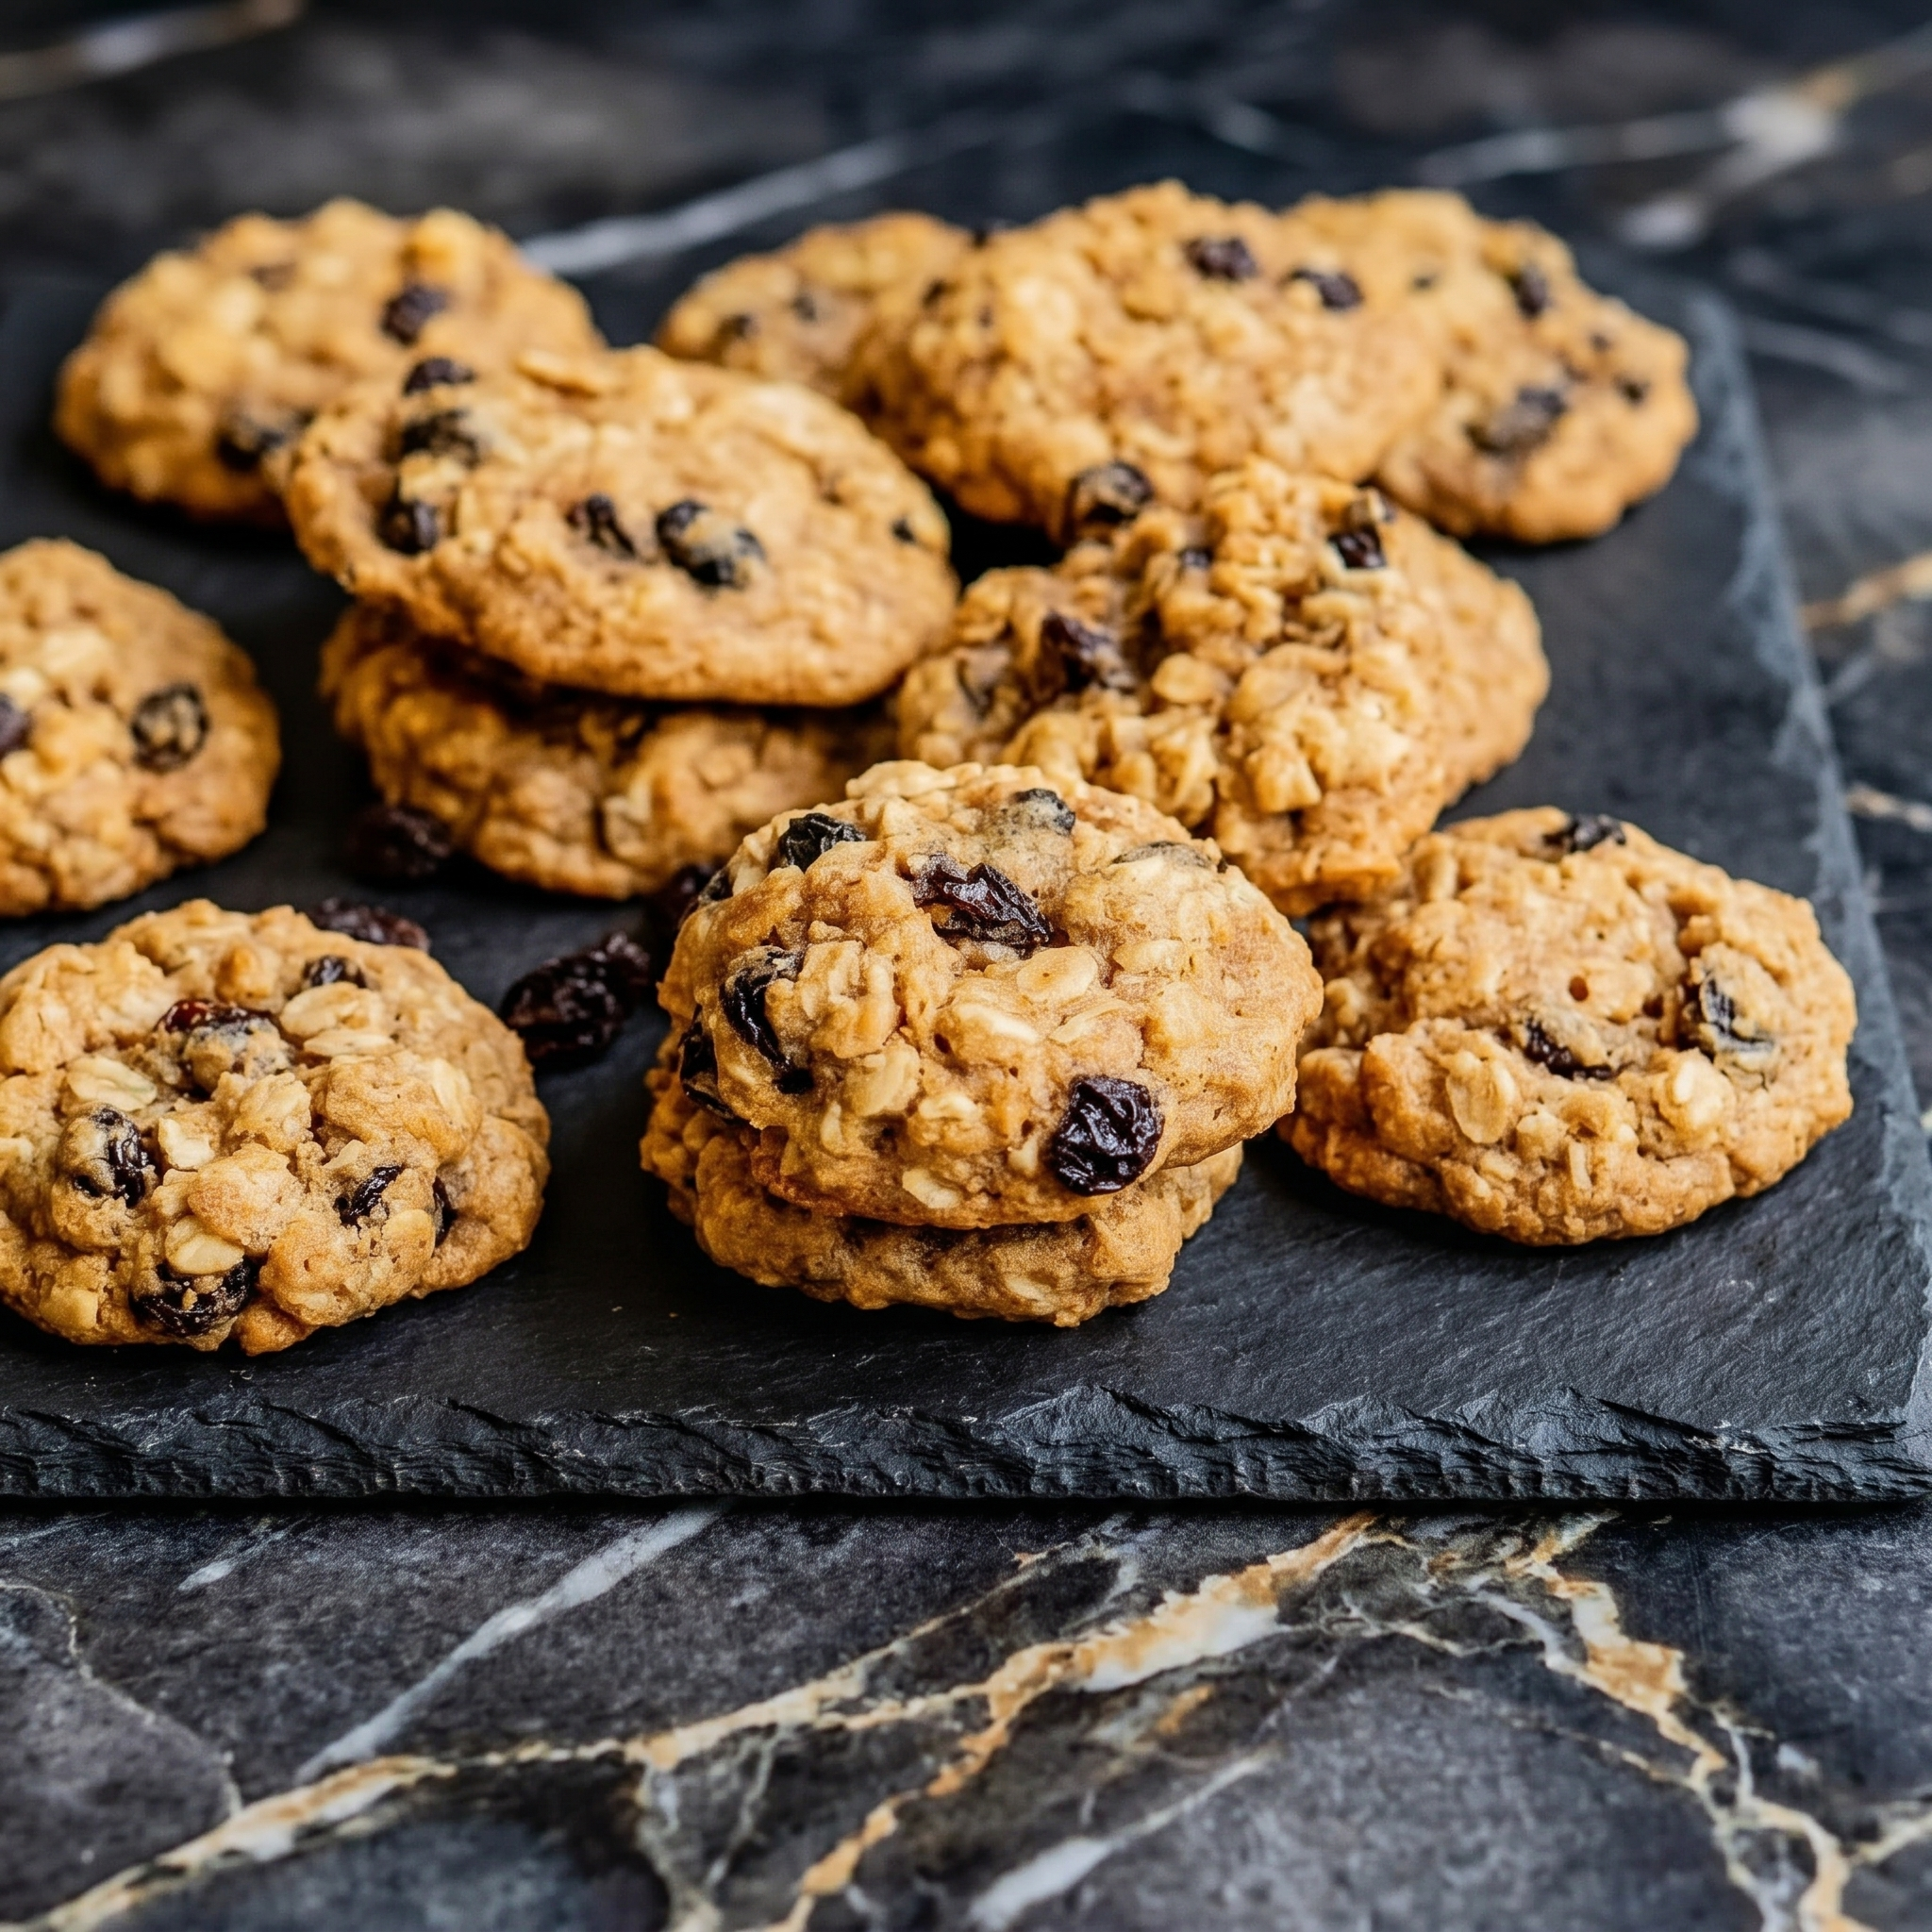
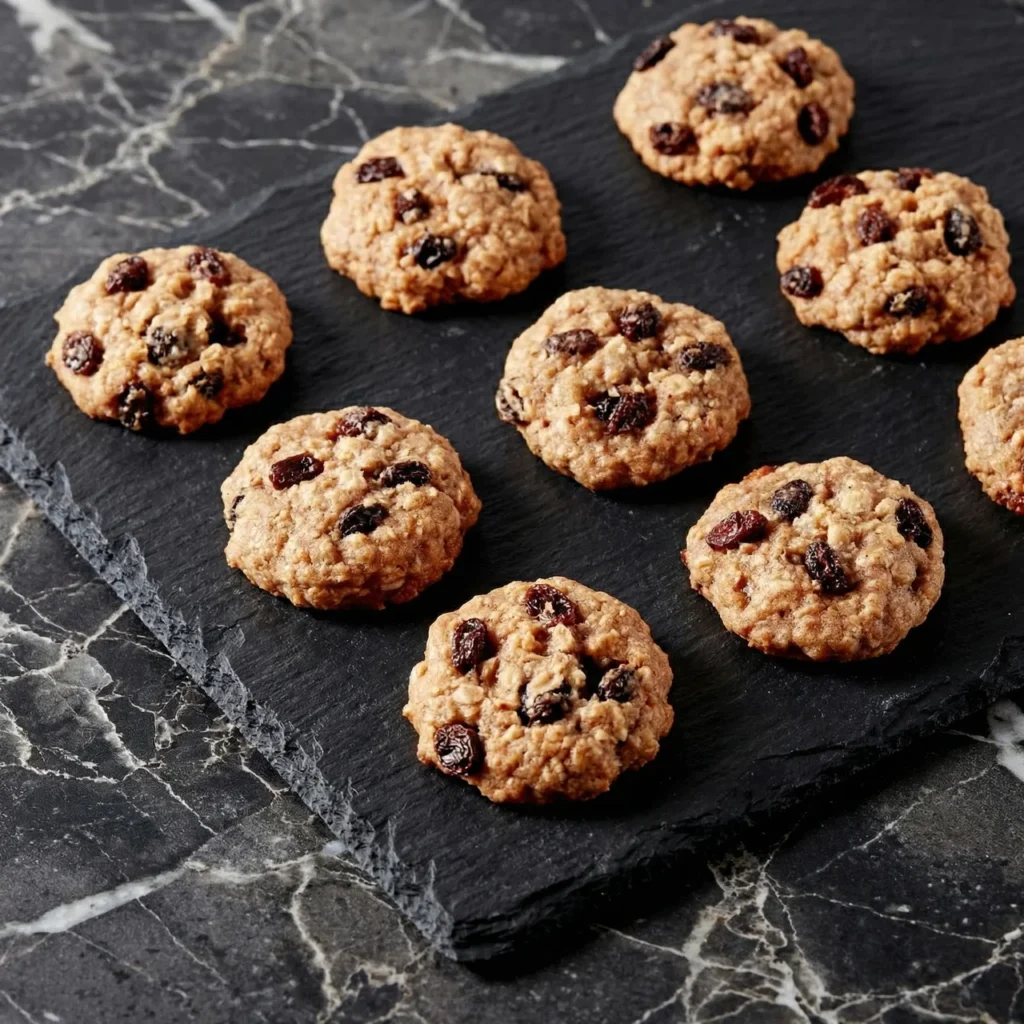
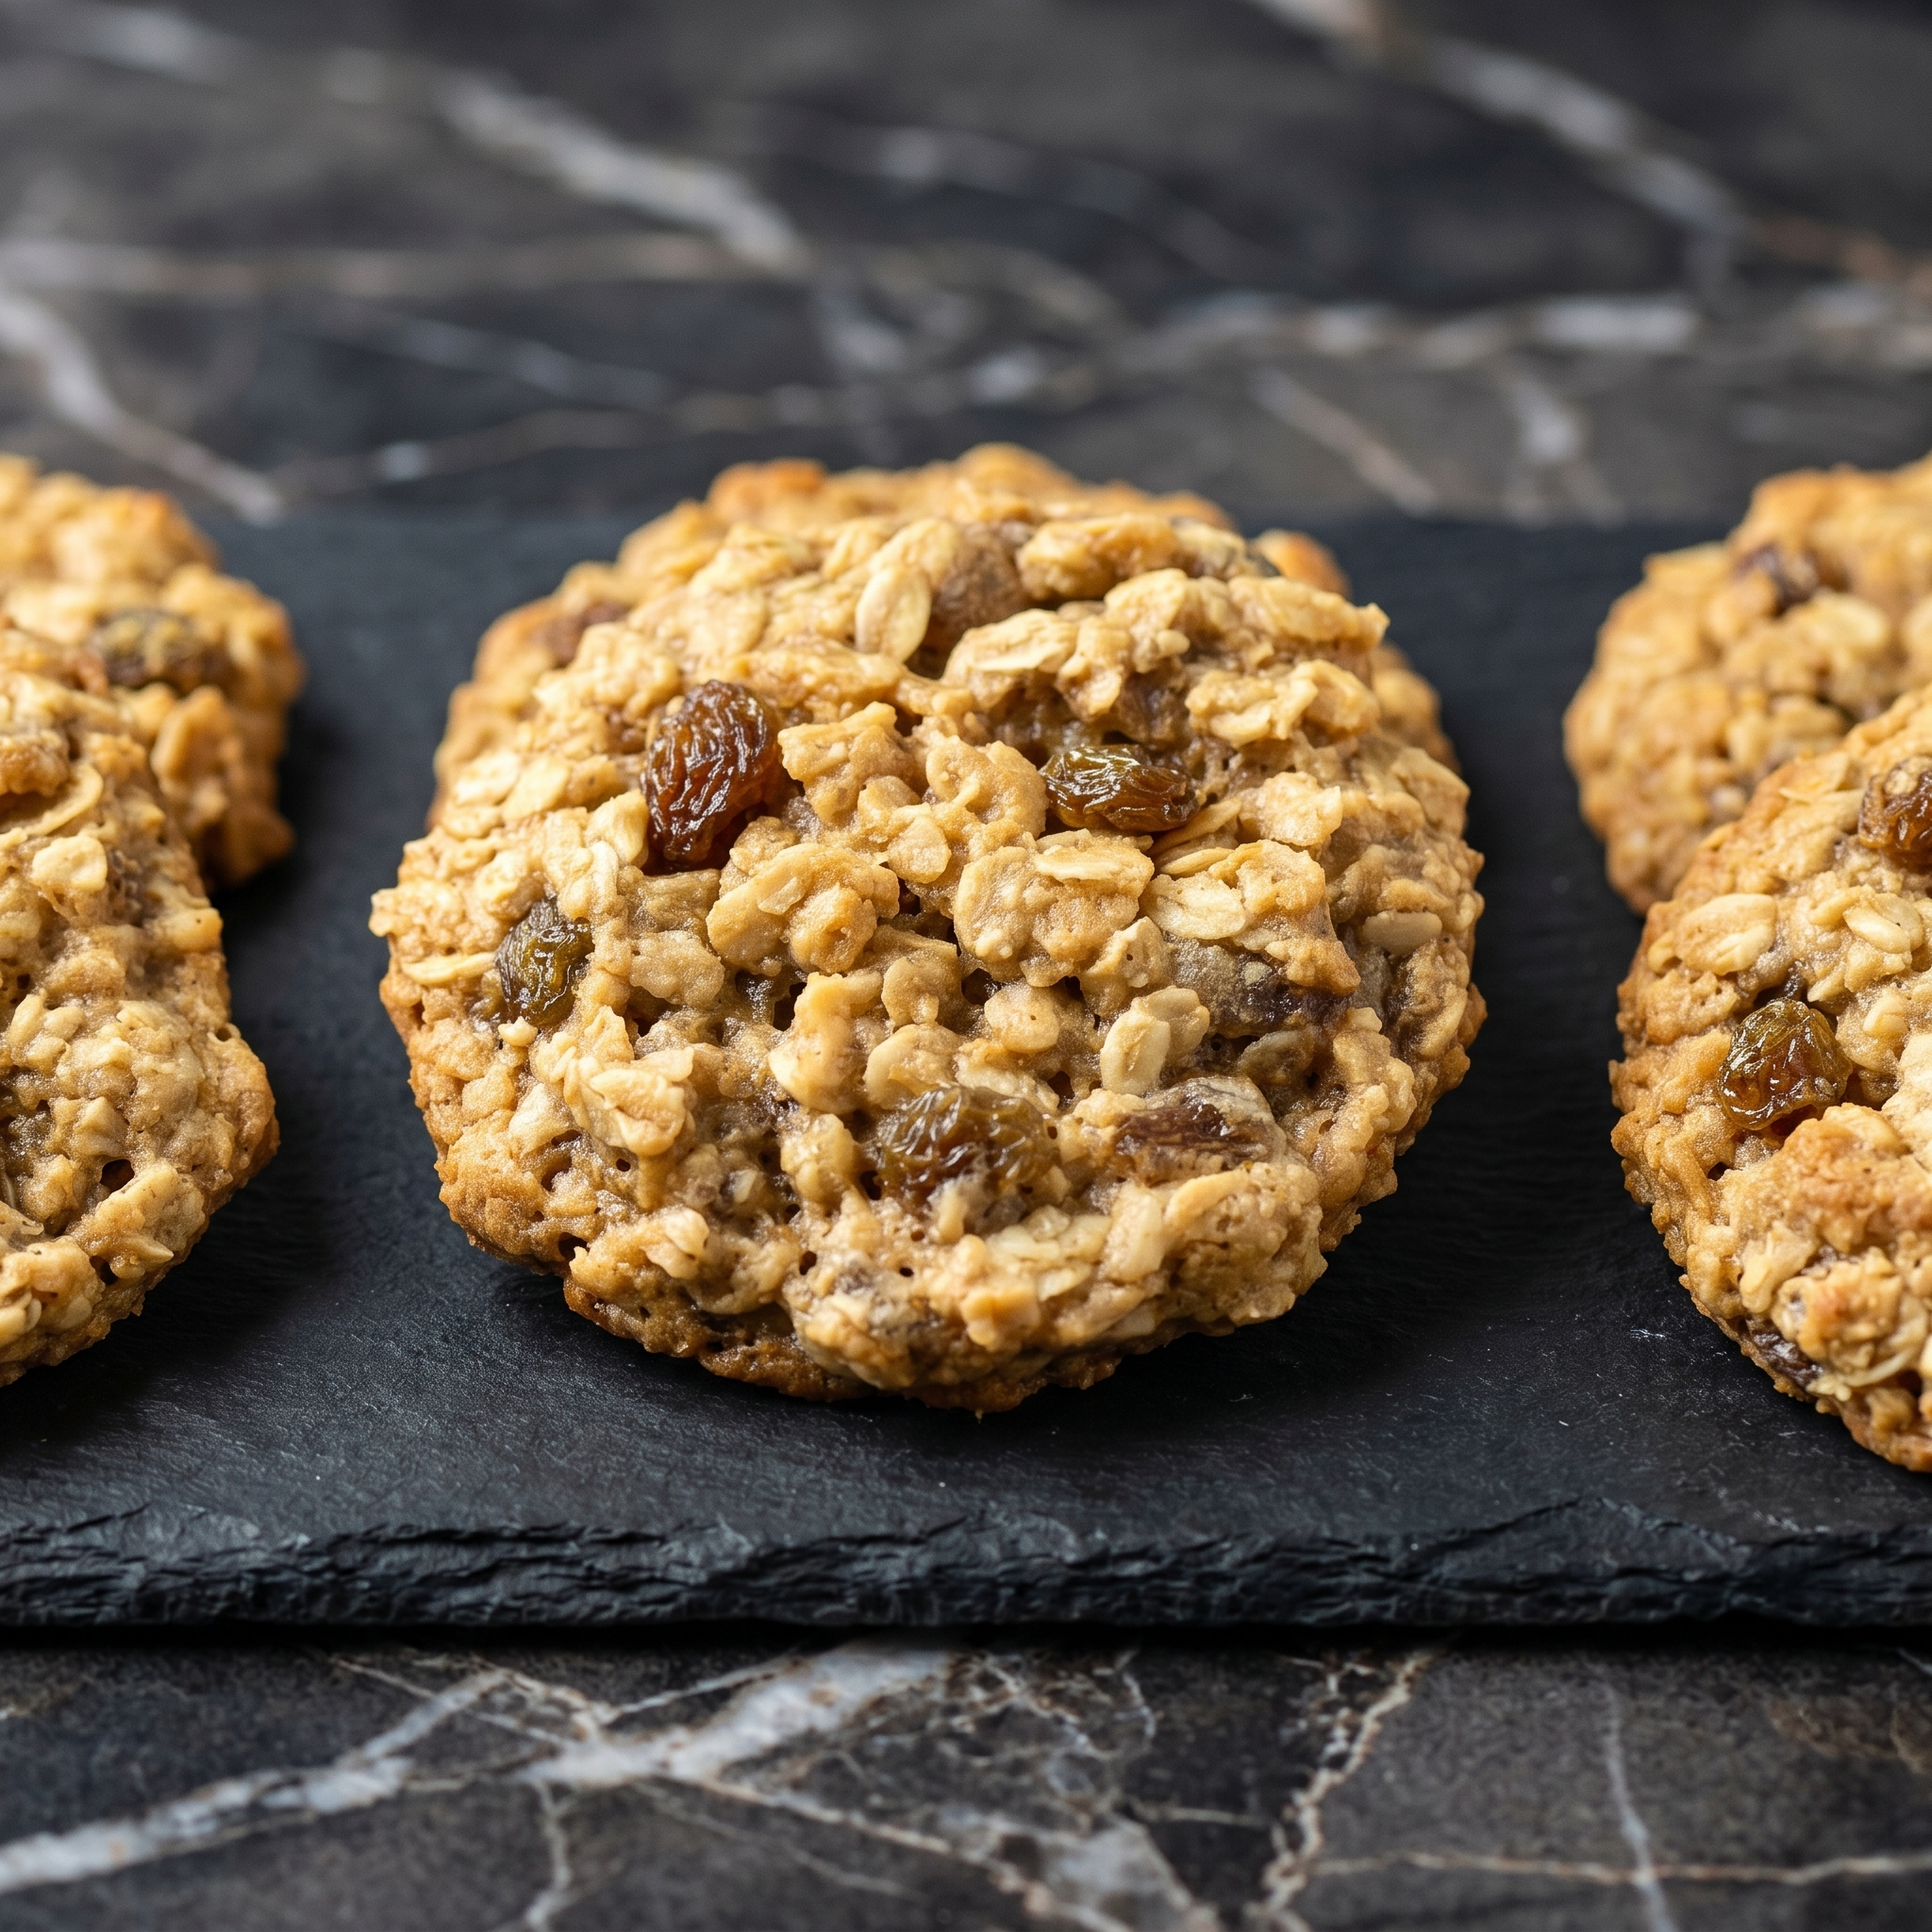
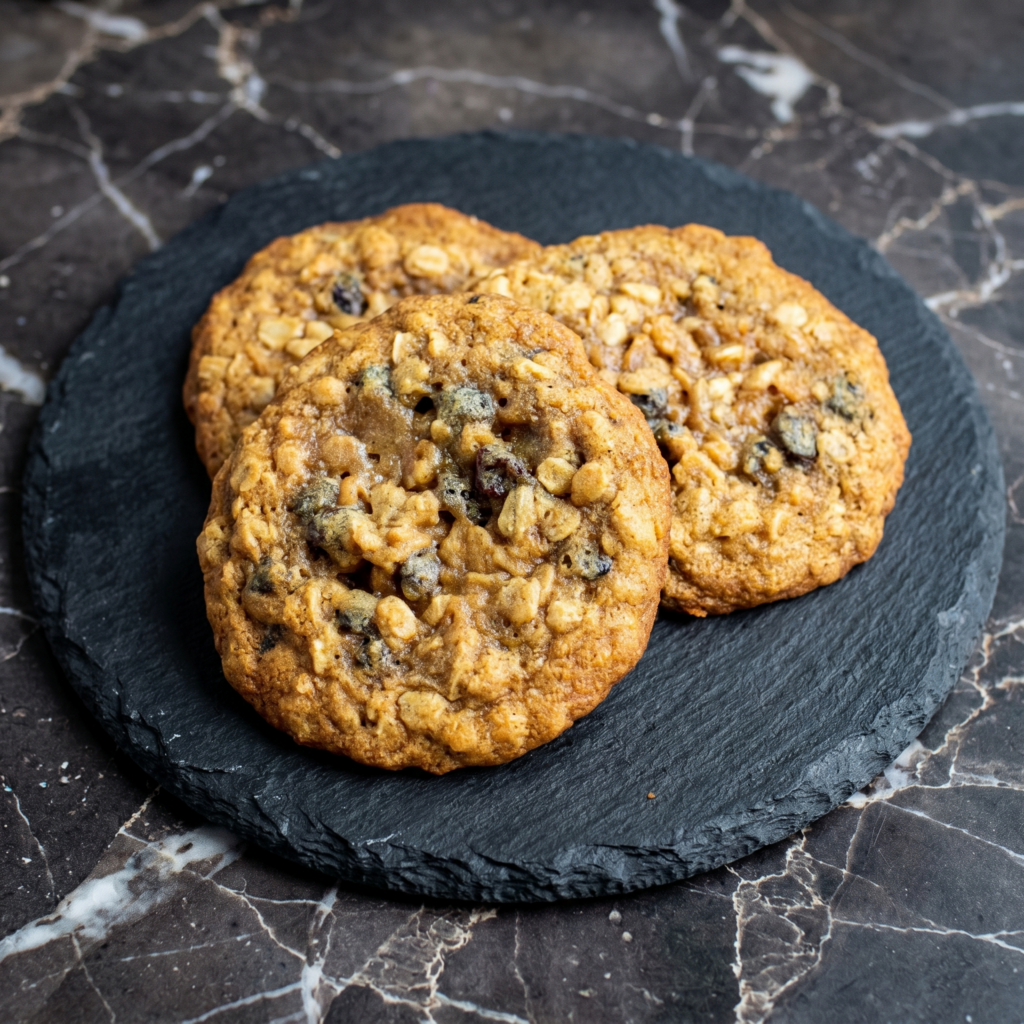
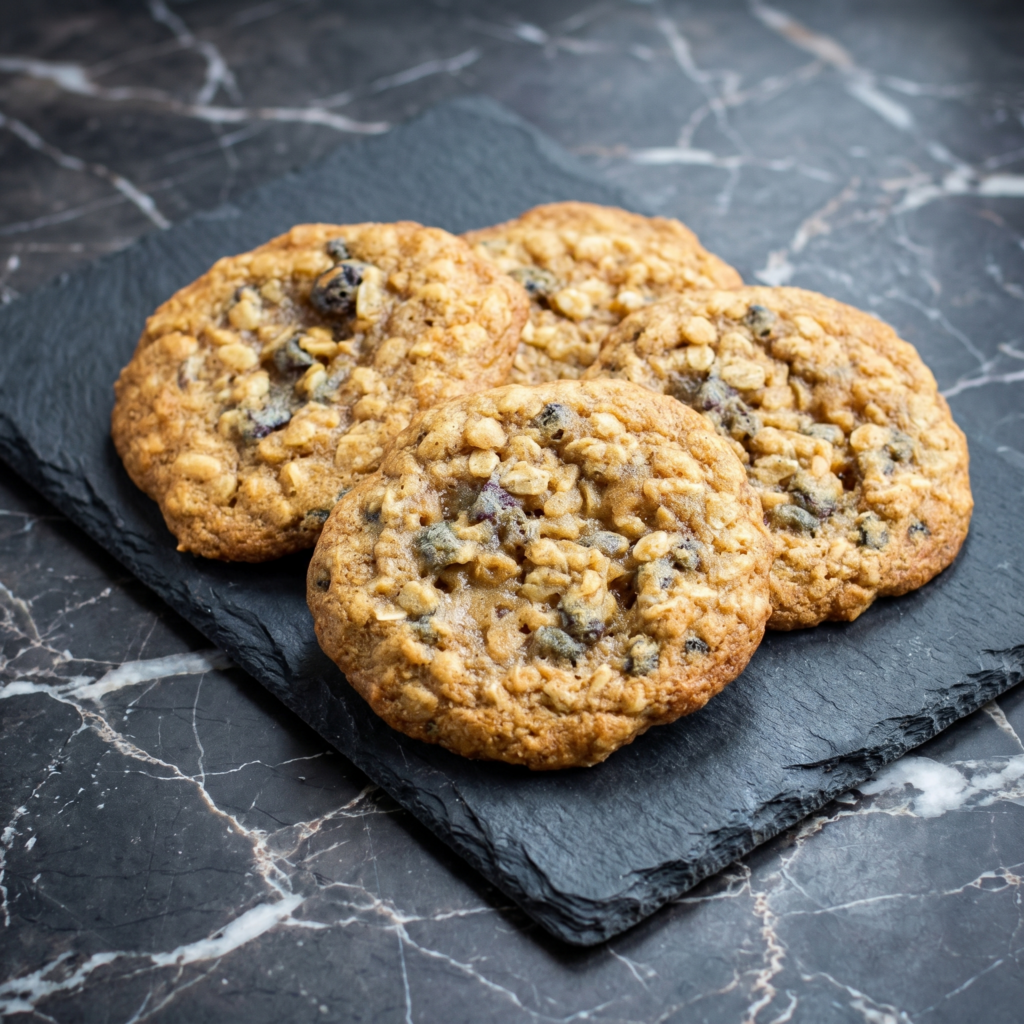
I know what you’re thinking. Oatmeal raisin? The “I thought this was chocolate chip” cookie. The one that sits sadly in the tin while everyone grabs the others. But hear me out—these oatmeal raisin cookies are different.
These are the kind that convert haters. They’re soft and chewy in the middle with slightly crisp edges, perfectly spiced with cinnamon and nutmeg, and packed with plump, juicy raisins that add little bursts of sweetness in every bite.
They’re not a sad substitute for chocolate chip—they’re a contender in their own right. Whether you’re already a fan or need convincing, these oatmeal raisin cookies are about to become your new favorite.
Place the raisins in a small bowl and cover with hot water. Let them sit for 10-15 minutes while you prepare the rest of the ingredients. This plumps them up and makes them juicy and soft instead of dry and chewy.
Drain well and pat dry with paper towels before adding to the dough.
2. Preheat and Prepare:
Preheat your oven to 350°F (175°C). Line two baking sheets with parchment paper or silicone baking mats.
3. Combine Dry Ingredients:
In a medium bowl, whisk together the flour, baking soda, cinnamon, nutmeg, and salt. Set aside.
4. Cream Butter and Sugars:
In a large bowl, beat the softened butter, brown sugar, and granulated sugar together with an electric mixer until light and fluffy, about 2-3 minutes. Scrape down the sides and bottom of the bowl as needed.
5. Add Eggs and Vanilla:
Add the eggs one at a time, beating well after each addition. Scrape down the bowl again.
Beat in the vanilla extract (and molasses if using).
6. Combine Wet and Dry:
Gradually add the flour mixture to the wet ingredients, mixing on low speed until just combined. Do not overmix.
Fold in the oats with a spatula until evenly distributed.
Gently fold in the plumped raisins (and nuts or zest if using).
7. Chill the Dough:
Cover the bowl and refrigerate the dough for at least 30 minutes. This step is important—it prevents spreading and allows the flavors to meld.
If you’re in a hurry, you can skip this, but 30 minutes makes a noticeable difference.
8. Scoop and Bake:
Scoop tablespoon-sized portions of dough (about 1.5 tablespoons) and roll into balls. Place on the prepared baking sheets, spacing about 2 inches apart.
Bake for 10-12 minutes, until the edges are lightly golden and set. The centers will still look soft and slightly underdone—that’s perfect.
Let the cookies cool on the baking sheet for 5-10 minutes. They will continue to set as they cool.
Transfer to a wire rack to cool completely.
9. Serve:
Serve with a cold glass of milk or a hot cup of coffee. These cookies are soft, chewy, and absolutely irresistible.
Store oatmeal raisin cookies in an airtight container at room temperature for up to 5 days. They actually stay soft and chewy thanks to the oats and raisins. Place a slice of white bread in the container to keep them extra soft—the cookies will absorb moisture from the bread.
Can You Freeze the Dough?
Absolutely! Scoop the dough into balls and place on a parchment-lined baking sheet. Freeze until solid, then transfer the frozen dough balls to a freezer bag. Bake from frozen, adding 1-2 minutes to the baking time. Fresh cookies anytime!
Freezing Baked Cookies:
Baked oatmeal cookies freeze beautifully. Place them in a single layer in a freezer-safe container with parchment between layers. Freeze for up to 3 months. Thaw at room temperature.
Make-Ahead Dough:
The dough can be refrigerated for up to 3 days before baking. Let it sit at room temperature for 10-15 minutes to soften slightly before scooping.
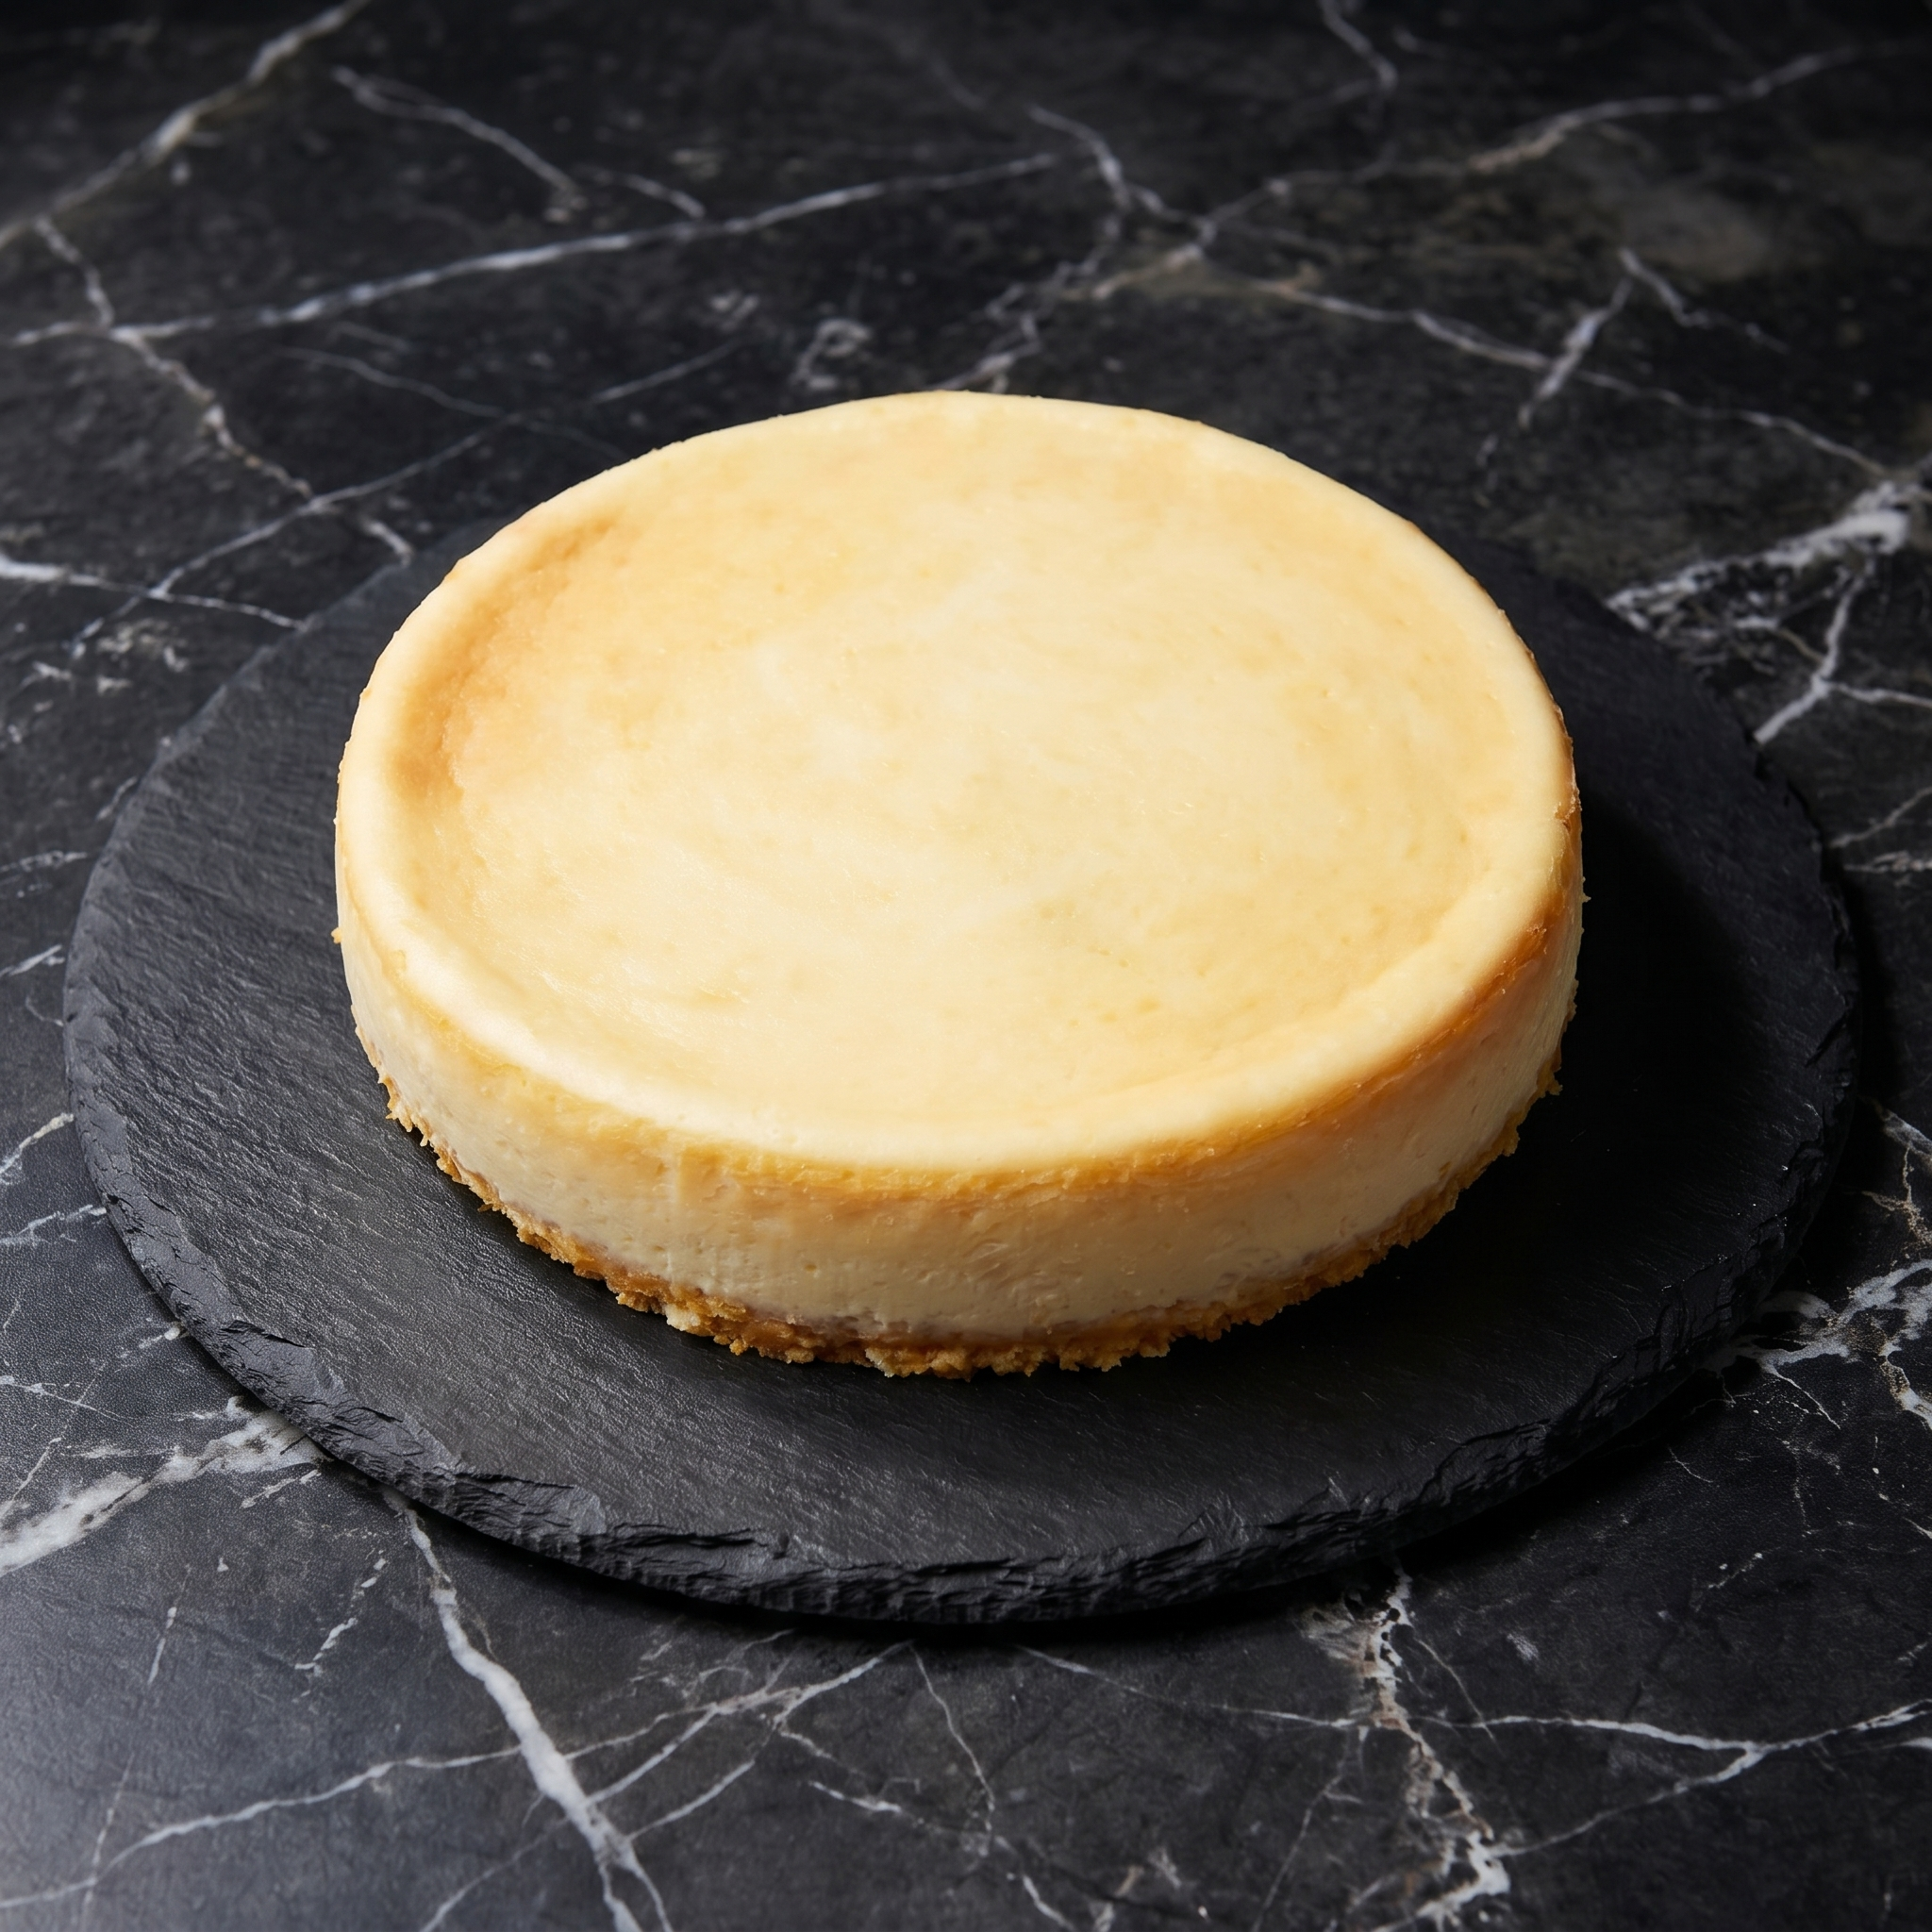
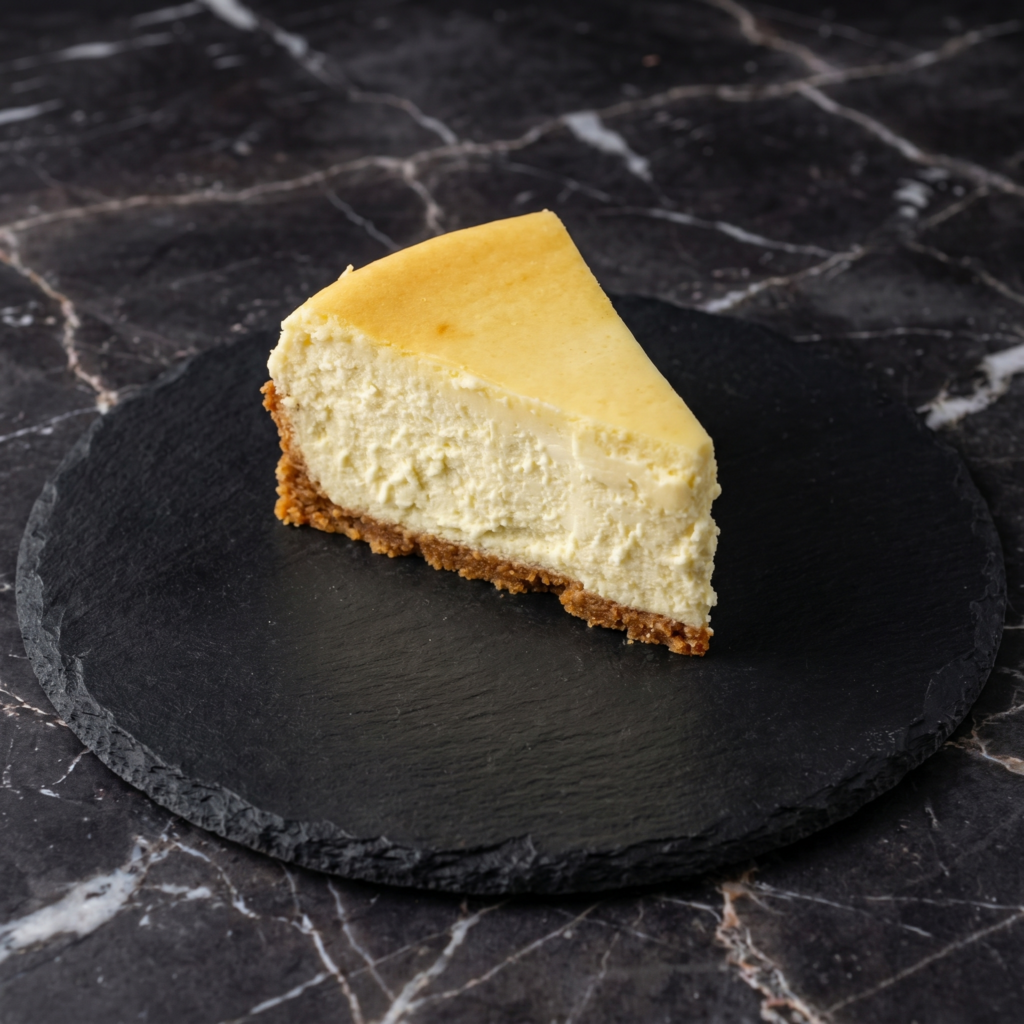
A great New York cheesecake is a thing of beauty. It’s dense and creamy, rich but not heavy, with a tangy-sweet flavor that’s perfectly balanced. The crust is buttery and slightly sandy, the filling is silky smooth, and the top is a pristine, crack-free canvas ready for whatever toppings you desire.
For years, I was intimidated by cheesecake. Water baths, cracks, sinking centers—it all seemed so complicated. But after countless tests and tweaks, I’ve developed a recipe that takes the fear out of cheesecake making.
This version delivers that classic New York style with a foolproof method that works every time. Whether you’re a beginner or a seasoned baker, this cheesecake will make you feel like a pro.
Ingredients
Makes one 9-inch cheesecake (12-16 servings).
For the Graham Cracker Crust:
2 cups (240g) graham cracker crumbs (about 16 full sheets)
¼ cup (50g) granulated sugar
½ cup (115g) unsalted butter, melted
¼ teaspoon salt
For the Cheesecake Filling:
32 oz (900g) full-fat cream cheese, softened to room temperature
Wrap the outside of a 9-inch springform pan with a double layer of heavy-duty aluminum foil, making sure it goes all the way up the sides. This will prevent water from seeping in during the water bath.
Lightly grease the inside of the pan with butter or non-stick spray.
2. Make the Crust:
In a medium bowl, combine the graham cracker crumbs, sugar, and salt. Stir until well mixed.
Pour in the melted butter and stir until all crumbs are moistened and the mixture resembles wet sand.
Press the mixture firmly into the bottom of the prepared springform pan and about 1 inch up the sides. Use the bottom of a measuring cup or glass to press it down firmly and evenly.
Bake for 10 minutes. Set aside to cool while you make the filling. Reduce oven temperature to 300°F (150°C).
3. Make the Filling:
In a large bowl, beat the softened cream cheese with an electric mixer on medium speed until completely smooth and creamy, with no lumps, about 2-3 minutes. Scrape down the sides and bottom of the bowl well.
Add the sugar and cornstarch, and beat until combined, about 1 minute. Scrape the bowl again.
Add the vanilla extract and beat until incorporated.
Add the eggs one at a time, beating on low speed just until each egg is incorporated. Do not overbeat—overmixing incorporates too much air, which can cause cracks.
Add the sour cream, heavy cream, and lemon zest (if using). Beat on low speed just until combined and smooth. Scrape the bowl one last time and gently fold by hand with a spatula to ensure everything is well mixed.
4. Prepare the Water Bath:
Place the foil-wrapped springform pan into a large roasting pan or deep baking dish.
Pour the cheesecake filling into the cooled crust and smooth the top with a spatula.
Place the roasting pan in the oven, then carefully pour hot water into the roasting pan until it reaches about halfway up the sides of the springform pan. Be careful not to splash water onto the cheesecake.
5. Bake:
Bake at 300°F (150°C) for 60-75 minutes. The edges should be set, but the center will still be slightly jiggly (like Jell-O, not liquid).
Turn off the oven, crack the oven door open, and let the cheesecake cool in the oven for 1 hour. This gradual cooling helps prevent cracks.
Remove the cheesecake from the water bath and remove the foil. Run a thin knife around the edge of the pan to loosen the cheesecake (this prevents cracking as it cools).
Let the cheesecake cool completely at room temperature, then cover and refrigerate for at least 6 hours, preferably overnight. Chilling is essential for the perfect texture.
6. Serve:
When ready to serve, remove the sides of the springform pan.
Slice with a sharp, thin-bladed knife, wiping the blade clean between each cut for neat slices.
Serve plain or with your favorite toppings like fresh berries, compote, or whipped cream.
Store cheesecake covered in the refrigerator for up to 5 days. Keep it in the springform pan or transfer to an airtight container. The flavor actually improves after a day or two!
Can You Freeze Cheesecake?
Absolutely! Cheesecake freezes beautifully. Freeze the whole cheesecake or individual slices. Place in the freezer uncovered for 1-2 hours until firm, then wrap tightly in plastic wrap and foil. Freeze for up to 3 months. Thaw overnight in the refrigerator.
Make-Ahead for Parties:
Cheesecake is the perfect make-ahead dessert. Make it 1-2 days before your event and keep it refrigerated. Add toppings just before serving for the freshest presentation.
Freezing Crust:
You can freeze an unbaked crust for up to 3 months. Press into the pan, wrap tightly, and freeze. Bake directly from frozen, adding a few minutes to the baking time.
Can You Freeze Cheesecake with Toppings?
It’s best to freeze cheesecake without toppings. Add fresh berries, sauces, or whipped cream after thawing.
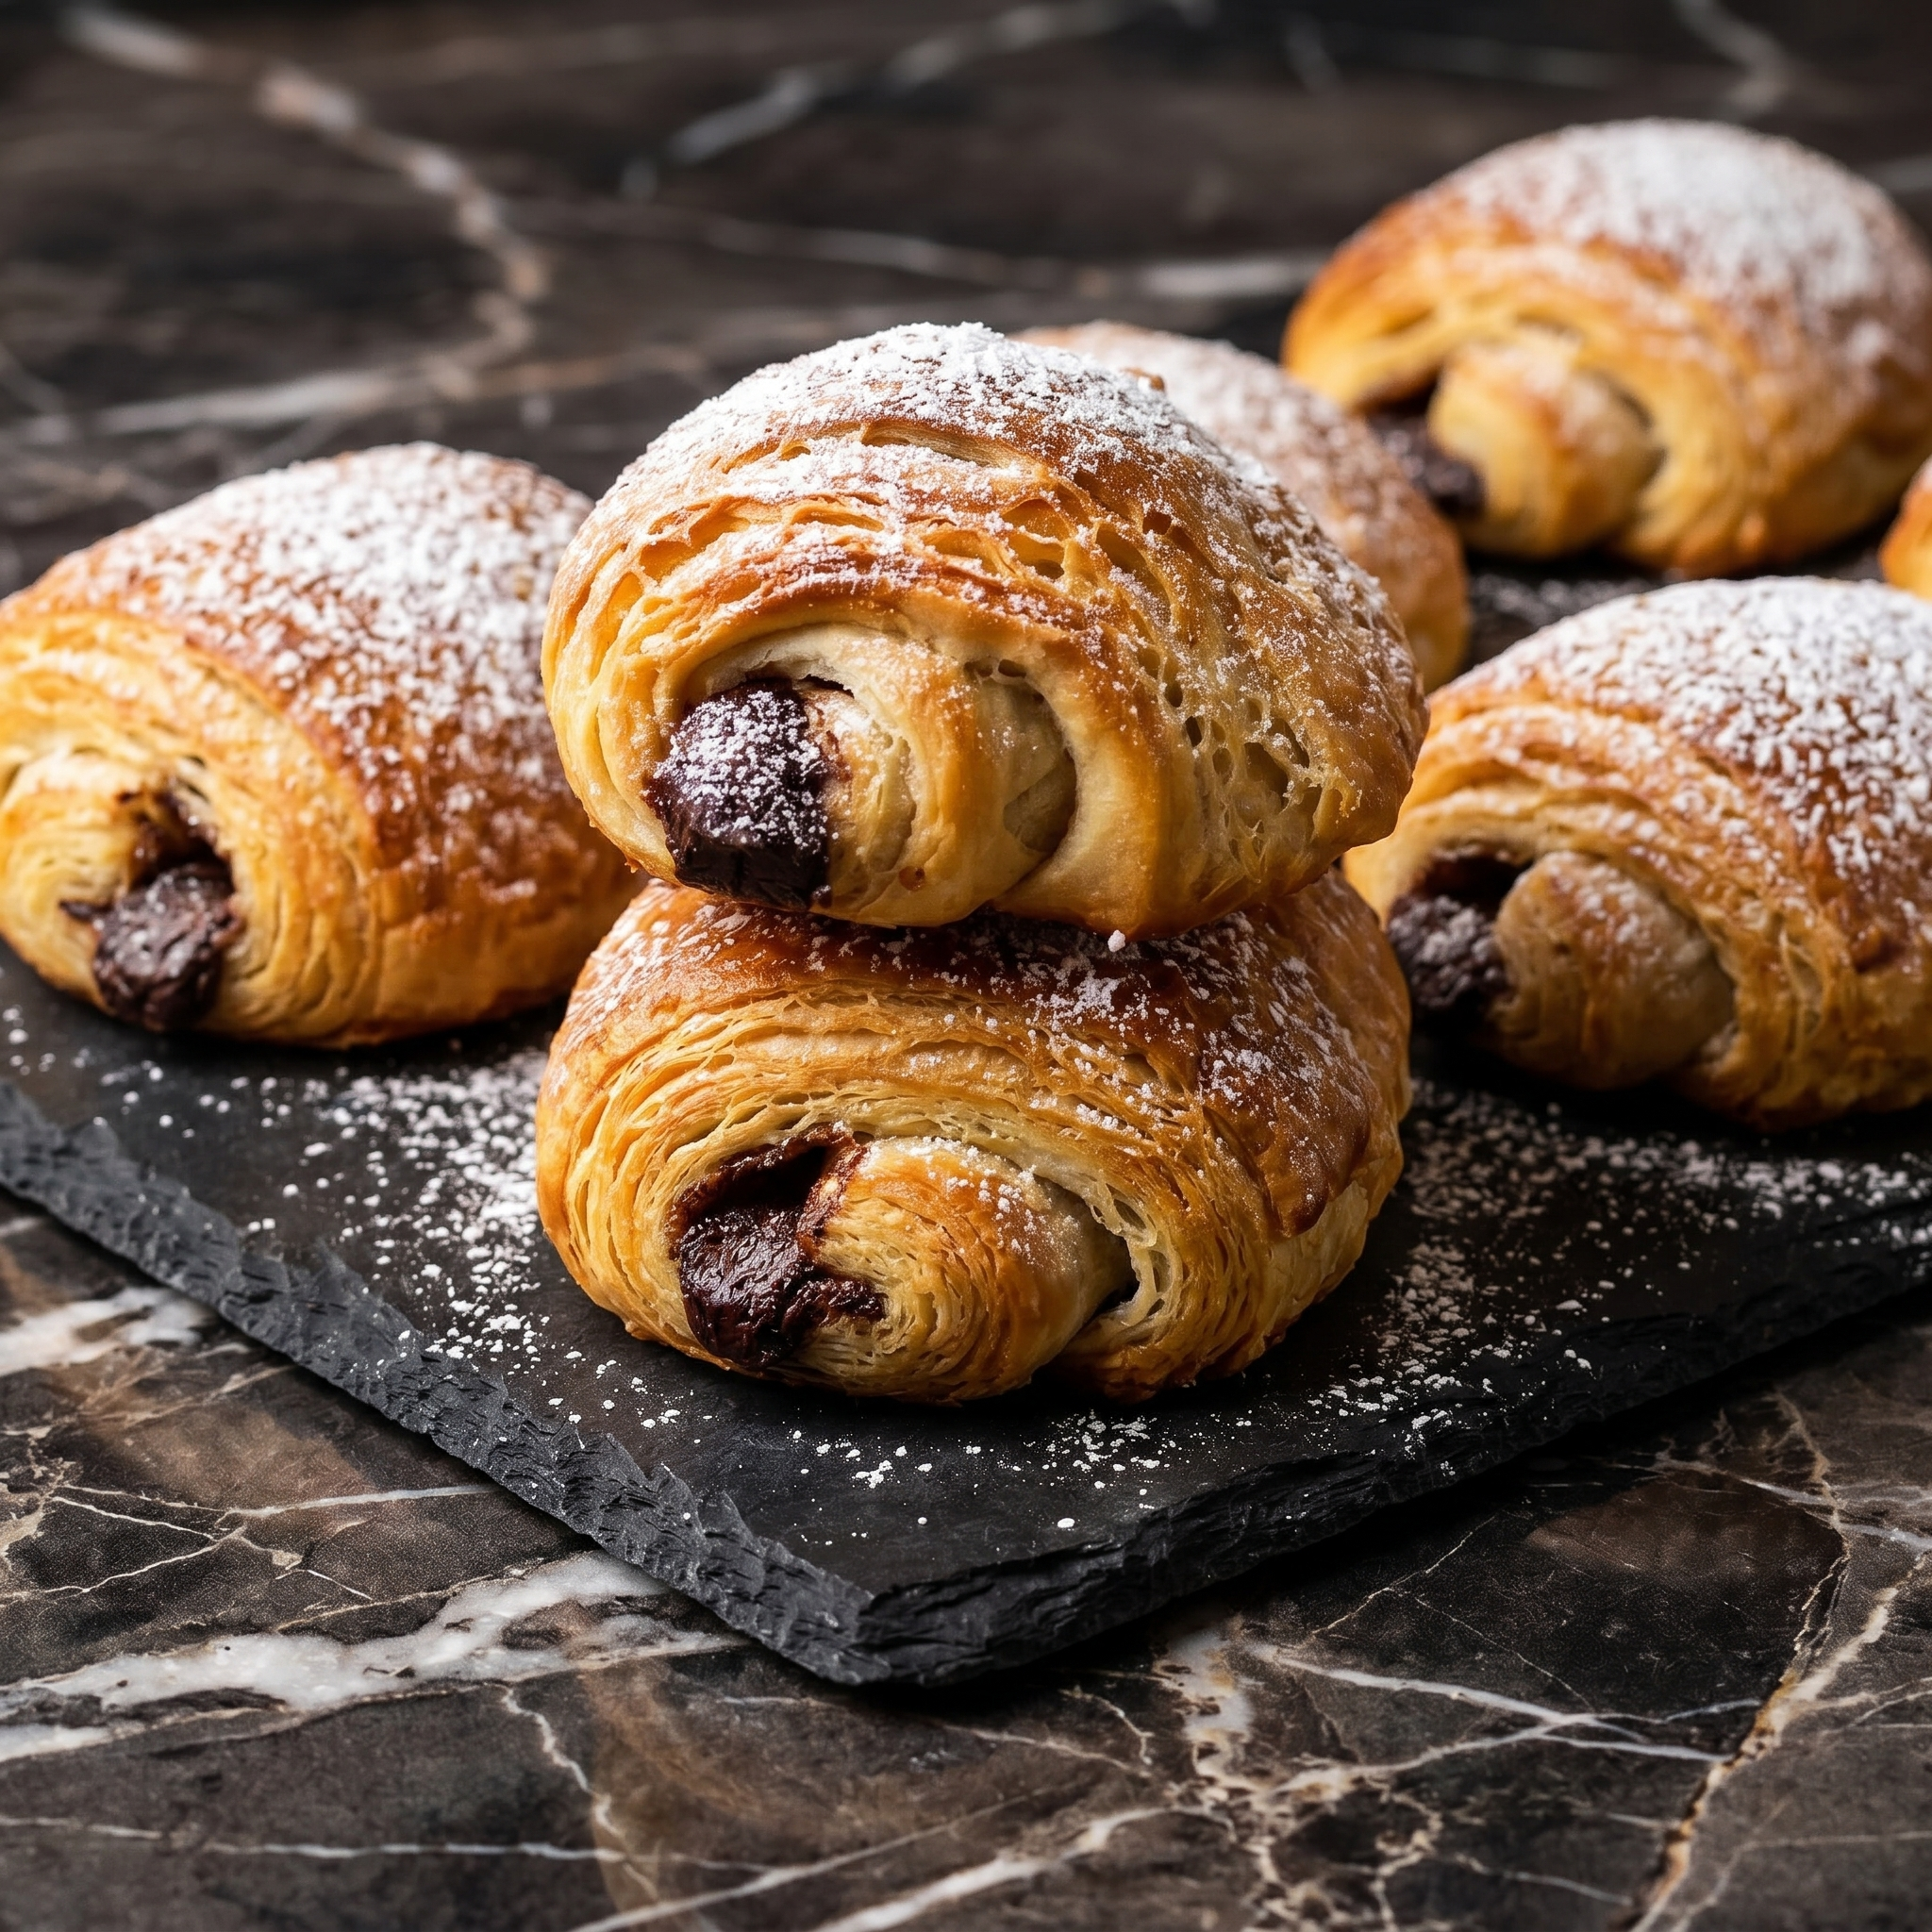
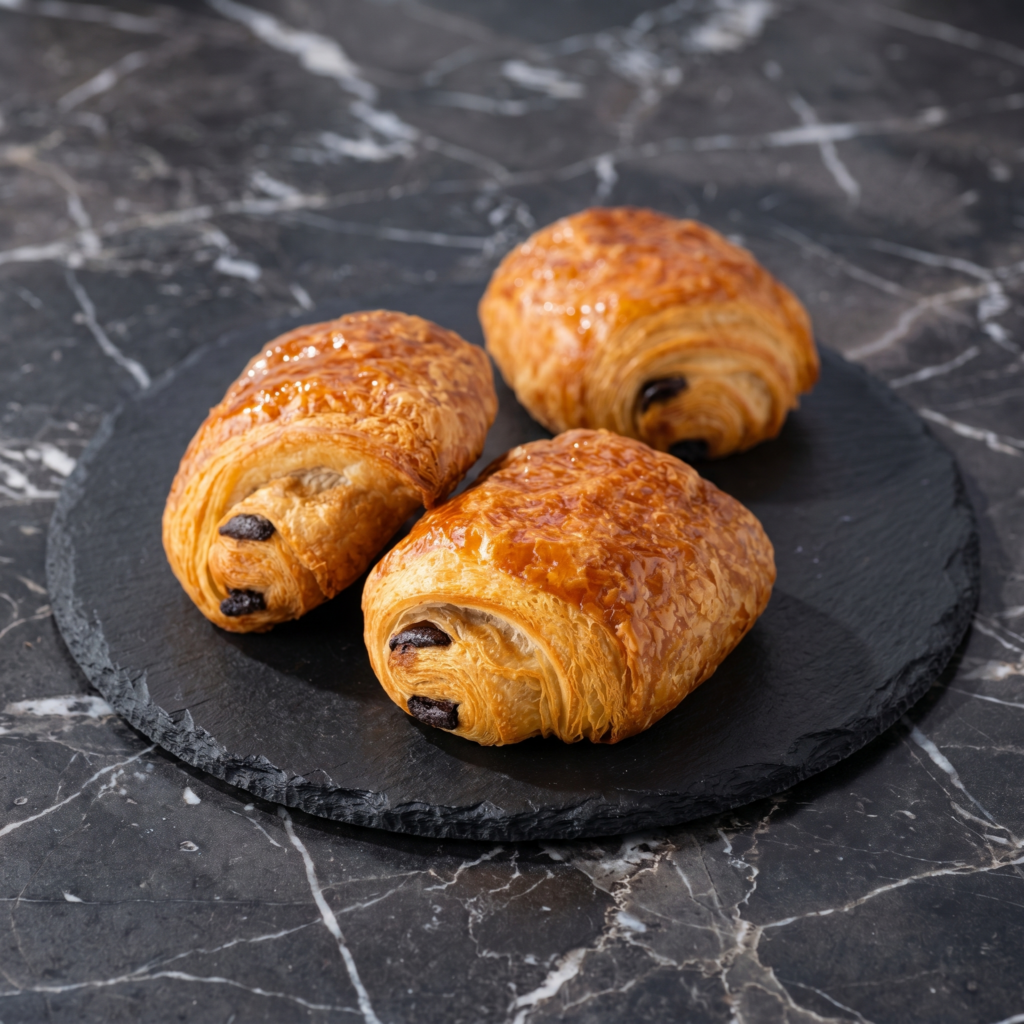
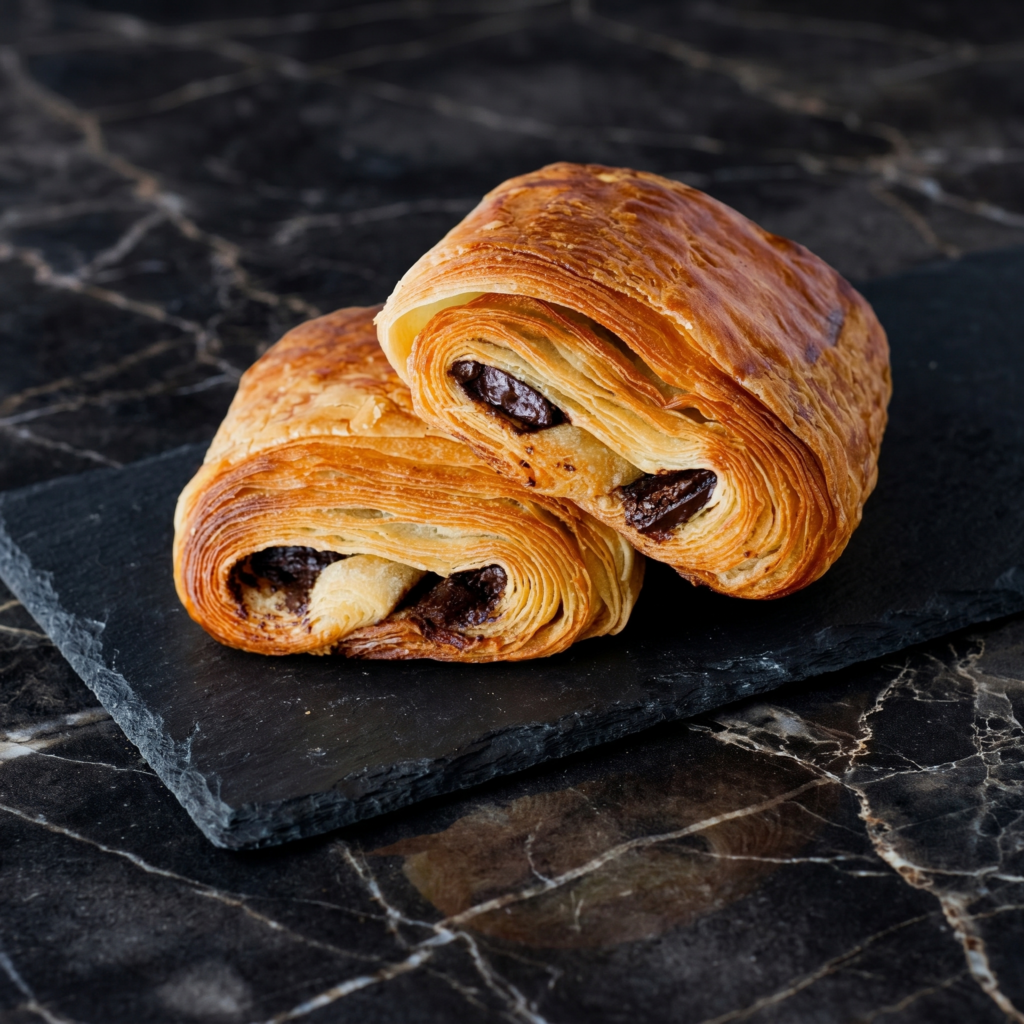
Pain au chocolat. Chocolate croissant. Call it whatever. It’s buttery, flaky, chocolatey heaven.
The secret? You don’t need to laminate dough for days. Store-bought puff pastry does the heavy lifting. Roll. Cut. Bake. Boom. French bakery vibes, zero airfare.
Ingredients
Makes 8 pastries.
2 sheets frozen puff pastry, thawed
16 dark chocolate batons or 4 oz (115g) dark chocolate, cut into 16 sticks
1 egg, beaten (for egg wash)
1 tablespoon milk (optional, for egg wash)
Optional: Powdered sugar for dusting
Step-by-Step Instructions
Step 1: Prep
Preheat oven to 400°F (200°C). Line a baking sheet with parchment.
Unfold puff pastry sheets. Cut each sheet into 4 rectangles (8 total).
Step 2: Fill
Place 2 chocolate sticks near one short edge of each rectangle.
Roll tightly away from you, enclosing the chocolate.
Place seam-side down on the baking sheet.
Step 3: Egg Wash and Bake
Mix egg with milk. Brush generously over each pastry.
Bake for 15-18 minutes until puffed, golden, and flaky.
Step 4: Cool (If You Can Wait)
Let cool 5 minutes on a wire rack. Dust with powdered sugar if feeling fancy.
Eat warm. Chocolate should be melty. Napkins required.