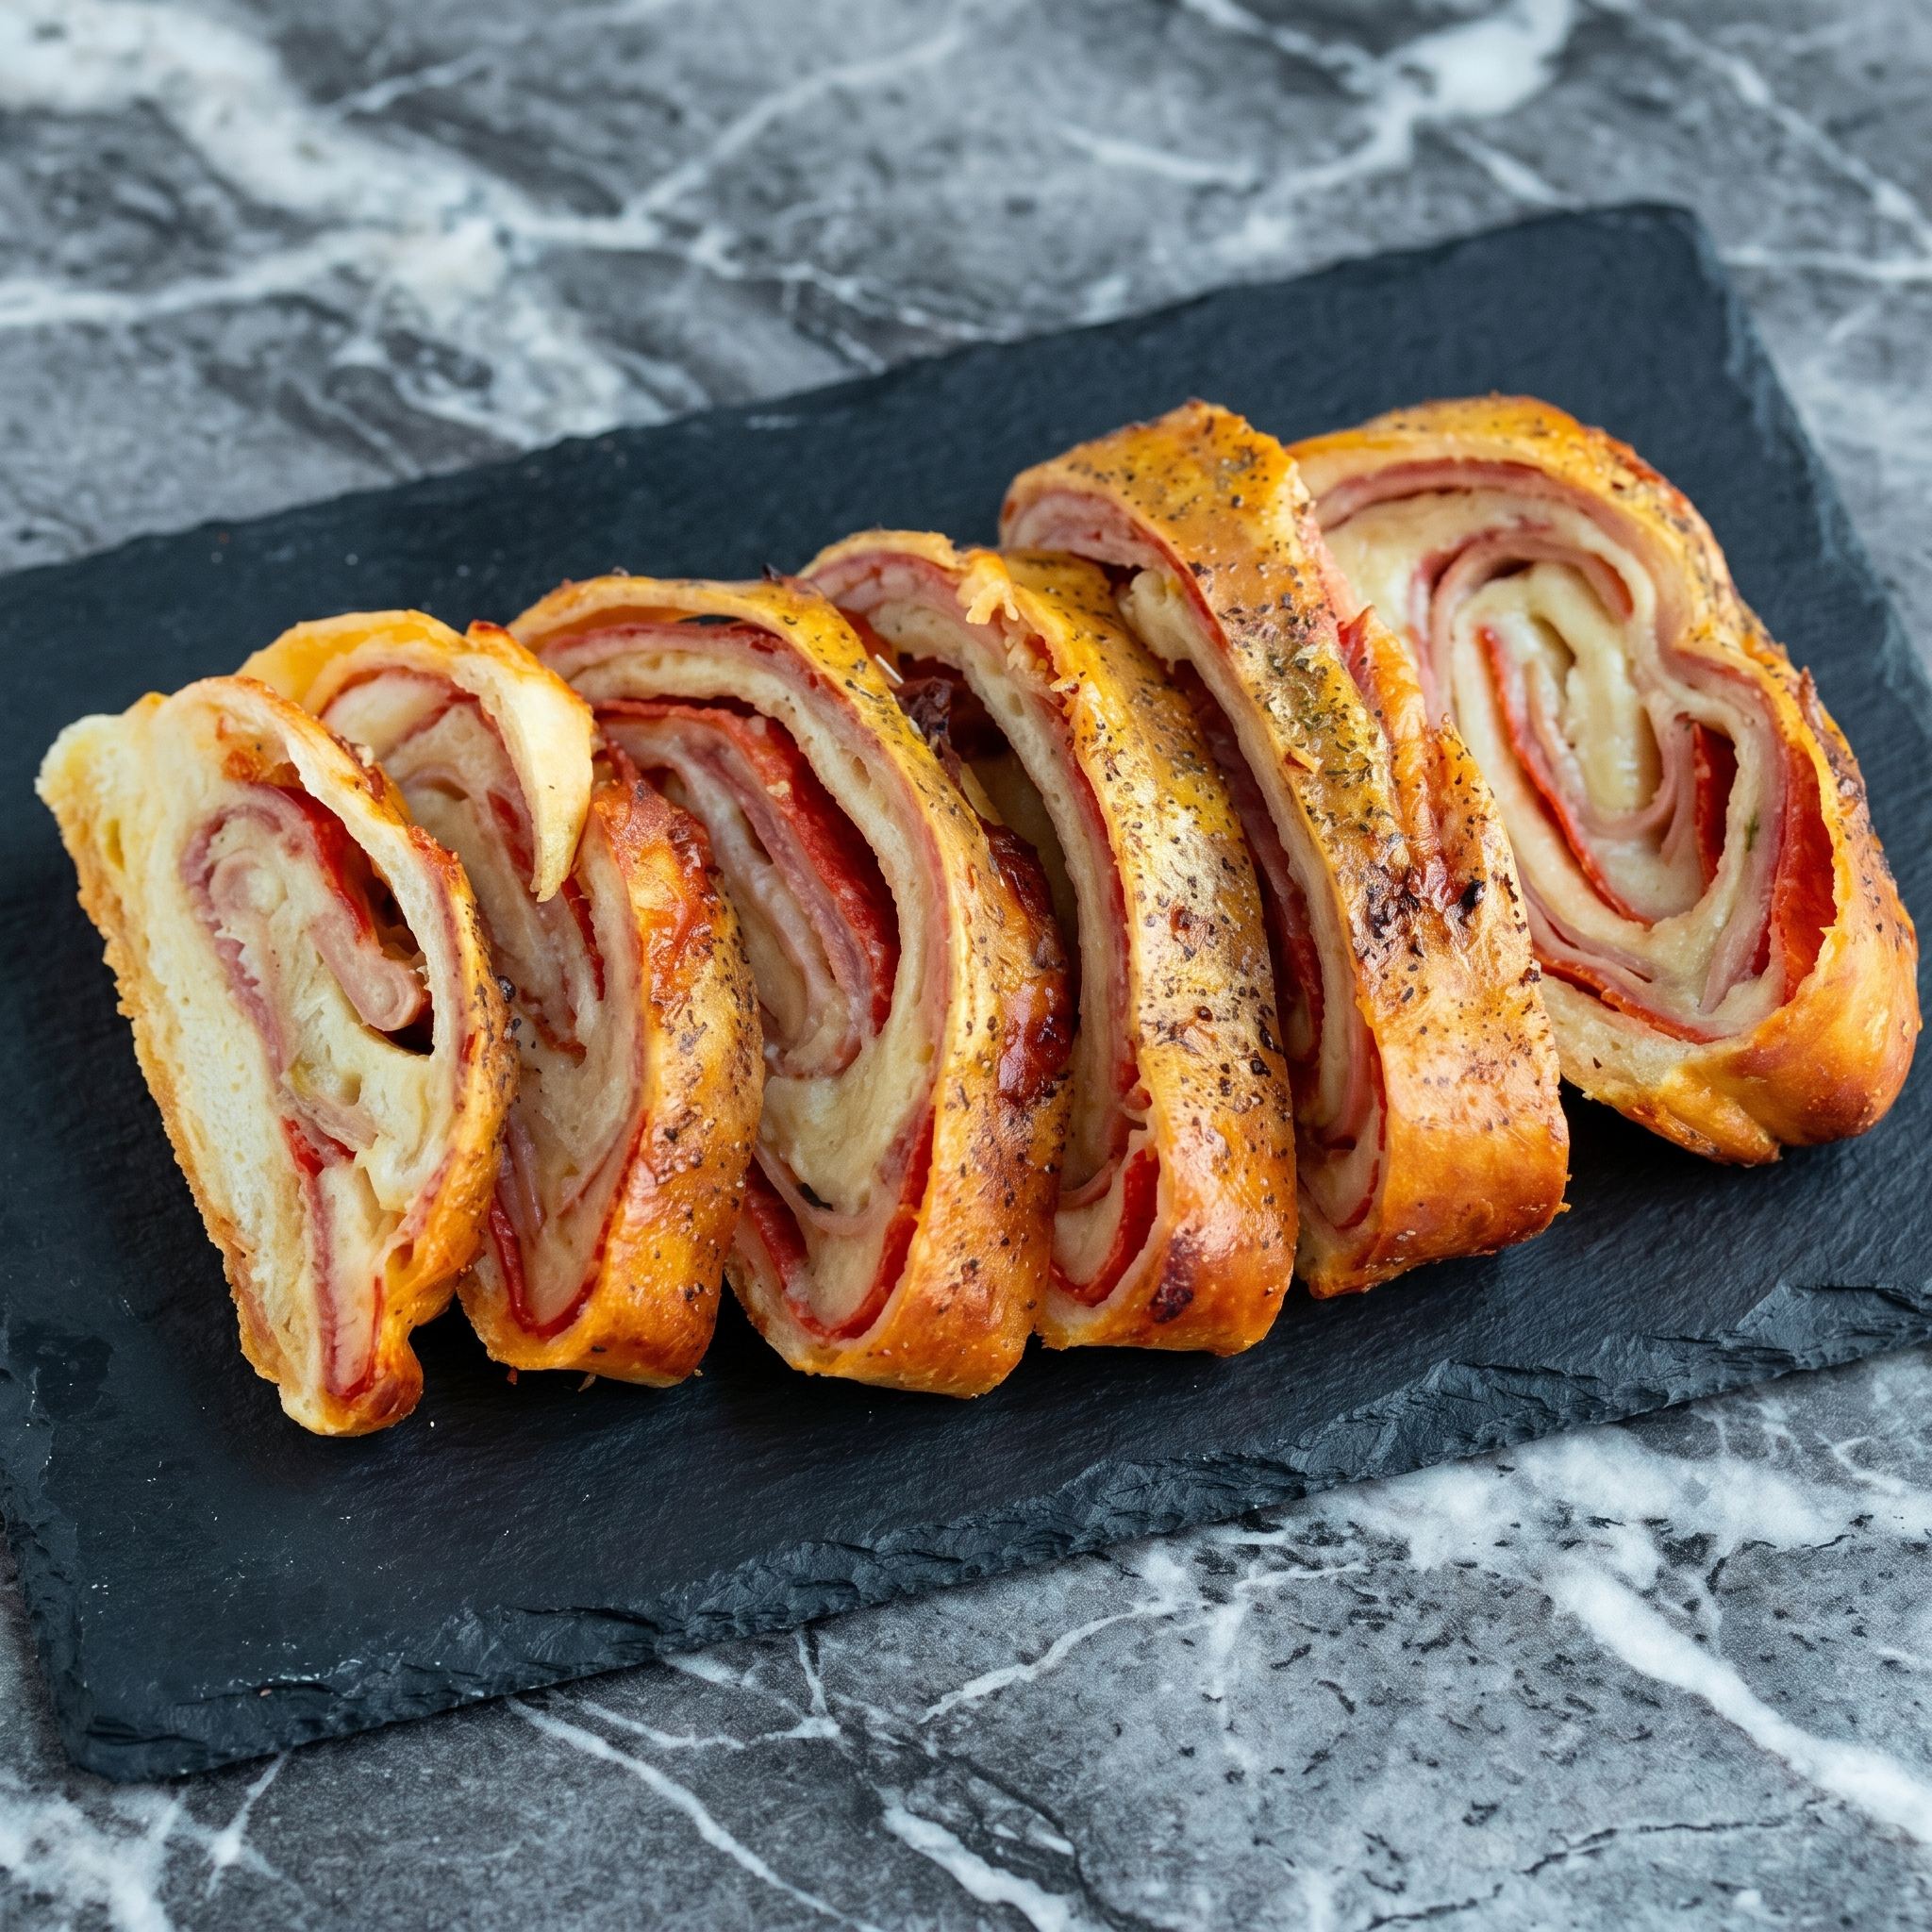
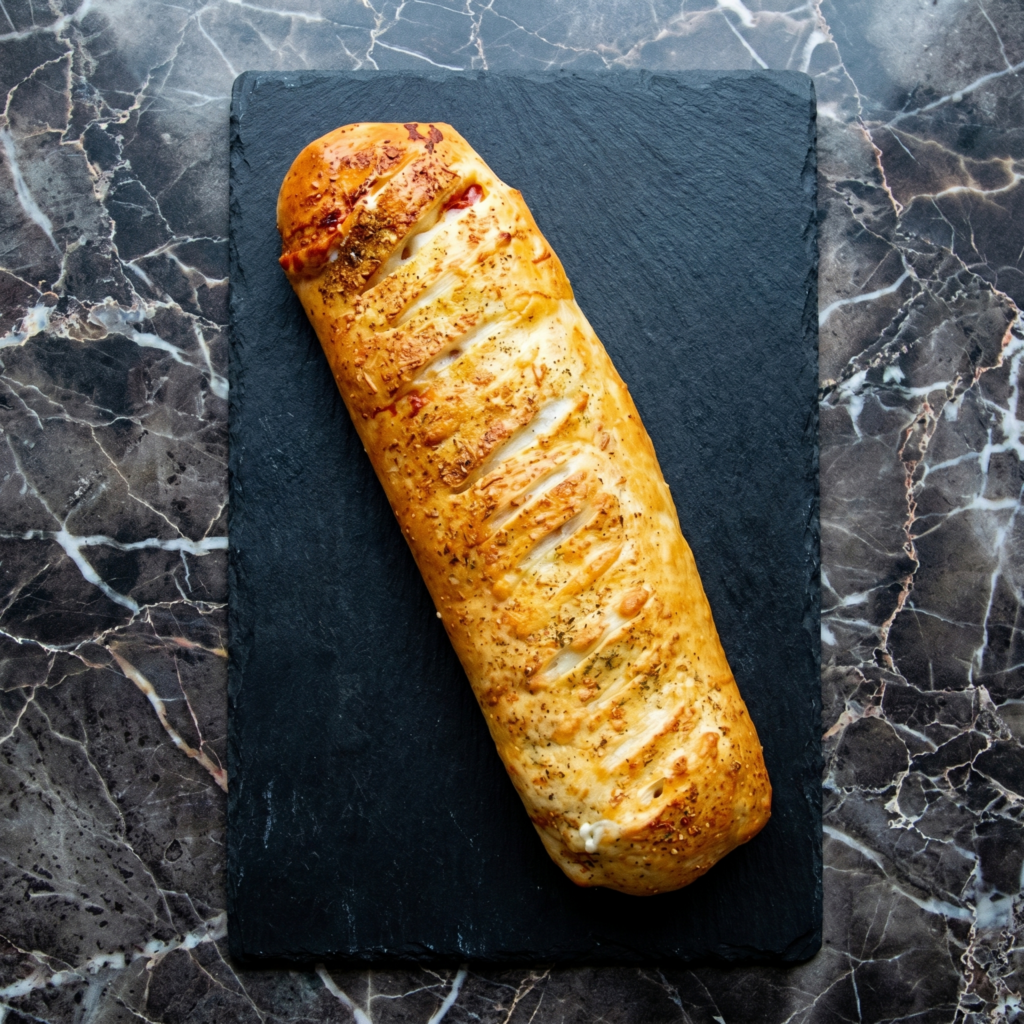
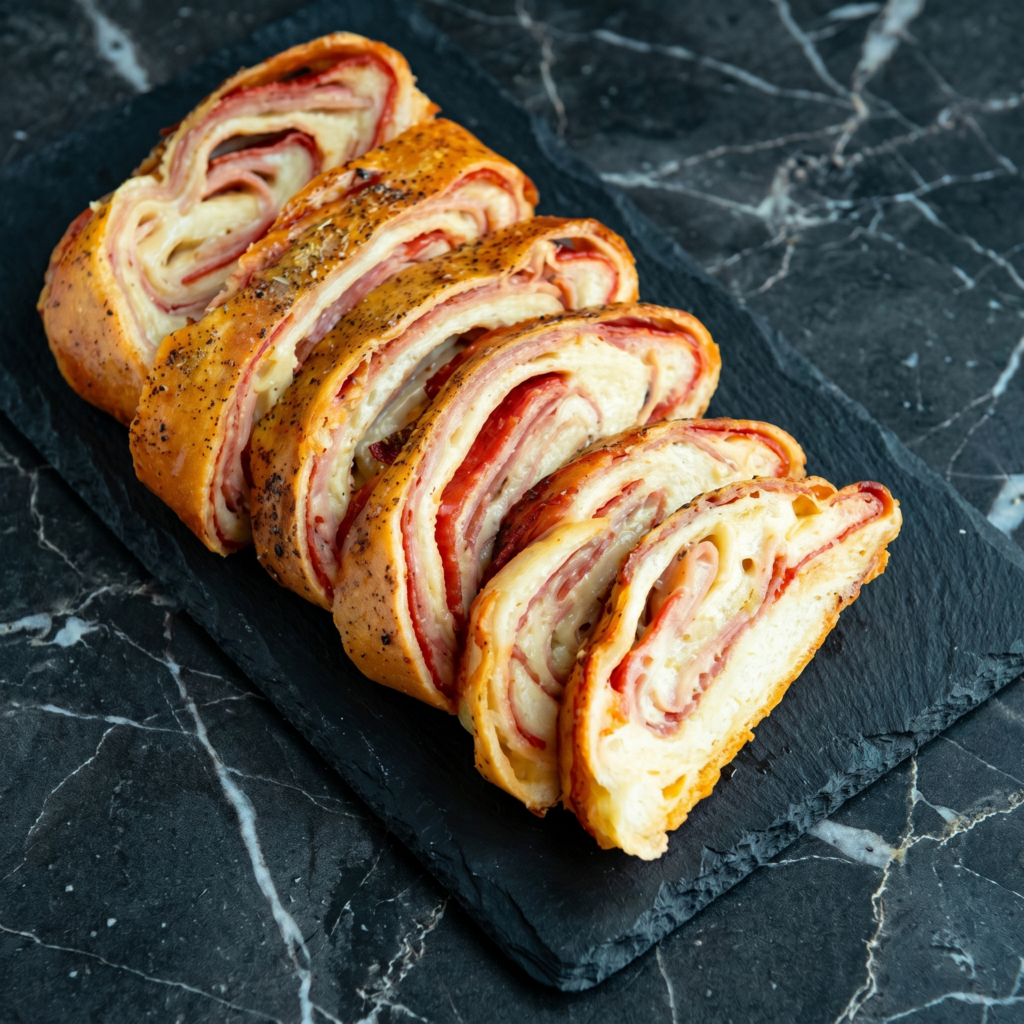
It’s pizza dough, but rolled like a jelly roll with layers of salami, pepperoni, ham, gooey mozzarella, and tangy roasted red peppers. Slice it into spirals of perfection. Serve with marinara. Watch it disappear.
Ingredients
Serves 4-6.
1 lb (450g) pizza dough (store-bought or homemade)
½ cup marinara sauce (plus more for dipping)
8 slices provolone cheese
6 slices genoa salami
6 slices pepperoni
6 slices ham or capicola
1 cup (120g) shredded mozzarella
½ cup roasted red peppers, drained and sliced
1 egg, beaten (for egg wash)
1 tablespoon sesame seeds or Italian seasoning (optional)
Step-by-Step Instructions
Step 1: Preheat Oven
Preheat to 400°F (200°C). Line a baking sheet with parchment paper.
Step 2: Roll the Dough
On a floured surface, roll dough into a 12×10-inch rectangle.
Step 3: Layer the Fillings
Spread marinara sauce over dough, leaving a 1-inch border.
Layer provolone, then salami, pepperoni, ham, shredded mozzarella, and roasted peppers.
Step 4: Roll It Up
Starting from the long edge, roll dough tightly like a jelly roll. Pinch the seam and ends shut.
Step 5: Brush and Score
Place seam-side down on baking sheet. Brush with egg wash. Sprinkle with sesame seeds if using.
Cut 4-5 small slits on top to vent steam.
Step 6: Bake
Bake for 20-25 minutes until deep golden brown and crispy.
Step 7: Rest and Slice
Let rest 5 minutes (cheese is lava-hot). Slice into 1-inch rounds. Serve with warm marinara for dipping.
Game day food shouldn’t be complicated. Neither should Tuesday dinner.
These sliders are spicy, creamy, crunchy, and dangerously snackable. Rotisserie chicken does the heavy lifting. Buffalo sauce brings the heat. Ranch slaw cools it down. You bring the appetite.
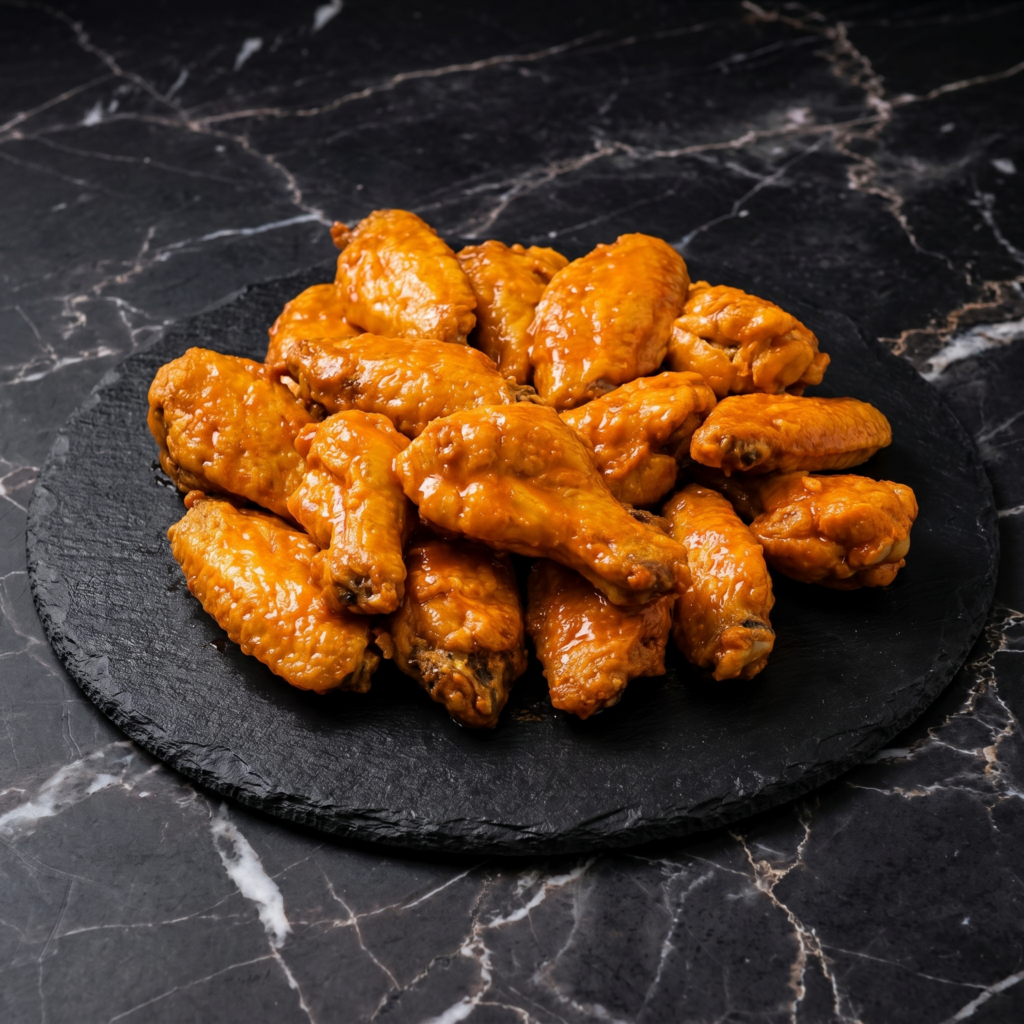
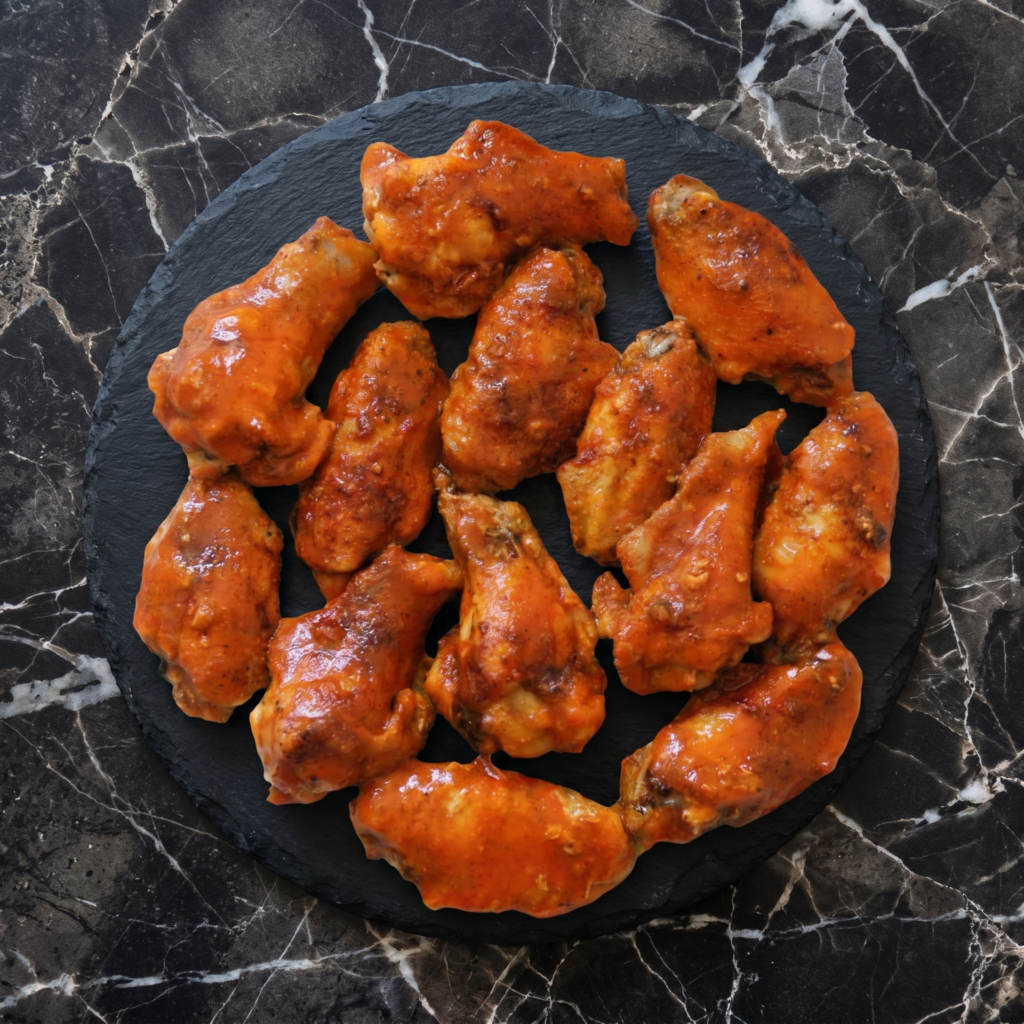
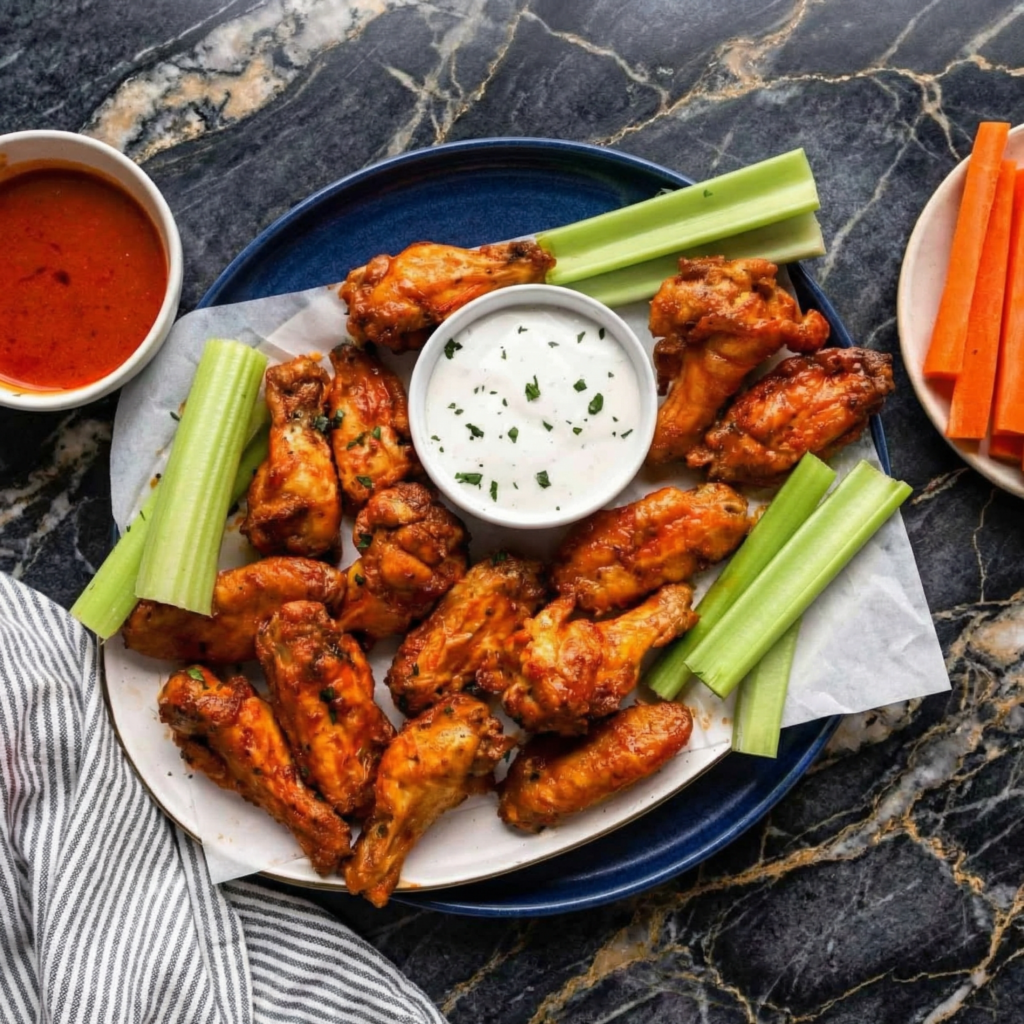
Buffalo wings are a game day legend. Spicy. Tangy. Buttery. Crispy baked wings tossed in classic Frank’s RedHot sauce. 35 minutes. Ranch or blue cheese on the side. Celery sticks mandatory.
Best fresh and crispy. Keeps in fridge for 3 days. Reheat in oven or air fryer at 375°F for 5-7 minutes (microwave makes skin soft). The sauce-soaked wings are still delicious the next day.
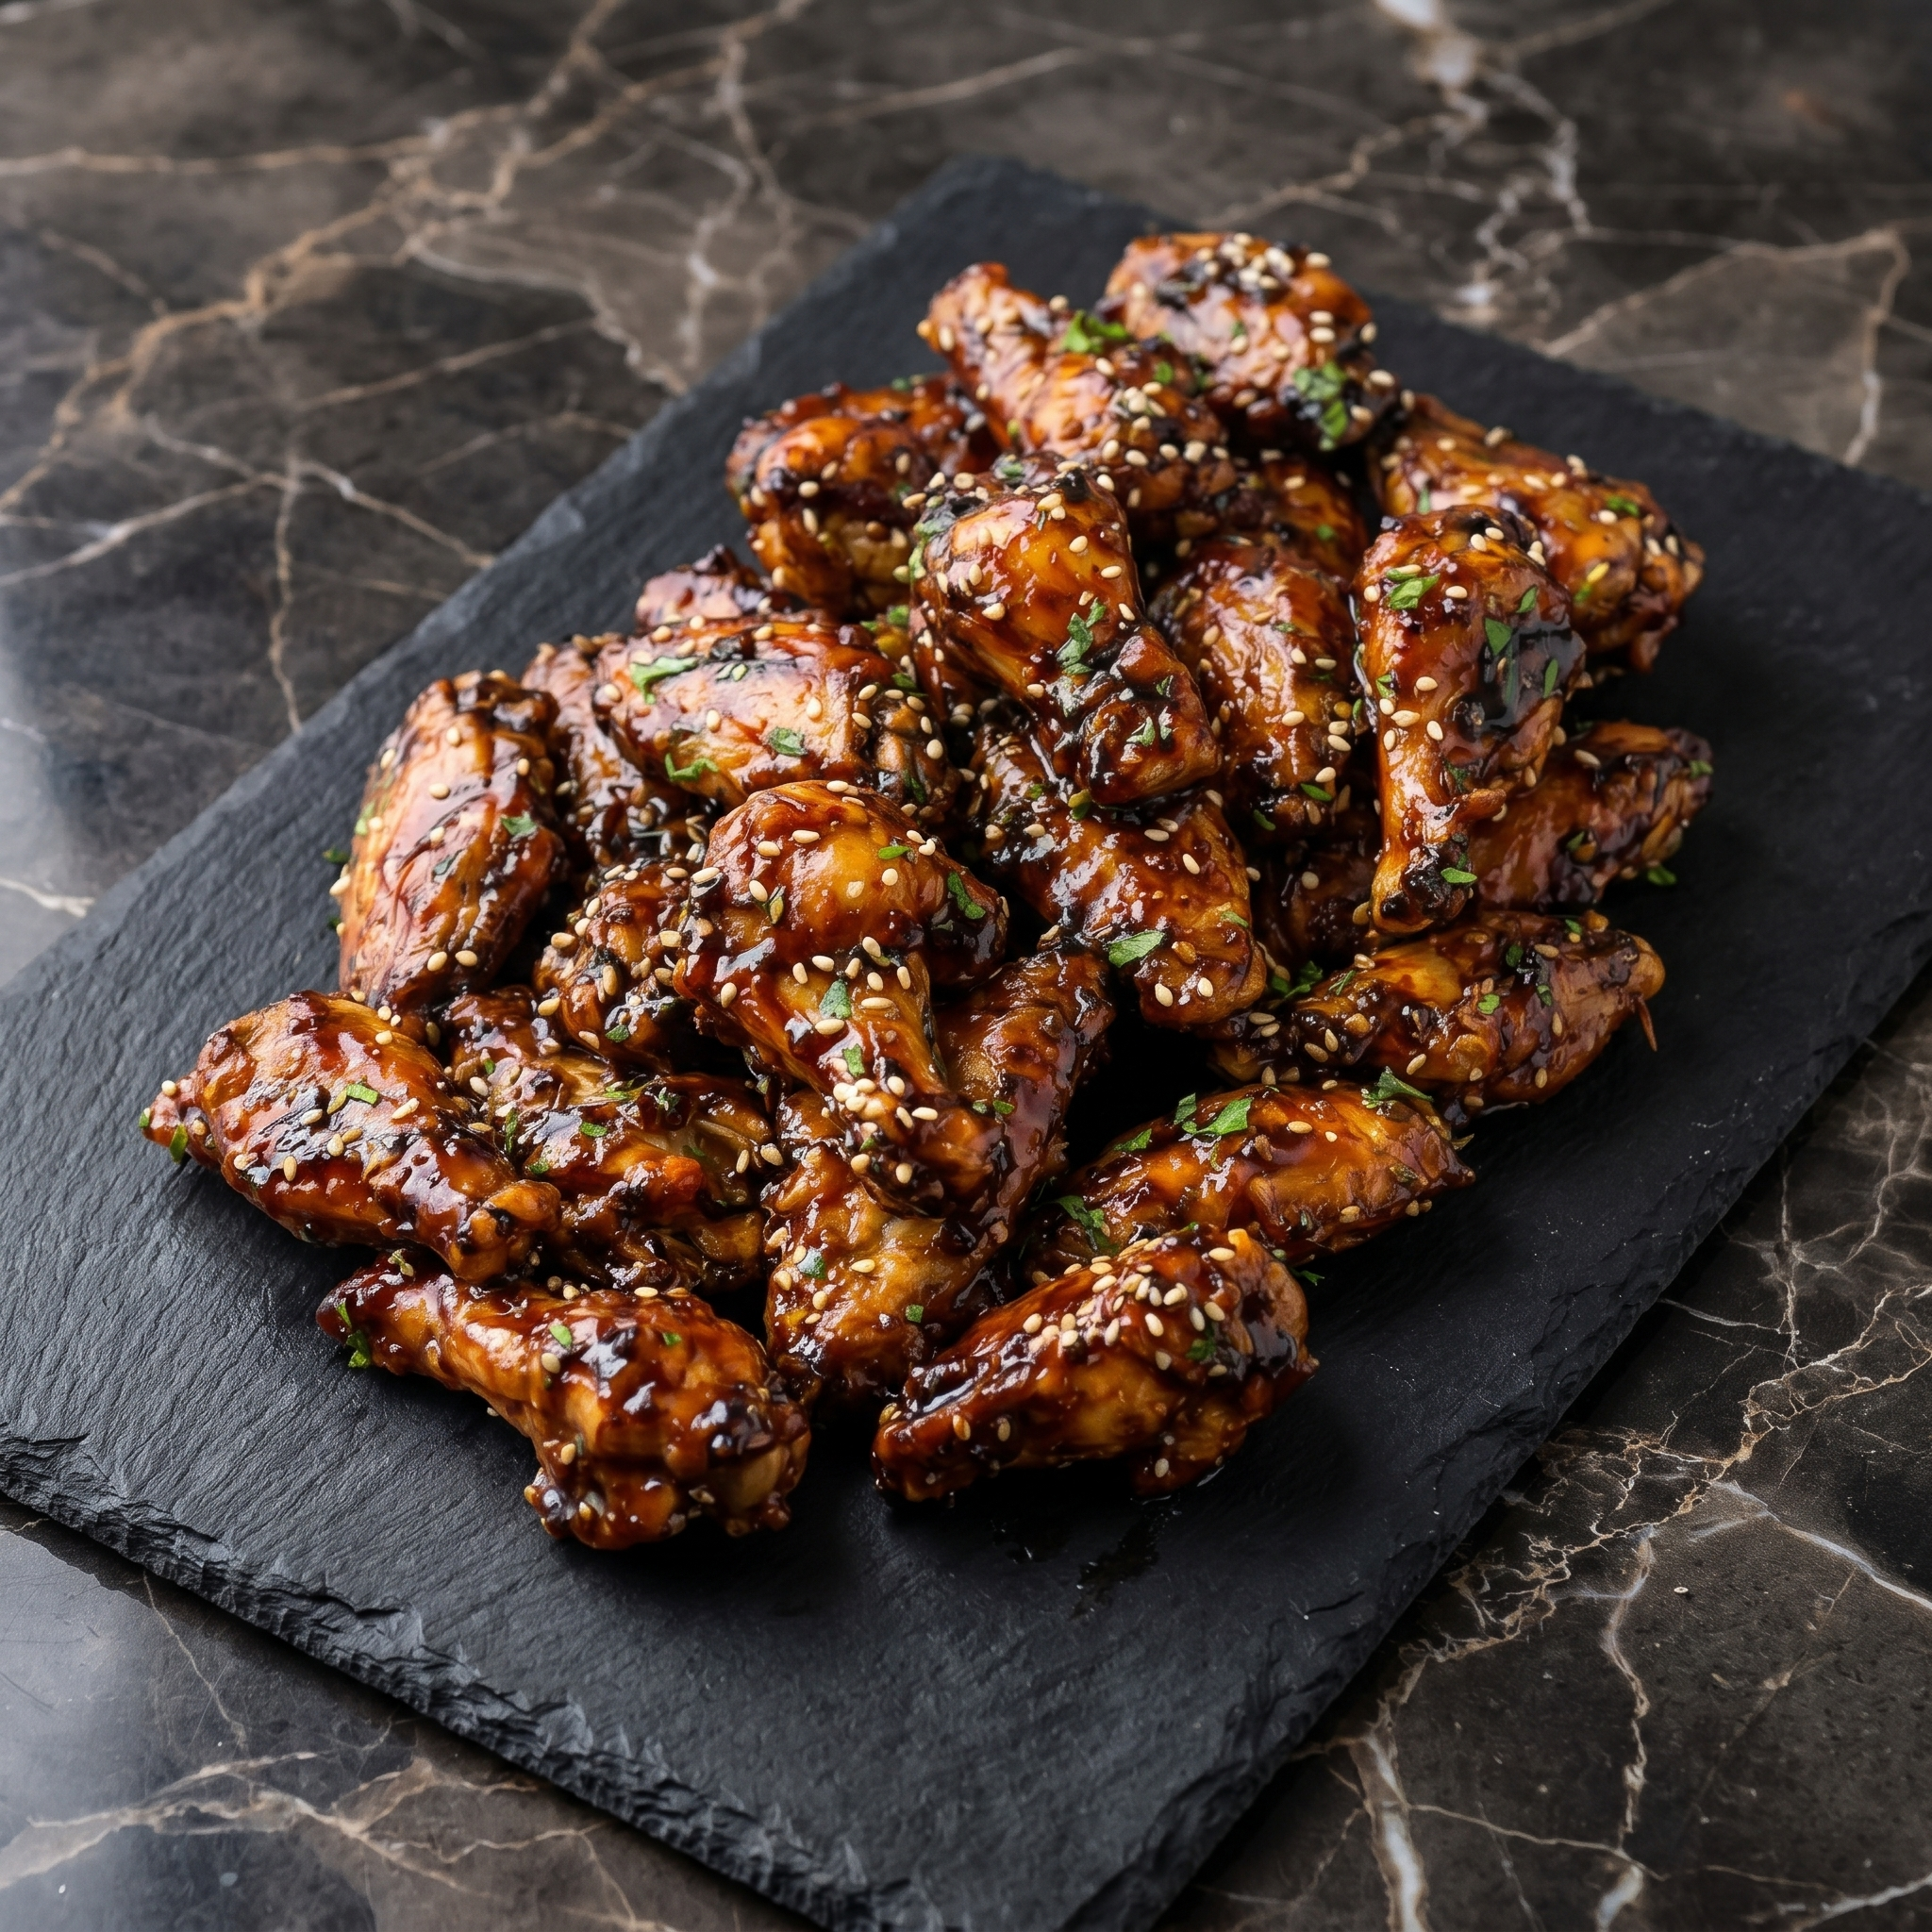
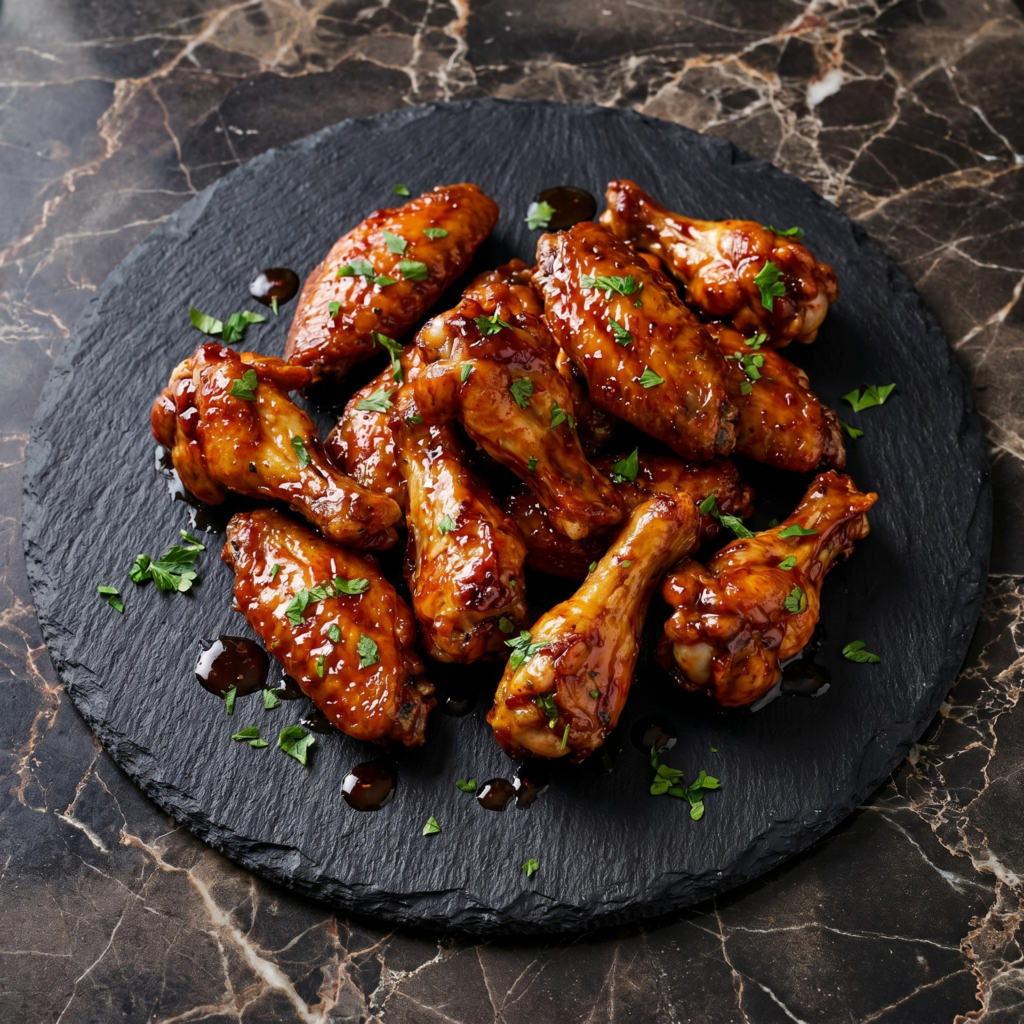
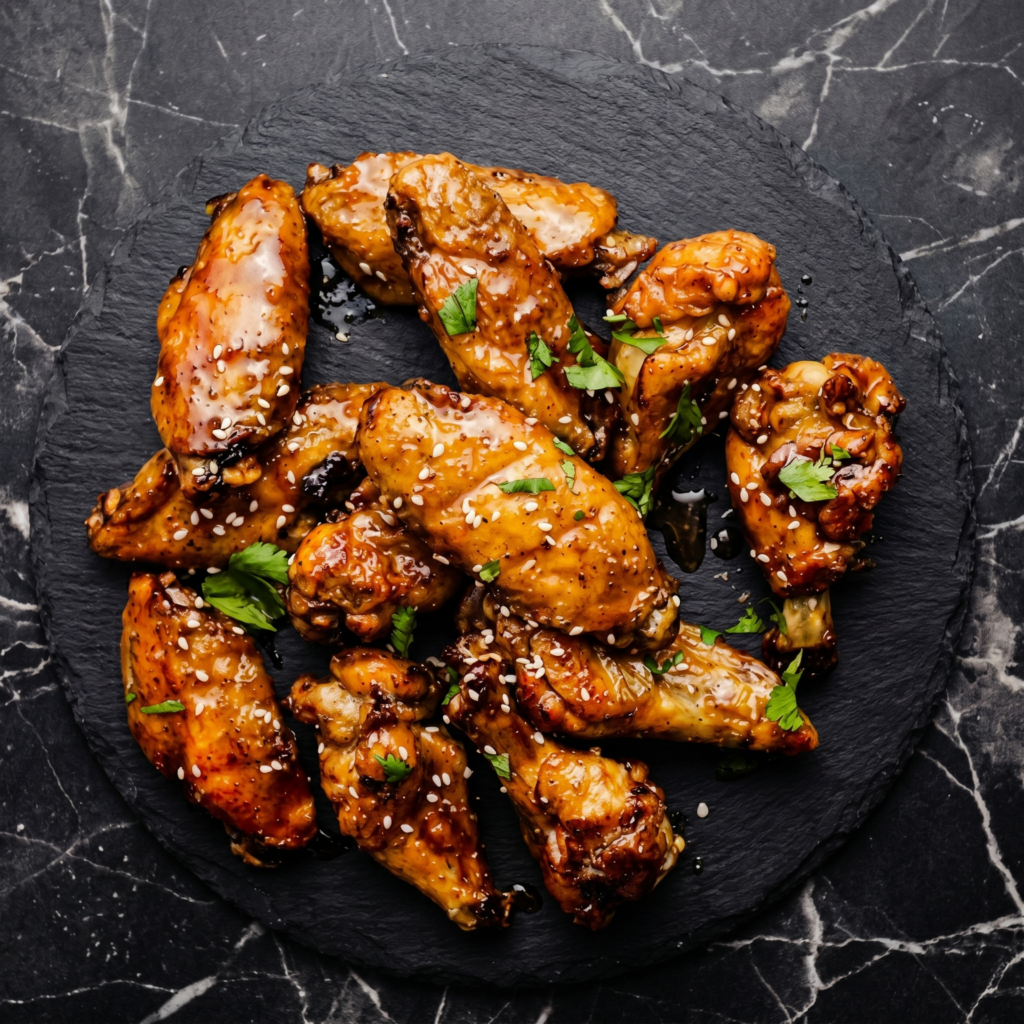
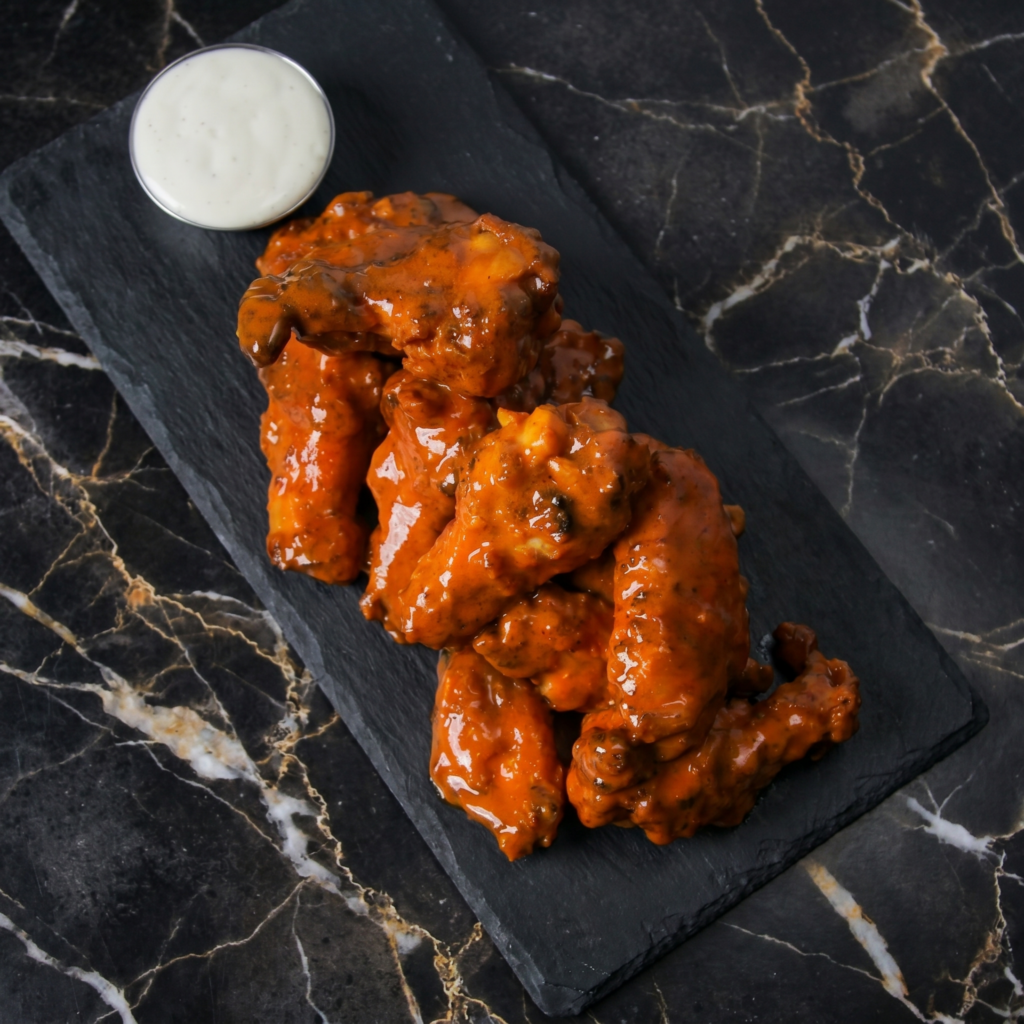
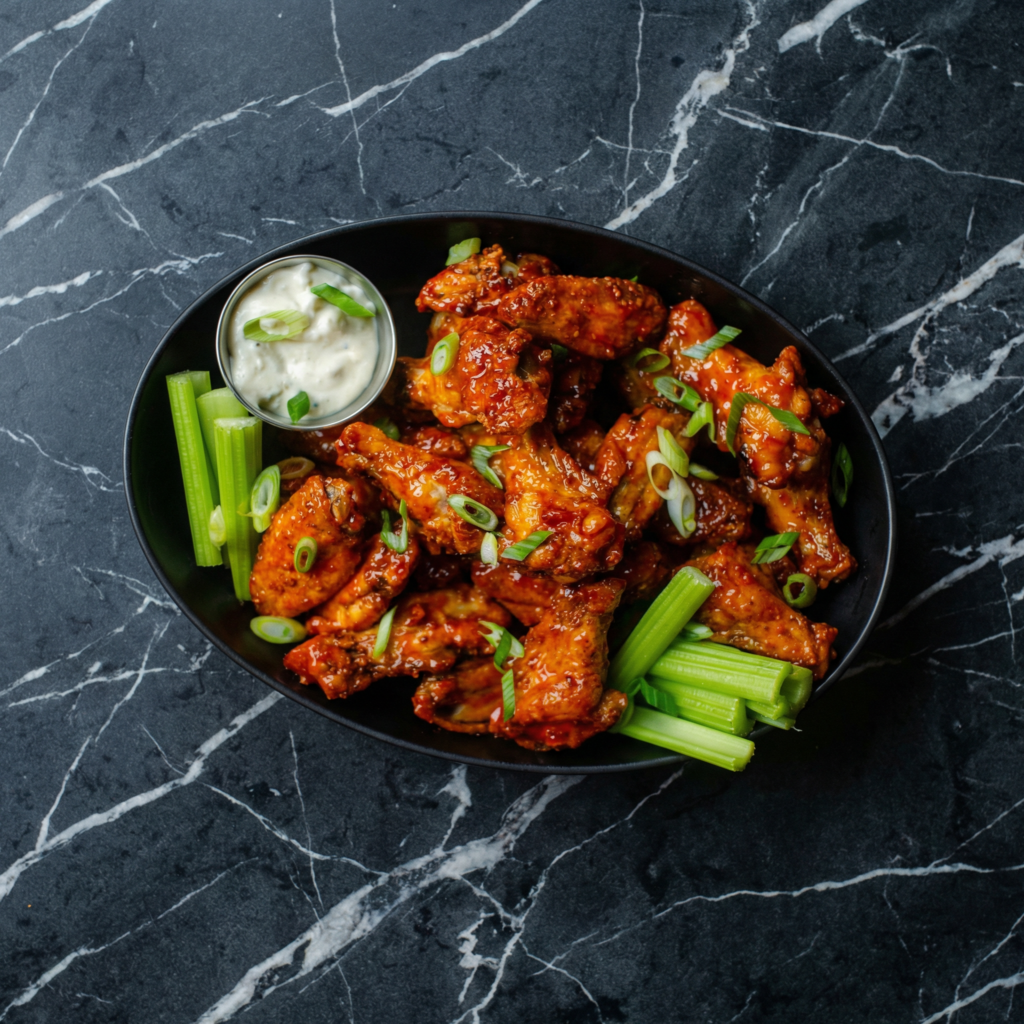
Honey garlic wings are the people-pleaser of the wing world. Not too spicy, not too sweet. Just sticky, glossy, garlicky perfection.
These are baked until crispy, then tossed in a glaze that clings to every nook and cranny. No deep fryer needed. Just a wire rack, a hot oven, and a bowl to lick clean afterward.
Ingredients
Serves 4.
2 lbs chicken wings (drumettes and flats)
1 tablespoon baking powder (not baking soda)
½ teaspoon salt
Honey Garlic Glaze:
½ cup honey
¼ cup soy sauce (low sodium preferred)
4 cloves garlic, minced
1 tablespoon rice vinegar (or apple cider vinegar)
1 teaspoon sesame oil
Optional: 1 teaspoon sriracha for heat
Garnish:
Sesame seeds, sliced green onions
Step-by-Step Instructions
Step 1: Prep the Wings
Preheat oven to 425°F (220°C). Line a baking sheet with foil and place a wire rack on top.
Pat wings completely dry with paper towels.
Toss wings with baking powder and salt until coated.
Step 2: Bake Until Crispy
Arrange wings on the rack (not touching).
Bake for 45-50 minutes, flipping halfway, until golden and crispy.
Step 3: Make the Glaze
While wings bake, combine honey, soy sauce, garlic, vinegar, sesame oil, and sriracha (if using) in a small saucepan.
Simmer over medium-low heat for 5 minutes until slightly thickened.
Step 4: Toss and Serve
Transfer hot wings to a large bowl. Pour glaze over and toss to coat.
Sprinkle with sesame seeds and green onions. Serve immediately with napkins. So many napkins.
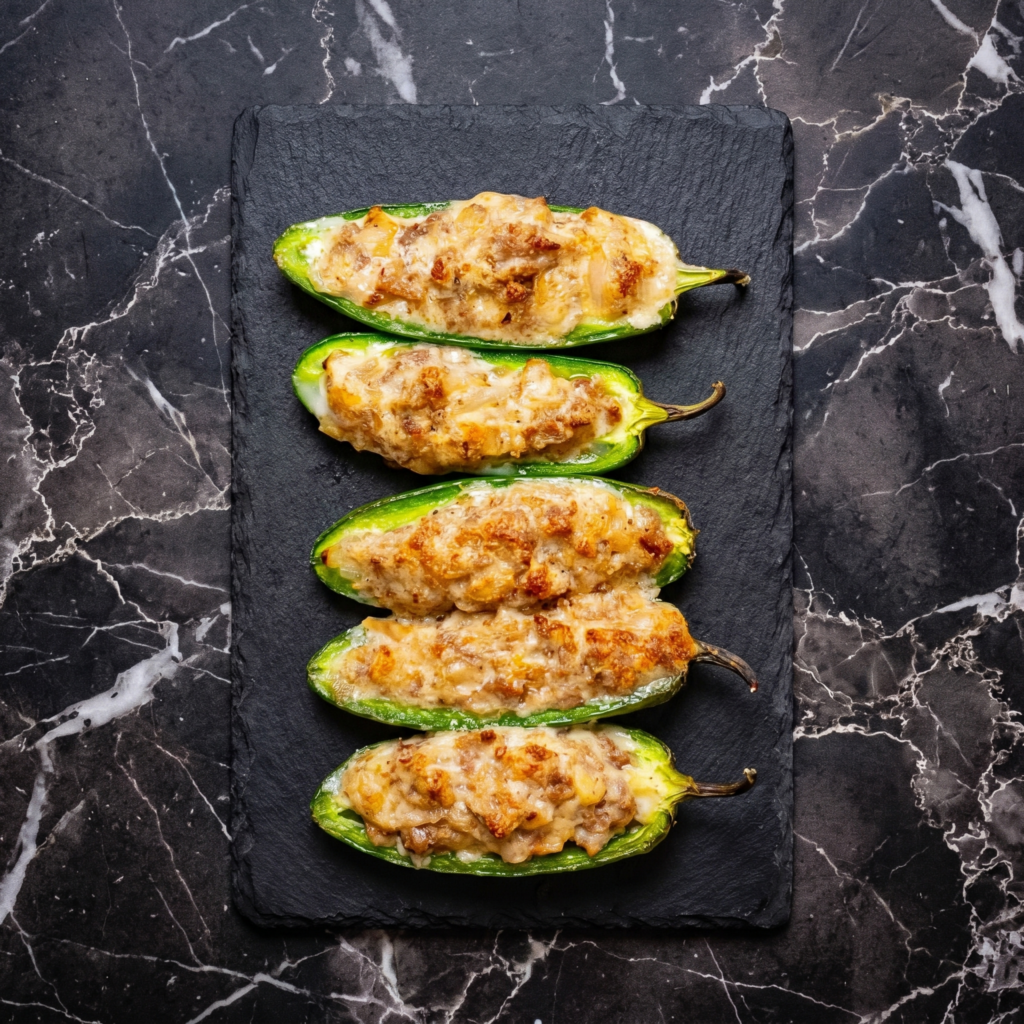
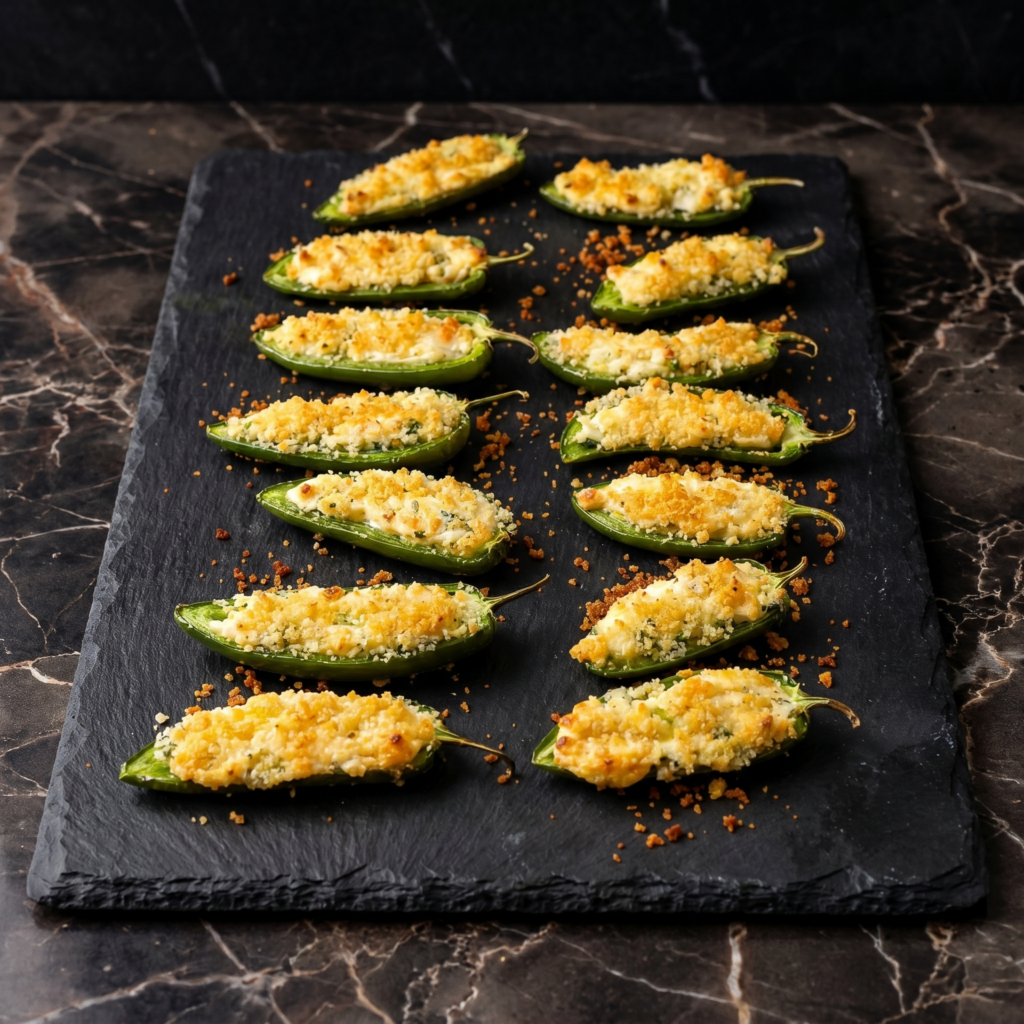
Store baked poppers in an airtight container for up to 4 days. Reheat in air fryer at 375°F for 5 minutes or oven at 375°F for 8 minutes.
Freezing:
Freeze unbaked assembled poppers on a tray, then transfer to a bag. Freeze for up to 2 months. Bake from frozen at 400°F for 25-30 minutes.
Make-Ahead:
Prep and fill the jalapeños (without bacon) up to 2 days ahead. Refrigerate. Add bacon and bake when ready.
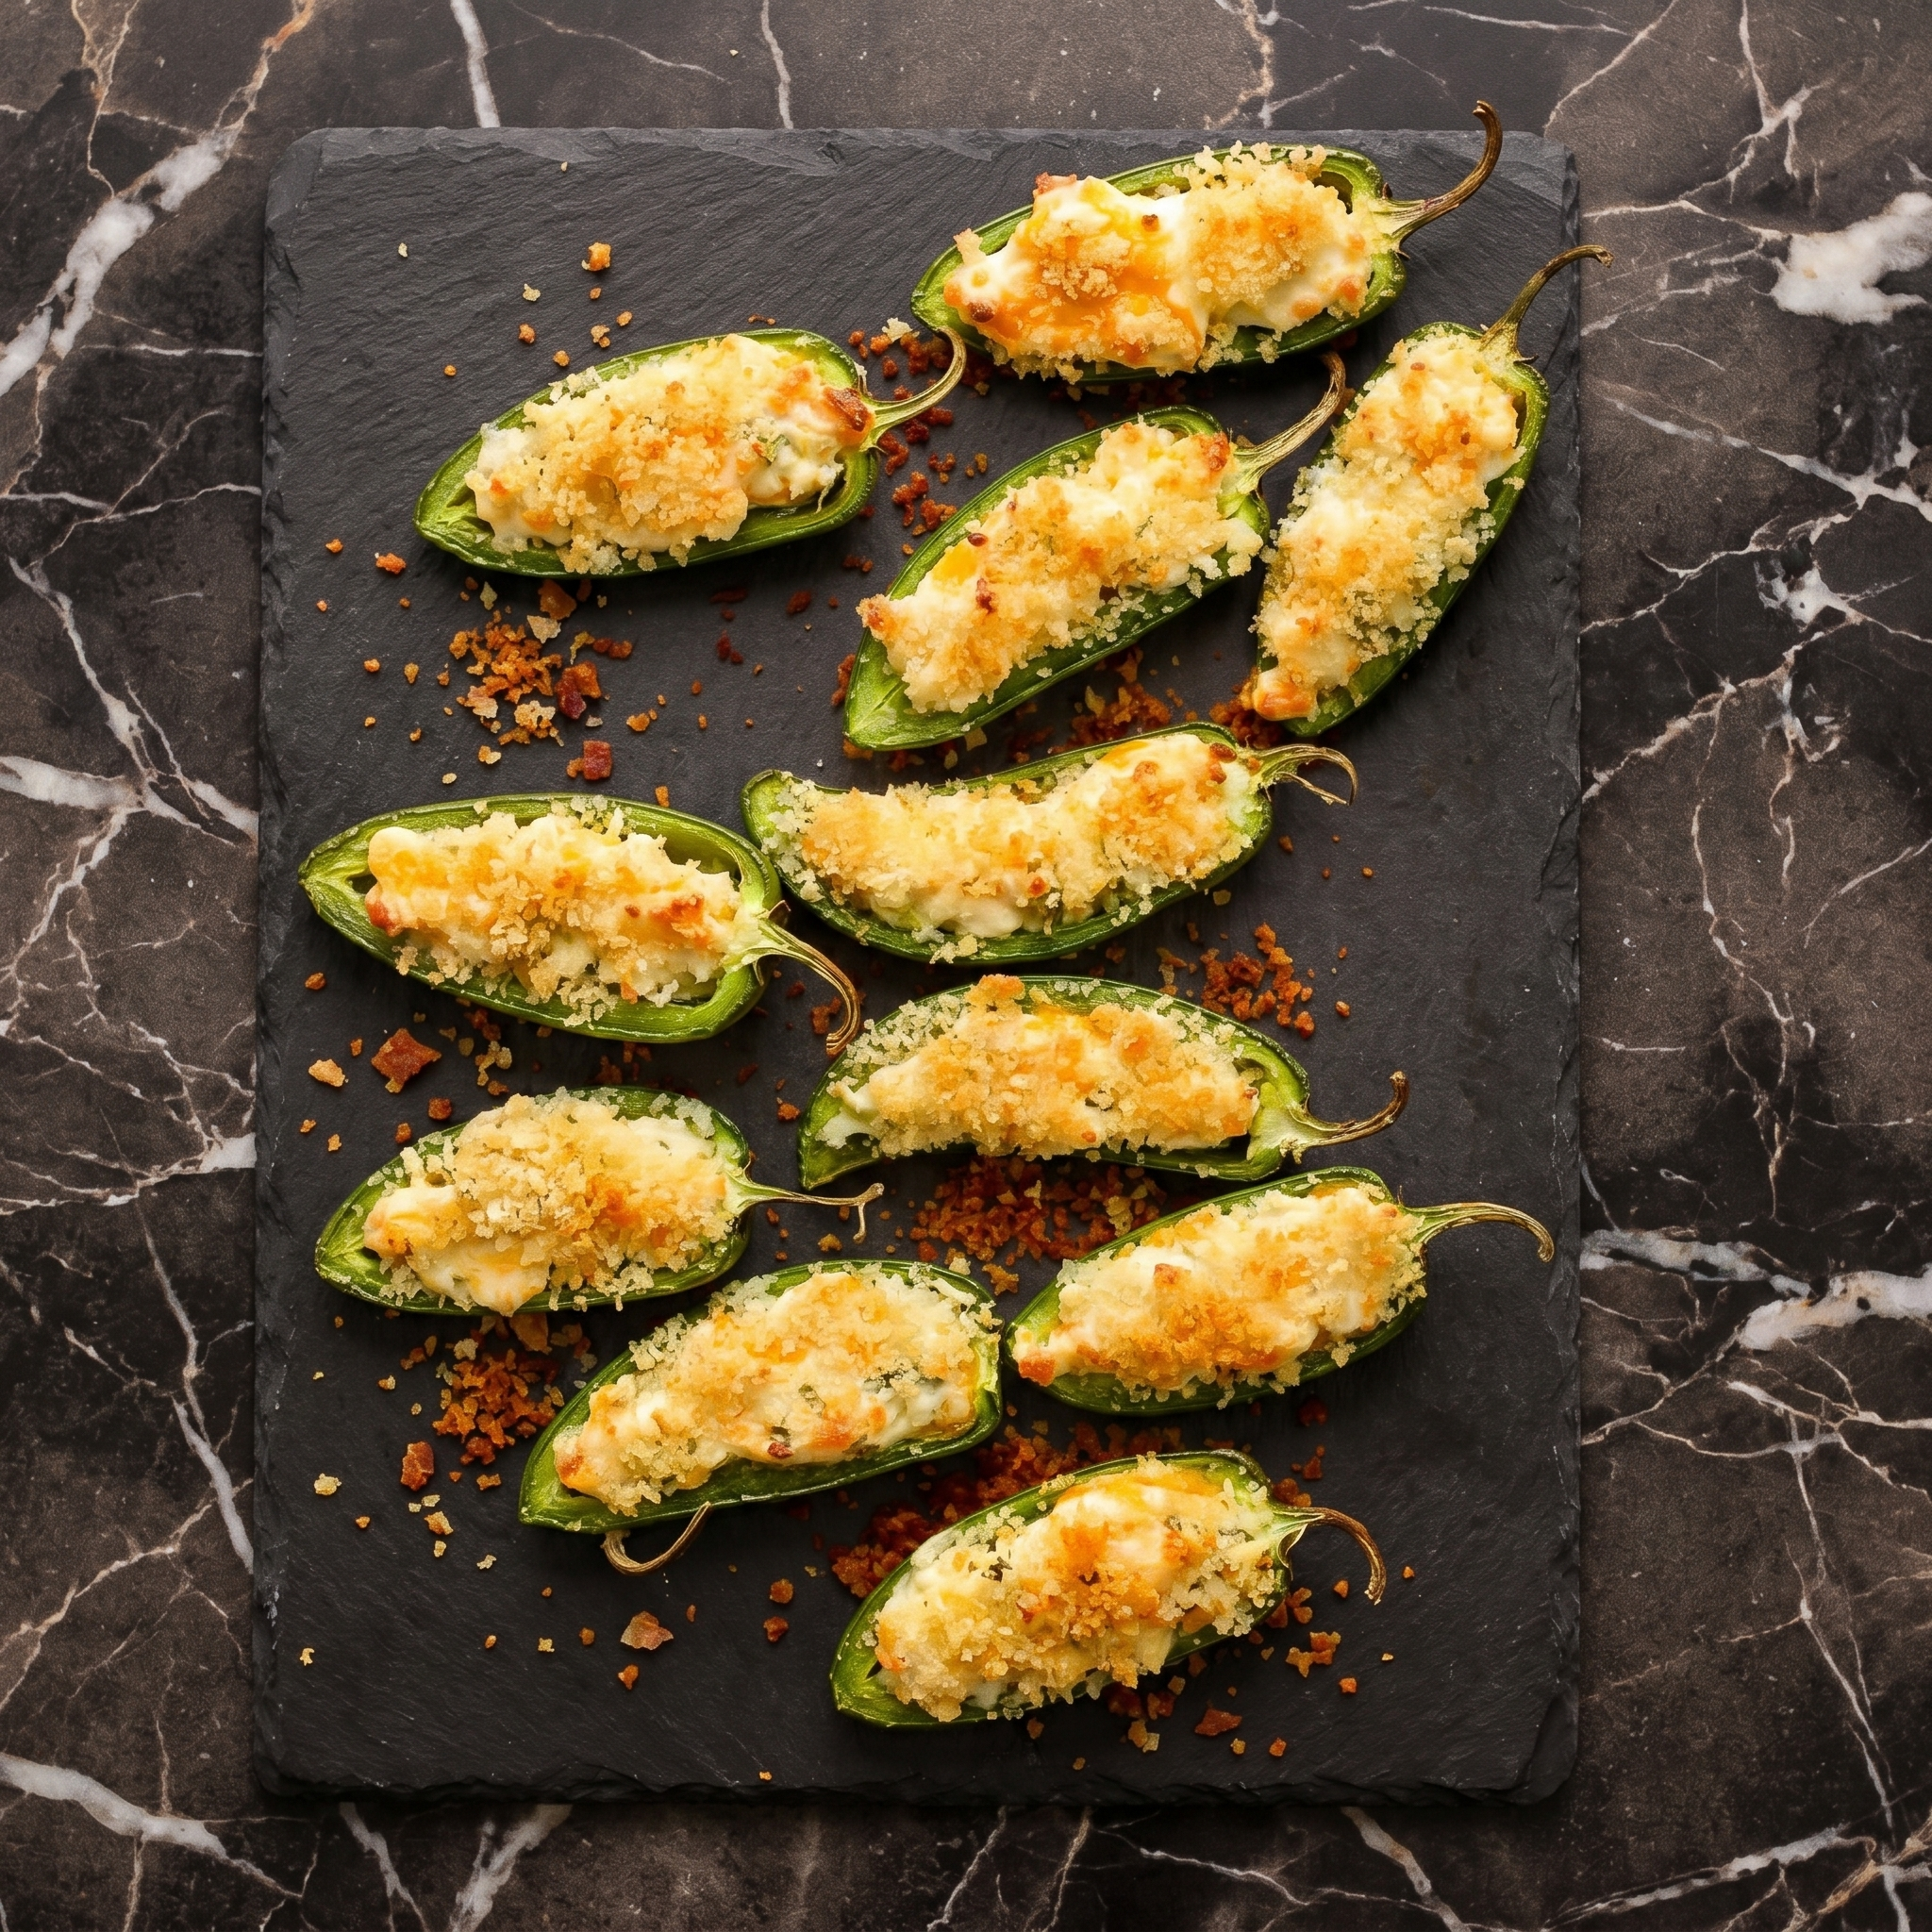
Heat Warning:
WEAR GLOVES when handling jalapeños. The oils stick to your skin and will burn your eyes, nose, and other sensitive areas for hours. Learn from our mistakes.
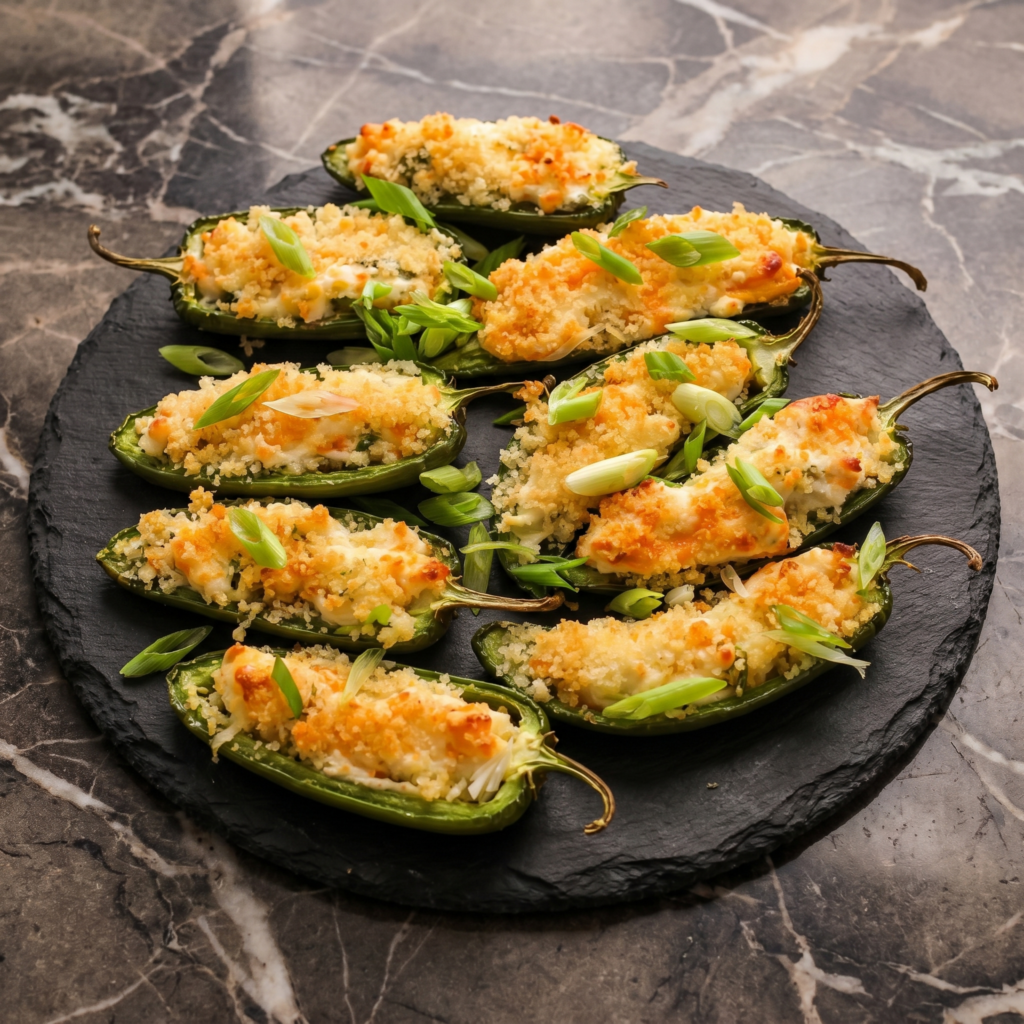
Vegetarian Option:
Skip the bacon. Sprinkle with panko breadcrumbs mixed with a little olive oil before baking.
Tacos are great. Crumbling taco shells all over your shirt? Less great.
Enter taco cups. Wonton wrappers pressed into a muffin tin, baked until crispy, then filled with taco meat and cheese. They hold together perfectly. One bite. No mess. Everyone wants the recipe.
Ingredients
Makes 12 taco cups.
24 square wonton wrappers
1 lb (450g) ground beef (or turkey)
1 packet taco seasoning (or 2 tbsp homemade)
⅓ cup water
1 cup shredded Mexican cheese blend
Cooking spray
Toppings:
Sour cream
Diced tomatoes
Sliced olives
Jalapeños
Fresh cilantro
Hot sauce
Step-by-Step Instructions
Step 1: Preheat and Prep
Preheat oven to 375°F (190°C). Spray a 12-cup muffin tin with cooking spray.
Step 2: Press Wontons
Place one wonton wrapper in each cup. Press down and up the sides.
Spray lightly with oil. Layer a second wrapper on top, rotated 45 degrees.
Press again. Spray with oil.
Step 3: Pre-Bake
Bake empty shells for 5 minutes until lightly golden.
Step 4: Cook Taco Meat
While shells bake, brown ground beef in a skillet. Drain fat.
Add taco seasoning and water. Simmer 5 minutes until thickened.
Step 5: Fill and Bake
Fill each cup with taco meat. Top with shredded cheese.
Bake another 5-7 minutes until cheese melts and edges are crisp.
Step 6: Top and Serve
Let cool 2 minutes. Run a knife around edges to release.
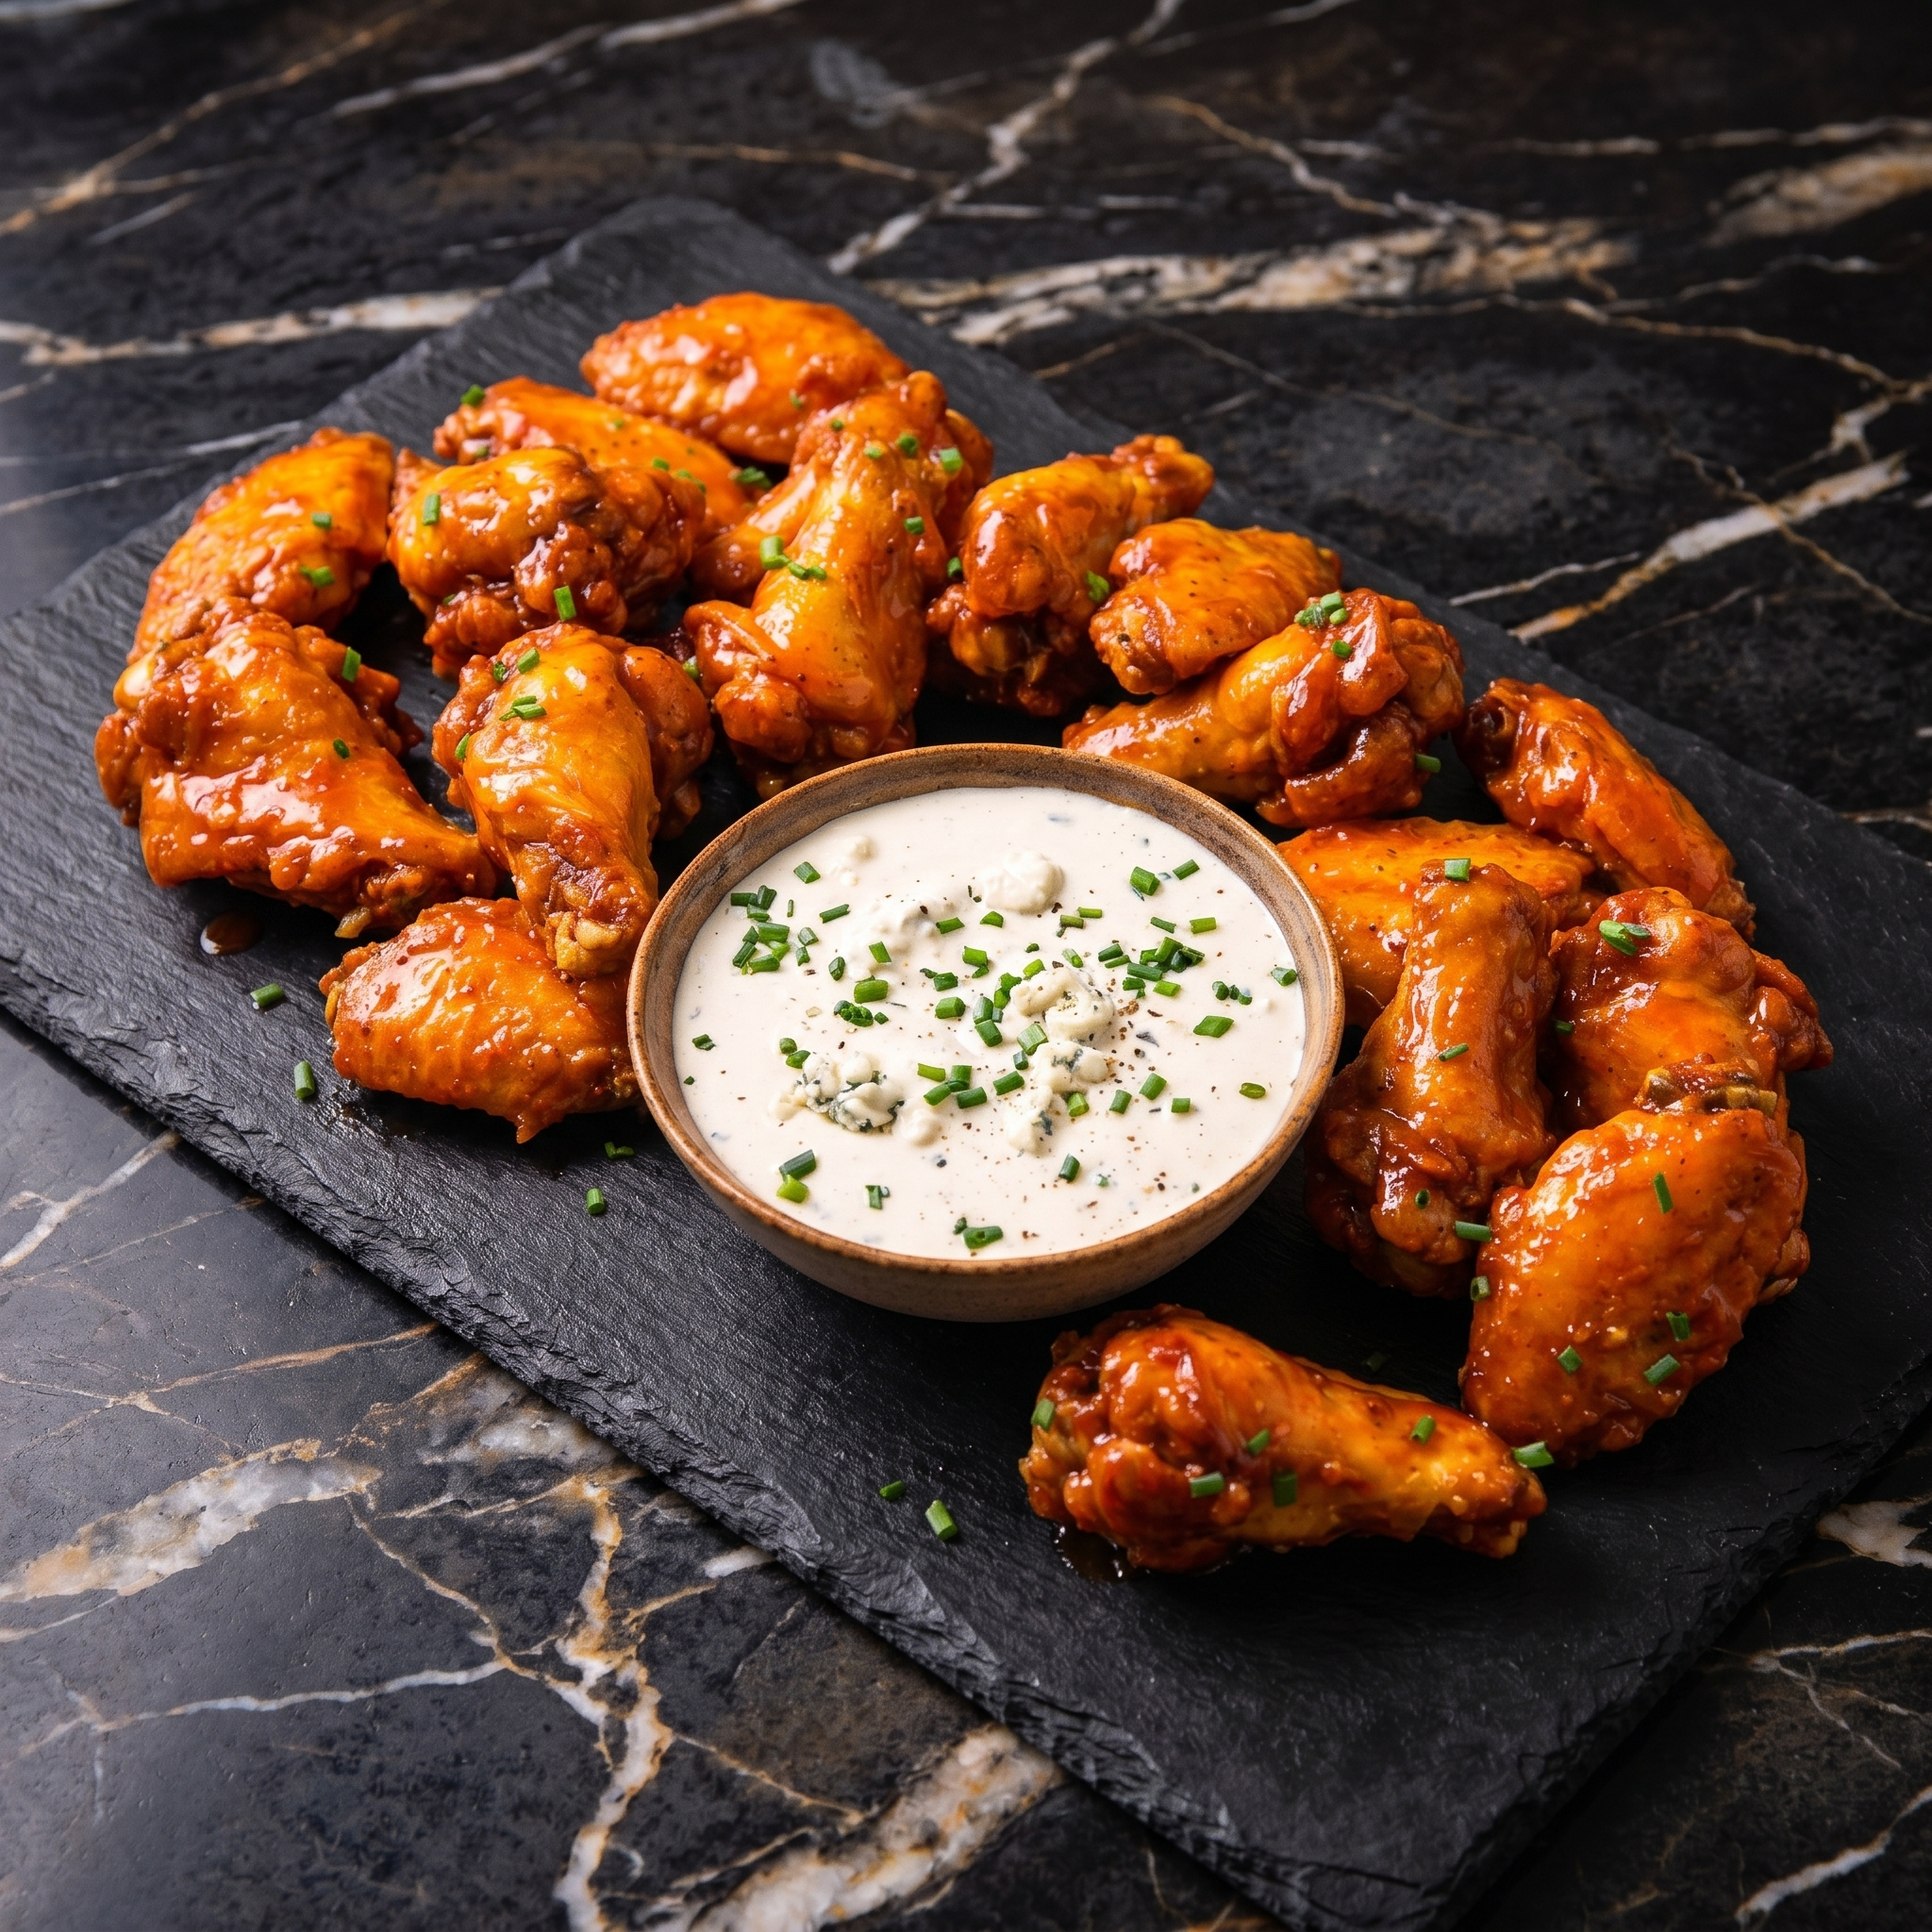
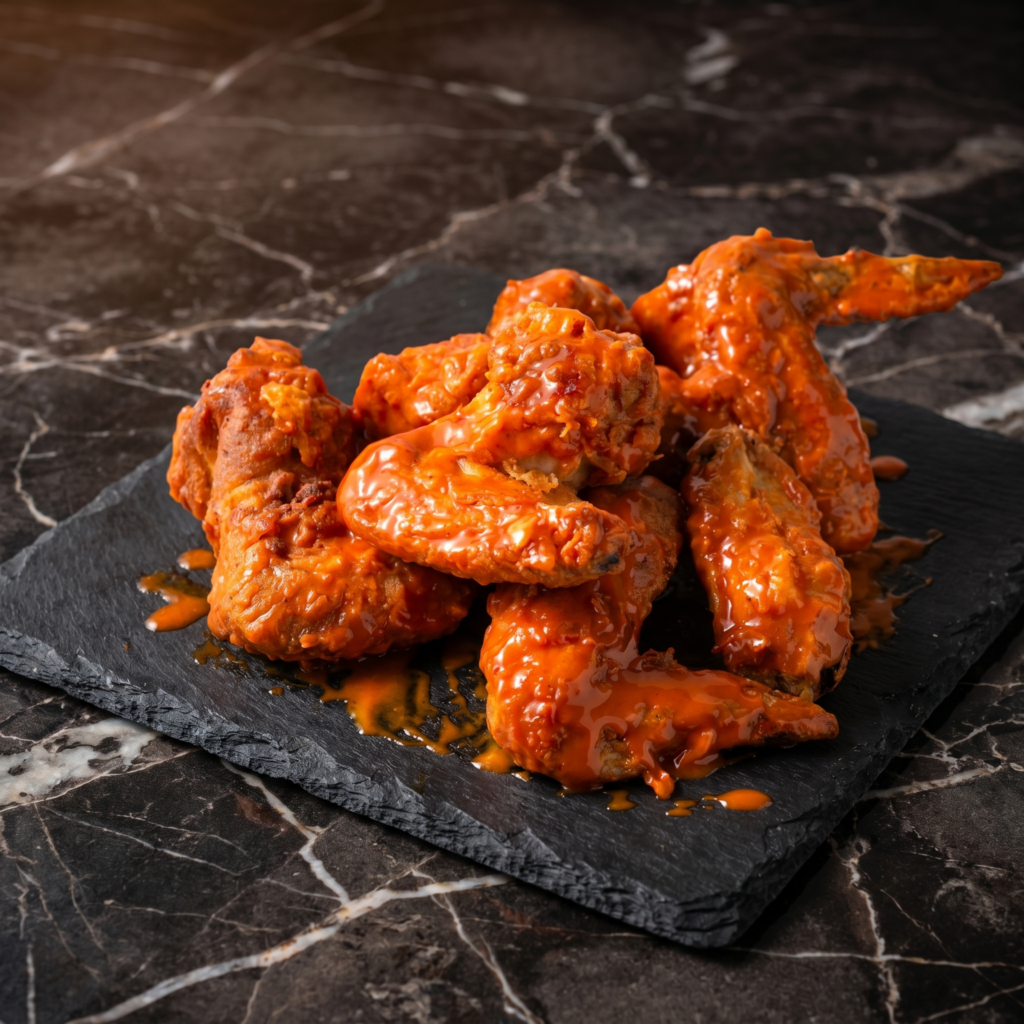
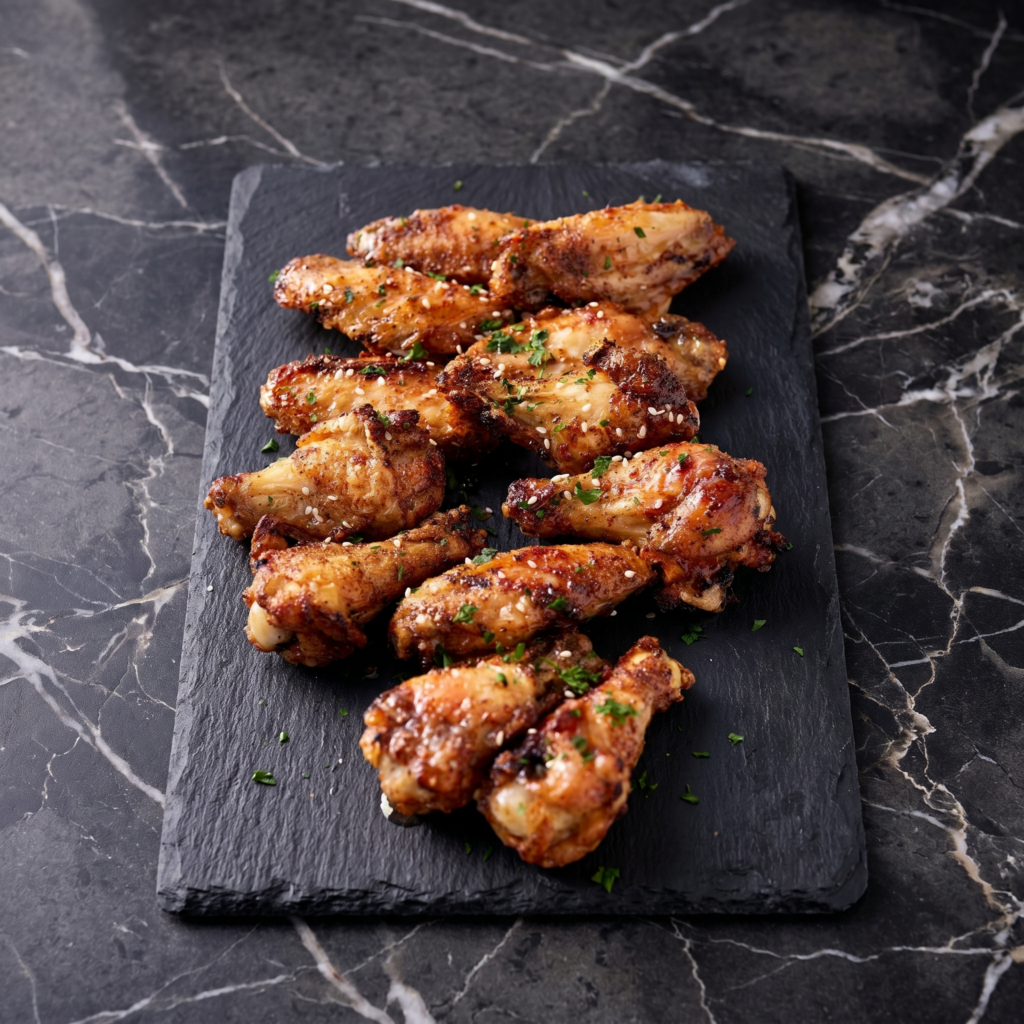
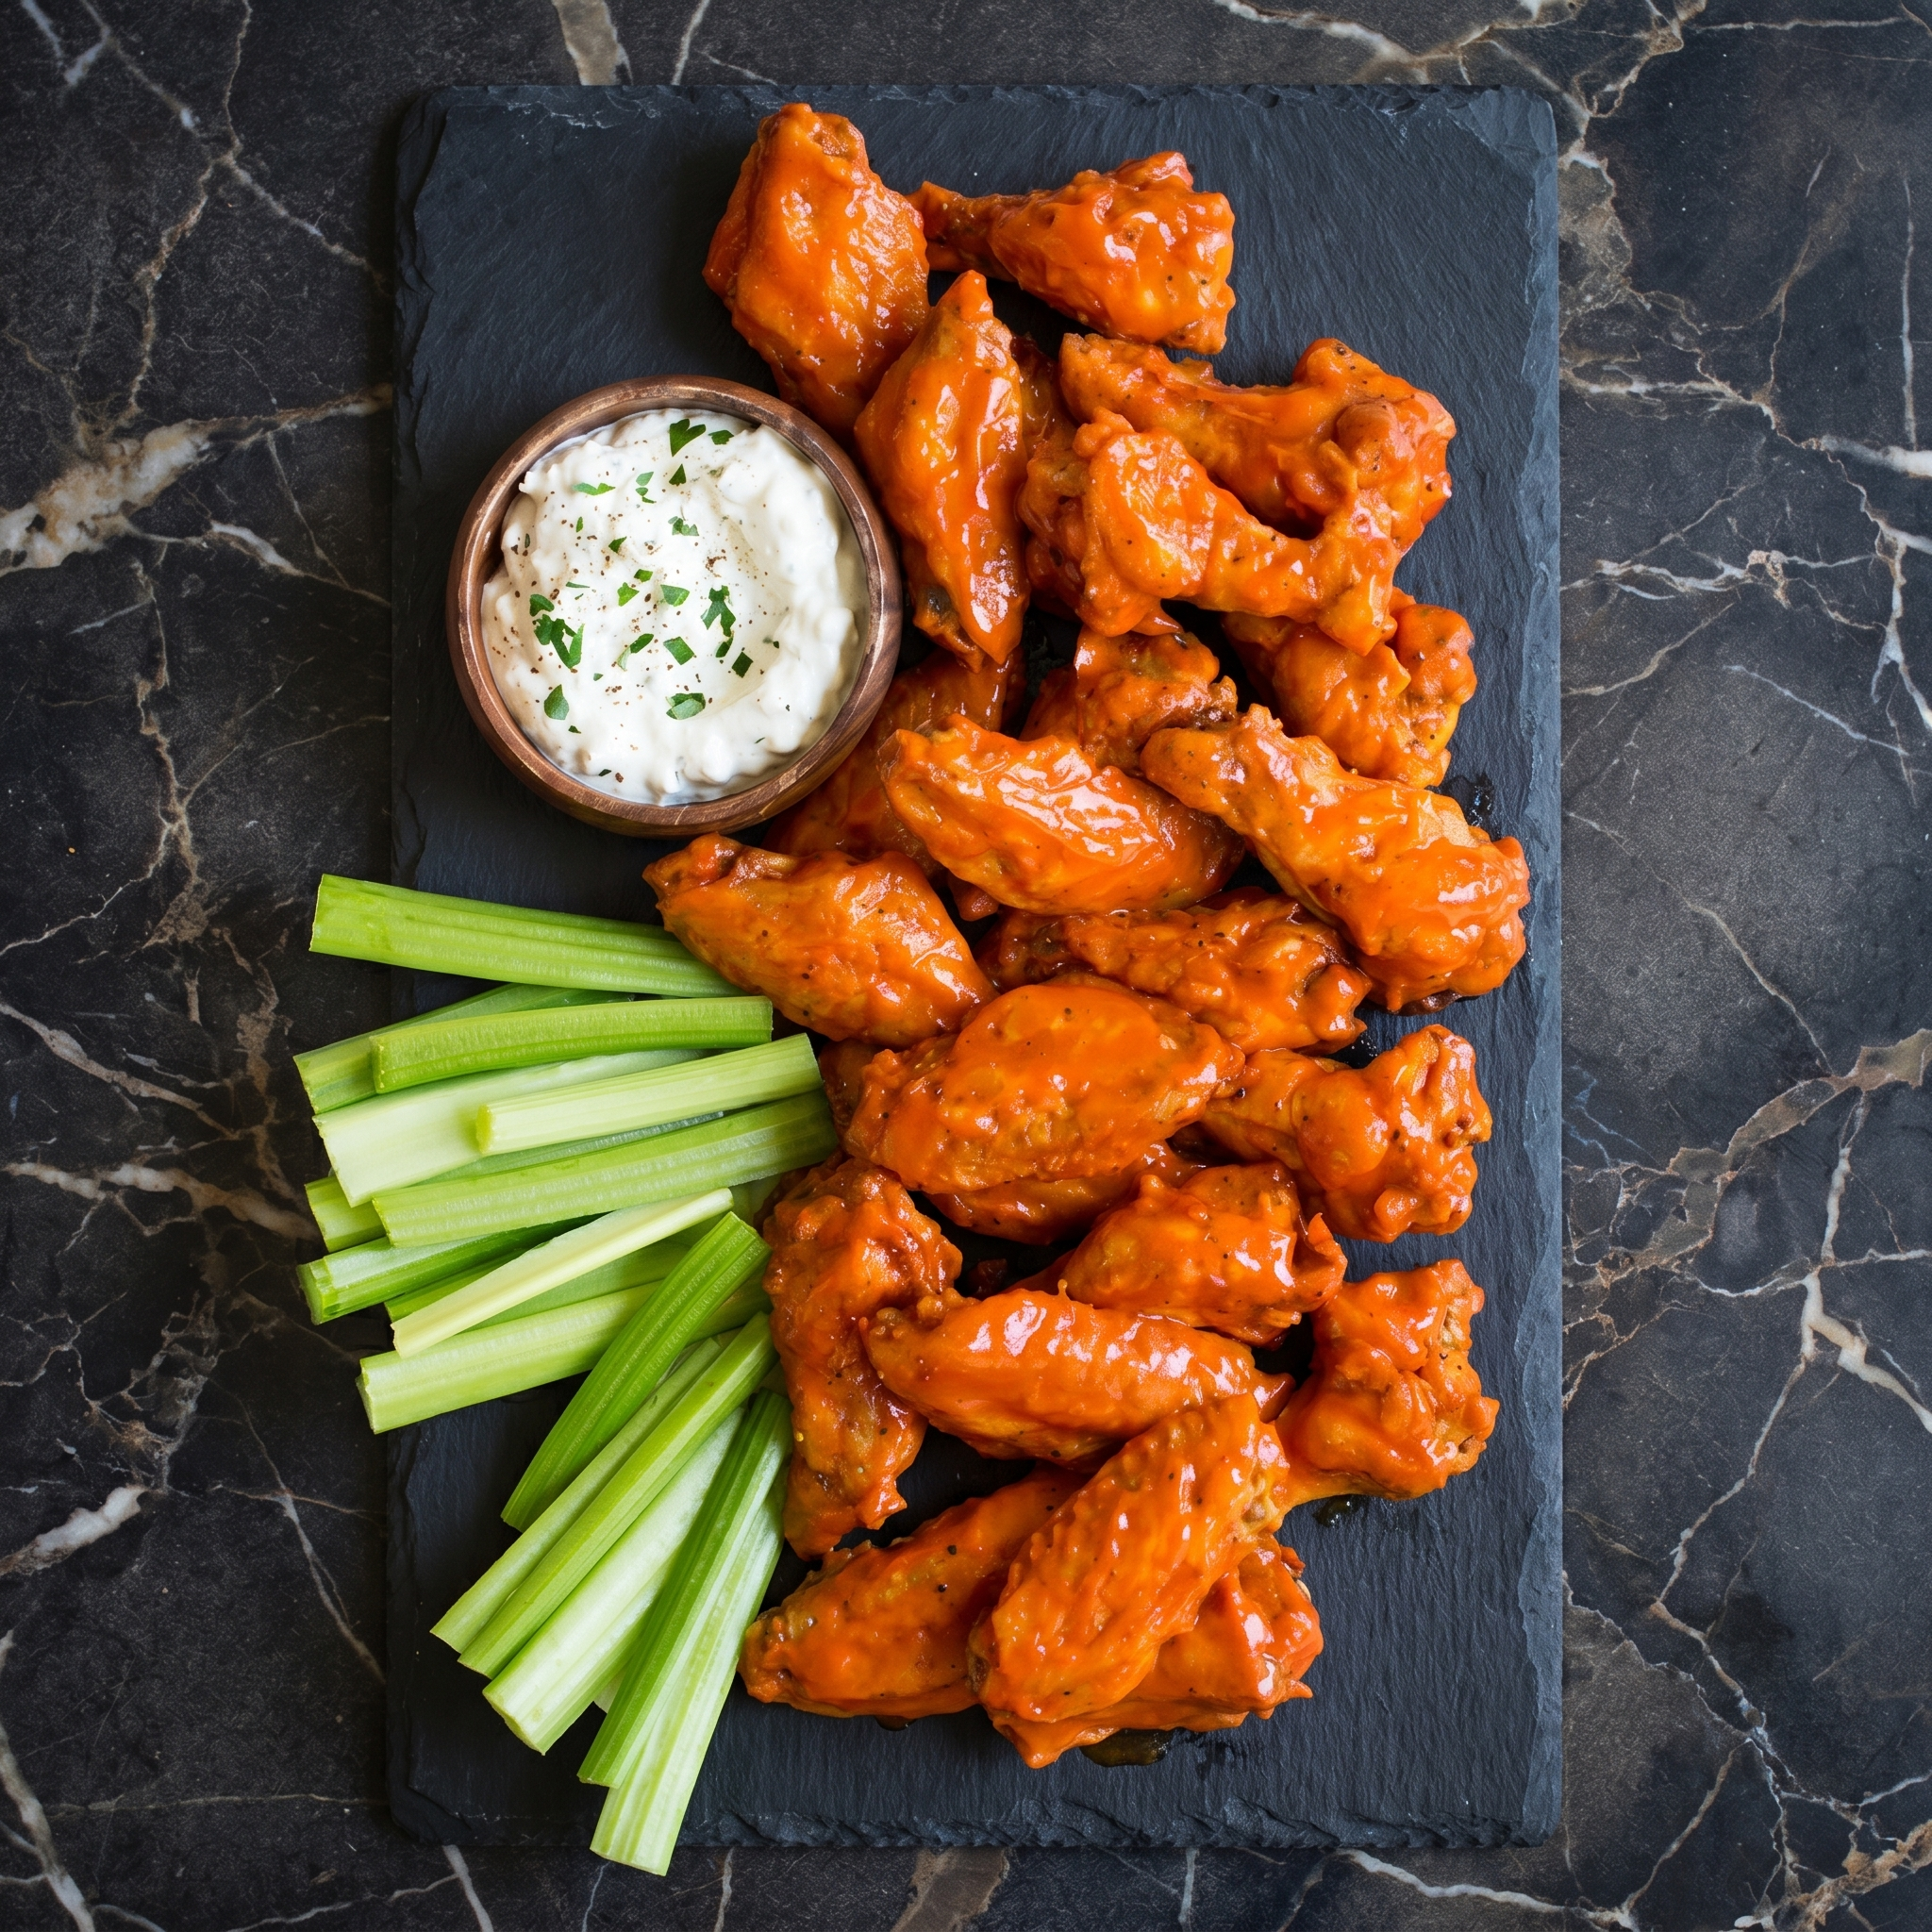
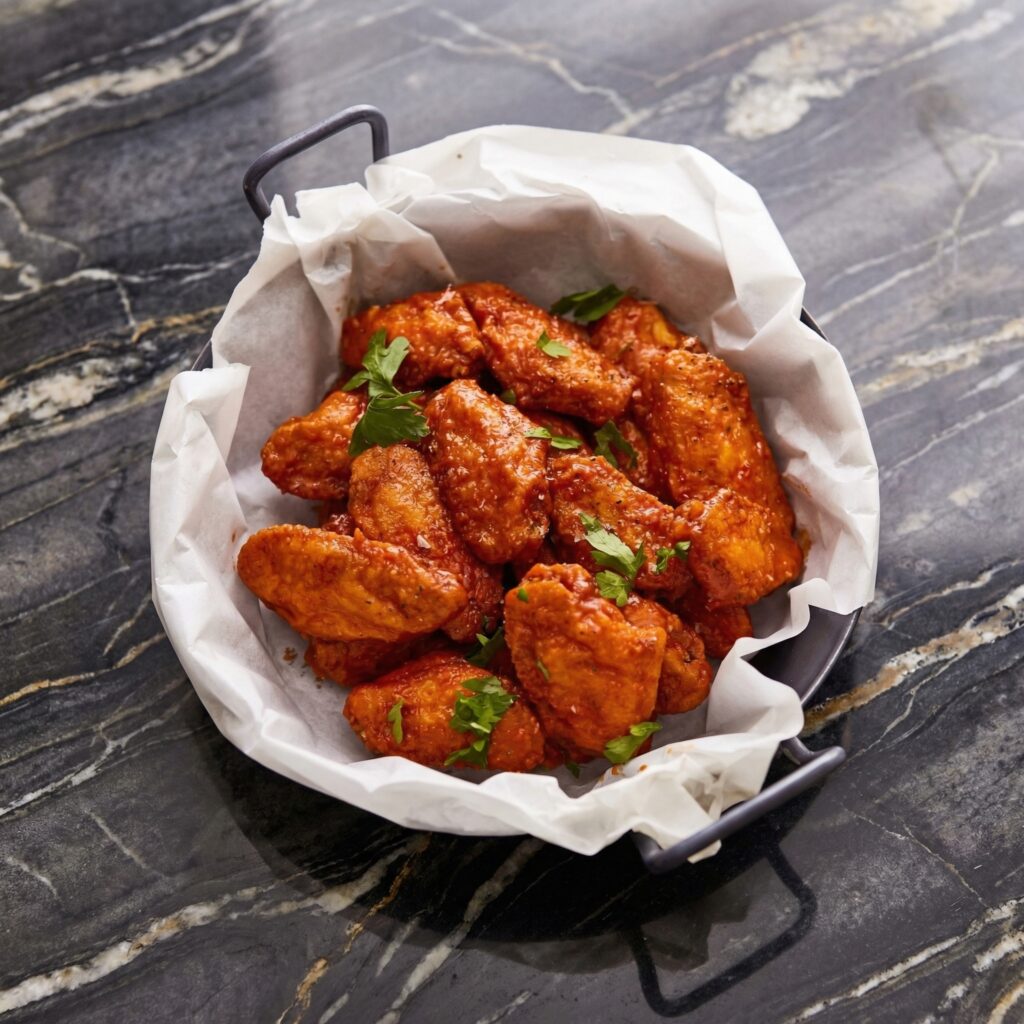
Buffalo wings are a beautiful thing. Not complicated, not fancy—just chicken, heat, butter, and time. The goal is simple: wings so crispy they crunch when you bite into them, coated in a sauce that’s equal parts tangy, buttery, and spicy, with enough residual heat to make you reach for a cold beer.
The secret is in the technique. A steam-and-bake method (or a double fry, if you’re feeling ambitious) ensures the skin renders and crisps without burning. Then comes the sauce—a simple emulsion of Frank’s RedHot and butter that’s greater than the sum of its parts. Toss, serve with celery and blue cheese, and watch them disappear.
Ingredients
Serves 4 as an appetizer (or 2 as a meal).
For the Wings:
2 lbs chicken wings, split into drums and flats (tip removed or saved for stock)
1 tbsp baking powder (NOT baking soda—this is crucial for crispiness)
1 tsp salt
1 tsp garlic powder
½ tsp black pepper
Neutral oil, for frying (if frying—skip for baking method)
For the Buffalo Sauce:
½ cup Frank’s RedHot Original hot sauce (the classic, don’t substitute)
⅓ cup unsalted butter, cut into cubes
1 tbsp white vinegar (optional, for extra tang)
½ tsp Worcestershire sauce
¼ tsp cayenne (optional, for extra heat)
For Serving:
Blue cheese dressing (homemade or quality store-bought)
Celery sticks
Carrot sticks (optional)
Extra hot sauce, for those who like pain
Step-by-Step Instructions
Step 1: Prep the Wings
Pat wings completely dry with paper towels. Moisture is the enemy of crispiness.
In a large bowl, combine baking powder, salt, garlic powder, and black pepper. Toss wings in the mixture until evenly coated. This baking powder trick is the secret to oven-crispy wings.
Step 2: Choose Your Method
Oven Method (Easier): Place wings on a wire rack set over a baking sheet. Refrigerate uncovered for at least 1 hour (up to 24) to dry out the skin. Bake at 400°F for 40-50 minutes, flipping halfway, until golden and crispy.
Frying Method (Classic): Heat 2 inches of oil in a deep pot to 375°F. Fry wings in batches for 10-12 minutes until golden and cooked through. Drain on a wire rack.
Air Fryer Method (Best of Both): Place wings in air fryer basket in single layer. Cook at 380°F for 12 minutes, flip, then 12 minutes more at 400°F until extra crispy.
Step 3: Make the Buffalo Sauce
While wings cook, combine hot sauce and butter in a small saucepan over low heat. Whisk until butter is melted and sauce is smooth.
Stir in vinegar and Worcestershire sauce. Keep warm.
Step 4: Sauce the Wings
Place cooked wings in a large bowl. Pour about half the sauce over them and toss to coat. Add more sauce as needed—you want them well-coated but not drowning.
Reserve extra sauce for dipping (or double-dipping, we don’t judge).
Step 5: Serve Immediately
Arrange wings on a platter with celery sticks and a bowl of blue cheese dressing.
Sprinkle with a little extra salt or cayenne if desired.
Serve with plenty of napkins and cold beer. This is not finger food—it’s whole-hand food.
Take a bite. Feel that crunch. Let the sauce run down your chin. This is Buffalo.
Summary
Prep Time: 15 minutes + drying time | Cook Time: 40-50 minutes | Total Time: 1 hour (mostly hands-off)
Yield: 2 lbs wings (serves 4 as appetizer)
Difficulty: Game-day essential
Storage Notes
Leftovers:
Store leftover wings (without sauce) in an airtight container in the fridge for up to 3 days. Store sauce separately.
Reheating (Bring Back the Crunch):
Oven: 375°F for 10-15 minutes on a wire rack. Air fryer: 375°F for 5-7 minutes. Toss with warmed sauce after reheating.
Never microwave wings—they become sad, soggy, rubbery versions of their former glory.
Make Ahead:
You can dry the wings (tossed in baking powder mixture) in the fridge for up to 24 hours before cooking. This makes them even crispier. Sauce can be made ahead and gently reheated.
Freezer-Friendly:
Freeze cooked, unsauced wings for up to 3 months. Reheat from frozen in a 400°F oven until hot and crispy, then toss with fresh sauce.
Pro Tips for Wing Greatness:
Baking powder, not soda. Baking soda will make them taste metallic. Trust the recipe.
Dry those wings. Pat them dry before anything else. More drying = more crispy.
Frank’s is the law. Other hot sauces won’t give you that classic Buffalo flavor. Don’t argue with tradition.
Butter matters. Real butter, not margarine. It emulsifies with the hot sauce into silky perfection.
Toss twice, eat once. Coat well, but don’t drown. You want crispy wings with sauce, not saucy wings with crunch.
Blue cheese, not ranch. In Buffalo, this is a religious debate with a clear answer. Blue cheese.
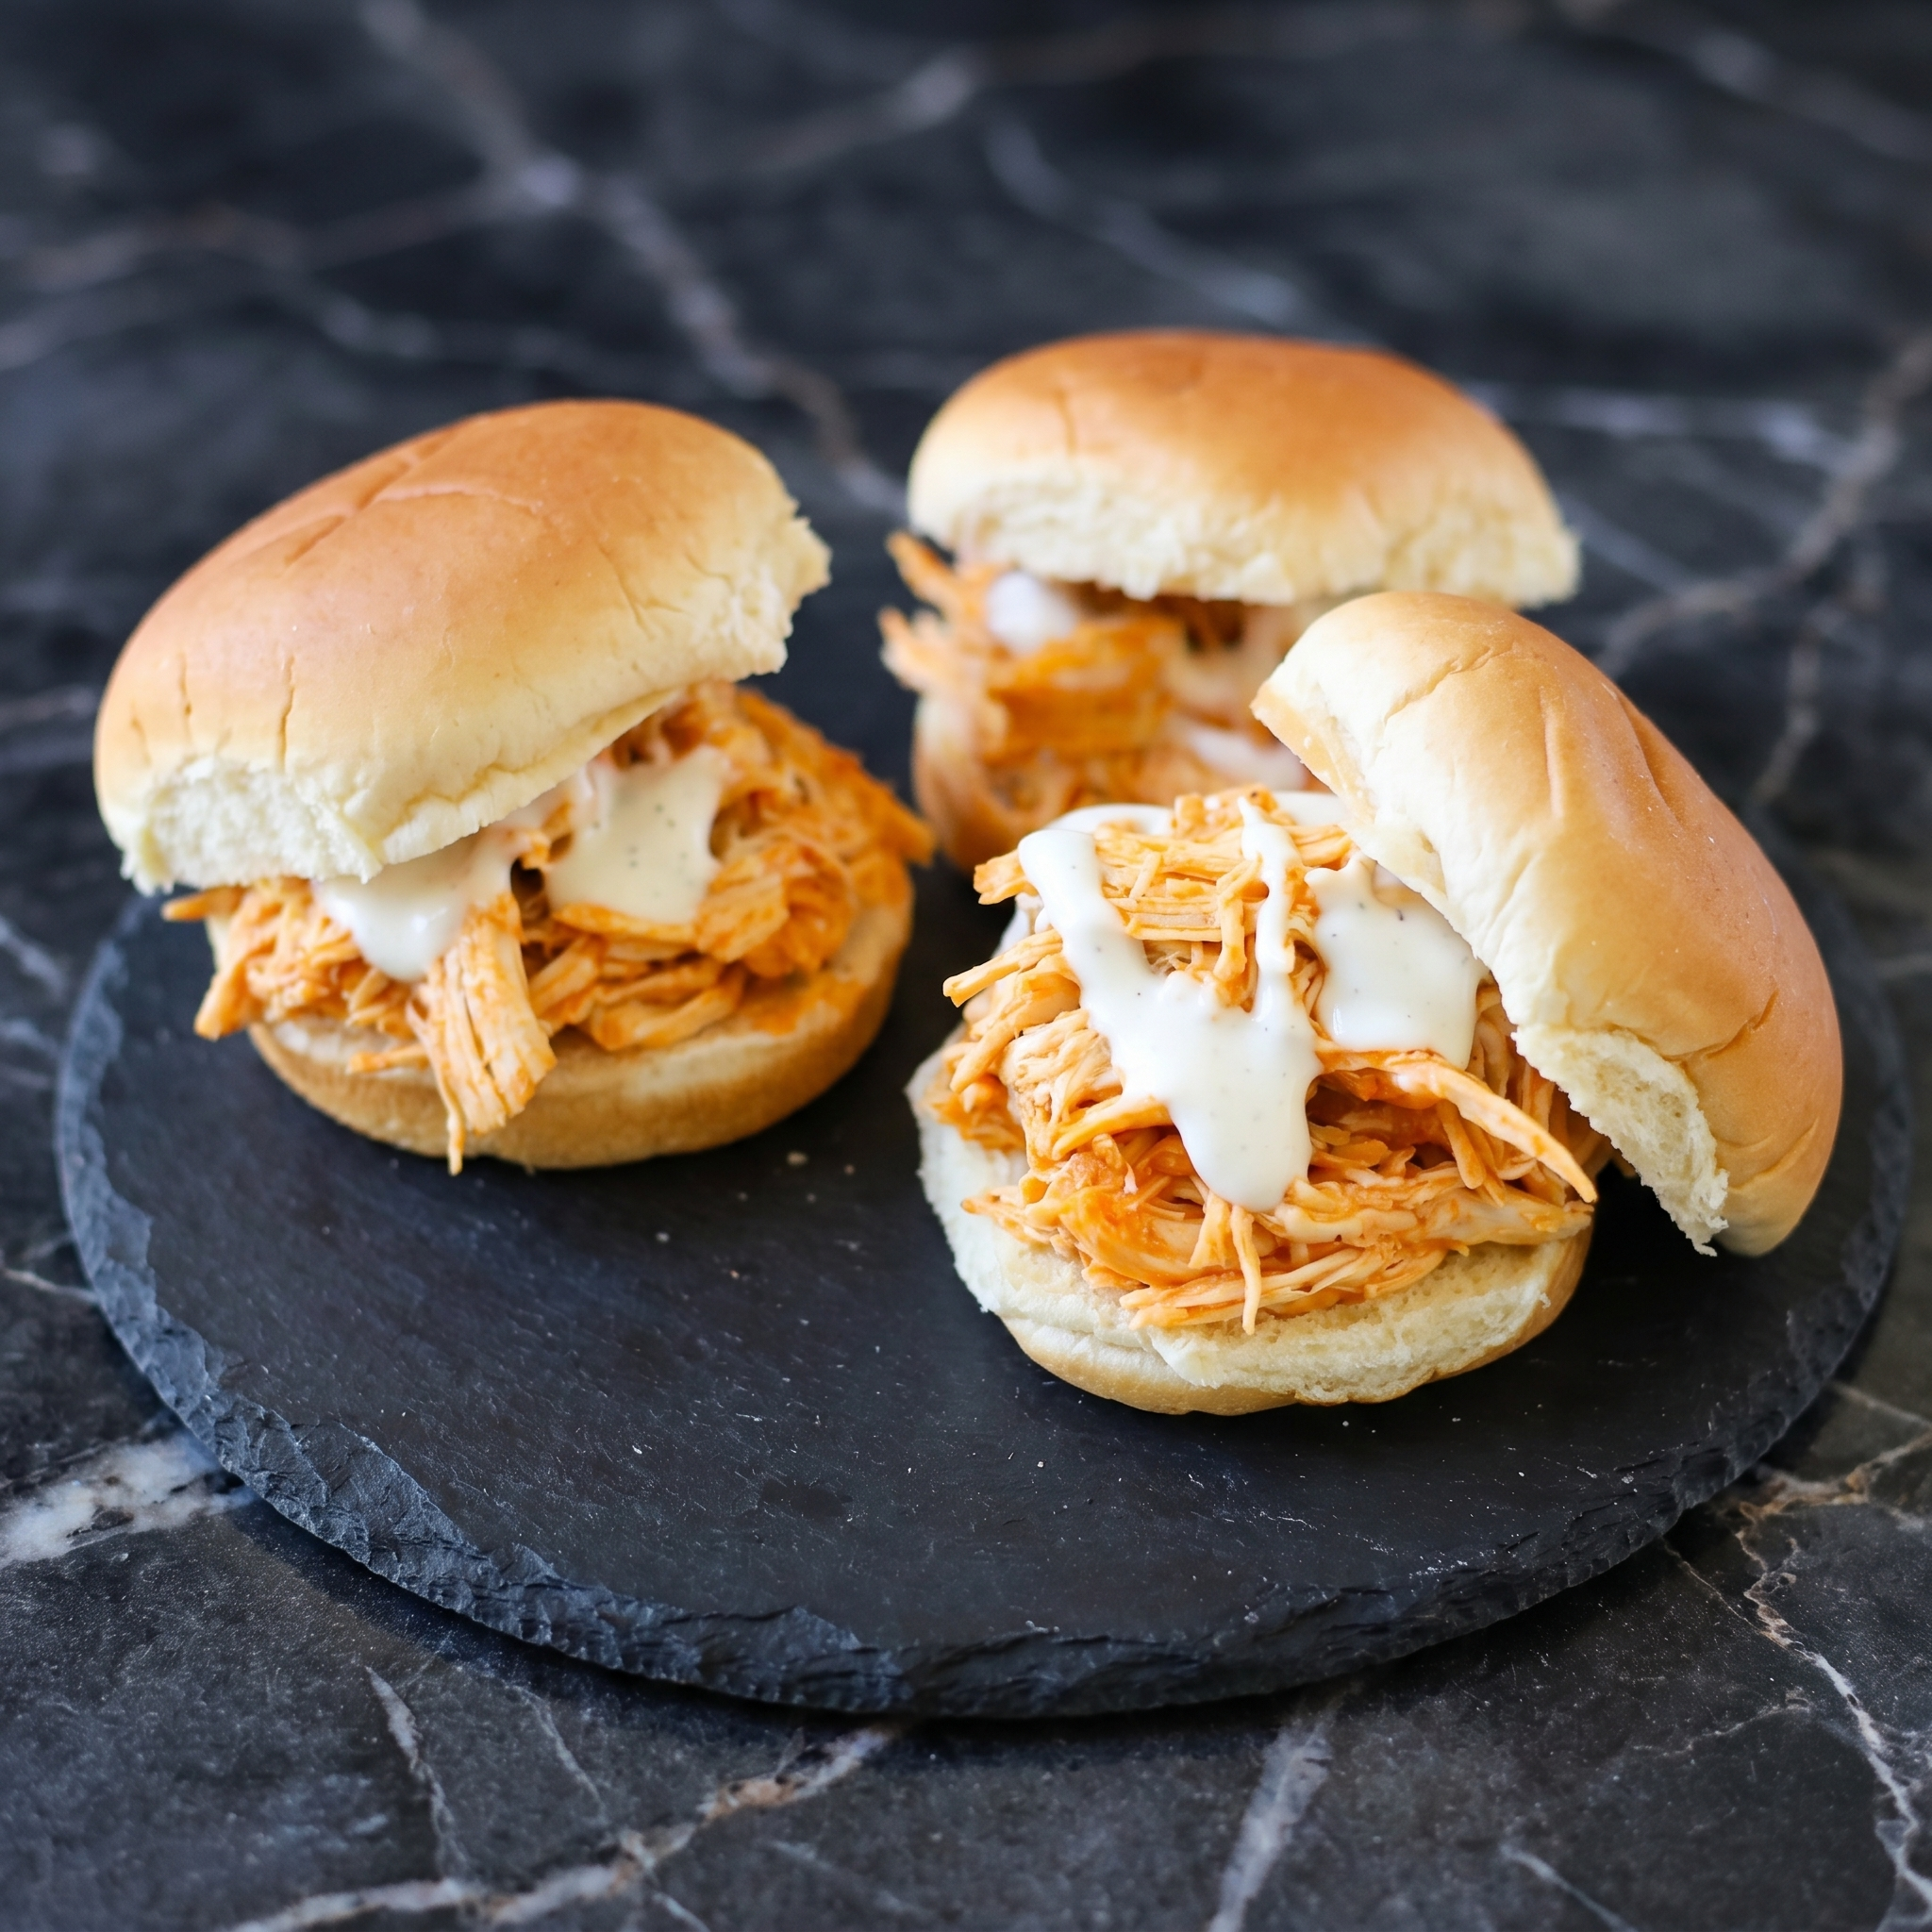
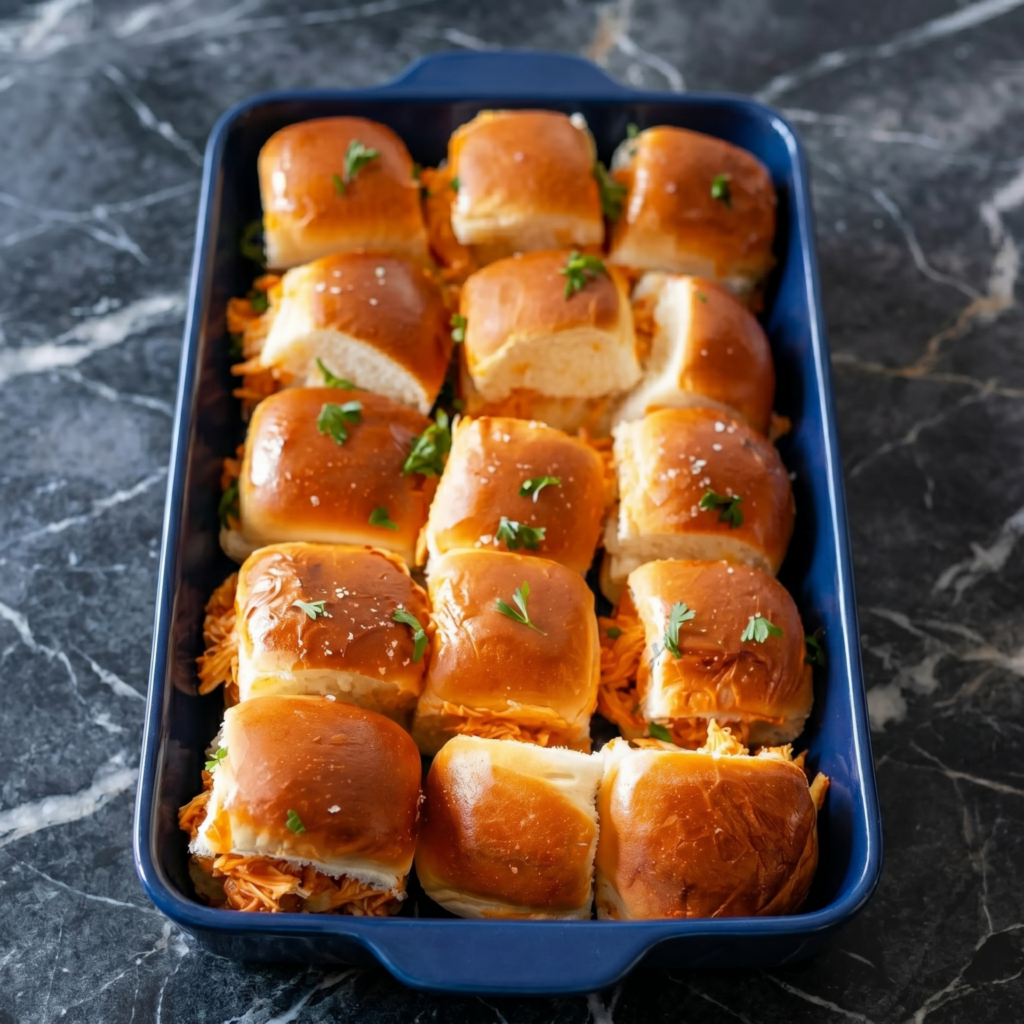
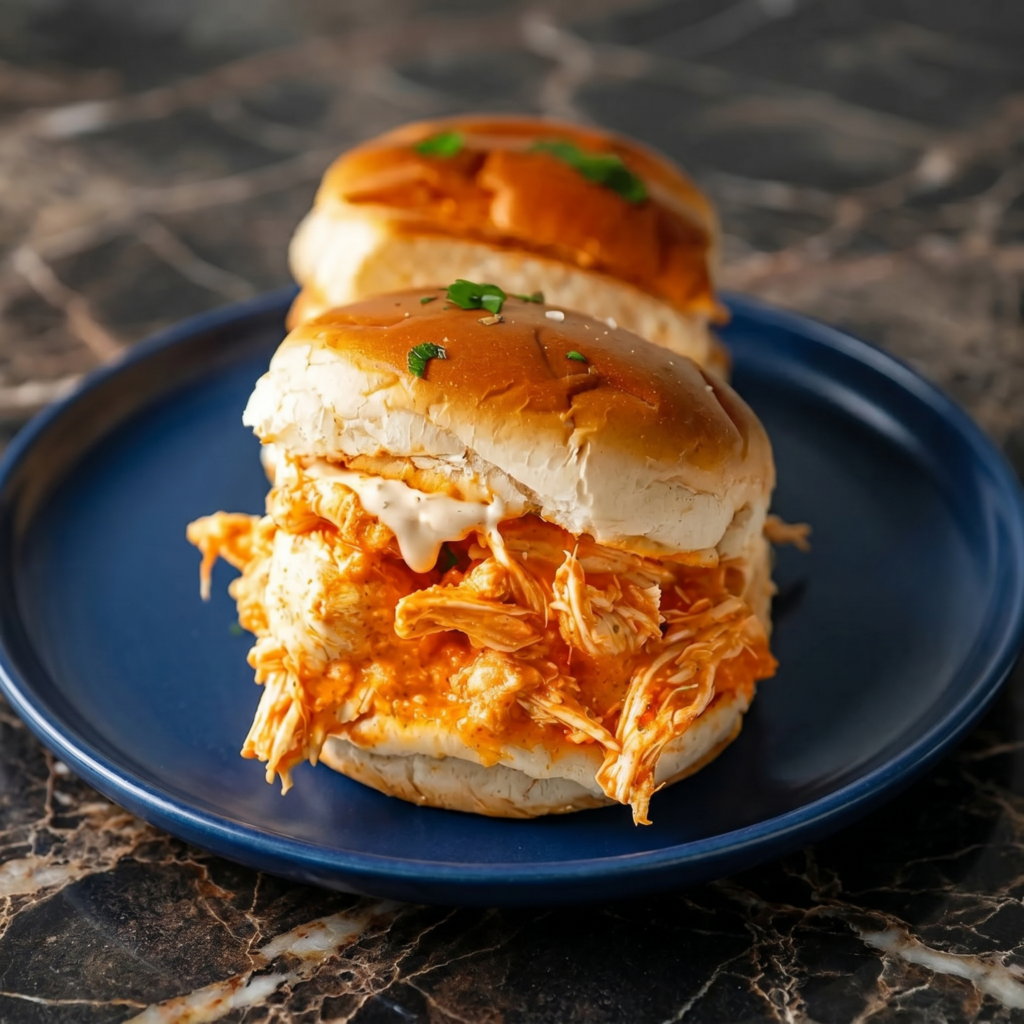
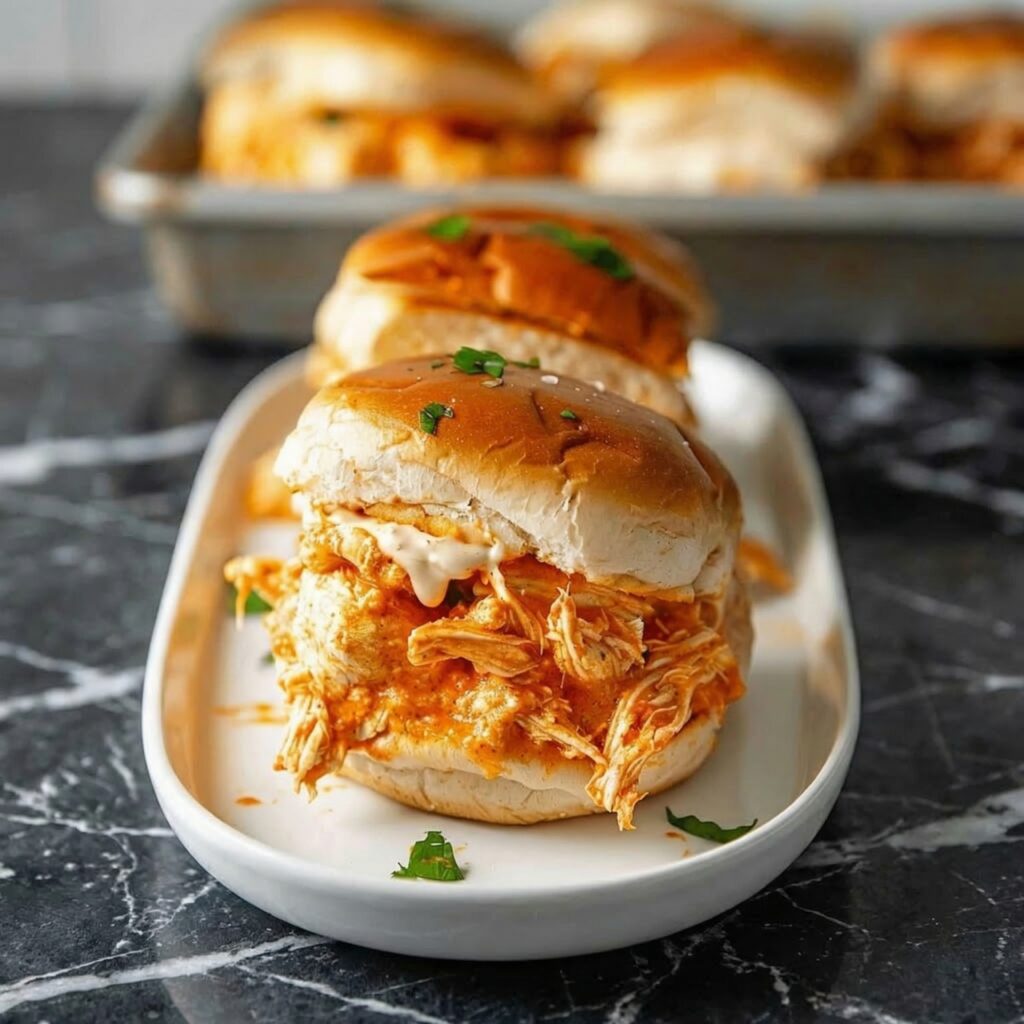
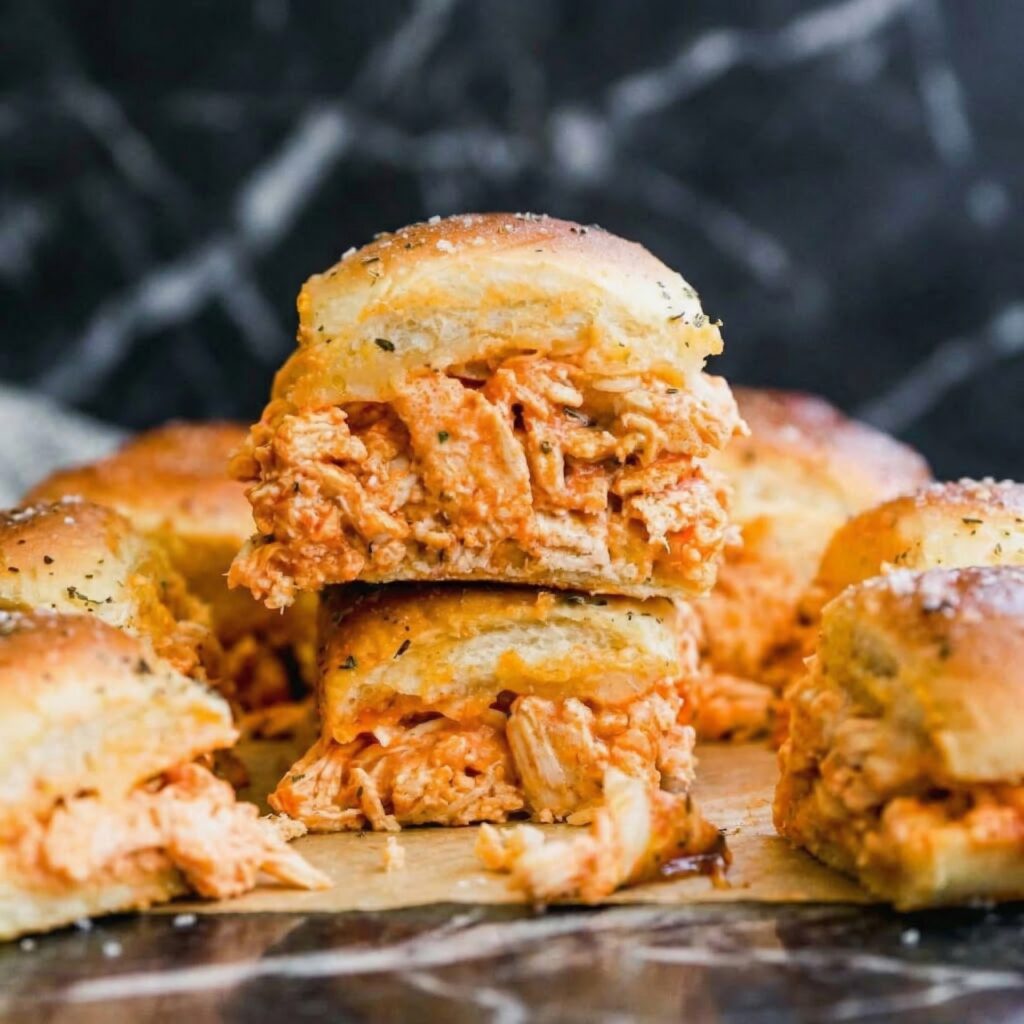
These aren’t your average sliders. We’re talking about tender, juicy shredded chicken, drenched in a perfectly balanced homemade buffalo sauce that’s equal parts buttery and spicy.
It’s piled high onto soft, sweet Hawaiian rolls, blanketed with gooey provolone cheese, and baked until the tops are buttery and the edges are gloriously crisp. The combination of spicy, creamy, sweet, and savory is absolutely irresistible. Get ready to make a lot of these, because one batch is never enough.
Optional: Crumbled blue cheese or ranch dressing for serving/drizzling
Step-by-Step Instructions
Step 1: Cook and Shred the Chicken
Preheat your oven to 375°F (190°C).
Place the chicken breasts in a baking dish. Drizzle with olive oil and season generously with garlic powder, onion powder, salt, and pepper. Toss to coat.
Bake for 20-25 minutes, or until the chicken is cooked through and reaches an internal temperature of 165°F (74°C). The exact time will depend on the thickness of your breasts.
Let the chicken rest for 5-10 minutes, then use two forks to shred it into bite-sized pieces. (Alternatively, you can use a stand mixer with a paddle attachment on low speed to shred it in seconds!)
Step 2: Make the Buffalo Sauce
While the chicken bakes, make the sauce. In a small saucepan over low heat, combine the hot sauce and cubed butter. Stir frequently until the butter is melted and the sauce is smooth.
Whisk in the honey (if using). Remove from heat.
Step 3: Combine Chicken and Sauce
Place the shredded chicken in a large bowl. Pour about ¾ of the buffalo sauce over the chicken and toss well to coat. You want it generously sauced, but not swimming in it. Reserve the remaining sauce for brushing on top.
Step 4: Assemble the Sliders
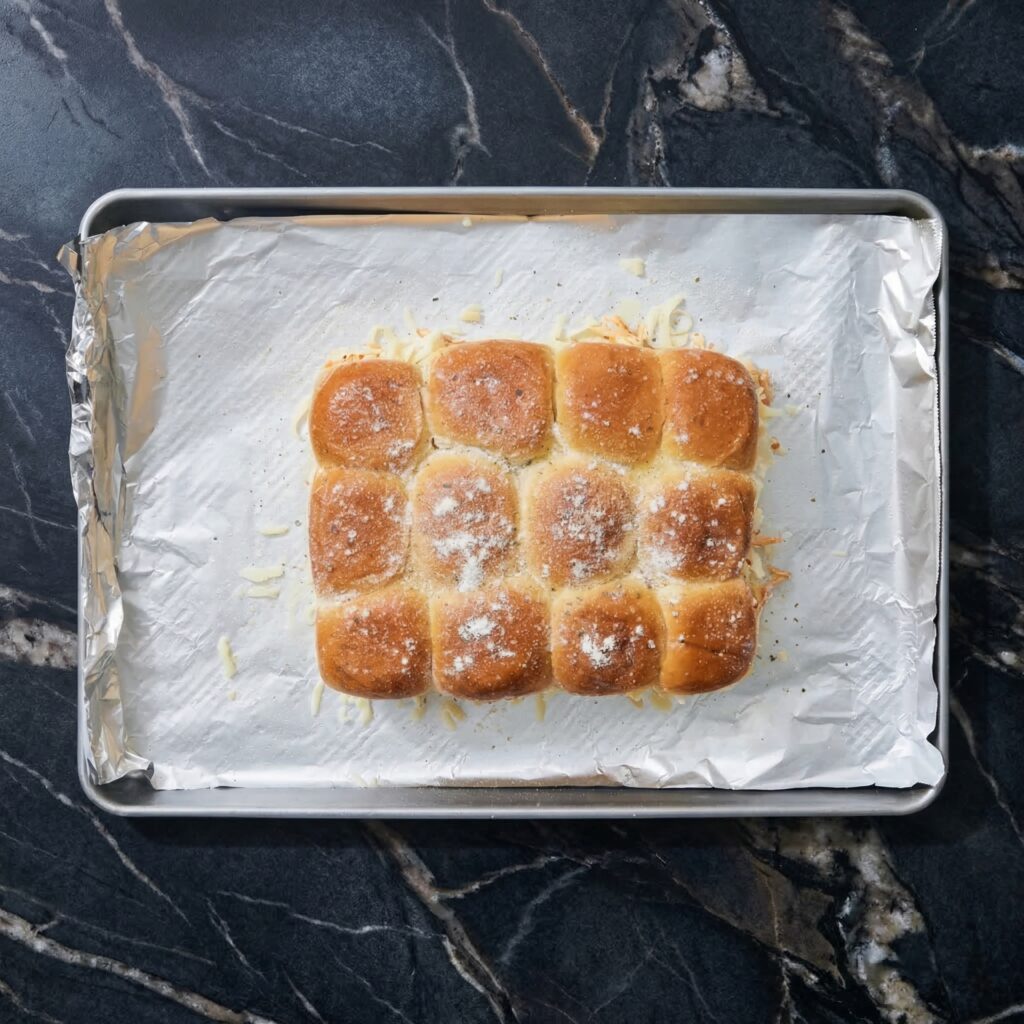
Without separating the individual rolls, slice the entire slab of Hawaiian rolls in half horizontally. Place the bottom half of the rolls in a 9×13 inch baking dish (or on a parchment-lined baking sheet).
Place the cheese slices evenly over the bottom layer of rolls, overlapping slightly to cover completely. This creates a cheesy barrier that helps keep the rolls from getting soggy.
Pile the buffalo chicken mixture evenly over the cheese.
Place the top half of the rolls over the chicken to create a complete “slab” of sandwiches.
Step 5: The Famous Buttery Topping
In a small bowl, whisk together the melted butter, honey, garlic powder, and dried parsley.
Generously brush this mixture all over the tops of the rolls. Don’t be shy—let it soak into the crevices.
If you have any reserved buffalo sauce, you can also drizzle a little over the top for extra kick.
Step 6: Bake to Golden Perfection
Cover the dish loosely with aluminum foil (to prevent the tops from burning before the insides are hot).
Bake at 350°F (175°C) for 15 minutes.
Remove the foil and bake for another 5-10 minutes, until the tops are golden brown and the edges are just starting to get crispy.
Step 7: Serve Immediately
Let the sliders rest for 5 minutes before using a sharp knife to cut between the rolls and separate them into individual sliders.
Serve hot with extra buffalo sauce, ranch dressing, or blue cheese crumbles on the side for dipping. Prepare for them to disappear instantly.
Yield: 12 sliders (serves 4-6 as a meal, 8-10 as an appetizer)
Difficulty: Easy
Storage and Make-Ahead Tips
How to Store Leftovers:
Store any leftover sliders in an airtight container in the refrigerator for up to 3 days. The flavors will meld, but the buns may lose some of their crispness.
Reheating:
For best results, reheat in a 350°F oven for 5-10 minutes, or in an air fryer for 2-3 minutes to help re-crisp the tops. The microwave works in a pinch but will make the buns softer.
Make-Ahead for Parties:
You can prepare the buffalo chicken up to 2 days in advance and store it in the refrigerator. When you’re ready to serve, simply assemble the sliders (bring the chicken to room temperature or warm it slightly for easier spreading), add the buttery topping, and bake as directed.
Freezing Instructions:
Assemble the sliders completely (but do not bake) in a freezer-safe aluminum foil pan. Wrap tightly with plastic wrap and foil. Freeze for up to 3 months. To bake from frozen, remove the plastic wrap, cover with foil, and bake at 350°F for 30 minutes. Remove the foil and bake for another 5-10 minutes until hot and golden.