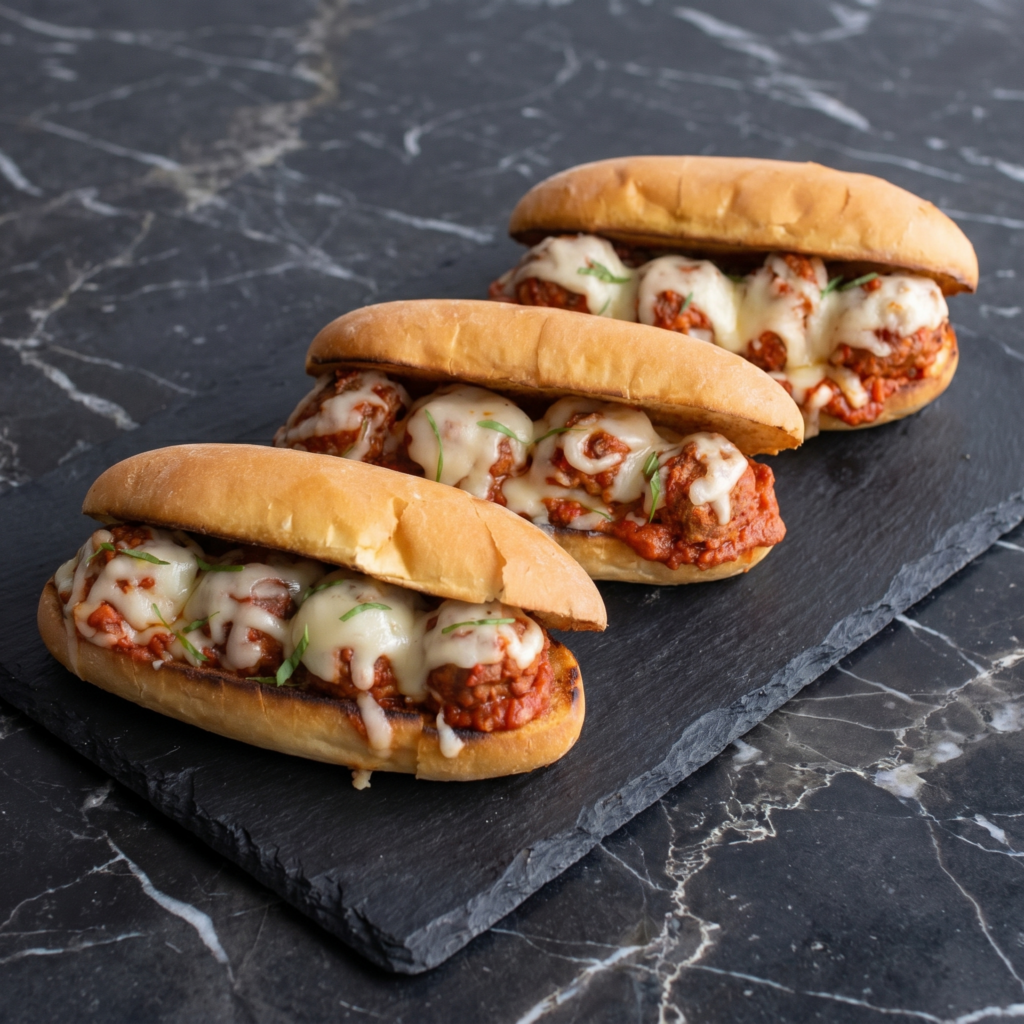
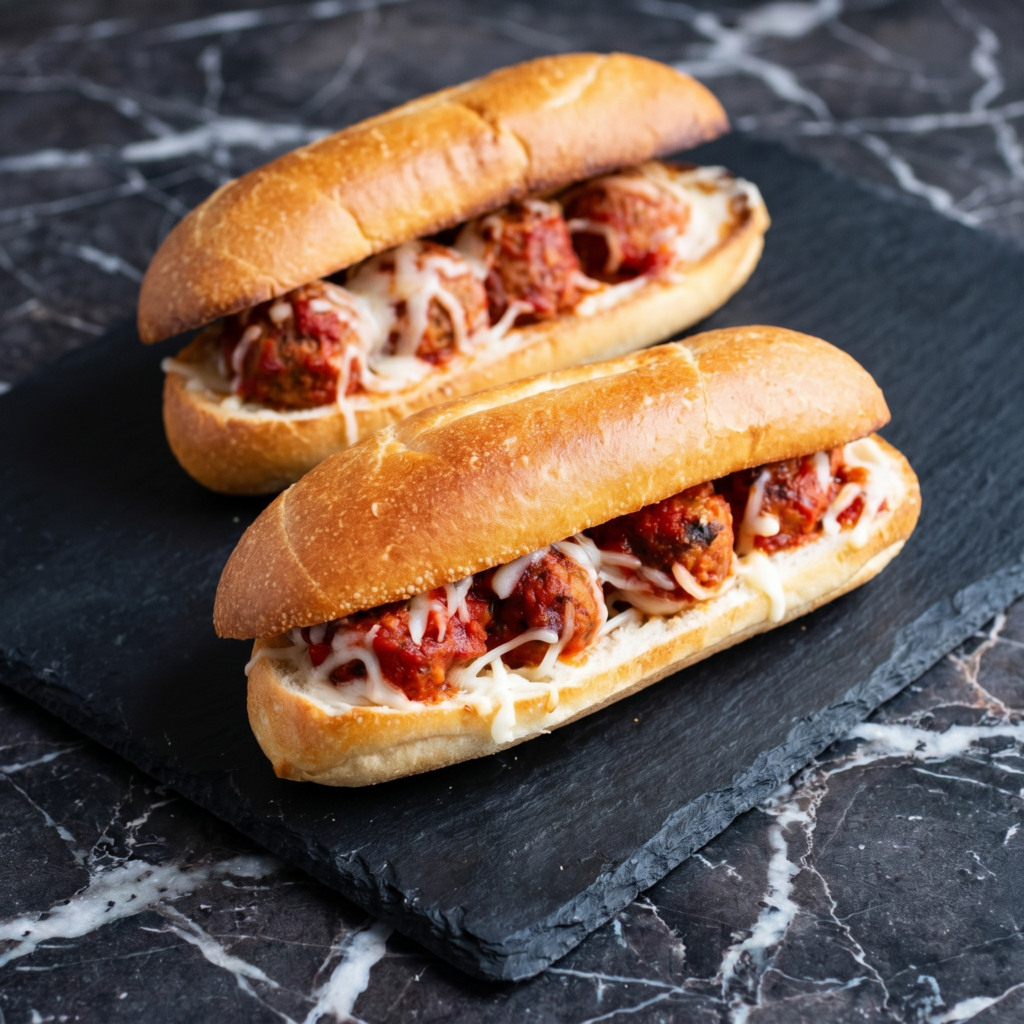
A great meatball sub is a beautiful mess. Sloppy, saucy, cheesy, and absolutely worth the napkins. The meatballs are tender and flavorful. The bread holds up. The cheese stretches for days.
Use homemade or jarred sauce. Bake the meatballs or use leftovers. Either way, dinner is in 20 minutes.
Ingredients
Serves 4 (makes 4 subs).
4 sub rolls (soft but sturdy)
16-20 cooked beef meatballs (homemade or frozen)
2 cups marinara sauce (jarred or homemade)
8 slices provolone or mozzarella cheese
2 tablespoons grated Parmesan cheese
2 tablespoons butter, melted
½ teaspoon garlic powder
Optional: fresh basil, red pepper flakes
Step-by-Step Instructions
Step 1: Heat Meatballs and Sauce
In a saucepan, combine meatballs and marinara sauce.
Simmer over medium-low heat for 10–15 minutes until meatballs are hot and sauce is bubbling.
Step 2: Preheat Oven
Preheat oven to 400°F (200°C).
Line a baking sheet with foil or parchment paper.
Step 3: Toast the Rolls
Slice sub rolls open lengthwise (but not all the way through).
Mix melted butter with garlic powder. Brush inside and outside of rolls.
Place on baking sheet and toast for 3–5 minutes until lightly golden.
Step 4: Assemble the Subs
Spoon 4–5 meatballs onto each bottom roll.
Top with a generous scoop of sauce.
Lay 2 slices of provolone over the meatballs.
Sprinkle with Parmesan.
Step 5: Melt the Cheese
Return subs to the oven (open-faced) for 3–5 minutes until cheese is bubbly and melted.
Step 6: Close and Serve
Top with fresh basil or red pepper flakes if using.
Close the roll. Press down gently. Serve with extra sauce on the side and a mountain of napkins.
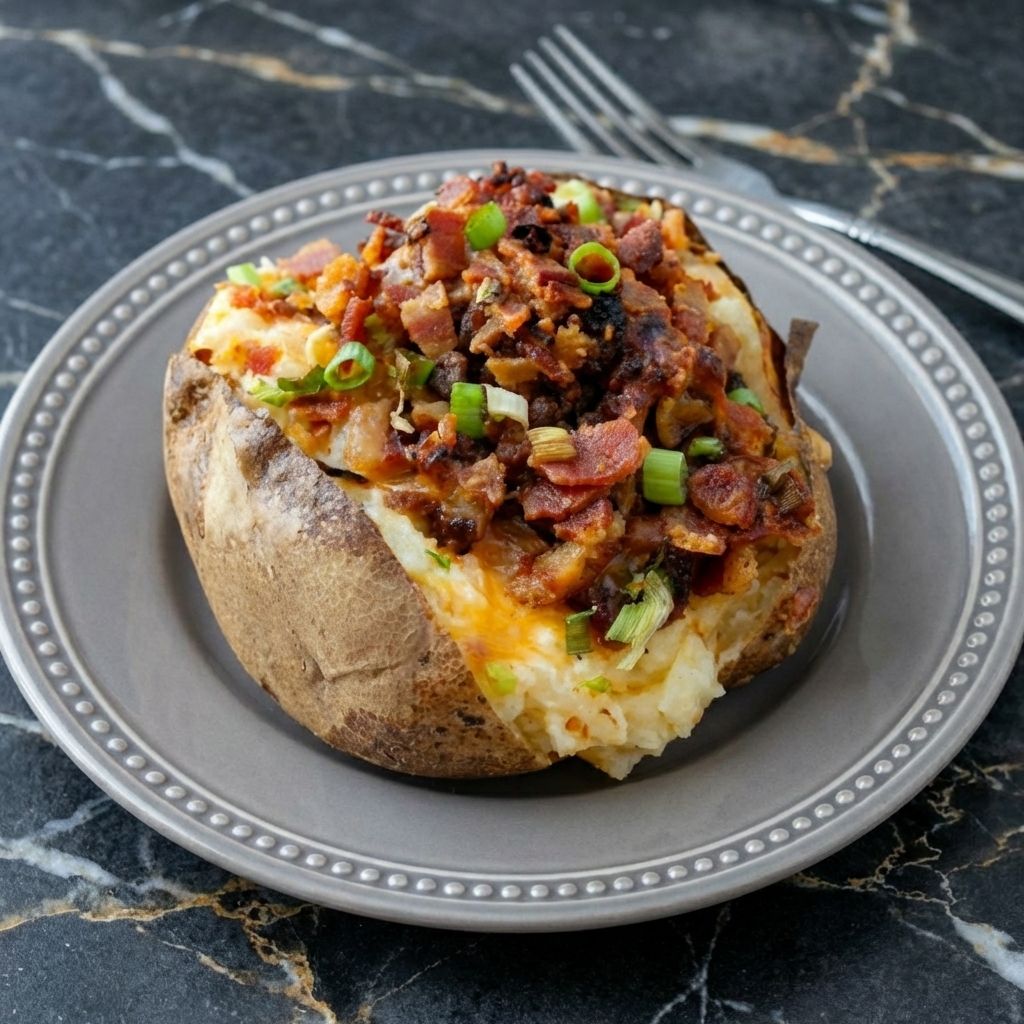
The baked potato is humble. The loaded baked potato? That’s a star. A perfectly baked potato with a crispy, salty skin and a fluffy, steam-in-the-oven interior, split open and stuffed with all the good stuff—melty cheddar, crispy bacon, cool sour cream, and fresh chives.
This is the kind of meal that asks very little of you but delivers everything. It’s a blank canvas for whatever you have in the fridge, but the classics are classic for a reason. Butter, cheese, bacon, and a dollop of sour cream. Maybe some broccoli if you’re feeling virtuous. Dinner is served.
Ingredients
Serves 4.
For the Potatoes:
4 large russet potatoes (the best for baking—high starch = fluffy interior)
1 tbsp olive oil (for rubbing)
1 tsp coarse salt (for the skin)
For the Toppings Bar:
1½ cups shredded sharp cheddar cheese
8 slices bacon, cooked crispy and crumbled
1 cup sour cream
4 tbsp unsalted butter (1 tbsp per potato, minimum)
¼ cup fresh chives or green onions, chopped
Salt and black pepper, to taste
Optional Toppings (Because Why Not?):
Steamed broccoli florets
Chili (for a fully loaded meal)
Pickled jalapeños
Hot sauce
Extra cheese (always extra cheese)
Step-by-Step Instructions
Step 1: Preheat and Prep
Preheat your oven to 400°F (200°C). Scrub potatoes clean and dry thoroughly.
Poke each potato several times with a fork. This lets steam escape so they don’t explode in your oven.
Rub each potato with olive oil and sprinkle generously with coarse salt. The oil helps the skin crisp up; the salt makes it delicious.
Step 2: Bake the Potatoes
Place potatoes directly on the oven rack (with a baking sheet on the rack below to catch any drips). This allows air to circulate and gives you crispy skin all around.
Bake for 50-60 minutes until the skin is crisp and a knife slides in easily with no resistance.
For extra fluffy potatoes, let them rest for 10 minutes before handling.
Step 3: Prep the Toppings
While potatoes bake, cook your bacon until crispy, then crumble or chop.
Shred the cheese (freshly shredded melts better than pre-shredded).
Chop your chives and set up a toppings bar if serving family-style.
Step 4: Open and Fluff
Transfer hot potatoes to a plate. Using a sharp knife, slice each potato lengthwise down the middle, but not all the way through—you want to open it like a book.
Gently squeeze the ends to push the potato open and expose the fluffy interior.
Use a fork to fluff the inside, breaking it up a bit. This creates more surface area for butter and toppings.
Step 5: Build Your Masterpiece
Drop a pat of butter into each potato and let it melt into the fluffy interior. Sprinkle with a pinch of salt and pepper.
Pile on the shredded cheddar—it will melt from the residual heat.
Sprinkle with crispy bacon and fresh chives.
Top with a generous dollop of sour cream.
Step 6: Serve Immediately
Serve hot with extra toppings on the side for those who want more.
Take a bite that includes crispy skin, fluffy potato, melted cheese, and bacon all at once. Close your eyes. This is peak comfort.
Store leftover baked potatoes (without toppings) in the fridge for up to 4 days. Store toppings separately.
Reheating:
Oven method (best): 350°F for 15-20 minutes until heated through and skin re-crisps. Air fryer: 375°F for 5-7 minutes. Microwave: Works in a pinch, but skin will be soft. Split, add butter, and reheat in 60-second bursts.
Make Ahead:
You can bake potatoes up to 2 days in advance. Store in the fridge, then reheat in a 400°F oven for 10-15 minutes before serving. Or use leftovers for twice-baked potatoes—just scoop out the insides, mix with toppings, stuff back in, and bake until golden.
Pro Tips for Potato Perfection:
Russets are non-negotiable. Waxy potatoes (red, Yukon) won’t give you that fluffy interior.
Salt the skin. It’s not just for show—it seasons the potato and helps the skin crisp.
Don’t wrap in foil. Foil steams the potato instead of baking it. You want dry heat for crispy skin.
Use a wire rack or oven rack. Air circulation is key to even cooking.
Freshly shredded cheese melts better. Anti-caking agents in pre-shredded cheese mess with meltability.
Potato Bar Party Idea:
Set up a loaded potato bar for your next gathering. Bake a bunch of potatoes, keep them warm in a low oven, and set out bowls of toppings: cheeses, bacon, sour cream, chives, broccoli, chili, pulled pork, pickled jalapeños, hot sauces. Let everyone build their own masterpiece. It’s interactive, delicious, and way easier than catering to individual preferences.