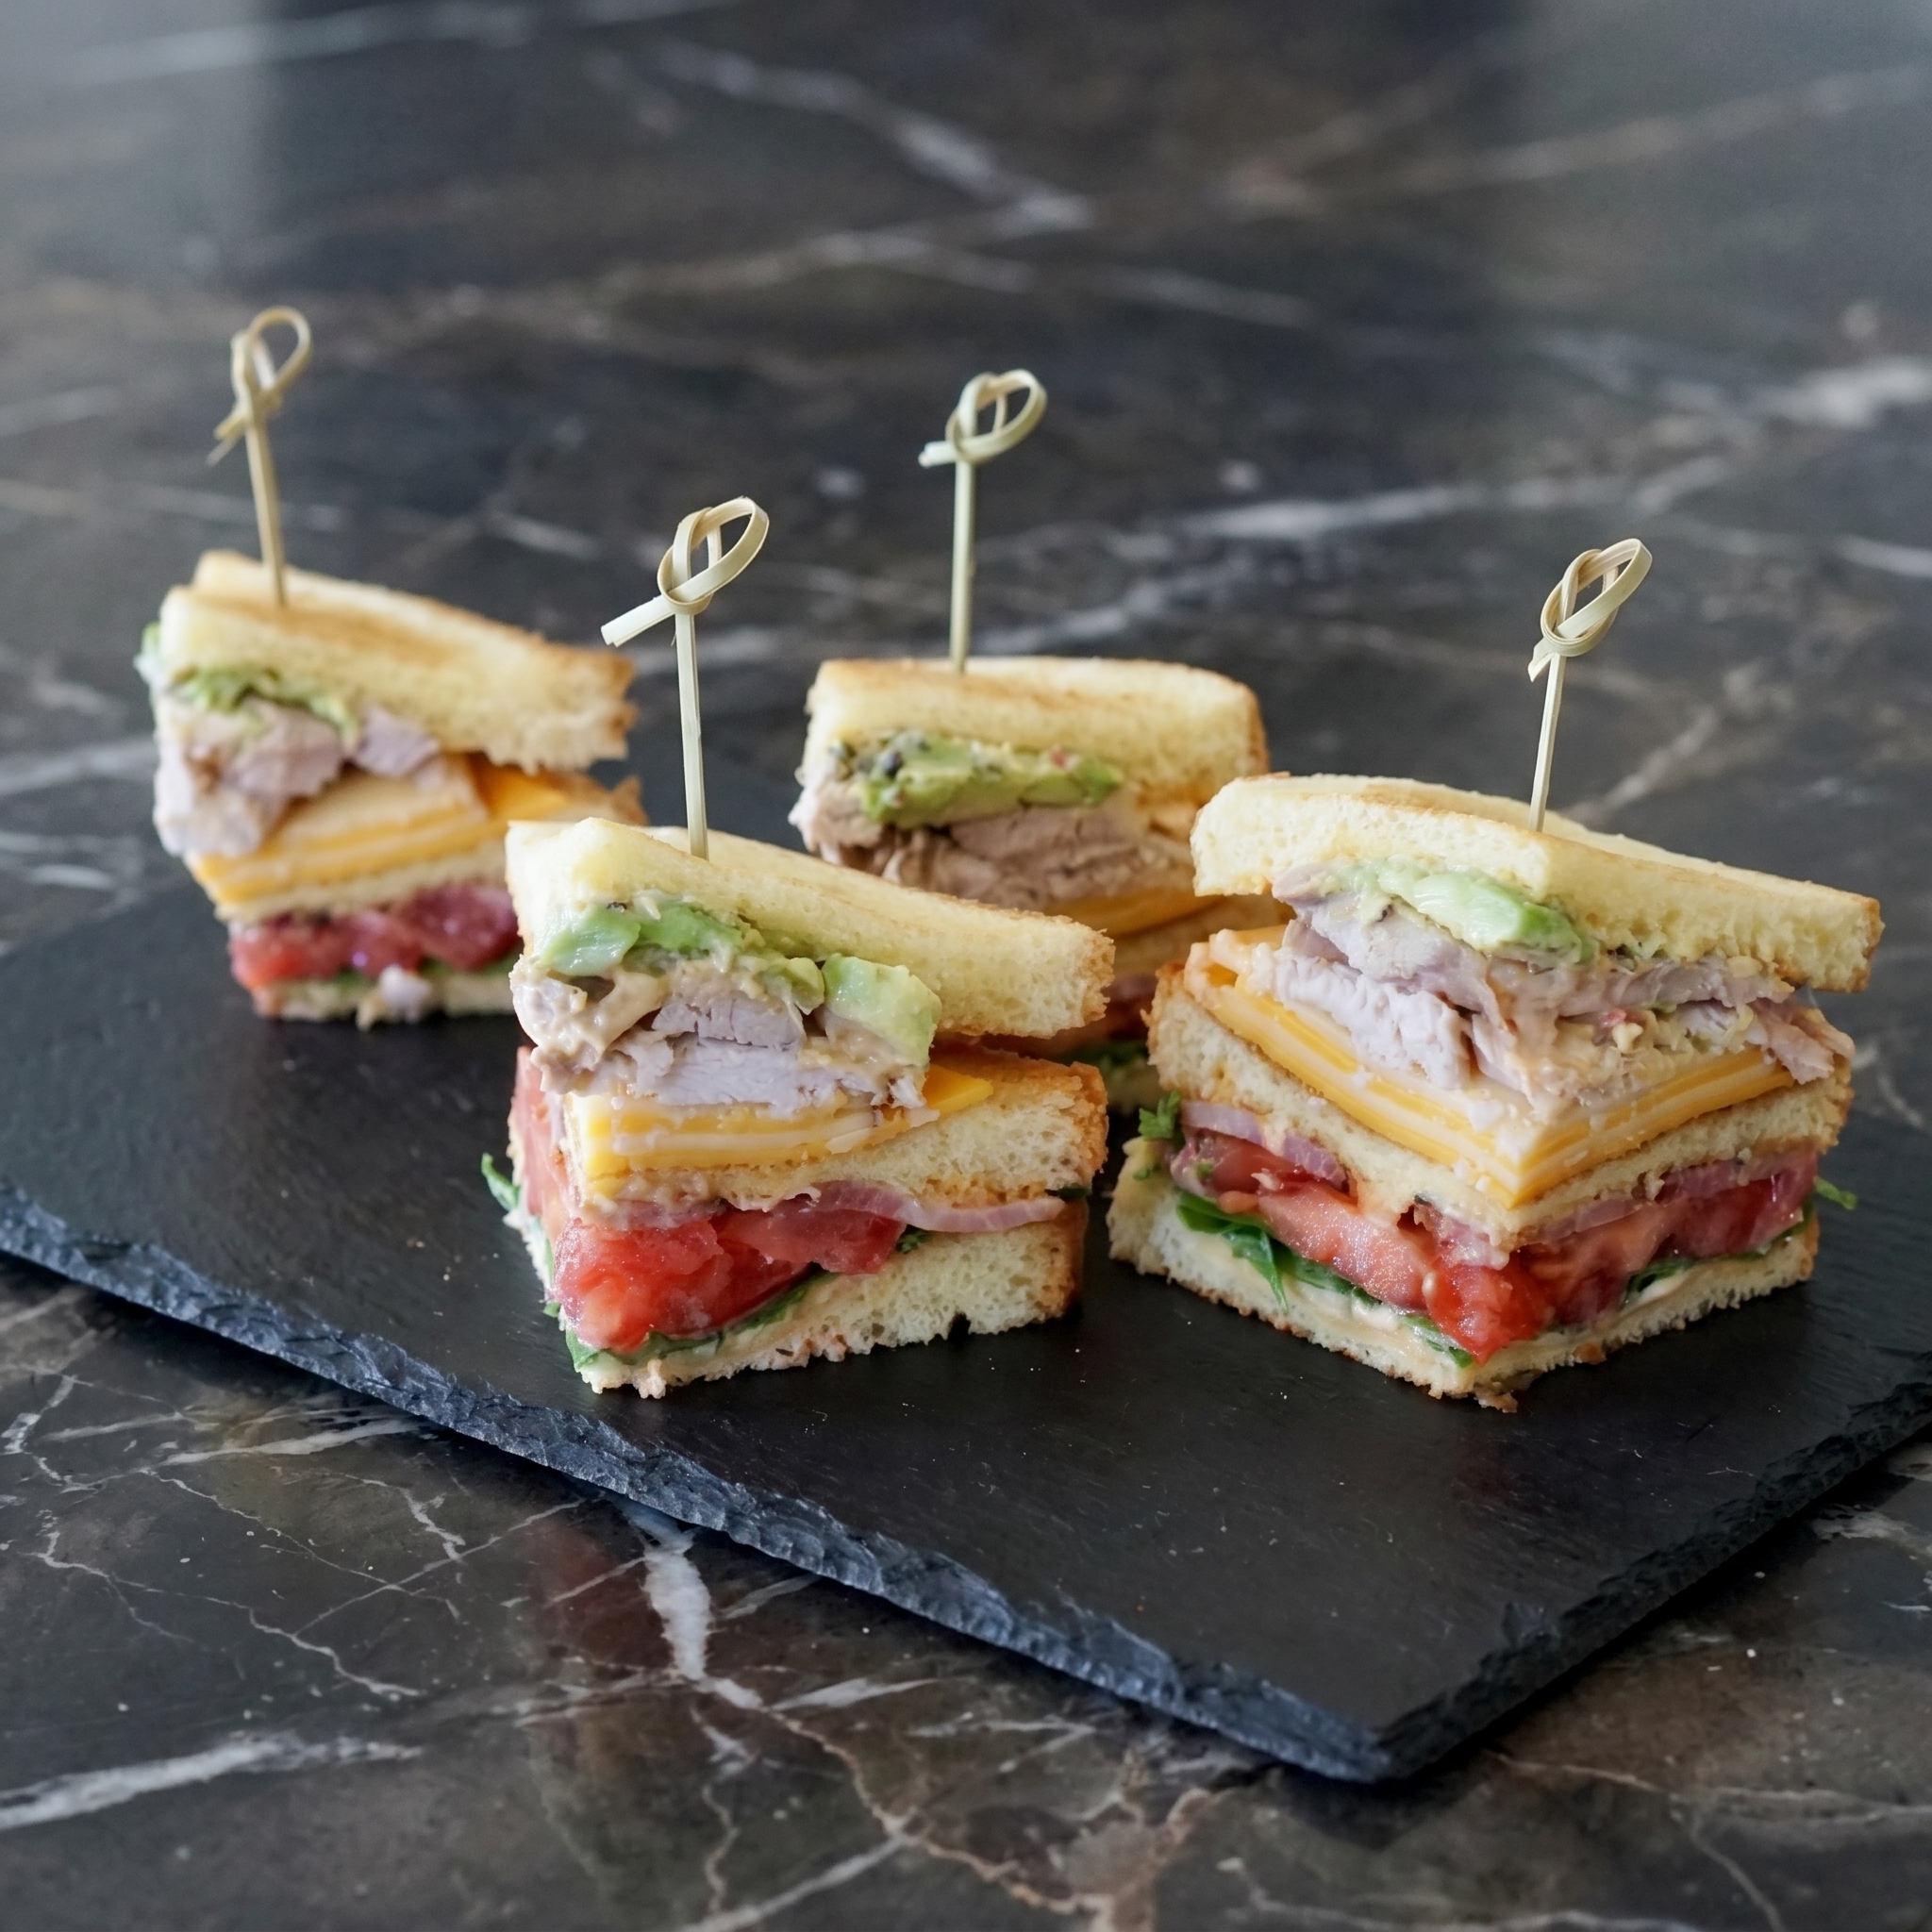
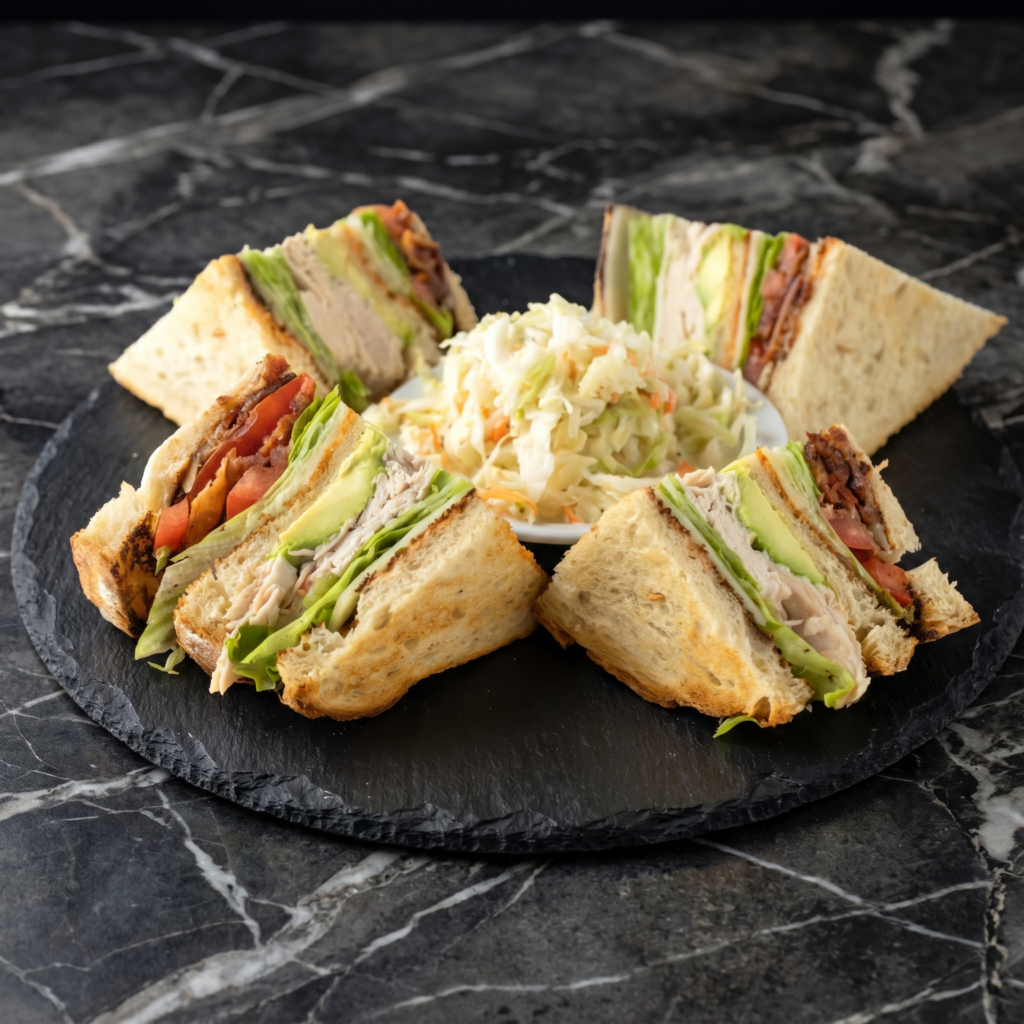
The club sandwich is a masterpiece of engineering. Three slices of toast. Two layers of fillings. One frilly toothpick holding it all together. This version keeps it classic: turkey, bacon, lettuce, tomato, and mayo. No fancy stuff. Just diner-perfect crunch in 10 minutes.
Ingredients
Serves 1 very hungry person or 2 normal people.
3 slices white, sourdough, or whole wheat bread
4-6 slices roasted turkey breast
4 slices crispy bacon
2 leaves romaine or iceberg lettuce
2 thick slices tomato
2 tablespoons mayonnaise
Salt and black pepper
Frilly toothpicks (for authenticity)
Step-by-Step Instructions
Step 1: Toast the Bread
Toast all three bread slices until golden and crisp.
Lightly spread mayo on one side of each slice.
Step 2: Layer the Bottom Tier
Place one slice of toast (mayo-side up) on a plate.
Top with half the turkey, half the bacon, lettuce, and tomato.
Season tomato with a pinch of salt and pepper.
Step 3: Add the Middle Toast
Place the second slice of toast (mayo-side up) right on top of the fillings.
Step 4: Layer the Top Tier
Add remaining turkey, bacon, lettuce, and tomato on the middle toast.
Season again.
Step 5: Cap It Off
Place the third slice of toast on top (mayo-side down).
Step 6: Secure and Slice
Stick 2-4 frilly toothpicks through the sandwich to hold everything together.
Slice diagonally into 4 triangles (or 2 rectangles).
The club sandwich does not store well—bread gets soggy, lettuce wilts. Assemble fresh. You can cook bacon ahead and refrigerate for up to 3 days. Leftover turkey keeps for 3-4 days. But seriously, just eat the whole sandwich.
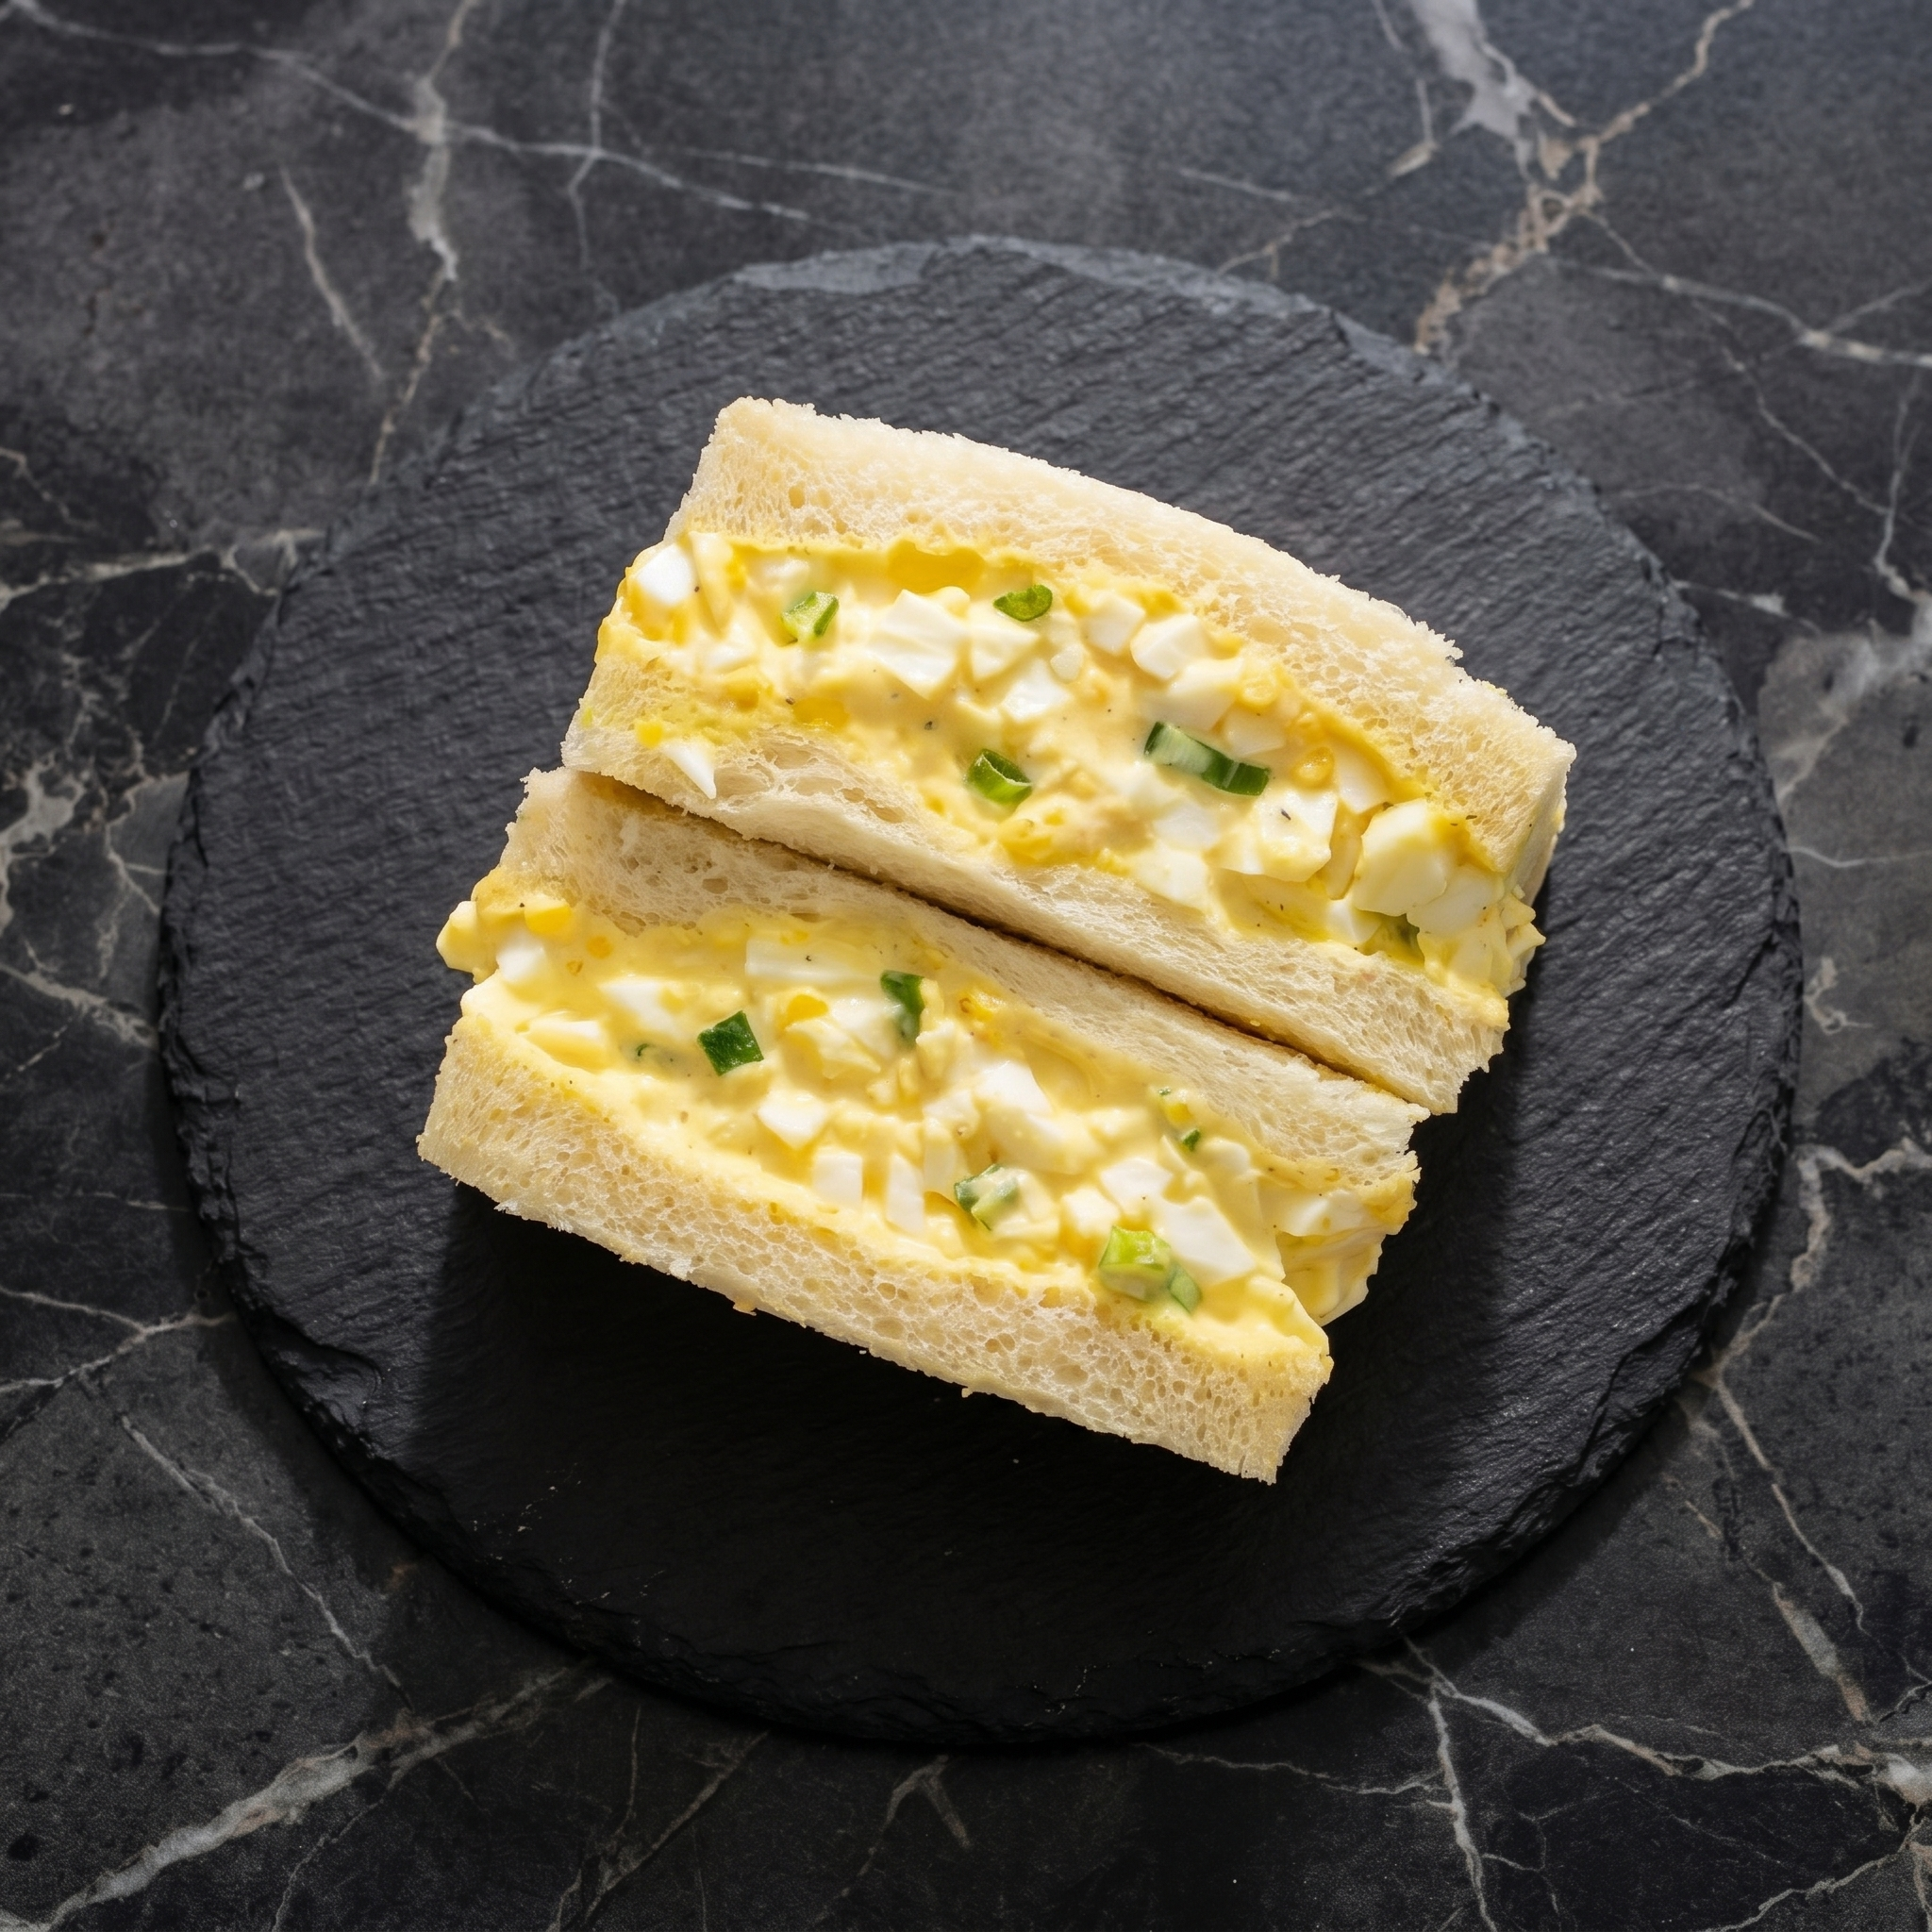
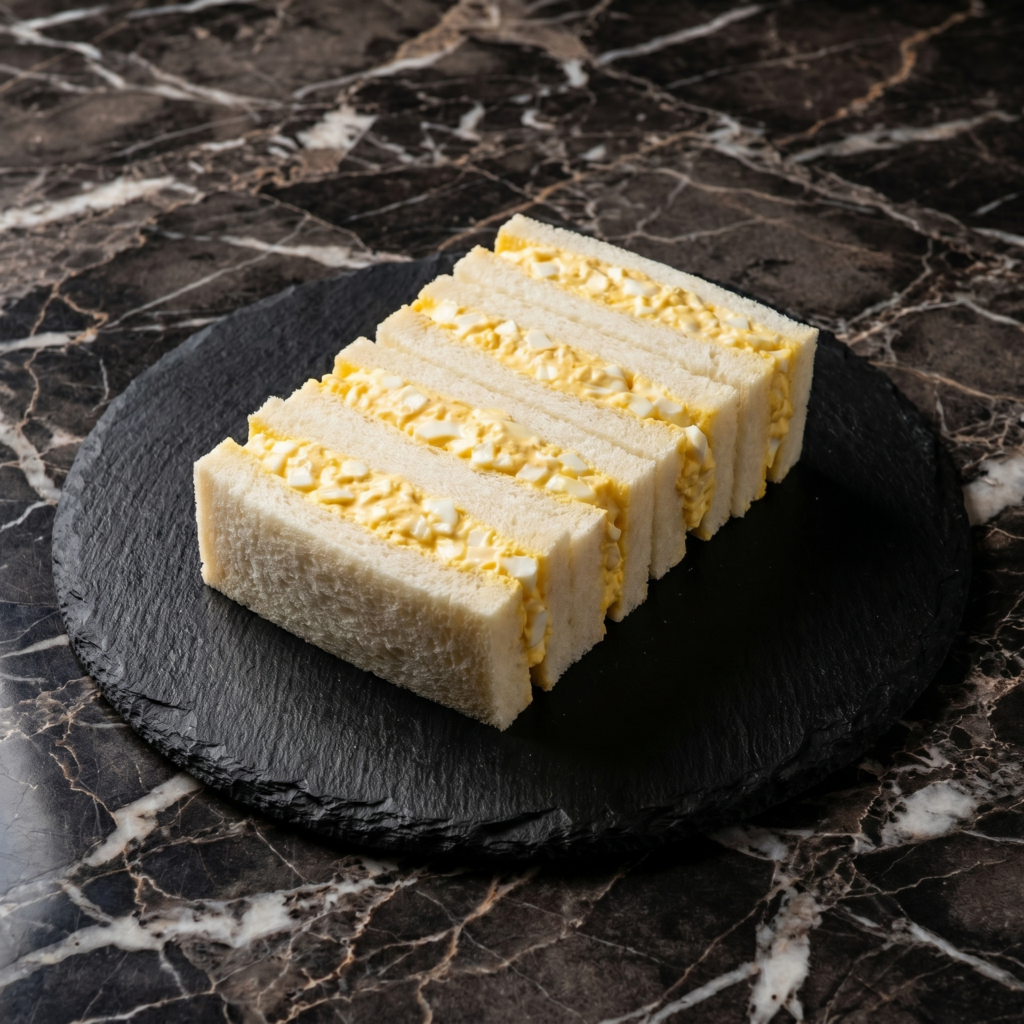
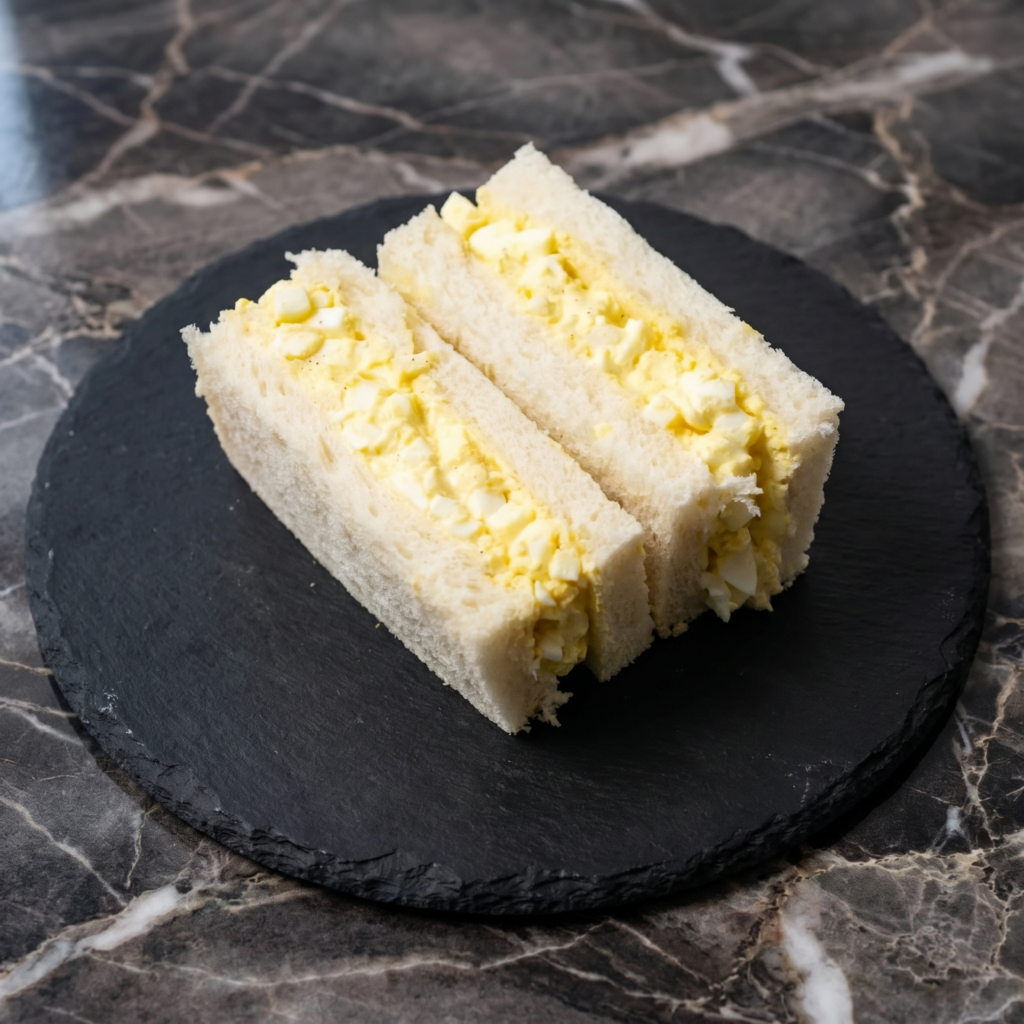
Japan’s 7-Eleven sells a sandwich so perfect it has a cult following. It’s called tamago sando—egg sandwich. Sounds simple. Tastes like a hug. The secret? Creamy, almost sweet egg salad tucked inside impossibly fluffy Japanese milk bread with the crusts cut off.
This isn’t your chunky, mustard-y egg salad. It’s smooth, rich, and custard-like thanks to Kewpie mayo and a touch of mirin. One bite and you’ll be booking a flight. Or just making another batch.
Ingredients
Makes 2 sandwiches.
4 large eggs
3 tablespoons Kewpie mayo (Japanese mayo—don’t substitute)
½ teaspoon sugar
¼ teaspoon salt
½ teaspoon mirin (optional, for sweetness)
4 slices shokupan (Japanese milk bread)
Softened butter, for spreading
Step-by-Step Instructions
Step 1: Boil the Eggs
Place eggs in a pot and cover with cold water. Bring to a boil, then turn off heat and cover for 10 minutes.
Transfer to an ice bath. Peel carefully.
Step 2: Make the Egg Salad
Cut eggs in half. Separate yolks from whites.
Mash yolks with Kewpie mayo, sugar, salt, and mirin until smooth and creamy.
Chop whites into small pieces (not too fine). Fold into yolk mixture. Keep some texture.
Step 3: Assemble the Sando
Trim crusts off the milk bread (authentic and necessary).
Spread a thin layer of butter on each slice.
Pile egg salad generously onto two slices. Top with the remaining bread.
Step 4: Wrap and Press (The Secret Step)
Wrap each sandwich tightly in plastic wrap. Let sit for 10-15 minutes at room temperature.
Slice in half with a sharp knife (plastic wrap still on) for clean edges.
Step 5: Serve
Unwrap and eat immediately. Or refrigerate for up to a few hours—it’s designed to be eaten cool.
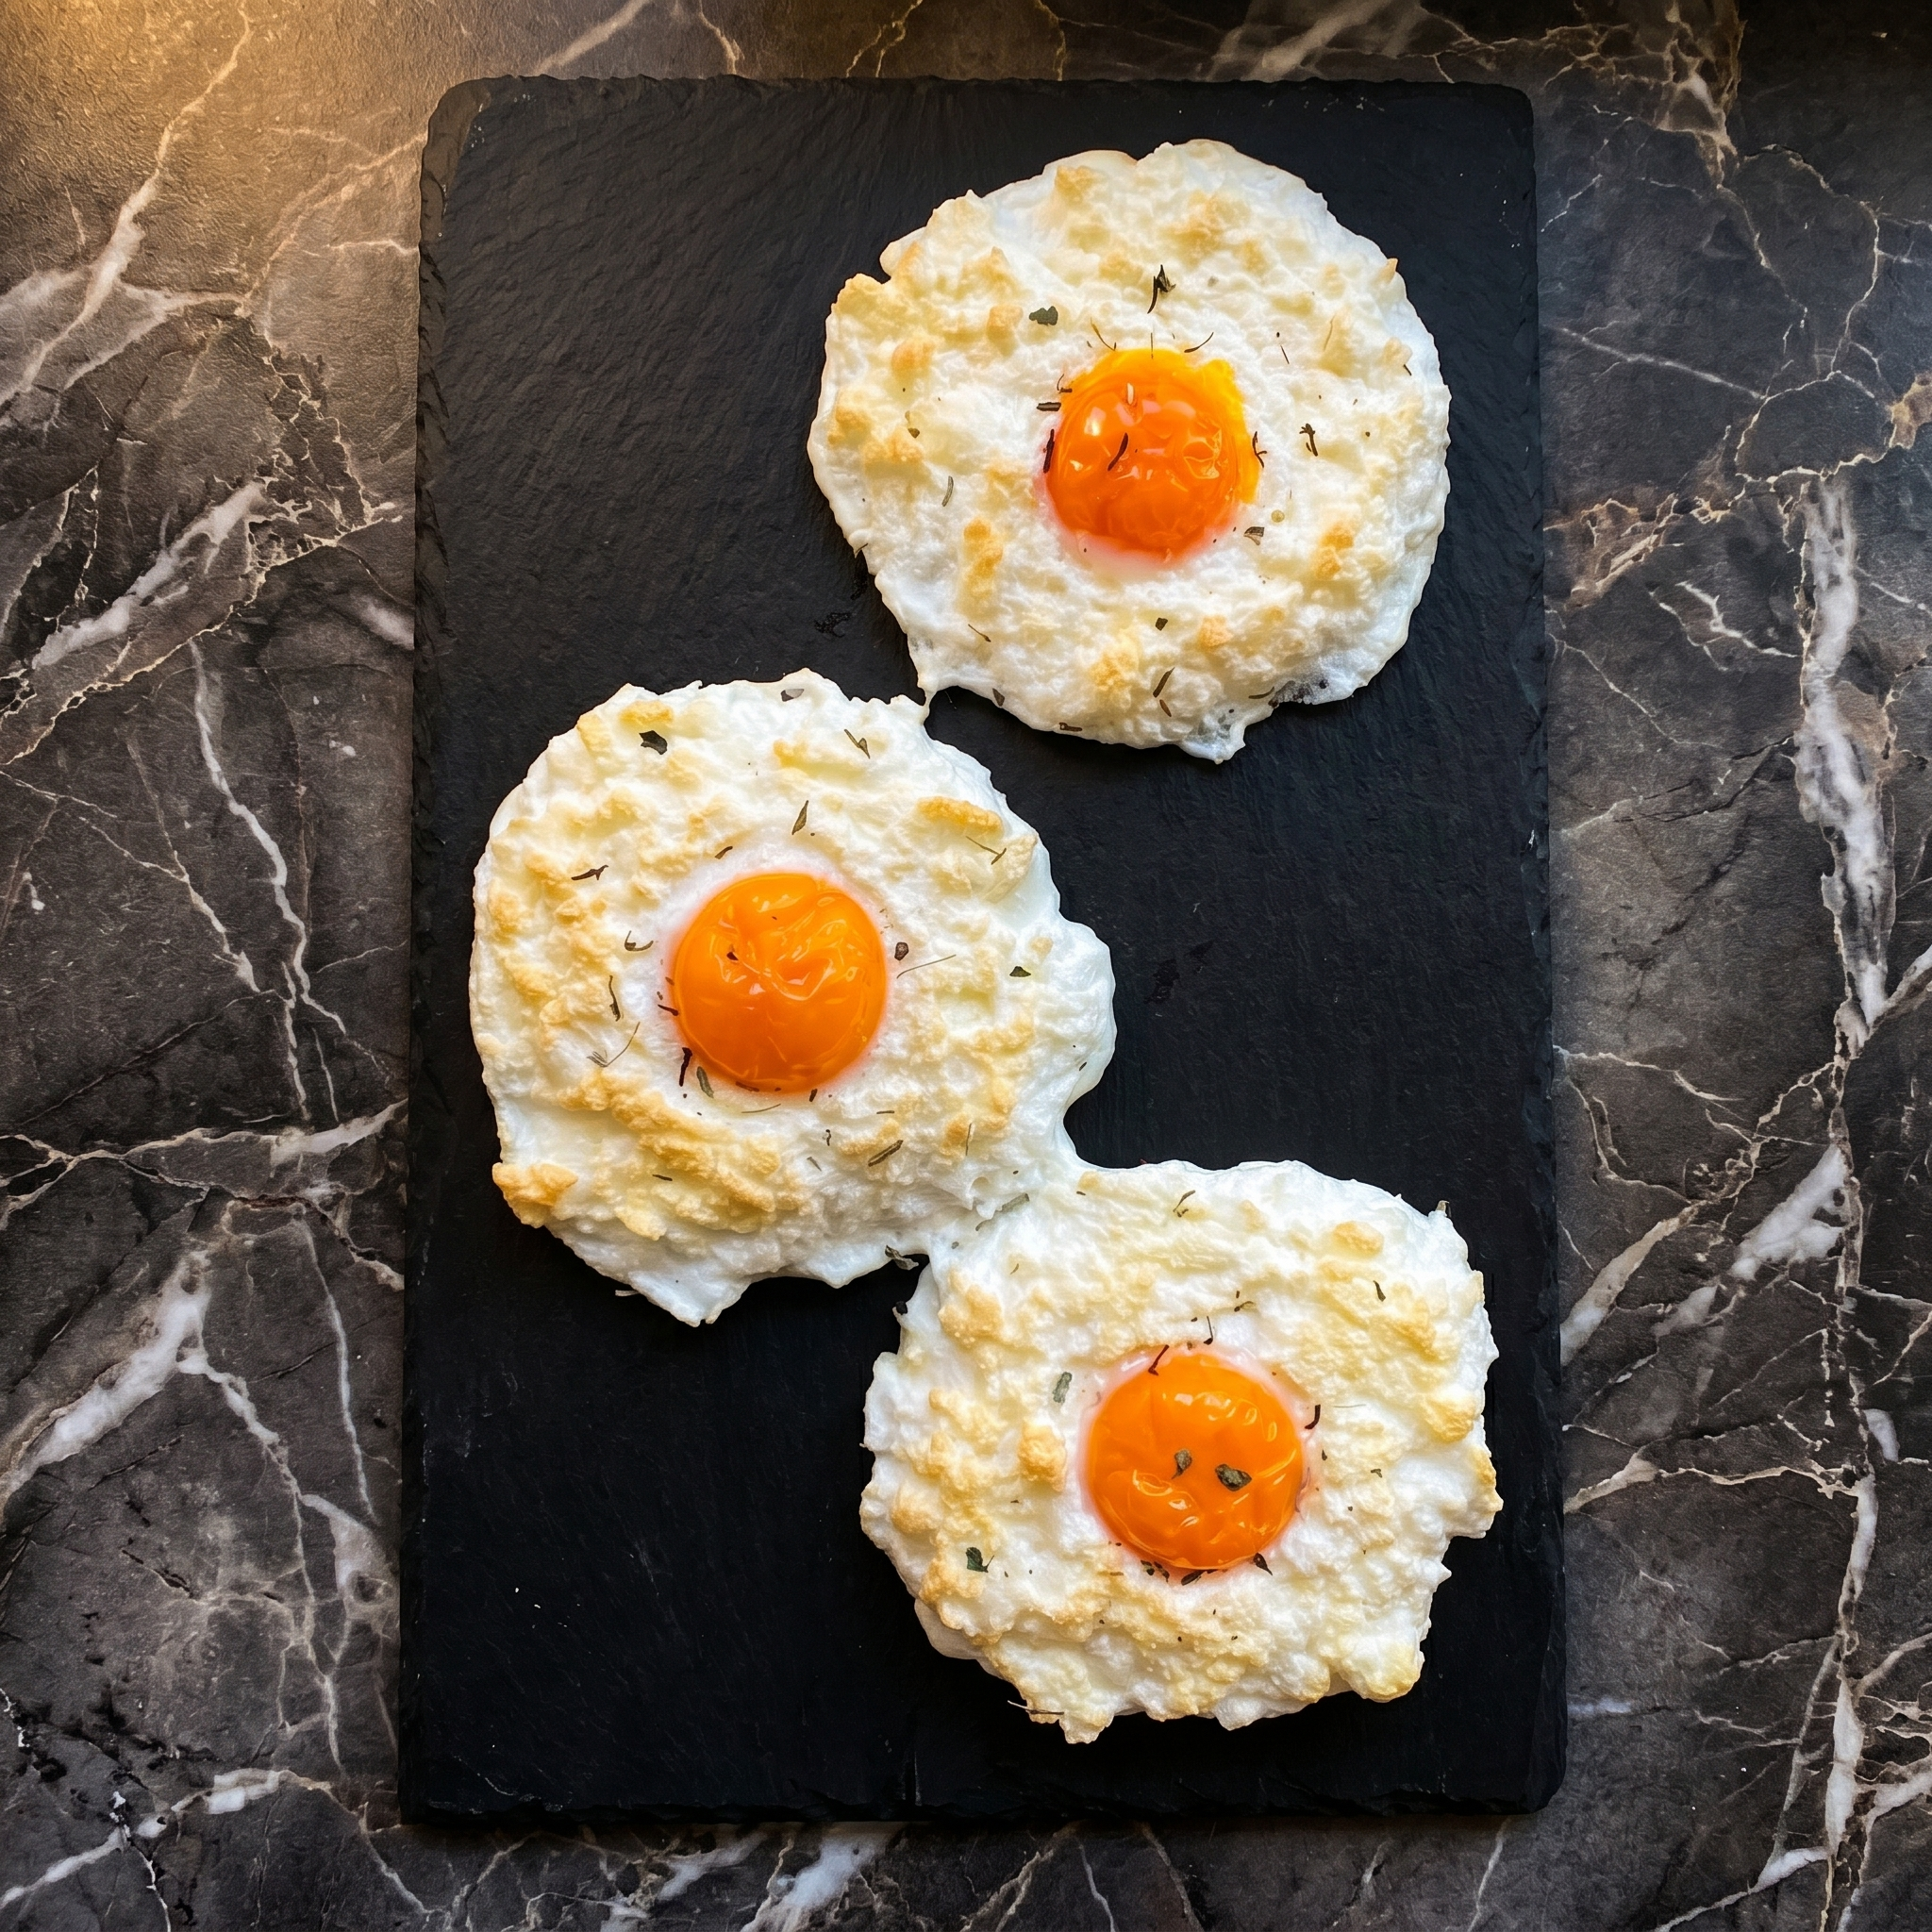
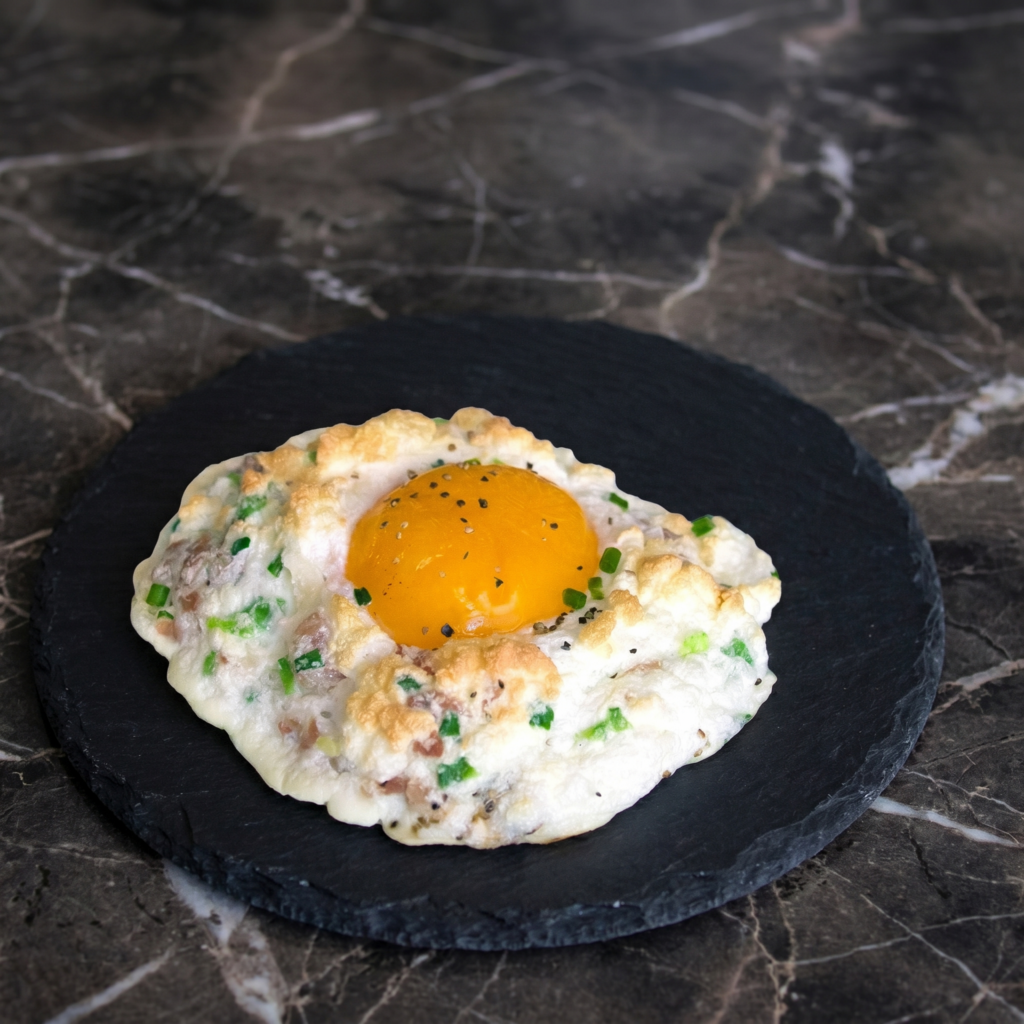
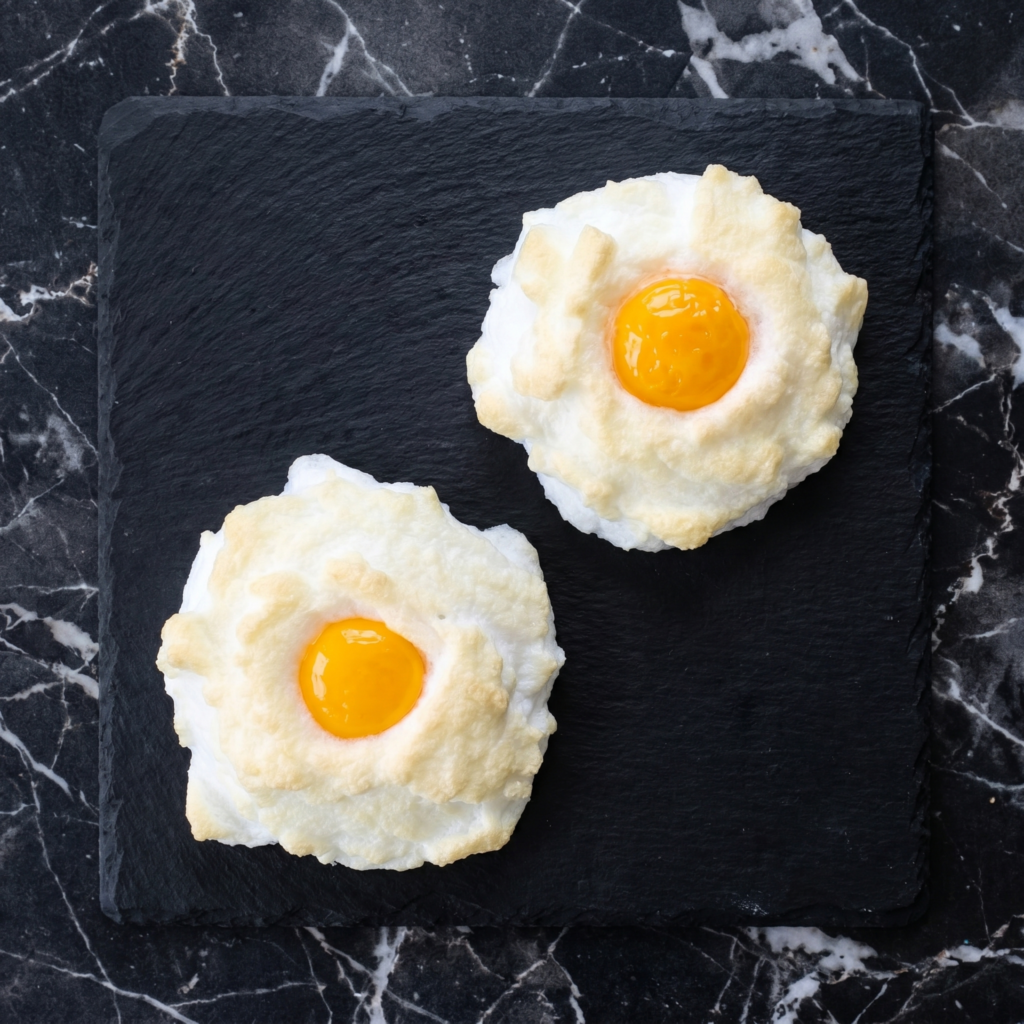
Cloud eggs look like a fancy brunch trick, but they’re shockingly simple. Whip the whites until stiff, pile them into fluffy clouds, bake for a few minutes, then drop the yolk right into its cozy nest. The result? A dramatic, Instagram-worthy breakfast that tastes as good as it looks.
The texture is magic: crispy and golden on the outside, soft and marshmallow-like inside, with a warm, runny yolk waiting to be popped. No special equipment needed beyond a whisk or hand mixer.
Ingredients
Serves 2.
4 large eggs, separated
¼ teaspoon salt
⅛ teaspoon black pepper
2 tablespoons grated Parmesan or shredded cheddar (optional)
Pinch of paprika or chives, for garnish
Step-by-Step Instructions
Step 1: Preheat & Prep
Preheat oven to 450°F (230°C). Line a baking sheet with parchment paper.
Separate egg whites from yolks carefully. Keep each yolk intact in its own small bowl.
Step 2: Whip the Whites
Add salt to egg whites. Whip with a mixer (or whisk vigorously) until stiff peaks form. The whites should hold their shape when you lift the beater.
If using cheese, gently fold it in now.
Step 3: Shape the Clouds
Scoop the whipped whites onto the baking sheet, forming 4 mounds. Create a shallow well in the center of each with the back of a spoon.
Bake for 3 minutes until the clouds just start to turn golden.
Step 4: Add the Yolks
Remove from oven. Gently slip one egg yolk into each well.
Return to oven and bake for 3 more minutes for runny yolks, or 4-5 minutes for firmer.
Step 5: Serve Immediately
Sprinkle with paprika or chives. Eat right away—these deflate quickly.
No. Cloud eggs are best eaten immediately. They deflate and become rubbery as they cool. If you have leftovers, chop them up and toss into a salad or scramble into fried rice—but fresh is truly the only way to experience the magic.
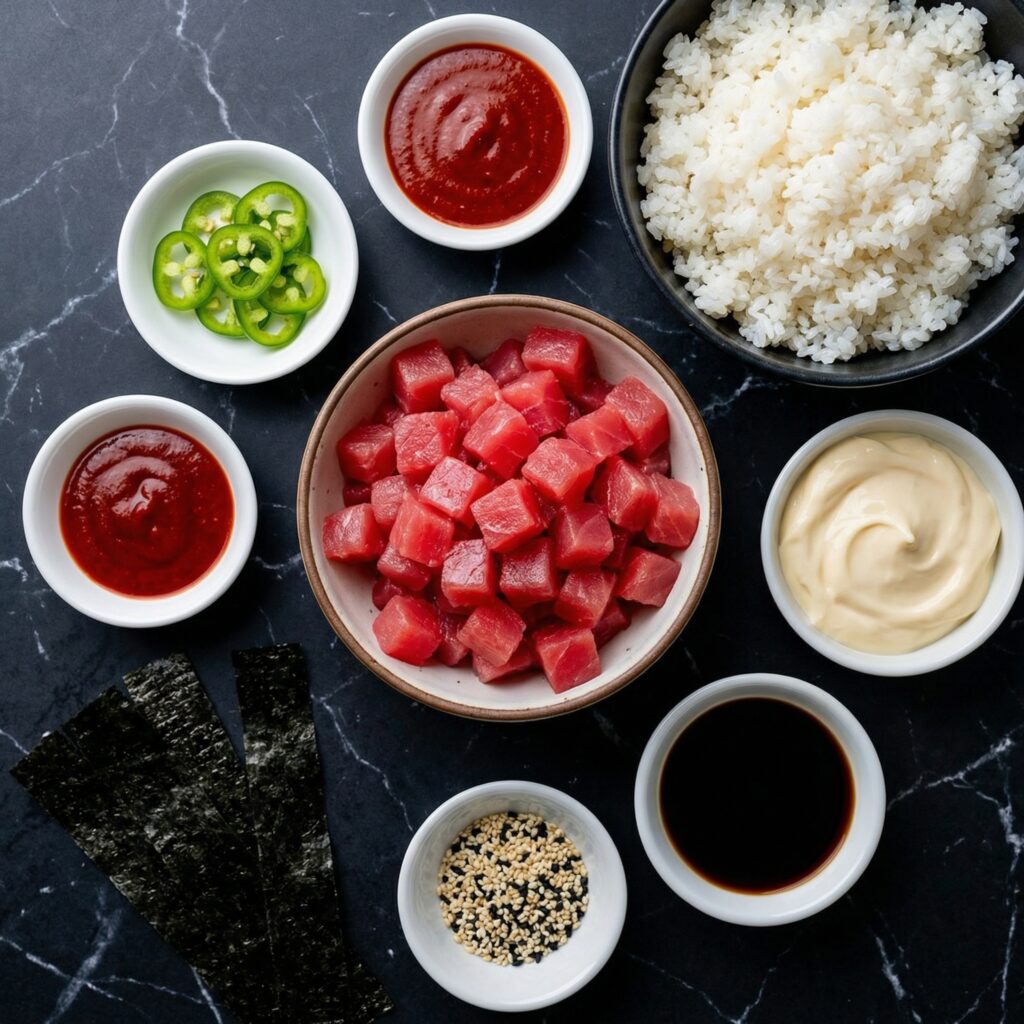
If you’ve ever ordered Spicy Tuna Crispy Rice at a sushi bar, you know the magic: golden, crunchy rice squares topped with cool, creamy, spicy tuna and finished with a pop of jalapeño. It’s the perfect contrast of textures—crispy and tender, spicy and refreshing, rich yet balanced.
The good news?
You don’t need a restaurant kitchen to make it. With a few key techniques and fresh ingredients, you can recreate this crowd-pleasing appetizer right at home.
Let’s break it down step by step so you can achieve that irresistible crunch and bold flavor.
Place the sushi rice in a bowl and rinse under cold water, gently swirling with your hand. Drain and repeat until the water runs mostly clear. This removes excess starch and ensures the rice isn’t gummy.
Proper rinsing is essential for achieving distinct grains that hold together without becoming mushy.
Step 2: Cook the Rice
Combine the rinsed rice and water in a pot or rice cooker. If using the stovetop, bring to a boil, then reduce heat to low, cover, and simmer for 15 minutes. Remove from heat and let sit covered for another 10 minutes to steam.
Avoid lifting the lid during cooking, as steam is crucial for perfect texture.
Step 3: Season the Rice
While the rice rests, combine rice vinegar, sugar, and salt in a small bowl. Stir until dissolved.
Transfer the cooked rice to a large bowl. Gently fold in the vinegar mixture using a spatula, slicing and lifting the rice rather than stirring aggressively. This keeps the grains intact.
Allow the rice to cool to room temperature.
Step 4: Shape and Chill
Line a baking dish (about 8×8 inches) with plastic wrap. Press the seasoned rice evenly into the dish, about ¾ to 1 inch thick. Use damp hands or the back of a spatula to press it firmly and evenly.
Cover and refrigerate for at least 2 hours, or until fully chilled and firm. This step is key—cold rice holds its shape when frying.
Step 5: Prepare the Spicy Tuna
In a mixing bowl, combine the finely diced sushi-grade tuna, mayonnaise, sriracha, sesame oil, soy sauce, and green onion.
Stir gently to combine. Taste and adjust spice level as desired. Refrigerate the mixture until ready to use.
Keeping the tuna chilled maintains freshness and food safety.
Step 6: Cut the Rice
Once the rice is firm, remove it from the pan using the plastic wrap. Place it on a cutting board.
Using a sharp knife (wipe it clean between cuts), slice the rice into small rectangles or squares—about 2 by 1 inch each. Aim for uniform pieces to ensure even frying.
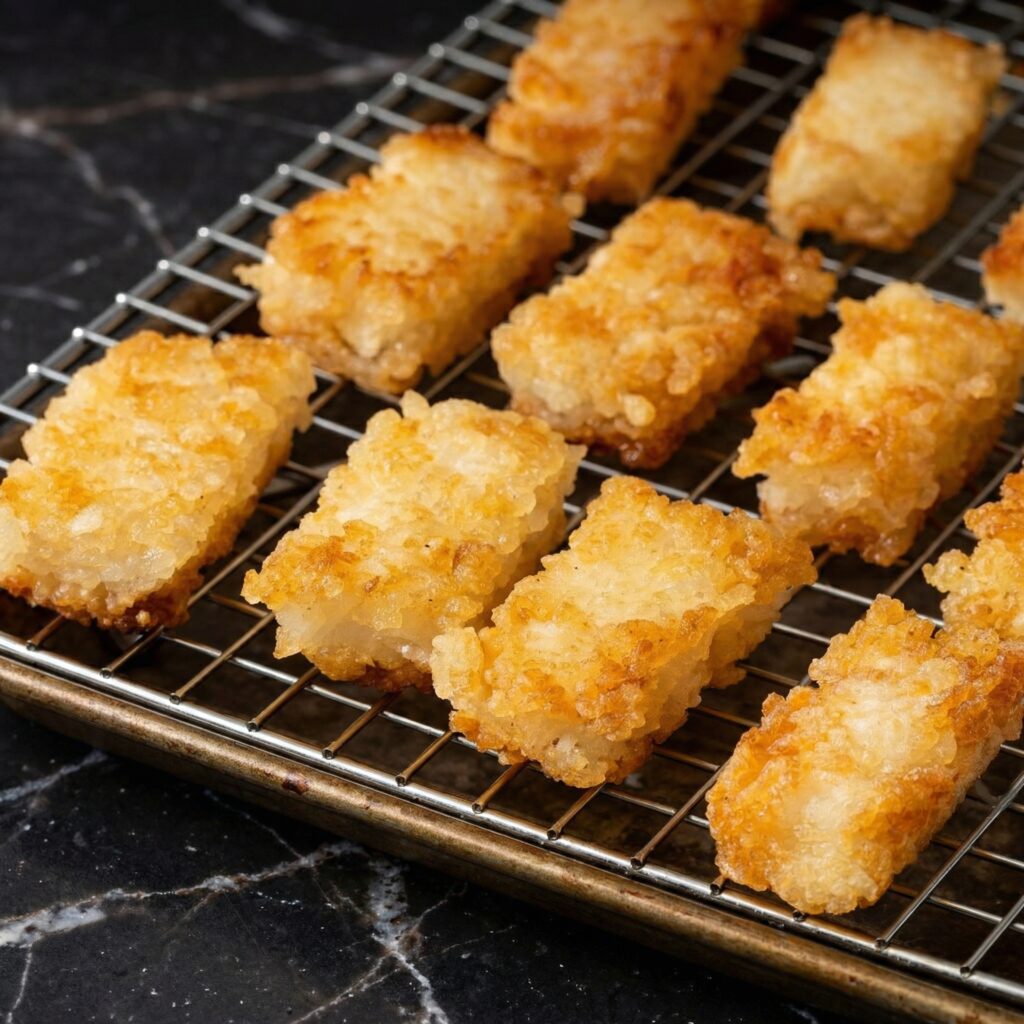
Step 7: Fry the Rice
Pour about ½ inch of neutral oil into a heavy skillet and heat over medium-high. The oil is ready when a small piece of rice sizzles immediately upon contact.
Working in batches, carefully place the rice pieces into the hot oil. Fry for about 2–3 minutes per side until deeply golden and crispy.
Use tongs or a spatula to flip gently. Once done, transfer to a paper towel-lined plate to drain excess oil.
The exterior should be crisp and golden, while the inside remains tender.
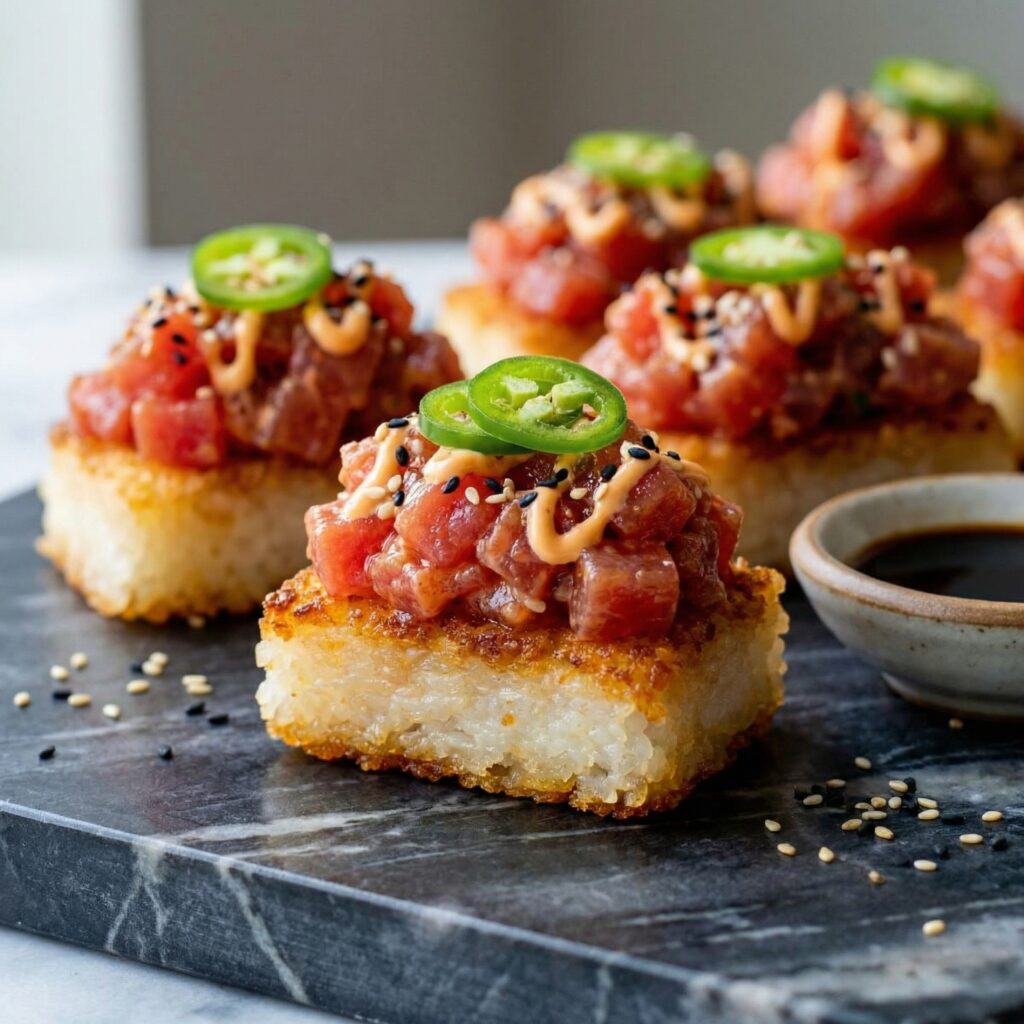
Step 8: Assemble the Crispy Rice
Allow the rice to cool slightly so it stays crisp but isn’t too hot.
Top each crispy rice square with a generous spoonful of spicy tuna. Gently press the tuna onto the rice so it adheres.
Add a thin slice of jalapeño on top, sprinkle with sesame seeds, and garnish with extra green onion if desired.
For extra indulgence, drizzle with additional spicy mayo.
Step 9: Serve Immediately
Spicy Tuna Crispy Rice is best served fresh, while the rice is still crisp and warm. Arrange on a platter and serve as an appetizer or party bite.
The contrast between warm, crunchy rice and cool, spicy tuna is what makes this dish unforgettable.
Pro Tips for Success
Use sushi-grade tuna from a trusted source. Freshness is critical.
Chill the rice thoroughly before cutting to prevent crumbling.
Don’t overcrowd the pan when frying; this keeps the rice crisp.
Maintain oil temperature—too low and the rice absorbs oil; too high and it burns.
Flavor Variations
Add finely diced avocado to the tuna mixture for extra creaminess.
Mix in a touch of chili oil for deeper heat.
Substitute spicy salmon for a twist.
Top with a small dollop of wasabi or a drizzle of eel sauce for added complexity.
Why This Recipe Works
Short-grain sushi rice provides the ideal sticky texture for shaping and frying. Pressing and chilling it creates a firm structure that crisps beautifully in hot oil. The spicy tuna mixture balances creamy, salty, and spicy notes, while jalapeño adds freshness and bite.
Each element complements the others—crunch meets creaminess, heat meets coolness, and richness meets brightness.
Spicy Tuna Crispy Rice is proof that texture can elevate a simple dish into something extraordinary.
With a little preparation and attention to detail, you can recreate this sushi-bar favorite in your own kitchen.
Whether for entertaining or indulging in a restaurant-style treat at home, this dish delivers bold flavor and irresistible crunch in every bite.
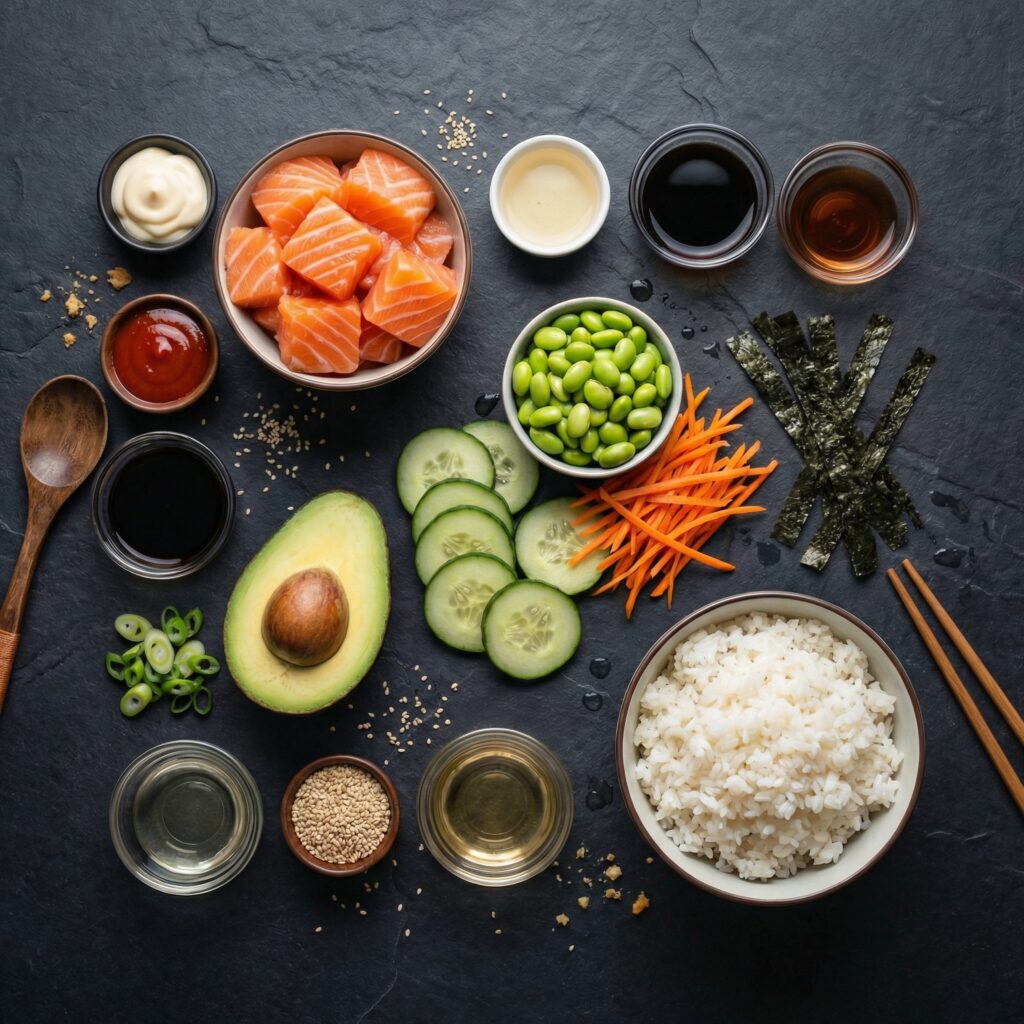
Sushi doesn’t have to be intimidating—or require a trip to your favorite Japanese restaurant. With Easy Salmon “Sushi” Bowls, you get all the bright, fresh flavors of sushi in a simple, deconstructed format.
These bowls are perfect for weeknight dinners, meal prep, or even a casual gathering with friends. Juicy salmon, tender rice, crisp veggies, and a punchy sauce come together to create a satisfying, customizable dish that’s as fun to make as it is to eat.
Let’s dive into this step-by-step guide so you can assemble vibrant, restaurant-quality bowls at home.
Ingredients
For the base:
2 cups sushi rice
2 ¼ cups water
3 tablespoons rice vinegar
1 tablespoon sugar
1 teaspoon salt
For the salmon:
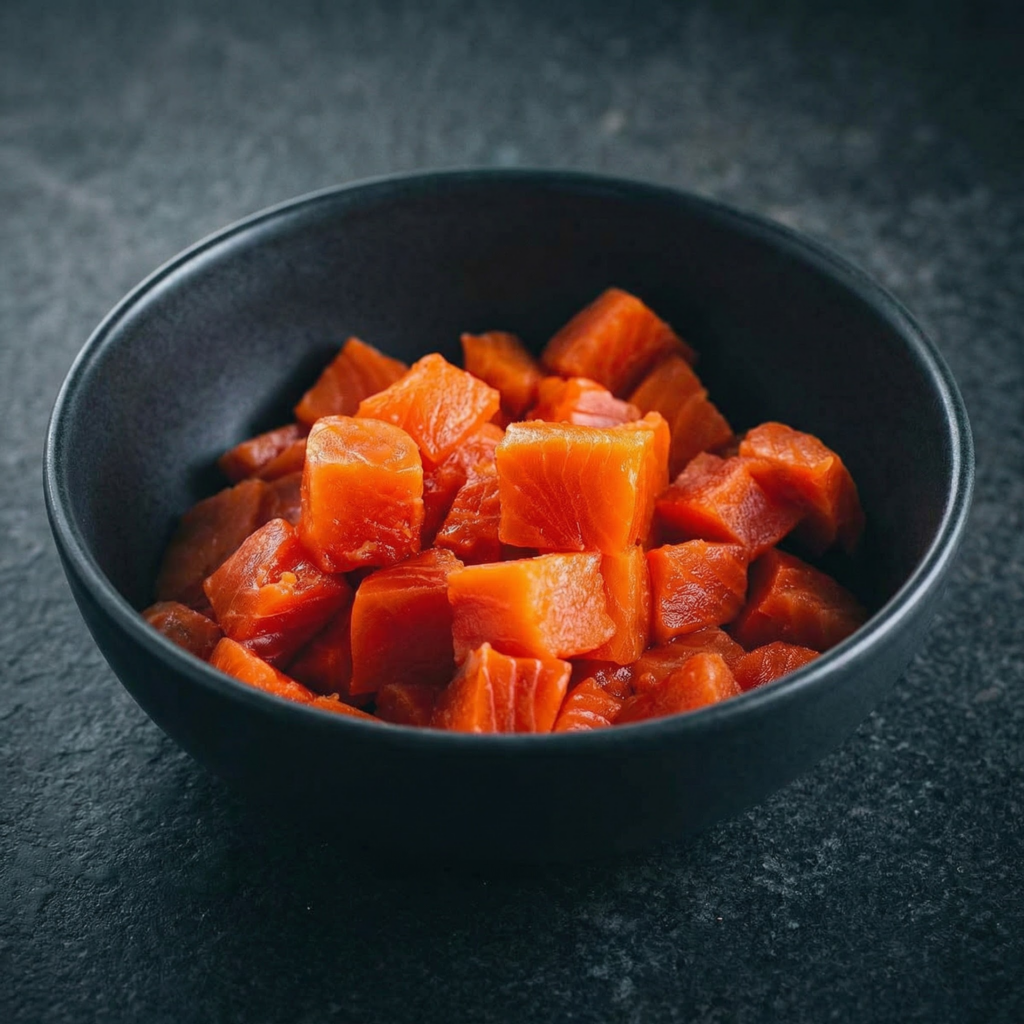
8–10 ounces sushi-grade salmon, cut into cubes
1 teaspoon sesame oil
1–2 teaspoons soy sauce
½ teaspoon sriracha or chili paste (optional)
For the vegetables and toppings:
1 small cucumber, thinly sliced or julienned
1 ripe avocado, sliced
1 medium carrot, shredded or julienned
2–3 radishes, thinly sliced
1 sheet nori, cut into thin strips (optional)
1 tablespoon sesame seeds
Green onions, sliced, for garnish
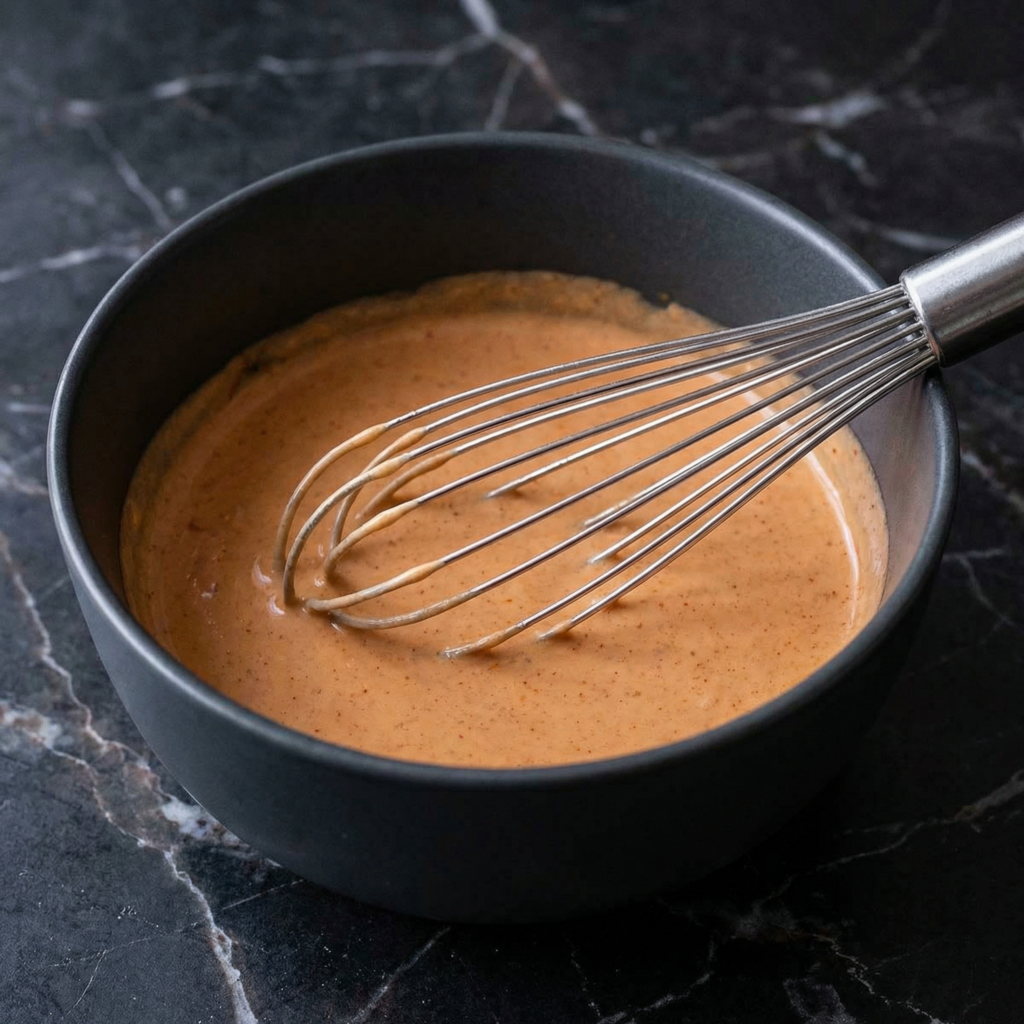
For the sauce:
3 tablespoons mayonnaise (Japanese mayo preferred)
1 teaspoon sriracha (or more to taste)
1 teaspoon soy sauce
1 teaspoon lime or lemon juice
Step 1: Cook the Sushi Rice
Rinse the rice under cold water until the water runs mostly clear. This removes excess starch, giving you rice that’s tender but not sticky.
Combine the rinsed rice and water in a rice cooker or saucepan. If using a pot, bring to a boil, then reduce to low, cover, and simmer for 15 minutes. Remove from heat and let it sit, covered, for another 10 minutes to steam.
Step 2: Season the Rice
In a small bowl, mix rice vinegar, sugar, and salt until dissolved. Transfer the cooked rice to a large bowl and fold in the vinegar mixture gently.
Avoid stirring aggressively to keep the grains intact.
Allow the rice to cool to slightly warm or room temperature.
Step 3: Prepare the Salmon
Cut the sushi-grade salmon into bite-sized cubes. In a small bowl, combine sesame oil, soy sauce, and sriracha (if using).
Toss the salmon cubes gently in the marinade and set aside for 5–10 minutes. This adds flavor without cooking the fish, maintaining its silky texture.
Step 4: Prepare the Sauce
In another small bowl, mix mayonnaise, sriracha, soy sauce, and lime juice.
Adjust the spice level to your liking. The sauce will provide a creamy, tangy kick that complements the salmon perfectly.
Step 5: Prep the Veggies
While the rice is cooling and the salmon is marinating, prep the vegetables. Slice cucumber, radishes, and carrot.
Cut the avocado just before serving to prevent browning. Arrange them neatly for easy assembly.
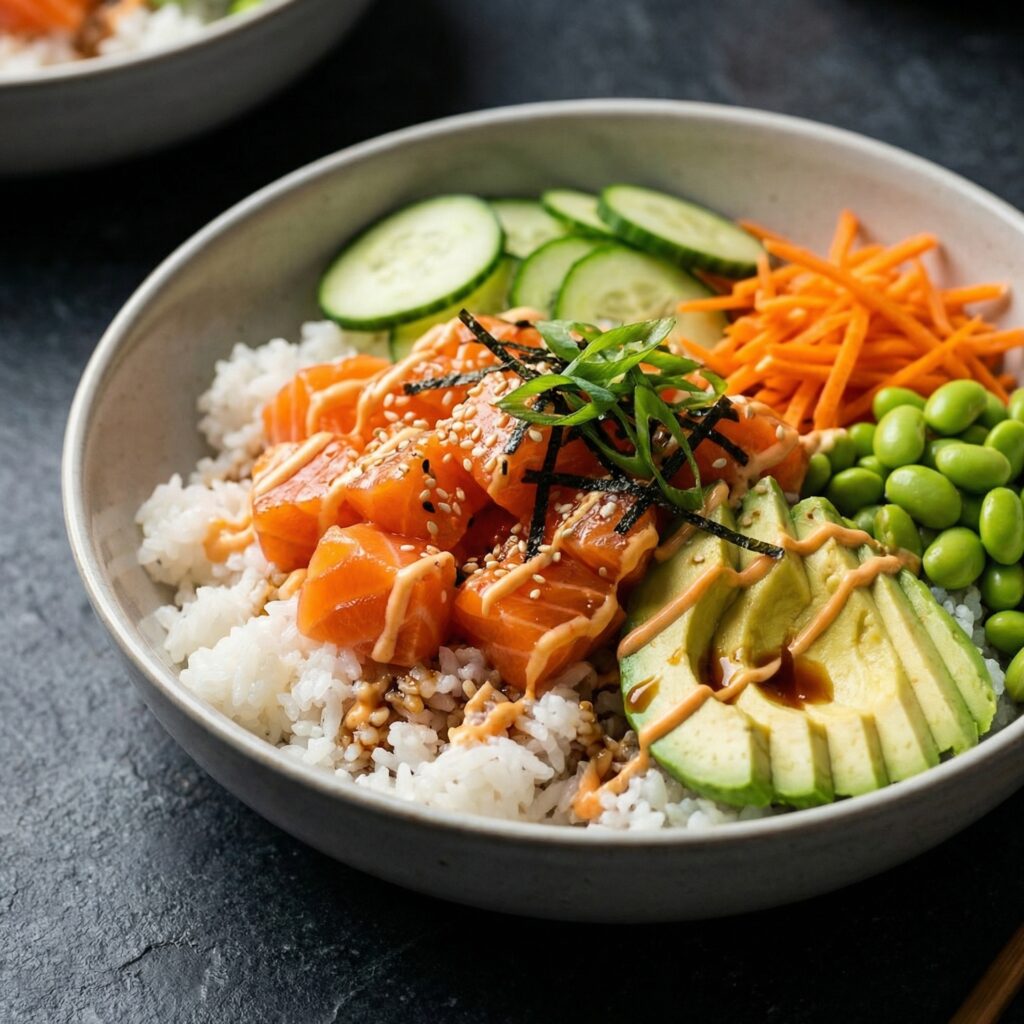
Step 6: Assemble the Bowls
Start by dividing the sushi rice evenly among serving bowls. Arrange the salmon cubes over the rice, then add cucumber, carrot, avocado, radishes, and nori strips on top.
Drizzle with the prepared spicy mayo sauce.
Finish by sprinkling sesame seeds and sliced green onions over the top for flavor and color.
Step 7: Optional Additions
Pickled ginger or kimchi for a tangy bite
Masago (smelt roe) or tobiko for a crunchy, salty pop
Edamame beans for extra protein and texture
A drizzle of unagi or soy glaze for sweetness
Step 8: Serve Immediately
These bowls are best enjoyed fresh to preserve the salmon’s silky texture and the crispness of the vegetables.
The rice should be slightly warm or at room temperature—never hot, as that can partially cook the raw salmon.
Tips for Perfect Sushi Bowls
Use sushi-grade salmon: Freshness is key. Never use frozen or raw salmon not labeled safe for raw consumption.
Rinse rice properly: This prevents a mushy base.
Balance flavors: Adjust the spicy mayo and soy sauce to your taste.
Prep ingredients ahead: You can cook the rice in advance and prep the vegetables for faster assembly.
Customize toppings: Don’t be afraid to experiment with vegetables, pickles, or garnishes.
Why This Dish Works
The combination of lightly marinated salmon, perfectly seasoned rice, and fresh, crisp vegetables creates a dish with varied textures and flavors.
The spicy mayo adds richness, while the citrus and soy elements bring brightness and umami. Each bite balances creamy, crunchy, savory, and tangy notes—just like sushi, but in an approachable, customizable bowl form.
Meal Prep and Storage
These bowls are excellent for meal prep, but assemble them fresh for best results. Store cooked rice separately in an airtight container in the fridge for up to 3 days.
Keep the salmon chilled and prepare veggies in advance.
Assemble bowls right before eating to maintain freshness and texture.
Variations
Shrimp Sushi Bowl: Swap salmon for cooked or raw shrimp.
Vegetarian Option: Replace salmon with marinated tofu or avocado for a plant-based bowl.
Spicy Crunch: Add tempura flakes or crispy onions on top for extra texture.
Citrus Twist: Add mandarin orange slices or a squeeze of lemon for brightness.
The Takeaway
Easy Salmon “Sushi” Bowls bring all the vibrant flavors of sushi into a simple, home-cooked meal.
They’re perfect for anyone who loves sushi but wants a fast, flexible option without rolling and cutting nigiri. With tender salmon, crisp vegetables, perfectly seasoned rice, and a spicy, tangy sauce, this bowl is balanced, flavorful, and visually stunning.
Whether for a weeknight dinner, a lunch meal prep, or a weekend treat, these bowls are satisfying, wholesome, and guaranteed to impress. Once you try them, you’ll realize how simple it is to recreate restaurant-quality sushi right in your own kitchen—without the hassle.