Tag: game day food

  • Pretzel Hot Dogs (Soft Pretzel + Juicy Hot Dog = Pure Magic)

    Pretzel Hot Dogs (Soft Pretzel + Juicy Hot Dog = Pure Magic)

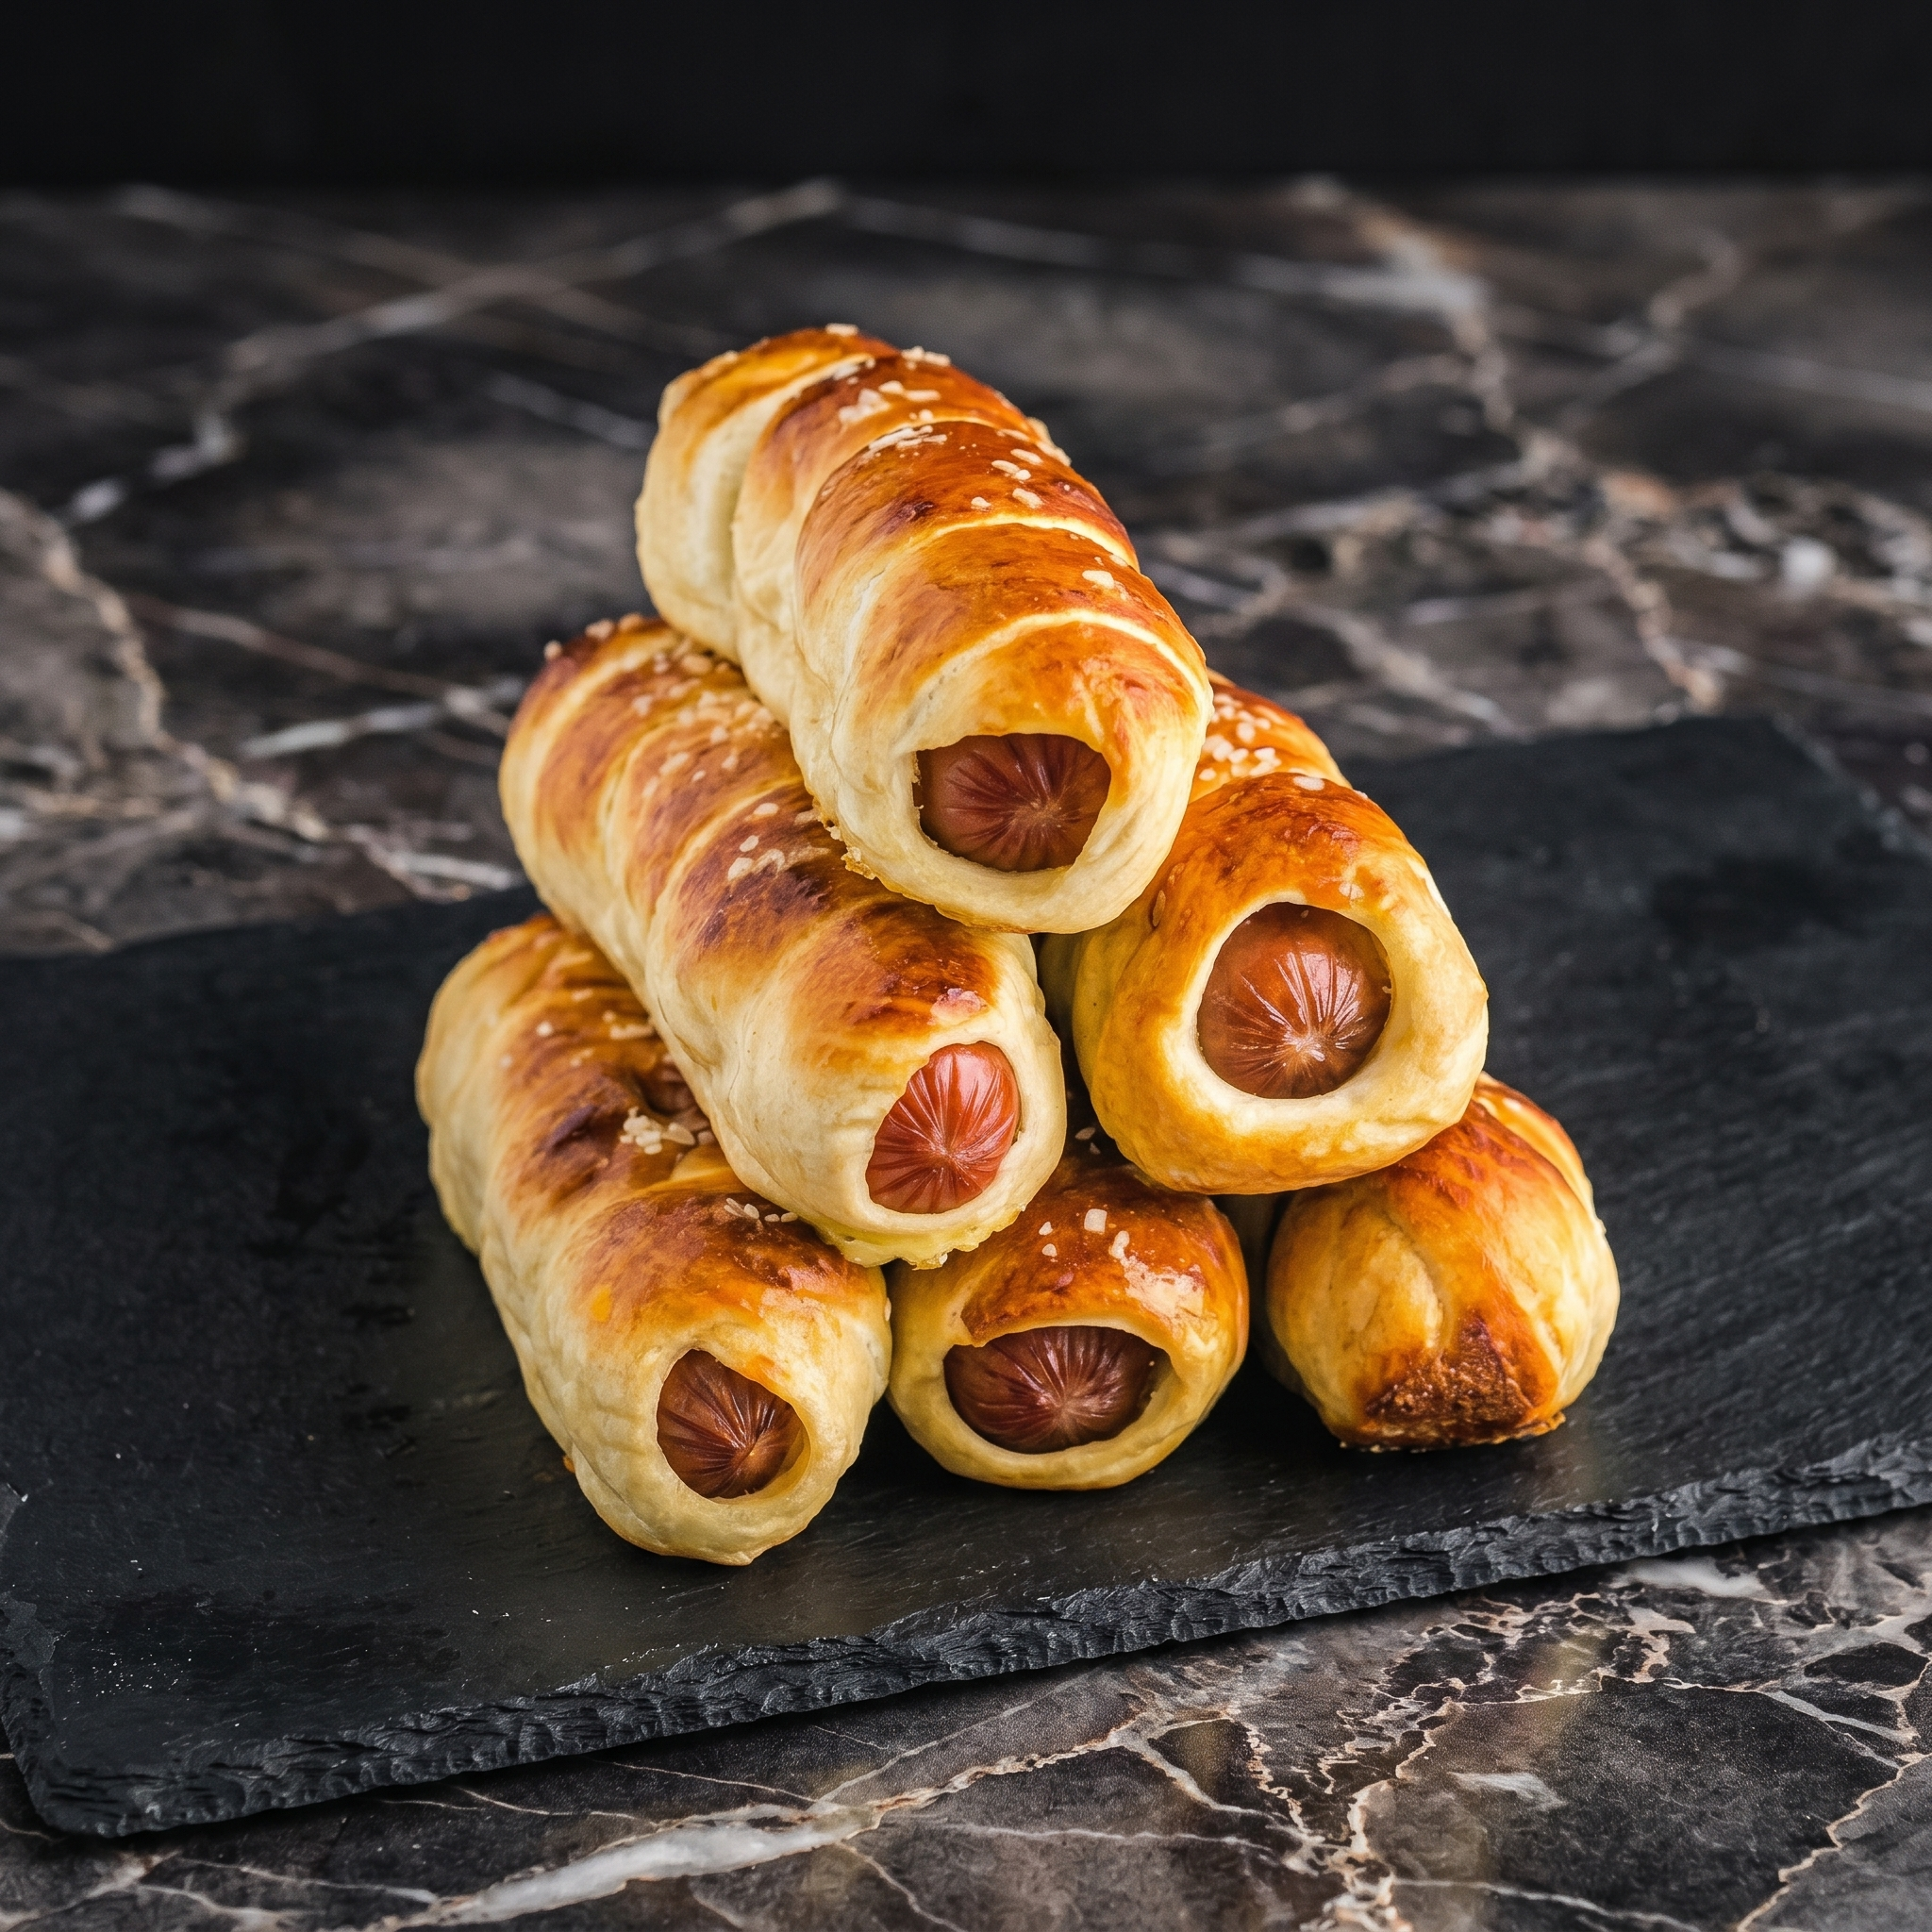
    Pretzel dogs are the best of both worlds. Soft, chewy, golden pretzel dough wrapped around a juicy hot dog. Brush with butter. Sprinkle with salt. Dip in mustard or cheese sauce. Pure magic.
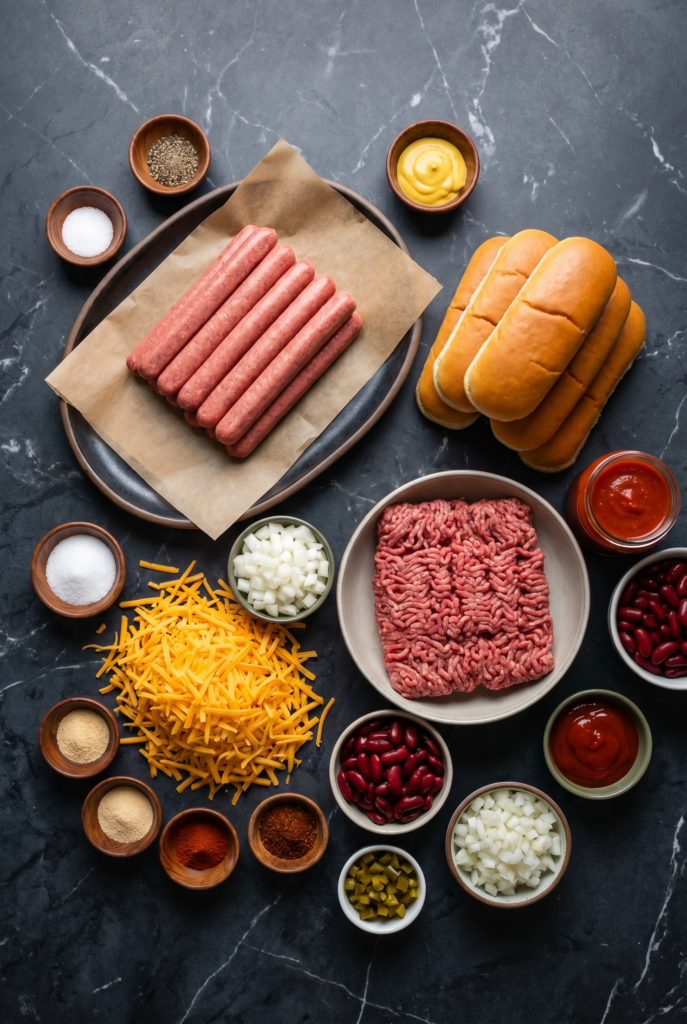
    Ingredients

    Makes 8 pretzel hot dogs.

    For the Dough:

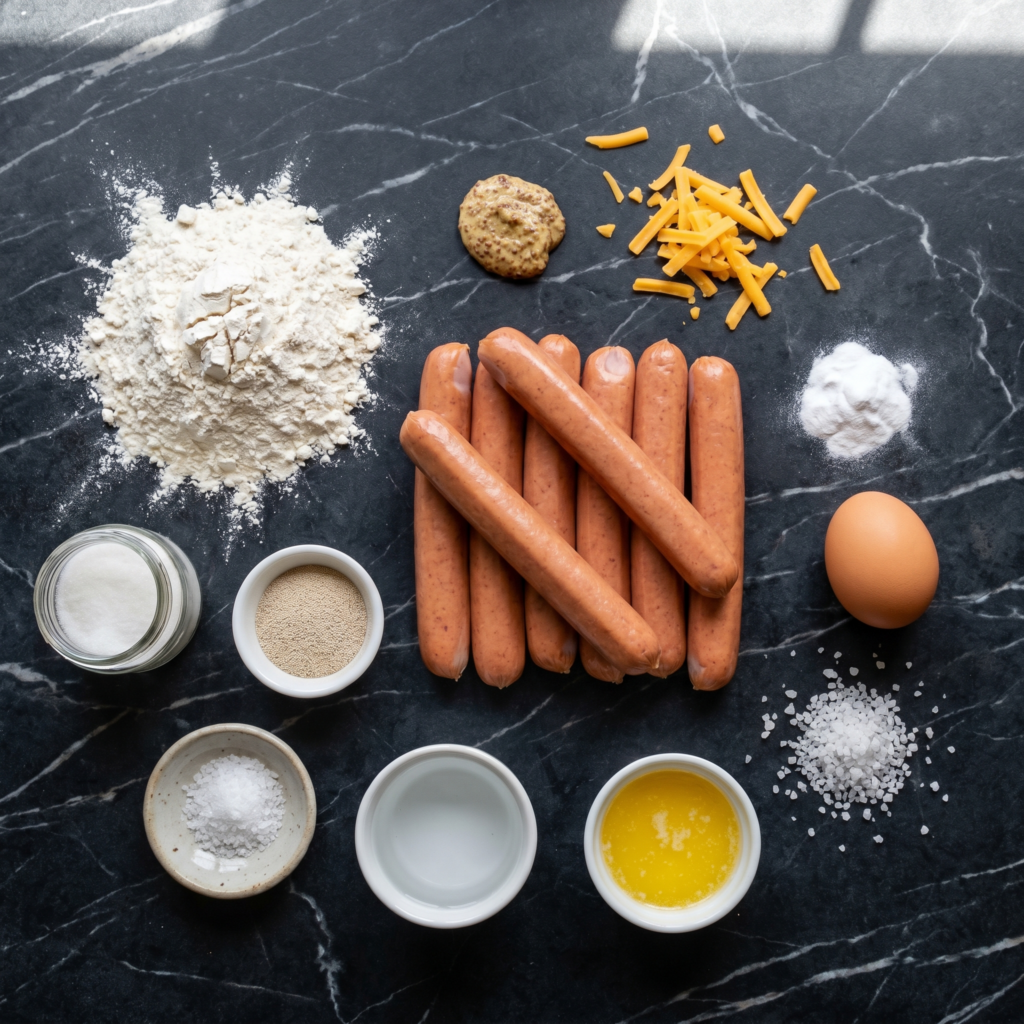
    • 1½ cups (360ml) warm water (110°F / 45°C)
    • 1 packet (2¼ tsp) instant yeast
    • 1 tbsp brown sugar
    • 3½ cups (440g) all-purpose flour
    • 1 tsp salt
    • 2 tbsp melted butter

    For the Baking Soda Bath:

    • 8 cups water
    • ½ cup baking soda

    For Assembly:

    • 8 hot dogs
    • 1 egg yolk + 1 tbsp water (egg wash)
    • Flaky sea salt
    • ¼ cup melted butter (for brushing after baking)

    For Serving:

    • Mustard or cheese sauce

    Step-by-Step Instructions

    Step 1: Make Dough

    1. Mix warm water, yeast, and brown sugar. Let sit 5 minutes until foamy.
    2. Add flour, salt, and melted butter. Knead 5-7 minutes until smooth. Cover and rise 1 hour until doubled.

    Step 2: Preheat & Prep Bath

    1. Preheat oven to 425°F (220°C). Line baking sheet with parchment.
    2. Bring 8 cups water and baking soda to a gentle boil.

    Step 3: Shape Dogs

    1. Punch down dough. Divide into 8 equal pieces. Roll each into a 12-inch rope.
    2. Wrap each rope around a hot dog, spiraling from top to bottom. Pinch ends to seal.

    Step 4: Baking Soda Bath

    1. Gently drop each pretzel dog into boiling water for 30 seconds. Remove with slotted spoon.

    Step 5: Top & Bake

    1. Place on baking sheet. Brush with egg wash. Sprinkle with flaky salt.
    2. Bake 12-15 minutes until deep golden brown.

    Step 6: Butter & Serve

    1. Brush warm pretzel dogs with melted butter. Serve with mustard or cheese sauce.

    Summary

    Prep Time: 20 min + rise | Cook Time: 15 min | Total: 35 min + rise

    Yield: 8 pretzel hot dogs | Difficulty: Medium

    Storage Notes

    Best fresh. Fridge 3 days. Reheat in oven or air fryer at 375°F for 8-10 minutes. Never microwave — pretzel gets chewy. Freeze baked pretzel dogs for 3 months. Reheat from frozen.

  • Chili Cheese Dogs: Messy. Cheesy. Perfect.

    Chili Cheese Dogs: Messy. Cheesy. Perfect.

    Some foods are meant to be messy. Chili cheese dogs are the king of messy.

    Grilled hot dog. Smoky, beefy chili. A mountain of shredded cheddar. Diced onion. That’s it. 20 minutes. Eat with your hands. Lick your fingers. Zero regrets.

    Ingredients

    Serves 4.

    • 4 hot dogs (beef recommended)
    • 4 hot dog buns
    • 1 (15 oz) can chili (no beans or with beans—your call)
    • 1 cup shredded cheddar cheese
    • ¼ cup diced white onion (optional)
    • Yellow mustard (optional)
    • Pickled jalapeños (optional)

    Quick Homemade Chili (Optional):

    • ½ lb ground beef
    • 1 (8 oz) can tomato sauce
    • 1 tbsp chili powder
    • ½ tsp cumin

    Step-by-Step Instructions

    Step 1: Heat the Chili

    1. In a small pot, heat chili over medium heat until bubbly.
    2. If making quick homemade: brown ground beef, drain, add tomato sauce, chili powder, and cumin. Simmer 5 minutes.

    Step 2: Cook the Hot Dogs

    1. Grill, pan-fry, or boil hot dogs until heated through.
    2. Steam or toast buns lightly.

    Step 3: Assemble

    1. Place hot dog in bun. Squeeze mustard if using.
    2. Ladle chili generously over the dog.
    3. Pile on cheddar cheese. Top with onion and jalapeños.

    Step 4: Serve

    1. Serve immediately with a fork (and napkins. so many napkins).

    Summary

    Prep Time: 5 minutes | Cook Time: 10-15 minutes | Total Time: 15-20 minutes

    Yield: 4 chili cheese dogs

    Difficulty: Easy

    Storage Notes

    Best Fresh:

    Assemble and eat immediately. Nobody wants a soggy chili cheese dog.

    Leftover Chili:

    Store chili in fridge for 4 days or freeze for 3 months. Reheat and make fresh dogs.

    Pro Tip:

    Toast the buns. A little crunch prevents soggy bottom syndrome.

  • Pepperoni Pizza Rolls (Better Than the Frozen Ones, Promise)

    Pepperoni Pizza Rolls (Better Than the Frozen Ones, Promise)

    Let’s be honest: frozen pizza rolls are fine. These are unforgettable.

    Real dough. Real cheese. Real pepperoni. Rolled up, sliced into pinwheels, and baked until golden. They’re crispy, gooey, and dangerously snackable. Make a double batch. Trust me.

    Ingredients

    Makes 20-24 pizza rolls.

    • 1 lb (450g) pizza dough (store-bought or homemade)
    • ½ cup marinara or pizza sauce (plus more for dipping)
    • 1½ cups shredded mozzarella cheese
    • ½ cup grated Parmesan cheese
    • 4 oz (120g) pepperoni, finely chopped
    • 1 teaspoon Italian seasoning
    • 1 egg, beaten (for egg wash)
    • Garlic butter for brushing (optional)

    Step-by-Step Instructions

    Step 1: Preheat and Prep

    1. Preheat oven to 400°F (200°C). Line a baking sheet with parchment paper.

    Step 2: Roll the Dough

    1. On a floured surface, roll dough into a 12×10-inch rectangle (about ¼-inch thick).

    Step 3: Add Fillings

    1. Spread marinara sauce evenly over dough, leaving a 1-inch border.
    2. Sprinkle with mozzarella, Parmesan, chopped pepperoni, and Italian seasoning.

    Step 4: Roll and Slice

    1. Starting from the long edge, roll dough tightly into a log. Pinch the seam to seal.
    2. Using a serrated knife, slice into 1-inch rolls (about 20-24 pieces).

    Step 5: Bake

    1. Place rolls cut-side up on the baking sheet. Brush with beaten egg.
    2. Bake for 15-18 minutes until golden brown and bubbly.

    Step 6: Serve

    1. Brush with garlic butter if desired. Serve warm with marinara for dipping.

    Summary

    Prep Time: 15 minutes | Cook Time: 18 minutes | Total Time: 33 minutes

    Yield: 20-24 pizza rolls

    Difficulty: Easy

    Storage Notes

    Fridge: Keeps 4 days. Reheat in oven at 375°F for 5-7 minutes or air fryer at 350°F for 3-4 minutes.

    Freezer (baked): Freeze up to 3 months. Reheat from frozen at 375°F for 10-12 minutes.

    Freezer (unbaked): Freeze sliced rolls on a tray, then bag. Bake from frozen at 400°F for 20-22 minutes.

  • BBQ Pulled Pork Sliders (Big Flavor, Little Buns)

    BBQ Pulled Pork Sliders (Big Flavor, Little Buns)

    Some foods are meant for sharing. These BBQ pulled pork sliders are at the top of that list.

    Think tender, smoky pulled pork drenched in tangy BBQ sauce, piled onto buttery slider buns, and topped with a crisp, cool coleslaw for contrast. Your slow cooker does all the heavy lifting. You get all the credit. Perfect for game day, potlucks, or when you just want to eat seven tiny sandwiches in one sitting.

    Ingredients

    Makes 12 sliders.

    • 3 lbs (1.4 kg) pork shoulder (or pork butt)
    • 1 cup BBQ sauce (plus more for serving)
    • ½ cup chicken broth
    • 1 tablespoon smoked paprika
    • 1 tablespoon brown sugar
    • 1 teaspoon garlic powder
    • 1 teaspoon onion powder
    • 12 slider buns (brioche or potato)
    • 1 cup coleslaw mix (for topping)
    • Pickles (optional)

    Step-by-Step Instructions

    Step 1: Season the Pork

    1. Mix smoked paprika, brown sugar, garlic powder, and onion powder in a small bowl.
    2. Rub the spice mix all over the pork shoulder.

    Step 2: Slow Cook

    1. Place pork in the slow cooker. Add chicken broth.
    2. Cook on LOW for 8 hours or HIGH for 5 hours, until pork falls apart easily with a fork.

    Step 3: Shred and Sauce

    1. Remove pork and shred using two forks. Discard the fat.
    2. Return shredded pork to the slow cooker. Add BBQ sauce and stir to coat.
    3. Let sit for 10 minutes to soak up the flavor.

    Step 4: Toast the Buns

    1. Split slider buns and toast them lightly on a skillet or in the oven.

    Step 5: Assemble

    1. Place a generous pile of pulled pork on each bun bottom.
    2. Top with coleslaw mix and pickles (if using).
    3. Add a drizzle of extra BBQ sauce.
    4. Close with the bun top and secure with a toothpick.

    Summary

    Prep Time: 10 minutes | Cook Time: 8 hours (slow cooker) | Total Time: 8 hours 10 minutes

    Yield: 12 sliders

    Difficulty: Super Easy

    Storage Notes

    • Fridge: Pulled pork keeps for 4-5 days in an airtight container.
    • Freezer: Freezes beautifully for up to 3 months.
    • Reheat: Warm in a skillet or microwave with a splash of BBQ sauce.
    • Pro tip: Store pork separately from buns and slaw. Assemble fresh.
  • Bacon Wrapped Mozzarella Sticks (Cheesy, Meaty, Dangerous)

    Bacon Wrapped Mozzarella Sticks (Cheesy, Meaty, Dangerous)

    Mozzarella sticks are great. Bacon is great. So why has no one forced them to marry sooner? This is a three-ingredient miracle: string cheese, bacon, and your favorite marinara. Air fry or bake until the bacon is crispy and the cheese is melty. Prepare for addiction.

    Ingredients

    Makes 8 sticks (serves 2-4).

    • 8 mozzarella string cheese sticks
    • 8 slices thin-cut bacon
    • 1 cup marinara sauce, for dipping
    • Optional: Everything bagel seasoning or black pepper

    Step-by-Step Instructions

    Step 1: Prep the Cheese

    1. Remove string cheese from wrappers.
    2. If using, roll each stick in everything bagel seasoning or pepper.

    Step 2: Wrap With Bacon

    1. Wrap one slice of bacon around each cheese stick in a spiral, slightly overlapping.
    2. Tuck the end under the bacon to secure. No toothpicks needed.

    Step 3: Cook Until Crispy

    1. Air fryer method: Place sticks in a single layer. Cook at 380°F for 8-10 minutes until bacon is crispy.
    2. Oven method: Bake at 400°F on a wire rack over a baking sheet for 12-15 minutes.
    3. Pan method: Cook in a skillet over medium heat, turning often, for 8-10 minutes.

    Step 4: Cool Slightly

    1. Let rest for 2 minutes. The cheese will be lava-hot.

    Step 5: Serve With Marinara

    1. Warm marinara sauce in a small bowl.
    2. Dip and pull. Watch the cheese stretch to oblivion.

    Summary

    Prep Time: 5 minutes | Cook Time: 10 minutes | Total Time: 15 minutes

    Yield: 8 sticks

    Difficulty: Easy

    Storage Notes

    These are best fresh and hot. Leftovers can be refrigerated for 2 days. Reheat in an air fryer at 375°F for 3-4 minutes. Do not microwave (soggy bacon, exploded cheese). Uncooked bacon-wrapped sticks can be frozen for up to 1 month—cook from frozen, add 2-3 minutes.

  • Buffalo Chicken Tenders (So Crispy, So Saucy, So Gone)

    Buffalo Chicken Tenders (So Crispy, So Saucy, So Gone)

    Buffalo wings are great. But buffalo chicken tenders? Even better. All the spicy, buttery, tangy goodness, none of the messy bone-picking.

    These tenders come out ultra-crispy (even baked, not fried). Toss them in classic Frank’s + butter sauce, then serve with ranch or blue cheese. Game day, dinner night, or just a hungry Tuesday—these deliver.

    Ingredients

    Serves 4.

    • 1½ lbs (675g) chicken tenders (or boneless breasts cut into strips)
    • 1 cup buttermilk
    • 1 cup all-purpose flour
    • 1 teaspoon garlic powder
    • 1 teaspoon paprika
    • ½ teaspoon salt
    • ½ teaspoon black pepper
    • ½ cup buffalo sauce (like Frank’s RedHot)
    • 4 tablespoons unsalted butter, melted
    • Ranch or blue cheese dressing, for dipping

    Step-by-Step Instructions

    Step 1: Marinate (Quick Version)

    1. Toss chicken tenders in buttermilk. Let sit for 10 minutes (or up to 2 hours in the fridge).

    Step 2: Coat and Crisp

    1. Preheat oven to 425°F (220°C). Line a baking sheet with parchment and place a wire rack on top.
    2. Mix flour, garlic powder, paprika, salt, and pepper in a shallow dish.
    3. Remove chicken from buttermilk, letting excess drip off. Dredge in flour mixture, pressing firmly.
    4. Place on the wire rack. Spray or brush lightly with oil.
    5. Bake for 15-18 minutes, flipping halfway, until golden and cooked through (internal temp 165°F).

    Step 3: Sauce It Up

    1. Whisk buffalo sauce and melted butter together in a large bowl.
    2. Toss the hot chicken tenders in the sauce until fully coated.

    Step 4: Serve Immediately

    1. Plate with ranch or blue cheese. Celery sticks optional but encouraged.

    Summary

    Prep Time: 10 minutes | Cook Time: 18 minutes | Total Time: 28 minutes

    Yield: 4 servings

    Difficulty: Easy

    Storage Notes

    Store leftovers in an airtight container in the fridge for up to 3 days. Reheat in an air fryer or oven at 375°F for 5-7 minutes to bring back the crisp. (Microwave will make them sad and soggy.)

    Make ahead? Bread the tenders and refrigerate (uncooked) for up to 6 hours. Bake when ready.