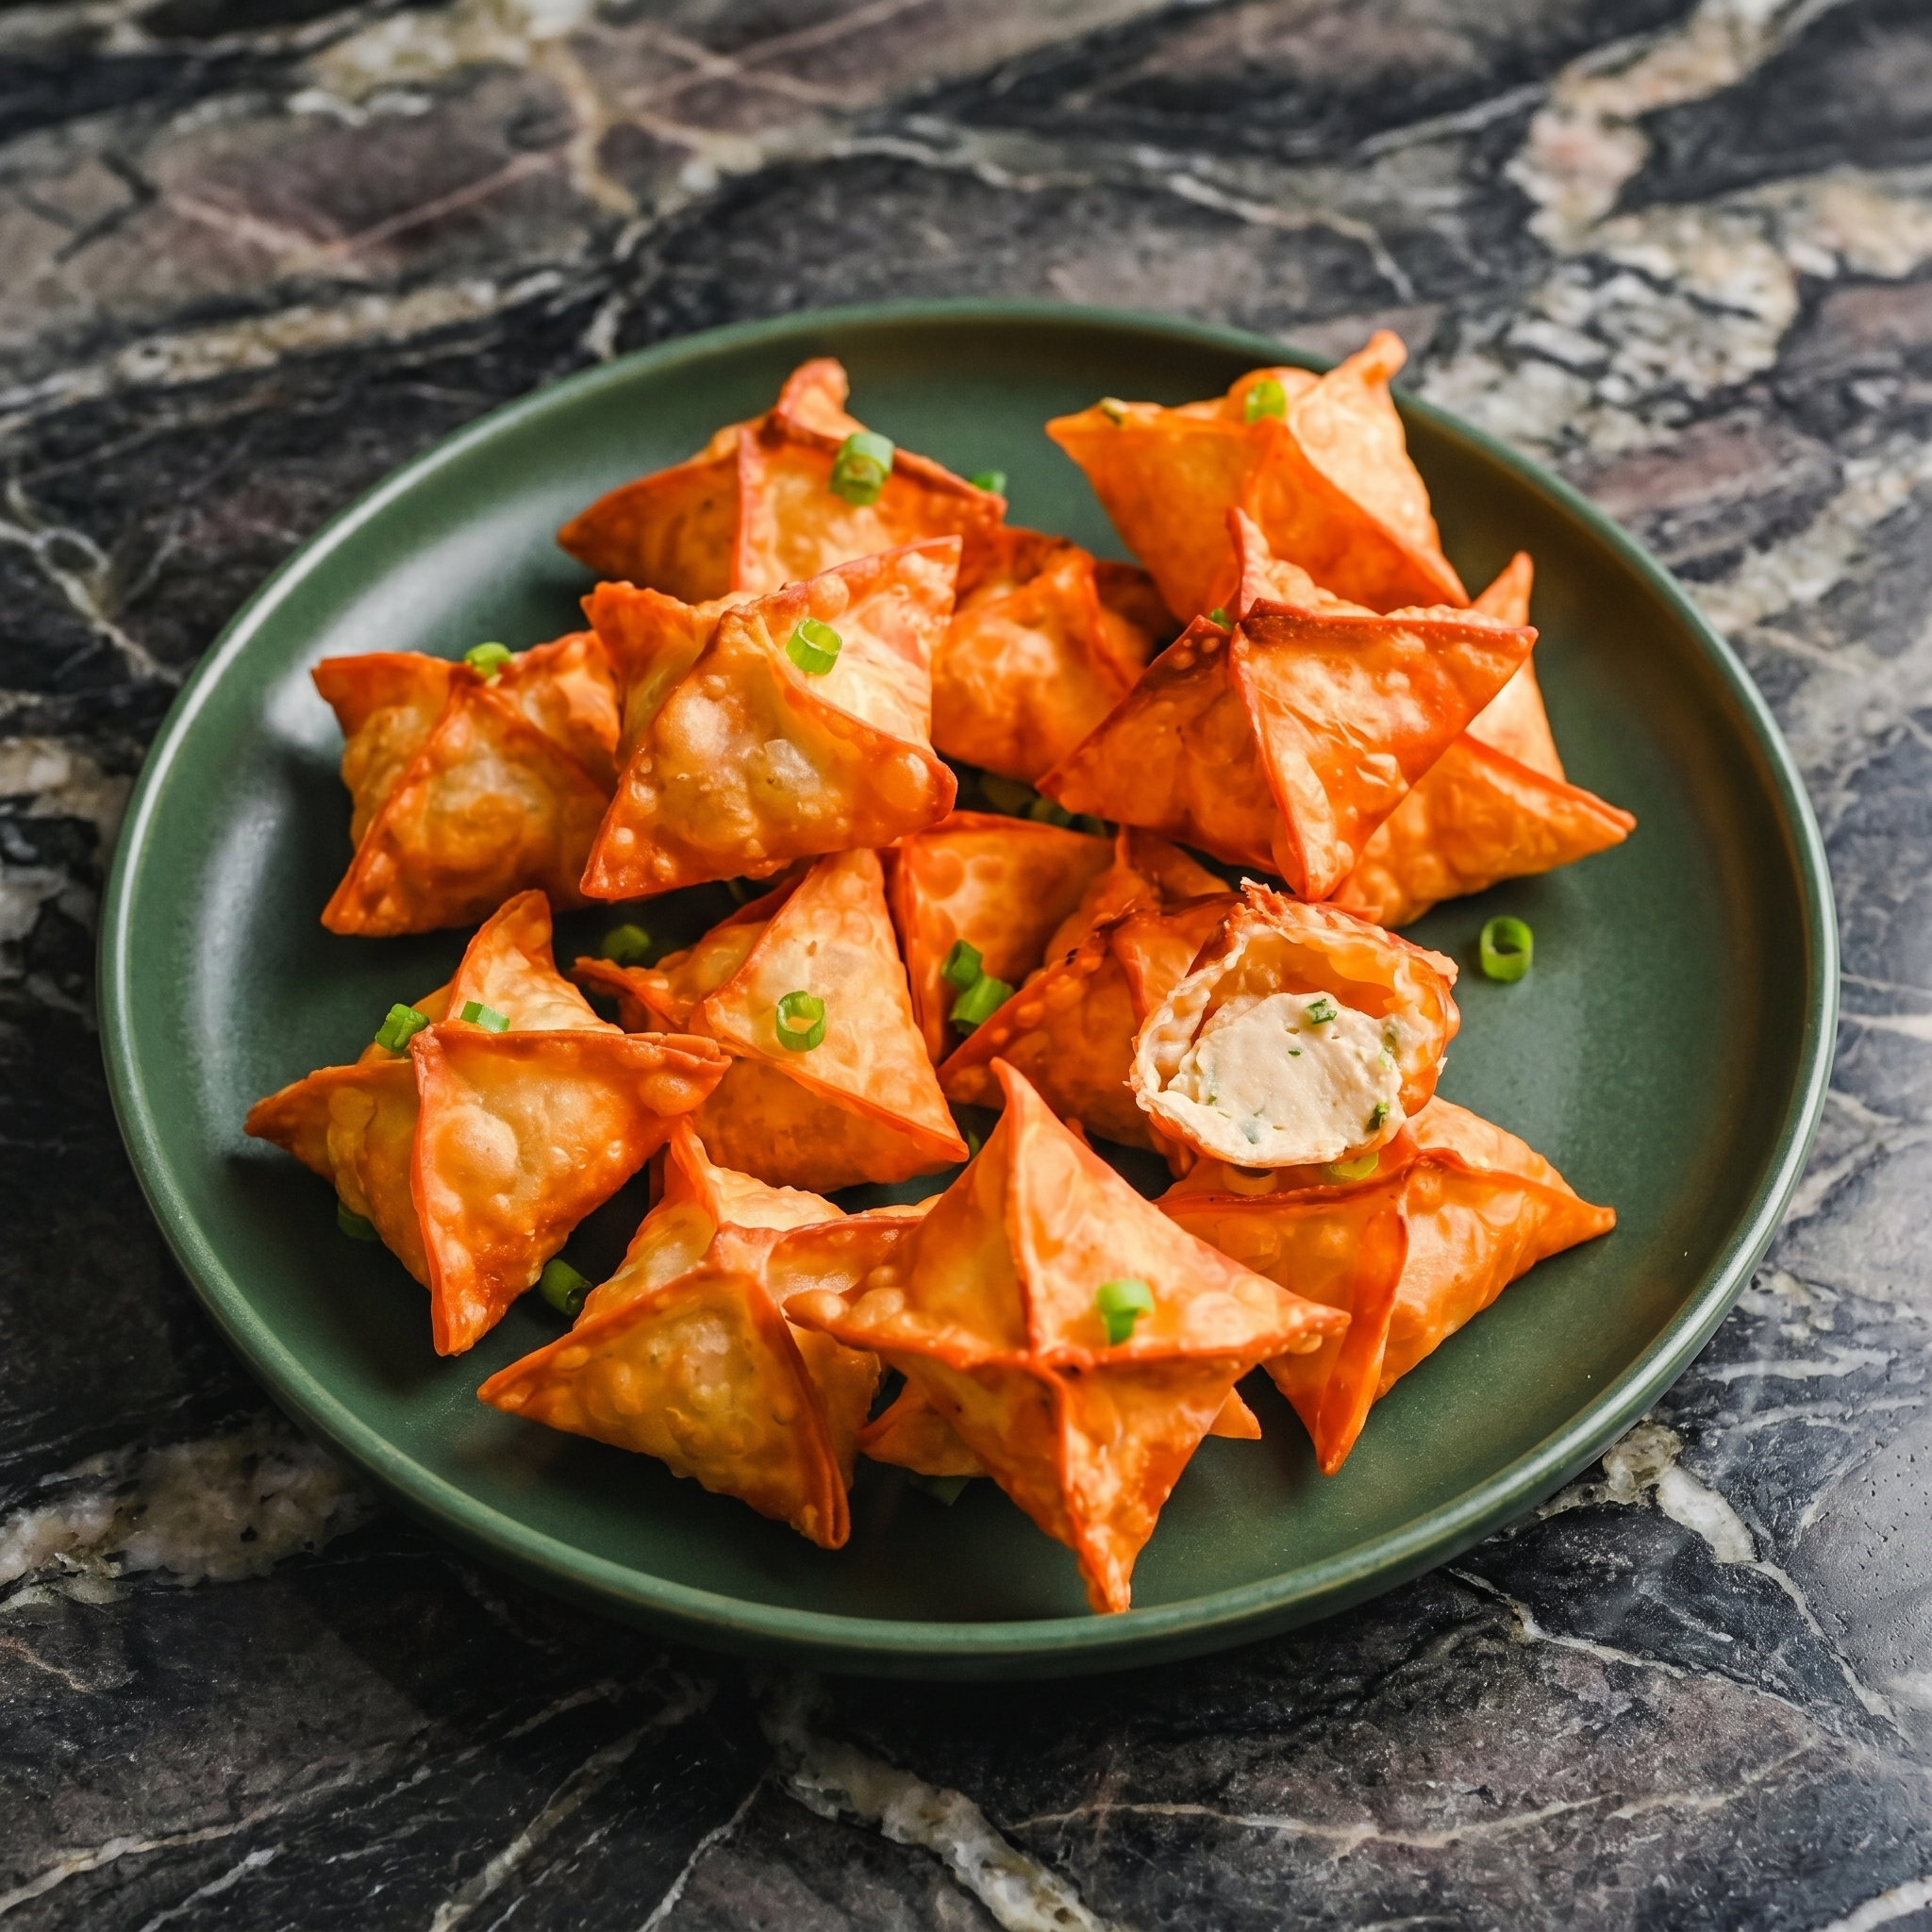
Cream cheese wontons are the unsung heroes of takeout menus. Crispy, golden, stuffed with sweet and tangy cream cheese. No crab needed. Just pure, fried, creamy perfection. Make a double batch. You’ll thank me.
Ingredients
Makes 24 wontons.
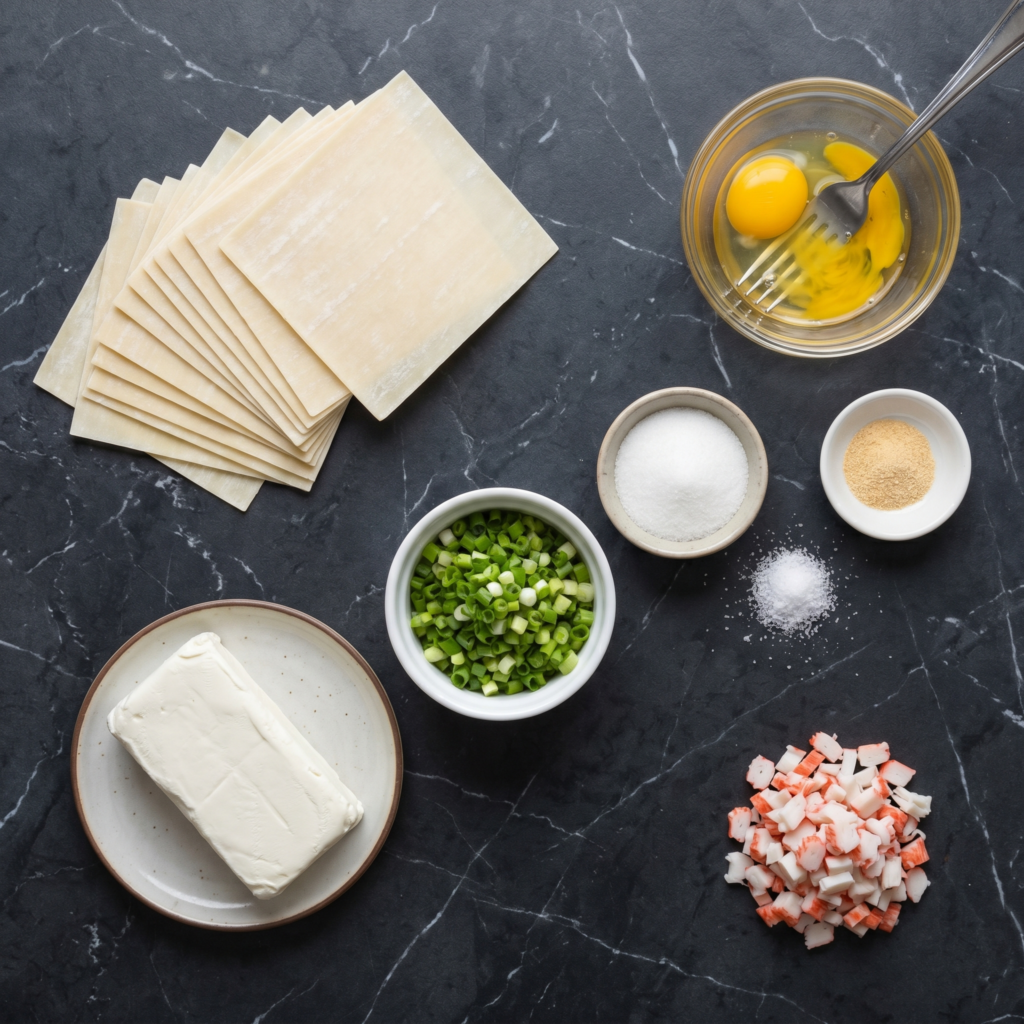
24 wonton wrappers
8 oz (225g) cream cheese, softened
2 green onions, finely chopped (optional)
1 tsp sugar
½ tsp garlic powder
¼ tsp salt
1 egg white (for sealing)
Vegetable oil for frying
Sweet chili sauce or duck sauce for dipping
Step-by-Step Instructions
Step 1: Make Filling
In a bowl, mix cream cheese, green onions, sugar, garlic powder, and salt until smooth.
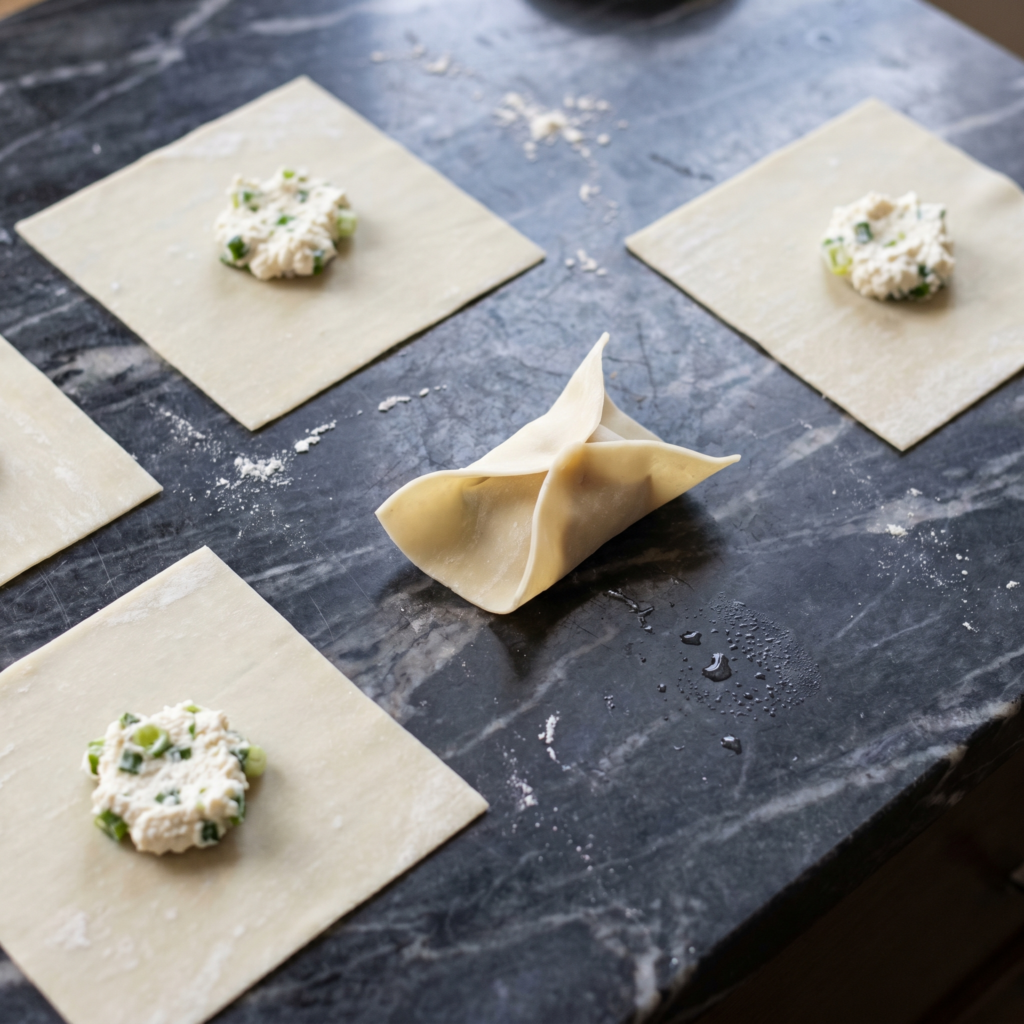
Step 2: Fill Wontons
Place a wonton wrapper in a diamond shape. Place 1 teaspoon of filling in the center.
Wet edges with egg white. Fold into a triangle, pressing out air. Seal well.
For the classic shape, wet the two long corners and fold them together.
Repeat with remaining wrappers.
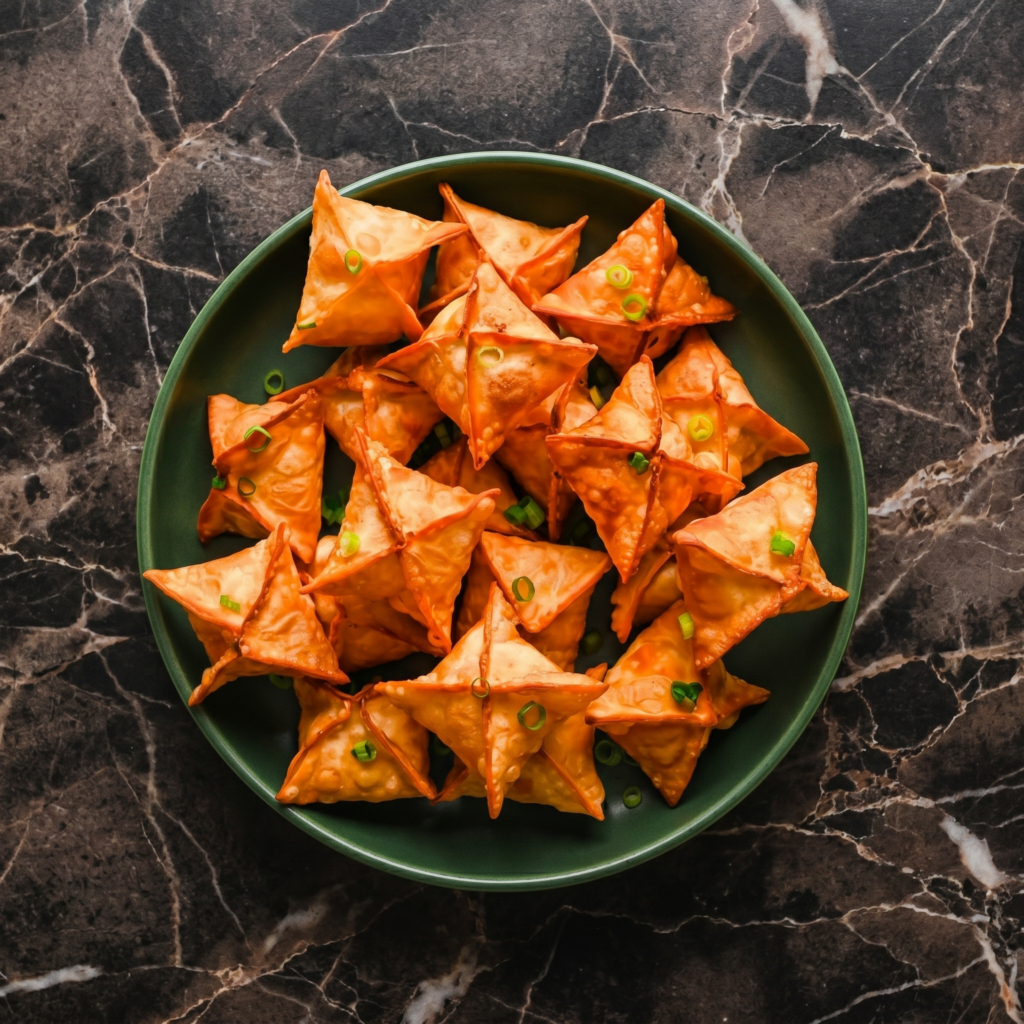
Step 3: Fry
Heat 1½ inches of oil to 350°F (175°C).
Fry wontons in batches (5-6 at a time) for 1-2 minutes until golden brown and crispy.
Drain on paper towels or a wire rack.
Step 4: Serve
Serve hot with sweet chili sauce or duck sauce. Fight over the last one.
Summary
Prep Time: 20 min | Cook Time: 10 min | Total: 30 min
Yield: 24 wontons | Difficulty: Easy
Storage Notes
Make ahead: Assemble uncooked wontons and freeze on a tray. Once frozen, transfer to a bag. Fry from frozen (add 1 minute). Leftovers: Reheat in oven or air fryer at 375°F for 5-7 minutes. Never microwave — sogginess is tragedy.
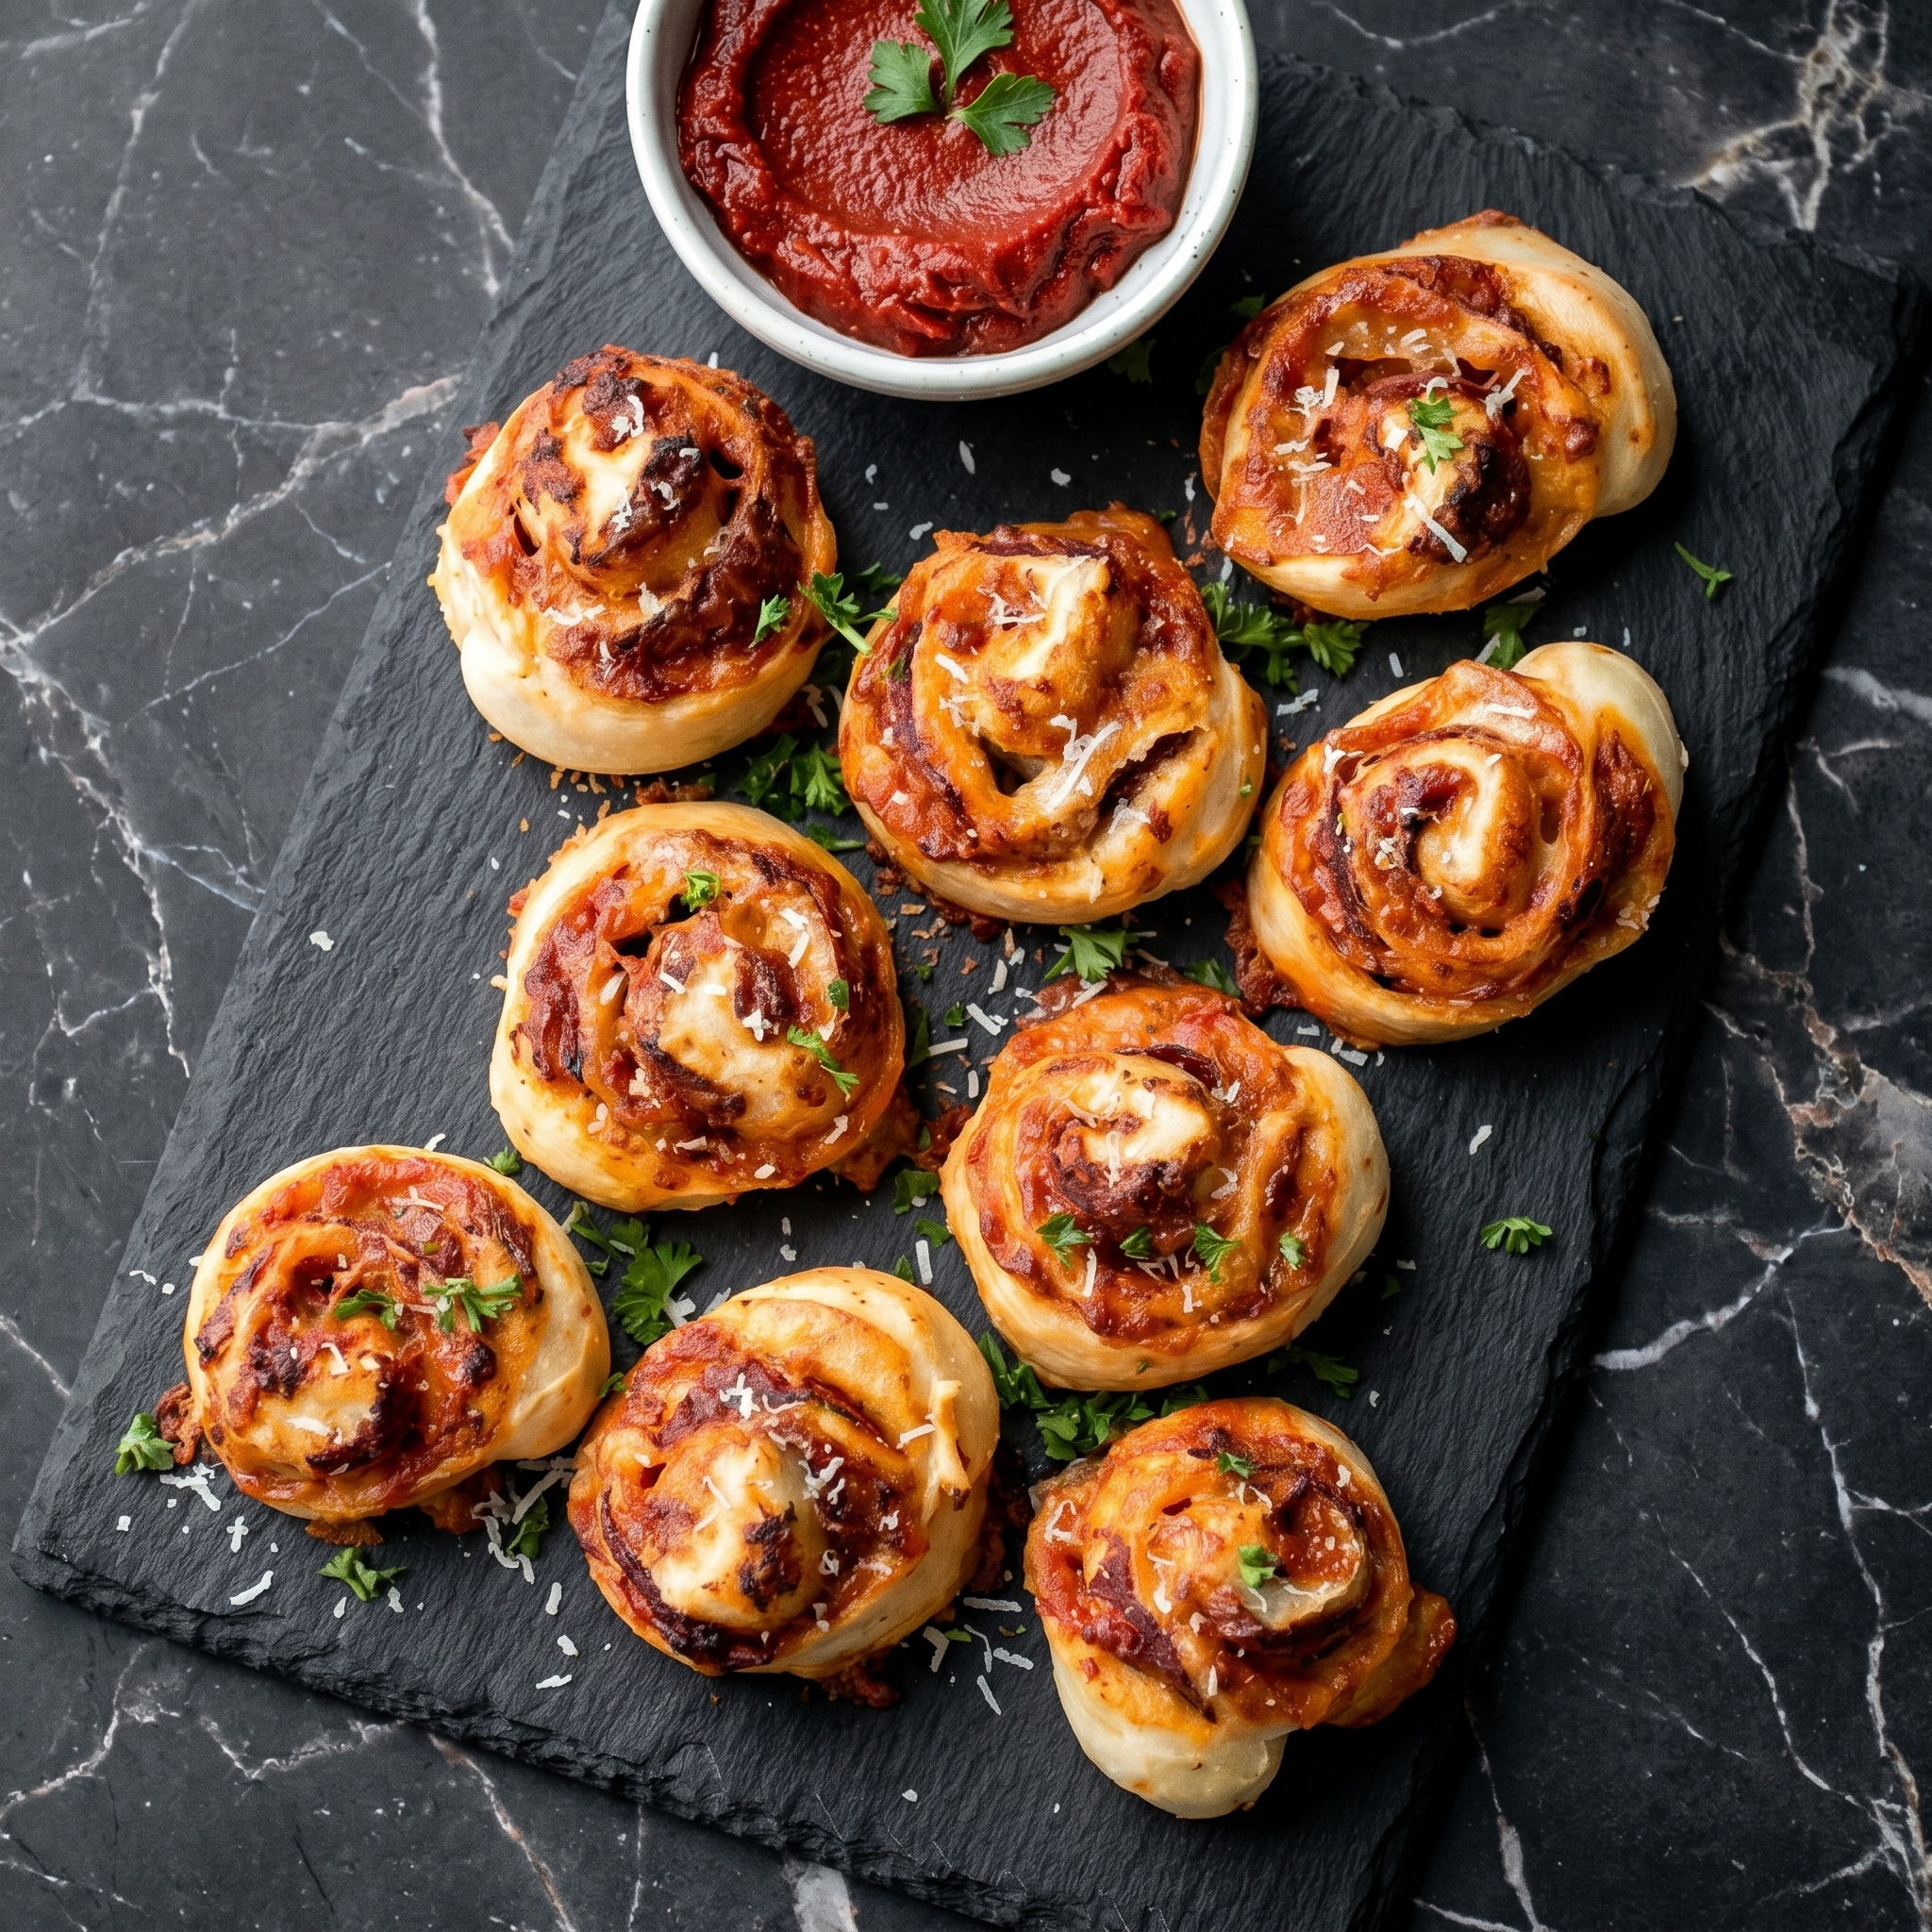
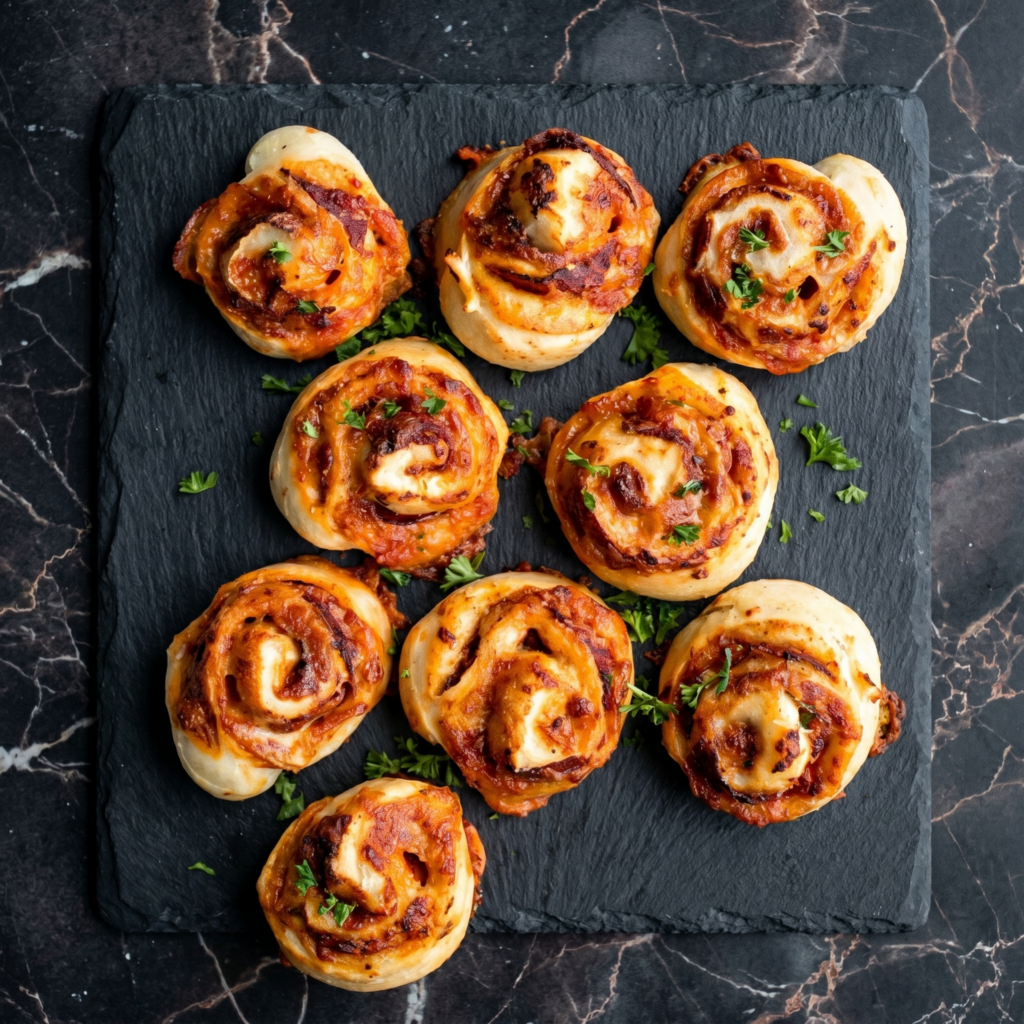
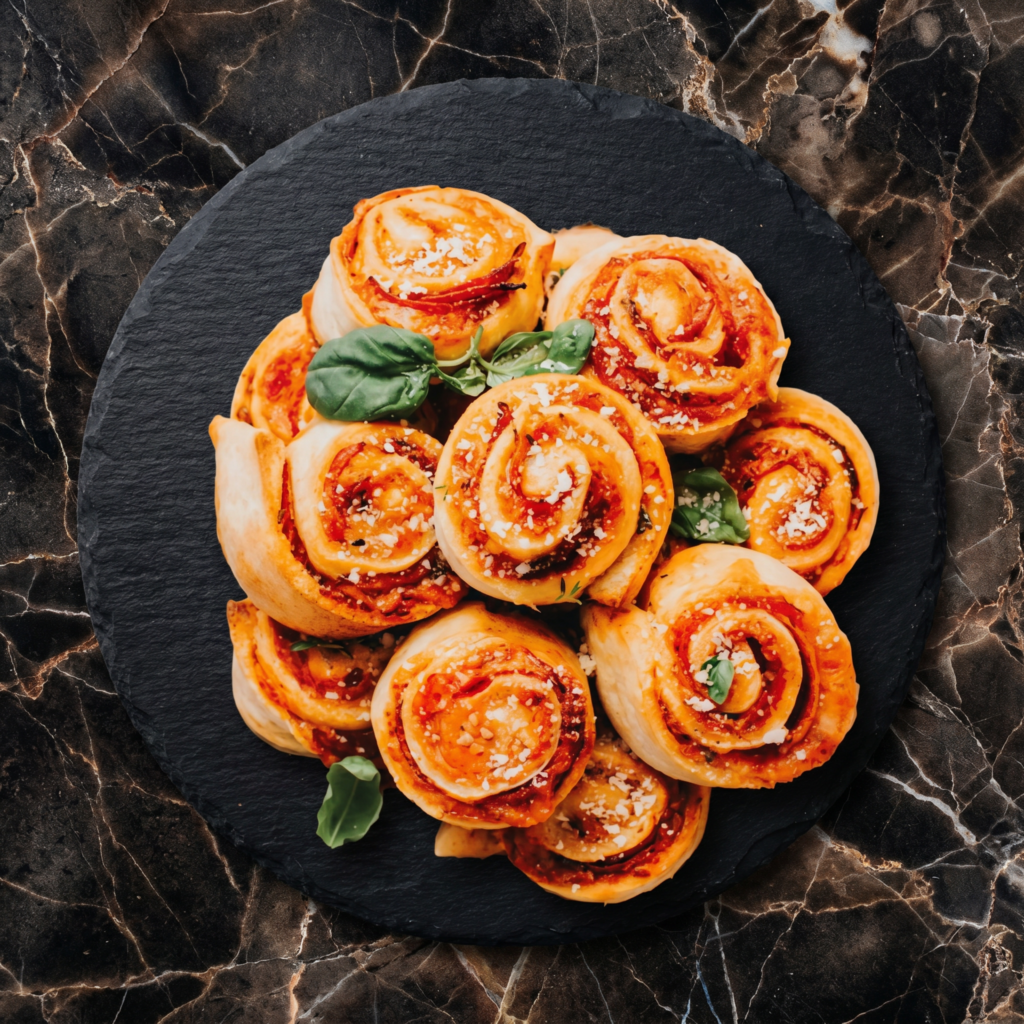
Let’s be honest: frozen pizza rolls are fine. These are unforgettable.
Real dough. Real cheese. Real pepperoni. Rolled up, sliced into pinwheels, and baked until golden. They’re crispy, gooey, and dangerously snackable. Make a double batch. Trust me.
Ingredients
Makes 20-24 pizza rolls.
1 lb (450g) pizza dough (store-bought or homemade)
½ cup marinara or pizza sauce (plus more for dipping)
1½ cups shredded mozzarella cheese
½ cup grated Parmesan cheese
4 oz (120g) pepperoni, finely chopped
1 teaspoon Italian seasoning
1 egg, beaten (for egg wash)
Garlic butter for brushing (optional)
Step-by-Step Instructions
Step 1: Preheat and Prep
Preheat oven to 400°F (200°C). Line a baking sheet with parchment paper.
Step 2: Roll the Dough
On a floured surface, roll dough into a 12×10-inch rectangle (about ¼-inch thick).
Step 3: Add Fillings
Spread marinara sauce evenly over dough, leaving a 1-inch border.
Sprinkle with mozzarella, Parmesan, chopped pepperoni, and Italian seasoning.
Step 4: Roll and Slice
Starting from the long edge, roll dough tightly into a log. Pinch the seam to seal.
Using a serrated knife, slice into 1-inch rolls (about 20-24 pieces).
Step 5: Bake
Place rolls cut-side up on the baking sheet. Brush with beaten egg.
Bake for 15-18 minutes until golden brown and bubbly.
Step 6: Serve
Brush with garlic butter if desired. Serve warm with marinara for dipping.
These are perfect make-ahead party food. Just don’t assemble too early.
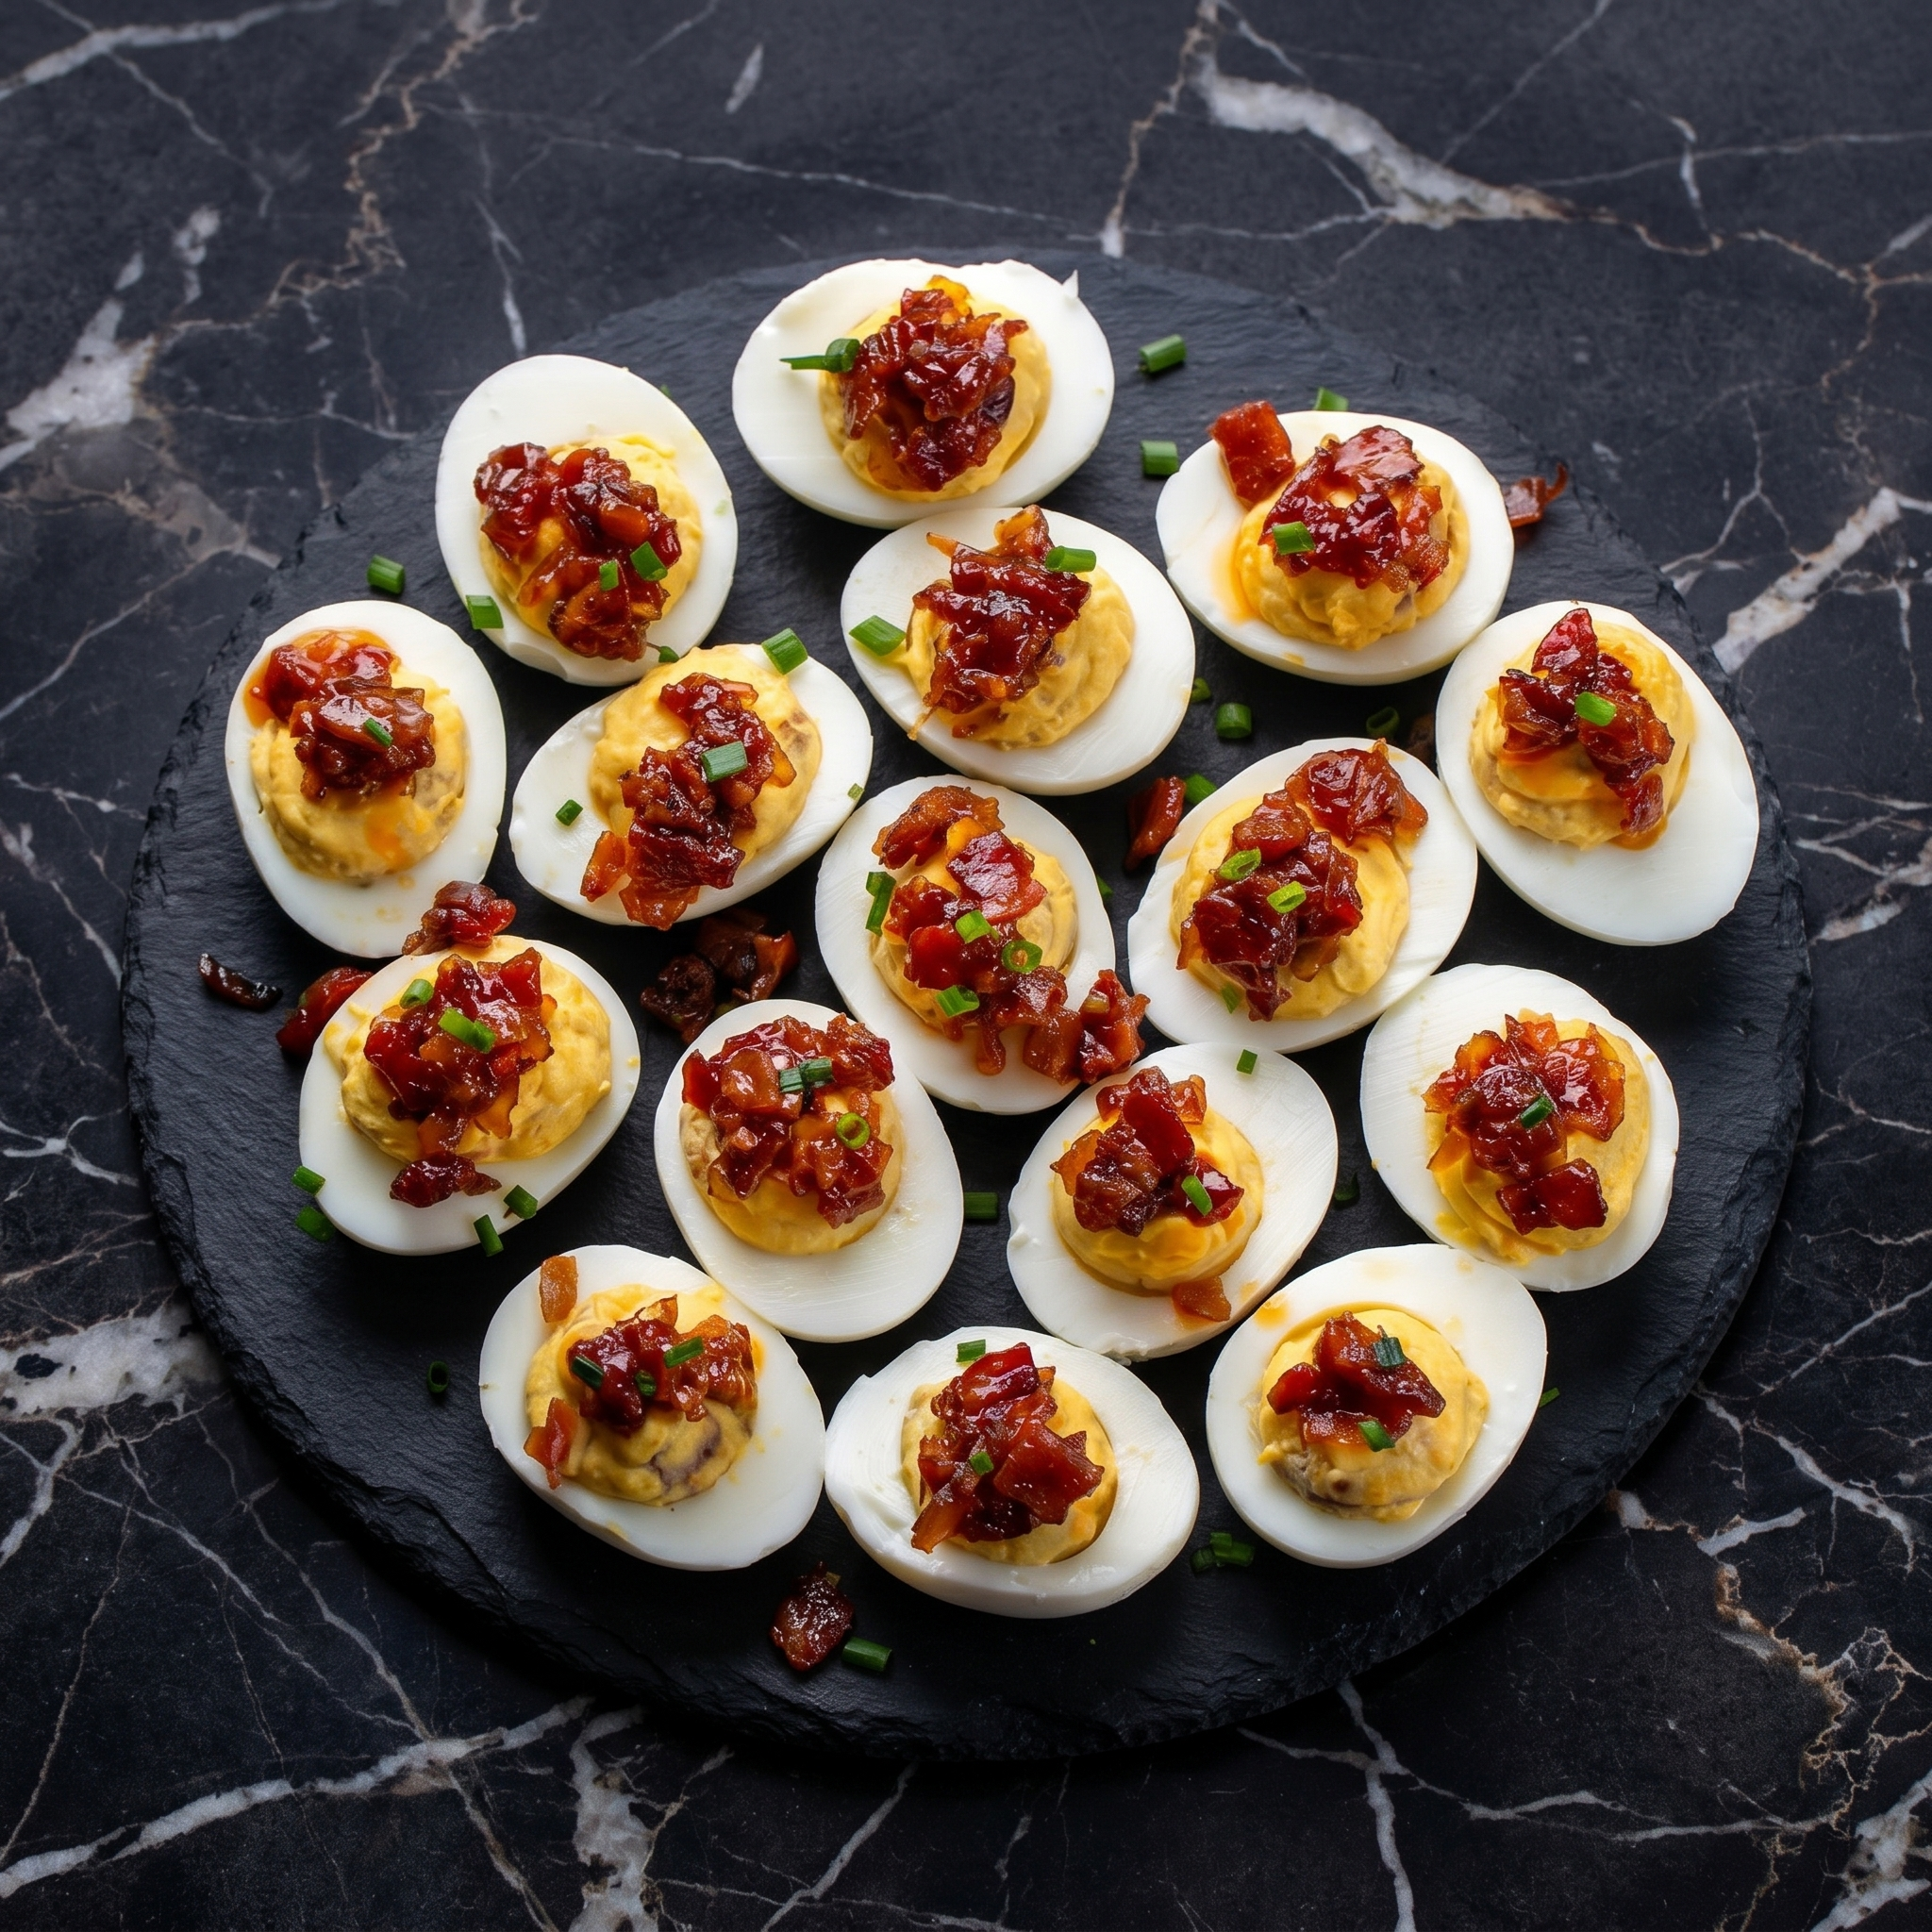
Fridge (filling only): Store yolk mixture in a piping bag or container for up to 2 days. Keep egg whites separate in a sealed container. Fill fresh before serving.
Fridge (assembled): Store in an airtight container for up to 1 day. Bacon may lose crispiness.
Do not freeze. Texture disaster.
Pro tip: Use a piping bag or zip-top bag with the corner snipped off for Instagram-worthy filling.
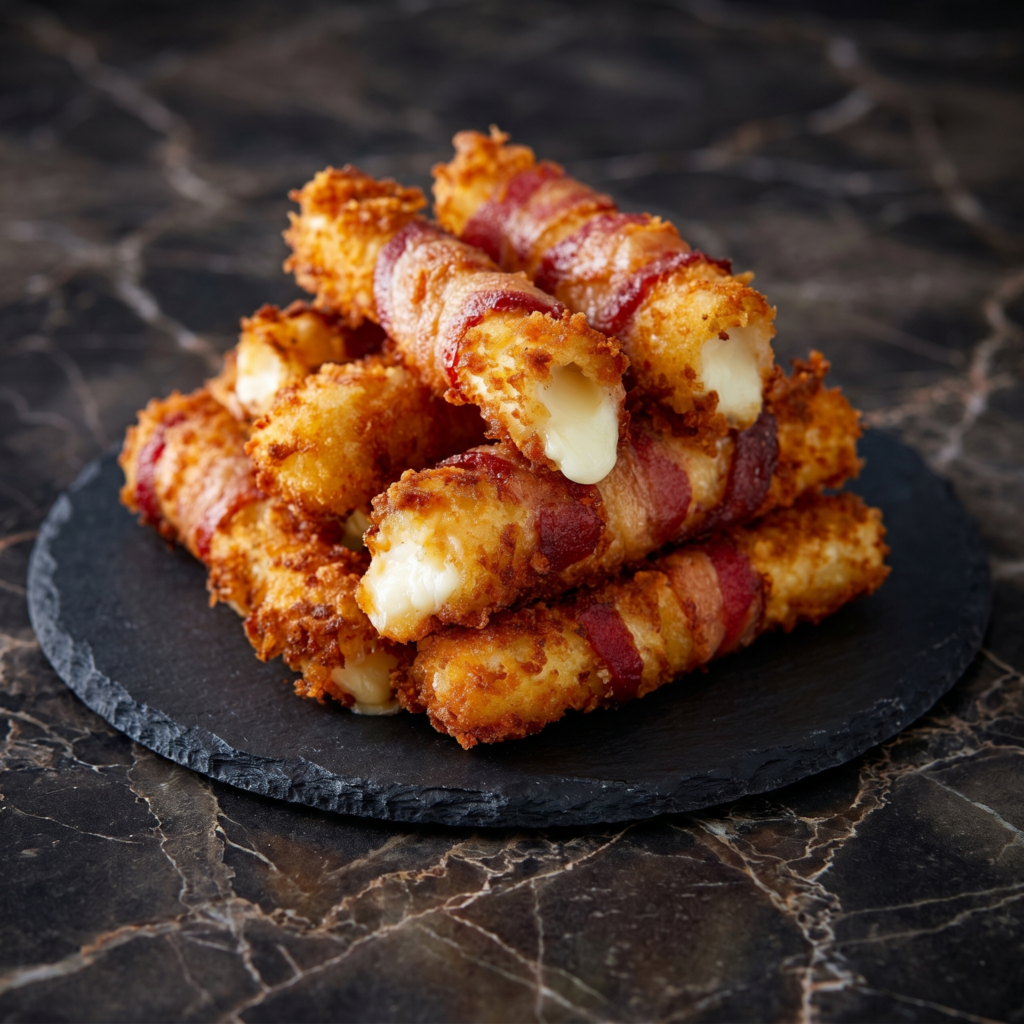
Mozzarella sticks are great. Bacon is great. So why has no one forced them to marry sooner? This is a three-ingredient miracle: string cheese, bacon, and your favorite marinara. Air fry or bake until the bacon is crispy and the cheese is melty. Prepare for addiction.
Ingredients
Makes 8 sticks (serves 2-4).
8 mozzarella string cheese sticks
8 slices thin-cut bacon
1 cup marinara sauce, for dipping
Optional: Everything bagel seasoning or black pepper
Step-by-Step Instructions
Step 1: Prep the Cheese
Remove string cheese from wrappers.
If using, roll each stick in everything bagel seasoning or pepper.
Step 2: Wrap With Bacon
Wrap one slice of bacon around each cheese stick in a spiral, slightly overlapping.
Tuck the end under the bacon to secure. No toothpicks needed.
Step 3: Cook Until Crispy
Air fryer method: Place sticks in a single layer. Cook at 380°F for 8-10 minutes until bacon is crispy.
Oven method: Bake at 400°F on a wire rack over a baking sheet for 12-15 minutes.
Pan method: Cook in a skillet over medium heat, turning often, for 8-10 minutes.
Step 4: Cool Slightly
Let rest for 2 minutes. The cheese will be lava-hot.
Step 5: Serve With Marinara
Warm marinara sauce in a small bowl.
Dip and pull. Watch the cheese stretch to oblivion.
These are best fresh and hot. Leftovers can be refrigerated for 2 days. Reheat in an air fryer at 375°F for 3-4 minutes. Do not microwave (soggy bacon, exploded cheese). Uncooked bacon-wrapped sticks can be frozen for up to 1 month—cook from frozen, add 2-3 minutes.
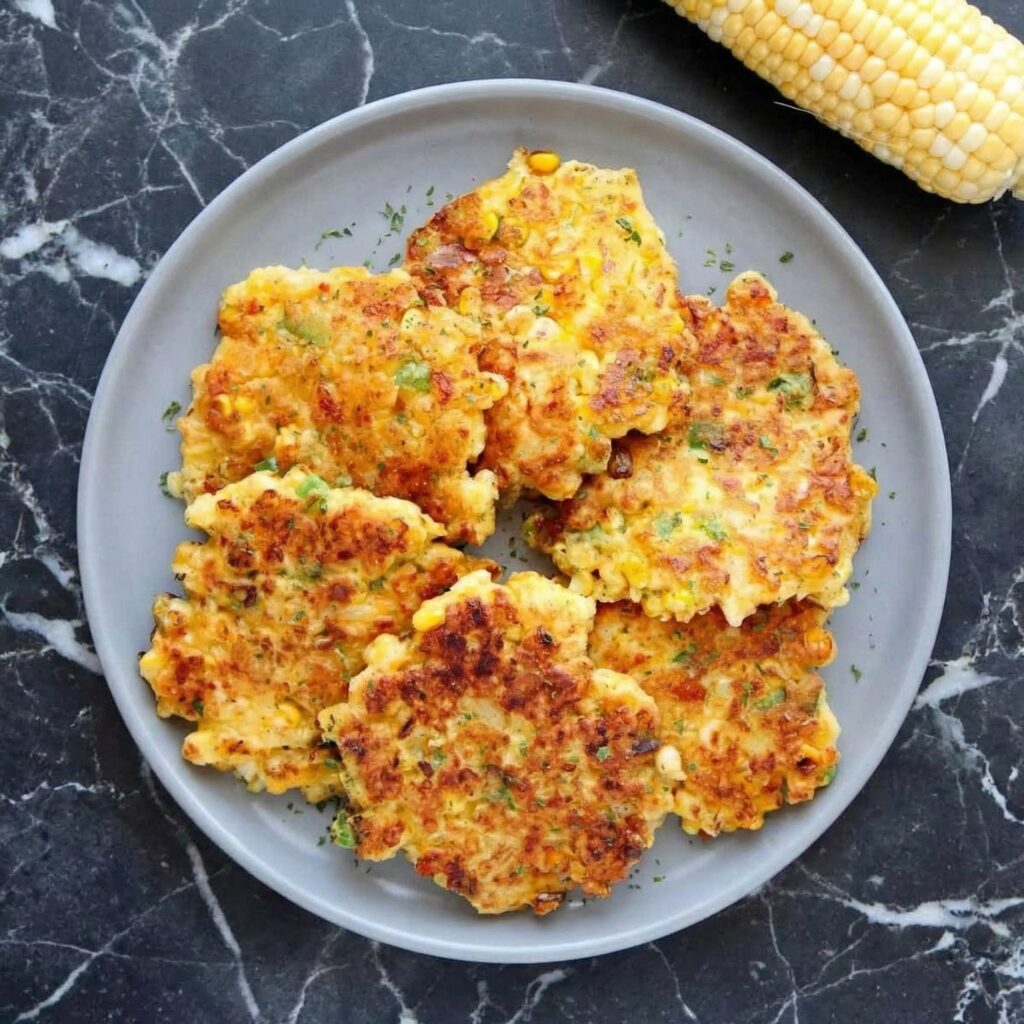
Corn fritters are the kind of food that disappears before it hits the table. Little golden disks of sweet corn, lightly bound with a simple batter, fried until crispy and served with something cool and creamy (or drizzled with honey, if you’re into sweet-savory perfection).
They’re Southern, they’re summery, and they’re ridiculously easy to make. Fresh corn is ideal when it’s in season, but frozen corn works beautifully too. Serve them as an appetizer, a side dish, or pile them up for a lazy brunch. However you eat them, they won’t last long.
¼ cup finely chopped green onions (white and green parts)
1 small jalapeño, finely minced (optional, for heat)
Neutral oil, for frying (vegetable, canola, or avocado)
For Serving:
Sour cream or crème fraîche
Honey or maple syrup (for drizzling)
Fresh chives or cilantro, chopped
Lime wedges
Hot sauce (optional)
Step-by-Step Instructions
Step 1: Prep the Corn
If using fresh corn, cut kernels off the cob. Run the back of your knife down the cob to extract the “milk”—that starchy liquid adds flavor and helps bind the fritters.
If using frozen corn, thaw completely and pat dry with paper towels to remove excess moisture.
Step 2: Make the Batter
In a large bowl, whisk together flour, cornmeal (if using), baking powder, salt, pepper, and cayenne.
In a separate bowl, whisk eggs and milk together.
Pour wet ingredients into dry ingredients and stir until just combined. A few lumps are okay—don’t overmix.
Fold in corn, green onions, and jalapeño (if using). The batter should be thick but scoopable. If it’s too thick, add a splash more milk.
Step 3: Heat the Oil
Heat about ¼ inch of oil in a large skillet over medium-high heat until shimmering (about 350°F).
Test by dropping a tiny bit of batter—it should sizzle immediately.
Step 4: Fry the Fritters
Drop heaping tablespoons of batter into the hot oil, gently flattening with the back of a spoon into 2-3 inch rounds.
Don’t crowd the pan—work in batches. Cook for 2-3 minutes per side until deep golden brown and crispy.
Transfer to a paper towel-lined plate to drain. Sprinkle with a little salt while hot.
Step 5: Serve Immediately
Arrange fritters on a platter. Top with a dollop of sour cream, a drizzle of honey, and a sprinkle of fresh chives.
Serve with lime wedges for squeezing and hot sauce on the side.
Take a bite. Crispy exterior, sweet corn interior, a little heat, a little honey. This is the way.
Store in an airtight container in the fridge for up to 3 days. They’ll lose crispiness, but still taste great.
Reheating (Bring Back the Crunch):
Air fryer (best): 375°F for 3-4 minutes. Oven: 400°F for 5-7 minutes on a wire rack. Skillet: Reheat in a dry pan over medium heat, flipping once. Microwave: Avoid—it makes them soggy.
Freezer-Friendly:
Freeze cooked fritters in a single layer on a baking sheet, then transfer to a zip-top bag for up to 3 months. Reheat from frozen in the oven or air fryer.
Make Ahead:
Mix the batter up to 4 hours in advance and refrigerate. Stir before using. Fry just before serving for maximum crispiness.
Pro Tips for Corn Fritter Greatness:
Pat corn dry. Excess moisture makes fritters soggy instead of crispy.
Don’t overmix the batter. Overmixing develops gluten, making tough fritters. Stir until just combined.
Oil temperature matters. Too cool = greasy fritters. Too hot = burnt outside, raw inside. Aim for 350°F.
Test with a batter drop. If it sizzles immediately and floats, you’re ready.
Flatten gently. Pressing the batter in the pan creates more surface area for crispy edges.
Don’t crowd the pan. Fritters need room to crisp up. Work in batches and keep finished ones warm in a low oven.