Tag: Date Night Dinner

  • Creamy & Comforting: The Ultimate Mushroom Risotto With Peas (Step-by-Step Guide)

    Creamy & Comforting: The Ultimate Mushroom Risotto With Peas (Step-by-Step Guide)

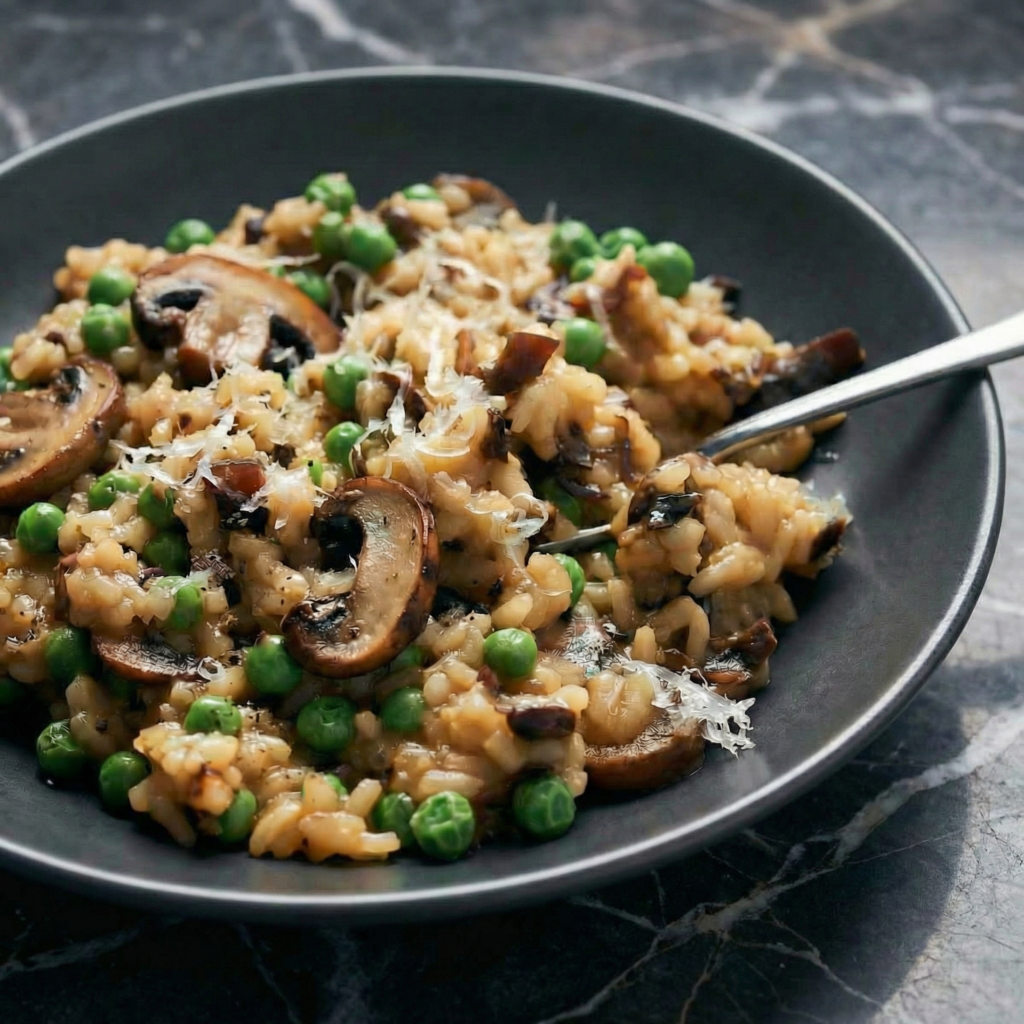
    There’s something deeply comforting about a bowl of Mushroom Risotto with Peas. It’s creamy without heavy cream, rich without being overwhelming, and filled with earthy mushrooms and sweet bursts of green peas.

    This classic Italian-inspired dish transforms simple pantry staples into a luxurious meal that feels restaurant-worthy but is absolutely achievable at home.

    Risotto has a reputation for being fussy, but once you understand the technique, it becomes a relaxing and rewarding cooking experience. With patience, warm broth, and steady stirring, you’ll create a silky, flavorful dish that’s perfect for both weeknight dinners and elegant gatherings.

    Let’s walk through it step by step.


    Why You’ll Love This Mushroom Risotto

    • Creamy texture without cream
    • Deep, savory mushroom flavor
    • Bright sweetness from peas
    • Naturally gluten-free
    • Elegant yet comforting

    This dish is all about balance—earthy, sweet, rich, and fresh in every bite.


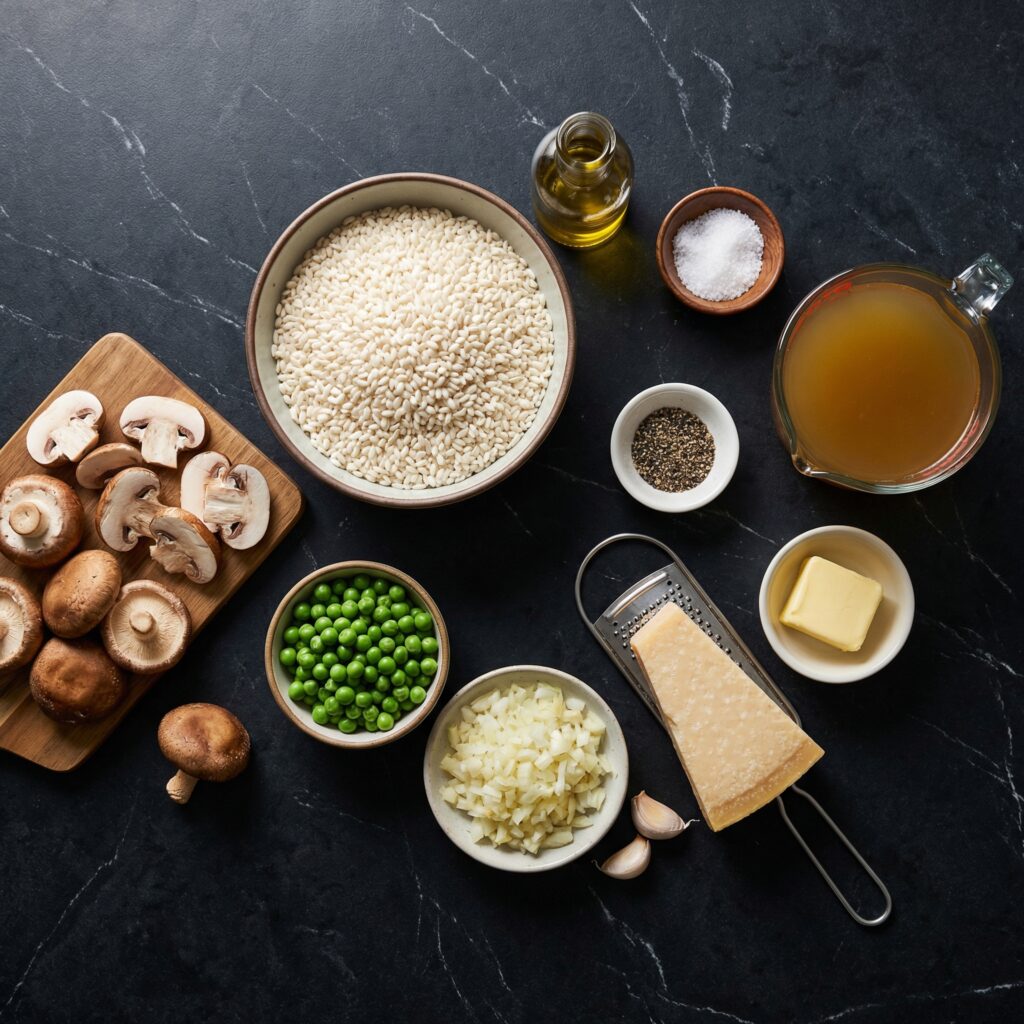
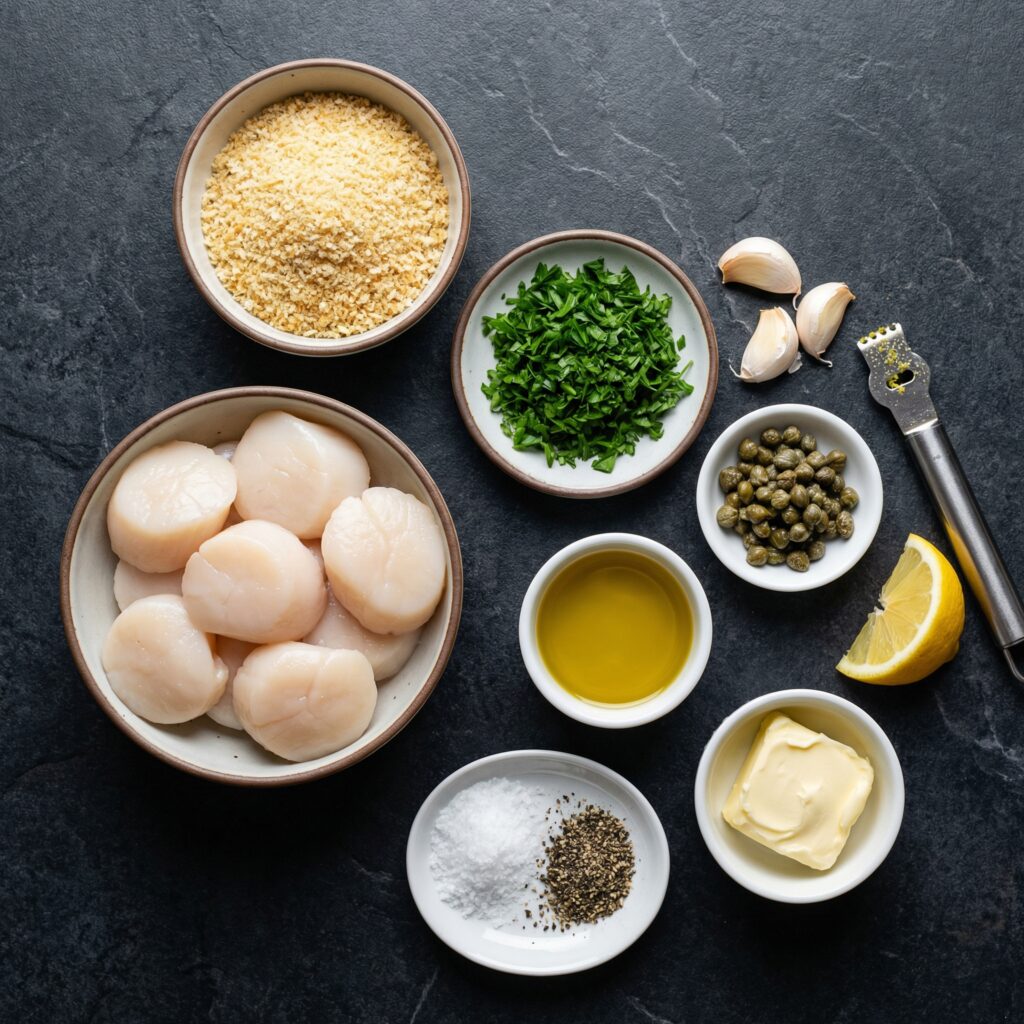
    Ingredients You’ll Need

    For the Risotto Base:

    • 1 ½ cups Arborio rice
    • 4–5 cups vegetable or chicken broth (kept warm)
    • 2 tablespoons olive oil
    • 2 tablespoons unsalted butter

    For the Vegetables:

    • 8 ounces mushrooms (cremini, button, or a mix), sliced
    • 1 small onion or 2 shallots, finely diced
    • 2 cloves garlic, minced
    • 1 cup frozen peas

    For Finishing:

    • ½ cup dry white wine
    • ½ cup freshly grated Parmesan cheese
    • Salt and freshly cracked black pepper

    Optional Garnish:

    • Fresh parsley
    • Extra Parmesan
    • Lemon zest

    Step 1: Warm the Broth

    Pour your broth into a saucepan and keep it gently simmering over low heat.

    Adding warm broth to risotto is essential—it allows the rice to cook evenly and release starch properly. Cold broth slows the cooking process and affects texture.


    Step 2: Sauté the Mushrooms

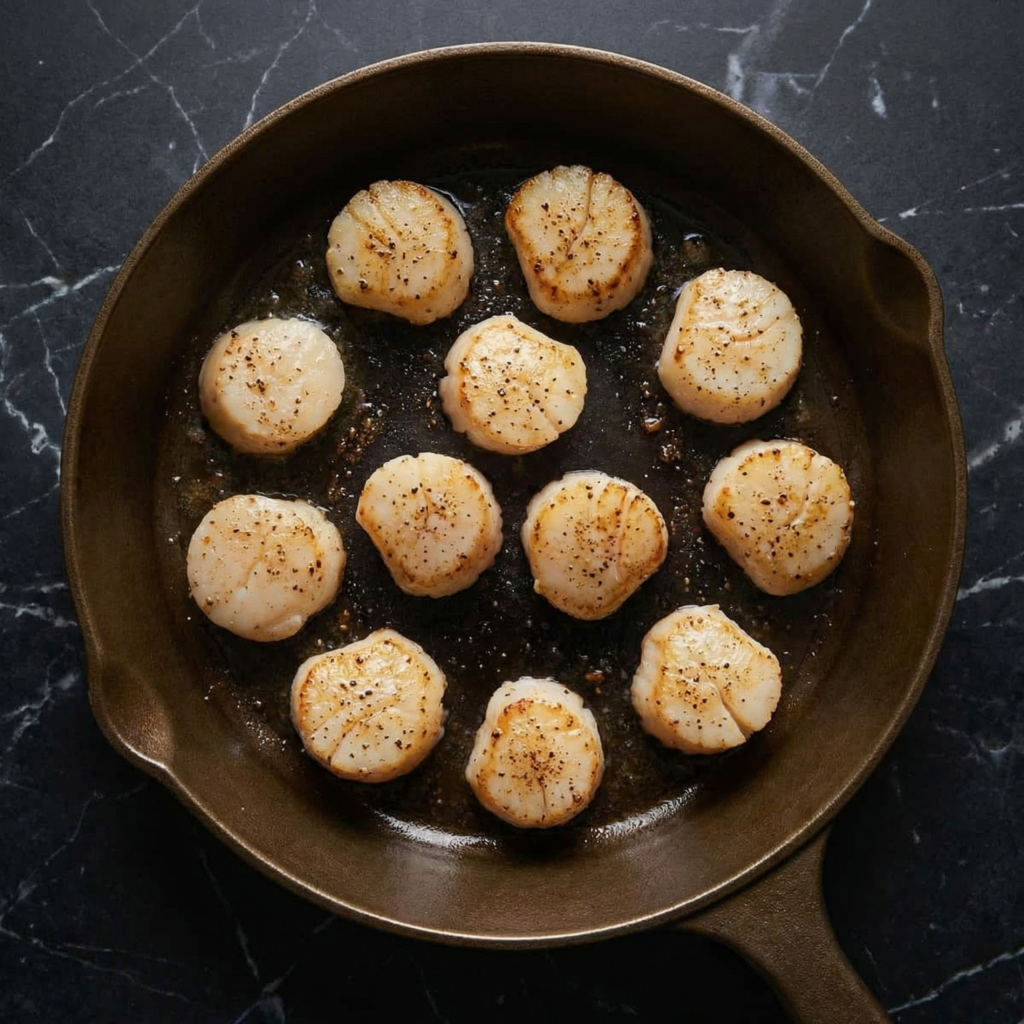
    Heat 1 tablespoon olive oil and 1 tablespoon butter in a large, heavy-bottomed skillet or saucepan over medium heat.

    Add the sliced mushrooms in a single layer. Cook for 5–7 minutes, stirring occasionally, until they release their moisture and turn golden brown.

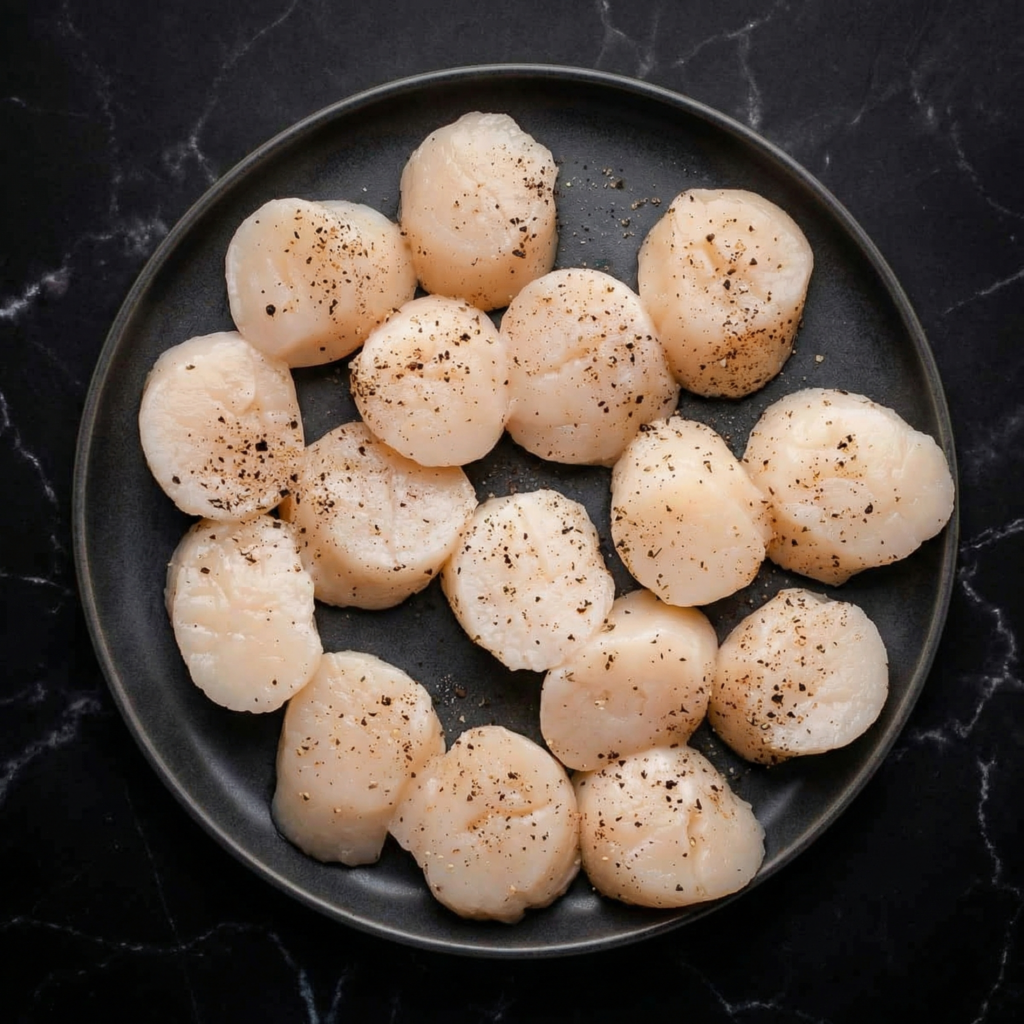
    Season lightly with salt and pepper.

    Remove the mushrooms from the pan and set aside. Cooking them separately ensures they stay tender and flavorful rather than watery.


    Step 3: Cook the Aromatics

    In the same pan, add the remaining olive oil.

    Add diced onion or shallots and cook for 3–4 minutes until soft and translucent.

    Stir in the minced garlic and cook for 30 seconds, just until fragrant.

    These aromatics create a flavorful base that supports the creamy rice.


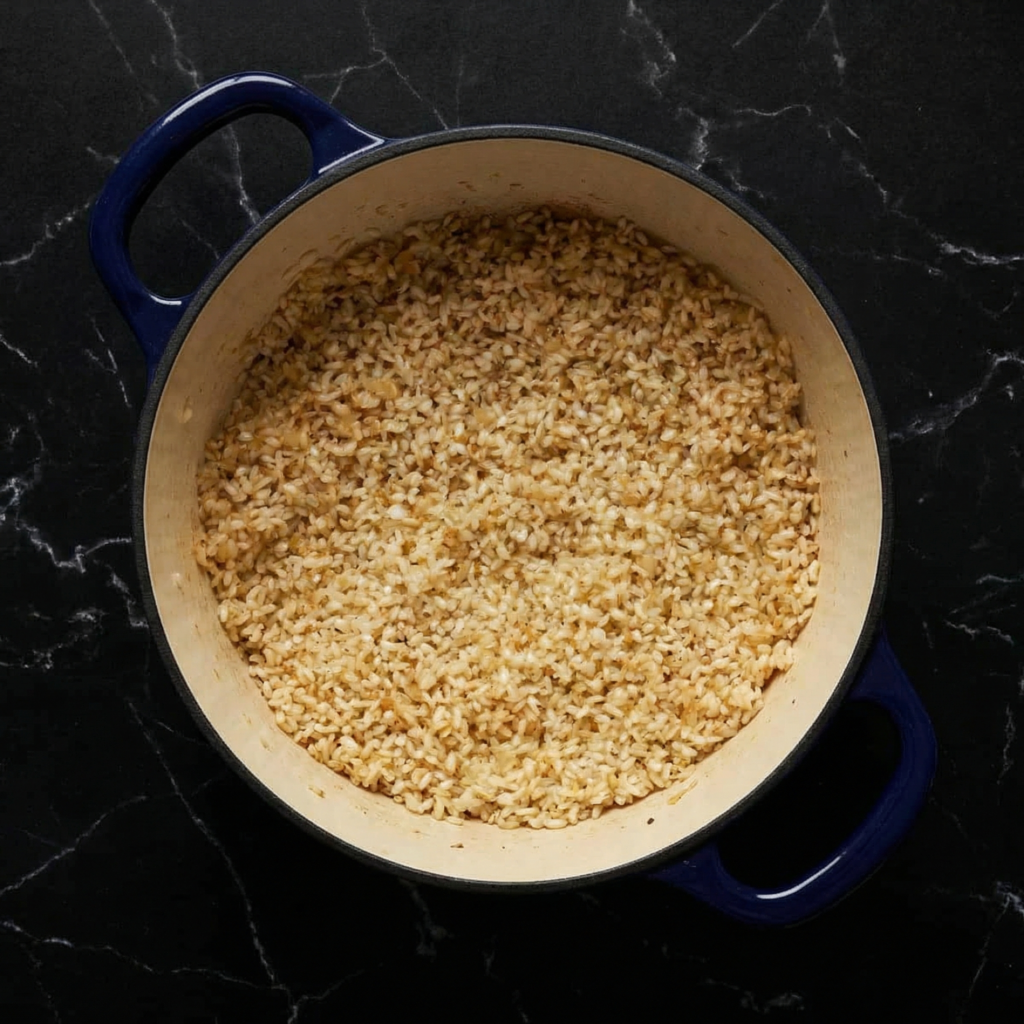
    Step 4: Toast the Rice

    Add the Arborio rice directly into the pan.

    Stir continuously for 1–2 minutes, coating each grain in oil. The edges will become slightly translucent while the center remains opaque.

    Toasting enhances the rice’s nutty flavor and helps maintain structure during cooking.


    Step 5: Deglaze with Wine

    Pour in the white wine and stir constantly.

    Allow it to simmer until most of the liquid evaporates. This adds acidity and depth, balancing the richness of the final dish.

    If you prefer not to use wine, substitute with a splash of broth and a squeeze of lemon.


    Step 6: Add Broth Gradually

    Add one ladle (about ½ cup) of warm broth to the rice.

    Stir gently and frequently until the liquid is mostly absorbed.

    Repeat this process—adding broth one ladle at a time—waiting for each addition to absorb before adding the next.

    This gradual addition is the key to creamy risotto. It encourages the rice to release starch slowly, creating that signature silky texture.


    Step 7: Stir with Patience

    Continue adding broth and stirring for 18–22 minutes.

    Taste as you go. The rice should be tender but still slightly firm in the center—al dente.

    Adjust the heat as needed to maintain a gentle simmer.

    Risotto isn’t about constant frantic stirring but steady, attentive movement.


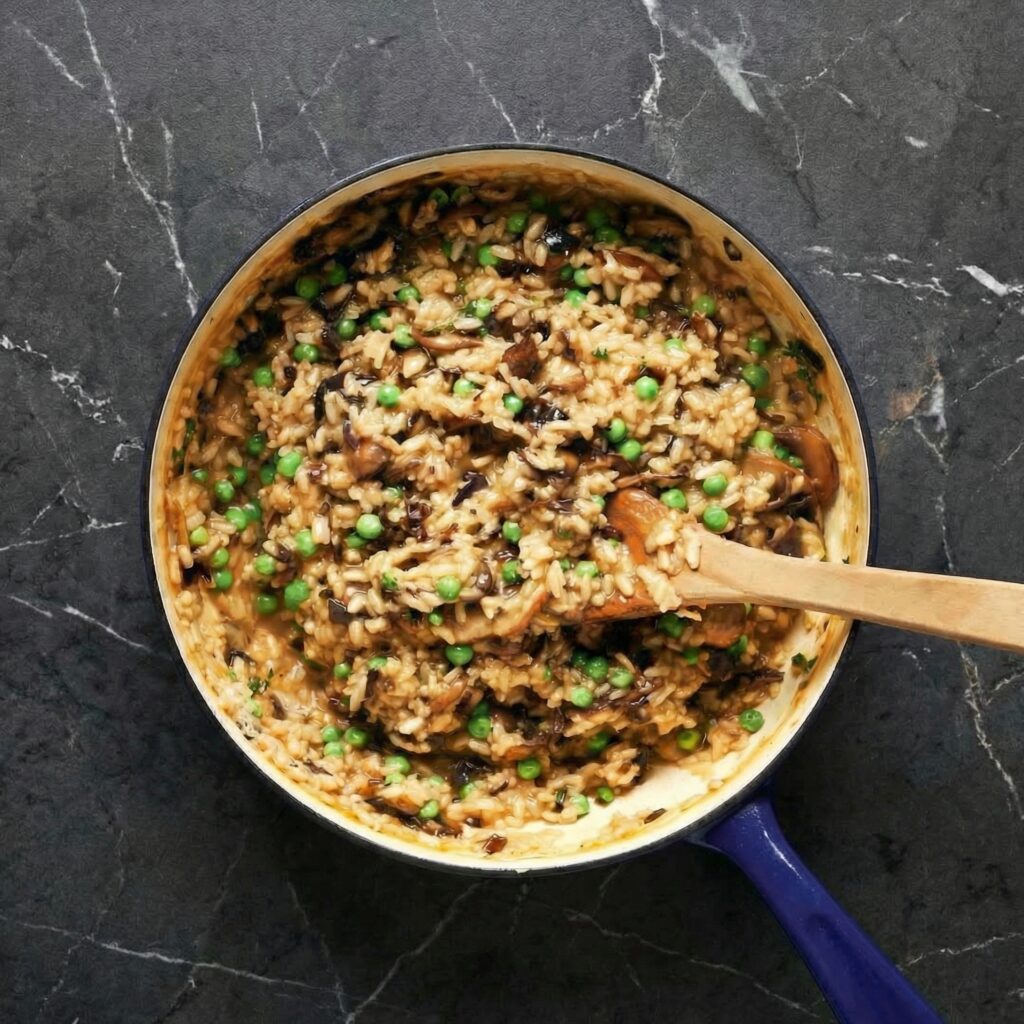
    Step 8: Add Mushrooms and Peas

    When the rice is nearly done, stir the sautéed mushrooms back into the pan.

    Add the peas and cook for 2–3 minutes until heated through and bright green.

    The peas add a pop of sweetness and color, complementing the earthy mushrooms.


    Step 9: Finish with Butter and Parmesan

    Remove the pan from the heat.

    Stir in the remaining tablespoon of butter and the grated Parmesan cheese.

    This step, called mantecatura, gives risotto its luxurious, glossy finish.

    Taste and adjust seasoning with salt and freshly cracked black pepper.


    Step 10: Rest and Serve

    Let the risotto rest for 1–2 minutes before serving.

    It should flow slightly when spooned onto a plate—not stiff or dry.

    Garnish with fresh parsley, extra Parmesan, and a touch of lemon zest if desired.

    Serve immediately while warm and creamy.


    Texture and Flavor Highlights

    • Silky, creamy consistency
    • Tender rice with slight bite
    • Rich umami from mushrooms
    • Sweet bursts of peas
    • Savory, cheesy finish

    The combination creates a beautifully balanced dish that feels indulgent yet fresh.


    Pro Tips for Perfect Risotto

    Use Arborio rice. Its high starch content is essential.

    Keep broth warm. It ensures even cooking.

    Don’t rush the process. Gradual broth addition is key.

    Taste frequently. Texture matters as much as flavor.

    Serve immediately. Risotto thickens as it cools.


    Optional Variations

    • Vegan Version: Use olive oil instead of butter and plant-based Parmesan.
    • Protein Boost: Top with grilled chicken or shrimp.
    • Herb Forward: Add thyme or rosemary.
    • Extra Creamy: Stir in a spoonful of mascarpone at the end.
    • Lemon Brightness: Add extra lemon zest for freshness.

    Storage and Reheating

    Risotto is best enjoyed fresh, but leftovers can be stored in the refrigerator for up to 2 days.

    Reheat gently on the stovetop with a splash of broth or water to restore creaminess.

    Avoid high heat to prevent drying out the rice.


    Why This Recipe Works

    Mushroom Risotto with Peas works because it relies on technique rather than complicated ingredients. Slow stirring and gradual broth addition allow the rice’s natural starch to create creaminess.

    Sautéed mushrooms add depth and umami, while peas bring brightness and contrast.

    The finishing touch of butter and Parmesan ties everything together into a glossy, cohesive dish that feels comforting yet elegant.


    Creamy, savory, and beautifully balanced, Mushroom Risotto with Peas is a dish that rewards patience and simple technique.

    Once you master it, you’ll have a timeless recipe that delivers comfort, elegance, and incredible flavor every single time.

  • Crispy-Seared Scallops with Bread-Crumb Salsa Verde: A Restaurant-Worthy Dinner at Home

    Crispy-Seared Scallops with Bread-Crumb Salsa Verde: A Restaurant-Worthy Dinner at Home

    If you’ve ever ordered perfectly golden scallops at a restaurant and wondered how they achieved that caramelized crust and buttery center, you’re in for a treat.

    Scallops are surprisingly simple to cook at home, and when paired with a vibrant bread-crumb salsa verde, they transform into a dish that feels elegant yet approachable. This recipe walks you through every step, from selecting the scallops to plating like a pro.

    Let’s get started.


    Ingredients

    For the scallops:

    • 1 pound large sea scallops (about 12–16), side muscle removed
    • Salt and freshly ground black pepper
    • 2 tablespoons neutral oil (such as avocado or vegetable oil)
    • 1 tablespoon unsalted butter

    For the bread-crumb salsa verde:

    • 1 cup fresh parsley leaves, finely chopped
    • 2 tablespoons capers, drained and finely chopped
    • 1 small garlic clove, minced
    • Zest of 1 lemon
    • 2 tablespoons fresh lemon juice
    • ½ teaspoon red pepper flakes (optional)
    • ½ cup toasted fresh bread crumbs
    • ⅓ cup extra virgin olive oil
    • Salt and black pepper to taste

    Step 1: Prep the Scallops Properly

    Start by patting your scallops completely dry with paper towels. This is one of the most important steps. Moisture is the enemy of a golden crust, and any excess water will cause the scallops to steam rather than sear.

    If the small, tough side muscle is still attached, gently peel it off and discard. Season both sides of the scallops generously with salt and freshly ground black pepper. Let them sit at room temperature for about 10–15 minutes while you prepare the salsa verde.


    Step 2: Toast the Bread Crumbs

    For maximum flavor and texture, use fresh bread crumbs rather than store-bought dry ones. Pulse a slice or two of day-old crusty bread in a food processor until coarse.

    Heat a small skillet over medium heat. Add a drizzle of olive oil and toss in the bread crumbs. Stir constantly for 3–5 minutes, until they are golden brown and crisp. Transfer to a bowl and let cool completely. This step adds a nutty crunch that makes the salsa verde truly special.


    Step 3: Make the Bread-Crumb Salsa Verde

    In a medium bowl, combine the chopped parsley, capers, minced garlic, lemon zest, lemon juice, and red pepper flakes. Stir to combine.

    Add the cooled toasted bread crumbs and pour in the extra virgin olive oil. Mix until everything is evenly coated and vibrant. Taste and adjust seasoning with salt and black pepper as needed. The mixture should be bright, slightly tangy, and richly herbaceous, with a pleasant crunch from the crumbs.

    Set aside while you cook the scallops.


    Step 4: Heat the Pan Until Very Hot

    Place a large stainless steel or cast-iron skillet over medium-high heat. Let it heat for several minutes until very hot. Add the neutral oil and swirl to coat the bottom.

    You’ll know the pan is ready when the oil shimmers and just begins to smoke lightly. This high heat is essential for achieving that golden-brown crust.


    Step 5: Sear the Scallops

    Carefully place the scallops in the hot pan, flat-side down, leaving space between each one. Do not overcrowd the pan. If necessary, cook in batches.

    Resist the urge to move them. Let the scallops sear undisturbed for about 2–3 minutes. They should develop a deep golden crust.

    Once the bottom is beautifully browned, add the tablespoon of butter to the pan. Flip the scallops and spoon the melted butter over them as they cook for another 1–2 minutes. The centers should be just opaque and slightly translucent in the very middle.

    Remove immediately from the pan. Overcooked scallops become rubbery, so timing is key.


    Step 6: Plate Like a Pro

    Arrange the scallops on a serving platter or individual plates. Spoon a generous amount of bread-crumb salsa verde over the top or alongside each scallop.

    For an elegant touch, finish with an extra squeeze of fresh lemon juice and a drizzle of olive oil. A sprinkle of flaky sea salt can elevate the flavor even more.


    Serving Suggestions

    These scallops pair beautifully with creamy risotto, mashed potatoes, or a simple bed of lemony arugula. You can also serve them over a light pasta or alongside roasted vegetables for a complete meal.

    If you’re entertaining, consider serving them as an appetizer with small forks and a crisp white wine. The bright herbal salsa verde complements the sweet, delicate scallops perfectly.


    Pro Tips for Perfect Scallops

    • Always buy “dry” scallops rather than “wet” ones treated with preservatives. Dry scallops caramelize better.
    • Make sure the pan is hot before adding scallops.
    • Do not overcrowd the pan, as this lowers the temperature and prevents browning.
    • Let the scallops form a crust before flipping. If they stick, they’re not ready yet.

    Why This Dish Works

    The magic of this recipe lies in contrast. The scallops are tender and buttery with a crisp exterior, while the bread-crumb salsa verde is fresh, bright, and slightly crunchy. The acidity from the lemon and capers cuts through the richness of the scallops, creating a perfectly balanced bite.

    This dish feels sophisticated but relies on straightforward techniques. With just a handful of quality ingredients and attention to timing, you can create a meal that rivals your favorite seafood restaurant.

    Once you master this method, you’ll find yourself returning to it again and again for special occasions—or simply when you want to treat yourself to something extraordinary.