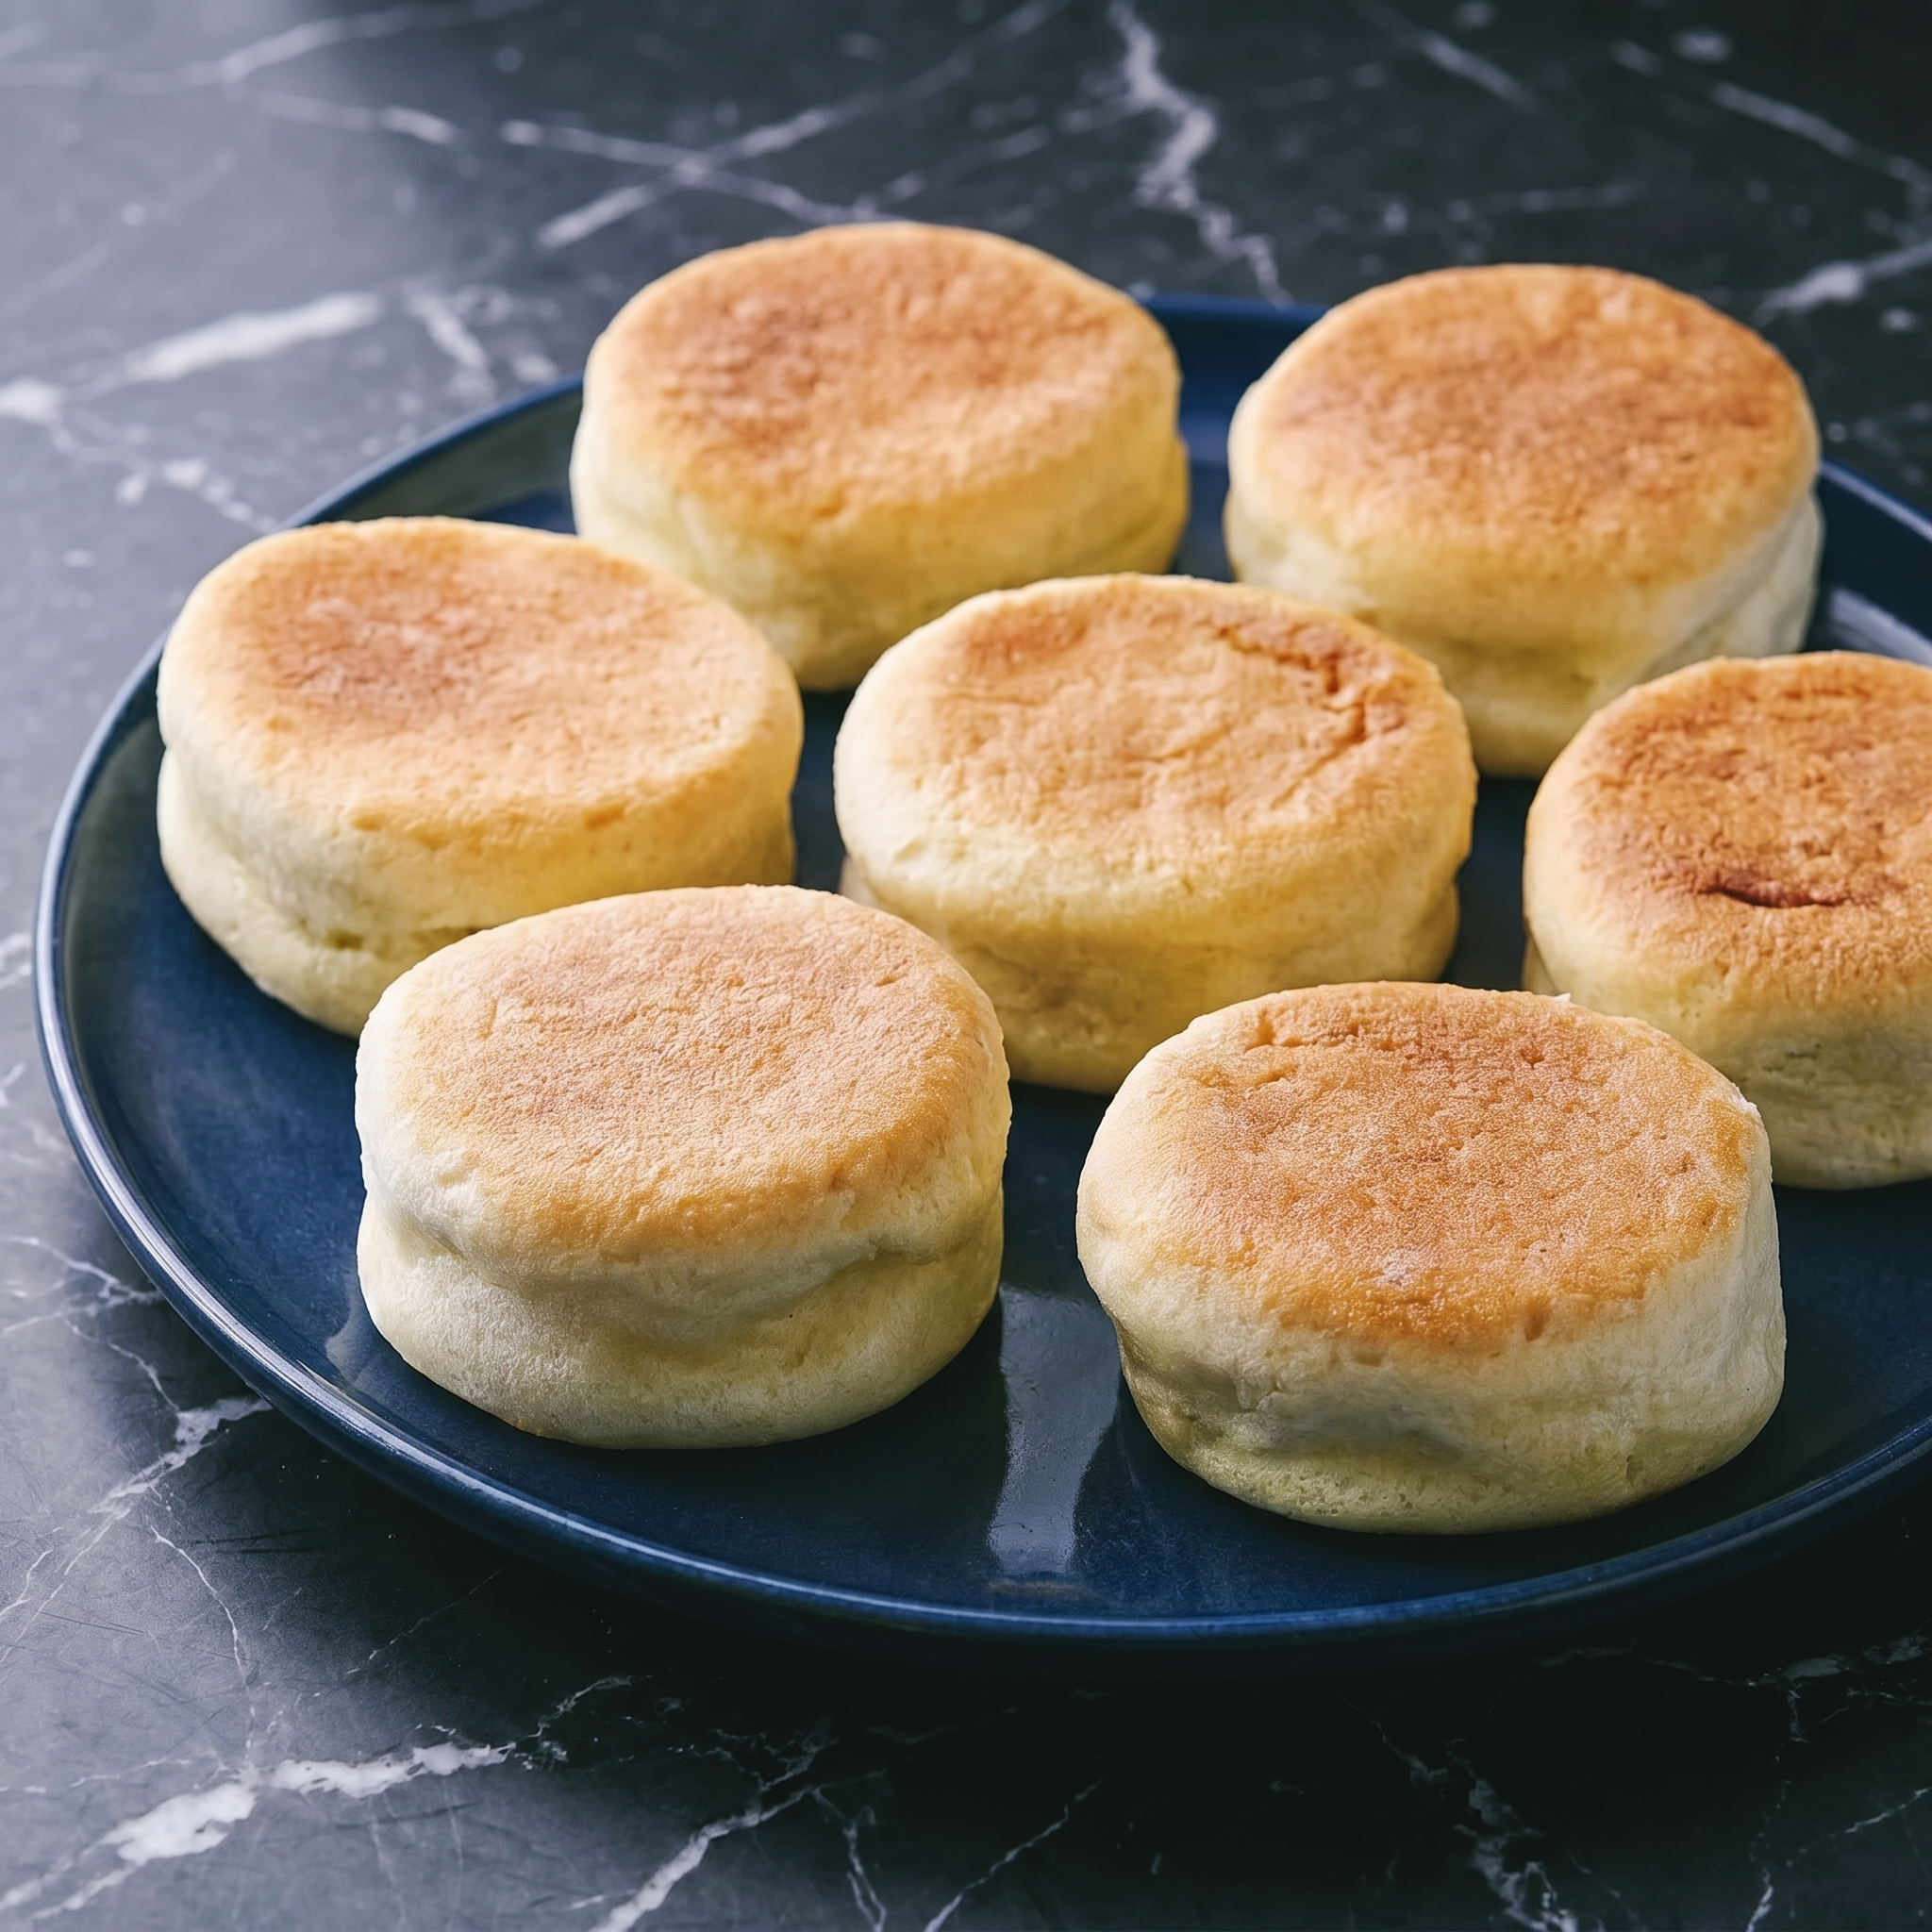
English muffins are all about the nooks and crannies. This homemade version delivers. Toasted until golden. Butter melts into every pocket. No special griddle rings required. Just a skillet. Breakfast forever changed.
Ingredients
Makes 8-10 muffins.
3 cups (375g) bread flour or all-purpose flour
1 tbsp sugar
1 tsp salt
2¼ tsp (1 packet) instant yeast
1 cup (240ml) warm milk (110°F / 45°C)
¼ cup (60ml) warm water
2 tbsp melted butter or vegetable oil
Cornmeal for dusting
Step-by-Step Instructions
Step 1: Make Dough
Whisk flour, sugar, salt, and yeast. Add warm milk, warm water, and melted butter. Mix into a sticky dough.
Knead 5-7 minutes until smooth (dough will be soft). Cover and rise 1-2 hours until doubled.
Step 2: Shape
Punch down dough. Turn onto a floured surface. Roll to ½-inch thickness.
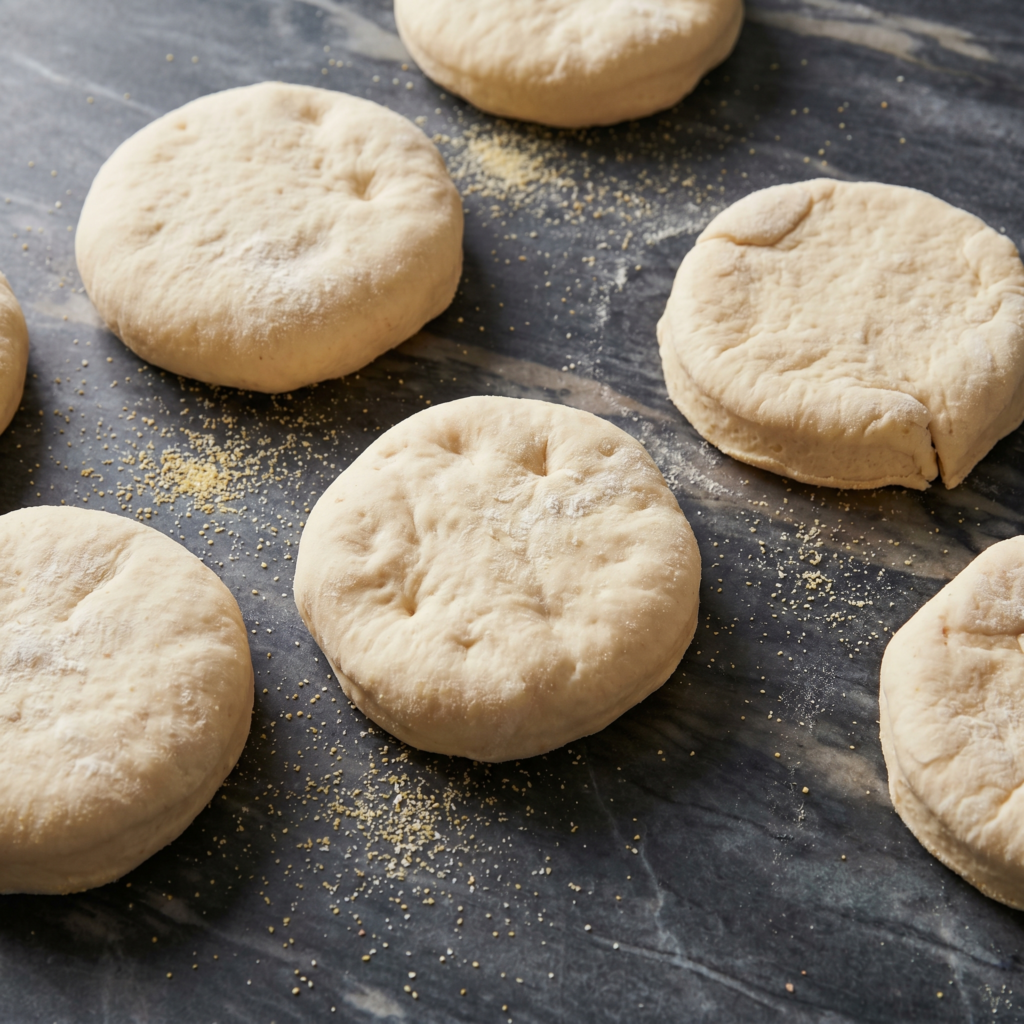
Cut into 3-inch rounds using a biscuit cutter or glass. Re-roll scraps.
Sprinkle a baking sheet generously with cornmeal. Place muffins on sheet. Sprinkle tops with more cornmeal. Cover and rise 45-60 minutes until puffy.
Step 3: Cook (Not Bake)
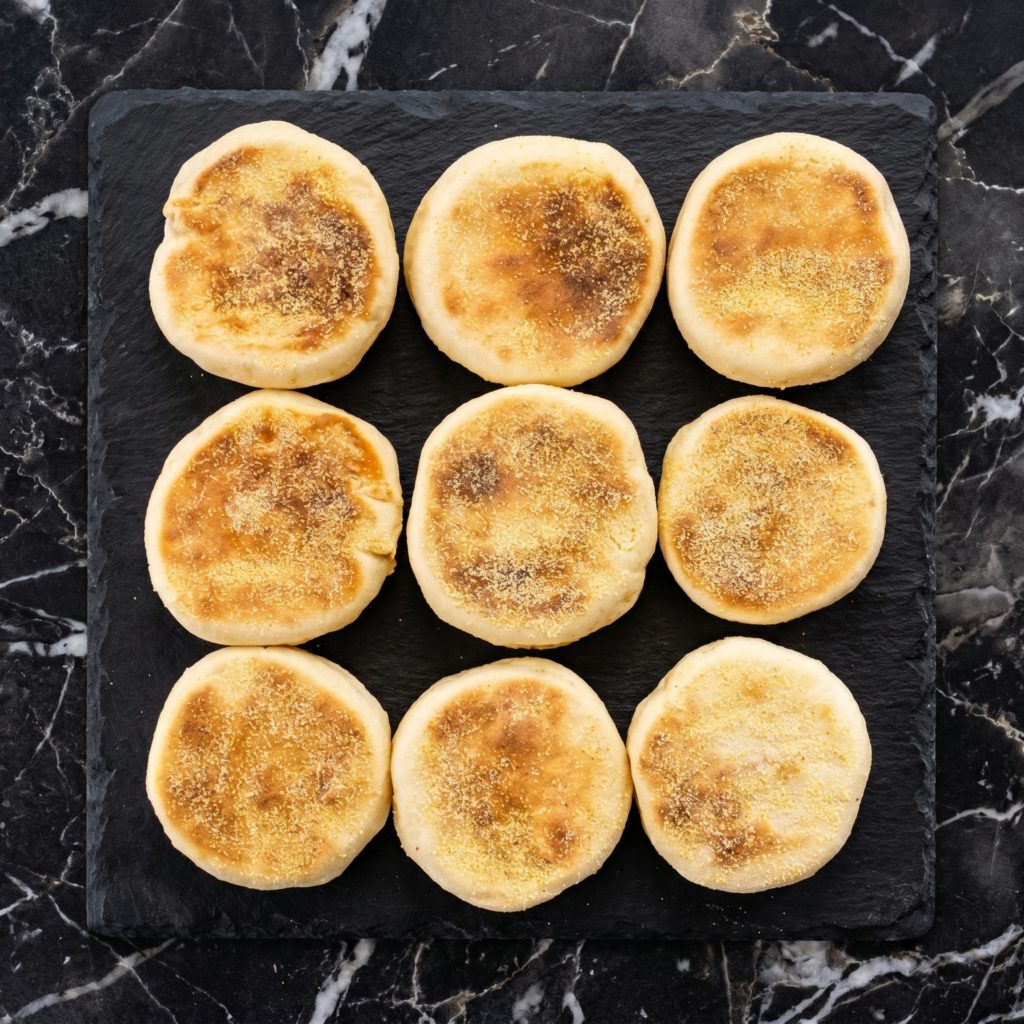
Heat a large skillet or griddle over medium-low heat (no oil needed).
Carefully transfer muffins to the skillet. Cook 5-7 minutes per side until golden brown and cooked through (internal temp 200°F / 93°C).
Muffins will puff up as they cook. If browning too fast, reduce heat.
Step 4: Cool & Toast
Cool on a wire rack. To serve, split with a fork (don’t cut — fork preserves nooks and crannies). Toast until golden. Butter generously. Add jam, eggs, or make a breakfast sandwich.
Summary
Prep Time: 20 min + rises | Cook Time: 20 min | Total: 40 min + rises
Yield: 8-10 muffins | Difficulty: Medium
Storage Notes
Counter (airtight): 5 days. Freezer: 3 months. Split with a fork before freezing. Toast frozen muffins directly — no thawing needed. Never refrigerate (dries out).
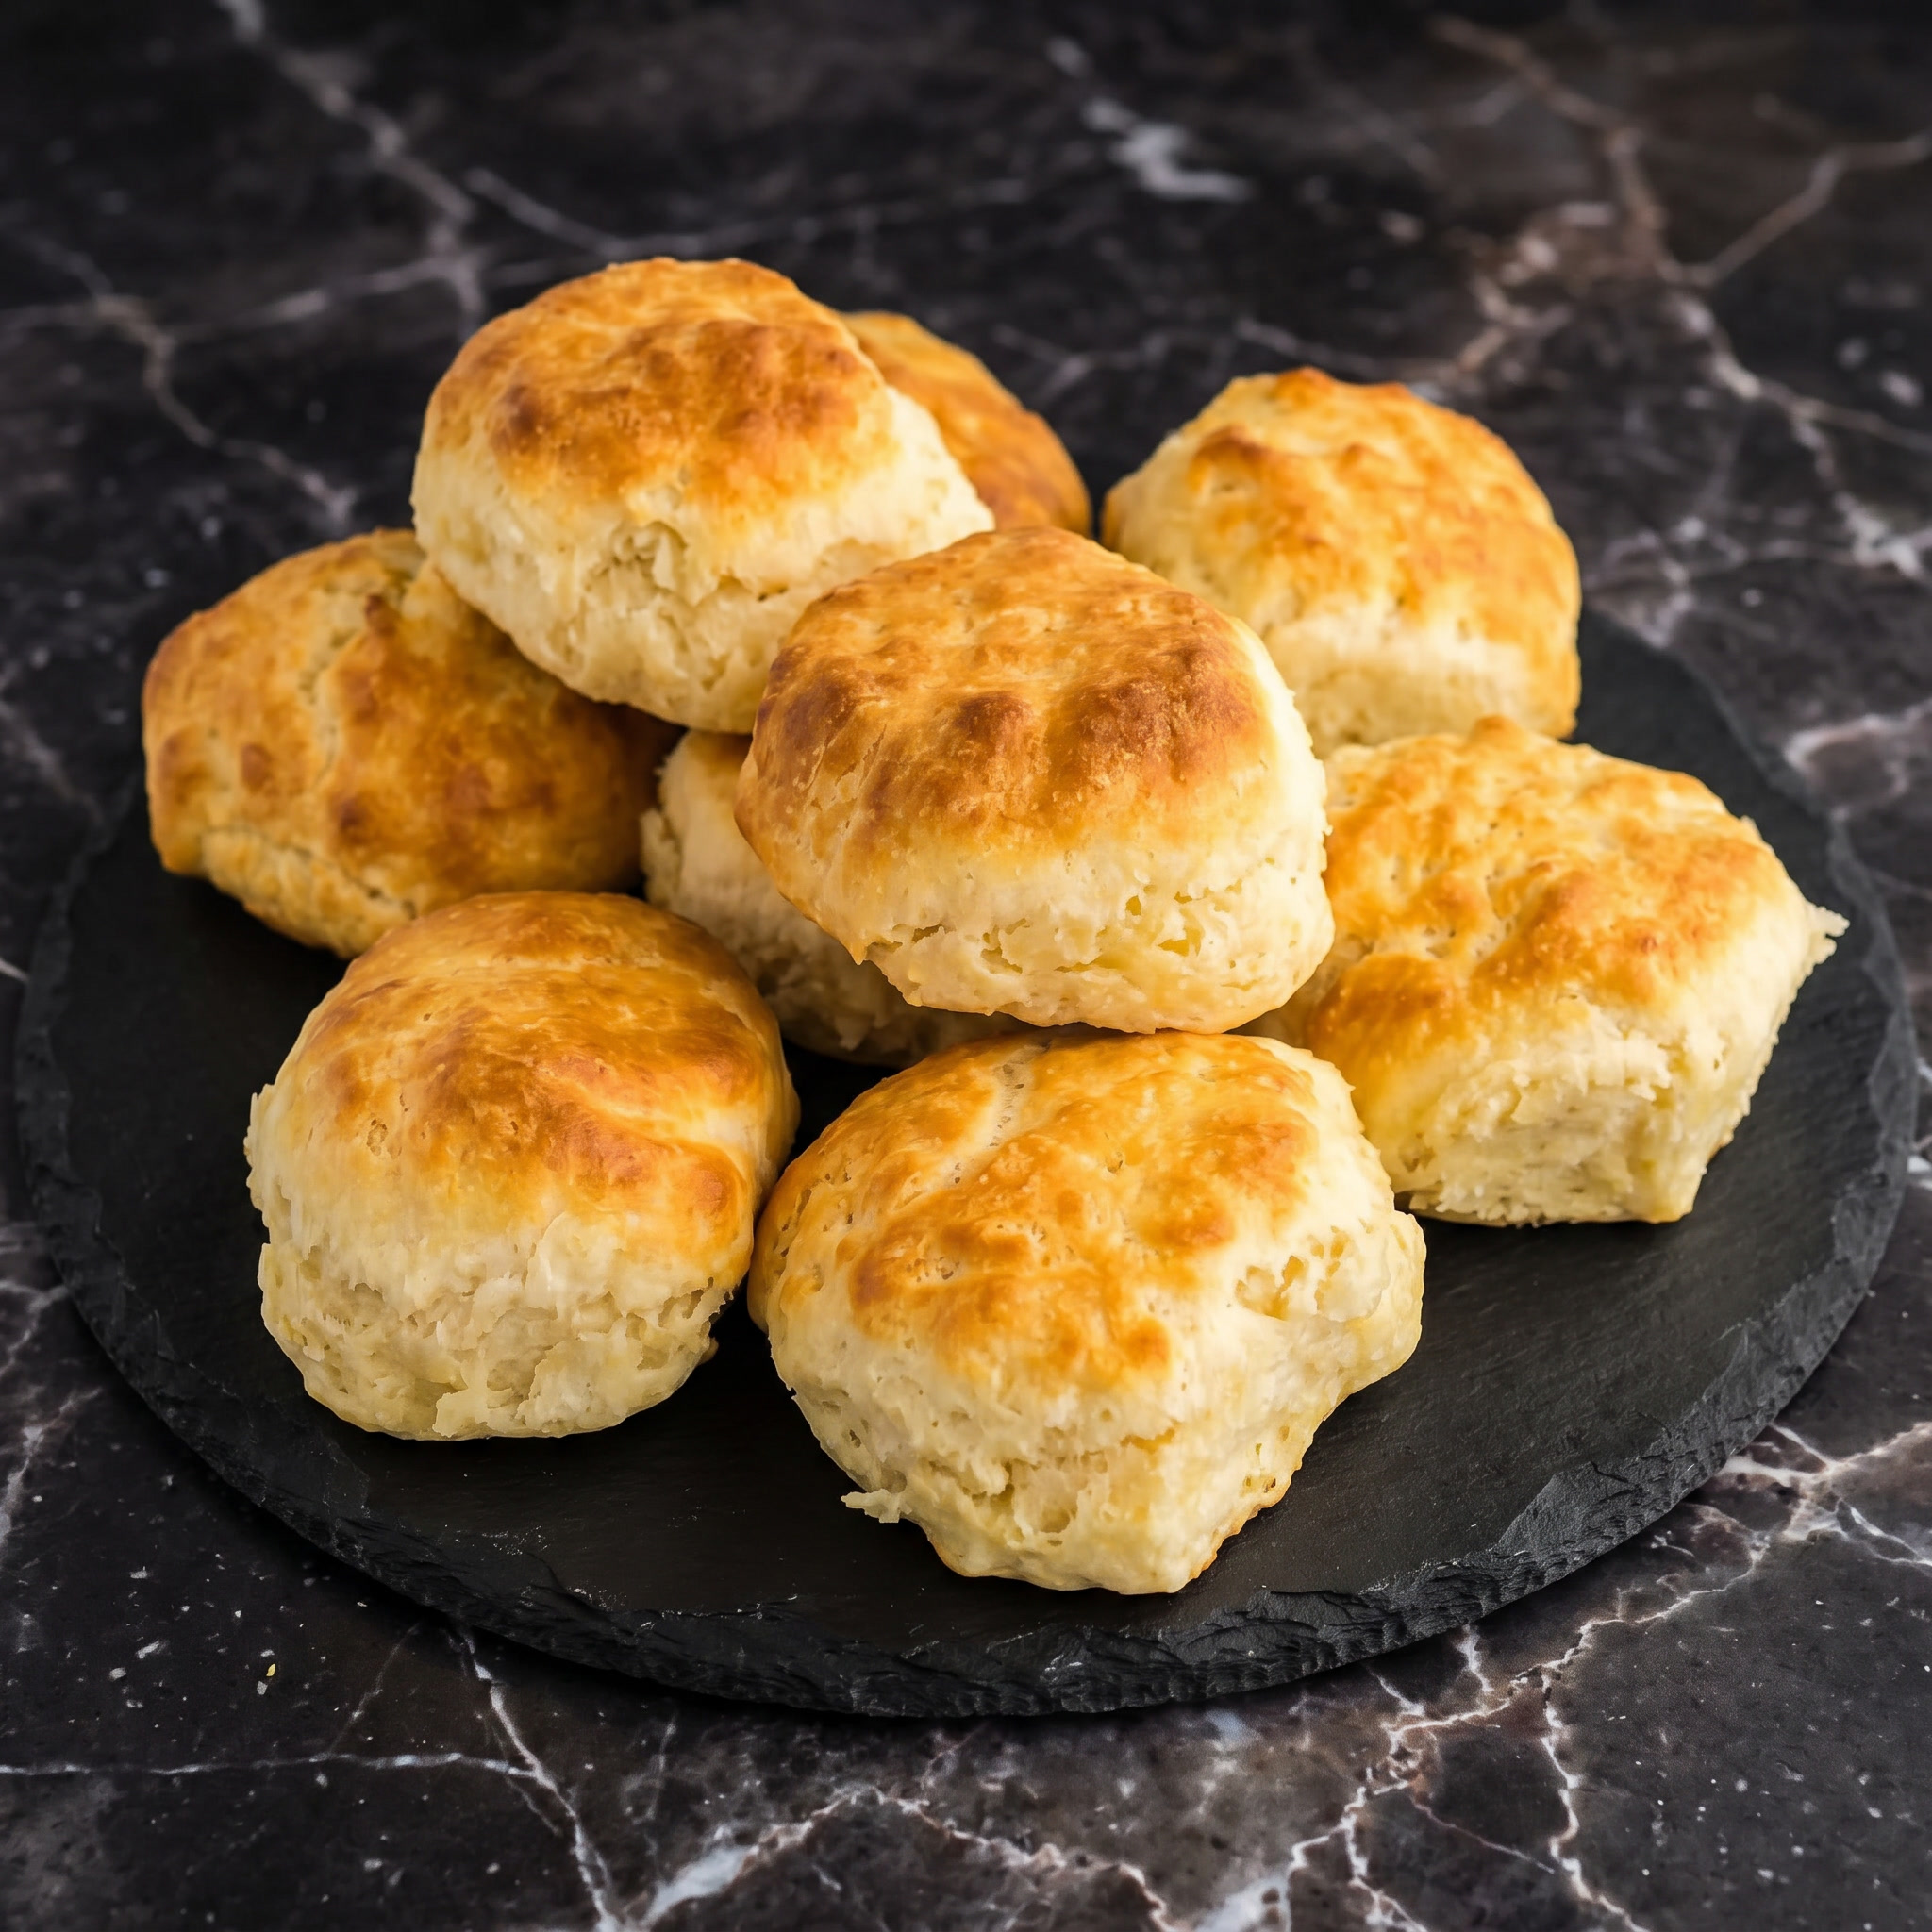
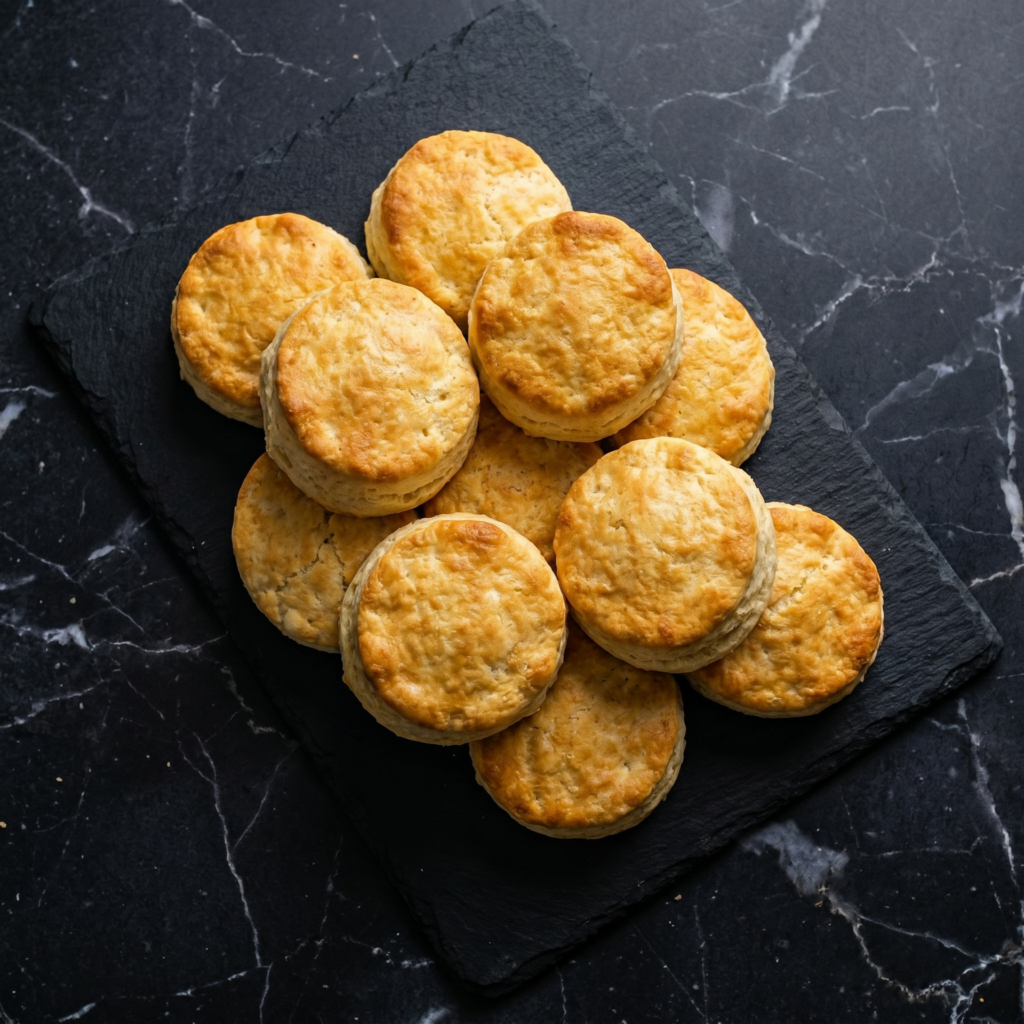
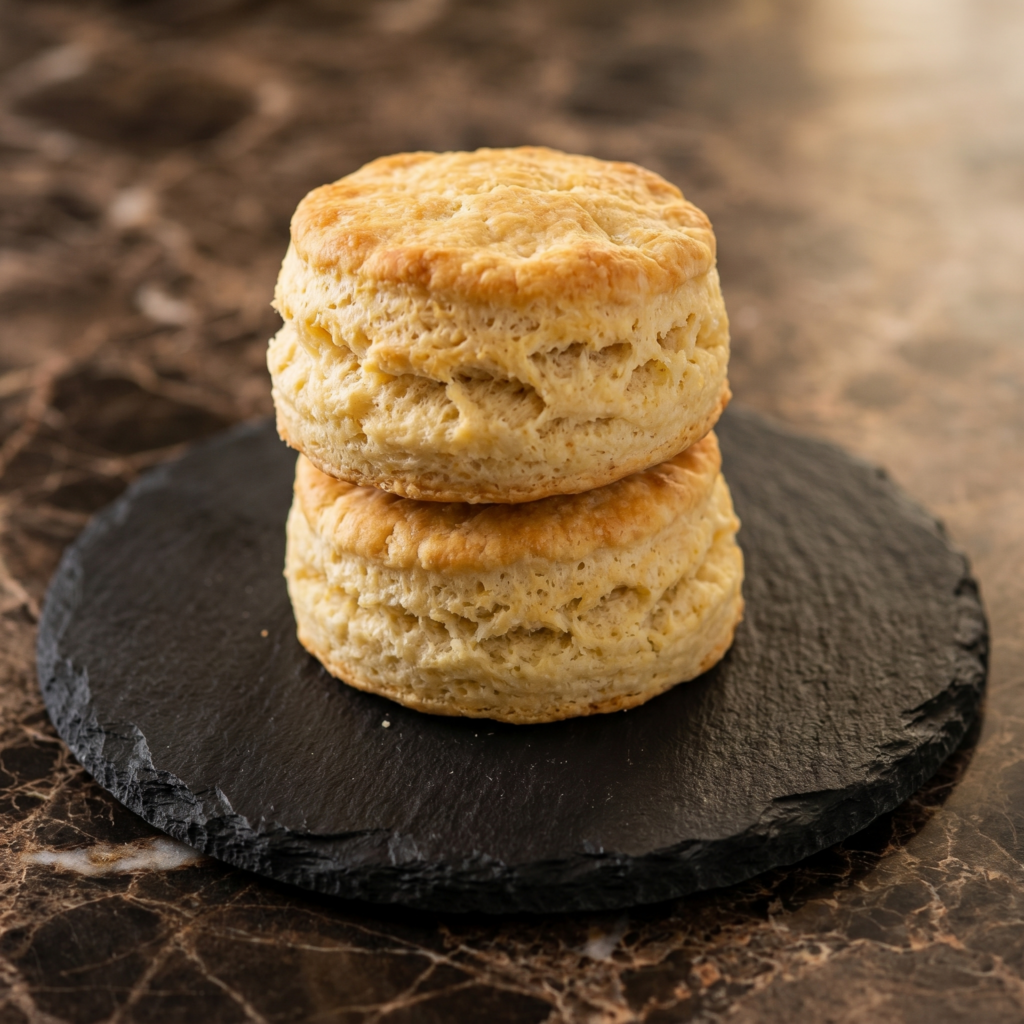
A great biscuit is a thing of beauty. It’s tall and golden, with layers that peel apart in tender, buttery sheets. It’s crisp on the outside, soft on the inside, and absolutely begging to be slathered with butter, jam, or gravy.
For years, I chased the perfect biscuit—through too-dry failures, hockey pucks, and flat disappointments. But after learning a few key techniques (cold butter, gentle handling, and a hot oven), I finally cracked the code.
These flaky buttermilk biscuits are the result: impossibly tall, incredibly tender, and packed with buttery layers. Whether you’re serving them for breakfast with sausage gravy, alongside fried chicken, or simply warm with a pat of butter, these biscuits will make you feel like a Southern grandma just hugged you.
Ingredients
Yields 8-10 biscuits.
For the Biscuits:
2 ½ cups (310g) all-purpose flour, plus more for dusting
1 tablespoon baking powder
1 tablespoon granulated sugar
1 teaspoon salt
½ teaspoon baking soda
½ cup (115g) unsalted butter, very cold (frozen is even better)
1 cup (240ml) cold buttermilk, plus more for brushing
2 tablespoons melted butter, for brushing (optional)
For Serving (Optional):
Salted butter
Honey or jam
Sausage gravy
Step-by-Step Instructions
1. Preheat and Prepare:
Preheat your oven to 450°F (230°C). Line a baking sheet with parchment paper or lightly grease it.
2. Combine Dry Ingredients:
In a large bowl, whisk together the flour, baking powder, sugar, salt, and baking soda until well combined.
3. Cut in the Butter:
Grate the cold butter using the large holes of a box grater, or cut it into small cubes. If grating, work quickly so the butter stays cold.
Add the grated butter to the flour mixture. Toss with your fingers or a fork to coat the butter pieces with flour. Then, using a pastry blender, two forks, or your fingertips, work the butter into the flour until the mixture resembles coarse meal with some pea-sized butter pieces remaining. These butter pieces are what create flaky layers.
4. Add Buttermilk:
Make a well in the center and pour in the cold buttermilk. Stir with a fork or spatula just until the dough comes together. It will be shaggy and sticky—do not overmix.
5. Fold and Layer (The Secret to Flaky Biscuits):
Turn the dough out onto a lightly floured surface. Gently bring it together with your hands, patting it into a rectangle about ¾-inch thick.
Fold the dough in half like a book, then gently pat it back into a rectangle. Repeat this folding process 3-4 times. This creates those beautiful flaky layers.
After the final fold, pat the dough to about 1-inch thickness.
6. Cut the Biscuits:
Use a sharp 2.5-inch biscuit cutter or a round cookie cutter. Press straight down without twisting—twisting seals the edges and prevents the biscuits from rising as high.
Dip the cutter in flour between cuts to prevent sticking. Place the biscuits on the prepared baking sheet, spacing them about 2 inches apart for crusty edges or close together for softer sides.
Gently gather the scraps, pat back to 1-inch thickness, and cut additional biscuits. Avoid overworking the scraps.
7. Bake:
Brush the tops of the biscuits with a little cold buttermilk for a golden crust.
Bake for 12-15 minutes, until the biscuits are tall, golden brown, and have risen beautifully.
If desired, brush the hot biscuits with melted butter as soon as they come out of the oven for a soft, buttery top.
8. Serve:
Serve warm, with butter, honey, jam, or your favorite gravy. These are best enjoyed the day they’re made.
Biscuits are best the day they’re made, but you can store leftovers in an airtight container at room temperature for up to 2 days. Refresh in a 300°F oven for 5-10 minutes.
Can You Freeze Biscuits?
Yes! Two options: freeze unbaked or baked. To freeze unbaked, cut the biscuits and place on a parchment-lined baking sheet. Freeze until solid, then transfer to a freezer bag. Bake from frozen, adding 2-3 minutes to the baking time. To freeze baked, cool completely, wrap tightly, and freeze for up to 3 months. Reheat in the oven.
Make-Ahead for Breakfast:
Cut the biscuits and place them on a baking sheet. Cover and refrigerate overnight. Bake fresh in the morning—they may need an extra minute or two of baking time since they’re cold.
Reviving Day-Old Biscuits:
Sprinkle biscuits with a few drops of water, wrap in foil, and warm in a 300°F oven for 5-10 minutes. They’ll taste almost freshly baked.
Freezing Buttermilk:
Leftover buttermilk freezes beautifully! Pour it into an ice cube tray, freeze, then transfer cubes to a freezer bag. Thaw and use in future batches of biscuits.