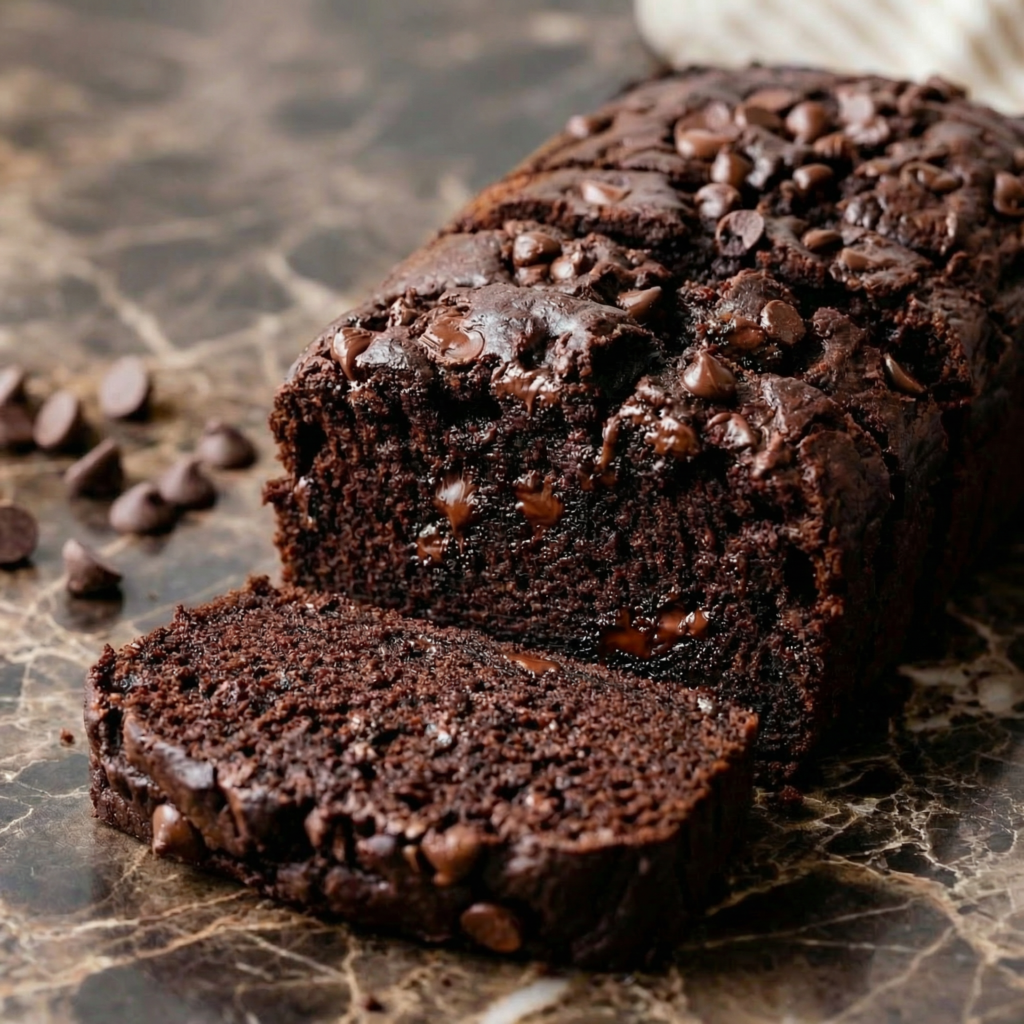
If you love classic banana bread but crave something more indulgent, Double Chocolate Banana Bread is about to become your new obsession.
This recipe combines sweet, ripe bananas with deep cocoa flavor and melty chocolate chips for a loaf that’s incredibly moist, tender, and decadently rich. It’s the perfect balance of comforting and chocolatey—ideal for breakfast, dessert, or an afternoon treat with coffee.
Let’s walk step by step through making bakery-style double chocolate banana bread right in your own kitchen.
Why You’ll Love This Recipe
- Extra moist and tender texture
- Deep chocolate flavor from cocoa and chocolate chips
- Perfect way to use overripe bananas
- Simple, pantry-friendly ingredients
- Freezer-friendly and great for meal prep
This isn’t just banana bread—it’s a chocolate lover’s dream.
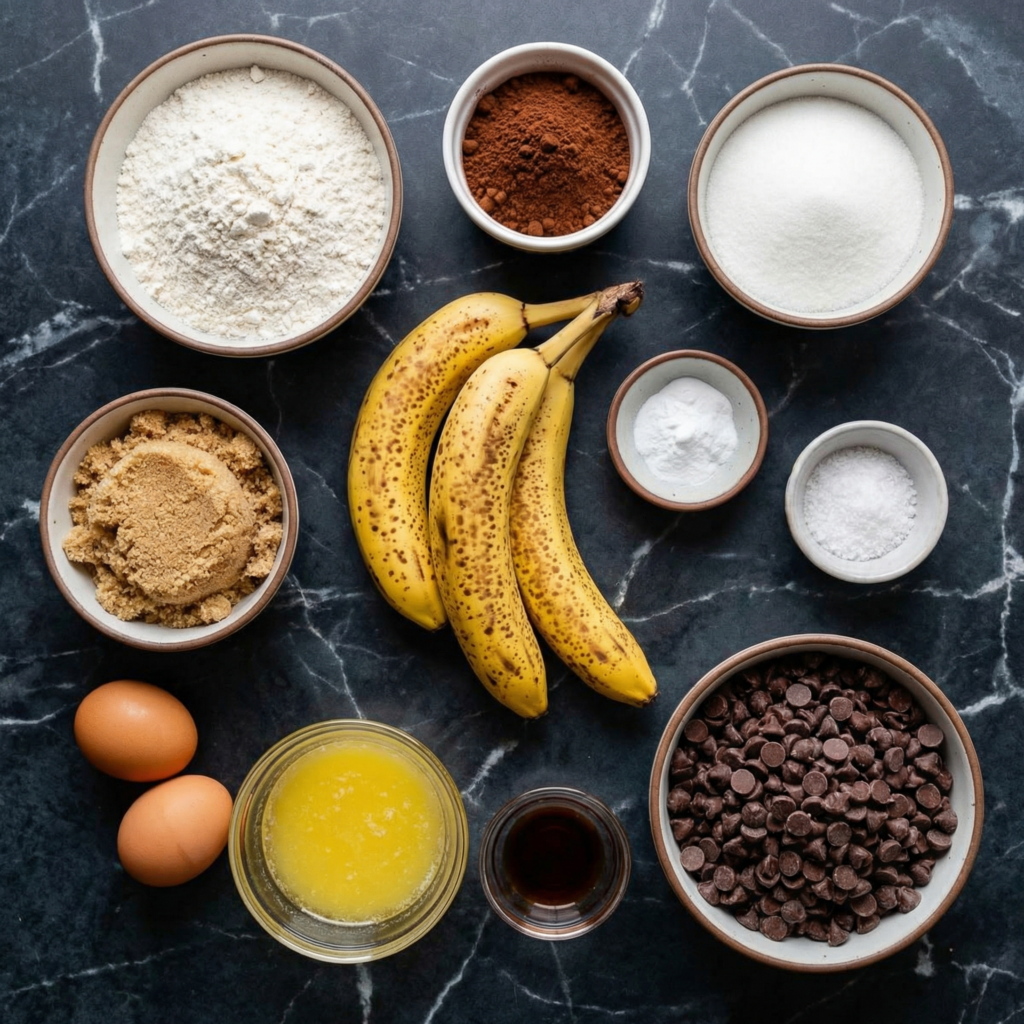
Ingredients You’ll Need
Wet Ingredients:
- 3 very ripe bananas (mashed)
- ½ cup unsalted butter, melted (or vegetable oil)
- ¾ cup granulated sugar
- ¼ cup brown sugar
- 2 large eggs
- 1 teaspoon vanilla extract
Dry Ingredients:
- 1 ½ cups all-purpose flour
- ½ cup unsweetened cocoa powder
- 1 teaspoon baking soda
- ½ teaspoon salt
Chocolate Add-Ins:
- 1 cup semi-sweet chocolate chips
- ½ cup dark chocolate chunks (optional but recommended)
Step 1: Preheat and Prepare Your Pan
Preheat your oven to 350°F (175°C).
Grease a 9×5-inch loaf pan and line it with parchment paper, leaving an overhang for easy removal. Proper preparation ensures clean slices and prevents sticking.
Step 2: Mash the Bananas
In a large mixing bowl, mash the ripe bananas until mostly smooth with a few small lumps remaining.
The riper the bananas, the sweeter and more flavorful your bread will be. Overripe bananas with brown spots are perfect.
Step 3: Combine Wet Ingredients
Add melted butter (cooled slightly) to the mashed bananas. Stir to combine.
Mix in granulated sugar and brown sugar until smooth.
Add the eggs one at a time, whisking well after each addition.
Stir in vanilla extract.
The mixture should look glossy and well blended.
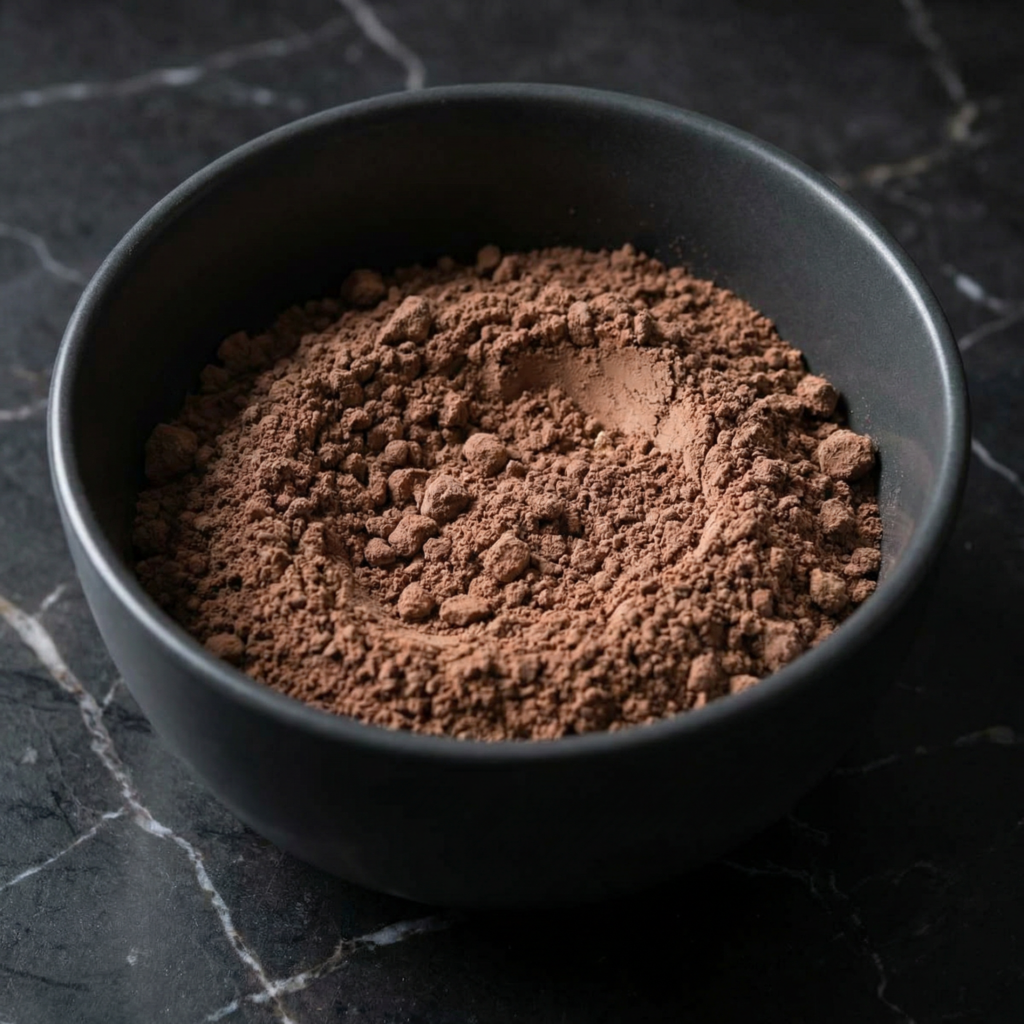
Step 4: Mix Dry Ingredients
In a separate bowl, whisk together:
- Flour
- Cocoa powder
- Baking soda
- Salt
Sifting the cocoa powder helps eliminate lumps and ensures even chocolate flavor throughout.
Step 5: Combine Wet and Dry Mixtures
Gradually add the dry ingredients into the wet mixture.
Use a spatula to fold gently until just combined. Avoid overmixing—this keeps the bread soft and tender rather than dense.
The batter will be thick and rich.
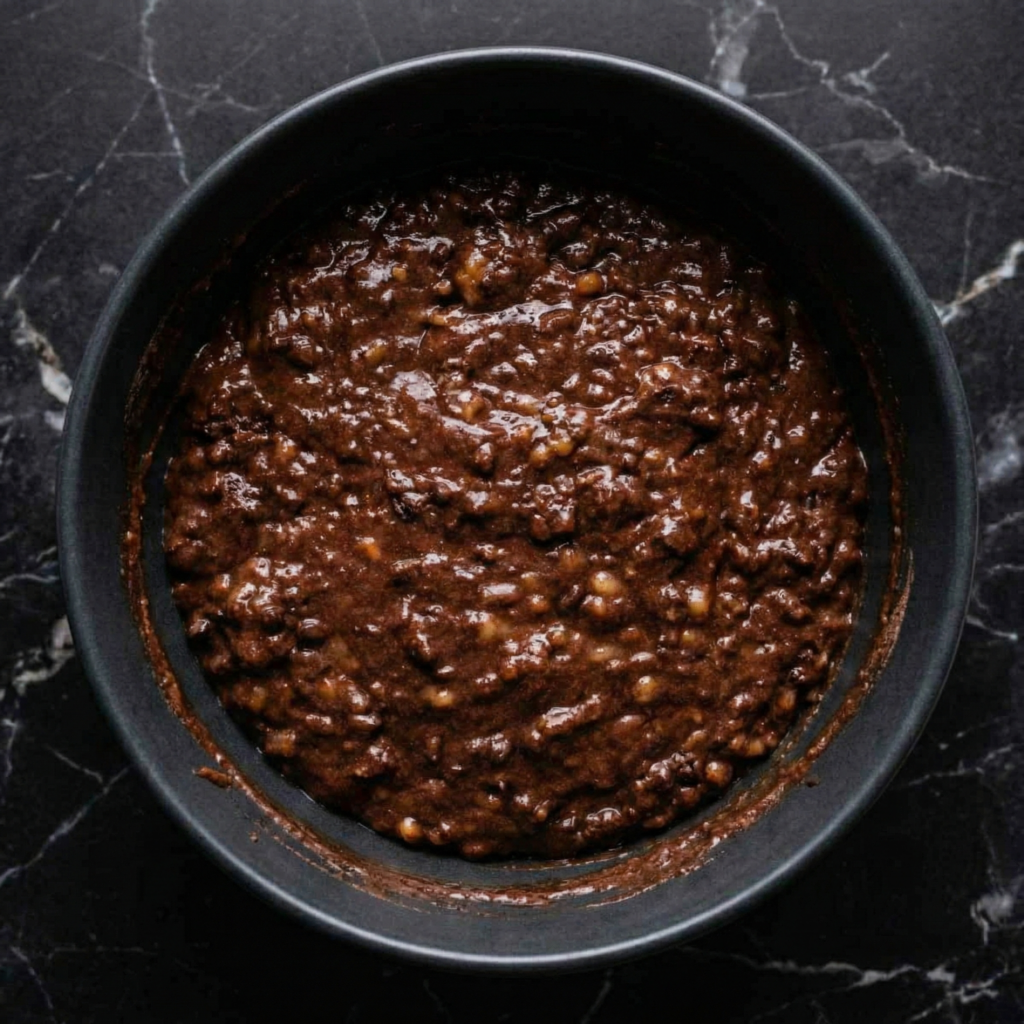
Step 6: Fold in Chocolate Chips
Gently fold in the chocolate chips and chocolate chunks.
Reserve a small handful to sprinkle on top for a bakery-style finish.
This step creates that irresistible double chocolate effect—cocoa in the batter plus pockets of melted chocolate.
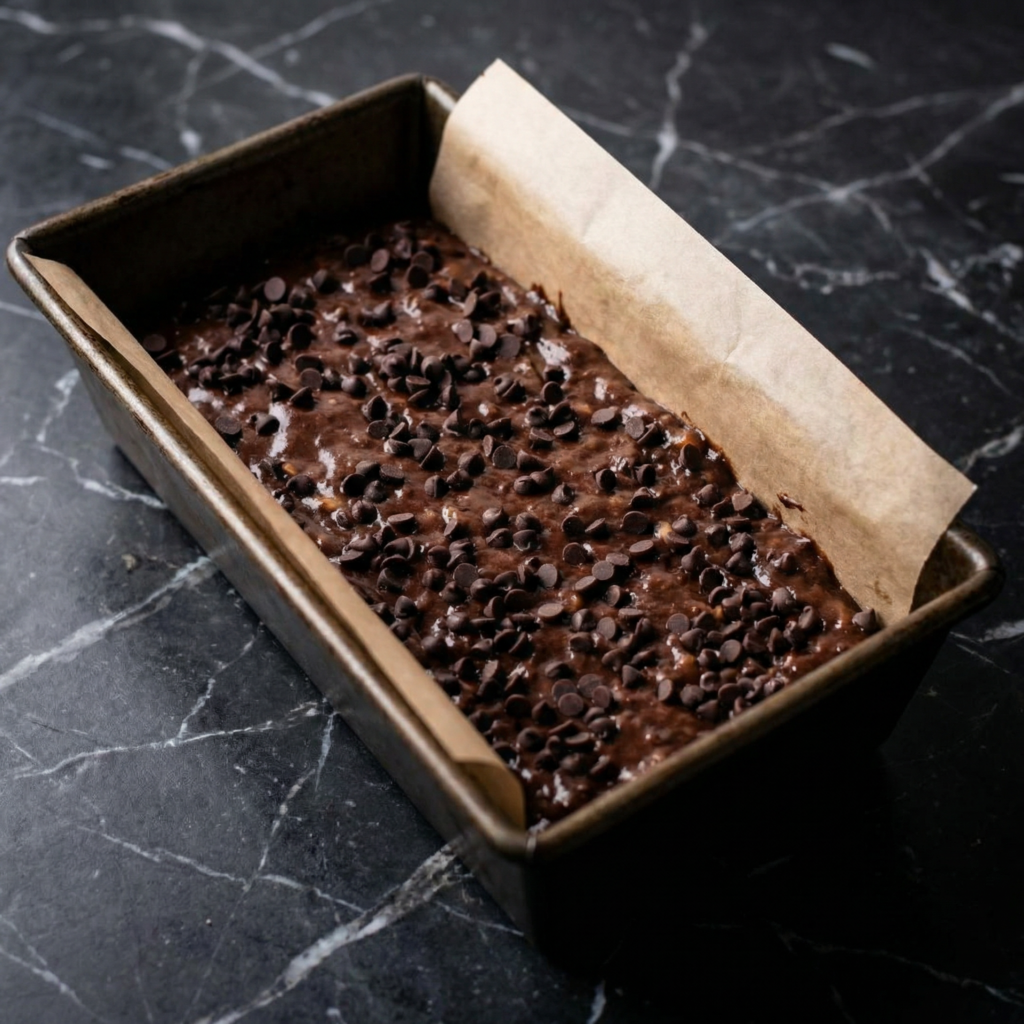
Step 7: Transfer to Pan
Pour the batter into the prepared loaf pan.
Smooth the top evenly with a spatula.
Sprinkle remaining chocolate chips on top.
For a decorative touch, slice a banana lengthwise and place it cut-side up on top before baking (optional).
Step 8: Bake to Perfection
Bake for 55–65 minutes, or until a toothpick inserted into the center comes out with moist crumbs but no raw batter.
If the top begins browning too quickly, loosely tent with foil during the last 15 minutes.
Avoid overbaking—slightly underbaked ensures a fudgy texture.
Step 9: Cool Properly
Remove from the oven and let the bread cool in the pan for 10–15 minutes.
Then lift it out using the parchment overhang and transfer to a wire rack to cool completely.
Cooling allows the crumb to set and makes slicing easier.
Step 10: Slice and Enjoy
Once cooled, slice using a sharp serrated knife.
Serve plain, warm with butter, or slightly toasted for an even richer experience.
Texture and Flavor Highlights
- Deep chocolate intensity
- Ultra-moist banana base
- Melty chocolate pockets
- Soft, tender crumb
- Slightly crisp top edges
Every bite delivers rich cocoa flavor balanced by natural banana sweetness.
Pro Tips for Perfect Double Chocolate Banana Bread
Use very ripe bananas. The darker, the better.
Don’t overmix. Gentle folding keeps the bread tender.
Measure flour correctly. Spoon and level for accuracy.
Add espresso powder. A teaspoon enhances chocolate flavor without tasting like coffee.
Check early. Ovens vary—start checking at 50 minutes.
Optional Variations
Nutty Crunch: Add ½ cup chopped walnuts or pecans.
Healthier Swap: Replace half the butter with Greek yogurt.
Extra Fudgy: Add ¼ cup melted dark chocolate to the batter.
Mini Loaves: Divide batter into mini pans and bake 25–30 minutes.
Chocolate Swirl: Swirl Nutella into the top before baking.
Storage Instructions
Store at room temperature in an airtight container for up to 4 days.
Refrigerate for up to 1 week.
To freeze, wrap slices individually in plastic wrap and store in a freezer-safe bag for up to 3 months.
Thaw at room temperature or microwave for 15–20 seconds.
Why This Recipe Works
Double Chocolate Banana Bread succeeds because it balances moisture and structure perfectly. Bananas provide natural sweetness and tenderness, while cocoa powder delivers concentrated chocolate flavor.
The combination of granulated and brown sugar adds depth and helps maintain moisture.
Chocolate chips create melty pockets that elevate every slice, while careful mixing prevents toughness. Baking at a moderate temperature ensures even cooking without drying out the loaf.
If you’re craving something comforting yet indulgent, this Double Chocolate Banana Bread checks every box. It’s rich, moist, packed with chocolate, and wonderfully simple to make.
Whether served as a sweet breakfast, afternoon snack, or dessert, it’s guaranteed to satisfy chocolate lovers and banana bread fans alike.
Once you try it, plain banana bread may never be enough again.